

Page 1
1
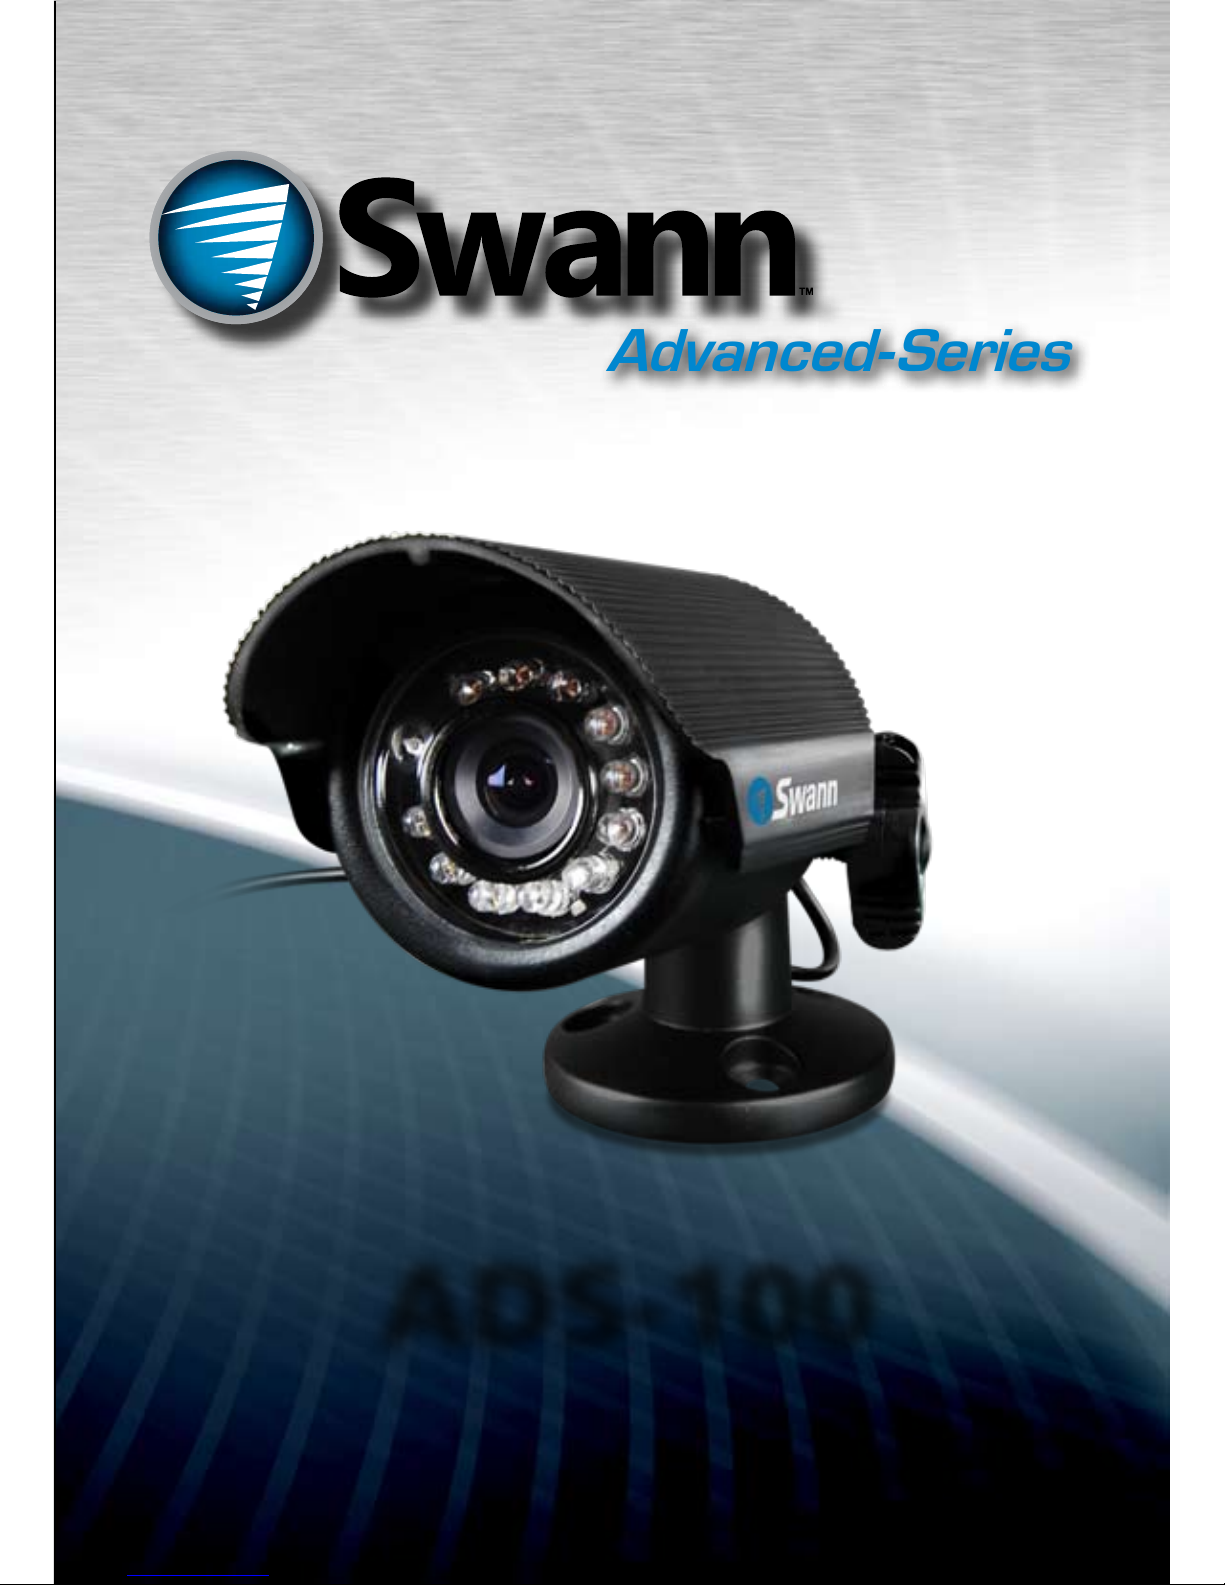
ADS-100
Advanced-Series
M100CAM220910E
Page 2

222
Congratulations on your purchase of the ADS-100 from Swann! You’ve chosen a great entry-level,
indoor and outdoor, compact CCTV camera which has active infrared night vision, allowing it to see up
to 5m/15ft in complete darkness!
Placement Guide
The ADS-100 has a 3.6mm wide-angle lens built-in which allows it to see almost 60 degrees
horizontally. What does this mean for you when placing it?
You will be able to see a • reasonably wide area. If it’s mounted
high up in a square corner, you’ll be able to see most of the room.
Things may look slightly further away than they really are. Anything •
further than a few meters (ten feet or so) from the camera may
appear to be too small for the level of detail you require.
The small size of the camera, wide viewing area and limited •
night vision range mean that you really need to get this camera
as close to what you want to see as possible.
The ADS-100 is great for monitoring smaller areas. You can use the miniature size of the camera to your
advantage when choosing a location to mount it, as it doesn’t require much space.
It’s best mounted high-up in a corner looking down into the room, so that it can look over intervening
obstacles. Also, the higher the camera is mounted, the harder it’ll be for an intruder to access the
camera or interfere with it.
Installing the Camera
The camera mounts onto almost any flat surface using the screws (and wall-plugs, if necessary - see
below) provided. The surface must have sufficient strength to hold the camera. Materials such as
hardwood, brick or masonry are good options, and we’ve included all the gear you’ll need to mount it
there (except the tools - sorry, you’ll still need your own drill). You can mount the camera onto a metal
surface, but you’ll need to supply your own mounting hardware.
To mount the camera:
Using the holes on the camera stand as a guide, mark the locations on your wall to drill. Make •
sure the wall is thick and strong enough that you won’t drill through it.
If the wall is masonry, brickwork or similar, use the provided wall plugs. If the wall is made of •
wood, then the camera can be screwed directly onto the wall.
Ensure that the cable is fully protected from the weather. The camera is weather resistant, but the •
cable (particularly the microphone - see Audio, opposite) is not.
Once the camera has been mounted, ensure that it is securely fixed in place. The camera’s not •
going to do any good if it falls!
Troubleshooting
Problem: At night, all I see is white.
Solution: The camera is most likely looking through a window. At night, the infrared light the camera
uses to see in the dark can ‘bounce back’ off a reflective surface (such as glass, water, spider webs,
some ceramics and so on) and effectively blind the camera. If you want to see outside, mount the
camera outside - we made it weather-resistant for a reason! If the camera absolutely must see through
glass (or similar transparent material) then ensure it is clean, and try to have the camera on an angle
relative to the glass, so that the IR light doesn’t bounce directly back into the lens.
Problem: I see only a blank screen where my image should be.
Solution: Check the wiring to the camera, and ensure the camera is being supplied power from
the included power adapter. Try using a different video lead, or connecting the camera to a different
television or monitor. Be sure there are no devices interrupting your signal, such as a DVR or VCR that
isn’t outputting the signal correctly.
Problem: I can’t see anything at night.
Solution: The maximum range of the night vision is just that, the maximum range. If there’s nothing
in this range, you won’t see anything. Also, some dark objects (like the proverbial black cat) may not
reflect enough light to be seen except as a silhouette if the background is brighter. Some objects which
can easily be seen in visible light don’t reflect much infrared light.
About the Camera
60°
10m
33ft
11.5m
55ft
Page 3

3
INPUT
2A. Connecting Directly to TV 2B. Connecting to Your Existing DVR
Connect the yellow video out plug to the
video input on your television (typically also yellow).
If you want sound, connect the RED audio out to
the RED audio input. If your TV doesn’t have a red
audio in, connect it to the white Audio In socket.
2
Using the RCA to BNC adapter, connect the
YELLOW video plug to an channel input on the
rear of the DVR. If your DVR has audio inputs,
connect the RED audio plug to an audio in socket.
2
Plug in the camera
power adapter into
a wall socket
4
Connect the camera’s DC and RCA sockets
to the extension cable, matching plugs to
sockets by color .
Microphone
1
Connect the extension cables
DC socket to the DC plug on
the power adapter
3
Technical Specifications
Video
Image Sensor 1/4” CMOS
Video Quality 400 TV Lines
Effective Pixels NTSC: 510 x 492
PAL: 628 x 582
Min. Illumination 0 Lux (IR on)
White Balance Automatic
Electronic Shutter NTSC: 1/60 ~ 1/100 000
PAL: 1/50 ~ 1/100 000
Gain Control Automatic
Backlight Comp. No
Wide Dynamic Range No
Lens 3.6mm
Viewing Angle H: 60°, V: 47°
Night Vision
Range Up to 5m (15ft)
IR Cut Filter No
Number of IR LEDs 11
Infrared Wavelength 850nm
IR LED Life (Average) 10, 000 hours
General
Power Required DC 12V @ 150mA
Operating Temp. -10°C ~ 45°C (14°F ~ 113°F)
Casing Aluminum
Dimensions (Camera) 165mm x 115mm x 67mm
(6.5” x 4.5” x 3.15”)
Dimensions (Stand) 60mm x 50mm x 45mm
(2.4” x 2” x 1.75”)
Weight (Camera) 60g / 2.2oz (approx)
Weight (Stand) 60g / 2.2oz (approx)
Audio
The ADS-100 has a microphone built in. It’s not in the camera itself, it’s attached to the cable (it’s in the
plastic tab near the A/V plugs). The RED RCA jack on the back of the camera carries the audio. It’s a
standard line-level output, and can be connected to a TV, DVD recorder, DVR, audio recorder, the line-in
port on a computer or any other audio device with standard inputs.
The microphone has a range of about 3m/10ft for sounds as loud as a normal speaking voice. Loud
sounds travel much further, and it might not hear really soft sounds at all.
The microphone isn’t in the camera for two reasons:
The weather-resistant case makes it relatively sound-resistant as well. We couldn’t put the mic in 1.
there without compromising the seal, and losing any shielding the camera has.
You can use the somewhat moveable microphone to your advantage, by placing it closer to what 2.
you’d want to hear. The microphone has a limited range, so proximity is the key to good results!
Cable: Note that the cable has female
plugs on one end and male plugs on the
other. The camera attaches to the
female side of the cable. Bear this in
mind when you’re installing your cable.
Connection Guide and Specifications
Page 4

444
© Swann Communications 2010
Warranty Information
Helpdesk / Technical Support Details
Swann Technical Support
All Countries E-mail: tech@swannsecurity.com
Telephone Helpdesk
See http://www.worldtimeserver.com for information on time zones and the current time in
Melbourne, Australia compared to your local time.
USA toll free
1-800-627-2799
(Su, 2pm-10pm US PT)
(M-Th, 6am-10pm US PT)
(F 6am-2pm US PT)
USA Exchange & Repairs
1-800-627-2799 (Option 1)
(M-F, 9am-5pm US PT)
AUSTRALIA toll free
1300 138 324
(M 9am-5pm AUS ET)
(Tu-F 1am-5pm AUS ET)
(Sa 1am-9am AUS ET)
NEW ZEALAND toll free
0800 479 266
UK
0203 027 0979
Swann Communications warrants this product against defects in workmanship and material for a period of
one (1) year from it’s original purchase date. You must present your receipt as proof of date of purchase for
warranty validation. Any unit which proves defective during the stated period will be repaired without charge
for parts or labour or replaced at the sole discretion of Swann. The end user is responsible for all freight
charges incurred to send the product to Swann’s repair centres. The end user is responsible for all shipping
costs incurred when shipping from and to any country other than the country of origin.
The warranty does not cover any incidental, accidental or consequential damages arising from the use of
or the inability to use this product. Any costs associated with the fitting or removal of this product by a
tradesman or other person or any other costs associated with its use are the responsibility of the end user.
This warranty applies to the original purchaser of the product only and is not transferable to any third party.
Unauthorized end user or third party modifications to any component or evidence of misuse or abuse of the
device will render all warranties void.
By law some countries do not allow limitations on certain exclusions in this warranty. Where applicable by
local laws, regulations and legal rights will take precedence.
Swann Communications USA Inc.
12636 Clark Street
Santa Fe Springs CA 90670
USA
Swann Communications
Unit 13, 331 Ingles Street,
Port Melbourne Vic 3207
Swann Communications LTD.
Stag Gates House
63/64 The Avenue
SO171XS
United Kingdom
FCC Verification
This equipment has been tested and found to comply with the limits for Class B digital device, pursuant to part 15 of
the FCC Rules. These limits are designed to provide reasonable protection against harmful interference in a residential
installation. This equipment generates, uses and can radiate radio frequency energy and, if not installed and used
in accordance with the instructions, may cause harmful interference to radio or television reception, which can be
determined by turning the equipment off and on, the user is encouraged to try to correct the interference by one or
more of the following measures:
Reorient or relocate the receiving antenna•
Increase the separation between the equipment and the receiver•
Connect the equipment into an outlet on a circuit different from that to which the receiver is connected•
Consult the dealer or an experienced radio/TV technician for help•
WARNING: Modifications not approved by the party responsible for compliance could void user’s authority to
operate the equipment.
 Loading...