


SUUNTO TRAVERSE 2.1
USER GUIDE
2020-10-14

Suunto Traverse
1. SAFETY............................................................................................................................................................ 4
2. Getting started.............................................................................................................................................. 5
2.1. Using buttons..................................................................................................................................... 5
2.2. Set up.................................................................................................................................................. 5
2.3. Adjusting settings.............................................................................................................................6
3. Features.......................................................................................................................................................... 8
3.1. Activity monitoring............................................................................................................................ 8
3.2. Alti-Baro.............................................................................................................................................. 9
3.2.1. Getting correct readings....................................................................................................10
3.2.2. Matching profile to activity................................................................................................11
3.2.3. Using altimeter profile....................................................................................................... 12
3.2.4. Using barometer profile....................................................................................................12
3.2.5. Using automatic profile.....................................................................................................12
3.3. Autopause.........................................................................................................................................13
3.4. Backlight............................................................................................................................................13
3.5. Button lock........................................................................................................................................14
3.6. Compass........................................................................................................................................... 14
3.6.1. Calibrating compass........................................................................................................... 15
3.6.2. Setting declination............................................................................................................. 15
3.6.3. Setting bearing lock...........................................................................................................16
3.7. Countdown timer.............................................................................................................................16
3.8. Displays............................................................................................................................................. 17
3.8.1. Adjusting display contrast................................................................................................. 17
3.8.2. Inverting display color....................................................................................................... 17
3.9. FusedAlti........................................................................................................................................... 18
3.10. Find back.........................................................................................................................................18
3.11. Icons...................................................................................................................................................18
3.12. Logbook..........................................................................................................................................20
3.13. Memory left indicator....................................................................................................................21
3.14. Movescount.................................................................................................................................... 21
3.15. Navigating with GPS.....................................................................................................................21
3.15.1. Getting GPS signal............................................................................................................22
3.15.2. GPS grids and position formats....................................................................................22
3.15.3. GPS accuracy and power saving................................................................................. 23
3.15.4. GPS and GLONASS......................................................................................................... 23
3.16.
Notifications...................................................................................................................................24
3.17. Recording activities...................................................................................................................... 24
3.18. Pairing heart rate sensor............................................................................................................25
3.19. Points of interest...........................................................................................................................25
3.19.1. Checking your location....................................................................................................26
2

Suunto Traverse
3.19.2. Adding a POI..................................................................................................................... 26
3.19.3. Deleting a POI................................................................................................................... 27
3.20. Routes.............................................................................................................................................27
3.20.1. Navigating a route............................................................................................................27
3.20.2. During navigation............................................................................................................28
3.21. Service menu................................................................................................................................ 29
3.22. Sport modes................................................................................................................................. 30
3.23. Stopwatch......................................................................................................................................30
3.24. Suunto app.....................................................................................................................................31
3.24.1. Syncing with mobile app................................................................................................. 31
3.25. Suunto Apps................................................................................................................................. 32
3.26. Time................................................................................................................................................ 32
3.26.1. Alarm clock........................................................................................................................ 32
3.26.2. Time syncing.................................................................................................................... 33
3.27. Tones and vibration..................................................................................................................... 33
3.28. Track back..................................................................................................................................... 33
3.29. Weather indicators...................................................................................................................... 34
4. Care and support....................................................................................................................................... 35
4.1. Handling guidelines....................................................................................................................... 35
4.2. Water resistance............................................................................................................................ 35
4.3. Charging the battery..................................................................................................................... 35
5. Reference.....................................................................................................................................................37
5.1. Technical
specifications.................................................................................................................37
5.2. Compliance..................................................................................................................................... 38
5.2.1. CE........................................................................................................................................... 38
5.2.2. FCC compliance................................................................................................................ 38
5.2.3. ISED REGULATORY COMPLIANCE.............................................................................. 39
5.2.4. NOM-121-SCT1-2009.........................................................................................................39
5.3. Trademark........................................................................................................................................39
5.4. Patent notice...................................................................................................................................39
5.5. International Limited Warranty...................................................................................................39
5.6. Copyright.......................................................................................................................................... 41
3
Suunto Traverse
1. SAFETY
Types of safety precautions
WARNING: - is used in connection with a procedure or situation that may result in
serious injury or death.
CAUTION: - is used in connection with a procedure or situation that will result in
damage to the product.
NOTE: - is used to emphasize important information.
TIP: - is used for extra tips on how to utilize the features and functions of the device.
Safety precautions
WARNING: ALLERGIC REACTIONS OR SKIN IRRITATIONS MAY OCCUR WHEN
PRODUCT IS IN CONTACT WITH SKIN, EVEN THOUGH OUR PRODUCTS COMPLY WITH
INDUSTRY STANDARDS. IN SUCH EVENT, STOP USE IMMEDIATELY AND CONSULT A
DOCTOR.
WARNING: ALWAYS CONSULT YOUR DOCTOR BEFORE BEGINNING AN EXERCISE
PROGRAM. OVEREXERTION MAY CAUSE SERIOUS INJURY.
WARNING: ONLY FOR RECREATIONAL USE.
WARNING: DO NOT ENTIRELY RELY ON THE GPS OR BATTERY LIFETIME, ALWAYS USE
MAPS AND OTHER BACKUP MATERIAL TO ENSURE YOUR SAFETY.
CAUTION: DO NOT APPLY SOLVENT OF ANY KIND TO THE PRODUCT, AS IT MAY
DAMAGE THE SURFACE.
CAUTION: DO NOT APPLY INSECT REPELLENT ON THE PRODUCT, AS IT MAY DAMAGE
THE SURFACE.
CAUTION: DO NOT THROW THE PRODUCT AWAY, BUT TREAT IT AS ELECTRONIC
WASTE TO PRESERVE THE ENVIRONMENT.
CAUTION: DO NOT KNOCK OR DROP THE DEVICE, AS IT MAY BE DAMAGED.
NOTE: At Suunto we use advanced sensors and algorithms to generate metrics that can
help you in your activities and adventures. We strive to be as accurate as possible. However,
none of the data our products and services collect is perfectly reliable, nor are the metrics
they generate absolutely precise. Calories, heart rate, location, movement detection, shot
recognition, physical stress indicators and other measurements may not match the real
world. Suunto products and services are intended for recreational use only and are not
meant for medical purposes of any kind.
4

START
NEXT
LIGHT
BACK LAP
VIEW
21:39
19:36
Tue
4.2.
Suunto Traverse
2. Getting started
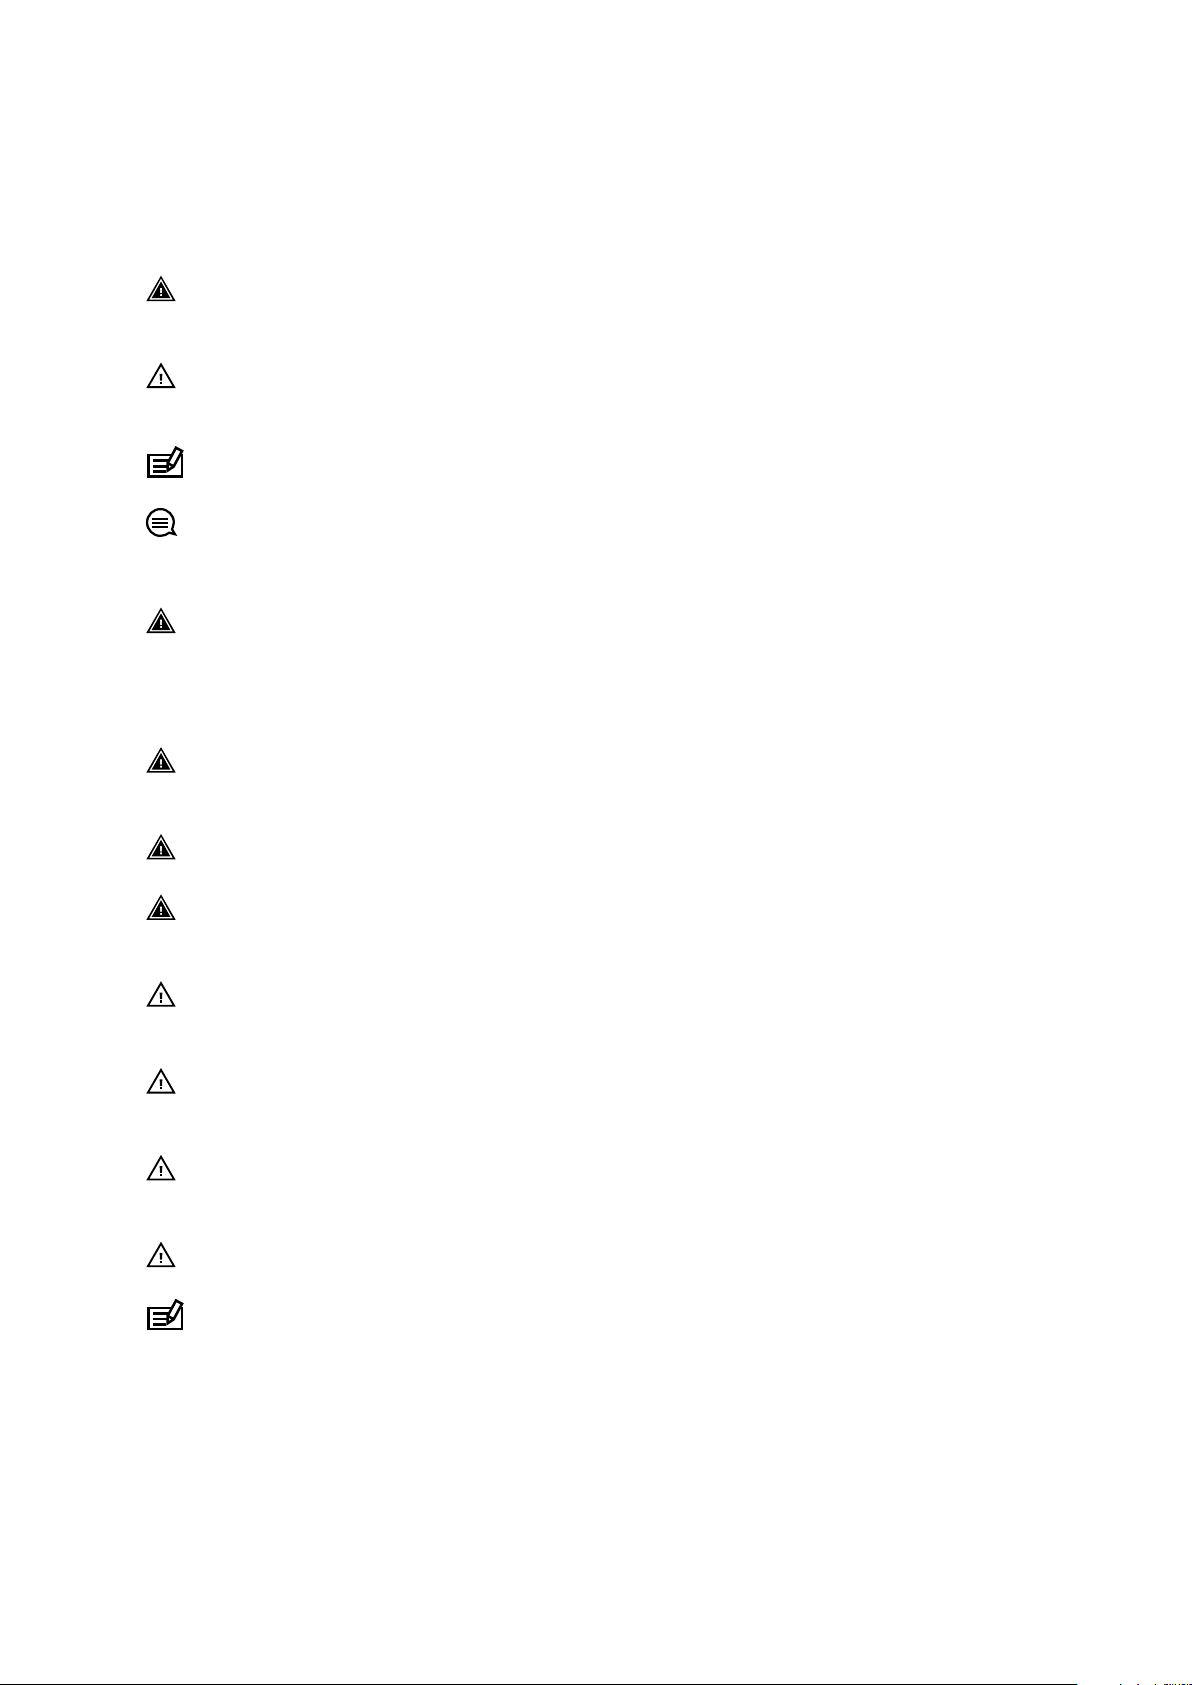
2.1. Using buttons
Suunto Traverse has
five buttons which allow you to access all the features.
[START] :
•
press to access the start menu
•
press to pause or resume a recording or timer
•
press to increase a value or move up in the menu
•
keep pressed to start recording or access a list of available modes
•
keep pressed to stop and save a recording
[NEXT] :
•
press to change displays
•
press to enter/accept a setting
•
keep pressed to access/exit the options menu
[LIGHT] :
•
press to activate the backlight
•
press to decrease a value or move down in the menu
•
keep pressed to activate
•
press to deactivate flashlight
flashlight
[BACK LAP] :
•
press to return to the previous menu
•
press to add a lap during a recording
•
keep pressed to lock/unlock buttons
[VIEW] :
•
press to access additional display views
•
keep pressed to save POI
TIP: When changing the values, you can increase the speed by keeping [START] or
[LIGHT] pressed until the values start to scroll faster.
2.2. Set up
To start using your watch:
1. Keep [START] pressed to wake up the device.
2. Press [START] or [LIGHT] to scroll to the desired language and press [NEXT] to select.
5
Language
English
Unit system
Metric
21:39
19:36
Tue
4.2.
Enter
options
~2 sec
Suunto Traverse
3. Follow the startup wizard to complete initial settings. Set values with [START] or [LIGHT]
and press [NEXT] to accept and go to the next step.
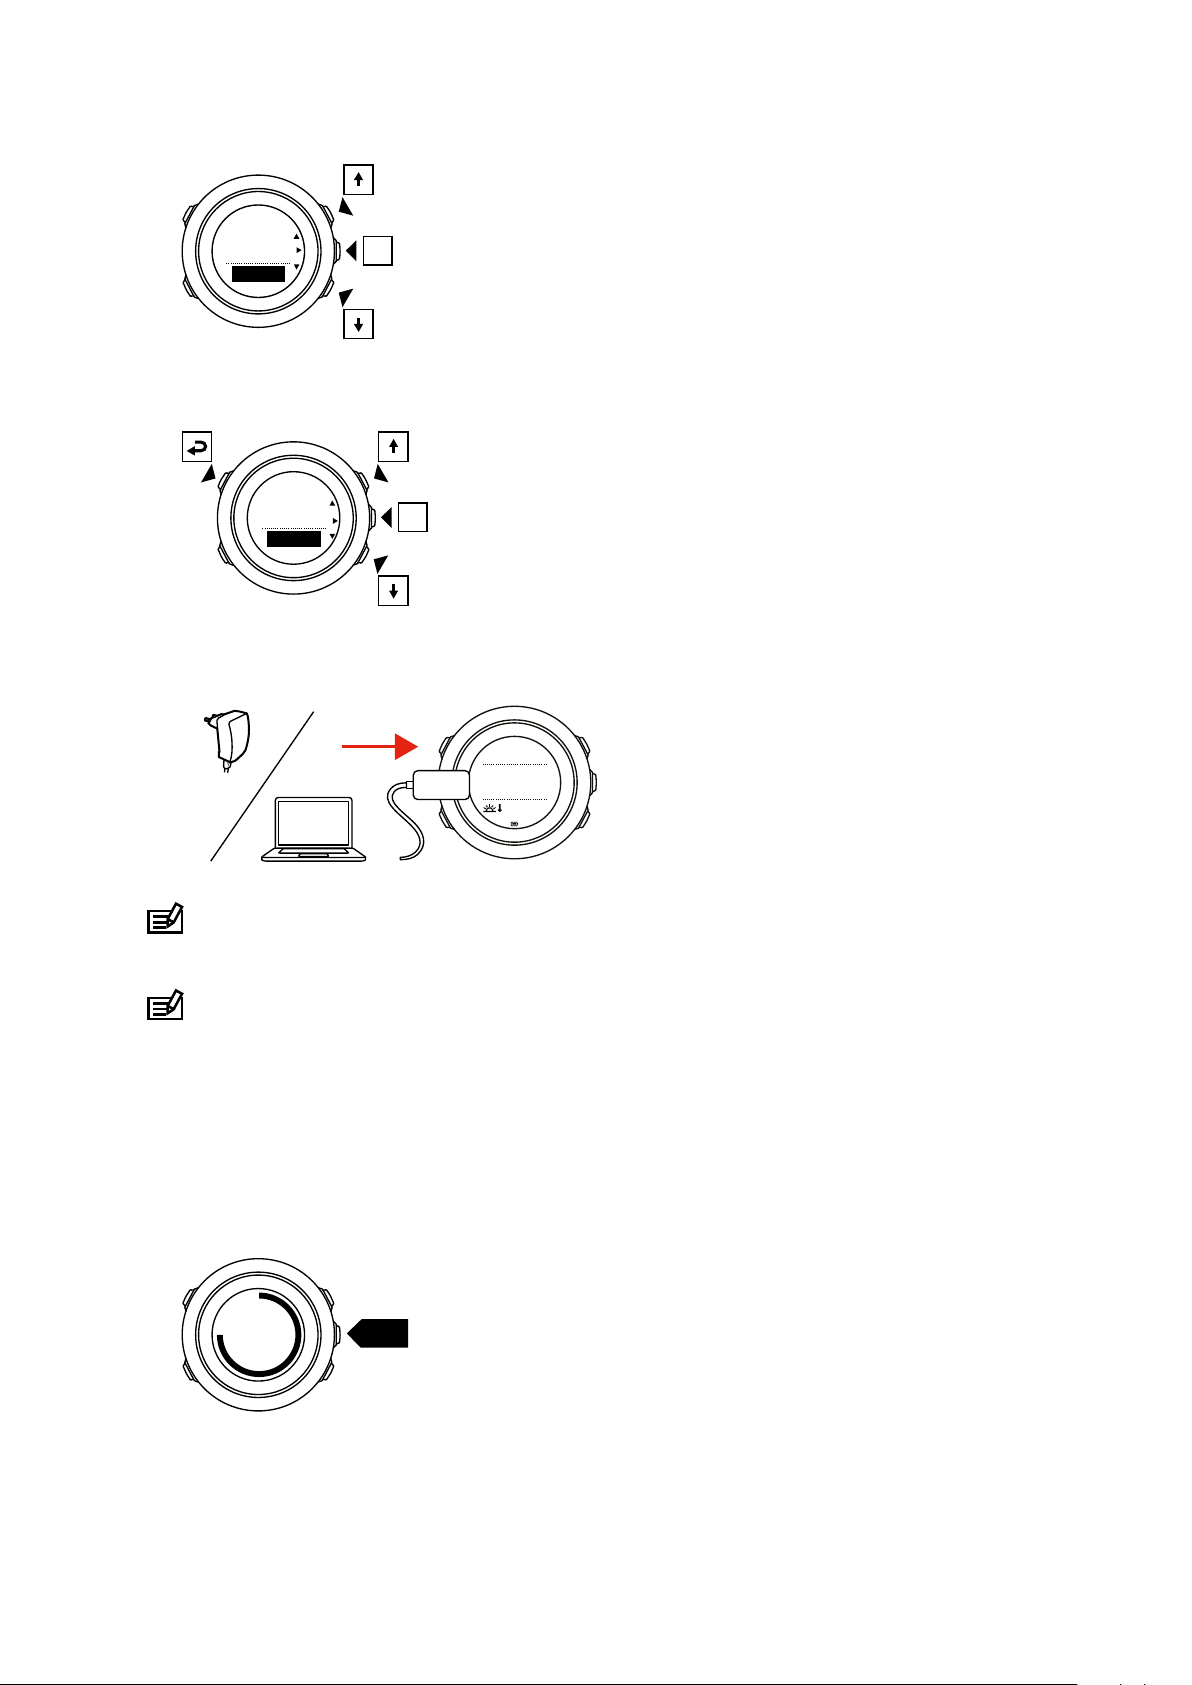
After completing the setup wizard, charge the watch with the supplied USB cable until the
battery is fully charged.
NOTE: If a blinking battery symbol is displayed, Suunto Traverse needs to be charged
before starting.
NOTE: If the battery dies, and you recharge the product, press and hold START to start
the product
2.3. Adjusting settings
You can change the settings of your Suunto Traverse directly in the watch.
To change the settings in the watch:
1. Keep [NEXT] pressed to enter the options menu.
2. Scroll the menu with [START] and [LIGHT] .
3. Press [NEXT] to enter a setting.
6

NAVIGATION
GENERAL
ALTI-BARO
CONNECTIV...
Suunto Traverse
4. Press [START] and [LIGHT] to adjust the setting values and confirm with [NEXT] .
5. Press [BACK LAP] to return to the previous menu or keep [NEXT] pressed to exit.
7
19:36
Tue 4.2.
1539
steps
915
kcal
Steps
11899
Suunto Traverse
3. Features
3.1. Activity monitoring
Suunto Traverse measures your daily steps and estimates calories burned during the day
based on your personal settings.
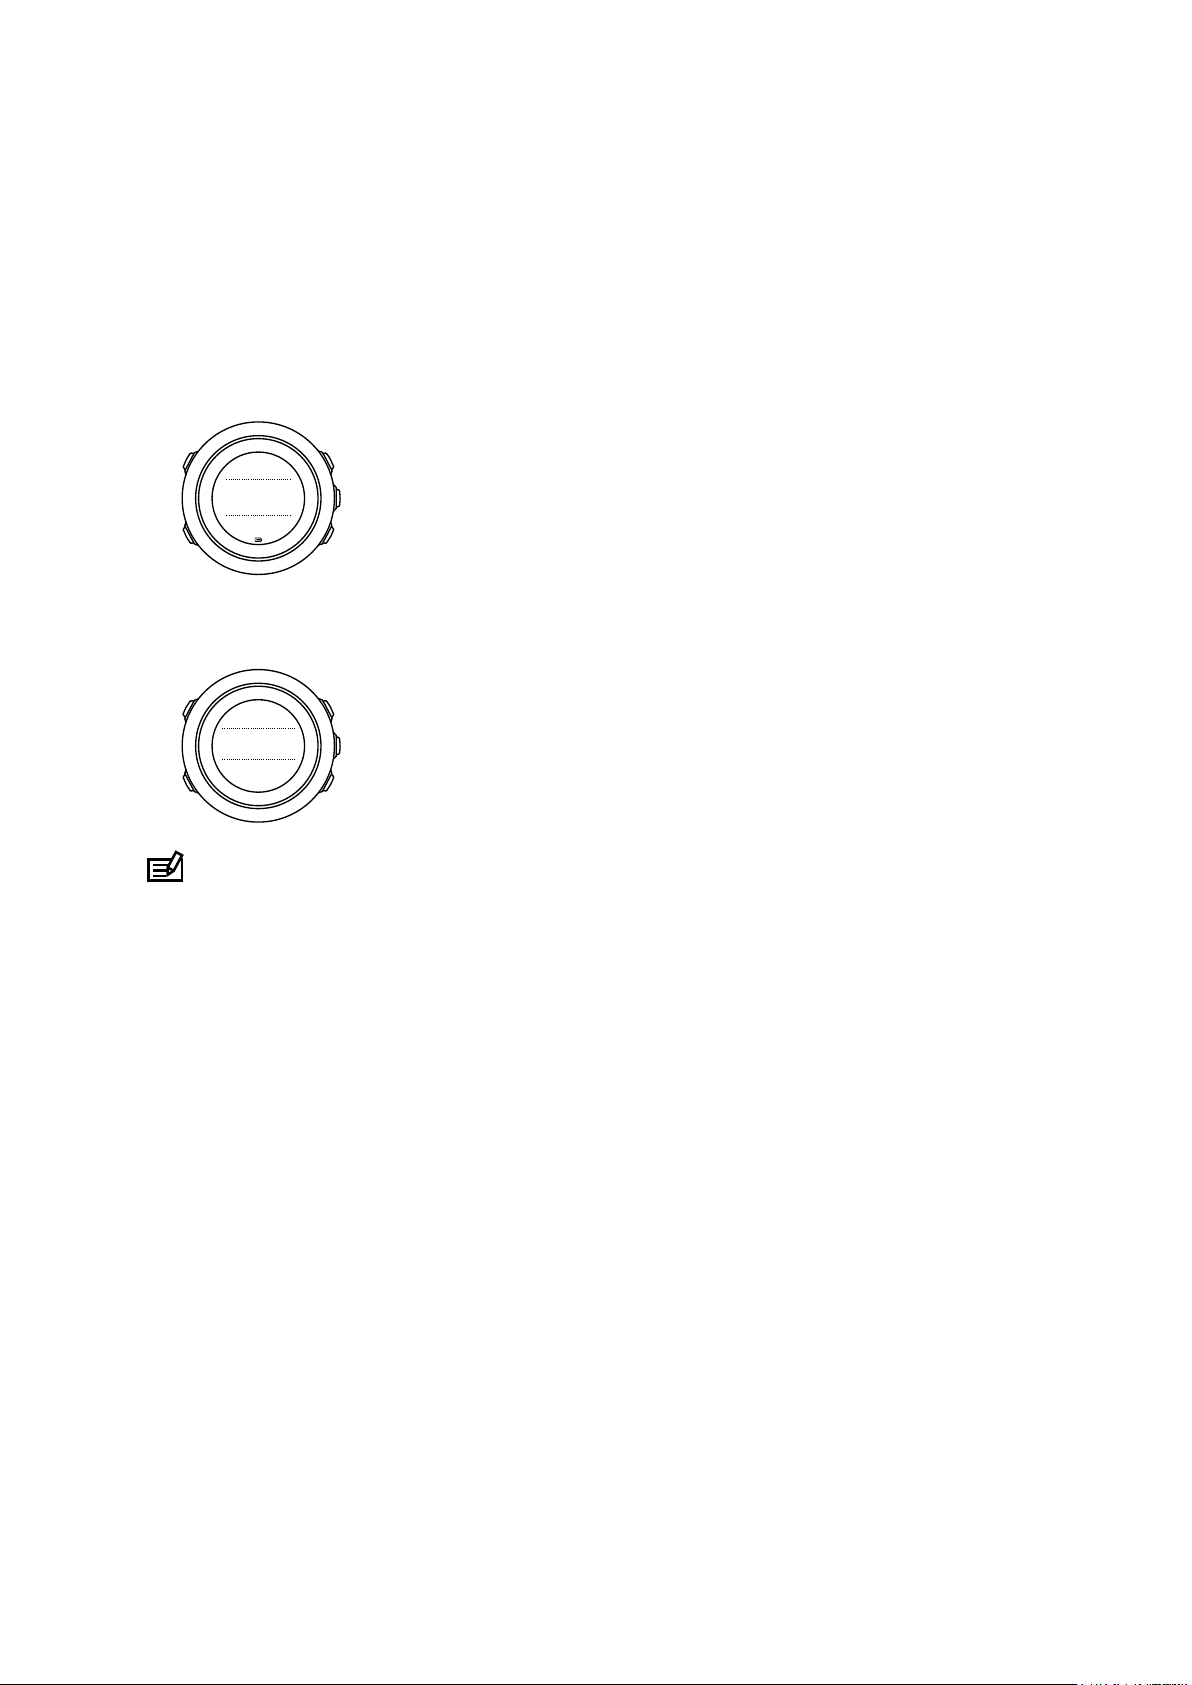
Your approximate daily step count is available as a default view in the time display. Press
[VIEW] to change to the step counter view. The step count is updated every 60 seconds.
Daily step count and calories burned are displayed under DISPLAYS » Steps. The values are
reset daily at midnight.
NOTE: Activity monitoring is based on your movement as measured by sensors in the
watch. The values provided by activity monitoring are estimations and not intended for
medical diagnostics of any kind.
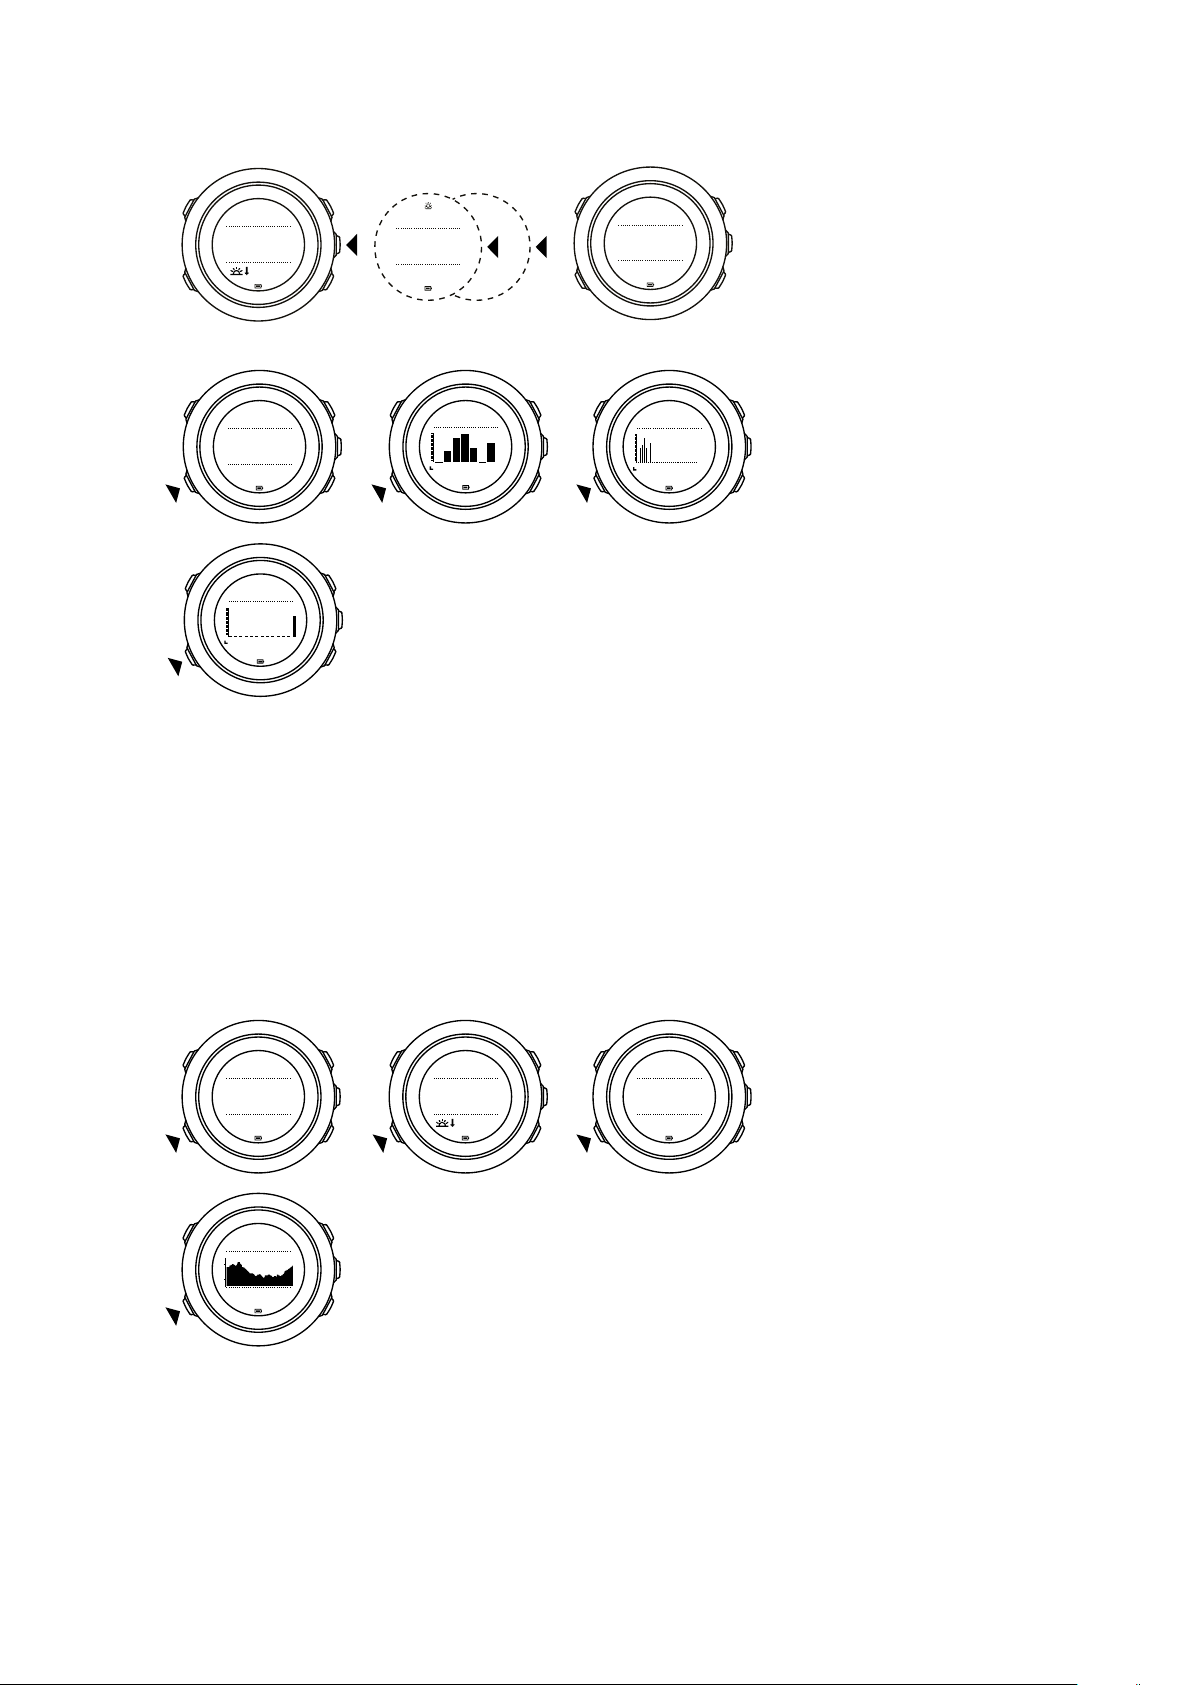
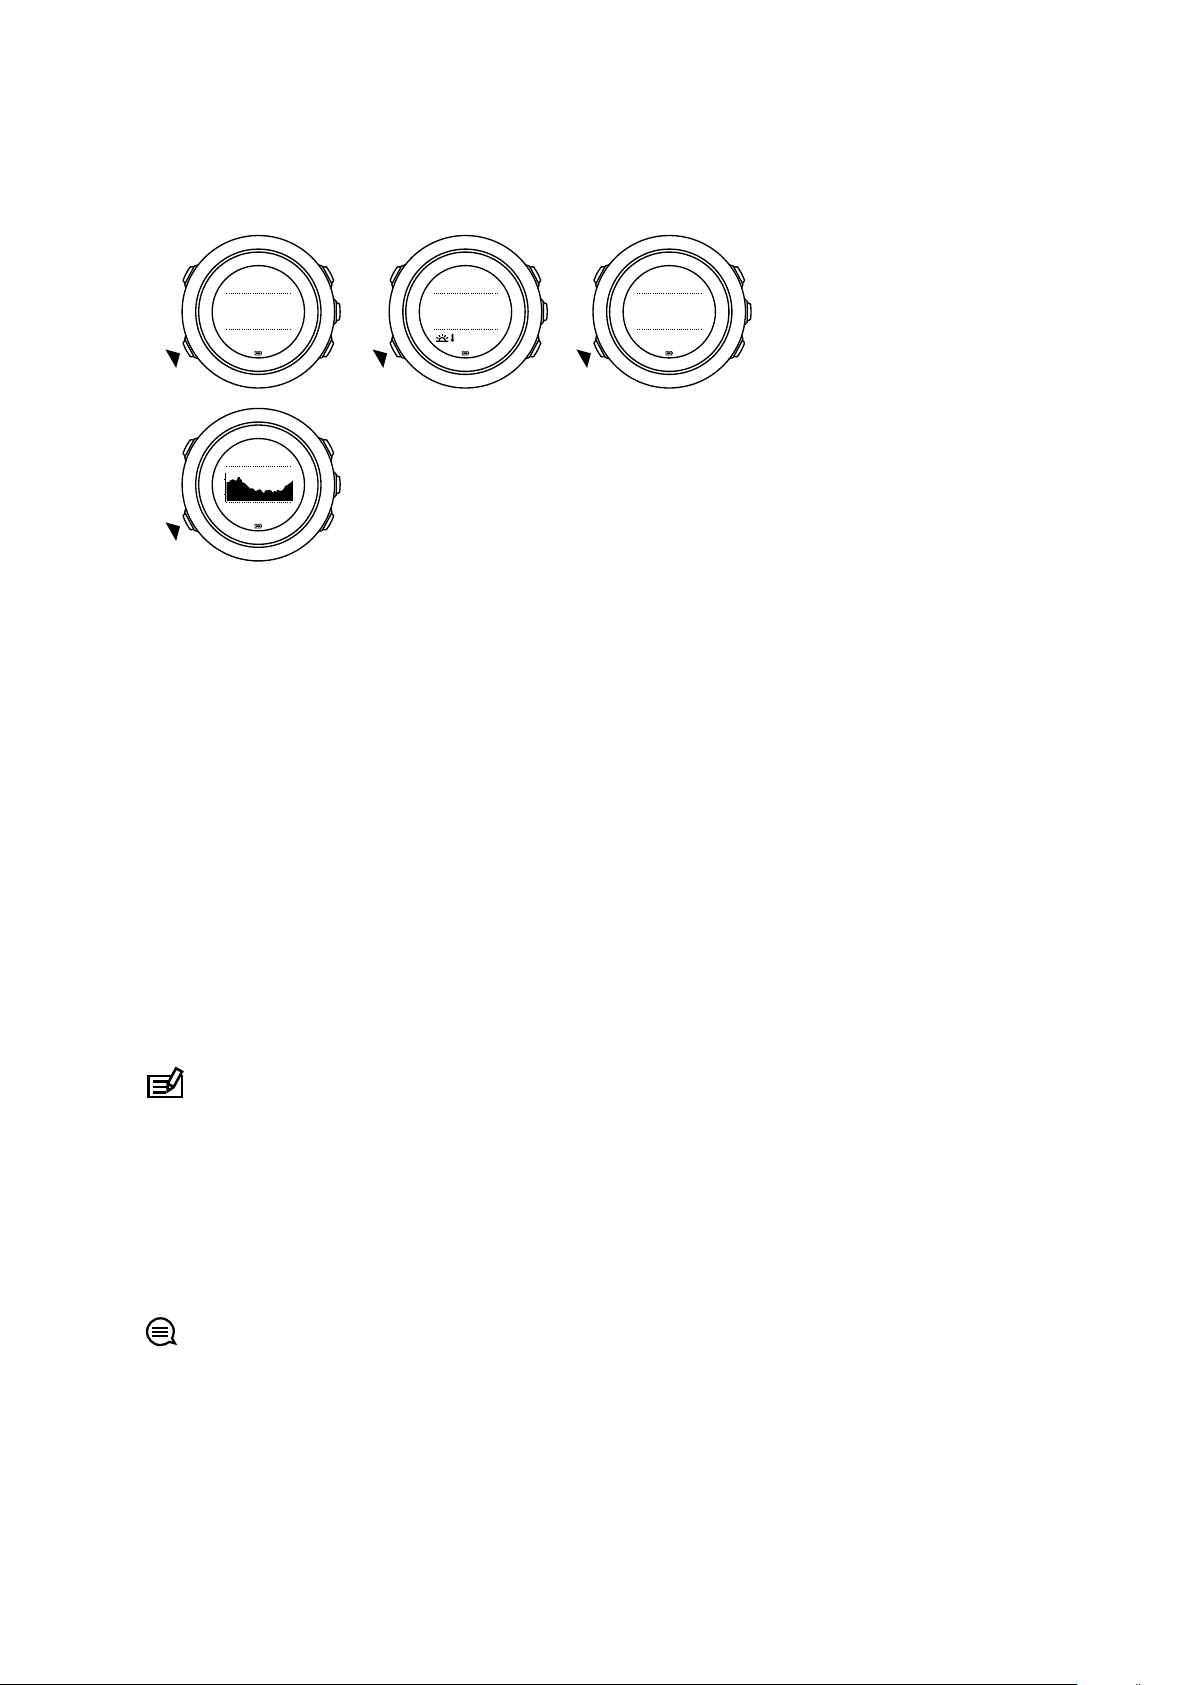
Step history
Suunto Traverse provides a complete history of your step count. The step display shows your
daily steps, as well as an overview of weekly, monthly and yearly trends. You can show/hide
the step display from the start menu under DISPLAYS » Steps. When activated, you can view
your step history by pressing [NEXT] to scroll through active displays.
8
26
°C
1018hPa
Barometer
950
kcal
1306
Steps
21:39
19:36
Tue 4.2.
950
kcal
1306
Steps
avg
2018
30 days
avg
2018
7 days
avg
2018
Year
26
°C
1472m
Altitude
1472m
Altitude
21:39
1472
m
Altitude
ref
1018
hPa
1472m
Altitude
Suunto Traverse
While in the steps
display, you can press [VIEW] to see your 7-day, 30-day and yearly trends.
3.2. Alti-Baro
Suunto Traverse continuously measures absolute air pressure using the built-in pressure
sensor. Based on this measurement and reference values, it calculates altitude or sea level air
pressure.
Three
profiles, see 3.2.2. Matching profile to activity.
To view alti-baro information, press [NEXT] while in the time display or activate the alti-baro
display from the display menu.
profiles are available: Automatic, Altimeter and Barometer. For information on setting
You can change to dierent views by pressing [VIEW] .
In altimeter profile, you can see:
•
altitude + temperature
•
altitude + sunrise/sunset
9
26
°C
1472m
Altitude
1472m
Altitude
21:39
1472
m
Altitude
ref
1018
hPa
1472m
Altitude
Suunto Traverse
•
altitude + reference point
•
12h altitude graph + altitude
In barometer profile, you get the corresponding views:
•
barometric pressure + temperature
•
barometric pressure + sunrise/sunset
•
barometric pressure + reference point
•
24h barometric pressure graph + barometric pressure
Sunrise and sunset time views are available when GPS has been activated. If GPS is not
active, sunrise and sunset times are based on the last recorded GPS data.
You can show/hide the alti-baro display under the start menu.
To hide the alti-baro display:
1. While in the time display, press [START] .
2. Scroll to DISPLAYS with [LIGHT] and press [NEXT] .
3. Scroll to End Alti-Baro and press [NEXT] .
4. Keep [NEXT] pressed to exit.
Repeat the procedure and select Alti-Baro to show the display again.
NOTE: If you are wearing your Suunto Traverse on your wrist, you will need to take it o
in order to get an accurate temperature reading because your body temperature will aect
the initial reading.
3.2.1. Getting correct readings
If your outdoor activity requires accurate sea level air pressure or altitude, you need to
calibrate your Suunto Traverse by entering either your current altitude or the current sea level
air pressure.
TIP: Absolute air pressure and known altitude reference = sea level air pressure.
Absolute air pressure and known sea level air pressure = altitude.
The altitude of your location can be found from most topographic maps or Google Earth. A
sea level air pressure reference for your location can be found using the websites of national
weather services.
10

Suunto Traverse
CAUTION: Keep the area around the sensor free of dirt and sand. Never insert any
objects into the sensor openings.
If FusedAlti is activated, the altitude reading is corrected automatically using FusedAlti
together with altitude and sea level pressure calibration. For more information, see 3.9.
FusedAlti.
Changes in local weather conditions
is advisable to reset the current altitude reference value frequently, preferably before starting
your journey when the reference values are available. As long as the local weather stays
stable, you do not need to set reference values.
To set the sea level pressure and altitude reference values:
1. Keep [NEXT] pressed to enter the options menu.
2. Scroll to ALTI-BARO with [LIGHT] and enter with [NEXT] .
3. Press [NEXT] to enter Reference. The following setting options are available:
4. FusedAlti: GPS is switched on and the watch starts calculating altitude based on FusedAlti.
5. Altitude: Set your altitude manually.
6. Sea level pressure: Set the sea level pressure reference value manually.
7. Set the reference value using [START] and [LIGHT] . Accept the setting with [NEXT] .
TIP: When not recording an activity, press [START] in the alti-baro display to get directly
to the ALTI-BARO menu.
aect altitude readings. If local weather changes often, it
Use example: Setting the altitude reference value
You’re on the second day of your two-day hike. You realize that you forgot to switch from the
barometer profile to the altimeter profile when you started in the morning.You know that the
current altitude readings of your Suunto Traverse are wrong.
So, you hike to the nearest location shown on your topographic map for which an altitude
reference value is provided. You correct your Suunto Traverse altitude reference value
accordingly and switch to the altimeter
profile. Your altitude readings are correct again.
3.2.2. Matching profile to activity
The altimeter
altitude (such as hiking in the mountains).
The barometer profile should be selected when your outdoor activity does not involve
changes in altitude (such as canoeing).
To get correct readings, you need to match the profile to your activity. You can either let
Suunto Traverse decide a suitable profile for the activity using the automatic profile, or choose
a profile yourself.
profile should be selected when your outdoor activity involves changes in
11

26
°C
1472m
Altimeter
26
°C
1018hPa
Barometer
Suunto Traverse
To set the alti-baro profile:
1. Keep [NEXT] pressed to enter the options menu.
2. Scroll to ALTI-BARO with [LIGHT] and enter with [NEXT] .
3. Scroll to Profile with [START] and enter with [NEXT] .
4. Change the profile with [START] or [LIGHT] and confirm your selection with [NEXT] .
5. Keep [NEXT] pressed to exit.
Incorrect readings
If the altimeter
profile is on for an extended period of time with the device in a fixed location
while the local weather changes, the device will give incorrect altitude readings.
If you use the altimeter
profile and the weather changes frequently while you climb in altitude
or go down in altitude, the device will give you incorrect readings.
If you use the barometer profile for an extended period of time as you climb in altitude or go
down in altitude, the device assumes that you are standing still and interprets your changes in
altitude as changes in sea level air pressure. It will therefore give you incorrect sea level air
pressure readings.
3.2.3. Using altimeter
profile
The altimeter profile calculates altitude based on reference values. The reference value can
either be sea level air pressure or altitude. When the altimeter profile is activated, the
altimeter icon is shown at the top of the alti-baro display.
3.2.4. Using barometer profile
The barometer profile shows the current sea level air pressure. This is based on the reference
values and the constantly measured absolute air pressure.
When the barometer profile is activated, the barometer icon is shown on the display.
3.2.5. Using automatic profile
The automatic profile switches between the altimeter and barometer profiles according to
your movement.
It is not possible to measure weather and altitude changes at the same time, as both cause a
change in the surrounding air pressure. Suunto Traverse senses vertical movement and
12

Suunto Traverse
switches to measuring altitude, when needed. When altitude is shown, it is updated with a
maximum delay of 10 seconds.
If you are at a constant altitude (less than 5 meters of vertical movement within 12 minutes),
Suunto Traverse interprets all pressure changes as weather changes. The measurement
interval is 10 seconds. The altitude reading remains steady and if the weather changes, you
will see changes in the sea level air pressure reading.
If you are moving in altitude (more than 5 meters of vertical movement within 3 minutes),
Suunto Traverse interprets all pressure changes as movements in altitude.
Depending on which
baro display with [VIEW] .
NOTE: When you are using the automatic profile, barometer or altimeter icons are not
shown on the alto-baro display.
profile is active, you can access the altimeter or barometer in the alti-
3.3. Autopause
Autopause pauses the recording of your activity when your speed is less than 2 km/h (1.2
mph). When your speed increases to more than 3 km/h (1.9 mph), the recording continues
automatically.
You can turn autopause
settings for the sport mode.
on/o for each sport mode in Movescount under the advanced
3.4. Backlight
Pressing [LIGHT] activates the backlight.
By default, the backlight turns on for a few seconds and turns o automatically.
There are four backlight modes:
•
Normal: The backlight turns on for a few seconds when you press [LIGHT] and when the
alarm clock sounds. This is the default setting.
•
O: The backlight is not switched on by pressing a button or when the alarm clock
sounds.
•
Night: The backlight turns on for a few seconds when you press any button and when the
alarm clock sounds.
•
Toggle: The backlight turns on when you press [LIGHT] and stays on until you press
[LIGHT] again.
You can change the general backlight setting in the watch settings under GENERAL » Tones/
display » Backlight.
You can adjust the backlight brightness (in percent), either in the watch settings under Tones/
display » Backlight.
TIP: When the [BACK LAP] and [START] buttons are locked, you can still activate the
backlight by pressing [LIGHT] .
Flashlight
In addition to normal backlight modes, Traverse has one additional mode where the backlight
is automatically set to maximum brightness and can be used as a flashlight. To activate the
flashlight, keep [LIGHT] pressed.
13
 Loading...