

Page 1

SUUNTO D4F
USER GUIDE
2017-02-02
Page 2

1 Safety ................................................................................................ 4
2 Getting started ................................................................................. 8
2.1 Display states and views .......................................................... 8
2.2 Set up ........................................................................................ 8
2.3 Icons .......................................................................................... 9
3 Features .......................................................................................... 11
3.1 Activation and pre-checks ...................................................... 11
3.2 Alarms, warnings and notifications ...................................... 12
3.3 Apnea timer ............................................................................ 14
3.4 Backlight ................................................................................. 16
3.5 Battery indicators ................................................................... 17
3.6 Calendar clock ........................................................................ 17
3.6.1 Time ................................................................................ 18
3.6.2 Date ................................................................................ 18
3.6.3 Units ................................................................................ 18
3.6.4 Dual time ........................................................................ 19
3.6.5 Alarm clock ..................................................................... 19
3.7 Display contrast ...................................................................... 20
3.8 Depth alarm ............................................................................ 20
3.9 Dive history ............................................................................. 21
3.9.1 Dive numbering .............................................................. 23
3.10 Dive modes ........................................................................... 24
3.10.1 Free mode ..................................................................... 25
3.11 Dive time alarm .................................................................... 26
3.12 Sample rate ........................................................................... 27
3.13 Stopwatch ............................................................................. 27
3.14 Surface and no-fly time ........................................................ 28
3.15 Tones ..................................................................................... 30
2
Page 3

3.16 Water contact ....................................................................... 31
4 Care and support ............................................................................ 32
4.1 Handling guidelines ............................................................... 32
4.2 Water resistance ..................................................................... 33
4.3 Battery replacement .............................................................. 34
5 Reference ........................................................................................ 35
5.1 Technical specifications .......................................................... 35
5.2 Compliance ............................................................................. 36
5.2.1 CE EMC ............................................................................ 36
5.2.2 EN 13319 ......................................................................... 37
5.3 Trademark .............................................................................. 37
5.4 Patent notice .......................................................................... 37
5.5 International Limited Warranty ............................................ 37
5.6 Copyright ................................................................................ 40
Index .................................................................................................. 41
3
Page 4
1 SAFETY
Types of safety precautions
WARNING: - is used in connection with a procedure or situation
that may result in serious injury or death.
CAUTION: - is used in connection with a procedure or situation
that will result in damage to the product.
NOTE: - is used to emphasize important information.
TIP: - is used for extra tips on how to utilize the features and
functions of the device.
Before you dive
Make sure that you fully understand the use, displays and
limitations of your dive instruments. If you have any questions
about this manual or the dive computer, contact your Suunto dealer
before diving with the dive computer. Always remember that YOU
ARE RESPONSIBLE FOR YOUR OWN SAFETY!
4
Page 5

Safety precautions
WARNING: ONLY TRAINED DIVERS SHOULD USE A DIVE
COMPUTER! Insufficient training for any kind of diving may cause a
diver to commit errors that may lead to serious injury or death.
WARNING: You must read the printed quick guide and online
user guide for your dive computer. Failure to do so may lead to
improper use, serious injury or death.
WARNING: THERE IS ALWAYS A RISK OF DECOMPRESSION
SICKNESS (DCS)! An individual’s physiological make up can vary
from day to day. The dive computer cannot account for these
variations. You are strongly advised to remain well within the
exposure limits provided by the instrument to minimize the risk of
DCS. As an added measure of safety, you should consult a physician
regarding your fitness before diving.
WARNING: If you have a pacemaker, we recommend you do not
dive. Diving creates physical stresses on the body which may not be
suitable for pacemakers.
WARNING:
using this device. The inductive frequency used by the device may
interfere with pacemakers.
If you have a pacemaker, consult a doctor before
5
Page 6
WARNING: Allergic reactions or skin irritations may occur when
product is in contact with skin, even though our products comply
with industry standards. In such event, stop use immediately and
consult a doctor.
WARNING: Not for professional use! Suunto dive computers are
intended for recreational use only. The demands of commercial or
professional diving may expose the diver to depths and conditions
that tend to increase the risk of decompression sickness (DCS).
Therefore, Suunto strongly recommends that the device not be used
for any commercial or professional diving activities.
WARNING:
USE BACKUP INSTRUMENTS! Ensure that you use
backup instrumentation, including a depth gauge and a timer or
watch.
WARNING: For safety reasons, you should never dive alone. Dive
with a designated buddy. You should also stay with others for an
extended time after a dive as the onset of possible DCS may be
delayed or triggered by surface activities.
WARNING:
PERFORM PRE-CHECKS! Always check that your dive
computer is functioning properly before diving. Check that the
display is working, the battery level is OK, and so forth.
6
Page 7
WARNING: Check your dive computer regularly during a dive. If
there is any apparent malfunction, abort the dive immediately and
safely return to the surface.
WARNING: DO NOT EXPOSE ANY PART OF YOUR DIVE
COMPUTER TO ANY GAS MIX CONTAINING MORE THAN 40%
OXYGEN! Enriched air with greater oxygen content presents a risk
of fire or explosion and serious injury or death.
WARNING: Do not use Suunto USB Cable in areas where
flammable gases are present. Doing so may cause an explosion.
WARNING: Do not disassemble or remodel Suunto USB Cable in
any way. Doing so may cause an electric shock or fire.
WARNING:
Do not use Suunto USB cable if cable or parts are
damaged.
CAUTION: DO NOT allow the connector pins of the USB cable to
touch any conductive surface. This may short circuit the cable,
making it unusable.
7
Page 8
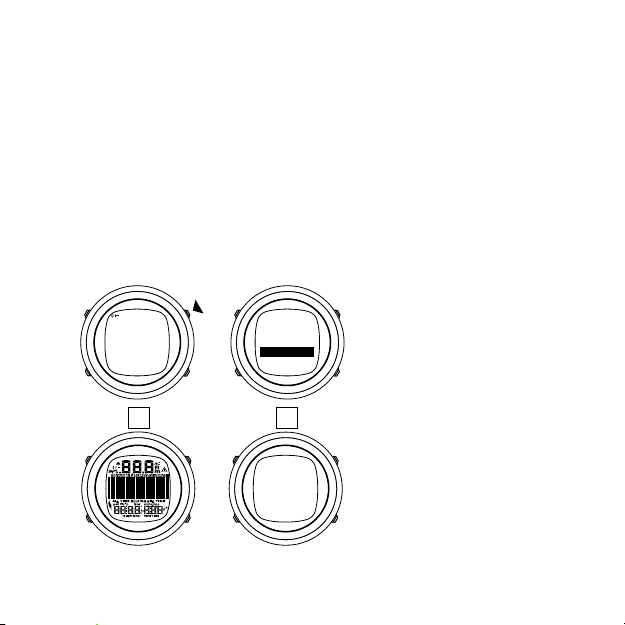
2 GETTING STARTED
DIVE MEM
12:00
1.12
TH
12:00
1.12
TH
2.1 Display states and views
Suunto D4f has three main modes: TIME, DIVE and MEMORY.
Change modes by pressing [MODE].
Unless DIVE mode is turned off, Suunto D4f automatically switches
to DIVE mode if you are more than 1.2 m (4 ft) under water.
Time and dive modes have different views in the bottom row which
you can scroll through with [DOWN] and [UP].
2.2 Set up
To get the most out of your Suunto D4f, take some time to read this
manual and familiarize yourself with the modes and settings. Make
absolutely sure you have it set up as you want before getting into
the water.
To get started:
1. Wake up the device by keeping any button pressed until the
display turns on.
2.
Keep [DOWN] pressed to enter General Settings.
8
Page 9
3. Set time. See
3.
2.
1.
4.
5.
4. Set date. See
5. Set units. See
6. Press [MODE] to exit settings.
The default dive mode is Free. For more information on dive modes,
see
3.10 Dive modes
3.6.1 Time
3.6.2 Date
3.6.3 Units
.
.
.
.
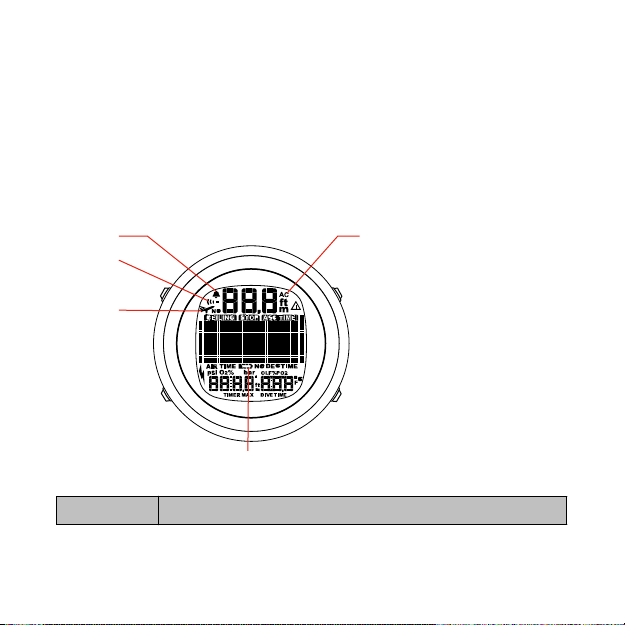
2.3 Icons
Suunto D4f uses the following icons:
Icon Description
1 Daily alarm
2 Dive alarm
9
Page 10

Icon Description
3 No-fly
4 Low battery
5 Active water contact
10
Page 11
3 FEATURES
12:00
1.12
TH
DIVE
Free
Battery
OK
3.1 Activation and pre-checks
Unless the dive mode turned off, the dive mode activates
automatically when you dive deeper than 1.2 m (4 ft). However, you
should switch to dive mode before diving to check battery
condition, the display and so on.
Each time your Suunto D4f enters dive mode, a series of automatic
checks are performed. All graphical display elements are turned ON,
and the backlight and the beep are activated. Then the battery level
is checked.
11
Page 12
Before leaving on a dive trip, it is highly recommended that you
switch to dive mode to make sure everything is functioning
properly.
After the automatic checks, Suunto D4f enters surface mode. At this
point, you should perform your manual checks before entering the
water.
Ensure that:
1. Suunto D4f is in the correct mode and provides complete
displays.
2. Unit system is correct.
3. Correct temperature and depth are shown.
4. The alarm beeps.
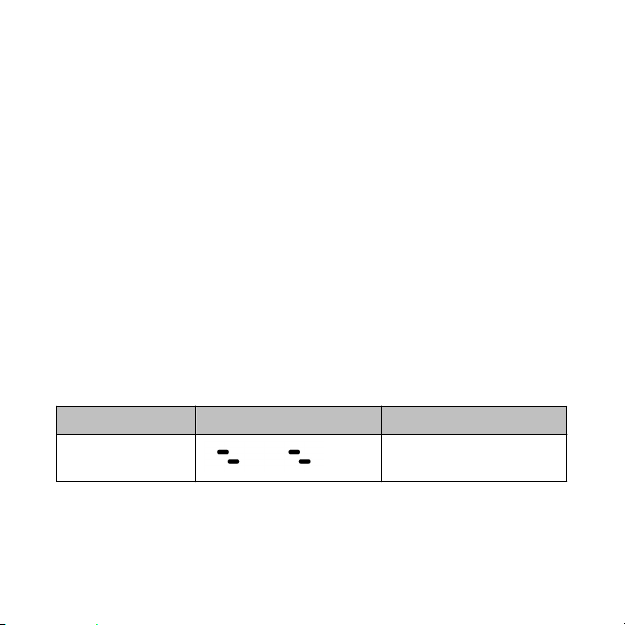
3.2 Alarms, warnings and notifications
Suunto D4f has audible and visual alarms designed to let you know
when important limits or presets are being reached.
The one audible alarm type indicating low priority:
Alarm type Sound pattern Duration
Low priority
In addition, there are two audible guidance notifications:
12
0.8 s sound + 3.2 s
break
Page 13
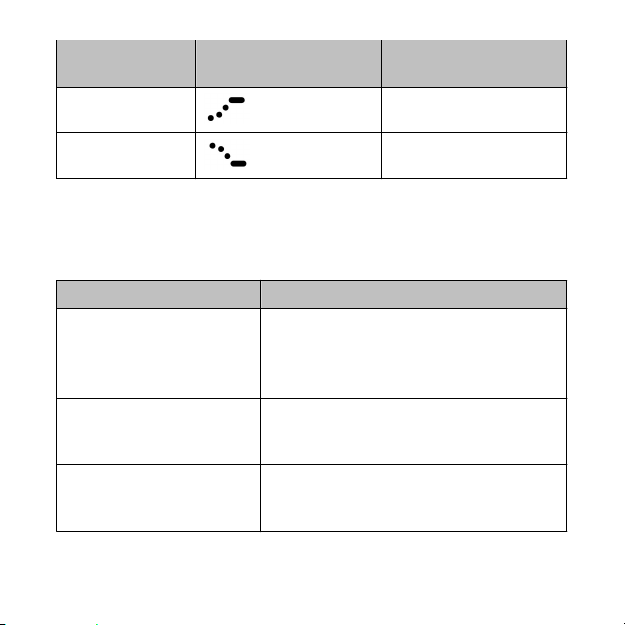
Instructional
beep
Ascending Start ascending
Descending Start descending
Suunto D4f displays information during the alarm breaks in order to
save battery life.
Low priority alarms:
Alarm type Alarm reason
Low priority alarm,
repeated twice.
Maximum depth value
blinks
Low priority alarm,
repeated twice; dive time
value blinks
Low priority alarm.
Maximum depth value
blinks.
Sound pattern Interpretation
Defined maximum depth or the
maximum depth of the device
exceeded. Acknowledge the alarm by
pressing any button.
Defined dive time exceeded.
Acknowledge the alarm by pressing
any button.
Defined depth reached. Acknowledge
the alarm by pressing any button.
13
Page 14

Alarm type Alarm reason
Low priority alarm,
Surface time value blinks.
Visual alarms
Symbol on display Indication
Duration of surface time until next
dive. Acknowledge the alarm by
pressing any button.
Do not fly (after single 10-minute free
dive)
3.3 Apnea timer
You can use the apnea timer for interval training when freediving.
You can adjust the following settings:
•
Vent.: ventilation time; this is the starting duration of the time
your breathing time. The time is increased by the increment time
for each interval.
•
Incr: increment time; this is added to the ventilation time for
each interval. For example, if your ventilation time is 1:00
minute and your increment time is 0:30 seconds, the first interval
ventilation is 1:00, the second is 1:30, the third is 2:00, and so on.
•
Repeats: number of intervals
To adjust apnea timer settings:
14
Page 15
1. While in time mode, keep [UP] pressed to enter the apnea timer
2s
12:00
1.12
TH
TIMER
Apena
1:00
15:00
TIME
START
view.
2. Keep [DOWN] pressed to enter apnea timer settings.
3. Adjust the ventilation time with [UP] or [DOWN] and confirm
with [SELECT].
4. Adjust the increment time with [UP] or [DOWN] and confirm
with [SELECT].
5. Adjust the number of intervals with [UP] or [DOWN] and confirm
with [SELECT].
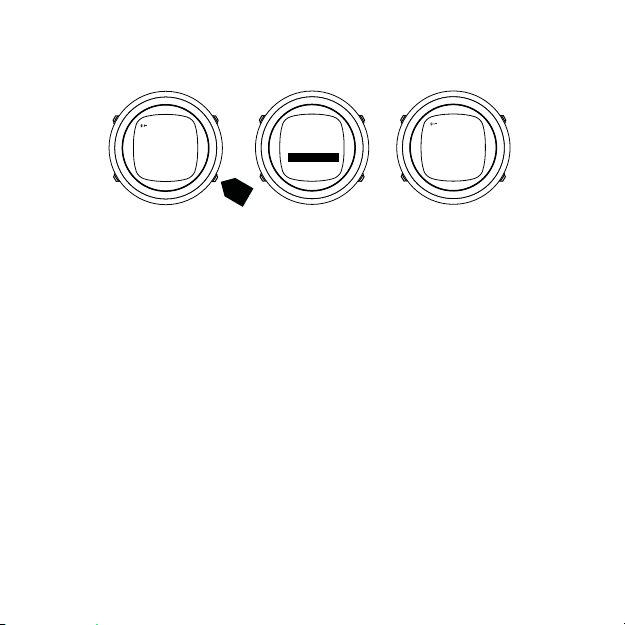
To use the apnea timer:
1. Press [SELECT] to start the first interval. The timer counts down
the ventilation time. The countdown continues up to -0:30
seconds beyond the defined ventilation time.
2. Press [SELECT] to start the apnea cycle. You can start this at any
time during the ventilation countdown.
The apnea time is not defined in the watch. It is as long or short
as you choose.
3. Press [SELECT] again to start the next ventilation cycle.
4. Repeat until the end of the defined number of intervals.
5. Press [MODE] to exit the apnea timer.
15
Page 16

You can reset the apnea timer by keeping [SELECT] pressed.
The apnea timer supports up to 20 intervals, but this is dependent
on the ventilation and increment times. The last ventilation cycle
cannot be shorter than 0:05 seconds or longer than 20:00 minutes.
WARNING: Anyone who engages in any form of breath hold
diving is in danger of shallow-water blackout (SWB), the sudden
loss of consciousness caused by oxygen starvation.
3.4 Backlight
To active the backlight while diving, press [MODE].
Otherwise, keep [MODE] pressed until the backlight activates to use
the backlight.
You can define how long the backlight stays on when you activate
it or turn the backlight off altogether.
To set backlight duration:
1. While in time mode, keep [DOWN] pressed.
2.
Press [DOWN] to scroll to BACKLIGHT and press [SELECT].
3. Set duration or turn off with [DOWN] or [UP].
4. Press [MODE] to save and exit to settings.
NOTE:
alarm sounds.
16
When the backlight is off, it does not illuminate when an
Page 17

3.5 Battery indicators
Replace
Battery
Battery
Low
12:00
1.12
TH
Temperature or internal oxidation can affect the battery voltage. If
you store your Suunto D4f for a long period or use it in cold
temperatures, the low battery warning may appear even though
the battery has enough capacity.
In these cases, re-enter dive mode and check the battery power. If
the battery is low, the Low Battery warning comes on.
If the low battery icon appears in surface mode, or if the display
looks faded, the battery may be too low. Battery replacement is
recommended.
NOTE: For safety reasons, the backlight and buzzer (sound)
cannot be activated when the low battery warning is displayed.
3.6 Calendar clock
The calendar clock is the default mode of Suunto D4f .
17
Page 18

3.6.1 Time
In the time settings, you can set the hours, minutes, seconds, and
format (12 or 24-hour).
To set time:
1. While in time mode, keep [DOWN] pressed.
2.
Press [UP] to scroll to Time and press [SELECT].
3. Set hours with [DOWN] or [UP] and confirm with [SELECT].
4. Repeat for minutes and seconds.
Set the format with [DOWN] or [UP] and confirm with [SELECT].
5. Press [MODE] to exit.
3.6.2 Date
The date and weekday are shown in the bottom row of time mode.
Press [DOWN] to toggle between views.
To set the date:
1. While in time mode, keep [DOWN] pressed.
2.
Press [UP] to scroll to
3. Set year with [DOWN] or [UP] and accept with [SELECT].
4. Repeat for month and day.
5. Press [MODE] to exit.
Date
and press [SELECT].
3.6.3 Units
In the units setting, choose whether the units are displayed in the
metric or Imperial system.
1. While in time mode, keep [DOWN] pressed.
2.
Press [UP] to scroll to Units and press [SELECT].
18
Page 19

3.
Press [DOWN] to toggle between Metric and Imperial and
confirm with [SELECT].
4. Press [MODE] to exit.
3.6.4 Dual time
Dual time allows you to keep track of the time in a second time
zone. Dual time is shown in the bottom left of the time mode
display by pressing [DOWN].
To set dual time:
1. While in time mode, keep [DOWN] pressed.
2.
Press [UP] to scroll to Dual Time and press [SELECT].
3. Set hours with [DOWN] or [UP] and confirm with [SELECT].
4. Repeat for minutes.
5. Press [MODE] to exit.
3.6.5 Alarm clock
Suunto D4f has a daily alarm which can be set to activate once, on
weekdays or every day.
When the daily alarm activates, the screen blinks and the alarm
sounds for 60 seconds. Press any button to stop the alarm.
To set the daily alarm:
1. While in time mode, keep [DOWN] pressed.
2.
Press [UP] to scroll to Alarm and press [Select.]
3. Select alarm activation with [DOWN] or [UP] and confirm with
[Select].
The options are OFF, ONCE, WEEKDAYS, or EVERY DAY.
4. Set hours with [DOWN] or [UP ]and confirm with [SELECT].
19
Page 20

5. Repeat for minutes.
6. Press [MODE] to exit.
3.7 Display contrast
You can adjust the contrast of the display according to your
preference or, for example, to suite changing dive conditions.
1. While in time mode, keep [DOWN] pressed.
2.
Press [UP] to scroll to Contrast and press [Select].
3. Use [DOWN] or [UP] to change the contrast from 0 (lowest) to 10
(highest).
4. Press [MODE] to exit.
3.8 Depth alarm
By default the depth alarm sounds at 30 m (100 ft). You can adjust
the depth according to your personal preference or switch it off.
To adjust the depth alarm:
1. While in a dive mode, keep [DOWN] pressed to enter settings.
2.
Press [UP] to scroll to Depth Alarm and press [SELECT].
3. Press [UP] to toggle the alarm on/off and confirm with [SELECT].
4. Adjust depth with [DOWN] or [UP] and accept with [SELECT].
5. Press [MODE] to exit.
When the depth alarm activates, the backlight blinks and the low
priority audible alarm pattern sounds. Acknowledge the alarm by
pressing any button.
20
Page 21

3.9 Dive history
Suunto D4f has a detailed logbook and dive history available in
memory mode.
The logbook contains a sophisticated dive profile for each recorded
dive. The time between each data point saved in the log is based on
the configurable sample rate (see
The dive history is a summary of all recorded dives.
To access dive history:
1.
Press [MODE] until you see MEM.
2.
Switch between History and Logbook with [DOWN] or [UP].
3. When you are viewing the history or logbook, you can press
[MODE] to go back and select the other one. Press [MODE] a
second time to exit.
History
When you have entered the dive history view, you can switch
between Scuba History and FREE DIVE HISTORY with [DOWN] and
[UP].
Scuba dive history shows you a summary of the following:
•
Dive hours (if a single dive exceeds 10 minutes)
•
Total number of dives
•
Maximum depth
The scuba dive history records a maximum of 999 dives and 999
diving hours. When these limits are reached, the counters reset to
zero.
3.12 Sample rate
).
21
Page 22

Free dive history shows the following:
•
the deepest and the longest dives of all free dives
•
the cumulative dive time in hours and minutes
•
the total number of dives
The free dive history records a maximum of 999 dives and 99:59
diving hours. When these limits are reached, the counters are reset
to zero.
Logbook
To access the logbook:
1.
Press [MODE] three time until you come to MEM mode.
2.
Press [UP] to choose Logbook.
3. Press [DOWN] or [UP] to scroll to the log you wish to look at and
press [SELECT].
4. Press [SELECT] to scroll through the pages.
5. Press [MODE] to exit.
Each log has three pages:
1. Summary
•
maximum depth
•
date of dive
•
type of dive (indicated by first letter of dive mode, F for Free
and G for Gauge mode if dive exceeds 10 minutes)
•
dive start time
•
dive number – from oldest to newest
•
total dive time (in minutes)
2. Surface time
22
Page 23

•
maximum depth
•
surface time after previous dive
•
average depth
3. Dive profile
•
Dive profile graph
•
water temperature
•
depth/time profile of the dive
Press [UP] to step through the dive profile graph or keep [UP]
pressed to auto-scroll.
The dive profile graph shows point by point dive information.
The End of Logs text is displayed between the oldest and most
recent dive.
The logbook capacity depends on the sample rate. With the default
setting (2 sec), the capacity is approximately 3.5 hours.
If the memory is full, when new dives are added, the oldest dives
are deleted.
The contents of the memory remain when the battery is changed
(providing that the battery has been replaced according to the
instructions).
3.9.1 Dive numbering
Repetitive dives on the same day are considered part of the same
dive series.
Within each series, the dives are given numbers. The first dive of the
series is
DIVE 1
, the second
DIVE 2
, and so on.
23
Page 24

3.10 Dive modes
Suunto D4f has the following dive modes:
•
Free: for free diving
•
Off: turns dive mode off completely; the dive computer does not
automatically switch the dive mode when submerged and dive
planning mode is hidden
By default, Free mode is activated when you enter dive mode. You
can change which mode is activated or turn dive mode off under
the general settings.
TIP: Dive mode can be turned off during periods when you do
not need a dive computer.
To change dive modes:
1. While in time mode, keep [DOWN] pressed.
2.
Press [SELECT] to enter Dive Mode.
3. Change to the desired mode with [UP] or [DOWN] and confirm
with [SELECT].
4. Press [MODE] to exit.
Each dive mode has its own settings which you need to adjust while
in the given mode.
To modify dive mode settings:
1. While in a given dive mode, keep [DOWN] pressed.
2. Press [DOWN] or [UP] to scroll through the settings.
3. Press [SELECT] to enter a setting.
24
Page 25

4. Adjust the setting with [DOWN] or [Up] and confirm with
[SELECT].
5. Press [MODE] to exit.
3.10.1 Free mode
With Free mode, Suunto D4f can be used as a freediving
instrument. The dive time is indicated in minutes and seconds in the
center of the display.
The free dive starts at 1.2 m (4 ft) and ends when your depth is less
than 0.9 m (3 ft).
Free mode has the following settings:
•
Depth notifications (see
•
Depth alarm (see
•
Dive time alarm (see
•
Surface timer (see
•
Sample rate (see
3.10.1.1 Depth notifications
3.8 Depth alarm
3.11 Dive time alarm
)
)
3.10.1.2 Surface countdown timer
3.12 Sample rate
)
)
)
3.10.1.1 Depth notifications
You can define up to five independent depth notifications for
freediving, for example, to alert you to start free falling or mouth
filling. Each notification has a defined depth and can be turned on
or off.
When you reach the notification depth, the backlight blinks and the
low priority audible alarm sounds.
To define depth notifications:
1.
While in Free mode, keep [DOWN] pressed.
2.
Press [SELECT] to enter the Depth Notify settings.
25
Page 26

3. Scroll through the notifications with [DOWN] or [UP] and enter a
notification with [SELECT].
4. Press [DOWN] or [UP] to toggle the notification On/Off and
confirm with [SELECT].
5. Adjust the depth with [DOWN] or [UP] and confirm with
[SELECT].
6. Scroll to the next notification to modify or press [MODE] to exit.
3.10.1.2 Surface countdown timer
While freediving, you can use the surface countdown timer to help
you prepare yourself for you next dive. Suunto D4f starts the
countdown as soon as you reach 1.2 m (4 ft).
To set the surface countdown timer:
1.
While in Free mode, keep [DOWN] pressed.
2.
Press [UP] to scroll to Surf. Time Notify.
3. Press [DOWN] or [UP] to toggle the timer on and confirm with
[SELECT].
4. Adjust the countdown duration with [DOWN] or [UP] and
conform with [SELECT].
5. Press [MODE] to exit.
3.11 Dive time alarm
The dive time alarm can be activated and used for several purposes
to add to your diving safety. It is simply a countdown timer in
minutes.
To set the dive time alarm:
1. While in a relevant dive mode, keep [DOWN] pressed.
26
Page 27

2.
Press [DOWN] or [UP] to scroll to ALARM TIME.
3. Press [UP] to toggle the alarm on and press [SELECT] to confirm.
4. Adjust the duration with [UP] or [DOWN] and accept with
[SELECT].
5. Press [MODE] to exit.
3.12 Sample rate
The sample rate controls how often information from the dive is
saved to the active log. The default sample rate is 2 seconds.
To change the sample rate:
1. While in a dive mode, keep [DOWN] pressed.
2.
Press [UP] to scroll to Sample Rate and press [SELECT].
3. Press [DOWN] or [UP] to change the rate and confirm with
[SELECT].
4.
Press MODE to exit.
The sample rate options are: 1, 2 and 5 seconds.
3.13 Stopwatch
The stopwatch can be used to measure elapsed and split times.
To activate the stopwatch:
1. While in time mode, scroll through the bottom row view by
pressing [UP] or [DOWN] until the stopwatch is displayed.
27
Page 28

2. Press [SELECT] to start/stop the stopwatch.
3. Press [DOWN] to take split times.
4. Keep [SELECT] pressed to reset the stopwatch.
After stopping the stopwatch, you can scroll through the split times
with [DOWN].
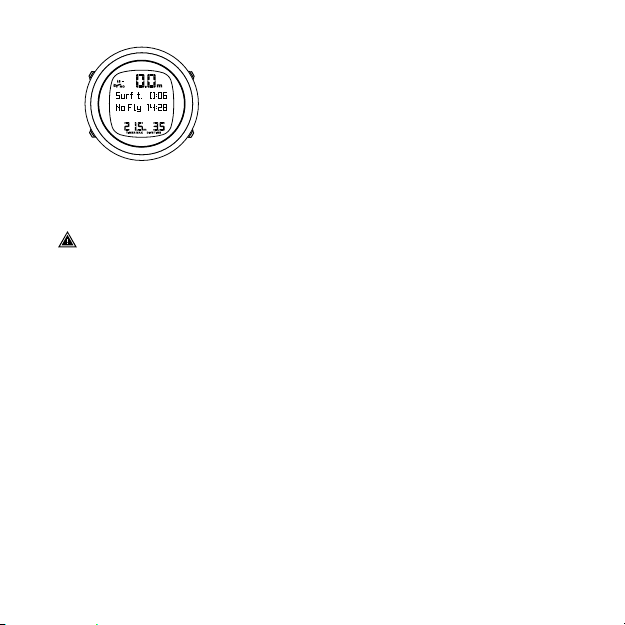
3.14 Surface and no-fly time
Once back at the surface, Suunto D4f continues to provide post-dive
safety information and alarms. If, after your dive, you need to wait
until flying, the no-fly symbol displays in all modes.
To access further information about your surface and no-fly times,
enter dive mode.
Suunto D4f shows the time since you surfaced in the
The airplane symbol indicates that you should not fly. The
countdown until you will be safe to fly is shown in the
28
Surf t.
No Fly
field.
field.
Page 29
If single free dive lasts longer than 10 minutes or if a dive is done in
Gauge mode (bottom timer), the no-fly time is always 48 hours.
WARNING: YOU ARE ADVISED TO AVOID FLYING ANY TIME THE
COMPUTER COUNTS DOWN THE NO-FLY TIME. ALWAYS ACTIVATE
THE COMPUTER TO CHECK THE REMAINING NO-FLY TIME PRIOR TO
FLYING! Flying or traveling to a higher altitude within the no-fly
time can greatly increase the risk of DCS. Review the
recommendations given by Divers Alert Network (DAN). There can
never be a flying-after-diving rule that is guaranteed to completely
prevent decompression sickness!
The Divers Alert Network (DAN) recommends the following on nofly times:
•
A minimum surface interval of 12 hours would be required in
order to be reasonably assured a diver will remain symptom free
upon ascent to altitude in a commercial jetliner (altitude up to
2,400 m (8,000 ft)).
•
Divers who plan to make daily, multiple dives for several days, or
make dives that require decompression stops, should take special
29
Page 30

precautions and wait for an extended interval beyond 12 hours
before a flight. Further, the Undersea and Hyperbaric Medical
Society (UHMS) suggests divers using standard air cylinders and
exhibiting no symptoms of decompression sickness wait 24 hours
after their last dive to fly in an aircraft with cabin pressure up to
2,400 m (8,000 ft). The only two exceptions to this
recommendation are:
•
If a diver has less than two (2) hours total accumulated dive
time in the last 48 hours, a 12 hour surface interval before
flying is recommended.
•
Following any dive that required a decompression stop, flying
should be delayed for at least 24 hours, and if possible, for 48
hours.
Suunto recommends that flying is avoided until all the DAN and
UHMS guidelines, as well as the dive computer’s no-fly conditions,
are satisfied.
3.15 Tones
Device tones can be turned on or off. When tones are off, there are
no audible alarms.
To set tones:
1. While in time mode, keep [DOWN] pressed.
2.
Press [DOWN] or [UP] to scroll to
3. Press [DOWN] or [UP] to toggle on/off and confirm with
[SELECT].
4. Press [MODE] to exit.
30
Tones
and press [SELECT].
Page 31
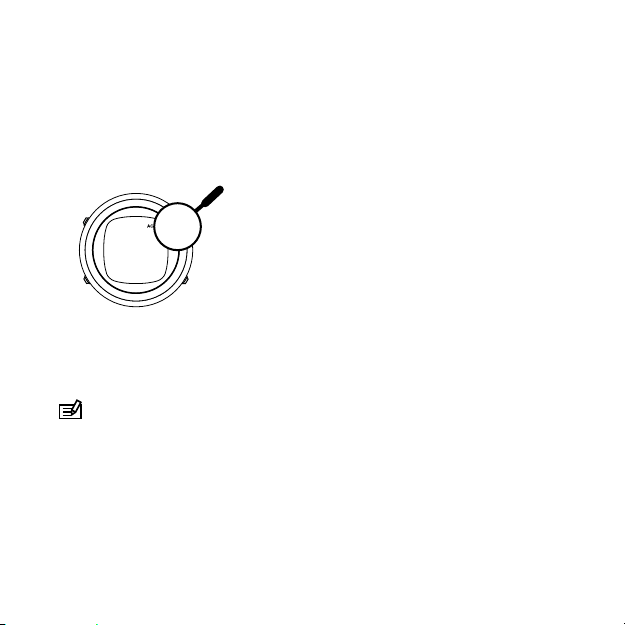
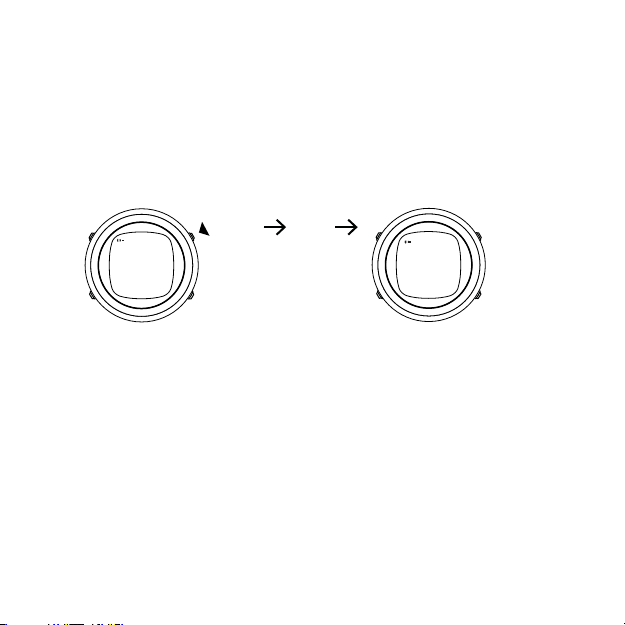
3.16 Water contact
AC
The water contact is located on the side of the case. When
submerged, the water contact poles are connected by the
conductivity of the water. Suunto D4f switches to dive state when
water is detected and the depth gauge senses water pressure at 1.2
m (4 ft).
AC
The
is shown until the water contact deactivates. It is important
to keep the water contact area clean. Contamination or dirt can
prevent automatic activation/deactivation.
NOTE: Moisture build-up around the water contact may cause
the dive mode to activate. This can happen, for example, when
washing your hands or sweating. To save battery power, deactivate
the water contact by cleaning it and/or drying it with a soft towel.
31
Page 32

4 CARE AND SUPPORT
4.1 Handling guidelines
The Suunto D4f dive computer is a sophisticated precision
instrument. Although it is designed to withstand the rigors of
diving, you must treat it with the same proper care and caution as
any other precision instrument.
Handle the unit with care – do not knock or drop it.
Do not fasten the strap of your dive computer too tightly. You
should be able to insert your finger between the strap and your
wrist.
After use, rinse it with fresh water, mild soap, and carefully clean
the housing with a moist soft cloth or chamois.
Use only original Suunto accessories - damage caused by nonoriginal accessories is not covered by warranty.
Keep the water contact and depth sensors areas on the sides of the
watch clean using fresh water and a soft brush, such as a
toothbrush.
Never try to open the case of the dive computer. Have your Suunto
D4f serviced every two years by an authorized Suunto service
center.
This service includes a general operational check, replacement of
the battery, and water resistance check. The service requires special
tools and training. Do not attempt to do any servicing yourself.
32
Page 33

Should moisture appear inside the case or battery compartment,
immediately have the instrument checked by your Suunto service
center.
The optional scratch guard for Suunto D4f is designed to help
prevent the display from getting scratched. Scratch guards can be
purchased separately from your authorized Suunto dealer.
Should you detect scratches, cracks or other such flaws on the
display that may impair its durability, immediately contact your
authorized Suunto dealer.
Protect the unit from shock, extreme heat, direct sunlight, and
chemicals.
Store your dive computer in a dry place when you are not using it.
4.2 Water resistance
Suunto D4f is water resistant to 100 meters (328 ft) in compliance
with the dive watch standard ISO 6425.
To maintain water resistance, it is recommended to:
•
never use the device for other than intended use.
•
contact an authorized Suunto service center, distributor or
retailer for any repairs.
•
keep the device clean from dirt and sand.
•
never attempt to open the case yourself.
•
avoid subjecting the device to rapid air and water temperature
changes.
•
always clean your device with fresh water if subjected to salt
water.
•
never knock or drop the device.
33
Page 34

4.3 Battery replacement
Suunto D4f displays a battery symbol as a warning when the power
gets too low. When this happens, your Suunto D4f should not be
used for diving until the battery has been replaced.
Contact an authorized Suunto service center for battery
replacement. It is imperative that the change is made in a proper
manner to avoid any leakage of water into the battery
compartment or computer.
Defects caused by improper battery installation are not covered by
the warranty.
All history and logbook data, as well as the altitude, personal and
alarm settings, remain in the dive computer memory after the
battery change. Other settings revert back to default values.
34
Page 35

5 REFERENCE
5.1 Technical specifications
Dimensions and weight
•
Length: 50 mm (1.97 in)
•
Width: 50 mm (1.97 in)
•
Height: 16.0 mm (0.61 in)
•
Weight: 85 g (3.0 oz)
Operating conditions
•
Water resistance: 100 m (328 ft) (complying with ISO 6425)
•
Normal altitude range: 0 to 3,000 m (0 to 10,000 ft) above sea
level
•
Operating temperature: 0 °C to 40 °C ( 32 °F to 104 °F)
•
Storage temperature: -20 °C to +50 °C ( -4 °F to +122 °F)
•
Maintenance cycle: 2 (two) years
Depth gauge
•
Temperature compensated pressure sensor
•
Maximum static pressure: 10 bar (145 psi) (complying with EN
13319 and ISO 6425)
•
Accurate to 100 m (328 ft) complying with EN 13319
•
Depth display range: 0 to 300 m (0 to 984 ft)
•
Resolution: 0.1 m from 0 to 100 m (1 ft from 0 to 328 ft)
Temperature display
•
Resolution: 1 °
•
Display range: -20 °C to +50 °C (-4 °F to +122 °F)
35
Page 36

•
Accuracy: ± 2 °C (± 3.6 °F) within 20 minutes of temperature
change
Other displays
•
Dive time: 0 to 999 min
•
Surface time: 0 to 99 h 59 min
•
Dive counter: 0 to 999 for repetitive dives
Calendar clock
•
Accuracy: ± 25 s/month (at 20 °C (68 °F))
•
12/24 h display
Stopwatch
•
Accuracy: 1 second
•
Display range: 0’00 – 99’59
•
Resolution: 1 second
Logbook
•
Sample rate in free diving mode: default 2 seconds
•
Memory capacity: approximately 3.5 hours with 2-second
recording interval
5.2 Compliance
5.2.1 CE EMC
Suunto Oy hereby declares that this product is in compliance with
the essential requirements and other relevant provisions of
Directive 2004/108/EC.
36
Page 37

5.2.2 EN 13319
EN 13319 is a European diving depth gauge standard. Suunto dive
computers are designed to comply with this standard.
5.3 Trademark
Suunto D4f, its logos, and other Suunto brand trademarks and
made names are registered or unregistered trademarks of Suunto
Oy. All rights are reserved.
5.4 Patent notice
This product is protected by pending patent applications and their
corresponding national rights: US 5,845,235. Additional patent
applications may be filed.
5.5 International Limited Warranty
Suunto warrants that during the Warranty Period Suunto or a
Suunto Authorized Service Center (hereinafter Service Center) will,
at its sole discretion, remedy defects in materials or workmanship
free of charge either by a) repairing, or b) replacing, or c)
refunding, subject to the terms and conditions of this International
Limited Warranty. This International Limited Warranty is valid and
enforceable regardless of the country of purchase. The International
Limited Warranty does not affect your legal rights, granted under
mandatory national law applicable to the sale of consumer goods.
Warranty Period
The International Limited Warranty Period starts at the date of
original retail purchase.
37
Page 38

The Warranty Period is two (2) years for Products and Dive wireless
transmitters unless otherwise specified.
The Warranty Period is one (1) year for accessories including but not
limited to wireless sensors and transmitters, chargers, cables,
rechargeable batteries, straps, bracelets and hoses.
Exclusions and Limitations
This International Limited Warranty does not cover:
1. a) normal wear and tear such as scratches, abrasions, or
alteration of the color and/or material of non-metallic straps, b)
defects caused by rough handling, or c) defects or damage
resulting from use contrary to intended or recommended use,
improper care, negligence, and accidents such as dropping or
crushing;
2. printed materials and packaging;
3. defects or alleged defects caused by use with any product,
accessory, software and/or service not manufactured or supplied
by Suunto;
4. non-rechargeable batteries.
Suunto does not warrant that the operation of the Product or
accessory will be uninterrupted or error free, or that the Product or
accessory will work with any hardware or software provided by a
third party.
This International Limited Warranty is not enforceable if the
Product or accessory:
1. has been opened beyond intended use;
38
Page 39

2. has been repaired using unauthorized spare parts; modified or
repaired by unauthorized Service Center;
3. serial number has been removed, altered or made illegible in
any way, as determined at the sole discretion of Suunto; or
4. has been exposed to chemicals including but not limited to
sunscreen and mosquito repellents.
Access to Suunto warranty service
You must provide proof of purchase to access Suunto warranty
service. You must also register your product online at
www.suunto.com/mysuunto to receive international warranty
services globally. For instructions how to obtain warranty service,
visit www.suunto.com/warranty, contact your local authorized
Suunto retailer, or call Suunto Contact Center.
Limitation of Liability
To the maximum extent permitted by applicable mandatory laws,
this International Limited Warranty is your sole and exclusive
remedy and is in lieu of all other warranties, expressed or implied.
Suunto shall not be liable for special, incidental, punitive or
consequential damages, including but not limited to loss of
anticipated benefits, loss of data, loss of use, cost of capital, cost of
any substitute equipment or facilities, claims of third parties,
damage to property resulting from the purchase or use of the item
or arising from breach of the warranty, breach of contract,
negligence, strict tort, or any legal or equitable theory, even if
Suunto knew of the likelihood of such damages. Suunto shall not
be liable for delay in rendering warranty service.
39
Page 40

5.6 Copyright
© Suunto Oy 10/2012. All rights reserved. Suunto, Suunto product
names, their logos and other Suunto brand trademarks and names
are registered or unregistered trademarks of Suunto Oy. This
document and its contents are proprietary to Suunto Oy and are
intended solely for the use of clients to obtain knowledge and
information regarding the operation of Suunto products. Its
contents shall not be used or distributed for any other purpose
and/or otherwise communicated, disclosed or reproduced without
the prior written consent of Suunto Oy. While we have taken great
care to ensure that information contained in this documentation is
both comprehensive and accurate, no warranty of accuracy is
expressed or implied. This document content is subject to change at
any time without notice. The latest version of this documentation
can be downloaded at www.suunto.com.
40
Page 41

INDEX
A
Activation
pre-checks, 11
Alarm, 19
Alarms, 12
Apnea timer, 14
B
Backlight, 16
Battery, 34
indicators, 17
C
Calendar clock, 17
D
Date, 18
Depth alarm, 20
display, 8
Display
contrast, 20
Dive history
Memory mode, 21
Dive modes, 24
Free, 25
Dive numbering, 23
Dive time alarm, 26
F
Free mode, 25
Depth notifications, 25
surface countdown timer, 26
H
handling
care, 32
I
Icon, 9
L
Logbook, 21
M
modes
change modes, 8
Modes
Dive, 24
N
No-fly time, 28
Notifications, 12
S
Sample rate, 27
41
Page 42

Set up, 8
Stopwatch, 27
Surface time, 28
T
Time, 18
Dual time, 19
Time mode, 17
Tones, 30
U
units, 18
W
Warnings, 12
Water contact
AC symbol, 31
42
Page 43
SUUNTO CUSTOMER SUPPORT
1. www.suunto.com/support
www.suunto.com/mysuunto
2. AUSTRALIA +61 1800 240 498
AUSTRIA +43 720 883 104
CANADA (24/7) +1 855 624 9080
CHINA +86 400 661 1646
FINLAND +358 9 4245 0127
FRANCE +33 4 81 68 09 26
GERMANY +49 89 3803 8778
ITALY +39 02 9475 1965
JAPAN +81 3 4520 9417
NETHERLANDS +31 1 0713 7269
NEW ZEALAND +64 9887 5223
RUSSIA +7 499 918 7148
SPAIN +34 91 11 43 175
SWEDEN +46 8 5250 0730
SWITZERLAND +41 44 580 9988
UK (24/7) +44 20 3608 0534
USA (24/7) +1 855 258 0900
© Suunto Oy
Suunto is a registered trademark of Suunto Oy. All Rights reserved.
 Loading...