


Suunto 3 Fitness User Guide

SUUNTO 3 FITNESS
USER GUIDE
2018-06-20

Suunto 3 Fitness
1. SAFETY............................................................................................................................................................ 4
2. Getting started.............................................................................................................................................. 5
2.1. Suunto app..........................................................................................................................................5
2.2. SuuntoLink......................................................................................................................................... 6
2.3. Buttons................................................................................................................................................6
2.4. Optical heart rate..............................................................................................................................7
2.5. Icons.....................................................................................................................................................7
2.6. Adjusting settings............................................................................................................................ 9
3. Features........................................................................................................................................................ 10
3.1. Activity tracking................................................................................................................................10
3.2. Adaptive training guidance...........................................................................................................11
3.3. Airplane mode................................................................................................................................. 13
3.4. Backlight............................................................................................................................................13
3.5. Bluetooth connectivity...................................................................................................................13
3.6. Button lock and screen dimming................................................................................................14
3.7. Chest heart rate sensor................................................................................................................. 14
3.8. Device info........................................................................................................................................14
3.9. Display theme..................................................................................................................................14
3.10. Do Not Disturb mode................................................................................................................... 15
3.11. Feeling...............................................................................................................................................15
3.12. Fitness level....................................................................................................................................15
3.13. Instant HR........................................................................................................................................ 16
3.13.1. Daily HR................................................................................................................................ 16
3.14. Intensity zones................................................................................................................................17
3.14.1. Heart rate zones.................................................................................................................18
3.14.2. Pace zones........................................................................................................................ 20
3.15. Interval training.............................................................................................................................. 21
3.16. Language and unit system........................................................................................................ 22
3.17. Logbook.......................................................................................................................................... 22
3.18.
Notifications...................................................................................................................................23
3.19. Pairing PODs and sensors......................................................................................................... 23
3.19.1. Calibrating foot POD........................................................................................................ 24
3.20. Recording an exercise............................................................................................................... 24
3.20.1. Using targets when exercising..................................................................................... 25
3.20.2. Connected GPS...............................................................................................................26
3.20.3. Sport mode power saving options............................................................................. 27
3.21. Sleep tracking................................................................................................................................27
3.22. Speed and distance calibration...............................................................................................29
3.23. Sport modes................................................................................................................................. 29
3.24. Swimming......................................................................................................................................29
2

Suunto 3 Fitness
3.25. Stress and recovery....................................................................................................................29
3.26. Time and date.............................................................................................................................. 30
3.26.1. Alarm clock........................................................................................................................ 30
3.27. Timers.............................................................................................................................................. 31
3.28. Tones and vibration.................................................................................................................... 32
3.29. Training insight.............................................................................................................................32
3.30. Recovery time...............................................................................................................................33
3.31. Watch faces....................................................................................................................................33
4. Care and support....................................................................................................................................... 35
4.1. Handling guidelines....................................................................................................................... 35
4.2. Battery.............................................................................................................................................. 35
4.3. Disposal............................................................................................................................................35
5. Reference.....................................................................................................................................................36
5.1. Technical specifications................................................................................................................ 36
5.2. Compliance......................................................................................................................................37
5.2.1. CE............................................................................................................................................37
5.2.2. FCC compliance.................................................................................................................37
5.2.3. IC............................................................................................................................................ 37
5.2.4. NOM-121-SCT1-2009.........................................................................................................38
5.2.5. KC.......................................................................................................................................... 38
5.2.6. Thailand-NBTC...................................................................................................................38
5.2.7. NCC........................................................................................................................................38
5.2.8. EAC....................................................................................................................................... 38
5.3. Trademark........................................................................................................................................38
5.4. Patent notice...................................................................................................................................38
5.5. International Limited Warranty...................................................................................................39
5.6. Copyright......................................................................................................................................... 40
3

Suunto 3 Fitness
1. SAFETY
Types of safety precautions
WARNING: - is used in connection with a procedure or situation that may result in
serious injury or death.
CAUTION: - is used in connection with a procedure or situation that will result in
damage to the product.
NOTE: - is used to emphasize important information.
TIP: - is used for extra tips on how to utilize the features and functions of the device.
Safety precautions
WARNING: Allergic reactions or skin irritations may occur when the product is in contact
with skin, even though our products comply with industry standards. In such event, stop use
immediately and consult a doctor.
WARNING: Always consult your doctor before beginning an exercise program.
Overexertion may cause serious injury.
WARNING: Only for recreational use.
WARNING: Do not entirely rely on the connected GPS or battery lifetime of the product.
Always use maps and other backup material to ensure your safety.
CAUTION: Do not apply solvent of any kind to the product, as it may damage the
surface.
CAUTION: Do not apply insect repellent on the product, as it may damage the surface.
CAUTION: Do not throw the product away, but treat it as electronic waste to preserve the
environment.
CAUTION: Do not knock or drop the product, as it may get damaged.
NOTE: At Suunto we use advanced sensors and algorithms to generate metrics that can
help you in your activities and adventures. We strive to be as accurate as possible. However,
none of the data our products and services collect is perfectly reliable, nor are the metrics
they generate absolutely precise. Calories, heart rate, location, movement detection, shot
recognition, physical stress indicators and other measurements may not match the real
world. Suunto products and services are intended for recreational use only and are not
meant for medical purposes of any kind.
4
Suunto 3 Fitness
2. Getting started
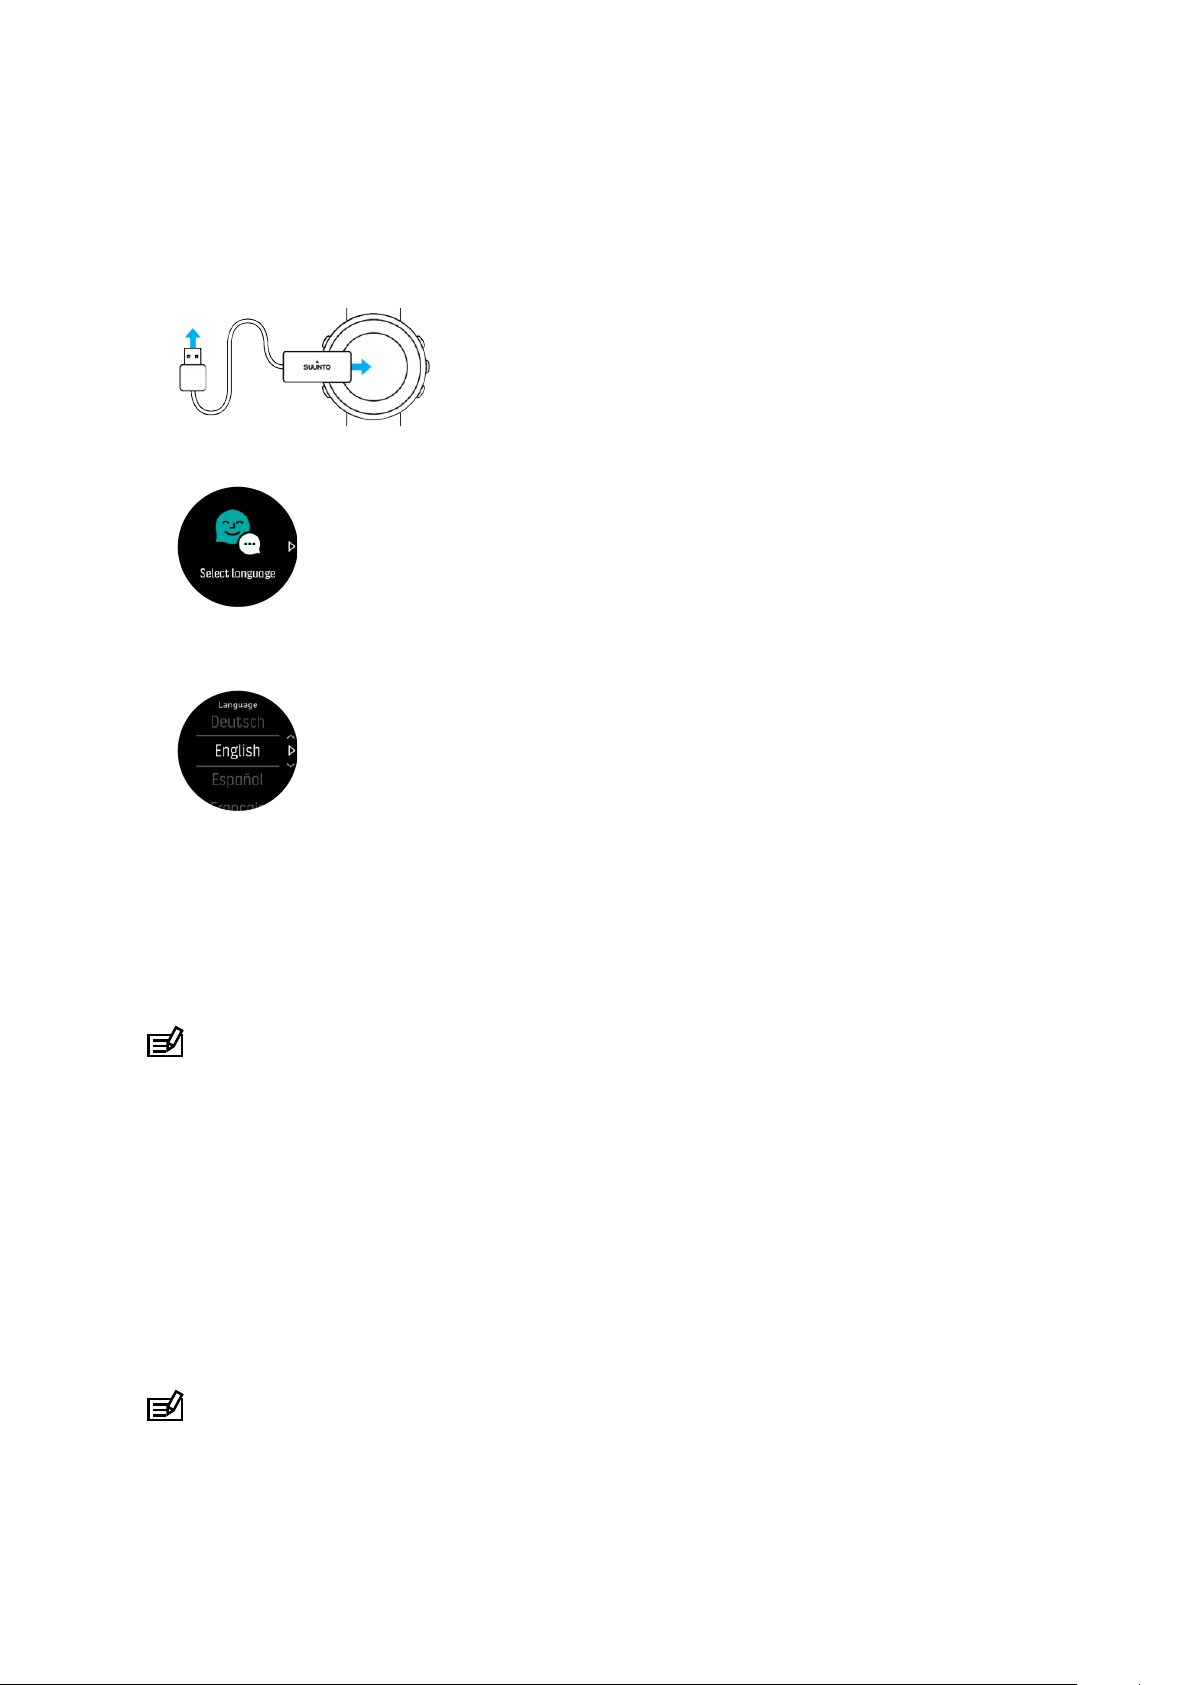
Starting your Suunto 3 Fitness for the first time is quick and simple.
1. Wake up your watch by connecting it to a computer with the USB cable from the box.
2. Press the middle button to begin the setup wizard.
3. Select your language by pressing the right top or right bottom button and confirm with the
middle button.
4. Follow the wizard to complete initial settings. Press the upper right or lower right button to
change values and press the middle button to select and go to the next step.
2.1. Suunto app
With the Suunto app, you can further enrich your Suunto 3 Fitness experience. Pair your
watch with the mobile app to get connected GPS, mobile notifications, insights and more.
NOTE: You cannot pair anything if airplane mode is on. Turn o airplane mode before
pairing.
To pair your watch with Suunto app:
1. Ensure your watch Bluetooth is on. Under the settings menu, go to Connectivity »
Discovery and enable it if it is not already.
2. Download and install Suunto app on your compatible mobile device from the iTunes App
Store, Google Play in addition to several popular app stores in China.
3. Start Suunto app and turn on Bluetooth if it is not on already.
4. Tap the watch icon in the upper-left of the app screen and then tap “PAIR” to pair your
watch.
5. Verify the pairing by typing the code that are displayed on your watch in the app.
NOTE: Some features require an internet connection over Wi-Fi or mobile network.
Carrier data connection fees may apply.
5

Suunto 3 Fitness
2.2. SuuntoLink
Download and install SuuntoLink on your PC or Mac to update your watch software.
We strongly recommend updating your watch when a new software release is available. If an
update is available, you are notified via SuuntoLink as well as the Suunto app.
Visit www.suunto.com/SuuntoLink for further information.
To update your watch software:
1. Plug your watch into the computer with the supplied USB cable.
2. Start SuuntoLink if it is not already running.
3. Click the update button in SuuntoLink.
2.3. Buttons
Suunto 3 Fitness has
five buttons you can use to navigate through displays and features.
Normal use:
1. Upper left button
•
press to activate backlight
•
press to view alternative information
2. Upper right button
•
press to move up in views and menus
3. Middle button
•
press to select an item or to go forward/change displays
•
keep pressed to open in-context shortcut menu
4. Lower left button
•
press to go back
•
keep pressed to go back to watch face
5. Lower right button
•
press to move down in views and menus
When you are recording an exercise, the buttons have
1. Upper left button
•
press to view alternative information
2. Upper right button
•
press to pause or resume recording
6
dierent functions:

Suunto 3 Fitness
•
keep pressed to change activity
3. Middle button
•
press to change displays
•
keep pressed to open in-context options menu
4. Lower left button
•
press to change displays
5. Lower right button
•
press to mark a lap
•
keep pressed to lock and unlock buttons
2.4. Optical heart rate
Optical heart rate measurement from the wrist is an easy and convenient way to track your
heart rate. To get the best results, please keep in mind factors that may
measurement:
•
The watch must be worn directly against your skin. No clothing, however thin, can be
between the sensor and your skin.
•
The watch may need to be higher on your arm than where watches are normally worn.
The sensor reads blood
•
Arm movements and flexing muscles, such as gripping a tennis racket, can change the
flow through tissue. The more tissue it can read, the better.
accuracy of the sensor readings.
•
When your heart rate is low, the sensor may not be able to provide stable readings. A
short warm up of a few minutes before you start the recording helps.
•
Dark skin and tattoos block light and prevent reliable readings from the optical sensor.
•
The optical sensor may not provide accurate heart rate readings for swimming activities.
•
For highest accuracy and quickest responses to changes in your heart rate, we
recommend using a compatible chest heart rate sensor such as Suunto Smart Sensor.
aect heart rate
WARNING: Optical heart rate sensor technology is currently not as accurate or reliable
as measuring heart rate from the chest. Your actual heart rate may be higher or lower than
the optical sensor reading.
2.5. Icons
Suunto 3 Fitness uses the following icons:
Button lock
Calories
Charging
Distance
Do Not Disturb
7

Suunto 3 Fitness
Duration
EPOC (Excess Post-Exercise Oxygen Consumption)
Failure
Fitness level
Flat time
Connected GPS acquired
Connected GPS not available
Heart rate
HR signal from watch acquired
HR signal from HR sensor acquired
Incoming call
Logbook
Low battery
Message/notification
Missed call
Pace/speed
Planned move
POD signal acquired
Peak Training Eect
Recovery time
Steps
Stopwatch
Stroke rate (swimming)
Success
8

Suunto 3 Fitness
Syncing
Settings
2.6. Adjusting settings
To adjust a setting:
1. Press the upper right button until you see the settings icon, then press the middle button
to enter the settings menu.
2. Scroll through the settings menu by pressing the upper right or lower right buttons.
3. Select a setting by pressing the middle button when the setting is highlighted. Go back in
the menu by pressing the lower left button.
4. For settings with a value range, change the value by pressing the upper right or lower
right button.
5. For settings with just on or o, change the value by pressing the middle button.
TIP: You can also access general settings from the shortcuts menu by keeping the middle
button pressed.
9

Suunto 3 Fitness
3. Features
3.1. Activity tracking
Your watch keeps track of your overall activity level throughout the day. This is an important
factor whether you just aim to be fit and healthy or you are training for an upcoming
competition. It is good to be active, but when training hard, you need to have proper rest days
with low activity.
The activity counter automatically resets at midnight every day. At the end of the week, the
watch provides a summary of your activity.
From the watch face display, press the lower right button until you see your total steps for the
day.
Your watch counts steps using an accelerometer. The total step count accumulates 24/7, also
while recording training sessions and other activities. However, with some
such as swimming and cycling, steps are not counted.
In addition to steps, you can press the upper left button to see estimated calories for the day.
The large number in the center of the display is the estimated amount of active calories you
have burned during the day. Below this you see the total calories burned. The total includes
both active calories and your Basal Metabolic Rate (see below).
The ring in both displays indicates how close you are to your daily activity goals. These
targets can be adjusted to your personal preferences (see below).
You can also check your steps over the last seven days by pressing the middle button once.
Press the middle button again to see calories burned over the last seven days.
specific sports,
While in steps or calories display, press the lower right button to see the exact numbers for
each day.
Activity goals
You can adjust your daily goals for both steps and calories. While in the activity display, keep
the middle button pressed to open the activity goal settings.
10

Suunto 3 Fitness
When setting your steps goal, you define the total number of steps for the day.
The total calories you burn per day is based on two factors: your Basal Metabolic Rate (BMR)
and your physical activity.
Your BMR is the amount of calories your body burns while at rest. These are the calories your
body needs to stay warm and perform basic function like blink your eyes or beat your heart.
This number is based on your personal
When you set a calorie goal, you define how many calories you want to burn in addition to
your BMR. These are your so-called active calories. The ring around the activity display
advances according to how many active calories you burn during the day compared to your
goal.
profile, including factors such as age and gender.
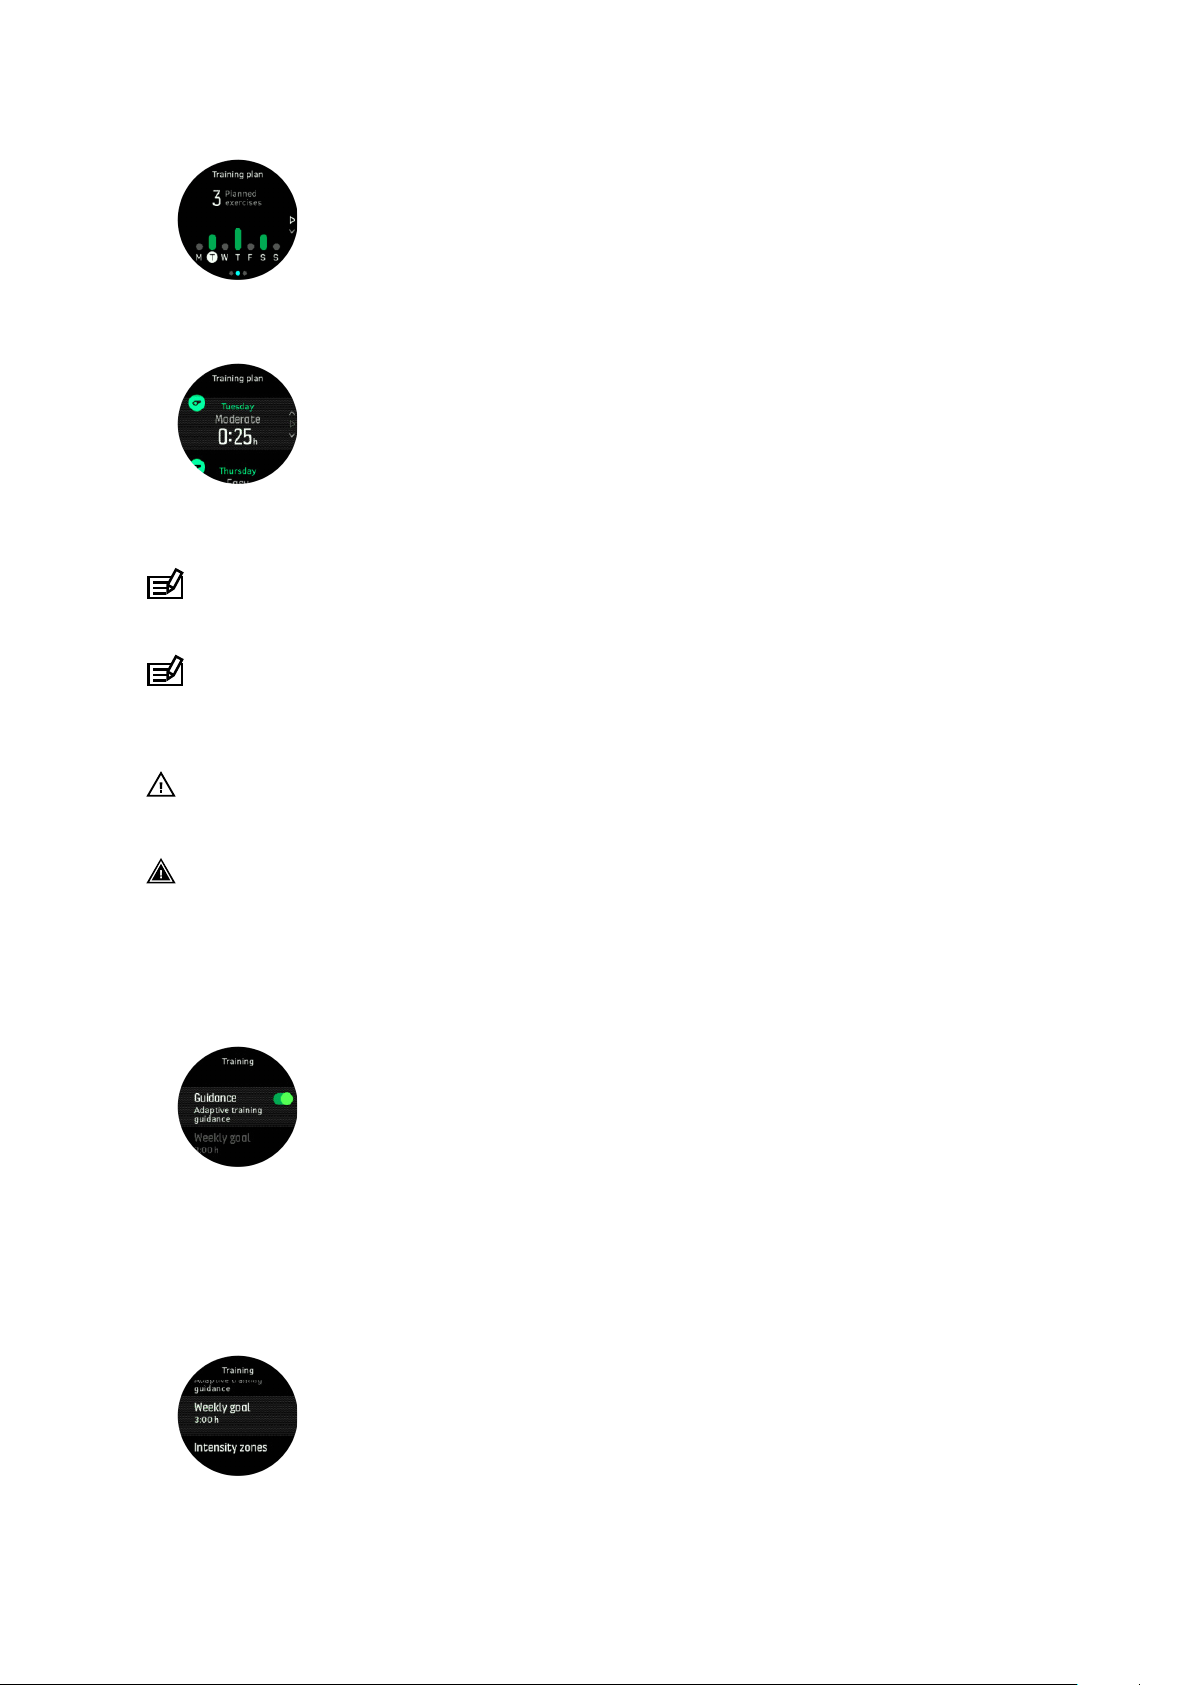
3.2. Adaptive training guidance
Your Suunto 3 Fitness automatically generates a 7-day training plan to help you improve your
fitness. The training plan adapts to your personal needs based on your profile, recorded
exercises and fitness level.
The training plan consist of planned excercises with a target duration and intensity. Each
exercise is planned with the goal of helping you improve your fitness gradually without overstressing your body. If you miss an exercise, or do a little more than planned, Suunto 3 Fitness
automatically adapts your training plan accordingly.
When you start a planned exercise, your watch will guide you with visual and audio indicators
to help you stay at the right intensity and keep track of your progress.
The HR zones settings (see 3.14.1. Heart rate zones)
upcoming activities in the training plan include intensity. If your HR zones are not set correctly,
the intensity guidance during a planned exercise may not correlate to the real intensity of
your exercise.
To see your next planned training sessions:
1. From the watch face, press the lower right button to scroll to the training insight view.
aect the adaptive training plan. The
2. Press the middle button to view your plan for the current week.
11
Suunto 3 Fitness
3. Press the lower right button to see additional information; training day, duration and
intensity level (based on the heart rate zones, see 3.14. Intensity zones.
4. Press the lower left button to exit the planned exercise views and return to the time
display.
NOTE: Today's planned activity is also visible when pressing the middle button in the
watch face view.
NOTE: Adaptive training guidance has the singular goal of improving your fitness. If you
are already very fit and exercise frequently, the 7-day plan may not suite your existing
routine.
CAUTION: If you have been ill, the training plan may not adjust enough when you start
exercising again. Be extra cautious and exercise easy after an illness.
WARNING: The watch cannot tell if you have an injury. Follow the recommendations of
your doctor to recover from the injury before following the training plan in your watch.
To disable your personalized training plan:
1. Under the settings menu, go to Training.
2. Toggle the Guidance to
o.
If you don't want the adaptive guidance but would like an exercise goal, you can define a
target number of hours as your weekly goal from the settings under Training.
1. Disable Guidance.
2. Select Weekly goal. by pressing the middle button.
3. Select your new Weekly goal by pressing the upper right or lower right buttons.
4. Confirm by pressing the middle button.
12
Suunto 3 Fitness
Real-time guidance
If you have a planned exercise scheduled for the current day, that activity appears as the first
option in the sport mode list when you enter the exercise view to start an exercise recording.
If you want real-time guidance, start the recommended excercise as you would a normal
recording, see 3.20. Recording an exercise.
NOTE: Today's planned activity is also visible when pressing the middle button in the
watch face view.
When exercising according to a planned exercise, you will see a green progress bar and
percentage of your progress. The goal is estimated based on planned intensity and duration.
When you exercise within the planned intensity (based on your heart rate), you should reach
the goal around the planned duration. Higher exercise intensity will get you to the goal faster.
Similarly a lower intensity will take longer.
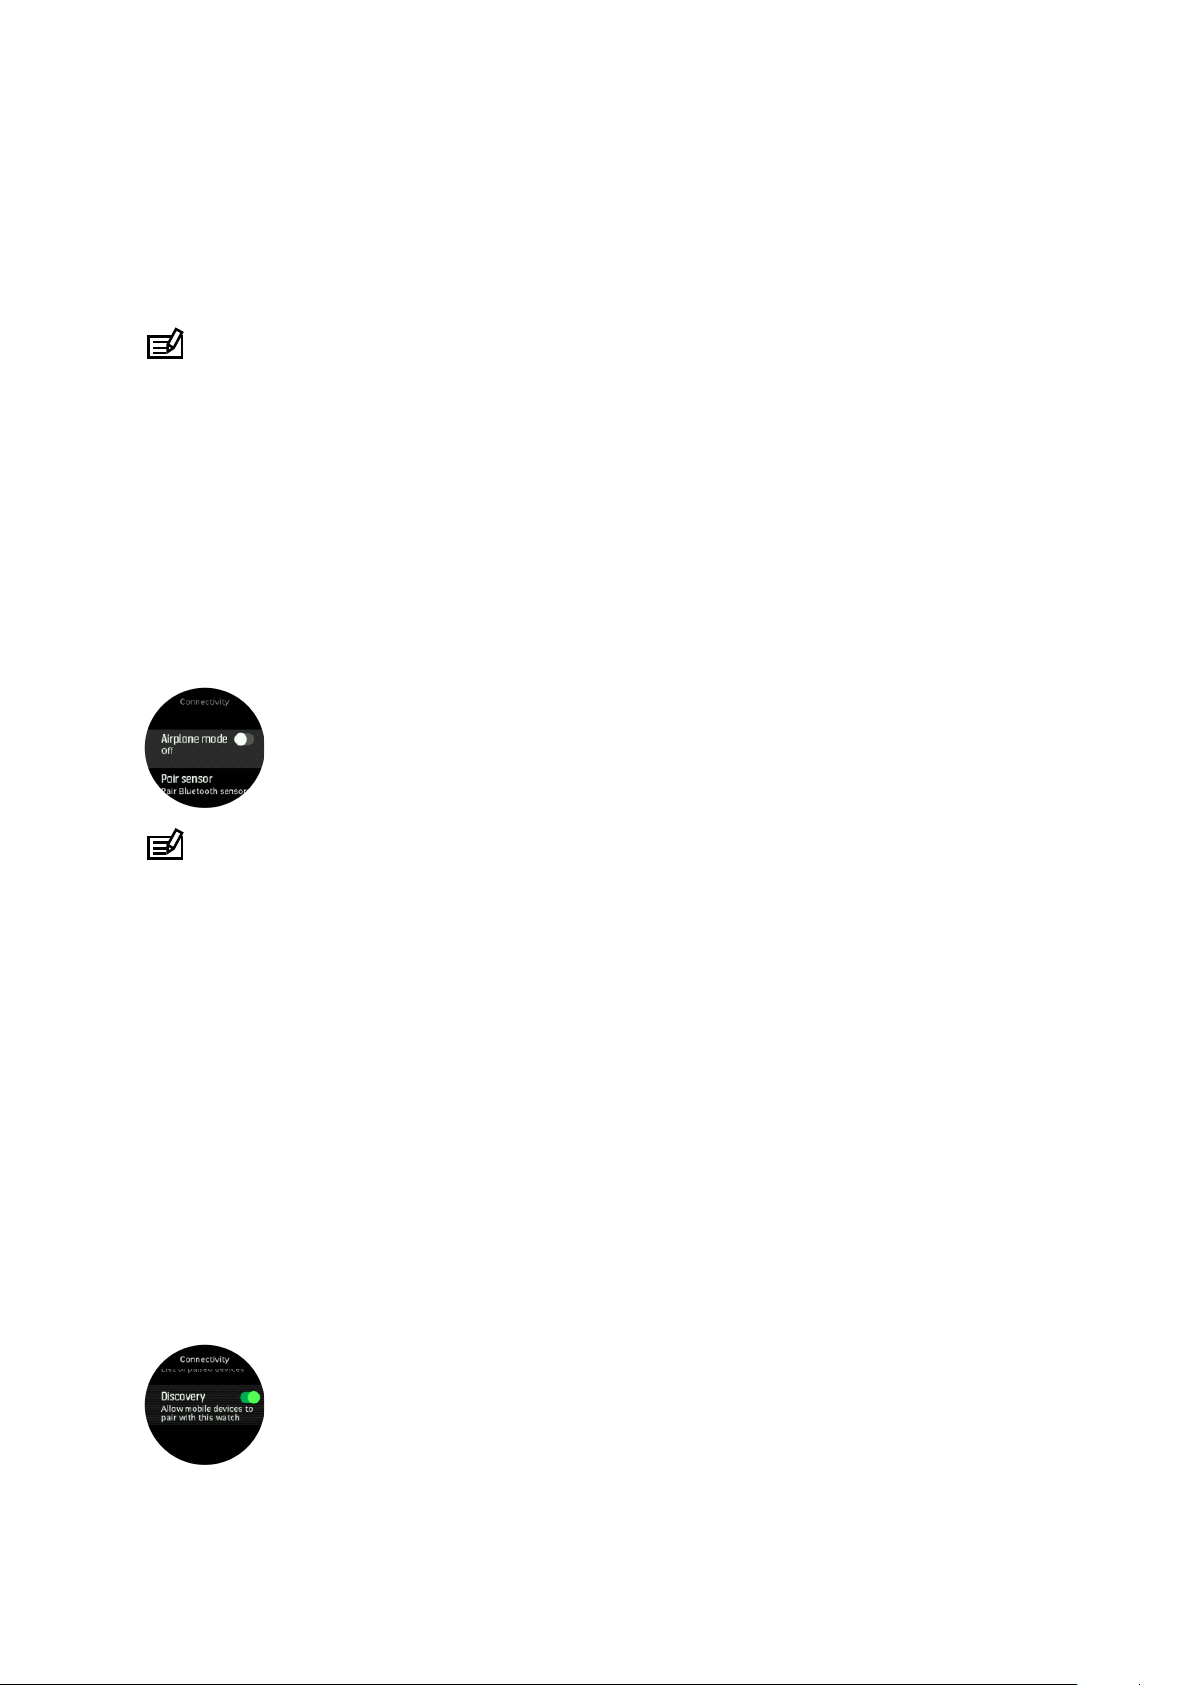
3.3. Airplane mode
Activate airplane mode when needed to turn
deactivate airplane mode from the settings under Connectivity.
NOTE: To pair anything with your device, you need to first turn o airplane mode if you
have it on.
o wireless transmissions. You can activate or
3.4. Backlight
The backlight has two modes: automatic and toggle. In automatic mode, the backlight comes
on with any button press. In toggle mode, you turn the backlight on by keeping the upper left
button pressed. The backlight stays on until you keep the upper left button pressed again.
By default, the backlight is in automatic mode. You can change the backlight mode from the
settings under General » Backlight.
3.5. Bluetooth connectivity
Suunto 3 Fitness uses Bluetooth technology to send and receive information from your
mobile device when you have paired your watch with the Suunto app. Same technology is
also used when pairing PODs and sensors.
However, if you do not want your watch to be visible for Bluetooth scanners, you can activate
or deactivate the discovery setting from the settings under Connectivity » Discovery.
13