

Page 1
MP3 y VIDEO reproductor
con radio FM
HELIOS
Manual de Instrucciones
Por favo r, lea detenidamente este manual antes de utilizarlo.
Page 2

Tabla de Contenidos
TABLA DE CONTENIDOS .........................................2
CONTENIDOS ..........................................................4
CARACTERÍSTICAS .................................................5
CONTROLES DE FÁCIL VISUALIZACIÓN ................6
COMENZAR .............................................................8
Cargue la batería ..................................................8
Cargándola a un ordenador .......................8
Conectando/desconectando el aparato .........9
Restaurando el reproductor .................................9
MENÚ PRINCIPAL ..................................................10
Controles del Menú Principal .............................10
MODO DE MÚSICA ............................................... 11
Controles de visualización de música .............. 11
Controles de Reproducción Actual (Reproducción
de Música) .............................................................. 13
Opción de Menú Rápido ............................ 14
MODO DE FOTOGRAFIA ...................................... 17
Controles de Buscador de imágenes ............... 17
Controles de Visualizador de Imagen ..............18
MODO VIDEO .......................................................19
Controles de Buscador de Vídeo ......................19
Controles de Reproducción de Películas ........19
MODO RADIO .......................................................21
Controles de Sintonizador de Radio .................21
MODO E-BOOKS ...................................................23
Controles de Buscador E-Book ..........................23
Controles del Lector E-Book ...............................23
Page 2
Page 3

Tabla de Contenidos
MODO DE GRABACIÓN .......................................25
Controles de Reproducción de Voz ..................25
Opción de Menú Rápido ....................................25
MODO EXPLORADOR ...........................................28
Controles de Explorador .....................................28
MODO DE CONFIGURACIÓN .............................. 29
TRANSFERIR ARCHIVOS A SU ORDENADOR ....... 31
Transferir con Windows Microsoft ......................32
Transferir con Macintosh OS X ................................32
Desconectarlo del Ordenador ..........................33
Microsoft Windows .......................................33
Macintosh OS X .............................................34
CONVERSION DE VIDEO ......................................35
PROBLEMAS ...........................................................39
ESPECIFICACIONES .............................................. 42
Page 3
Page 4
CONTENIDOS
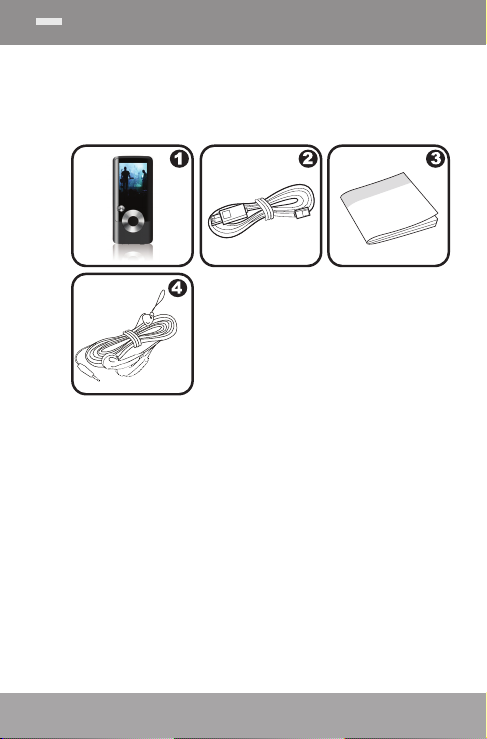
Por favor, asegúrese de que los productos que aparecen a continuación están incluídos en el embalaje.
Si faltara alguno, por favor, póngase en contacto
con la tienda en donde ha comprado este producto.
1. Reproductor MP3 SUNSTECH
2. Cable USB
3.
Manual de Instrucciones & Documentación
4. Auriculares estéreo profesionales
Page 4
Page 5

CARACTERÍSTICAS
Memoria Interna Integrada
Pantalla CSTN LCD de 1,5”
Reproduce música, vídeo, fotos y texto
Soporta ID3 y LRC para canciones e infor-
mación sincronizada en pantalla de las letras.
Radio FM integrada
USB 2.0 de Alta velocidad para transferencia
rápida de archivos
Page 5
Page 6
CONTROLES DE FÁCIL VISUALIZACIÓN
1
2
5
3
4
Page 6
6 7
8
Reset
Page 7
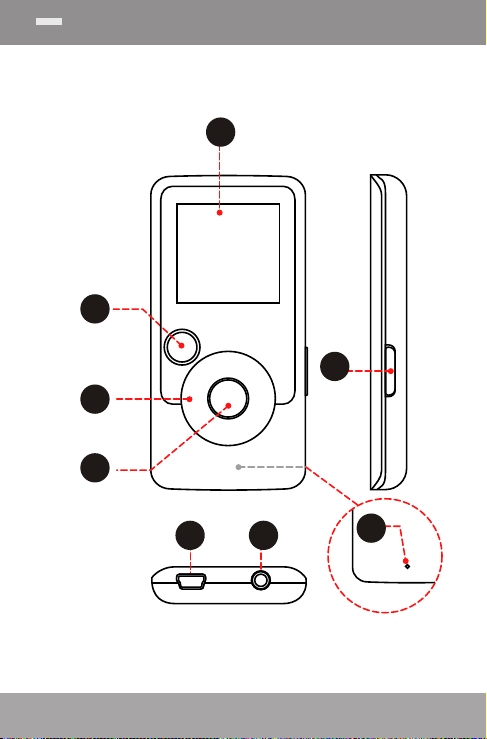
CONTROLES DE FÁCIL VISUALIZACIÓN
Panel frontal
1. Pantalla LCD
2. Botón de Menú <MENU>
<UP>
(HACIA ARRIBA)
<DOWN>
3. Control de
los botones
4. Botón Enter <ENTER>
Vista lateral
5. Botón de encendido
Presione y mantenga el botón
para conectar el
reproductor en la
posición on o off.
Botón de Visualización
6. USB Puerto/Carga
7. Clavija de auriculares de 3.5mm
(HACIA ABAJO)
<LEFT>
(HACIA LA IZQUIERDA)
<RIGHT>
(HACIA LA DERECHA)
<POWER>
(ENCENDIDO)
Vista trasera
8. Botón de Reset <RESET> (RESTAURAR)
Page 7
Page 8
COMENZAR
Cargue la batería
Su reproductor posee batería recargable integrada.
Antes de su utilización inicial, debería cargar la batería completamente para asegurar un rendimiento
óptimo y larga duración de la batería.
Si el reproductor no se ha utilizado durante un
tiempo, la batería deberá cargarse durante toda la
noche (unas 8 horas).
Si se le diera un mal uso a la batería, el aparato podría incendiarse o quemarse. No desmonte la batería,
ni la queme ni la caliente. No la exponga a lugares
con luz directa del sol o en coches con las ventanillas
cerradas.
No conecte el reproductor a una fuente de alimentación que no sea la que aquí se indica o en la etiqueta. Eso podría dar lugar a peligro de incendio o
descarga eléctrica.
Cargándola a un ordenador
Su reproductor puede cargarlo en un ordenador a
través de USB. Utilice el cable USB para conectar
el reproductor a un puerto USB de un ordenador. El
ordenador deberá encontrarse en la posición on y
no en el modo sleep.
Cuando el reproductor esté conectado y cargando, el
símbolo de USB aparecerá en pantalla.
Page 8
Page 9

COMENZAR
Conectando/desconectando el
aparato
Para encender el reproductor, presione y sos-
tenga el botón <POWER> hasta que la pantalla
se encienda.
Para apagar el aparato, presione y sostenga
el botón <POWER> hasta que la pantalla se
apague.
Restaurando el reproductor
Restaure el reproductor se bloqueara y no respondiera o funcionara mal.
1. Desconecte su reproductor en caso de que se
encuentre conectado a un ordenador.
2. Utilice un clip o la punta de un boli o lápiz para
presionar el botón <RESET> situado en la parte
trasera del reproductor.
Page 9
Page 10

MENÚ PRINCIPAL
Cuando conecte el reproductor, verá el menú principal. El Menú Principal le da acceso a los diferentes
modos de función de su reproductor. Estos modelos
son:
Música: Buscar y reproducir música.
Fotos: Buscar y ver fotos.
Películas: Buscar y reproducir películas.
Radio: Escuchar la radio FM.
E-Books: Buscar y leer archivos de texto.
Grabación: Reproducir o grabar desde el micrófono
Explorar: Buscar a todos los archivos.
Conguración: Ajustar las opciones del reproductor.
integrado.
Controles del Menú Principal
Para Buscar por los diferentes modos,
presione <LEFT> (IZQUIERDA) o <RIGHT>
(DERECHA)
Para seleccionar un modo, presione el botón
<ENTER>.
Page 10
Page 11
MODO DE MÚSICA
Busque y reproduzca sus archivos de música.
Si ha cargado nuevos archivos de música en el reproductor, la librería de música necesitará ser actualizada cuando entre en el modo de Música. Este proceso
le llevará varios minutos. Usted no podrá acceder a
la pantalla del menú de Música hasta que no se actualice la librería de música.
Para más información acerca de cómo obtener música con su reproductor, por favor, diríjase a la sección
“Transferir Archivos al Reproductor ”.
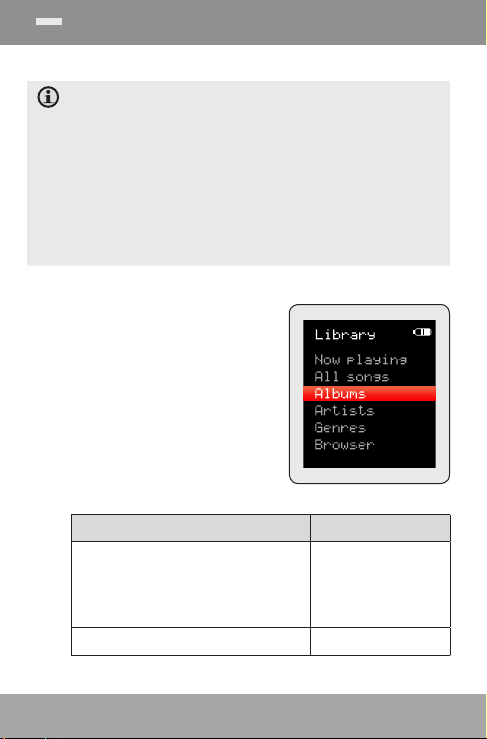
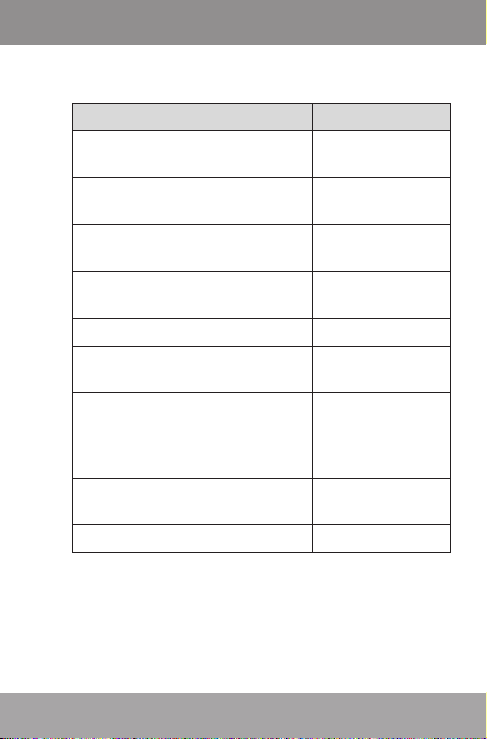
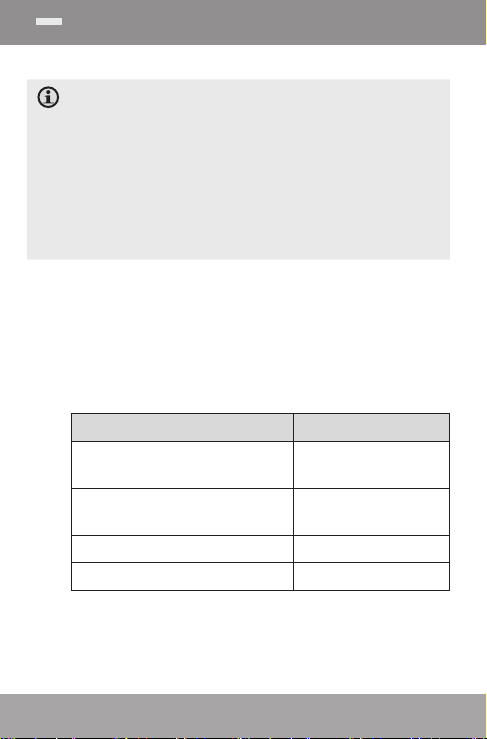
Controles de visualización de música
Cuando usted seleccione el
modo de MÚSICA del Menú
Principal, verá la pantalla de
Buscador de Música. Podrá
seleccionar buscar su música
por nombre de canción, álbum, artista ó género o podrá
seleccionar “Buscador” para
ver archivos y carpetas de
música en el reproductor.
Función Teclas de Acción
Presione <UP> o
Buscar a través de la lista
Para seleccionar un artículo Presione <ENTER>
<DOWN> (HACIA
ARRIBA o HACIA
ABAJO)
Page 11
Page 12
MODO DE MÚSICA
Función Teclas de Acción
Volver a la pantalla anterior
Vover a la pantalla de reproducción
actual
Volver al menú principal Mantener <MENU>
Si sus archivos de música contienen ID3 Tag, usted
podrá buscar las pistas por Ar tista, álbum o género.
Para buscar todos los archivos (incluyendo aquellos
que no contienen ID3 Tag), seleccione “Todas las
Canciones” o use la opción de “Buscador”.
Si la música está ya reproduciendo, tendrá la opción
de volver a la Pantalla de Reproducción Actual:
El Lyric display requiere un archivo” .LRC” que lo
encontrará en internet o podrá crear un editor de
archivos Lyric. Los archivos de Lyric display pueden
contener coordinación sincronizada así como información de lyric.
Los archivos de Lyric deben de tener el mismo nombre al correspondiente a los archivos de música (ej.
“Título de Canción1.lrc” y “Título de canción1.mp3) y
debe situarse en la misma dirección.
Utilizando la lista de Reproducción Rápida
Para crear una lista de Reproducción rápida que
contenga sus canciones favoritas:
1. Seleccione “Buscador” de la pantalla de Buscador
de Música
Page 12
Presione <LEFT>
(IZQUIERDA)
Presione <MENU>
Page 13
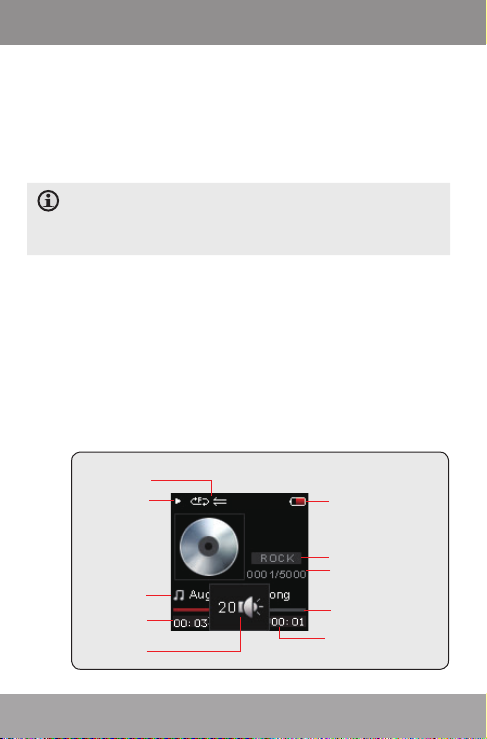
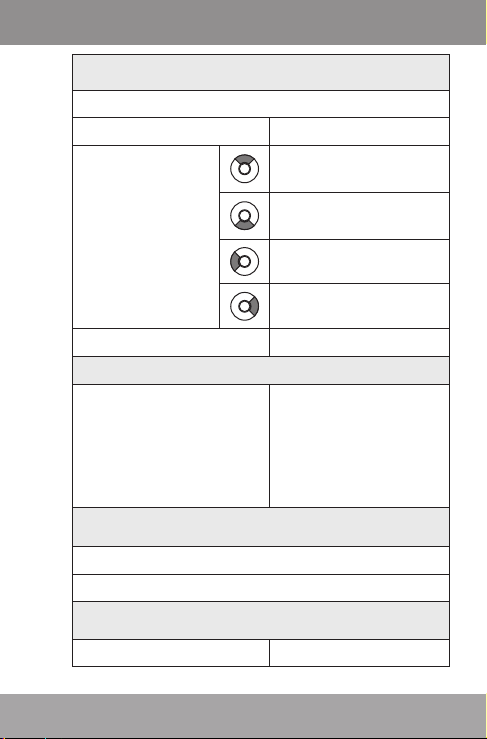
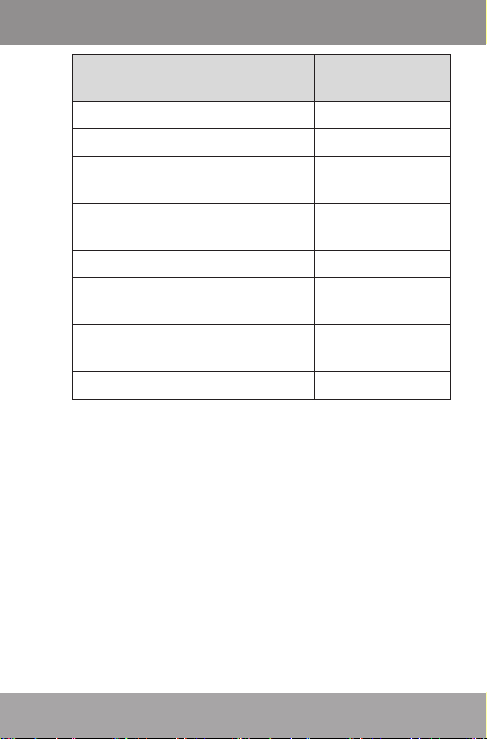
Volume Level
Estado de la
reproducción
Función de
reproducción
Nivel de la batería
Ecualizador
Pista actual /
Número total de pistas
Barra de progreso
Nombre de
la carpeta,
Artista, Album
Tiempo
transcurrido
Tiempo restante
MODO DE MÚSICA
2. Utilice los controles de Buscador para seleccionar
la canción a añadir.
3. Presione y mantenga <ENTER>. En la pantalla
aparecerá “Añadir a la Lista”.
4. Presione <ENTER> para nalizar.
Esta Lista de Reproducción rápida se puede reproducir desde el menú de Opción Rápida del menú de la
pantalla de Reproducción Actual (ver página 16 para
más detalles).
Controles de Reproducción Actual (Reproducción de Música)
Para comenzar a reproducir música, busque una
canción y luego, presione <ENTER> para comenzar
a reproducir.
Cuando una canción se esté reproduciendo, la
pantalla de Reproducción Actual aparecerá (ver
más abajo).
Page 13
Page 14
MODO DE MÚSICA
Las siguientes funciones se podrán llevar a caba
desde la pantalla de Reproducción Actual.
Función Teclas de Acción
Reproducir la siguiente pista
Reproducir la pista anterior
Escanear rápidamente hacia adelante a través de la pista actual.
Escanear rápidamente del lado contrario a través del la pista actual.
Pausar/reanudar la reproducción Presione <ENTER>
Acceder a la opción de menú rápido
(ver más abajo para más detalles)
Ajustar el nivel de volumen
Volver a la pantalla de Buscador de
Música
Volver al menú principal Mantener <MENU>
Opción de Menú Rápido
Para acceder a la opción de menú rápido, presione
mantener <ENTER> en la pantalla de Reproducción
Actual.
Presionar <RIGHT>
(DERECHO)
Presionar <LEFT>
(IZQUIERDA)
Mantenga <RIGHT>
(DERECHA)
Mantenga <LEFT>
(IZQUIERDA)
Mantenga <ENTER>
Presione <UP> o
<DOWN> (HACIA
ARRIBA o HACIA
ABAJO)
Presione <MENU>
Page 14
Page 15

MODO DE MÚSICA
Para buscar por las conguraciones, presione
<UP> o <DOWN> (ARRIBA o ABAJO)
Para seleccionar una conguración, presione
<ENTER>
Para volver a la pantalla anterior, presione
<LEFT> (IZQUIERDA)
Ecualizador
Seleccione un ecualizador digital para optimizar la
manera en que el reproductor procesará la señales
de audio. Las opciones son. Normal, Pop, Rock,
Classic, Jazz y Bass.
Repetición
Cambie las opciones de repetición para ajustar el
órden por el cual se reproducirán las pistas.
Artículo Descripción
Sin Repet. Reproduce las pistas en el orden
Una Reproduce la pista actual repetidam-
Todas Reproduce todas las pista repetida-
Todas aleatorias Reproducir todas las pistas de forma
Dir Normal Repite todas las pitas de la carpeta
normal y sin repetición.
ente.
mente
aleatoria.
actual.
Page 15
Page 16
MODO DE MÚSICA
Dir Rep Repite todas las pistas de todas las
carpetas
Dir Random Reproduce carpetas aleatoriamente
Librería
Volver a la pantalla de Buscador de Música.
Lista Reproducción
Seleccione “Lista de Reproducción” y luego, “Mi
Lista” para reproducir una lista de sus canciones
favoritas.
Para añadir canciones a la lista, ver “Utilizar la Lista
de Reproducción Rápida” de la página 12.
Page 16
Page 17
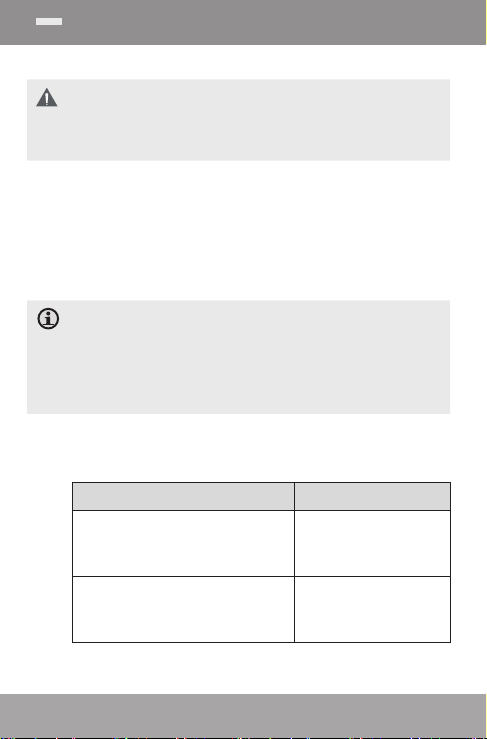
MODO DE FOTOGRAFIA
Pictures
Picture 001.jpg
2
1
Buscar y visualizar sus archivos de fotos (JPG y
BMP).
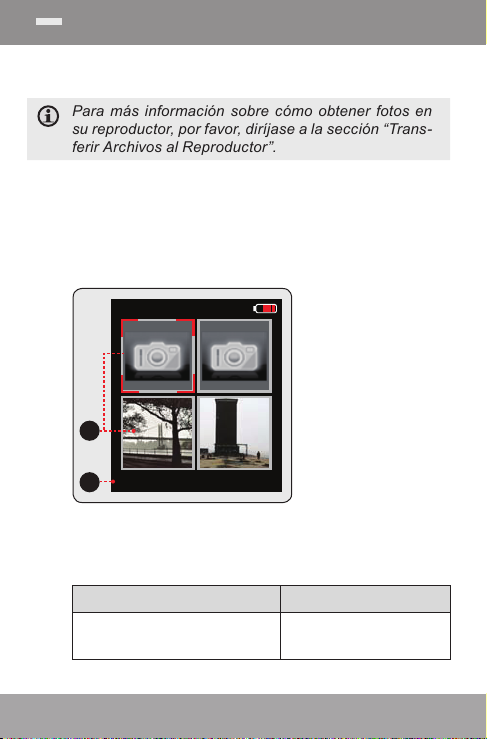
Para más información sobre cómo obtener fotos en
su reproductor, por favor, diríjase a la sección “Trans-
ferir Archivos al Reproductor”.
Controles de Buscador de imágenes
Cuando seleccione el modo IMÁGENES del Menú
Principal, podrá ver la pantalla de Buscador de
Imágenes. Sus imágenes aparecerán en tamaño
pequeño.
1. Cuadro
2. Nombre de
la imagen
seleccionada
Utilice el Buscador de Imágenes para encontrar
todos los archivos de imágenes cargados en su
reproductor.
Función Teclas de acción
Para buscar por imágenes y
carpetas.
Page 17
Presione <UP>, <DOWN>,
<LEFT>, <RIGHT>
Page 18
MODO DE FOTOGRAFIA
Función Teclas de acción
Para seleccionar/visualizar un
artículo
Para volver a la pantalla
anterior
Para volver al Menú Principal Mantenga <MENU>
Presione <ENTER>
Presione <MENU>
Controles de Visualizador de Imagen
Para visualizar una imagen, buscar a través de
las fotos en tamaño miniatura y luego, presionar
<ENTER>:
Las siguientes funciones pueden ser utilizadas
desde la pantalla de Visualizador de Imagen.
Función Tecla de acción
Visualizar la imágen siguiente Presionar <RIGHT>
Visualilzar la imágen anterior. Presione <LEFT>
Comenzar o parar el modo de pase
de fotos.
Para volver a la pantalla de Buscador
de Imagen.
Para volver al Menú Principal. Mantenga <MENU>
Presione <ENTER>
Presione <MENU>
Usted podrá cancelar y parar el pase de fotos automático, presionando <LEFT> o <RIGHT> (IZQUIERDA o DERECHA) en cualquier momento.
Page 18
Page 19
MODO VIDEO
Buscar y reproducir sus archivos de vídeo
Su reproductor soporta archivos MTV codicados en
128 x 128 y 25 fps. Los vídeos han de estar codi-
cados con el software incluído para la reproducción.
Para más información sobre el conversor de vídeo,
por favor, diríjase a la sección “ Conversor de Vídeo”.
Para más información sobre cómo obtener películas en su reproductor, por favor, diríjase a la sección
“Transferir Archivos al Reproductor ”.
Controles de Buscador de Vídeo
Cuando seleccione el modo PELÍCULAS del menú
Principal, visualizará el Buscador de Películas
en pantalla. Utilice el Buscador de Películas para
encontrar todos los archivos de películas cargados
en su reproductor.
Función Teclas de acción
Para buscar por la lista de archivos de películas y carpetas
Para seleccionar/reproducir un
artículo
Para volver a la pantalla anterior Presione <LEFT>
Para volver al Menú Principal Mantener <MENU>
Press <UP> or <DOWN>
Presione <ENTER>
Controles de Reproducción de Películas
Las funciones siguientes se pueden realizar desde
la pantalla de Reproducción Actual.
Page 19
Page 20
MODO VIDEO
Función
Para reproducir la siguiente película Presione <RIGHT>
Para reproducir la película anterior Presione <LEFT>
Para buscar rápidamente hacia delante a través de la película actual.
Para buscar rápidamente hacia atrás
en la película actual.
Para pausar/reanudar la reproducción Presione <ENTER>
Para ajustar el nivel de volumen
Para volver a la pantalla de Buscador
de Película.
Para volver al Menú Principal Mantener <MENU>
Tecla de ac-
ción
Mantener <RIGHT>
Mantener <LEFT>
Presione <UP> o
<DOWN>
Presione <MENU>
Page 20
Page 21
MODO RADIO
Escuchar transmisiones de radio FM
Se ha de disponer de un par de auriculares conectados a la salida de auriculares para recibir las transmisiones FM. Su reproductor utilizará el cable de auriculares como una antena.
Controles de Sintonizador de Radio
Cuando seleccione RADIO del menú Principal,
podrá ver la pantalla de Sintonizador de Radio.
Podrá buscar emisoras, sintonizarlas manualmente
o a través de presintonías.
Para poder utilizar dicho modo, deberá haberlas guardado con anterioridad. Mantenga <ENTER> para
guardar las emisoras de forma automática como emisoras presintonizadas dentro del rango de recepción.
Estas prevalecerán sobre todas las emisoras guardadas con anterioridad.
Las siguientes funciones podrían ser ejecutadas
desde la pantalla de Sintonización de Radio.
Función Tecla de acción
Para cambiar entre normal
(normal) y sintonización presintonizada.
Para auto-guardar todas las emisoras disponibles como emisoras
presintonizadas.
Presione <ENTER>
Mantener <ENTER>
Page 21
Page 22

MODO RADIO
Función Tecla de acción
Para sintonizar a una emisora
superior
Para sintonizar a una emisora
más baja
Para buscar la emisora siguiente
más alta (únicamente, en modo
normal)
Para buscar la siguiente emisora
más baja (únicamente, modo
normal)
Para guardar la emisora actual
como emisora presintonizada
(modo normal)
Para eliminar la emisora presintonizada actual (modo presintonizado)
Comienza la grabación de FM
Para ajustar el nivel de volumen Presione <UP> o <DOWN>
Para volver al menú Principal Mantener <MENU>
Presione <RIGHT>
Presione <LEFT>
Mantener <RIGHT>
Mantener <LEFT>
Presione <MENU>, luego
<ENTER>
Presione <MENU>, luego
<ENTER>
Presione <MENU>, Seleccione <Start Record>, luego
<ENTER>
Page 22
Page 23
MODO E-BOOKS
Leer los archivos de texto de su reproductor (TXT).
Para más información sobre cómo obtener archivos
de texto en su reproductor, por favor, diríjase a la
sección “Transferir Archivos al Reproductor”.
Controles de Buscador E-Book
Cuando seleccione E-BOOKS del menú Principal,
podrá ver la Pantalla de Buscador E-Book.
Utilice el Buscador E-Book para encontrar todos los
archivos de texto cargados en su reproductor.
Función
Para buscar por la lista de archivos de
texto y carpetas.
Para seleccionar/visualizar un artículo Presionar <ENTER>
Para volver a la pantalla anterior. Presione <LEFT>
Para volver al menú Principal Mantener <MENU>
Teclas de ac-
ción
Presione <UP> o
<DOWN>
Controles del Lector E-Book
Las siguientes funciones pueden ejecutarse desde
la pantalla de Texto.
Función
Para leer la siguiente página Presione <DOWN>
Page 23
Teclas de ac-
ción
Page 24

MODO E-BOOKS
Función
Teclas de ac-
ción
Para leer la página anterior Presione <UP>
Para cambiar la función de autodesplazamiento
Para volver a la pantalla de Buscador
E-Book.
Presione <ENTER>
Presione <MENU>
Para volver al menú Principal Mantener <MENU>
Usted podrá cancelar la función de auto -desplaza-
miento presionando <DOWN> o <UP> en cualquier
momento.
Page 24
Page 25
MODO DE GRABACIÓN
Reproducir sus archivos de grabación de voz
digital o grabando sonidos desde una fuente
de audio externa.
Controles de Reproducción de Voz
Las siguientes funciones podrán ser ejecutadas
desde la pantalla de Reproducción de Voz.
Función
Reproducir la pista siguiente Presione <RIGHT>
Reproducir la pista anterior Presione <LEFT>
Buscar rápidamente hacia adelante
dentro de la pista actual.
Buscar rápidamente en sentido
contrario dentro de la pista actual.
Pausar/reanudar la reproducción Presione <ENTER>
Para acceder a la Opción de menú
Rápido (para más detalles, ver más
abajo)
Para ajustar el nivel de volumen
Para volver al menú Principal Mantener <MENU>
Teclas de
acción
Mantener <RIGHT>
Mantener <LEFT>
Mantener <ENTER>
Pr es io na r <U P> o
<DOWN>
Opción de Menú Rápido
Para acceder a la opción de menú rápida, pre-
Page 25
Page 26

MODO DE GRABACIÓN
sione y mantenga <ENTER> en la pantalla de
Reproducción de Voz.
Buscar a través de la conguración. Presionar
<UP> o <DOWN>
Seleccionar una conguración. Presionar
<ENTER>
Para volver a la pantalla anterior. Presione
<LEFT>
Repetición
Cambie las opciones de repetición para ajustar el orden
de las pistas que se están reproduciendo.
Item Description
Sin repetición Reproduce pistas en el orden normal y
Una Reproduzca la pista actu al de forma
Todas R e pr o du c e t o d a s l a s p i s t a s
Aleatorias todas Reproduce todas las pistas de forma
Dir Normal Rep ite todas l as p ista de la c ar peta
Dir Rep Repite todas l as pistas de todas las
sin repetición.
repetida.
repetidamente.
aleatoria.
actual
carpetas.
Page 26
Page 27

MODO DE GRABACIÓN
Dir Random Repite carpetas aleatoriamente.
Comenzar a grabar
Realice grabaciones de voz con el micrófono
integrado localizado en la parte posterior de su
reproductor.
El reproductor comenzará la grabación inmediatamente.
1. Presione <ENTER> para pausar la grabación;
presione <ENTER> de nuevo para reanudarla.
2. Presione <MENU> para parar y guardar la
grabación. El archivo grabado se guardará en
la carpeta “MICIN.DIR” y llamado “MICXXXXX.
WAV” donde XXXX correspnde a la secuencia
numérica en la cual se ha realizado la grabación (la numeración comienza desde 00001).
Page 27
Page 28

MODO EXPLORADOR
Entre en el modo de Explorador para visualizar
y eliminar carpetas y archivos cargados en su
reproductor.
Para entrar en el modo de Explorador, seleccione y
conrme EXPLORADOR desde el Menú Principal.
Controles de Explorador
Cuando seleccione modo EXPLORADOR desde el
menú Principal, visualizará en pantalla el Archivo de
Explorador. Usted podrá encontrar y eliminar archivos
y carpetas desde el reproductor.
Función
Para buscar en la lista de archivos y
carpetas
Para seleccionar una carpeta Presione <ENTER>
Para volver a la pantalla anterior Presione <LEFT>
Para eliminar un artículo seleccionado Presione <MENU>
Para volver la menú Principal Mantener <MENU>
Page 28
Teclas de ac-
Presione <UP> o
<DOWN>
ción
Page 29

MODO DE CONFIGURACIÓN
Entre en el modo de Conguración para ajustar
las opciones de su reproductor.
Para entrar en el modo de Conguración, seleccione CONFIGURACIÓN en el menú Principal.
Función
Para buscar con las opciones
Para seleccionar un artículo. Presione <ENTER>
Para cancelar y volver a la pantalla
anterior
Para volver al menú Principal Mantenga <MENU>
Las siguientes opciones están disponibles. Algunas
de ellas, se pueden congurar desde los menús de
Opción Rápida.
Artículo Descripción
Potencia
Sleep Congure la duración del tiempo (en
Page 29
minutos) hasta que el reproductor se apague
automáticamente. El congurar “Off”
inutilizará esta característica de ahorro de
energía.
Idioma
Teclas de ac-
ción
Presione <UP> o
<DOWN>
Presione <LEFT> o
<MENU>
Page 30

MODO DE CONFIGURACIÓN
Artículo Descripción
Idioma Ajuste el idioma que aparecen en los menús
Luz de fondo Ajuste la duración del tiempo (en segundos)
Brillo Ajuste el contraste de la pantalla LCD.
-- Establecer la calidad de la grabación.
Formato Podría tener que formatear su reproductor,
Reset Restaura todos los ajustes del reproductor al
Sys Info Muestra el Firmware y la información de uso
Clasicar Clasique toda música cargada en su repro-
de pantalla.
Pantalla
que la luz de fondo permanece una vez se
ha presionado una tecla. La conguración
“On” mantendrá la luz de fondo de forma
continuada:
Grabar
Herramientas Sys
en caso de que los archivos o los datos
se corrompieran. Tanto podrá seleccionar
formateo Rápido o Completo. Un formateo
Completo le llevará más tiempo.
estado de defecto de fábrica.
de Memoria
ductor. Seleccione “Clasicación obligada”
para actualizar inmediatamente la librería de
música. Este proceso puede llevarle varios
minutos, en caso de que tenga que tranferir archivos de música recientemente al reproductor.
Page 30
Page 31

TRANSFERIR ARCHIVOS A SU ORDENADOR
Conecte el reproductor al ordenador con el cable
USB 2.0 suministrado:
Transferir archivos a y desde su reproductor
Ejecutar funciones de uso básicas
USB Port
USB Port
Computer
Sobre conexión:
Su ordenador reconocerá automáticamente al
reproductor como un Disco Extraíble.
Para abrir el reproductor y visualizar archivos,
haga doble clic en el icono que aparece.
Una vez haya abierto la carpeta de su reproductor,
arrastre y deje ir los archivos al reproductor como si
fuera un diskette.
Copiar archivos de música al directorio raíz.
Copiar archivos de vídeo a la carpeta “MOVIE.DIR”
Copiar archivos de foto a la carpeta de “PHOTO.DIR”
Copiar archivos de texto a la carpeta “TEXT.
DIR”
Page 31
Page 32

TRANSFERIR ARCHIVOS A SU ORDENADOR
Si necesitara asistencia adicional para transferir
archivos, por favor, diríjase al manual de instrucciones del sistema o a la ayuda en pantalla. Si está
utilizando un programa multimedia tipo iTunes,
Winamp o Windows Media Player, por favor, diríjase
a su documentación para más ayuda.
Transferir con Windows Microsoft
1. Abra una ventana de explorador de archivo.
Localice los archivos que desearía transferir a
su ordenador. Seleccione los archivos/carpetas
con el ratón y presione CTRL-C (copiar) en el
teclado.
2. Haga doble clic en “Mi PC” de su escritorio y
luego, doble clic en el icono que represente el
reproductor SUNSTECH (ej.: HELIOS/Disco
Extraíble). En el ordenador aparecerá todos los
archivos y carpetas actuales almacenadas en el
reproductor.
3. Presione CTRL-V (pegar) del teclado para
transferir los archivos seleccionados en el Pso 1
del reproductor.
Transferir con Macintosh OS X
1. Abra una ventana. Localice los archivos que le
gustaría transferir de su ordenador. Seleccione
los archivos/carpetas con el ratón y presione
APPLE-C (copiar) en el teclado.
2. Haga clic en el icono de Disco Extraíble
Page 32
Page 33

TRANSFERIR ARCHIVOS A SU ORDENADOR
localizado en la parte izquierda de la ventana.
En el ordenador aparecerán todos los archivos
y carpetas almacenadas recientemente en el
reproductor.
3. Presione APPLE-V (pegar) en el teclado para
transferir los archivos seleccionados en el Paso 1
del reproductor.
Desconectarlo del Ordenador
Para evitar la pérdida de datos o la corrupción de
archivos/rmware, desconecte el reproductor tal
y como se le indica más abajo o como su sistema
operacional especíco.
Microsoft Windows
1. Haga doble clic en la echa verde de la
barra de herramientas
situada en la parte
inferior derecha de
la pantalla del ordenador (para extraer el
Hardware de forma
segura).
2. Forma segura de
extraer el Hardware:
Seleccione “USB
Mass Storage Devise” de la lista que
aparece y luego,
haga clic en “Stop”.
Page 33
Page 34

TRANSFERIR ARCHIVOS A SU ORDENADOR
Parar un Hardware: Seleccione “USB Mass
Storage Device” de la lista que aparezca y
luego, haga clic en “OK”.
3. Cuando aparezca la ventana “Extracción
Segura del Hardware”, haga clic en OK y
desconecte el cable USB del reproductor y de
su ordenador.
Macintosh OS X
1. En el lado izquierdo de
la ventana, identique
el icono del disco
extraíble adecuado.
2. Haga clic en la echa
“Eject” del lado derecho del icono del disco
extraíble.
3. Desconecte el cable USB del reproductor y de
su ordenador.
Page 34
Page 35

CONVERSION DE VIDEO
Utilice el software de conversión de vídeo incluído
en el reproductor para crear archivos de vídeo que
están disponibles para reproducir en el reproductor.
Su reproductor soporta archivos de MTV con las
siguientes especicaciones:
128 x 128 de resolución en 25 frames por seg.
(fps).
El software de conversión de vídeo está incluído y
es compatible únicamente con Microsoft Windows.
Hay otras muchas herramientas de conversión de
vídeo disponibles para descargar o comprar en
internet.
Debido a que el programa es de licencia gratuita,
no tiene garantía más que la permitida por la ley
aplicable.
En ningún caso, a menos que la ley lo requiera o
a un acuerdo escrito, ningún copyright o ninguna
otra parte que pueda modicar y/o redistribuir el
programa, se hará responsable de los daños del
usuario, incluyendo cualquiera de tipo general,
especial, incidental o consecuencial procedente
de la incapacidad de utilizar el programa (incluído,
pero no limitado a pérdida de datos o datos poco
precisos o pérdida sostenida por el usuario o por
terceras personas o fallo del programa para operar
con cualquier otro programa), incluso aunque el
titular u otras parte le hayan aconsejado de la posi-
bilidad de tales daños.
Page 35
Page 36

CONVERSION DE VIDEO
Instalación
Sistema mínimo requerido
Sopor te OS Microsoft 2000/XP/Vista
CPU Pentium class equivalente o superior
Memoria
(RAM)
Espacio libre HD10MB
Video Adaptador 24-bit color
WMP Windows Media Player 9 o superior
1. Copiar la carpeta
“VideoConverter_V2.12.00(128x128)” para su
ordenador
2. Para iniciar el software, hacer doble clic en el
archivo “VideoConvert.exe”
(únicamente, 32-bit )
>64MB
Convertir Video
Para iniciar el software, haga doble clic en el
archivo “VideoConvert.exe”.
Aparecerá la siguiente ventana de aplicación.
Page 36
Page 37

CONVERSION DE VIDEO
1
2
3
4
5
6
1. Barra de búsqueda para una vista previa y un
tiempo de selección.
2. Comenzar y nalizar el tiempo de selección
3. Seleccione el archivo de vídeo a convertir.
4. Seleccione la carpeta de destino del archivo
convertidor de video.
5. Ventana de vista previa de vídeo
6. Barra progresiva de conversión
Convertir a vídeo:
1. Haga clic en el botón de “entrada de vídeo”
(3) para seleccionar el archivo de la fuente de
vídeo a convertir.
La fuente del archivo debe ser uno de los
siguiente tipos de vídeo: AVI (*.avi), WMV
Page 37
Page 38

CONVERSION DE VIDEO
(*.wmv, *.asf), MPEG-1 (*.mpg), QuickTime
(*.mov, *.qt), MPEG-2 (*.vob), RealMedia (*.rm,
*.rmvb), MPEG-4, or 3GP (*.3gp)
2. DirectX 9.0, Media Player 9.0 y otros códecs
deberán ser instalados para soportar todo tipo
de medios.
3. Haga clic en el botón de “salida vídeo” (4) para
seleccionar la carpeta en donde se guardará el
archivo convertidor.
4. Haga clic en el botón “Iniciar la conversión”
para comenzar el proceso de conversión.
5. Cuando se haya completado la conversión,
copie los archivos convertidos a la carpeta
“MOVIE.DIR” del reproductor para la reproducción.
Page 38
Page 39

PROBLEMAS
Si tiene algún problema con este aparato, por favor,
la guía de problemas que aparece a continuación.
El reproductor no enciende.
Asegúrese de que el reproductor se encuentra
completamente cargado. Intente cargar el
reproductor durante la noche (8hrs.).
Reajuste el reproductor (utilice la punta de
un lápiz o bolígrafo y presionar suavemente
sobre el botón que hay en la parte trasera del
reproductor) e inténtelo de nuevo.
Los botones no funcionan.
Reajuste el reproductor (utilice la punta de
un lápiz o bolígrafo y presionar suavemente
sobre el botón que hay en la parte trasera del
reproductor) e inténtelo de nuevo.
No puedo transferir archivos al reproductor
Asegúrese de que el sistema operacional de
su ordenador funciona correctamente.
Si utiliza un cable de extensión USB,
asegúrese de que se encuentra ajustado
correctamente al reproductor y al PC o intente
utilizar otro cable USB.
Si el USB está conectado al reproductor a
través de un hub, intente conectar el reproductor directamente al ordenador.
Page 39
Page 40

PROBLEMAS
Asegúrese de que la capacidad de la memoria
del reproductor no se encuentre llena.
Sin sonido durante la reproducción.
Compruebe el nivel del volumen.
Asegúrese de que los auriculares se encuen-
tran conectados correctamente al reproductor.
Baja calidad de sonido.
Intente reproducir el archivo en su ordenador.
Si la calidad de sonido todavía es baja, intente
descargarse el archivo de nuevo o codicarlo
usted de nuevo.
Asegúrese de que el bit rate del archivo no sea
demasiado bajo. Cuanto más alto sea el bit rate
del archivo, mejor será el sonido. El bit rate
más bajo recomendable es 125kbps para MP3
y 96kbps para WMA.
Intente disminuir el volumen del reproductor.
Asegúrese de que los auriculares están bien
conectados al reproductor.
El reproductor no reproduce mis archivos de
música.
Asegúrese de que el archivo se encuentra en
un formato compatible.
Page 40
Page 41

PROBLEMAS
El archivo puede haberse copiado con protec-
ción y que usted no tenga autorización para
reproducir este archivo. Si usted piensa que es
un error, por favor, contacte con el servicio por
el que usted se descargó el archivo.
Los caracteres LCD están corruptos o algo está
mal con la pantalla.
Asegúrese de que se ha congurado correcta-
mente el idioma del menú.
Reajuste el reproductor (utilice la punta de
un lápiz o bolígrafo y presionar suavemente
sobre el botón que hay en la parte trasera del
reproductor) e inténtelo de nuevo.
El reproductor tiene un mal funcionamiento.
Reajuste el reproductor (utilice la punta de
un lápiz o bolígrafo y presionar suavemente
sobre el botón que hay en la parte trasera del
reproductor) e inténtelo de nuevo.
Pag e 41
Page 42

Especicaciones
Tipo de pantalla 1.5” Full-Color LCD @ 128x128
Memoria Memoria Flash integrada
Soporta Formato
Audio
Soporta Formato
Vídeo
Soporta Formato Foto JPG, BMP
Soporta info de la
canción
Formato de grabación IMA-ADPCM Encoding
Interfaz PC USB 2.0 (MSC)
Soporta Plug and Play Windows 2000/XP/Vista
Entrada audio Micrófono integrado
Salida audio 3.5mm Stereo (auriculares)
Alimentación suministrada
Tiempo reproducción Música: 8 horas*
Dimensiones de la
unidad
Las especicaci ones y el manual están sujeta s a cambio sin p revio
aviso.
* El tiemp o de reprodu cción de la música es un valo r estimado
basado en l a reproduc ción de MP 3 a 128kps. El tie mpo actual de
reproducción pu ede variar dependiendo del método de co dicac ión
utiliza do y otros fac tores.
Page 42
MP3, WMA
MTV: 128x128, 25fps
ID3, Windows Media
Macintosh OS X
Batería recargable de Li-Polymer
Carga USB
1.57” x 3.11” x 0.38” (WHD)
Page 43

Page 43
Page 44

Para obtener más información, por favor visite
nuestro sitio web
www.sunsiberica.com
Page 45

MP3 & Video Player with
FM Radio
HELIOS
Instruction Manual
Please read this manual carefully before operation
Page 46

Package Contents
Please make sure that the items shown below are
included in the package. Should an item be missing,
please contact the local retailer from which you
purchased this product.
1. HELIOS
2. USB Cable
3. Instruction Manual & Documentation
4. Professional Stereo Earphones
Page 2
Page 47

Features
Integrated ash memory
1.5” CSTN LCD full-color display
Plays music, video, photos and text
ID3 and LRC support for song and synchro-
nized lyric information display
Integrated Microphone for Digital Voice
Recording
Integrated FM Radio and Recorder
USB 2.0 Hi-speed for fast le transfers
Page 3
Page 48

Controls at a Glance
1
2
3
4
5
Page 4
6 7
8
Reset
Page 49

Controls at a Glance
Front View
1. LCD Display
2. Menu Button <MENU>
<UP>
<DOWN>
3. Control Buttons
<LEFT>
<RIGHT>
4. Enter Button <ENTER>
Side View
5. Power Button
Press and hold the button to
power the player on or off.
Bottom View
6. USB Port/Charge
7. 3.5mm Headphone Jack
Rear View
8. Reset Button <RESET>
<POWER>
Page 5
Page 50

Getting Started
Charging the Battery
Your player has an integrated rechargeable battery.
Upon initial use, the battery should be charged fully
to ensure optimal performance and battery life.
If the player has not been used in a while, the battery may need to be recharged overnight (about 8
hours).
The battery used in this device may present a re or
chemical burn if mistreated. Do not disassemble, incinerate, or heat the battery. Do not leave the battery
in a place subject to direct sunlight, or in a car with its
windows closed.
Do not connect the player to a power source other
than that which is indicated here or on the label as this
may result in the risk of re or electric shock.
Charging with a Computer
Your player can be charged through a USB computer connection. Use the supplied USB cable to
connect the player to a high-power USB port of a
computer. The computer must be powered on and
not in sleep mode.
When the player is connected and charging, a USB
symbol will be displayed on the player’s screen.
Turning the Player On/Off
To turn the player on, press and hold the
<POWER> button until the screen turns on.
Page 6
Page 51

Getting Started
To turn the player off, press and hold the
<POWER> button until the screen turns off.
Resetting the Player
Reset the player if it should freeze and not respond
or otherwise malfunction.
1. Disconnect your player if it is connected to a
computer.
2. Use a paper clip to gently press the <RESET>
button located on the rear of the player.
Page 7
Page 52

Main Menu
When you turn on the player, you will see the Main
menu. The Main menu gives you access to the different function modes of your player. These modes are:
Music: Browse and play music.
Pictures: Browse and view pictures.
Movies: Browse and play movies.
Radio: Listen to FM radio broadcasts.
E-Books: Browse and read text les.
Record: Make or play voice recordings.
Explorer: Browse all les.
Settings: Adjust the player’s options.
Main Menu Controls
To browse through the different modes, press
<LEFT> or <RIGHT>.
To select a mode, press the <ENTER> button.
Page 8
Page 53

Music Mode
Browse for and play your music les.
If you have loaded new music les onto the player, the
music library will need to be refreshed when you enter
Music mode. This process may take several minutes.
You will not be able to access the Music Browser
screen until you refresh the music library.
For more information about how to get music onto
your player, please refer to the section “Transferring
Files to the Player”.
Music Browser Controls
When you choose MUSIC
mode from the Main menu,
you will see the Music Browser
screen. You can choose to
browse your music by song
name, album, artist, or genre,
or you may choose “Browser”
to view the music les and
folders on the player.
Function Key Action
To browse through the list
To select an item Press <ENTER>
To return to the previous screen Press <LEFT>
To return to the Now Playing screen Press <MENU>
To return to the Main menu Hold <MENU>
Press <UP> or
<DOWN>
Page 9
Page 54

Music Mode
If your music les contain ID3 song information tags,
you will be able to view your tracks by Artist, Album,
or Genre. To view all les (including those that do not
contain ID3 information), select “All Songs” or use the
“Browser” option.
If music is already playing, you will have the additional
option to return to the Now Playing screen.
Lyric display requires a “.LRC” lyric le which may be
found on the internet or may be created with a Lyric
le editor. Lyric les can contain synchronized timing
information as well as lyric information.
Lyric les must have the same name as its corresponding music le (e.g., “SongTitle1.lrc” and “SongTitle1.
mp3”) and must be placed in the same directory.
Using the Quick Play List
To create a quick Play List that contains your
favorite songs:
1. Select “Browser” from the Music Browser screen.
2. Use the Browser controls to select a song to add.
3. Press and hold <ENTER>. The screen will
display “Add to List”.
4. Press <ENTER> to nish adding the song to
the Play List.
This quick Play List can be played from the Quick Op-
tion menu of the Now Playing screen (see page 13 for
more details).
Page 10
Page 55

Music Mode
Now Playing Controls (Music Playback)
To start playing music, browse for a song and then
press <ENTER> to start playback.
When a song is playing, the Now Playing screen
appears (see below).
Play Mode
Play Status
ID3 Information
Elapsed Time
Volume Level
Battery Level
Equalizer
Current Track /
Total Tracks
Progress Bar
Remain Time
Page 11
Page 56

Music Mode
The following functions may be performed from the
Now Playing screen.
Function Key Action
To play the next track Press <RIGHT>
To play the previous track Press <LEFT>
To forward-scan quickly through the
current track
To reverse-scan quickly through the
current track
To pause/resume playback Press <ENTER>
To access the Quick Option menu
(see below for details)
To adjust the volume level
To return to the Music Browser
screen
To return to the Main menu Hold <MENU>
Quick Option Menu
To access the quick option menu, press and hold
<ENTER> on the Now Playing screen.
To browse through the settings, press <UP> or
<DOWN>
To select a setting, press <ENTER>
To return to the previous screen, press <LEFT>
Hold <RIGHT>
Hold <LEFT>
Hold <ENTER>
Press <UP> or
<DOWN>
Press <MENU>
Page 12
Page 57

Music Mode
Equalizer
Select a digital equalizer preset to optimize the way
the player processes audio signals. The options are:
Normal, Pop, Rock, Classic, Jazz, and Bass.
Repeat
Change the repeat options to adjust the order in
which tracks are played.
Item Description
No Repeat Play tracks in normal order and no
One Play the current track repeatedly.
All Play all tracks repeatedly.
RandomAll Play all tracks in random order.
Dir Normal Repeat all tracks in the current folder.
Dir Rep Repeat all tracks in all folders.
Dir Random Play folders in random order.
Library
Return to the Music Browser screen.
Play List
Selet "Play List" and then "My List" to play a list of
your favorite songs.
repeat.
To add songs to the list, see " Using the Quick Play
List" on the page 10.
Page 13
Page 58

Pictures
Picture 001.jpg
2
1
Page 14
Pictures Mode
Browse for and view your photo les (JPG and
BMP).
For more information about how to get pictures onto
your player, please refer to the section “Transferring
Files to the Player”.
Picture Browser Controls
When you choose PICTURES mode from the Main
menu, you will see the Picture Browser screen. Your
pictures will be displayed as thumbnail images.
1. Picture
2. N a m e o f t h e
selected picture
Use the Picture Browser to nd all picture les
loaded on your player.
Function Key Action
To browse through the pictures
& folders
To select/view an item Press <ENTER>
To return to the previous screen Press <MENU>
Press <UP>, <DOWN>,
<LEFT>, <RIGHT>
Page 59

Pictures Mode
Function Key Action
To return to the Main menu Hold <MENU>
Picture Viewer Controls
To view a picture, browse through the thumbnail
pictures and then press <ENTER>.
The following functions may be performed from the
Picture Viewer screen.
Function Key Action
To view the next picture Press <RIGHT>
To view the previous picture Press <LEFT>
To start or stop slideshow mode Press <ENTER>
To return to the Picture Browser
screen
To return to the Main menu Hold <MENU>
You can override and stop the automatic slideshow by
pressing <LEFT> or <RIGHT> at any time.
Press <MENU>
Page 15
Page 60

Movies Mode
Browse for and play your movie les.
Your player supports MTV les encoded at 128 x 128
and 25 fps. Videos may need to be encoded with the
included software for device playback.
For more information about converting video, please
refer to the section “Movie Conversion”.
For more information about how to get movies onto
your player, please refer to the section “Transferring
Files to the Player”.
Movie Browser Controls
When you choose MOVIES mode from the Main
menu, you will see the Movie Browser screen.
Use the Movie Browser to nd all movie les loaded
on your player.
Function Key Action
To browse through the list of movie
les & folders
To select/play an item Press <ENTER>
To return to the previous screen Press <LEFT>
To return to the Main menu Hold <MENU>
Press <UP> or
<DOWN>
Movie Playback Controls
The following functions may be performed from the
Now Playing screen.
Page 16
Page 61

Movies Mode
Function Key Action
To play the next movie Press <RIGHT>
To play the previous movie Press <LEFT>
To forward-scan quickly through the
current movie
To reverse-scan quickly through the
current movie
To pause/resume playback Press <ENTER>
To adjust the volume level
To return to the Movie Browser screen Press <MENU>
To return to the Main menu Hold <MENU>
Hold <RIGHT>
Hold <LEFT>
Press <UP> or
<DOWN>
Page 17
Page 62

Radio Mode
Listen to FM radio broadcasts.
You must have a pair of headphones connected to the
headphone jack to receive FM broadcasts; your player
will utilize the headphone cord as an antenna.
Radio Tuning Controls
When you choose RADIO from the Main menu, you
will see the Radio Tuning screen. You can search for
stations, tune to stations manually, or tune to preset
stations.
You must have saved preset stations prior to using preset tuning mode. Hold <ENTER> to automatically save
all stations within reception range as preset stations.
This will overwrite all previously saved preset stations.
The following functions may be performed from the
Radio Tuning screen.
Function Key Action
To toggle between normal (normal) and preset tuning
To auto-save all available stations
as preset stations
To tune to a higher station Press <RIGHT>
To tune to a lower station Press <LEFT>
To scan to the next highest station
(normal mode only)
Press <ENTER>
Hold <ENTER>
Hold <RIGHT>
Page 18
Page 63

Radio Mode
Function Key Action
To scan to the next lowest station
(normal mode only)
To save the current station as a
preset station (normal mode)
To delete the current preset station (preset mode)
To Start FM Record
To adjust the volume level
To return to the Main menu Hold <MENU>
Hold <LEFT>
Press <MENU>, select “Add
Preset” then <ENTER>
Press <MENU>, select “Del
Preset”, then <ENTER>
Press<MENU>, select “Start
Record”, then <ENTER>
Press <UP> or
<DOWN>
Page 19
Page 64

E-Books Mode
Read text les loaded on your player (TXT).
For more information about how to get text les onto
your player, please refer to the section “Transferring
Files to the Player”.
E-Book Browser Controls
When you choose E-BOOKS from the Main menu,
you will see the E-Book Browser Screen.
Use the E-Book Browser to nd all text les loaded
on your player.
Function Key Action
To browse through the list of text les
& folders
To select/view an item Press <ENTER>
To return to the previous screen Press <LEFT>
To return to the Main menu Hold <MENU>
Press <UP> or
<DOWN>
E-Book Reader Controls
The following functions may be performed from the
Text Display screen.
Function Key Action
To read the next page Press <DOWN>
To read the previous page Press <UP>
Page 20
Page 65

E-Books Mode
Function Key Action
To toggle the auto-scroll function Press <ENTER>
To return to the E-Book Browser
screen
To return to the Main menu Hold <MENU>
You can override the auto-scroll function by pressing
<DOWN> or <UP> at any time.
Press <MENU>
Pag e 21
Page 66

Record Mode
Play your digital voice recording les or record
sounds from external audio sources.
Voice Playing Controls
The following functions may be performed from the
Voice Playing screen.
Function Key Action
To play the next track Press <RIGHT>
To play the previous track Press <LEFT>
To forward-scan quickly through the
current track
To reverse-scan quickly through the
current track
To pause/resume playback Press <ENTER>
To access the Quick Option menu
(see below for details)
To adjust the volume level
To return to the Main menu Hold <MENU>
Hold <RIGHT>
Hold <LEFT>
Hold <ENTER>
P r e s s < U P > o r
<DOWN>
Quick Option Menu
To access the quick option menu, press and hold
<ENTER> on the Voice Playing screen.
Page 22
Page 67

Record Mode
To browse through the settings, press <UP> or
<DOWN>
To select a setting, press <ENTER>
To return to the previous screen, press <LEFT>
Repeat
Change the repeat options to adjust the order in
which tracks are played.
Item Description
No Repeat Play tr ac ks in nor mal order and no
One Play the current track repeatedly.
All Play all tracks repeatedly.
RandomAll Play all tracks in random order.
Dir Normal Repeat all tracks in the current folder.
Dir Rep Repeat all tracks in all folders.
Dir Random Play folders in random order.
Start Record
Make voice recordings through the integrated microphone located on the back of your player.
repeat.
The player will start the recording immediately.
Page 23
Page 68

Record Mode
1. Press <ENTER> to pause recording; press
<ENTER> again to resume recording.
2. Press <MENU> to stop and save the recording.
The recorded le will be saved to the folder
“MICIN.DIR” and named “MICXXXXX.WAV”
where XXXXX corresponds to the numerical
sequence in which the recording was made
(numbering starts from 00001).
Page 24
Page 69

Explorer Mode
Enter Explorer mode to view and delete folders
and les loaded on your player.
To enter Explorer mode, select and conrm
EXPLORER from the Main Menu.
Explorer Controls
When you choose EXPLORER mode from the Main
menu, you will see the File Explorer screen. You can
nd and delete les or folders from the player.
Function Key Action
To browse through the list of les &
folders
To select a folder Press <ENTER>
To return to the previous screen Press <LEFT>
To delete a selected item Press <MENU>
To return to the Main menu Hold <MENU>
Press <UP> or
<DOWN>
Page 25
Page 70

Settings Mode
Enter the Settings mode to set your player’s
system options.
To enter Settings mode, select SETTINGS in the
Main menu.
Function Key Action
To browse through the options
To select an item Press <ENTER>
To cancel and return to the previous
screen
To return to the Main menu Hold <MENU>
The following options are available. Some of these
options may be set from the Quick Option menus.
Item Description
Power
Sleep Set the duration of time (in minutes) until the
player turns off automatically. A setting of
“Off ” will disable this power-saving feature.
Language
Language Set the language that the on-screen menus
appear in.
Display
Press <UP> or
<DOWN>
Press <LEFT> or
<MENU>
Page 26
Page 71

Settings Mode
Item Description
Backlight Adjust the duration of time (in seconds)
Brightness Adjust the contrast of LCD display.
-- Set the quality of recording.
Format It may become necessary to format your
Reset Restore all of the player's settings to their
Sys Info View Firmware & Memory Usage informa-
Sort Sort all music that loaded on your player. Se-
that the backlight will remain on after a
key press. A setting of “On” will keep the
backlight on continuously.
Record
Sys Tools
player if data or les become corrupt. You
may choose either Quick or Complete
formatting. A Complete format will take more
time.
factory-default state.
tion.
lect “Force Sort” to update the music library
immediately. This process may take several
minutes if you have transferred music les to
the player recently.
Page 27
Page 72

Transferring Files to the Player
Connect the player to a computer with the USB 2.0
cable provided to:
Transfer les to and from your player
Perform basic le management functions.
USB Port
USB Port
Computer
Upon connection:
Your computer will automatically recognize the
player as a Removable Disk.
To open the player to view les, double- click
the icon that appears.
Once you have opened the player’s folder, simply
drag and drop les to the player as you would a
oppy disk.
Copy music les to the root directory.
Copy movie les to the “MOVIE.DIR” folder
Copy photo les to the “PHOTO.DIR” folder
Copy text les to the “TEXT.DIR” folder.
Page 28
Page 73

Transferring Files to the Player
If you need further assistance with transferring les,
please refer to your operating system’s instruction
manual or on-screen help. If you are using media
management software such as iTunes, Winamp, or
Windows Media Player, please refer to their documentation for support.
Transferring with Microsoft Windows
1. Open a le explorer window. Locate the les
you would like to transfer from your computer.
Select the les/folders with the mouse and
press CTRL-C (copy) on the keyboard.
2. Double-click the “My Computer” icon on your
desktop and then double-click the icon that
represents your player. The computer will
display all les and folders currently stored in
the player.
3. Press CTRL-V (paste) on the keyboard to trans-
fer the les you selected in Step 1 to the player.
Transferring with Macintosh OS X
1. Open a nder window. Locate the les you
would like to transfer from your computer.
Select the les/folders with the mouse and
press APPLE-C (copy) on the keyboard.
2. Click on the Removable Disk icon located on
the left side of the nder window. The computer
will display all les and folders currently stored
in the player.
Page 29
Page 74

Transferring Files to the Player
3. Press APPLE-V (paste) on the keyboard to trans-
fer the les you selected in Step 1 to the player.
Disconnecting from a Computer
To avoid data loss or le/rmware corruption, disconnect the player as instructed below or as by your
specic operating system.
Microsoft Windows
1. Double-click the
green arrow in the
taskbar located on the
lower-right side of the computer screen (Safely
Remove Hardware).
2. Safely Remove
Hardware:
Select “USB Mass
Storage Device”
from the list that
appears and then
click on “Stop”.
Stop a Hardware
Device: Select
“USB Mass Storage Device” from the list that appears and then
click on “OK”.
3. When the “Safe to Remove Hardware” window
appears, click the OK button and disconnect the
USB cable from the player and your computer.
Page 30
Page 75

Transferring Files to the Player
Macintosh OS X
1. On the left side of the Finder Window, identify
the appropriate Removable Disk icon.
2. Click on the “Eject” arrow on the right of the
Removable Disk icon.
3. Disconnect the USB
cable from the player
and your computer.
Page 31
Page 76

Video Conversion
Use the video conversion software utility included
on the installation CD to create video les that are
suitable for playback on the player.
Your player supports MTV les with the following
specications:
128 x 128 resolution at 25 frames per second
(fps).
The video conversion software is included for your
convenience and is compatible with Microsoft Win-
dows operating systems only. There are many other
video conversion utilities available for download or
purchase on the internet.
Because the program is licensed free of charge, there
is no warranty for the program, to the extent permitted
by applicable law. Except when other wise stated in
writing the copyright holders and/or other parties pro-
vide the program “as is” without warranty of any kind,
either expressed or implied, including, but not limited
to, the implied warranties of merchantability and t-
ness for a particular purpose. The entire risk as to the
quality and per formance of the program is with you.
Should the program prove defective, you assume the
cost of all necessary servicing, repair or correction.
In no event unless required by applicable law or
agreed to in writing will any copyright holder, or any
other party who may modify and/or redistribute the
program as permitted above, be liable to you for dam-
ages, including any general, special, incidental or
consequential damages arising out of the use or in-
ability to use the program (including but not limited
to loss of data or data being rendered inaccurate or
Page 32
Page 77

Video Conversion
losses sustained by you or third parties or a failure
of the program to operate with any other programs),
even if such holder or other par ty has been advised of
the possibility of such damages.
Installation
Minimum System Requirements
OS Support Microsoft 2000/XP/Vista
CPU Pentium class equivalent or better
Memor y (RAM) >64MB
Free HD Space 10MB
Video 24-bit color adapter
WMP Windows Media Player 9 or better
1. Copy the folder
“VideoConverter_V2.12.00(128x128)” to your
computer
2. To start the software, double-click the le
“VideoConvert.exe”
Page 33
(32-bit only)
Page 78

Video Conversion
Converting Video
To start the software, double-click the le
“VideoConvert.exe”.
The application window shown below will appear.
1
2
3
4
1. Seek Bar for preview and time selection
2. Start and End time-point selection
3. Select the video le to convert
4. Select the destination folder of the converted
video le
5. Video preview window
6. Conversion progress bar
Page 34
5
6
Page 79

Video Conversion
To convert a video:
1. Click the “Input Video” button [3] to select the
source video le to conver t.
The source le must be one of the follow-
ing video types: AVI (*.avi), WMV (*.wmv,
*.asf), MPEG-1 (*.mpg), QuickTime (*.mov,
*.qt), MPEG-2 (*.vob), RealMedia (*.rm,
*.rmvb), MPEG-4, or 3GP (*.3gp)
DirectX 9.0, Media Player 9.0, and other
codecs must be installed to support all
media types.
2. Click the “Output Video” button [4] to select the
folder that the converted le will be saved to.
3. Click the “Start Conversion” button to start the
conversion process.
4. When the conversion is complete, copy the
converted les to the player ’s “MOVIE.DIR”
folder for playback.
Page 35
Page 80

Troubleshooting
If you have a problem with this device, please read
the troubleshooting guide below.
The player does not turn on.
Ensure that the player is fully charged. Try
charging the player overnight (8 hours).
Reset the player (use a paper clip to gently
press the Reset button on the rear of the player)
and try again.
The but tons do not work.
Reset the player (use a paper clip to gently
press the Reset button on the rear of the player)
and try again.
I cannot transfer les to the player.
Ensure that your computer is running a sup-
ported operating system.
If using a USB extension cable, ensure that it is
securely attached to the player and the PC, or
try using another USB cable.
If you have connected the player through a
USB hub, try connecting the player directly to
your computer.
Ensure that the player’s memory capacity is
not full.
There is no sound during playback.
Page 36
Page 81

Troubleshooting
Check the volume level.
Ensure that the headphones are attached
securely to the player.
The sound quality of the music is poor.
Try playing the le on your computer. If the
sound quality is still poor, try downloading the
le again or re-encoding the le yourself.
Try lowering the volume of the player.
Ensure that the headphones are attached
securely to the player.
The player will not play my music le.
Ensure that the le is in a compatible format.
The le may be copy-protected and you no
longer have authorization to play this le. If you
feel this is in error, please contact the service
from which you downloaded the le.
The LCD characters are corrupted or something
is wrong with the display.
Ensure that the correct menu language has
been set.
Reset the player (use a paper clip to gently
press the Reset button on the rear of the
player) and try again.
The player has malfunctioned.
Page 37
Page 82

Troubleshooting
Reset the player (use a paper clip to gently
press the Reset button on the rear of the
player) and try again.
Page 38
Page 83

Specications
Display Type 1.5” Full-Color LCD @ 128x128
Memory Integrated Flash Memory
Audio Format Support MP3
Video Format Support MTV: 128x128, 25fps
Photo Format Support JPG
Song Info Support ID3, Windows Media
FM Frequency Range 87.5 - 108.0MHz
PC Interface USB 2.0 (MSC)
Plug and Play Support Windows 2000/XP/Vista
Audio Output 3.5mm Stereo (Headphone)
Audio Input Integrated Microphone
Power Supply Rechargeable Lithium-Polymer
Play Time Music: 8 hours*
Unit Dimensions 1.57” x 3.11” x 0.38” (WHD)
Speci cations a nd manual are s ubject to ch ange withou t notice.
* Music play time is an esti mated value based on playing an MP3 encoded at 128 kbps. Actual play time may vary de pending on en coding
method used and other fa ctors.
Macintosh OS X
Battery
USB Charge
Page 39
Page 84

For more information please check our website
www.sunsiberica.com
 Loading...