

Page 1
Instruction Manual
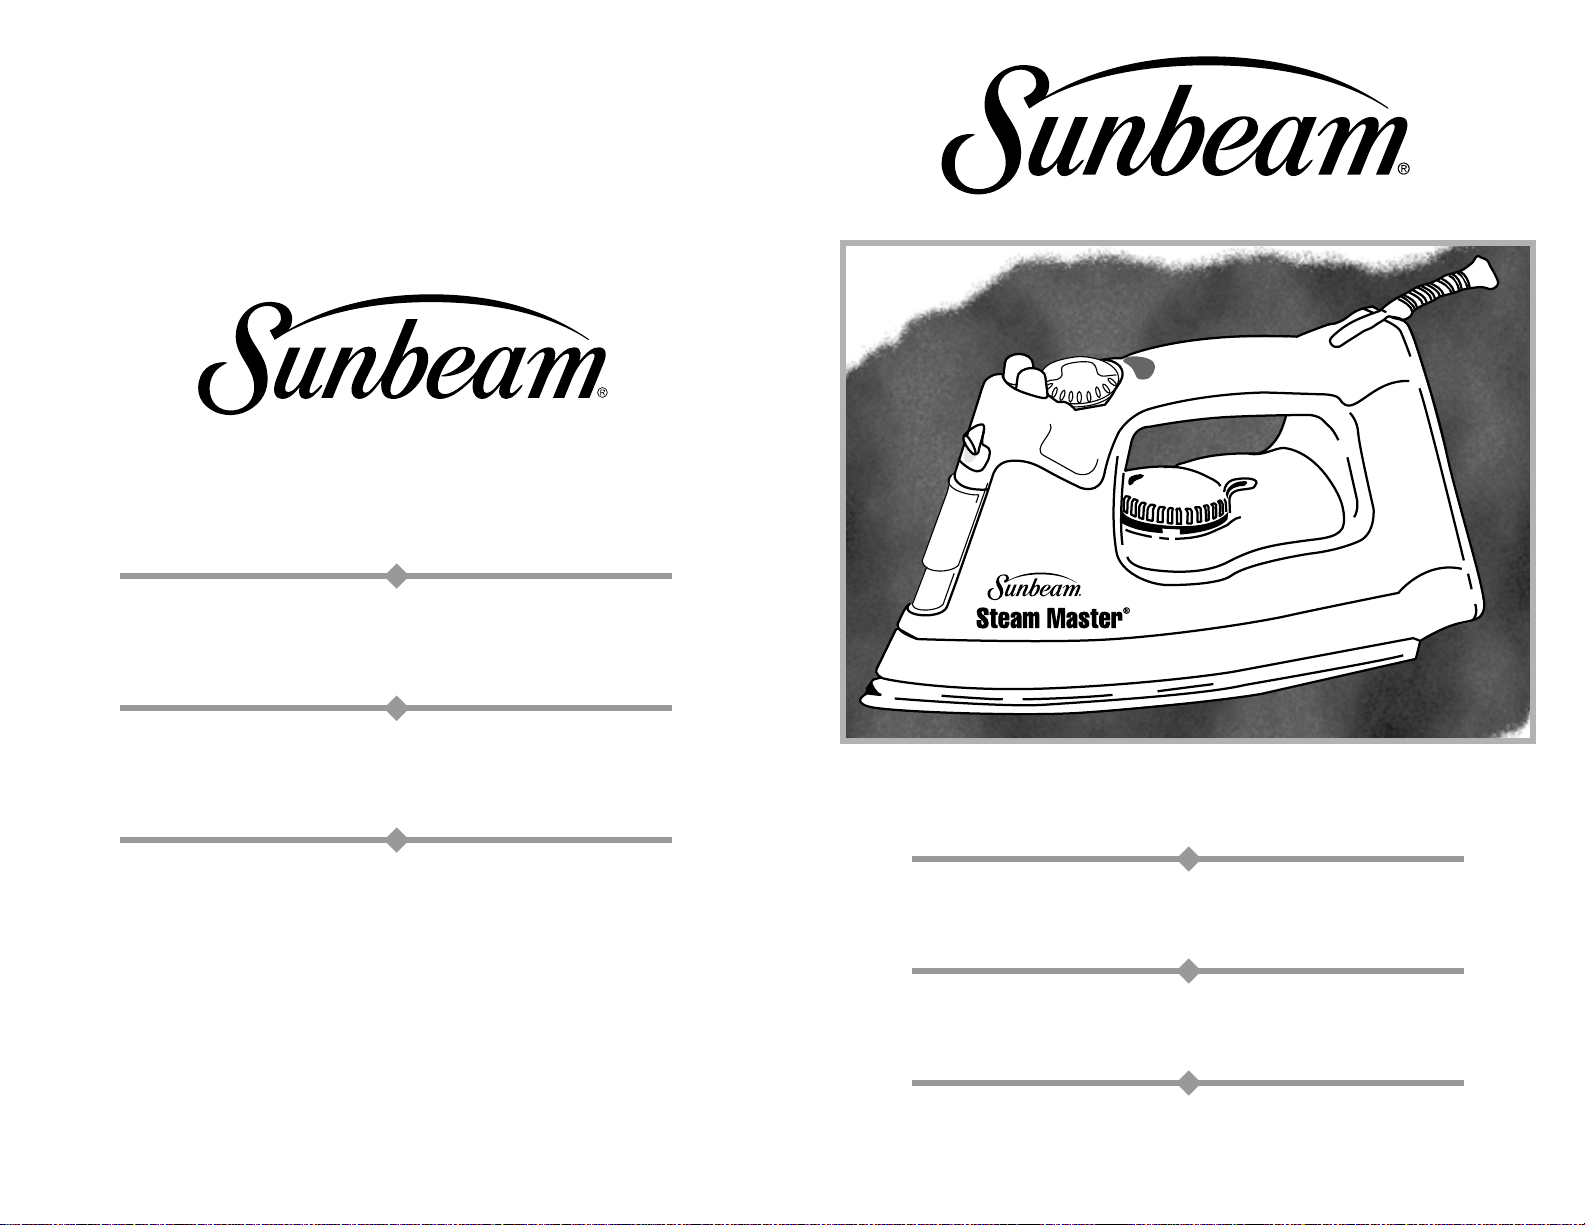
STEAM MASTER®IRON
Manuel d’Instructions
FER À REPASSER STEAM MASTER
®
Manual de Instrucciones
PLANCHA STEAM MASTER
®
Manual de Instruções
FERRO STEAM MASTER
®
©2002 Sunbeam Products, Inc. All rights reserved.
SUNBEAM®, STEAM MASTER®, SHOT OF STEAM®, SPRAY MIST®and SAFETY SMART
®
are registered trademarks of Sunbeam Products, Inc.
FLEXCord™and SILK STEAM™are trademarks of Sunbeam Products, Inc.
Distributed by Sunbeam Products Inc., Boca Raton, Florida 33431.
©2002 Sunbeam Products, Inc. Tous droits réservés.
SUNBEAM®, STEAM MASTER®, SHOT OF STEAM®, SPRAY MIST®et SAFETY SMART
®
sont marques déposées de Sunbeam Products, Inc.
FLEXCord™et SILK STEAM™sont marques de commerce de Sunbeam Products, Inc.
Distribué par Sunbeam Products Inc., Boca Raton, Florida 33431.
©2002 Sunbeam Products, Inc. Todos los derechos reservados.
SUNBEAM®, STEAM MASTER®, SHOT OF STEAM®, SPRAY MIST®y SAFETY SMART
®
son marcas registradas de Sunbeam Products, Inc.
FLEXCord™y SILK STEAM™son marcas comerciales de Sunbeam Products, Inc.
Distribuido por Sunbeam Products Inc., Boca Raton, Florida 33431.
©2002 Sunbeam Products, Inc. Todos os direitos reservados.
SUNBEAM®, STEAM MASTER®, SHOT OF STEAM®, SPRAY MIST®e SAFETY SMART
®
são marcas registradas da Sunbeam Products, Inc.
FLEXCord™e SILK STEAM™são marcas comerciais da Sunbeam Products, Inc.
Distribuído por Sunbeam Products Inc., Boca Raton, Florida 33431.
Printed in China / Imprimé en Chine
Impreso en China / Impresso na China
U.S.Patent Nos. D376,234; D389,967;
4,686,352; 5,619,812; 5,621,989; 5,787,615
Foreign Patents Pending P.N. 66814-002
Page 2
3
2
IMPORTANT SAFEGUARDS
When using your SUNBEAM®STEAM M
ASTER
®
IRON, basic safety precautions
should always be followed, including the following:
READ ALL INSTRUCTIONS BEFORE USING
1. Use iron only for its intended use.
2. To protect against risk of electric shock, do not immerse the iron in water
or other liquids.
3. The iron should always be turned to “OFF” before plugging or unplugging
from outlet. Never yank cord to disconnect from outlet; instead, grasp plug
and pull to disconnect.
4. Do not allow cord to touch hot surfaces. Let iron cool completely before
putting away. Loop cord loosely around iron when storing.
5. Always disconnect iron from electrical outlet when filling with water
or emptying and when not in use.
6. Do not operate iron with a damaged cord or if the iron has been dropped
or damaged. To avoid the risk of electric shock, do not disassemble the iron.
Take it to a qualified service technician for examination and repair.
Incorrect reassembly can cause a risk of electric shock when the iron is used.
7.
Close supervision is necessary for any appliance being used by or near children.
Do not leave iron unattended while connected or on an ironing board.
8. Burns can occur from touching hot metal parts, hot water or steam.
Use caution when you turn a steam iron upside down – there may be
hot water in the reservoir.
9. If your STEAM MASTER®is not operating normally, disconnect from the
power supply and have the flatiron serviced by qualified service personnel.
10. Your
SUNBEAM®IRON
is designed to rest on the heel rest. Do not leave
the iron unattended. Do not set the iron on an unprotected surface,
even if it is on its heel rest.
SPECIAL INSTRUCTIONS
1. This is a 1200-Watt appliance.* To avoid a circuit overload, do not operate
another high wattage appliance on the same circuit.
2. If an extension cord is absolutely necessary, a 10-Ampere cord should be used.
Cords rated for less amperage may overheat. Care should be taken to arrange
the cord so that it cannot be pulled or tripped over.
FOR PRODUCTS PURCHASED IN THE U.S. AND CANADA ONLY
To reduce the risk of electrical shock, this appliance has a polarized plug
(one blade is wider than the other). This plug fits a polarized outlet only one way;
if the plug does not fit fully into the outlet, reverse the plug. If it still does not fit,
contact a qualified electrician. Do not attempt to defeat this safety feature.
*
In Mexico, the iron runs at 127 Volts, 1350 Watts. If an extension cord is necessary,
a 13-Ampere cord should be used.
SAVE THESE INSTRUCTIONS
Page 3
5
4
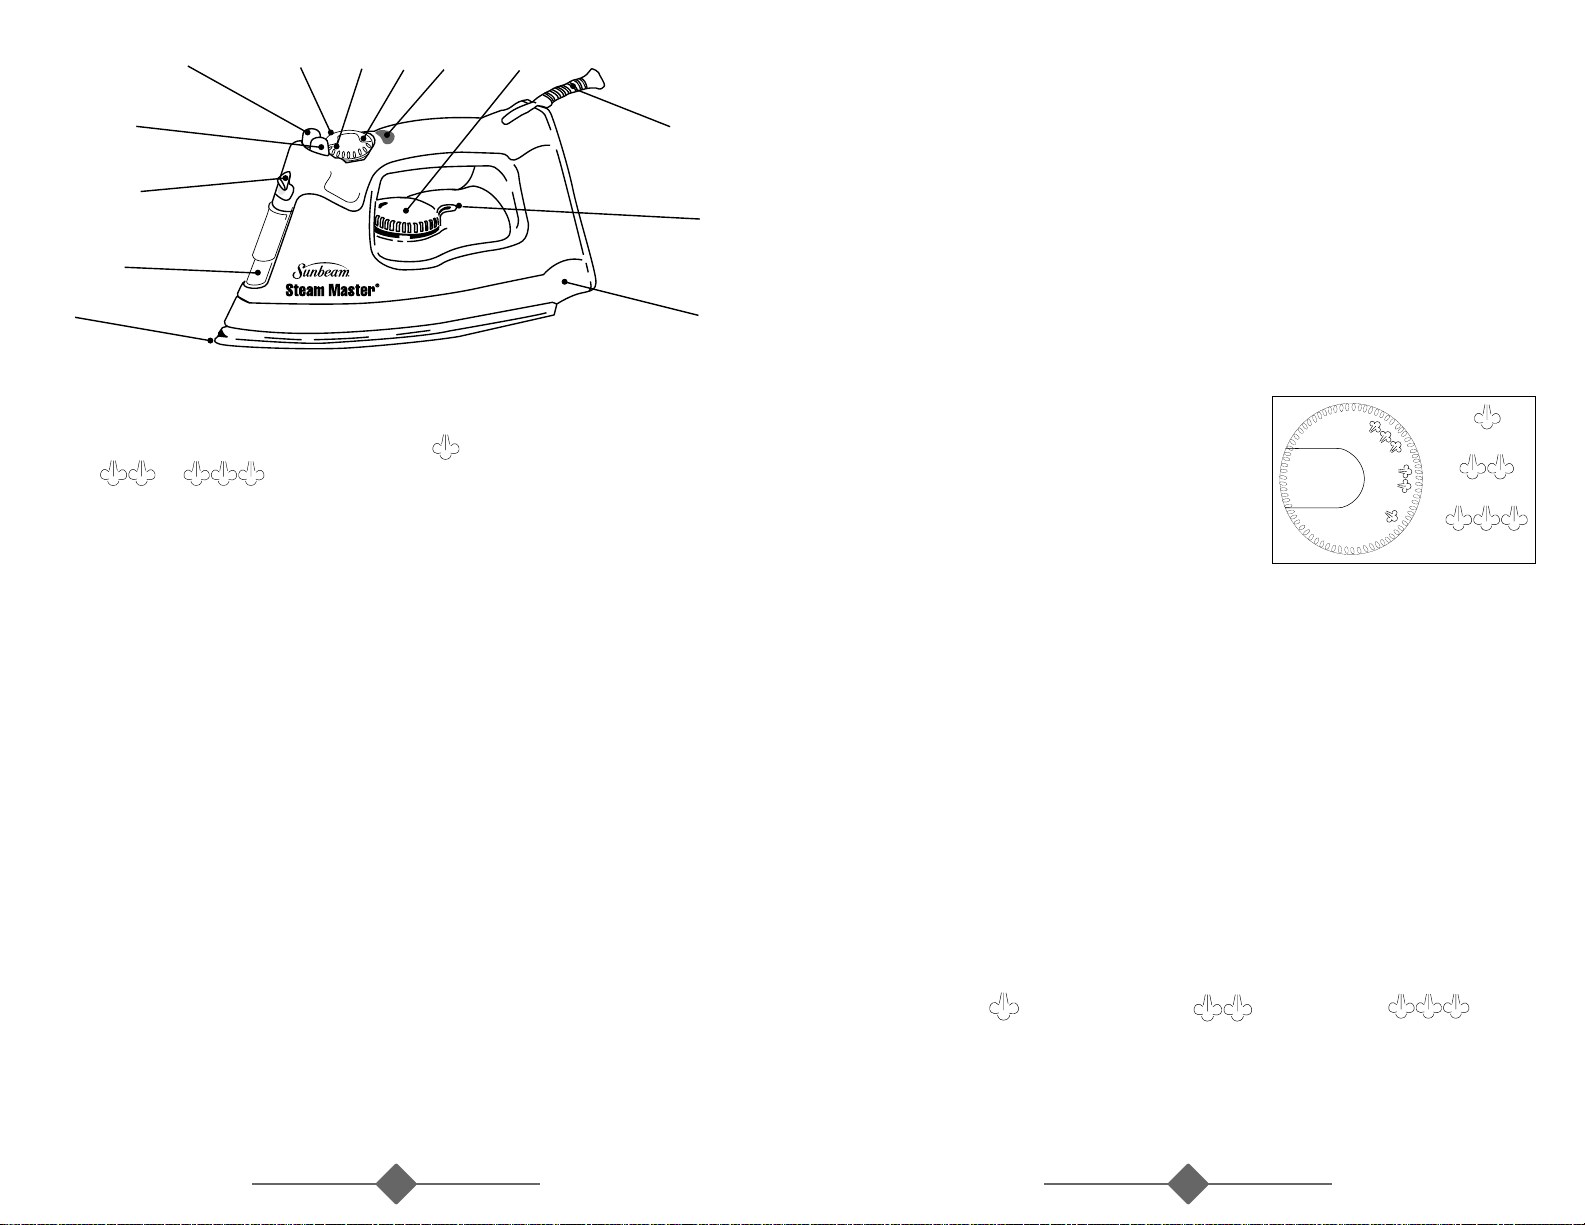
FEATURES
A. Variable Steam Dial – Adjusts steam level for different ironing needs. For dry ironing,
turn dial to DRY. For steam ironing, turn dial to the . For additional steam, turn dial to
the or . (Refer to Ironing Guide for recommended settings).
B. Steam Valve (connected to the variable steam dial) – Removable to prevent scale build up.
C. Steam Indicator Mark
D. Auto-Off Indicator (Some Models Only)
E. Temperature Dial – Controls heat output of iron. Adjust dial according to ironing needs.
For low temperatures, turn dial to first dot. For medium temperatures, turn dial to second set
of dots. For high temperatures, turn dial to third set of dots. (Refer to Ironing Guide for
recommended settings).
F. Swivel Cord – Pivots up and down and is supported to prevent dragging on fabric.
Flexible grommet protects the cord from fraying.
G. Temperature Indicator Mark
H. Cord Wrap – Provides quick, convenient cord storage.
I. Soleplate – Has full length button grooves for added convenience when ironing shirts
and blouses; some models have non-stick coating.
J. Sliding Water Reservoir Cover – Prevents dust and foreign matter from entering
the water tank; resists water splashing during ironing.
K.
SPRAY MIST®Feature
L.
S
PRAYMIST
®
Button – Provides a fine spray mist for spot dampening.
M.
SHOT OF STEAM®Button – Provides a powerful burst of steam for maximum steam power.
•
S
AFETYSMART
®
Automatic Shut-Off (Some Models Only) – Shuts off if iron is unmoved
for 15 minutes in the upright position or 30 seconds in the ironing position.
A
I
J
K
L
M BCD E
F
G
H
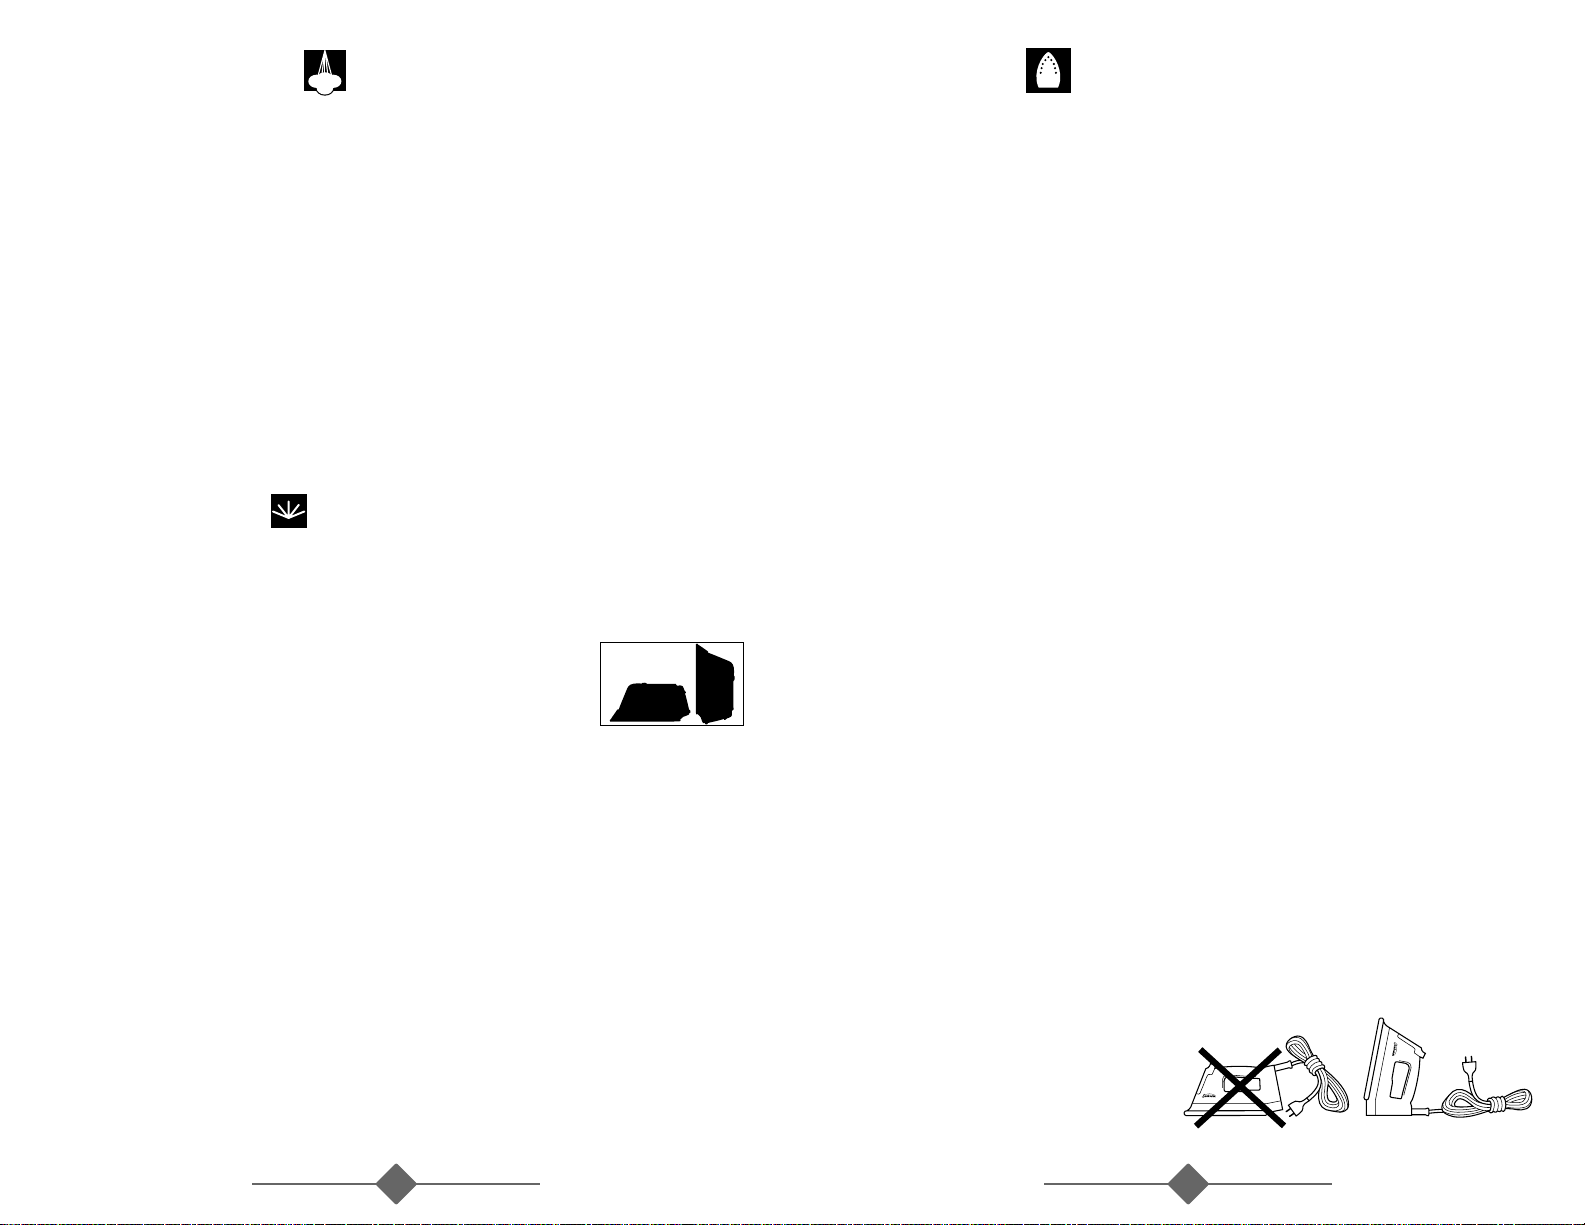
BEFORE THE FIRST USE
• When turned on for the first time, your new iron may give off a slight odor for up to ten minutes.
This is due to the initial heating of the materials used. It is safe, not detrimental to the
performance of the product, and will not recur.
• Prior to first use, clean steam vents using the SHOT OF STEAM®feature.
After cleaning vents, run iron over an all-cotton cloth to remove any residue.
• When not ironing, always have steam dial turned to DRY. (See Diagram)
INSTRUCTIONS FOR USE
DRY IRONING
• Plug the cord into a 120-Volt AC outlet. On units with
automatic shut off, the auto off light will illuminate.
• Turn the temperature dial to the desired setting.
(Refer to Ironing Guide for Recommended Settings)
While iron is heating, place iron on heel rest
on a stable, protected surface.
• Set the steam dial on DRY to prevent steam flow
if water is in the tank.
STEAM IRONING
• Make sure the plug is removed from the wall socket before filling the iron with water.
• Turn the steam dial to DRY.
• Place the iron on its heel and open the water reservoir cover. Pour water slowly into the
water reservoir. Fill up to the maximum water level. To prevent the risk of burns,
use caution when filling a hot iron with water. Burns can occur from touching
hot metal parts, hot water or steam. Push firmly to close the cover. NOTE: Tap water
may be used due to the special design of this iron. However, in areas with very hard water,
distilled or demineralized water is recommended.
• Turn the temperature dial to any of the temperatures within the steam band and allow the iron
to heat for approximately 2 minutes before ironing. While heating, place iron on heel rest on
a stable, protected surface.
• Turn steam dial to for regular steam, or to for extra steam or
for ultra steam. NOTE: When using extra or ultra steam, it may be necessary to fill the tank
more often.
CLEAN
S
T
E
A
M
D
R
Y
STEAM
EXTRA S
TEAM
ULTRA STEAM
Page 4
SHOT OF STEAM®FEATURE
• The
S
HOT OF STEAM
®
feature provides an extra burst of steam for deep penetration of stubborn
wrinkles. The
SHOT OF STEAM®feature can be used with dry or steam ironing provided the tank
is at least 1/4 full of water and the temperature dial is set within the steam band.
• Allow the iron to heat for approximately two minutes.
• Press the white
SHOT OF
STEAM
®
button several times to prime the pump.
• Pump
SHOT OF STEAM® button another three to four times in order to clean the unit.
• The
S
HOT OF STEAM
®
feature is now ready for use. The
SHOT OF
STEAM
®
feature can be used
continuously with just a short pause between shots. The
S
HOT OF STEAM
®
feature is most
effective with the iron held in a horizontal position just above the fabric being ironed.
• If the tank runs dry, unplug the iron and refill with water. The iron may be filled with water
while it is hot. NOTE: It may be necessary to re-prime the pump before using the
SHOT OF STEAM®feature again.
SPRAY MIST®FEATURE
(Some Models Only)
• Use the
SPRAY MIST®feature to dampen fabrics with stubborn wrinkles.
• Press the gray
SPRAY MIST®button firmly to produce spray.
SAFETY SMART® FEATURE AUTO SHUT-OFF
(Some Models Only)
• When the iron is plugged into 120-Volt AC electrical outlet, the steady red light signals that
the iron is plugged in and is ready to be turned on.
• If the iron is left on the heel rest unmoved the iron will stop heating in 15 minutes.
The light on the handle will blink to indicate the iron has automatically shut off
and will continue blinking until the iron is restarted or unplugged.
• If the iron is left unmoved in the ironing position or accidentally tipped over, the iron will stop
heating in 30 seconds. Again, the light on the handle will blink to indicate the iron
has automatically shut off and will continue blinking until the iron is restarted
or unplugged.
• NOTE: If the temperature dial is turned to the Off position, the light will continue blinking
and then go off.
• To restart the iron, move the iron back and forth. Allow the iron to heat and continue ironing
as normal.
• NOTE: Although heat is no longer generated once the iron has automatically shut off,
allow sufficient time for the iron to cool before touching the soleplate or storing the iron.
7
6
NON-STICK FINISH
(Some Models Only)
• The non-stick coating prevents sticking of fabrics and starch residue to the soleplate.
• To clean the soleplate, allow iron to cool and wipe with a soft cloth using a mild
vinegar solution.
• Do not use scouring pads, abrasives or chemical cleaning solvents as they may damage
the finish.
• NOTE: Scratches in the non-stick soleplate do not affect the performance of the iron.
CARE AFTER EACH USE
• Turn the steam dial to DRY.
• Unplug the iron from the power outlet.
• Empty the water tank by opening the water reservoir cover and turning the iron upside down
to allow water to flow from the opening. Shake the iron gently to remove trapped water drops.
• Close cover and allow the iron to cool.
• Loop cord loosely around cord wrap. Always store iron on its heel rest.
• When not ironing, always set steam dial to DRY.
CARE AND MAINTENANCE
STEAM VALVE
The steam valve (attached to the variable steam dial) is removable for easy cleaning of lint and
scale build up. Cleaning the steam valve is only necessary if you notice a reduction in steam
performance. To remove the steam valve, empty the water tank and place iron on the soleplate.
Turn the variable steam dial to CLEAN. The valve will “pop-up.”Pull up to remove the steam
valve fully. Wipe the tip gently with a damp cloth to clean. To replace, align CLEAN with the
indicator mark. Push down and rotate clockwise to the DRY.
NOTE:
Do not pour water into the steam valve hole.
SOLEPLATE
If starch or other material clings to the iron’s soleplate, allow the iron to cool and wipe with a soft,
damp cloth. Avoid ironing over snaps, zippers, rivets, etc., as they may scratch the soleplate.
STORAGE
Always store your iron on the heel rest.
Never store with the soleplate facing down
or in the carton. Always store your iron
with the steam dial turned to DRY.
Wrap cord around cord wrap.
Steam Master
®
Steam Master
®
15
min.
30
sec.
Page 5

9
8
MAINTENANCE
Other than the recommended instructions in this pamphlet, no further maintenance is necessary.
However, following is a list of frequently asked questions and their resolutions. If for any reason
your iron continues to exhibit one of these symptoms, or requires repair for another reason,
send it to the Sunbeam Appliance Service Center or call our Consumer Hot Line 1-800-597-5978.
SYMPTOM RESOLUTION
Iron emits an odor • Iron gives off an odor when turned on for the first time.
• Allow ten minutes for odor to disappear.
Iron does not heat • Iron should be plugged into a 120-Volt, AC electrical outlet only.
• The temperature dial must be set at the desired temperature.
• The auto shut-off feature may have been activated.
(Some Models Only)
Move the iron back and forth to restart.
Iron does not steam •
The water tank may be empty. Turn steam valve to DRY and add water.
•
Allow iron to heat, then set the steam dial to one of the steam settings.
Use temperature settings within the steam band.
• There may be an obstruction. Remove steam valve by turning it to
CLEAN. Replace and set the steam dial to one of the steam settings.
SHOT OF STEAM®feature • The water tank must be at least 1/4 full.
does not work
• Temperature must be set to steam position.
• Iron should be in the horizontal position.
• Prime pump briefly.
• Allow a short pause between shots.
• Be sure to fully depress the SHOT OF STEAM®button.
SPRAY MIST®feature • The water tank must be at least 1/4 full.
does not work
Iron is leaking • The variable steam dial must be set on DRY until the iron is hot.
• The temperature setting is too low to produce steam.
(See Ironing Guide)
IRONING TIPS
• Always read garment labels and follow the manufacturer’s ironing instructions.
• Sort the articles to be ironed according to the type of fabric.
• Garments requiring low temperature and steam should be ironed first to avoid damaging
garments with a too-hot iron.
• If you are unsure of the fabric content of the garment, test a small area such as a seam
or facing before ironing a visible area. Start with a low temperature and gradually increase
the heat to find the best setting.
• When changing the temperature from a high setting to a low setting, allow approximately
5 minutes for the lower temperature to be reached.
• When steam ironing, use long slow glides. This will allow the steam to penetrate the fabric
while it allows the heat of the soleplate to dry out the moisture.
• To iron linens, turn garment inside out. Be careful not to use a too-hot iron as lining may
melt or stick to soleplate.
• To iron zippers, use an ironing cloth or make sure the zipper is closed and iron over the flap.
Never iron directly over an unprotected zipper.
• Use the following chart to select the best setting and method for the fabric you plan to iron.
Page 6
11
10
TEMPERATURE
IRONING
FABRIC S
ETTING RECOMMENDATIONS
Acrylic
•
Dry iron inside out.
Acetate • Dry iron inside out while still damp.
Silk
• •
Iron inside out. Use an ironing cloth to prevent
shine marks.
Nylon
• •
Iron inside out while still damp.
Polyester
• •
Iron inside out while still damp.
Rayon
• •
Iron inside out.
Viscose
• •
Mainly dry iron. Steam can be used under
manufacturer’s instructions.
Wool
• •
Steam iron inside out or use an ironing cloth.
Wool Blends
• •
Steam iron inside out or use an ironing cloth.
Cotton Blends
• •
Check label and follow manufacturer’s instructions.
Use setting for the fiber requiring the lowest setting.
Corduroy
• • •
Steam iron inside out or use ironing cloth and brush
to raise the pile.
Cotton
• • •
Dry iron while still damp or use extra steam and/or
S
HOT OFSTEAM
®
feature. Iron dark fabrics on
wrong side to avoid shine.
Linen
• • •
Iron inside out or use an ironing cloth to prevent shine
marks, especially with dark colors. Dry iron while still
damp or use steam and/or
S
HOT OFSTEAM
®
feature.
Iron each section until entirely dry.
Denim
• • •
Use extra steam and/or
S
HOT OFSTEAM
®
feature.
IRONING GUIDE
Steam and SHOT OF STEAM
®
Steam and SHOT OF STEAM
®
Dry Ironing at any setting
Steam and SHOT OF STEAM
®
1-Y
EAR
L
IMITED
W
ARRANTY
Sunbeam Products, Inc, or if in Canada, Sunbeam Corporation (Canada) Limited (collectively “Sunbeam”)
warrants that for a period of one year from the date of purchase, this product will be free from defects in material
and workmanship. Sunbeam, at its option, will repair or replace this product or any component of the product
found to be defective during the warranty period. Replacement will be made with a new or remanufactured
product or component. If the product is no longer available, replacement may be made with a similar product
of equal or greater value. This is your exclusive warranty.
This warranty is valid for the original retail purchaser from the date of initial retail purchase and is not transferable.
Keep the original sales receipt. Proof of purchase is required to obtain warranty performance. Sunbeam
dealers, service centers, or retail stores selling Sunbeam products do not have the right to alter, modify
or any way change the terms and conditions of this warranty.
This warranty does not cover normal wear of parts or damage resulting from any of the following: negligent
use or misuse of the product, use on improper voltage or current, use contrary to the operating instructions,
disassembly, repair or alteration by anyone other than Sunbeam or an authorized Sunbeam service center.
Further, the warranty does not cover: Acts of God, such as fire, flood, hurricanes and tornadoes.
What are the limits on Sunbeam’s Liability?
Sunbeam shall not be liable for any incidental or consequential damages caused by the breach of any express,
implied or statutory warranty or condition.
Except to the extent prohibited by applicable law, any implied warranty or condition of merchantability
or fitness for a particular purpose is limited in duration to the duration of the above warranty.
Sunbeam disclaims all other warranties, conditions or representations, express, implied, statutory
or otherwise.
Sunbeam shall not be liable for any damages of any kind resulting from the purchase, use or misuse of, or
inability to use the product including incidental, special, consequential or similar damages or loss of profits,
or for any breach of contract, fundamental or otherwise, or for any claim brought against purchaser by any
other party.
Some provinces, states or jurisdictions do not allow the exclusion or limitation of incidental or consequential
damages or limitations on how long an implied warranty lasts, so the above limitations or exclusion may
not apply to you.
This warranty gives you specific legal rights, and you may also have other rights that vary from province
to province, state to state or jurisdiction to jurisdiction.
How to Obtain Warranty Service
In the U.S.A. –
If you have any question regarding this warranty or would like to obtain warranty service,
please call 1.800.458.8407 and a convenient service center address will be provided to you.
In Canada –
If you have any question regarding this warranty or would like to obtain warranty service,
please call 1.800.458.8407 and a convenient service center address will be provided to you.
In the U.S.A., this warranty is offered by Sunbeam Products, Inc., located in Boca Raton, Florida 33431.
In Canada, this warranty is offered by Sunbeam Corporation (Canada) Limited, located at 5975 Falbourne
Street, Mississagua, Ontario L5R 3V8.
PLEASE DO NOT RETURN THIS PRODUCT TO ANY OF
THESE ADDRESSES OR TO THE PLACE OF PURCHASE.
Page 7

13
12
INSTRUCTIONS PARTICULIÈRES
1.
Ceci est un appareil de 1200 W.* Pour éviter toute surcharge du réseau électrique,
ne pas utiliser un autre appareil de forte puissance sur le même circuit.
2. S’il est absolument nécessaire de se servir d’une rallonge électrique, utiliser
un cordon de 10 A. Les cordons de capacité moindre présentent des risques
d’échauffement. Veiller à placer le cordon de manière à ce qu’il ne risque pas
d’être arraché ou de provoquer de trébuchement
.
PRODUITS ACHETÉS AUX ÉTATS-UNIS ET AU CANADA UNIQUEMENT:
Pour réduire le risque de choc électrique, cet appareil est doté d’une fiche
polarisée (une broche est plus large que l’autre). Cette fiche ne va que dans un
sens seulement sur une prise de courant polarisée. Si la fiche ne s’enfonce pas
complètement dans la prise, la retourne et essayer de nouveau. Si elle ne s’adapte
toujours pas à fond, consulter un électricien qualifié. Veillez à respecter les
mesures de securité de la prise polarisée.
* Au Mexique, où il fonctionne à une tension de 127 Volts, 1350 Watts. S’il est
nécessaire de se servir d’une rallonge électrique, utiliser un cordon de 13 A.
Lors de l’utilisation du fer à repasser, veiller à toujours respecter des mesures
de précaution élémentaires, notamment:
LIRE TOUTES LES INSTRUCTIONS
1. Utiliser ce fer uniquement à des tâches pour lesquelles il est conçu.
2. Pour écarter les risques d’électrocution, ne pas immerger le fer dans l’eau
ni dans aucun autre liquide.
3. Veiller à toujours mettre le fer en position ARRÊT (OFF) avant de le brancher
ou de le débrancher. Ne jamais tirer sur le fil pour débrancher le cordon;
saisir la fiche et l’extraire de la prise.
4. Ne pas laisser le cordon d’alimentation venir au contact des surfaces chaudes.
Laisser le fer refroidir complètement avant de le ranger. Pour le rangement,
enrouler le cordon autour du fer sans serrer.
5. Veiller à toujours débrancher le fer de la prise de courant avant de remplir
ou vider le réservoir d’eau ou lorsque le fer n’est pas utilisé.
6. Ne pas utiliser un fer dont le cordon d’alimentation est endommagé ou qui a
subi une chute ou a été endommagé. Pour écarter les risques d’électrocution,
ne pas démonter le fer. Confier les contrôles et réparations à un réparateur
qualifié. Un fer mal remonté présente un danger d’électrocution durant
son utilisation.
7. Faites particulièrement attention lorsque le fer est utilisé par, ou en présence
d’enfants. Ne pas laisser sans surveillance un fer branché ou posé sur la table
à repasser.
8. Les brûlures se produisent en cas de contact avec des parties métalliques
chaudes, de l’eau chaude ou de la vapeur. Attention avant de tourner un fer
à repasser vapeur à l’envers: le réservoir peut contenir de l’eau bouillante.
9. Si le fer à repasser ne fonctionne pas correctement, débrancher le cordon
d’alimentation et faire réparer le fer par un réparateur qualifié.
10. Ce fer à repasser
SUNBEAM®est conçu pour reposer sur talon d’appui.
Ne pas laisser le fer sans surveillance. Ne pas placer le fer sur une surface
non protégée, même s’il repose sur son talon d’appui.
PRÉCAUTIONS IMPORTANTES
CONSERVER CES INSTRUCTIONS
Page 8

15
14
AVANT LA PREMIÈRE UTILISATION
• Lorsque vous le mettez en marche pour la première fois, un fer à repasser neuf pourra émettre
des odeurs durant un maximum de 10 minutes, en raison du chauffage initial des matériaux à
l’intérieur du fer. Ces odeurs initiales sont normales, n’influent en rien sur le rendement du fer,
et ne se reproduiront pas par la suite.
• Avant la première utilisation, nettoyer les orifices de vapeur à l’aide la fonction
SHOT OF STEAM®.
Après nettoyage des orifices, passer le fer sur un tissu 100% coton pour éliminer tout résidu.
• Lorsque le fer n’est pas utilisé, toujours placer le bouton de vapeur en position DRY.
(Voir Schéma)
INSTRUCTIONS D
’UTILISATION
REPASSAGE À SEC
• Brancher le cordon d’alimentation sur une prise
de courant 120 V. Sur les modèles à arrêt automatique,
le voyant d’arrêt automatique s’allume.
• Tourner le bouton de température jusqu’à la position
désirée. (Voir le Réglage Recommandé dans le
Guide de Repassage) Pour laisser chauffer le fer,
le poser sur son talon d’appui sur une surface stable
et bien protégée.
• Régler le bouton de vapeur sur DRY pour éviter tout dégagement de vapeur si le réservoir
contient de l’eau.
REPASSAGE À LA VAPEUR
•
S’assurer que la fiche d’alimentation est sortie de la prise de courant avant de remplir le fer d’eau.
• Mettre le bouton de vapeur sur DRY.
• Poser le fer sur son talon d’appui et ouvrir le bouchon du réservoir d’eau. Verser lentement l’eau
dans le réservoir. Remplir jusqu’au niveau maximum. Pour écarter les risques de brûlure,
remplir un fer chaud en faisant preuve de précaution. Les brûlures se produisent
en cas de contact avec des parties métalliques chaudes, de l’eau chaude ou de
la vapeur. Appuyer fermement pour refermer le bouchon. REMARQUE: Ce fer est conçu pour
permettre l’utilisation d’eau du robinet. Toutefois, lorsque cette eau est très dure, il est préférable
d’utiliser de l’eau distillée ou déminéralisée.
• Régler le bouton de température sur la valeur désirée dans la plage «Vapeur» et laisser le fer
chauffer pendant 2 minutes environ avant de l’utiliser. Durant le chauffage, poser le fer sur son
talon d’appui sur une surface stable et bien protégée.
• Régler le bouton de vapeur sur vapeur normale, sur vapeur plus ou sur
vapeur ultra. REMARQUE: En mode vapeur plus ou vapeur ultra, il peut être nécessaire de remplir
le réservoir plus souvent.
CARACTÉRISTIQUES
A. Bouton de Réglage de la Vapeur – Permet de régler le niveau de vapeur en fonction
des besoins. Pour repasser à sec, placer ce bouton sur DRY. Pour repasser à la vapeur,
le mettre en position . Pour obtenir plus de vapeur, placer le bouton
sur ou . (Voir le Réglage Conseillé dans le Guide de Repassage)
B. Soupape à Vapeur (reliée au bouton de vapeur) – Amovible pour éviter l’entartrage.
C. Repère du Bouton de Vapeur
D. Témoin d’Arrêt Automatique (Certains Modèles Seulement)
E. Bouton de Température – Contrôle la production de chaleur du fer. Régler ce bouton
en fonction des besoins. Pour les basses températures, placer ce bouton sur le point
unique. Pour les températures moyennes, le placer sur le second groupe de points.
Pour les températures élevées, le placer sur le troisième groupe de points.
(Voir le Réglage Recommandé dans le Guide de Température).
F. Cordon Articulé – Pivote de haut en bas et dispose d’un support qui l’empêche
de traîner sur le tissu. Le manchon souple protège le cordon contre la déchirure.
G. Repère du Bouton de Température
H. Enroulement du Cordon – Permet un rangement rapide et pratique du cordon électrique.
I. Semelle – Dispose de rainures pour le passage des boutons sur toute sa longueur,
très pratiques lors du repassage de chemises et de chemisiers; certains modèles présentent
un revêtement antiadhérent.
J. Couvercle de Réservoir d’Eau Coulissant – Empêche les poussières et autres corps
étrangers de pénétrer dans le réservoir d’eau; résiste l’eau giclait durant le repassage.
K. Caractéristique de
SPRAY MIST
®
L. Bouton à
SPRAY MIST®– Produit un fin brouillard pour humectage local.
M.Bouton à
SHOT OF STEAM®– Permet de produire une puissante décharge
de vapeur supplémentaire.
• Arrêt Automatique à
SAFETY SMART®(Certains Modèles Seulement) – Éteint le fer s’il est
inutilisé pendant 15 minutes en position verticale et 30 secondes en position de repassage.
A
I
J
K
L
M BCD E
F
G
H
VAPEUR
VAPEUR PLUS
VAPEUR ULTRA
CLEAN
M
A
E
T
S
D
Y
R
Page 9

17
16
REVÊTEMENT ANTIADHÉRENT
(Certains Modèles Seulement)
• Le revêtement antiadhérent empêche les tissus et les résidus d’amidon d’adhérer à la semelle.
• Laisser le semelle refroidir et l’essuyer avec un chiffon doux et une solution légèrement vinaigrée
• Ne pas utiliser de tampons à récurer, produits abrasifs ou solvants nettoyants chimiques,
qui risqueraient d’endommager le revêtement.
• REMARQUE: Les rayures sur une semelle antiadhérente n’ont pas d’effet sur l’efficacité du fer.
APRÈS
CHAQUE UTILISATION
• Ramener le bouton de vapeur en position DRY.
• Débrancher le fer de la prise de courant.
• Vider le réservoir d’eau en ouvrant le bouchon et en retournant le fer pour permettre l’écoulement
de l’eau. Remuer délicatement le fer pour éliminer les dernières gouttes d’eau.
• Refermer le bouchon et laisser le fer refroidir.
• Enrouler le cordon électrique sans serrer autour du passage prévu à cet effet.
Veiller à toujours poser le fer sur son talon d’appui.
• Lorsque le fer n’est pas utilisé, toujours placer le bouton de vapeur en position DRY.
S
OIN ET
ENTRETIEN
SOUPAPE À VAPEUR
La soupape à vapeur (attachée au bouton de réglage de la vapeur) est amovible pour permettre un
nettoyage facile des dépôts de peluches et de tartre. Nettoyer la soupape à vapeur uniquement en
cas de baisse de production de la vapeur. Pour démonter la soupape à vapeur, vider le réservoir
d’eau et poser le fer à repasser sur sa semelle. Mettre le bouton de vapeur en position CLEAN.
La soupape doit «sauter». Tirer sur la soupape à vapeur pour l’extraire complètement. Nettoyer son
extrémité en l’essuyant délicatement avec un chiffon humide. Pour remettre la soupape en place,
aligner CLEAN sur le repère du boîtier. Enfoncer et tourner dans le sens des aiguilles d’une montre
jusqu’à DRY.
R
EMARQUE: Ne pas verser d’eau dans l’orifice de la soupape à vapeur.
SEMELLE
En cas d’adhérence d’amidon ou d’autres matières à la semelle du fer à repasser, laisser refroidir et
essuyer avec un chiffon doux humide. Éviter de repasser sur les boutons-pression, fermetures à
glissière, rivets, etc. afin de ne pas rayer la semelle.
RANGEMENT
Toujours ranger le fer à repasser sur son talon d’appui.
Ne jamais l’entreposer avec la semelle vers le bas ou
dans l’emballage carton. Toujours mettre le bouton
de vapeur en position DRY avant de ranger le fer.
Enrouler le cordon.
Steam Master
®
Steam Master
®
LA CARACTÉRISTIQUE À SHOT OF STEAM
®
• La caractéristique à
SHOT OF STEAM®produit une décharge de vapeur supplémentaire qui pénètre
en profondeur dans les plis réfractaires. La caractéristique à
SHOT OF STEAM®s’utilise pendant
le repassage à sec comme à la vapeur, à condition que le réservoir d’eau soit au quart plein
au minimum et que le bouton de température soit réglé sur une valeur de la plage «vapeur».
• Laisser le fer chauffer pendant deux minutes environ.
• Appuyer sur le bouton blanc
SHOT OF STEAM®à plusieur reprises pour amorcer la pompe.
• Enfoncer le bouton
S
HOT OF STEAM
®
à trois ou quatre reprises supplémentaires afin de nettoyer
l’appareil.
• La caractéristique à
S
HOT OF STEAM
®
est maintenant prête à l’emploi. Elle peut être utilisée en
continu avec seulement une courte pause entre les décharges de vapeur. L’utilisation la plus
efficace de la caractéristique à
SHOT OF STEAM®se fait en tenant le fer en position horizontale
juste au-dessus du tissu à repasser.
• Lorsque le réservoir est vide, débrancher le fer et le remplir d’eau. Le Fer peut être rempli
pendant qu’il est chaud. Remarque: Il peut être nécessaire de réamorcer la pompe avant de
pouvoir utiliser de la nouveau caractéristique à
SHOT OF
STEAM
®
.
LA CARACTÉRISTIQUE À SPRAY MIST
®
(Certains Modèles Uniquement)
• Utiliser le vaporisateur à
SPRAY MIST®pour humecter les tissus aux plis réfractaires.
• Pour vaporiser, enfoncer fermement le bouton gris
SPRAY MIST®.
LA CARACTÉRISTIQUE DE ARRÊT AUTOMATIQUE SAFETY SMART
®
(Certains Modèles Uniquement)
• Lorsque le fer à repasser est branché sur une prise de courant 120 V, le voyant rouge s’allume
sans clignoter pour signaler que le fer est allumé.
• Si le fer est inutilisé pendant 15 minutes, il s’éteint automatiquement. Le voyant sur la
poignée clignote pour indiquer que le fer s’est éteint automatiquement et il
continue à clignoter jusqu’à ce que le fer soit remis en marche ou débranché.
• Si on laisse le fer en position de repassage, il commute au mode de mise à l’arrêt automatique
au bout de 30 secondes. Encore ici, le voyant sur la poignée clignote pour indiquer
que le fer s’est éteint automatiquement et il continue à clignoter jusqu’à ce que
le fer soit remis en marche ou débranché.
• REMARQUE: Si le bouton de température est placée en position Arrêt, le voyant continue
à clignoter quelques instants avant de s’éteindre.
• Pour remettre le fer en marche, le balancer d’avant en arrière. Le laisser chauffer puis reprendre
le repassage.
• REMARQUE: Bien que le fer ne produise plus de chaleur après son arrêt automatique,
prévoir un temps de refroidissement suffisant avant de toucher la semelle ou de ranger le fer.
15
min.
30
sec.
Page 10

19
18
TRUCS DE REPASSSAGE
• Lisez toujours l’étiquette sur les vêtements et suivez les directives de repassage du fabricant.
• Triez les articles à repasser d’après le type de tissu.
• Repasser en premier les vêtements nécessitant de basses températures et peu de vapeur.
Ceci permet d’éviter d’endommager les vêtements avec un fer trop chaud.
• Si vous avez des doutes à propos de la composition en fibres d’un vêtement, mettez à l’essai
une petite surface telle qu’une maille ou une section intérieure de l’ourlet avant de repasser
une section visible. Commencez avec une basse température et augmentez graduellement
la chaleur afin de trouver le réglage approprié.
• Lorsque vous réduisez la température pour repasser des tissus fragiles, laissez refroidir
le fer environ 5 minutes jusqu’à la nouvelle valeur de température.
• Repasser à la vapeur par longs mouvements lents. Ceci permet à la vapeur de pénétrer
dans le tissu tout en laissant la chaleur de la semelle sécher l’humidité.
• Pour repasser les doublures, retourner le vêtement. Veiller à ne pas utiliser un fer trop chaud
afin d’éviter que la doublure ne fonde ou adhère à la semelle.
• Repasser les fermetures à glissière à l’aide d’un tissu protecteur ou s’assurer que la glissière
est fermée et repasser sur le rabat. Ne jamais repasser directement sur une fermeture à glissière
non protégée.
• Consulter le tableau ci-après pour connaître la température optimale et la meilleure méthode
en fonction du tissu à repasser.
E
NTRETIEN
Aucune opération d’entretien autre que les soins recommandés plus haut dans ce document
n’est nécessaire. Toutefois, ce qui suit est une liste des problèmes les plus fréquents avec
leur solution. Si, pour quelle que raison que ce soit, le fer à repasser continuait à présenter
l’un de ces problèmes ou nécessitait toute autre réparation, le renvoyer au Centre de Réparation
Électroménager de Sunbeam ou appeler notre Numéro d’assistance à la clientèle au 1-800-597-5978.
SYMPTÔME SOLUTION
Le Fer dégage une odeur • Le Fer dégage une odeur la première fois qu’il est allumé.
• Compter dix minutes avant que l’odeur disparaisse.
Le Fer ne chauffe pas • Le Fer doit être branché exclusivement sur une prise
secteur 120 V.
• Le bouton de température doit être réglé sur la valeur
désirée.
• Il est possible qu’on ait actionné la fonction de mise à l’arrêt
automatique. (Sur Certains Modèles Uniquement)
Balancer le fer d’avant en arrière pour le remettre en marche.
Le Fer ne produit vapeur • Le réservoir d’eau est vide. Mettre le bouton pas de sur DRY
et ajouter de l’eau.
• Laisser le fer chauffer puis mettre le bouton de vapeur
sur l’un des réglages avec vapeur. Choisir une température
dans la plage vapeur.
• Il est possible que le fer soit obstrué. Démonter la soupape
à vapeur en plaçant le bouton sur CLEAN. Remettre la
soupape en place et mettre le bouton sur l’un des réglages
avec vapeur.
La fonction
S
HOT OFSTEAM
®
• Le réservoir d’eau doit être au moins
ne fonctionne pas • au quart plein.
• Le bouton de température doit être en position «Vapeur».
• Le Fer doit être en position horizontale.
• Amorcer brièvement la pompe.
• Prévoir une courte pause entre les décharges de vapeur.
• Veiller à bien enfoncer complètement le bouton
S
HOT OFSTEAM
®
.
La fonction
S
PRAYMIST
®
• Le réservoir d’eau doit être au moins au quart plein.
ne fonctionne pas
Le Fer fuit • Le bouton de réglage de la vapeur doit être en position DRY
jusqu’à ce que le fer soit chaud.
• Le réglage de température choisi est trop bas pour
la production de vapeur. (Voir le Guide de Repassage)
Page 11

21
20
RÉGLAGE DE RECOMMANDATION
TISSU T
EMPÉRATURE DE REPASSAGE
Acrilique • Repasser à sec sur l'envers.
Rayonnes • Repasser à sec l’envers pendant qu’il est encore humide.
d'Acétate
Soie • • Repasser sur l’envers. Utiliser un tissu protecteur
pour éviter le lustrage.
Nylon • • Repasser sur l’envers humide.
Polyester • • Repasser sur l’envers humide.
Rayonne • • Repasser sur l’envers.
Viscose • • Repasser essentiellement à sec. Utiliser la vapeur
uniquement suivant les indications du fabricant.
Laine • • Repasser à la vapeur sur l’envers ou utiliser
un tissu protecteur.
Mélanges • • Repasser à la vapeur sur l’envers ou utiliser
de Lainages un tissu protecteur.
Mélanges • • Consulter l’étiquette et suivre les indications
de Coton du fabricant. Régler en fonction de la fibre
nécessitant le réglage le plus bas.
Velours • • • Repasser à la vapeur sur l’envers ou utiliser un tissu
Côtelé protecteur et brosser pour redresser les fibres.
Coton • • • Repasser à sec le tissu encore humide ou utiliser
de la vapeur supplémentaire ou
S
HOT OFSTEAM
.
®
Repasser les tissus sombres sur l’envers pour
éviter le lustrage.
Lins • • • Repasser à la vapeur sur l’envers ou utiliser un tissu
protecteur pour éviter le lustrage, en particulier les
couleurs sombres. Repasser à sec le tissu encore
humide ou utiliser de la vapeur ou
S
HOT OFSTEAM
.
®
Repasser chaque portion jusqu’à ce qu’elle
soit totalement sèche.
Denim • • • Utiliser de la vapeur supplémentaire
ou
S
HOT OFSTEAM
.
®
GUIDE DE REPASSAGE
Dry Ironing at any setting
Steam and SHOT OF STEAM
®
Steam and SHOT OF STEAM
®
Steam and SHOT OF STEAM
®
G
UARANTIE
L
IMITÉE DE
1 A
N
Sunbeam Products, Inc, ou au Canada, Sunbeam Corporation (Canada) Limited (collectivement « Sunbeam »)
garantit que pendant une période de un an à partir de la date d’achat, ce produit sera exempt de défauts de
matériaux et de main d’œuvre. Sunbeam, selon son choix, réparera ou remplacera ce produit ou tout
composant du produit étant trouvé défectueux durant la période de couverture de la garantie. Le remplacement
sera réalisé au moyen d’un produit ou composant neuf ou reconstruit. Si le produit n’est plus disponible,
un produit d’une valeur similaire ou supérieure fera lieu de replacement. Ceci est votre garantie exclusive.
Cette garantie est valide pour l’acheteur au détail d’origine à partir de la date d’achat au détail initiale et n’est
pas transférable. Gardez le reçu de vente d’origine. Une preuve d’achat est requise pour obtenir l’application
de la garantie. Les concessionnaires, les centres de réparation Sunbeam ou les magasins au détail vendant
des produits Sunbeam n’ont pas le droit d’altérer, modifier ou de quelconque façon changer les termes et
conditions de cette garantie.
Cette garantie ne couvre pas l’usure normale des pièces ni les dégâts provenant d’un des suivants : mauvaise
ou négligente utilisation du produit, emploi sur un mauvais courant ou une mauvaise tension, utilisation
contraire aux instructions de fonctionnement, démontage, réparation ou modification par quiconque autre
que Sunbeam ou un centre de réparation Sunbeam agréé. De plus, la garantie ne couvre pas les cas de force
majeure, tels qu’incendies, inondations, ouragans et tornades.
Quelles sont les limites de responsabilité de Sunbeam ?
Sunbeam ne sera pas responsable des dégâts secondaires ou conséquents causés par la rupture de toute
garantie ou condition exprimée, tacite ou statutaire.
Dans la mesure des lois applicables, toute garantie ou condition tacite d’aptitude à être vendu ou utilisé
dans un but particulier est limitée en durée à la durée de la garantie ci-dessus.
Sunbeam rejette toute autre garantie, condition ou représentation exprimée, tacite, statutaire ou autre.
Sunbeam ne sera pas responsable des dégâts, quel qu’en soit la sorte, résultant de l’achat, de l’utilisation,
de l’abus du ou de l’incapacité à utiliser le produit y compris les dégâts secondaires, spéciaux, conséquents
ou similaires ; ni des pertes de revenus ; ni de toute rupture de contrat, fondamentale ou autre ; ni de toute
plainte amenée contre l’acheteur par toute autre partie.
Quelques provinces, états ou juridictions ne permettent pas l’exclusion ou la limitation des dégâts secondaires
ou conséquents ni les limitations sur la durée de garantie tacite, donc il se peut que les limitations ou
exclusions ci-dessus ne s’appliquent pas à vous.
Cette garantie vous donne des droits légaux précis et il se peut que vous ayez aussi d’autres droits
qui varient d’une province, d’un état ou d’une juridiction à l’autre.
Comment Obtenir une Réparation Sous Garantie ?
Aux U.S.A. –
Pour toute question au sujet de cette garantie ou si vous désirez obtenir une réparation sous garantie,
veuillez appeler le 1.800.458.8407 et l’adresse d’un centre de réparation convenable vous sera fournie.
Au Canada –
Pour toute question au sujet de cette garantie ou si vous désirez obtenir une réparation sous garantie,
veuillez appeler le 1.800.458.8407 et l’adresse d’un centre de réparation convenable vous sera fournie.
Aux U.S.A., cette garantie est offerte par Sunbeam Products, Inc., située à Boca Raton, Florida 33431.
Au Canada, cette garantie est offerte par Sunbeam Corporation (Canada) Limited, située à 5975 Falbourne
Street, Mississagua, Ontario L5R 3V8.
VEUILLEZ NE PAS RENVOYER CE PRODUIT
À L’UNE DE CES ADRESSES NI AU LIEU D’ACHAT.
Page 12

23
22
Cuando utilice su plancha, siempre debe de seguir algunas medidas básicas
de seguridad, incluyendo las siguientes:
LEA TODAS LAS INSTRUCCIONES
1. Utilice la plancha sólo para lo que fue diseñada.
2. Para protegerse contra el riesgo de descargas eléctricas, no sumerja
la plancha en agua o en cualquier otros líquidos.
3. La plancha siempre deberá estar “APAGADA” antes de conectar o desconectar
de la toma de corriente eléctrica. Nunca jale el cable eléctrico para
desconectarlo de la toma de corriente eléctrica; por el contrario,
agarre la clavija y desconecte.
4. No permita que el cable eléctrico toque superficies calientes. Deje que
la plancha se enfríe completamente antes de guardarla. Enrede el cable
eléctrico alrededor de la plancha para almacenarla.
5. Siempre desconecte la plancha de la toma de corriente eléctrica cuando
la llene con agua o cuando la vacíe y cuando no esté en uso.
6. No opere la plancha con un cable eléctrico dañado o después de que
la plancha se ha caído o dañado. Para evitar el riesgo de descarga eléctrica,
no desensamble la plancha. Llévela con una persona calificada para su
examinación y reparación. Si la plancha ha sido ensamblada de nuevo
incorrectamente, puede existir el peligro de descargas eléctricas cuando
se utilice.
7. Supervisión cercana es necesaria cuando cualquier electrodomésticos
sea usado por o cerca de niños. No deje sin atender la plancha cuando
esté conectada o cuando esté sobre la tabla de planchado.
8. Pueden ocurrir quemaduras al tocar agua y partes metálicas calientes o
el vapor que sale de las ventilas. Tenga cuidado cuando invierta la posición
de una plancha de vapor – puede haber agua caliente en el tanque de agua.
9. Si la plancha no está funcionando de una forma normal, desconecte de
la toma de corriente eléctrica y lleve el aparato con el personal de servicio
para que sea revisada.
10. Su plancha
SUNBEAM®está diseñada para que descanse sobre su base
posterior o talón. No deje de atender su plancha. No coloque la plancha sobre
una superficie sin protección, aún cuando está sobre su base de descanso.
INSTRUCIONES ESPECIALES
1. Este aparato tiene una potencia de 1200 Watts*. Para evitar que el circuito
eléctrico se sobre cargue, no opere otro aparato de alta potencia en
el mismo circuito.
2. Si un cable de extensión es absolutamente necesario, un cable de 10 Amperios
debe de usarse. Cables con un amperaje menor pueden sobre calentarse.
Tenga cuidado cuando coloque el cable de extensión ya que no debe de dejar
que cuelgue, jale o se pueda poder tropezar con él.
PARA PRODUCTOS COMPRADOS EN ESTADOS UNIDOS Y CANADÁ ÚNICAMENTE
Para reducir el riesgo de descargas eléctricas, este aparato cuenta con una clavija
polarizada (una cuchilla es más ancha que otra). Como medida de seguridad,
esta clavija entra sólo de una manera en un enchufe polarizado. Si la clavija
no encaja en el enchufe simplemente colóquela al revés. Si aún así no encaja
llame a un electricista calificado. De ninguna manera intente modificar esta
medida de seguridad.
* En México, la plancha funciona a 127 Voltios, 1350 Watts. Si un cable
de extensión es necesario, un cable de 13 Amperios debe de usarse.
PRECAUCIONES IMPORTANTES
GUARDE ESTAS INSTRUCCIONES
Page 13

25
24
CARACTERÍSTICAS
A. Disco de Vapor Variable – Ajusta el nivel de vapor para las diferentes necesidades
de planchado. Para planchar en seco, gire el disco a SECO/DRY. Para planchar con vapor,
gire el disco a la posición . Para más vapor gire el disco a la posición o a la
posición . (Observe la Guía de Planchado para obtener las
recomendaciones de las temperaturas adecuadas).
B. Válvula de Vapor (conectada al disco de vapor variable) – Removible para prevenir
la acumulación de residuos.
C. Marca Para Indicación de Vapor
D. Indicador de Apagado Automático (Algunos Modelos Solamente)
E.
Disco de Temperatura – Controla la salida de calor de la plancha. Ajuste el disco de acuerdo
a las necesidades del planchado. Para usar una temperatura baja, gire el disco y colóquelo en
el primer punto. Para usar una temperatura media, gire el disco y colóquelo en el segundo
conjunto de puntos. Para temperaturas más altas, gire el disco y colóquelo en el tercer
conjunto de puntos. (Observe la Guía de Planchado para obtener las recomendaciones
de las temperaturas adecuadas).
F. Protector del Cable – Con un pivote que se mueve hacia arriba y hacia abajo y que ayuda
como soporte previniendo que el cable se arrastre por la tela. El anillo flexible protege que
el cable se queme.
G. Marca Para Indicar la Temperatura
H. Espacio para Enredar el Cable – Para almacenar el cable rápida y convenientemente.
I. Suela – Tiene un canal a todo lo largo del borde de la plancha, para planchar con más
comodidad por debajo de los botones de camisas o blusas, algunos modelos no tienen
acabado antiadherente.
J. Cubierta Deslizable en el Tanque de Agua – Previene que polvo y materias extrañas
entren al tanque de agua; también ayuda a evitar que salpica el agua mientras se
está planchando.
K. La Característica de
SPRAY MIST
®
L. Botón
SPRAY MIST®– Provee un fino rocío que evita las manchas provocadas por excesiva
salida de agua.
M.Botón
S
HOT OFSTEAM
®
– Provee penetrante vapor extra para un máximo poder.
• Apagado Automático
SAFETY SMART®(Algunos Modelos Solamente) – Apaga la plancha
si ha permanecido inmóvil por 15 minutos en posición vertical por 30 segundos en la posición
de planchado.
ANTES DE USAR POR PRIMERA VEZ
• Cuando encienda por primera vez, su nueva plancha emitirá vapores por aproximadamente
10 minutos. Esto es normal y se debe al calentamiento inicial de los materiales con los
que está fabricada. No son peligrosos y no afectarán el desempeño del producto.
Esto sólo sucederá la primera vez.
• Antes del primer uso, limpie las ventilas de vapor usando la función
SHOT OF STEAM.
®
Después de limpiar las ventilas, pase la plancha sobre un paño de algodón para remover
cualquier residuo.
• Cuando no esté planchando, siempre coloque el disco de vapor en la posición SECO/DRY.
(Observe el Diagrama)
INSTRUCCIONES PARA USO
PLANCHADO EN SECO
• Conecte el cordón en una toma de corriente alterna
de 120 Voltios. En aparatos que tengan la función
de apagado automático, la luz de apagado automático
se iluminará.
• Gire el disco de temperatura a la posición deseada.
(Observe la Guía de Planchado para Obtener las
Recomendaciones de las Temperaturas Adecuadas)
Mientras la plancha se calienta, coloque la plancha sobre
su base posterior en una superficie estable y protegida.
• Coloque el disco de vapor en la posición SECO/DRY para prevenir que el vapor fluya
si hay agua en el tanque.
PLANCHADO CON VAPOR
• Asegúrese de que el enchufe es removido del contacto de la pared antes de llenar la plancha
con agua.
• Gire el disco de vapor a la posición SECO/DRY.
• Coloque la plancha sobre su base posterior o talón y abra la tapa del tanque de agua.
Vierta agua lentamente dentro del tanque de agua. Llene con agua hasta el nivel máximo.
Para prevenir contra el riesgo de quemaduras, tenga cuidado al llenar con agua
una plancha que esté caliente. Las quemaduras pueden ocurrir al tocar las partes
calientes de metal, agua caliente o vapor. Empuje firmemente para cerrar la tapa.
N
OTA
:
Gracias al diseño especial de esta plancha, puede usar agua del grifo. Sin embargo,
se recomienda usar agua destilada o desmineralizada en áreas que tienen agua muy dura.
• Gire el disco de temperatura a cualquiera de los niveles de temperatura que están dentro
de la banda de vapor y permita que la plancha se caliente aproximadamente 2 minutos
antes de planchar. Mientras se calienta, coloque la plancha sobre su base posterior
o talón de descanso en una superficie estable y protegida.
• Gire el disco de vapor a la posición para vapor normal, o a para vapor extra
o a para ultra vapor.
N
OTA
: Cuando use vapor extra o vapor ultra,
puede ser necesario llenar el tanque con agua más veces.
A
I
J
K
L
M BCD E
F
G
H
VAPOR
VAPOR EXTRA
VAPOR ULTRA
CLEAN
M
A
E
T
S
D
Y
R
Page 14

27
26
LA CARACTERÍSTICA DE SHOT OF STEAM
®
• La función
SHOT OF STEAM®provee una descarga extra potente de vapor para una penetración
más profunda en las arrugas difíciles. La función
S
HOT OF STEAM
®
puede usarse con el planchado
en seco o con el planchado a vapor siempre que el tanque esté lleno de agua al menos a 1/4
de su capacidad y el disco de temperatura esté colocado en la posición de la banda de vapor.
• Permita que la plancha se caliente por aproximadamente dos minutos.
• Presione el botón blanco de la función
SHOT OF STEAM®varias veces para preparar la bomba
de agua.
• Bombée el botón
S
HOT OF STEAM
®
otras tres o cuatro veces para limpiar la unidad.
• La función
S
HOT OF STEAM
®
está ahora lista para usarse. La función
SHOT OF
STEAM
®
puede
usarse continuamente con sólo una corta pausa entre cada descarga. La función
SHOT OF
STEAM®es más efectiva con la plancha sostenida en posición horizontal elevada ligeramente
por arriba de la prenda que está planchando.
• Si el tanque se queda sin agua, desconecte la plancha y rellene de agua. La plancha debe de ser
llenada con agua mientras está caliente.
NOTA:puede ser necesario preparar otra vez la bomba
de agua antes de usar la función
S
HOT OF STEAM
®
nuevamente.
LA CARACTERÍSTICA DE SPRAY MIST
®
(Algunos Modelos Solamente)
• Use la función
S
PRAYMIST
®
para humedecer las telas que tengan arrugas difíciles.
• Presione el botón gris
S
PRAYMIST
®
firmemente para producir el rocío.
LA CARACTERÍSTICA DEL APAGADO AUTOMÁTICO SAFETY SMART
®
(Algunos Modelos Solamente)
• Cuando la plancha está conectada en una toma de corriente alterna de 120 Voltios,
la luz indicadora roja señala que la plancha está encendida.
• Si la plancha se deja en posición vertical, sobre su base de descanso durante 15 minutos,
la plancha dejará de calentar. La señal de luz en el mango de la plancha parpadeará
hasta que la plancha se apague automáticamente y continuará parpadeando hasta
que la plancha sea desconectada o encendida nuevamente.
• Si la plancha se deja en la posición de planchado, la función de apagado automático se activará
en 30 segundos. Una vez más, la señal de luz en el mango de la plancha
parpadeará para indicar la plancha se apagó automáticamente y continuará
parpadeando hasta que la plancha sea desconectada o encendida nuevamente.
• NOTA: Si el disco de temperatura ha sido girado a la posición de apagado, la luz continuará
parpadeando y después se apagará.
• Para encender la plancha nuevamente, mueva la plancha hacia adelante y hacia atrás.
Permita que la plancha se caliente y continúe planchando como siempre.
• NOTA: A pesar de que el calor no es generado una vez que la plancha ha sido apagada
automáticamente, permita que transcurra el tiempo suficiente para que la plancha se enfríe
antes de tocar la suela o almacenar la plancha.
ACABADO ANTIADHERENTE
(Algunos Modelos Solamente)
• El acabado antiadherente previene que la tela y los residuos de almidón se peguen a la suela.
• Para limpiar la suela, permita que la plancha se enfríe y limpie con un paño usando una
solución suave de vinagre .
• No use fibras o esponjas, limpiadores abrasivos o solventes químicos, ya que pueden dañar
el acabado de la suela.
•
NOTA:
Cualquier raspadura o rayón en la suela de la plancha, no afectará su desempeño.
CUIDADOS
DESPUÉS DE C ADA
USO
• Gire el disco de vapor a la posición SECO/DRY.
• Desconecte la plancha de la toma de corriente.
• Vacíe el tanque de agua abriendo la tapa del tanque de agua e invirtiendo la plancha para
permitir que el agua fluya por el orificio. Sacuda la plancha ligeramente para remover las gotas
de agua que hayan sobrado.
• Cierre la tapa y permita que la plancha se enfríe.
• Enrolle el cable alrededor del espacio para guardarlo. Siempre guarde la plancha sobre su talón
de descanso.
• Cuando no esté planchando, siempre coloque el disco de vapor a la posición SECO/DRY.
CUIDADOS Y MANTENIMIENTO
VÁLVULA DE VAPOR
La válvula de vapor (junto al disco de vapor variable) es removible para facilitar la limpieza de
pelusas y residuos. Es necesario limpiar la válvula de vapor sólo si usted nota una reducción
en el desempeño del aparato al planchar con vapor. Para remover la válvula de vapor, vacíe el
tanque de agua y coloque la plancha sobre la suela. Gire el disco de vapor variable a la posición
LIMPIAR/CLEAN. La válvula “saltará hacia afuera.” Jale hacia arriba para remover completamente la
válvula. Limpie la punta suavemente con un paño húmedo. Para reemplazar, alinee la marca para
indicar con la posición LIMPIAR/CLEAN. Presione hacia abajo y gire en sentido de las manecillas
del reloj a la posición SECO/DRY.
NOTA: No vierta agua dentro del orificio de la válvula de vapor.
SUELA
Si almidón o cualquier otro material se adhiere a la suela de la plancha, permita que la plancha
se enfríe y limpie con un paño suave y húmedo. Evite planchar sobre cierres de contacto,
cierres de metal o cremalleras, ribetes en los pantalones de mezclilla o jeans, etc.,
ya que puede rayar la suela de la plancha.
ALMACENAMIENTO
Siempre almacene su plancha en el talón de
descanso o base posterior. Nunca almacene con la
suela hacia abajo o dentro del empaque. Siempre
almacene su plancha con el disco de vapor
colocado en la posición SECO/DRY. Enrolle el
cable alrededor del espacio para almacenarlo.
Steam Master
®
Ste
a
m
M
a
ster
®
15
min.
30
sec.
Page 15

29
28
MANTENIMIENTO
La plancha no necesita ningún otro mantenimiento que no sea el recomendado en las instrucciones
de este manual. Sin embargo, en seguida encontrará una lista de preguntas que se hacen
con mayor frecuencia acompañadas de sus repuestas. Si por cualquier razón su plancha
continúa presentando uno de estos síntomas, o requiere reparación por cualquier otro motivo,
envíe el producto al Centro de Servicio de Aparatos Sunbeam o llame a la Línea de Ayuda
al Consumidor 1-800-597-5978.
P
ROBLEMA
S
OLUCIONES
La plancha emite • La plancha emite un olor extraño cuando se apaga por primera vez.
un olor extraño
• Permita que transcurran 10 minutos para que el olor desaparezca.
La plancha no calienta • La plancha solamente debe conectarse en una toma de corriente
eléctrica alterna de 120 Voltios.
•
El disco de temperatura debe de colocarse en la temperatura deseada.
• La función de apagado automático puede estar activada.
(Algunos Modelos Solamente) Mueva la plancha hacia adelante
y hacia atrás para encenderla de nuevo.
La plancha • El tanque de agua puede estar vacío. Gire la válvula de vapor
no genera vapor a la posición SECA/DRY y agregue agua.
• Permita que la plancha se caliente, después coloque el disco
de vapor en una de las posiciones para usar vapor.
Use temperaturas que estén dentro de la banda de vapor.
• Puede haber una obstrucción. Remueva la válvula para vapor girando
a la posición LIMPIAR/CLEAN. Coloque de nuevo y ponga el disco
de vapor en una de las posiciones para usar vapor.
La función
SHOT OF STEAM®• El tanque de agua debe de estar lleno por lo menos a 1/4 de
no funciona su capacidad.
• La temperatura debe colocarse en la posición de vapor.
• La plancha debe de colocarse en posición horizontal.
• Bombee un poco.
• Permita una ligera pausa entre cada descarga de vapor.
• Asegúrese de presionar completamente el botón
SHOT OF STEAM®.
La función
SPRAY MIST®• El tanque de agua debe de estar lleno por lo menos a 1/4 de
no funciona su capacidad.
La plancha • El disco de vapor variable debe ser colocado en la posición
está escurriendo agua SECO/DRY hasta que la plancha esté caliente.
• La temperatura es demasiado baja para producir vapor
(observe la guía de planchado).
CONSEJOS DE PLANCHADO
• Siempre lea las etiquetas en las prendas y siga las recomendaciones que le dé el fabricante
de la tela.
• Organice las prendas que planchará de acuerdo al tipo de tela.
• Las prendas que requieren bajas temperaturas y poco vapor, deben ser planchadas primero
para evitar dañar las prendas con una plancha que está demasiado caliente.
• Si usted no está seguro de los materiales contenidos en una prenda, inicie en una zona de
la prenda escondida o que no se note, tales como las costuras o el revés, haga esto antes
de planchar en una zona visible. Inicie con una temperatura baja y gradualmente incremente
la temperatura hasta encontrar el nivel de temperatura adecuado.
• Cuando reduzca la temperatura para planchar telas delicadas, deje pasar aproximadamente
5 minutos para que la temperatura en la plancha baje al nuevo nivel.
• Cuando planche con vapor, pase la plancha sobre la tela con movimientos lentos y largos.
Esto permitirá que el vapor penetre en la tela mientras que el calor en la suela seca la humedad.
• Para planchar los forros, planche por el revés. Tenga cuidado de no usar una plancha demasiado
caliente ya que el forro puede derretirse o pegarse a la suela de la plancha.
• Para planchar cierres o cremalleras, use un paño o asegúrese de que el cierre o cremallera
esté cerrado y planche el revés. Nunca planche directamente sobre un cierre o cremallera
sin protección.
• Use el siguiente cuadro para conocer el método y selección que mejor se ajusten a la tela que
desea planchar.
Page 16

31
RECOMENDACIONES
TELA T
EMPERATURA DE PLANCHADO
Acrílico • Plancha seca en el lado contrario.
Acetato • Plancha seca en el lado contrario mientras esté húmeda.
Seda • • Planche en el lado contrario. Use un paño para prevenir
las marcas de brillo.
Nilón • • Planche en el lado contrario mientras esté húmeda.
Poliester • • Planche en el lado contrario mientras esté húmeda.
Rayón • • Planche en el lado contrario.
Viscosa • • Principalmente plancha seca. Puede usar vapor su así lo
indica el fabricante.
Lana • • Planche con vapor en el lado contrario o use un paño
para planchar.
Mezclas • • Planche con vapor en el lado contrario o use un paño para
de Lana planchar.
Mezclas • • Lea la etiqueta y siga las instrucciones del fabricante.
de Algodón Use la temperatura que se indica para el material que requiera
el nivel más bajo.
Pana • • • Plancha con vapor en el lado contrario o use un paño
al planchar y cepille para levantar el tejido.
Algodón • • • Plancha seca mientras esté húmeda o use vapor extra y/o
S
HOT OFSTEAM
.®Planche telas obscuras en el lado contrario
para evitar que la tela brille.
Lino • • • Planche en el lado contrario o use un paño para planchar para
prevenir las marcas de brillo, especialmente con colores
obscuros. Plancha seca mientras esté húmeda o use vapor y/o
S
HOT OFSTEAM
.®Planche cada sección hasta que esté seca.
Mezclilla • • • Use vapor extra y/o
S
HOT OFSTEAM
.
®
30
GUÍA DE PLANCHADO
Vapor y SHOT OF STEAM
®
Vapor y SHOT OF STEAM
®
Planchado en Seco en cualquier temperatura
Vapor y SHOT OF STEAM
®
G
ARANTÍA
L
IMITADA DE
1 A
ÑO
Sunbeam Products, Inc, o si en Canadá, Sunbeam Corporation (Canadá) Limited (colectivamente “Sunbeam”) garantizan que
este producto estará libre de defectos en material o mano de obra por un período de un año a partir de la fecha de la compra.
Sunbeam, a su elección, reparará o reemplazará este producto o cualquier componente del producto que se encuentre
defectuoso
durante el período de garantía. El reemplazo será efectuado por un producto o componente nuevo o remanufacturado.
Si el producto ya no está disponible, el reemplazo podrá efectuado con un producto similar de igual o mayor valor.
Esta es su garantía exclusiva.
Esta garantía es válida para el comprador original al detalle desde la fecha de compra original al detalle y no es transferible.
Guarde el recibo de venta original. Se requiere prueba de compra para obtener la garantía. Los concesionarios Sunbeam,
centros de servicio, o almacenes de ventas al detalle de productos Sunbeam no tienen el derecho de alterar, modificar
o cambiar, de manera alguna, los términos y condiciones de esta garantía.
Esta garantía no cubre el desgaste normal de las piezas o daños resultantes de cualquiera de los siguientes: uso negligente
o mal uso del producto, uso en voltaje o corriente inapropiada, uso contrario a las instrucciones de operación, desarme,
reparación o alteración por cualquier persona que no sea Sunbeam o de un centro de servicio autorizado Sunbeam.
Además, esta garantía no cubre: Actos de la naturaleza, tales como incendios, inundaciones, huracanes o tornados.
¿Cuales son los límites de Responsabilidad de Sunbeam?
Sunbeam no será responsable por ningún daño incidental o consecuente causados por el incumplimiento de la garantía
o condición expresa, implícita o reglamentaria.
Excepto hasta donde lo prohiben las leyes aplicables, cualquier garantía implícita o condición de comerciabilidad
o aptitud para un propósito particular, está limitada en duración a la duración de la garantía descrita arriba.
Sunbeam niega cualquier otra garantía, condición o representación, expresa, implícita, reglamentaria o de otra manera.
Sunbeam no será responsable por ningún tipo de daño que resulte de la compra, uso o mal uso, o inhabilidad de usar el
producto incluyendo daños incidentales, especiales, consecuentes o similares o pérdida de lucro, o por cualquier incumplimiento
de
contrato, fundamental o de otra manera, o por cualquier reclamo contra el comprador iniciado por cualquier otra tercera persona.
Algunas provincias, estados o jurisdicciones no permiten la exclusión o la limitación de daños incidentales o consecuentes,
o limitaciones sobre cuanto dura una garantía implícita, de modo que las limitaciones o exclusiones mencionadas arriba
pueda que no le aplique a usted.
Esta garantía le otorga derechos legales específicos, y pueda que usted tenga otros derechos, los cuales varían de provincia
a provincia, de estado a estado o de jurisdicción a jurisdicción.
Cómo Obtener Servicio de Garantía
En los Estados Unidos –
Si usted tiene alguna pregunta relacionada con esta garantía o quisiera obtener servicio de garantía, por favor llame al teléfono
800.458.8407
y le proporcionaremos la dirección del centro de servicio más conveniente para usted.
En Canadá –
Si usted tiene alguna pregunta relacionada con esta garantía o quisiera obtener servicio de garantía, por favor llame al teléfono
800.458.8407
y le proporcionaremos la dirección del centro de servicio más conveniente para usted.
En los Estados Unidos, esta garantía es ofrecida por Sunbeam Products, Inc., situada en Boca Ratón, Florida 33431.
En Canadá, esta garantía es ofrecida por Sunbeam Corporation (Canadá) Limited, situada en el 5975 Falbourne Street,
Mississagua, Ontario L5R 3V8.
POR FAVOR, NO RETORNE ESTE PRODUCTO A NINGUNA
DE ESTAS DIRECCIONES NI AL LUGAR DONDE LO COMPRÓ.
Page 17

33
32
Sempre que utilizar o seu ferro elétrico, você deve tomar algumas medidas básicas
de segurança, como as que seguem:
LEIA TODAS AS INSTRUÇÕES ATENTAMENTE
1. Utilize o ferro elétrico somente para o que ele foi designado.
2. Para evitar risco de choque elétrico, não submerja o fio, ou a tomada ou o aparelho
em água ou em qualquer outro líquido.
3. O ferro elétrico deverá sempre ser DESLIGADO antes de conectá-lo ou desconectá-lo
da tomada. Nunca puxe o fio elétrico para desconectá-lo da tomada; pelo contrário,
segure o plugue e desconecte-o.
4. Não permita que o fio elétrico toque superfícies quentes. Deixe que o ferro elétrico
se esfrie completamente antes de guardá-lo. Enrole o fio ao redor do ferro elétrico
para guardá-lo.
5. Sempre desconecte o ferro elétrico da tomada quando estiver enchendo-o de água
ou esvaziando-o e também quando este não estiver em uso.
6. Não use o ferro elétrico com o fio danificado ou após ter apresentado algum defeito
ou após ter caído no chão. Para evitar o risco de curto circuito, não abra ou desmonte
o ferro elétrico. Leve-o à uma pessoa qualificada para consertos e/ou reparos.
Se o ferro elétrico for aberto ou desmontado incorretamente, pode haver risco
de descargas elétricas quando for utilisá-lo.
7. É necessário manter uma supervisão muito próxima quando este aparelho for usado
por, em ou perto de crianças. Não deixe o ferro elétrico sozinho quando estiver ligado
ou na tábua de passar.
8. Podem ocorrer queimaduras se tocar nas partes metálicas quentes, água quente ou
vapor que sai dos orifícios. Tome cuidado ao virar um ferro de passar para baixo –
poderá ainda haver água quente no reservatório de água.
9. Se o ferro elétrico não estiver funcionando normalmente desconecte-o da tomada
e submeta-o a assistência por técnico competente.
10. Seu ferro elétrico foi modelado para descansar sobre sua base posterior. Não deixe
de cuidar do seu ferro elétrico. Não coloque o ferro elétrico sobre uma superfície
sem proteção, mesmo quando estiver sobre sua base de descanso.
INSTRUÇÕES ESPECIAIS
1. Este aparelho é de 1200 Watts* de potência. Para evitar que o circuito elétrico
se sobrecarregue, não use outro aparelho de alta potência no mesmo circuito.
2. Se um fio de extensão for absolutamente necessário, um fio de 10 Amperes deve
ser usado. Fios com amperagem menor podem esquentar-se muito. Tenha cuidado
quando colocar o fio de extensão para que ninguém chute, pise ou tropeçe nele.
PARA PRODUTOS COMPRADOS SOMENTE NOS ESTADOS UNIDOS E CANADÁ
Este aparelho conta com um plug polarizado (um dos contatos é mais largo do
que outro). Para evitar risco de choque elétrico, este plug encaixa-se somente
em um plug unidirecional polarizado. Se o plug não se encaixar totalmente dentro
da tomada, inverta o mesmo. Se ainda assim não encaixar, contate um eletricista
competente. Não tente desativar este recurso de segurança.
* No México, onde o ferro funciona a 127 Volts, 1350 Watts. Se um fio de extensão
for necessário, um fio de 13 Amperes deve ser usado.
PRECAUÇÕES IMPORTANTES
GUARDE ESTAS INSTRUÇÕES
Page 18

35
34
CARACTERÍSTICAS
A. Seletor de Controle de Vapor Variável – Ajusta a quantidade de vapor para diferentes
necessidades de aplicação. Para passar a seco, gire o seletor para DRY (Seco). Para passar
a vapor, gire o seletor para . Para maior quantidade de vapor, gire o seletor para ou
. (Consulte o Manual de Passagem a Ferro para as Regulagens Recomendadas)
B. Válvula de Vapor (conectada ao seletor de controle variável de vapor) – Removível para
impedir a acumulação de impurezas.
C. Marca de Indicação de Vapor
D. Indicador de Desligamento Automático (Alguns Modelos Somente)
E. Disco de Temperatura – Controla a saída de calor do ferro elétrico. Ajuste o bico de acordo
com as suas necessidades. Para usar uma temperatura baixa, gire o disco e coloque-o no ponto
inicial. Para usar uma temperatura média, gire o disco ou coloque-o no segundo conjunto de
pontos. Para temperaturas mais altas, gire o disco e coloque-o no terceiro conjunto de pontos.
Observe o manual para obter as recomendações das temperaturas adequadas.
F. Protetor do Fio – Com um pivote que move para cima e para abaixo e que ajuda como
suporte prevenindo que o fio se arraste pela roupa.
G. Marca de Indicação de Temperatura
H. Espaço para Enrolar o Fio – Para armazenar o fio rápido e convenientemente.
I. Chapa – Conta com entranhas amplas para botão, para maior conveniência ao passar
camisas e blusas; alguns modelos contam com revestimento não aderente.
J. Tampa Deslizante no Tanque de Água – Previne que poeira e corpos estranhos entrem
no tanque de água; também ajuda evitar que salpica água durante o passar de roupa.
K. Característica de
SPRAY MIST
®
L. Botão
SPRAY MIST®– Oferece um fino orifício que evita as manchas provocadas
por excessiva saída de água.
M. Botão
SHOT OF STEAM®– Proporciona um jato potente de vapor para máxima potência.
• Desligamento Automático
S
AFETYSMART
®
(Alguns Modelos Somente) – Desliga
automaticamente se o ferro não for movimentado durante 15 minutos na posição vertical
ou 30 segundos na posição horizontal.
ANTES DE USAR PELA PRIMEIRA VEZ
• Ao ser ligado pela primeira vez o ferro poderá soltar algum vapor durante uns 10 minutos.
Isto é causado pelo aquecimento inicial do material usado. Não apresenta perigo,
nem atrapalha o funcionamento do produto e certamente não se repetirá.
• Antes da utilização pela primeira vez, limpe as aletas de vapor usando o recurso
SHOT OF STEAM
.®Após limpar as aletas, passe o ferro sobre um pano de algodão
para remover qualquer resíduo.
• Quando não estiver usando o ferro, gire sempre o seletor de vapor para DRY (seco).
(Ver Diagrama)
DADOS DE
USO
USO DO FERRO A SECO
• Conecte o cabo de alimentação em uma tomada
de 120 Volts de corrente alternada. Em aparelho
com desligamento automático, a luz auto off
(desligamento automático) acenderá.
• Gire o seletor de temperatura para o grau desejado
(consulte o Manual de Passagem a Ferro para saber
as regulagens recomendadas). Enquanto o ferro estiver
aquecendo, coloque-o no suporte sobre uma superfície
estável e protegida.
• Ajuste o seletor de vapor para DRY (seco) para evitar
o escape de vapor se houver água no seu interior.
USO DO FERRO A VAPOR
• Verifique se o plugue foi retirado da tomada antes de encher o ferro com água.
• Gire o seletor de vapor para DRY (seco).
• Coloque o ferro no suporte e abra a tampa do reservatório d'água. Despeje a água
vagarosamente no reservatório. Encha até o nível máximo. Evite o risco de queimaduras,
tenha cuidado ao encher o ferro quente com água. Podem ocorrer queimaduras
se tocar nas partes metálicas quentes, água quente ou vapor. Empurre com firmeza
para fechar a tampa.
O
BSERVAÇÃO
:
Pode ser usada água de torneira devido ao projeto especial
deste ferro. Contudo, em áreas onde a água contenha muitos minerais, recomenda-se o uso
de água destilada ou desmineralizada.
• Gire o seletor de temperatura para qualquer das temperaturas dentro da faixa de vapor
e permita que o ferro aqueça por aproximadamente 2 minutos antes de usá-lo.
Durante o aquecimento, coloque o ferro no suporte sobre uma superfície estável e protegida.
• Gire o seletor de vapor para para vapor regular, ou para para vapor extra ou
para vapor super extra.
O
BSERVAÇÃO
:
Ao usar o vapor extra ou super extra,
poderá ser necessário encher o reservatório com maior freqüência.
A
I
J
K
L
M BCD E
F
G
H
VAPOR
VAPOR EXTRA
VAPOR SUPER
CLEAN
M
A
E
T
S
D
Y
R
Page 19

37
36
CARACTERÍSTICA DE SHOT OF STEAM
®
• A característica de
SHOT OF STEAM®fornece um jato extra de vapor para alta penetração
em amassados difíceis de desfazer. A característica do
SHOT OF STEAM®pode ser usado
com o ferro no modo a seco ou a vapor desde que o reservatório tenha uma quantidade
de pelo menos 1/4 de água e o seletor de temperatura esteja dentro da faixa de vapor.
• Deixe que o ferro aqueça por aproximadamente 2 minutos.
• Aperte o botão branco
SHOT OF STEAM®várias vezes para escorvar a bomba.
• Bombeie o botão
S
HOT OF STEAM
®
mais três ou quatro vezes para desobstruir o ferro.
•
A característica de
S
HOT OF STEAM
®
está agora pronto para o uso, podendo ser utilizado
continuamente
com poucas pausas curtas entre um jato e outro. A característica de
SHOT OF
STEAM
®
é mais eficaz
com o ferro na posição horizontal ligeiramente acima do tecido que esteja sendo passado.
• Se o reservatório secar, desconecte o ferro e reabasteça-o com água. O ferro pode ser enchido
com água enquanto estiver quente. OBSERVAÇÃO
: Poderá ser necessário escorvar a bomba antes
de utilizar a característica de
SHOT OF
STEAM
®
novamente.
CARACTERÍSTICA DE S
PRAY MIST
®
(Alguns Modelos Somente)
• Use a característica do
SHOT OF
STEAM
®
para umedecer tecidos que contenham amassados
difíceis de desfazer.
• Aperte o botão cinza
SHOT OF
STEAM
®
com firmeza para gerar um borrifo.
CARACTERÍSTICA DO DESLIGAMENTO AUTOMÁTICO
SAFETY SMART
®
(Alguns Modelos Somente)
• Quando o ferro está ligado em tomada elétrica de 120 Volts CA, a luz sinalizadora vermelha
quando firme indica que o ferro está ligado.
• Se o ferro elétrico ficar parado sobre a sua base de descanso durante 15 minutos, o ferro
elétrico deixará de esquentar. A luz contida no cabo piscará para indicar que o ferro
desligou-se automaticamente e continuará a piscar até que o ferro seja reiniciado
ou desconectado.
• Se o ferro ficar na posição de passar, ele passa para o modo de desligamento automático
em 30 segundos. Mais uma vez a luz no cabo piscará para indicar que o ferro
desligou-se automaticamente e continuará a piscar até que o ferro seja
reiniciado ou desconectado.
• OBSERVAÇÃO: Se o seletor de temperatura for colocado na posição desligada, a luz continuará
a piscar e em seguida desligará.
• Para reiniciar o ferro, mova-o para a frente e para trás. Permita que o ferro aqueça e continue
a utilizá-lo normalmente.
• OBSERVAÇÃO: Embora o calor não seja mais gerado uma vez que o ferro tenha desligado
automaticamente, permita tempo o suficiente para que o ferro esfrie antes de ter contato
com a chapa ou antes de guardar o ferro.
ACABAMENTO NÃO ADERENTE
(Alguns Modelos Somente)
• O acabamento não aderente evita aderência a tecidos e resíduos de goma na chapa.
• Deixe que na superfície do ferro elétrico seque e limpe-o com um pano usando uma solução
suave de vinagre
• Não use fibras ou esponjas, limpadores abrasivos ou solventes químicos, porque podem
danificar a superfície.
•
NOTA: Qualquer arranhadura na superfície do ferro elétrico não afetará o seu desempenho.
CUIDADOS APÓS O USO
• Gire o seletor de vapor para DRY (seco).
• Desconecte o ferro da tomada.
• Esvazie o reservatório de água abrindo a tampa do mesmo e virando o ferro de baixo para cima
para permitir que a água saia pela abertura. Agite o ferro suavemente para remover gotas
d'água restantes.
• Feche a tampa e permita que o ferro esfrie.
• Enrole o cabo de alimentação sem apertar em volta do envoltório do cabo de alimentação.
Guarde sempre o ferro sobre o seu suporte.
• Quando não estiver usando o ferro, gire o seletor de vapor para DRY (seco).
CUIDADO E MANUTENÇÃO
VÁLVULA DE VAPOR
A válvula de vapor (conectada ao seletor de vapor variável) pode ser removida para fácil limpeza
de fiapos e acumulação de impurezas. A limpeza da válvula de vapor só é necessária se notar
uma redução no desempenho da emissão de vapor. Para retirar a válvula de vapor, esvazie o
reservatório d'água e coloque o ferro sobre a chapa. Gire o seletor de vapor variável para CLEAN
(limpar). A válvula “ejetará.” Puxe para retirar a válvula de vapor até o fim. Limpe a ponta
suavemente com um pano úmido. Para recolocar, alinhe CLEAN (limpar) com a marca indicadora.
Pressione e gire no sentido horário para DRY (seco).
O
BSERVAÇÃO: Não despeje água no orifício da válvula de vapor.
CHAPA
Se goma ou outro tipo de material grudar na chapa do ferro, deixe que o ferro esfrie e limpe-o
com um pano úmido e macio. Evite passar o ferro sobre botões, zíperes, arrebites, etc. pois estes
poderão riscar a chapa.
ARMAZENAGEM
Guarde sempre o ferro sobre um suporte. Nunca
guarde com a chapa virada para baixo ou na caixa.
Guarde-o sempre com o seletor de vapor girado
para DRY (seco). Enrole a corda em volta do
envoltório do cabo de alimentação.
S
team Master
®
S
team
M
as
ter
®
15
min.
30
sec.
Page 20

39
38
MANUTENÇÃO
O ferro elétrico não necessita de nenhum outro tipo de manutenção que não seja o recomendado
nas instruções deste manual. Portanto, em seguida encontrará uma lista de perguntas que se fazem
com maior frequência, acompanhadas de suas respostas. Se por qualquer razão seu ferro elétrico
continuar apresentando um destes sintomas, ou requerer reparação por qualquer outro motivo,
envie o produto ao Centro de Serviço Autorizado Sunbeam ou para maior assistência,
ligue gratuitamente para o seguinte número 1-800-597-5978.
S
OLUÇÃO
P
ROBLEMA
O ferro exala odor • O ferro exala um odor ao ser ligado pela primeira vez.
• Deixe que o odor se dissipe por 10 minutos.
O ferro não aquece • O ferro elétrico deve ser conectado em uma tomada alternada
de 120 Volts.
• O seletor de temperatura deve ser girado para a temperatura desejada
• A função do apagador automático pode estar ativada.
(Alguns Modelos Somente) Movimente o ferro para frente
e para trás para reiniciar.
O ferro não ger vapor • O tanque de água pode estar vazio. Gire a válvula de vapor para
DRY (seco) e adicione água.
• Deixe que o ferro aqueça e em seguida coloque o seletor de vapor
em um dos ajustes de vapor. Use os ajustes de temperatura dentro
da faixa de vapor.
• Pode haver obstrução. Retire a válvula de vapor girando-a para
CLEAN (limpar). Recoloque e ajuste o seletor de vapor para um
dos ajustes de vapor.
Função SHOT OF STEAM®• O reservatório de água deve estar com pelo menos 1/4 de capacidade.
não funciona
• A temperatura deve ser ajustada para a posição de vapor.
• O ferro deve estar na posição horizontal.
• Escorve a bomba brevemente.
• Permita uma pausa curta entre um jato e outro.
• Aperte o botão SHOT OF STEAM®até o fim.
Função SPRAY MIST®• O reservatório de água deve estar com pelo menos 1/4 de capacidade.
não funciona
Há vazamento no ferro • O seletor de vapor variável deve ser ajustado para DRY (seco) até
que o ferro esteja quente.
• O ajuste da temperatura é excessivamente baixo para produzir vapor.
(Ver o Manual de Instruções)
DICAS SOBRE COMO PASSAR A ROUPA
• Leia sempre a etiqueta das roupas e siga as instruções sobre lavar/passar do fabricante.
• Separe os artigos a serem passados de acordo com o tipo de tecido.
• Os tecidos que requerem baixas temperaturas e pouco vapor, devem ser passados primeiro.
Isto lhe ajudará a evitar danos aos tecidos com o ferro elétrico demasiadamente quente.
• Caso não tenha certeza quanto ao teor de fibra de alguma roupa, teste uma pequena área como,
por exemplo, a bainha ou a parte da costura dentro da roupa antes de passar a parte visível da
roupa. Comece com uma temperatura baixa e vá gradativamente aumentando o calor até chegar
à melhor regulagem.
• Ao reduzir a temperatura do ferro para passar tecidos mais delicados, espere cerca
de 5 minutos para que o ferro esfrie e a temperatura chegue à nova regulagem.
• Quando usar o ferro no modo a vapor, use movimentos longos e lentos. Isso permite que
o vapor penetre o tecido enquanto possibilita que o calor da chapa seque a umidade.
• Para passar forros, vire-os do avesso. Cuidado para não usar o ferro excessivamente quente
pois os tecidos poderão derreter ou grudar na chapa.
• Para passar zíperes, use um pano e certifique-se de que o zíper está fechado e passe
o ferro sobre a aba. Nunca passe diretamente sobre um zíper sem proteção.
• Use a tabela a seguir para escolher o melhor ajuste e método para o tecido
que pretende passar.
Page 21

41
REGULAGEM DA
TECIDO T
EMPERATURA RECOMENDAÇÃO DE C
OMO PASSAR
Acrílicos • Passe a seco do avesso.
Acetato • Passe a seco do lado contrário quando estiver úmida.
Sedas • • Passe o ferro com o tecido do avesso. Use um pano para passar
para evitar a formação de marcas brilhantes.
Nylon • • Passe o ferro do lado do avesso enquanto ainda estiver úmido.
Poliester • • Passe o ferro do lado do avesso enquanto ainda estiver úmido.
Rayon • • Passe o ferro do lado do avesso.
Viscose • • Use o ferro a seco no maioria dos casos. O vapor pode ser
usado sob instruções do fabricante.
Lãs • • Use o ferro a vapor com o tecido do avesso ou use um pano
para passar o ferro.
Lãs Mistas • • Use o ferro a vapor com o tecido do avesso ou use um pano
para passar o ferro.
Algodões • • Verifique a etiqueta e siga as instruções do fabricante.
Mistos Use os ajustes para fibra que exijam o menor ajuste possível.
Veludo • • • Passe o ferro a vapor com o tecido do avesso ou use um pano
para passar e escove e levante os fios.
Algodão • • • Passe a seco enquanto ainda estiver úmido ou use vapor extra
e/ou
S
HOT OFSTEAM
®
. Passe o tecidos escuros do avesso para
evitar a formação de marcas brilhantes.
Linho • • • Passe o ferro a seco com o tecido do lado do avesso ou use um
pano para passar para evitar a formação de marcas brilhantes,
especialmente em cores escuras. Passe a seco enquanto ainda
estiver úmido ou use vapor e/ou
S
HOT OFSTEAM
®
. Passe cada
seção até que esteja inteiramente seco.
Jeans • • • Use vapor extra e/ou
S
HOT OFSTEAM
®
.
40
MODO DE PASSAR A FERRO
Ferro a Seco a Qualquer Temperatura
Vapor e SHOT OF STEAM
®
Vapor e SHOT OF STEAM
®
Vapor e SHOT OF STEAM
®
G
ARANTÍA
L
IMITADA DE
1 A
NO
Sunbeam Products, Inc., ou se no Canadá, Sunbeam Corporation (Canadá) Limited (coletivamente “Sunbeam”) garante que
por um período de um ano, contado a partir da data de compra, este produto estará livre de defeitos no material e de mão-deobra. Sunbeam, a seu critério, reparará ou substituirá este produto ou qualquer componente do produto, que for considerado
defeituoso, durante este período de garantia. A substituição será feita por um produto, ou componente, novo ou
remanufaturado. Se o produto já não estiver mais disponível, a substituição poderá ser feita por um produto similar do mesmo
valor ou maior. Esta é a sua garantia exclusiva.
Esta garantia é válida para o comprador original a varejo, a partir da data de compra inicial a varejo, e não é transferível.
Mantenha consigo o recibo original de venda. Prova de compra é necessária para obter o serviço de
garantia. Os
representantes da Sunbeam, centros de serviço ou lojas a varejo que vendem os produtos Sunbeam,
não têm o direito de
alterar, modificar ou de trocar, de nenhum modo, os termos e as condições desta garantia.
Esta garantia não cobre desgaste normal de peças, nem danos resultantes de qualquer um dos seguintes: uso negligente ou
indevido do produto, uso com voltagem ou corrente inadequada, uso contrário às instruções operacionais, desmontagem,
reparo ou alteração feita por qualquer pessoa que não seja da Sunbean ou de um centro de serviço Autorizado da Sunbeam.
Além disso, a garantia não abrange: atos de Força Maior, tal como incêndio, inundação, furacão e tornados.
Quais são os limites de Responsabilidade da Sunbeam?
Sunbeam não será responsável por quaisquer danos emergentes, ou imprevistos, causados pela inadimplência de qualquer
garantia ou condição explícita, implícita ou estatutária.
Salvo na medida em que seja proibido por lei aplicável, qualquer garantia implícita ou condição de comercialização,
ou de adequação para um fim particular, está limitada em duração pela duração da garantia acima.
Sunbeam se isenta de quaisquer outras garantias, condições ou representações explícitas, implícitas, estatutárias ou outras,
de qualquer espécie.
Sunbean não será responsável por quaisquer danos, de qualquer tipo, resultante da compra, do uso ou do uso indevido de,
ou da inabilidade para utilizar o produto incluindo danos emergentes, especiais, imprevistos ou similares, ou lucros cessantes,
ou por qualquer quebra do contrato, fundamental ou outra, de qualquer espécie, ou por qualquer reivindicação que surgir
contra o comprador por terceiros.
Algumas províncias, estados ou jurisdições não permitem a exclusão ou a limitação de danos emergentes ou imprevistos,
ou limitações sobre quanto tempo dura uma garantia implícita, de modo que as limitações ou exclusões acima podem
não lhe aplicar.
Esta garantia lhe dá direitos legais específicos, e você pode ter também outros direitos que variam conforme a província,
estado ou jurisdição.
Como Obter o Serviço de Garantia
Nos EUA –
Se você tiver alguma dúvida no que se refere a esta garantia ou gostaria de obter o serviço de garantia, por gentileza telefone
para 1.800.458.8407 e um endereço de um centro de serviço conveniente lhe será fornecido.
No Canadá –
Se você tiver alguma dúvida no que se refere a esta garantia ou gostaria de obter o serviço de garantia, por gentileza telefone
para 1.800.458.8407 e um endereço de um centro de serviço conveniente lhe será fornecido.
Nos EUA, esta garantia é oferecida pela Sunbeam Products, Inc., que está localizada em Boca Raton, Flórida 33431. No Canadá,
esta garantia é oferecida pela Sunbeam Corporation (Canadá) Limited, que está localizada em 5975 Falbourne Street,
Mississagua, Ontario L5R 3V8.
POR GENTILEZA, NÃO DEVOLVA ESTE PRODUTO A QUALQUER
UM DESSES ENDEREÇOS OU PARA O LUGAR DE COMPRA.
Page 22

43
42
NOTES
/NOTAS
NOTES
/NOTAS
 Loading...