

Page 1
Page 2

Warranty
Stryker Endoscopy warrants the X-7000 Light Source
against defects in both materials and workmanship to the
registered owner at the time of purchase. All components
are covered by the warranty for a period of one year from
the date of purchase.
This warranty does not apply to any unit which has been
the subject of misuse, abuse, neglect, improper installation
or operation or that which has been altered, adjusted, or
tampered with by any person other than Stryker Endos-
copy authorized service personnel.
The customer is responsible for returning the defective
equipment to the factory at his or her own expense.
Stryker Endoscopy or its representative will service the
unit, repair or replace any defective parts thereof, and
return the unit.
If, upon examination, it is determined that the fault has
been caused by misuse or abnormal conditions of opera-
tion, the repairs will be billed to the customer in the same
manner as out-of-warranty repairs.
shall Stryker Endoscopy be liable for any breach of war-
ranty in any amount exceeding the purchase price of the
product.
No agent, employee or representative of Stryker Endoscopy
has the authority to bind the Company to any other war-
ranty, affirmation, or representation concerning this
instrument.
This warranty is valid only to the original purchaser of
Stryker Endoscopy products directly from Stryker Endos-
copy or from a Stryker Endoscopy authorized agent. The
warranty cannot be transferred or assigned by the original
purchaser.
The X-7000 Light Source warranty is void if any WARN-
INGS, CAUTIONS, or NOTES are disregarded.
All Stryker products are warranted against defects in mate-
rials and workmanship.
Products repaired by Stryker Endoscopy will be issued a 30
day repair warranty against defects in both materials and
workmanship, provided the original warranty period has
expired. This warranty applies only to products that have
been repaired by Stryker. Instruments submitted due to
defects in materials and workmanship during the warranty
period will be repaired at no charge to the customer.
The warranty as set forth herein is exclusive and in lieu of
all other warranties, remedies, obligations, and liabilities of
Stryker Endoscopy Inc., expressed or implied, including
the implied warranties of merchantability and fitness for
use and of consequential damages. These products are
being sold only for the purpose described herein, and such
warranty only runs to the original purchaser. In no event
© Stryker and Stryker Endoscopy are registered trade-
marks of Stryker Corporation.
Page 3

Table of Contents
1.0 INTRODUCTION
1.1 Scope.........................................................................................................................................................................................1
1.2 Responsibility...........................................................................................................................................................................1
1.3 Upgrades...................................................................................................................................................................................1
1.4 Equipment Overview...............................................................................................................................................................1
1.5 Service Options........................................................................................................................................................................1
1.6 Maintenance Precautions........................................................................................................................................................1
1.7 Factory Service Instructions...................................................................................................................................................2
1.8 Required Equipment...............................................................................................................................................................2
1.9 Required Skills.........................................................................................................................................................................2
1.10 Required Replacement Components..................................................................................................................................2
2.0 DIAGNOSTICS AND CORRECTIVE MAINTENANCE
2.1 General Recommendations....................................................................................................................................................3
2.2 Power Requirements...............................................................................................................................................................3
2.3 Ambient Requirements...........................................................................................................................................................3
2.4 Connections and Wiring.........................................................................................................................................................3
2.5 Verify Operation......................................................................................................................................................................3
3.0 REPAIR CHECKLIST AND MATRIX
3.1 Diagnostic Analysis Checklist................................................................................................................................................5
3.2 Repair Matrix ..........................................................................................................................................................................6
4.0 COMPONENT REMOVAL AND REPAIR
4.1 Component Replacement Instructions.................................................................................................................................7
4.1.1 Component Removal Table.................................................................................................................................7
4.1.2 Individual Replacement Instructions.................................................................................................................8
4.2 Console Cover Removal ..........................................................................................................................................................8
4.3 Power Source Components...................................................................................................................................................9
4.3.1 Control Board Replacement...............................................................................................................................9
4.3.2 Lamp Ballast Replacement.................................................................................................................................10
4.3.3 AC Inlet Board Replacement.............................................................................................................................11
4.3.4 Ballast Fan Replacement....................................................................................................................................12
4.4 Light Source Components....................................................................................................................................................12
4.4.1 Bulb Fan Replacement........................................................................................................................................12
4.4.2 Bulb Board Replacement...................................................................................................................................13
4.4.3 Shutter Replacement..........................................................................................................................................13
4.4.4 Hot Mirror Replacement...................................................................................................................................13
4.4.5 Motor Mount Replacement..............................................................................................................................14
4.4.6.1 Motor Replacement.........................................................................................................................................15
4.4.6.2 Integrating Rod Replacement........................................................................................................................15
Page 4

4.5 Front Panel Components......................................................................................................................................................16
4.5.1 Jaw Handle Replacement...................................................................................................................................16
4.5.2 Potentiometer Knob Replacement....................................................................................................................16
4.5.3 Front Panel Replacement...................................................................................................................................17
4.5.4 Jaw Assembly Replacement...............................................................................................................................17
4.5.5 Power Switch Replacement................................................................................................................................18
4.5.6 Display Board Replacement..............................................................................................................................18
4.6 Fuse Replacement..................................................................................................................................................................19
4.6.1 Rear Panel Fuses..................................................................................................................................................19
5.0 ELECTRONIC PROCEDURES
5.1 Required Skills.......................................................................................................................................................................20
5.2 Alignment and Calibration..................................................................................................................................................20
6.0 FINAL ASSEMBLY AND TESTING
6.1 Required Skills.......................................................................................................................................................................21
6.2 Assembly.................................................................................................................................................................................21
6.3 Electrical Current Leakage Test...........................................................................................................................................21
6.4 Hi-Pot Test..............................................................................................................................................................................22
7.0 APPENDIX
7.1 Assembly Diagram................................................................................................................................................................23
7.2 Parts Listing............................................................................................................................................................................23
7.3 Reference Documents...........................................................................................................................................................23
8.0 WARRANTY
..................................................................................................................................................................................................................24
9.0 SERVICE
..................................................................................................................................................................................................................24
10.0 OTHER SERVICE
..................................................................................................................................................................................................................25
Page 5
1.0 Introduction
1.1 SCOPE
This manual is intended to be used as a reference guide for
electronics technicians and the Stryker Repair Team in the
analysis and repair procedures for the X-7000 Light
Source. It is meant to be used in conjuction with the
Stryker X-7000 Universal Light Source Operating and
Maintenance Manual (Stryker P/N 1000-400-651) and
does not replace existing documentation.
Stryker Endoscopy maintains a complete repair depart-
ment for the sole purpose of providing efficient and reli-
able service.
1.2 RESPONSIBILITY
Stryker Endoscopy accepts full responsibility for the effects
on safety, reliability, and performance of the equipment
only if readjustments, modifications and repairs have been
carried out exclusively by a person specifically authorized
by Stryker Endoscopy to do so.
In no event shall Stryker Endoscopy be liable for incidental
or consequential damages in connection with or arising
from the performance or use of its products after unautho-
rized modification or repair performed by individuals
other than Stryker Endoscopy perosnnel.
1.3 UPGRADES
The Stryker Endoscopy X-7000 Light Source is a high per-
formance device designed for use with Stryker Endoscopy
medical video cameras to provide outstanding illumina-
tion of the surgical site across all endoscopic applications.
With the proper light cable and adapters, it can be con-
nected to any flexible or rigid endoscope. Stryker Endos-
copy reserves the right to incorporate improvements
without notice. However, updated parts will be fully inter-
changeable with older versions and will offer at least the
same level of quality and performance.
tive for up-to-date information on available options and
upgrades to equipment as well as updates to this manual.
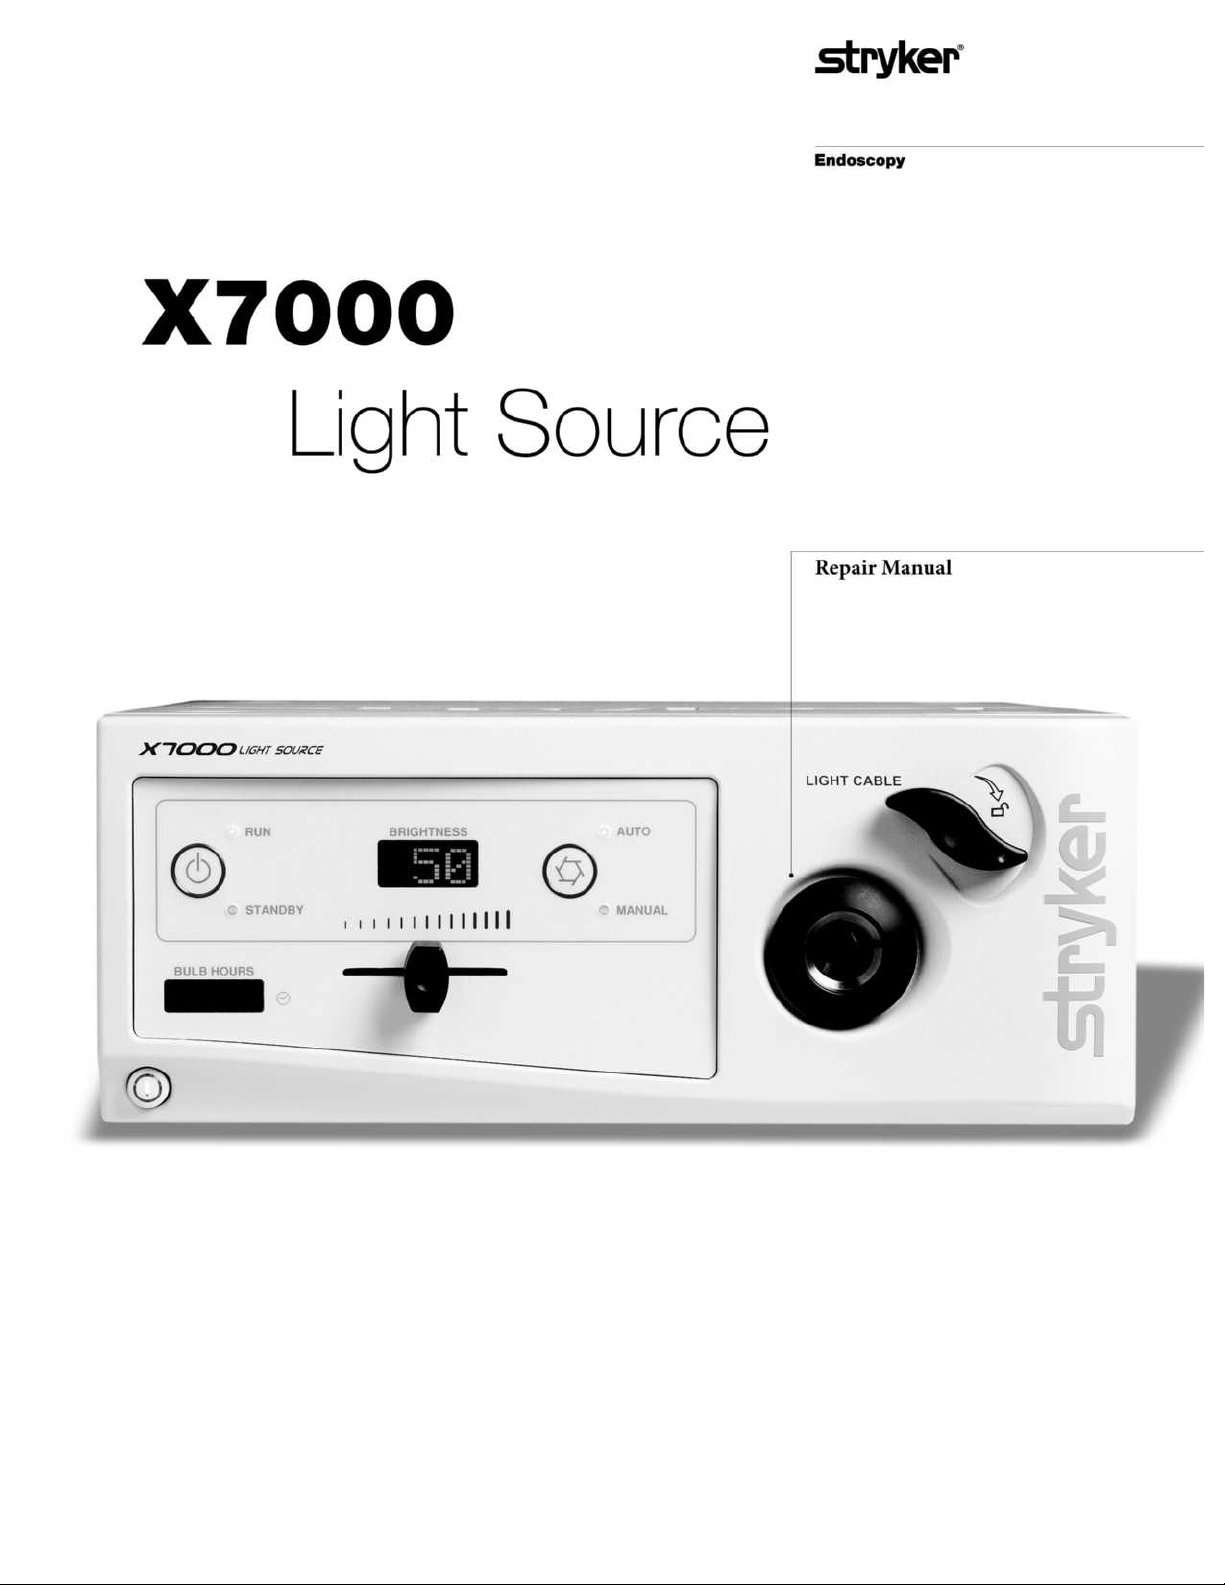
1.4 EQUIPMENT OVERVIEW
The Stryker Endoscopy X-7000 Light Source consists of
the light source, power cord, and Operation and Mainte-
nance Manual. Replacement or spare lamps can be pur-
chased separately.
1.5 SERVICE OPTIONS
The user is advised to return a malfunctioning unit to
Stryker Endoscopy for repair or replacement, where spe-
cialized equipment and technicians are available to per-
form repairs while maintaining full product quality and
safety.
In the event that the user decides to undertake repair pro-
cedures, Stryker Endoscopy recommends that these be car-
ried out only by qualified technicians with proper test
equipment listed in this manual, so that the safety of oper-
ators and patients may not be compromised.
1.6 MAINTENANCE PRECAUTIONS
WARNING: The incorrect use of any of the required tools
and techniques may risk damage to the
equipment or injury to the person carrying
out the procedure, subsequent operators, or
patient. Repairs should be made ONLY by
those that have been specificallytrained in
the use of all pertinent equipment andtech-
niques. Stryker Endoscopy cannot continue
to guarantee compliance to UL, CSA, TUV,
or other labeled safety standards if service is
performed by anyone other than Stryker
Endoscopy Personnel.
Stryker Endoscopy will inform customers of significant
upgrades to the product. Contact your Stryker representa-
1
Page 6

1.7 FACTORY SERVICE INSTRUCTIONS
1.9 REQUIRED SKILLS
If service is needed either during or after the warranty
period:
Contact Stryker Endoscopy at 1-800-624-4422 or contact
your local Stryker Endoscopy sales representative. If
needed, a loaner unit may be requested during the time of
your unit repair.
Package the X-7000 carefully in the original shipping container, if possible.
Ship the Stryker Endoscopy X-7000 Light Source, prepaid
and insured, to:
Stryker Endoscopy Customer Service
Attention: Repair Department
5900 Optical Court
San Jose, CA 95138
1.8 REQUIRED EQUIPMENT
Most of the procedures described in this manual require
the following basic tool kit:
Each diagnostic and repair procedure described in this
manual requires a technician qualified by training or experience in the following areas:
•Basic electronics techniques
•Multimeter operation
1.10 REQUIRED REPLACEMENT COMPONENTS
If a repair procedure necessitates replacements parts,
please refer to the Appendix (page 22).
• Small flat blade screwdriver
• Medium Philips screwdriver
• 8” adjustable wrench
• Needlenose pliers
• Small wire cutting pliers
• Wire stripper
• Soldering iron and solder
•Multimeter
• Stryker medical video camera
•Stryker Scope
•Fiber optic cable
• Glass fuse puller
•Shorting clip
• Bio Tek Model 170 Analyzer or equivalent current
leakage tester
• Nut drivers 11/32” and 5/16”
• Open end wrenches 7/16” and 1/2”
• Set of standard allen wrenches / hex keys
•Hi-Pot Tester
2
Page 7
2.0 Diagnostic and Corrective Maintenance
2.1 GENERAL RECOMMENDATIONS
The Stryker Endoscopy Model X-7000 Light Source is a
precision instrument which has been engineered and man-
ufactured with great care to ensure the safety of operators
and patients. In order to maintain the high level of safety
and reliability required of the X-7000, it is important to
fully understand and comply with all required procedures
set out herein.
If some part of a procedure is omitted or adequate equip-
ment is not used, the safety and performance of the device
may be unknowingly compromised. It is strongly recom-
mended that if any element in these procedures is beyond
the scope of the technician’s training, refer to section 1.7
for information on obtaining fully qualified professional
service at Stryker Endoscopy.
WA R N I N G : As is the case with all AC powered devices,
dangerous voltages are present. If adequate
safety precautions are not taken, results may
include damage to the equipment, injury, or
death. It is imperative that these procedures
be approached only by trained technicians
with proper equipment after fully reading
and understanding the steps involved.
2.2 POWER REQUIREMENTS
• There is one AC power cord for the X-7000 Light Source.
A separate AC power cord is normally required for any
other instrument being used.
• Each instrument is clearly marked for power require-
ments at the AC power cord connection.
• Testing the outlet for proper grounding and polarity is
highly recommended prior to connecting the X-7000
Light Source. If available, a ground-fault-interrupt type
outlet will provide an additional level of safety.
NOTE: A proper electrical installation procedure will
ensure that all associated signal cabling is cor-
rectly installed prior to applying AC power to the
system.
2.3 AMBIENT REQUIREMENTS
Ensure that:
• The distance between the X-7000 Light Source and the
associated devices does not exceed the available cable
length.
• Controls will be easily accessible to operator.
• Ventilation is not obstructed around the unit. Avoid
locations with excessive heat or temperature fluctua-
tions, such as direct sunlight.
2.4 CONNECTIONS AND WIRING
Please refer to the procedures detailed in the X-7000 Uni-
versal Light Source Operating and Maintenance Manual
(Stryker P/N #1000-400-651).
2.5 VERIFY OPERATION
After ensuring that both power and signal connections
have been correctly made, place the power switch in each
unit to the “ON” position. Check that an image is present
on the monitor.
3
Page 8

3.0 Repair Checklist and Matrix
3.1 INITIAL REPAIR CHECKLIST
The following page is intended for use by qualified Stryker
personnel only. Complete a copy of the checklist and file it
in the DHR.
3.2 REPAIR MATRIX #1
3.3 REPAIR MATRIX #2
The Repair Matrices are intended for use by qualified
Stryker personnel only, in conjuction with section 4.0
(Component Removal and Repair). See page 6 and 7 for
Repair Matrices.
4
Page 9
5900 Optical Court
San Jose, CA 95138
t: 408 754 2000 f: 408 754 2505
www .stryker.com
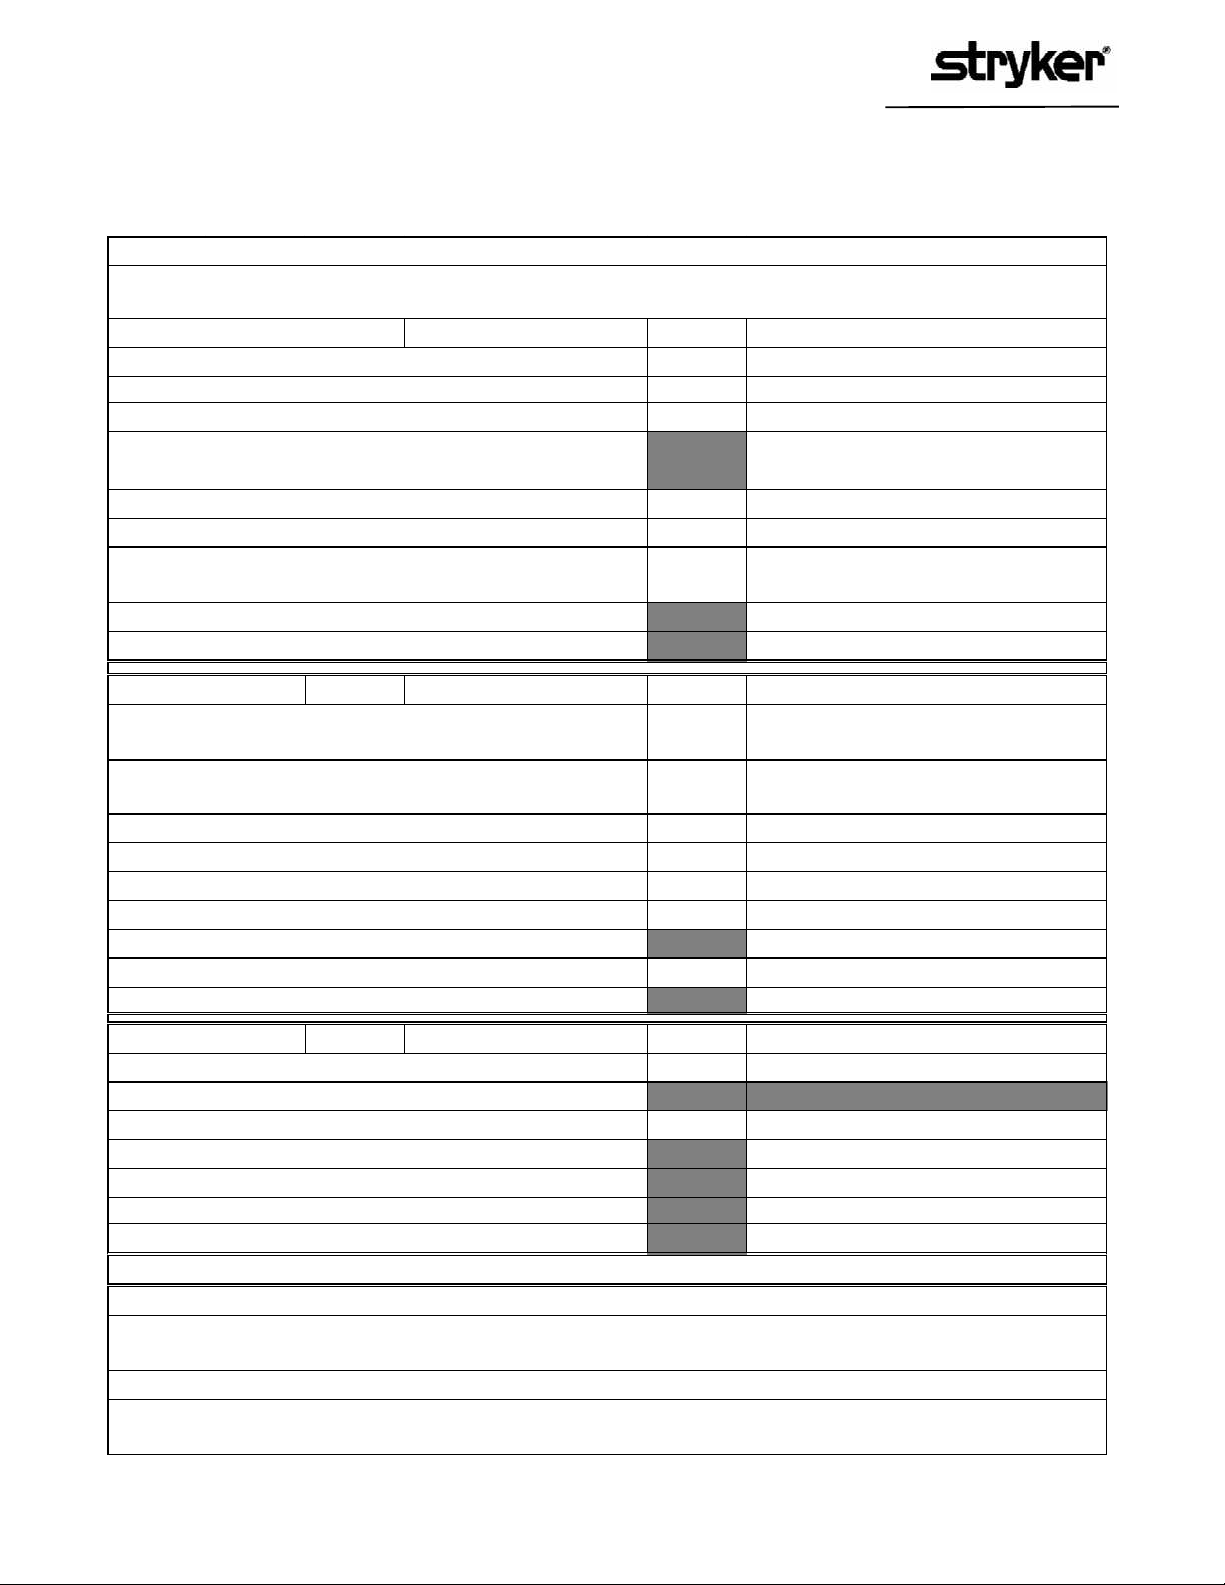
DIAGNOSTIC ANALYSIS CHECKLIST CHECK DATE: _______________NAME: _____________________
SERIAL #: ___________________
Endoscopy
What is the customer complaint?
General Assembly Check Points Yes/No Details
Is there any visual damage on the unit?
Are the door switches plastic or metal?
Are there screws on the door switches?
What is the Rev of the control board? (R ev. stamped on
control board)
Does the front display board backlight turn on when the device
Does warm message appear when the unit is powered on?
Does the unit turn on the front panel LEDs as expected after
message?
warm
What is the software version number?
How many hours are there on the bulb?
System Checks Yes/No Details
Does the unit have D53 and D54 chips? (Rev. F and prior
versions only)
Does the unit turn on the bulb when the interlocks are closed?
(door and light cable)
Does the unit show the brightness properly?
Does the unit switch between run/standby?
Does the unit switch between auto/manual?
When the cable is pulled out, does the bulb turn OFF?
If not, record the voltage between TP20 and GND.
Cable in: Cable out:
When the door is opened, does the bulb turn OFF?
If not, record the voltage between TP23 and GND.
Door open: Door closed:
Failure Diagnostics Yes/No Details
Is power button flashing when powered on?
Disconnect the ballast from the control board and
connect the jumper cable, Does the bulb turn ON?
If the bulb does not turn on,
Measure the boost voltage.
Measure the 5-V line voltage on the jumper.
Measure the 12-V line voltage on the jumper.
Boost voltage =
5-V line value =
12-V line value =
Other Observations:
Staff Recommendation:
Page 10

3.2 REPAIR MATRIX
Use the following matrix to identify failure and repair codes. Refer to section 4.0 for repair instructions.
REPAIR CODES
NLB
NCB
NLL
NMO
NPB
BBR
IRR
NSW
NFU
NFG
NSH
EPR
NDB
NJW
EBF
CHR
NC1
BUR
BAR
RCR
DFR
Replace Balla st
Replace Control Board
Replace Bulb Assem bly
Replace Motor
Replace AC Inlet Board
Replace Bulb Board
Replace Integrating Rod
Replace Power Switch
Replace Fuse
Replace Hot Mirror
Replace Shutter
Replace Eprom / Upgrade
Software (in-house)
Replace Display Board
Replace Jaw Assembly
Replace Ethernet Board
Replace Chassis
Replace Cover
Replace Bulb Fan
Replace Balla st Fan
Replace Ribbon Cable
Error Code Failures
E1F E-1 231
E2F E-2 3 1 4 2
E3F E-3 2 1
E5F E-5 4 3 2 1
E6F E-6 12
Power Failures
PSF Power Switch Fa ilure 4 3 2 1
LPF No Power 2 3 4 1
FBF Flashing Power Button 2 1 3
BUF "Bulb" in Bulb Hours 1 2 3
PFF Power only to Front Panel 1 2 3 4
Light Output Failure
NLF No Light Output 3 4 1 5 6 2
SBY Unit won't e xit Standb y Mode 4 2 3 6 7 1 5 8
LLF Low Light Output 5 1 4 3 2
BHF Bulb Hours not Displayed 3 1 2 4
DCF Delayed Ignition, Clicking 2 3 1
DPF Delayed Ignition, Popping 1 3 2
STR Strobing Light 321 54 6
LOF Light Stays On 2 3 1
Input/Output Ports
PSF Permanent Sidne Failure 1 2
ISF Intermittent Sidne Failure 2 1
ECF Ethernet Communication Failure 2 1
VIF Vide o Failure 1
Board/Component Failures
CBF Control Board Failure 1
FAILURE CODES
LBF Ballast Failure 1
DBF Display Board Failure 1
BJW Jaw Assembly Failure 1
BAF Bulb Assembly Failure 1
BBF Bulb Board Failure 1
EBR Ethe rnet B oar d F ailure 1
PBF AC Inlet Board Failure 1
FMO Motor Failure 1
IRF Integrating Rod Failure 1
BFG Hot Mirror Failure 1
BSH Shutter Failure 1
PSF Power Switch Fa ilure 1
BSP Slide Pot Knob Fa ilure 1
BHD Jaw Handle Failure 1
EPF Eprom Failure 1
FUF Fuse Failure 1
RBF Ribbon Cable Failue 1
FNF Fan Failure 12
Cosmetics
CHF Damaged Chassis 1
COF Damaged Cover 1
DFF Damaged/Missing Feet 1
FPF Damaged Front Panel 1
Replace Feet
NSP
NHL
NFP
Replace Slide Pot Knob
Replace Jaw Handle
Replace Front Panel
6
Page 11

4.0 Component Removal and Repair
4.1 COMPONENT REPLACEMENT INSTRUCTIONS
Required skills:
Basic electronics techniques.
WA R N I N G : The incorrect use of any of the required tools
and techniques may risk damage to the
equipment or injury to the person carrying
out the procedure, subsequent operators, or
patient. Repairs should be made ONLY by
those that have been specifically trained in
the use of all pertinent equipment andtech-
niques.
The following instructions apply to the removal of compo-
nents from the X-7000. To remove a component for
replacement or repair will require the removal of certain
other components. Components must be removed in the
order listed in the following procedures.
The table in section 4.1.1 shows the order in which compo-
nents must be removed according to the basic physical
assembly of the X-7000. To remove a component for
replacement, or repair, begin with section 4.2 and proceed
accordingly to the appropriate section.
4.1.1 Component Removal Table
NOTE: All components in previous columns must be
removed before removing a component.
12 3 4 5
Control
Board
Bulb,
Bulb Fan
Slide
Button,
Jaw Knob
Ballast AC Inlet
Board
Ballast
Fan
Bulb
Board
Shutter Hot
Mirror
Front
Panel
Power
Switch
Display
Board
Motor
Mount
Assembly
Motor
Integrating Rod
Jaw
Assembly
7
Page 12

4.1.2 Individual Replacement Instructions
4.2 CONSOLE COVER REMOVAL
NOTE: Before removing any component in the X-7000,
the Console Cover must be removed (refer to sec-
tion 4.2).
To remove and repair any of the following components,
proceed to section 4.3 (Power Source Components):
• Control Board (4.3.1)
• Lamp Ballast (4.3.2)
• AC Inlet Board (4.3.3)
• Ballast Fan (4.3.4)
To remove and repair any of the following components,
proceed to section 4.4 (Light Source Components):
• Bulb (4.4.1)
• Bulb Fan (4.4.2)
• Shutter (4.4.3)
• Hot Mirror (4.4.4)
• Motor Mount (4.4.5)
• Motor (4.4.6.1)
• Integrating Rod (4.4.6.2)
Tools Required:
Basic Tool Kit
• Remove power cord.
• On the back of the unit, remove the two screws attaching
the console to the unit.
• Open the lamp door latch on the side of the unit and
open the door.
• Slide the cover back, then lift off.
To remove and repair any of the following components,
proceed to section 4.5 (Front Panel Components):
• Jaw Handle (4.5.1)
• Potentiometer Knob (4.5.2)
• Front Panel (4.5.3)
• Jaw Assembly (4.5.4)
• Power Switch (4.5.5)
• Display Board (4.5.6)
To remove and repair any of the following components,
proceed to section 4.6 (Rear Board Components):
• Fuses (4.6.1)
8
Page 13

4.3 POWER SOURCE COMPONENTS
4.3.1 Control Board Replacement
Tools Required:
Basic Tool Kit
• Remove power cord and console cover (procedure 4.2).
• Disconnect connectors and attached wires.
• Remove the 5 screws attaching the control board to the
ballast.
• Unscrew the nut and washer on the BNC connector.
• Remove the old control board.
• Install a new control board with 4 screws.
• Reattach the connectors to their original locations,
including attaching the ground for the ribbon cable with
the 5th screw.
• Screw washer and nut onto BNC.
• Perform calibration (procedure 5.2).
• Reinstall the console cover.
• Perform Electrical Current Leakage Test (procedure
6.3).
9
Page 14

4.3.2 Lamp Ballast Replacement
Tools Required:
Basic Tool Kit
• Remove power cord and console cover (procedure
4.2).
• Remove the control board (procedure 4.3.1).
• Label and disconnect the three power input cables
located at the rear of the ballast.
• Remove the bulb holder assembly.
• Using the X-Long Magnetic Phillips screwdriver, remove
the 4 screws attaching the lamp ballast to the chassis.
• Replace the lamp ballast assembly.
• Install new ballast assembly using an X-Long Magnetic
Phillips screwdriver.
• Reconnect all cables previously disconnected.
• Reattach the control board to the chassis.
• Reinstall the console cover.
• Perform Electrical Current Leakage Test (procedure 6.3).
• Perform Hi-Pot test (procedure 6.4).
10
Page 15

4.3.3 AC Inlet Board Replacement
Tools Required:
Basic Tool Kit
• Remove power cord and console cover (procedure
4.2).
• Remove the control board (procedure 4.3.1).
• Remove the lamp ballast (procedure 4.3.2).
• Remove the 2 bolts from the 2 nuts.
• Remove the 1-2 screws from the AC inlet board (number
of screws varies by revision).
• Remove the wiring harness from the J2 connector.
11
Page 16

4.3.4 Ballast Fan Replacement
4.4 LIGHT SOURCE COMPONENTS
Tools Required:
Basic Tool Kit
NOTE: BOTH fans must be replaced if one fan malfunc-
tions.
• Remove power cord and console cover (procedure
4.2).
• Remove the black ribbon cable.
• Remove the fan wire harness assembly.
• Note the fan orientation.
• Remove the 2 nuts attaching the fan to the Chassis and
remove the sub-assembly.
• Remove the 4 screws from the fan mounts.
4.4.1 Bulb Fan Replacement
Tools Required:
Basic Tool Kit
NOTE: BOTH fans must be replaced if one fan malfunc-
tions.
• Remove power cord and console cover (procedure
4.2).
• Remove the bulb module.
• Detach the wire harness from the control board.
• Remove the 2 nuts attaching the bulb fan housing assem-
bly to the chassis.
• Note the fan orientation.
• Remove the malfunctioning fan(s) and replace. Ensure
the correct orientation.
• Reinstall the 2 fan mounts with the 4 screws.
• Reinstall the 2 nuts.
• Reinstall the black ribbon cable, fan wire harness assem-
bly, and console cover.
• Perform Electrical Current Leakage Test (procedure 6.3).
• Remove the 4 nuts attaching the bulb fan to the fan
mounts/fan ducts.
• Reinstall the new fan onto the mounts/duct with 4 bolts,
ensuring the correct orientation.
• Reinstall the fan assembly onto the chassis with 2 nuts.
• Reconnect the wire harness.
• Replace the bulb module and cover.
12
Page 17

4.4.2 Bulb Board Replacement
• Remove power cord and console cover (procedure 4.2).
• Remove the bulb.
• Remove the bulb fan (procedure 4.4.1).
• Remove the 2 wire harnesses.
• Remove the bulb board and replace.
• Reinstall the 2 wire harnesses, bulb fan, bulb, and cover.
4.4.4 Hot Mirror Replacement
• Remove power cord and console cover (procedure 4.2).
• Remove the bulb (procedure 4.4.1).
• Remove the shutter (procedure 4.4.3).
• Remove the 2 Allen screws.
4.4.3 Shutter Replacement
• Remove the power cord and console cover (procedure
4.2).
• Remove the bulb (procedure 4.4.1).
• Remove the Allen screw from the shutter shaft.
• Remove the shutter and replace.
• Reinsert the Allen screw.
• Replace the bulb and cover.
• Remove the hot mirror mount and replace.
• Reinsert the 2 Allen screws.
• Replace the shutter, bulb, and cover.
13
Page 18

4.4.5 Motor Mount Replacement
• Remove power cord and console cover (procedure 4.2).
• Remove the bulb (procedure 4.4.1).
• Remove the hot mirror (procedure 4.4.4).
• Remove the 2 Phillips screws from beneath the hot mir-
ror.
• Remove the 2 nuts.
• Remove the motor wire harness from the control board.
• Remove the motor mount assembly with the motor
attached, and replace.
• Replace the wire harness.
• Reinsert the 2 nuts and 2 Phillips screws beneath the hot
mirror.
• Replace the hot mirror, bulb, and cover.
14
Page 19

4.4.6.1 Motor Replacement
• Remove power cord and console cover (procedure 4.2).
• Remove the motor mount (procedure 4.4.5).
• Remove the 4 Allen screws.
• Remove the motor and replace.
• Reinsert the 4 Allen screws.
• Replace the motor mount and cover.
4.4.6.2 Integrating Rod Replacement
• Remove power cord and console cover (procedure 4.2).
• Remove the motor mount (procedure 4.4.5).
• Remove the 2 screws and the cover.
• Slide the integrating rod out.
• Swab the rod holder with alcohol.
• Insert new integrating rod.
• Reinsert the 2 screws.
• Replace the cover and motor mount.
15
Page 20

4.5 FRONT PANEL COMPONENTS
4.5.2 Potentiometer Knob Replacement
4.5.1 Jaw Handle Replacement
• Remove power cord.
• Remove the set screw from the bottom of the jaw handle.
• Remove the jaw handle from the actuator shaft.
• Ensure that the jaw handle key (P/N 105-186-472) stays
in place on the actuator shaft.
• Replace the jaw handle onto the actuator shaft.
• Secure the jaw handle in place using the set screw.
• Reinsert the set screw and reinstall the cover.
• Remove power cord.
• If potentiometer knob is damaged or detaches from the
front panel, but the protruding metal tab is still con-
nected, perform the following repair steps:
• Remove the set screw from the bottom of the potentiom-
eter knob.
• Remove the knob from the slide pot of the front panel.
• Loosely screw the set screw into the bottom of the poten-
tiometer knob.
• With the screw hole facing down, insert the potentiome-
ter knob onto the slide pot.
• Secure the knob in place by screwing in the set screw.
• If the potentiometer knob is damaged or detaches from
the front panel, and the protruding metal tab is also
damaged or disconnected, replace the display board and
potentiometer knob.
16
Page 21

4.5.3 Front Panel Replacement
• Replace all removed components.
• Remove power cord and console cover (procedure 4.2).
• Remove the jaw knob and potentiometer knob (proce-
dures 4.5.1 and 4.5.2,).
CAUTION: DO NOT DAMAGE THE JAW INT ERLOCK
CABLE WHEN REMOVING THE FRONT
PAN EL .
• Disconnect the ribbon cable from the inside of the front
panel.
• Disengage the six tabs which hold the front panel onto
the chassis.
• Remove the jaw interlock cable from the display board.
• Remove the display board (procedure 4.5.6).
4.5.4 Jaw Assembly Replacement
• Remove power cord and console cover (procedure 4.2).
• Remove the front panel (procedure 4.5.3).
• Remove the motor mount (procedure 4.4.5).
• Remove the ESST wire harness from the display board.
• Remove the 4 Phillips screws.
• Remove the jaw assembly and replace.
• Reinsert the 4 Phillips screws.
• Replace the ESST wire harness, motor mount, front
panel, and cover.
• Remove the power switch (procedure 4.5.4).
• Remove the ESST ring.
• Remove the front panel and replace with new panel.
17
Page 22

4.5.5 Power Switch Replacement
4.5.6 Display Board Replacement
• Remove power cord and console cover (procedure 4.2).
• Remove the jaw knob and potentiometer
knob (procedures 4.5.1 and 4.5.2).
• Remove the front panel (procedure 4.5.3).
• Cut the zip tie over the cables.
• Disconnect wire harness from display board.
• Push in the two snap clips and push out the switch from
inside the console.
• Remove the LED and verify its operation.
• Replace the LED if necessary, inserting it to full depth
with the appropriate Allen wrench.
• Insert a new power switch.
• Remove power cord and console cover (procedure 4.2).
• Remove the front panel (procedure 4.5.3).
• Detach the flex cable from the display board (J1).
• Unclip the 6 front panel clips from the chassis.
• Remove the ESST ring cable from the display board.
• Remove the ribbon cable from the display board.
• Remove the power switch wire harness from the display
board.
• Remove the display board from the front panel clips.
• Replace the display board.
• Push the board onto the front panel clips.
• Reconnect the wire harness.
• Replace the zip tie, front panel, and console cover.
• Perform Electrical Current Leakage Test (procedure 6.3).
• Reattach the power switch wire harness.
• Reattach the ESST ring wire harness.
• Reattach the front panel ribbon cable.
• Reinsert the front panel onto the chassis.
• Reattach the jaw handle and potentiometer knob (proce-
dures 4.5.1 and 4.5.2).
• Reinstall the console cover.
• Perform Electrical Current Leakage Test (procedure 6.3).
18
Page 23

4.6 FUSE REPLACEMENT
4.6.1 Rear Panel Fuse Replacement
Too l s Re qu i re d :
Basic Tool Kit
• Remove power cord.
• Locate the fuse holder below the power cord inlet (see
Figure 1).
• Release the fuse holder clamps with a flat head screw
driver and remove the fuse holder with 2 attached fuses.
• Wipe the metallic ends of the new fuse(s) with a clean
tissue to remove any residue from fingers..
• Remove the old fuse(s) and install a new 5a fuse in the
fuse holder.
• Replace the fuse holder with 2 attached fuses.
• Reattach the fuse holder clamps.
19
Page 24

5.0 Electrical Procedures
5.1 REQUIRED SKILLS
• Basic electronics techniques.
• Experience in the operation of an oscilloscope.
WA R N I N G : The incorrect use of any of the required tools
and techniques may risk damage to the
equipment or injury to the person carrying
out the procedure, subsequent operators, or
patient. Repairs should be made ONLY by
those that have been specifically trained in
the use of all pertinent and techniques.
5.2 ALIGNMENT AND CALIBRATION
1. Align and calibrate the unit per the instructions in MAP
0337.
2. If the lamp ballast or the control board were replaced,
then perform a burn-in and hot strike, per the instruc-
tions in MAP 0337.
20
Page 25

6.0 Final Assembly and Testing
6.1 REQUIRED SKILLS
• Basic electronics techniques
• Experience in the operation of a Current Leakage Tester.
6.2 ASSEMBLY
• Reinstall all pertinent components.
• Verify that all connectors are firmly attached to their
proper locations.
• Ensure that there are no unattached or unsoldered leads.
• Check all physical mounting screws and nuts for tight-
ness.
• Install console cover.
• Apply power and check for proper operation.
• If unit is still malfunctioning after following this man-
ual’s instructions, follow procedure 1.7 to obtain factory
service at Stryker Endoscopy.
• If the unit appears to be operating correctly, proceed to
procedure 6.3.
• Disconnect the X-7000 power cord from the power
source.
• Disconnect the video cables from the console.
• Connect the X-7000 power cord to the power receptacle
on the safety analyzer front panel.
• Clip the safety analyzer test load to the X-7000 console
ground post.
• Set the main power switch on the X-7000 to “ON” and
plug in the light cable.
• Set the main power switch on the safety analyzer to the
“CHASSIS LEAKAGE µA” position.
• Read the leakage current in the following positions:
NORMAL POLARITY - NORMAL GROUND
NORMAL POLARITY - OPEN GROUND
REVERSE POLARITY - OPEN GROUND
REVERSE POLARITY - NORMAL GROUND
• If any leakage reading is over 500µA, send the unit to
Stryker Endoscopy for repair (refer to procedure 1.6 to
obtain factory service at Stryker Endoscopy).
6.3 ELECTRICAL CURRENT LEAKAGE TEST
Required Equipment:
Bio-Tek Current Leakage Tester
• ALWAYS perform this test after working on the unit and
prior to returning it to operation.
• Maximum leakage specification is 500µA for “open
ground” or single-fault condition.
• Set the X-7000 power and the safety analyzer power to
“OFF.”
• Disconnect the safety analyzer from the X-7000.
• This completes the repair procedure
21
Page 26

6.4 HI-POT TEST
• Energize the Hi-Pot tester and adjust the voltage by turn-
ing the adjusting knob until the meter reads 1.8KV.
• Ensure the Hi-Pot tester is operating properly by touch-
ing the positive and negative test leads and listening for
the sound emitted.
• If no sound is emitted, turn the equipment in for repair.
• If sound is emitted, reset the unit before proceeding.
• Connect an alligator clip to the neutral and positive ter-
minals of the power plug.
• Turn on the standby and power switches.
WARNING: HIGH VOLTAGE!
• Touch the positive test lead (red probe) to the alligator
clip and the negative lead (black probe) to the ground
post.
• Hold the leads there for one second. If sound is emitted
from the Hi-Pot tester, reject the unit.
22
Page 27

7.0 Appendix
7.1 ASSEMBLY DIAGRAM
7.2 PARTS LISTING
A 105-199-584 ASSY, X-7000 BOTTOM TRAY
B 105-199-581 ASSY, X-7000 ELLIPTICAL BULB MODULE
C 105-199-678 ASSY, COVER, X-7000
D 105-193-198 SCREW, 6-32 X 0.25 PH EXT. SEMS
7.3 REFERENCE DOCUMENTS
• MAP 0337
NOTE: NONE OF THE IN-HOUSE MAPs (Manufac-
turing Assembly Procedures), QIPs (Quality
Inspection Procedures), SPECIALTY TOOLS,
JIGS, OR FIXTURES LISTED IN THIS MAN-
UAL ARE AVAILABLE FOR PURCHASE.
23
Page 28

8.0 Warranty
This Stryker Endoscopy product is warranted to the original purchaser to be free from defects in material and workmanship for
the following times:
• One year following the date of delivery and an additional 30 days following repair
This warranty extends to all purchases and is limited to the repair or replacement of the product without charge when returned
in the original shipping case to:
Stryker Endoscopy
5900 Optical Court
San Jose, CA 95138
Stryker Endoscopy cannot accept responsibility for returns or replacements which have not been authorized. This warranty
does not cover damages caused by misuse or by failure to follow the procedures outlined in this manual or demonstrated by
Stryker Endoscopy representatives.
There are no other expressed warranties.
9.0 Service
The user is advised to return a malfunctioning unit to Stryker Endoscopy for repair or replacement, where specialized equip-
ment and technicians are available to perform repairs while maintaining full product quality and safety.
In the event that the user decides to undertake repair procedures, Stryker Endoscopy recommends that these be carried out
only by qualified technicians with proper test equipment listed in this manual, so that the safety of operators and patients may
not be compromised.
If service is needed either during or after the warranty period:
1. Contact Stryker Endoscopy at 1-800-624-4422, or call your local Stryker Endoscopy sales representative.
2. Clean and sterilize all parts that will be returned for service. Follow the instructions provided in the user manual.
3. Package all the components carefully in the original shipping container if possible.
4. Ship the product pre-paid and insured to:
Stryker Endoscopy Customer Service
Attention: Repair Department
5900 Optical Court
San Jose, CA 95138
The product described in this manual is continually being reviewed, and improvements may be made without notice.
Stryker and Stryker Endoscopy are registered trademarks of Stryker Corporation.
24
Page 29

10.0 Other Service
For service in the U.S.A., call your Stryker Endoscopy Representative. Outside of the U.S.A., please contact your Stryker
Endoscopy distributor at one of the following locations:
Stryker Corporation
2725 Fairfield Road
Kalamazoo, MI 49002
USA
Phone:1-269-385-2600
Telex:224464 STRYKER KMZ
Fax:1-269-385-1996
Stryker Canada
45 Innovation Drive
Hamilton, Ontario, Canada
L9H 7L8
Phone: (905) 690-5700
(800) 668-8323 (toll free)
Fax: +1(905) 690-5698
Stryker Deutschland GmbH
Gewerbeallee 18, D-45478
Mulheim an der Ruhr
GERMANY
Phone:49-208-999-060
Fax:49-208-999-0666
Stryker Latin America
15100 N.W. 67th Ave. Suite 210
Miami, Florida 33014
USA
Phone:1-305-821-1888
Fax:1-305-826-0067
Stryker European Rep - RA/QA Manager
ZAC Satolas Green Pusignan
Av. De Satolas Green
69881 MEYZIEU Cedex, France
Phone:33-1-48175000
Fax:33-1-48632175
Stryker India Private Limited
First Floor
C-5, SDA Commercial Complex
New Delhi 110 017
INDIA
Phone:91-11-686-6740
Fax:91-11-696-6020
Stryker Australia
Unit 58, 2a Herbert St.
St. Leonards NSW 2065
AUSTRA LIA
Phone: 02 9467 1000
Fax: 02 9467 1010
Stryker Singapore PTE/LTD
70 Bendemeer Road
#03-32 Hiap Huat House
SINGAPORE 339940
Phone:65-293-0119
Fax:65-293-7028
Stryker B.V.
Marinus van Meelweg 17
P.O. Box 8747
5657 En Eindhoven
THE NETHERLANDS
Phone:31-40-2922522
Fax:31-40-2922555
Stryker Osteonics, SA
5, Chemin des Aulx 5
1228 Plan-les-Ouates
Case Postale 725
1212 Grand-Lancy 1
Geneve, SWITZERLAND
Phone:41-22-884-0111
Fax:41-22-884-0199
Stryker Pacific Ltd.
Suite 2501, Citibank Tower
Citibank Plaza
3 Garden Road, Central
HONG KONG
Phone:61-2-9415-5100
Fax:61-29-4294127
Stryker Mexico, S.A. de C.V.
Calle Sacramento 410
Col. Insurgentes San Borja
C.P. 03100
Mexico, D.F.
MEXICO
Phone:525-488-0890
Fax:525-488-0891
25
Page 30

Stryker Finland
PL 80 (Makelankatuz)
FIN 00501 Helsinki
FINLAND
Phone:358 (0) 9 7744 680
Fax:358 (0) 9 7744 6820
Stryker Middle East / Africa
Via Della Posta
6934 Bioggio
Switzerland
Phone:(4021) 212-1122
Fax:(4021) 212-1133
Stryker Korea
11F Dong Sung Bldg.
154-24 Samsung-dong
Kangnam-ku
Seoul, KOREA 135-090
Phone:82-2-34517572
Fax:82-2-552-4156
Stryker China Limited
Room 903-905, Office Tower 2
Beijing Sun Dong An Plaza
138 Wang Fu Jing Da Jie
Beijing 100006, P.R. China
Phone:86-10-65136183
Fax:86-10-83913571
Stryker Japan
Dai Tokyo Kasai Shinjuku Bldg.
3-25-3, Yoyogi
Shibuya-ku, Tokyo 151-0053
Phone:813-535-29106
Fax:813-535-21789
Stryker Europe Headquarters
Cite-Centre, Grand Rue 92
CH-1820 Montreux
SWITZERLAND
Phone:41-21-966-1201
Fax:41-21-966-1200
NV Stryker SA (Belgium)
Ikaros Business Park Fase III
Ikaroslaan 12
1930 Zaventem
Brussels, BELGIUM
Phone:32-2-717-92-10
Fax:32-2-717-92-49
Stryker Chile
Avenida Nueva Tajamar 481
Oficina 805 Piso 8 Torre Norte Santiago,
CHILE
Phone:562-244-3600
Fax:562-244-3696
Stryker Spain
Manuel Tovar 35
28034 Madrid
SPAIN
Phone:34-91-7283500
Fax:34-91-3580748
Stryker AB Scandinavia
Krossverksgatan 3
S-216 10 Malmö
SWEDEN
Phone:46 40-69-18-100
Fax:46 40-69-18-190
26
Stryker Taiwan
5F-1,23 Pa Te Road
Section 1, Taipei, TAIWAN, R.O.C.
Phone:886-2-2322-2895
Fax:886-2-2357-8543
Stryker U.K. Ltd.
Hambridge Road
Newbury
Berkshire RG14 5 EG
United Kingdom
Phone:44-1635-262400
Fax:44-1635-262464
Stryker AB Denmark
Sankt Annae Plads 9
1021 Copenhagen, Denmark
Phone:45 33 9360 99
Fax:45 33 9320 69
MANUFACTURER
Stryker Endoscopy Inc.
5900 Optical Court
San Jose, CA 95138
USA
Phone:408-754-2000
Fax:408-754-2505
Page 31

5900 Optical Court
San Jose, CA 95138
408-754-2000
1-800-624-4422
1000-400-755 Rev. A
 Loading...