

Page 1
STIH)
STIHL SE 121
Instruction Manual
Notice d’emploi
Instrucciones de servicio
Skötselanvisning
Istruzioni d’uso
Betjeningsvejledning
Bruksanvisning
Instruções de serviço
Návod na obsluhu
Handleiding
Инструкция по эксплуатации
пдзгЯет чсЮузт
Instrukcja u¿ytkowania
Eksploatavimo instrukcija
Instrucþiuni de utilizare
Gebrauchsanleitung
Page 2
15SE 121, SE 121 E
English
BA_SE_125_002_01_04.fmPrinted on chlorine-free paper.
Printing inks contain vegetable oils; paper can be recycled.
© ANDREAS STIHL AG & Co. KG, 2007
0458 645 9921. M4. A7. FST. Printed in Germany
STIHl
Contents
Guide to Using this Manual ............ 16
Important safety instructions ........... 17
Intended use ................................... 18
Start-up ........................................... 18
Parking the machine ....................... 19
Connect vacuum unit to
power supply, operation .................. 19
Cleaning the filter element .............. 21
Emptying the container ................... 21
Replacing the filter element ............ 22
Storage ........................................... 23
Minimize wear and
avoid damage ................................. 23
Remedying faults ............................ 24
Main parts of the machine .............. 25
Specifications ................................. 26
Special accessories ........................ 26
Maintenance and Repairs ............... 26
Disposal .......................................... 27
Certificate of conformity .................. 27
Quality Certification ........................ 28
Dear Customer,
Thank you for choosing a quality
engineered STIHL product.
This machine has been built using
modern production techniques and
comprehensive quality assurance.
Every effort has been made to ensure
your satisfaction and troublefree use
of the machine.
Please contact your dealer or our
sales company if you have any
queries concerning your machine.
Hans Peter Stihl
Page 3

16
English
SE 121, SE 121 E
Pictograms
All the pictograms attached to the
machine are shown and explained in
this manual.
The operating and handling instructions
are supported by illustrations.
Symbols in text
The individual steps or procedures
described in the manual may be marked
in different ways:
: A bullet marks a step or procedure
without direct reference to an
illustration.
A description of a step or procedure that
refers directly to an illustration may
contain item numbers that appear in the
illustration.
Example:
Loosen the screw (1)
Lever (2) ...
In addition to the operating instructions,
this manual may contain paragraphs
that require your special attention. Such
paragraphs are marked with the
symbols described below:
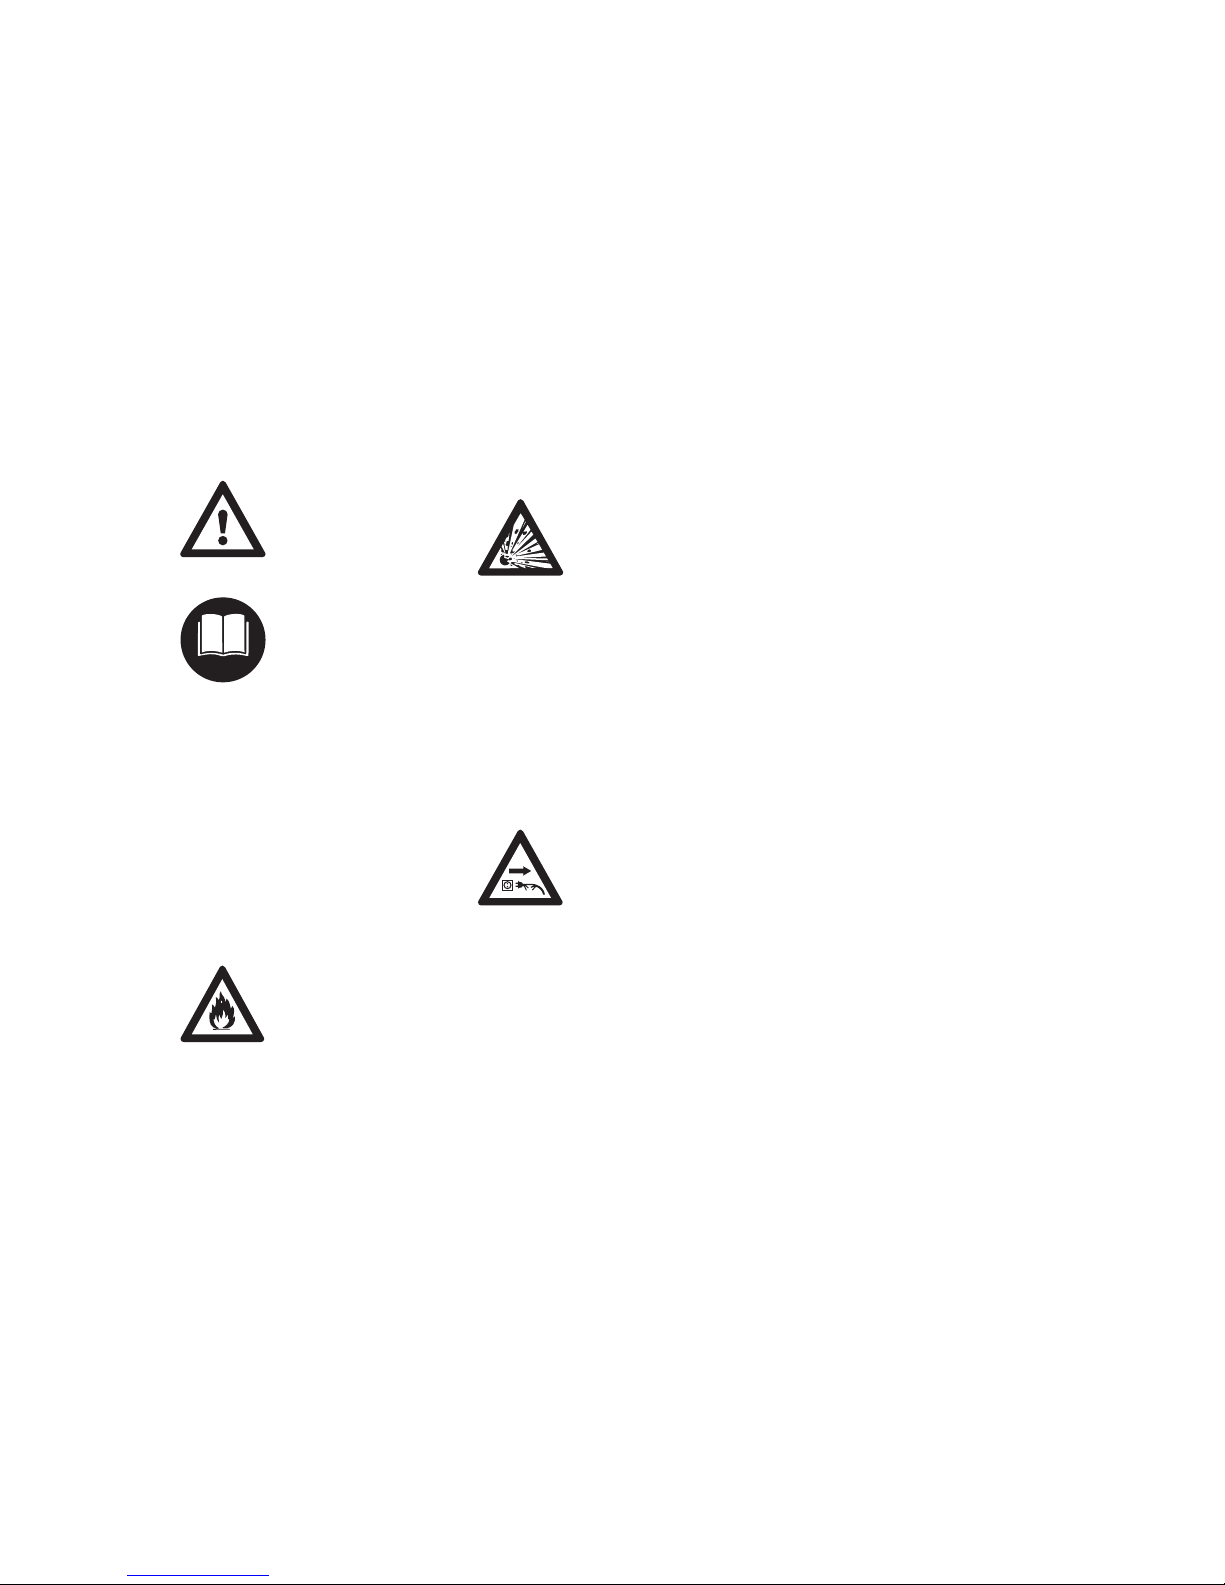
Warning where there is a risk of an
accident or personal injury or
serious damage to property.
Caution where there is a risk of
damaging the machine or its
individual components.
Note or hint which is not essential
for using the machine, but may
improve the operator’s understanding of the situation and result
in better use of the machine.
Note or hint on correct procedure in
order to avoid damage to the
environment.
Equipment and features
This instruction manual may refer to
several models with different
features. Components that are not
installed on all models and related
applications are marked with an
asterisk (*). Such components may
be available as special accessories
from your STIHL dealer.
Engineering improvements
STIHL’s philosophy is to continually
improve all of its products. As a result,
engineering changes and improvements
are made from time to time. If the
operating characteristics or the
appearance of your machine differ from
those described in this manual, please
contact your STIHL dealer for
assistance.
Therefore some changes, modifications
and improvements may not be covered
in this manual.
Guide to Using this Manual
Page 4
17SE 121, SE 121 E
English
General
Particular safety
precautions must be
taken when working with
the machine. The power
connection is a particular
source of danger.
Read all instructions
before using this
machine. The following
safety precautions must
be observed.
Before starting work, always check that
your vacuum cleaner is operating
correctly and is in good condition. Pay
special attention to the power cable and
plug.
The machine may only be used by duly
trained and authorized operators. The
machine must never be used by
adolescents.
Keep children, animals and bystanders
at a safe distance.
The machine may only be operated with
an undamaged filter element.
Never attempt to pick up
flammable materials (hot
ashes, inflammable
explosive dust, glowing
cigarettes, etc.) or
combustible liquids
(petrol, thinners, etc.).
The machine cannot be used to vacuum
physiologically harmful dust.
Risk of fire or explosion
Avoid damage to the power cable by
rolling over, crushing or pulling it.
Never pull the power cable to disconnect
the plug from the wall outlet. Always
grasp the plug, never the cable, to
unplug.
Inspect the power cable regularly for
signs of damage or ageing. Never use
the machine if the power cable is
damaged in any way – risk of
electrocution.
The main plug must be
disconnected
immediately if the power
cable is damaged –
electric shocks can kill.
Always remove the paper filter bag and
check correct operation of the float
before using the vacuum cleaner to pick
up liquids or wet materials. Always use
the filter element.
Stop work immediately and empty the
container if foam forms.
Never modify your vacuum cleaner in
any way, as this could be extremely
dangerous.
Only carry out the maintenance work
and repairs described in this manual.
Other work should be performed by your
STIHL servicing dealer.
Only use original replacement parts.
Always disconnect the plug from the
power supply (unplug it) before
performing any kind of work on the
machine.
The power cable may only be repaired
or replaced by authorized personnel.
All plugs and connectors for power
cables must at least be splash-proof.
The machine must be unplugged from
the power supply before cleaning or
servicing it and before replacing any
parts.
Never spray the upper part of the
vacuum cleaner with water: danger to
people, risk of short-circuiting.
Important safety
instructions
Page 5
18
English
SE 121, SE 121 E
For vacuuming:
: Dry, non-flammable materials
(dust, dirt, broken glass, wood or
metal shavings, sand, etc.)
: Non-flammable liquids
(dirty water, spilled juices, etc.)
: Also suitable for more demanding
use in industrial applications
The machine must not be plugged into
the mains socket while carrying out the
following operations.
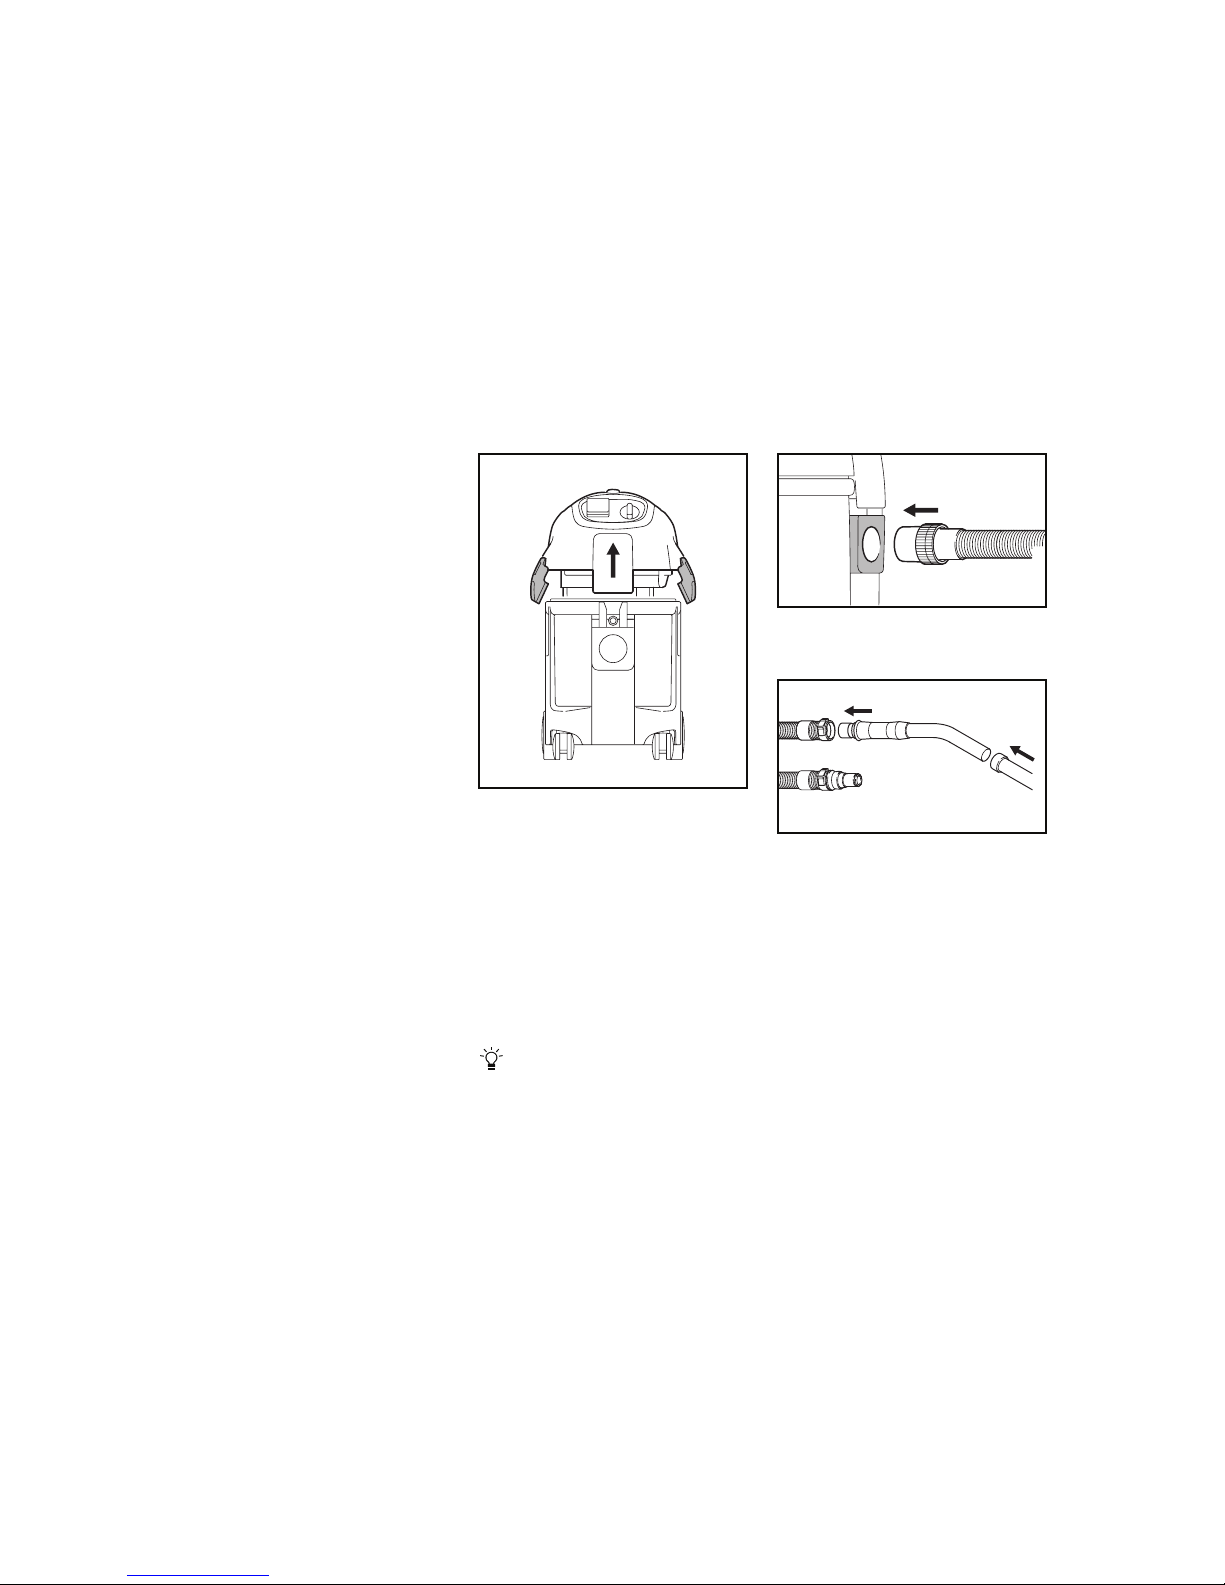
: Release catches (1)
: Lift upper part of vacuum unit (2)
vertically upwards
: Remove accessories from container
: Insert filter bag in vacuum unit
(instructions are printed on the bag)
: Refit upper part of vacuum unit and
engage catches
Ensure that catches are fitted
correctly.
: Insert suction hose into intake port
: Push handle tube (7) into sleeve of
suction hose
: Push extension tube (8) onto handle
tube
SE 121 E
Fit sleeve for power tools on end of
hose (9)
Intended use Start-up
645BA001 KN
1
2
1
645BA002 KN
645BA003 KN
7
8
9
Page 6

19SE 121, SE 121 E
English
: Attach suction tube holder approx.
20 cm (A) from bottom end of
extension tube
: Fit a crevice tool (10) or floor
tool (11) on the extension tube as
required.
The parking brake may be applied on
the swivel wheel to lock the machine in
one position.
The operating voltage specified on the
rating plate must match that of the mains
power supply. The rating plate is located
on the rear of the upper part of the
vacuum unit.
: Ensure that the vacuum unit is
switched off
: Plug the power cable into a correctly
installed socket.
Observe the minimum cable crosssections when using extension leads.
SE 121
Switch positions
0 = Vacuum unit OFF
I = Vacuum unit ON
645BA014 KN
A
645BA004 KN
10
11
Parking the machine
645BA013 KN
Cable length Cross-section
Up to 20 m 1.5 mm
2
20 m to 50 m 2.5 mm
2
Connect vacuum unit to
power supply, operation
645BA017 KN
Page 7

20
English
SE 121, SE 121 E
SE 121 E
: Other machines (up to 2400 W) are
connected to the socket (1) outlet on
the machine.
: The machine is switched on and off
or to automatic operation via the
switch (2). The suction force is
adjusted manually by turning the
switch further.
Switch positions
0
Vacuum unit is switched off, the
socket cannot be used
I
Vacuum unit is switched on, the
socket cannot be used
auto
The machine connected to the
socket on the vacuum unit switches
the vacuum unit on and off via the
automatic switch-on function
Switch off the connected machine
before moving the switch to the "auto"
position.
The motor continues to run for a few
seconds after switching off in order to
empty the suction hose.
Vacuuming dry matter
Flammable materials must not be
vacuumed.
Always ensure that the filter bag has
been fitted in the container before
vacuuming dry materials. This makes it
easier to dispose of the vacuumed
material. Dry matter can also be
vacuumed without filter bag.
Vacuuming liquids
Flammable liquids must not be
vacuumed.
Always remove the paper filter bag and
check correct operation of the float
before vacuuming liquids. The float
interrupts the air stream when the
container is full. The filter element
should be replaced by a special
cartridge* if the vacuum unit is used
exclusively for wet vacuuming.
The filter element is damp after
vacuuming liquids. The filter
element may clog more quickly if dry
matter is vacuumed while it is still
damp. For this reason, the filter
element should be dried or replaced
by a dry filter element before
vacuuming dry matter.
* Special accessory
645BA005 KN
1
2
0
auto
I
Page 8

21SE 121, SE 121 E
English
After use
: Unplug the power cable from the
mains socket
: Wind up the power cable and hang
it over the handle
: Empty the container and clean the
vacuum unit
After vacuuming liquids:
: Remove the upper part of the
vacuum unit so that the filter
element can dry
: Switch on vacuum unit
: Push slide (1) to release sleeve on
hose
: Remove sleeve
: Seal suction hose at sleeve – press
sleeve firmly against upper part of
vacuum unit
: Press filter cleaning button three
times
Accumulated dust is cleared from the
filter element.
: Switch off machine
: Unplug machine from mains socket
: Release catches (1)
: Lift upper part of vacuum unit (2)
vertically upwards
When dry-vacuuming without filter
bag and when picking up liquids:
: Empty the container and dispose of
the contents in accordance with
regulations
: Refit upper part of vacuum unit
Cleaning the filter element
1
645BA006 KN
645BA007 KN
Emptying the container
645BA001 KN
1
2
1
Page 9

22
English
SE 121, SE 121 E
When dry-vacuuming with filter bag:
: Pull filter bag sleeve off intake port
and seal opening in filter bag sleeve
with slide
: Carefully remove filter bag from
container and dispose of it in
accordance with statutory
regulations
: Fit a new filter bag (3)
(instructions are printed on the bag)
: Push filter bag sleeve onto intake
port as far as possible
Refit upper part of vacuum unit
: Clean edge of container
: Refit upper part of vacuum unit
: Clean sleeve and intake port before
fitting the suction hose
: Unplug machine from mains socket
: Remove upper part of vacuum unit
and turn it over
: Unscrew filter cage (1)
: Remove filter element (2) and
dispose of it in accordance with
statutory regulations
: Fit a new filter element in reverse
order of steps
: Check correct operation of the float:
the float must move easily when the
filter cage is turned
: Refit upper part of vacuum unit
Never work without the filter
element.
645BA008 KN
645BA009 KN
3
Replacing the filter element
645BA010 KN
1
2
Page 10

23SE 121, SE 121 E
English
The vacuum cleaner should be stored in
a dry place where it is safe from
unauthorized use.
Excess wear and damage to the device
can be avoided by observing the
instructions in this booklet.
The device must be used, serviced and
stored following the precautions in this
booklet.
The user is responsible for all damage
due to non-compliance with the safety,
operating and maintenance instructions.
This applies to the following in particular:
– Modifications to the product not
authorized by STIHL
– The use of accessories that are
impermissible or unsuitable for the
device or are of inferior quality
– Improper use of the device
– Use of the device in sports or
competitive events
– Damage from using the device with
defective parts
– Damage due to operation with the
wrong power supply
Service tasks
All of the tasks listed in the section
"Service and Care Instructions" must be
performed regularly. If the user is unable
to do these service tasks, hire a dealer.
STIHL recommends that you only use
STIHL dealers for service and repairs.
STIHL dealers are regularly trained and
provided with technical information.
If these tasks are not done right or at all,
damage can ensue for which the user is
responsible. This includes:
– Damage to device components from
untimely or insufficient service
– Corrosion and other damage due to
incorrect storage
– Damage to the device from using
inferior-quality replacement parts
Storage
645BA011 KN
Minimize wear and
avoid damage
Page 11

24
English
SE 121, SE 121 E
Wear parts
Some parts of the power tool are subject
to normal wear and tear even when the
machine is used for its intended
purpose. These parts must be replaced
in good time, depending on the nature
and duration of use.
Such parts include the following, for
example:
– Filter element, filter bag
– Carbon brushes
Fault: Motor does not start
Fault: Motor does not run in automatic
mode
Fault: Reduced vacuuming
performance
Fault: No suction when picking up
liquids
Cause Remedy
Mains fuse
disconnected
Check and
reconnect mains
fuse
Overload
protection tripped
Leave vacuum to
cool for approx.
5 minutes
Cause Remedy
Power tool
defective or not
plugged in
correctly
Check correct
operation of
power tool or plug
in correctly
Remedying faults
Cause Remedy
Suction force
manually set to an
excessively low
level
See "Operation"
Filter bag full See "Emptying
the container
Suction hose /
nozzle clogged
Clean suction
hose / nozzle
Filter element
soiled
See "Cleaning the
filter element" or
"Replacing the
filter element"
Seal between
upper part of
vacuum unit and
container soiled or
defective
Clean or replace
the seal
Cause Remedy
Container is full
(float seals the
suction opening)
See "Emptying
the container"
Page 12

25SE 121, SE 121 E
English
1 = Suction hose
2 = Handle tube
3 = Sleeve for power tool
1)
4 = Socket outlet for power tool
1)
5 = Switch
6 = Catches
7 = Intake port for connecting the
suction hose
8 = Castor with parking brake
9 = Container
10 =Holder for nozzles and accessories
11 =Filter cleaning button
12 =Handle
13 =Suction tube
14 =Floor tool
15 =Suction tube holder
16 =Crevice tool
1)
Only for SE 121 E
Main parts of the machine
8
4 5
645BA012 KN
1
2
3
6
7
9
10
11
12
13
13
14
15
16
6
Page 13

26
English
SE 121, SE 121 E
1) Great Britain, 110 V version
Filter bag
Filter element
Wet vacuuming nozzle – for wetvacuuming large areas
Coupling – for connecting nozzles
directly to the suction hose
Machine sleeve
1)
– for connecting a
power tool to the suction hose
Connecting element – for connecting
suction hoses
Suction hose ND 27, 3.5 m
Suction hose ND 27, 3.5 m 2) (antistatic)
Further information on these and other
special accessories is available from
your STIHL dealer.
1) Already included with the SE 121 E
2) Only for SE 121 E
Users of this machine may only carry
out the maintenance and service work
described in this user manual.
All other repairs must be carried out
by a servicing dealer.
STIHL recommends that all
maintenance and repair work be carried
out by an authorized STIHL dealer.
STIHL dealers regularly attend training
courses and are supplied with the
necessary technical information.
When repairing the machine, only use
replacement parts which have been
approved by STIHL for this power tool
or are technically equivalent. Only use
high-quality replacement parts in order
to avoid the risk of accidents or damage
to the machine.
STIHL recommends the use of genuine
STIHL replacement parts.
Original STlHL parts can be identified by
the STIHL part number, the
STIHl
logo and the STlHL parts symbol (.
The symbol may appear alone on small
parts.
Voltage 230 - 240 V
(110 V
1)
)
Frequency 50 -60 Hz
Power consumption
- Maximum 1500 W
- Acc. to EN 60335-2-69 1200 W
Fuse 16 A
(15 A
1)
)
Protection class SE 121 2
Type of protection IP X4
Max. intake capacity
- Air 3600 l/min
Max. vacuum 230 mbar
Length approx 390 mm
Width approx. 380 mm
Height approx. 570 mm
Suction hose
- Length 3 m
- Diameter, inside 36 mm
Container capacity 27 l
Weight approx. 10 kg
Sound pressure level at
a distance of 1 m 62 dB(A)
Specifications Special accessories Maintenance and Repairs
Page 14

27SE 121, SE 121 E
English
Electrical appliances must not be thrown
in the garbage can. Take the unit,
accessories and packaging to an
approved disposal site for environmentfriendly recycling.
Andreas Stihl AG & Co. KG
Badstr. 115
71336 Waiblingen
certifies that the new machines
described below
conform to the specifications of
Directives 98/37/EC, 73/23/EEC and
89/336/EEC.
The products have been developed and
manufactured in compliance with the
following standards:
EN ISO 12100-1, EN ISO 12100-2,
EN 60335-1, EN 60335-2-69,
EN 55014-1, EN 55014-2, EN 61000-3-2
Done at Waiblingen,
11 January 2005
Andreas Stihl AG & Co. KG
pp.
Steinhauser
Director
Group Product Management /
Technical Service
Disposal
Category: Vacuum cleaner
Make: STIHL
Model: SE 121,
SE 121 E
Serial identification: 4742
Certificate of conformity
Page 15

28
English
SE 121, SE 121 E
All STIHL products comply with the
highest quality standards.
An independent organization has
certified that all products manufactured
by STIHL meet the strict requirements of
the ISO 9001 standard for quality
management systems in terms of
product development, materials
purchasing, production, assembly,
documentation and customer service.
Quality Certification
000BA026
 Loading...