

Page 1

STIHL BF
WARNING
Read Instruction Manual thoroughly
before use and follow all safety
precautions – improper use can
cause serious or fatal injury.
ADVERTENCIA
Antes de usar la máquina lea y siga
todas las precauciones de
seguridad dadas en el manual de
instrucciones – el uso incorrecto
puede causar lesiones graves o
mortales.
{
Instruction Manual
Manual de instrucciones
Page 2

Instruction Manual
1 - 20
Manual de instrucciones
21 - 43
Page 3

Contents
English
Interchangeable Attachments 2
Guide to Using this Manual 2
Safety Precautions and Working
Techniques 3
Using the Unit 8
Approved Basic Power Tools 10
Mounting the Attachment 10
Fitting the Carrying Ring 13
Original Instruction ManualPrinted on chlorine-free paper
Mounting the Loop Handle 13
Fitting the Harness 14
Starting / Stopping the Engine 15
Storing the Machine 16
Maintenance and Care 16
Main Parts 17
Specifications 18
Maintenance and Repairs 18
Disposal 19
Trademarks 19
Printing inks contain vegetable oils, paper can be recycled.
Allow only persons who fully understand
the manuals of the basic power tool and
your soil cultivator attachment to operate
this power tool combination.
To receive maximum performance and
satisfaction from your STIHL soil
cultivator attachment, it is important that
you read, understand and follow the
safety precautions and the operating
and maintenance instructions in chapter
"Safety Precautions and Working
Techniques" before using your soil
cultivator attachment. For further
information you can go to
www.stihlusa.com.
Contact your STIHL dealer or the STIHL
distributor for your area if you do not
understand any of the instructions in the
two manuals.
WARNING
Because a power tool power head and
shaft equipped with a soil cultivator
attachment is a power tool, some special
safety precautions must be observed to
reduce the risk of personal injury.
Careless or improper use may cause
serious or even fatal injury.
Always wear proper eye protection.
{
© ANDREAS STIHL AG & Co. KG, 2015
0458-504-8621-A. VA0.L15.
0000000674_009_GB
BF
This instruction manual is protected by copyright. All rights reserved, especially the rights to reproduce, translate and process
with electronic systems.
1
Page 4
English
.
.
.
.
002BA531 KN
+
+
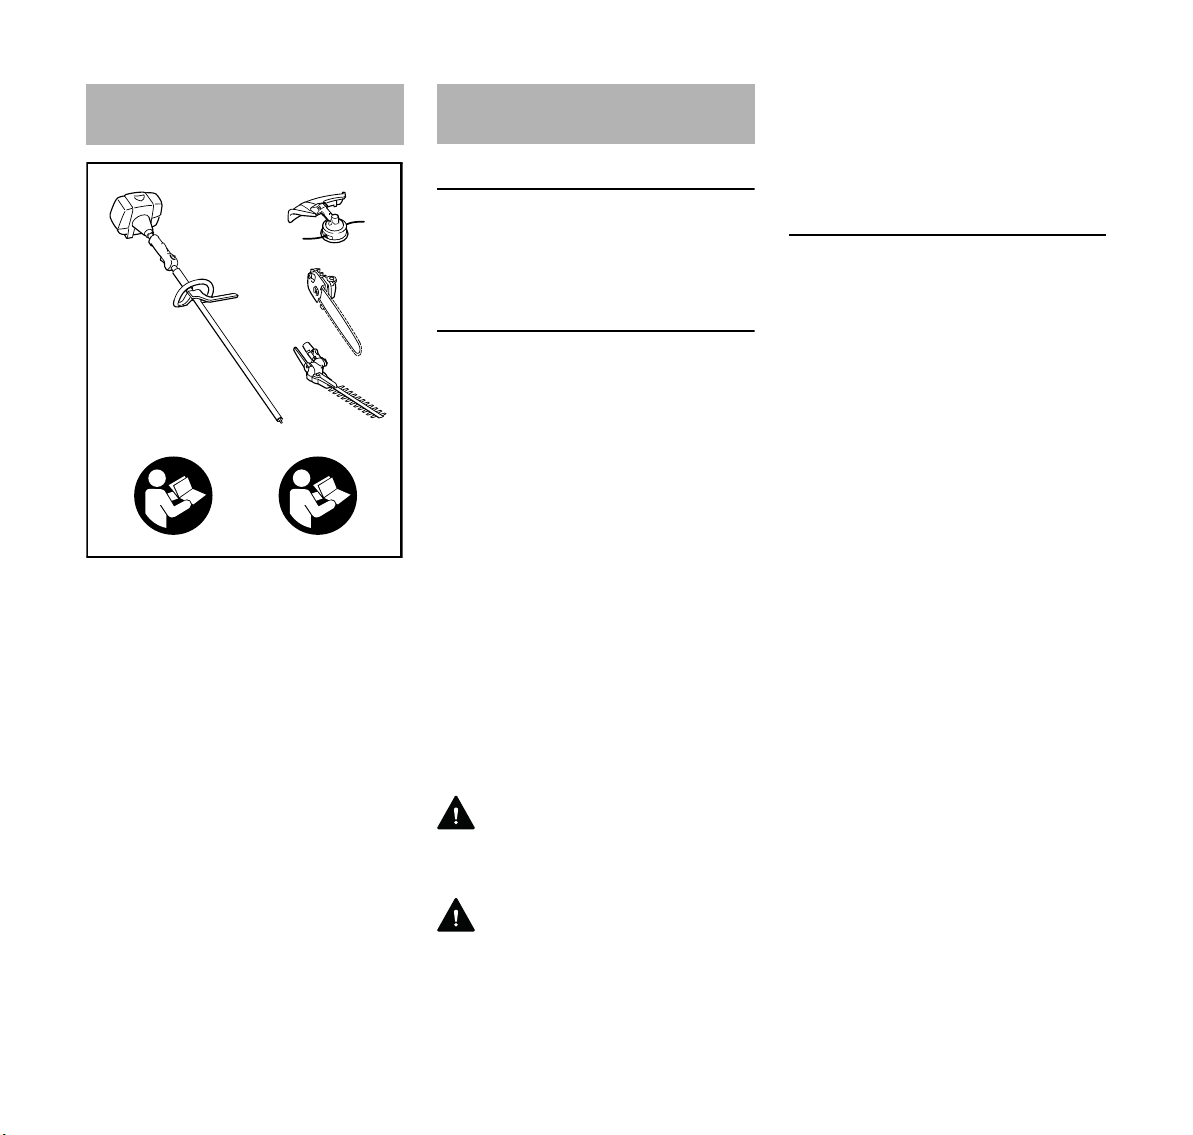
Interchangeable
Attachments
The STIHL interchangeable attachment
may be mounted to different STIHL
power tools.
The approved power tool models are
listed in the chapter on "Approved Basic
Power Tools".
In this instruction manual the functional
unit formed by the basic power tool and
interchangeable attachment is referred
to as the power tool.
Therefore, the separate instruction
manuals for the basic power tool and
attachment should be used together for
the power tool.
Always read and and make sure you
understand both instruction manuals
before using your power tool for the first
time and keep them in a safe place for
future reference.
Guide to Using this Manual
Pictograms
All the pictograms attached to or
embossed on the machine are shown
and explained in this manual.
Symbols in Text
Many operating and safety instructions
are supported by illustrations.
The individual steps or procedures
described in the manual may be marked
in different ways:
N A bullet marks a step or procedure.
A description of a step or procedure that
refers directly to an illustration may
contain item numbers that appear in the
illustration. Example:
N Loosen the screw (1).
N Lever (2) ...
In addition to the operating instructions,
this manual may contain paragraphs
that require your special attention. Such
paragraphs are marked with the
following symbols and signal words:
DANGER
Indicates an imminent risk of severe or
fatal injury.
WARNING
Indicates a hazardous situation which, if
not avoided, could result in severe or
fatal injury.
NOTICE
Indicates a risk of property damage,
including damage to the machine or its
individual components.
Engineering Improvements
STIHL’s philosophy is to continually
improve all of its products. As a result,
engineering changes and improvements
are made from time to time. Therefore,
some changes, modifications and
improvements may not be covered in
this manual. If the operating
characteristics or the appearance of
your machine differs from those
described in this manual, please contact
your STIHL dealer or the STIHL
distributor for your area for assistance.
2
BF
Page 5
English
Safety Precautions and
Working Techniques
Because a power tool
power head and shaft
equipped with a soil cultivating attachment is a
high-speed power tool,
special safety precautions must be observed to
reduce the risk of personal injury.
It is important that you
read, fully understand
and observe the following
safety precautions and
warnings. Read the
instruction manuals and
the safety precautions for
your basic power tool and
your soil cultivating
attachment periodically.
Careless or improper use
may cause serious or
fatal injury.
Have your STIHL dealer show you how
to operate your power tool. Observe all
applicable local safety regulations,
standards and ordinances.
WARNING
As more fully explained later in these
Safety Precautions, to reduce the risk of
personal injury, make sure your unit is
equipped with the proper handle and
harness for the type of working tool you
are using. Use only working tools that
are specifically authorized by STIHL for
use on your power tool power head and
shaft with soil cultivating attachment.
WARNING
Do not lend or rent your power tool
without the instruction manuals for your
basic power tool and your soil cultivating
attachment. Be sure that anyone using it
understands the information contained
in these manuals.
WARNING
The use of this machine may be
hazardous. If the rotating blade comes in
contact with your body, it will injure you.
When it comes in contact with solid
foreign objects such as rocks or bits of
metal, it may fling them directly or by
ricochet in the direction of bystanders or
the operator. Striking such objects could
damage the soil cultivating attachment
and may cause blades to crack, chip or
break. Thrown objects, including broken
blades, may result in serious or fatal
injury to the operator or bystanders.
STIHL does not recommend the use of
non-elastic blades when working in
stony areas.
Use your power tool power head and
shaft equipped with the soil cultivating
attachment only for rejuvenation of
flower beds and plantings, and for
mixing soil-improving additives into the
soil.
WARNING
Do not use it for other purposes, since
misuse may result in personal injury or
property damage, including damage to
the machine.
WARNING
Minors should never be allowed to use
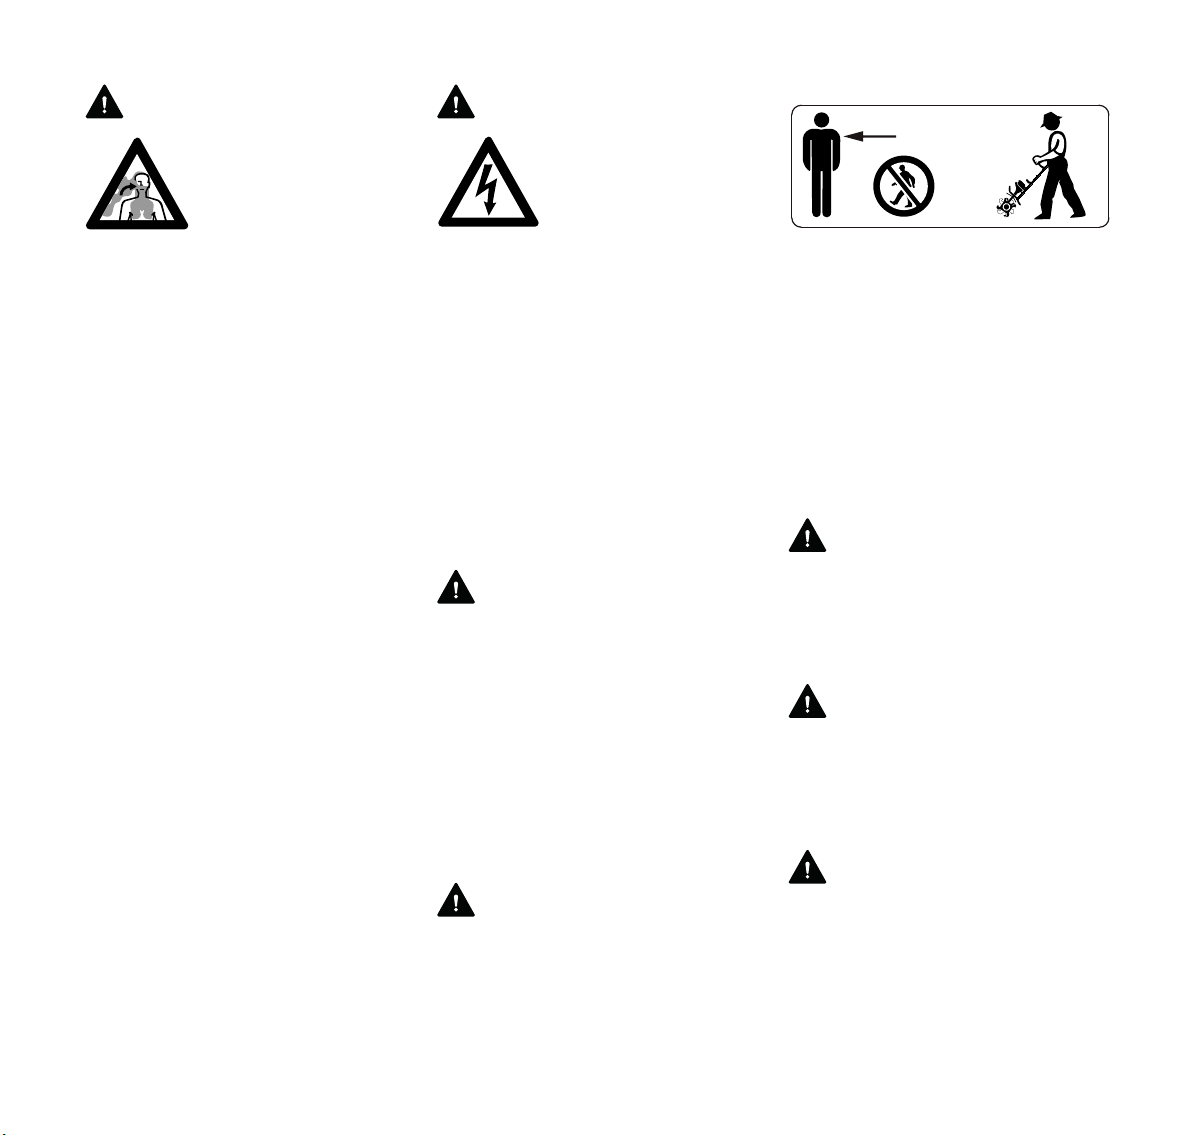
this power tool. Bystanders, especially
children, and animals should not be
allowed in the area where it is in use.
WARNING
To reduce the risk of injury to bystanders
and damage to property, never let your
power tool run unattended. When it is
not in use (e.g. during a work break),
shut it off and make sure that
unauthorized persons do not use it.
Most of these safety precautions and
warnings apply to the use of all STIHL
soil cultivators. Different models may
have different parts and controls. See
the appropriate section of your basic
power tool and your soil cultivating
attachment instruction manuals for a
description of the controls and the
function of the parts of your model.
Safe use of a power tool involves
1. the operator
2. the power tool
3. the use of the power tool.
THE OPERATOR
Physical Condition
You must be in good physical condition
and mental health and not under the
influence of any substance (drugs,
alcohol, etc.) which might impair vision,
dexterity or judgment. Do not operate
this machine when you are fatigued.
BF
3
Page 6
English
WARNING
Be alert – if you get tired, take a break.
Tiredness may result in loss of control.
Working with any power tool can be
strenuous. If you have any condition that
might be aggravated by strenuous work,
check with your doctor before operating
this machine.
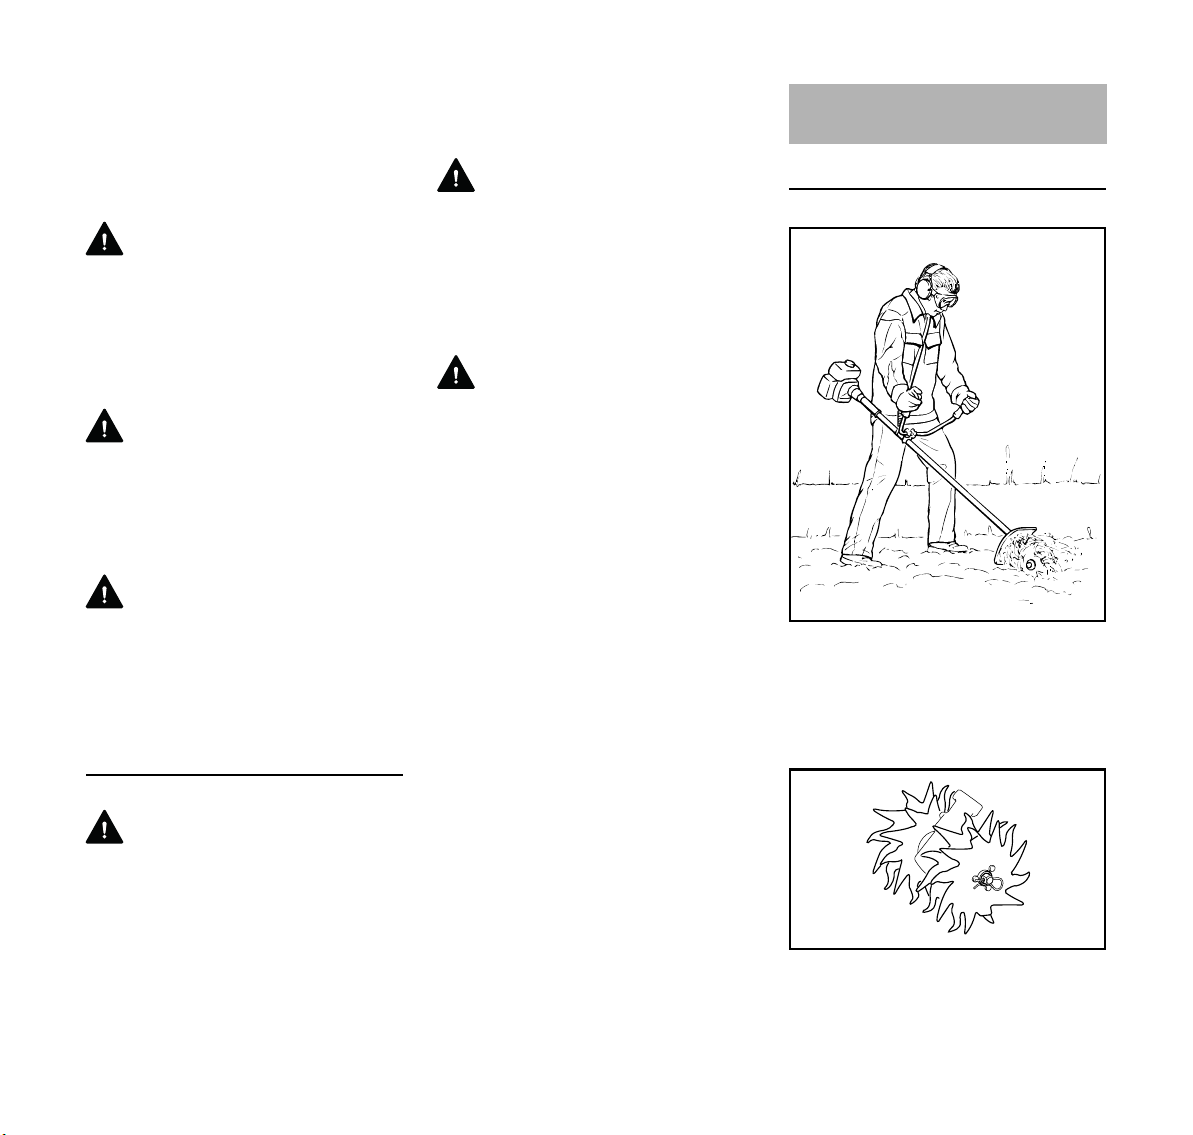
Proper Clothing
WARNING
To reduce the risk of injury, the operator
should wear proper protective apparel.
The deflector provided with your power
tool will not protect the operator from all
foreign objects (stones, glass, wire, etc.)
thrown back by the rotating working tool.
Thrown objects may also ricochet and
strike the operator.
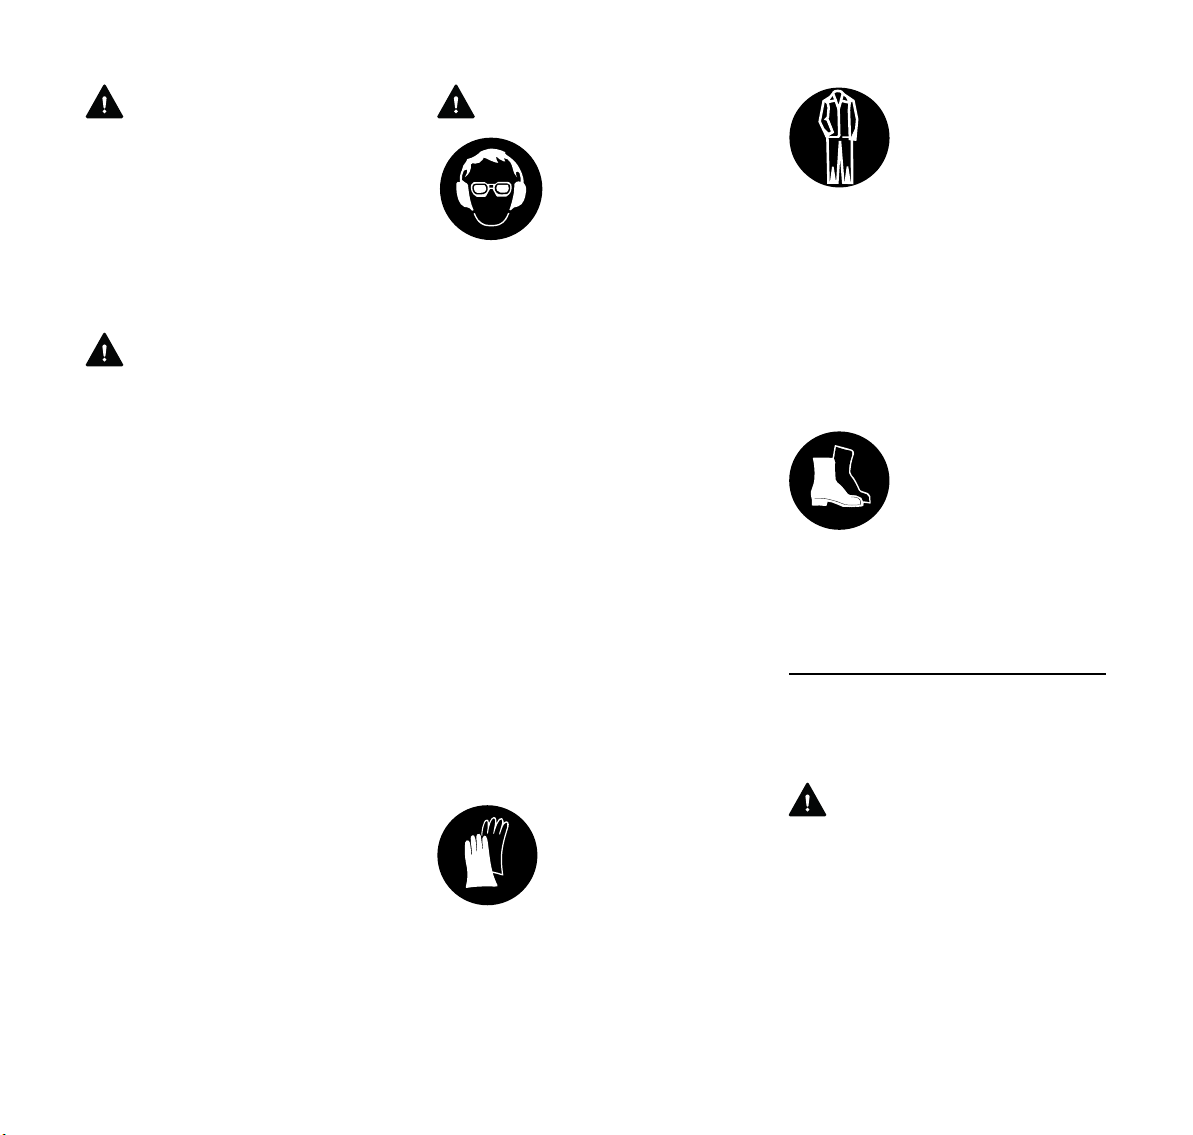
WARNING
To reduce the risk of
injury to your eyes never
operate your power tool
unless wearing goggles
or properly fitted protective glasses with
adequate top and side
protection complying with
ANSI Z87 "+" (or your
applicable national standard). To reduce the risk of
injury to your face STIHL
recommends that you
also wear a face shield or
face screen over your
goggles or protective
glasses.
Power tool noise may
damage your hearing.
Wear sound barriers (ear
plugs or ear mufflers) to
protect your hearing.
Continual and regular
users should have their
hearing checked
regularly.
Be particularly alert and cautious when
wearing hearing protection because
your ability to hear warnings (shouts,
alarms, etc.) is restricted.
Always wear heavy duty
work gloves (e.g. made of
leather or other wear
resistant material) when
handling the soil cultivating attachment. Heavyduty, nonslip gloves
improve your grip and
help to protect your
hands.
Clothing must be sturdy
and snug-fitting, but allow
complete freedom of
movement. Wear long
pants made of heavy
material to help protect
your legs. Do not wear
shorts, sandals or go
barefoot.
Avoid loose-fitting jackets, scarfs,
neckties, jewelry, flared or cuffed pants,
unconfined long hair or anything that
could become caught on branches,
brush or the moving parts of the unit.
Secure hair so it is above shoulder level.
Good footing is very
important. Wear sturdy
boots with nonslip soles.
Steel-toed safety boots
are recommended.
For further instructions on proper
clothing see the safety precautions in
the instruction manual for the basic
power tool model you are using.
THE POWER TOOL
For illustrations and definitions of the
power tool parts see the chapter on
"Main Parts."
WARNING
Never modify this power tool in any way.
Only attachments supplied by STIHL
and expressly approved by STIHL for
use with the specific STIHL basic power
tool model are authorized. Although
certain unauthorized attachments are
useable with STIHL power tools, their
use may, in fact, be extremely
dangerous.
4
BF
Page 7
English
002BA254 KN
If this tool is subjected to unusually high
loads for which it was not designed (e.g.
heavy impact or a fall), always check
that it is in good condition before
continuing work. Check in particular that
the controls and safety devices are
working properly. Do not continue
operating this machine if it is damaged.
In case of doubt, have it checked by your
STIHL servicing dealer.
THE USE OF THE POWER TOOL
Transporting the Power Tool
WARNING
To reduce the risk of injury from loss of
control and blade contact, never carry or
transport your power tool with the
working tool moving.
WARNING
Always switch off the engine and make
sure the working tool has stopped before
putting a power tool down.
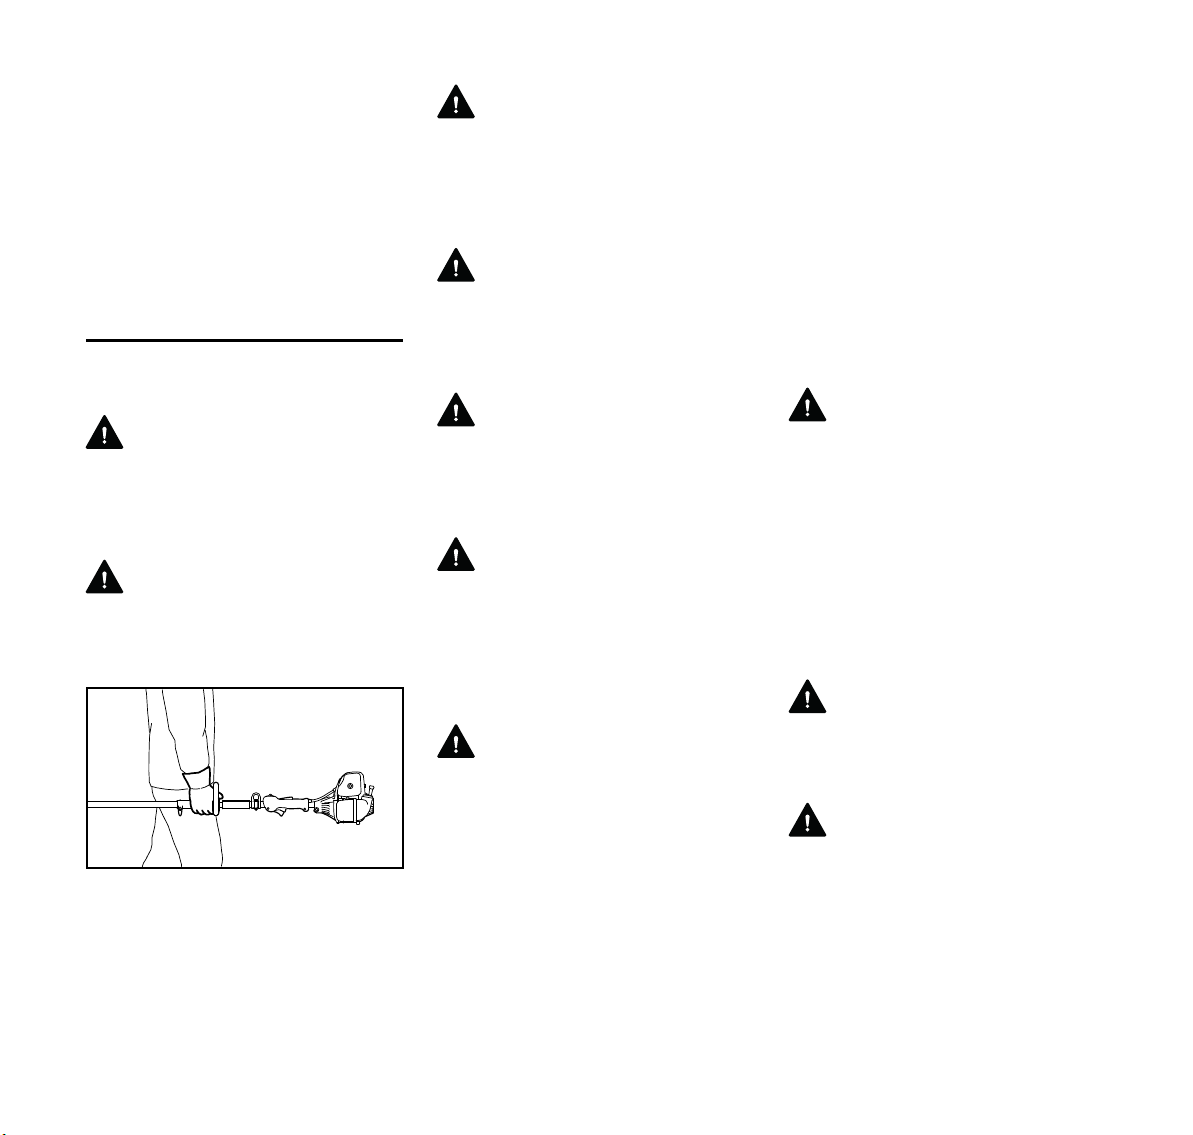
It may be carried only in a horizontal
position. Grip the shaft in a manner that
the machine is balanced horizontally.
Keep the hot muffler away from your
body and the soil cultivating attachment
behind you.
WARNING
When transporting it in a vehicle,
properly secure it to prevent turnover,
fuel spillage and damage to the unit.
Before Starting
WARNING
Always check your power tool for proper
condition and operation before starting.
Never attempt to modify the controls or
safety devices.
WARNING
Never operate your power tool if it is
damaged, improperly adjusted or
maintained, or not completely or
securely assembled.
WARNING
Do not attach any soil cultivating
attachment to a unit without proper
installation of all required parts. Failure
to use the proper parts may cause the
blades to fly off and seriously injure the
operator or bystanders.
WARNING
The soil cultivating attachment must be
properly tightened and in safe operating
condition. Inspect for loose parts (nuts,
screws, etc.) and for cracked, bent,
warped or damaged blades. Replace
damaged blades before using the power
tool.
Keep the handles clean and dry at all
times; it is particularly important to keep
them free of moisture, pitch, oil, fuel mix,
grease or resin in order for you to
maintain a firm grip and properly control
your power tool.
Keep the deflector adjusted properly at
all times (see chapter "Mounting the
Attachment" of your instruction manual).
Adjust harness and hand grip to suit
your size before starting work. To be
better prepared in case of an
emergency, practice releasing the unit
from the harness as quickly as possible.
Starting
WARNING
Start the engine at least 10 feet (3 m)
from the fueling spot, outdoors only.
For specific starting instructions, see the
appropriate section of your basic power
tool and your soil cultivating attachment
manuals.
Place the power tool on firm ground or
other solid surface in an open area.
Maintain good balance and secure
footing.
WARNING
To reduce the risk of injury from loss of
control, do not attempt to "drop start"
your power tool.
WARNING
To reduce the risk of injury from loss of
control, be absolutely sure that the
working tool is clear of you and all other
obstructions and objects, including the
ground, because when the engine starts
at starting-throttle, engine speed will be
fast enough for the clutch to engage and
move the working tool.
BF
5
Page 8

English
002BA055 KN
002BA080 KN
Once the engine has started,
immediately blip the throttle trigger,
which should release the starting throttle
and allow the engine to slow down to
idle.
With the engine running only at idle,
attach the power tool to the spring hook
of your harness (see appropriate
chapter of this manual).
WARNING
Your power tool is a one-person
machine. Do not allow other persons in
the general work area, even when
starting.
See also the safety precautions on
Starting in the instruction manual of your
basic power tool.
During Operation
Holding and Controlling the Power Tool
Always hold the unit firmly with both
hands on the handles while you are
working. Wrap your fingers and thumbs
around the handles.
Models with Bike Handle
Right handle on control handle, left hand
on left handle.
Models with Loop Handle
Your right hand should grip the control
handle at the rear, and your left hand
should grip the loop handle. This also
applies to left-handers.
WARNING
To reduce the risk of injury from loss of
control, never work on a ladder or on any
other insecure support. Never hold the
soil cultivating attachment above waist
height.
WARNING
Never attempt to operate
your power tool with one
hand. Loss of control of
the power tool resulting in
serious or fatal injury may
result. To reduce the risk
of cut injuries, keep
hands and feet away
from the soil cultivating
attachment. Never touch
a moving working tool
with your hand or any
other part of your body.
WARNING
Do not overreach. Keep proper footing
and balance at all times. Special care
must be taken in slippery conditions (wet
ground, snow) and in difficult, overgrown
terrain. Watch for hidden obstacles such
as tree stumps, roots and ditches to
avoid stumbling. For better footing, clear
away scrub and cuttings. Be extremely
cautious when working on slopes or
uneven ground.
Working Conditions
Operate and start your power tool only
outdoors in a well-ventilated area.
Operate it under good visibility and
daylight conditions only. Work carefully.
WARNING
If the soil being worked on or the
surrounding ground is coated with a
chemical substance (such as an active
pesticide or herbicide), read and follow
the instructions and warnings that
accompany the substance at issue.
6
BF
Page 9
WARNING DANGER
5m (16ft)
Inhalation of certain
dusts, especially organic
dusts such as mold or
pollen, can cause susceptible persons to have
an allergic or asthmatic
reaction. Substantial or
repeated inhalation of
dust and other airborne
contaminants, in particular those with a smaller
particle size, may cause
respiratory or other
illnesses. Control dust at
the source where possible. Use good work
practices, such as operating the unit so that the
wind or operating process directs any dust
Information on the routing of cables can
be obtained from public utilities and such
service providers as "Miss Utility" or
"One Call."
Operating Instructions
raised by the power tool
away from the operator.
Follow the recommendations of EPA / OSHA /
NIOSH and occupational
and trade associations
with respect to dust ("particulate matter"). When
the inhalation of dust cannot be substantially
controlled, i.e., kept at or
near the ambient (background) level, the
operator and any
bystanders should wear a
Do not operate your power tool using the
starting throttle lock, as you do not have
control of the engine speed.
In the event of an emergency, switch off
the engine immediately – move the slide
control / stop switch / momentary stop
switch to 0 or STOP.
See section of your basic power tool
instruction manual on the proper use of
the slide control / stop switch /
momentary stop switch.
respirator approved by
NIOSH / MSHA for the
type of dust encountered.
The soil cultivating attachment
continues to rotate for a short period
after the throttle trigger is released
(flywheel effect).
BF
WARNING
WARNING
Your power tool is not
insulated against electric
shock. To reduce the risk
of electrocution, ensure
that there are no buried
power cables that may be
carrying electric current
that could come into contact with the working tool.
Damaging such cables
with the tool can cause
electric shocks with serious or fatal
consequences.
English
To reduce the risk of eye and other injury
always wear proper eye protection (see
section on "Proper Clothing") and
ensure that bystanders are at least
16 feet (5 m) away. To reduce the risk of
damage to property, also maintain this
distance from such objects as vehicles
or windows. Any coworkers who must be
in the restricted area should also wear
goggles or protective glasses.
Stop the engine immediately if you are
approached.
WARNING
Before you start work, examine the area
for stones, glass, fence wire, metal,
trash or other solid objects. The soil
cultivating attachment could throw
objects of this kind.
WARNING
Replace a cracked, bent, warped or
damaged blade immediately, even if
damage is limited to superficial cracks.
Such attachments may shatter at high
speed and cause serious or fatal injury.
WARNING
Avoid cutting close to fences, sides of
buildings, tree trunks, stones or similar
obstacles which could damage the blade
or lead to loss of control of the unit. Be
aware of a higher risk of ricochets in
such conditions. Flying objects or
7
Page 10
English
381BA003 KN
469BA017 KN
damaged blades may cause serious or
fatal injuries to the operator and
bystanders. Avoid the roots of trees!
Large roots may jam the blades and
damage the machine. The tree may also
be damaged if its roots are severed.
WARNING
If the working tool or deflector is blocked
or covered, always switch off the engine
and ensure that the tool has come to a
standstill before starting to clean it.
Grass, weeds, etc. should be cleaned off
the tool at regular intervals.
WARNING
To reduce the risk of unintentional
rotation of the working tool and injury,
always shut off the engine and remove
the spark plug boot before replacing the
soil cultivating attachment.
WARNING
The gearbox becomes hot during
operation. To reduce the risk of burn
injury, do not touch the gear housing
when it is hot.
MAINTENANCE, REPAIR AND
STORING
cultivating attachment. Have such work
performed at your STIHL servicing
dealer only.
WARNING
Use only identical STIHL replacement
parts for maintenance and repair. Use of
non-STIHL parts may cause serious or
fatal injury.
Wear gloves when handling or
performing maintenance on blades.
WARNING
Never repair damaged attachments by
welding, straightening or modifying the
shape. This may cause parts of the
attachment to come off and result in
serious or fatal injuries.
Tighten all nuts, bolts and screws,
except the carburetor adjustment
screws, after each use.
Do not clean your machine with a
pressure washer. The solid jet of water
may damage parts of the machine.
Store the power tool in a dry and high or
locked location out of reach of children.
Using the Unit
General
The BF attachment is used as a
cultivator for tilling the soil.
Bolo tine rotor blades are available as
special accessories for working lighter
soils.
WARNING
Always stop the engine and make sure
that the attachment is stopped before
doing any maintenance or repair work or
cleaning the power tool. Do not attempt
any maintenance or repair work not
described in the instruction manuals for
your basic power tool and your soil
8
Pick tines are particularly suitable for
tilling and loosening hard or packed soil.
BF
Page 11
English
Preparations
N Start the engine.
N Put on the shoulder strap.
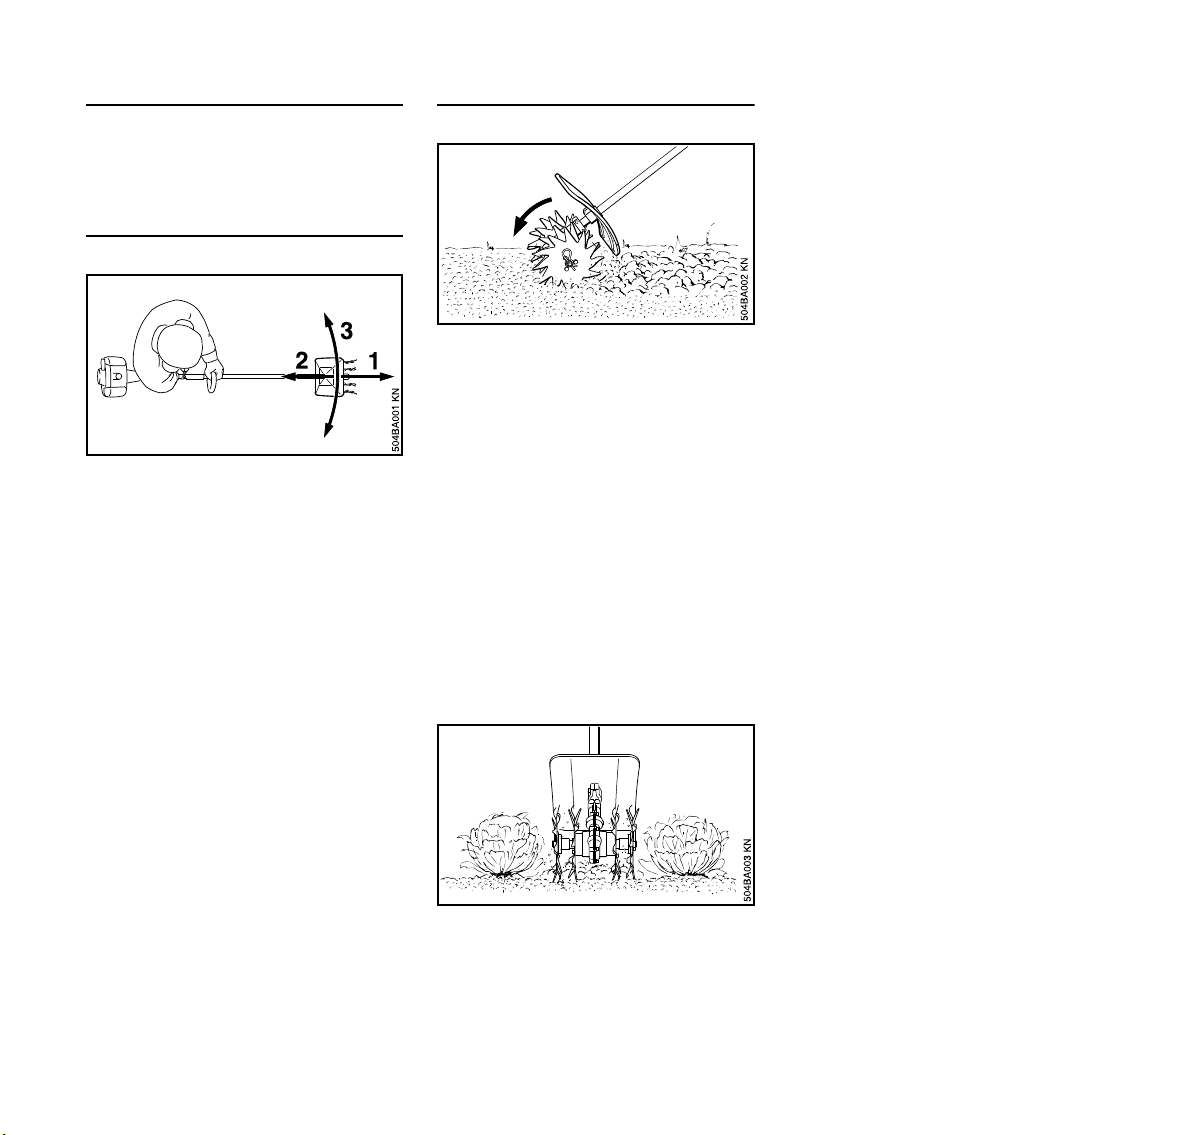
Working Technique
You can work with your cultivator in the
forward (1) and backward (2) directions,
from left to right or vice versa (3) or in a
circular motion.
Choose the best method to suit your
purpose, i.e. this depends on the shape
and size of the area and soil conditions.
Working in an alternating backwards
and forwards motion is particularly
suitable for loosening packed soil.
The rotor blades may only be mounted
and operated in one position. Arrows on
the blades show the required direction of
rotation.
Typical Applications
N Breaking up soil
A few preparations are necessary before
you begin to break up soil which has
been previously tilled (e.g. last year's
vegetable or flower garden). First clear
away surface weeds and remains of
other plants as well as hard objects like
rocks, stones, bottles, pieces of wood
etc.
Hold the cultivator firmly with both hands
and till only a small area at a time to the
required depth.
Finish tilling the area by guiding the
cultivator in such a way that you leave
no footprints. Use a rake to level off the
entire area.
N Loosening soil around plants
Only loosen the surface soil around
plants. Avoid going too deep as this
could damage the shallow roots of some
plants.
To avoid any damage to the cultivator or
trees, be wary not to catch the blades on
the large roots of trees.
N Working in soil improvers
The cultivator can be used for mulching
with loam, compost, leaves, other
organic material or fertilizers.
Prepare the area by removing all old
roots, the remains of large plants and
hard objects (stones etc.). Spread the
mulch evenly on the ground.
Work in the mulch with a circular or back
and forth motion.
Finish off by leveling the area with a
rake.
N Trenching or furrowing
Walk slowly backward and pull the
cultivator to create the furrow required.
Repeat as necessary to obtain deeper
furrows.
Cleaning the rotor blades
Parts of plants, e.g. roots, can become
tightly wrapped around or between the
rotor blades during operation. To clean
the rotor blades:
– Wear work gloves.
– Pull the hitch pins out of the axle.
– Pull the rotor blades off the shaft.
– Remove pieces of roots, plants and
soil.
BF
9
Page 12
English
002BA658 KN
413BA014 KN
Approved Basic Power Tools
WARNING
This interchangeable attachment is only
approved for use on a basic power tool
equipped with one of the following
handle systems:
– Bicycle handle
– Loop handle
Operation of this interchangeable
attachment is permitted only with the
following basic power tools:
Bike-handled or loop-handled machines
– STIHL FC 851), FC 951),
FC 110
– STIHL FH 75
1)
– STIHL FS 85
2) 3)
, FS 90, FS 1103),
FS 120, FS 130, FS 200, FS 240,
FS 250
– STIHL HL 75, HL 100 The BF
attachment is not approved for use
on machines with a short drive tube.
Bike-handled or loop-handled machines
The following machines must be
retrofitted with a loop handle and, if
necessary, a carrying ring for a
harness/shoulder strap:
– HL 75, HL 100, all versions with 0°
gearbox. The BF attachment is not
approved for use on machines with
a short drive tube.
To retrofit the loop handle see chapter
on "Mounting the Loop Handle".
To retrofit the carrying ring – see "Fitting
the Carrying Ring".
WARNING
Combinations with basic power tools
other than those listed above are not
permitted since they may result in
accidents or serious personal injury.
Mounting the Attachment
Preparations for Mounting the
Attachment
WARNING
To reduce the risk of injury, always shut
off the engine before converting the
basic power tool.
NOTICE
Make sure the work area is clean before
mounting or removing the attachment.
N Rest the power tool on the machine
support.
Removing the protective cap
If a cap is fitted on the end of the power
tool's drive tube:
1)
If necessary, retrofit machine with
carrying ring for a harness/shoulder
strap. To retrofit the carrying ring –
see "Fitting the Carrying Ring".
10
2)
Not approved for model FS 85 with
serial numbers from 2 49 848 196
up to 2 53 552 820
3)
Not approved for models FS 85 RX
and FS 110 RX
N Pull the protective cap off the end of
the drive tube and keep it in a safe
place.
BF
Page 13

002BA248 KN
FH/HL
FS
228BA083 KN
HT
228BA082 KN
KB/KW
228BA089 KN
381BA015 KN
L
English
228BA081 KN
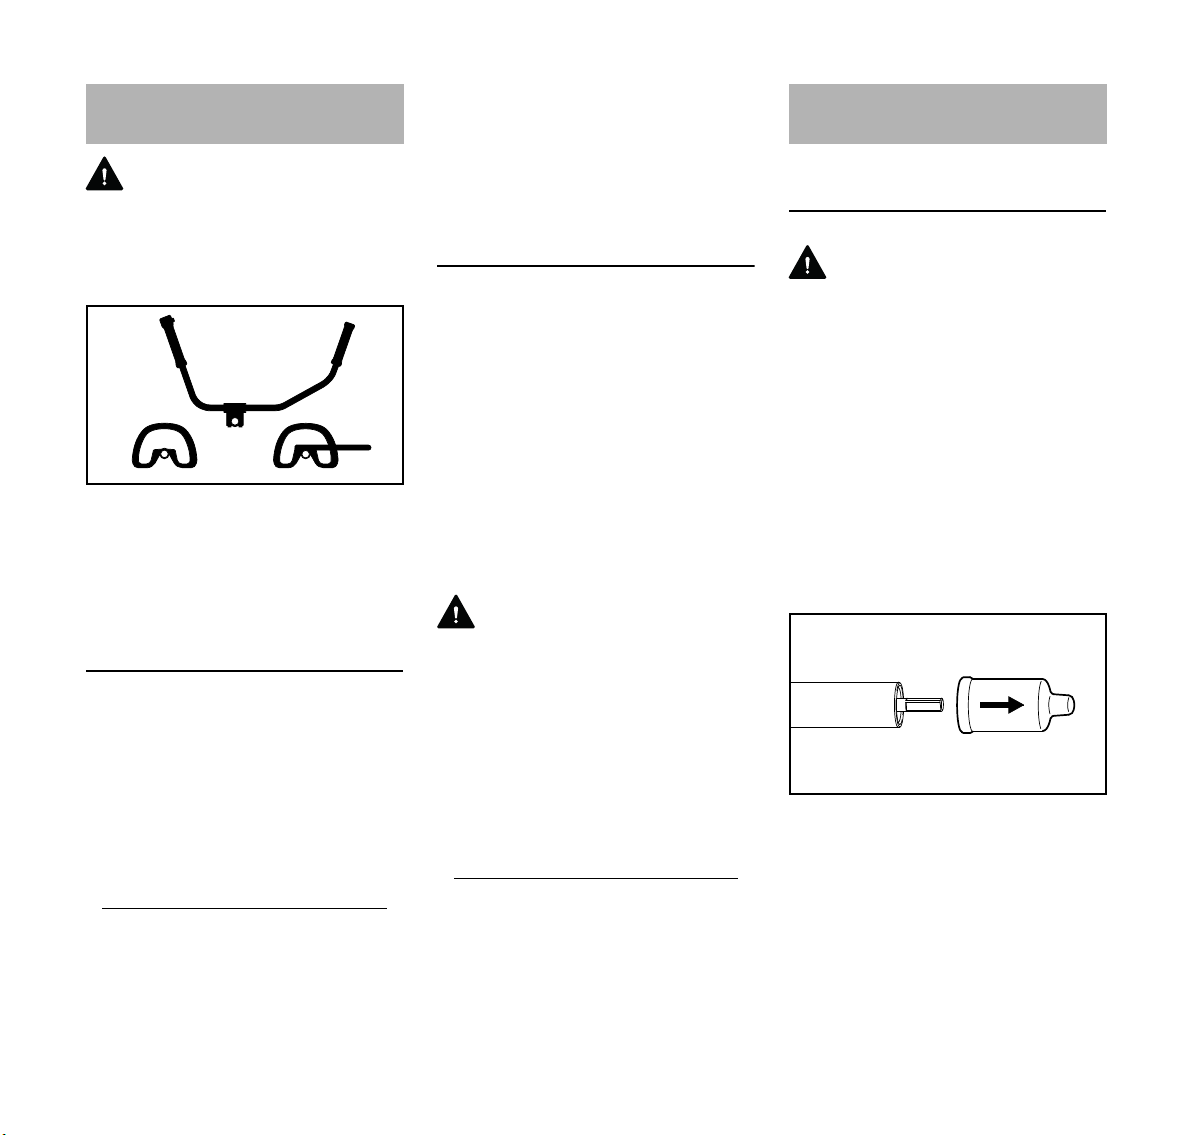
If the plug comes out of the drive tube
when you pull off the cap:
N Push the plug into the drive tube as
far as stop.
Removing the gearbox or attachment
Remove any existing gearbox or
interchangeable attachment from the
basic power tool.
FCS
FCS
228BA090 KN
FS
N Loosen the clamp screws (arrows)
on the gearbox housing – do not
remove them.
N Pull the gearbox off the drive tube.
If the drive shaft slips out of the tube
when you pull off the gearbox:
N Push the drive shaft into the tube.
The drive shaft must not project from t he
tube more than L = 22 mm (7/8 in).
228BA086 KN
If dimension (L) is not correct:
N Apply slight pressure to the drive
shaft and rotate it slowly at the same
time until it can be pushed in to the
specified length.
BF
228BA091 KN
11
Page 14
English
413BA015 KN
A
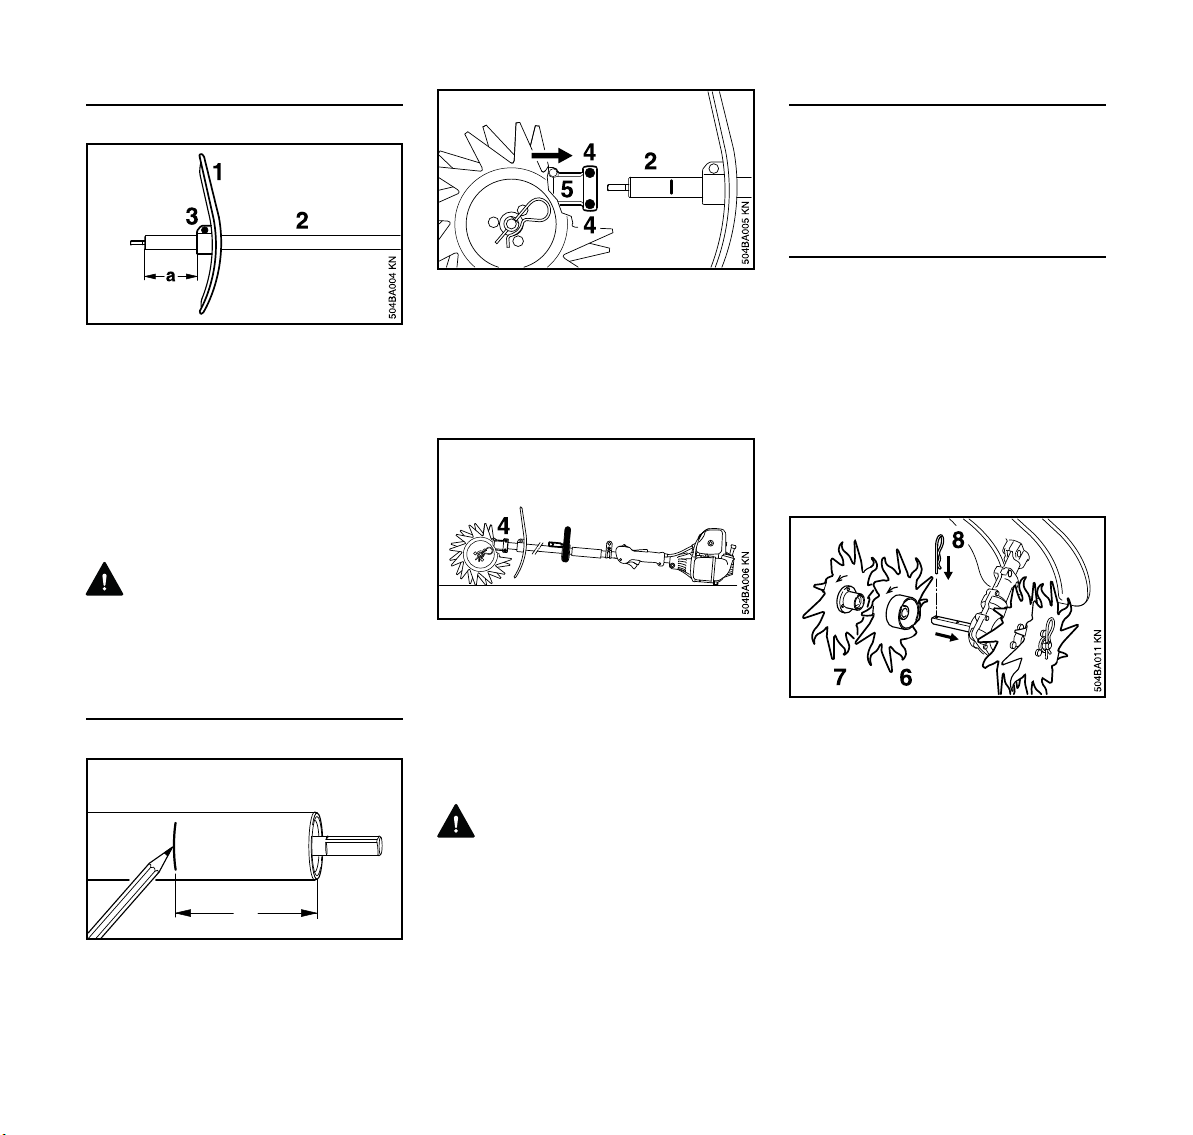
Mounting the Deflector
N Slide the deflector (1) onto the drive
tube (2) until distance "a" is 100 mm
(4 in).
N Line up the deflector on the drive
tube so that the machine support on
the powerhead and the longer part
of the deflector point up.
N Tighten down the clamp screws (3)
firmly.
WARNING
Check that the deflector is secure – it
must not be possible to rotate it on the
drive tube.
Mounting the Gearbox
N Loosen the clamp screws (4) on the
gearbox – do not remove them.
N Push the gearbox (5) onto the drive
tube (2) – turn the gearbox back and
forth as necessary until the housing
reaches or covers the mark.
N Line up the gearbox on the drive
tube so that the machine support on
the engine points down and the
rotor blades are vertical – parallel
with the deflector.
N Tighten down the clamp screws (4)
on the gearbox firmly.
WARNING
It must not be possible to rotate the
gearbox on the drive tube.
Adjusting the Loop Handle
N Loosen the screws on the loop
handle.
N Go to "Mounting the Loop Handle".
Mounting the Rotor Blades
Take care not to lose the two washers
on the gearbox output shaft.
N Arrange the blades in the order they
will be fitted on the shaft, noting the
following points:
Left-hand and right-hand blades are
different. The direction of rotation is
marked with arrows on the gearbox and
blades.
N Rotate the inner right-hand
blade (6) on the shaft until it can be
pushed into position – check the
direction of rotation again (arrows).
The hub of the inner blade is larger than
that of the outer blade.
N Apply a mark (with pencil or felt-tip
pen) at distance A (50 mm/2 in)
from the end of the drive tube.
12
BF
Page 15
English
002BA142 KN
1
2
1
3
4
1
002BA654 KN
2
N Rotate the outer right-hand
blade (7) on the shaft until it can be
pushed into position – check the
direction of rotation again (arrows).
N Insert and engage the hitch pin (8)
in the hole in the shaft – fold the
hitch pin flat against the blade.
N Use the same procedure to mount
the rotor blades on the left-hand
side.
Fitting the Carrying Ring
Not all basic power tools are equipped
with a carrying ring.
The carrying ring is available as a
special accessory.
The type of carrying ring depends on the
market and the basic power tool.
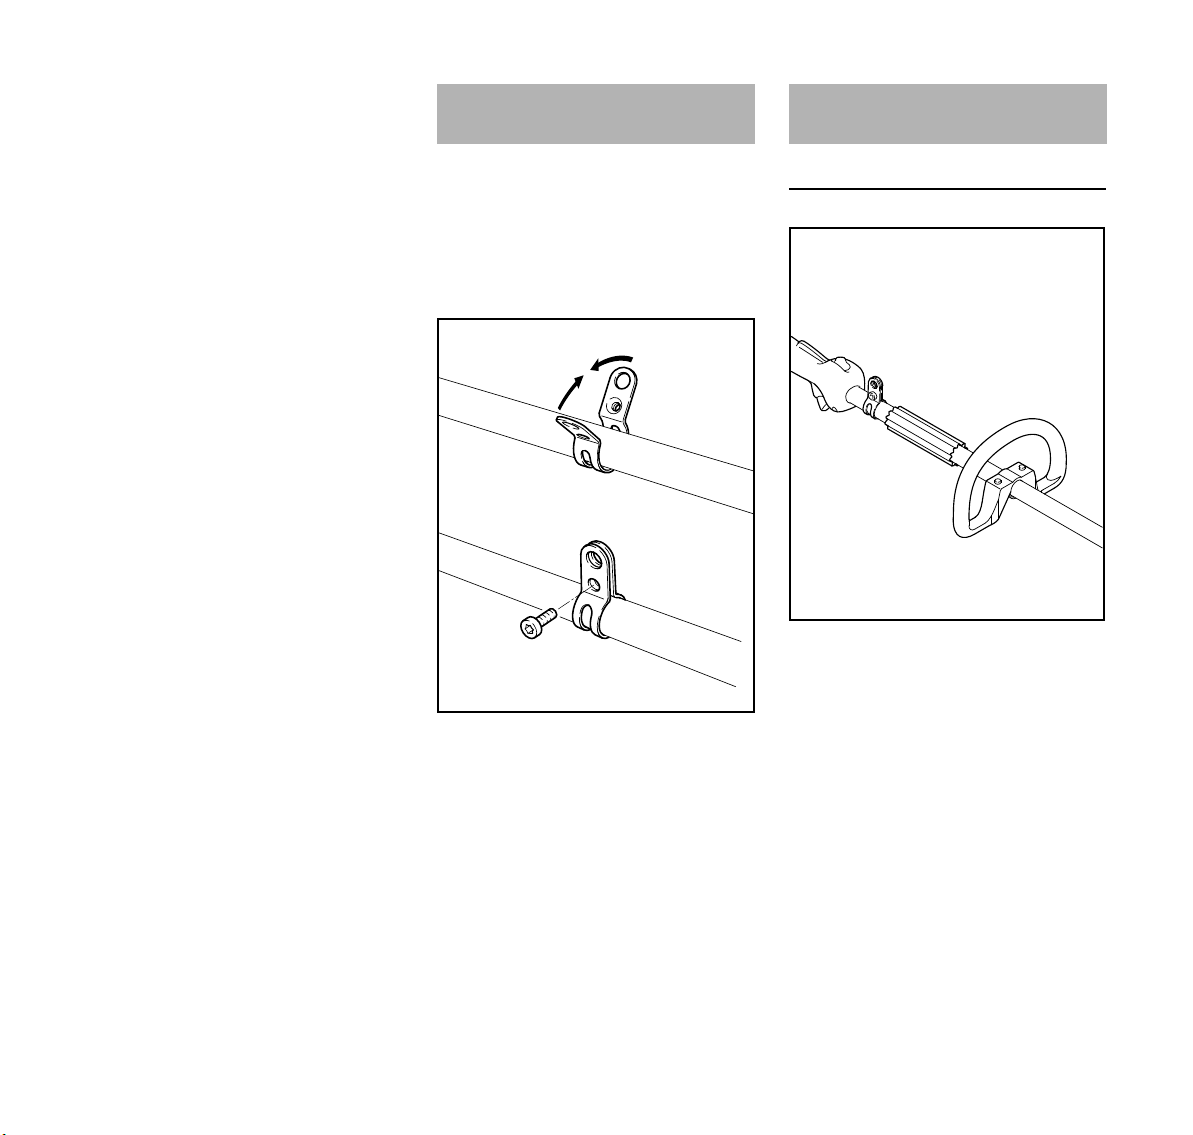
Mounting the Loop Handle
Position of Handle
A loop handle (1), sleeve (2) or a
carrying ring (3) may already be fitted to
the basic power tool.
For position of carrying ring see
"Mounting the Loop Handle".
N Place the clamp (1) against the
BF
drive tube with the tapped hole on
the left (viewed from engine).
N Squeeze the two ends of the clamp
together and hold in that position.
N Insert the M6x14 screw (2).
N Line up the carrying ring.
N Tighten down the screw firmly.
Position of carrying ring
The carrying ring (3) on the drive tube
must be in front of the control handle.
Position of sleeve
The sleeve (2) on the drive tube acts as
a spacer.
N Slide the sleeve (2) so that it is in
front of the carrying ring.
13
Page 16

English
1
6
002BA157 KN
10
7
10
5
9
8
9
8
002BA183 KN
1
A
1
002BA441 KN
2
If a loop handle is already fitted:
N Align the loop handle (1) and secure
it in position – see "Adjusting and
Securing the Loop Handle".
If a loop handle is not fitted:
N Mount the loop handle – see chapter
on "Mounting the Loop Handle".
Mounting the Loop Handle
N Rotate the square nuts (10) as far
as stop.
N Align the loop handle (1) and secure
it in position – see "Adjusting and
Securing the Loop Handle".
Adjusting and Securing the Loop Handle
Fitting the Harness
Not all basic power tools are equipped
with a harness and carrying ring.
N Fit the carrying ring – see "Fitting the
Carrying Ring".
The shoulder strap/harness is available
as a special accessory.
The type of carrying ring, shoulder
strap/harness and carabiner depends
on the market and the basic power tool.
Shoulder Strap
N Place the clamp (5) in the loop
handle (1) and position them both
against the drive tube (6).
N Position the clamp (7) against the
drive tube.
N Line up the holes.
N Fit the washers (8) on the
screws (9), and insert the screws in
the holes.
14
N Align the loop handle (1) and move
it to the most comfortable position.
Distance A must not be more than
55 cm (22 in).
N Tighten down the screws firmly –
lock the nuts if necessary.
N Put on the shoulder strap (1).
N Adjust the length of the strap – with
the machine attached, the
carabiner (2) must be about a
hand's width below your right hip.
BF
Page 17

English
1
002BA440 KN
3
2
1
2
1
2
002BA311 KN
1
2
1
2
002BA312 KN
504BA018 KN
Full Harness
N Put on the harness (1) and close the
locking plate (3).
N Adjust the length of the strap – with
the machine attached, the
carabiner (2) must be about a
hand's width below your right hip.
Attaching Machine to Harness
Detaching Machine from Harness
N Press down the bar on the
carabiner (1) and pull the carrying
ring (2) out of the carabiner.
Throwing Off the Machine
WARNING
The machine must be quickly thrown off
in the event of imminent danger. To
throw off the machine, use the
procedure described under "Detaching
Machine from Harness". Practice
removing and putting down the machine
as you would in an emergency. To avoid
damage, do not throw the power tool to
the ground when practicing.
If you are using a full harness, the
locking plate must be opened before
throwing off the machine.
Starting / Stopping the
Engine
Starting the Engine
Always follow the starting procedure
described in the basic power tool
instruction manual.
N Put the unit on the ground: Place the
machine on the ground: It must rest
securely on the machine support.
Rest the deflector end of the drive
tube on a raised support (e.g.
mound, log, brick).
To reduce the risk of accidents, check
that the rotor blades are not touching the
ground of any other obstacles.
N Make sure you have a firm footing,
either standing, stooping or
kneeling.
N Hold the machine with you left hand
and press it down firmly – do not
touch the controls on the control
handle – see basic power tool
instruction manual.
N Attach the carabiner (1) to the
carrying ring (2).
BF
NOTICE
Do not stand or kneel on the drive tube.
15
Page 18

English
WARNING
The blades may begin to rotate as soon
as the engine starts. For this reason, blip
the throttle after starting – the engine
returns to idling speed.
Now follow the starting procedure
described in the basic power tool
instruction manual.
Stopping the Engine
N See basic power tool instruction
manual.
Storing the Machine Maintenance and Care
For periods of about 3 months or longer
N Remove, clean and inspect the rotor
blades.
N Coat metal parts of interchangeable
attachment with corrosion inhibiting
oil.
N Store the machine in a dry and
secure location Keep out of the
reach of children and other
unauthorized persons.
The following intervals apply to normal
operating conditions only. If your daily
working time is longer or operating
conditions are difficult (very dusty work
area, etc.), shorten the specified
intervals accordingly.
All accessible screws and nuts
N Retighten if necessary
Sweeping attachments and deflectors
N Visual inspection, check tightness
before starting work and after every
refueling stop
N Replace if damaged
Safety labels
N Replace illegible safety labels
16
BF
Page 19

Main Parts
3
4
5
6
7
1
2
504BA019 KN
English
1 Drive Tube
2 Deflector
3 Outer Right-Hand Cultivator Blade
4 Inner Right-Hand Cultivator Blade
5 Inner Left-Hand Cultivator Blade
6 Outer Left-Hand Cultivator Blade
7 Hitch Pin
BF
17
Page 20

English
Definitions
1 Drive Tube
Encloses and protects the drive
shaft between the engine and
gearbox.
2 Deflector
Designed to reduce the risk of injury
from foreign objects flung
backwards toward the operator by
the attachments and from contact
with the attachments.
3 Outer Right-Hand Cultivator Blade
Metal blade, star-shaped with
pointed or curved tines. Mounts to
the outer right-hand side.
4 Inner Right-Hand Cultivator Blade
Metal blade, star-shaped with
pointed or curved tines. Mounts to
the inner right-hand side.
5 Inner Left-Hand Cultivator Blade
Metal blade, star-shaped with
pointed or curved tines. Mounts to
the inner left-hand side.
6 Outer Left-Hand Cultivator Blade
Metal blade, star-shaped with
pointed or curved tines. Mounts to
the outer left-hand side.
7Hitch Pin
Secures the attachments and
simplifies removal and installation of
the attachments.
Specifications
Gearbox
Single-stage worm gear
Gear ratio: 44:1
Attachment
Four rotor blades, double-edged, rotate
in same direction
Diameter: 230 mm (9.1 in)
Working width: 220 mm (8.7 in)
Weight
Attachment complete with deflector 3.6 kg (7.9 lbs)
Maintenance and Repairs
Users of this unit should carry out only
the maintenance operations described
in this manual. STIHL recommends that
other repair work be performed only by
authorized STIHL servicing dealers.
Warranty claims following repairs can be
accepted only if the repair has been
performed by an authorized STIHL
servicing dealer using genuine STIHL
replacement parts.
Genuine STIHL parts can be identified
by the STIHL part number, the
{ logo and, in some cases, by
the STIHL parts symbol K. The
symbol may appear alone on small
parts.
18
BF
Page 21

English
000BA073 KN
TM
STIHL
Injection
Disposal
Observe all country-specific waste
disposal rules and regulations.
STIHL products must not be thrown in
the garbage can. Take the product,
accessories and packaging to an
approved disposal site for environmentfriendly recycling.
Contact your STIHL servicing dealer for
the latest information on waste disposal.
Trademarks
STIHL Registered Trademarks
®
STIHL
{
K
The color combination orange-grey
(U.S. Registrations #2,821,860;
#3,010,057, #3,010,058, #3,400,477;
and #3,400,476)
OILOMATIC
Rock Boss
STIHL Cutquik
STIHL DUROMATIC
STIHL Quickstop
STIHL ROLLOMATIC
STIHL WOOD BOSS
TIMBERSPORTS
WOOD BOSS
YARD BOSS
®
®
®
®
®
®
®
®
®
®
Some of STIHL’s Common Law
Trademarks
BF
4-MIX ™
BioPlus ™
Easy2Start ™
EasySpool ™
AutoCut
EASYSTART
FARM BOSS
iCademy
MAGNUM
®
®
®
®
®
MasterWrench Service
MotoMix
®
®
ElastoStart ™
Ematic ™
FixCut ™
HT Plus ™
IntelliCarb ™
Master Control Lever ™
Micro ™
Pro Mark ™
19
Page 22

English
Quad Power ™
Quiet Line ™
STIHL Arctic ™
STIHL Compact ™
STIHL HomeScaper Series ™
STIHL Interchangeable Attachment
Series ™
STIHL M-Tronic ™
STIHL MiniBoss ™
STIHL MotoPlus 4 ™
STIHL Multi-Cut HomeScaper Series ™
STIHL OUTFITTERS ™
STIHL PICCO ™
STIHL PolyCut ™
STIHL PowerSweep ™
STIHL Precision Series ™
STIHL Protech ™
STIHL RAPID ™
STIHL SuperCut ™
STIHL Territory ™
TapAction ™
TrimCut ™
This listing of trademarks is subject to
change.
Any unauthorized use of these
trademarks without the express written
consent of
ANDREAS STIHL AG & Co. KG,
Waiblingen is strictly prohibited.
20
BF
Page 23

Contenido
español / EE.UU
Accesorios intercambiables 22
Acerca de este manual de
instrucciones 22
Medidas de seguridad y técnicas
de manejo 23
Uso 29
Herramientas motorizadas básicas
aprobadas 31
Montaje del accesorio 32
Manual de instrucciones originalImpreso en papel libre de cloro.
Montaje de la argolla de transporte 35
Montaje del mango tórico 35
Uso de la correa para hombro 36
Arranque / parada del motor 38
Almacenamiento de la máquina 39
Información para mantenimiento 39
Componentes importantes 40
Especificaciones 41
Información de reparación 41
Desecho 42
Marcas comerciales 42
Las tintas contienen aceites vegetales, el papel es reciclable.
Permita que solamente las personas
que comprenden la materia tratada en
los manuales de la herramienta
motorizada y del accesorio cultivador
manejen esta herramienta motorizada.
Para obtener el rendimiento y
satisfacción máximos de la guadaña
motorizada STIHL, es importante que
lea, comprenda y respete las medidas
de seguridad y las instrucciones de uso
y mantenimiento dadas en el capítulo
"Medidas de seguridad y técnicas de
uso", antes de usar el accesorio
cultivador. Para información adicional,
puede acudir a www.stihlusa.com.
Comuníquese con el concesionario o
distribuidor de STIHL si no se entiende
alguna de las instrucciones dadas en los
dos manuales.
ADVERTENCIA
Dado que el motor y varilla de la
herramienta motorizada equipada con
un accesorio cultivador es una
herramienta poderosa, es necesario
tomar medidas especiales de seguridad
para reducir el riesgo de lesiones
personales. El uso descuidado o
inadecuado puede causar lesiones
graves e incluso mortales.
Siempre protéjase adecuadamente los
ojos.
{
© ANDREAS STIHL AG & Co. KG, 2015
0458-504-8621-A. VA0.L15.
0000000674_009_EA
BF
Este manual de instrucciones está protegido por derechos de propiedad intelectual. Todos los derechos reservados, especialmente los derechos de reproducción, traducción y procesamiento con sistemas electrónicos.
21
Page 24

español / EE.UU
.
.
.
.
002BA531 KN
+
+
Accesorios intercambiables
El accesorio intercambiable STIHL
puede instalarse en diferentes
herramientas motorizadas de STIHL.
Los modelos aprobados de
herramientas motorizadas se listan en el
capítulo "Herramientas motorizadas
básicas aprobadas".
En el presente manual de instrucciones
la unidad funcional formada por la
herramienta motorizada básica y el
accesorio intercambiable se denomina
como la herramienta motorizada.
Por lo tanto, para esta herramienta
motorizada es necesario usar juntos los
manuales de instrucciones de la
herramienta básica y del accesorio.
Siempre lea y entienda los dos
manuales de instrucciones antes de
usar la herramienta motorizada por
primera vez y guarde los mismos en un
lugar seguro para referencia futura.
Acerca de este manual de
instrucciones
Pictogramas
Todos los pictogramas que se
encuentran fijados o grabados en la
máquina se muestran y explican en este
manual.
Símbolos en el texto
Muchas de las instrucciones de uso y
seguridad vienen acompañadas de
ilustraciones.
Los pasos individuales o
procedimientos descritos en el manual
pueden estar señalados en diferentes
maneras:
N Se usa un punto para denotar un
paso o procedimiento.
Una descripción de un paso o
procedimiento que se refiere
directamente a una ilustración puede
contener números de referencia que
aparecen en la ilustración. Ejemplo:
N Suelte el tornillo (1).
N Palanca (2) ...
Además de las instrucciones de uso, en
este manual pueden encontrarse
párrafos a los que usted debe prestar
atención especial. Tales párrafos están
marcados con los símbolos y las
palabras identificadoras:
PELIGRO
Indica un riesgo inminente de lesiones
graves o mortales.
22
BF
Page 25

español / EE.UU
ADVERTENCIA
Identifica una situación de peligro que,
al no evitarse, puede resultar en
lesiones graves o mortales.
INDICACIÓN
Indica el riesgo de daños a la propiedad,
incluyendo a la máquina o sus
componentes.
Mejoramientos técnicos
La filosofía de STIHL es mejorar
continuamente todos sus productos.
Como resultado de ello, periódicamente
se introducen cambios de diseño y
mejoras. Por lo tanto, es posible que
algunos cambios, modificaciones y
mejoras no se describen en este
manual. Si las características de
funcionamiento o la apariencia de su
máquina difieren de las descritas en
este manual, comuníquese con el
concesionario STIHL para obtener la
ayuda que requiera.
Medidas de seguridad y
técnicas de manejo
Dado que el motor y varilla de la herramienta
motorizada equipada con
un accesorio cultivador
es una herramienta
poderosa, es necesario
tomar medidas especiales de seguridad para
reducir el riesgo de lesiones personales.
Es importante que usted
lea, comprenda bien y
respete las siguientes
advertencias y medidas
de seguridad. Lea los
manuales de instrucciones y las precauciones
de seguridad de la herramienta básica y del
accesorio cultivador
periódicamente. El uso
descuidado o inadecuado
puede causar lesiones
graves o incluso la
muerte.
Pida a su concesionario STIHL que le
enseñe el manejo de la herramienta
motorizada. Respete todas las
disposiciones, reglamentos y normas de
seguridad locales del caso.
ADVERTENCIA
Tal como se explicará a continuación en
estas Medidas de seguridad, para
reducir el riesgo de lesiones personales,
asegúrese que su máquina esté
equipada con el mango y arnés
adecuados para el tipo de accesorio que
se está utilizando. Utilice únicamente
herramientas específicamente
autorizadas por STIHL para uso con la
herramienta motorizada y eje con
accesorio cultivador.
ADVERTENCIA
No preste ni alquile la herramienta
mecánica sin proporcionar los manuales
de instrucciones de la herramienta
básica, y del accesorio cultivador.
Asegúrese que todas las personas que
utilicen la máquina lean y comprendan
la información contenida en estos
manuales.
ADVERTENCIA
El uso de esta máquina puede ser
peligroso. Si la cuchilla giratoria llega a
entrar en contacto con su cuerpo, le
ocasionará una lesión. Cuando choca
con algún objeto extraño sólido tal como
rocas o pedazos de metal, puede
arrojarlo directamente o por rebote en
dirección de personas que se
encuentren en la cercanía o del
operador. El contacto con dichos
objetos puede dañar los accesorios de
cultivación y puede hacer que las
cuchillas se rompan, astillen o agrieten.
Los objetos lanzados, incluso las
cuchillas rotas, pueden provocar
lesiones graves o mortales al operador o
a personas que se encuentren en su
proximidad.
STIHL no recomienda el uso de
cuchillas rígidas en zonas pedregosas.
Utilice la herramienta motorizada y eje
con accesorio cultivador únicamente
para el rejuvenecimiento de jardines de
flores y semilleros y para la mezcla de
aditivos con la tierra.
BF
23
Page 26

español / EE.UU
ADVERTENCIA
No debe usarse para ningún otro
propósito ya que el uso indebido puede
resultar en lesiones personales o daños
a la propiedad, incluso daños de la
máquina.
ADVERTENCIA
Nunca se debe permitir a los niños que
usen esta herramienta motorizada. No
se debe permitir la proximidad de otras
personas, especialmente de niños, ni de
animales en los lugares donde se esté
utilizando la máquina.
ADVERTENCIA
Para reducir el riesgo de ocasionar
lesiones a las personas en la cercanía y
daños a la propiedad, nunca deje la
herramienta motorizada en marcha
desatendida. Cuando no está en uso
(por ejemplo durante el descanso),
apáguela y asegúrese que las personas
no autorizadas no puedan usarla.
La mayoría de las medidas de seguridad
y avisos contenidos en este manual se
refieren al uso de todas las cultivadoras
de STIHL. Los distintos modelos pueden
contar con piezas y controles diferentes.
Vea la sección correspondiente de los
manuales de instrucciones de la
herramienta básica y del accesorio
cultivador para tener una descripción de
los controles y la función de los
componentes de su modelo.
El uso seguro de una herramienta
motorizada atañe a
1. el operador
2. la herramienta motorizada
3. el uso de la herramienta
motorizada.
EL OPERADOR
Condición física
Usted debe estar en buenas
condiciones físicas y psíquicas y no
encontrarse bajo la influencia de
ninguna sustancia (drogas, alcohol,
etc.) que le pueda restar visibilidad,
destreza o juicio. No maneje esta
máquina cuando está fatigado.
ADVERTENCIA
Esté alerta. Si se cansa, tómese un
descanso. El cansancio puede provocar
una pérdida del control. El uso de
cualquier herramienta motorizada es
fatigoso. Si usted padece de alguna
dolencia que pueda ser agravada por la
fatiga, consulte a su médico antes de
utilizar esta máquina.
Vestimenta adecuada
ADVERTENCIA
Para reducir el riesgo de lesiones el
operador debe usar el equipo protector
adecuado.
El deflector provisto con su herramienta
motorizada no siempre protege al
operador contra todos los objetos
extraños (piedras, vidrio, alambre, etc.)
arrojados por el accesorio giratorio. Los
objetos arrojados o lanzados por el
accesorio también pueden rebotar y
golpear al operador.
ADVERTENCIA
Para reducir el riesgo de
lesionarse los ojos,
nunca maneje la herramienta motorizada si no
tiene puestas gafas o
anteojos de seguridad
bien ajustados con una
protección adecuada en
las partes superior y lateral que satisfagan la
norma ANSI Z87 "+" (o la
norma nacional correspondiente). Para reducir
el riesgo de lesionarse la
cara, STIHL recomienda
usar también una careta
o protector facial adecuado sobre las gafas o
anteojos de seguridad.
El ruido de la herramienta
motorizada puede dañar
los oídos. Siempre use
amortiguadores del ruido
(tapones u orejeras) para
protegerse los oídos. Los
usuarios constantes y
regulares deben someterse con frecuencia a un
examen o control
auditivo.
Esté especialmente alerta y tenga
cuidado cuando se usa protectores de
oídos, ya que los mismos reducen la
posibilidad de oír señales de
advertencia (gritos, alarmas, etc.).
24
BF
Page 27

español / EE.UU
002BA254 KN
Siempre use guantes
gruesos (por ejemplo,
fabricados de cuero u
otro material resistente al
desgaste) cuando manipule el accesorio
cultivador. Los guantes
gruesos y antideslizantes mejoran el manejo y
ayudan a proteger las
manos.
La ropa debe ser de confección fuerte y ajustada,
pero no tanto que impida
la completa libertad de
movimiento. Use pantalones largos hechos de un
material grueso para protegerse las piernas. No
use pantalones cortos,
sandalias o pies
descalzos.
Evite el uso de chaquetas sueltas,
bufandas, corbatas, joyas, pantalones
acampanados o con vueltas, pelo largo
suelto o cualquier cosa que pueda
engancharse en las ramas, matorrales o
piezas en movimiento de la máquina.
Sujétese el pelo de modo que quede
sobre los hombros.
Es muy importante tener
una buena superficie de
apoyo para los pies. Póngase botas gruesas con
suela antideslizante.
Recomendamos las
botas de seguridad con
puntera de acero.
Para instrucciones adicionales acerca
de la ropa adecuada, vea las
precauciones de seguridad, en el
manual de instrucciones de la
herramienta básica que está usando.
LA HERRAMIENTA MOTORIZADA
Para las ilustraciones y definiciones de
los componentes de la herramienta
motorizada, vea el capítulo sobre
"Piezas principales".
ADVERTENCIA
Nunca modifique, de ninguna manera,
esta herramienta motorizada. Utilice
únicamente los accesorios
suministrados por STIHL y
expresamente autorizados por STIHL
para usarse con el modelo básico de la
herramienta motorizada de STIHL. Si
bien es posible conectar a la
herramienta motorizada de STIHL
ciertos accesorios no autorizados, su
uso puede ser, en la práctica,
extremadamente peligroso.
Si la máquina experimenta cargas
excesivas para las cuales no fue
diseñada (por ejemplo, impactos
severos o una caída), siempre
asegúrese que esté en buenas
condiciones antes de seguir con el
trabajo. Compruebe específicamente
que los controles y dispositivos de
seguridad funcionen correctamente. No
siga manejando esta máquina si está
dañada. En caso de dudas, pida que el
concesionario de servicio de STIHL la
revise.
USO DE LA HERRAMIENTA
MOTORIZADA
Transporte de la herramienta
motorizada
ADVERTENCIA
Para reducir el riesgo de sufrir lesiones
debido a la pérdida de control y al
contacto con la cuchilla, nunca lleve ni
transporte la herramienta motorizada
con el accesorio en marcha.
ADVERTENCIA
Antes de apoyar la herramienta
motorizada en el suelo, siempre apague
el motor y asegúrese de que el
accesorio ha dejado de girar.
Puede acarrearse solamente en
posición horizontal. Agarre el eje de una
manera que mantenga la máquina
equilibrada horizontalmente. Mantenga
el silenciador caliente lejos de su cuerpo
y el accesorio cultivador detrás de
usted.
ADVERTENCIA
Cuando transporte la máquina en un
vehículo, sujétela firmemente para
impedir su vuelco, el derrame de
combustible y el daño a la máquina.
BF
25
Page 28

español / EE.UU
Antes de arrancar
ADVERTENCIA
Siempre revise que la herramienta
motorizada esté en buenas condiciones
y funcione correctamente antes de
arrancarla. Nunca intente modificar los
controles o los dispositivos de
seguridad.
ADVERTENCIA
No maneje nunca una herramienta
motorizada que esté dañada, mal
ajustada o mantenida o que no fue
armada completa y debidamente.
ADVERTENCIA
No instale ningún accesorio cultivador
en una máquina sin que todas las piezas
requeridas estén correctamente
instaladas. Si no se utilizan las piezas
debidas se puede causar el
desprendimiento de las cuchillas y
lesionar gravemente al operador o a las
personas que encuentren en su
proximidad.
ADVERTENCIA
El accesorio cultivador debe estar
correctamente apretado y en buenas
condiciones de trabajo. Busque piezas
sueltas (tuercas, tornillos, etc.) y
cuchillas agrietadas, dobladas,
deformadas o dañadas. Sustituya las
cuchillas dañadas antes de usar la
herramienta motorizada.
Mantenga los mangos limpios y secos
en todo momento; es particularmente
importante mantenerlos libres de
humedad, aceite, combustible, grasa o
resinas para garantizar que la máquina
pueda empuñarse firmemente para
mantenerla bajo control seguro.
Conserve el ajuste correcto del deflector
en todo momento (vea el capítulo
"Montaje del accesorio", en su manual
de instrucciones).
Ajuste el arnés y la empuñadura de
modo correspondiente a su estatura
antes de empezar a trabajar. Para
prepararse para emergencias, practique
la liberación rápida de la unidad del
arnés.
Arranque
ADVERTENCIA
Arranque el motor solamente al aire
libre, por lo menos 3 m (10 pies) del
lugar en que lo haya llenado.
Para las instrucciones de arranque,
consulte la sección correspondiente de
los manuales de la herramienta básica y
del accesorio cultivador.
Coloque la herramienta motorizada
sobre suelo firme u otra superficie sólida
en un lugar abierto. Mantenga el
equilibrio y elija un buen punto de apoyo
para los pies.
ADVERTENCIA
Para reducir el riesgo de sufrir lesiones
causadas por la pérdida de control, no
intente arrancar el motor de la
herramienta "por lanzamiento".
ADVERTENCIA
Para reducir el riesgo de lesiones
debido a la pérdida de control, esté
absolutamente seguro que la
herramienta motorizada se encuentra
lejos de su cuerpo y de todas las
obstrucciones y objetos, incluido el
suelo, porque al arrancar el motor
acelerado, su velocidad será lo
suficientemente rápida para que el
embrague se engrane y haga funcionar
la herramienta motorizada.
Tan pronto arranque, accione
inmediatamente por un breve momento
el gatillo de aceleración para
desconectarlo de la posición de
arranque y permitir que el motor se
desacelere a la marcha en vacío.
Con el motor funcionando a marcha en
vacío solamente, enganche la
herramienta motorizada al gancho de
resorte de su arnés (vea el capítulo
correspondiente en este manual).
ADVERTENCIA
Su herramienta motorizada es una
máquina que debe ser manejada por
solamente una persona. No deje que
otras personas estén en el lugar de
trabajo, aun durante el arranque.
Vea también las Precauciones de
seguridad de arranque en el manual de
instrucciones de la herramienta
motorizada básica.
Durante el funcionamiento
Sujeción y control de la herramienta
motorizada
Al trabajar, siempre sujete la máquina
firmemente con ambas manos en los
mangos. Cierre firmemente los dedos y
pulgares sobre los mangos.
26
BF
Page 29

español / EE.UU
002BA055 KN
002BA080 KN
Modelos con manillar tipo bicicleta
Mano derecha en el mango de control,
mano izquierda en el mango izquierdo.
Modelos con mango tórico
Agarre el mango de control trasero con
la mano derecha y el mango tórico con
la mano izquierda. Esto también
corresponde a personas zurdas.
ADVERTENCIA
Para reducir el riesgo de lesiones
causadas por la pérdida del control,
nunca trabaje sobre una escalera o
cualquier otra superficie de soporte
poco seguro. Nunca mantenga el
accesorio cultivador a una altura más
arriba de la cintura.
ADVERTENCIA
Nunca intente manejar la
herramienta motorizada
con una sola mano. La
pérdida de control de la
herramienta motorizada
puede ocasionar lesiones
graves o mortales. Para
reducir el riesgo de lesionarse, mantenga las
manos y los pies alejados
del accesorio cultivador.
No toque nunca con las
manos o cualquier parte
del cuerpo un accesorio
que está girando.
ADVERTENCIA
No trate de alcanzar más lejos de lo
debido. Mantenga los pies bien
apoyados y equilibrados en todo
momento. Se debe tener cuidado
especial cuando las condiciones del
suelo son resbaladizas (suelo húmedo,
nieve) y en terreno difícil y con mucha
vegetación. Para evitar tropezarse, esté
atento a los obstáculos ocultos tales
como tocones, raíces y zanjas. Para
obtener un punto de apoyo seguro, quite
los matorrales y el material cortado. Sea
sumamente precavido cuando trabaje
en declives o terreno irregular.
Condiciones de trabajo
Maneje y arranque su herramienta
motorizada solamente al aire libre en un
lugar bien ventilado. Manéjela
solamente en condiciones de buena
visibilidad y a la luz del día. Trabaje con
mucho cuidado.
ADVERTENCIA
Si el suelo que se está cultivando o la
tierra en el lugar está recubierta de una
sustancia química (tal como un pesticida
o herbicida activo), lea y siga las
instrucciones suministradas con la
sustancia en cuestión.
ADVERTENCIA
La inhalación de ciertos
polvos, especialmente
los polvos orgánicos,
tales como el moho o
polen, puede provocar
reacciones alérgicas o
asmáticas en las personas sensibles.
La inhalación repetida o de grandes
cantidades de polvo u otros
contaminantes del aire, especialmente
los de partículas pequeñas puede
causar enfermedades respiratorias o de
otro tipo. Controle el polvo en su fuente,
siempre que sea posible. Utilice buenas
prácticas de trabajo, tal como trabajar
de manera que el viento o el proceso de
corte dirija el polvo producido por la
herramienta motorizada en sentido
opuesto del operador. Observe las
recomendaciones emitidas por
EPA/OSHA/NIOSH y las asociaciones
de trabajo y los sindicatos con respecto
al polvo ("materia particulada"). Cuando
sea imposible eliminar
significativamente la inhalación del
polvo, es decir mantener el nivel cerca
del valor ambiente, el operador y las
personas que se encuentren en la
cercanía siempre deberán usar un
BF
27
Page 30

español / EE.UU
5m (16ft)
respirador aprobado por NIOSH/MSHA
para el tipo de polvo presente en el
lugar.
PELIGRO
Su herramienta motorizada no está aislada
contra las sacudidas
eléctricas. Para reducir el
riesgo de electrocución,
asegúrese que en el
lugar no existan cables
subterráneos que puedan
tener corriente eléctrica.
El cortar tales cables con
la herramienta puede
resultar en choques eléctricos y la posibilidad de
lesiones graves o la
muerte.
La información acerca de la ubicación
de cables eléctricos puede obtenerse de
las empresas de servicio eléctrico
locales o de un servicio de localización
de líneas eléctricas, tal como "Miss
Utility" o "One Call".
Instrucciones de manejo
ADVERTENCIA
No maneje la herramienta motorizada
usando el bloqueo de acelerador para
arranque, pues no tendrá control de la
velocidad del motor.
En caso de emergencia, apague el
motor inmediatamente – mueva el
control deslizante / interruptor
momentáneo de parada a 0 o STOP
Consulte la sección del manual de
instrucciones de la herramienta
motorizada básica que describe el uso
del control deslizante / interruptor de
parada / interruptor momentáneo de
parada.
ADVERTENCIA
El accesorio cultivador sigue girando por
un rato después que se suelta el gatillo
de aceleración (efecto de volante).
Para reducir el riesgo de ocasionar
lesiones a los ojos u otras partes del
cuerpo (vea la sección "Vestimenta
adecuada"), asegúrese que las
personas estén a por lo menos 5 m
(16 pies) de distancia de la máquina.
Para reducir el riesgo de ocasionar
daños a la propiedad, mantenga esta
distancia con respecto a los vehículos y
las ventanas. Los trabajadores que
deben quedar en la zona prohibida
también deben usar gafas o protección
ocular.
Apague el motor inmediatamente si se
le aproxima alguna persona.
ADVERTENCIA
Antes de empezar a trabajar,
inspeccione el área en busca de
piedras, vidrio, alambre, pedazos de
metal, basura u otros objetos sólidos. El
accesorio cultivador puede arrojar los
objetos de esta clase.
ADVERTENCIA
Sustituya inmediatamente una cuchilla
trizada, combada, deformada o dañada,
incluso si solamente hay rayas
superficiales. Los accesorios en esa
condición pueden romperse a velocidad
alta y causar lesiones graves o
mortales.
ADVERTENCIA
Evite cortar cerca de vallas, edificios,
tocones, piedras u otros objetos de ese
tipo que puedan dañar la cuchilla o
resultar en la pérdida de control de la
unidad. Esté alerta a la posibilidad de
rebote de los objetos lanzados en estas
condiciones. Los objetos lanzados o las
cuchillas dañadas pueden causar
lesiones graves o la muerte del
operador o de las personas en la
cercanía. ¡Evite las raíces de los
árboles! Las raíces grandes pueden
aprisionar las cuchillas y dañar la
máquina. También es posible dañar el
árbol al cortar las raíces.
ADVERTENCIA
Si el accesorio o el deflector se atasca o
queda pegado, siempre apague el
motor y asegúrese que el accesorio está
detenido antes de limpiarlo. Limpie el
pasto, las malezas, etc. del accesorio en
intervalos regulares.
ADVERTENCIA
Para reducir el riesgo de la rotación
inesperada del accesorio y la posibilidad
de sufrir lesiones, siempre apague el
motor y quite el casquillo de la bujía
antes de sustituir el accesorio cultivador.
28
BF
Page 31

español / EE.UU
381BA003 KN
ADVERTENCIA
La caja de engranajes está caliente
durante el funcionamiento de la
máquina. Para reducir el riesgo de
lesiones por quemaduras, no toque la
caja de engranajes cuando está
caliente.
MANTENIMIENTO, REPARACIÓN Y
ALMACENAMIENTO
ADVERTENCIA
Siempre apague el motor y verifique que
el accesorio está parado antes de llevar
a cabo cualquier trabajo de
mantenimiento, reparación o limpieza
de la herramienta motorizada. No
intente efectuar trabajos de
mantenimiento o reparación que no se
hayan descrito en los manuales de
instrucciones de la herramienta básica o
del accesorio cultivador. Este tipo de
trabajo debe realizarse únicamente en
el taller de servicio de STIHL.
ADVERTENCIA
Utilice solamente las piezas de repuesto
idénticas de STIHL para el
mantenimiento y la reparación. El uso
de piezas no fabricadas por STIHL
puede causar lesiones graves o
mortales.
Use guantes para manipular o reparar
las cuchillas.
ADVERTENCIA
Nunca repare los accesorios dañados
aplicándoles soldadura,
enderezándolos o modificándoles su
forma. Esto puede causar el
desprendimiento de alguna pieza del
accesorio y producir lesiones graves o
mortales.
Apriete todas las tuercas, pernos y
tornillos, excepto los tornillos de ajuste
del carburador, después de cada uso.
No limpie la máquina con una lavadora
a presión. El chorro fuerte de agua
puede dañar las piezas de la máquina.
Guarde la herramienta motorizada en un
lugar seco y elevado o con llave lejos del
alcance de los niños.
Uso
Generalidades
El accesorio BF se utiliza como
cultivadora para labrar la tierra.
Las cuchillas giratorias de púas bolo
están disponibles como accesorios
especiales para labrar en tierra blanda.
BF
29
Page 32

español / EE.UU
469BA017 KN
Si se trabaja alternando el sentido hacia
adelante y hacia atrás, esto resulta
particularmente útil para soltar la tierra
compactada.
Las cuchillas giratorias sólo pueden
montarse y accionarse en una posición.
Las flechas en las cuchillas indican el
sentido de giro requerido.
Las púas ganzúas son particularmente
útiles para labrar y soltar suelos duros,
compactados y con materiales
incrustados.
Preparaciones
N Arranque el motor.
N Colóquese la correa para hombros.
Técnica de trabajo
Se puede trabajar con el cultivador en
los sentidos de avance (1) y retroceso
(2), de izquierda a derecha o viceversa
(3), o en sentido circular.
Elija el mejor método para su trabajo, es
decir dependiendo de la forma y tamaño
del lugar de trabajo y las condiciones del
suelo.
Usos típicos
N Rotura del suelo
Hay que hacer unos pocos trabajos
preparativos antes de empezar a
romper el suelo previamente cultivado
(por ejemplo, en el jardín del año
pasado). Primero quite las malezas de
la superficie y los restos de los demás
cultivos, así como los objetos duros,
tales como rocas, piedras, botellas,
pedazos de madera, etc.
Agarre la cultivadora firmemente con
ambas manos y cultive a la profundidad
deseada solamente una zona pequeña
a la vez.
Termine el cultivo guiando la cultivadora
para evitar dejar huellas. Use un rastrillo
para nivelar la zona de trabajo.
N Aflojado del suelo alrededor de los
cultivos
Afloje únicamente la tierra superficial
alrededor de las plantas. No trabaje
demasiado profundo, ya que esto puede
dañar las raíces poca profundas de
algunos cultivos.
Para evitar dañar la cultivadora o los
árboles, procure no enganchar las
cuchillas en las raíces grandes de los
árboles.
N Incorporación de mejoradores del
suelo
La cultivadora puede usarse para la
incorporación de marga, tierra de
jardinero, hojas u otros materiales
orgánicos o fertilizantes.
Prepare la zona quitando las raíces
viejas, los restos de plantas grandes y
objetos duros (rocas, etc.). Esparza el
mullido uniformemente sobre el suelo.
Incorpore el mullido con un movimiento
giratorio o hacia adelante y atrás.
Termine el trabajo nivelando la zona con
un rastrillo.
N Zanjeo o apertura de surcos
Camine lentamente hacia atrás y tire de
la cultivadora para formar el surco
requerido. Repita según sea necesario
para formar surcos más profundos.
30
BF
Page 33

español / EE.UU
002BA658 KN
Limpieza de las cuchillas giratorias
Las piezas de plantas, tales como las
raíces, pueden enrollarse alrededor de
las cuchillas giratorias o entre las
mismas durante el trabajo. Para limpiar
las cuchillas giratorias:
– Póngase guantes de trabajo.
– Extraiga los pasadores de
enganche del eje.
– Extraiga las cuchillas giratorias del
eje.
– Quite los restos de raíces, plantas y
suelo.
Herramientas motorizadas
básicas aprobadas
ADVERTENCIA
Este accesorio intercambiable ha sido
aprobado únicamente para uso con una
herramienta motorizada básica
equipada con una de las siguientes
sistemas de mango:
– Manillar tipo bicicleta
– Mango tórico
Se permite el uso de este accesorio
intercambiable solamente con las
siguientes herramientas motorizadas
básicas:
Máquinas con manillar tipo bicicleta o
mango tórico
– STIHL FC 851), FC 951),
FC 110
1)
– STIHL FH 75
– STIHL FS 85
2) 3)
, FS 90, FS 1103),
FS 120, FS 130, FS 200, FS 240,
FS 250
– STIHL HL 75, HL 100, el accesorio
BF no está aprobado para usarse
en máquinas con el tubo de mando
corto.
BF
1)
De ser necesario, adaptar la
máquina con una argolla de
transporte para un arnés o una
correa para el hombro. Instale la
argolla de transporte – vea
"Instalación de la argolla de
transporte".
2)
No ha sido aprobado para uso con
FS 85 con números de serie de
2 49 848 196 a 2 53 552 820
3)
No aprobado para uso con FS 85
RX y FS 110 RX
31
Page 34

español / EE.UU
413BA014 KN
002BA248 KN
228BA091 KN
FCS
Máquinas con manillar tipo bicicleta o
mango tórico
En las siguientes máquinas es
necesario instalar un mango tórico y si
es necesario, una argolla de transporte
para un arnés o una correa para el
hombro:
– HL 75, HL 100 en las versiones con
una caja de engranajes de 0°. El
accesorio BF no ha sido aprobado
para uso con máquinas con el tubo
de mando corto.
Para instalar el mango tórico, vea el
capítulo "Montaje del mango tórico".
Instale la argolla de transporte – vea
"Instalación de la argolla de transporte".
ADVERTENCIA
El uso con herramientas motorizadas
básicas no mencionadas aquí no se
permite ya que esto podría causar
accidentes o lesiones personales
graves.
Montaje del accesorio
Preparación para instalar el accesorio
ADVERTENCIA
Para reducir el riesgo de lesionarse,
siempre pare el motor antes de efectuar
la conversión de la herramienta básica.
INDICACIÓN
Compruebe que la zona de trabajo esté
limpia antes de montar o quitar el
accesorio.
N Apoye la herramienta motorizada
sobre el soporte de la máquina.
Retiro de la tapa protectora
Si tiene montado una tapa en el extremo
del tubo de mando de la herramienta
motorizada:
Si el tapón se sale del tubo de mando
cuando se quita la tapa:
N Empuje el tapón en el tubo de
mando hasta llegar al tope.
Retiro de la caja de engranajes o del
accesorio
Retire el mecanismo o accesorio
intercambiable de la herramienta
motorizada básica.
FCS
32
228BA090 KN
N Quite la tapa protectora del extremo
del tubo de mando y déjela en un
lugar seguro.
BF
Page 35

FH/HL
FS
228BA083 KN
HT
228BA082 KN
KB/KW
228BA089 KN
381BA015 KN
L
228BA081 KN
N Suelte los tornillos de
fijación (flechas) de la caja de
engranajes, pero no los saque.
N Tire de la caja de engranajes para
sacarla del tubo de mando.
Si el eje impulsor se sale fuera del tubo
cuando se extrae la caja de engranajes:
N Empuje el eje impulsor en el tubo.
español / EE.UU
Montaje del deflector
N Deslice el deflector (1) en el tubo de
mando (2) de modo que la distancia
"a" sea de 100 mm (4 pulg).
N Alinee el deflector en el tubo de
mando de manera que el soporte en
el motor y la parte larga del deflector
apunten hacia arriba.
N Apriete los tornillos (3) de fijación
firmemente.
BF
FS
El eje impulsor no debe sobresalir del
228BA086 KN
tubo más de L = 22 mm (7/8 pulg).
Si la dimensión (L) no es la correcta:
N Aplique una ligera presión en el eje
impulsor y al mismo tiempo gírelo
lentamente hasta que se pueda
empujarlo hasta el largo requerido.
ADVERTENCIA
Verifique que el deflector esté bien fijado
– no debe ser posible girarlo en el tubo
impulsor.
33
Page 36

español / EE.UU
413BA015 KN
A
Montaje de la caja de engranajes
N Haga una marca (con un lápiz o
marcador de fieltro) a una distancia
A (50 mm/2 pulg) del extremo del
tubo de mando.
N Suelte los tornillos de fijación (4) de
la caja de engranajes, pero no los
saque.
N Empuje la caja de engranajes (5) en
el tubo de mando (2) – gire la caja
de engranajes en uno y otro sentido
hasta que alcance o cubra la marca.
N Alinee la caja de engranajes en el
tubo de mando de manera que el
soporte del motor apunte hacia
abajo y las cuchillas del rotor estén
verticales – paralelas al deflector.
N Apriete los tornillos de fijación (4) de
la caja de engranajes bien firmes.
ADVERTENCIA
No debe ser posible girar la caja de
engranajes en el tubo de mando.
Ajuste del mango tórico
N Afloje los tornillos en el mango
tórico.
N Prosiga a "Montaje del mango
tórico".
Montaje de las cuchillas giratorias
Procure no perder las dos arandelas en
el eje de salida de la caja de engranajes.
N Arregle las cuchillas en la secuencia
de instalación en el eje, observando
los siguientes puntos:
Las cuchillas izquierdas y derechas son
diferentes. El sentido de giro está
marcado con flechas en la caja de
engranajes y en las cuchillas.
N Gire la cuchilla derecha interior (6)
en el eje hasta que sea posible
empujarla sobre el eje – Verifique
otra vez el sentido de giro (flechas).
La cuchilla giratoria interior tiene un
cubo más grande que el de la cuchilla
exterior.
N Gire la cuchilla derecha exterior (7)
en el eje hasta que sea posible
empujarla en su lugar – verifique
otra vez el sentido de giro (flechas).
N Coloque y enganche el pasador de
enganche (8) en el agujero del eje –
doble el pasador de enganche
hasta que esté plano contra la
cuchilla.
N Utilice el mismo procedimiento para
colocar las cuchillas giratorias en el
lado izquierdo.
34
BF
Page 37

español / EE.UU
002BA142 KN
1
2
1
3
4
1
002BA654 KN
2
Montaje de la argolla de
transporte
No todas las herramientas básicas
tienen argolla de transporte.
La argolla de transporte se suministra
como un accesorio especial.
El tipo de argolla de transporte depende
del mercado y del tipo de herramienta
básica.
N Alinee la argolla de transporte
N Apriete el tornillo firmemente.
Montaje del mango tórico
Posición del mango
La herramienta motorizada básica
puede tener instalada un mango tórico
(1), manguito (2) o argolla de transporte
(3).
Para la posición de la argolla de
transporte, consulte la sección "Montaje
del mango tórico".
N Coloque la abrazadera (1) contra el
tubo de mando con el agujero con
roscas a la izquierda (vista desde el
motor).
N Apriete juntos los dos extremos de
la abrazadera y sosténgala en esa
posición.
N Introduzca el tornillo M6x14 (2).
BF
Posición de la argolla de transporte:
La argolla de transporte (3) debe
colocarse en el tubo de mando, delante
del mango de control.
Posición del manguito
El manguito deslizante (2) en el tubo de
mando sirve como un espaciador.
N Deslice el manguito (2) de manera
que quede delante de la argolla de
transporte.
35
Page 38

español / EE.UU
1
6
002BA157 KN
10
7
10
5
9
8
9
8
002BA183 KN
1
A
Si un mango tórico ya está instalado:
N Alinee el mango tórico (1) y sujétela
en su lugar – vea "Ajuste y fijación
del mango tórico".
Si un mango tórico no está instalado:
N Instale el mango tórico – vea el
capítulo "Montaje del mango tórico".
Montaje del mango tórico
N Gire las tuercas cuadradas (10)
hasta que topen.
N Alinee el mango tórico (1) y sujétela
en su lugar – vea "Ajuste y fijación
del mango tórico".
Ajuste y fijación del mango tórico
Uso de la correa para
hombro
No todas las herramientas básicas
tienen arnés y argolla de transporte.
N In stale la a rgolla de transpor te – vea
"Instalación de la argolla de
transporte".
La correa para hombro/arnés se
suministra como un accesorio especial.
El tipo de argolla de transporte, correa
para el hombro/arnés y mosquetón
depende del mercado y del tipo de
herramienta básica.
N Coloque la abrazadera (5) en el
mango tórico (1) y ponga los dos en
posición contra el tubo de
mando (6).
N Coloque la abrazadera (7) contra el
tubo de mando.
N Alinee los agujeros.
N Coloque las arandelas (8) en los
tornillos (9), e inserte los tornillos en
los agujeros.
36
N Alinee el mango tórico (1) y
colóquelo en la posición más
cómoda.
La distancia A no deberá ser mayor que
55 cm (22 pulg).
N Apriete los tornillos firmemente y, si
es necesario, trabe las tuercas.
BF
Page 39

español / EE.UU
1
002BA441 KN
2
1
002BA440 KN
3
2
1
2
1
2
002BA311 KN
1
2
1
2
002BA312 KN
Correa para hombro
N Colóquese la correa (1) sobre el
hombro.
N Ajuste el largo de la correa – con la
máquina conectada, el
mosquetón (2) debe quedar
aproximadamente a la misma altura
que su cadera derecha.
Arnés completo
N Colóquese el arnés (1) y cierre la
placa de bloqueo (3).
N Ajuste el largo de la correa – con la
máquina conectada, el
mosquetón (2) debe quedar
aproximadamente a la misma altura
que su cadera derecha.
Conexión de la máquina al arnés
N Enganche el mosquetón (1) a la
argolla de transporte (2).
Desconexión de la máquina del arnés
N Empuje la barra en el
mosquetón (1) y extraiga la argolla
de transporte (2) del mosquetón.
Eliminación de la máquina
ADVERTENCIA
BF
Es necesario quitarse la máquina
rápidamente en caso de un peligro
inminente. Para lanzar la máquina,
utilice el procedimiento dado en
"Desconexión de la máquina del arnés".
Practique quitarse la máquina y
colocarla en el suelo de la manera en la
cual lo haría en caso de emergencia.
37
Page 40

español / EE.UU
504BA018 KN
Para evitar dañar la herramienta
motorizada, no la lance al suelo cuando
esté practicando.
Si se usa el arnés completo, es
necesario abrir la placa de bloqueo
antes de quitarse la máquina.
Arranque / parada del motor
Arranque del motor
Siempre siga el procedimiento de
arranque descrito en el manual de
instrucciones de la herramienta
motorizada básica.
N Apoye la máquina en el suelo:
Coloque la máquina sobre el suelo
Debe quedar firmemente apoyada
en el apoyo de la máquina. Apoye el
extremo con deflector del tubo de
mando sobre un soporte elevado
(por ejemplo, un montículo, tronco o
ladrillo).
Para reducir el riesgo de sufrir
accidentes, verifique que las cuchillas
giratorias no toquen el suelo ni ningún
otro obstáculo.
N Asegúrese de tener los pies bien
apoyados – ya sea de estar a pie,
agacharse o arrodillarse.
N Sujete la máquina con la mano
izquierda y presionarla contra el
suelo firmemente – no toque los
mandos del mango de control al
presionarla – consulte el manual de
instrucciones de la herramienta
motorizada básica.
INDICACIÓN
No se pare ni se arrodille sobre el tubo
de mando.
ADVERTENCIA
Las cuchillas pueden empezar a girar
tan pronto que arranque el motor. Por
esta razón, accione momentáneamente
el gatillo de aceleración – el motor
reduce su aceleración al régimen de
marcha en vacío.
Siga el procedimiento de arranque
descrito en el manual de instrucciones
de la herramienta motorizada básica.
Parada del motor
N Consulte el manual de
instrucciones de la herramienta
básica.
38
BF
Page 41

español / EE.UU
Almacenamiento de la
máquina
Para intervalos de 3 meses o más
N Retire, limpie e inspeccione las
cuchillas giratorias.
N Cubra los componentes metálicos
del accesorio intercambiable con
aceite inhibidor de corrosión
N Guarde la máquina en un lugar seco
y bajo llave, fuera del alcance de los
niños y de otras personas no
autorizadas.
Información para
mantenimiento
Los intervalos dados a continuación
corresponden únicamente a
condiciones normales de trabajo. Si el
tiempo de trabajo por jornada es más
largo que lo normal, o si las condiciones
son extremas (zonas polvorientas, etc.),
acorte los intervalos indicados de modo
correspondiente.
Todos los tornillos y tuercas accesibles
N Vuelva a apretarlos de ser
necesario.
Accesorios de barrido y deflectores
N Inspeccione, revise el apriete antes
de comenzar el trabajo y después
de cada parada para cargar
combustible.
N Sustituya si está dañado.
Etiquetas de seguridad
N Cambie las etiquetas de seguridad
ilegibles
BF
39
Page 42

español / EE.UU
3
4
5
6
7
1
2
504BA019 KN
Componentes importantes
1 Tubo de mando
2 Deflector
3 Cuchilla cultivadora exterior
derecha
4 Cuchilla cultivadora interior derecha
5 Cuchilla cultivadora interior
izquierda
6 Cuchilla cultivadora exterior
izquierda
7 Pasador de enganche
40
BF
Page 43

español / EE.UU
Definiciones
1 Tubo de mando
Encierra y protege el eje impulsor
entre el motor y el mecanismo.
2 Deflector
Sirve para reducir el riesgo de
lesiones causadas por objetos
extraños arrojados contra el
operador los accesorios y por el
contacto con los accesorios.
3 Cuchilla cultivadora exterior
derecha
Cuchilla metálica, forma de estrella
con púas apuntadas o curvadas.
Para colocar en el exterior del lado
derecho.
4 Cuchilla cultivadora interior derecha
Cuchilla metálica, forma de estrella
con púas apuntadas o curvadas.
Para colocar en el interior del lado
derecho.
5 Cuchilla cultivadora interior
izquierda
Cuchilla metálica, forma de estrella
con púas apuntadas o curvadas.
Para colocar en el interior del lado
izquierdo.
6 Cuchilla cultivadora exterior
izquierda
Cuchilla metálica, forma de estrella
con púas apuntadas o curvadas.
Para colocar en el exterior del lado
izquierdo.
7 Pasador de enganche
Fije los accesorios y facilita el retiro
y la instalación de los mismos.
Especificaciones
Caja de engranajes
Engranaje sinfín de etapa sencilla
Relación entre engranajes: 44:1
Accesorio
Cuatro cuchillas con filo doble, giran en
un mismo sentido
Diámetro: 230 mm (9,1 pulg)
Ancho de trabajo: 220 mm (8,7 pulg)
Peso
Accesorio completo con deflector 3,6 kg (7,9 lb)
Información de reparación
Los usuarios de esta máquina deben
efectuar únicamente los trabajos de
mantenimiento descritos en este
manual. STIHL recomienda que un
concesionario de servicio STIHL efectúe
los demás trabajos de reparación.
Los reclamos de garantía presentados
después de realizadas las reparaciones
serán aceptados únicamente si las
mismas fueron ejecutadas por un
concesionario de servicio autorizado
STIHL utilizando piezas de repuesto
genuinas de STIHL.
Los repuestos genuinos STIHL se
identifican por medio del número de
pieza STIHL, el logotipo { y el
símbolo de piezas STIHL K. El
símbolo aparece solo en algunas piezas
pequeñas.
BF
41
Page 44

español / EE.UU
000BA073 KN
TM
STIHL
Injection
Desecho
Respete todas las leyes y los
reglamentos sobre eliminación de
desechos que correspondan a su país.
No se debe botar los aparatos STIHL en
el basurero. Lleve el producto, los
accesorios y el embalaje a un vertedero
autorizado para reciclarlos y contribuir al
cuidado del medio ambiente.
Comuníquese con un concesionario de
servicio de STIHL para obtener la
información más actualizada sobre la
eliminación de desechos.
Marcas comerciales
Marcas registradas de STIHL
®
STIHL
{
K
La combinación de colores anaranjadogris (Números de registro EE.UU.
2,821,860; 3,010,057, 3,010,058,
3,400,477; y 3,400,476)
OILOMATIC
Rock Boss
STIHL Cutquik
STIHL DUROMATIC
STIHL Quickstop
STIHL ROLLOMATIC
STIHL WOOD BOSS
TIMBERSPORTS
WOOD BOSS
YARD BOSS
®
®
®
®
®
®
®
®
®
®
Algunos de las marcas comerciales de
STIHL por ley común
42
4-MIX ™
BioPlus ™
Easy2Start ™
EasySpool ™
AutoCut
EASYSTART
FARM BOSS
iCademy
MAGNUM
®
®
®
®
®
MasterWrench Service
MotoMix
®
®
ElastoStart ™
Ematic ™
FixCut ™
HT Plus ™
IntelliCarb ™
Master Control Lever ™
Micro ™
Pro Mark ™
BF
Page 45

Quad Power ™
Quiet Line ™
STIHL Arctic ™
STIHL Compact ™
STIHL HomeScaper Series ™
STIHL Interchangeable Attachment
Series ™
STIHL M-Tronic ™
STIHL MiniBoss ™
STIHL MotoPlus 4 ™
STIHL Multi-Cut HomeScaper Series ™
Stihl Outfitters ™
STIHL PICCO ™
STIHL PolyCut ™
STIHL PowerSweep ™
STIHL Precision Series ™
STIHL Protech ™
STIHL RAPID ™
STIHL SuperCut ™
STIHL Territory ™
TapAction ™
TrimCut ™
Esta lista de marcas comerciales está
sujeta a cambios.
Queda terminantemente prohibido todo
uso de estas marcas comerciales sin el
consentimiento expreso por escrito de
ANDREAS STIHL AG & Co. KG,
Waiblingen.
español / EE.UU
BF
43
Page 46

español / EE.UU
44
BF
Page 47

Page 48

0458-504-8621-A
englisch / spanisch USA
englisch / spanisch USA
G U
U
www.stihl.com
*04585048621A*
0458-504-8621-A
 Loading...