

Steelcase Details eyesite FPAC2CS, Details eyesite FPAC2CC, Details eyesite FPAEC2CC, Details eyesite FPAC2TM, Details eyesite FPAEC2TM Installation Instructions Manual
...
CLAMP
BRACKET
B
OTTOM
B
RACKET
B
OLT
B
UTTON HEAD
S
CREW
WO
R
K
S
U
R
F
A
C
E
PLATE
D
RILLED HOLE
P
LATE
NUT
WOR
K
S
U
R
F
A
C
E
BASE
B
RACKET
PLASTIC COVER
SCREW
CLAMPING
BRACKET
BRACE
SCREW
age 1 of 2
P
eyesite™dual monitor support
Installation Instructions 19716201 Rev A
FPAC2CC FPAEC2CC
FPAC2TM FPAEC2TM
FPAC2CS FPAEC2CS
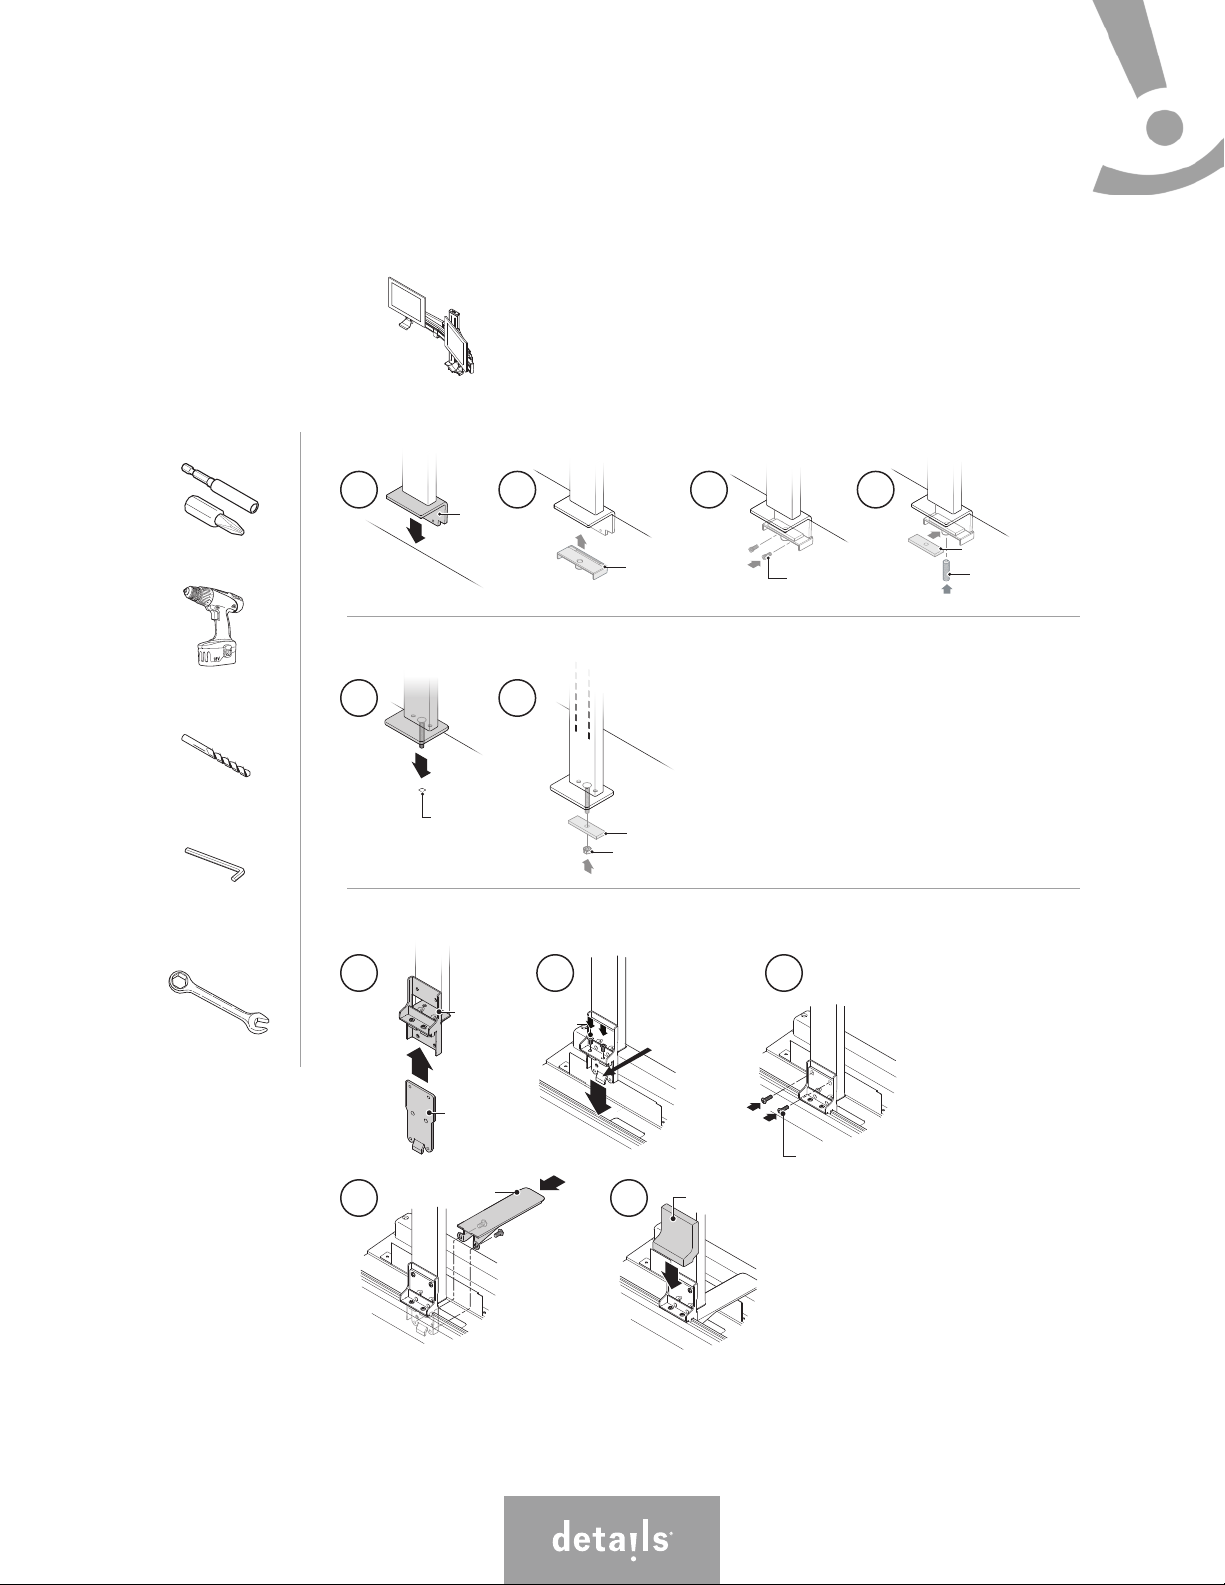
Tools required:
2 Phillips Screwdriver
#
ower Drill
P
3
⁄8" Drill Bit
5
⁄32" Allen Wrench
Provided
5
⁄16" Box End Wrench
C-clamp Mount Installation
1a 1b 1c 1d
Through Mount Installation - Drill3⁄8" 24 - 30" from front of worksurface edge
1a 1b
c:scape™Mount Installation
1a 1b 1c
Must seat
in the lower
c:scape Rail
groove.
1d 1e
Eyesiite
A S t e e l c a s e C o m p a n y
™
| Installation Instructions
Page 2 of 2
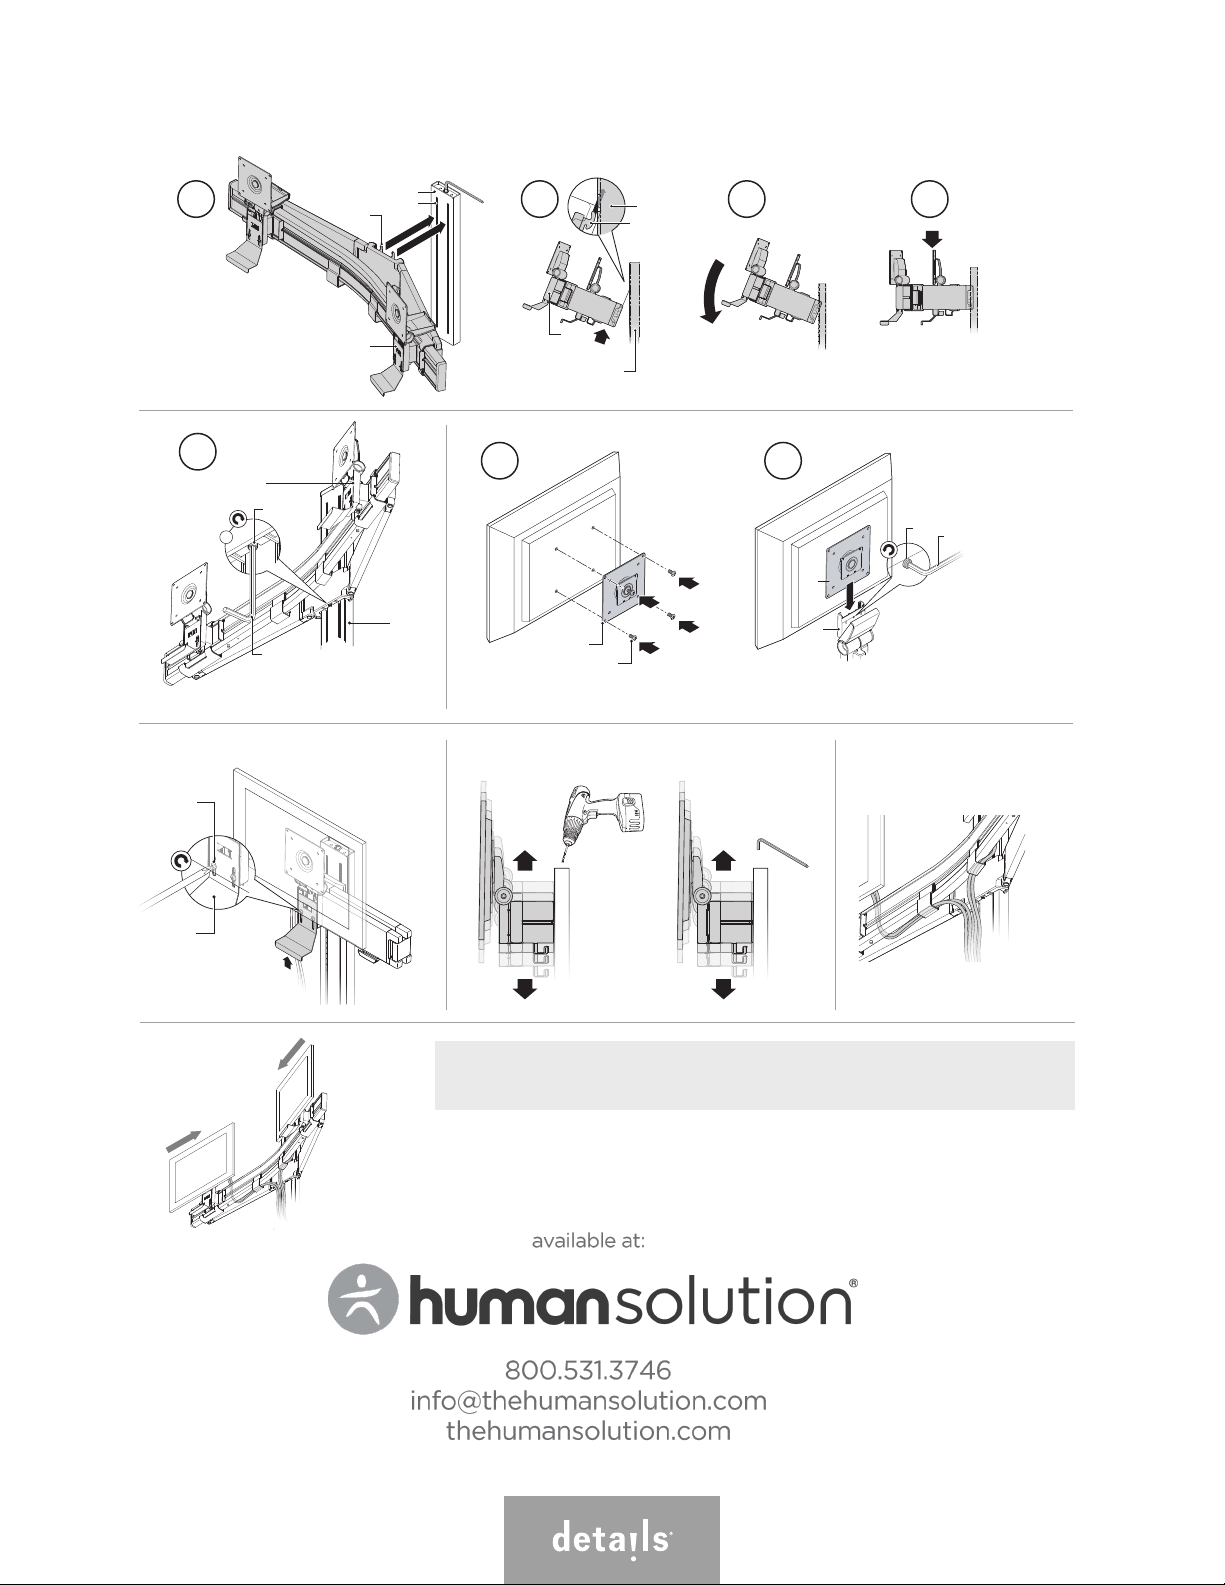
Installation Instructions:
2a 2b 2c 2d
MONITOR MOUNT
BRACKET ASSEMBLY
TOOTH
COLUMN
COLUMN SLOT
MONITOR
MOUNT
BRACKET
ASSEMBLY
COLUMN
TOOTH
COLUMN
NOTE: Install Tooth shown into top slot.
3a
MONITOR MOUNT
BRACKET ASSEMBLY
4a
ADJUSTMENT
SCREW
PROVIDED
ALLEN WRENCH
COLUMN
4a 4b
MONITOR MOUNT
ASSEMBLY
SCREW
MONITOR
MOUNT
ASSEMBLY
MONITOR
BRACKET
ASSEMBLY
MOUNT
NOTE: Secure Yolk to the Column.
Adjust height with Drill or Allen Wrench Route CablesAdjust Handle
SET SCREW
ALLEN WRENCH
ADJUSTMENT
SCREW
MONITOR
TILT BRACKET
Align Screens
Recommendation: Adjust the height of the Flat Panel Monitor Support
so that the center of VESA bracket is 46" above the floor.
For a better day at work.
©2009 Steelcase Inc.
®
All rights reserved. 11/09
A S t e e l c a s e C o m p a n y
 Loading...