

Star Manufacturing PC18 Installation Manual

PIZZAS OF EIGHT PIZZA SYSTEMS
OPERATOR'S MANUAL
MODEL PC18
FOR SERVICE INFORMATION
U.S. AND CANADA CALL: 1-800-807-9054
24 HOURS/DAY 7 DAYS/WEEK
TABLE OF CONTENTS
UNCRATING AND INSPECTION PAGE 1
ASSEMBLY AND INSTALLATION PAGE 1, 2
STACKING INSTRUCTIONS PAGE 3
OPERATION PAGE 4
COOKING PROCEDURES PAGE 4
CLEANING PROCEDURES PAGE 5, 6
TROUBLESHOOTING GUIDE PAGE 6, 7, 8
MAINTENANCE PROCEDURES PAGE 9, 10, 11
PARTS LIST PAGE 12
DRAWINGS
ADJ. HEAT SHIELDS, FRONT VIEW PAGE 2
UNLOAD TRAY PAGE 2
HEAT REFLECTOR/CRUMB TRAYS PAGE 5
REMOVING THE CONVEYOR BELT PAGE 5
BELT SUPPORT SYSTEM PAGE 5
DRIVE SYSTEM PAGE 8
HEATER TUBE INSTALLATION PAGE 9
COMPONENT ARRANGEMENT PAGE 11
WIRING DIAGRAM
CONVEYOR BELT CLEANING PROCEDURES
PAGE 13
PAGE 14
2M-HG0106 REV. 5/4/2005
PAGE 1
PIZZAS OF EIGHT PIZZA SYSTEMS
OPERATOR'S MANUAL
MODEL PC18
UNCRATING AND INSPECTION
Unpack unit and components from container. Remove all visible packing material, inspect unit for damage. If
damage is discovered, file a claim immediately with the carrier that handled the shipment.
The following should be included in the container:
A. 1 ea. Baking oven with heaters with conveyor belt in place. Remove heating element shipping
supports.
B. 1 ea. Stainless Steel Unload Tray and 4 ea. 2 ½ “ Metal Legs.
ASSEMBLY AND INSTALLATION
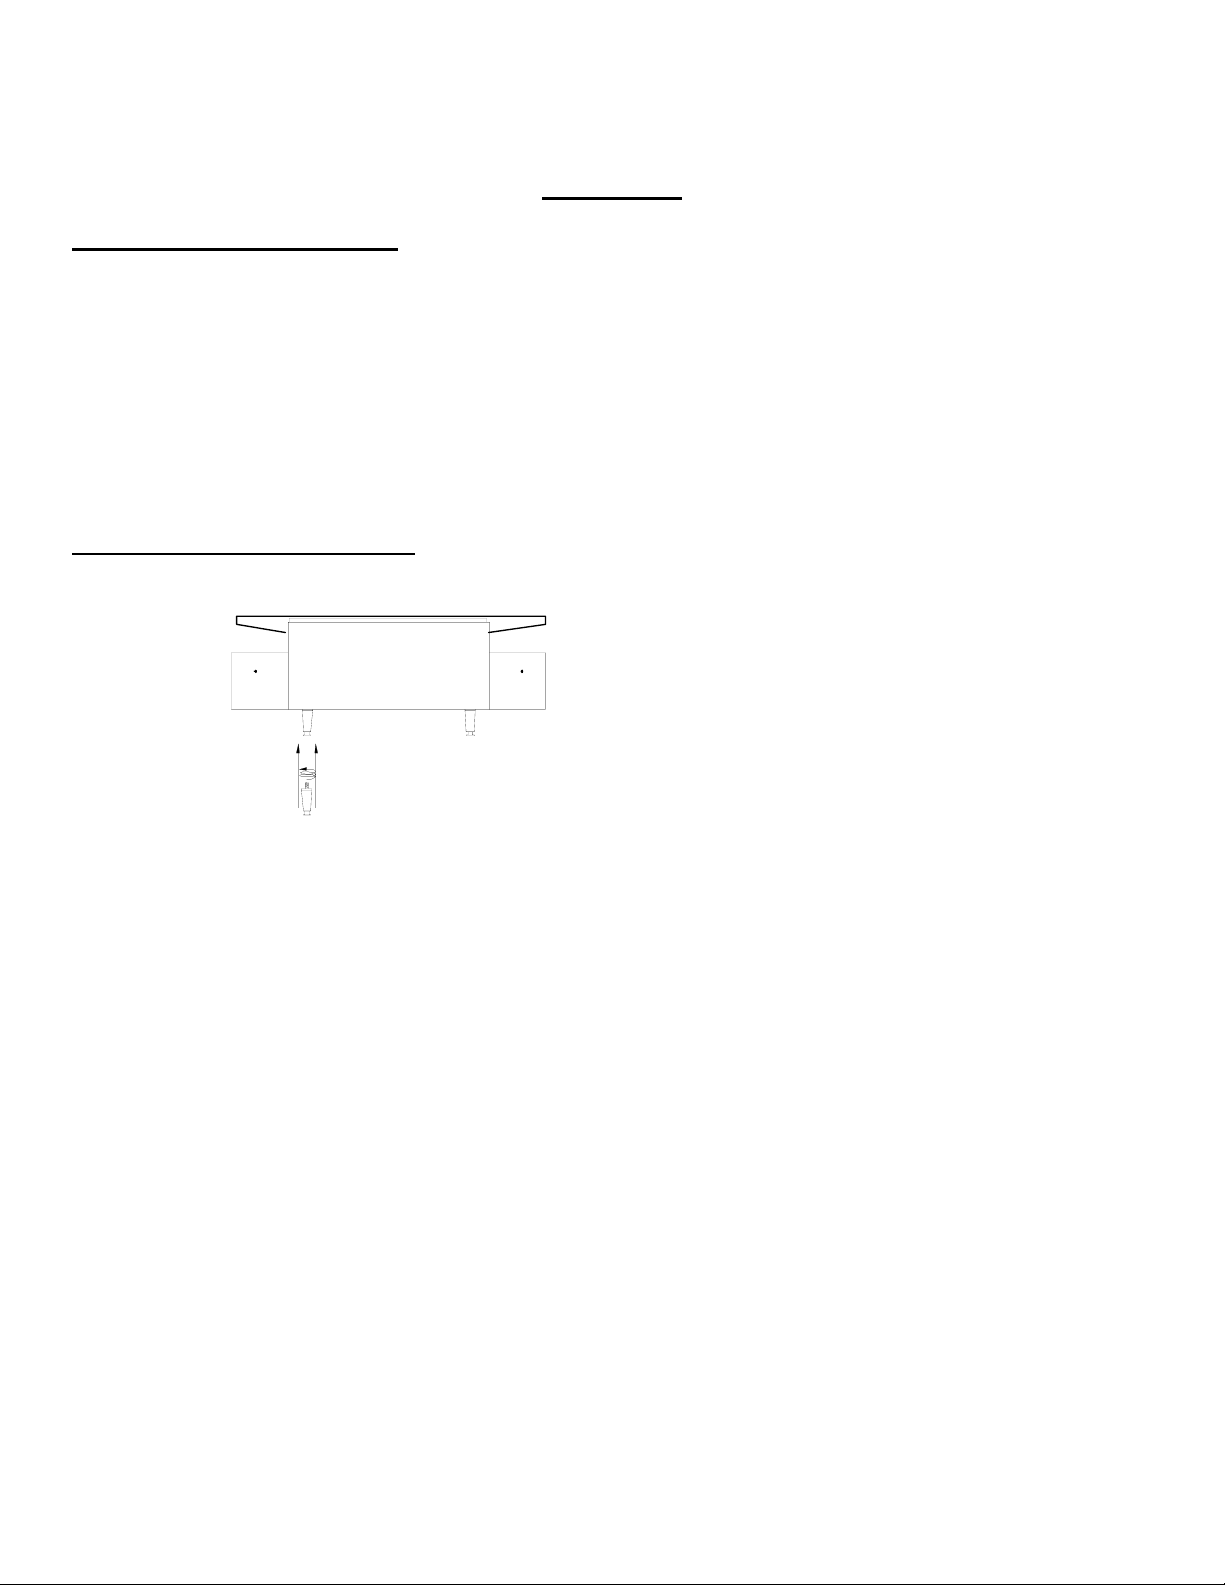
A. Attach legs by screwing into weld nuts, as shown
INSERT LEG BY SCREWING
INTO WELD NUT ON BOTTOM
OF UNIT.
B. Anti Skid pads are available at no charge and may be adhered to the foot section of each leg to
prevent sliding. Call the Holman Cooking Equipment Factory Service Team at 1-800-807-9054 for
details.
CAUTION: Use of these pads are not approved by the National Sanitation Foundation.
C. Install unit in its operating position. The load & unload ends must be at least 6" from any vertical
combustible surfaces. Allow sufficient space for operating personnel.
D. Have an electrician connect input power to the unit(s) in accordance with local electrical codes. A
connection terminal block is inside the left side cavity.
ASSEMBLY AND INSTALLATION CONT. ON PAGE 2

PIZZAS OF EIGHT PIZZA SYSTEMS
OPERATOR'S MANUAL
MODEL PC18
ASSEMBLY AND INSTALLATION (CONT)
WARNING
: MAKE SURE ALL INPUT POWER IS OFF BEFORE INSTALLING/REMOVING ANY PARTS.
WARNING
: BEFORE INSTALLING UNIT(S), CHECK WITH LOCAL POWER COMPANY TO DETERMINE
ACTUAL VOLTAGE AT JOB SITE. NEVER PLUG A 208 VOLT UNIT INTO 240 VOLTS OR A
240 VOLT UNIT INTO 208 VOLTS.
WARNING;
BE ABSOLUTELY SURE THE GROUND CONNECTION FOR THE RECEPTACLE IS
PROPERLY WIRED. NEVER CONNECT UNIT TO POWER WITHOUT PROPER GROUND
CONNECTIONS. IMPROPER GROUND MAY RESULT IN SEVERE INJURY OR FATALITY.
E. Before applying input power to the unit(s) check heating elements for breakage, do not apply power to
the unit(s) if a broken tube is found. If no broken tubes are found apply input power by switching the
master on/off toggle switch to the ON position. Turn both heat controls and conveyor belt speed
control to the maximum setting and check all heater tubes and conveyor for proper operation.
F. Allow approximately 5 to 8 minutes for the fan cooling system to come on, check the air intake area as
noted below and be sure that there is a sufficient flow of air into the control box.
ADJUSTABLE HEAT SHUTTER
AIR INTAKE LOCATED
ON BOTTOM CONTROL
BOX COVER.
UPPER POSITION
LOWER POSITION
G. If all heaters and conveyor system are operating properly, switch the master on/off switch to the OFF
position and allow unit to cool, the fan will continue to circulate cool air through the unit until the
internal temperatures have been decreased.
H. If a problem is discovered during start up procedures, immediately switch the master on/off switch to
the OFF position and notify the Holman Cooking Equipment Factory Service Team at 1-800-807-9054
24 hours 7 days a week, service will be arranged for you.
I. Install unload tray as shown.
UNLOAD TRAY
CRUMB TRAYCRUMB TRAY
PAGE 2

D
PIZZAS OF EIGHT PIZZA SYSTEMS
OPERATOR'S MANUAL
MODEL PC18
ASSEMBLY AND INSTALLATION (CONT.)
F. Stacking Ovens
When stacking two PC18 ovens, a stacking spacer with external air duct must
overheating of the control box in the top oven.
1) If cart is to be used with units, place bottom unit on cart and align leg hole of unit to holes in top
portion of cart. Insert 3/8" bolts through cart and into leg holes to secure bottom unit to cart as
shown below.
2) Place stacking spacer on top of the bottom oven with internal air duct facing up and toward the rear
of the oven.
3) Mount external air duct on stacking spacer as shown below. External air duct must be installed for
cooling system of top unit to function properly.
4) Screw cap screws (4ea.) into leg holes on top oven (see fig. #1 below).
5) Place top oven on stacking spacer. Cap screws will set into cut outs in top of stacking spacer to
lock unit into position. (NOTE) Air intake of top unit must fit over the internal air duct of
stacking spacer to allow airflow into the control box of the top oven.
TOP UNIT- CAP SCREWS
SCREW INTO LEG HOLE.
UNIT SITS ON TOP
OF SPACER.
BOTTOM UNIT
CAN BE COUNTER
MOUNTED OR
PLACED ON A
CART AS SHOWN
STACKING SPACER (REQUIRE
MOUNTS ON TOP
OF BOTTOM OVEN.
EXTERNAL AIR DUCT
MOUNTS ON SPACER.
MOUNTING BOLTS
FOR BOTTOM UNIT
SCREW INTO LEG
HOLES THOUGH
CART FRAME.
PAGE 3
be used to prevent

PIZZAS OF EIGHT PIZZA SYSTEMS
OPERATOR'S MANUAL
MODEL PC18
OPERATION
A. Switch master on/off switch to the ON position and turn top and bottom heat controls to number 10,
turn conveyor speed control to fastest time setting.
B. Allow 10 to 15 minutes for unit(s) to warm up.
C. Baking in these units is a combination of heat and belt speed. Some foods may require more top heat
or vice versa; other foods may require low top and bottom heat and slow belt speeds. Every product
should, therefore, be tested using the separate top and bottom heat controls and the variable speed
Control to arrive at the correct balance of heat and belt speed. When changing heat and/or belt speed
settings allow approx. 5 minutes for the oven to stabilize itself at the new settings.
COOKING PROCEDURES
THE FOLLOWING SUGGESTED SETTINGS FOR THE VARIOUS PRODUCTS LISTED ARE
INTENDED TO ASSIST THE USER OF THESE OVENS WITH ARRIVING AT THE CORRECT
BALANCE OF HEAT AND SPEED. SOME ADJUSTMENTS MAY STILL HAVE TO BE MADE TO BOTH
HEAT AND SPEED DEPENDING ON THE PRODUCTS FRESHNESS AND/OR THICKNESS AND
DENSITY.
PRODUCT
PIZZA
12" FRESH 350°F 450°F 8 MINUTES
16" FRESH 300°F 450°F 12 MINUTES
12" BLANCHED 300°F 400°F 6 MINUTES
16" BLANCHED 300°F 400°F 8 MINUTES
12" FROZEN 300°F 300°F 8 MINUTES
16" FROZEN 350°F 350°F 12 MINUTES
SANDWICHES
MEAT/CHEESE 450°F 300°F 4 MINUTES
MEATBALL 500°F 350°F 2 MINUTES
BAGEL (OPEN) 500°F 400°F 2 MINUTES
COOKIES
1 TO 1 1/2 Oz 200°F 250°F 12 MINUTES
GARLIC BREAD
LIGHTLY SEASONED 500°F 500°F 2 MINUTES
FISH
TOP HEAT BOTTOM HEAT BELT SPEED
SIZZLE PLATTER 400°F 500°F 6 MINUTES
PAGE 4

Y
Y
PAGE 5
PIZZAS OF EIGHT PIZZA SYSTEMS
OPERATOR'S MANUAL
MODEL PC18
CLEANING PROCEDURES
Preventive maintenance for your conveyor oven consist of the following recommended cleaning procedures.
To keep your oven in its top operating condition, these steps should be performed daily or weekly as indicated.
NOTE:
MAINTENANCE. CALL HOLMAN FACTORY SERVICE DEPARTMENT FOR DETAILS.
LUBRICATION OF DRIVE CHAIN WITH A GRAPHITE BASED LUBRICANT IS REQUIRED AS PERIODIC
WARNING:
HIGH VOLTAGES ARE PRESENT IN THESE UNITS. BE SURE ALL INPUT POWER IS OFF
BEFORE SERVICING OR CLEANING UNIT.
A. Remove load and unload trays (daily) as shown.
UNLOAD TRAY
CRUMB TRA
CRUMB TRA
B. Remove the crumb trays from both load and unload ends of the oven (daily) as shown above, (DO
NOT CLEAN WITH CAUSTIC CLEANERS).
C. For lightly soiled conveyor surfaces a damp cloth or scotch pad can be used without removing the
conveyor belt. (daily)
D. For heavily soiled conveyor surfaces disconnect and remove the conveyor as shown and soak in hot
soapy water overnight (as required).
MOUNTING STUD
COUPLER WILL SCREW
ONTO MOUNTING STUD
BELT SUPPORT ROD
E. If you have removed the conveyor belt, then remove the conveyor support system as shown above
and clean with a scotch pad (as required).
CLEANING PROCEDURES CONT. PAGE 6
 Loading...