

Page 1

1
Gasoline Tiller
Gasoline Tiller
SGT-25-450-H
GB
Original instructions
Page 2

2
2
Manufactured under license by:
MATRIX GmbH • Postauer Straße 26 • D-84109 Wörth/Isar • www.matrix-direct.net
Stanley is a registered trademark of The Stanley Works or its affiliates and is used under license.
GB
Page 3

3
3
GENERAL SAFETY RULES
ATTENTION: When using gasoline motors like this
one, basic safety rules must be observed in order
to reduce risk of accidents and/or damage to the
machine. Read all instructions again before using
the device in the future.
SAFETY PRECAUTIONS
• Read these instructions carefully.
• Never allow children or persons who are not
familiar with these instructions to operate the
machine. Local regulations may impose a limit on
the age of the operator.
• Never operate the machine around children or
pets.
• Keep in mind that the operator of the machine is
responsible for any accidents that may occur to
third parties and/or to their property.
• The machine must be operated solely by a
capable person who is qualified to operate it.
• Always wear appropriate footwear (safety shoes)
and long pants when operating this tool.
• Do not operate the machine when barefoot or
when wearing open sandals.
• Carefully inspect the area where the equipment
will be operated and remove any objects that could
be thrown by the machine.
CAUTION
-
Gasoline is extremely flammable:
- Store fuel only in containers designed for this
purpose.
- Refill the machine with fuel only when outdoors
and never smoke when re-filling the equipment
with fuel.
- Add fuel before starting up the motor. Never
remove the fuel tank plug or add gasoline while the
motor is running or when the engine is hot.
- If gasoline is spilled, do not attempt to start up the
motor; take the machine away from the area where
the gasoline was spilled and keep all sparks away
until the gasoline has evaporated.
• Replacing a defective muffler.
• Before each use, always check to be sure that
the tools are not worn out or damaged. When
changing a worn-out or damaged component or
bolt, change all similar components out in order to
preserve balance.
• Do not operate the machine in a confined space
where dangerous carbon monoxide vapors could
accumulate.
• Always be sure that the machine is balanced on
its stands.
• Walk, never run, with the machine.
• Work is a diagonal direction, never from up and
down.
• Pay very close attention when changing direction
on slopes.
• Never work on slopes that are too steep.
• Pay very close attention when reversing the
machine or pulling it towards you.
• Do not change direction adjustments and do not
exceed the speed limit of the motor.
• When starting the motor, following the
instructions carefully and keep your feet far away
from the blades.
• Do not put your hands or feet near or on rotating
parts.
• Never pick up or carry the machine while the
motor is running .
• Shut off the motor:
• Every time you leave the machine.
- Before refilling it with gasoline.
- When performing maintenance and cleaning
operations.
- While changing tools.
- When using any traction force other than the
engine to move the machine.
• Reduce the starter when shutting off the machine
and close the fuel hose when finished working.
• Use the tiller only with the blades provided.
• Always place your hands on the handlebar when
using the machine. Do not hold the machine by its
other parts while operating it.
• Keep all nuts, bolts and screws properly tightened
so that you are sure that equipment is in optimum
safety condition.
• Never store the equipment with gas in the tank,
inside a building where vapors could reach an
open flame or a spark.
G
B
Page 4

4
4
• Allow the motor to cool off before storing it in any
enclosed space.
• To reduce risk of fire, keep the storage area for
the machine, tail pipe and gasoline free of any
vegetation or excess lubricant.
• Replace any worn or damaged parts as a measure
of safety.
• If the fuel tank must be drained, it must be done
outdoors. Handle fuel in an environmentally safe
manner.
• The fuel tank must be drained every time the tiller
is moved.
• To reduce the effects of machine vibrations, wear
protective gloves when operating it.
• Be sure to take breaks after every 30-minute
period of work to avoid Hand Arm Vibration
Syndrome.
PRELIMINARY MEASURES:
When working, always wear stable shoes and long
pants.
Never operate the machine when barefoot or when
wearing light sandals.
Inspect the entire terrain on which you will be
operating the equipment and remove any objects
that could be thrown by the machine.
CAUTION!
– Gasoline is extremely flammable!
Store gasoline only in containers that are designed
for this purpose. Fill it up only in the open air and do
not smoke when filling it.
Fill the tank with gas before starting the motor. Do
not open the gas tank closure plug or fill it with
gasoline while the motor is operating, or when the
motor is hot.
If the gasoline overflows, do not attempt to start up
the motor for any reason.
Instead, remove the equipment from the area
where the gas has been spilled. Then, avoid all
attempts to start up the machine until all gasoline
vapors have evaporated
Replace any damaged tailpipes.
Before use, always visually inspect for worn or
damaged parts. If there are any worn or damaged
parts, or fastening bolts, the entire set must be
replaced.
HANDLING:
The engine must not be operated in enclosed
areas in which carbon monoxide, a dangerous
substance, could become concentrated.
Operate this machine only in daylight or with
proper lighting. Be sure that you keep the unit
balanced on its stands.
Do not operate the machine faster than you can
walk.
For wheeled machines: Work transversely relative
to the slope, never when climbing or descending.
Pay particular attention when you are changing
direction on a slope.
Be especially careful when you are making a
U-turn with the machine or when you are pulling it
towards you.
Never change the motor base adjustment or make
it run too quickly.
Use caution when starting up the motor, in
compliance with the manufacturer’s instructions
and be sure to keep a sufficient distance between
your feet and the tool or tools.
Never put your hands or feet on or under rotating
parts.
Never lift or carry a machine when its motor is
running.
Always shut off the motor before filling the fuel
tank with gasoline. When the motor is running
unloaded, be sure to close the flow restrictor.
If the machine has a gasoline shutoff valve, it must
be closed after any intervention
For safety reasons, the motor rotation speed must
not exceed the data indicated on the power plate.
Always use two persons to transport or store the
power tiller. Do not carry it all by yourself.
G
B
Page 5
5
5
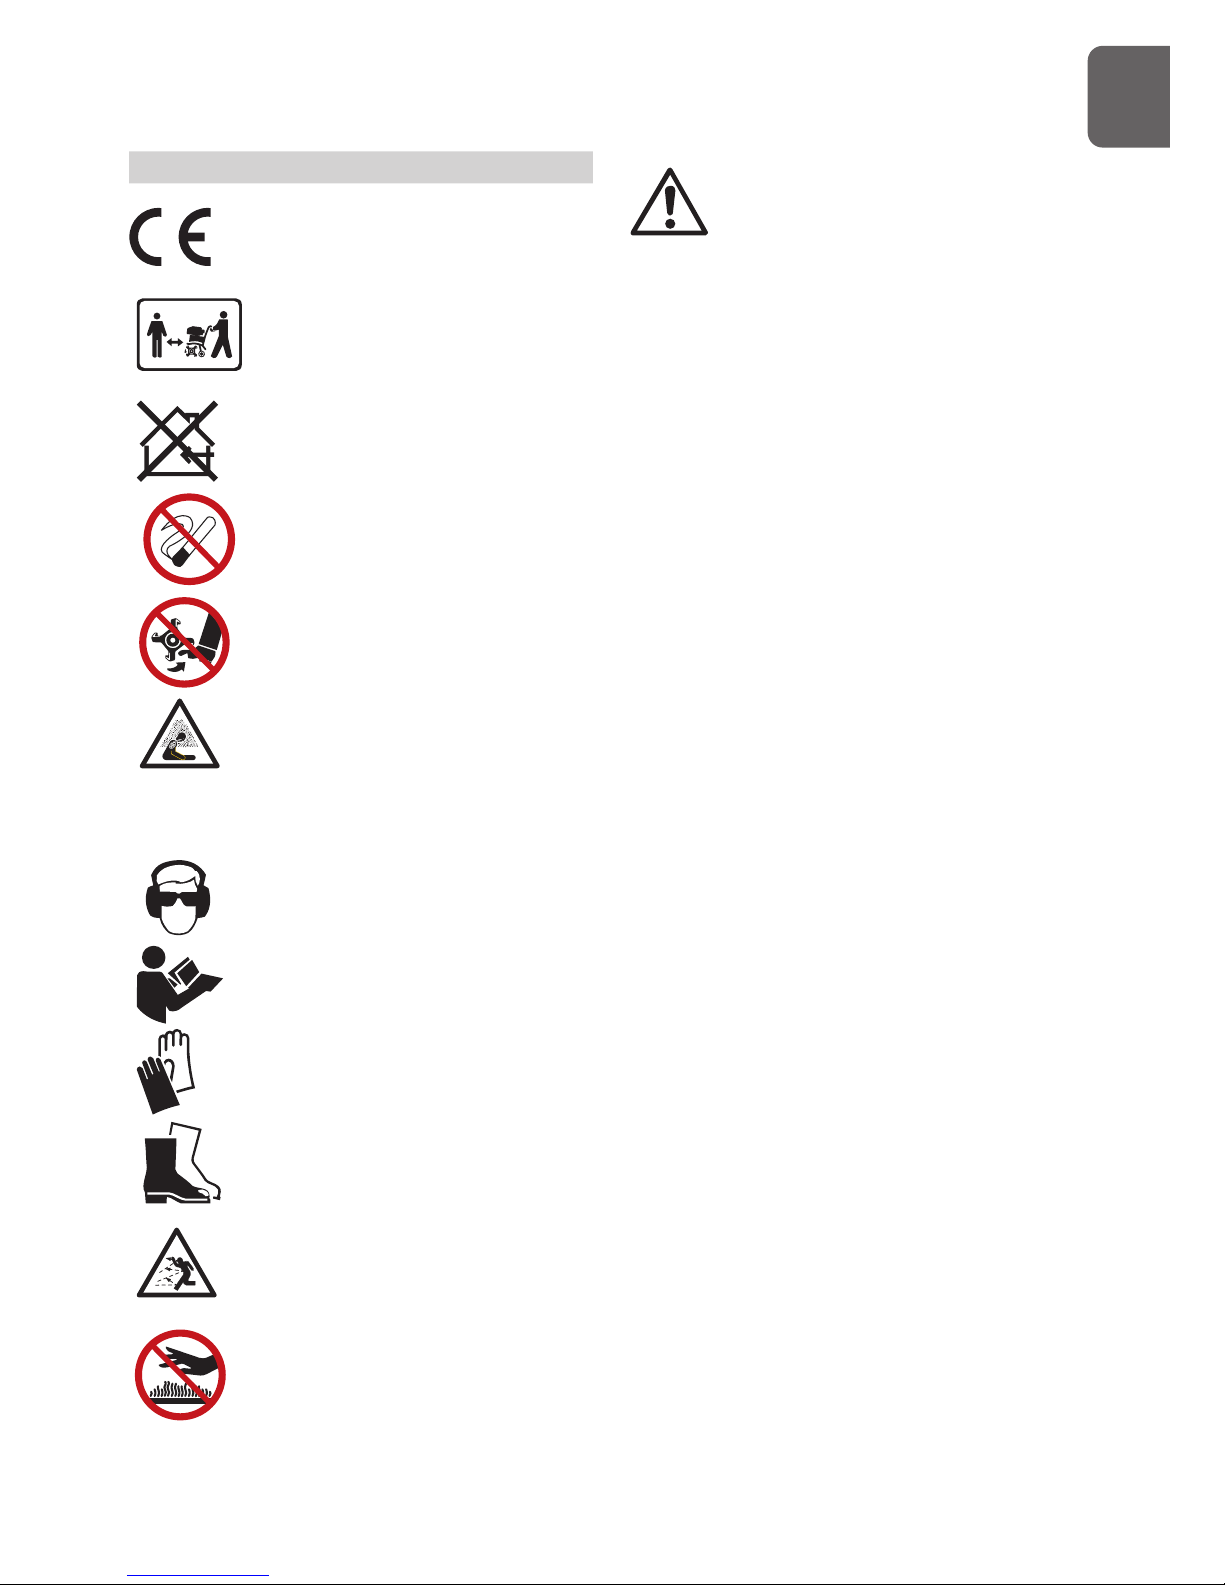
SYMBOLS
Complies with appropriate safety
standards.
Keep bystanders away.
Only operate the
generator outside to ensure
adequate ventilation.
Do not smoke or have open flames
Stay away from rotating augers.
During operation, toxic gases are
produced e.g. carbon monoxide
(Which is a colorless and odorless
gas) this gas may lead to by
suffocation.
Wear eye protection.
Wear hearing protection.
Read these instructions for use
carefully.
wear gloves when operating
Wear safety footwear.
Never direct discharge towards
persons or property.
Do not touch a hot muffler, gear
housing or cylinder.
G
B
Important: Do not wear loose clothing,
neckties or jewelry (rings, wristwatches)
when operating this machine. They may be
caught by moving parts.
Page 6
6
6
G
B
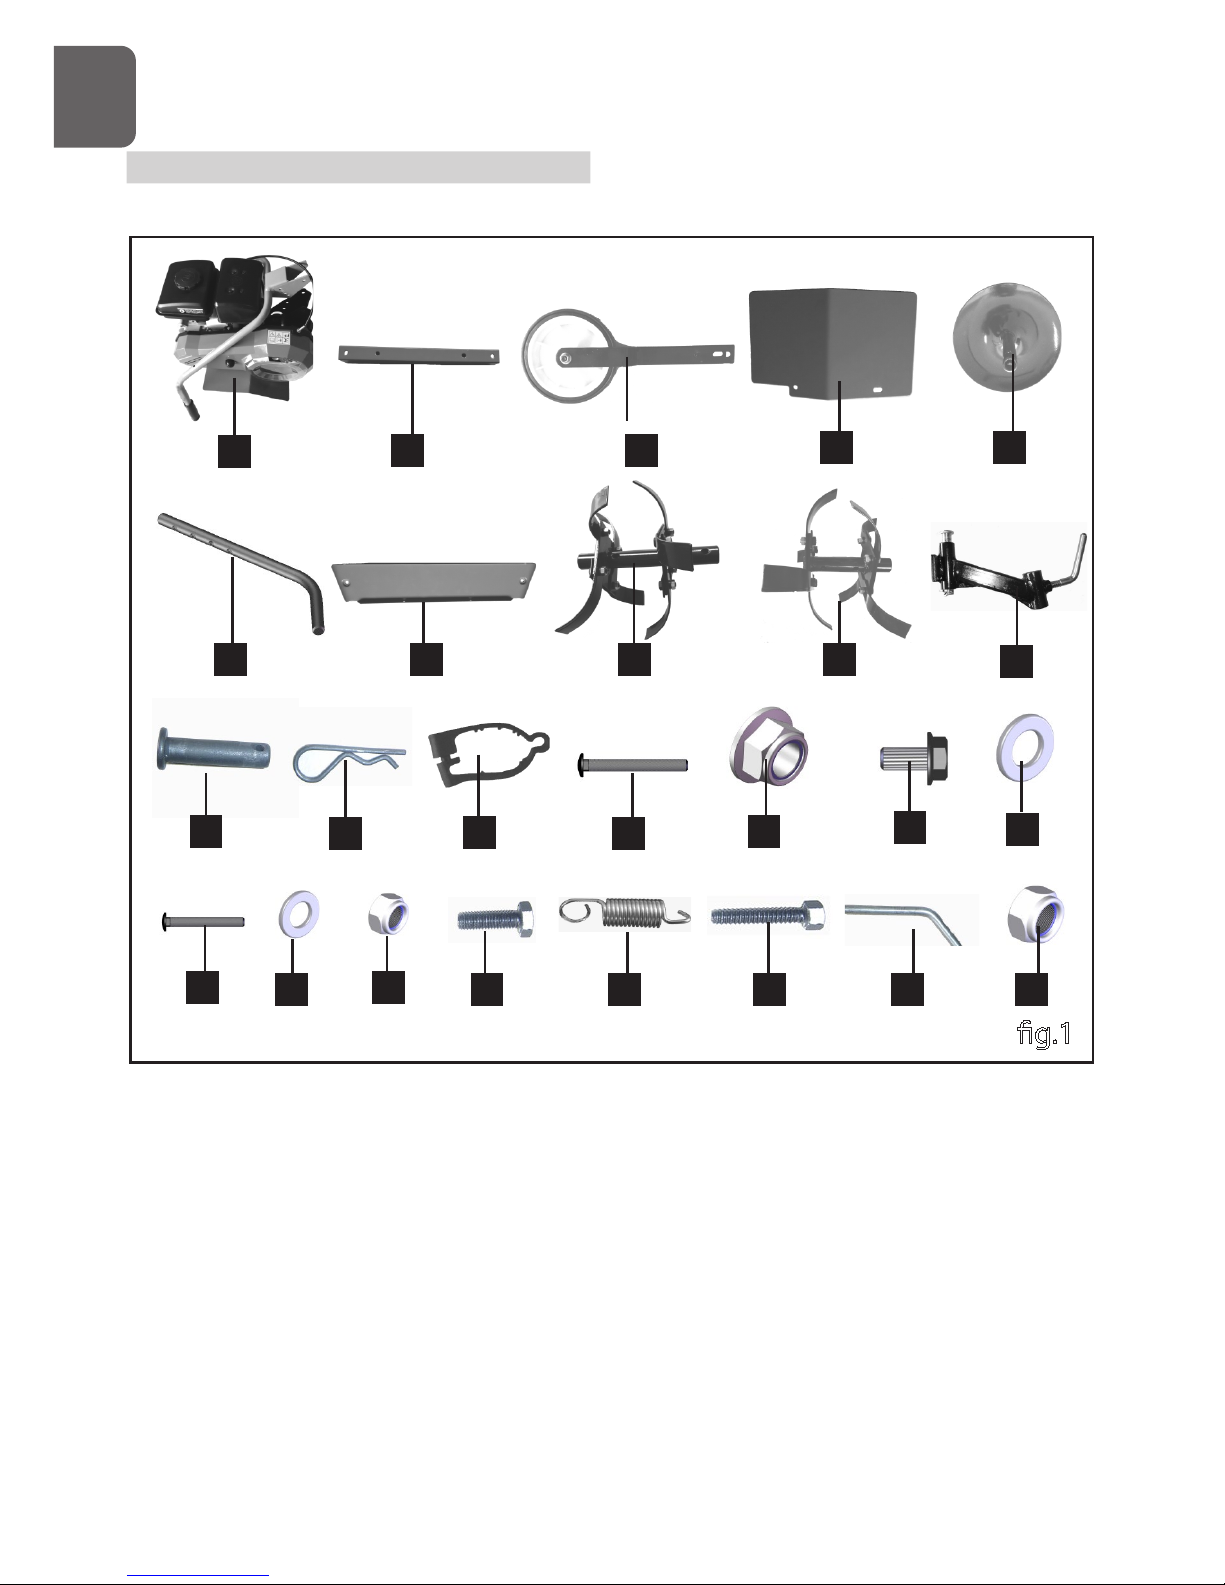
CONTENTS SUPPLIED
1.Tiller X1
2.Girder X1
3.Wheel assy X1
4.Right blade cover X1
5.Blade disc X2
6.Resistance rod X1
7.Safety plate X1
8.Right blade assy X1
9.Left blade assy X1
10. Resistance rod support X1
11.Pin X4
12.Cotter pin X5
13.Cable bandage X4
14.Bolt M 8*70 X2
15.Hex flange face locknut M8 X5
16.Bolt M 8*16 X2
17.Flat washer D8 X3
18.Bolt M 6*35 X2
19.Flat washer D6 X2
20.Hex locknut M6 X2
21.Hex bolt M 8*50 X1
22.Extension spring X1
23.Hex bolt M 8*70 X1
24.Handle lock lever X1
25.Hex locknut M8 X1
11
12
13
14
15
16
17
18
19
20
21
22
23
24
25
1
2
3
4
7
8
6
5
9
10
g.1
Page 7

7
7
G
B
ASSEMBLY
Following the assembly directions below, you will
assemble the front tine tiller in a few minutes.
1.Place tilling tines on the tine shaft on both sides
of the gear box. Line up the holes in the tine frame
sleeves and tine shaft. Insert clevis pins through
the holes in tine frames and tine shaft. Insert cotter
pins through the holes in the clevis pins to secure
them.(Fig.3)
11/12
5
9
8
5
g.2
2. Install the resistance rod support with clevis pin,
and tight them with cotter pin. Insert the resistance
rod in the hole of resistance
rod support, then lock them with lock lever in
desired position.(Fig.3)
g.3
6
10
3. Mount the girder on the tiller with 2
M8*70 screws and flange nuts.(Fig.4)
g4
2
14/15
4. Install the handle on the girder with M 8*70
screw, washer and flange nut, then insert the
lock lever in desired position to secure the top of
handle(Fig.5).
g.5
12/17/24
17/23/25
5. Install the safety plate with 2x M 6*35 screws,
washers and flange nuts.(Fig.6)
g.6
7
18/19/20
6. Mount the Wheel assy on the tiller with M 8*50
screw and flange nut, then hang extension spring
(Fig.7).
Page 8

8
8
g.7
3
15/21
22
7. Install the Cable bandage(See Fig.8)
g.8
13
8. Mount the blade cover and tight it on the
machine with 2x M 8*16 screws and flange
locknuts.(See Fig.9)
g.9
4
15/16
Engine oil
Engine is shipped from factory without
oil. You must add engine oil before
G
B
Page 9

9
9
G
B
7
2
3
4
5
6
9
8
1
Page 10

10
10
LAYOUT
1. Handle
2. Gasoline engine
3. Blade cover
4.Blade disc
5. Wheel
6. Chain box
7. Blade
8. Resistance rod
9. Belt cover
10.Oil dispstick
11. Choke Lever
12.ON/OFF Switch
13.Recoiling Handle
14. Forward control rod
15. Reverse control rod
16. Adjust Nut
17. Spark cap
18. Spark Plug
OPERATION INSTRUCTION
1. Checking/Adding Oil (Figure 10)
Place engine in a horizontal position and clean the
oil fill area of any debris before adding or checking
the oil.
1) Remove the dipstick (G) and swipe with a clean
cloth.
2) Insert the dipstick into the filler neck without
screwing it in.
3) Pull the dipstick out and check the oil lever. The
oil lever should be in between the MIN.and MAX.
levels.
4) If low, add oil slowly into the engine oil fill
tube(G). Do not overfill. After adding oil, wait one
minute and then recheck the oil level.
5) Replace and tighten the dipstick.
g.10
Warning:
If the level is too low, it may cause serious damage
to the engine. When the engine is working,
please use clean and good quality 4-stroke engine
oil. Run with other engine oil or dirty oil may
shorten the lifetime of the engine severely.
2. Adding fuel (Figure 11)
1) Clean the fuel cap area of dirt and debris.
Remove the fuel cap.
2) Fill the fuel tank with gasoline. To allow for
expansion of the gasoline, do not fill above the
bottom of the fuel tank neck.
3) Reinstall the fuel cap.
CAUTION:
1) Turn engine off and let engine cool at least 2
minutes before removing the fuel cap.
2) Fill fuel tank outdoors or in well-ventilated area.
3) Do not overfill fuel tank. Fill tank to approximately
1.5 inches (38mm) below top of neck to allow for
fuel expansion.
4) Gasoline is extremely flammable and is
explosive. Do not smoke and allow flames or sparks
G
B
Page 11

11
11
in the area where gasoline is stored or where the
fuel tank is refueled.
5) Check fuel lines, tank, cap and fittings frequently
for cracks or leaks. Replace if necessary.
6) If fuel spill,wait until it evaporates before starting
engine.
g.11
3. Starting engine
Starting is different due to different equipments. It
is optional according to your engine.
1) Check the engine oil lever. See the” Checking/
Adding Oil” section.
2) Push the choke lever to the CLOSE position (Fig.
12)
Note: It is not necessary to push to the CLOSE
position when the engine is warm or the air
temperature is high.
g.12
Open
Close
11
3) Push below switche to the “ON” position.(Fig. 13)
g.13
12
4) Pull the starting handle slowly until you feel
the resistance, and then pull it out suddenly and
quickly. (Fig.14)
g.14
13
Attention:
Send the starting handle back slowly. Or it may
cause the damage of the starting equipment and
other spare parts. Please don’t pull the starting
handle out when running, because it will affect the
engine.
5) If the choke lever is on the “CLOSE” position,
please turn the choke lever to the “OPEN” position
after engine runs 2 minutes. (Figure 12)
4. Shutting the engine down
Push the Engine switch to the “OFF” position.
(Figure 13)
5. Adjusting the clutch
If the main clutch cable is not adjusted well (too
G
B
Page 12

12
12
tight or loose), the clutch may not work well.
1) Starting the engine.
2) Take the clutch control rod to the middle position.
( Figure 15)
3) Turn the adjusting nut in figure 16 in a clockwise
direction to tighten the wheel clutch; or in a
anticlockwise direction to loosen it.
g.15
14
15
g.16
16
6. Using the rear resistance rod or adjusting the
tilling depth
Adjust the depth of rear resistance rod by changing
the hole. (Figure 17)
7. Adjusting the height of the handle
Loosen the bolt and then adjust the height of the
handle by moving the nut right or left. (Figure 18)
g.17
g.18
Tilling
Tilling is digging in, turning over and breaking up
garden soil and prepare a seedbed for planting.
Best tilling depth is 100mm (4”) to 150mm (6”). A
tiller will also clear the soil of unwanted vegetation.
The decomposition of this vegetation matter
enriches the soil.
Avoid tilling soil that is too dry as it will pulverize
and produce a dust that will not hold water. Water
a few days before tilling. Also, tilling soil that is
too wet will produce unsatisfactory clods. Wait a
day or two after heavy rain for the soil to dry.
Better growth will be obtained if an area is tilled
properly and used soon after tilling to preserve
the moisture content.
The type of soil and working conditions will
determine the actual setting of the tilling depth.
In some soils, the desired depth is reached first
pass over garden. In other soils, the desired depth
is obtained by going over the garden two or three
G
B
Page 13

13
13
times. In later case, the depth regulator rod should
be lowered before each succeeding pass over the
garden. Passes should be made across the length
and width of the garden alternately. Do not try to
dig too deeply in the first pass. If the machine
jumps or bucks, allow the unit to move forward
at a lightly faster rate.
If the tiller stops forward motion and tries to dig
in one spot, rock the handles from side to side to
start it moving forward again.
Rocks which are turned up should be removed
from the garden area.
Cultivating
Cultivating is loosening or digging around growing
plants to disrupt weeds and aerate soil. Less than
50mm (2”) depth is always desirable.
MAINTENANCE
CAUTION:
Stop the engine at the flat ground, and do not touch
the hot part or moving parts to avoid injury. If the
maintenance is required with the engine running,
be sure to keep good ventilation in the area. The
exhaust emissions from the engine contain toxic
carbon monoxide, breathing it may result injury and
even death.
Keeping your tiller in top running condition will
prolong its life, and help you obtain optimum
performance whenever you wish to till your garden.
Cleaning tine area
Clean the tiller underside of the tine shield after
each use. The dirt washes off tines easier if rinsed
off immediately instead of after it dries.
1. Turn off engine. Engine must be cool.
2. Keep the engine’s throttle control in its “STOP”
position, and remove spark plug wire from spark
plug and secure.
3. Remove all vegetation, string, wire, and other
materials that may have accumulated to the
axle between the inside set of tines and the
seals on the transmission housing.
4. Always towel dry the tiller afterwards and apply
a light coat of oil or silicone to prevent rusting
or water damage.
5. Replace spark plug wire.
Never use a “pressure washer” to clean
your tiller. Water can penetrate tight
areas of the tiller and its transmission
case and cause damage to spindles, pulleys,
bearings, or the engine. The use of pressure
washers will result in shortened life and reduce
serviceability.
Lubrication
Remove the tine assemblies to lubricate the tine
shafts at least once a season.
Change Oil
When the engine is hot, it is easy to drain the oil
out completely.
- Keep the engine in a horizontal position.
- Unscrew the oil filler (bolt). (Fig.19)
- Place a cup under the drain plug and then screw
off the drain plug to drain the oil out completely.
- After draining the oil thoroughly out , re- install
the drain plug.
- Fill engine oil up to the mark of top limit.
- Re-install the oil filler.
g.19
G
B
Page 14

14
14
Clean the air filter (Fig.20)
If the air cleaner is jam, it will output less enough
air and cause fuel consumption increase. Check
and clean it periodically.
Cleaning Period: Once 50 hours’ working.
If work in hervy dust area, check it every day or
once 10 hours.
Replace: each year or 300 hours’ running
1) Remove the air cleaner housing.
2) Remove paper element, paying attention to
prevent dust and foreign matter.
3) Check, clean or replace damaged air cleaner
parts.
4) Re-stall the air cleaner parts back.
g.20
Clean the sediment cup (Fig.21)
First check fuel tank for fuel, if having, drain the
fuel in the fuel tank completely.
1) Remove the fuel sediment cup and o-ring.
2) Wash the sediment cup and o-ring in nonflammable solvent and dry them thoroughly.
3) Place the o-ring in the fuel valve and install
the sediment cup. Then tighten the sediment cup
securely.
4) Move the fuel valve to the ON position and check
for leaks. And replace the o-ring if there is any
leakage.
G
B
Deposit Cup
O Seal Ring
g.21
Clear Spark Plug(Fig.22/23)
In order to ensure the engine normal running,
the gap of the spark plug must be correct and no
deposit around the spark plug.
5) Remove the spark cap
6) Clear away dirt around the spark plug base.
7) Dismantle the spark plug with a spark plug
wrench.
8) Visually check the spark plug. Clean with a steel
brush. If the insulator is damaged, replace the
spark plug .
9) Measure the spark plug clearance with
a thickness feeler. The clearance should be
0.6~0.7mm. If adjustment is necessary, bend the
side electrode carefully.
10) Check if the spark plug gasket is in good
condition.
11) Screw the spark plug to the bottom first by hand
and then screw up with a spark plug wrench and
compress the gasket.
g.22
17
Page 15

15
15
g.23
18
STORAGE
If the tiller will not be used for a period longer than
30 days, following the steps below to prepare your
tiller for storage.
1. Drain the fuel tank completely. Stored fuel
containing ethanol or MTBE can start to go stale
in 30 days. Stale fuel has a high gum content
and can clog the carburetor and restrict fuel
flow.
2. Start the engine and allow it to run until it stops.
This ensures no fuel is left in the carburetor.
This helps prevent gum deposits from forming
inside the carburetor and possible engine
damage.
3. While the engine is still warm, drain the oil from
the engine. Refill with fresh oil of the grade
recommended in the Engine Manual.
4. Allow the engine to cool. Remove the spark
plug and put 30 ml (1 oz.) of high quality motor
oil into the cylinder. Pull the starter rope slowly
to distribute the oil. Replace the spark plug.
Remove the spark plug and drain all
of the oil from the cylinder before
attempting to start the unit after
storage.
5. Use clean cloths to clean off the outside of the
tiller and to keep the air vents free of
obstructions.
Do not use strong detergents or
petroleum based cleaners when
cleaning plastic parts. Chemicals can
damage plastics.
6. Inspect for any loose or damaged parts. Repair
or replace damaged parts and tighten loose
screws, nuts or bolts.
7. Remove the tines. Clean and apply oil to the
tines and tine shafts to prevent rusting. Mount
the tines onto the tine shafts.
8. Oil the control cables and all visible moving
parts. Do not remove the engine cover.
9. To store with the handles folded down, loosen
the knobs that secure the upper handle to the
lower handles. Carefully fold the upper handle
down. Do not allow control cables to become
pinched or bent. Tighten the knobs.
Do not sore tiller with fuel in a
nonventilated area where fuel fumes may
reach flame, sparks, or any ignition
sources.
Use only approved fuel containers
.
Specification
Engine 4-stroke, air-cooled single cylinder, OHV
Max. Power (kw/rpm) 1.8/3600
Displacement (cc) 94
Fuel Tank Capacity (L) 1.5
Oil Capacity(L) 0.4
Tilling Width (mm) 450
Tilling diameter (mm) 260
Tine Speed (rpm) Forward 180/Reverse 100
Starting Type Recoil
Sound power level L
WA
91.2 dB(A), K=3dB
Sound pressure level LPA 87.8 dB (A), K=3dB
Garantierter Schallleistungspegel LWA: 93dB(A)
Vibrating level on handlebar grips
Left: 11.7 m/s2, K=1,5m/s2
Right: 10 m/s2, K=1,5m/s2
G
B
Page 16

16
16
G
B
Maintenance schedule
Frequency
Items
Each time First
month or
20hrs
Each
season
or 50hrs
Every 6
month or
100 hrs
Each year
or 300hrs
Engine Oil Oil level
check
○
Replace
○ ○
Reduction
Gear Oil
Oil level
check
○
Replace
○ ○
Air Cleaner Check
○
Clean
○ ○
Replace
○
Deposit Cup Clean
○
Spark Plug Clean, adjust
○
Replace
○
Valve
Clearance
Check-adjust
○
*
Fuel Tank &
Fuel Filter
Clean
○
Fuel Supply
Tube
Check Every two years( do a replacement if necessary)
Cylinder head Clean carbon Every 125hours*
Notice:
When it works in heavy dusty area, the air cleaner should be cleaned after 10 hours or once
a day.
Please check the machine periodically upon the schedule or the working time, which expires
first.
Page 17

17
17
Problem Cause Remedy
Engine fails to start.
1. Spark plug wire disconnected.
2.Out of fuel or stale fuel.
3. Throttle control lever not in correct
starting position.
4.Choke not in ON Position.
5.Blocked fuel line.
6.Fouled spark plug.
7.Engine flooding.
8. Tine clutch control not in neutral
position.
1. Attach spark plug wire securely to
spark plug.
2.Fill with clean, fresh gasoline.
3. Move throttle control lever to start
position.
4. Chock must be positioned at CHOKE
for a cold start.
5.Clean the fuel line.
6.Clean, adjust gap, or replace.
7. Wait a few minutes to restart, but do
not prime.
8. Tine clutch control lever must be released
to neutral to start the engine.
Engine runs erratically.
1. Spark plug wire loose.
2.Unit running on CHOKE.
3.Blocked fuel line or stale fuel.
4.Vent plugged.
5.Water or dirt in fuel system.
6.Dirty air cleaner.
7.Improper carburetor adjustment.
1. Connect and tighten spark plug wire.
2.Move choke lever to OFF.
3. Clean fuel line. Fill tank with clean,
fresh gasoline.
4.Clear vent.
5. Drain fuel tank. Refill with fresh fuel.
6.Clean or replace air cleaner.
7.Refer to Engine Manual.
Engine overheats.
1. Engine oil level low.
2.Dirty air cleaner.
3.Air flow restricted.
4.Carburetor not adjusted properly.
1. Fill crankcase with proper oil.
2.Clean air cleaner.
3.Remove blower housing and clean.
4.Refer to Engine Manual.
Engine will not stop when
throttle control is positioned
at stop, or engine speed
does not increase properly
when throttle control is
adjusted.
1. Debris interfering with throttle linkage.
2. Improper throttle linkage
adjustment.
1. Clean dirt and debris.
2. Refer to Engine Manual to check and
adjust throttle linkage.
Tiller moves forward during
starting.
Tine clutch control not in neutral
position.
Tine clutch control lever must be released
to neutral to start the engine.
Tiller is difficult to control
when tilling (machine jumps
or lurches forward).
1. Improper tilling depth setting.
2. Too high engine speed on hard
ground.
1. Raise the tines for shallower tilling
by raising the depth regulator rod.
2.Set the throttle lever at lower speed.
Tines do not engage.
1. Foreign object lodged in tines.
2.Tine clevis pin(s) missing.
3.Belt worn and/or stretched.
4. Pulley and idler not in correct
adjustment.
1. Stop tiller completely, check and
discard foreign object.
2.Replace tine clevis pin(s).
3.Replace belt.
4.Contact dealer.
TROUBLE SHOOTING
G
B
Page 18

18
18
Matrix GmbH
Postauer Str. 26
D-84109 Wörth/Isar
Germany
Fax: +49 (0) 8702/45338 98
E-Mail: info@matrix-direct.net
EN 709; EN ISO 14982; Geräuschemission 2000/14/EC, Anhang VI & 2005/88/EC
Garantierter Schallleistungspegel: LwA= 97 dB (A) Gemessener Schallleistungspegel: LwA= 93,5 dB (A)
Benannte Stelle , Name und Anschrift der beteiligten Stelle: TÜV SÜD China. 16F, West Building, New
Hua Lian Mansion, No. 775, Huaihai Road Shanghai 200020,P.R.China
Wörth/Isar, den 27.11.2017
Art.-Nr.: 604.400.020
The technical documentation is kept by our authorized representative:
Matrix GmbH
Postauer Str. 26
D-84109 Wörth/Isar
Germany
Front Tine Tiller /SGT-25-450-H
2006/42/EC
R&TTED 1999/5/EC
2000/14/EC_2005/88/EC
97/68/EC_ 2004/26/EC
97/68/EC_2012/46/EC
93/68/EEC
2014/30/EU
2002/96/EC
Joachim Lichtl (Geschäftsführer)
GB
hereby declares the following conformity
under the EU Directive and standards for
the following article
Original Declaration of Conformity
Page 19

19
19
GARANTIE
Guarantee
GB
This appliance is a quality product. It was designed in compliance with
current technical standards and made carefully using normal, good quality
materials.
The warranty period is 24 months and commences on the date of purchase,
which can be verified by the receipt, invoice or delivery note. During this
warranty period all functional errors, which, despite the careful treatment
described in our operating manual, are verifiably due to material aws, will
be rectified by our after-sales service staff.
The warranty takes the form that defective parts will be repaired or replaced
with perfect parts free of charge at our discretion. Replaced parts will
become our property. Repair work or the replacement of individual parts
will not extend the warranty period not will it result in a new warranty period
being commenced for the appliance. No separate warranty period will
commence for spare parts that may be fitted. We cannot offer a warranty for
damage and defects on appliances or their parts caused by the use of excessive
force, improper treatment and servicing.
This also applies for failures to comply with the operating manual and the
installation or spare and accessory parts that are not included in our range of
products. In the event of interference with of modifications to the appliance by unauthorised
persons, the warranty will be rendered void.
Damages that are attributable to improper handling, over loading, or natural wear and tear
are excluded from the guarantee.
Damages caused by the manufacturer or by a material defect will be corrected at no
charge by repair or by providing spare parts.
The prerequisite is that the equipment is handed over assembled, and complete with
the proof of sale and guarantee.
For a guarantee claim, only use the original packaging.
That way, we can guarantee quick and smooth guarantee processing.
Please send us the appliances post-paid or request a Freeway sticker.
Unfortunately we will be unable to accept appliances that are not postpaid.
The warranty does not cover parts that are subject to natural wear and tear.
If you wish to make a warranty claim, report faults or order spare parts or
accessories, please contact the after-sales centre below:
Subject to change without prior notice.
210 Bath Road; Slough, Berks SL1 3YD
www.stanleytools.co.uk
Tel: +44 (0)1753 511234
Fax: +44 (0)1753 512365
Page 20

20
20
Front Tine Tiller /SGT-25-450-H
GB
WARRANTY
Purchased at:
in (city, street):
Name of customer:
Street address:
Postal code, city:
Telephone:
Date, signature:
Fault description:
 Loading...