

Page 1
SGS105
English Page 04
Russian Page 11
Ukrainian Page 21
Page 2
ENGLISH (Original instr uctions )
A
2
3
1
B
3
10
9
C
8
7
6
4
5
2
Page 3
(Or iginal instructions) ENGLISH
D
8
6
4
5
E
15º-30º
A B
F
* The picture may differ slightly to actual unit.
3
Page 4
ENGLISH (Original instr uctions )
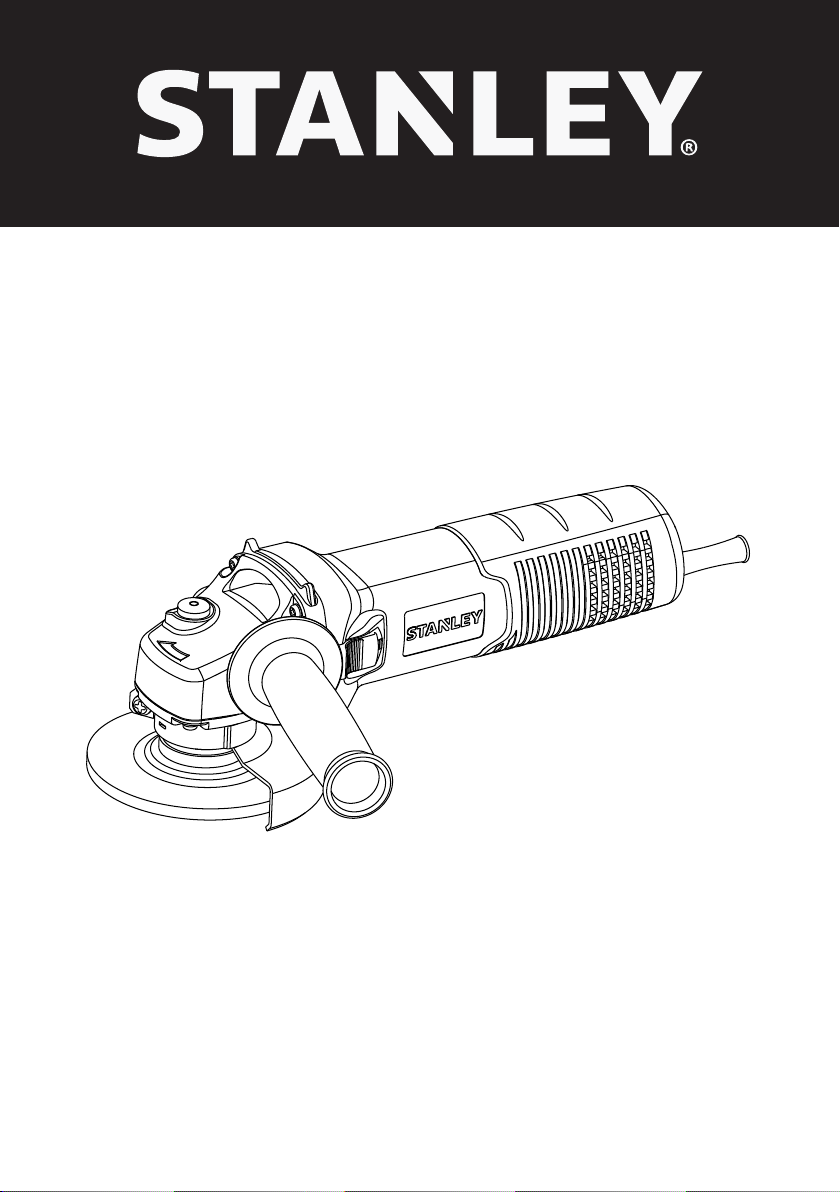
Intended use
Your STANLEY angle grinder SGS105 has been designed for
grinding metal using the appropriate type of grinding disc. This
tool is intended for professional use.
Safety instructions
General Power Tool Safety Warnings
Save all warnings and instructions for future reference.
The term “power tool” in the warnings refers to your
mains-operated (corded) power tool or battery-operated
(cordless) power tool.
1. Work area safety
a. Keep work area clean and well lit. Cluttered and dark
b. Do not operate power tools in explosive atmospheres,
c. Keep children and bystanders away while operating a
2. Electrical safety
a. Power tool plugs must match the outlet. Never modify
b. Avoid body contact with earthed or grounded
c. Do not expose power tools to rain or wet conditions.
d. Do not abuse the cord. Never use the cord for
e. When operating a power tool outdoors, use an
f. If operating a power tool in a damp location is
3. Personal safety
WARNING! Read all safety warnings and all
instructions. Failure to follow the warnings and
instructions may result in electric shock, fire and/or
serious injury.
areas invite accidents.
such as in the presence of flammable liquids, gases or
dust. Power tools create sparks which may ignite the dust
or fumes.
power tool. Distractions can cause you to lose control.
the plug in any way. Do not use any adapter plugs
with earthed (grounded) power tools. Unmodified plugs
and matching outlets will reduce risk of electric shock.
surfaces such as pipes, radiators, ranges and
refrigerators. There is an increased risk of electric shock
if your body is earthed or grounded.
Water entering a power tool will increase the risk of electric
shock.
carrying, pulling or unplugging the power tool. Keep
cord away from heat, oil, sharp edges or moving parts.
Damaged or entangled cords increase the risk of electric
shock.
extension cord suitable for outdoor use. Use of a cord
suitable for outdoor use reduces the risk of electric shock.
unavoidable, use a residual current device (RCD)
protected supply. Use of an RCD reduces the risk of
electric shock. NOTE: The term “residual current device
(RCD)” may be replaced by the term “ground fault circuit
interrupter (GFCI)” or “earth leakage circuit breaker
(ELCB)”.
4
a. Stay alert, watch what you are doing and use common
sense when operating a power tool. Do not use a
power tool while you are tired or under the influence
of drugs, alcohol or medication. A moment of inattention
while operating power tools may result in serious personal
injury.
b. Use personal protective equipment. Always wear eye
protection. Protective equipment such as dust mask,
non-skid safety shoes, hard hat, or hearing protection
used for appropriate conditions will reduce personal
injuries.
c. Prevent unintentional starting. Ensure the switch is in
the off-position before connecting to power source
and/or battery pack, picking up or carrying the tool.
Carrying power tools with your finger on the switch or
energising power tools that have the switch on invites
accidents.
d. Remove any adjusting key or wrench before turning
the power tool on. A wrench or a key left attached to a
rotating part of the power tool may result in personal injury.
e. Do not overreach. Keep proper footing and balance at
at all times. This enables better control of the power tool
in unexpected situations.
f. Dress properly. Do not wear loose clothing or
jewellery. Keep your hair, clothing and gloves away
from moving parts. Loose clothes, jewellery or long hair
can be caught in moving parts.
g. If devices are provided for the connection of dust
extraction and collection facilities, ensure these are
connected and properly used. Use of these devices can
can reduce dust related hazards.
4. Power tool use and care
a. Do not force the power tool. Use the correct power
tool for your application. The correct power tool will do
the job better and safer at the rate for which it was
designed.
b. Do not use the power tool if the switch does not turn it
on and off. Any power tool that cannot be controlled with
the switch is dangerous and must be repaired.
c. Disconnect the plug from the power source and/or the
battery pack from the power tool before making any
adjustments, changing accessories, or storing power
tools. Such preventive safety measures reduce the risk of
starting the power tool accidentally.
d. Store idle power tools out of the reach of children and
do not allow persons unfamiliar with the power tool or
these instructions to operate the power tool. Power
tools are dangerous in the hands of untrained users.
e. Maintain power tools. Check for misalignment or
binding of moving parts, breakage of parts and any
other condition that may affect the power tools
operation. If damaged, have the power tool repaired
before use. Many accidents are caused by poorly
maintained power tools.
Page 5

f. Keep cutting tools sharp and clean. Properly
maintained cutting tools with sharp cutting edges are less
likely to bind and are easier to control.
g. Use the power tool, accessories and tool bits etc. in
accordance with these instructions, taking into
account the working conditions and the work to be
performed. Use of the power tool for operations different
from those intended could result in a hazardous situation.
5. Service
a. Have your power tool serviced by a qualified repair
person using only identical replacement parts. This will
ensure that the safety of the power tool is maintained.
SAFETY INSTRUCTIONS FOR ALL OPERATIONS
Safety warnings common for grinding.
• This power tool is intended to function as a grinder.
Read all safety warnings, instructions, illustrations
and specifications provided with this power tool.
Failure to follow all instructions listed below may result in
electric shock, fire and/or serious injury.
• Operations such as polishing are not recommended to
be performed with this power tool. Operations for which
the power tool was not designed may create a hazard and
cause personal injury.
• Do not use accessories which are not specifically
designed and recommended by the tool manufacturer.
Just because the accessory can be attached to your
power tool, it does not assure safe operation.
• The rated speed of the accessory must be at least
equal to the maximum speed marked on the power
tool. Accessories running faster than their rated speed
can break and fly apart.
• The outside diameter and the thickness of your
accessory must be within the capacity rating of your
power tool. Incorrectly sized accessories cannot be
adequately guarded or controlled.
• Threaded mounting of accessories must match the
grinder spindle thread. For accessories mounted by
flanges, the arbour hole of the accessory must fit the
locating diameter of the flange. Accessories that do not
match the mounting hardware of the power tool will run out
of balance, vibrate excessively and may cause loss of
control.
• Do not use a damaged accessory. Before each use
inspect the accessory such as abrasive wheel for
chips and cracks, backing pad for cracks, tear or
excess wear, wire brush for loose or cracked wires. If
power tool or accessory is dropped, inspect for
damage or install an undamaged accessory. After
inspecting and installing an accessory, position
yourself and bystanders away from the plane of the
rotating accessory and run the power tool at
(Or iginal instructions) ENGLISH
maximum no-load speed for one minute. Damaged
accessories will normally break apart during this test time.
• Wear personal protective equipment. Depending on
application, use face shield, safety goggles or safety
glasses. As appropriate, wear dust mask, hearing
protectors, gloves and work shop apron capable of
stopping small abrasive or workpiece fragments. The
eye protection must be capable of stopping flying
debris generated by various operations. The dust mask
or respirator must be capable of filtrating particles
generated by your operation. Prolonged exposure to high
intensity noise may cause hearing loss.
• Keep bystanders a safe distance away from work
area. Anyone entering the work area must wear
personal protective equipment. Fragments of workpiece
or of a broken accessory may fly away and cause injury
beyond immediate area of operation.
• Hold power tool by insulated gripping surfaces only,
when performing an operation where the cutting
accessory may contact hidden wiring or its own cord.
Cutting accessory contacting a “live” wire may make
exposed metal parts of the power tool “live” and shock the
operator.
• Position the cord clear of the spinning accessory. If
you lose control, the cord may be cut or snagged and your
hand or arm may be pulled into the spinning accessory.
• Never lay the power tool down until the accessory has
come to a complete stop. The spinning accessory may
grab the surface and pull the power tool out of your
control.
• Do not run the power tool while carrying it at your
side. Accidental contact with the spinning accessory could
snag your clothing, pulling the accessory into your body.
• Regularly clean the power tool’s air vents. The motor’s
fan will draw the dust inside the housing and excessive
accumulation of powdered metal may cause electrical
hazards.
• Do not operate the power tool near flammable
materials. Sparks could ignite these materials.
• Do not use accessories that require liquid coolants.
Using water or other liquid coolants may result in
electrocution or shock.
FURTHER SAFETY INSTRUCTIONS FOR ALL
OPERATIONS
Kickback and Related Warnings
Kickback is a sudden reaction to a pinched or snagged rotating
wheel, backing pad, brush or any other accessory. Pinching or
snagging causes rapid stalling of the rotating accessory which
in turn causes the uncontrolled power tool to be forced in the
direction opposite of the accessory’s rotation at the point of the
binding.
5
Page 6
ENGLISH (Original instr uctions )
For example, if an abrasive wheel is snagged or pinched by the
workpiece, the edge of the wheel that is entering into the pinch
point can dig into the surface of the material causing the wheel
to climb out or kick out. The wheel may either jump toward or
away from the operator, depending on direction of the wheel’s
movement at the point of pinching. Abrasive wheels may also
break under these conditions. Kickback is the result of tool
misuse and/or incorrect operating procedures or conditions and
can be avoided by taking proper precautions as given below:
• Maintain a firm grip on the power tool and position
your body and arm to allow you to resist kickback
forces. Always use auxiliary handle, if provided, for
maximum control over kickback or torque reaction
during start up. The operator can control torque reaction
or kickback forces, if proper precautions are taken.
• Never place your hand near the rotating accessory.
Accessory may kickback over your hand.
• Do not position your body in the area where power
tool will move if kickback occurs. Kickback will propel
the tool in direction opposite to the wheel’s movement at
the point of snagging.
• Use special care when working corners, sharp edges
etc. Avoid bouncing and snagging the accessory.
Corners, sharp edges or bouncing have a tendency to
snag the rotating accessory and cause loss of control or
kickback.
• Do not attach a saw chain woodcarving blade or
toothed saw blade. Such blades create frequent kickback
and loss of control.
Additional Safety Information
• Do not use Type 11 (flaring cup) wheels on this tool.
Using inappropriate accessories can result in injury.
• Always use side handle. Tighten the handle securely.
The side handle should always be used to maintain control
of the tool at all times.
• Use clamps or another practical way to secure and
support the work piece to a stable platform. Holding
the work by hand or against your body leaves it unstable
and may lead to loss of control.
Personal safety
• No children or pregnant women should enter the work rea
where the paint sanding is being done until all cleanup is
completed.
• A dust mask or respirator should be worn by all persons
entering the work area. The filter should be replaced daily
or whenever the wearer has difficulty breathing.
Note: only those dust masks suitable for working with lead paint
dust and fumes should be used. Ordinary painting masks do not
offer this protection. See your local hardware dealer for the NIOSH
approved proper mask.
6
Environmental safety
• Paint should be removed in such a manner as to minimize
the amount of dust generated.
• Areas where paint removal is occurring should be sealed
with plastic sheeting of 4 mils thickness.
• Sanding should be done in a manner to reduce tracking of
paint dust outside the work area.
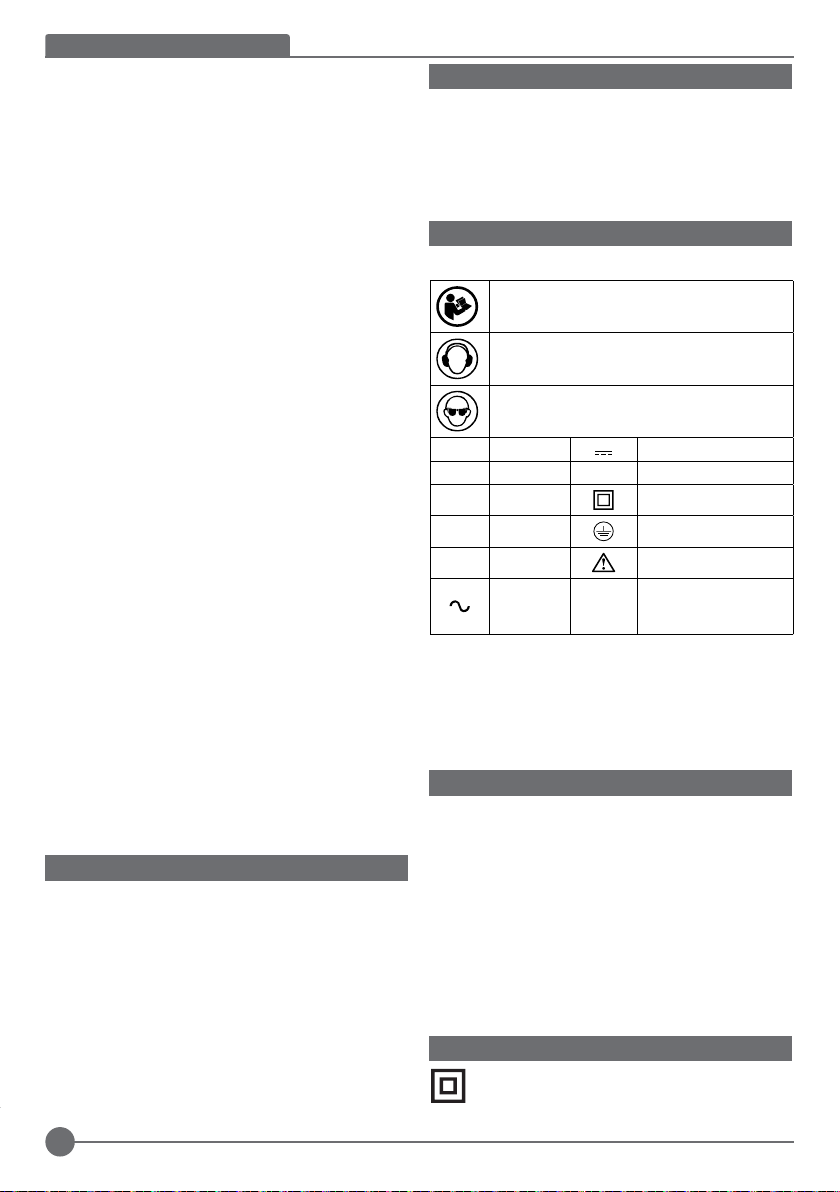
Labels on tool
The label on your tool may include the following symbols:
WARNING! To reduce the risk of injury, the user
must read the instruction manual before use.
Wear ear protection.
Wear safety glasses or goggles.
/min.
Direct Current
Class II Construction
Earthing Terminal
Safety Alert Symbol
Revolutions or
Reciprocation per
minute
V Volts
A Amperes n0No-Load Speed
Hz Hertz
W Watts
min minutes
Alternating
Current
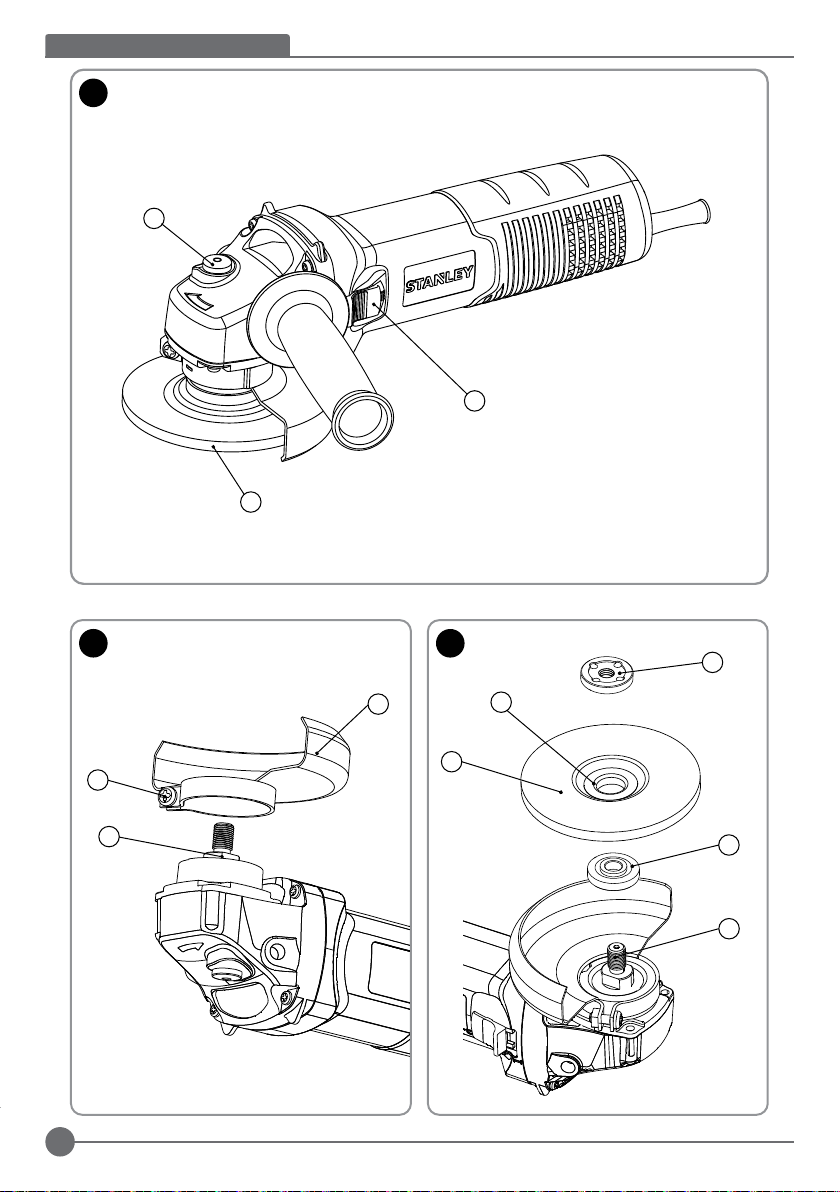
Position of Date Code (Fig. A)
The Date Code (10), which also includes the year of
manufacture, is printed into the housing.
Example:
Package Contents
The package contains:
1 Angle Grinder
1 Guard
1 Flange set
1 Spanner
1 Handle
1 Instruction Manual
• Check for damage to the tool, parts or accessories which
may have occurred during transport.
• Take the time to thoroughly read and understand this
manual prior to operation.
Electrical Safety
Your tool is double insulated; therefore no earth
wire is required. Always check that the main voltage
corresponds to the voltage on the rating plate.
2017 XX JN
Year of manufacturing
Page 7
Warning! If the power cord is damaged, it must be
replaced by the manufacturer, authorized Stanley
Service Center or an equally qualified person in
order to avoid damage or injury. If the power cord is
replaced by an equally qualified person, but not
authorized by Stanley, the warranty will not be valid.
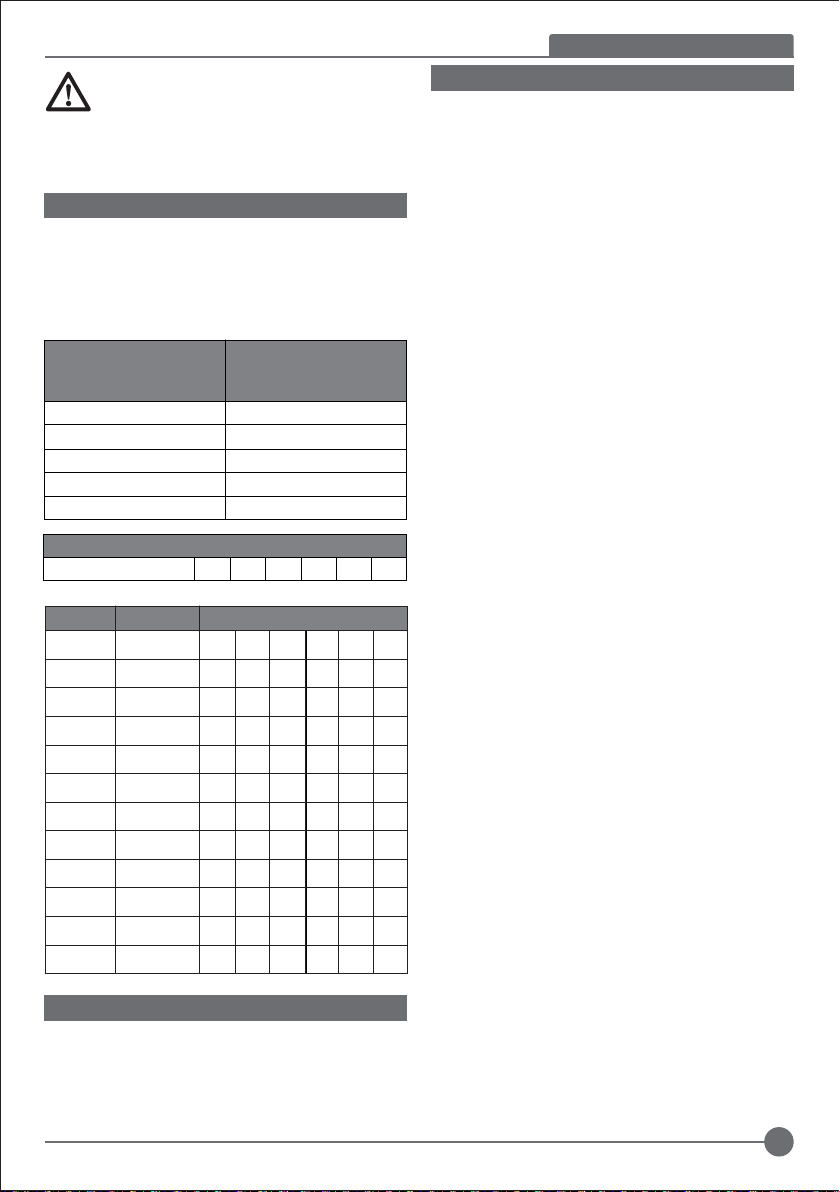
Using an Extension Cable
If it is necessary to use an extension cable, please used an
approved extension cable that fits the tool’s power input
specifications. The minimum cross-sectional area of the
conducting wire is 1.5 sq. mm. Cables should be untangled
before reeling up.
Cable cross-sectional
area (mm
2
) Cable rated
current (Ampere)
Cable cross-sectional
area (mm2) Cable rated
current (Ampere)
0.75 6
1.00 10
1.50 15
2.50 20
4.00 25
Cable length (m)
7.5 15 25 30 45 60
Voltage Amperes Cable rated current (Ampere)
110-127 0 - 2.0 6 6 6 6 6 10
2.1 - 3.4 6 6 6 6 15 15
3.5 - 5.0 6 6 10 15 20 20
5.1 - 7.0 10 10 15 20 20 25
7.1 - 12.0 15 15 20 25 25 -
12.1 - 20.0 20 20 25 - - -
220-240 0 - 2.0 6 6 6 6 6 6
2.1 - 3.4 6 6 6 6 6 6
3.5 - 5.0 6 6 6 6 10 15
5.1 - 7.0 10 10 10 10 15 15
7.1 - 12.0 15 15 15 15 20 20
12.1 - 20.0 20 20 20 20 25 -
(Or iginal instructions) ENGLISH
Assembly
WARNING! To prevent accidental operation, turn off and
unplug tool before performing the following operations. Failure
to do this could result in serious personal injury.
Attaching and Removing the Wheel Guard (Fig. B)
WARNING! To minimize the danger of serious personal injury,
please switch off the tool power and disconnect all plugs
before adjusting or removing/installing any accessory. Before
reassembling the tool, press and release the trigger switch to
make sure the tool is already switched off.
Attaching the Guard
1. Place the angle grinder on a work bench, groove facing
up.
2. Bring the flange of the guard (3) collar over the groove (9)
of the gear housing.
3. Turn the guard (3) counterclockwise by 150 degrees.
4. Make sure that the screws (10) are tightened.
Removing the Guard
1. Loosen the screws (10) on the guard collar.
2. Pull up the guard (3).
WARNING! Do not operate the tool when the safety guard is
not in place.
Note: Refer to the grinding accessories chart at the end of this
section for accessories that can be used together with this
angle grinder.
Attaching and Removing Grinding Wheels (Fig. C
and D)
WARNING! Do not use damaged grinding wheels.
1. Place the tool on a work bench, groove facing up.
2. Figure C: Attach the inner flange (4) correctly on the
output shaft (5).
3. Place the grinding wheel (6) on the inner flange (4).When
attaching a grinding wheel with a raised center,make sure
that the raised center (7) faces the innerflange (4).
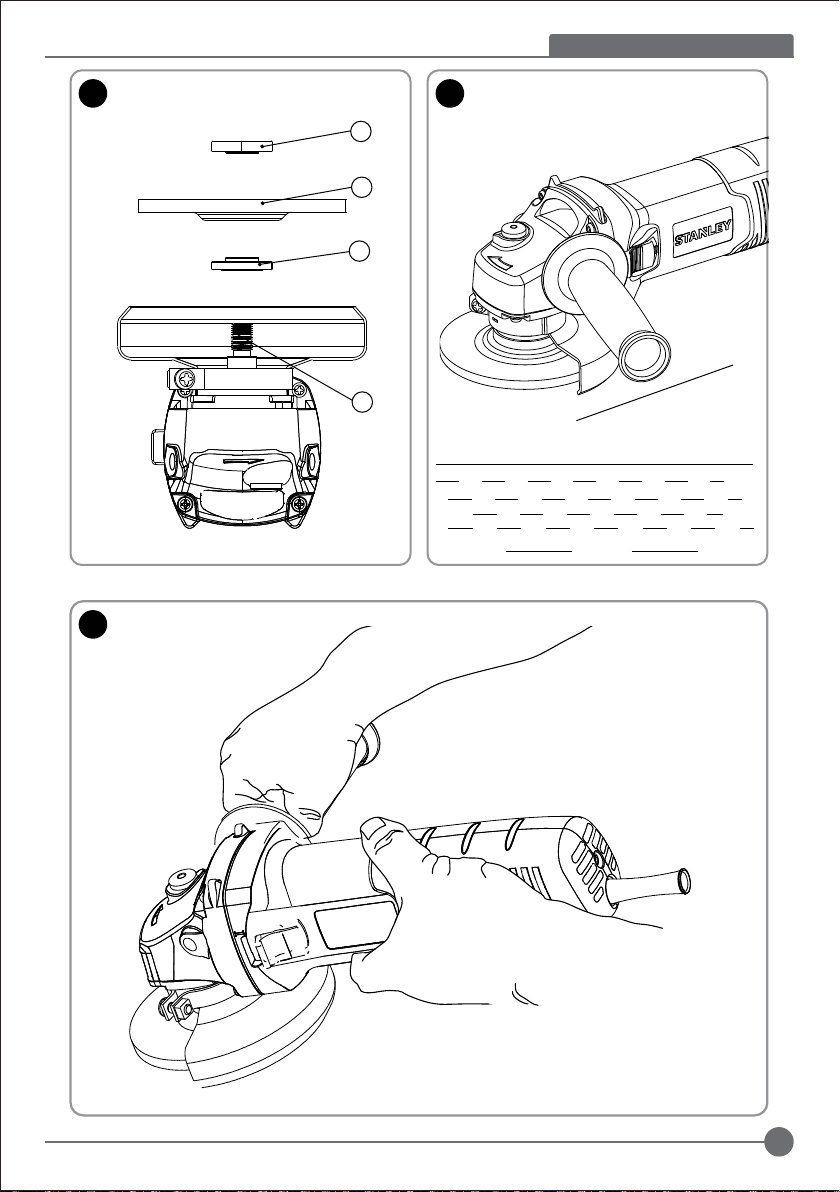
4. Figure D: Tighten the outer flange (h) until the output shaft
(5).
4). When attaching the grinding wheel, the ring on top ofthe
outer flange (8) must face the wheel.
5. Press the spindle lock (2) and prevent the spindle (4)from
rotating until it locks in place.
6. Use the pin spanner to tighten the outer flange (8).
Features (Fig. A)
This tool includes some or all of the following features.
1. ON/OFF Switch
2. Spindle Lock
3. Guard
Preparation Before Use
• Attach the safety guard and appropriate abrasive or
grinding wheels. Do not use abrasive or grinding wheels
that are overly worn.
• Make sure that the inner and outer flanges are attached
correctly.
7
Page 8

ENGLISH (Original instr uctions )
• Make sure that the abrasive or grinding wheels are
rotating in the direction of the arrows on the accessories
and tool.
OPERATION
WARNING! Always observe the safety instructions and
applicable regulations.
WARNING! To minimize the danger of serious personal injury,
please switch off the tool power and disconnect all plugs
before adjusting or removing/installing any accessory. Before
reassembling the tool, press and release the trigger switch to
make sure the tool is already switched off.
WARNING!
• Make sure all materials to be grinded are secured in
position.
• Apply slight pressure to the tool. Do not apply side
pressure to the abrasive disc.
• Avoid overloading. If the tool becomes hot, let it spin for a
few minutes with no load.
• Be sure to hold the tool tightly with both hands (one hand
on housing, the other on side handle). Start the tool and
bring the grinding wheel on the workpiece.
• Keep the edge of the wheel tilted at angle from 15 to 30
degrees against the surface of the workpiece.
• When using a new grinding wheel, do not operate the
wheel in the B direction, otherwise, it will cut into the
workpiece. When the edge of wheel has been rounded off,
you are free to operate the grinder in either the A or B
direction.
Starting and Stopping (Fig. A)
WARNING! Before using the tool, check whether the handle is
tightened securely. Check whether the ON/OFF switch is
working normally.
Before plugging in the tool to the power supply, check whether
the switch is in the OFF (o) position when pressing the rear
end of the switch.
To start the tool, press the rear end of the switch and slide it
forward. Then press the front end of the switch to lock it.
Press the rear end of the switch to stop the tool.
WARNING! Do not switch the tool on or off while under load
conditions.
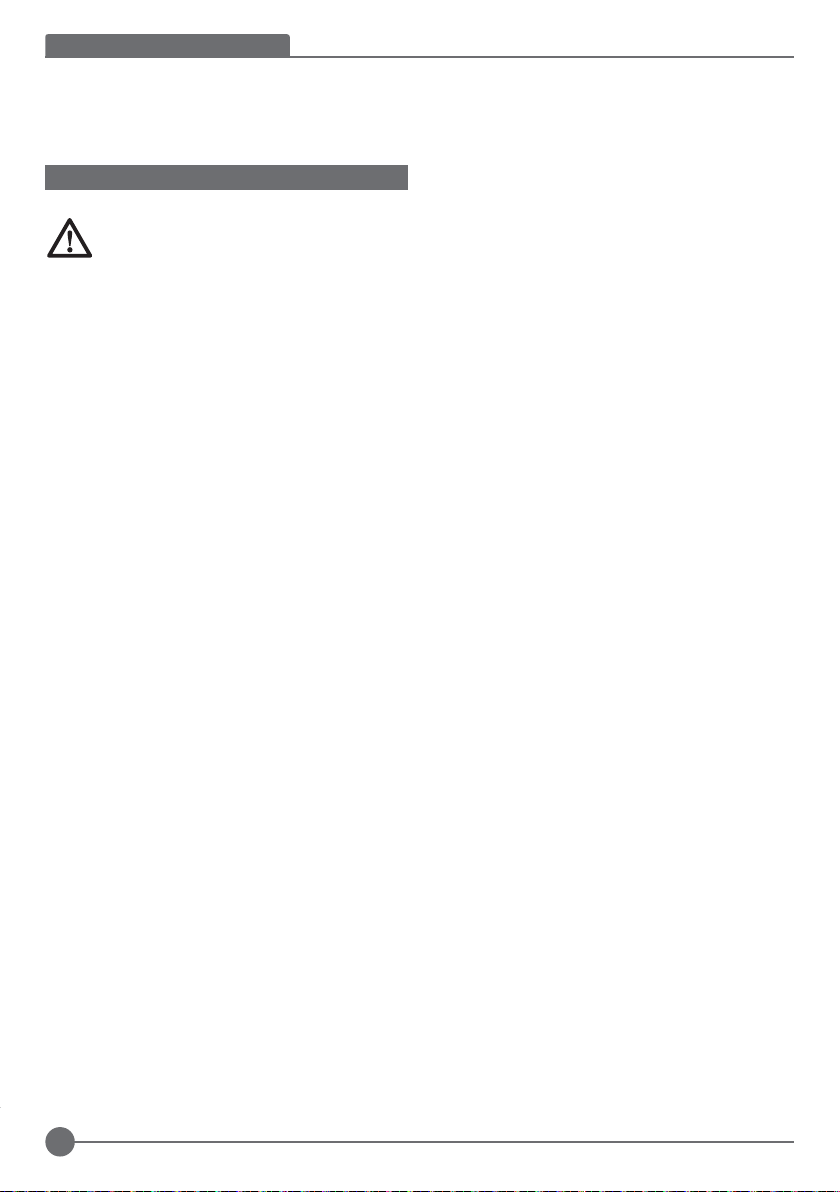
Proper Hand Position (Fig. F)
WARNING! To reduce the risk of serious personal injury,
ALWAYS use proper hand position as shown.
WARNING! To reduce the risk of serious personal injury,
ALWAYS hold securely in anticipation of a sudden reaction.
Proper hand position requires one hand on the side handle
(Figure A), with the other hand on the body of the tool, as
shown in Figure F.
Switches
Caution! Hold the body of the tool firmly to maintain control of
the tool at start up and during use and until the wheel or
accessory stops rotating. Make sure the wheel has come to a
complete stop be fore laying the tool down.
Note: To reduce unexpected tool movement, do not switch the
tool on or off while under load conditions. Allow the grinder to
run up to full speed before touching the work surface. Lift the
tool from the surface before turning the tool off. Allow the tool
to stop rotating before putting it down.
Slider switch (Fig. A)
WARNING! Before connecting the tool to a power supply, be
sure the slider switch is in the off position by pressing the rear
part of the switch and releasing. Ensure the slider switch is in
the off position as described above after any interruption in
power supply to the tool, such as the activation of a ground
fault interrupter, throwing of a circuit breaker, accidental
unplugging, or power failure. If the slider switch is locked on
when the power is connected, the tool will start unexpectedly.
To start the tool, slide the slider switch (1) toward the front of
the tool. To stop the tool, release the slider switch. For
continuous operation, slide the switch toward the front of the
tool and press the forward part of the switch inward. To stop
the tool while operating in continuous mode, press the rear
part of the slider switch and release.
Spindle lock (Fig. A)
The spindle lock (2) prevents the output shaft from rotating
when attaching or removing the grinding wheel. Only use the
spindle lock when the tool is switched off, power is unplugged,
and wheel stops completely.
Note: To minimize tool damages, don’t use the spindle lock
when the tool is operating.
Otherwise, it may damage the tool. The attached accessories
may come off and cause injury.
If using the spindle lock, press the spindle lock button and
rotate the output shaft until it stops.
Application on Metals
When applying the tool on metals, make sure that a
residual-current device (RCD) is inserted to prevent danger
from metal chips.
If the RCD causes power disconnection, have the tool sent to
an authorized Stanley dealer for repair.
WARNING! Under extreme working conditions, conductive
dust and grit may accumulate on the housing interior when
handling metal workpieces.
This could create an electric shock hazard as it weakens the
protective insulation in the grinder.
8
Page 9
To avoid accumulation of metal chips in the interior of the
grinder, we recommend cleaning the ventilation ducts
daily.Refer to Maintenance.
Using Grinding Wheels
WARNING! Metal powder accumulates. Excessive use of the
grinding wheel on metals may increase the risk of electric
shock. To reduce the risk, insert the RCD before use and
clean the ventilation ducts daily. Follow the maintenance
instructions below to blow dry compressed air into the
ventilation ducts.
GRINDING
Surface Grinding with Grinding Wheels
1. Allow the tool to reach full speed before touching the tool
to the work surface.
2. Apply minimum pressure to the work surface, allowing the
tool to operate at high speed. Grinding rate is greatest
when the tool operates at high speed.
3. Maintain a 20˚ to 30˚ angle between the tool and work
surface.
4. Continuously move the tool in a forward and back motion
to avoid creating gouges in the work surface.
5. Remove the tool from work surface before turning tool off.
Allow the tool to stop rotating before laying it down.
Precautions to Take when Sanding Paint
• Sanding of lead based paint is NOT RECOMMENDED
due to the difficulty of controlling the contaminated dust.
The greatest danger of lead poisoning is to children and
pregnant women.
• Since it is difficult to identify whether or not a paint
contains lead without a chemical analysis, we recommend
the following precautions when sanding any paint.
GENERAL INFORMATION
Helpful Hints
• Hold your angle grinder with one hand on the body and
the other hand firmly around the side handle as shown in
Fig. J.
• Always position the guard so that as much of the exposed
disc as possible is pointing away from you. ff Be prepared
for a stream of sparks when the disc touches the metal.
• Maintain an angle between the disc and work surface (Fig.
J) of approximately 30° when grinding and 10°- 15° when
sanding (Fig. K) for best tool control, material removal, and
minimal loading.
CAUTION! Use extra care when grinding into a corner as a
sudden, sharp movement of the grinder may be experienced
when the wheel contacts a secondary surface.
WARNING! Always wear eye protection while operating this
power tool.
(Or iginal instructions) ENGLISH
Maintenance
Your Stanley corded/cordless appliance/tool has been
designed to operate over a long period of time with a minimum
of maintenance. To ensure satisfactory operations, the tool
must be maintained and cleaned regularly
WARNING! To minimize the danger of serious personal
injury, please switch off the tool power and disconnect all
plugs before adjusting or removing/ installing any
accessory. Before reassembling the tool, press and release
the trigger switch to make sure the tool is already switched off.
WARNING! Before performing any maintenance on corded/
cordless power tools:
Lubrication
Stanley tools are properly lubricated at the factory
and are ready for use.
Tools should be lubricated regularly every year depending on
usage. (Tools used on heavy duty jobs and tools exposed to
heat may require more frequent lubrication.) This lubrication
should be attempted only by trained power tool repairperson’s
such as those at Stanley service centers or in other qualified
service personnel.
Cleaning
WARNING! Dust and grit from metal grinding often
accumulate on interior surfaces and could create an
electrical shock hazard if not cleaned out. Use only
mild soap and a damp cloth to clean the tool. Never
let any liquid get inside the tool; never immerse any
part of the tool into a liquid.
WARNING! Never use solvents or harsh chemicals
to clean non-metal parts of the tool. These
chemicals may weaken the material of the parts.
Use only mild soap and damp cloth to clean the
tool. Never let any liquid get inside the tool; never
immerse any part of the tool into liquid.
WARNING! Do not overload your angle grinder.
Overloading causes a reduction in speed and
efficiency, causing your angle grinder to become too
hot. If this happens, operate your angle grinder
under no load for one or two minutes until it has
cooled to normal operating temperature. Switching
your angle grinder off under load will reduce the life
of the switch.
¡IMPORTANT! To ensure product SAFETY and
RELIABILITY, repairs, maintenance and adjustment
(other than those listed in this manual) should be
performed by authorized service centers or other
qualified organizations, always using identical
replacement parts. Unit contains no user service
able parts inside.
9
Page 10

ENGLISH (Original instr uctions )
Optional Accessories
WARNING! Since accessories, other than those
offered by Stanley, have not been tested with this
product, use of such accessories with this tool could
be hazardous. To reduce the risk of injury, only
Stanley, recommended accessories should be used
with this product.
The performance of any power tool is dependent upon the
accessory used. Stanley accessories are engineered to high
quality standards and are designed to enhance the
performance of power tool. By using Stanley accessories will
ensure that you get the very best from your Stanley tool.
Stanley offers a large selection of accessories available at our
local dealer or authorized service center at extra cost.
Remarks
Stanley’s policy is one of continuous improvement to our
products and, as such, we reserve the right to change product
specifications without prior notice. Standard equipment and
accessories may vary by country. Product specifications may
differ by country. Complete product range may not be
available in all countries. Contact your local Stanley dealers
for range availability.
Protecting the Environment
Separate collection. This product must not be
disposed of with normal household waste.
Should you find one day that your STANLEY product needs
replacement, or if it is of no further use to you, do not dispose
of it with household waste. Make this product available for
separate collection.
STANLEY provides a facility for the collection and
recycling of STANLEY products once they have
advantage of this service please return your product to any
authorised repair agent who will collect them on our behalf.
You can check the location of your nearest authorised repair
agent by contacting your local STANLEY office at the address
indicated in this manual. Alternatively, a list of authorised
STANLEY repair agents and full details of our after-sales
service and contacts are available on the Internet at:
www.2helpU.com.
reached the end of their working life. To take
Technical Data
GRINDER SGS105
Voltage V 220-240
Frecuency Hz 50/60
Power W 1050
No-load Speed /min 11000
Wheel Diameter mm 125
Spindle Size M14
Weight kg 2.3
10
Page 11

Назначение
Ваша угловая шлифмашина STANLEY SGS 105
пред назначена д ля шли фования металла с
исп ол ьз ов ан ие м шлиф ов ал ьн ых круго в
соответству ющего типа. Данный инстру мент
предназначен для профессионального использования.
Инструкции по технике безопасности
Общие правила безопасности при работе с
электроинструментами
ВНИМАНИЕ! Внимательно прочтите все
инструкции по безопасности и руководство
по эксп луатации. Несоблюдение всех
перечисленных ниже правил безопасности и
инструкций может привести к поражению
электрическим током, возникновению пожара
и/или получению тяжёлой травмы.
Сохраните все инструкции по безопасности и
руководство по эксплуатации для их дальнейшего
использования. Термин «Электроинструмент» во всех
привёденных ниже указаниях относится к Вашему
сетевому ( с кабелем ) или акк умулятор ному
(беспроводному) электроинструменту.
1. Безопасность рабочего места
а. Содержите рабочее место в чистоте и хорошо
освещенным. Беспорядок на рабочем месте или
отсутствие освещения рабочего места может
привести к аварии.
b. Не работайте с электроинструментом в месте
хранения взрывоопасных материалов, например,
в присутствии огнеопасных жидкостей, газов или
пыли. Электрические инструменты создают искры,
которые могут воспламенить пыль или пары.
с. Дети и посторонние лица должны находиться как
можн о да льше в о время ра боты с
электроинструментом. Вы можете отвлечься и
потерять контроль.
2. Электробезопасность
а. В ил ка эл ек тр ои нс тр ум ен та до лж на
со ответ ств оват ь розе тке . Нико гда н е
модифицируйте вилку каким-либо образом. Не
используйте ник акие вилки-переходни ки с
за земле нными (за мкнут ыми на з емлю)
электроинструментами. Вилки и розетки, которые
не подвергались никаким изменениям снижают риск
поражения электрическим током.
b. Избегайте контакта тела с заземленны ми
поверхностями, такими как трубы, радиаторы,
плиты и холодильники. Существует повышенный
риск поражения электрическим током, если ваше
тело заземлено.
с. Избегайте любого воздействия дождя или влаги
на элек троинструменты. Вода, попавшая в
электроинструмент, увеличивает риск поражения
электрическим током.
(Перевод с оригинала инструкции)
d. Аккуратно обращайтесь со шнуром питания.
Никогда не используйте шнур питания для
переноски, перемещения или извлечения вилки
из розетки. Держите шнур вдали от источников
тепла, масла, острых краев или движущихся частей.
Поврежденные или запутанные шнуры увеличивают
риск поражения электрическим током.
е. При работе с электроинструментом на улице,
используйте удлинитель, подходящий для
наружного использования. Использование кабеля,
пригодного для использования на открытом воздухе,
снижает риск поражения электрическим током.
f. П ри н ео бх од им ос ти р аб оты с
электроинструме нтом во влажной с реде,
используйте устройство защитного отключения
(УЗО). Использование УЗО снижает риск поражения
электрическим током. ПРИМЕЧАНИЕ: Термин
«устройство защитного отключения (УЗО)» может
быть заменён на «аварийный прерыватель
заземления» или «автоматический выключатель тока
утечки».
3. Личная безопасность
a. Будьте внимательны, смотрите, что вы делаете,
используйте здравый смысл при работе с
эл ектр оинст рум ент ом. Н е испо льзу йте
электроинструмент, если вы устали или находитесь
под влиянием наркотиков, алкоголя или лекарств.
Малейш ая неосторожность при работе с
электроинструментом может привести к серьезным
травмам.
b. Используйте средства индивидуальной защиты.
Всегда надевайте защитные очки. Другое
защитное оборудование, включая респиратор,
ботинки на нескользящей подошве, защитный
шлем или средства защиты органов слуха,
используемые в надлежащих условиях, уменьшат
риск получения травмы.
с. Для п редотвращения случа йного запуска,
убедитесь, что переключатель находится в
выключенном положении перед подключением к
источнику питания и/или аккумуляторной
батарее, поднятия или переноски инструмента. Не
переносите электроинструмент с пальцем на
выключателе и не включайте питание на инструмент с
включенным выключателем, что может привести к
несчастному случаю.
d. Перед включением электроинструмента снимайте
регулировочный или гаечный ключ. Гаечный или
регулировочный ключ, оставленный на вращающейся
части электроинструмента, может привести к травме.
е. Не тянитесь. Сохраняйте правильную стойку и
баланс в се время . Это позволяет лучше
контролировать инструмент в неожиданных
ситуациях.
РУССКИЙ
11
Page 12

РУССКИЙ
f. Одевайтесь правильно. Не надевайте свободную
одежду или украшения. Держите волосы, одежду
и перчатки вдали от движущихся частей.
Свободная одежда, украшения или длинные волосы
могут попасть в движущиеся части.
g. Если имеются устройства для подключения
пылесборника или вытяжки, убедитесь в том, что
они подсоединены и используются правильно.
Использование пылесборника снижает вероятность
возникновения рисков, связанных с пылью.
4. Использование и уход за электроинструментом
a. Н е п ерег ру жайт е э лектр ои нстру мент.
Используйте подход ящий элек триче ский
инструмент для соответствующего применения.
Правильно подо бранный электроинструмент
позволит выполнить работу лучше и безопаснее при
скорости, для которой он был разработан.
b. Не используйте электроинструм ент, если
переключатель не может его включить и
выключить. Любой электроинструмент, который
нельзя контролировать с помощью переключателя,
опасен и должен быть отремонтирован.
c. Отключите кабель питания от источника питания
и/или аккумуляторный блок от электрического
инструмента п еред выполнением любых
регулировок, замены принадлежностей или при
хра не нии эл ек трои нс труме нта. Та кие
профилактические меры безопасности уменьшают
риск непреднамеренного запуска электрического
инструмента.
d. Храните неиспользуемые электроинструменты в
недоступном для детей месте и не позволяйте
лицам, не знакомым с электроинструментом или
да нными инс трук циями, работа ть с
электроинструментом. Электроинструменты опасны в
руках неопытных пользователей.
е. Поддержание электроинструмента. Проверяйте
разрегулированность или cоединение подвижных
частей, поломки частей и любые другие условия,
кото рые мог ут по влия ть н а ра бот у
электроинструмента. При наличии повреждения,
отремонтируйте электроинс трумент перед
использованием. М н о г и е
несчастные случаи являются следствием плохого
ухода за электроинструментом.
f. Держите режущий инструмент острым и чистым.
Хорошо ухоженный режущий инструмент с острыми
режущими кромками легче контролировать.
g. И с по л ьз у йт е э л ек т ро и нс т ру м ен т,
принадлежности, насадки и т.д. в соответствии с
этими инструкциями, принимая во внимание
рабочие условия и характер выполняемой
работы Использование электроинструмента иным
способом может привести к опасным ситуациям.
(Перевод с оригинала инструкции)
5. Обслуживание
а. Обеспечьте, чтобы обслу живание и ремонт
ваш его электроинструмента проводился в
авторизованном сервисном центре по ремонту с
использованием только оригинальных запасных
час тей. Это станет гарантией безопасности
электроинструмента.
МЕРЫ БЕЗОПАСНОСТИ ПРИ ВЫПОЛНЕНИИ
ВСЕХ ОПЕРАЦИЙ
Общие правила б езоп асно сти при работе
шлифовальными машинами
• Данный электроинструмент предназначен для
шлифован ия. Вн имательно пр очтите все
инст рукции по испо льзо вани ю, пр авила
бе зопасн ост и, с пец ификац ии, а так же
рассмотрите все иллюстрации, входящие в
руко водст во по э ксплуат ации д анног о
эл ектроинст румента . Несоблю дение всех
перечисленных ниже инструкций может привести к
поражению электрическим током, возникновению
пожара и/или получению серьёзной травмы.
• Не рекомендуется выпо лнение данны м
инструментом работ по полировке. Использование
инструмента не по назначению может привести к
повреждению инструмента и получению телесной
травмы.
• Н е и с по ль зу йт е д оп ол ни те ль ные
принадлежнос ти и насадки, специально не
ра зработанн ые и не рек омендов анные
про изводителе м инструмента. Возможность
установки принадлежнос тей и насадок на
электроинструмент не обеспечивает безопасности
при его использовании.
• Номинальная скорость вращения насадок должна
соотв етство вать с коро сти, у казанной на
электроинструменте. Диски и прочие насадки при
вращении на скор ости, превышающей их
номинальную скорость, могут разрушиться и
сорваться с крепления.
• Внешний диаметр и толщина насадки должны
соответствовать диапазону мощности Вашего
электроинструмента. Насадка неправильного
размера не закрывается надлежащим образом
защитным кожухом и не обеспечивает контроля при
управлении инструментом.
• М онт ажна я резьб а наса док до лжна
соответствовать резьбе шпинделя шлифмашины.
Для насадок, устанавливаемых на фланцы:
посадочное отвер стие насадк и до лжно
соответствовать устан овоч ному ди аметру
фланца. Насадки, не соответствующие крепёжным
деталям электроинструмента, могут стать причиной
разбалансированности, повышенной вибрации и
потери контроля над электроинструментом.
12
Page 13

• Не используйте повреждённые насадки. Перед
каждым использованием проверяйте абразивные
диск и н а нал ичие сколов и трещ ин,
диски-подошвы - на наличие надрывов и трещин,
проволочные щётки - на наличие ослабленной
или сломанной проволоки. В случае падения
электроинструмента или насадки проверьте их на
на личие п овреж ден ий и ли уст анови те
неповреждённую насадку. После проверки и
установки насадки отведите электроинструмент
от себя и посторонних лиц в сторону и запустите
его на максимальной скорости без нагрузки в
течение одной минуты. Повреждённые насадки
отлетят в сторону в течение данного тестового
периода.
• Используйте средства индивидуальной защиты. В
зависимости от типа выполняемых работ
надевайте щиток для защиты лица, защитную
маску или защитные очки. В соответствии с
не обходи мос тью над евайт е респи рато р,
защитные наушники, перчатки и рабочий фартук,
способный защитить от отлетающих мелких
абр аз ив ных ч астиц и ф ра гменто в
обрабатываемой детали. Средства защиты для
глаз д олж ны останав лив ать час тиц ы,
вылетающие при выполнении различных видов
работ. Противопылевая маска или респиратор
должны обеспечивать фильтрацию твёрдых частиц,
образующихся в ходе работ. Длительное воздействие
шума высокой интенсивности может привести к
нарушениям слуха.
• Не подпускайте посторонних лиц близко к
рабочей зоне. Любое лицо, входящее в рабочую
зо ну, д олж но и спол ьзо ват ь сре дств а
индивидуальной защиты. Отлетающие фрагменты
обрабатываемой детали и л и
разрушенной насадки могут стать причиной
получения травмы даже за пределами рабочей зоны.
• Держи те эле ктрои нструме нт тол ько за
изолированные поверхности при выполнении
ра бот, в о в рем я к оторы х р ежущ ая
принадлежность может задеть скрытую проводку
или кабель подключения к электросети. При
контакте с находящимся под напряжением проводом,
на не изолированны х металлических час тях
инструмента также появляется напряжение, что
приводит к поражению электрическим током.
• Располагайте кабель подключения к электросети
на удалении от вращающейся насадки. В случае
потери контроля кабель может быть разрезан или
защемлён, а Ваша рука может быть затянута
вращающейся насадкой.
• Никогда не кладите электроинструмент, пока
насадка полностью не остановится. Вращающаяся
насадка может задеть за поверх ность, и
электроинструмент вырвется из Ваших рук.
(Перевод с оригинала инструкции)
• Не включайте электроинструмент, если насадка
направлена на Вас. Случайный контакт с
вращающейся насадкой может привести к захвату
насадкой Вашей одежды и получению телесной
травмы.
• Регулярно очищайте вентиляционные отверстия
электроинструмента. Вентилятор электродвигателя
затягивает пыль внутрь корпуса, а скопление
большого количе ства пыли на мета лле
электродвигателя повышает риск поражения
электротоком.
• Не используйте электроинс трумент вблизи с
пожаро опас ными матери алам и. Искровые
разряды могут привести к их воспламенению.
• Не используйте насадки, требующие жидкостного
охлаждения. Использование воды или других
жидких охлаждающих средств может привести к
поражению электрическим током вплоть до
смертельного исхода.
РУССКИЙ
ДОПОЛНИТЕЛЬНЫЕ МЕРЫ БЕЗОПАСНОСТИ
ПРИ ВЫПОЛНЕНИИ ВСЕХ ОПЕРАЦИЙ
Причины обратного удара и меры по его
предотвращению
Обратный удар является внезапной реакцией на
защемление или застревание вращающегося диска,
диска-подошвы, щётки или какой-либо другой насадки.
Защемление или застревание могут стать причиной
мгновенной остановки вращающейся насадки, что в
свою очередь приводит к потере контроля над
электроинструментом и его внезапному отбрасыванию
назад в направлении, противоположном вращению
насадки.
Например, если абразивный круг был защемлён или
застрял в заготовке, край круга в момент защемления
может врезаться в поверхность заготовки, в результате
чего круг поднимается или отскакивает назад. В
зависимости от направления движения круга в момент
защемления, круг может резко подняться в сторону или
от оператора. В этот момент абразивные круги могут
также сломаться. Обратный удар является результатом
использования инструмента не по назначению и/или
неправильных действий оператора и условий работы, и
его можно избежать, соблюдая следующие меры
безопасности:
• Крепко удерживайте элек троинструмент и
следите за положением тела и рук, чтобы
эффек тивно про тивос тоят ь воз действию
обратного удара. Для максимального контроля
силы обратного удара или реакции от крутящего
момента всегда используйте вспомогательную
рукоятку, ес ли она предусмотрена. При
со бл юде ни и со от ве тс тв ую щи х м ер
предосторожности оператор может контролировать
силу обратного удара и реакцию от крутящего
момента.
13
Page 14

РУССКИЙ
• Никогда не держите руки вблизи от вращающейся
насадки. При обратном ударе насадка может
поранить Ваши руки.
• Не стойте в зоне действия обратного удара
электроинструмента. В момент заклинивания сила
обратного удара отбросит инструмент в направлении,
обратном движению диска.
• Будьте особенно осторожны при обрабатывании
углов, острых кромок и пр. И збегайте
отскакивания и заклинивания насадки. Именно
при обработке углов, острых кромок или при
отскакивании высока вероятность заклинивания
вращающейся насадки, что может пос лужить
причиной потери контроля над инструментом или
образования обратного удара.
• Не устанавливайте на инструмент диск для
резьбы по дереву или зубчатый пильный диск.
Да нные ди ски уве личив ают вер оятно сть
возникновения обратного удара и потери контроля
над инструментом.
(Перевод с оригинала инструкции)
Дополнительные инструкции по безопасности
• Не используйте диски Тип 11 (конусные
чашеобразные) с данным ин струменто м.
Использование насадок несоответствующего типа
может привести к получению травмы.
• Всегда используйте боковую рукоятку.
Надёжно затягивайте боковую рукоятку. Для
обеспечения полного контроля над инструментом во
время работы всегда должна использоваться боковая
рукоятка.
• И спо льзу йте стру бцин ы ил и др уги е
приспособления для фиксации обрабатываемой
детали, устанавливая их только на неподвижной
поверхности. Если держать обрабатываемую деталь
руками или с упором в собственное тело, то можно
потерять контроль над инструментом или
обрабатываемой деталью.
Личная безопасность
• Не допускайте детей или беременных женщин в
рабочую зону, где выполняется шлифование
окрашенных поверхностей до тех пор, пока рабочая
зона не будет полностью очищена.
• Все люди, входящие в рабочую зону, должны надевать
пылезащитные маски или респираторы. Фильтр
следует заменять ежедневно или по мере его
загрязнения.
Примечание: Следует использовать только те
пылезащитные маски, которые предназначены для
работы с пылью и парами красок, содержащих
свинец. Обычные маски для лакокрасочных работ не
обеспечив ают достаточной защиты. Купите в
строительном магазине респиратор, утверждённого
Национальным институтом США по охране труда и
промышленной гигиене (NIOSH) типа.
Экологическая безопасность
• Краску следует снимать таким образом, чтобы свести
к минимуму количество образующейся пыли.
• Зоны, где выполняется удаление краски, должны быть
герметизированы пластиковыми панелями толщиной
4 мм.
• Шлифование поверхности должно выполняться
таким образом, чтобы свести к минимуму
проникновение пыли за пределы рабочей зоны.
Маркировка инструмента
На инструменте имеются следующие знаки:
ВНИМАНИЕ! Полное ознакомление с руководством
по эксплуатации перед использованием инструмента
снизит риск получения травмы.
Используйте средства защиты органов слуха.
Надевайте защитные очки или маску.
V
Вольт
A
Ампер
Hz
Герц
W
Ватт
min
минут
Переменный
ток
Место положения кода даты (Рис. А)
Код даты (10), который также включает в себя год
изготовления, отштампован на поверхности корпуса
инструмента.
Пример:
Комплект поставки
В упаковку входят:
1 Угловая шлифмашина
1 Защитный кожух
1 Набор дисковых фланцев
1 Ключ
1 Боковая рукоятка
1 Руководство по эксплуатации
• Проверьте инструмент, детали и дополнительные
приспособления на наличие повреждений, которые
могли произойти во время транспортировки.
2017 XX JN
Год изготовления
Постоянный ток
Скорость без нагрузки
n
0
Конструкция Класса II
Клемма заземления
Символ опасности
Кол-во оборотов или
шагов в минуту
/min.
14
Page 15

• Перед началом работы необходимо внимательно
прочитать настоящее руководство и принять к
сведению содержащуюся в нем информацию.
Электробезопасность
Данный инструмент защищён двойной
изоляцией, что исключает потребность в
заземляющем проводе. Всегда проверяйте,
соответствует ли напряжение, указанное на
табличке с техническими параметрами,
напряжению электросети.
Внимание! Во избежание повреждений или
получения травмы, замена повреждённого
кабеля питания должна производиться только
на заводе-изготовителе, в авторизованном
серв ис ном центр е Stanley или
квалифицированным персоналом. При замене
кабеля питания квалифицированным лицом, но
не имеющим авторизацию Stanley, гарантия на
продукт будет недействительной.
Использование удлинительного кабеля
При необходимости использования удлинительного
кабеля, используйте только утверждённые кабели
промышленного изготовления, рассчитанные на
мощность не меньшую, чем потребляемая мощность
данного инструмента. Минимальный р азмер
проводника должен состав лять 1,5 мм². При
использовании кабельного барабана, всегда полностью
разматывайте кабель.
Поперечное сечение
проводника (мм
Номинал кабеля (Ампер)
Напряжение Ампер Номинал кабеля (Ампер)
110-127 0 - 2,0 6 6 6 6 6 10
2
)
0,75 6
1,00 10
1,50 15
2,50 20
4,00 25
2,1 - 3,4 6 6 6 6 15 15
3,5 - 5,0 6 6 10 15 20 20
5,1 - 7,0 10 10 15 20 20 25
7,1 - 12,0 15 15 20 25 25 -
12,1 - 20,0 20 20 25 - - -
Поперечное сечение
проводника (мм2)
Номинал кабеля (Ампер)
Длина кабеля (м)
7,5 15 25 30 45 60
(Перевод с оригинала инструкции)
220-240 0 - 2,0 6 6 6 6 6 6
2,1 - 3,4 6 6 6 6 6 6
3,5 - 5,0 6 6 6 6 10 15
5,1 - 7,0 10 10 10 10 15 15
7,1 - 12,0 15 15 15 15 20 20
12,1 - 20,0 20 20 20 20 25 -
Описание (Рис. А)
Данный инструмент может содержать все или некоторые
из перечисленных ниже составных частей:
1. Клавиша пускового выключателя
2. Кнопка блокировки шпинделя
3. Защитный кожух
Сборка
ВНИМАНИЕ! Чтобы избежать случайного включения,
перед проведением нижеследующих дейс твий
выключите инструмент и отсоедините его от источника
питания. Несоблюдение этого требования может
привести к получению тяжёлой травмы.
РУССКИЙ
Установка и снятие защитного кожуха (Рис. В)
ВНИМАНИЕ! Для снижения риска получения серьёзной
травмы, перед регулировкой или снятием/установкой
насадок выключайте инструмент и отсоединяйте его от
электросети. Перед повторной сборкой инструмента
нажмите и отпустите пусковой выключатель, чтобы
убедиться, что инструмент действительно выключен.
Установка защитного кожуха
1. Положите угловую шлифмашину на рабочий стол
прорезью вверх.
2. Поместите фланец воротника защитного кожуха (3)
поверх прорези (9) на коробке редуктора.
3. Поверните защитный кожух (3) на 150 градусов
против часовой стрелки.
4. Убедитесь, что винты (10) затянуты.
Снятие защитного кожуха
1. Ослабьте винты (10) на воротнике защитного кожуха.
2. Снимите защитный кожух (3).
ВНИМАНИЕ! Не используйте инс трумент без
установленного защитного кожуха.
Примечание: В конце данного раздела Вы найдете
Таблицу принадлежностей для шлифования, в которой
обозначены дополнительные принадлежности и
аксессуары, которые могут быть использованы с данной
угловой шлифмашиной.
15
Page 16

РУССКИЙ
(Перевод с оригинала инструкции)
Установка и снятие шлифовальных кругов
(Рис. С и D)
ВНИМ АНИЕ! Не используйте повр еждённые
шлифовальные круги.
1. Положите инструмент на рабочий стол прорезью
вверх.
2. Рисунок С: Установите на шпиндель (5) проставочный
фланец (4).
3. Установите шлифовальный круг (6) на проставочный
фланец (4). При установке шлифовальных кругов с
выпуклым центром проследите, чтобы выпуклый
центр (7) примыкал к проставочному фланцу (4).
4. Рисунок D: Затяните внешний фланец (8) на шпинделе
(5).
4). При установке шлифовального круга кольцо в
верхней части внешнего фланца (8) должно быть
обращено к кругу.
5. Нажмите кнопку блокировки шпинделя (2) и
удерживайте шпиндель (4) от вращения до его
полной фиксации на месте.
6. Спецключом затяните внешний фланец (8).
Подготовка к использованию
• Установите защитный кожух и соответствующий
абразивный или шлифовальный круг. Не используйте
очень изношенные абразивные или шлифовальные
круги.
• Убедитесь в правильной установке наружного и
внутреннего фланцев.
• Проследите, чтобы абразивный или шлифовальный
круг вращался в соответствии с указательными
стрелками на шлифмашине и на самой насадке.
ЭКСПЛУАТАЦИЯ
ВНИМАНИЕ! Всегда следуйте указаниям действующих
норм и правил безопасности.
ВНИМАНИЕ! Для снижения риска получения серьёзной
травмы, перед регулировкой или снятием/установкой
насадок выключайте инструмент и отсоединяйте его от
электросети. Перед повторной сборкой инструмента
нажмите и отпустите пусковой выключатель, чтобы
убедиться, что инструмент действительно выключен.
ВНИМАНИЕ!
• Следите, чтобы все обрабатываемые заготовки были
надёжно зафиксированы на месте.
• Не прилагайте к инструменту чрезмерного усилия. Ни
в коем случае не прилагайте бокового усилия к
абразивному диску!
• Избегайте перегрузки. Если инструмент очень
нагрелся, дайте ему поработать несколько минут на
холостом ходу.
• Крепко удерживайте инструмент обеими руками
(одной рукой за корпус, другой рукой за боковую
рукоятку). Включите инструмент и опустите
шлифовальный круг на заготовку.
16
• Следите, чтобы край шлифовального круга находился
под углом 15-30º к поверхности заготовки.
• При использовании нового шлифовального круга, не
ведите шлифмашину в направлении В, иначе
шлифовальный круг врежется в заготовку. Когда край
шлифовального круга округлится, Вы сможете
свободно работать в любом направлении – А или В.
Включение и выключение (Рис. А)
ВНИМАНИЕ! Перед использованием инструмента
убедитесь, что рукоятка надёжно затянута. Проверьте
функциональность пускового выключателя.
Перед подключением инструмента к источнику питания
убедитесь, что пусковой выключатель находится в
положении «ВЫКЛ.» (о); для этого нажмите и отпустите
заднюю половину выключателя.
Чтобы запустить инструмент, нажмите на заднюю
половину выключателя и передвиньте её вперёд. Затем
нажмите на переднюю половину выключателя, фиксируя
выключатель во включённом положении.
Чтобы выключить инструмент, нажмите на заднюю часть
клавиши пускового выключателя.
ВНИМАНИЕ! Не включайте и не выключайте инструмент,
находящийся под нагрузкой.
Правильное положение рук во время работы
(Рис. F)
ВНИМАНИЕ! Для уменьшения риска получения тяжёлой
тр авмы , ВСЕ ГДА пра вильн о уд ержи вайт е
электроинструмент, как показано на рисунке.
ВНИМАНИЕ! Для уменьшения риска получения тяжёлой
травмы ВСЕГДА надёжно удерживайте инструмент,
предупреждая внезапные сбои в работе.
Правильное положение рук во время работы: одной
рукой возьмитесь за боковую рукоятку (Рисунок А),
другой рукой удерживайте корпус инструмента, как
показано на Рис. F.
Выключатели
Пре дупреждение! Крепко удерживайте корпус
инструмента для обеспечения контроля над
инструментом при запуске, во время работы и до тех пор,
пока диск или насадка не прекратит вращаться. Прежде
чем положить инструмент убедитесь, что диск полностью
остановился.
Примечание: Для предотвращения неожиданного
движения инструмента не включайте/не выключайте
инструмент, находящийся под нагрузкой. Перед началом
работы с заготовкой дождитесь, пока инструмент не
наберёт полную скорость. Перед вык лючением
инструмента, сначала поднимите его с заготовки. Прежде
чем положить инструмент, дождитесь полной остановки
двигателя.
Page 17

Передвижной пусковой выключатель (Рис. А)
ВНИМАНИЕ! Перед подключением инструмента к
источнику питания убедитесь, что передвижной
пусковой выключатель находится в положении «ВЫКЛ.»;
для этого нажмите и отпустите заднюю половину
вы ключа тел я. П осле л юбог о п реры вани я
электроснабжения инструмента, например, при
срабатывании аварийного прерывателя заземления или
автоматического выключателя, при случайном
отсоединении от источника питания или при нарушении
электропитания, всегда проверяйте, что передвижной
пусковой выключатель находится в положении «ВЫКЛ.»,
как было описано выше. Если передвижной пусковой
вык лючатель при подаче питания находится в
положении «ВКЛ.», инструмент внезапно начнёт
работать.
Чтобы включить инструмент, передвиньте пусковой
выключатель (1) в сторону передней части инструмента.
Чтобы выключить инструмент, отпустите клавишу
пускового выключателя. Для непрерывного режима
работы передвиньте пусковой выключатель в сторону
передней части инструмента и нажмите на переднюю
половину выключателя. Для выключения непрерывного
режима работы инструмента нажмите на заднюю
половину передвижного пускового выключателя и
отпустите.
Блокировка шпинделя (Рис. А)
Кнопка блокировки шпинделя (2) предотвращает
вращение шпинделя во время установки или снятия
шлифовального круга. Используйте кнопку блокировки
шпинделя только при выключенном инструменте,
отключённом от источника питания или при полностью
остановленном круге.
Примечание: Для сведения к минимуму повреждения
инструмента не нажимайте на кнопку блокировки
шпинделя при работающем инструменте.
Это действие может привести к поломке инструмента.
Установленная насадка может соскочить со шпинделя и
стать причиной получения травмы.
При использовании блокировки шпинделя нажмите на
кнопку блокировки шпинделя и поворачивайте
шпиндель до его полной фиксации на месте.
Обработка металла
При использовании инструмента для обработки металла
убедитесь, в наличии устройства защитного отключения
(УЗО), предотвращения опасности в связи с
металлической стружкой.
Если УЗО провоцирует отключение электроэнергии,
отнесите инструмент в авторизованный сервисный центр
Stanley для проведения ремонта.
(Перевод с оригинала инструкции)
ВНИМАНИЕ! В экс тремальных условиях работы
токопроводящая пыль и песок могут накапливаться на
внутренней поверхности корпуса при обработке
металлических деталей.
Это ослабляет изоляцию шлифмашины и может создать
опасность поражения электрическим током.
Во избежание скапливания внутри шлифмашины
металлической стружки рекомендуется ежедневная
очистка вентиляционных прорезей. См. раздел
«Техническое обслуживание».
РУССКИЙ
Использование шлифовальных кругов
ВНИМАНИЕ! Скапливание металлической пыли.
Чрезмерное использование шлифовального круга для
обработки металла может увеличить риск поражения
электрическим током. Для снижения риска, перед
использованием устанавливайте УЗО и ежедневно
прочищайте вентиляционные прорези. Для прочистки
вентиляционных прорезей сухим сжатым воздухом см.
инструкции по техническому обслуживанию.
ШЛИФОВАНИЕ
Шлифование поверхнос ти с использован ием
шлифовальных кругов
1. Дождитесь, пока инструмент не наберёт полную
скорость, прежде чем прикасаться им к
обрабатываемой поверхности.
2. Нажимайте на поверхность с минимальным усилием,
чтобы инструмент работал на высокой скорости.
Эффективность шлифования максимальна, когда
инструмент работает на высокой скорости.
3. Удерживайте инструмент под углом от 20° до 30° по
отношению к обрабатываемой поверхности.
4. Непрерывно перемещайте инструмент вперёд и
назад для предотвращения образования канавок на
обрабатываемой поверхности.
5. Прежде чем выключить инструмент поднимите его с
обрабатываемой поверхности. Прежде чем положить
инструмент, дождитесь полной остановки двигателя.
Меры предосторожности при шлифовании
лакокрасочных покрытий
• НЕ РЕКОМЕНДУЕТСЯ шлифование красок с
содержанием свинца, так как это приводит к
образованию вредной для здоровья пыли.
Наибольшую опасность отравление свинцом
представляет для детей и беременных женщин.
• Так как определить наличие свинца в краске без
проведения химического анализа достаточно сложно,
мы рекомендуем соблюдать следующие меры
предосторожности при выполнении шлифования
окрашенных поверхностей.
17
Page 18

РУССКИЙ
ОБЩАЯ ИНФОРМАЦИЯ
Рекомендации по оптимальному использованию
• Одной рукой держите угловую шлифмашину за
корпус, другой рукой крепко удерживайте боковую
рукоятку, как показано на Рисунке J.
• Всегда располагайте защитный кожух таким образом,
чтобы наиболее выступающая часть диска была
направлена в противоположную сторону от Вас.
Будьте готовы к сильному выбросу искр при
соприкосновении диска с металлом.
• Для наилучшего контроля над инструментом и
снижения нагрузки во время удаления материала
держите круг под углом приблизительно 30° к
обрабатываемой поверхности во время шлифования
(Рис. J) и под углом 10°- 15° во время зачистки (Рис. K).
ПРЕДУПРЕЖДЕНИЕ! Будьте особенно внимательны при
шлифовании углов - при контакте круга со вторичной
поверхностью шлифмашина может резко отскочить.
ВНИМАНИЕ ! Всегда при раб оте с д анны м
электроинструментом надевайте защитные очки.
Техническое обслуживание
Ваш электрический/аккумуляторный инструмент Stanley
рассчитан на работу в течение продолжительного
времени при минимальном техническом обслуживании.
Срок службы и надёжность инструмента увеличивается
при правильном уходе и регулярной чистке.
ВНИМАНИЕ! Для снижения риск а получения
серьёзной травмы, перед регулировкой или
сн ятие м/ус тан овко й нас адок в ык люч айт е
инструмент и отсоединяйте его от электросети. Перед
повторной сборкой инструмента нажмите и отпустите
пусковой выключатель, чтобы убедиться, что инструмент
действительно выключен.
ВНИМА НИЕ! Перед проведением технического
обслужива ния эле ктр ического/а ккумуляторн ого
инструмента:
(Перевод с оригинала инструкции)
Смазка
Инс трументы Stanley смазаны должным
образом на производс тве и готовы к
использованию.
Инструменты должны регулярно смазываться каждый
год, в зависимости от интенсивности использования.
(Инструменты, используемые в тяжёлом режиме, и
инструменты, подвергающиеся влиянии высоких
температур, должны смазываться более часто). Смазка
инструмента должна производиться только обученным
персоналом по ремонту электроинструментов,
например, в авторизованном сервисном центре Stanley.
Чистка
ВНИМАНИЕ! На внутренних поверхностях
инструмента часто собирается содержащая
металлические частицы пыль, повышая риск
поражения электрическим током. Для чистки
инструмента используйте только слабый
мыльный раствор и влажную ткань. Не
допускайте попадания какой-либо жидкости
внутрь инструмента; ни в коем случае не
погружайте какую-либо часть инструмента в
жидкость.
ВНИМАНИЕ! Н икогд а не и спользуйте
растворители или агрессивные химические
средства для очистки неметаллических деталей
инструмента. Эти химикаты могут ухудшить
свойства материалов, применённых в данных
деталях. Для чистки инструмента используйте
только слабый мыльный раствор и влажную
ткань. Не допускайте попадания какой-либо
жидкости внутрь инструмента; ни в коем случае
не погружайте какую-либо часть инструмента в
жидкость.
ВНИМАНИЕ! Избегайте перегрузки Вашей
угловой шлифмашины. Перегрузка приведёт к
снижению скорости и производительности, а
также перегреву угловой шлифмашины. Если
это произошло, дайте поработать шлифмашине
без нагрузки в течение одной-двух минут – это
позволить ей остыть до нормальной рабочей
температуры. Включение и выключение
угловой шлифмашины, находящейся под
нагрузкой, значительно снизит срок службы
выключателя.
ВАЖНО! В целях обеспечения БЕЗОПАСНОСТИ
и ДОЛГОВЕЧНОСТИ в использовании продукта
ремонт, техническое обс луживание и
регулировка (кроме перечисленных в данном
руководстве по эксплуатации) должны
производиться только в авторизованных
се рв исных ц ентрах ил и других
квалифицированных мастерских и только с
использованием идентичных запасных частей.
Внутри инструмента нет обслуживаемых
пользователем деталей.
Дополнительные принадлежности
ВНИМАНИЕ! Поскольку принадлежности,
отличные от тех, которые предлагает Stanley, не
проходили тесты на данном изделии, то
использование этих принадлежностей может
привести к опасной ситуации. Во избежание
риска получения травмы, с данным продуктом
дол жн ы ис по ль зо ва ть ся т ол ьк о
до по лн ите ль ны е пр ин ад ле жно ст и,
рекомендованные Stanley.
18
Page 19

Производительность любого электроинс трумента
напрямую зависит от того, какие дополнительные
принадлежности с ним используются. Принадлежности
Stanley изготовлены в соответствии с самыми высокими
стандартами качества и способны увеличить
производительность вашего электроинструмента.
Использование принадлежностей Stanley гарантирует
самые наилучшие результаты в работе Вашего
инструмента Stanley. Stanley предоставляет широкий
выбор насадок и дополнительных принадлежностей,
которые можно приобрести за дополнительную плату у
местного дилера или в авторизованном сервисном
центре.
Примечания
Политик а St anley н ацелена на пос тоян ное
усовершенствование нашей продукции, поэтому фирма
оставляет за собой право изменять технические
харак терис тики изделий без предварительного
уведо мления. Стан дартн ое о борудов ание и
дополнительные принадлежности могут меняться в
зависимости от страны продаж. Техн ические
характеристики продуктов могут различаться в
зависимости от страны продаж. Полная линия продуктов
присутствует на рынках не всех стран. Для получения
информации касательно линии продуктов в Вашей
стране обратитесь в ближайший сервисный центр
Stanley.
(Перевод с оригинала инструкции)
Технические характеристики
УГЛОВАЯ ШЛИФМАШИНА SGS105
Напряжение В 220-240
Частота Гц 50/60
Потребляемая мощность Вт 1050
Номинальная скорость об/мин. 11000
Диаметр диска мм 125
Размер шпинделя M14
Вес кг 2,3
РУССКИЙ
Защита окружающей среды
Раздельный сбор. Данное изделие нельзя
утилизировать вместе с обычными бытовыми
отходами.
Если одна жды В ы захотите за менить Ваш
электроинструмент STANLEY, или Вы больше в нем не
нуждаетесь, не выбрасывайте его вместе с бытовыми
отходами. Отнесите изделие в специальный приемный
пункт.
Фирма STANLEY обеспечивает прием и
переработку отслуживших свой срок изделий
STANLEY. Чтобы воспользоваться этой услугой,
Вы можете сдать Ваше изделие в любой авторизованный
сервисный центр, который собирает их по нашему
поручению. Вы можете узнать место нахождения Вашего
ближайшего авторизованного сервисного центра,
обратившись в Ваш местный офис STANLEY по адресу,
указанному в данном руководстве по эксплуатации.
Кроме того, список авторизованных сервисных центров
STANLEY и полную информацию о нашем
послепродажном обслуживании и контактах Вы можете
найти в интернете по адресу: www.2helpU.com.
19
Page 20

РУССКИЙ
(Перевод с оригинала инструкции)
Гарантийные условия
Уважаемый покупатель!
1. Поздравляем Вас с покупкой высококачественного изделия
STANLEY и выражаем признательность за Ваш выбор.
2. При покупке изделия требуйте проверки его комплектности
и исправности в Вашем присутствии, инструкцию по
эксплуатации и заполненный гарантийный талон на
русском языке.
В гарантийном талоне должны быть внесены: модель, дата
продажи, серийный номер, дата производства
инструмента; название, печать и подпись торговой
организации. При отсутствии у Вас правильно заполненного гарантийного талона, а также несоответствия
указанных в нем данных мы будем вынуждены откло- нить
Ваши претензии по качеству данного изделия.
3. Во избежание недоразумений убедительно просим Вас
перед началом работы с изделием внимательно
ознакомиться с инструкцией по его эксплуатации. Правовой
основой настоящих гарантийных условий является
действующее Законодательство. Гарантийный срок на
данное изделие составляет 24 месяца и исчисляется со
дня продажи. В случае устранения недостатков изделия,
гарантийный срок продлевается на период его нахождения
в ремонте. Срок службы изделия составляет 5 лет со дня
продажи.
4. В случае возникновения каких-либо проблем в про- цессе
эксплуатации изделия рекомендуем Вам обра- щаться
только в уполномоченные сервисные центры STANLEY,
адреса и телефоны которых Вы сможете найти в
гарантийном талоне, на сайте www.2helpU.com или узнать
в магазине. Наши сервисные станции - это не только
квалифицированный ремонт, но и широкий ассортимент
запчастей и принадлежностей.
5. Производитель рекомендует проводить периодическую
проверку и техническое обслуживание изделия в
уполномоченных сервисных центрах.
Изготовитель
Блэк энд Деккер Холдингс ГмбХ
Германия, 65510, Идштайн,
ул. Блэк энд Деккер, 40
6. Наши гарантийные обязательства распространяются
только на неисправности, выявленные в течение гарантийного срока и вызванные дефектами производства и \
или материалов.
7. Гарантийные условия не распространяются на
неисправности изделия, возникшие в результате:
7.1. Несоблюдения пользователем предписаний инструкции по
эксплуатации изделия, применения изделия не по
назначению, неправильном хранении, использования
принадлежностей, расходных материалов и запчастей, не
предусмотренных производителем.
7.2. Механического повреждения (сколы, трещины и разрушения) внутренних и внешних деталей изделия,
основных и вспомогательных рукояток, сетевого электрического кабеля, вызванного внешним ударным или
любым иным воздействием
7.3 Попадания в вентиляционные отверстия и проник- новение
внутрь изделия посторонних предметов, материалов или
веществ, не являющихся отходами, сопровождающими
применение изделия по назначению, такими как: стружка,
опилки, песок, и пр.
7.4. Воздействий на изделие неблагоприятных атмосферных и
иных внешних факторов, таких как дождь, снег,
повышенная влажность, нагрев, агрессивные среды,
несоответствие параметров питающей электросети,
указанных на инструменте.
7.5. Стихийного бедствия. Повреждение или утрата изделия,
связанное с непредвиденными бедствиями, стихийными
явлениями, в том числе вследствие действия
непреодолимой силы (пожар, молния, потоп и другие
природные явления), а так же вследствие перепадов напряжения в электросети и другими причинами, которые
находятся вне контроля производителя.
8. Гарантийные условия не распространяются:
8.1. На инструменты, подвергавшиеся вскрытию, ремонту или
модификации вне уполномоченного сервисного центра.
8.2. На детали и узлы, имеющие следы естественного износа,
такие как:
приводные ремни и колеса, угольные щетки, смазка,
подшипники, зубчатое зацепление редукторов, рези- новые
уплотнения, сальники, направляющие ролики, муфты,
выключатели, бойки, толкатели, стволы, и т.п.
8.3. На сменные части: патроны, цанги, зажимные гайки и
фланцы, фильтры, аккумуляторные батареи, ножи,
шлифовальные подошвы, цепи, звездочки, пильные шины,
защитные кожухи, пилки, абразивы, пильные и абразивные
диски, фрезы, сверла, буры и т.п.
8.4. На неисправности, возникшие в результате перегрузки
инструмента (как механической, так и электрической),
повлекшей выход из строя одновременно двух и более
деталей и узлов, таких как: ротора и статора, обеих
обмоток статора, ведомой и ведущей шестерни ре- дуктора
или других узлов и деталей. К безусловным признакам
перегрузки изделия относятся, помимо прочих: появление
цветов побежалости, деформация или оплавление
деталей и узлов изделия, потемнение или обугливание
изоляции проводов электродвигателя под воздействием
высокой температуры.
20
Page 21

Призначення
Кутова шліфмашина STANLEY SGS105 розроблена для
обробки металу за допомогою кіл належного типу. Цей
ін струмент приз начен ий для п рофесі йного
використання.
ВКАЗІВКИ З ТЕХНІКИ БЕЗПЕКИ
Загальні правила техніки безпеки під час роботи з
електричним інструментом
Збережіть усі застереження та вказівки з техніки
безпеки для подальшого використання. Термін
«електричний інструмент», що використовується в
попереджувальних написах та вказівках щодо техніки
безпеки, відносяться до електричного інструмента, який
працює від мережі (зі шнуром електроживлення) або від
акумуляторної батареї (без шнура живлення).
1. Вказівки з техніки безпеки на робочому місці
a. Утримуйте робоче місце в чистоті і добре
b. Не працюйте з електроінструментом в місці
c. Забороняється перебування дітей та сторонніх
2. Електрична безпека
a. Вилка шнура живлення інструмента повинна
b. Не торкайтеся поверхонь заземлених чи
c. Забороняється піддавати електричні інструменти
УВ АГА ! Уважн о про чита йте в сі
попереджувальні написи та вказівки з
те хн ік и б ез пе ки . По ру ше нн я
попереджувальних написів і вказівок може
призвести до ураження електричним струмом,
пожежі та/або серйозних травм.
освітленим. Безлад або погане освітлення на
робочому місці можуть призвести до нещасного
випадку.
зберігання вибу хонебезпечних матеріалів,
наприклад, у присутності легкозаймистих рідин,
газів або пилу. Електричні інструменти створюють
іскри, що можуть запалити пил або пари.
осіб побли зу працюючого елек трич ного
інструменту. Ви можете відволіктися і втратити
контроль за роботою інструменту.
відповідати мережевій розетці. Забороняється
вносити будь-які зміни у вилку шнура живлення.
Не використовуйте жодних вилок-перехідників із
з а з е м л е н и м и ( з а н у л е н и м и )
електроінструментами. Відсутність змін у вилках
шнурів живлення та відповідність електричних вилок і
розеток знижує ризик ураження електричним
струмом.
занулених предметів, наприклад труб, радіаторів,
електроплит або холодильників. Заземлення чи
занулення тіла підвищує ризик у раження
електричним струмом.
впливу дощу чи підвищеної вологості. При
попаданні вологи всередину електричного
(Переклад оригінальних інструкцій) УКРАЇНСЬКА
інс трумента підвищує ться ризик ураження
електричним струмом.
d. Забороняється пошкоджувати шнур живлення. У
жодному разі не використовуйте шнур живлення
для перенесення чи зміни положення інструмента;
не тягніть за шнур, виймаючи вилку з розетки. Не
прокладайте шнур живлення поруч із гарячими
предметами, мастилом, гострими краями і
рухомими деталями. Пошкодження й заплутування
шнурів живлення підвищує ризик ураження
електричним струмом.
e. Під час роботи з електричним інструментом за
межами приміщень використовуйте відповідний
подо вжув ач. Викорис тан ня под овж увача,
призначеного для роботи поза приміщеннями,
знижує ризик ураження електричним струмом.
f. Якщо елек тричним інструментом необхідно
кори сту вати сь у в ологому міс ці, слі д
використовувати пристрій захисного відключення
(ПЗВ) електричної мережі. Використанн Примітка:
Термін «пристрій захисного відключення» (ПЗВ) може
бути замінений терміном «вимикач короткого
замикання на землю» (ВКЗЗ) або терміном
«автоматичний вимикач витоку на землю» (АВВЗ).я
ПЗВ знижує ризик ураження електричним струмом.
3. Безпека персоналу
a. Під час роботи з електричним інструментом
необх ідно бути об ачним, слідкувати за
виконуваною роботою та керуватися здоровим
глузд ом. Забо рон яєт ься п рац ювати з
електричним інструментом у стані втоми чи під
впливом наркотиків, алкоголю й лікарських
препаратів. Ослаблення уваги навіть на мить може
призвести до серйозної травми.
b. Використовуйте засоби індивідуального захисту.
Завжди користуйтеся засобами захисту очей.
Використання у відповідних умовах засобів
індивідуального захисту, наприклад пилозахисної
маски, протиковзного захисного взуття, захисної
каски або засобів захисту органів слуху, завжди
знижує ризик отримання травми.
c. Не доп уска йте нен авмисно го вмик ання
інструмента. Перш ніж підключити джерело
живлення та/або акумулятор, піднімати чи
переносити інструмент, переконайтесь, що його
вимикач переведено у положення «вимкнено».
Якщо тримати палець на вимикачі під час
пере несе ння інструмента чи п ідключення
увімкненого інструмента до мережі, це підвищує
ризик нещасного випадку.
d. Перш ніж увімкнути електричний інструмент,
обов’язково вийміть із нього регулювальний чи
гайковий ключ. Ключ, залишений ключ на
обертальній деталі інструмента, може призвести до
травмування.
21
Page 22

УКРАЇНСЬКА
e. Не намагайтеся дотягнутися до важкодоступних
місць. Завжди міцно тримайтеся на ногах і
зберігайте рівновагу під час роботи. Це дозволяє
краще контролювати електричний інструмент у
непередбачуваних ситуаціях.
f. Одягайте відповідний од яг. Забороняється
одягати вільний одяг або прикраси. Волосся, одяг
та рукавиці повинні знаходитися на максимальній
відстані від рухомих деталей інструмента. Вільний
одяг, прикраси або довге волосся можуть бути
захоплені рухомими деталями.
g. Якщо встановлені пристрої підключення засобів
пиловловлювання та пилозбірників, необхідно
перевіряти, щоб вони були підключені та
ви ко ристо вували ся н алежн им чином .
Використання цих пристроїв знижує рівень ризику,
пов’язаного з пилом.
4. Ви корис тання та догляд за електричним
інструментом
a. Н е зас тосовуйте надмір не зусилл я д о
електричного інструмента. Викорис товуйте
електричний інструмент тільки за призначенням.
Правильно підібраний електроінструмент дозволить
виконати роботу краще і безпечніше при швидкості,
для якої він був розроблений.
b. Забороняється використовувати цей електричний
інструмент, якщо не вдається ввімкнути чи
вимкнути його вимикачем. Будь-який електричний
інструмент, роботою якого неможливо керувати за
допомогою вимикача, є небезпечним, і його
обов’язково потрібно відремонтувати.
c. Перш ніж регулювати електричний інструмент,
замінювати на ньому приладдя чи класти на
зберігання, необхідно витягти вилку живлення з
розетки та/або зняти з нього акумулятор. Такий
превентивний захід безпеки знижує ризик
випадкового увімкнення інструмента.
d. Зберігайте електричний інструмент, який в даний
момент не використовується, в недоступному для
дітей місці та не дозволяйте працювати з
інструментом особам, які не знайомі з ним або з
цими вказівками. Електричний інструмент є
небезпечним в руках ненавченої людини.
e. Підтримуйте інструмент в робочому стані.
Перевіряйте центрування та з’єднання рухомих
деталей, наявність пошкоджених деталей та
будь-я кі фактори, які можуть негативно
позначитися на роботі електричного інструмента.
У разі виявлення пошкодження електричний
інструмент необхідно відремонт увати перед
використанням . Багато нещ асни х випа дків
тр апл яєть ся чер ез нен але жне тех нічне
обслуговування електричних інструментів.
(Переклад оригінальних інструкцій)
f. Ріжучі інструменти мають бути загостреними й
чистими. Підтримуваний у належному робочому
стані ріжучий інструмент з гострими лезами менше
застряє, ним легше керувати.
g. Вико ристовуйте ел ектричн ий інструме нт,
приладдя, вставні різці і т. п. відповідно до даних
вказівок, враховуючи умови експлуатації та
роботу, яка має бути виконана. Використання
електричного інструменту не за призначенням може
призвести до небезпечної ситуації.
5. Обслуговування
a. Обслуговувати електричний інструмент повинен
тільки кваліфікований ремонтний персонал із
використанням лише ідентичних запасних частин.
Це забезпечить утримання електричного інструмента
у безпечному стані.
ВКАЗІВКИ ЩОДО БЕЗПЕЧНОГО ВИКОНАННЯ
ВСІХ ОПЕРАЦІЙ
Запобіжні заходи, загальні для усіх операцій
шліфування.
• Цей електричний інструмент призначений для
використання в якості шліфувальної машини.
Уважно вивчіть усі попереджувальні знаки,
вказівки щодо безпечної роботи, графічні
матеріали та технічні описи, що додаються до
даного електричного інструмента. Недотримання
вказівок щодо безпечної роботи може призвести до
ураження електричним струмом, пожежі та/або
серйозних травм персоналу.
• Ц им е лектр ичним ін ст рум енто м н е
рекомендується виконувати такі операції як
полірування, різання і оброблення дротяною
щіткою. Операції, на які не розрахована конструкція
цього електричного інструмента, можуть призвести
до виникнення аварійної ситуації та травм персоналу.
• Не використовуйте приладдя, яке не було
розроблене і не рекомендоване виробником
інструменту. Якщо приладдя можна встановити на
ваш інструмент, це ще не є гарантією безпечної
роботи.
• Номінальна швидкість приладд я повинна
щона йменш е дор івнюв ати м аксим альні й
швидко сті, з азна чені й на елект ричн ому
інструменті. Приладдя, що працює з швидкістю, яка
перевищує свою номінальну швидкість, може
зруйнуватися та розлетітися в сторони.
• Зовнішній діаметр і товщина приладдя повинні
лежати в ме жах хара ктерис тик вашого
електри чн ого інстру мента. Пр илад дя
неправильного розміру не можуть бути належним
чином захищені запобіжним щитком, і їх роботу
неможливо нормально контролювати.
22
Page 23

• Різьбове кріплення приладдя має збігатися з
різьбою шпинделя шліфувальної машини. Для
приладдя, що кріпиться за допомогою фланців,
це нтров ий отв ір по вин ен від пов ідати
кріпильному діаметру фланця. Приладдя, що не
збігається з елементами кріплення електричного
інструмента, буде розбалансованим, буде відчувати
надмірні вібрації та може стати причиною втрати
контролю за інструментом.
• Забороняється використовувати пошкоджене
прилад дя. Перед початком роботи завж ди
перевіряйте приладдя, таке як шліфувальні кола,
на наявність сколів та тріщин, підошву на
наявність тріщин, дір та надмірного зносу, і
дротяну щітку на наявність обламаного дроту. У
випадку падіння електричного інструмента та
приладдя перевірте їх на наявність пошкоджень
або замініть пошкоджене приладдя. Після
перевірки та установки приладдя весь персонал
повинен відійти у бік від площини обертання
прилад дя, після чого необхідно увімкнути
електричний інс труме нт на максимальну
швидкість холостого ходу без навантаження.
Пошкоджене приладдя за цей час зазвичай
розлітається.
• Використовуйте засоби індивідуального захисту.
За лежно в ід с посо бу в ико риста ння,
використовуйте лицьовий щиток, відкриті або
закриті захисні окуляри. У разі необхідності
одягайте пилозахисну маску, засоби захисту
органів слуху, захисні рукавички та робочий
фартух, що здатні зупинити дрібні абразивні
частки або осколки робочої деталі. Засіб захисту
очей повинен зупиняти частинки, які розлітаються під
час роботи. Пилозахисна маска або респіратор мають
відфільтровувати частинки, які з’являються під час
роботи. Тривалий вплив сильного шуму може
призвести до погіршення слуху.
• Сторонні особи повинні перебувати на безпечній
відстані від робочої зони. Будь-які особи, які
вход ять до ро боч ої з они , по вин ні
використовувати засоби індивідуального захисту.
Уламки робочої деталі або зруйнованого приладдя
можуть розлітатися і стати причиною травмування
персоналу за межами безпосередньої зони роботи.
• Під час виконання робіт, коли ріжуча деталь
електричного інструменту може стикатися з
прихованою електропроводкою або зі своїм
шнуром, інструмент необхідно тримати тільки за
діелектричну поверхню. Під час контакту ріжучої
деталі з дротом, який знаходиться під напругою, під
напругу можу ть потрапити металеві деталі
електричного інструмента, внаслідок чого виникає
небезпека ураження оператора електричним
струмом.
(Переклад оригінальних інструкцій) УКРАЇНСЬКА
• Шнур електроживлення повинен знаходитися на
максимальному відд аленні від робочого
приладдя. У разі втрати контролю шнур може бути
обрізаний, або з нього може бути зідрана ізоляція, і
рука чи долоня оператора може втягнутись в
приладдя, яке обертається.
• Ніколи не кладіть електроінструмент до повної
зупинки рухомих деталей. Рухомі деталі можуть
захопити частину поверхні, в результаті чого
інструмент вийде з-під контролю.
• Під час роботи з інструментом не тримайте його
збок у. При випадковому контакті обертового
приладдя може порватися ваш одяг, і приладдя може
увійти в тіло.
• Виконуйте регулярне очищення вентиляційних
отворів електричного інструмента. Вентилятор
двигуна може втягувати пил всередину його корпусу, і
через надмірне скупчення металевого пилу може
виникнути небезпека ураження елек тричним
струмом.
• Не використовуйте електроінструмент поблизу
легкозаймистих матеріалів. Такі матеріали можуть
займатися від іскор.
• Не використовуйте приладдя, що потребує рідких
охолоджувачів. Використання води та інших рідких
охолоджувачів може призвести до ураження
електричним струмом або навіть до летального
наслідку.
ДОДАТКОВІ ВКАЗІВКИ ЩОДО БЕЗПЕЧНОГО
ВИКОНАННЯ УСІХ ОПЕРАЦІЙ
Віддача та пов’язані з нею вказівки щодо безпечної
роботи
Віддача — це миттєва реакція на затиснутий або
застопорене, підошву, щітку та інше приладдя, яке
обертається. Затискання або стопоріння призводить до
швидкої зупинки обертового приладдя, що, у свою чергу,
призводить до того, що некерований електричний
інструмент починає о бертатися в напрямку,
протилежному напрямку обертання приладдя, в точці
зчеплення.
Наприклад, якщо шліфувальне коло застопорився або
був затиснутий робочою деталлю, край диска, який
заходить в місце стопоріння, може заглибитися в
поверхню матеріалу, що призведе до виштовхування або
віддачі диска. В залежності від напрямку обертання кола
в точці стопоріння, коло може відскочити в напрямку
оператора або від нього. У таких умовах шліфувальні
диски можуть також руйнуватися. Віддача є результатом
неправильного використання інструмента та/або
неправильної пос лідовнос ті в иконання дій і
неправильних умов роботи, і може бути усунута при
дотриманні заходів безпеки, зазначених нижче:
23
Page 24

УКРАЇНСЬКА
• Міцно тримайте інструмент і станьте в таке
положення, щоб ви усім тілом могли чинити опір
силам віддачі. Завжди використовуйте додаткове
руків’я, якщо воно входить в комплект, щоб
максимально контролювати віддачу і реакцію від
крутного моменту під час пуску. Оператор завжди
зможе контролювати реакцію від крутного моменту
або віддачу, якщо були зроблені належні запобіжні
заходи.
• Категоричн о забороняє ться тримати руки
поблизу обертового приладдя. Приладдя може
відскочити назад на руку.
• Не ставайте в зоні, куди ваш інструмент може піти
при віддачі. Віддача буде штовхати інструмент в
напрямку, протилежному напрямку руху кола в місці
стопоріння.
• Будьте особливо уважними під час роботи з
кутами, гострими краями тощо. Попереджайте
стрибки і стопоріння приладдя. Кути, гострі краї та
підс трибув ання призв одять до стопорін ня
обертового приладдя і втрати контролю або віддачі.
• Забороняється прикріплювати до інструмента ніж
ланцюгової пилки для дерева або зубчастий
різальний диск. Такі полотна часто створюють
віддачу і призводять до втрати контролю над
інструментом.
(Переклад оригінальних інструкцій)
Додаткові вказівки з техніки безпеки
• В ць ому і нстр уме нті з або роняє ться
використовувати шліфувальні кола типу 11
(чашкоподібні) . Викорис тання нена лежн ого
приладдя може призвести до травмування персоналу.
• Завжди використовуйте тільки бічне руків’я. Його
необхідно міцно закрутити в інструменті. Щоб
надійно тримати інструмент під час роботи, потрібно
завжди використовувати бічне руків’я.
• Для фіксації положення оброблюваної деталі на
стійкій основі використовуйте затискачі або інший
зручний і практичний спосіб. Якщо тримати деталь
руками або притискати її до тіла, вона буде
перебувати в незакріпленому положенні, що може
призвести до втрати контролю за роботою
інструмента.
Індивідуальна техніка безпеки
• Дітям і вагітним жінкам забороняється заходити у
зону виконання робіт зі зняття фарби аж до
закінчення прибирання.
• Усі особи, які заходять у зону виконання робіт,
повинні одягати пилозахисні маски чи респіратори.
Фільтр пилозахисної маски чи респіратора слід
заміняти щодня, а також якщо під час користування
маскою відчувається ускладнення дихання.
Примітка. Слід користуватися тільки пилозахисними
масками, придатними для використання в умовах
пилу і випарів фарб, які містять свинець. Звичайні
малярні маски не забезпечують такого захисту.
Зверніться до місцевого продавця індивідуальних
засобів захисту по відповідну маску з сертифікатом
NIOSH.
Екологічна безпека
• Фарбу необхідно знімати таким чином, щоб зменшити
до мінімуму кількість пилу, який при цьому
утвориться.
• Ділянки, на яких буде виконуватись операція зняття
фарби, повин ні бути щільно обгороджені
пластмасовими листами товщиною 4 мм.
• Шліфування необхідно виконувати таким чином, щоб
зменшити попадання пилу фарби за межі робочої
ділянки.
Наклейки на інструменті
Наклейка на вашому інструменті може містити наступні
символи:
УВАГА! Для зниження ризику травмування
оператор повинен прочитати цю інструкцію
з експлуатації перед початком роботи.
Застосовуйте засоби захисту органів слуху.
Використовуйте відкриті і закриті захисні окуляри.
Напруга
В
A Ампери
Гц Герци
Вт Вати
хвилини
хв.
Змінний0
струм
Розташування коду дати (рис. A)
Штрих-код з датою (10), який також включає рік
виготовлення, надрукований на корпусі.
Приклад:
Вміст комплекту постачання
Упаковка містить:
1 кутову шліфувальну машини
1 запобіжний щиток
1 набір фланців
1 ключ
2017 XX JN
Рік виготовлення
Постійний струм
Швидкість холостого ходу
n
0
Конструкція класу II
Клема заземлення
Попереджувальний знак
Кількість обертів або
зворотно-поступальних
/хв
рухів за хвилину
24
Page 25

1 руків’я
1 інструкцію з експлуатації
• Перевірте, чи не має інструмент, його деталі та
приладдя пошкоджень, які могли з’явитися під час
транспортування.
• Перш ніж починати роботу з інструментом, уважно
прочитайте і вивчіть вказівки, які містяться у цій
інструкції.
Електрична безпека
Цей інструмент має подвійну ізоляцію, тому дріт
заземлення для нього не потрібен. Завжди
перевіряйте, чи мережева напруга відповідає
значенню, вказаному в таблиці з паспортними
даними.
Увага! Щоб уникнути травм персоналу і
пошкодження інструмента збитків у разі
пошкодження шнура живлення, його необхідно
замінити, звернувшись до виробника, в
уповноважений сервісний центр Stanley або до
особи, яка має відповідну кваліфікацію. Якщо
заміну шнура живлення виконає особа, яка має
відповідну кваліфікацію, але не уповноважена
компанією Stanley, гарантійні зобов’язання
будуть анульовані.
Використання подовжувача
Якщо необхідно використовувати подовжувач,
користуйтеся сертифікованим подовжувачем, який
відповідає споживаній потужності інструмента.
Мінімальна площа поперечного перерізу електричного
дроту становить 1,5 кв. мм. Кабелі перед намотуванням
на барабан необхідно розплутати.
Площа перерізу кабелю,
мм2 Номінальний струм
кабелю, А
0,75 6
1,00 10
1,50 15
2,50 20
4,00 25
Площа перерізу кабелю,
мм2 Номінальний струм
кабелю, А
Довжина кабелю, м
7,5 15 25 30 45 60
(Переклад оригінальних інструкцій) УКРАЇНСЬКА
Напруга, В
110-127 0 - 2,0 6 6 6 6 6 10
220-240 0 - 2,0 6 6 6 6 6 6
Функції (Рис. A)
Цей інструмент може мати усі або деякі з перерахованих
нижче функцій.
1. Вимикач
2. Кнопка фіксації шпинделя
3. Запобіжний щиток
Монтаж
ОБЕРЕЖНО! Щоб запобігти випадковому увімкненню,
перед виконанням описаних далі дій вимкніть інструмент
і витягніть із розетки вилку шнура живлення.
Недотримання цієї вимоги може призвести до важких
травм.
Струм, А Номінальний струм кабелю, А
2,1 - 3,4 6 6 6 6 15 15
3,5 - 5,0 6 6 10 15 20 20
5,1 - 7,0 10 10 15 20 20 25
7,1 - 12,0 15 15 20 25 25 -
12,1 - 20,0 20 20 25 - - -
2,1 - 3,4 6 6 6 6 6 6
3,5 - 5,0 6 6 6 6 10 15
5,1 - 7,0 10 10 10 10 15 15
7,1 - 12,0 15 15 15 15 20 20
12,1 - 20,0 20 20 20 20 25 -
Встановлення і зняття захисного щитка кола
(рис. B)
ОБЕРЕЖНО! Щоб запобігти травмуванню, перед
початком регулювання або знят тя/встановлення
приладдя завжди вимикайте інструмент і від'єднуйте
джерело живлення. Перед повторним складанням
інструмента короткочасно натисніть пусковий вимикач,
щоб упевнитися, що інструмент вимкнено.
Прикріплення запобіжного щитка
1. Установіть кутову шліфувальну машину на верстак
пазом вгору.
2. Установіть фланець кільця запобіжного щитка (3) в
паз (9) корпусу редуктора.
3. Поверніть запобіжний щиток (3) проти годинникової
стрілки на 150 градусів.
4. Перевірте затяжку гвинтів (10).
25
Page 26

УКРАЇНСЬКА
(Переклад оригінальних інструкцій)
Зняття захисного щитка
1. Послабте гвинти (10) на кільці запобіжного щитка.
2. Зніміть щиток (3).
ОБЕРЕЖНО! Забороняється робота інструмента, якщо
запобіжний щиток не встановлений на місці.
Примітка. В кінці цього розділу наведена таблиця
шліфувального приладдя, яке може використовуватись з
цією кутовою шліфувальною машиною.
Встановлення та зняття шліфувальних кіл
(рис. D, E)
ОБ ЕРЕЖНО ! За бор оняєтьс я ви кор истовувати
пошкоджені кола.
1. Установіть інструмент на верстак пазом вгору.
2. Рисунок C: Установіть внутрішній фланець (4) на
вихідний вал (5) у правильному положенні.
3. Установіть шліфувальне коло (6) на внутрішній
фланець (4). При встановленні кола з піднятим
центром переконайтесь, що піднятий центр (7)
направлений до фланця (4).
4. Рисунок D: Затягніть зовнішній фланець (h) до
вихідного вала (5).
4). Під час встановлення шліфувального кола кільце
зверху на зовнішньому фланці (8) повинно бути
направлене до кола.
5. Натисніть кнопку фіксації шпинделя (2) і не давайте
шпинделю (4) обертатись, поки він не зафіксується по
місцю.
6. Затягніть зовнішній фланець (8) за допомогою
двохштифтового ключа.
Підготовка до роботи
• Установіть запобіжний щиток і відповідні абразивні та
шліфувальні кола. Не використовуйте надмірно
зношені абразивні та шліфувальні кола.
• Перевірте, чи правильно встановлені внутрішній та
зовнішній фланці.
• Перевірте, щоб абразивний чи шліфувальне коло
обертався в напрямку, вказаному стрілками на
приладді та інструменті.
ЕКСПЛУАТАЦІЯ
ОБЕРЕЖНО! Завжди дотримуйтесь вказівок з безпечної
роботи і відповідних норм.
ОБЕРЕЖНО! Щоб запобігти травмуванню, перед
початком регулювання або зняття/встановлення
приладдя завжди вимикайте інструмент і від'єднуйте
джерело живлення. Перед повторним складанням
інструмента короткочасно натисніть пусковий вимикач,
щоб упевнитися, що інструмент вимкнено.
УВАГА!
• Перевірте, щоб усі матеріали, що підлягають
шліфуванню, були закріплені.
• Прикладайте помірні зусилля до інструмента. Не
прикладайте бічне зусилля до абразивного кола.
• Уникайте перевантажень інструмента. Якщо
інструмент нагрівся, дайте йому попрацювати
декілька хвилин без навантаження.
• Міцно тримайте інструмент двома руками (однією
рукою тримайте корпус, іншою — руків’я). Увімкніть
інструмент і підведіть коло до робочої деталі.
• Підтримуйте кут нахилу кола до поверхні робочої
деталі в межах 15 - 30 градусів.
• При використанні нового шліфувального кола не
працюйте з ним в напрямку B, інакше він почне
врізатися в робочу деталь. Коли край кола стане
заокругленим, шліфувальну машину можна буде
використовувати як в напрямку A, так і в напрямку B.
Запуск і зупинка (Рис. A)
ОБЕ РЕЖНО! Перед використанням інструмента
переконайтесь, що руків’я надійно закріплене. Перевірте,
чи нормально працює вимикач.
Перед тим, як вставити вилку шнура в мережеву розетку,
натисніть задній кінець вимикача, перевівши його тим
самим у вимкнене положення.
Щоб запустити інструмент, натисніть задній кінець
перемикача і перемістіть перемикач в переднє
положення. Потім натисніть на передню частину
перемикача, щоб зафіксувати його положення. Щоб
зупинити інструмент, натисніть на задній кінець
вимикача.
ОБЕРЕЖНО! Не перемикайте перемикач під час роботи
інструмента в режимі навантаження.
Правильне положення рук (рис. F)
ОБЕРЕЖНО! Щоб зменшити ризик отримання серйозної
травми, ЗАВЖДИ тримайте руки в положенні, показаному
на рисунку.
ОБЕРЕЖНО! Щоб зменшити ризик отримання серйозної
травми, ЗАВЖДИ міцно тримайте інструмент та будьте
готовим до раптової реакції.
Правильне положення рук вимагає, щоб одна рука була
на бічному руків’ї (рис. A), а інша - на корпусі інструмента,
як показано на Рисунку С.
Перемикачі
Увага! Міцно тримайте корпус інструмента і належним
чином керуйте ним під час запуску, під час роботи і до
повної зупинки кола чи приладдя. Перш ніж покласти
інструмент, переконайтесь, що коло повністю зупинився.
26
Page 27

Примітка. Щоб зменшити ризик несподіваного руху
інструмента, не вмикайте і не вимикайте інструмент під
час роботи з навантаженням. Перед тим, як доторкнутись
робочої поверхні, дайте шліфувальній машині набрати
повні оберти. Перед вимиканням інструмента підніміть
його над поверхнею. Перш ніж опустити інструмент,
почекайте, поки він не перестане обертатись.
Пересувний перемикач (рис. A)
ОБЕРЕЖНО! Перед під'єднанням до джерела живлення
переконайтеся, що пересувний перемикач вимкнений.
Для цього короткочасно натисніть на задню частину
перемикача. Встановлюйте пересувний вимикач у
вимкнене положення, як описано вище, після кожного
відключення живлення інструмента, такого як
спрацьовування переривача замикання на землю,
спрацьовування автоматичного вимикача, випадкове
випадання вилки шнура з розетки або збій живлення.
Якщо пересувний перемикач встановлений в увімкнене
положення в момент підключення джерела живлення,
інструмент раптово увімкнеться.
Щоб запустити інструмент, перемістіть пересувний
перемикач (1) вперед. Щоб вимкнути інструмент,
відпустіть пересувний перемикач. Для неперервної
роботи перемістіть пересувний перемикач вперед і
натисніть на його передню частину в напрямку до центру.
Щоб зупини роботу інструмента в неперервному режимі,
короткочасно натисніть на задню частину пересувного
перемикача.
Фіксатор шпинделя (рис. A)
Фіксатор шпинделя (2) не дозволяє обертатись вихідному
валу, коли прикріплюється або знімається шліфувальне
коло. Застосовувати фіксатор шпинделя дозволяється
тільки тоді, коли інструмент вимкнено, вилку шнура
електроживлення витягнуто з розетки і коло повністю
зупинився.
Примітка. Щоб зменшити до мінімуму пошкодження
інструмента, не застосовуйте фіксатор шпинделя, коли
інструмент працює.
Інакше інструмент може пошкодитись. Прикріплене
приладдя може вилетіти з інструмента і травмувати
персонал.
Щоб застосувати фіксатор шпинделя, натисніть на його
кнопку і прокрутіть вихідний вал, поки він не зупиниться.
Робота з металами
При використанні інструменту для обробки металів,
перевірте, щоб було встановлено пристрій захисного
відключення (ПЗВ) для запобігання небезпечного впливу
металевої стружки.
Якщо встановлений ПЗВ призводить до відключення
(Переклад оригінальних інструкцій) УКРАЇНСЬКА
живлення, надішліть інс трумент на ремонт в
уповноважений сервісний центр BLACK+DECKER.
ОБЕРЕЖНО! В умовах граничного режиму обробки
металевих робочих деталей електропровідний пил і
металеві крихти можуть осідати на внутрішній поверхні
корпусу.
Внаслідок цього виникає небезпека ураження
електричним струмом, оскільки послаблюється захисна
ізоляція шліфувальної машини.
Щоб уникнути накопичення металевих крихт всередині
шліфувальної машини, ми рекомендуємо виконувати
щоденне очищення повітряних отворів. Дивіться розділ
технічного обслуговування.
Використання шліфувальних кіл
ОБЕРЕЖНО! Накопичення металевого пилу. Тривала
обробка металів шліфувальним колом може призвести
до виникнення небезпеки ураження електричним
струмом. Щоб зменшити такий ризик, установіть перед
роботою ПЗВ і щодня очищайте повітряні отвори. Щоб
прочистити стисненим повітрям повітряні канали,
керуйтеся вказівками з технічного обслуговування, які
наведені нижче.
ШЛІФУВАННЯ
Шліфування поверхонь шліфувальними колами
1. Перед тим, як інструмент увійде в контакт з робочою
поверхнею, він повинен набрати повні оберти.
2. Щоб інструмент працював на максимальних обертах,
прикладайте до нього мінімальне зусилля. Щоб
швидкість шліфування була максима льною,
інструмент повинен працювати на максимальних
обертах.
3. Підтримуйте кут між інструментом і робочою
поверхнею в межах 20˚ - 30˚.
4. Щоб запобігти утворенню заглиблень на робочій
поверхні, постійно рухайте інструментом вперед і
назад.
5. Перед вимиканням інструмента підніміть його над
робочою поверхнею. Перш ніж опустити інструмент,
почекайте, поки він не перестане обертатись.
Заходи безпеки під час фарби
• НЕ РЕКОМЕНДОВАНО шліфування фарби, яка містить
свинець , оск ільки скла дно контро лювати
забруднений свинцем пил. Найбільшу небезпеку
свинець становить для дітей і вагітних жінок.
• Оскільки без хімічного аналізу важко визначити,
міс тить чи не містить фарба свинець, ми
рекомендуємо дотримуватись наступних заходів
безпеки під час зняття будь-якої фарби.
27
Page 28

УКРАЇНСЬКА
ЗАГАЛЬНА ІНФОРМАЦІЯ
Корисні поради
• Кутову шліфувальну машину тримайте однією рукою
за корпус, а іншою міцно тримайте за бічне руків’я, як
показано на Рис. J.
• Завжди встановлюйте запобіжний щиток таким
чином, щоб відкрита частина кола була спрямована
максимально від вас. Будьте готові до зливи іскор,
коли коло буде торкатися металу.
• Для забезпечення максимальної керованості
інструментом, оптимального зняття матеріалу і
мінімального навантаження, під час операції
шліфування кут між диском і робочою поверхнею
(Рис. J) підтримуйте на рівні близько 30°, під час
операції обробки наждачною шкуркою - на рівні 10°15° (Рис. K).
УВАГА! Будьте дуже уважними під час шліфування в
кутах, оскільки контакт диска з другою поверхнею (яка
прилягає до основної), може призвести до різкої віддачі
інструмента.
ОБЕРЕЖНО! Під час роботи з цим інструментом завжди
одягайте захисні окуляри.
Технічне обслуговування
Конструкція вашого дротового/бездротового побутового
приладу/інструмента Stanley розрахована на роботу
протягом тривалого періоду часу при мінімальному
технічному обслуговуванні. Щоб забезпечити належне
виконання робочих операцій, необхідно регулярно
виконувати технічне обслуговування і очищення
інструмента.
УВАГА! Щоб зменшити до мінімуму небезпеку
отримання важкої травми, вимикайте живлення
інструмента і виймайте з розеток усі вилки, перш ніж
регулювати або знімати/встановлювати будь-яке
приладдя. Перед повторним складанням інструмента
короткочасно натисніть пусковий вимикач, щоб
упевнитися, що інструмент вимкнено.
ОБЕРЕЖНО! Перед виконанням будь-яких робіт з
техніч ного обслу говуван ня інс тру мен та з
дротовим/бездротовим живленням:
(Переклад оригінальних інструкцій)
Змащування
Інструменти Stanley належним чином змащені
на заводі і готові до використання.
Залежно від режиму використання, інструменти слід
змащувати щороку. (Інструменти, які використовуються
для важких робіт або працюють в інтенсивному режимі,
можливо, необхідно буде змащувати частіше.) Таке
змащування мають виконувати тільки досвідчені
спеціалісти з обслуговування електричного інструмента,
наприклад працівники уповноважених сервісних центрів
Stanley або інші кваліфіковані спеціалісти з
обслуговування.
Очищення
УВАГА! Пил і абразив, що містять металеві
частинки, часто накопичуються на внутрішніх
поверхнях деталей, і якщо їх не вилучити, може
виникнути небезпека ураження електричним
струмом. Д ля очищення інструмента
дозволяється користуватися тільки м'яким
мильним розчином і вологою ганчіркою. В
жодному разі не дозволяйте попадати рідині
всередину інструменту і не занурюйте
інструмент будь-якою частиною в рідину.
УВАГА! Забороняється використовувати для
очищення неметалевих частин інструмента
розчинники й агресивні хімічні речовини. Ці
хімічні речовини можуть погіршити міцність
матеріалів цих частин. Для очищення
інструмента можна користуватися тільки
м'яким мильним розчином і вологою ганчіркою.
В жодному разі не дозволяйте попадати рідині
всередину інструменту і не занурюйте
інструмент будь-якою частиною в рідину.
УВАГА! Не перевантажуйте вашу кутову
шліфув альну ма шину. Перевантаження
призводить до зниження швидкості та
ефективності роботи машини, внаслідок чого
вона почне сильно нагріватися. У такому
випадку машина повинна декілька хвилин
працювати без навантаження, поки її
температура не опуститься до нормального
робочого значення. Вимкнення кутової
шліфувальної машини в режимі роботи під
навантаженням призведе до скорочення
терміну служби перемикача.
ВАЖЛИВО! Щоб гарантувати БЕЗПЕКУ та
НАДІЙНІС ТЬ і нструмента , р емонт,
обслуговування та регулювання (окрім
описаних в цій інструкції) повинні виконувати
уповноважені сервісні центри чи інші
кваліфіковані організації; для виконання цих
робіт обов’язково слід використовувати
ідентичні запасні частини. Виріб не містить
деталей, призначених для обслуговування
користувачем.
Додаткове приладдя
ОБЕРЕЖН О! Оскільки приладд я інших
виробників не проходило випробування з цим
виробом, використання такого приладдя із цим
інструментом може бути небезпечним. Щоб
обмежити ризик отримання травми, з цим
виробом слід використовувати тільки
рекомендоване приладдя компанії Stanley.
28
Page 29

Ефективніс ть роботи будь-якого електричного
інструмента залежить від використовуваного приладдя.
Приладдя Stanley розроблено відповідно до високих
стандартів якості, і його конструкція розширює
можливості інструмента. Використання цього приладдя
дає змогу отримувати від інструмента максимальну
користь. Компанія Stanley випускає широкий асортимент
приладдя, яке можна за додаткову плату придбати у
місцевих дилерів чи в уповноважених сервісних центрах.
Примітки
Одним із принципів політики компанії Stanley є постійне
вдосконалення виробів, тому компанія залишає за собою
право змінювати характеристики своїх виробів без
попереднього сповіщення. Стандартне обладнання та
приладдя у різних країнах може відрізнятися. Технічні
характеристики виробів можуть різнитися залежно від
країни. Повна лінійка продуктів може бути доступна не в
усіх країнах. З питання можливості придбання наших
виробів зверніться до місцевих дилерів компанії Stanley.
Захист навколишнього середовища
Окреме збирання. Цей продукт не можна
викидати разом зі звичайним побутовим
сміттям.
Якщо якось ви вирішите, що ваш виріб фірми STANLEY
має бути замінено, або він вам більше не потрібний, не
викидайте його на смітник побутового сміття. Зробіть цей
виріб доступним для спеціального збирання.
Компанія STANLEY має можливість для збору та
переробки продуктів власного виробництва
після закінчення їхнього терміну служби. Щоб
скористатися цією послугою, поверніть виріб компанії в
офіційний сервісний центр, які збирають відпрацьовані
продукти за наш рахунок.
Ви можете знайти місцезнаходження найближчого до Вас
сервісного центру, зв’язавшись з місцевим офісом
компанії STANLEY за адресою, вказаною в цих інструкціях.
Крім того, список офіційних сервісних центрів компанії
STANLEY з усіма подробицями нашого післяпродажного
обслуговування та контактною інформацією міститься в
Інтернеті за адресою: www.2helpU.com
(Переклад оригінальних інструкцій) УКРАЇНСЬКА
Технічні дані
ШЛІФУВАЛЬНА МАШИНА SGS105
Напруга В 220 – 240
Частота Гц 50/60
Потужність Вт 1050
Швидкість холостого ходу /хв 11000
Діаметр диска мм 125
Діаметр шпинделя M14
Вага кг 2,3
29
Page 30

УКРАЇНСЬКА
(Переклад оригінальних інструкцій)
Гарантійні умови
Шановний покупець!
1. Вітаємо Вас з покупкою високоякісного виробу STANLEY
і висловлюємо вдячність за Ваш вибір.
2. При покупці виробу вимагайте перевірки його
комплектності і справності у Вашій присутності,
інструкцію з експлуатації та заповнений гарантійний
талон українською мовою
В гарантійному талоні повинні бути внесені: модель, дата
продажу, серійний номер, дата виробництва
інструменту; назва, печатка і підпис торгової організації.
За відсутності у Вас правильно заповненого
гарантійного талону, а також при невідповідності
зазначених у ньому даних ми будемо змушені відхилити
Ваші претензії щодо якості даного виробу.
3. Щоб уникнути непорозумінь, переконливо просимо Вас
перед початком роботи з виробом уважно
ознайомитися з інструкцією з його експлуатації.
Правовою основою справжніх гарантійних умов є чинне
Законодавство. Гарантійний термін на даний виріб
складає 24 місяці і обчислюється з дня продажу. У разі
усунення недоліків виробу, гарантійний строк
продовжується на період його перебування в ремонті.
Термін служби виробу становить 5 років з дня продажу.
4. У разі виникнення будь-яких проблем у процесі
експлуатації виробу рекомендуємо Вам звертатися
тільки в уповноважені сервісні центри STANLEY, адреси
та телефони яких Ви зможете знайти в гарантійному
талоні, на сайті www.2helpU.com або дізнатися в
магазині. Наші сервісні станції - це не тільки
кваліфікований ремонт, але і широкий асортимент
запчастин і аксесуарів.
5. Виробник рекомендує проводити періодичну перевірку
і технічне обслуговування виробу в уповноважених
сервісних центрах.
6. Наші гарантійні зобов'язання поширюються тільки на
несправності, виявлені протягом гарантійного терміну і
викликані дефектами виробництва та \ або матеріалів.
7. Гарантійні умови не поширюються на несправності
виробу, що виникли в результаті:
7.1 Недотримання користувачем приписів інструкції з
експлуатації виробу, застосування виробу не за
призначенням, неправильного зберігання,
використання приладдя, витратних матеріалів і
запчастин, що не передбачені виробником.
7.2 Механічного пошкодження (відколи, тріщини і
руйнування) внутрішніх і зовнішніх деталей виробу,
основних і допоміжних рукояток, мережевого кабелю,
що викликані зовнішнім ударним або будь-яким іншим
впливом
7.3 Потрапляння у вентиляційні отвори та проникнення
всередину виробу сторонніх предметів, матеріалів або
речовин, що не є відходами, які супроводжують
застосування виробу за призначенням, такими як:
стружка, тирса, пісок, та ін.
7.4 Впливу на виріб несприятливих атмосферних і інших
зовнішніх факторів, таких як дощ, сніг, підвищена
вологість, нагрівання, агресивні середовища,
невідповідність параметрів електромережі, що
зазначені на інструменті.
7.5 Стихійного лиха. Пошкодження або втрати виробу, що
пов'язані з непередбаченими лихами, стихійними
явищами, у тому числі внаслідок дії непереборної сили
(пожежа, блискавка, потоп і інші природні явища), а
також внаслідок перепадів напруги в електромережі та
іншими причинами, які знаходяться поза контролем
виробника.
8. Гарантійні умови не поширюються:
8.1. На інструменти, що піддавались розкриттю, ремонту або
модифікації поза уповноваженим сервісним центром.
8.2. На деталі, вузли та матеріали, що мають сліди
природного зносу, такі як: приводні ремені і колеса,
вугільні щітки, мастило, підшипники, зубчасті зчеплення
редукторів, гумові ущільнення, сальники, направляючі
ролики, муфти, вимикачі, бойки, штовхачі, стволи тощо.
8.3. На змінні частини: патрони, цанги, затискні гайки і
фланці, фільтри, акумуляторні батареї, ножі, шліфувальні
підошви, ланцюги, зірочки, пильні шини, захисні кожухи,
пилки, абразиви, пильні і абразивні диски, фрези,
свердла, бури тощо
8.4. На несправності, що виникли в результаті
перевантаження інструменту (як механічного, так і
електричного), що спричинили вихід з ладу одночасно
двох і більше деталей і вузлів, таких як: ротора і статора,
обох обмоток статора, веденої і ведучої шестерень
редуктора або інших вузлів і деталей. До безумовних
ознак перевантаження виробу відносяться, крім інших:
поява кольорів мінливості, деформація або оплавлення
деталей і вузлів виробу, потемніння або обвуглювання
ізоляції проводів електродвигуна під впливом високої
температури.
Виробник:
"Stanley Black & Decker Deutschland
GmbH" Black-&-Decker Str.40, D-65510
Idstein, Німеччина
30
Page 31

05.2017 N516695
Page 32

 Loading...