

Page 1
SBD20
English Page 04
Turkish Page 11
Russian Page 19
Ukrainian Page 28
Page 2
ENGLISH (Original instructions)
5
3
4
2
1
9
8
7
6
2
Page 3

(Original instructions) ENGLISH
6
A
B
7
3
2
1
C
D
E F
4
5
3
Page 4
ENGLISH (Original instructions)
Intended use
Your Stanley SBD20 drill/screwdriver has been designed for
screwdriving applications and for drilling in wood, metal and
plastics. This tool is intended for professional use.
SAFETY INSTRUCTIONS
General power tool safety warnings
Warning! Read all safety warnings and all
instructions. Failure to follow the warnings and
instructions listed below may result in electric
shock, fire and/or serious injury.
Save all warnings and instructions for future reference.
The term "power tool" in all of the warnings listed below refers
to your mains operated (corded) power tool or battery operated
(cordless) power tool.
1. Work area safety
a. Keep work area clean and well lit. Cluttered or dark areas
invite accidents.
b. Do not operate power tools in explosive atmospheres,
such as in the presence of flammable liquids, gases or
dust. Power tools create sparks which may ignite the dust
or fumes.
c. Keep children and bystanders away while operating a
power tool. Distractions can cause you to lose control.
2. Electrical safety
a. Power tool plugs must match the outlet. Never modify
the plug in any way. Do not use any adapter plugs with
earthed (grounded) power tools. Unmodified plugs and
matching outlets will reduce risk of electric shock.
b. Avoid body contact with earthed or grounded surfaces
such as pipes, radiators, ranges and refrigerators.
There is an increased risk of electric shock if your body is
earthed or grounded.
c. Do not expose power tools to rain or wet conditions.
Water entering a power tool will increase the risk of electric
shock.
d. Do not abuse the cord. Never use the cord for carrying,
pulling or unplugging the power tool. Keep cord away
from heat, oil, sharp edges or moving parts. Damaged
or entangled cords increase the risk of electric shock.
e. When operating a power tool outdoors, use an
extension cord suitable for outdoor use. Use of a cord
suitable for outdoor use reduces the risk of electric shock.
f. If operating a power tool in a damp location is unavoid-
able, use a residual current device (RCD) protected
supply. Use of an RCD reduces the risk of electric shock.
3. Personal safety
a. Stay alert, watch what you are doing and use common
sense when operating a power tool. Do not use a
power tool while you are tired or under the influence of
drugs, alcohol or medication. A moment of inattention
while operating power tools may result in serious personal
injury.
b. Use personal protective equipment. Always wear eye
protection. Protective equipment such as dust mask,
non-skid safety shoes, hard hat, or hearing protection used
for appropriate conditions will reduce personal injuries.
c. Prevent unintentional starting. Ensure the switch is in
the off-position before connecting to power source
and/or battery pack, picking up or carrying the tool.
Carrying power tools with your finger on the switch or
energising power tools that have the switch on invites
accidents.
d. Remove any adjusting key or wrench before turning
the power tool on. A wrench or a key left attached to a
rotating part of the power tool may result in personal injury.
e. Do not overreach. Keep proper footing and balance at
all times. This enables better control of the power tool in
unexpected situations.
f. Dress properly. Do not wear loose clothing or
jewellery. Keep your hair, clothing and gloves away
from moving parts. Loose clothes, jewellery or long hair
can be caught in moving parts.
g. If devices are provided for the connection of dust
extraction and collection facilities, ensure these are
connected and properly used. Use of dust collection can
reduce dust-related hazards.
4. Power tool use and care
a. Do not force the power tool. Use the correct power tool
for your application. The correct power tool will do the job
better and safer at the rate for which it was designed.
b. Do not use the power tool if the switch does not turn it
on and off. Any power tool that cannot be controlled with
the switch is dangerous and must be repaired.
c. Disconnect the plug from the power source and/or the
battery pack from the power tool before making any
adjustments, changing accessories, or storing power
tools. Such preventive safety measures reduce the risk of
starting the power tool accidentally.
d. Store idle power tools out of the reach of children and
do not allow persons unfamiliar with the power tool or
these instructions to operate the power tool. Power
tools are dangerous in the hands of untrained users.
4
Page 5
e. Maintain power tools. Check for misalignment or
binding of moving parts, breakage of parts and any
other condition that may affect the power tools
operation. If damaged, have the power tool repaired
before use. Many accidents are caused by poorly
maintained power tools.
f. Keep cutting tools sharp and clean. Properly maintained
cutting tools with sharp cutting edges are less likely to bind
and are easier to control.
g. Use the power tool, accessories and tool bits etc. in
accordance with these instructions, taking into
account the working conditions and the work to be
performed. Use of the power tool for operations different
from those intended could result in a hazardous situation.
5. Battery tool use and care
a. Recharge only with the charger specified by the
manufacturer. A charger that is suitable for one type of
battery pack may create a risk of fire when used with
another battery pack.
b. Use power tools only with specifically designated
battery packs. Use of any other battery packs may create
a risk of injury and fire.
c. When battery pack is not in use, keep it away from
other metal objects, like paper clips, coins, keys, nails,
screws, or other small metal objects, that can make a
connection from one terminal to another. Shorting the
battery terminals together may cause burns or a fire.
d. Under abusive conditions, liquid may be ejected from
the battery; avoid contact. If contact accidentally
occurs, flush with water. If liquid contacts eyes,
additionally seek medical help. Liquid ejected from the
battery may cause irritation or burns.
6. Service
a. Have your power tool serviced by a qualified repair
person using only identical replacement parts. This will
ensure that the safety of the power tool is maintained.
ADDITIONAL POWER TOOL SAFETY WARNINGS
Warning! Additional safety warnings for
drills/screwdrivers
• Wear ear protectors when impact drilling. Exposure to
noise can cause hearing loss.
• Use auxiliary handles supplied with the tool. Loss of
control can cause personal injury.
• Hold power tool by insulated gripping surfaces when
performing an operation where the cutting accessory
(Original instructions) ENGLISH
may contact hidden wiring. Cutting accessory
contacting a "live" wire may make exposed metal parts of
the power tool "live" and could give the operator an electric
shock.
• Hold power tool by insulated gripping surfaces, when
performing an operation where the fastener may
contact hidden wiring. Fasteners contacting a "live" wire
may make exposed metal parts of the power tool "live" and
could give the operator an electric shock.
• Use clamps or another practical way to secure and
support the workpiece to a stable platform. Holding the
work by hand or against your body leaves it unstable and
may lead to loss of control.
• Before drilling into walls, floors or ceilings, check for the
location of wiring and pipes.
• Avoid touching the tip of a drill bit just after drilling, as it may
be hot.
• The intended use is described in this instruction manual.
The use of any accessory or attachment or performance of
any operation with this tool other than those recommended
in this instruction manual may present a risk of personal
injury and/or damage to property.
SAFETY OF OTHERS
• This tool is not intended for use by persons (including
children) with reduced physical, sensory or mental
capabilities, or lack of experience and knowledge, unless
they have been given supervision or instruction concerning
use of the tool by a person responsible for their safety.
• Children should be supervised to ensure that they do not
play with the appliance.
Residual risks
Additional residual risks may arise when using the tool which
may not be included in the enclosed safety warnings. These
risks can arise from misuse, prolonged use etc.
Even with the application of the relevant safety regulations and
the implementation of safety devices, certain residual risks can
not be avoided. These include:
• Injuries caused by touching any rotating/moving parts.
• Injuries caused when changing any parts, blades or
accessories.
• Injuries caused by prolonged use of a tool. When using any
tool for prolonged periods ensure you take regular breaks.
• Impairment of hearing.
• Health hazards caused by breathing dust developed when
using your tool (example:- working with wood, especially
oak, beech and MDF.)
5
Page 6
ENGLISH (Original instructions)
LABELS ON TOOL
The following symbols are shown on the tool along with the
date code:
Warning! To reduce the risk of injury, the user must
read the instruction manual.
Always wear safety goggles
Always wear safety hearing protection
POSITION OF DATE CODE
The Date Code, which also includes the year of manufacture,
is printed into the housing.
Example:
2017 XX JN
Year of manufacturing
Additional safety instructions for batteries and
chargers
Batteries
• Never attempt to open for any reason.
• Do not expose the battery to water.
• Do not store in locations where the temperature may
exceed 40 °C.
• Charge only at ambient temperatures between 10 °C and
40 °C.
• Charge only using the charger provided with the tool.
• When disposing of batteries, follow the instructions given in
the section "Protecting the environment".
Do not attempt to charge damaged batteries.
Chargers
• Use your Stanley charger only to charge the battery in the
tool with which it was supplied. Other batteries could burst,
causing personal injury and damage.
• Never attempt to charge non-rechargeable batteries.
• Have defective cords replaced immediately.
• Do not expose the charger to water.
• Do not open the charger.
• Do not probe the charger.
The charger is intended for indoor use only.
Read the instruction manual before use.
Electrical safety
Your charger is double insulated; therefore no earth
wire is required. Always check that the mains voltage
corresponds to the voltage on the rating plate. Never
attempt to replace the charger unit with a regular
mains plug.
• If the supply cord is damaged, it must be replaced by the
manufacturer or an authorised Stanley Service Centre in
order to avoid a hazard.
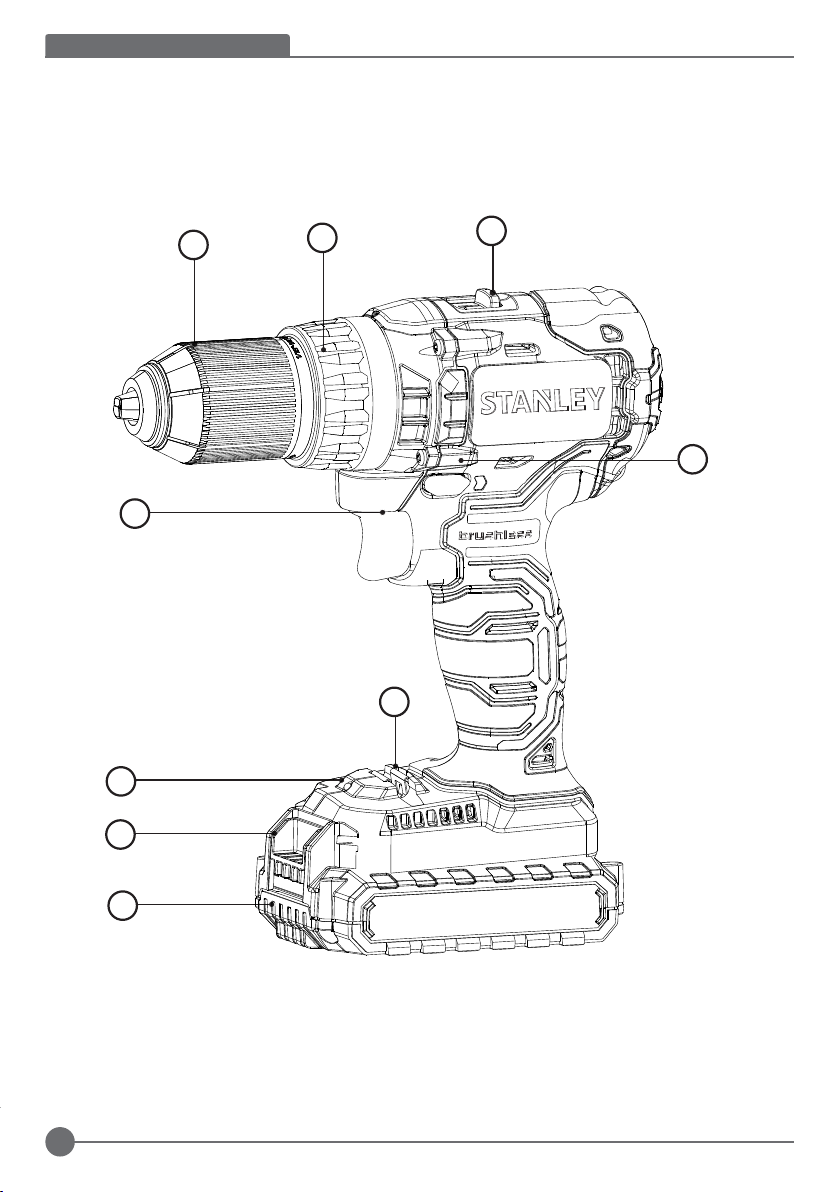
FEATURES
This appliance includes some or all of the following features.
1. Trigger Switch
2. Forward/Reverse Button
3. Torque Adjust Collar
4. Dual Range Gear Selector
5. Keyless Chuck
6. Battery
7. Battery Release Button
8. LED Work Light
9. Bit Tip Holder
Use
Warning! Let the tool work at its own pace. Do not overload.
CHARGING THE BATTERY
The battery needs to be charged before first use and whenever
it fails to produce sufficient power on jobs that were easily done
before. The battery may become warm while charging; this is
normal and does not indicate a problem.
Warning! Do not charge the battery at ambient temperatures
below 10 °C or above 40 °C. Recommended charging tempera-
ture: approx. 24 °C.
Note: The charger will not charge a battery if the cell tempera-
ture is below approximately 10 °C or above 40 °C.
The battery should be left in the charger and the charger will
begin to charge automatically when the cell temperature warms
up or cools down.
• Plug the charger into an appropriate outlet before inserting
the battery pack.
• Insert the battery pack into the charger.
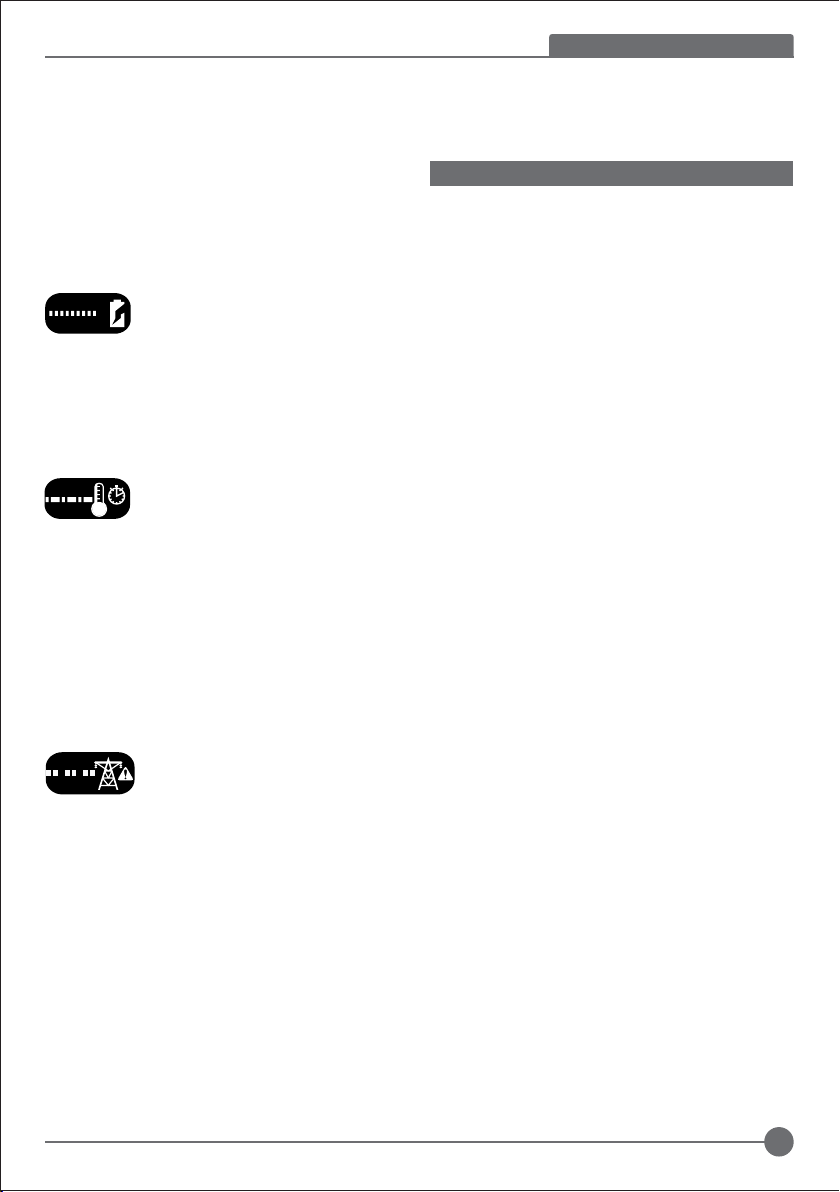
The green LED will flash indicating that the
battery is being charged.
The completion of charge is indicated by the
green LED remaining on continuously.
The pack is fully charged and may be used at
this time or left in the charger.
6
Page 7
Warning! Recharge discharged batteries as soon as possible
after use or battery life may be greatly diminished.
Charger diagnostics
This charger is designed to detect certain problems that can
arise with the battery packs or the power source. Problems are
indicated by one LED flashing in different patterns.
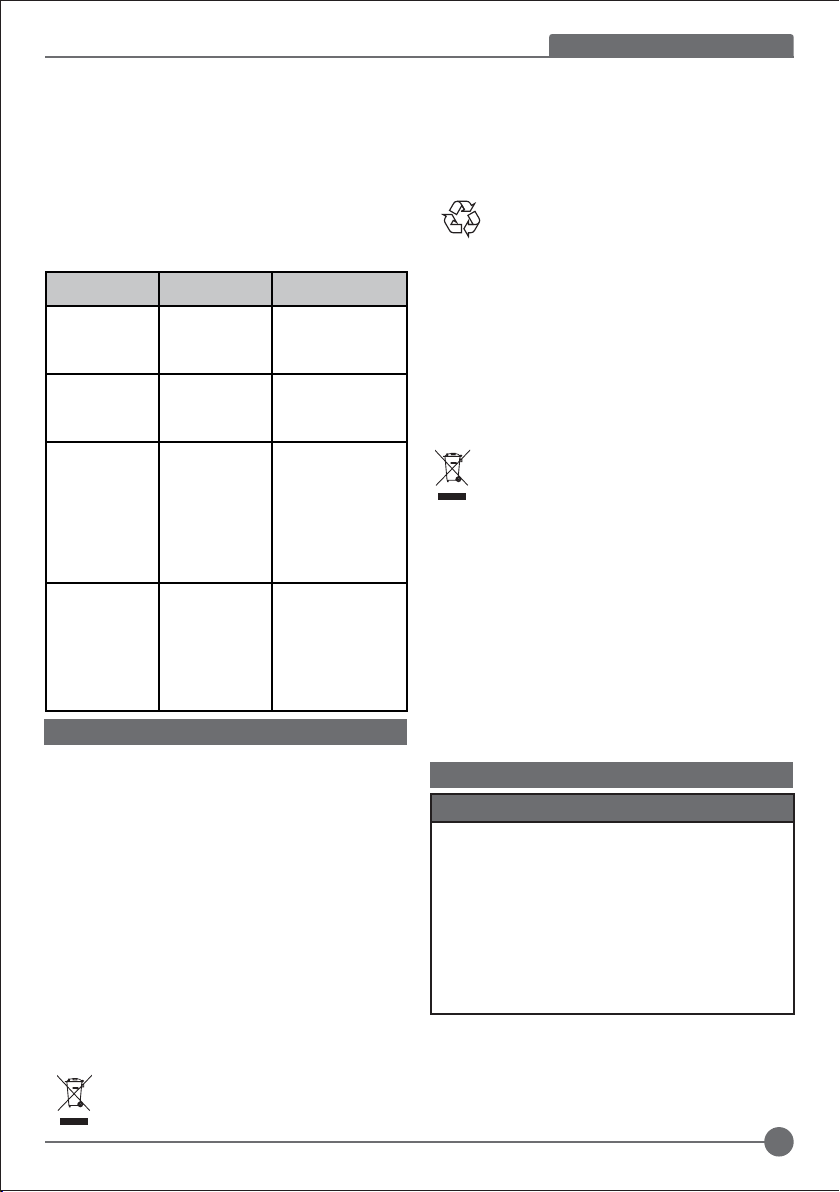
Bad Battery
The charger can detect a weak or damaged
battery. The red LED flashes in the pattern
indicated on the label. If you see this bad
battery blink pattern, do not continue to
charge the battery. Return it to a service
centre or a collection site for recycling.
Hot/Cold Pack Delay
When the charger detects a battery that is
excessively hot or excessively cold, it
automatically starts a Hot/Cold Pack delay,
suspending charging until the battery has
normalised. After this happens, the charger
automatically switches to the Pack Charging
mode. This feature ensures maximum battery
life. The red LED flashes in the pattern
indicated on the label when the Hot/Cold pack
delay is detected.
Problem Power Line
When the charger is used with some portable
power sources such as generators or sources
that convert DC to AC, the charger may
temporarily suspend operation. The LED
flashes in the pattern indicated on the label.
This indicates that the power source is out of
limits..
Leaving the battery in the charger
The charger and battery pack can be left connected with the
LED glowing indefinitely. The charger will keep the battery pack
fresh and fully charged.
Li-Ion battery packs only
Li-Ion batteries are designed with an Electronic Protection
System that will protect the battery against overloading,
(Original instructions) ENGLISH
overheating or deep discharge. The tool will automatically turn
off if the Electronic Protection System engages. If this occurs,
place the Li-Ion battery on the charger until it is fully charged.
IMPORTANT CHARGING NOTES
• Longest life and best performance can be obtained if the
battery pack is charged when the air temperature is
between (18°- 24°C). DO NOT charge the battery pack in
an air temperature below (+4.5°C), or above (+40.5°C).
This is important and will prevent serious damage to the
battery pack.
• The charger and battery pack may become warm to touch
while charging. This is a normal condition, and does not
indicate a problem. To facilitate the cooling of the battery
pack after use, avoid placing the charger or battery pack in
a warm environment such as in a metal shed, or an
uninsulated trailer.
• If the battery pack does not charge properly:
- Check current at receptacle by plugging in a lamp or other
appliance.
- Check to see if receptacle is connected to a light switch
which turns power off when you turn out the lights.
- Move charger and battery pack to a location where the
surrounding air temperature is approximately (18°- 24°C).
If charging problems persist, take the tool, battery pack and
charger to your local Stanley service center.
• The battery pack should be recharged when it fails to
produce sufficient power on jobs which were easily done
previously.
• DO NOT CONTINUE to use under these conditions. Follow
the charging procedure.
• You may also charge a partially used pack whenever you
desire with no adverse affect on the battery pack.
NOTE: Make sure your battery pack (6) is fully charged.
To install the battery pack into the tool - figure A
• Align the battery pack with the rails inside the handle.
• Slide it firmly into place until you hear the lock snap into
place.
To remove the battery pack from the tool - figure B
• Press the battery release button (7) and firmly pull the
battery pack out of the tool handle.
• Insert battery pack into the charger as described in the
charger section of this manual.
7
Page 8

ENGLISH (Original instructions)
To remove the battery pack from the tool - figure B
• Press the battery release button (7) and firmly pull the
battery pack out of the tool handle.
• Insert battery pack into the charger as described in the
charger section of this manual.
USE
Trigger switch & forward/reverse button - figure C
• The drill is turned ON and OFF by pulling and releasing the
trigger switch (1) shown in figure C.
The farther the trigger is depressed, the higher the speed of
the drill.
• A forward/reverse control button (2) determines the
rotational direction of the tool and also serves as a lock off
button.
• To select forward rotation, release the trigger switch and
depress the forward/reverse control button on the right side
of the tool.
• To select reverse, depress the forward/reverse control
button on the left side of the tool.
• The center position of the control button locks the tool in the
off position. When changing the position of the control
button, be sure the trigger is released.
USE
Adjusting torque control - figure D
This tool is fitted with a torque adjustment collar (3) to select the
operating mode and to set the torque for tightening screws.
Large screws and hard workpiece materials require a higher
torque setting than small screws and soft workpiece materials.
• For drilling in wood, metal and plastics, set the collar to the
drilling position symbol.
• For screwdriving, set the collar to the desired setting. If you
do not yet know the appropriate setting, proceed as follows:
• Set the collar to the lowest torque setting.
• Tighten the first screw.
• If the clutch ratchets before the desired result is achieved,
increase the collar setting and continue tightening the
screw.
• Repeat until you reach the correct setting.
• Use this setting for the remaining screws.
Dual range switch - figure E
The dual range feature of your drill allows you to shift gears for
greater versatility.
• To select low speed, high torque setting (position1), turn
tool off and permit to stop. Slide gear shifter button (4)
away from the chuck.
• To select the high speed, low torque setting (position 2),
turn tool off and permit to stop. Slide gear shifter button
back toward the chuck.
Note: Do not change gears when tool is running. If you are
having trouble changing gears, make sure that the dual range
gear button is either completely pushed forward or completely
pushed back.
8
Keyless chuck - figure F
Warning! Make certain the battery pack is removed to prevent
tool actuation before installing or removing accessories.
To insert a drill bit or other accessory:
• Grasp the chuck (5) and rotate it in the counterclockwise
direction, as viewed from the chuck end.
• Insert the bit or other accessory fully into the chuck, and
tighten securely by rotating the chuck in the clockwise
direction as viewed from the chuck end.
Warning! Do not attempt to tighten or loosen drill bits (or any
other accessory) by gripping the front part of the chuck and
turning the tool on. Damage to the chuck and personal injury
may occur when changing accessories.
Screw driving
• For driving fasteners, the forward/reverse button should be
pushed to the left.
• Use reverse (button pushed to the right) for removing
fasteners.
Note: When moving from forward to reverse, or vice versa,
always release the trigger switch first.
Drilling
• Use sharp drill bits only.
• Support and secure work properly, as instructed in the
Safety Instructions.
• Use appropriate and required safety equipment, as
instructed in the Safety Instructions.
• Secure and maintain work area, as instructed in the Safety
Instructions.
• Run the drill very slowly, using light pressure, until the hole
is started enough to keep the drill bit from slipping out of it.
• Apply pressure in a straight line with the bit. Use enough
pressure to keep the bit biting but not so much as to stall
the motor or deflect the bit.
• Hold the drill firmly with two hands, one hand on the handle,
and the other gripping the bottom around the battery area
or the auxiliary handle if provided.
• DO NOT CLICK THE TRIGGER OF A STALLED DRILL
OFF AND ON IN AN ATTEMPT TO START IT. DAMAGE
TO THE DRILL CAN RESULT.
• Minimize stalling on breakthrough by reducing pressure
and slowly drilling through the last part of the hole.
• Keep the motor running while pulling the bit out of a drilled
hole. This will help reduce jamming.
• Make sure switch turns drill on and off.
Drilling in wood
Holes in wood can be made with the same twist drill bits used
for metal or with spade bits.
These bits should be sharp and should be pulled out frequently
when drilling to clear chips from the flutes.
Drilling in metal
Use a cutting lubricant when drilling metals. The exceptions are
cast iron and brass which should be drilled dry. The cutting
lubricants that work best are sulphurized cutting oil.
Page 9
(Original instructions) ENGLISH
LED work light
When drill is activated by pulling the trigger switch (1), the
integrated LED work light (8)will automatically illuminate the
work area.
Note: The work light is for lighting the immediate work surface
and is not intended to be used as a flashlight.
Bit tip holder
A bit storage slot (9) is built into the base of the tool.
Troubleshooting
Problem Possible cause Possible solution
Unit will not start. Battery pack not
Unit starts immedi-
ately upon inserting
battery
Battery pack will not
charge.
Unit shuts off
abruptly.
installed properly.
Battery pack not
charged.
The switch has
been left in the “on”
position.
Battery pack not
inserted into charger.
Charger not plugged
in.
Surrounding air
temperature too hot or
too cold.
Battery pack has
reached its maximum
thermal limit.
Out of charge. (To
maximize the life of
the battery pack it is
designed to shutoff
abruptly when the
charge is depleted
Check battery pack
installation.
Check battery pack charging requirements
The switch must be
moved to “off” to prevent
the tool from immediately
starting when battery is
inserted.
Insert battery pack into
charger until LED lights.
Plug charger into a work-
ing outlet.
Move charger and battery
pack to a surrounding air
temperature of above 40
degrees F (45ºC) or below
105 degrees F (+40.5ºC)
Allow battery pack to cool
down.
Place on charger
and allow to charge.
MAINTENANCE
Your Stanley tool has been designed to operate over a long
period of time with a minimum of maintenance. Continuous
satisfactory operation depends upon proper tool care and
regular cleaning.
Your charger does not require any maintenance apart from
regular cleaning.
Warning! Before performing any maintenance on the tool,
remove the battery from the tool. Unplug the charger before
cleaning it.
• Regularly clean the ventilation slots in your tool and
charger using a soft brush or dry cloth.
• Regularly clean the motor housing using a damp cloth. Do
not use any abrasive or solvent-based cleaner.
• Regularly open the chuck and tap it to remove any dust
from the interior.
Should you find one day that your STANLEY product needs
replacement, or if it is of no further use to you, do not dispose
of it with household waste. Make this product available for
separate collection.
STANLEY provides a facility for the collection and
recycling of STANLEY products once they have
reached the end of their working life. To take
advantage of this service please return your product to any
authorised repair agent who will collect them on our behalf.
You can check the location of your nearest authorised repair
agent by contacting your local STANLEY office at the address
indicated in this manual. Alternatively, a list of authorised
STANLEY repair agents and full details of our after-sales
service and contacts are available on the Internet at:
www.2helpU.com.
Batteries
STANLEY batteries can be recharged many times.
At the end of their useful life, discard batteries with
due care for our environment:
• Run the battery down completely, then remove it from the
tool.
• NiCd, NiMH and Li-Ion batteries are recyclable. Take them
to any authorized repair agent or a local recycling station.
Notes
STANLEY’s policy is one of continuous improvement to our
products and as such, we reserve the right to change product
specifications without prior notice. Standard equipment and
accessories may vary by country. Product specifications may
differ by country.
Complete product range may not be available in all countries.
Contact your local STANLEY dealers for range availability
TECHNICAL DATA
SBD20
Voltage VDC 18V
No-load speed Min-1 0-430/0-1700
Max. torque Nm 55
Chuck capacity mm 13
Max Drilling capacity
Steel/wood mm 13/35
Weight kg 1.5
PROTECTING THE ENVIRONMENT
Separate collection. This product must not be
disposed of with normal household waste.
9
Page 10
ENGLISH (Original instructions)
Charger SC201 SC202
Input voltage VAC 220-240 220-240
Output voltage VDC 18 18
Current mA 1000 2000
Approx. charge time Mins 80-240 40-120
Battery SB20C SB20S SB20D SB20M
Voltage VAC 18 18 18 18
Capacity Ah 1.3 1.5 2.0 4.0
Type Li-Ion Li-Ion Li-Ion Li-Ion
Level of sound pressure according to EN 60745:
Sound pressure (LpA) 72 dB(A), uncertainty (K) 3 dB(A)
Sound power (LWA) 83 dB(A), uncertainty (K) 3 dB(A)
Vibration total values (triax vector sum) according to EN 60745:
Drilling into metal (a
Screwdriving without impact (ah) 1.0 m/s2, uncertainty (K) 1.5 m/s
) 1.7 m/s2, uncertainty (K) 1.5 m/s
h, D
2
2
Vibration
The declared vibration emission values stated in the technical
data and the declaration of conformity have been measured in
accordance with a standard test method provided by EN 60745
and may be used for comparing one tool with another. The
declared vibration emission value may also be used in a
preliminary assessment of exposure.
Warning! The vibration emission value during actual use of the
power tool can differ from the declared value depending on the
ways in which the tool is used. The vibration level may increase
above the level stated.
When assessing vibration exposure to determine safety
measures required by 2002/44/EC to protect persons regularly
using power tools in employment, an estimation of vibration
exposure should consider, the actual conditions of use and the
way the tool is used, including taking account of all parts of the
operating cycle such as the times when the tool is switched off
and when it is running idle in addition to the trigger time.
SERVICE INFORMATION
STANLEY offers a full network of company-owned and
authorized service locations. All STANLEY Service Centers are
staffed with trained personnel to provide customers with
efficient and reliable power tool service. For more information
about our authorized service centers and if you need technical
advice, repair, or genuine factory replacement parts, contact
the STANLEY location nearest you.
EC declaration of conformity
MACHINERY DIRECTIVE
SBD20- Drill / Screwdriver
STANLEY declares that these products described under
"technical data" are in compliance with: 2006/42/EC, EN
60745-1:2009 + A11:2010, EN 60745-2-1:2010
These products also comply with Directive 2014/30/EU and
2011/65/EU. For more information, please contact STANLEY
at the following address or refer to the back of the manual.
The undersigned is responsible for compilation of the
technical file and makes this declaration on behalf of
STANLEY.
R.Laverick
Engineering Manager
STANLEY , Europe, Egide Walschaertsstraat14-18,
2800 Mechelen, Belgium
01.2017
TWO YEAR WARRANTY
If your STANLEY product becomes defective due to faulty
materials or workmanship within 24 months from the date of
purchase, STANLEY guarantees to replace all defective parts
free of charge or – at our discretion – replace the unit free of
charge provided that:
• The product has not been misused and has been used in
accordance with the instruction manual;
• The product has been subject to fair wear and tear;
• Repairs have not been attempted by unauthorized
persons;
• Proof of purchase is produced.
• The STANLEY product is returned complete with all original
components
• The product hasn’t been used for hire purposes
If you wish to make a claim, contact your seller or check the
location of your nearest authorised STANLEY repair agent in
the STANLEY catalogue or contact your local STANLEY office
at the address indicated in this manual. A list of authorised
STANLEY repair agents and full details of our after sales
service is available on the internet at: www.2helpU.com
10
Page 11
(Çevirisi orijinal talimatlardan yapılmıştır) TÜRKÇE
Kullanım amacı
Stanley SBD20 matkap/tornavidanız vida takma/sökme
uygulamaları ve ahşap, metal ve plastik delme işlemleri için
tasarlanmıştır. Bu alet profesyonel kullanım içindir.
GÜVENLİK TALİMATLARI
Genel elektrikli alet güvenlik uyarıları
Uyarı! Bütün güvenlik uyarılarını ve
talimatlarını mutlaka okuyun. Aşağıda yer alan
uyarılar ve talimatların herhangi birisine
uyulmaması elektrik çarpması, yangın ve/veya
ciddi yaralanma riskine neden olabilir.
Bütün uyarı ve güvenlik talimatlarını ileride bakmak
üzere saklayın. Aşağıda yer alan uyarılardaki «elektrikli alet»
terimi şebeke elektriğiyle (kablolu) veya akü/pille (şarjlı)
çalışan elektrikli aletinizi ifade etmektedir.
1. Çalışma alanının güvenliği
a. Çalışma alanını temiz ve aydınlık tutun. Karışık veya
karanlık alanlar kazaya davetiye çıkartır.
b. Elektrikli aletleri, yanıcı sıvılar, gazlar ve tozların
bulunduğu yerler gibi yanıcı ortamlarda
çalıştırmayın. Elektrikli aletler, toz veya dumanları
ateşleyebilecek kıvılcımlar çıkartır.
c. Bir elektrikli aleti çalıştırırken çocuklardan ve
etraftaki kişilerden uzak tutun. Dikkatinizi dağıtıcı
şeyler kontrolü kaybetmenize neden olabilir.
2. Elektrik güvenliği
a. Elektrikli aletlerin şleri prizlere uygun olmalıdır. Fiş
üzerinde kesinlikle hiçbir değişiklik yapmayın.
Topraklı elektrikli aletlerde hiçbir adaptör şi
kullanmayın. Değiştirilmemiş şler ve uygun prizler
elektrik çarpması riskini azaltacaktır.
b. Borular, radyatörler, ocaklar ve buzdolapları gibi
topraklanmamış yüzeylerle vücut temasından
kaçının. Vücudunuzun topraklanması halinde yüksek bir
elektrik çarpması riski vardır.
c. Elektrikli aletleri yağmura maruz bırakmayın veya
ıslatmayın. Elektrikli alete su girmesi elektrik çarpması
riskini arttıracaktır.
d. Elektrik kablosunu uygun olmayan amaçlarla
kullanmayın. Elektrikli aleti kesinlikle kablosundan
tutarak taşımayın, çekmeyin veya prizden
çıkartmayın. Kabloyu sıcaktan, yağdan, keskin
kenarlardan veya hareketli parçalardan uzak tutun.
Hasarlı veya dolaşmış kablolar elektrik çarpması riskini
arttırır.
e. Elektrikli bir aleti açık havada çalıştırıyorsanız, açık
havada kullanıma uygun bir uzatma kablosu
kullanın. Açık havada kullanıma uygun bir kablonun
kullanılması elektrik çarpması riskini azaltır.
f. Eğer bir elektrikli aletin nemli bir bölgede
çalıştırılması zorunluysa, bir artık akım aygıtı (RCD)
korumalı bir kaynak kullanın. Bir RCD kullanılması
elektrik şoku riskini azaltır.
3. Kişisel güvenlik
a. Elektrikli bir aleti kullanırken her zaman dikkatli olun,
yaptığınız işe yoğunlaşın ve sağduyulu davranın.
Elektrikli bir aleti yorgunken veya ilaç ya da alkolün
etkisi altındayken kullanmayın. Elektrikli aletleri
kullanırken bir anlık dikkatsizlik ciddi kişisel yaralanmayla
sonuçlanabilir.
b. Kişisel koruyucu ekipmanları mutlaka kullanın.
Daima koruyucu gözlük takın. Koşullara uygun toz
maskesi, kaymayan güvenlik ayakkabıları, baret veya
kulaklık gibi koruyucu donanımların kullanılması kişisel
yaralanmaları azaltacaktır.
c. İstem dışı çalıştırılmasını önleyin. Aleti güç kaynağına
ve/veya aküye bağlamadan, yerden kaldırmadan
veya taşımadan önce açma/kapama düğmesinin
kapalı konumda olduğundan emin olun. Aleti,
parmağınız tetik üzerinde bulunacak şekilde taşımak
veya açık konumdaki elektrikli aletleri elektrik şebekesine
bağlamak kazaya davetiye çıkartır.
d. Elektrikli aleti açmadan önce tüm ayarlama
anahtarlarını çıkartın. Elektrikli aletin hareketli bir
parçasına takılı kalmış bir anahtar kişisel yaralanmaya
neden olabilir.
e. Ulaşmakta zorlandığınız yerlerde kullanmayın.
Daima sağlam ve dengeli basın. Bu, beklenmedik
durumlarda elektrikli aletin daha iyi kontrol edilmesine
olanak tanır.
f. Uygun şekilde giyinin. Bol elbiseler giymeyin ve takı
takmayın. Saçınızı, elbiselerinizi ve eldivenlerinizi
hareketli parçalardan uzak tutun. Bol elbiseler ve
takılar veya uzun saç hareketli parçalara takılabilir.
g. Eğer kullandığınız üründe toz emme ve toplama
özellikleri olan ataşmanlar varsa bunların bağlı
olduğundan ve doğru şekilde kullanıldığından emin
olun. Bu toz toplama ataşmanların kullanılması tozla ilgili
tehlikeleri azaltabilir.
4. Elektrikli aletlerin kullanımı ve bakımı
a. Elektrikli aleti zorlamayın. Uygulamanız için doğru
elektrikli aleti kullanın. Doğru elektrikli alet,
belirlendiği kapasite ayarında kullanıldığında daha iyi ve
güvenli çalışacaktır.
b. Tetik açmıyor ve kapatmıyorsa elektrikli aleti
kullanmayın. Tetikle kontrol edilemeyen tüm elektrikli
aletler tehlikelidir ve tamir edilmesi gerekmektedir.
c. Herhangi bir ayarlama, aksesuar değişimi veya
elektrikli aletlerin saklanması öncesinde şi güç
kaynağından çekin ve/veya aküyü elektrikli aletten
ayırın. Bu tür önleyici güvenlik tedbirleri aletin istem dışı
olarak çalıştırılması riskini azaltacaktır.
11
Page 12

TÜRKÇE
(Çevirisi orijinal talimatlardan yapılmıştır)
d. Elektrikli aleti, çocukların ulaşamayacağı yerlerde
saklayın ve elektrikli aleti tanımayan veya bu
talimatları bilmeyen kişilerin elektrikli aleti
kullanmasına izin vermeyin. Elektrikli aletler, eğitimsiz
kullanıcıların elinde tehlikelidir.
e. Elektrikli aletleri iyi durumda muhafaza edin.
Hareketli parçalardaki hizalama hatalarını ve
tutuklukları, parçalardaki kırılmalar ve elektrikli
aletin çalışmasını etkileyebilecek tüm diğer koşulları
kontrol edin. Hasarlı ise, elektrikli aleti kullanmadan
önce tamir ettirin. Kazaların çoğu, elektrikli aletlerin
bakımının yeterli şekilde yapılmamasından kaynaklanır.
f. Kesim aletlerini keskin ve temiz tutun. Bakımı uygun
şekilde yapılmış keskin kesim uçlu kesim aletlerinin
sıkışma ihtimali daha düşüktür ve kontrol edilmesi daha
kolaydır.
g. Elektrikli aleti, aksesuarlarını ve aletin diğer
parçalarını kullanırken bu talimatlara mutlaka uyun
ve çalışma ortamının koşullarını ve yapılacak işin ne
olduğunu göz önünde bulundurun. Elektrikli aletin
öngörülen işlemler dışındaki işlemler için kullanılması
tehlikeli durumlara neden olabilir.
5. Akü/pille çalışan aletin kullanımı ve bakımı
a. Sadece üretici tarafından belirtilen şarj cihazı ile şarj
edin. Bir akü tipine uygun bir şarj cihazı başka tipte bir
aküyü şarj etmek için kullanıldığında yangın riski yaratabilir.
b. Elektrikli aletleri yalnızca özel olarak tanımlanmış
akülerle kullanın. Başka bir akünün kullanılması
yaralanma veya yangın riskine yol açabilir.
c. Akü kullanımda değilken, ataç, bozuk para, anahtar,
çivi, vida veya terminaller arasında kontağa neden
olabilecek diğer küçük metal nesnelerden uzak
tutulmalıdır. Akü terminallerinin birbirine kısa devre
yapılması yanıklara veya yangına neden olabilir.
d. Sıra dışı koşullarda sıvı aküden dışarı akabilir,
temastan kaçının. Yanlışlıkla cilde temas edilirse su ile
yıkayın. Gözle temas durumunda ayrıca doktora
başvurun. Aküden sıvı akması ciltte tahriş veya yanmaya
neden olabilir.
6. Servis
a. Elektrikli aletinizi, sadece orijinal yedek parçaların
kullanıldığı yetkili servise tamir ettirin. Bu, elektrikli
aletin güvenliğinin muhafaza edilmesini sağlayacaktır.
ELEKTRİKLİ EL ALETLERİ İÇİN EK GÜVENLİK
TALİMATLARI
Uyarı! Matkaplar/tornavidalar için ek güvenlik
talimatları
• Darbeli matkap ile çalışırken kulaklık takın. Yüksek
sese maruz kalmak işitme kaybına yol açabilir.
• Aletle birlikte verilmiş olan yardımcı tutma kollarını
kullanın. Kontrol kaybı kişisel yaralanmalara neden
olabilir.
• Kesme aksesuarının gizli kablolara temas edebileceği
yerlerde çalışma yaparken elektrikli aleti yalıtımlı
kavrama yüzeylerinden tutun. Kesme aksesuarının
«akım taşıyan» bir kabloya temas etmesi durumunda
elektrikli aletin metal kısımları da «akım taşır» hale
gelecek ve kullanıcının elektrik çarpılmasına neden
olabilir.
• Bağlantı parçasının gizli kablolara temas edebileceği
yerlerde çalışma yaparken elektrikli aleti yalıtımlı
kavrama yüzeylerinden tutun. Bağlantı parçalarının
«akım taşıyan» bir kabloya temas etmesi durumunda
elektrikli aletin metal kısımları da «akım taşır» hale
gelecek ve kullanıcının elektrik çarpılmasına neden
olabilir.
• Üzerinde çalıştığınız parçayı sabitlemek ve destekle-
mek için kelepçeler veya başka pratik yöntemler
kullanın. Parçayı elle veya vücudunuza dayamanız
dengesiz durmasına neden olacaktır ve aletin kontrolünü
kaybetmenize yol açabilir.
• Duvar, zemin veya tavanda delik açmadan önce kablo ve
boruların konumunu kontrol edin.
• Delme işleminin hemen ardından matkap ucuna
dokunmaktan kaçının; sıcak olabilir.
• Kullanım amacı bu kullanım kılavuzunda açıklanmıştır.
Herhangi bir aksesuarın veya bağlantının ya da işlemin,
bu kılavuzda tavsiye edilen şekilden başka bir şekilde
kullanılması şahısların yaralanmalarına ve/veya mal
kaybına yol açabilir.
DİĞER KİŞİLERİN GÜVENLİĞİ
• Bu alet ziksel ve zihinsel kapasitesinin yanı sıra algılama
gücü azalmış olan veya yeterince deneyim ve bilgisi
bulunmayan kişiler (çocuklar dahil) tarafından
kullanılmak üzere üretilmemiştir. Bu tür kişiler aleti ancak
güvenliklerinden sorumlu bir kişi tarafından cihazın
kullanımıyla ilgili talimatların verilmesi veya sürekli
kontrol altında tutulması durumunda kullanabilir.
• Çocuklar, aletle oynamalarını önlemek amacıyla kontrol
altında tutulmalıdır.
Diğer tehlikeler
Aletin kullanımıyla ilgili ekte sunulan güvenlik uyarılarına
dahil olmayan ilave kalıcı riskler ortaya çıkabilir. Bu riskler,
hatalı, uzun süreli kullanım vb. dolayısıyla ortaya çıkabilir.
Emniyet tedbirlerini düzenleyen yönetmeliğin
uygulanmasına ve emniyet sağlayıcı aygıtların kullanılmasına
rağmen, başka belirli risklerden kaçınılamaz. Bunlar:
• Aletin dönen ve hareket eden parç alarına dokunma
sonucu ortaya çıkan yaralanmalar.
• Herhangi bir parçayı, bıçak veya aksesuarı değiştirirken
ortaya çıkan yaralanmalar.
12
Page 13

• Aletin uzun süreli kullanılması sonucu ortaya çıkan
yaralanmalar. Herhangi bir aleti uzun sürelerle
kullanacaksanız düzenli olarak çalışmanıza ara verin.
• Duyma bozukluğu.
• Aleti kullanırken ortaya çıkan tozun solunması sonucu
ortaya çıkan sağlık sorunları (örnek: ahşapta çalışırken,
özellikle meşe, akgürgen ve MDF).
ALET ÜZERİNDEKİ ETİKETLER
Aletin etiketinde tarih kodu ile birlikte aşağıdaki semboller
bulunabilir:
Uyarı! Yaralanma riskini en aza indirmek için
kullanıcı kullanım talimatlarını mutlaka okumalıdır.
Daima koruyucu gözlük takın
Daima koruyucu kulaklık takın
Tarih kodu konumu
İmalat yılını da içeren Tarih Kodu gövdeye basılıdır.
Örnek:
2017 XX JN
İmalat Yılı
Aküler ve şarj cihazları için ek güvenlik talimatları
Aküler
• Kesinlikle, hiçbir nedenle açmaya çalışmayın.
• Aküyü suya batırmayın.
• Sıcaklığın 40 °C’yi aşabileceği yerlerde saklamayın.
• Sadece 10 °C ila 40 °C arasındaki ortam sıcaklıklarında şarj
edin.
• Sadece aletle birlikte verilen şarj cihazını kullanarak şarj
edin.
• Aküleri atarken, «Çevrenin korunması» başlıklı bölümdeki
talimatlara uyun.
Hasarlı aküleri şarj etmeyi çalışmayın.
Şarj cihazları
• Stanley şarj cihazınızı, yalnızca aletle birlikte verilen aküyü
şarj etmek için kullanın. Diğer aküler patlayarak
yaralanmanıza veya hasar meydana gelmesine yol
açabilir.
• Şarj edilme özelliği olmayan aküleri kesinlikle şarj etmeye
çalışmayın.
• Hasarlı kabloların hemen değiştirilmesini sağlayın.
• Şarj cihazını suya batırmayın.
• Şarj cihazını açmayın.
(Çevirisi orijinal talimatlardan yapılmıştır) TÜRKÇE
• Şarj cihazını delmeyin.
Şarj cihazı, yalnızca kapalı alanda kullanım içindir.
Aletle çalışmaya başlamadan önce bu kılavuzu
okuyun.
Elektrik güvenliği
Şarj cihazınız çift yalıtımlıdır. Bu yüzden hiçbir
topraklama kablosuna gerek yoktur. Her zaman
şebeke geriliminin aletin üretim etiketinde
belirlenmiş değerlere uyup uymadığını kontrol
edin. Şarj cihazını kesinlikle normal bir elektrik şi
ile değiştirmeye kalkışmayın.
• Elektrik kablosu hasarlı ise, bir tehlike oluşmasını
önlemek için üretici ya da yetkili Stanley Servis Merkezi
tarafından değiştirilmelidir.
ÖZELLİKLER
Bu alet, aşağıdaki özelliklerin bir kısmını veya tümünü
içermektedir.
1. Açma/kapama tetiği
2. İleri/geri kontrol düğmesi
3. Tork ayarlama bileziği
4. Vites mandalı
5. Anahtarsız mandren
6. Akü
7. Akü çıkartma düğmesi
8. LED aydınlatma
9. Matkap/tornavida ucu yuvası
Kullanım
Uyarı! Aletin kendi hızında çalışmasına izin verin. Aşırı
yüklenmeyin.
AKÜNÜN ŞARJ EDİLMESİ
Akünün, ilk kullanımdan önce ve daha önce kolayca yapılan
işler için yeterli güç üretemediği hallerde şarj edilmesi
gereklidir. Akü, şarj sırasında ısınabilir; bu normal bir
durumdur ve bir sorun olduğuna işaret etmez.
Uyarı! Ortam sıcaklığı 10 °C’den düşük veya 40 °C’den
yüksekse aküyü şarj etmeyin. Tavsiye edilen şarj sıcaklığı:
yaklaşık 24 °C.
Not: Pil hücre ısısı yaklaşık olarak 10 °C altında veya 40 °C
üzerindeyse şarj cihazı aküyü şarj etmeyecektir.
Akü şarj cihazında bırakılmalıdır. Şarj cihazı pil hücresi ısısı
yukarı çıktığında veya aşağı indiğinde otomatik olarak şarj
işlemine başlayacaktır.
• Aküyü takmadan önce, şarj cihazının şini uygun prize
takın.
• Aküyü şarj cihazına takın.
13
Page 14

TÜRKÇE
(Çevirisi orijinal talimatlardan yapılmıştır)
Akü şarj olurken yeşil LED ışık yanıp
sönecektir.
Yeşil LED ışığın sürekli açık kalması, şarjın
tamamlandığını gösterir. Akü tamamen
şarj olmuştur ve hemen kullanılabilir veya
şarj cihazında bırakılabilir.
Uyarı! Boşalmış aküleri, kullanımdan sonra mümkün olan en
kısa sürede şarj edin aksi taktirde akü ömrü önemli ölçüde
azalacaktır.
Şarj cihazı hata tanıma sistemi
Bu şarj cihazı akü veya güç kaynağı ile ortaya çıkabilecek
bazı problemleri tespit etmek için tasarlanmıştır. Problemler
LED ışığın farklı yanıp sönme aralıkları tarafından gösterilir.
Hasarlı akü
Şarj cihazı akünün zayıf veya hasarlı
olduğunu tespit edebilir. Kırmızı LED ışığı,
etikette gösterilen aralıkla yanıp
sönecektir. Hasarlı aküyü tespit eden
yanıp sönme aralığını görünce aküyü şarj
etmeye devam etmeyin. Aküyü geri
dönüşüm için servis veya toplama
merkezine getirin.
Sıcak/soğuk akü gecikmesi
Şarj cihazı bir akünün aşırı sıcak veya aşırı
soğuk olduğunu tespit ederse, otomatik
olarak Sıcak/Soğuk Akü Gecikmesini
başlatır ve akü uygun sıcaklığa ulaşana
kadar şarj işlemini durdurur. Şarj cihazı
bundan sonra otomatik olarak şarj
moduna geçer. Bu özellik maksimum akü
ömrü sağlamaktadır. Sıcak/Soğuk Akü
Gecikmesi tespit edilirse kırmızı LED ışığı,
etikette gösterilen aralıkla yanıp
sönecektir.
Elektrik hattında bir sorun var
Şarj cihazı, jeneratörler veya DC'yi AC'ye
dönüştüren kaynaklar gibi bazı taşınabilir
güç kaynakları ile kullanıldığında, şarj
cihazı işlemi geçici olarak durabilir. LED
ışığı, etikette gösterilen aralıkla yanıp
sönecektir. Bu, güç kaynağının sınırların
dışında olduğunu gösterir.
Aküyü şarj cihazında bırakma
Şarj cihazı ve akü sürekli bağlı olarak, LED ışığı yanarak
prizde bırakılabilir. Şarj cihazı aküyü sürekli tam şarjda
tutacaktır.
Sadece Li-Ion Aküler
Li-Ion aküler, aküyü aşırı yük, aşırı ısınma veya derin deşarja
karşı koruyan Elektronik Koruma Sistemli olarak
tasarlanmışlardır. Elektronik Koruma Sisteminin devreye
14
girmesi durumunda alet otomatik olarak kapanır. Bu
durumla karşılaşırsanız Li-Ion aküyü şarj cihazına yerleştirin
ve tam olarak şarj olmasını bekleyin.
ÖNEMLİ ŞARJ ETME NOTLARI
• En uzun akü ömrü ve en iyi akü performansı, akünün 18º
- 24°C sıcaklıkta şarj edilmesiyle sağlanır. Sadece +4,5°C
ila +40,5 °C arasındaki ortam sıcaklıklarında şarj edin. Bu
önemlidir ve aküye ciddi bir zararın verilmesini önler.
• Şarj sırasında şarj cihazı ve akü haf bir ses çıkartabilir. Bu
normal bir durumdur ve bir sorun olduğuna işaret etmez.
Kullandıktan sonra akünün soğumasını mümkün kılmak
için şarj cihazı veya aküyü bir metal depo veya yalıtımsız
bir römork gibi sıcak bir ortama koymayın.
• Akü düzgün bir şekilde şarj edilmiyorsa:
- Prize bir lamba veya başka bir cihaz takarak akımı kontrol
edin.
- Prizin gücü açıp kapayan bir açma/kapama düğmesine
(duy) bağlı olup olmadığını kontrol edin.
- Şarj cihazını ve aküyü 18 °C ila 24 °C arasındaki ortam
sıcaklığına getirin. Sorun devam ederse aleti, şarj cihazını
ve aküyü yerel Stanley servis merkezine getirin.
• Akü, daha önce kolayca yapılan işlerde yeterince güç
üretemeyecek duruma geldiğinde şarj edilmelidir.
• Bu şartlar altında aküyü kullanmaya DEVAM ETMEYİN.
Şarj işlemlerini uygulayın.
• Ayrıca aküye herhangi bir olumsuz etkisi olmadan,
kısmen kullanılmış olan aküyü istediğiniz zaman şarj
edebilirsiniz.
Akünün alete takılması ve çıkartılması
Uyarı! Açma/kapama tetiğinin çalışmasını önlemek için
aküyü takıp çıkarmadan önce, aletin tetik kilidi düğmesinin
basılı olduğundan emin olun.
NOT: Akünün (6) tamamen şarjlı olduğundan emin olun.
Aküyü alete takma - şekil A
1. Aküyü kolun içindeki raylarla hizalayın.
2. Kilidin yerine oturduğunu duyana kadar yerine doğru
sıkıca kaydırın.
Aküyü aletten çıkartma - şekil B
1. Serbest bırakma düğmesine (7) basın ve aküyü sıkıca
çekerek aletin kolundan çıkarın.
2. Aküyü bu kılavuzun şarj cihazı kısmında açıklandığı gibi
şarj cihazına takın.
KULLANIM
Açma/kapama tetiği ve ileri/geri kontrol düğmesi Şekil C
• Alet, Şekil C’ de gösterildiği gibi açma/kapama tetiğine
(1) basarak ve tetiğini bırakarak AÇIK ve KAPALI konuma
getirilir.
• Tetiğe daha fazla basıldığında matkap daha hızlı çalışır.
• İleri/geri kontrol düğmesi (2) aletin çalışma yönünü
belirler ve ayrıca çalışmayı önleyen bir kilit görevi görür.
Page 15

• İleri dönmeyi seçmek için tetik düğmesini bırakın ve
aletin sağ tarafındaki ileri/geri kontrol düğmesine basın.
• Geri dönmeyi seçmek için aletin sol tarafındaki ileri/geri
kontrol düğmesine basın.
• İleri/geri kontrol düğmesi orta konumundayken aleti
kapalı konumda kilitler. İleri/geri kontrol düğmesinin
yerini değiştirirken tetiğin serbest bırakıldığından emin
olun.
Tork kontrolünün ayarlanması - Şekil D
Bu alet, çalışma modunun seçilmesi ve vida sıkma torkunun
ayarlanması için bir tork ayarlama bileziği (3) ile
donatılmıştır. Büyük vidalar ve üzerinde çalışılan sert
malzemeler küçük vidalara ve yumuşak malzemelere göre
daha yüksek bir tork ayarı gerektirir.
• Ahşap, metal ve plastik delme işlemleri için bileziği
delme konumu sembolüne getirin.
• Vida takma ve sökme işlemleri için bileziği istediğiniz
konuma getirin. Henüz uygun ayarı bilmiyorsanız,
aşağıda belirtildiği şekilde ilerleyin:
• Bileziği en düşük tork ayarına getirin.
• Ardından ilk vidayı sıkın.
• Kavrama istenen sonuç elde edilmeden düşerse, bilezik
ayarını yükselin ve vidayı sıkmaya devam edin.
• Doğru ayara ulaşana kadar tekrarlayın.
• Kalan vidalar için de bu ayarı kullanın.
Vites mandalı - Şekil E
Aletiniz iki hızlı vites kutusu özelliği ile çok amaçlı kullanım
için vitesler arasında geçiş yapmanızı sağlar.
• Düşük vitesi (yüksek tork ayarı, konum 1) seçmek için
aleti kapatın ve durmasını bekleyin. Vites mandalını (4)
mandrenden uzağa kaydırın.
• Yüksek vitesi (düşük tork ayarı, konum 2) seçmek için
aleti kapatın ve durmasını bekleyin. Vites mandalını
mandrene doğru kaydırın.
Not: Alet çalışırken vites değiştirmeyin. Vites değiştirirken
sorun yaşıyorsanız vites mandalının tamamen ileri veya
tamamen geri itildiğinden emin olun.
Anahtarsız mandren - Şekil F
Uyarı! Aletin çalışmasını önlemek için aksesuarları takıp
çıkarmadan önce, akünün aletten çıkarıldığından emin olun.
Matkap ucu veya diğer aksesuarların takılması:
• Mandrenin arka kısmından göründüğü şekliyle,
mandreni (5) tutun ve saatin ters yönünde çevirin.
• Ucu mandrene sonuna kadar sokun ve mandrenin arka
kısmından göründüğü şekliyle, mandreni çevirerek
sağlam bir şekilde sıkın.
Uyarı! Mandrenin ön kısmını tutarak ve aleti çalıştırarak
matkap uçları (veya başka bir aksesuarı) sıkmaya veya
gevşetmeye kalkışmayın. Aksesuar değiştirme sırasında
mandrenin zarar görmesine ve kişisel yaralanmaya neden
olabilir.
(Çevirisi orijinal talimatlardan yapılmıştır) TÜRKÇE
Vidalama
• Vidaları sıkmak için ileri/geri kontrol düğmesini sola itin.
• Vidaları sökmek için geri dönmeyi kullanın (düğmeyi
sağa iterek).
Not: Dönme yönü değiştirirken daima ilk önce
açma/kapama tetiğini bırakın.
Delme
• Yalnızca keskin matkap uçlarını kullanın.
• Güvenlik talimatlarında belirtildiği gibi çalışılan parçayı
düzgün bir şekilde destekleyin.
• Güvenlik talimatlarında belirtildiği gibi uygun ve gerekli
koruyucu ekipmanlarını kullanın.
• Güvenlik talimatlarında belirtildiği gibi çalışma alanını
destekleyin ve bakımlı tutun.
• Delik matkap ucu dışarı kaymayacak kadar yeterli
boyutuna ulaşınca matkabı, haf bir baskı uygulayarak
çok yavaş çalıştırın.
• Matkap ucuna düz bir çizgide haf bir baskı uygulayın.
Uca yeterli bir baskı uygulayın, ama motor duracak ya da
uç sekecek kadar değil.
• Bir el ana kolun, diğer el akü alt kısmını veya eğer varsa
yan tutma kolun üzerinde olacak şekilde matkabı iki
elinizle sıkıca tutun.
• ANİDEN DURMUŞ VEYA SIKIŞMIŞ MATKABI YENİDEN
ÇALIŞTIRMAK İÇİN AÇMA/KAPAMA TETİĞİNE SÜREKLİ
BASMAYA KALKIŞMAYIN. BU MATKABA ZARAR VEREBİLİR.
• Çalışma parçasını delip geçme aşamasında sıkışmayı en
aza indirmek için baskıyı azaltın ve deliğin son kısmını
yavaşça delin.
• Ucu açılmış deliğinden çekerken motor çalışmasını
sağlayın. Bu sıkışma azaltmaya yardımcı olacaktır.
• Tetik aleti açtığından ve kapattığından emin olun.
Ahşapta delme
Ahşapta delikler metal için kullanılan aynı matkap uçları
veya geniş ağızlı ahşap uçları ile delinebilir.
Bu uçlar çok keskin olmalı ve delme sırasında oluklardan
talaşların temizlenmesi için sık sık delikten dışarı
çıkartılmalıdır.
Metalde delme
Metalleri delerken bir yağlayıcı kullanın. Döküm demir ve
pirinç istisna olarak kuruyken delinmelidir. Kükürtlenmiş
kesme yağı en uygun yağdır.
LED aydınlatma
Açma/kapama tetiğine (1) basarak matkabı çalıştırınca
entegre LED aydınlatma (8) otomatik olarak çalışma alanını
aydınlatır.
Not: Bu aydınlatma sadece çalışma alanını aydınlatmak için
tasarlanmıştır; fener olarak kullanım için değildir.
Uçların saklanması
Alet tabanında entegre uç yuvası (9) bulunmaktadır.
15
Page 16

TÜRKÇE
(Çevirisi orijinal talimatlardan yapılmıştır)
Arıza giderme
Problem Olası nedeni Olası çözüm
Alet çalışmıyor. Akü doğru bir şekilde
Akü takıldıktan
hemen sonra alet
çalışmaya başlar.
Akü şarj olmuyor. Akü şarj cihazına
Alet aniden duruyor. Akü maksimum ısı
takılmamış.
Akü boş.
Tetik açık konumda
bırakılmış.
takılmamış.
Şarj cihazı güç
kaynağına takılı değil.
Ortam sıcaklığı çok
yüksek veya çok düşük.
sınırına ulaştı.
Akü boş. (Akünün
çalışma ömrünü
uzatmak amacıyla akü,
şarj bittiği zaman
otomatik olarak aniden
kapanma özelliği ile
donatılmıştır).
Akünün doğru takıldığını
kontrol edin.
Akü şarj gerekliliklerini
kontrol edin.
Akü takıldıktan hemen
sonra aletin çalışmasını
engellemek için tetik kapalı
konumda olmalıdır.
Aküyü şarj cihazına LED
ışıkları yanacak şekilde
takın.
Çarj cihazının şini çalışan
bir prize takın.
Şarj cihazını ortam sıcaklığı
4,5 ºC’den daha yüksek veya
40,5 ºC’ daha düşük olduğu
yere götürün.
Aküyü şarj cihazına takın ve
şarj edin.
BAKIM
Stanley aletiniz minimum bakımla uzun bir süre çalışacak
şekilde tasarlanmıştır. Kesintisiz olarak memnuniyet verici bir
şekilde çalışması gerekli özenin gösterilmesine ve düzenli
temizliğe bağlıdır.
Şarj cihazınız, düzenli temizlik dışında herhangi bir bakım
gerektirmemektedir.
Uyarı! Herhangi bir bakım çalışmasına başlamadan önce
aküyü aletten çıkartınız. Şarj cihazını temizlemeden önce
şten çekin.
• Aletinizdeki ve şarj cihazındaki havalandırma deliklerini
yumuşak bir fırça veya kuru bir bezle düzenli olarak
temizleyin.
• Motor muhafazasını düzenli olarak nemli bir bezle silin.
Aşındırıcı veya çözücü bazlı temizleyiciler kullanmayın.
• Mandreni düzenli olarak tamamen açın ve içindeki tozu
dökmek için hafçe vurun.
Çevrenin korunmasi
Ayrı olarak atın. Bu ürün, normal evsel atıklarla
birlikte atılmamalıdır.
STANLEY ürününüzün değiştirilmesi gerektiğini düşünmeniz
veya artık kullanılamaz durumda olması halinde onu, evsel
atıklarla birlikte atmayın. Bu ürünü, ayrı olarak toplanacak
şekilde atın.
STANLEY, hizmet ömrünün sonuna ulaşan STANLEY
ürünlerinin toplanması ve geri dönüşüme
sokulması için bir imkân sunmaktadır. Bu hizmetin
avantajlarından faydalanmak için, lütfen, ürününüzü bizim
16
adımıza teslim alacak herhangi bir yetkili servise iade edin.
Bu kılavuzda belirtilen listeden size en yakın STANLEY yetkili
tamir servisinin yerini öğrenebilirsiniz. Ya da, alternatif olarak
internet’ten STANLEY yetkili tamir servislerinin listesini ve
satış sonrası hizmetlerimizle ilgili tüm bilgiler ve temas
bi lgi ler ine aş ağı dak i s ite den ulaş abi lir sin iz.
www.2helpU.com
AKÜLER
STANLEY aküleri defalarca yeniden şarj edilebilir.
Hizmet ömürlerinin sonunda, aküleri çevremize
gerekli özeni göstererek atın:
• Aküyü bitene kadar aleti çalıştırın, sonra aletten çıkartın.
• NiCd, NiMH ve Li-Ion aküler geri dönüşümlüdür. Aküleri
yetkili servise veya yerel toplama merkezine teslim edin.
Notlar
STANLEY olarak, ürünlerimizi sürekli iyileştirme politikası
uyguladığımızdan, önceden haber vermeden ürün
özelliklerini değiştirme hakkını saklı tutarız. Standart
ekipman ve aksesuarlar ülkeye göre değişebilir. Ürün
özellikleri ülkelere göre farklı olabilir. Komple ürün çeşidi
tüm ülkelerde geçerli olmayabilir. Ürün çeşidi durumu
hakkında lütfen en yakın STANLEY yetkili servisiyle temas
kurun
TEKNİK ÖZELLİKLERİ
SBD20
Voltaj VDC 18
Yüksüz hızı dev/dak 0-430/0-1700
Maks. tork Nm 55
Mandren kapasitesi mm 13
Maks. delme kapasitesi
Çelik/ahşap mm 13/35
Ağırlık kg 1,5
Şarj Cihazı SC201 SC202
Giri voltajı VAC 220-240 220-240
Çıkı voltajı VDC 18 18
Çıkı akımı mA 1000 2000
Yaklaık arj süresi dak. 80 – 240 40 - 120
Akü SB20C SB20S SB20D SB20M
Voltaj VAC 18 18 18 18
Kapasite Ah 1,0 1,5 2,0 4,0
Tip Li-Ion Li-Ion Li-Ion Li-Ion
Page 17

(Çevirisi orijinal talimatlardan yapılmıştır) TÜRKÇE
EN 60745’e göre ses basıncı düzeyi:
Ses basıncı (LpA) 72 dB(A), belirsizlik (K) 3 dB(A)
Akustik güç (LwA) 83 dB(A), belirsizlik (K) 3 dB(A)
EN 60745’e göre tespit edilen toplam titreşim değerleri
(üç yönün vektör toplamı):
Metalde delme (a
Darbesiz vidalama (ah) 1,0 m/s², belirsizlik (K) 1,5 m/s²
) 1,7 m/s², belirsizlik (K) 1,5 m/s²
h, D
Titreşim
Teknik veriler ve uygunluk beyanatı içerisinde belirtilen
titreşim emisyon değerleri EN60745 tarafından belirlenen
standart bir test yöntemine uygun olarak ölçülmektedir ve
diğer bir aletle karşılaştırma yaparken kullanılabilir. Beyan
edilen titreşim emisyon değeri aynı zamanda maruz
kalmanın önceden değerlendirilmesinde de kullanılabilir.
Uyarı! Elektrikli aletin mevcut kullanımı sırasındaki titreşim
emisyon değeri, aletin kullanım yöntemine bağlı olarak,
beyan edilen değere göre farklılık sergileyebilir. Titreşim
düzeyi belirlenen seviyenin üzerinde artış gösterebilir.
İşyerinde düzenli olarak elektrikli alet kullanan çalışanları
korumak amacıyla 2002/44/EC tarafından getirilen elektrik
güvenliği önlemlerini belirlemek üzere titreşime maruz
kalmayı değerlendirirken, çalışma döngüsü içerisinde
örneğin aletin kapalı olduğu ve aktif durumda olmasının yanı
sıra boşta çalıştığı zamanlar gibi, bütün zaman dilimleri dahil
olmak üzere mevcut kullanım durumu ve aletin kullanım şekli
göz önünde bulundurularak değerlendirilmelidir.
SERVİS BİLGİLERİ
STANLEY, kendisine ait ve yetkili servisler ile tam bir servis ağı
sunmaktadır. Tüm STANLEY Servis Merkezleri müşterilere
etkili ve güvenilir elektrikli el aleti hizmeti sunmak için
eğitimli personel ile donatılmıştır. Yetkili servis merkezlerimiz
hakkında daha fazla bilgi almak istiyorsanız veya teknik
danışmanlık, onarım ya da orijinal fabrika yedek parçası
ihtiyacınız varsa, size en yakın STANLEY satış noktasına
başvurun.
AT Uygunluk Beyanatı
MAKİNE DİREKTİFİ
SBD20 – Matkap/Tornavidanız
STANLEY, «teknik özellikleri» bölümünde açıklanan bu
ürünlerin aşağıda belirtilen yönergelere uygun
olduğunu beyan eder: 2006/42/EC, EN 60745-1:2009 +
A11:2010, EN 60745-2-1:2010
Bu ürünler ayrıca 2014/30/EU ve 2011/65/EU
Direktierine de uygundur. Daha fazla bilgi için, lütfen
aşağıdaki adresten STANLEY ile irtibata geçin veya
kılavuzun arkasına bakın.
Bu belge altında imzası bulunan yetkili, teknik
dosyanın derlenmesinden sorumludur ve bu beyanı
STANLEY adına vermiştir.
R.Laverick
Mühendislik Bölümü Müdürü
STANLEY, Europe, Egide Walschaertsstraat14-18,
2800 Mechelen, Belçika
01.2017
17
Page 18

TÜRKÇE
(Çevirisi orijinal talimatlardan yapılmıştır)
İki yıl garanti
Sahip olduğunuz STANLEY ürünü satın alma
tarihinden itibaren 24 ay içinde hatalı malzeme veya
işçilik nedeniyle bozulursa, STANLEY aşağıdaki
şartlara uyulması koşuluyla ücretsiz olarak tüm
kusurlu parçaların yenilenmesini veya -kendi
inisiyatine bağlı olarak- satın alınan ürünün
değiştirilmesini garanti eder:
• Ürün, hatalı kullanılmamış kullanım kılavuzuna
uygun kullanılmıştır.
• Ürün yıpr anmamış, hır palanmamış ve
aşınmamıştır;
• Yetkili olmayan kişilerce tamire çalışılmamıştır.
• Satın alma belgesi (fatura) ibraz edilmiştir;
• STANLEY ürünü, tüm orijinal parçaları ile birlikte
iade edilmiştir;
• Ürün kiralama amacıyla kullanılmamıştır.
Garanti talebinde bulunmak için, lütfen satıcıyla
irtibata geçin veya STANLEY katalogunda belirtilen
size en yakın STANLEY yetkili satıcı adresini kontrol
edin veya ürünün kılavuzunda belirtilen adresteki
yerel STANLEY yetkili tamir servisi ile temas kurun.
İnternet’ten STANLEY yetkili tamir servislerinin
listesine ve satış sonrası hizmetlerimizle ilgili tüm
bilgilerine aşağıdaki siteden ulaşabilirsiniz:
www.2helpU.com
Sanayi ve Ticaret Bakanlığı tebliğince kullanım ömrü
7 yıldır.
Türkiye Distribütörü
STANLEY BLACK&DECKER TURKEY ALET URETIM SAN.
TIC. LTD.STI.
Kozyatağı Mh Değirmen Sk. Nida Kule
No:18 Kat:6 34742 Kadıköy İstanbul
Tel : (0216) 665 29 00
Faks : (0216) 665 29 01
E-posta: info-tr@sbdinc.com
18
Page 19

(Перевод с оригинала инструкции)
РУССКИЙ
Назначение
Ваша дрель/винтовёрт STANLEY SBD20 предназначена
для сверления отверстий и заворачивания саморезов в
древесине, металле и пластике. Данный инструмент
предназначен для профессионального использования.
ПРАВИЛА БЕЗОПАСНОСТИ
Общие правила безопасности при работе с
электроинструментами
Внимание! Внимательно прочтите все
инструкции по безопасности и руководство
по э ксплуатации. Несоблюдение всех
перечисленных ниже правил безопасности и
инструкций может привести к поражению
электрическим током, возникновению пожара
и/или получению тяжёлой травмы.
Сохраните все инс трукции по безопасности и
руководство по эксплуатации для их дальнейшего
использования. Термин «Электроинструмент» во всех
приведённых ниже указаниях относится к вашему
сетевому (с кабелем) электроинструменту или
аккумуляторному (беспроводному) электроинструменту.
1. Безопасность рабочего места
a. Содержите рабочее место в чистоте и обеспечьте
хорошее освещение. Плохое освещение или
беспорядок на рабочем месте может привести к
несчастному случаю.
b. Не используйте электроинструменты, если есть
опасность возгорания или взрыва, например,
вблизи легко воспламеняющихся жидкостей,
газо в или п ыли. В процессе работ ы
электроинструменты создают искровые разряды,
которые могут воспламенить пыль или горючие пары.
c. Во время работы с электроинструментом не
подпускайте близко детей или посторонних лиц.
Отвлечение внимания может вызвать у Вас потерю
контроля над рабочим процессом.
2. Электробезопасность
a. Вилка кабеля электроинс трумента должна
соответствовать штепсельной розетке. Ни в коем
случае не видоизменяйте вилку электрического
кабеля. Не и спользуйте соединительные
штепсели-переходники, если в силовом кабеле
электроинструмента есть провод заземления.
Использование оригинальной вилки кабеля и
соответствующей ей штепсельной розетки уменьшает
риск поражения электрическим током.
b. Во время работы с электроинструментом
избегайте физического контакта с заземлёнными
объектами, такими как трубопроводы, радиаторы
отопления, электроплиты и холодильники. Риск
поражения электрическим током увеличивается, если
Ваше тело заземлено.
c. Не используйте электроинструмент под дождём
или во влажной среде. Попадание воды в
электроинструмент увеличивает риск поражения
электрическим током.
d. Бережно обращайтесь с электрическим кабелем.
Ни в коем случае не используйте кабель для
перено ски элек трои нструмента и ли для
вытягивания его вилки из штепсельной розетки.
Не по дверг айте эле ктрич еск ий кабе ль
воздействию высоких температур и смазочных
веществ; держите его в стороне от острых кромок
и движущихся частей электроинс трумента.
Повреждённый или запутанный кабель увеличивает
риск поражения электрическим током.
e. При работе с электроинструментом на открытом
воздухе используйте удлинительный кабель,
пред назначенн ый д ля нару жных работ.
Использование кабеля, пригодного для работы на
открытом воздухе, снижает риск поражения
электрическим током.
f. П ри н ео бх од им ос ти р аб от ы с
электрои нструментом во вла жной среде
используйте источник питания, оборудованный
устройством защитного отключения (УЗО).
Использование УЗО снижает риск поражения
электрическим током.
3. Личная безопасность
a. При работе с электроинс трументами будьте
внимательны, следите за тем, что Вы делаете, и
рук оводствуйтесь здравы м смысл ом. Не
используйте электроинструмент, если Вы устали, а
также находясь под действием алкоголя или
по нижающи х реак цию ле карстве нных
препаратов и других средств. Малейшая
неосторожность при работе с электроинструментами
может привести к серьёзной травме.
b. Пр и ра боте исполь зу йте средс тв а
индивидуальной защиты. Всегда надевайте
защитные очки. Своевременное использование
защитного снаряжения, а именно: пылезащитной
маски, ботинок на нескользящей подошве, защитного
шлема или противошумовых наушников, значительно
снизит риск получения травмы.
c. Не допускайте непреднамеренного запуска.
Перед тем, как подключить электроинструмент к
сети и/или аккумулятору, поднять или перенести
его, убедитесь, что выключатель находится в
положении « выключено». Не переносите
элект роинс труме нт с нажатым курков ым
выключателем и не подключайте к сетевой розетке
электрои нструмен т, вык лючатель которо го
установлен в положение «включено», это может
привести к несчастному случаю.
19
Page 20

РУССКИЙ
d. Перед включением электроинструмента снимите
с него все регулировочные или гаечные ключи.
Регулировочный или гаечный ключ, оставленный
за креп лённ ым н а враща ющей ся ч асти
электроинструмента, может стать причиной
получения тяжёлой травмы.
e. Работайте в устойчивой позе. Всегда твёрдо
стойте на ногах, сохраняя равновесие. Это
позволит Вам не потерять контроль при работе
электроинструментом в непредвиденной ситуации.
f. Одевайтесь соответствующим образом. Во время
работы не надевайте свободную одежду или
украшения. Следите за тем, чтобы Ваши волосы,
одежда или перчатки находились в постоянном
отдалении от движущихся частей инструмента.
Свободная одежда, украшения или длинные волосы
могут попасть в движущиеся части инструмента.
g. Если электроинструмент снабжён устройством
сбора и удаления пыли, убедитесь, что данное
устр ойство подключено и ис пользуется
надлежащим образом. Использование устройства
пылеудаления значите льно сни жает рис к
возникновения несчастного случая, связанного с
запылённостью рабочего пространства.
4. Исп ольз ова ние элек тро инс тру мен тов и
технический уход
a. Н е пе регру жа йте электр ои нстру мент.
Используйте Ваш инструмент по назначению.
Электроинструмент работает надёжно и безопасно
только при соблюдении параметров, указанных в его
технических характеристиках.
b. Не используйте электроинструмент, если его
выключатель не устанавливается в положение
включения или выключения. Электроинструмент с
неисправным выключателем представляет опасность
и подлежит ремонту.
c. Отключайте электроинструмент от сетевой
розетки и/или извлекайте аккумулятор перед
регулировкой, заменой принадлежностей или при
хранении элек троинструмента. Такие меры
предосторожности снижают риск случайного
включения электроинструмента.
d. Храните неиспользуемые электроинструменты в
недоступном для детей месте и не позволяйте
лицам, не знакомым с электроинструментом или
да нными инстр укци ями, рабо тат ь с
электроинс трумент ом. Элек троинструмент ы
представляют опасность в руках неопытных
пользователей.
e. Р ег ул ярн о п рове ряйте исп рав нос ть
электроинструмента. П роверяйте точ ность
совмещения и легкость перемещения подвижных
частей, целостность деталей и любых других
элементов электроинструмента, воздействующих
на его работу. Не используйте неисправный
(Перевод с оригинала инструкции)
20
электроинструмент, пока он не будет полностью
отремонтирован. Большинство несчастных случаев
являются следствием недостаточного технического
ухода за электроинструментом.
f. Следите за остротой заточки и чистотой режущих
принадлежностей. Принадлежности с острыми
кромками позволяют избежать заклинивания и
делают работу менее утомительной.
g. Используйте электроинструмент, аксессуары и
насадки в соответствии с данным Руководством
по эксплуатации и с учётом рабочих условий и
характера будущей работы. Использование
электроинструмента не по назначению может создать
опасную ситуацию.
5. Использование аккумуляторных инструментов и
технический уход
a. Заряжайте аккумулятор зарядным устройством
марки, указанной производителем. Зарядное
устройство, которое подходит к одному типу
аккумуляторов, может создать риск возгорания в
случае его использования с аккумуляторами другого
типа.
b. Используйте электроинс трументы только с
ра зра ботан ным и спе циа льн о д ля них
аккумуляторами. Использование аккумулятора
какой-либо другой марки может привести к
возникновению пожара и получению травмы.
c. Держите не используемый аккумулятор
подальше от металлических предметов, таких как
скрепки, монеты, ключи, гвозди, шурупы, и
других ме лких металлич еских пр едметов,
которые могут замкнуть контакты аккумулятора.
Короткое замыкание контактов аккумулятора может
привести к получению ожогов или возникновению
пожара.
d. В критических ситуациях из аккумулятора может
вытечь жидкость ( электролит); избегайте
контакта с кожей. Если жидкость попала на кожу,
смойте её водой. Если жидкость попала в глаза,
обраща йтесь за меди цинс кой по мощь ю.
Жидкость, вытекшая из аккумулятора, может вызвать
раздражение или ожоги.
6. Техническое обслуживание
a. Ремонт Вашего электроинструмента должен
производиться только квалифицированными
специалистами с использованием идентичных
запасных частей. Это обеспечит безопасность
Вашего элек троинс трумента в дальнейшей
эксплуатации.
ДОПОЛНИТЕЛЬНЫЕ МЕРЫ БЕЗОПАСНОСТИ ПРИ
РАБОТЕ С ЭЛЕКТРОИНСТРУМЕНТАМИ
Вн имани е! Дополн ительные п равила
б ез оп а сн ос т и пр и р а бо те
дрелями/винтовёртами
Page 21

(Перевод с оригинала инструкции)
РУССКИЙ
• При сверлении с ударом всегда надевайте
противошумовые наушники. Воздействие шума
может привести к потере слуха.
• При работе пользуйтесь дополнительными
рукоятками, прилагающимися к инструменту.
Потеря контроля над инструментом может привести к
получению тяжёлой травмы.
• Держите инструмент за изолированные ручки
при выполнении операций, во время которых
режущий инструмент может соприкасаться со
скрытой п роводкой . Контакт насадк и с
находящимся под напряжением проводом делает не
покрытые изоля цией металличе ские части
электроинструмента также «живыми», что создаёт
опасность поражения оператора электрическим
током.
• Держите инструмент за изолированные ручки
при выполнении операций, во время которых
крепёжный элемент может соприкасаться со
скрытой проводкой. Контакт крепёжного элемента с
находящимся под напряжением проводом делает не
покрытые изоля цией металличе ские части
электроинструмента также «живыми», что создаёт
опасность поражения оператора электрическим
током.
• И споль зуй те с труб цины ил и други е
приспособления для фиксации обрабатываемой
детали, устанавливая их только на неподвижной
поверхности. Если держать обрабатываемую деталь
руками или с упором в собственное тело, то можно
потерять контроль над инструментом ил и
обрабатываемой деталью.
• Прежде чем сверлить отверстия в стенах, полах или
потолках, проверьте наличие электропроводки и
трубопроводов.
• Не дотрагивайтесь до наконечника сверла сразу же
после окончания сверления, так как он может быть
горячим.
• Назначение инструмента описывается в данном
руководстве по эксплуатации.
• Использование любых принадлежностей или
приспособлений, а также выполнение данным
инструментом л юбых видов работ, не
рекомендованных данным руководством по
эксплуатации, может привести к несчастному случаю
и/или повреждению личного имущества.
БЕЗОПАСНОСТЬ ПОСТОРОННИХ ЛИЦ
• Данное изделие не может использоваться людьми
(включая детей) со сниженными физическими,
сенсорными и умственными способностями или при
отсутствии необходимого опыта или навыка, за
исключением, если они выполняют работу под
присмотром лица, отвечающего за их безопасность.
• Не позволяйте детям играть с инструментом.
Остаточные риски
При работе данным инс трументом возможно
возникновение дополнительных остаточных рисков,
которые не вошли в описанные здесь правила техники
безопасности. Эти риски могут возникнуть при
неправильном или продолжительном использовании
изделия и т.п.
Несмотря на соблюдение соответствующих инструкций
по техн ике б езопасн ости и испол ьзование
предохранительных устройств, некоторые остаточные
риски невозможно полностью исключить. К ним
относятся:
• Тр ав мы в ре зу льт ате к ас ан ия
вращающихся/двигающихся частей инструмента.
• Риск получения травмы во время смены деталей или
насадок.
• Риск по лучени я тра вмы, связ анный с
продолжительным использованием инструмента. При
ис пол ьзов ани и и нст рум ента в течен ие
продолжительного периода времени делайте
регулярные перерывы в работе.
• Ухудшение слуха.
• Ущерб здоровью в результате вдыхания пыли в
процессе работы с инструментом (например, при
обработке древесины, в особенности, дуба, бука и
ДВП).
МАРКИРОВКА ИНСТРУМЕНТА
Помимо кода даты на инструменте имеются следующие
знаки:
Вним ание! Полное озна комле ние с
руководством по эксплуатации снизит риск
получения травмы.
Всегда работайте в защитных очках
Всегда используйте средства защиты слуха
Положение даты штрих-кода
Дата кода, который также включает год изготовления,
печатается на корпусе.
Пример:
2017 XX JN
Год изготовления
Дополнительные меры безопасности при
работе с аккумуляторами и зарядными
устройствами
Аккумуляторы
• Ни в коем случае не пытайтесь разобрать
аккумулятор.
• Не погружайте аккумулятор в воду.
21
Page 22

РУССКИЙ
• Не храните в местах, где температура может
превысить 40 °С.
• Заряжайте аккумулятор только при температуре
окружающей среды в пределах 10°С - 40°С.
• Заряж айте только зарядными устройствами,
входящими в комплект поставки инструмента.
• Утилизируйте отработанные аккумуляторы, следуя
инструкциям раздела «Защита окружающей среды».
Зарядные устройства
• Используйте ваше зарядное устройство Stanley
только для зарядки аккумулятора инструмента, в
комплект поставки которого он входит. Аккумуляторы
других марок могут взорваться, что приведёт к
получению травмы или повреждению инструмента.
• Ни в коем случае не пытайтесь зарядить
неперезаряжаемые аккумуляторы.
• Немедленно заменяйте повреждённый сетевой
кабель.
• Не погружайте зарядное устройство в воду.
• Не разбирайте зарядное устройство.
• Не используйте зарядное устройство в качестве
объекта для проведения испытаний.
(Перевод с оригинала инструкции)
Ни в коем случае не пытайтесь заряжать
повреждённый аккумулятор!
Зарядное устройство предназначено только
для использования внутри помещений.
Перед началом работы внимательно прочтите
руководство по эксплуатации.
Электробезопасность
Ваше зарядное устройство защищено двойной
изоляцией, что исключает потребность в
заземляющем проводе. Всегда проверяйте,
соответствует ли напряжение, указанное на
табличке с техническими параметрами,
напряжению электросети. Ни в коем случае не
пыта йтес ь замен ить зарядный блок
стандартным сетевым штепселем.
• Во избеж ание несчастного случая, замена
по вреждён ного каб еля питан ия до лжн а
производиться только на заводе-изготовителе или в
авторизованном сервисном центре Stanley.
СОСТАВНЫЕ ЧАСТИ
Ваш инструмент может содержать все или некоторые из
перечис0астей:
1. Курковый пусковой выключатель
2. Переключатель направления вращения (реверса)
3. Муфта установки крутящего момента
4. Переключатель скоростей
5. Быстрозажимной патрон
6. Аккумулятор
7. Отпирающая кнопка аккумулятора
8. Светодиодная подсветка
9. Гнездо для хранения насадок
Эксплуатация
Внимание! Не форсируйте рабочий процесс.
Избегайте перегрузки инструмента.
ЗАРЯДКА АККУМУЛЯТОРА
Аккумулятор нуждается в зарядке перед первым
использованием и если он не обеспечивает достаточную
мощность для работ, которые ранее выполнялись легко и
быстро. В процессе зарядки аккумулятор может слегка
гудеть и нагреваться. Это нормально и не указывает на
наличие какой-либо проблемы.
Внимание! Не заряжайте аккумулятор при температуре
окружающей среды ниже 10 °C или выше 40 °С.
Рекомендуемая температура зарядки: приблизительно
24 °C.
Примечание: Зарядное устройство не будет заряжать
аккумулятор, если температура его элементов ниже 10 °C
или выше 40 °C.
Аккумулятор должен быть оставлен в зарядном
устройс тве. При уменьшении или увеличении
темпе рат уры э лем ентов за ряд ка на чнётс я
автоматически.
• Перед тем как вставить аккумулятор, подключите
вилку зарядного устройства к соответствующей
сетевой розетке.
• Вставьте аккумулятор в зарядное устройство.
Начнёт мигать зелёный светодиодный
индикатор, оповещая о зарядке
аккумулятора.
После завершения зарядки зелёный
светодиодный индикатор перейдёт в
режим непр ерыв ного свечения.
Аккумулятор полностью заряжен, и его
можно использовать с инструментом
или оставить в зарядном устройстве.
Внимание! По возможности заряжайте разряженные
аккумуляторы сразу после использования. Срок службы
аккумулятора, содержавшегося в разряженном
состоянии, значительно уменьшается.
Выявление неисправностей зарядн ым
устройством
Данное зарядное устройство разработано с целью
обнаружения некоторых проблем, связанных с работой
аккумулятора или источника питания. Оповещение о
наличие проблемы производится путём мигания одного
светодиода по определённой схеме.
22
Page 23

(Перевод с оригинала инструкции)
РУССКИЙ
Неисправность аккумулятора
Заря дное устройство спосо бно
обнаружить протечку или наличие
неисправности аккумулятора. В том
случае красный светодиод начнёт
мигать по схеме, обозначенной на
этикетке. Если Вы видите такое мигание,
остановите зарядку аккумулятора.
Верните аккумулятор в авторизованный
сервисный центр или сдайте в
приёмный пункт на переработку.
Пау за д ля с огреван ия/охлаж дения
аккумулятора
Если зарядное устройство определит,
что аккумулятор чрезмерно охлаждён
или н аг рет, ав томатически
ин иц ии ру ет ся п ау за дл я
согревания/охлаждения, в течение
которой акк умул ятор достигает
оптимальной для зарядки температуры.
После охлаж дения акк умулятора
зарядное устройство автоматически
переключится в режим зарядки. Данная
функция увеличивает максимальный
срок с лужбы аккумулятора. При
обнаружении охлаждения/нагревания
акк умулятора красный светодиод
начнёт мигать по схеме, обозначенной
на этикетке.
Проблема с линией электропитания
При и споль зовании з арядн ого
устройства с некоторыми переносными
источниками питания, например, с
генераторами или и нверторами,
преобразующими постоянный ток в
переменный ток, зарядное устройство
может временно приостановить свою
работу. В этом случае светодиодный
индикатор начнёт мигать по схеме,
обозначенной на этикетке. Это будет
означать, что источник питания
находится за пределами допустимых
значений.
Оставление аккумулятора в зарядном
устройстве
Аккумулятор может оставаться в зарядном устройстве
при горящем светодиодном индикаторе в течение
неограниченного периода времени. Зарядное
устройство сохрани т ак куму лятор по лностью
заряженным и готовым к работе.
ВАЖНЫЕ ПРИМЕЧАНИЯ К ЗАРЯДКЕ
• Продолжительный срок службы и высок ая
производительность аккумулятора будет достигнута,
если заряжать аккумулятор при температуре воздуха
от +18° до +24°C. НЕ ЗАРЯЖАЙТЕ аккумулятор при
температуре ниже +4,5°C или выше +40,5°C. Важно
соблюдать данное ус ловие, это предотвратит
серьёзные повреждения аккумулятора.
• В процессе зарядки зарядное устройство и
аккумулятор могут быть тёплыми на ощупь. Это
нормальное явление и не указывает на наличие
како й-либо неис правнос ти. Дл я быстрого
охлаждения аккумулятора после использования,
избегайте размещения зарядного устройства или
аккумулятора в тёплых местах, например, под
металлическим навесом или в неизолированных
автоприцепах.
• Если аккумулятор не заряжается должным образом:
• Проверьте выходной ток штепсельной розетки,
подключив к ней лампу или любой другой прибор.
• Убедитесь, что розетка соединена с выключателем
освещения и отключается при выключении света.
• Перенесите зарядное устройство и аккумулятор в
помещение, где температура воздуха достигает 18°24°C. Если зарядка всё же не происходит должным
образом, отнесите инструмент, аккумулятор и
зарядное устройство в авторизованный сервисный
центр Stanley.
• Аккумулятор следует подзаряжать, если он не
обеспечивает достаточную мощность для работ,
которые ранее выполнялись легко и быстро.
• НЕ ИСПОЛЬЗУЙТЕ аккумулятор в данных условиях.
Следуйте процедуре зарядки.
• Вы так же можете подз аряж ать частично
использованные аккумуляторы без каких-либо
негативных последствий для аккумуляторов.
Установка и извлечение аккумулятора из
инструмента
Вни мание! Чтобы предотвратить срабатывание
пускового выключателя, перед установкой или
извлечением аккумулятора убедитесь, что нажата кнопка
защиты от непреднамеренного пуска.
ПРИМЕЧАНИЕ: Убедитесь, что аккумулятор (6)
полностью заряжен.
Для установки аккумулятора в рукоятку
инструмента - рис. A
1. Совместите аккумулятор с бороздками внутри
рукоятки инструмента.
2. Вдвигайте аккумулятор в рукоятку, пока не услышите,
что замок защёлкнулся на месте.
Только Для Ионно-Литиевых (Lı-Ion)
Аккумуляторов
Аккумуляторы Li-Ion спроектированы по Электронной
Защитной Системе, которая защищает аккумулятор от
перегрузки, перегрева или глубокой разрядки. При
срабатывании Электронной Защитной Системы
инструмент автоматически отключится. Если это
произошло, поместите Li-Ion аккумулятор в зарядное
устройство до его полной зарядки.
Для извлечения аккумулятора из инструмента рис. B
1. Нажмите на отпирающую кнопку (7) и извлеките
аккумулятор из рукоятки инструмента.
2. Вставьте аккумулятор в зарядное устройство, как
описано в разделе «Зарядное устройство» данного
руководства.
23
Page 24

РУССКИЙ
(Перевод с оригинала инструкции)
ЭКСПЛУАТАЦИЯ
Курковый пусковой выключатель и переключатель
направления вращения – Рисунок С
• Данная дрель включается и выключается путём
наж атия и отпускания куркового пускового
выключателя (1), как показано на Рисунке С.
Чем сильнее нажим на курковый выключатель, тем
выше скорость инструмента.
• Переключатель напр авле ния в ращени я (2)
устанавливает направление вращения инструмента, а
также служит кнопкой блокировки.
• Для установки вращения вперёд, отпустите курковый
выключатель и нажмите на переключатель
направления вращения с пр авой стороны
инструмента.
• Для установки реверса, нажмите на переключатель
направ лени я вращения с левой стор оны
инструмента.
• Кнопка переключателя, установленная в среднее
положение, блокирует инструмент в состоянии
«выключено». При изменении положения кнопки
переключателя не забывайте отпускать курковый
выключатель.
ЭКСПЛУАТАЦИЯ
Установка крутящего момента – Рисунок D
Данный инструмент оборудован муфтой установки
крутящего момента (3) для выбора режима работы и
регулировки крутящего момента при заворачивании
саморезов. Крупные саморезы и заготовки из твёрдых
материалов нуждаются в более высоком крутящем
моменте, чем мелкие саморезы и заготовки из мягких
материалов.
• При сверлении в древесине, металле и пластике
установите муфту напротив символа режима
сверления.
• При заворачивании установите муфту на цифре,
соответс твующей необходимому для работы
крутящему моменту. Если Вы не знаете, какая из
настроек в полной мере соответствует выполняемой
операции, поступите следующим образом:
• Установите муфту на позицию минимального
крутящего момента.
• Заверните первый саморез.
• Ес ли до з аве ршения о пер ации муфта
пробуксовывает, увеличьте крутящий момент и
продолжите заворачивание.
• Повторяйте это действие, пока не будет определена
правильная величина крутящего момента.
• Используйте эту величину при заворачивании
остальных саморезов.
Переключатель скоростей – Рисунок Е
2-х скоростной редуктор Вашего инструмента позволяет
24
легко переключаться с одной скорости на другую для
ма ксимал ьно й униве рса льности примен ени я
инструмента.
• Для установки низкой скорости/высокого крутящего
момента (положение 1) выключите инструмент и
дождитесь его полной остановки. Переведите
переключатель скоростей (4) в направлении от
патрона.
• Для установки высокой скорости/низкого крутящего
момента (положение 2) выключите инструмент и
дождитесь его полной остановки. Переведите
переключатель скоростей назад в направлении
патрона.
• Примечание: Не перек лючайте скорость при
работающем инструменте. Если у Вас возникли
проблемы при переключении скоростей, убедитесь,
что переключатель скоростей полностью переведён
вперёд или назад.
Быстрозажимной патрон - Рисунок F
Внимание! Чтобы предотвратить внезапный запуск
инструмента, перед установкой или снятием насадок
убедитесь, что из инструмента извлечён аккумулятор.
Чтобы вставить сверло или другую насадку:
• Развернув патрон задней стороной к себе, обхватите
патрон (5) и поворачивайте его в направлении против
часовой стрелки.
• Вставьте хвостовик сверла или другой насадки в
патрон до упора. Развернув патрон задней стороной
к себе, надёжно затяните патрон, поворачивая его в
направлении по часовой стрелке.
Внимание! Не пытайтесь закрепить или ослабить сверло
(или какую-либо другую насадку), захватив переднюю
часть патрона и одновременно включив инструмент. Это
может привести к повреждению патрона и получению
травмы при смене насадок.
Заворачивание
• Для заворачивания саморезов полностью вдвиньте
переключатель направления вращения влево.
• Для выкручивания саморезов используйте реверс
(вдвинув переключатель вправо).
Примечание: При переключении направления
вращения всегда сначала отпускайте курковый пусковой
выключатель.
Сверление
• Всегда используйте только остро заточенные
насадки.
• Поддерж ивайте и закрепляйте з аготовку
надлежащим образом, как описано в Инструкциях по
технике безопасности.
• Используйте надлежащее и соответствующее
защитное оборудование, как описано в Инструкциях
по технике безопасности
Page 25

• Обеспечьте безопасность рабочего места, как
описано в Инструкциях по технике безопасности.
• Прилагая лёгкое давление на дрель, очень медленно
начните сверление, пока высверливаемое отверстие
не будет достаточного размера, чтобы из него не
выскользнуло сверло.
• Прилагайте давление по прямой линии со сверлом.
Давление должно бы ть до статочным для
равномерного врезания сверла, но не слишком
сильным, чтобы не вызвать останов двигателя или
отклонение сверла.
• Крепко удерживайте дрель обеими руками, одной
рукой обхватив основную рукоятку, другой рукой
удерживая нижнюю часть аккумулятора или
дополнительную рукоятку, если имеется.
• ПРИ ВНЕЗАПНОМ ОСТАНОВЕ НЕ ПЫТАЙТЕСЬ
ЗАПУСТИТЬ ДВИГАТЕЛЬ МНОГОКРАТНЫМ НАЖАТИЕМ
НА КУРКОВЫЙ ПУСКОВОЙ ВЫКЛЮЧАТЕЛЬ. ЭТО
МОЖЕТ ПРИВЕСТИ К ПОВРЕЖДЕНИЮ ДРЕЛИ.
• Для сведения к минимуму риск внезапного останова
ослабьте прилагаемое давление и медленно
закончите высверливание отверстия.
• Не выключайте двигатель при извлечении сверла из
высверленного отверстия. Это позволит снизить риск
заклинивания сверла.
• Убедитесь, что инструмент включается и выключается
при нажатии и отпускании пускового выключателя.
Сверление в дереве
Для сверления в дереве можно также использовать
спиральные свёрла для металла или перьевые свёрла
для сверления древесины.
Данные свёрла должны быть остро заточенными, и во
время сверления их следует часто извлекать из
отверстия для прочищения канавок от опилок.
Сверление в металле
При сверлении м еталлов и спользуйте
смазочно-охлаждающую жидкос ть. Ис ключение
составляют чугун и медь, которые нужно сверлить без
смазки. Наиболее эффективные смазочные материалы –
сульфированная СОЖ.
Светодиодная подсветка
При нажатии на курковый пусковой выключатель (1)
автоматически загорится встроенная светодиодная
подсветка (8), освещая рабочую зону.
Примечание: Подсветка служит для освещения рабочей
поверхности и не предназначена для использования в
качестве фонарика.
Хранение насадок
В основание инструмента встроено гнездо для хранения
насадок (9).
(Перевод с оригинала инструкции)
РУССКИЙ
Возможные неисправности и способы
их устранения
Проблема Возможная причина Возможное решение
Инструмент не
включается.
Инструмент
немедленно
включается при
установке
аккумулятора.
Аккумулятор не
заряжается.
Инструмент
внезапно
отключается.
ТЕХНИЧЕСКОЕ ОБСЛУЖИВАНИЕ
Ваш инструмент Stanley рассчитан на работу в течение
продолжительного времени при минимальном
техническом обслуживании. Срок службы и надёжность
инструмента увеличивается при правильном уходе и
регулярной чистке.
Ваше зарядное устройство не требует никакого
дополнительного технического обслуживания, кроме
регулярной чистки.
Внимание! Перед любыми видами работ по
техническому обслуживанию извлекайте из инструмента
аккумулятор. Перед чисткой зарядного устройства
отключите его от источника питания.
• Регулярно очищайте вентиляционные отверстия
вашего инструмента и зарядного устройства мягкой
щёткой или сухой тканью.
Неправильно
установлен
аккумулятор.
Аккумулятор не
заряжен.
Пусковой
выключатель был
оставлен в положении
«вкл.».
Аккумулятор не
вставлен в зарядное
устройство.
Вилка зарядного
устройства не
подключена к
розетке.
Слишком высокая или
слишком низкая
температура
окружающей среды.
Аккумулятор достиг
своего
максимального
теплового предела.
Аккумулятор
разряжен. (Чтобы
максимально
продлить срок
службы аккумулятора,
его конструкция
предусматривает
автоматическое
отключение при
чрезмерном
истощении заряда).
Проверьте правильность
установки аккумулятора.
Проверьте состояние
заряда аккумулятора
Для предотвращения
запуска инструмента при
установке аккумулятора
пусковой выключатель
должен быть установлен в
положение «выкл.».
Вставьте аккумулятор в
зарядное устройство и
дождитесь горения
светодиодных
индикаторов.
Вставьте вилку зарядного
устройства в рабочую
розетку.
Перенесите аккумулятор и
зарядное устройство в
место, где температура
окружающей среды не
ниже +4,5°C и не выше
+40,5°C.
Дайте аккумулятору
полностью остыть.
Установите аккумулятор в
зарядное устройство и
оставьте его заряжаться.
25
Page 26

РУССКИЙ
• Регулярно очищайте корпус двигателя влажной
тканью. Не используйте абразивные чистящие
средства, а также чистящие средства на основе
растворителей.
• Регулярно раскрывайте патрон и вытряхивайте из
него всю накопившуюся пыль.
(Перевод с оригинала инструкции)
Защита окружающей среды
Раздельный сбор. Данное изделие нельзя
утилизировать вместе с обычными бытовыми
отходами.
Если одна жды В ы захотите заменить Ваш
электроинструмент STANLEY, или Вы больше в нем не
нуждаетесь, не выбрасывайте его вместе с бытовыми
отходами. Отнесите изделие в специальный приемный
пункт.
Фирма STANLEY обеспечивает прием и
переработку отслуживших свой срок изделий
STANLEY. Чтобы воспользоваться этой услугой,
Вы можете сдать Ваше изделие в любой авторизованный
сервисный центр, который собирает их по нашему
поручению. Вы можете узнать место нахождения Вашего
ближайшего авторизованного сервисного центра,
обратившись в Ваш местный офис STANLEY по адресу,
указанному в данном руководстве по эксплуатации.
Кроме того, список авторизованных сервисных центров
STANLEY и по лную информа цию о нашем
послепродажном обслуживании и контактах Вы можете
найти в интернете по адресу: www.2helpU.com.
Аккумуляторы
Аккумуляторы STANLEY можно подзаряжать
неограниченное количество раз. По окончанию
срока службы утилизируйте отработанные
аккумуляторы безопасным для окружающей
среды способом:
• Полностью разрядите аккумулятор, затем извлеките
его из инструмента.
• Li-Ion, NiCd и NiMH аккумуляторы подлежат
переработке. Сдайте их в любой авторизованный
сервисный центр или в местный пункт переработки.
Примечания
Политика STAN LEY наце лена на по стоя нное
усовершенствование нашей продукции, поэтому фирма
оставляет за собой право изменять технические
харак терис тики изделий без предварительного
уведо мления. Стандартное обо рудо вание и
дополнительные принадлежности могут меняться в
зависимости от страны прода ж. Технические
характеристики продуктов могут различаться в
зависимости от страны продаж. Полная линия продуктов
присутствует на рынках не всех стран. Для получения
информации касательно линии продуктов в Вашей
стране обратитесь в ближайший сервисный центр
STANLEY
ТЕХНИЧЕСКИЕ ХАРАКТЕРИСТИКИ
SBD20
Напряжение питания В пост. тока 18
Скорость без нагрузки об/мин. 0-430/0-1700
Макс. крутящий момент Нм 55
Держатель насадок мм 13
Максимальный диаметр сверления
Сталь/дерево мм 13/35
Вес кг 1,5
Зарядное устройство SC201 SC202
Входное напряжение В
Выходное напряжение В
Выходной ток мА 1000 2000
Приблизительное время мин. 80-240 40-120
зарядки
Аккумулятор SB20C SB20S SB20D SB20M
Напряжение
питания В
Ёмкость Ач 1,3 1,5 2,0 4,0
Тип Li-Ion Li-Ion Li-Ion Li-Ion
пост. тока
перем. тока
220-240 220-240
пост. тока
18 18
18 18 18 18
Информация по техническому обслуживанию
STANLEY имеет обширную сеть принадлежащих
компании и авторизованных сервисных центров. В целях
предоставления клиентам эффективного и надёжного
технического обслуживания электроинструментов во
всех сервисных центрах STANLEY работает обученный
персонал. За дополнительной информацией о наших
авторизованных сервисных центрах, а также, если Вы
нуждаетесь в технической консультации, ремонте или
покупке оригинальных запасных частей, обратитесь в
ближайший к Вам сервисный центр STANLEY.
26
Page 27

Гарантийные условия
Уважаемый покупатель!
1. Поздравляем Вас с покупкой высококачественного изделия
STANLEY и выражаем признательность за Ваш выбор.
2. При покупке изделия требуйте проверки его комплектности
и исправности в Вашем присутствии, инструкцию по
эксплуатации и заполненный гарантийный талон на
русском языке.
В гарантийном талоне должны быть внесены: модель, дата
продажи, серийный номер, дата производства
инструмента; название, печать и подпись торговой
организации. При отсутствии у Вас правильно заполненного гарантийного талона, а также несоответствия
указанных в нем данных мы будем вынуждены откло- нить
Ваши претензии по качеству данного изделия.
3. Во избежание недоразумений убедительно просим Вас
перед началом работы с изделием внимательно
ознакомиться с инструкцией по его эксплуатации. Правовой
основой настоящих гарантийных условий является
действующее Законодательство. Гарантийный срок на
данное изделие составляет 24 месяца и исчисляется со
дня продажи. В случае устранения недостатков изделия,
гарантийный срок продлевается на период его нахождения
в ремонте. Срок службы изделия составляет 5 лет со дня
продажи.
4. В случае возникновения каких-либо проблем в про- цессе
эксплуатации изделия рекомендуем Вам обра- щаться
только в уполномоченные сервисные центры STANLEY,
адреса и телефоны которых Вы сможете найти в
гарантийном талоне, на сайте www.2helpU.com или узнать
в магазине. Наши сервисные станции - это не только
квалифицированный ремонт, но и широкий ассортимент
запчастей и принадлежностей.
5. Производитель рекомендует проводить периодическую
проверку и техническое обслуживание изделия в
уполномоченных сервисных центрах.
Изготовитель
Блэк энд Деккер Холдингс ГмбХ
Германия, 65510, Идштайн,
ул. Блэк энд Деккер, 40
(Перевод с оригинала инструкции)
6. Наши гарантийные обязательства распространяются
только на неисправности, выявленные в течение гарантийного срока и вызванные дефектами производства и \
или материалов.
7. Гарантийные условия не распространяются на
неисправности изделия, возникшие в результате:
7.1. Несоблюдения пользователем предписаний инструкции по
эксплуатации изделия, применения изделия не по
назначению, неправильном хранении, использования
принадлежностей, расходных материалов и запчастей, не
предусмотренных производителем.
7.2. Механического повреждения (сколы, трещины и разрушения) внутренних и внешних деталей изделия,
основных и вспомогательных рукояток, сетевого электрического кабеля, вызванного внешним ударным или
любым иным воздействием
7.3 Попадания в вентиляционные отверстия и проник- новение
внутрь изделия посторонних предметов, материалов или
веществ, не являющихся отходами, сопровождающими
применение изделия по назначению, такими как: стружка,
опилки, песок, и пр.
7.4. Воздействий на изделие неблагоприятных атмосферных и
иных внешних факторов, таких как дождь, снег,
повышенная влажность, нагрев, агрессивные среды,
несоответствие параметров питающей электросети,
указанных на инструменте.
7.5. Стихийного бедствия. Повреждение или утрата изделия,
связанное с непредвиденными бедствиями, стихийными
явлениями, в том числе вследствие действия
непреодолимой силы (пожар, молния, потоп и другие
природные явления), а так же вследствие перепадов напряжения в электросети и другими причинами, которые
находятся вне контроля производителя.
8. Гарантийные условия не распространяются:
8.1. На инструменты, подвергавшиеся вскрытию, ремонту или
модификации вне уполномоченного сервисного центра.
8.2. На детали и узлы, имеющие следы естественного износа,
такие как:
приводные ремни и колеса, угольные щетки, смазка,
подшипники, зубчатое зацепление редукторов, рези- новые
уплотнения, сальники, направляющие ролики, муфты,
выключатели, бойки, толкатели, стволы, и т.п.
8.3. На сменные части: патроны, цанги, зажимные гайки и
фланцы, фильтры, аккумуляторные батареи, ножи,
шлифовальные подошвы, цепи, звездочки, пильные шины,
защитные кожухи, пилки, абразивы, пильные и абразивные
диски, фрезы, сверла, буры и т.п.
8.4. На неисправности, возникшие в результате перегрузки
инструмента (как механической, так и электрической),
повлекшей выход из строя одновременно двух и более
деталей и узлов, таких как: ротора и статора, обеих
обмоток статора, ведомой и ведущей шестерни ре- дуктора
или других узлов и деталей. К безусловным признакам
перегрузки изделия относятся, помимо прочих: появление
цветов побежалости, деформация или оплавление
деталей и узлов изделия, потемнение или обугливание
изоляции проводов электродвигателя под воздействием
высокой температуры.
РУССКИЙ
27
Page 28

УКРАЇНСЬКА
(Переклад оригінальних інструкцій)
Призначення
Дриль/шуруповерт Stanley SBD20 призначений для
вкручування шурупів та свердління дерева, металів та
пластмас. Інструмент для професійного використання.
Вказівки з техніки безпеки
Загальні вказівки щодо безпечної роботи з
електричним інструментом
Наведені нижче визначення описують рівень небезпеки
за кожним сигнальним словом. Будь ласка, уважно
прочитайте цей посібник та зверніть увагу на наступні
знаки.
Ув ага! У важно п рочита йте вс і
попереджувальні написи та вк азівки з
техніки безпеки. Порушення наведених нижче
попереджувальних написів і вказівок може
призвести до ураження електричним струмом,
пожежі та/або серйозних травм.
Зберігайте всі попереджувальні написи та вказівки
щодо безпечної роботи для використання в
майбутньому. Термін «електричний інструмент», що
використовується у всіх застережливих написах та
вказівках щодо техніки безпеки, представлених нижче,
відноситься до електричного інструменту, що працює від
мережі (зі шнуром електроживлення) або від
акумуляторної батареї (без шнура живлення).
1. Вказівки з техніки безпеки на робочому місці
a. Утримуйте робоче місце в чистоті і добре
освітленим. Безлад або погане освітлення на
робочому місці можуть призвести до нещасного
випадку.
b. Не працюйте з електроінструментом в місці
зберігання в ибухо небезпечних мате ріалів,
наприклад, у присутності легкозаймистих рідин,
газів або пилу. Електричні інструменти створюють
іскри, що можуть запалити пил або пари.
c. Забороняється перебування дітей та сторонніх
осіб побли зу пр ацюючого е лектричного
інструменту. Ви можете відволіктися і втратити
контроль за роботою інструменту.
2. Електрична безпека
a. Вилка шнура живлення інструмента повинна
відповідати мережевій розетці. Забороняється
вносити будь-які зміни у вилку шнура живлення.
Не використовуйте жодних вилок-перехідників із
з а з е м л е н и м и ( з а н у л е н и м и )
електроінструментами. Відсутність змін у вилках
шнурів живлення та відповідність електричних вилок і
розеток знижує ризик ураження електричним
струмом.
b. Не торкайтеся поверхонь заземлених чи
занулених предметів, наприклад труб, радіаторів,
електроплит або холодильників. Заземлення чи
занулення тіла підвищує ризик ураження
електричним струмом.
c. Забороняється піддавати електричні інструменти
впливу дощу чи підвищеної вологості. При
попаданні вологи всереди ну електричного
інструме нта підвищуєть ся ризик ураження
електричним струмом.
d. Забороняється пошкоджувати шнур живлення. У
жодному разі не використовуйте шнур живлення
для перенесення чи зміни положення інструмента;
не тягніть за шнур, виймаючи вилку з розетки. Не
прокладайте шнур живлення поруч із гарячими
предметами, мас тилом, гострими краями і
рухомими деталями. Пошкодження й заплутування
шнурів живлення підвищує ризик ураження
електричним струмом.
e. Під час роботи з електричним інструментом за
межами приміщень використовуйте відповідний
подо вжув ач. Викор истанн я п одовжув ача,
призначеного для роботи поза приміщеннями,
знижує ризик ураження електричним струмом.
f. Якщо електричним інструментом необхідно
кори сту вати сь у вол огому місці , слі д
використовувати пристрій захисного відключення
(ПЗВ) електричної мережі. Використання ПЗВ
знижує ризик ураження електричним струмом.
3. Безпека персоналу
a. Під час роботи з електричним інструментом
необх ідно бу ти обачним, слідкувати за
виконуваною роботою та керуватися здоровим
глузд ом. За бор оня єть ся п рац юва ти з
електричним інструментом у стані втоми чи під
впливом наркотиків, алкоголю й лікарських
препаратів. Ослаблення уваги навіть на мить може
призвести до серйозної травми.
b. Використовуйте засоби індивідуального захисту.
Завжди користуйтеся засобами захисту очей.
Використання у відповідних умовах засобів
індивідуального захисту, наприклад пилозахисної
маски, протиковзного захисного взуття, захисної
каски або засобів захисту органів слуху, завжди
знижує ризик отримання травми.
c. Не допус кайте н енавмис ного вмик ання
інструмента. Перш ніж підключити джерело
живлення та/або акумулятор, піднімати чи
переносити інструмент, переконайтесь, що його
вимикач переведено у положення «вимкнено».
Якщо тримати палець на вимикачі під час
пере несе ння інструмента чи п ідключення
увімкненого інструмента до мережі, це підвищує
ризик нещасного випадку.
28
Page 29

(Переклад оригінальних інструкцій) УКРАЇНСЬКА
d. Перш ніж увімкнути електричний інструмент,
обов’язково вийміть із нього регулювальний чи
гайковий ключ. Ключ, залишений ключ на
обертальній деталі інструмента, може призвести до
травмування.
e. Не намагайтеся дотягнутися до важкодоступних
місць. Завжди міцно тримайтеся на ногах і
зберігайте рівновагу під час роботи. Це дозволяє
краще контролювати електричний інструмент у
непередбачуваних ситуаціях.
f. Одягайте відповідний одяг. Забороняєтьс я
одягати вільний одяг або прикраси. Волосся, одяг
та рукавиці повинні знаходитися на максимальній
відстані від рухомих деталей інструмента. Вільний
одяг, прикраси або довге волосся можуть бути
захоплені рухомими деталями.
g. Якщо встановлені пристрої підключення засобів
пиловловлювання та пилозбірників, необхідно
перевіряти, щоб вони були підключені та
ви ко ристо вували ся нал еж ним ч ином.
Використання цих пристроїв знижує рівень ризику,
пов’язаного з пилом.
4. Використання та догляд за електричним
інструментом
a. Не зас тосовуйте надмір не зусилля д о
електричного інструмента. В икори стовуйте
електричний інструмент тільки за призначенням.
Правильно підібраний електроінструмент дозволить
виконати роботу краще і безпечніше при швидкості,
для якої він був розроблений.
b. Забороняється використовувати цей електричний
інструмент, якщо не вдається ввімкнути чи
вимкнути його вимикачем. Будь-який електричний
інструмент, роботою якого неможливо керувати за
допомогою вимикача, є небезпечним, і його
обов’язково потрібно відремонтувати.
c. Перш ніж регулювати електричний інструмент,
замінювати на ньому приладдя чи класти на
зберігання, необхідно витягти вилку живлення з
розетки та/або зняти з нього акумулятор. Такий
превентивний захід безпеки знижує ризик
випадкового увімкнення інструмента.
d. Зберігайте електричний інструмент, який в даний
момент не використовується, в недоступному для
дітей місці та не дозволяйте працювати з
інструментом особам, які не знайомі з ним або з
цими вказівками. Е лектричний інструмент є
небезпечним в руках ненавченої людини.
e. Підтримуйте інс трумент в робочому стані.
Перевіряйте центрування та з’єднання рухомих
деталей, наявність пошкоджених деталей та
будь-я кі фактори, які можуть негати вно
позначитися на роботі електричного інструмента.
У разі виявлення пошкодження електричний
інструмент необхідно відремонтувати перед
використанням . Багато нещасних випадкі в
тр апл яєть ся чер ез не нале жне техн ічн е
обслуговування електричних інструментів.
f. Ріжучі інструменти мають бути загостреними й
чистими. Підтримуваний у належному робочому
стані ріжучий інструмент з гострими лезами менше
застряє, ним легше керувати.
g. Вико ристовуйте ел ектричн ий і нструмент,
приладдя, вставні різці і т. п. відповідно до даних
вказівок, враховуючи умови експлуатації та
роботу, яка має бути виконана. Використання
електричного інструменту не за призначенням може
призвести до небезпечної ситуації.
5. Використання та догляд за ак умуляторною
батареєю
a. Зарядка акумуляторної батареї пови нна
викон увати ся т ільки за допомогою того
зарядного пристрою, який вказав виробник
акумуляторної батареї. Якщо зарядний пристрій,
який підходить для одного типу акумулятора,
використовувати для зарядки акумулятора іншого
типу, це може призвес ти до виникнення
пожежонебезпечної ситуації.
b. Використовуйте електричний інструмент тільки з
конк ретн о з азначеним и а кумулятор ними
батар еями. Викорис тання будь-яких інши х
акумуляторних батарей підвищує ризик травмування
та виникнення пожежонебезпечної ситуації.
c. Якщо акумуляторна батарея не використовується,
вона повинна зберігатися окремо від металевих
предметів, таких як канцелярські скріпки, монети,
ключі, цвяхи, шурупи та інші невеликі металеві
предмети, які можуть закоротити клеми батареї.
Коротке замикання акумулятора може призвести до їх
вигоряння або загоряння акумулятора.
d. В умовах неправильної експлуатації рідкий
електроліт може бути викинутий з акумуляторної
батареї, тому слід остерігатис я контакту з
електролітом. Якщо стався випадковий контакт з
рідким електролітом, промийте це місце водою.
Якщо рідина потрапила в очі, необхідно також
звернутися за медичною допомогою. Контакт з
рідиною, викинутою з акумуляторної батареї, може
призвести до подразнення або опіків.
6. Обслуговування
a. Обслуговувати електричний інструмент повинен
тільки кваліфікований ремонтний персонал із
використанням лише ідентичних запасних частин.
Це забезпечить утримання електричного інструмента
у безпечному стані.
29
Page 30

УКРАЇНСЬКА
ДОДАТКОВІ ЗАСТЕРЕЖЕННЯ З ТЕХНІКИ
(Переклад оригінальних інструкцій)
БЕЗПЕКИ ПРИ РОБОТІ З ЕЛЕКТРИЧНИМ
ІНСТРУМЕНТОМ
Увага! Додаткові вказівки щодо безпечної
роботи з дрилем/шуруповертом.
• При роботі з ударними дрилями надягайте засоби
захисту органів слуху. Вплив шуму може призвести
до порушення слуху.
• В икористовуйте допоміжні рукоятки, які
поставляються разом з інструментом. Втрата
управління інструментом може призвести до
травмування.
• Під час виконання робіт, коли ріжуча деталь
електричного інструмент у може с тикатися з
прихованою електропроводкою, інструмент
необхідно тримати за діелектричну поверхню.
При контакті ріжучої деталі з проводом під напругою,
під напругу можуть потрапити металеві деталі
електричного інструменту, внаслідок чого виникає
небезпека ураження оператора електричним
струмом.
• Під час виконання робіт, коли кріпильна деталь
електричного інструмент у може с тикатися з
прихованою електропроводкою, інструмент
необхідно тримати за діелектричну поверхню.
При контакті кріпильної деталі з проводом під
напругою, під напругу можуть потрапити металеві
деталі електричного інструменту, внаслідок чого
виникає небезпека ураження оператора електричним
струмом.
• Для фіксації положення оброблюваної деталі на
стійкій основі використовуйте затискачі або інший
зручний і практичний спосіб. Якщо тримати деталь
руками або притискати її до тіла, вона буде
перебувати в незакріпленому положенні, що може
призвести до втрати контролю за роботою
інструменту.
• Перед виконанням свердління стін, підлог і стель
перевіряйте розташування електропроводки і труб.
• Не торкайтеся наконечника свердла дрилі після
свердління, оскільки він може бути гарячим.
• Призначення інструменту описане в цій інструкції з
експлуатації. Використання будь-якого приладдя і
додаткових пристосувань разом з цим інструментом
або використання інструменту в цілях, які не
рекомендовані в цій інструкції, може призвести до
виникнення ризику травмування персоналу та
пошкодження майна.
БЕЗПЕКА ІНШИХ ОСІБ
• Цей інструмент не призначений для використання
особами (включаючи дітей) з обмеженими фізичними,
сенсорними або розумовими здібностями або
особами, у яких відсутній необхідний досвід і знання,
крім випадків, коли вони знаходяться під наглядом і
отримали належні інструкції по роботі з інструментом
від особи, відповідальної за їхню безпеку.
• Щоб діти не гралися з інструментом, вони повинні
знаходитися під наглядом.
Залишковий ризик
Додатковий залишковий ризик може виникнути у
випадках використання інструменту, які можуть бути не
враховані в перерахованих вказівках щодо безпечної
роботи. Який ризик може виникати при неправильному
використанні, тривалому використанні та ін.
Навіть при дотриманні всіх відповідних правил техніки
безпеки та використанні захисних пристроїв деякий
залишковий ризик все ж залишається. Він включає:
• Травми, отримані при торканні обертових і рухомих
деталей.
• Травми, отримані при заміні деталей, ножів та
приладдя.
• Травми, отримані внаслідок тривалого використання
інструменту. При тривалому використанні
інструменту необхідно робити регулярні перерви в
роботі.
• Погіршення слуху.
• Шкода для здоров’я, викликана вдиханням пилу, яка
з’являється під час роботи інструменту (наприклад,
при роботі з деревом, особливо з дубом, буком або
ДВП).
НАКЛЕЙКИ НА ІНСТРУМЕНТІ
До поверхні інструменту разом з кодом дати прикріплені
наступні графічні зображення:
Увага! Для зниження ризику травмування
оператор повинен прочитати цю інструкцію з
експлуатації.
Використання для захисту очей
Використання захисту слуху
друкується на корпусі
Дата коду, який також включає рік виготовлення,
друкується на корпусі.
Приклад:
2017 XX JN
Рік виготовлення
30
Page 31

Додаткові вказівки щодо безпечного
використання акумуляторних батарей та
зарядних пристроїв
Акумуляторні батареї
• Незалежно від причини, ніколи не намагайтеся
розкрити акумуляторну батарею.
• Не піддавайте акумулятор дії води.
• Не зберігайте акумуляторні батареї в місцях, де
температура повітря може перевищувати 40 °C.
• Зарядку акумуляторної батареї необхідно виконувати
при температурі навколишнього повітря в межах від
10 °C до 40 °C.
• Зарядку акумуляторної батареї необхідно виконувати
тільки за допомогою зарядного пристрою, що
поставляється разом з батареєю.
• Утилізацію акумуляторних батарей необхідно
проводити відповідно до вказівок, що містяться в
розділі «Захист навколишнього середовища».
Не намагайтеся заряджати пошкоджені
акумуляторні батареї.
Зарядні пристрої
• Використовуйте зарядний пристрій Stanley тільки для
зарядки акумуляторної батареї для інструменту, з
яким вона була поставлена. При зарядці інших
акумуляторних батарей може статись вибух, який
призведе до травмування людей і пошкодження
майна.
• Ніколи не намагайтеся заряджати акумуляторні
батареї.
• Пошкоджені електричні шнури необхідно замінювати
негайно.
• Не піддавайте зарядний пристрій впливу води.
• Не відкривайте зарядний пристрій.
• Не вимірюйте характеристики зарядного пристрою
електричними приладами.
Зарядний пристрій призначений тільки для
використання у приміщенні.
Перед його використанням прочитайте
інструкцію з експлуатації.
Електрична безпека
Ваш зарядний пристрій має подвійну ізоляцію, і
тому дріт заземлення йому не потрібен. Завжди
пере віряйте, щоб ме реже ва нап руга
відповідала значенню, зазначеному в таблиці з
паспортними даними. Ніколи не намагайтеся
замінити вилку в блоці зарядного пристрою
звичайною мережевою вилкою.
• У разі пошкодження кабелю живлення, щоб уникнути
виникнення небезпечних ситуацій, його заміну
повинен виконати виробник обладнання або
(Переклад оригінальних інструкцій) УКРАЇНСЬКА
уповноважений сервісний центр Stanley.
ХАРАКТЕРИСТИКИ
Цей побутовий прилад може мати всі або деякі з
перерахованих нижче функції.
1. Пусковий перемикач
2. Перемикач прямого/зворотного напрямку обертання
3. Кільце регулювання крутного моменту
4. Двобічний перемикач швидкостей обертання
5. Безключовий затискний патрон
6. Акумуляторна батарея
7. Кнопка розблокування акумуляторної батареї
8. Світлодіод робочого освітлення
9. Утримувач головок викруток
Використання
Увага! Дайте можливість інструменту працювати із
притаманною йому швидкістю.
Не перевантажуйте його.
ЗАРЯДКА АКУМУЛЯТОРНОЇ БАТАРЕЇ
Заряджання акумуляторно ї батар еї необхідно
виконувати перед її першим використанням, а також
кожного разу, коли вона не в змозі забезпечувати
потужність, необхідну для виконання роботи, хоча перед
цим така робота виконувалася легко. Під час зарядки
акумуляторна батарея може нагріватися; це нормально і
не означає наявність проблеми.
Увага! Заборонено заряджати акумуляторну батарею
при температурі повітря нижче 10 °C і вище 40 °C.
Рекомендована температура повітря для зарядки
складає близько 24°C.
Примітка: зарядний пристрій не буде заряджати
акумуляторну батарею, якщо температура її елемента
становить приблизно нижче 10 °C або вище 40 °C.
Акумулятор треба залишати у зарядному пристрої, який
автоматично почне виконувати зарядку, коли
температура елемента ввійде у вказані межі (підніметься
або знизиться).
• Перш ніж вставляти акумуляторну батарею, увімкніть
зарядний пристрій в розетку.
• Вставте акумуляторну батарею в зарядний пристрій.
Зелений світлодіодний індикатор почне
блимати, що вказує на початок
заряджання.
Після завершення заряджання зелений
інди като р горить безперервно .
Акумуляторна батарея повністю
заряджена та готова до використання. Її
можна залишити у зарядному пристрої.
31
Page 32

УКРАЇНСЬКА
(Переклад оригінальних інструкцій)
Увага! Заряджайте розряджені акумуляторні батареї
якомога скоріше, інакше строк служби батареї може
суттєво скоротитися.
Діагностика зарядного пристрою
Зарядний пристрій може виявляти деякі несправності
акумуляторної батареї або джерела живлення. Ці
проблеми позначаються блиманням індикатора у певній
послідовності.
Несправна акумуляторна батарея
Зарядний пристрій може визначити
слабку або пошкоджену акумуляторну
батарею. Червоний світлодіодний
індикатор блимає у послідовності,
вказаній на рисунку. В цьому випадку
зарядж ати батаре ю заборонено.
Відправте її в сервісний центр або до
утилізаційного центру для переробки.
Затримка через перегрів/переохолодження
акумуляторної батареї
Якщо зарядний пристрій визначає, що
акумуляторна батарея занадто гаряча
або холодна, початок заряджання
автоматично відкладає ться, доки
температура акумуляторної батареї не
но рмалізу єтьс я. П ісля цьо го
заряджання починається автоматично.
Ця функція продовжує строк служби
акумуляторної батареї. У разі затримки
з а р я д ж а н н я ч е р е з
п е р е г р і в / п е р е о х о л о д ж е н н я
акумулято рної батареї червоний
світлодіодний індикатор блиматиме у
послідовності, вказаній на рисунку.
Проблема з джерелом живлення
Якщо зарядний пристрій підключений
до портативного джерела енергії,
напр ик ла д, генерато ра або
перетворювача постійного/змінного
струму, зарядний пристрій може
тимчасово пр изупин ити роботу.
Світлодіодний індикатор блимає у
послідовності, вказаній на рисунку. Це
вказує на те, що струм джерела
жив лення за межами граничних
значень.
Залишання акумуляторної батареї у зарядному
пристрої.
Зарядний пристрій та акумуляторну батарею можна
залишати з'єднаними на необмежений час з активним
світлодіодним індикатором. Зарядний пристрій буде
32
підтримувати акумуляторну батарею у повністю
зарядженому стані.
Тільки Для Літій-Іонних Акумуляторів
Літій-іонні акумулятори містять Систему електронного
захис ту, яка не допускає їх перевантаження,
перегрівання або надто глибокого розрядження. У таких
випадках акумулятор буде автоматично відключений
цією Сис темою. Якщо це відбулося, приєднайте
літій-іонний акумулятор до пристрою для зарядження і
повністю зарядіть його.
ВАЖЛИВІ ПРИМІТКИ ЩОДО ЗАРЯДЖАННЯ
• Для продовження строку служби та досягнення
оптимальних експ луатаційних характеристик
заряджайте акумуляторну батарею при температурі
18–24 °C. Заборонено заряджати акумуляторну
батарею при температурі повітря нижче +4,5 °C і вище
+40,5 °C. Це захистить батарею від серйозних
пошкоджень.
• В процесі заряджання зарядний прис трій та
акумуляторна батарея можуть нагріватися. Це
нормальне явище і не означає наявність проблеми.
Для кращого охолодження акумуляторної батареї
після використання не розміщуйте зарядний пристрій
або акумуляторну батарею в теплому середовищі,
наприклад, в металевому сараї або причепі без
теплоізоляції.
• Якщо акумуляторна батарея не заряджається
належним чином:
– перевірте струм в розетці, підключивши до неї лампу
або інший прилад;
– перевірте, чи з'єднана розетка з вимикачем світла,
який відключає живлення, коли ви вимикаєте світло;
– перемістіть зарядний пристрій і акумулятор в місце,
де температура становить приблизно 18–24 °C. d.
Якщо проблеми із заряджанням не зникли, відправте
інструмент, акумулятор і зарядний пристрій до
найближчого сервісного центру Stanley.
• Акумуляторну батарею слід заряджати, коли вона не
забезпечує достатню потужність для виконання робіт,
на які раніше вистачало потужності.
• НЕ ПРОДОВЖУЙТЕ використовувати акумуляторну
батарею в таких умовах. Зарядіть батарею.
• Частково розряджену акумуляторну батарею можна
заряджати без негативних наслідків для неї.
Встановлення та зняття акумуляторної батареї з
інструменту
Увага! Переконайтеся, що кнопка блокування вимикача
задіяна. Це дозволить запобігти вмиканню реле перед
зняттям або встановленням акумулятора.
ПРИМІТКА: Впевніться в тому, що акумулятор (6)
повністю заряджений.
Page 33

Приєднання акумулятора до рукоятки
інструменту - рис. A
• Поставте акумулятор на направляючі, що знаходяться
всередині рукоятки.
• Посуньте акумулятор вперед до упору; коли він стане
на місце, Ви повинні почути характерне клацання.
Від’єднання акумулятора від інструменту рис. B
• Натисніть кнопку вивільнення акумулятора (7) та з
силою витягніть акумулятор з рукоятки інструменту.
• В зарядний пристрій акумулятор вставляйте так, як то
описано у відповідному розділі цього документу.
ВИКОРИСТАННЯ
Пусковий вимикач та перемикач напрямку
обертання – рис. C
• Щоб увімкнути або вимкнути дриль, натисніть та
відпустіть пусковий вимикач (1), що показаний на рис.
C. Швидкість обертання дрилю збільшується з
посиленням натискання на вимикач.
• Перемикач напрямку обертання (2) визначає
напрямок обертання, а також виконує функцію кнопки
розблокування.
• Щоб вибрати прямий напрямок обертання, відпустіть
пусковий вимикач і натисніть перемикач напрямку
обертання з правого боку дрилю.
• Щоб вибрати зворотний напрямок обертання,
натисніть перемикач напрямку обертання з лівої
сторони дрилю.
• Центральне положення кнопки напрямку обертання
блокує інструмент у вимкненому положенні. При зміні
положення перемикача напрямку обертання
необхідно слідкувати за тим, щоб пусковий вимикач
був відпущений.
ВИКОРИСТАННЯ
Регулювання сили закручування – рис. D
Цей інструмент оснащений кільцем регулювання
крутного моменту (3) для вибору режиму роботи та
завдання крутного моменту для затягування шурупів. Для
великих шурупів і деталей з твердих матеріалів необхідно
збільшувати крутний момент у порівнянні з невеликими
шурупами і деталями з м’яких матеріалів.
• Для виконання свердління дерева, металів і пластмас
встановіть кільце в положення свердління.
• Для закручування шурупів встановіть необхідне
налаштування кільця. Якщо ви ще не знаєте, яке
налаштування вам встановити, виконайте такі дії:
• встановіть кільце в положення мінімального крутного
моменту;
• закрутіть перший шуруп;
• якщо почнуться переривчасті рухи патрона до того,
як шуруп буде повністю закручений, збільште
налаштування крутного моменту і продовжуйте
закручувати шуруп;
(Переклад оригінальних інструкцій) УКРАЇНСЬКА
• повторюйте ці дії доти, доки не буде знайдене
необхідне налаштування;
• використовуйте це налаштування для закручування
інших шурупів.
Двобічний перемикач швидкостей обертання –
рис. Е
Цей перемикач дозволяє вибирати швидкість обертання
для підвищення функціональності.
• Щоб вибрати низьку швидкість із високим крутним
моментом, (положення 1), вимкніть інструмент і
дочекайтеся його зупинки. Переведіть перемикач (4)
в бік задньої частини інструмента.
• Щоб вибрати високу швидкість із низьким крутним
моментом, (положення 2), вимкніть інструмент і
дочекайтеся його зупинки. Переведіть перемикач в
бік передньої частини інструмента.
Примітка: не перемикайте швидкості під час обертання
інструменту. У разі виникнення проблем із
перемиканням швидкостей переконайтеся, що
перемикач встановлений у крайнє переднє або заднє
положення.
Безключовий патрон – рис. F
Увага! Перед установкою або зняттям аксесуарів зніміть
акумуляторну батарею.
Щоб встановити свердло або інший аксесуар:
• утримуйте патрон (5) рукою та обертайте його проти
годинникової стрілки, якщо дивитися ззаду
інструмента;
• вставте свердло або інший аксесуар і затягніть патрон
за годинниковою стрілкою, якщо дивитися ззаду
інструмента, із зусиллям.
Увага! Не намагайтеся затягнути або послабити свердло
(аксесуар) шляхом тримання патрона і вмикання
інструмента. Це може призвести до пошкодження
патрона та травмування.
Закручування ґвинтів
• Для закручування ґвинтів перемикач напрямків
обертання повинен бути натиснутий в ліву сторону.
• Для викручування ґвинтів перемикач напрямків
обертання повинен бути натиснутий в ліву сторону
(зворотнє обертання).
Примітка: перш ніж задіяти перемикач напрямків
обертання, обов'язково відпустіть пусковий вимикач.
Свердління
• Використовуйте лише гострі свердла.
• Забезпечте належну підтримку та фіксацію робочої
деталі, як це вказано в Правилах та вказівках з техніки
безпеки.
• Використовуйте належне й необхідне захисне
обладнання, як це вказано в Правилах та вказівках з
техніки безпеки.
33
Page 34

УКРАЇНСЬКА
(Переклад оригінальних інструкцій)
• Забезпечте належне обладнання місця виконання
робіт, як це вказано в Правилах та вказівках з техніки
безпеки.
• Починайте свердління з малих обертів та слабкого
натискання, доки отвір не буде розсвердлений
достатньо, щоб свердло не вислизало з нього.
• Прикладайте зусилля вздовж осі обертання свердла.
Застосовуйте достатній тиск для свердління, але не
настільки, щоб двигун зупинився або свердло
змістилося.
• Тримайте дриль міцно двома руками, однією рукою за
ручку, а іншою за задню частину навколо батареї або
за допоміжну рукоятку (якщо передбачена).
• НЕ НАМАГАЙ ТЕСЯ ЗВІЛЬНИТИ ЗАТИСНЕНЕ
СВЕ РДЛО ШЛЯХОМ ВМИКАННЯ/ВИМИКАННЯ
ДРИЛЮ! ЦЕ МОЖЕ ПРИЗВЕСТИ ДО ПОШКОДЖЕННЯ
ДРИЛЮ!
• Щоб запобігти затисненню свердла наприкінці
наскрізного свердління, зменшуйте тиск та швидкість
перед виходом свердла з протилежної сторони
отвору.
• Не зупиняйте свердло при витяганні його з
просвердленого отвору. Це попередить його
затискання.
• Переконайтеся, що вимикач вмикає і вимикає дриль.
Свердління деревини
Отвори в деревині можна робити спіральними
свердлами для металу або перовими свердлами.
Свердла мають бути гострими. Під час свердління
свердло слід часто витягати, щоб видалити стружку.
Свердління металу
Використовуйте змащувально-охолоджувальну рідину
при свердлінні металів. Виняток становлять чавун і
латунь, які слід свердлити сухими. Найкраще
застосовувати сульфовані змащувально-охолоджувальні
рідини.
Світлодіод робочого освітлення
При натисканні пускового вимикача (1), вбудований
світлодіод (8) автоматично вмикається для підсвічування
місця виконання робіт.
Примітка: світлодіод призначений для освітлення
безпосередньо робочої поверхні і не призначений для
використання в якості ліхтарика.
Тримач для насадок
В нижній частині інструмента передбачений тримач для
насадок (9).
Пошук та усунення несправностей
Проблема Можлива причина Можливі рішення
Інструмент не
вмикається.
Інструмент
вмикається відразу
після вставляння
акумуляторної
батареї
Акумуляторна
батарея не
заряджається.
Інструмент різко
вимикається.
Акумуляторна батарея
встановлена
неправильно.
Акумуляторна батарея
не заряджена.
Вимикач залишений у
положенні
«ввімкнено».
Акумуляторна
батарея не вставлена
у зарядний пристрій
належним чином.
Зарядний пристрій не
підключений до
джерела живлення.
Температура
навколишнього
середовища занадто
висока або занадто
низька.
Акумуляторна
батарея досягла
граничної
температури.
Акумуляторна
батарея розряджена.
Щоб максимально
продовжити термін
служби батареї, вона
вимикається
автоматично при
розряджанні.
Перевірити правильність
встановлення
акумуляторної батареї
Перевірити зарядку
акумуляторної батареї
Переведіть вимикач у
положення «вимкнено»,
щоб запобігти вмиканню
інструменту після
встановлення
акумуляторної батареї.
Вставте акумуляторну
батарею в зарядний
пристрій правильно, щоб
засвітився світлодіод.
Вставте вилку в розетку,
що має струм.
Перемістити зарядний
пристрій і акумулятор до
приміщення з
температурою
навколишнього повітря
вище 4,5 ºC або нижче +
40,5 ºC
Дайте акумуляторній
батареї вистигнути.
Зарядіть акумуляторну
батарею за допомогою
зарядного пристрою.
ТЕХНІЧНЕ ОБСЛУГОВУВАННЯ
Конструкція інструмента Stanley розрахована на роботу
протягом тривалого періоду часу з мінімальним
технічним обслуговуванням. Належний догляд і
регулярне чищення – запорука тривалої задовільної
роботи інструмента.
Крім періодичної очистки, ваш зарядний пристрій не
вимагає інших операцій технічного обслуговування.
Увага! Перед виконанням будь-яких дій з технічного
обс луговування інструменту, дістаньте з нього
акумуляторну батарею. Перед проведенням очищення
зарядного пристрою вийміть його штепсельну вилку з
розетки.
• Регулярно очищуйте вентиляційні прорізи в
інструменті і зарядному пристрої за допомогою м’якої
щіточки або сухої тканини.
• Регулярно очищуйте корпус двигуна за допомогою
вологої тканини. Не використовуйте для очищення
абразивні матеріали та засоби очищення на основі
розчинників.
• Регулярно розкривайте і вибивайте затискний патрон
для видалення пилу з його внутрішньої частини.
34
Page 35

(Переклад оригінальних інструкцій) УКРАЇНСЬКА
Захист навколишнього середовища
Окреме збирання. Цей продукт не можна
викидати разом зі звичайним побутовим
сміттям.
Якщо якось ви вирішите, що ваш виріб фірми STANLEY
має бути замінено, або він вам більше не потрібний, не
викидайте його на смітник побутового сміття. Зробіть цей
виріб доступним для спеціального збирання.
Компанія STANLEY має можливість для збору та
переробки продуктів власного виробництва
після закінчення їхнього терміну служби. Щоб
скористатися цією послугою, поверніть виріб компанії в
офіційний сервісний центр, які збирають відпрацьовані
продукти за наш рахунок.
Ви можете знайти місцезнаходження найближчого до Вас
сервісного центру, зв’язавшись з місцевим офісом
компанії STANLEY за адресою, вказаною в цих інструкціях.
Крім того, список офіційних сервісних центрів компанії
STANLEY з усіма подробицями нашого післяпродажного
обслуговування та контактною інформацією міститься в
Інтернеті за адресою: www.2helpU.com
АКУМУЛЯТОРИ
Акумулятори, вироблені компанією «СТЕНЛІ» є
виробами багаторазового використання. Після
того, як термін використання акумулятору
закінчився, утилізуйте його з урахуванням
вимог щодо охорони оточуючого середовища:
• Повністю розрядіть акумулятор та від’єднайте його
від інструменту.
• Нікель-кадмієві, нікель-металгібридні та літій-іонні
акумулятори можуть направлятися на переробку.
Передавайте їх уповноваженим службам з ремонту
або на місцеві пункти переробки.
Примітка
Одним із принципів політики STANLEY є постійне
вдосконалення наших продуктів, тому ми залишаємо за
собою право змінювати характеристики наших продуктів
без попереднього сповіщення. Перелік стандартного та
додаткового обладнання може різнитися в залежності від
країни. Технічні характеристики продукту в різних
країнах можуть відрізнятися. Повна лінійка продуктів
може бути в наявності не у всіх країнах. З питання
наявності наших продуктів зверніться до дилерів
STANLEY
ТЕХНІЧНІ ДАНІ
SBD20
Напруга Впост. Ст. 18 В
Швидкість холостого ходу Хв-1 0–430/0–1700
Макс. момент обертання Нм 55
Найбільший діаметр
свердла в патроні мм 13
Найбільший діаметр свердління
Сталь / дерево мм 13/35
Вага кг 1,5
Зарядний пристрій SC201 SC202
Вхідна напруга Взм.ст. 220-240 220-240
Вихідна напруга Впост. ст. 18 18
Струм мА 1000 2000
Приблиз. час зарядки хв. 80–240 40-120
Акумуляторна батарея SB20C SB20S SB20D SB20M
Напруга Взм.ст. 18 18 18 18
Ємність А год 1,3 1,5 2,0 4,0
Тип літій- літій- літій- літій-
іонна іонна іонна іонна
ІНФОРМАЦІЯ СТОСОВНО ОБСЛУГОВУВАННЯ
Компанія «СТЕНЛІ» має мережу власних сервісних центрів
та уповноважених органів з обслуговування інструментів.
Всі сервісні організації компанії «СТЕНЛІ» укомплектовані
кваліфікованим персоналом, який надає покупцям
послуги з ефективного та надійного обслуговування
електроінструменту. Для того, щоб отримати додаткову
інформацію про наші уповноважені сервісні центри, а
також, якщо Вам потрібна порада з технічних питань,
ремонт або виготовлені нашою компанію запасні частини,
зв’язуйтесь з найближчим представництвом компанії
«СТЕНЛІ».
35
Page 36

УКРАЇНСЬКА
(Переклад оригінальних інструкцій)
Гарантійні умови
Шановний покупець!
1. Вітаємо Вас з покупкою високоякісного виробу STANLEY
і висловлюємо вдячність за Ваш вибір.
2. При покупці виробу вимагайте перевірки його
комплектності і справності у Вашій присутності,
інструкцію з експлуатації та заповнений гарантійний
талон українською мовою
В гарантійному талоні повинні бути внесені: модель, дата
продажу, серійний номер, дата виробництва
інструменту; назва, печатка і підпис торгової організації.
За відсутності у Вас правильно заповненого
гарантійного талону, а також при невідповідності
зазначених у ньому даних ми будемо змушені відхилити
Ваші претензії щодо якості даного виробу.
3. Щоб уникнути непорозумінь, переконливо просимо Вас
перед початком роботи з виробом уважно
ознайомитися з інструкцією з його експлуатації.
Правовою основою справжніх гарантійних умов є чинне
Законодавство. Гарантійний термін на даний виріб
складає 24 місяці і обчислюється з дня продажу. У разі
усунення недоліків виробу, гарантійний строк
продовжується на період його перебування в ремонті.
Термін служби виробу становить 5 років з дня продажу.
4. У разі виникнення будь-яких проблем у процесі
експлуатації виробу рекомендуємо Вам звертатися
тільки в уповноважені сервісні центри STANLEY, адреси
та телефони яких Ви зможете знайти в гарантійному
талоні, на сайті www.2helpU.com або дізнатися в
магазині. Наші сервісні станції - це не тільки
кваліфікований ремонт, але і широкий асортимент
запчастин і аксесуарів.
5. Виробник рекомендує проводити періодичну перевірку
і технічне обслуговування виробу в уповноважених
сервісних центрах.
6. Наші гарантійні зобов'язання поширюються тільки на
несправності, виявлені протягом гарантійного терміну і
викликані дефектами виробництва та \ або матеріалів.
7. Гарантійні умови не поширюються на несправності
виробу, що виникли в результаті:
7.1 Недотримання користувачем приписів інструкції з
експлуатації виробу, застосування виробу не за
призначенням, неправильного зберігання,
використання приладдя, витратних матеріалів і
запчастин, що не передбачені виробником.
7.2 Механічного пошкодження (відколи, тріщини і
руйнування) внутрішніх і зовнішніх деталей виробу,
основних і допоміжних рукояток, мережевого кабелю,
що викликані зовнішнім ударним або будь-яким іншим
впливом
7.3 Потрапляння у вентиляційні отвори та проникнення
всередину виробу сторонніх предметів, матеріалів або
речовин, що не є відходами, які супроводжують
застосування виробу за призначенням, такими як:
стружка, тирса, пісок, та ін.
7.4 Впливу на виріб несприятливих атмосферних і інших
зовнішніх факторів, таких як дощ, сніг, підвищена
вологість, нагрівання, агресивні середовища,
невідповідність параметрів електромережі, що
зазначені на інструменті.
7.5 Стихійного лиха. Пошкодження або втрати виробу, що
пов'язані з непередбаченими лихами, стихійними
явищами, у тому числі внаслідок дії непереборної сили
(пожежа, блискавка, потоп і інші природні явища), а
також внаслідок перепадів напруги в електромережі та
іншими причинами, які знаходяться поза контролем
виробника.
8. Гарантійні умови не поширюються:
8.1. На інструменти, що піддавались розкриттю, ремонту або
модифікації поза уповноваженим сервісним центром.
8.2. На деталі, вузли та матеріали, що мають сліди
природного зносу, такі як: приводні ремені і колеса,
вугільні щітки, мастило, підшипники, зубчасті зчеплення
редукторів, гумові ущільнення, сальники, направляючі
ролики, муфти, вимикачі, бойки, штовхачі, стволи тощо.
8.3. На змінні частини: патрони, цанги, затискні гайки і
фланці, фільтри, акумуляторні батареї, ножі, шліфувальні
підошви, ланцюги, зірочки, пильні шини, захисні кожухи,
пилки, абразиви, пильні і абразивні диски, фрези,
свердла, бури тощо
8.4. На несправності, що виникли в результаті
перевантаження інструменту (як механічного, так і
електричного), що спричинили вихід з ладу одночасно
двох і більше деталей і вузлів, таких як: ротора і статора,
обох обмоток статора, веденої і ведучої шестерень
редуктора або інших вузлів і деталей. До безумовних
ознак перевантаження виробу відносяться, крім інших:
поява кольорів мінливості, деформація або оплавлення
деталей і вузлів виробу, потемніння або обвуглювання
ізоляції проводів електродвигуна під впливом високої
температури.
Виробник:
"Stanley Black & Decker Deutschland
GmbH" Black-&-Decker Str.40, D-65510
Idstein, Німеччина
36
N52393003.2017
 Loading...