

Caméra vidéo
Video Camera
Videokamera
Modèle X-CEL / X-CEL model /
Modell X-CEL
Manuel de l’utilisateur
User manual
Bedienungsanleitung
www.spypoint.com
SPORT
HUNT

2 3
English
English
English
Thank you for choosing a great SPYPOINT product.
You can now enjoy many benefits of a second generation of
video cameras. The X-CEL was developed and designed by our
team of highly qualified engineers. This camera allows you to
capture crisp and clean videos while enjoying many sports and
hobbies.
v1.1
4 5
English
English
FEATURES
• Video resolution 640 x 480
• Video file AVI
• External memory Micro-SD/SDHC card
up to 8 GB
• Field of view 70 º FOV (X-CEL SPORT)
40 º FOV (X-CEL HUNT)
• Exposure Auto Exposure
• Play modes Computer / TV
• TV-out PAL / NTSC
• Power source 2 x AA batteries
• Operating temperature (-20 °C to + 50 °C)
(-4 °F to +122 °F)
• Storage temperature (-30 °C to + 75 °C)
(-22 °F to +167 °F)
• Computer operating system WIN 2000 / XP / VISTA /
Mac OS X
KIT INCLUDES
• SPYPOINT X-CEL camera
• USB cable
• Audio/Video cable
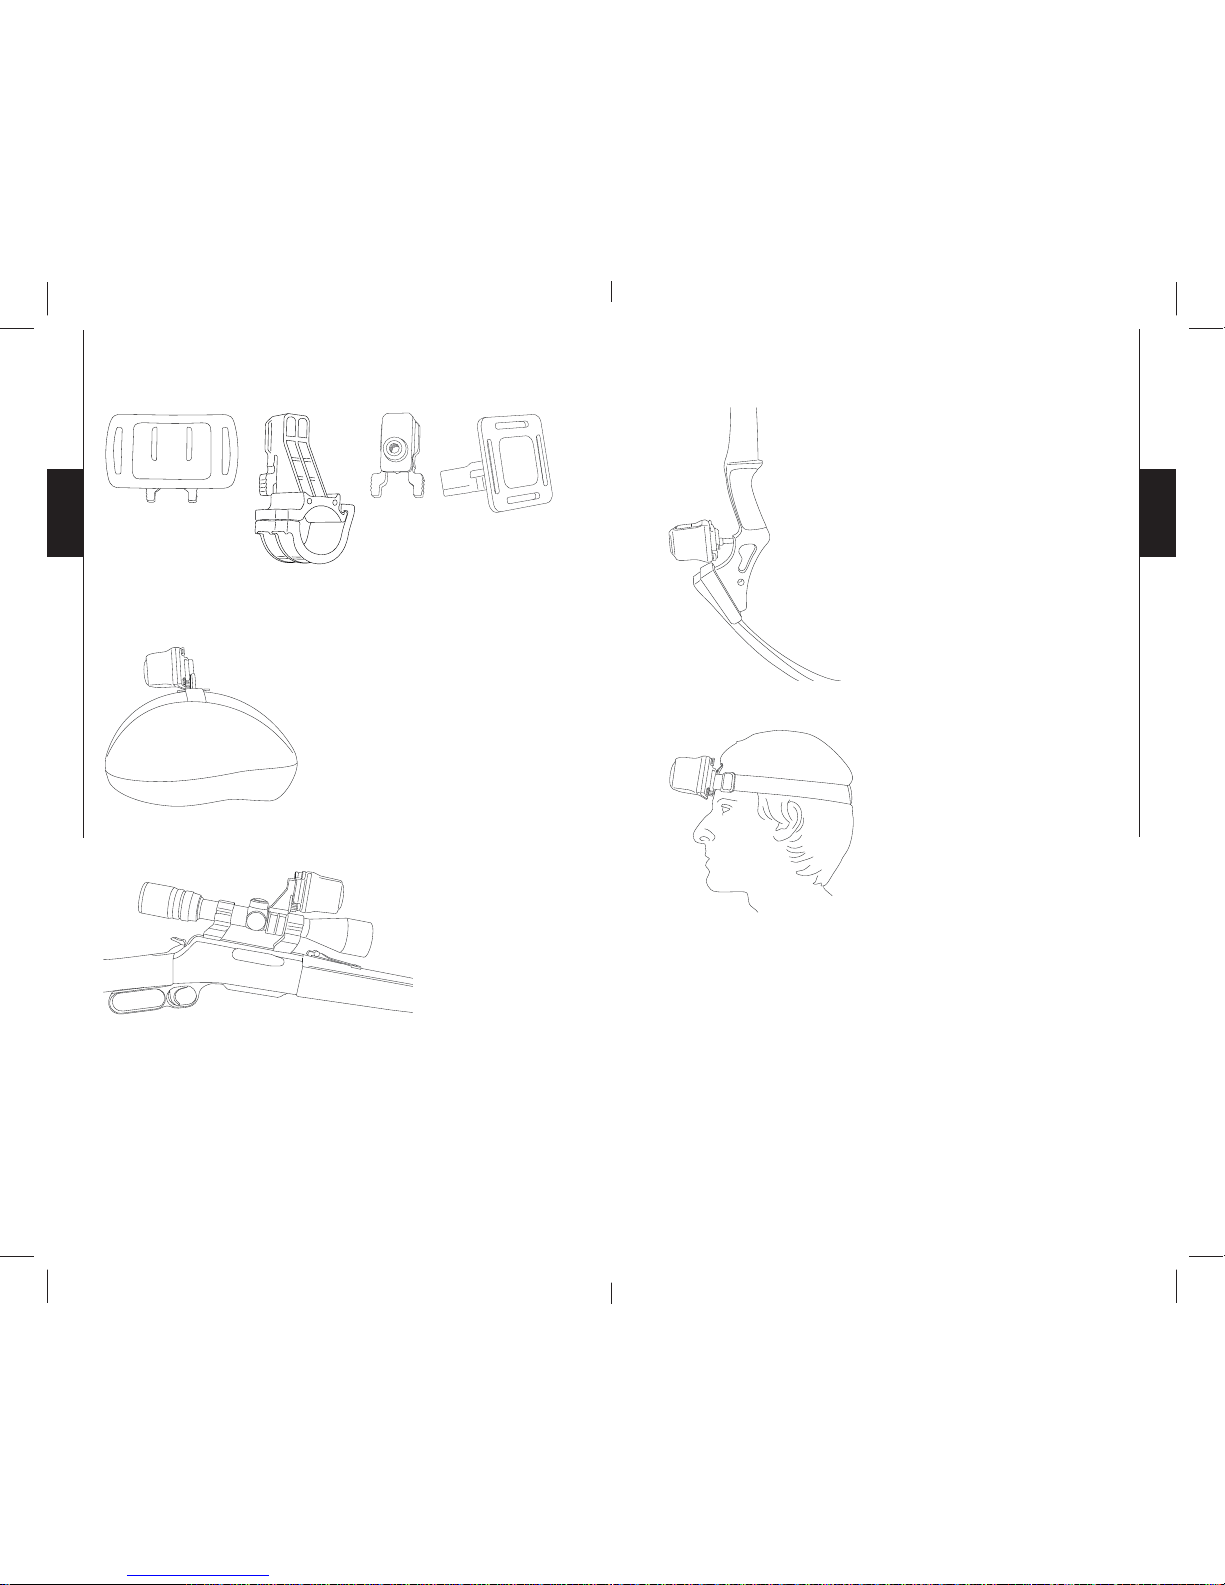
• 4 mounting brackets: scope, bow, helmet, forehead mount
• User’s Manual
MAIN FEATURES
• LCD screen to view the number of recorded videos, video
resolution and recording time available on memory card.
• Sound recording
• Water-resistant casing, up to 30 feet.
POWER
Alkaline batteries
This camera requires 2 AA batteries. We recommend the use
of AA lithium batteries since they significantly improve the
recording time and are more resistant to cold temperatures.
The use of AA alkaline batteries are also recommended. It is
important to note that the voltage of rechargeable AA batteries
(1.2V) is insufficient to power your SPYPOINT video camera.
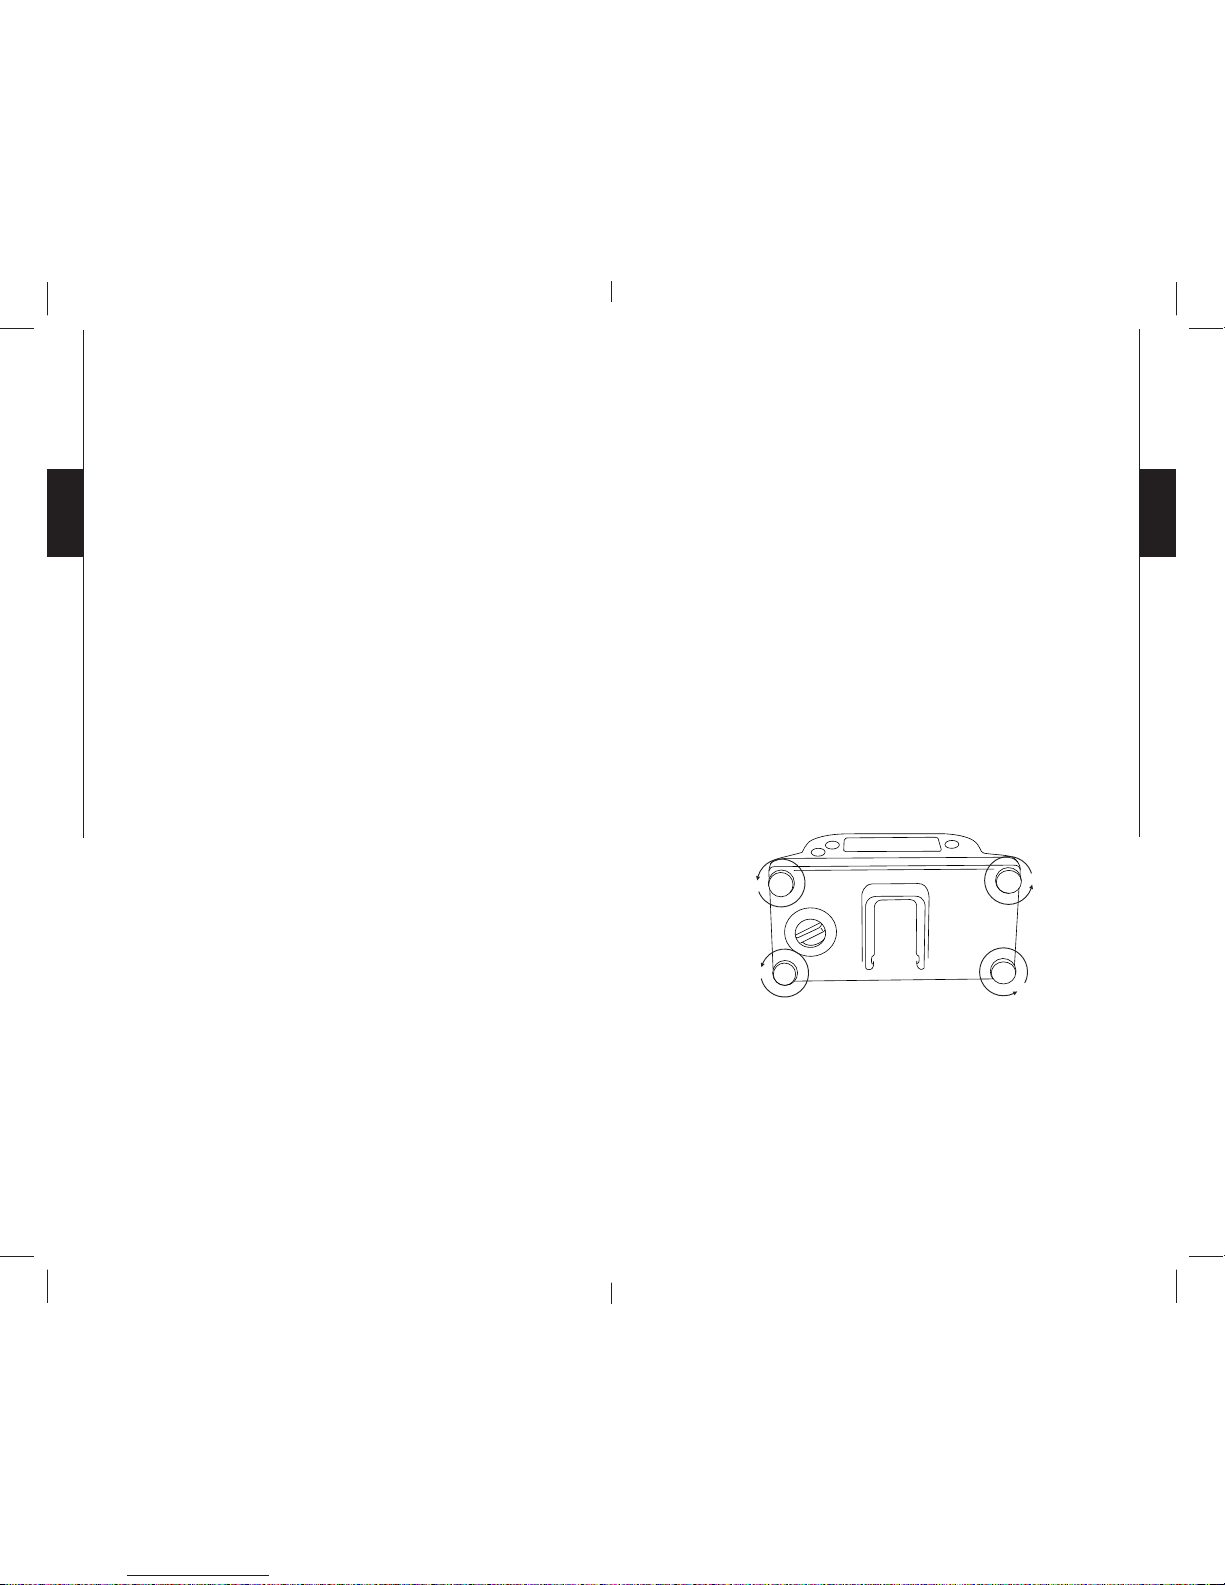
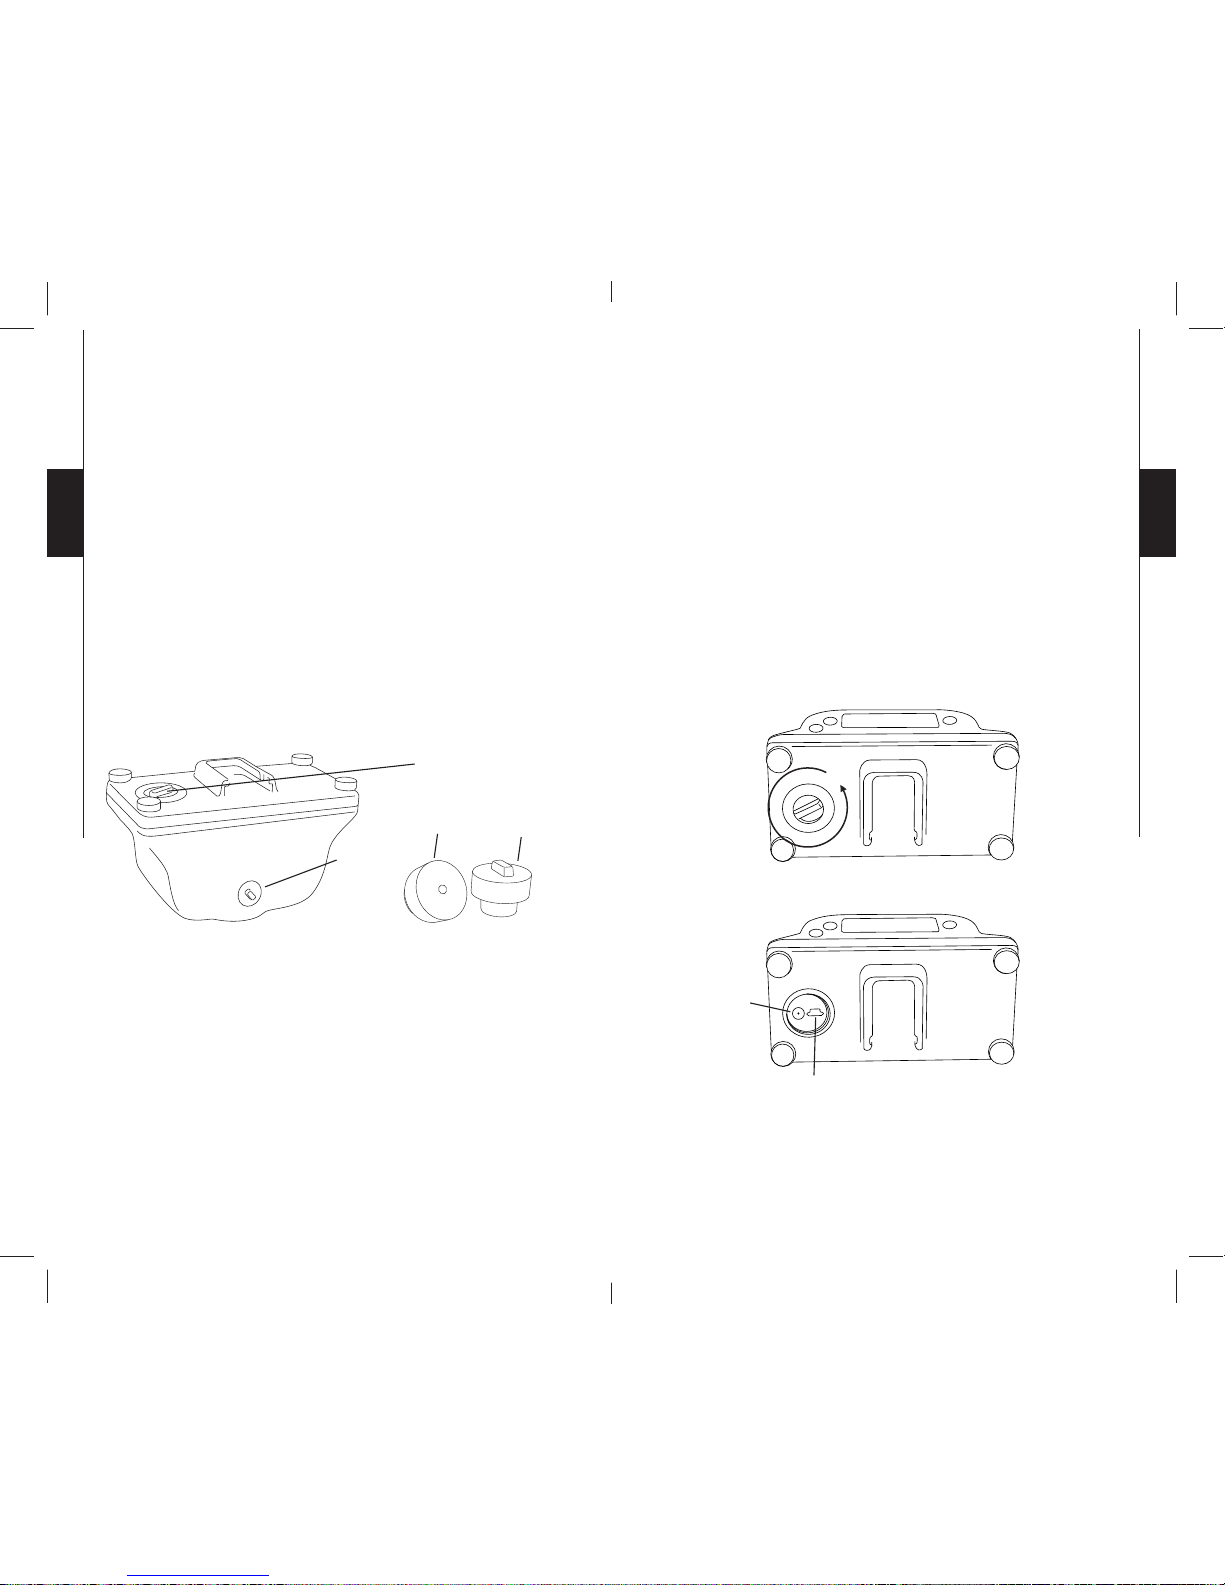
To insert the batteries, first unscrew the 4 screws behind the
camera (see figure below) and insert the batteries as indicated
inside the camera case.
Low Battery
When the batteries are low on charge, the resolution setting "H"
or "L" (depending on resolution selected) blinks on the screen
to notify the user that the batteries must be replaced shortly.
6 7
English
English
SCOPE
The diameter of the scope bracket is 1" (24mm) and is suitable
for most scopes. Some scopes might not be compatible with this
kind of bracket. An optional 1.2" (30mm) adaptor is available
(SC-30mm). (Refer to the section « OPTIONS »)
MOUNTING :
HELMET
To install the camera directly
onto a helmet, use the "helmet"
bracket. According to the
desired installation, use either
the short or the long strap.
Forehead mount
Scope
Helmet
Bow
FOREHEAD MOUNT
This bracket is used to directly
install the camera on the forehead.
BOW
The bracket for the bow is normally
positioned to the front of the bow,
with the screw (included), where the
stabilizer is usually located.
8 9
English
English
MEMORY CARD
Using a Micro-SD memory card (sold separately, refer to the
section « OPTIONS ») is required to operate the camera
SPYPOINT X-CEL. To insert the card, unscrew the 4 screws
located behind the camera (in the same manner as the batteries).
The Micro-SD card slot is located at the bottom of the camera
(see figure below).
The camera can accept memory cards up to 8 GB. Before
inserting or removing the memory card, the camera must be
turned "OFF". Failing to do so may cause the loss of videos or
damage to the memory card. When the memory card is full, the
LCD panel indicates "FULL". The following chart shows the
approximate time available for recording videos depending on
the memory card capacity.
Note: The use of a class 6 or higher memory card is
recommended. A class 2 or 4 memory card may not support a
data transfer rate high enough to record video from the X-CEL
camera.
Class 6
Micro-SD card slot
SETTINGS
To turn "ON" the camera, press the "ON/OFF" button and hold
for 2 seconds. The same procedure is used to turn "OFF" the
camera.
This video camera is very easy to use. The only setting needed
will be to choose the high resolution "H" or the low resolution
"L". To do this, press once on the "H/L/SOUND" button to
select "H" or press twice to select "L". In "H" setting, the camera
records video in higher quality therefore taking more space
on the memory card. See the previous "MEMORY CARD"
section to know how much time is available on memory card
depending on the setting.
To start recording a video, press the "START/ST OP" button. To
stop recording, press the same button again.
H
L
24
8:88:88
H / L / Sound
On / OFF
Start / Stop
Video resolution
Remaining time
available or duration
of the video
Number of videos recorded
10 11
English
English
SOUND RECORDING
For certain activities, such as hunting, the sound recording
may not be desired. To enable or disable the sound, press the
"H/L/SOUND" button and hold for 3 seconds. When the sound
recording is activated, the screen displays "ON" and when it is
turned off, the screen displays "OFF".
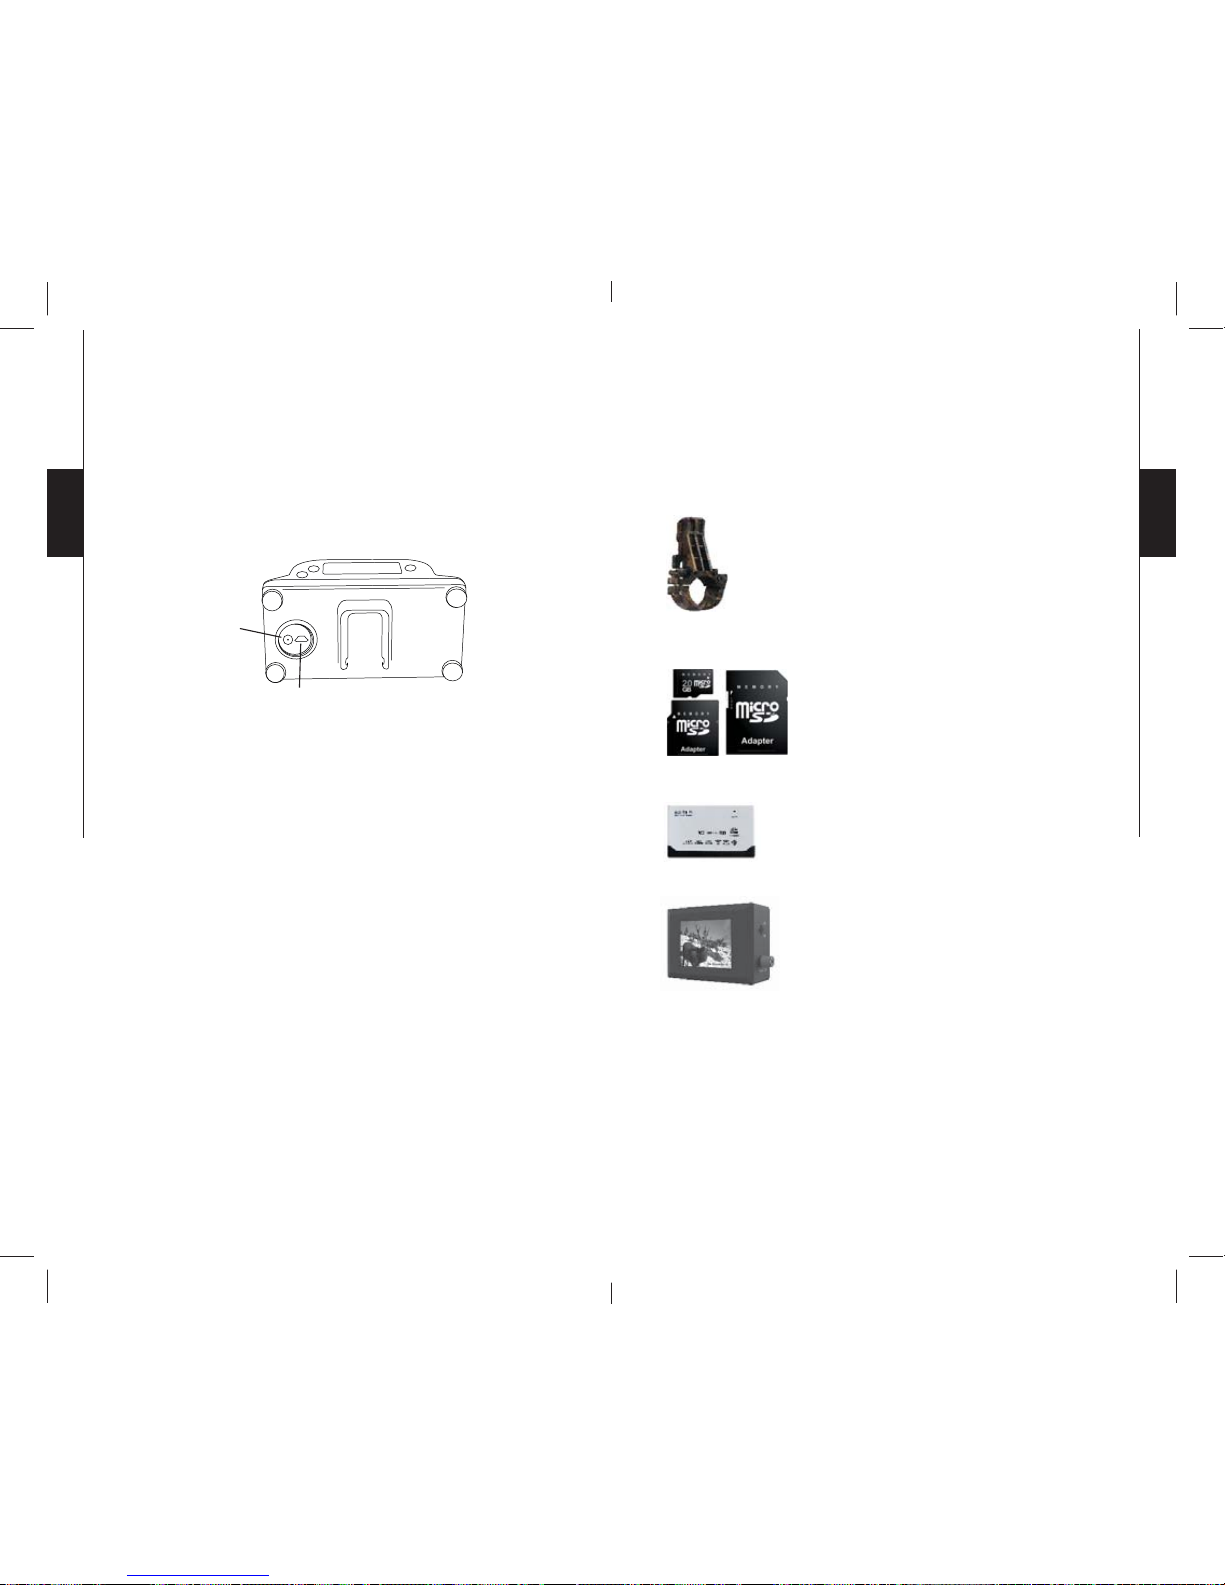
The X-CEL camera has an integrated microphone for
recording sound. The rubber cap for "normal conditions" can
record sound at all time. If recording video under water, it is
important to replace this rubber cap by the "underwater or
windy conditions" one to prevent infiltration of water inside
the camera. It is also recommended to use this rubber cap in
windy conditions. This rubber cap is located inside the camera,
under the screw (see figure below).
NUMBERS DISPLAYED ON SCREEN
LCD screen indicates, in the lower-left corner, the number
of videos recorded on the memory card. The numbers in the
middle of the screen refer to the remaining time available on
the memory card. When recording a video, these numbers
represent the duration of the video.
Microphone
Normal
conditions
Underwater
or windy
conditions
The replacement rubber cap is
located under the screw
DOWNLOADING TO A COMPUTER
To transfer or view photos and videos on a PC, you must first
turn the camera « OFF » and connect the USB cable (supplied) to
the camera and to your computer. The computer will recognize
the camera and install the software automatically. Click on
« My Computer » and select « Removable Disk ». Then click
« DCIM » and « 100DSCIM » to find all your photos and
videos.
Taking the SD card out of the camera and inserting it into the
computer port will achieve same results. If no SD slot is built
into the computer, a multi-card reader RD25-1 (sold separately)
must be used.
USB
TV OUT
12 13
English
English
WATCHING FOOTAGE ON A TELEVISION
SCREEN
To view recorded videos on TV screen, turn "OFF" your
camera. Connect the appropriate cable into "AUDIO / VIDEO
IN" of the TV, and the other end of the cable into the "TV OUT"
of the camera. (See figure below)
TV OUT
USB
Use the following keys to navigate into the menu displayed on
TV:
"ON/OFF" = MENU
"H/L/SOUND" = NEXT
"START/STOP" = PLAY/PAUSE/OK
To watch a video, press "PLAY/PAUSE/OK". The same button
is used to stop the video.
To view the following video, press "NEXT".
To see the different options available, press "MENU". To
confirm a choice within the menu, press "PLAY/PAUSE/OK"
Delete: Deletes the video on the screen (ONE) or all videos on
memory card (ALL).
Language: Selects language.
Exit: Returns to viewing screen.
OPTIONS
See your local dealer or visit www.spypoint.com to find available
products. The following items are popular options that can be added
to a SPYPOINT camera model X-CEL:
Adaptor 24mm (1 inch), SC-24mm
This adaptor allows placing the camera to a
24mm scope, available in black or camo.
Adaptor 30mm (1.2 inch), SC-30mm
This adaptor allows placing the camera to a
30mm scope, available in camo only.
Micro-SD memory card, Micro-SD-4GB
The 3-in-1 kit includes a memory card
Micro-SD 4 GB as well as an adaptor for
Mini-SD and SD cards. This package can be
used for multiple purposes.
Multi-card reader RD25-1
To allow the download of photos and videos
directly into a personal computer. This reader
works with 25 different types of memory
cards and is compatible with SD cards.
Photo and video viewer , PV-9
Photo and video viewer. 2.5" viewing screen.

14 15
English
English
LIMITED WARRANTY
SPYPOINT X-CEL designed by GG Telecom, is covered by
a one (1) year warranty on material and workmanship starting
from its original date of purchase. The sales receipt is your
proof of purchase and should be presented if warranty
service is needed.
This warranty does not cover any GG Telecom product which
has been subjected to misuse, neglect and accidents or has been
improperly used or maintained. Any modification or tampering
of the product will affect its operation, performance, durability
and void this warranty.
REPAIR SERVICE
Repairs for damages not covered by the warranty will be
subject to a reasonable charge. For technical assistance, write
to tech@spypoint.com. Give a description of the problem with
a phone number where you can be reached.
IMPORTANT: Under no circumstances GG Telecom will
accept returns without a Return Material Authorization number
(RMA).
WWW.SPYPOINT.COM
Note: For the latest update of the user’s manual, refer to our website.
The version number of this manual is on page 2.

16 17
Français
Français
Français
Merci d’avoir choisi un excellent produit
SPYPOINT. Vous pouvez maintenant bénéficier d’une caméra
vidéo complète et facile d’utilisation. Cet appareil a été conçu
et développé par notre équipe d’ingénieurs hautement qualifiés
et permet la prise de vidéos durant vos activités sportives.

18 19
Français
Français
SPÉCIFICATIONS
• Résolution vidéo 640 x 480
• Format AVI
• Mémoire externe Micro-SD/SDHC extensible
jusqu’à 8 Go
• Champ de visionnement 70 º FOV (X-CEL SPORT)
40 º FOV (X-CEL CHASSE)
• Exposition Automatique
• Visionnement Ordinateur / Télévision
• Sortie Télévision PAL / NTSC
• Alimentation 2 piles de type AA
• Température
de fonctionnement
(-20 °C à + 50 °C)
(-4 °F à +122 °F)
• Température de remisage (-30 °C à + 75 °C)
(-22 °F à +167 °F)
• OS WIN 2000 / XP / VISTA/
Mac OS X
CONTENU DE L’EMBALLAGE
• SPYPOINT Modèle X-CEL
• Câble USB
• Câble audio/vidéo
• 4 fixations: télescope, arc, casque, support frontal
• Manuel de l’utilisateur
CARACTÉRISTIQUES PRINCIPALES
• Écran LCD permettant de visualiser le nombre de
vidéos enregistrées, la résolution des vidéos et le temps
d’enregistrement disponible sur la carte mémoire.
• Enregistrement du son.
• Boîtier résistant à l’eau jusqu’à 10 mètres.
ALIMENTATION
Piles AA
Le système requiert l’utilisation de 2 piles AA. Nous
recommandons l’utilisation de piles AA au lithium car elles
améliorent significativement la durée d’enregistrement et
résistent mieux au froid. L’emploi de piles AA alcalines
est aussi recommandé. À noter que la tension des piles AA
rechargeables (1.2V) est insuffisante pour alimenter votre
caméra vidéo SPYPOINT. Pour insérer les piles, dévisser
tout d’abord les 4 vis situées derrière la caméra (voir figure
ci-dessous) et les positionner dans le sens indiqué au fond du
compartiment.
Piles faibles
Lorsque les piles sont faibles, le témoin « H » ou « L » (selon
la résolution choisie) clignote à l’écran pour aviser l’utilisateur
que les piles doivent être remplacées sous peu.

20 21
Français
Français
TÉLESCOPE
Le diamètre de la fixation pour le télescope est de 1 pouce
(24mm) et convient à la majorité des télescopes. Par contre,
certains télescopes peuvent ne pas être compatibles avec cette
fixation. Un adaptateur pour télescope de 30mm est offert
en option (SC-30mm). (Se référer à la section « Options
disponibles »)
INSTALLATION DES FIXATIONS
CASQUE
La fixation « casque » sert à
installer la caméra directement
sur un casque. Selon l’installation
désirée, l’utilisation de la petite
ou de la longue courroie est
nécessaire.
Support frontal
Télescope
Casque
Arc
SUPPORT FRONTAL
Le support frontal permet de fixer
la caméra directement sur la tête.
ARC
La fixation pour l’arc se positionne à
l’aide de la vis (incluse), sur le devant
de l’arc, où se situe généralement le
stabilisateur.

22 23
Français
Français
CARTE MÉMOIRE
L’utilisation d’une carte mémoire Micro-SD (vendue
séparément, se référer à la section « Options disponibles »)
est nécessaire au fonctionnement de l’appareil. Pour insérer la
carte, dévisser tout d’abord les 4 vis situées derrière la caméra
(de la même manière que pour insérer les piles). La fente pour
insérer la carte se situe dans la partie inférieure de la caméra.
(Voir figure ci-dessous)
L’appareil accepte des cartes mémoire jusqu’à une capacité de
8 Go. Avant d’insérer une carte, toujours mettre l’appareil à
« OFF » pour éviter que les vidéos présentes sur la carte soient
supprimées ou endommagées. Lorsque la carte mémoire est
pleine, l’écran affiche « FULL ». Voici un tableau de la durée
approximative des vidéos pouvant être enregistrées avec
différentes capacités de cartes mémoire.
Note: L'utilisation d'une carte mémoire de classe 6 ou plus est
recommandée. Une carte mémoire de classe 2 ou 4 pourrait ne
pas supporter un taux de transfert de données assez élevé pour
l'enregistrement vidéo de la caméra X-CEL.
Classe 6
Fente pour carte
Micro-SD
PROGRAMMATION
Pour débuter l’utilisation de l’appareil, appuyer sur « ON/OFF »
et tenir enfoncé durant 2 secondes pour mettre l’appareil
en service. La même procédure sert à mettre la caméra hors
tension.
La caméra vidéo X-CEL est très simple d’utilisation. La seule
configuration nécessaire est de choisir le mode haute résolution
« H » ou basse résolution « L ». Pour ce faire, appuyer une
fois sur le bouton « H/L/SOUND » pour sélectionner « H »
ou appuyer deux fois pour sélectionner « L ». En mode « H »,
la caméra enregistre des vidéos d’une qualité supérieure, tout
en prenant un peu plus d’espace sur la carte mémoire. Voir la
section « CARTE MÉMOIRE » précédente pour connaître le
temps d’enregistrement possible selon la configuration choisie.
Pour débuter l’enregistrement d’une vidéo, appuyer sur le
bouton « START/STOP ». Pour terminer l’enregistrement,
appuyer à nouveau sur le même bouton.
H
L
24
8:88:88
Résolution vidéo
Durée de la vidéo ou
temps d'enregistrement
restant
Nombre de vidéos
H / L / Sound Start / Stop
On / OFF

24 25
Français
Français
ENREGISTREMENT DU SON
Pour certaines activités, telles que la chasse, l’enregistrement
du son n’est pas désiré. Pour activer ou désactiver le son,
appuyer sur le bouton « H/L/SOUND » et tenir enfoncé
pendant 3 secondes. Lorsque l’enregistrement du son est activé,
l’écran affiche « ON » et lorsqu’il est désactivé, l’écran affiche
« OFF ».
La caméra X-CEL possède un micro intégré sous l’appareil
pour l’enregistrement du son. Le capuchon «conditions
normales» permet l’enregistrement du son en tout temps. Par
contre, lorsque la caméra est utilisée sous l’eau, ce capuchon
doit être remplacé par celui « conditions aquatiques ou
venteuses » pour éviter l’infiltration d’eau à l’intérieur de la
caméra. Il est également recommandé d'utiliser ce capuchon
dans des conditions venteuses. Ce dernier se trouve à l’intérieur
de la caméra, sous la vis. (Voir figure ci-dessous)
CHIFFRES APPARAISSANT À L’ÉCRAN
L’écran LCD affiche toujours dans le coin inférieur gauche,
le nombre de vidéos enregistrées sur la carte mémoire. Les
chiffres au centre signifient le temps restant pour enregistrer
sur la carte mémoire. Lorsque l’utilisateur enregistre une vidée,
les chiffres au centre de l’écran signifient la durée du vidéo en
court.
Micro
Conditions
normales
Conditions
aquatiques
ou venteuses
Le capuchon de rechange
se trouve sous la vis
TRANSFERT VERS L’ORDINATEUR
Pour transférer ou visionner les vidéos à un ordinateur, mettre
la caméra vidéo à « OFF » et connecter le câble USB (fourni) de
la caméra à l’ordinateur (voir figure ci-dessous). L’ordinateur
reconnaîtra la caméra et installera le logiciel de lui-même.
Cliquer sur « Poste de travail » et choisir « Disque amovible ».
Cliquer ensuite sur « DCIM » et « 100DSCIM » pour y
retrouver les vidéos emmagasinées.
Une autre façon de procéder est de retirer la carte mémoire
(vendue séparément) de la caméra et de l’insérer dans la fente
Micro-SD de l’ordinateur. Si aucune fente Micro-SD n’est
présente sur l’ordinateur, utiliser un lecteur de cartes mémoire
RD25-1 (vendu séparément).
USB
TV OUT

26 27
Français
Français
VISIONNER À LA TÉLÉVISION
Permets de visionner les vidéos directement sur un téléviseur.
Brancher l’extrémité du câble à la prise « AUDIO/VIDEO IN »
du téléviseur et l’autre extrémité à la prise « TV OUT » de la
caméra. (Voir figure ci-dessous)
USB
TV OUT
Les touches suivantes permettent de naviguer dans le menu
affiché sur le téléviseur, de la façon suivante:
ON/OFF = MENU
H/L/SOUND = NEXT
START/STOP = PLAY/PAUSE/OK
Pour visionner une vidéo, appuyer sur « PLAY/PAUSE/OK ».
Le même bouton sert à mettre la vidéo sur pause.
Pour visionner les vidéos suivantes, appuyer sur « NEXT ».
Pour connaître les différentes options disponibles, appuyer
sur « MENU ». Pour confirmer le choix à l’intérieur du menu,
appuyer sur « PLAY/PAUSE/OK ».
Effacer: Permets d’effacer seulement la vidéo affichée à
l’écran (« UN ») ou d’effacer toutes les vidéos présentes
sur la carte mémoire (« TOUS »).
Langue: Permets de modifier la langue d’affichage.
Sortie: Permets de retourner au visionnement des vidéos.
OPTIONS DISPONIBLES
Pour connaître et avoir plus d’informations sur les options
disponibles, visitez www.spypoint.com. Voici les principales
options disponibles pour la caméra SPYPOINT X-CEL.
Adaptateur 24mm, SC-24mm
Cet adaptateur permet d’avoir une fixation
additionnelle de 24mm pour télescope.
Disponible en noir ou camo.
Adaptateur 30mm, SC-30mm
Cet adaptateur permet de fixer la caméra
aux télescopes de 30mm. Disponible en
camo seulement.
Carte Mémoire Micro-SD, Micro-SD4GB
Cet ensemble 3 en 1 contient une carte
mémoire Micro-SD 4Go ainsi que des
adaptateurs pour carte Mini-SD et SD.
L ’utilisateur peut se servir de cet ensemble
pour de multiples utilisations.
Lecteur de cartes portatif, RD25-1
Lecteur permettant le branchement d’une
carte mémoire directement à l’ordinateur.
Compatible avec 25 types de cartes
différentes incluant les cartes SD.
Lecteur de photos et vidéos, PV-9
Lecteur de photos et vidéos. Écran de
visionnement de 2.5".

28 29
Français
Français
GARANTIE LIMITÉE
Le système SPYPOINT X-CEL, conçu par GG Telecom, est
couvert d’une garantie d’un (1) an incluant les pièces et la main
d’œuvre à compter de la date d’achat. Le coupon de caisse est
la preuve d’achat et devra être présenté si la garantie est
applicable.
La garantie ne couvre pas les produits de GG Telecom ayant
subi des abus, de la négligence, des accidents ou de mauvaises
utilisations ou entretiens. Toutes modifications ou utilisations
non conformes du produit affecteront son fonctionnement, ses
performances, sa durabilité et annuleront la garantie.
SERVICE DE RÉPARATION
Les réparations pour bris ou défectuosités non couverts par la
garantie seront facturées à prix raisonnables. Pour le soutien
technique, s.v.p. écrire un courriel à tech@spypoint.com.
Décrire le problème rencontré et indiquer un numéro de
téléphone pour vous rejoindre.
IMPORTANT: En aucune circonstance, GG Telecom
n’acceptera de réparation sans un numéro d’autorisation.
WWW.SPYPOINT.COM
Note: Pour la plus récente mise à jour du manuel d’utilisateur,
référez-vous à notre site W eb. Le numéro de version de ce manuel
se trouve à la page 2.

30 31
Deutsch
Deutsch
Deutsch
Vielen Dank, dass Sie sich für den Kauf dieses SPYPOINT
Produktes entschieden haben. Profitieren Sie nun von den
zahlreichen Vorteilen der Videokamera zweiter Generation.
Die X-CEL wurde von unseren hochqualifizierten Ingenieuren
entwickelt und ermöglicht es Ihnen, hochaufgelöste Videos
aufzunehmen, während Sie gleichzeitig Ihren Sportarten und
Hobbies nachgehen.

32 33
Deutsch
Deutsch
KENNDATEN
• Videoauflösung 640 x 480
• Videodatei AVI
• Externer Speicher Micro-SD/SDHC-Card
Karte bis zu 8 GB
• Erfassungsbereich 70° (X-CEL SPORT)
40° (X-CEL JAGD)
• Belichtung Auto
• Wiedergabemodus Computer/TV
• TV -Out PAL/NTSC
• Passiv-Infrarot-Distanz von 1,5 bis 15 m einstellbar
• Stromquelle 2 x AA Batterien
• Betriebstemperatur (-20 °C bis +50 °C)
• Lagerungstemperatur (-30 °C bis +75 °C)
• Computer-Betriebssystem WIN2000/XP/VISTA/Mac
OS X
DAS SET ENTHÄLT
• SPYPOINT X-CEL
• USB-Kabel
• Audio-/Videokabel
• 4 Halterungen: Rahmen, Bügel, Helm, Stirnbefestigung
• Bedienungsanleitung
AUSSTATTUNG
• Der LCD-Bildschirm ermöglicht Ihnen eine Übersicht
über die Anzahl der aufgezeichneten Videos, die
Videoauflösung sowie die noch verbleibende Zeit auf der
Speicherkarte.
• Tonaufzeichnung.
• Wasserfest bis zu 9 m Tiefe.
BETRIEB
AA-Batterien
Die Kamera benötigt 2 Batterien vom Typ “AA”. Das
verwenden von AA Lithium Batterien wird empfohlen,
weil diese maßgeblich die Aufnahme Zeit verbessern und
widerstandsfähiger gegen kalte Temperaturen sind. Das
Verwenden von AA Alkaline Batterien wird weiterhin
empfohlen. Es ist zu beachten, dass die Spannung einer
wiederaufladbaren AA Batterie (1,2V) nicht ausreichend ist
um Ihre SPYPOINT Video Kamera zu betreiben.
Schrauben Sie zum Einsetzen der Batterien zuerst die 4
Schrauben auf der Rückseite der Kamera ab (siehe Abbildung
unten). Setzen Sie die Batterien entsprechend der Anleitung
in das Kameragehäuse ein. Achten Sie dabei auf die korrekte
Polung.
Niedriger Batteriestatus
Ist der Batteriestatus niedrig, blinkt “H” oder “L” (je nach
Benutzereinstellung) auf dem Bildschirm und weist Sie darauf
hin, die Batterien in Kürze auszutauschen.

34 35
Deutsch
Deutsch
BEFESTIGUNG
HELM
Verwenden Sie zur Befestigung
der Kamera auf einem Helm die
“Helm” Halterung. Verwenden
Sie je nach Befestigung entweder
den kurzen oder den langen
Riemen.
Stirnbefestigung
Rahmen
Helm
Bügel
RAHMEN
Der Durchmesser der Rahmenhalterung beträgt 2,4 cm. Sie
können die Kamera an nahezu jedem Rahmen befestigen.
Einige Rahmen sind jedoch möglicherweise nicht mit dieser
Halterung kompatibel. Optional ist ein 30 mm Anschlussstück
erhältlich. (Auf den Abschnitt «Optionen»)
BÜGEL
Das Set enthält eine Boxenhalterung
und die dazugehörige Schraube.
Damit können Sie die Kamera vor
der Box fixieren, wo in der Regel der
Stabilisator befestigt ist.
STIRNBEFESTIGUNG
Diese Befestigung ist äußerst
handlich und kann bei allen
Sportarten und Aktivitäten
verwendet werden, da die Kamera
direkt an der Stirn befestigt wird.

36 37
Deutsch
Deutsch
SPEICHERKARTE
Diese Videokamera zeichnet Videos auf einer Micro-SD-Card
auf (siehe Abschnitt “Optionen” für weitere Informationen).
Die Kamera ist mit Micro-SD Speicherkarten von bis zu 8
GB kompatibel. Schrauben Sie zum Einsetzen der Karte das
Unterteil der Kamera ab, so wie Sie es bereits zum Einsetzen
der Batterien getan haben. Der Micro-SD Kartenschlitz befindet
sich auf der Seite der Batteriehalterung (siehe Abbildung
unten). Vor dem Einsetzen oder Entnehmen der Speicherkarte
muss die Kamera ausgeschaltet sein. Andernfalls kann es zum
Verlust von Videos oder zur Beschädigung der Speicherkarte
kommen.
Ist die Speicherkarte voll, erscheint die Anzeige “FULL” auf
dem Bildschirm. Die folgende Grafik zeigt die geschätzte, noch
zur Verfügung stehende Zeit zur Aufzeichnung von Videos in
Abhängigkeit von der Speicherkartenkapazität.
Achtung: Die Verwendung einer class 6 Speicherkarte oder
höher wird empfohlen. Die Übertragungsrate einer A class 2
oder 4 möglicherweise nicht ausreichend für V ideo Aufnahmen
einer Spypoint X-CEL Kamera.
Class 6
Micro-SD Kartenschlitz
EINSTELLUNGEN
Drücken Sie zum Ein-/Ausschalten der Kamera die “ON/OFF”
Taste und halten Sie diese 2 Sekunden lang gedrückt. Dasselbe
Verfahren gilt für die Abschaltung.
Diese V ideokamera ist einfach zu bedienen. Sie müssen lediglich
die Auflösung “H” für hohe Auflösung oder “L” für niedrige
Auflösung auswählen. Drücken Sie dazu einmal die “H / L /
SOUND” Taste, um “H” auszuwählen. Drücken Sie die Taste
zweimal, um “L” auszuwählen. In der Einstellung “H” wird die
Videoqualität besser , verbraucht jedoch auch mehr Speicher auf
der Speicherkarte. Unter dem Abschnitt SPEICHERKARTE
oben erfahren Sie, wie viel Zeit in Abhängigkeit von der
Einstellung auf der Speicherkarte verfügbar ist.
Drücken Sie zum Starten der Aufnahme die “START/STOP”
Taste. Drücken Sie die Taste erneut, um die Aufnahme zu
beenden.
H
L
24
8:88:88
H / L / Sound Start / Stop
On / OFF
Video resolution
Remaining time
available or duration
of the video
Number of videos recorded
AKTIVIERUNG ODER DEAKTIVIERUNG DES TONS
DURCH DRÜCKEN VON TASTEN
Diese Funktion ist nützlich bei Sportarten wie z.B. der Jagd, da
der Bediener den Ton durch Drücken von Tasten deaktivieren
kann. Drücken und halten Sie die “H / L / SOUND” Taste 3
Sekunden lang, um diese Funktion zu aktivieren oder zu
deaktivieren. Ist der Ton aktiviert, erscheint “ON” auf dem
Bildschirm. Ist der Ton deaktiviert, erscheint “OFF” auf dem
Bildschirm.

38 39
Deutsch
Deutsch
AUF DEM BILDSCHIRM ANGEZEIGTE ZAHLEN
Der LCD-Bildschirm zeigt in der unteren linken Ecke die
Anzahl der auf der Speicherkarte gespeicherten Videos an.
Die Zahlen in der Mitte des Bildschirms beziehen sich auf
die noch auf der Speicherkarte verfügbare Zeit. Während der
Aufzeichnung eines V ideos stellen diese Zahlen die V ideodauer
dar.
TONAUFZEICHNUNG
Die X-CEL Kamera verfügt über ein integriertes Mikrofon, mit
dem der Bediener während des Filmens auch Ton aufnehmen
kann. Unter normalen Bedingungen muss der Anwender
die Schutzklappe “normal conditions” unter der Kamera
installieren, um Töne aufnehmen zu können (siehe Abbildung
unten). Soll die Kamera unter Wasser verwendet werden,
muss diese Schutzklappe gegen eine Unterwasserklappe
(“underwater conditions”) ausgetauscht werden. Es ist
auch empfehlenswert die Unterwasserklappe bei windigen
Bedingungen zu verwenden.
Mikrofon
Anwender die
Schutzklappe
Unterwasser
oder windige
Bedingungen
Der schutzkappe ist unter
der Schraube entfernt
DOWNLOAD AUF DEN COMPUTER
Zur Übertragung oder zum Betrachten des Filmmaterials
auf einem PC müssen Sie zuerst die Kamera ausschalten
und sie dann anhand des mitgelieferten USB-Kabels an
Ihren PC anschließen. Der Computer erkennt die Kamera als
W echsellaufwerk. W arten Sie bis zum Abschluss der Installation
der Computer-Software (wenige Sekunden), bevor Sie den
Desktop anklicken. Klicken Sie dann das Wechsellaufwerk an
und suchen Sie den Ordner DCIM. Klicken Sie diesen Ordner
an. Alle Fotos und Videos erscheinen im Ordner 100DSCIM.
Die Videos können anhand Ihrer PC-Software betrachtet,
bearbeitet oder gelöscht werden.
Dieselben Ergebnisse erzielen Sie, wenn Sie die Micro SDCard aus der Kamera entnehmen und in den Computer-Port
stecken. Verfügt der PC nicht über einen Micro-SD-Slot,
muss ein Mehrfachkartenlesegerät RD25-1 (nicht inklusive)
verwendet werden.
USB
TV OUT

40 41
Deutsch
Deutsch
BETRACHTEN DES FILMMATERIALS AUF
EINEM TV-BILDSCHIRM
Verwenden Sie zur Übertragung/Projizierung von Videos auf
einen TV-Bildschirm das mitgelieferte Audio-/Videokabel
und stecken Sie den “TV/Out” Anschluss der Kamera in den
“Audio/Video In” Anschluss des TV-Sets (siehe Abbildung
unten).
TV OUT
USB
Das Bildschirmmenü wird auf dem TV-Bildschirm angezeigt
und die Bedienelemente sind Folgende:
“ON/OFF” = MENU
“H/L/SOUND” = NEXT
“START/STOP” = PLAY/PAUSE/OK
Wählen Sie zum Abspielen eines Videos “PLAY/PAUSE/OK”.
Dieselbe Taste ermöglicht das Anhalten des Videos.
Zum Betrachten des nächsten V ideos wählen Sie bitte “NEXT”.
Zum Betrachten der verschiedenen verfügbaren Optionen
nutzen Sie das “MENU”.
Zum Bestätigen Ihrer Wahl im Menü wählen Sie bitte “PLAY/
PAUSE/OK”.
Delete: Löschen eines Video auf dem Bildschirm (ONE) oder
aller Videos auf der Speicherkarte (ALL).
Language: Sprachauswahl, Englisch oder Französisch.
Exit: Rückkehr zum Betrachtungsbildschirm.
OPTIONEN
Kontaktieren Sie Ihren Händler vor Ort oder besuchen Sie
unsere Webseite unter www.spypoint.com. Dort finden Sie
eine Übersicht über unsere Produkte. Die folgenden Produkte
können Sie optional zur Ihrer X-CEL erwerben.
Adapter 24mm, SC-24mm
(Erhältlich in schwarz oder camo)
Adapter 30mm, SC-30mm
(Erhältlich in camo nur)
Anhand dieses Adapters kann die Kamera
an einem 30 mm/ 24mm Rahmen befestigt
werden.
Micro-SD Card, Micro-SD-4GB
Das Set enthält eine Micro-SD 4GB sowie
einen Anschluss für Mini-SD und SDKarten. Dieses Paket eignet sich ebenfalls
für viele andere Verwendungszwecke und
erhöht die Anzahl der zu speichernden
Videos.
Mehrfachkartenlesegerät, RD25-1
Ermöglicht den Download von Videos
direkt auf den PC, ohne die Verwendung
der SPYPOINT Kamera. Dieses Lesegerät
akzeptiert 25 verschiedene Arten von
Speicherkarten und ist mit einer Mini-SDCard kompatibel.
Foto- und Videobetrachter, PV-9
Foto- und Videobetrachter, 2,5"
Betrachtungsbildschirm.

42 43
Deutsch
Deutsch
GARANTIEBEDINGUNGEN
Für SPYPOINT X-CEL von GG Telecom gilt eine
Herstellergarantie von einem (1) Jahr ab Kaufdatum auf
Material- und Herstellungsfehler. Der Kaufbeleg ist zugleich
Kaufnachweis und ist bei der Inanspruchnahme von
Garantieleistungen vorzulegen.
Es gilt keine Garantie für GG Telecom-Produkte, die
missbräuchlich oder nachlässig verwendet wurden, einen
Unfall erlitten haben oder unsachgemäß eingesetzt oder
behandelt wurden. Eingriffe oder Änderungen am Gerät führen
zu eingeschränkter Funktionstüchtigkeit und Lebensdauer, in
diesen Fällen erlischt die Garantie.
REPARATURSERVICE
Sollten Sie Hilfe benötigen, kontaktieren Sie bitte zuerst Ihren
Händler. Adressen von Reparaturwerkstätten finden Sie unter
www.spypoint.com.
Die Reparatur von Schäden, die von der Garantie nicht
abgedeckt werden, unterliegt einer angemessenen Gebühr.
Benötigen Sie technische Unterstützung, schreiben Sie bitte
eine E-Mail an info@eurohunt.de. Beschreiben Sie uns kurz
das Problem und geben Sie eine Telefonnummer an, unter der
wir Sie erreichen können.
Bitte senden Sie uns nur für uns Portofreie Sendungen - Unfreie
Rücksendungen werden nicht angenommen.
Imported by :
EUROHUNT GmbH
Kurze Str. 2
99768 ILFELD / Germany
Tel. +49 (0) 36331/491950
Fax +49 (0) 36331/491959
info@eurohunt.de
WWW.SPYPOINT.COM
Hinweis: Für das neueste Update von der Bedienungsanleitung, Sie
auf unserer Website
 Loading...