

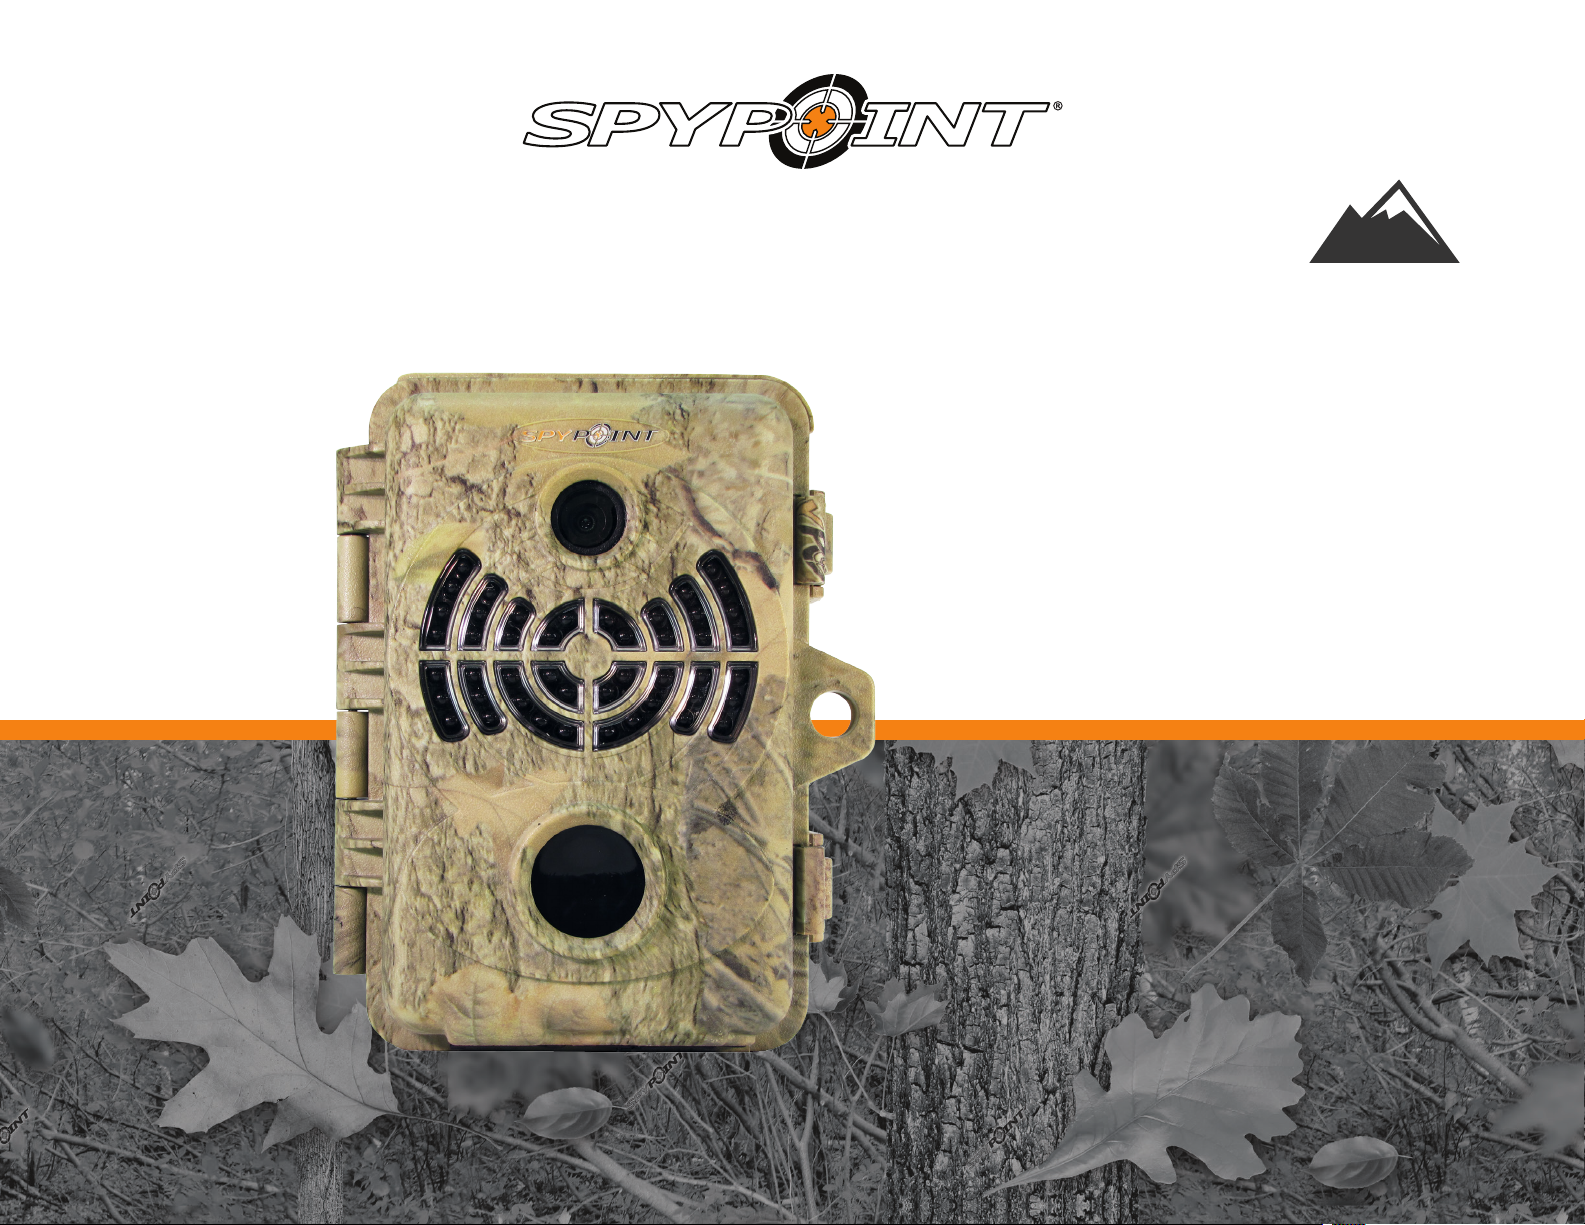
SPYPOINT BF-10HD User Manual
P INTSPY INTPSPY
SURVEILLANCE CAMERA | EXPEDITION SERIES
USER
MANUAL
Models :
BF-10
BF-12
HD
HD
v1.1

P INTSPY INTPSPY
youtube.com/spypointtrailcam
twitter.com/SpypointCamera
vimeo.com/spypointxcelcam
vimeo.com/spypointxcelcam
twitter.com/SpypointCamera
vimeo.com/spypointxcelcam
THANK YOU FOR CHOOSING A SPYPOINT® PRODUCT.
This manual will guide you through all the features of your device
so that you will get optimal use out of your SPYPOINT® product.
Our priority is to provide outstanding customer service. If you need
support for your product, please contact the SPYPOINT® technical
service or visit our website.
CONTACT
1-888-779-7646
tech@spypoint.com
www.spypoint.com
ABOUT US
GG Telecom’s mission is to offer products that are easy
to use, innovative, affordable and of exceptional quality.
Our SPYPOINT® products are mainly used for hunting and
residential/commercial surveillance. They are distributed and
shipped all over the world and the market never stops growing.
Prosperous and respected, GG Telecom is a company that constantly
keeps abreast of new technologies and listens to its customers to
deliver cutting-edge products with practical solutions that improve
hunting and outdoor activities.
JOIN THE SPYPOINT® COMMUNITY
facebook.com/spypoint
youtube.com/spypointtrailcam
twitter.com/SpypointCamera
CAMERAS WITH CELLULAR TRANSMISSION
• If you need information or would like to subscribe to mySPYPOINTTM service, go to www.myspypoint.com.
• For the latest version of the activation procedure, go to www.spypoint.com/activation.

Table of contents
Package contents ......................................................................... 4
Components ................................................................................. 5
Power ........................................................................................... 7
Memory card ................................................................................ 9
"BUSY" DEL .................................................................................. 9
Settings .......................................................................................10
Distance ......................................................................................13
REMOSTM Technology (BF-12HD) ....................................................14
Sound recording ..........................................................................15
File transfer to a computer ..........................................................16
Troubleshooting ..........................................................................17
Error messages............................................................................18
Available accessories ...................................................................19
Specications
BF-10HD .........................................................................................21
BF-12HD .........................................................................................22
Regulation (BF-12HD) .....................................................................23
Limited warranty .........................................................................24
Repair service ..............................................................................24
3
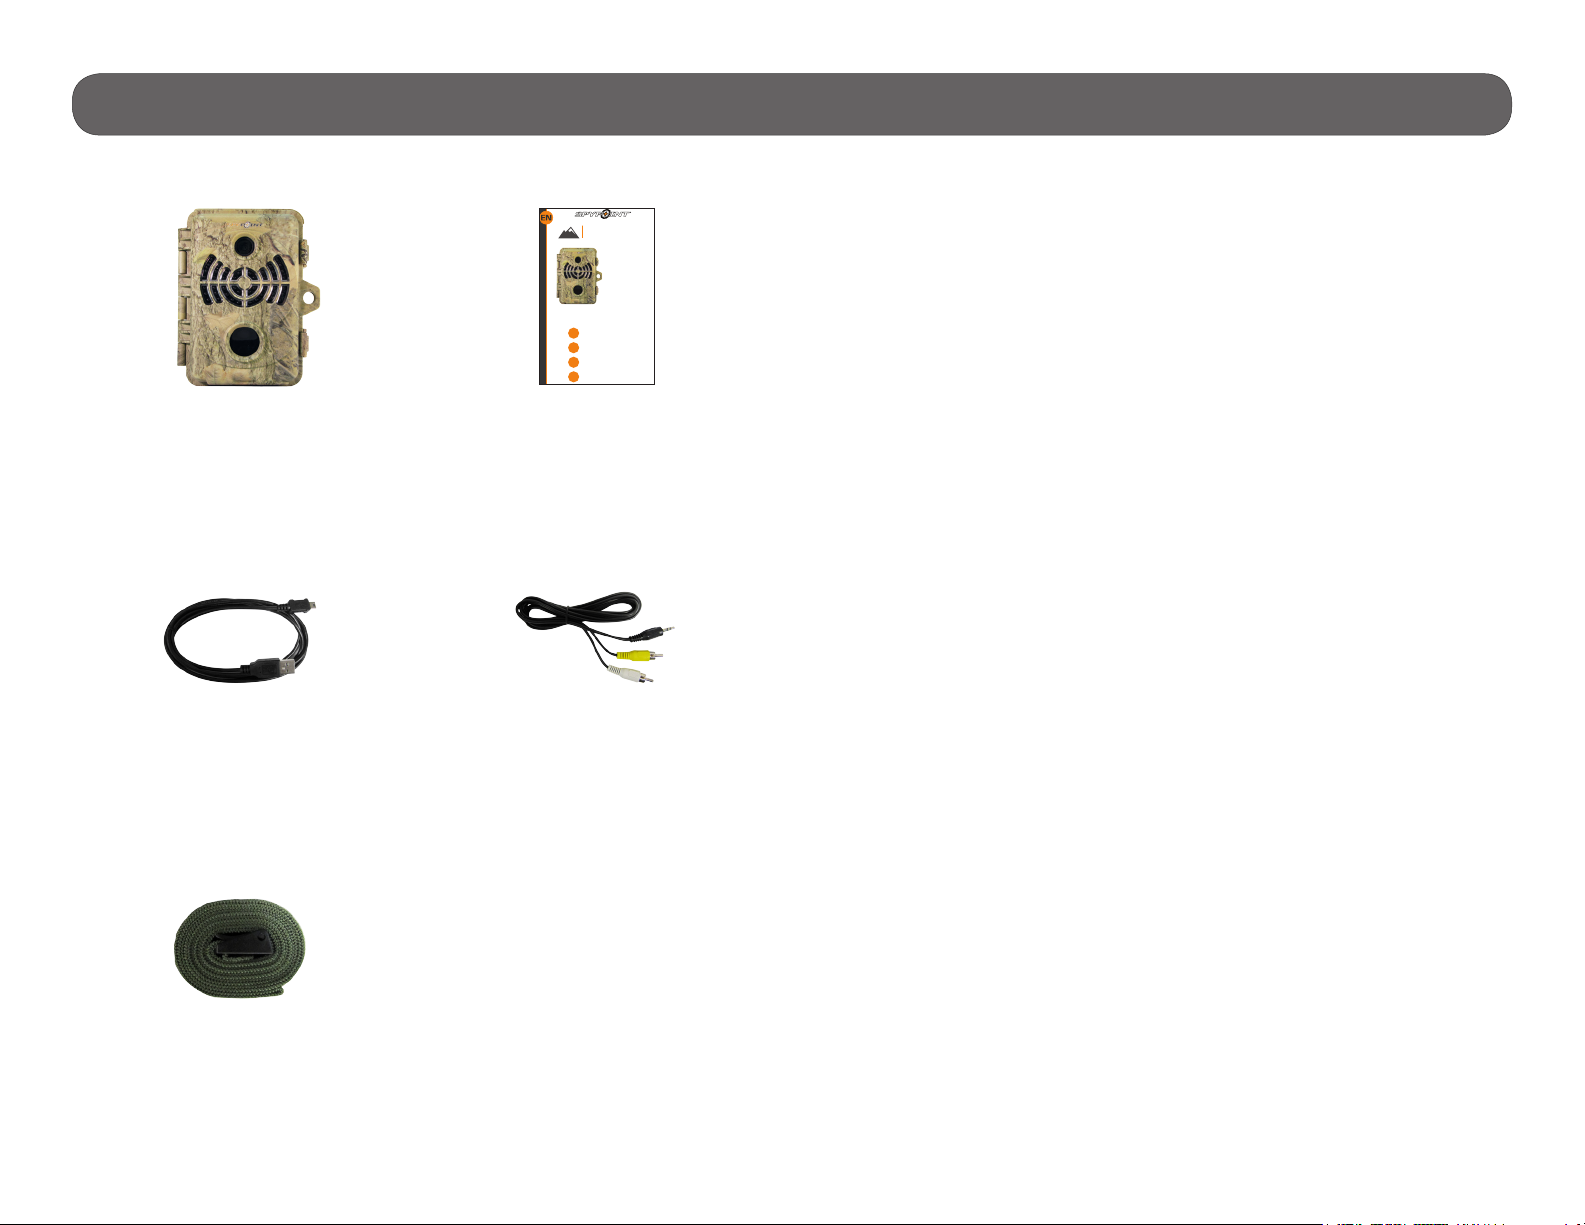
Package contents
P INTSPY INTPSPY
Get started
1
2
3
4
5
6
7
8
19
18
17
16
15
12
13
9
10
11
14
1
Useful! Detach a section and insert it into the
sleeve provided for this purpose within the
housing for the camera.
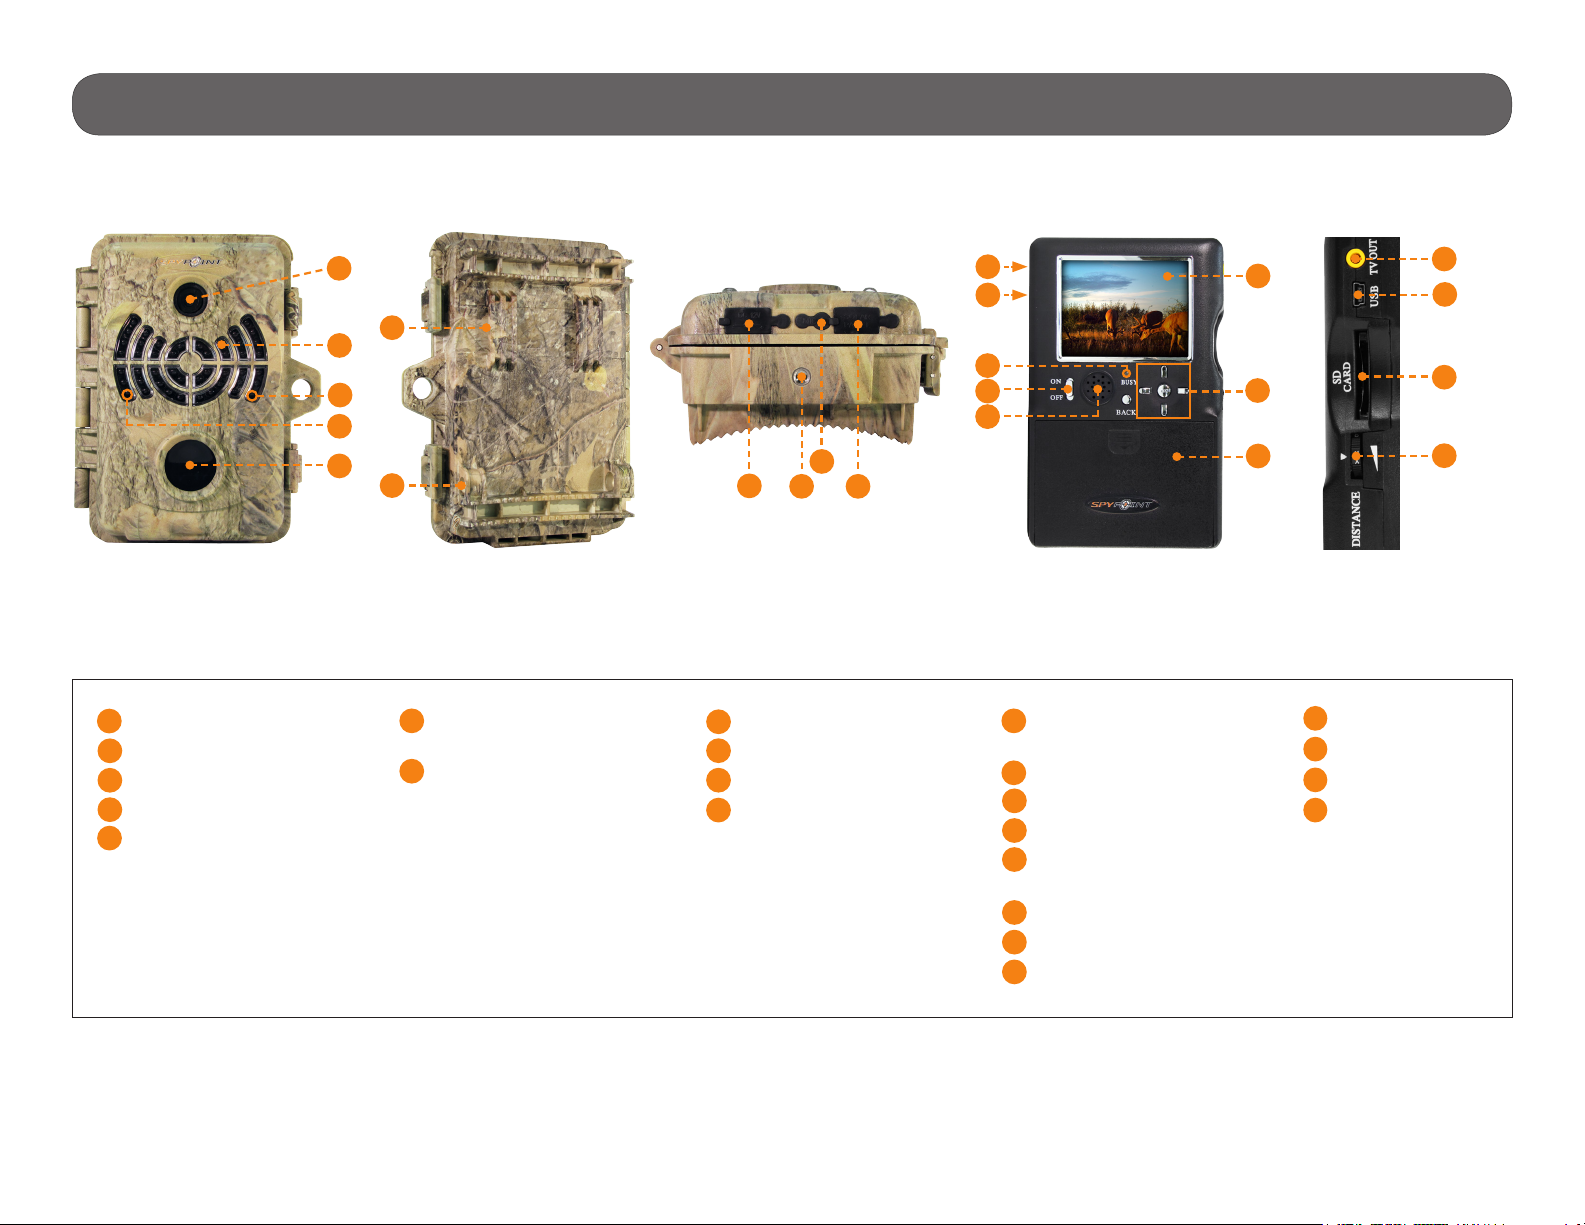
COMPONENTS
1 Photo lens Image sensor and infrared lter.
2 Invisible
black LEDs
Night lighting to obtain black and white
photos and videos.
3 Test light Flashes in TEST mode when there is detec-
tion and ashes 60 seconds in PHOTO/VIDEO
mode to allow the user to leave without being
photographed or recorded.
4 Fresnel lens Located ahead of the motion sensor, it makes
it more sensitive and allows to expand the
detection area.
5 12V power
jack
This camera can be powered from an
external 12-volt DC input such as a 12V
battery or a 12V adapter, sold separately.
6 Tripod mount Fixation for a standard ¼-20” tripod mount.
7 Microphone To record sound, lift the rubber cap and turn
it slightly to completely clear the microphone
receiver.
8 Solar panel
jack
Allows the user to connect a solar panel
(SP-12V) to maintain the charge of the
lithium battery pack (LIT-09/LIT-C-8), sold
separately.
9 BUSY LED Lights up when the camera is recording.
10 ON/OFF Allows the user to turn on/off the camera.
11 Built-in
speaker
(if applicable)
When viewing videos, allows to hear the
sound.
12 Viewing
screen
To access the main menu and to view photos/
videos. Screen with zoom and pan functions.
13 Navigation
buttons
Buttons to set the camera.
14 Battery switch Allows the user to select the power source
according to the type of batteries used.
15 Battery case Insert 6 alkaline or lithium AA batteries or
a rechargeable lithium battery pack (LIT-09/
LIT-C-8, sold separately).
16 TV OUT To view photos/videos directly on TV.
17 USB port To transfer or view photos/videos to a
computer.
18 SD card slot An SD card is required to record videos/
photos. The camera is compatible with SD/
SDHC memory card, up to 32 GB capacity
(not included).
19 DISTANCE
dial
Allows the user to adjust the distance of
detection and the sensitivity of the detector.
See DISTANCE section for more details.
BATTERY INSTALLATION
We recommend the use of new batteries to ensure a maximum
performance of the camera. Rechargeable AA batteries are not
recommended.
6 alkaline AA batteries Lithium battery pack
LIT-09/LIT-C-8
Switch position (depending on the power source)
Power source Switch position
• 6 AA
• 12V
• 12V + 6 AA
ALK
• LIT-09*
• 12V + LIT-09*
• Solar panel + LIT-09*
LIT-09
* Rechargeable lithium battery pack, sold separately (LIT-09) or with
a charger (LIT-C-8).
MEMORY CARD INSTALLATION
Insert an SD/SDHC memory card (up to 32 GB
capacity) in the card slot. The card is inserted
correctly when a click is heard.
Before inserting or removing a memory
card, always turn off the camera to
prevent loss or damage of the pictures already
recorded.
Surveillance camera
Expedition series
Models:
BF-10HD/S-BF-10
BF-12HD/S-BF-12
HD
HD
SPYPOINT
Camera
USB
cable
Quick start guide
1
2
3
4
®
Quick start
Get started
Settings
Error messages
Complete instructions
www.spypoint.com
v1.0
guide
Audio-video
cable
Installation
strap
4
Components
Photo lens
1
Invisible LEDs
2
Test light
3
Light sensor
4
Fresnel lens
5
1
6
2
3
4
5
7
Slot for installation
6
strap
Cable lock hole
7
10
8
12V Power jack
8
Tripod mount
9
10
Microphone
11
Solar panel jack
11
9
12
13
14
15
16
12
Access to the time
battery
13
Battery switch
14
BUSY Led
15
ON/OFF
16
Built-in speaker
(BF-12
17
Viewing screen
18
Navigation buttons
19
Battery case
HD
)
17
18
19
20
TV OUT
21
USB port
22
SD card slot
23
DISTANCE dial
20
21
22
23
5

Components
1 Photo lens Image sensor and infrared lter.
2 Invisible LEDs Night lighting to obtain black and white
photos and videos.
3 Test light Flashes in TEST mode when there is detec-
tion and ashes 60 seconds in PHOTO/VIDEO
mode to allow the user to leave without being
photographed or recorded.
4 Light sensor Allows the lighting of the LEDs panel at night.
5 Fresnel lens Expands the detection area and increases the
sensitivity of the camera’s motion sensor.
6 Slot for installation
strap
7 Cable lock hole Allows the user to install a CL-6FT cable lock,
8 12V power jack This camera can be powered from an external
9 Tripod mount Standard ¼-20" tripod mount.
10 Microphone Record sound in video mode (p.15).
11 Solar panel jack Allows the user to connect a solar panel
12 Access to the time
battery
Allows the user to install the camera using
the installation strap included (p.10).
sold separately (p.20).
12-volt DC input such as a 12V battery or a
12V adapter, each sold separately (p.19).
(SP-12V) to maintain the charge of the
lithium battery pack (LIT-09/LIT-C-8), sold
separately (p.19).
Battery that keeps the time and date in
memory (p.8).
13 Battery switch Allows the user to select the power source ac-
cording to the type of batteries used (p.7).
14 BUSY LED Lights up when the camera is recording
(p.9).
15 ON/OFF Allows the user to turn on/off the camera.
16 Built-in speaker
(BF-12HD)
17 Viewing screen Allows the user to access the main menu and
18 Navigation buttons Buttons to set the camera (p.10).
19 Battery case Case for AA batteries or a rechargeable
20 TV OUT Allows the user to view or delete photos/
21 USB port To transfer photos/videos to a computer
22 SD card slot An SD card is required to record photos/videos
23 DISTANCE dial Allows the user to adjust the distance of
When viewing videos, allows to hear the
sound.
view photos/videos. Screen with zoom and
pan functions (p.10).
lithium battery pack (p.7).
videos directly on TV (p.13).
(p.16).
(p.9).
detection and the sensitivity of the detector
(p.13).
6

Power
The battery level is shown in the bottom right corner of the screen when
the camera is in TEST mode. When a single line remains, the camera will
continue to take photos but we strongly recommend to change the AA
batteries or charge the lithium battery pack before they are empty. (see
gure below). If a video is being recorded and the batteries level reaches
0%, the camera saves the le before shutting down.
AA BATTERIES
This camera requires 6 AA batteries (1.5V). The use of alkaline or lithium
batteries is strongly recommended. During the installation of the AA batteries, slide the battery switch to ALK (i.e. alkaline). Insert the batteries as
indicated inside the battery case. Battery polarity must be followed.
6 alkaline AA batteries
Please note that the voltage of rechargeable AA batteries (1.2V) is
insufcient to power the SPYPOINT® camera. We also recommend the
use of new batteries to ensure maximum performance of the camera.
LITHIUM BATTERY PACK
This SPYPOINT® camera can be powered by a rechargeable lithium battery
pack LIT-09/LIT-C-8 (sold separately, p.19). This type of battery is less
affected by cold temperatures and lasts up to 3 times longer than an alkaline batteries. During the installation of the lithium battery, slide the battery
switch to LIT-09.
EXTERNAL (12V)
This camera can also be powered by an external 12-volt DC input such as
a 12-volt battery (KIT-12V, BATT-12V or KIT6V/12V) or a 12-volt adapter
(AD-12V), each sold separately (p.19). During the installation of a 12-volt
connection, slide the battery switch to ALK (the AA batteries can remain
safely inside the camera). If combined with a lithium battery pack, slide the
battery switch to LIT-09. For available accessories, see p.19.
SOLAR PANEL
This camera also offers the possibility to connect a solar panel (SP-12V sold
separately, p.19) to maintain the charge of the lithium battery pack
(sold separately, p.19). While installing the rechargeable lithium battery
pack, slide the battery switch to LIT-09 to activate the charging system of
the solar panel.
Battery switch position (depending on the power source)
Power source Battery switch position
• 6AA
• 12V
• 12V + 6AA
• LIT-09*
• 12V + LIT-09*
• Solar panel + LIT-09*
* Rechargeable lithium battery pack, sold separately (LIT-09) or with a
charger (LIT-C-8).
ALK
LIT-09
Lithium battery pack
LIT-09/LIT-C-8
7
Power
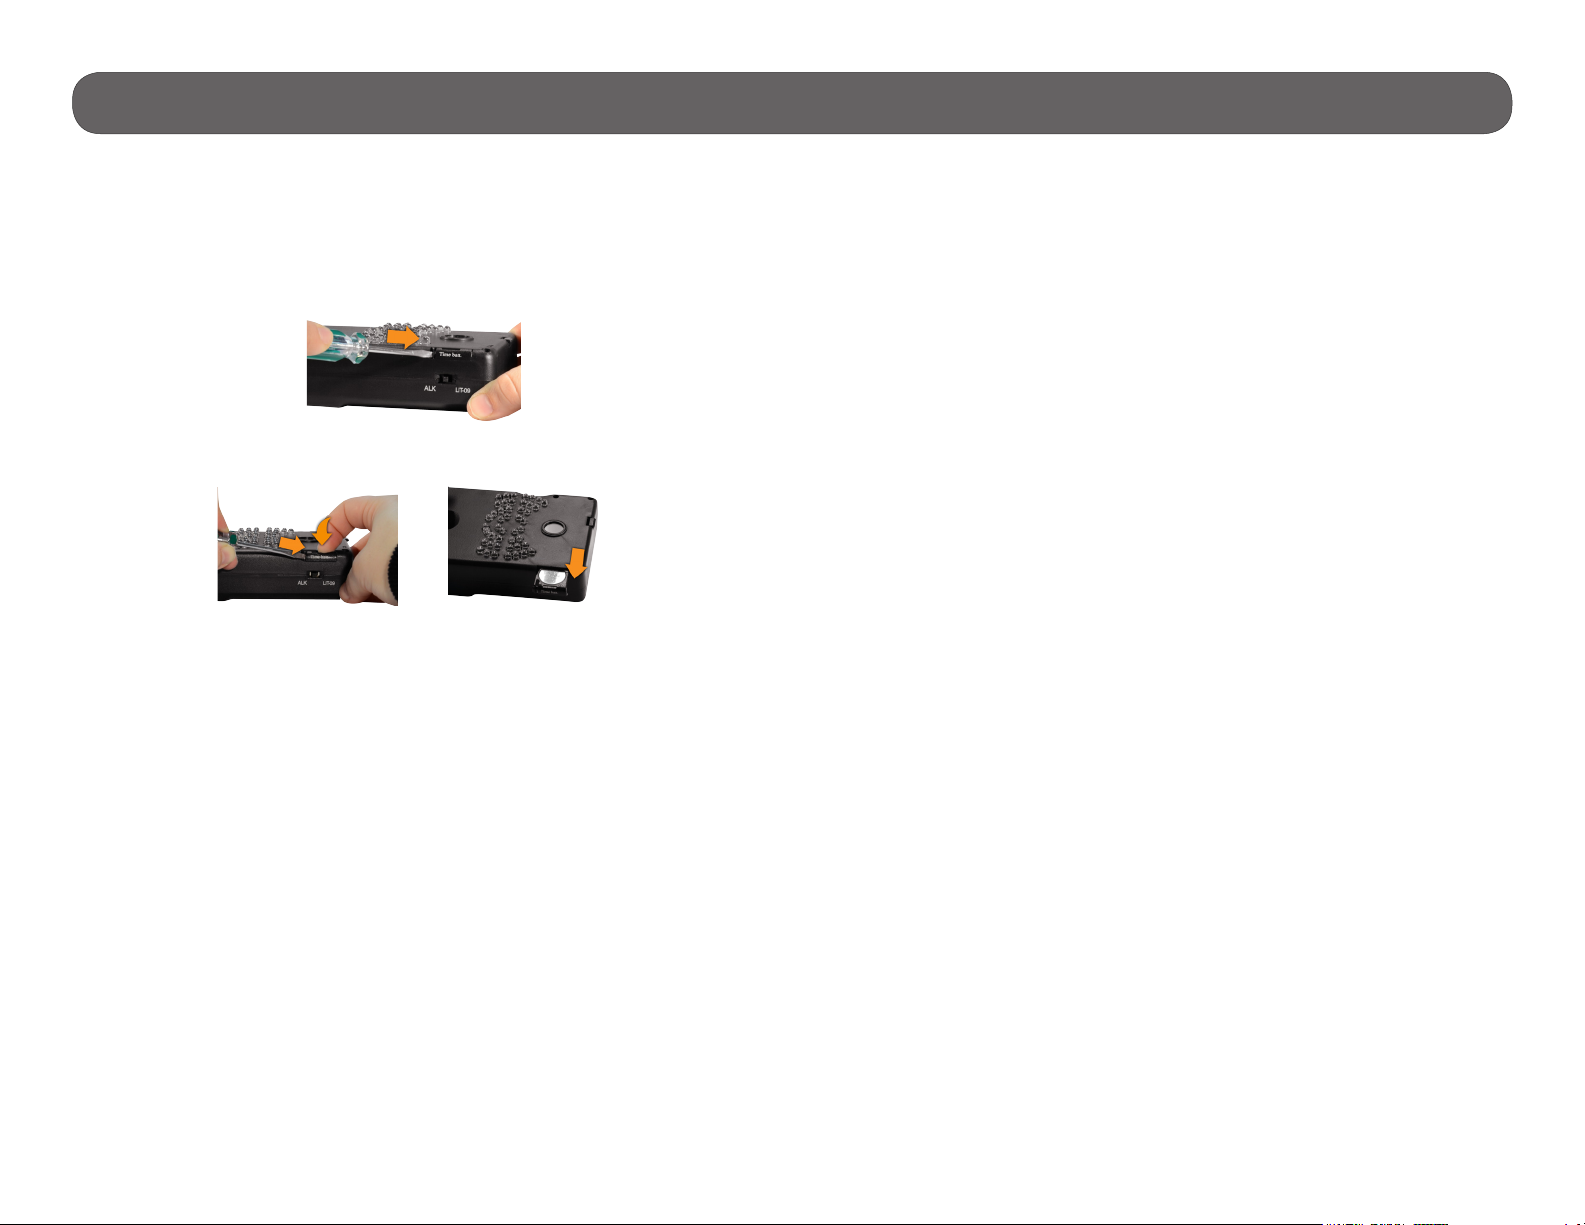
TIME BATTERY
The camera has a CR2032 lithium button battery which saves the time and
date. To replace the battery:
1. Turn off the camera and remove it from the housing.
2. Using a at screwdriver, push the tab to the right.
3. While pushing the tab, remove the compartment of the camera.
4. Replace the battery, the polarity must be respected (side + facing up).
8
 Loading...