

sPOD TJ 2003-2006 User Manual
sPOD Installation Instructions
Windshield Header
2003 – 2006 Wrangler
www.4x4s-POD.com
Tools required
• Phillips head screw driver.
• Flat head screw driver.
• 15mm socket with a 6” extension
• 5/16” socket
• 1 inch drill / hole saw (for harness exit)
1. Assembly Instructions
• Remove the battery from the Jeep.
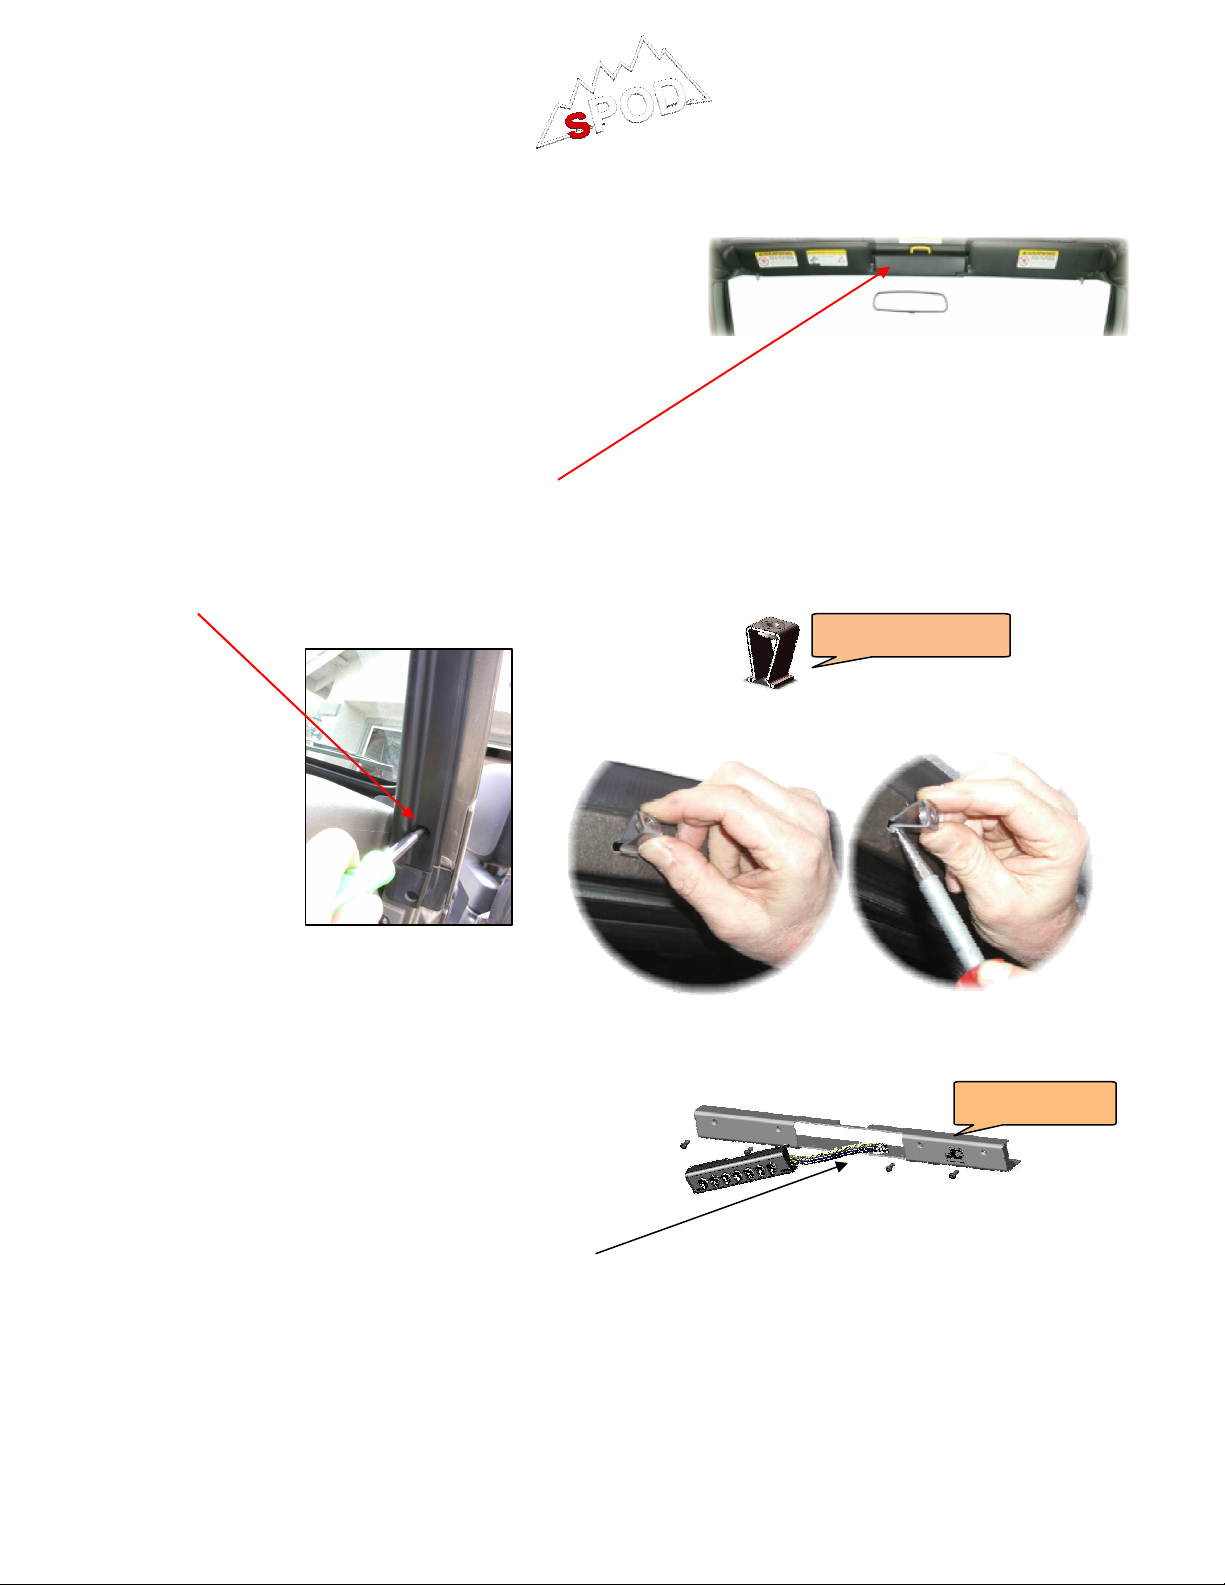
• Remove existing plastic windshield header cover by swinging the visors out of the way and pull the plastic
windshield header straight out until all 5 clips pop out of windshield frame.
• Remove the passenger sun visor and then loosen the right hand (passenger side) pillar piece using a
phillips head screwdriver to loosen the 3 screws. “Note” that you do not need to remove the plastic, just
loosen it!
• Install PN500-300 Clips 4pl. where shown in the original horizontal slots on the windshield frame by
inserting one end of the clip’s flange and then angle upward. Use a flat head screwdriver and push clip
flange in until it snaps in place.
• Install switch panel into header PN500-100 feed your wiring through the front switch panel opening and
feed the harness out through the end as required.
• Attach switch bezel to header using the 10/32 Phillips head screws & lock washers provided, slide switch
panel through the opening, align holes and tighten all 4.
PN 500-300 Clip
PN 500-100
1
sPOD Installation Instructions
Send wire harness and
Drill 1 in. diameter hole here on
plate to the ECU
screws
2003 – 2006 Wrangler
www.4x4s-POD.com
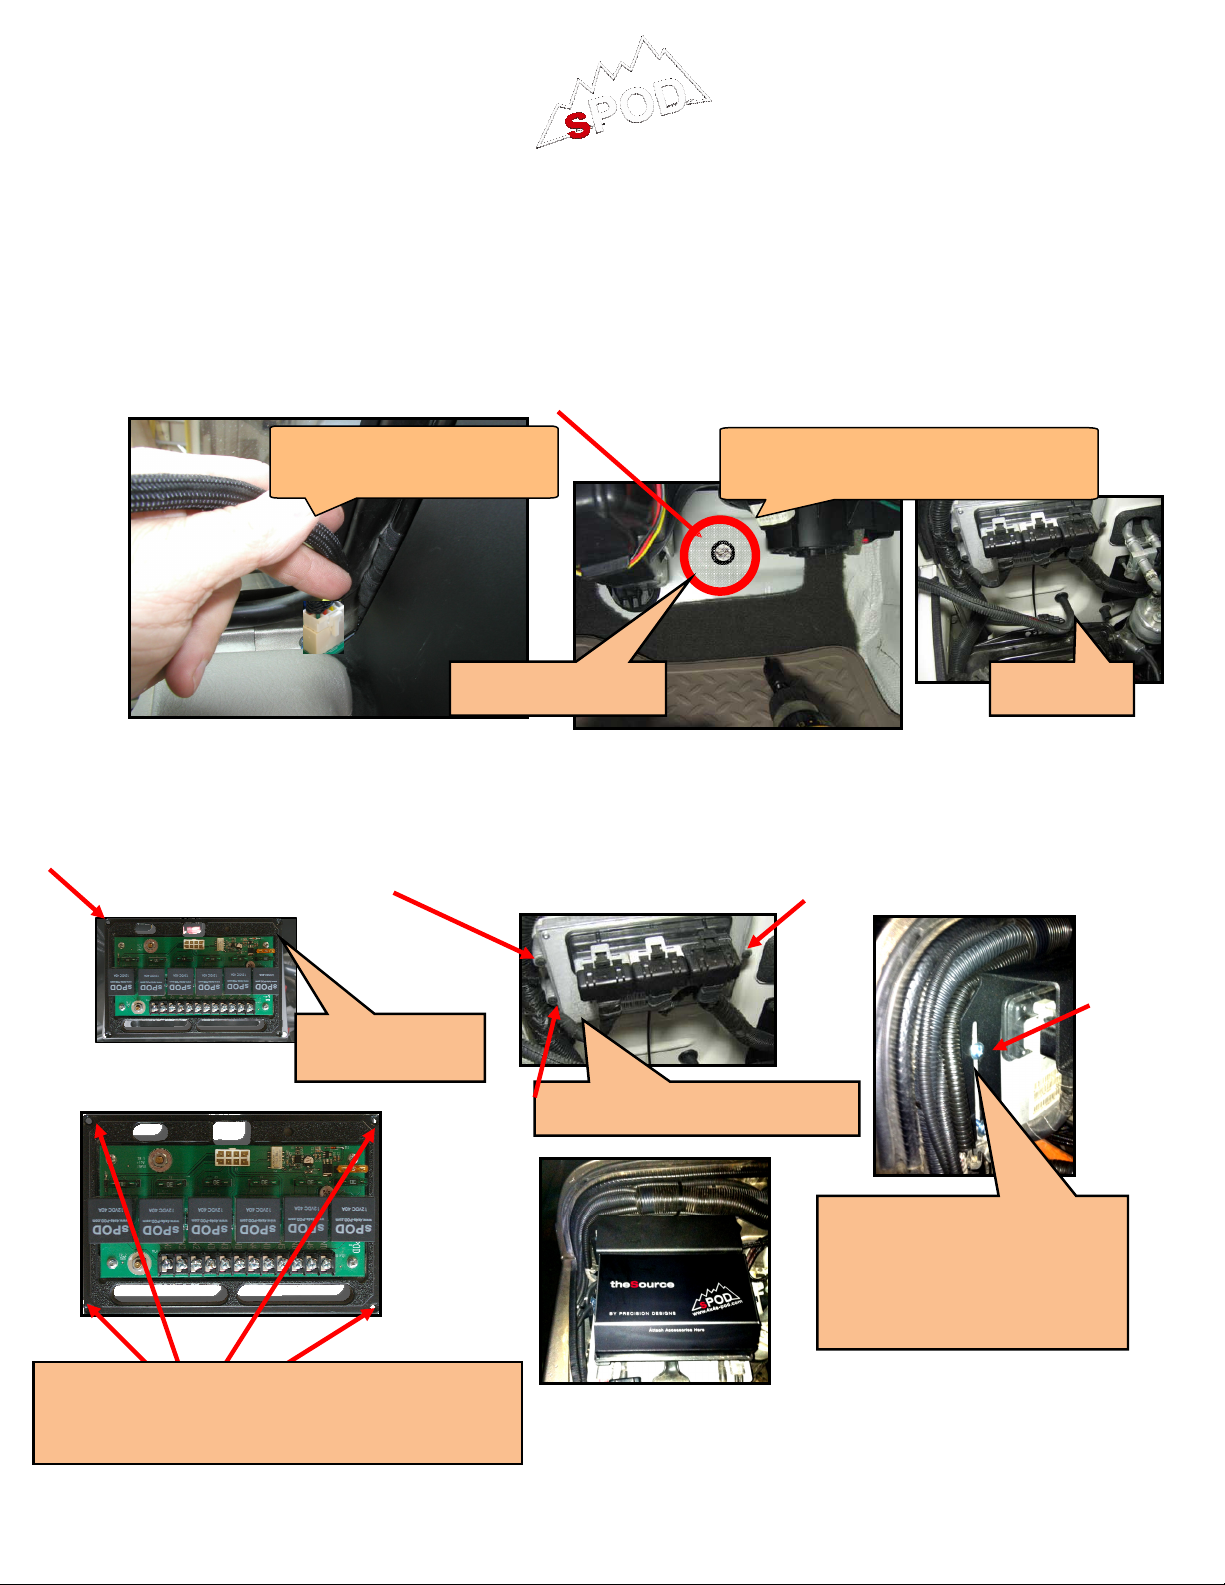
• Now you are ready to attach the entire assembly to the windshield using the ¼-20 Phillips head screws and
lock washers. Tighten all 4 screws (careful not to over tighten) while watching the alignment of the unit
against the windshield.
• Guide wire harness through right side of the sPOD header unit. Keep the harness as close to the
windshield rubber as possible. If you purchased the air gauge kit, then place the air line under the plastic
pieces and lead it all the way down the windshield pillar and down through the dash on drivers side.
• Remove glove box and feed wire harness down behind glove box and out of the way for now.
• Now drill a 1” dia. hole where shown from inside of the Jeep below the glove box area.
• Install supplied grommet and feed connectors through the firewall into the engine compartment.
• Re-install the battery.
• Next remove the 4 counter sunk screws from the plastic to the bracket and slide the assembly off the
bracket before installing the Source mounting plate.
• Loosen the 2 #10 screws using a 5/16” socket located on ECU just above the battery.
Re-install the Source back on to the plate.
Do not over tighten
4 counter sunk screws!
terminals down through here.
Counter sunk
passenger side under glove box area.
Grommet Pull carpet back
5/16” #10 sheet metal screws
Use the 2 supplied #10 x 2”
long Philips head sheet
metal screws with washers
to attach Source mounting
2
 Loading...