

Page 1

sPOD Installation Instructions
4 screws
through opening in plastic
key facing outward
Toyota FJ Cruiser
www.4x4s-POD.com
Allow approximately 2- 3 hours for installation
Tools required
• Phillips head screw driver.
• 10mm socket and extension.
• Drill motor + 5/16” Nut-Driver
• T-20 TORX bit & T-25 TORX bit
• Dremel Tool or File.
1. Remove the Source board from mounting plate by removing the 4 Phillips head screws for easier access
during installation.
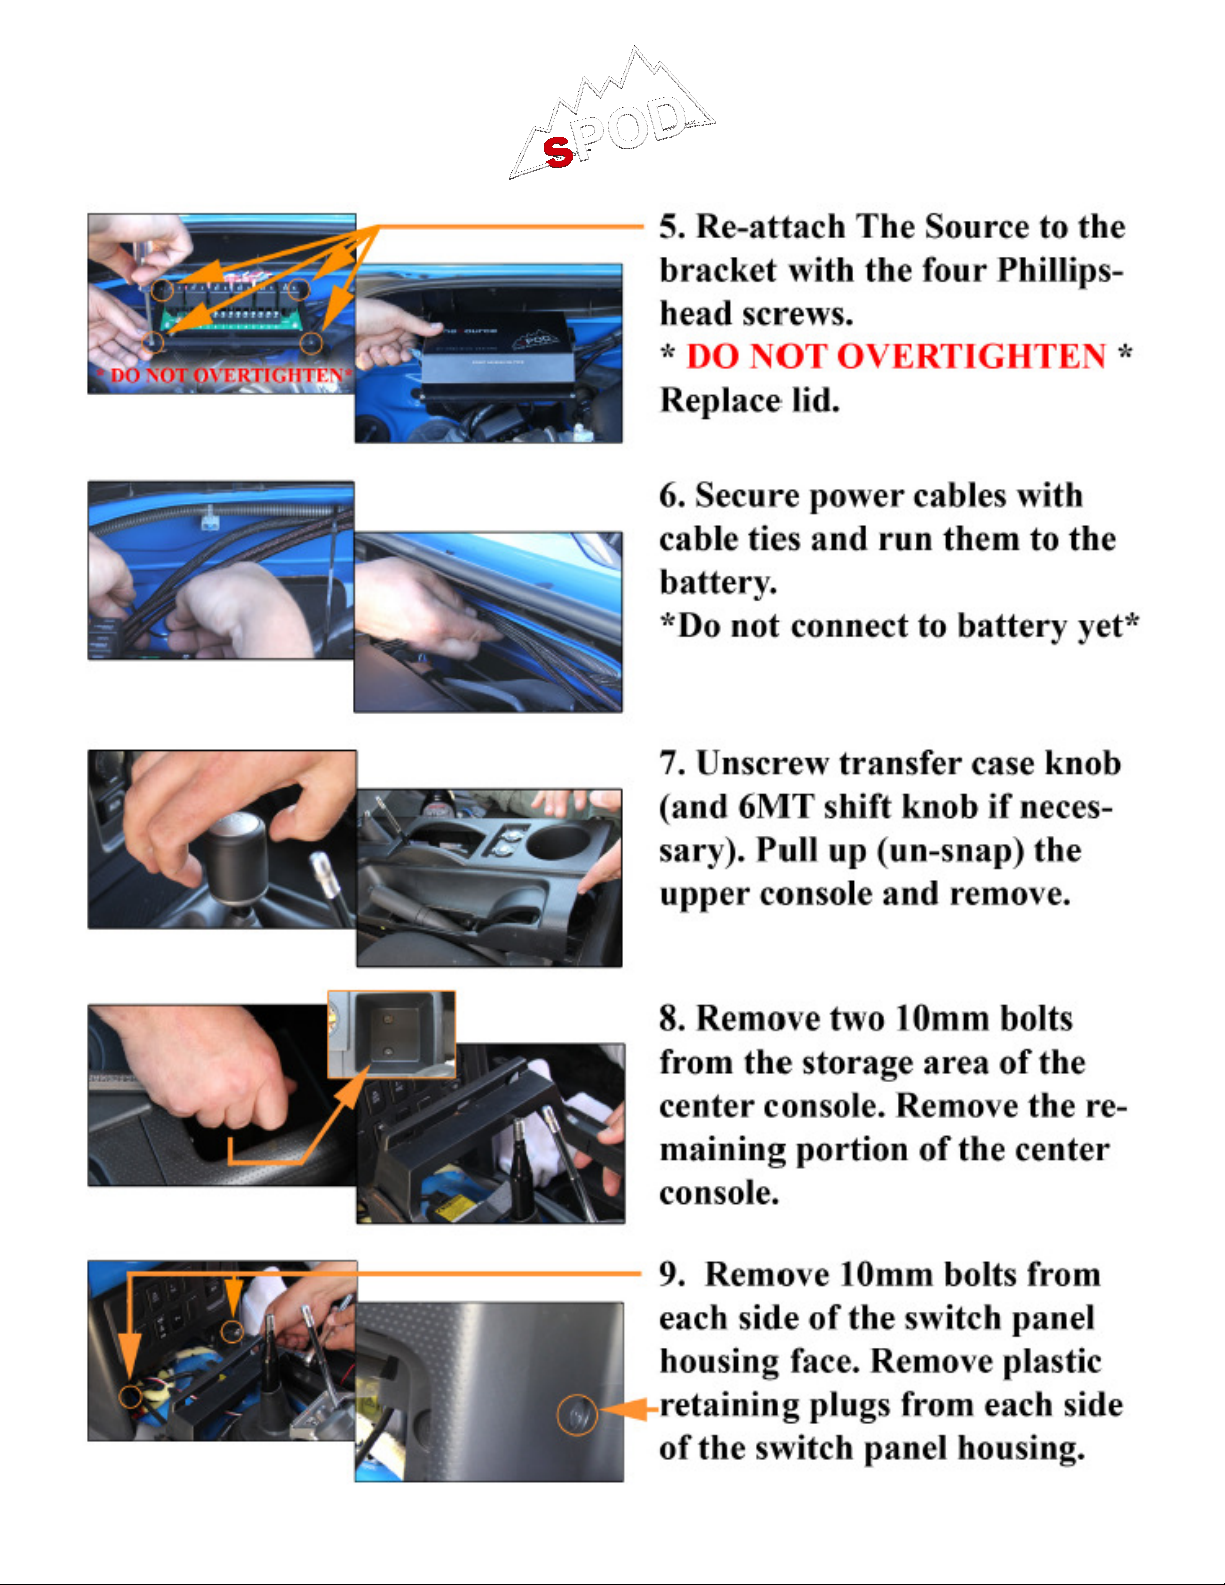
2. First move the OEM harness out of the way.
3. Mount the bracket to existing studs on the passenger’s side firewall aligning over slots in bracket.
• Use the 4 self drilling screws in any of the 4 available holes. Do not re-mount the Source yet.
4. From inside on the driver’s side, look under dash on the firewall for the steering column and feed the harness
with the white connector through the rubber boot.
Pull white connector through
Run white connector up
Plug connector in with
1
Page 2
sPOD Installation Instructions
Toyota FJ Cruiser
www.4x4s-POD.com
2
Page 3
sPOD Installation Instructions
Toyota FJ Cruiser
www.4x4s-POD.com
3
Page 4
sPOD Installation Instructions
After installation
9
4
Toyota FJ Cruiser
www.4x4s-POD.com
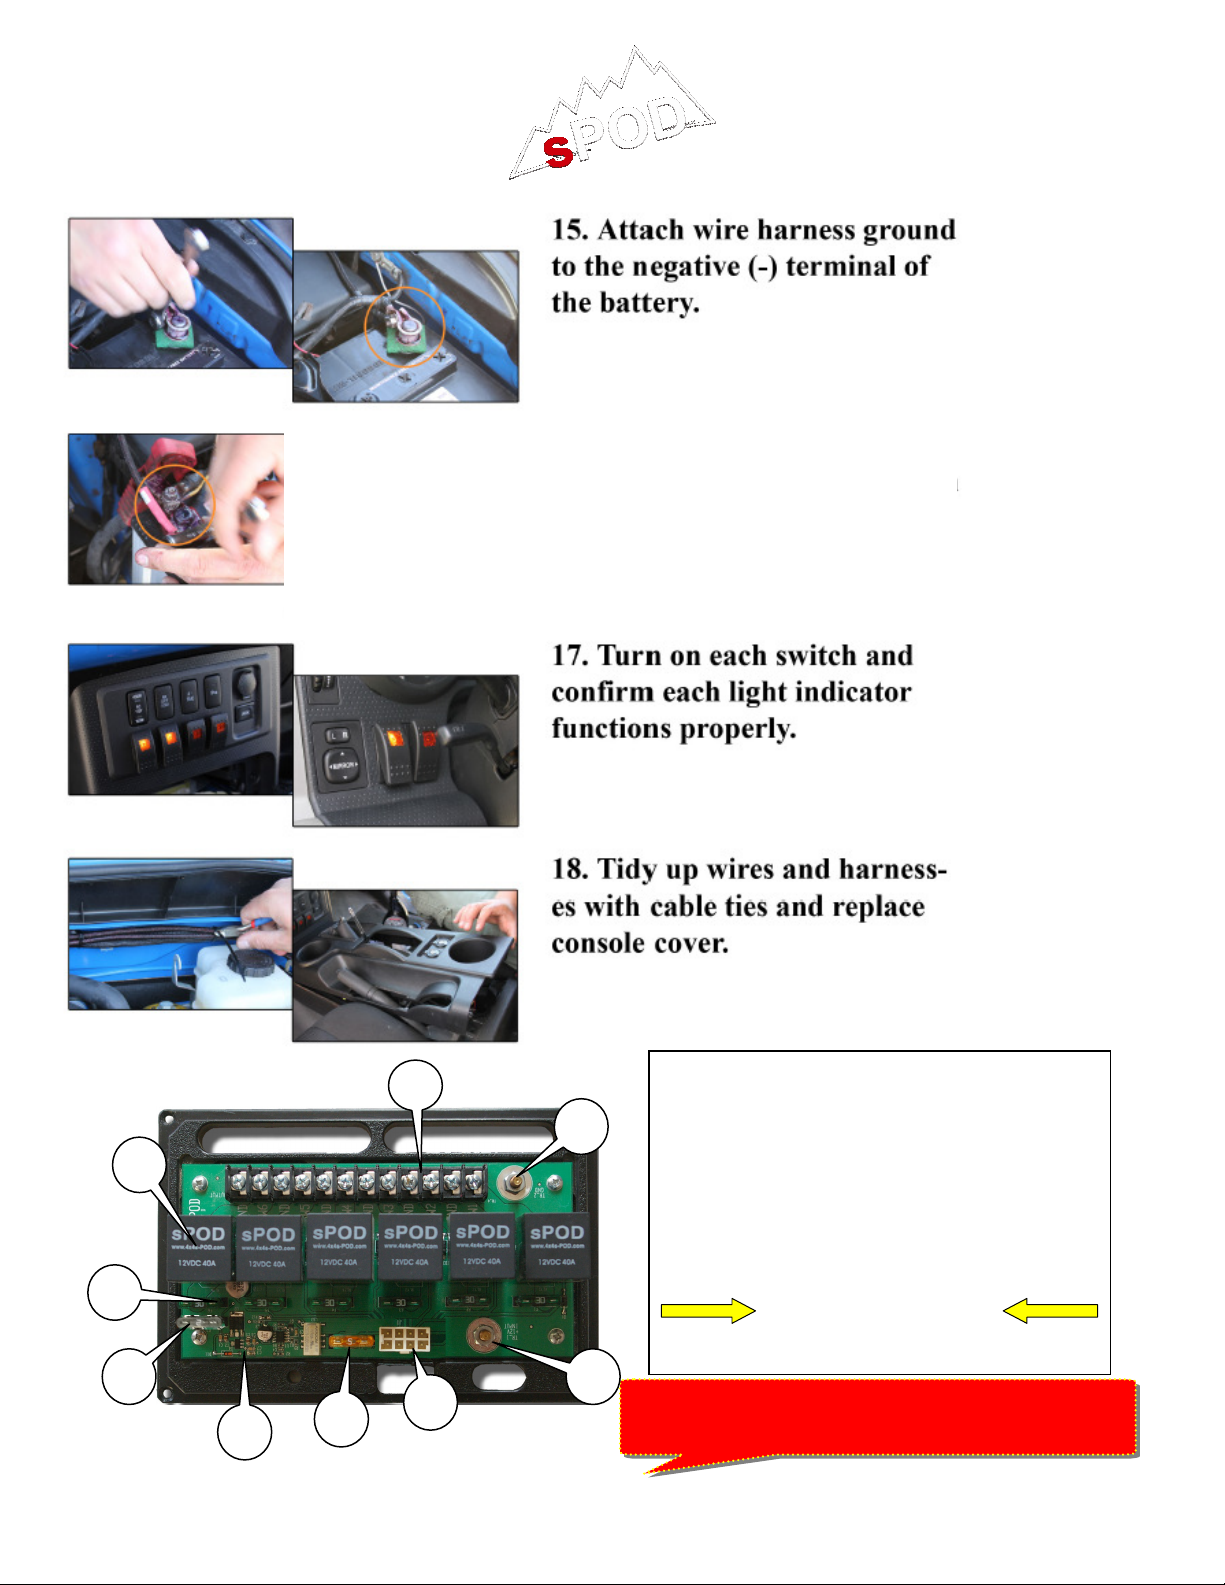
16. Connect the red wire to the
positive side of the battery
1. Attach your accessories here.
SWx Is the Positive and GND is the negative terminals.
2. Negative battery terminal.
3. Positive battery terminal.
4. Switch panel harness input.
5. Switch panel fuse.
6. Low voltage detection circuit.
7. Low voltage detection circuit fuse. Remove this fuse to
disable LVCO
8. Accessory fuses. Any fuse can go here up to 30 AMPs. (6 pl.)
9. Relays that are removable.
.
• If the LVCO detects a low voltage (10.6VDC) and
shuts the sPOD down, turn off all switches on sPOD
and start the vehicle to enable the sPOD again.
Always keep your engine running
whenever possible when powering
electrical accessories
!!!Must start engine to activate system!!!
4
 Loading...