

Sper Scientific 840034 User Manual

Psychrometer/Anemometer
840034
Instruction Manual

TABLE OF CONTENTS
Introduction 3
Front Panel Description
4-6
Measurement Procedures 7-14
Low Battery 15
USB Software 16
Troubleshooting 17
Error Codes 18
Probe Replacement 19-20
Specifications 21-22
FIRST TIME USE
When operating the meter, press the buttons firmly for one
full second to ensure proper operation.
Before measurement, rotate probe cover clockwise to open.
The probe and anemometer are calibrated as a system. Do
not connect the probe to another psychrometer/
anemometer as measurements will be inaccurate.

INTRODUCTION
Thank you for purchasing this psychrometer/anemometer.
The unique meter design contains seven HVAC & RH
parameters in one: Humidity, Air Temperature, Dew Point,
Wet Bulb, Air Velocity, Air Volume, and BTU.
The temperature/humidity sensor is built in to the probe and
is protected by a turnable cap. Please turn the cap open to
get accurate temperature and humidity readings when in
operation.
The microprocessor-based psychrometer is a must-have
device for HVAC engineers. It is easy to get wet bulb, dew
point and BTU readings.
- 3 -
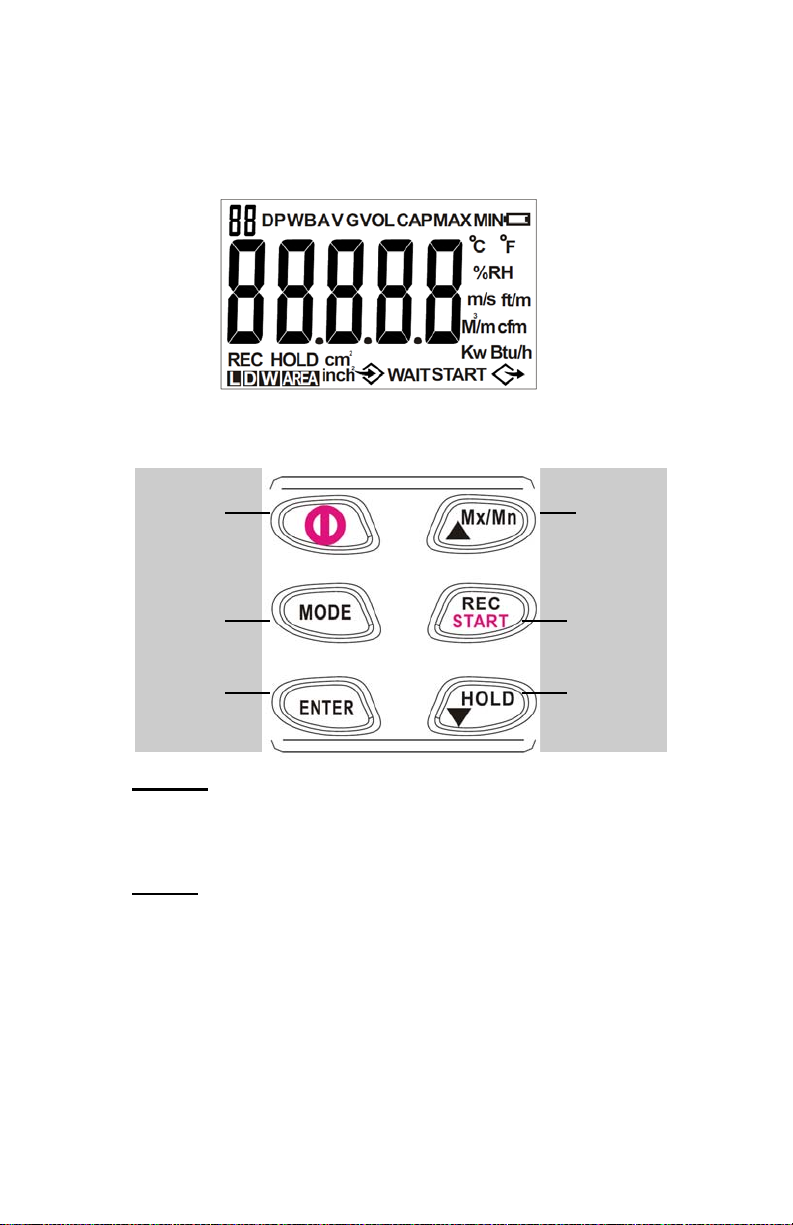
FRONT PANEL DESCRIPTION
LCD Display
Key Pad
Power
Mode
Enter
Mx/Mn
Rec/Start
Hold
Power
1. Press and release the Power button to turn
on the meter.
Mode
2. With the meter on, press the Mode button to
select the different units of measure: Temp
(Temperature), DP (Dew Point), WB (Wet
Bulb), RH (Relative Humidity), Velocity. Press
the Mode button longer than two seconds to
select VOL and CAP.
- 4 -

FRONT PANEL DESCRIPTION
Enter
3. Press Enter to confirm the scale settings and cali-
bration.
Mx/Mn/Up ▲
4. Press the Mx/Mn button to view average, maxi-
mum, and minimum values.
Rec/Start
5. In velocity mode, press Rec/Start to start measuring volume or capacity.
Hold/Down ▼
6. Press the Hold button to retain the current read-
ing in the display, and then press Hold again to
return to live measurement.
7. Press the Power button and the Hold button sim-
ultaneously for more than 3 seconds to enter the
RH calibration mode.
8. Press Enter and Hold simultaneously to turn
backlighting on or off.
- 5 -
FRONT PANEL DESCRIPTION
Auto Off
The 840034 defaults to auto-off mode when turned
on. To override the auto-off function, with the meter
off, hold the Power button and Mx/Mn buttons simultaneously for more than two seconds. The meter will
turn on with the auto-off function inactive.
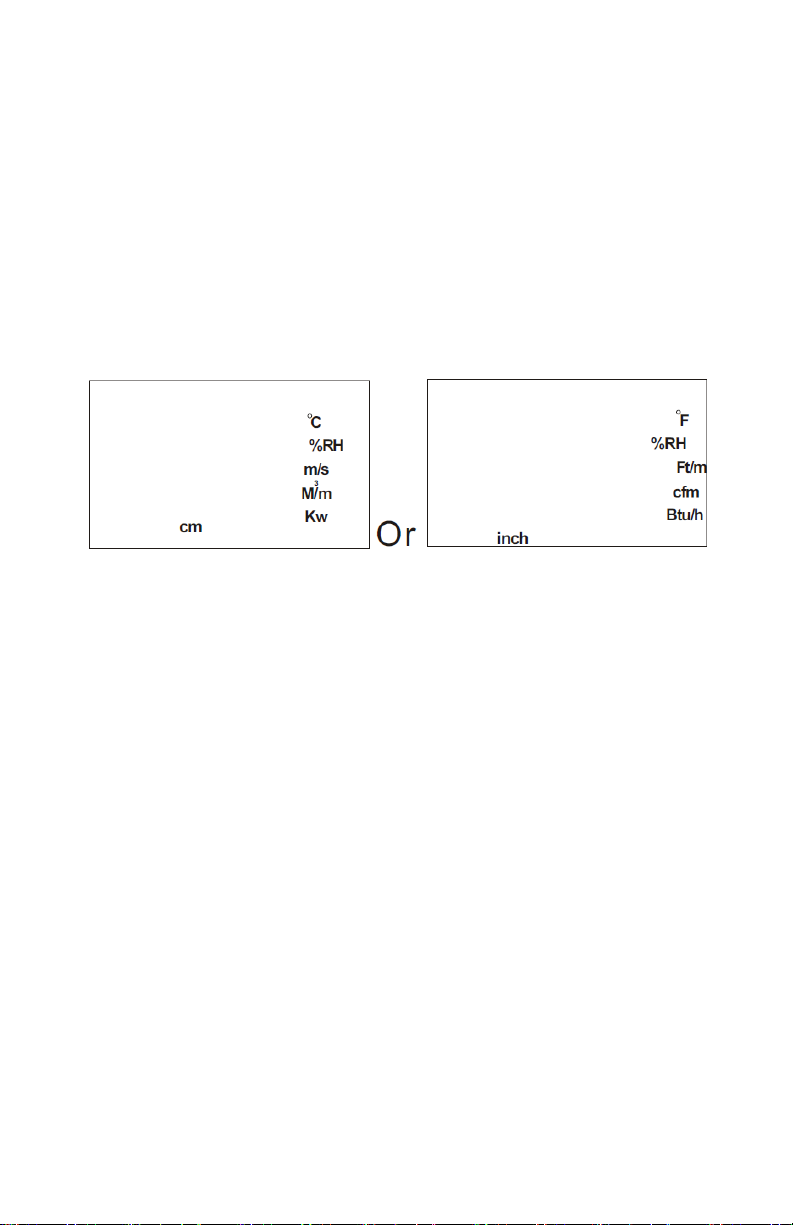
Select Unit
1. With the meter off, press the Power button for
more than two seconds to s elect metric or imperial
measurement.
2. Press Mx/Mn or Hold to select the scale.
3. Press Enter to save; the meter will turn on auto-
matically.
- 6 -

MEASUREMENT PROCEDURES
Air Flow
Your model 840034 meter measures both basic
measurements, including air temperature, humidity,
dew point, wet bulb, and air velocity as well as extended measurements, including air volume, sum of
volume, capacity, and sum of capacity.
1. When the meter is turned on, air temperature is
shown on the LCD.
2. To view the other measurement parameters, press
the Mode button (continually) to display them in
turn.
3. Press Mode for over two seconds to switch be-
tween volume and capacity.
Max, Min and Avg
1. When the meter is turned on, min/max and average
readings will automatically be saved for all basic measurements: air temperature, dew point, wet bulb, humidity, and velocity.
2. Press the Mx/Mn button to view the average value,
maximum value, and minimum value in turn.
3. Press Mx/Mn again to return to normal mode. The data
will be erased once the meter is turned off.
4. When in Mx/Mn/Avg mode, press the Mode button to
cycle through the different parameters (see following).
- 7 -

MEASUREMENT PROCEDURES
Air Volume: Outlet Size
1. While in standard mode, hold the Mode button to enter
air volume mode.
2. To measure the volume, you must first enter the air outlet size. There are 3 choices:
Length and Width. Press the Hold button to select the numeric setting first. Then press Mx/Mn to select the appropriate value (0-9). Values are displayed from 0 to 9 in a cycle.
After entering the length, press Enter to save the setting.
Repeat this process for width setting. Press Enter again to
save these settings.
Diameter. While in the default setting mode (length), press
Enter for over two seconds to choose a diameter setting.
Press the Hold button to select a numeric setting first, and
then press Mx/Mn to select the appropriate value. After selecting, press Enter to finish.
Area. While in diameter setting mode, press Enter for over
two seconds to enter the area setting. Press the Hold but-
ton to select a numeric setting first, then press the Mx/Mn
button to select the appropriate value (0-9). After selecting,
press Enter again to finish. (See following examples.)
- 8 -
 Loading...