

Page 1

Digital Radiation
Meter
840024
Instruction Manual
Page 2

Digital Radiation Meter 840024
Copyright ©2011 by Sper Scientific
ALL RIGHTS RESERVED
Printed in the USA
The contents of this manual may not be
reproduced or transmitted in any form or
by any means electronic, mechanical, or
other means that do not yet exist or may
be developed, including photocopying,
recording, or any information storage
and retrieval system without the express
permission from Sper Scientific.
7720 E. Redfield Rd. Suite #7,
Scottsdale, AZ 85260
Tel: (480) 948-4448 Fax: (480) 967-8736
Web: www.sperscientific.com
- 2 -
Page 3

TABLE OF CONTENTS
INTRODUCTION. . . . . . . . . . . . . . . . . . . .
CAUTION . . . . . . . . . . . . . . . . . . . . . . . . .
KEYPAD . . . . . . . . . . . . . . . . . . . . . . . . . .
OPERATING PROCEDURES . . . . . . . . .
METER SETUP . . . . . . . . . . . . . . . . . . . .
ESTABLISHING BACKGROUND
LEVELS . . . . . . . . . . . . . . . . . . . . . . . . . .
AREA MONITORING . . . . . . . . . . . . . . . .
CHECK SURFACE CONTAMINATION . .
CHECK AN OBJECT . . . . . . . . . . . . . . . .
MAINTENANCE AND CALIBRATION . . .
RADIATION AND RADIOACTIVITY . . . . .
SPECIFICATIONS . . . . . . . . . . . . . . . . . .
WARRANTY . . . . . . . . . . . . . . . . . . . . . . .
NOTICE . . . . . . . . . . . . . . . . . . . . . . . . . .
4
5
6
7
8
10
11
12
14
15
17
21
23
24
- 3 -
Page 4

INTRODUCTION
This manual provides the necessary
information for proper use and care of
Sper Scientific Model 840024 Radiation
Meter. We recommend reading this
manual completely prior to using the
instrument. It also contains valuable
information about the nature of ionizing
radiation that should be understood by
the user so that accurate measurements
can be made.
This Radiation Meter features selectable
measurement scales, adjustable audible
alarm and auto power off. It uses a thin
wall glass Geiger-Mueller (GM) tube that
will detect Beta and Gamma ionizing
radiation and X-rays. The GM tube
generates an electrical pulse each time
radiation passes through the tube.
These pulses are then electronically
detected and displayed in either SI units
(micro-sieverts per hour) or conventional
units (milliroentgens per hour).
- 4 -
Page 5

CAUTION
Although housed in a high-impact
case, the Geiger-Mueller tube that
senses radiation is fragile and may
break If the unit is dropped, exposed
to high temperature (above 122°F/50°
C) and/or high humidity (over 90%
RH).
x Do not allow surface of housing to
come in direct contact with
radioactive contamination
x Do not leave meter in
temperatures above 122°F (50°C)
x Do not expose to wet or high
humidity conditions
x Do not place meter in a microwave
oven
x Do not remove back cover
x Replace battery when is
displayed
- 5 -
Page 6
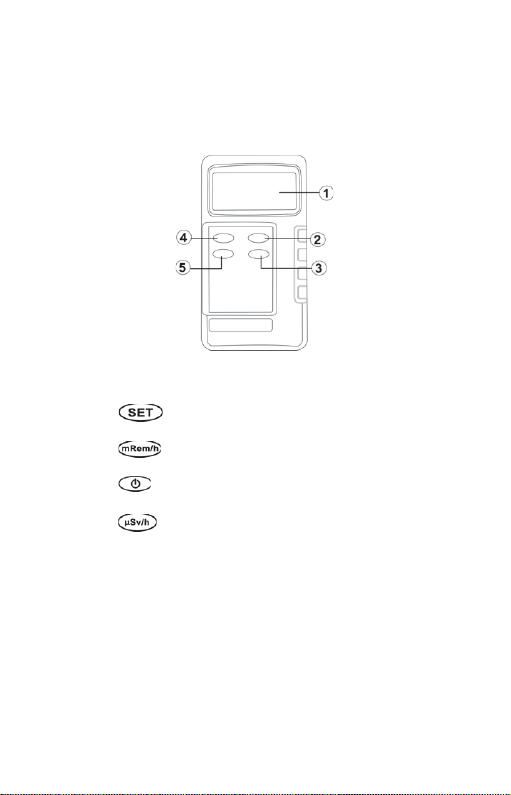
KEYPAD
1. 3.5 Digit LCD display
2. setup function button
3.
4.
5. (T1) and setup function up button
(T2) and setup function down button
Power ON / OFF button
- 6 -
Page 7

OPERATING
PROCEDURES
1. Press the button. The meter
performs a system check and
displays all indicators for
approximately two seconds together
with a Beep signal. When in use,
the instrument will emit a “chirping”
sound that increases in rate
according to the radiation intensity.
2. When powered on, the
measurement scale will default to
Micro-Sieverts per hour (T1).
Press the button to change
the measurement scale to
milliroentgens per hour (T2).
3. Hold the meter as shown on page
12 for detecting Beta radiation. Hold
the meter as shown on page 13 for
detecting gamma and x-ray
radiation.
- 7 -
Page 8
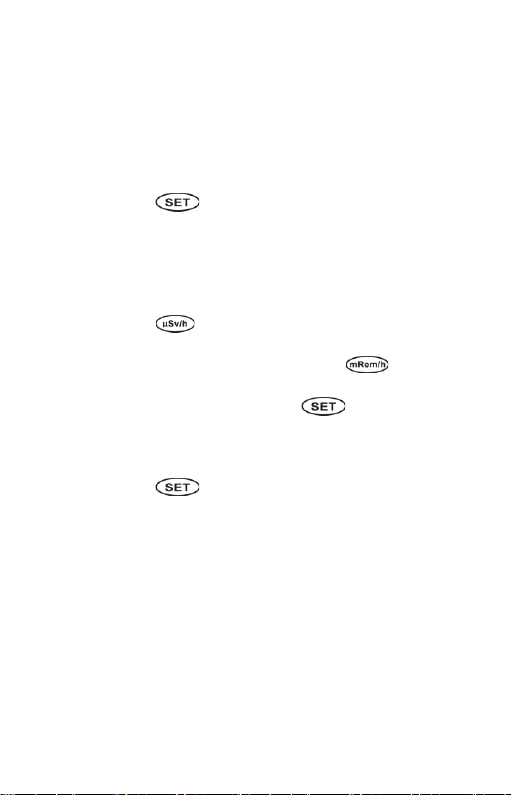
METER SETUP
1. To change the factory set alarm
level of 0.5 μSv/h press and release
the button. “ALA” appears in
the display followed by the alarm
set point. Press the Ÿ or ź arrows
to change the alarm point anywhere
in the range of 0 ~ 199.9 μSv/hr. It
is only necessary to set the alarm in
the range. The meter will
automatically select the
corresponding value for the
range. Once selection is made
press and release the button.
2. To change the 30 minute Auto
Power Off default press and release
the button until “APO”
appears in the display followed by
the current value in minutes. Press
the Ÿ or ź arrows to change the
Auto Off setting to anytime from 0 ~
60 minutes (selecting 0 will defeat
- 8 -
Page 9

METER SETUP
1. the Auto Off function). Once
selection is made press and release
the button.
3. To cancel or restore audible
chirping press and release the
button. The current setting will be
displayed (either “ON” or “OFF”).
Press the Ÿ or ź arrows to change
the setting. Selecting “OFF”
silences audible chirping. Once
selection is made press and release
the button to return to the
measurement screen.
- 9 -
Page 10

ESTABLISHING
BACKGROUND LEVEL
There is always naturally occurring
radiation around us, which is categorized
as background radiation. The radiation
levels vary at different locations and at
different altitudes. To attain the highest
degree of accuracy from this instrument a
background reading should be established
for each location being monitored. This
can be accomplished by taking an
unshielded reading or by shielding the
meter with a 0.5” thick lead barrier on all
sides. The following procedure can be
used to obtain a background level:
1. Press the button
2. Select measurement scale: or
3. Take a 5 minute reading
4. Maintain this reading for future
reference
5. Repeat this procedure each time meter
is moved to a different location
- 10 -
Page 11

AREA MONITORING
1. Establish background level as
described above
2. Press the button
3. Select measurement scale: or
4. Take a reading by holding the meter
in hand or placing it in a convenient
location. The meter will display an
updated reading once every second.
Allow at least one minute for readings
to stabilize
5. For environmental monitoring the
meter does not have to be held or
pointed in a specific direction
- 11 -
Page 12

CHECKING FOR SURFACE
CONTAMINATION
1. Establish background level (p.11)
2. Press the button
3. Select measurement scale: or
4. Place meter with the GM tube side
of the housing facing the surface
being monitored (see image A).
This allows detection of both beta
and gamma radiation. Do not allow
the meter housing to come in
contact with the surface being
monitored as this may contaminate
the meter and make it inoperative.
Image A
- 12 -
Page 13

CHECKING FOR SURFACE
CONTAMINATION
5. The meter is not sensitive to Beta
radiation with the GM tube side
pointed away from the source being
checked (see image B).
Image B
- 13 -
Page 14

CHECKING AN OBJECT
1. Establish background level (p.11)
2. Press the button
3. Select measurement scale: or
4. Hold the meter with the GM tube
side positioned as close as possible
to the object without allowing
contact. If the object is radioactive,
the radiation level will be highest at
a close distance and will decrease
proportionately as the distance from
the source increases. (For example,
a reading taken at a distance of six
inches (152mm) from the object will
be approximately one-fourth of the
reading taken at a distance of three
inches (76mm) following the inverse
square law.)
- 14 -
Page 15

MAINTENANCE AND
CALIBRATION
1. Replace the battery when the
symbol appears in display
2. Remove the battery if meter is not
being used for more than one
month
3. This meter should be checked for
accuracy once a year. Our
authorized service center can also
provide a Certificate of Calibration
using NIST traceable standards if
required by regulations.
4. For calibration or for out of warranty
repair information contact:
Sper Scientific Ltd.
Attention: Calibration/Repair
Department
7720 E. Redfield Rd., Suite #7
Scottsdale, AZ 85260 USA
Phone: 480-948-4448
Fax: 480-967-8736
Email: info@sperscientific.com
- 15 -
Page 16

MAINTENANCE AND
CALIBRATION
Note:
This instrument is not user serviceable.
Do not attempt making repairs or
adjustments. Do not return any meter
that may be contaminated with
radioactivity.
RADIA TION AND
RADIOACTIVITY
The following information is intended to
provide an understanding of radiation
and how the Model 840024 Radiation
Meter detects certain types of radiation.
Radiation is energy that travels in the
form of particles or waves.
Radioactivity is the property of some
atoms that cause spontaneous
emission of energy and emits ionizing
radiation as they decay.
Understanding Atoms
Atoms are small particles of which
everything is made of. Atoms have a
- 16 -
Page 17

RADIA TION AND
RADIOACTIVITY
nucleus that contains protons and
neutrons. Neutrons do not have an
electrical charge while protons have a
positive charge. Electrons are
negatively charged particles that orbit
the nucleus and balance the positive
electrical charge of the protons. The
nucleus of the atom is held together by
a delicate balance among the nuclear
particles allowing the atom to remain
stable. Any change in this structure will
cause the nucleus to become unstable
or radioactive until stability is restored.
Ionizing Radiation
Ionizing radiation is the type most
commonly referred to when discussing
radioactivity. It is radiation with enough
energy to remove tightly bound
electrons from the atom creating ions.
The GM tube in the radiation meter is
capable of detecting ions emitted from
certain radioactive particles and waves.
- 17 -
Page 18

RADIA TION AND
RADIOACTIVITY
Alpha Particles
An alpha particle is identical to a
Helium nucleus having two protons and
two neutrons. When ionized by
radiation the ratio of neutrons to
protons is changed in the atom. This
causes atoms to restore the balance by
emitting alpha particles. Alpha particles
are large atoms that travel slowly in air
and lose energy rapidly after a few
inches or centimeters. This energy is
low enough to be stopped by a piece of
paper therefore alpha particles can
only be detected with specialized
equipment. Model 840024 cannot
detect alpha particles.
Common Alpha Emitters Energy MeV
Americium-241 5.48
Uranium-238 4.27
Radium-226 4.87
Radon-222 5.48
- 18 -
Page 19

RADIA TION AND
RADIOACTIVITY
Beta Particles
Beta particle emission occurs when the
ratio of neutrons to protons is too high.
An excess neutron transforms into a
proton and electron. The proton
remains in the nucleus and the electron
is ejected. This process causes
radioactive decay of the atom. Some
beta emitters can also produce gamma
rays along with the beta emissions.
This energy is in the form of a gamma
photon. Beta particles can travel up to
several feet (meters) in open air, they
are, however, easily stopped by solid
objects.
Common Beta Emitters Energy (MeV)
Carbon-14 0.159
Cesium-137* 0.51
Iodine-131* 0.6
Phosphorus-32 1.71
Sulfur-35 0.16
Strontium-90 0.54
Tritium (Hydrogen 3) 0.018
*Also decays by gamma emissions. Refer to
Gamma Rays and X-Rays section.
- 19 -
Page 20

RADIA TION AND
RADIOACTIVITY
Gamma Rays and X-Rays
Gamma radiation is a high energy
ionizing radiation called gamma
photons that are emitted from the
nucleus of radioactive ions. Because of
their high energy gamma rays travel at
the speed of light and can travel a long
distance before expending their
energy. They also have the ability to
penetrate objects and human tissue. A
dense material such as lead is required
for proper shielding of gamma emitters.
The major difference between gamma
rays and X-rays is how they are
produced. Gamma rays originate in the
nucleus while X-rays originate in the
electron field surrounding the nucleus
and are machine produced.
Common Gamma Emitters Energy (MeV)
Cesium-137* 0.662
Iodine-125 0.035
Iodine-131* 0.364
Technecium-99m 0.140
*Also decays by beta emissions. Refer to Beta
Emitters section.
- 20 -
Page 21

SPECIFICATIONS
Display: 3.5 digit LCD with maximum
reading of 1999
Measurement Range: 0.1 - 199.9 μSv/hr,
0.01 - 19.99 mRem/hr
Sensor: Thin Wall glass GM tube
Energy Response: 30KeV to 1.5MeV
beta, gamma and
X-ray radiation
Accuracy: ±15%
Alarm Range: Adjustable from 0 -
199.9 μSv/hr (19.99 mRem/hr)
Overload Indicator: “OL”
Low Battery Indicator: Yes
Auto Power Off: Adjustable 0 - 60
minutes
- 21 -
Page 22

SPECIFICATIONS
Audio Signal: Selectable “ON” or
“OFF”
Temperature Range: 5° ~ 122°F
(5° ~50°C)
Humidity Range: 0 ~ 80% RH
Operating Voltage: >300VDC
Battery: 9V Alkaline - provides up to
50 hours of use
Weight: 8 ounces (178g)
Dimensions:
(143 x 74 x 34 mm)
5½” x 2Ǭ” x 1½”
- 22 -
Page 23

WARRANTY
Sper Scientific Ltd. warrants this radiation meter
against defects in materials and workmanship for
a period of two (2) years from date of purchase.
Sper Scientific Ltd, will, at its own discretion
repair or replace this instrument if it fails to
operate properly during the warranty period. This
warranty is void by the following: misuse,
unauthorized repairs, modifications, radioactive
contamination. Please return the warranty
registration card within ten (10) days of purchase.
For warranty service contact:
Sper Scientific Ltd.
Attention: Repair Department
7720 E. Redfield Rd., Suite #7
Scottsdale, AZ 85260 USA
Phone: 480-948-4448
Fax: 480-967-8736
Email: info@sperscientific.com
Shipping charges for all products returned for
service must be prepaid. Please include a
description of the problem along with a contact
name, phone number and a return address.
Rev. 5/2/12
- 23 -
Page 24

NOTICE
Sper Scientific believes this Radiation
Meter to be accurate within reasonable
standards of acceptance and includes
instructions that, if followed, will yield
accurate measurements.
The manufacturer assumes no liability
for damages, consequential or
otherwise, that may arise from the use
of the Radiation Meter by any person,
under any circumstances.
This Radiation Meter is sensitive to
gamma, beta and x-ray radiation, but
not to extremely low energy forms, or
alpha, neutron or microwave radiation.
Do not open Radiation Meter or
otherwise tamper with or attempt to
service it.
 Loading...