

SpeedLink Sonid, SL-870002-BKGY Quick Install Manual
SONID
STEREO HEADSET – USB
QUICK INSTALL GUIDE
VER. 1.0
SL-870002-BKGY
HU
1. Csatlakoztassa a headsetet az USB
csatlakozóval számítógépe szabad USB
portjára. A készüléket az operációs
rendszer magától felismeri és telepíti.
2. A Windows* alatt ezután a
rendszervezérlésben kiegészítő
audió készülékeket talál, győződjön
meg arról, hogy alpkészülékekként
vannak kiválasztva a felvételhez és
lejátszáshoz.
3. A kábel-távirányítón szabályozhatja
a hangerőt a „+” (hangosabb) és „-”
(halkabb) gombokkal. A többi gombbal
szükség esetén a lejátszást (középső
gomb) vagy az integrált mikrofon
némítását (bal gomb) kapcsolhatja;
az elnémított mikrofont világító piros
LED jelzi a távirányítón. Az újabb
megnyomás aktiválja a megfelelő
funkciót.
EL
1. Συνδέστε τα ακουστικά με το βύσμα
USB σε μια ελεύθερη υποδοχή
σύνδεσης USB του Η/Υ σας. Η συσκευή
αναγνωρίζεται αυτόματα από το
λειτουργικό σύστημα και εγκαθίσταται.
2. Στα Windows* θα βρείτε στη συνέχεια
στον έλεγχο συστήματος επιπρόσθετες
συσκευές ήχου – εξασφαλίστε ότι έχουν
επιλεγεί ως στάνταρ συσκευές για
εγγραφή και αναπαραγωγή.
3. Στο τηλεχειριστήριο καλωδίου
ρυθμίζετε την ένταση με τα πλήκτρα
„+“ (υψηλότερη ένταση) και
„-“ (χαμηλότερη ένταση). Με τα
υπόλοιπα πλήκτρα απενεργοποιείτε
εάν απαιτείται την αναπαραγωγή
(μεσαίο πλήκτρο) ή το ενσωματωμένο
μικρόφωνο (αριστερό πλήκτρο).
Κατά την απενεργοποίηση του
μικροφώνου ανάβει το κόκκινο LED
στο τηλεχειριστήριο. Μια νέα πίεση
ενεργοποιεί πάλι την εκάστοτε
λειτουργία.
CZ
1. USB konektorem zapojte headset
do volného USB portu na Vašem PC.
Operační systém automaticky rozpozná
přístroj a jej nainstaluje.
2. Vzápětí se v systémovém řízení
Windows* nachází dodatečná audio
zařízení – ujistěte se, zda byla tato
zvolena jako výchozí zařízení pro
záznam a přehrávání.
3. Na kabelovém dálkovém ovládání
můžete pomocí tlačítek „+“ (hlasitěji)
a „-“ (tišší) reguloat hlasitost.
Zbývajícími tlačítkami můžete
podle potřeby přepínat přehrávání
(prostřední tlačítko) nebo ztlumit
integrovaný mikrofon (levé tlačítko),
během ztlumení mikrofonu svítí
červená LED dioda na dálkovém
ovládání. Dalším stiskem se aktivuje
příslušná funkce.
PT
1. Ligue o conector USB dos auriculares
numa porta livre USB do seu
computador. O sistema operativo
irá detetar e instalar o dispositivo
automaticamente.
2. De seguida, poderá encontrar no Painel
de Controlo de Windows* dispositivos
adicionais de áudio – certifique-se
de que estejam selecionados como
dispositivos padrão para a gravação e
reprodução.
3. No telecomando do cabo, regule o
volume com os botões „+“ (mais
alto) e „-“ (mais baixo). Com os
outros botões é possível emudecer
a reprodução (botão do meio) ou
o microfone integrado (botão da
esquerda); durante o emudecimento
do microfone, o LED vermelho no
telecomando acende. Premindo outra
vez, ativará novamente a respetiva
função.
DK
1. Tilslut dit headset med USBstikket til en ledig plads på din PC.
Operativsystemet genkender enheden
automatisk.
2. Under Windows* findes der
så yderligere audio-enheder i
systemstyringen - sørg for, at
standardenheder til optagelse og
afspilning er afkrydset.
3. På kabelfjernbetjeningen regulerer du
lydstyrken med tasterne »+« (højere)
og »-« (lavere). Med de øvrige taster
dæmper du enten afspilningen (tasten i
midten) eller den integrerede mikrofon
(venstre tast); mens mikrofonen
er dæmpet, lyser den røde LED på
fjernbetjeningen. Et nyt tryk aktiverer
den tilsvarende funktion igen.
SE
1. Sätt headsetets USB-kontakt i en
ledig USB-port på din PC. Apparaten
upptäcks och installeras automatiskt
av operativsystemet.
2. I Windows* kontrollpanel finns det nu
nya audioapparater – försäkra dig om
att de valts som standard för upp- och
inspelning.
3. Du reglerar volymen på kabelfjärren
med knapparna ”+” (högre) och
”-” (lägre). De övriga knapparna
används för att koppla bort ljudet från
uppspelningen (mittknappen) eller den
inbyggda mikrofonen (vänster knapp)
om det behövs; när ljudet kopplats
bort från mikrofonen lyser den röda
indikatorlampan på fjärrkontrollen.
Tryck på knappen igen för att
återaktivera den aktuella funktionen.
FI
1. Liitä kuulokemikrofoni USB-pistokkeen
avulla tietokoneesi vapaaseen USBliitäntään. Käyttöjärjestelmä tunnistaa
ja asentaa laitteen automaattisesti.
2. Windows*-käyttöjärjestelmässä on
järjestelmäohjauksessa ylimääräisiä
audiolaitteita – varmista, että ne on
valittu vakiolaitteiksi tallennusta ja
toistoa varten.
3. Johtokaukosäätimessä
äänenvoimakkuutta säädellään
painikkeilla ”+ ” (kovempaa) ja
”- ” (hiljempää). Muilla painikkeilla
kytketään tarvittaessa toisto
(keskimmäinen painike) tai integroitu
mikrofoni (vasen painike) mykäksi;
mikrofonin mykkäkytkennässä
kaukosäätimen punainen merkkivalo
palaa. Uusi painallus aktivoi vastaavan
toiminnon uudelleen.
NO
1. Koble headsettet med USB-kontakten
til en ledig USB-port på PC-en din.
Apparatet blir automatisk gjenkjent og
installert av operativsystemet.
2. Etterpå finner du under Windows*systemstyring andre lydenheter
– forsikre deg om at de er valgt
som standardenheter for opptak og
avspilling.
3. På kabelfjernkontrollen regulerer du
lydstyrken med tastene «+» (høyere)
og «-» (lavere). Med de andre tastene
kobler du ved behov inn repetisjon
(midterste tast) eller kobler den
integrerte ut den integrerte mikrofonen
(venstre tast); når mikrofonen er
koblet ut, lyser den røde LED-en på
fjernkontrollen. Ved et nytt trykk
aktiveres den aktuelle funksjonen
igjen.
RO
1. Conectați căștile cu conectorul USB la
un port USB liber (5V, minim 500mA) al
calculatorului. Sistemul de operare va
detecta și instala automat dispozitivul.
2. În continuare, în SO Window*, în Setări
sistem sunt disponibile dispozitive
audio suplimentare – asigurați-vă că
sunt setate ca dispozitive standard
pentru înregistrare și redare.
3. Utilizați butoanele „+“ (mai tare) și
„-“ (mai liniștită) de pe telecomandă,
în scopul de regla nivelul volumului.
Utilizaţi butoanele cu alte pentru a
dezactiva redarea (butonul mijloc) sau
pentru a dezactiva microfonul (butonul
din stânga), dacă este necesar. LED-ul
roșu de pe telecomanda inline aprinde
atunci când microfonul este oprit. Din
nou apăsați butonul pentru a reactiva
funcția corespunzătoare.
2
3
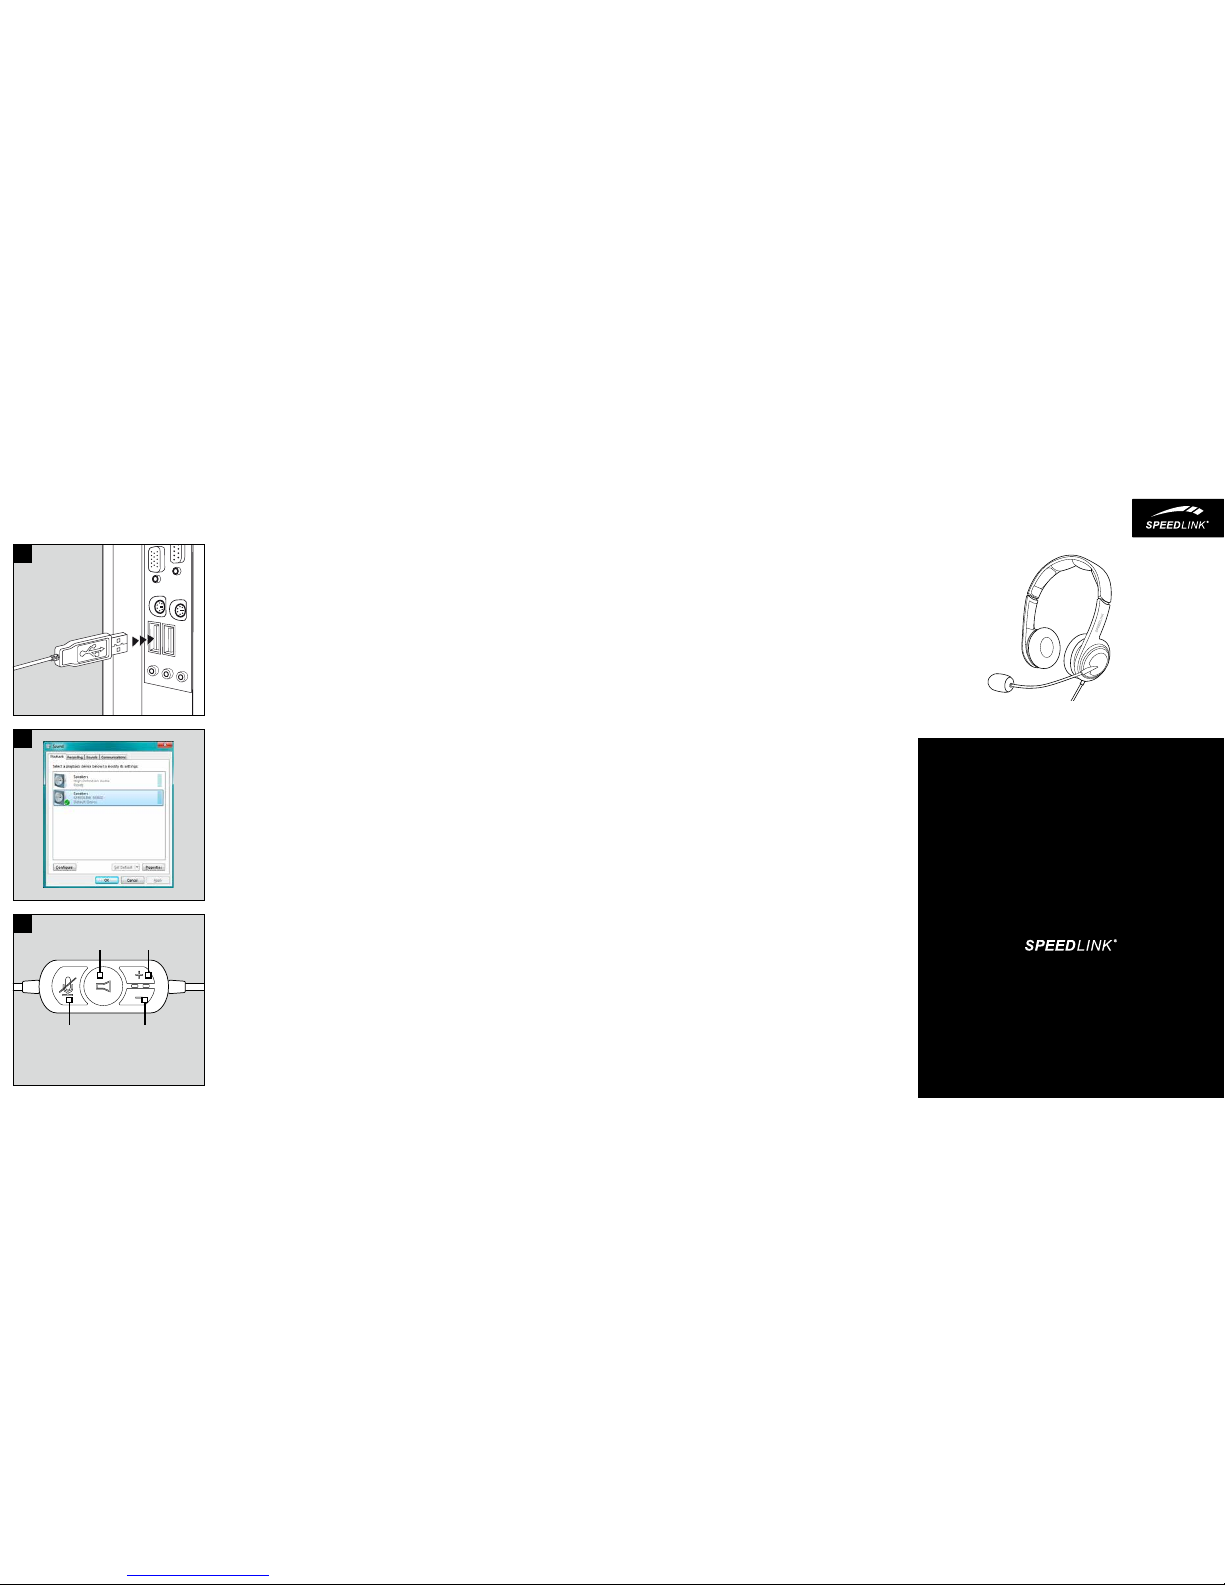
LED RED: MICROPHONE MUTED
LED BLUE: POWER ON
VOLUME UPMUTE
VOLUME DOWNMIC MUTE
QUICK INSTALL GUIDE
SONID – STEREO HEADSET – USB
1
IN 5V DC 20MA MAX.
TECHNICAL SUPPORT
EN
Having technical problems with this product? Get in touch with our Support team – the
quickest way is via our website: www.speedlink.com
DE
Bei technischen Schwierigkeiten mit diesem Produkt wenden Sie sich bitte an unseren
Support, den Sie am schnellsten über unsere Webseite www.speedlink.com erreichen.
FR
En cas de dicultés techniques concernant ce produit, veuillez vous adresser à notre
service d’assistance technique. Le moyen le plus rapide consiste à le contacter par le
biais de notre site Web www.speedlink.com
EN
1. Plug the headset’s USB connector into
any free USB port on your PC. The
operating system will detect and install
the device automatically.
2. Following that, additional audio
devices will be displayed in the
Windows* Control Panel – make sure
that these devices are configured as
the default devices for recording and
playback.
3. Use the ‘+’ (louder) and ‘-’ (quieter)
buttons on the inline remote to adjust
the volume level. Use the other
buttons to mute playback (middle
button) or to mute the microphone
(left button) when required – the red
LED on the inline remote will light up
when the microphone is muted. Press
them again to reactivate the relevant
function.
DE
1. Schließen Sie das Headset mit dem
USB-Stecker an einen freien USBAnschluss Ihres PCs an. Das Gerät
wird vom Betriebssystem automatisch
erkannt und installiert.
2. Unter Windows* finden sich
anschließend in der Systemsteuerung
zusätzliche Audiogeräte – stellen Sie
sicher, dass sie als Standardgeräte für
Aufnahme und Wiedergabe ausgewählt
sind.
3. An der Kabelfernbedienung regulieren
Sie mit den Tasten „+“ (lauter) und
„-“ (leiser) die Lautstärke. Mit den
übrigen Tasten schalten Sie bei Bedarf
die Wiedergabe (mittlere Taste) oder
das integrierte Mikrofon stumm
(linke Taste); während der MikrofonStummschaltung leuchtet die rote LED
an der Fernbedienung. Ein erneuter
Druck aktiviert die jeweilige Funktion
wieder.
FR
1. Raccordez la fiche USB du microcasque à un port USB libre sur votre
ordinateur. L’appareil est détecté
automatiquement par le système
d’exploitation et installé.
2. De nouveaux périphériques audio sont
désormais indiqués dans le Panneau
de configuration Windows* – assurezvous qu’ils sont bien sélectionnés
comme périphériques par défaut pour
l’enregistrement et la lecture.
3. La télécommande filaire vous permet
d’ajuster le volume à l’aide des
touches « + » (pour monter le son)
et « - » (pour baisser le son). Les
autres touches servent à arrêter
la lecture (touche du centre) et à
couper le microphone (touche de
gauche) ; quand le microphone est
coupé, le voyant rouge est allumé
sur la télécommande. Pour réactiver
la fonction en question, appuyez de
nouveau sur la touche.
ES
1. Enchufa el conector USB del headset a
un puerto USB libre de tu ordenador. El
programa de instalación se activa, lo
detecta y se instala automáticamente.
2. A continuación busca en panel de
control de Windows* dispositivos
adicionales de audio: asegúrate de
que los has elegido como dispositivo
estándar para grabar y reproducir.
3. En el mando del cable podrás regular
el volumen mediante los botones
«+» (más alto), «-» (más bajo). Con
los demás botones podrás conectar
la reproducción cuando la necesites
(botón central), o silenciar el micrófono
integrado (botón izq.); cuando está
silenciado el micro, se enciende el LED
rojo del mando. Si vuelves a pulsarlo,
se reactiva la función correspondiente.
RU
1. Подсоедините гарнитуру с помощью
USB-штекера к свободному USBпорту компьютера. Операционная
система автоматически
обнаруживает и инсталлирует
устройство.
2. Под Windows* после этого в
панели управления появятся
дополнительные аудиоустройства –
убедитесь в том, что они выбраны в
качестве стандартных устройств для
записи и воспроизведения.
3. На кабельном пульте ДУ громкость
регулируется кнопками «+»
(громче) и «-» (тише). Остальными
кнопками можно отключать звук
воспроизведения (средняя кнопка)
или встроенного микрофона
(левая кнопка); при отключении
звука микрофона загорается
красный светодиод на пульте ДУ.
Повторное нажатие кнопки включает
соовтетствующую функцию.
IT
1. Collegare la cua con il connettore
USB a una porta USB libera del PC.
Il dispositivo viene riconosciuto
e installato automaticamente dal
sistema operativo.
2. Di seguito troverete dispositivi audio
aggiuntivi nel Pannello di controllo
di Windows*. Accertatevi che siano
selezionati come dispositivi standard
per la registrazione e la riproduzione.
3. Premere i tasti «+» (aumenta) e «-»
(diminuisci) sul telecomando a filo
per regolare il volume. Premere
all‘occorrenza gli altri tasti per
disattivare la riproduzione (tasto
centrale) o il microfono integrato (tasto
sinistro). Premere nuovamente per
riattivare la funzione.
NL
1. Sluit de headset met de USB-stekker
aan op een vrije USB-poort van de
pc. Het apparaat wordt automatisch
herkend door het besturingssysteem
en geïnstalleerd.
2. Onder Windows* staan er vervolgens
in het Configuratiescherm extra
audioapparaten – controleer
of die geselecteerd zijn als
standaardapparaten voor opname en
weergave.
3. U regelt het volume met de knoppen
„+” (harder) en „-” (zachter) van de
regelaar in de kabel. Met de andere
knoppen kunt u desgewenst het geluid
(middelste knop) of de ingebouwde
microfoon (linker knop) uitschakelen;
als de microfoon is uitgeschakeld,
brandt de rode LED op de regelaar. Als
u een tweede keer op een knop drukt,
wordt de desbetreende functie weer
ingeschakeld.
PL
1. Podłącz wtyk USB zestawu
słuchawkowego do wolnego
złącza USB komputera. Urządzenie
zostanie automatycznie rozpoznane
i zainstalowane przez system
operacyjny.
2. W panelu sterowania systemu
Windows* znajdziesz teraz dodatkowe
urządzenia – upewnij się, że zostały
one wybrane do odtwarzania i
nagrywania jako standardowe
urządzenia.
3. Głośność można regulować
przyciskami na kablowym pilocie
zdalnego sterowania – „+” (głośniej)
i „-” (ciszej). Za pomocą pozostałych
przycisków można zatrzymać
odtwarzanie (środkowy przycisk)
lub wyciszyć wbudowany mikrofon
(lewy przycisk). Czerwona dioda LED
na pilocie sygnalizuje wyciszenie
mikrofonu. Ponowne naciśnięcie
aktywuje daną funkcję.
TR
1. Kulaklık setini USB fişiyle
bilgisayarınızdaki boş bir USB
bağlantısına takın. Aygıt işletim
sistemi tarafından otomatik algılanır ve
kurulumu yapılır.
2. Ardından Windows*‘ta Denetim
Masası‘nda ek audio aygıtları bulunur
– buradan kayıt ve oynatma için
standart aygıtların seçilmiş olduğunu
kontrol edin.
3. Kablolu uzaktan kumanda ile “+” (ses
arttırma) ve “-” (ses azaltma) tuşları
ile ses seviyesini ayarlayabilirsiniz.
Diğer tuşlarla, gerektiğinde çalmayı
(orta tuş) veya dahili mikrofonu (sol
tuş) sessiz konuma getirebilirsiniz;
mikrofon sessiz konumdayken
uzaktan kumandadaki kırmızı LED
lambası yanar. Tuşlara tekrar basarak
ilgili fonksiyonu tekrar etkin hale
getirebilirsiniz.
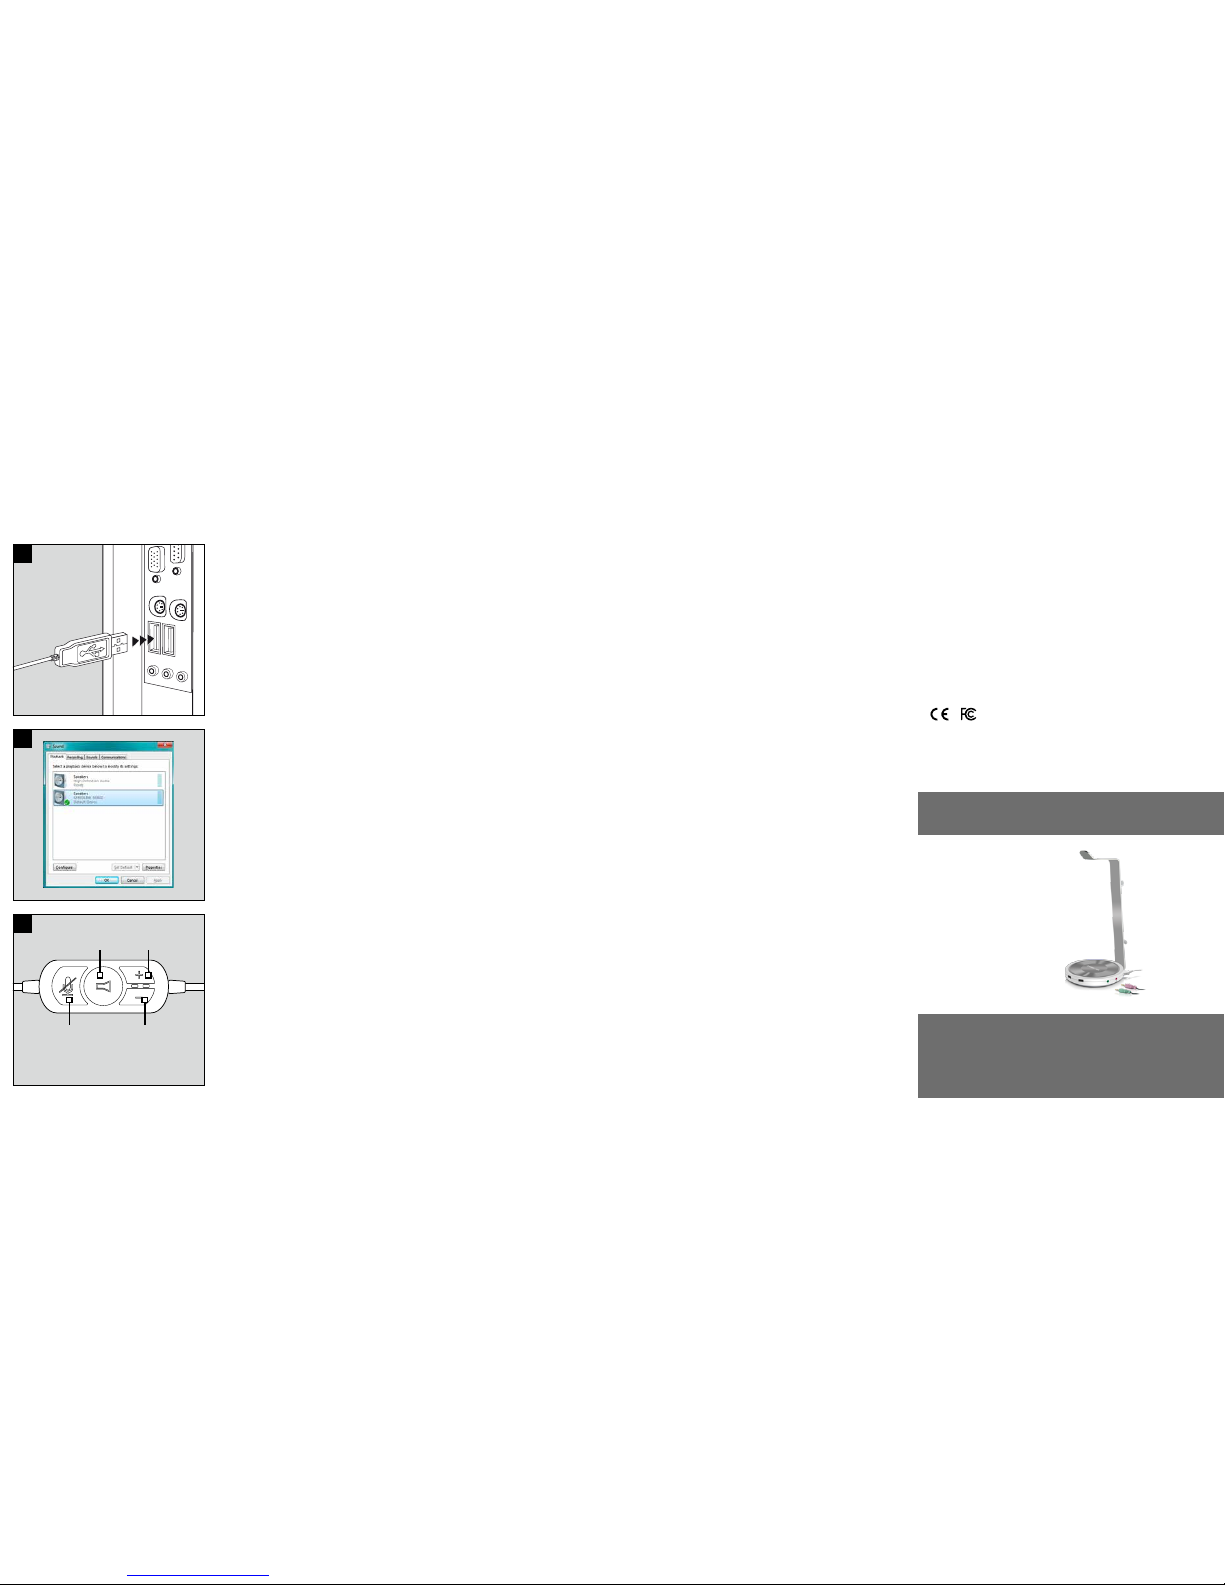
ESTRADO Multifunctional Headset Stand
Protect your precious headset against wear and tear, bring order to your desktop and
prevent cable breaks. The ESTRADO Multifunctional Headset Stand is the perfect storage
solution for your headset. Besides being a super stylish accessory, the stand oers many
more functions: an integrated passive USB hub with 3 USB 2.0 ports as well as a USB
sound card with audio output and microphone input make the ESTRADO a multifunctional
all-round talent.
GET TO KNOW IT:
© 2015 Jöllenbeck GmbH. All rights reserved. SPEEDLINK, the SPEEDLINK word mark and
the SPEEDLINK swoosh are registered trademarks of Jöllenbeck GmbH. All trademarks are
the property of their respective owner. Jöllenbeck GmbH shall not be made liable for any
errors that may appear in this manual. Information contained herein is subject to change
without prior notice. Please keep this information for later reference.
JÖLLENBECK GmbH, Kreuzberg 2, 27404 Weertzen, GERMANY
LUCIDIS
SL-640300-BK
1
2
3
QUICK INSTALL GUIDE
SONID – STEREO HEADSET – USB
IN 5V DC 20MA MAX.
VOLUME UPMUTE
VOLUME DOWNMIC MUTE
LED RED: MICROPHONE MUTED
LED BLUE: POWER ON
 Loading...