

Page 1
1 2
X D
DRIVER INSTALLATION
CONNECTING
PC/Notebook
3
XINPUT AND DIRECTINPUT
SWITCH
4
D-PAD MODE (DIRECTINPUT)
PRESS
5
RAPID-FIRE FUNCTION
PRESS
(+ FIRE BUTTON)
6
SETTINGS
XInput mode DirectInput mode
XEOX
GAMEPAD – USB
SL-6556-BK
EN
1. Driver installation
To install the driver software, insert
the supplied driver CD into the CD
drive. If the installation process does
not start automatically, navigate
to your CD drive using Windows
Explorer and start the program by
clicking Setup.exe. You will need to
install the driver to use the vibration
function with some games.
Always use the latest driver for the
best possible performance. You can
download it from the SPEEDLINK
website at www.speedlink.com.
2. Connecting
Plug the gamepad into a free USB
port on your PC. The operating
system will detect the device
automatically and it will be ready to
use a few seconds after that.
3. XInput and DirectInput
You can switch between the
gamepad’s two operating modes
using the switch on the back: ‘X’ for
XInput (for the majority of the latest
games) and ‘D’ for DirectInput (for
all older and some newer games).
In XInput mode, all four of the
gamepad’s LED will light up.
Set the gamepad to the desired
mode before starting a game.
Switching during gameplay may stop
the game identifying the controller
correctly; if this happens, restart the
game. Please consult the manual
that accompanied the game,
ask the publisher or try both
modes to establish which mode
works the best.
4. D-pad mode
®
In DirectInput mode, press the XEOX
button to switch between the two
digital D-pad modes. If the upper two
LEDs are not lit, coolie-hat mode is
enabled. If these LEDs are lit, the
D-pad and left analog stick functions
are swapped.
5. Rapid-re function
The rapid-re function allows a
button to re multiple times in rapid
succession when pressed. To do
this, keep the Rapid button held
depressed and press the button you
want to assign this function to.
If you press this button again while
pressing and holding the Rapid
button, the button will switch from
rapid-re to auto-re mode. In doing
so, the button will re automatically
in rapid succession when pressed
once. To reset the button back to
single-re mode, press and hold the
Rapid button and press the relevant
button again.
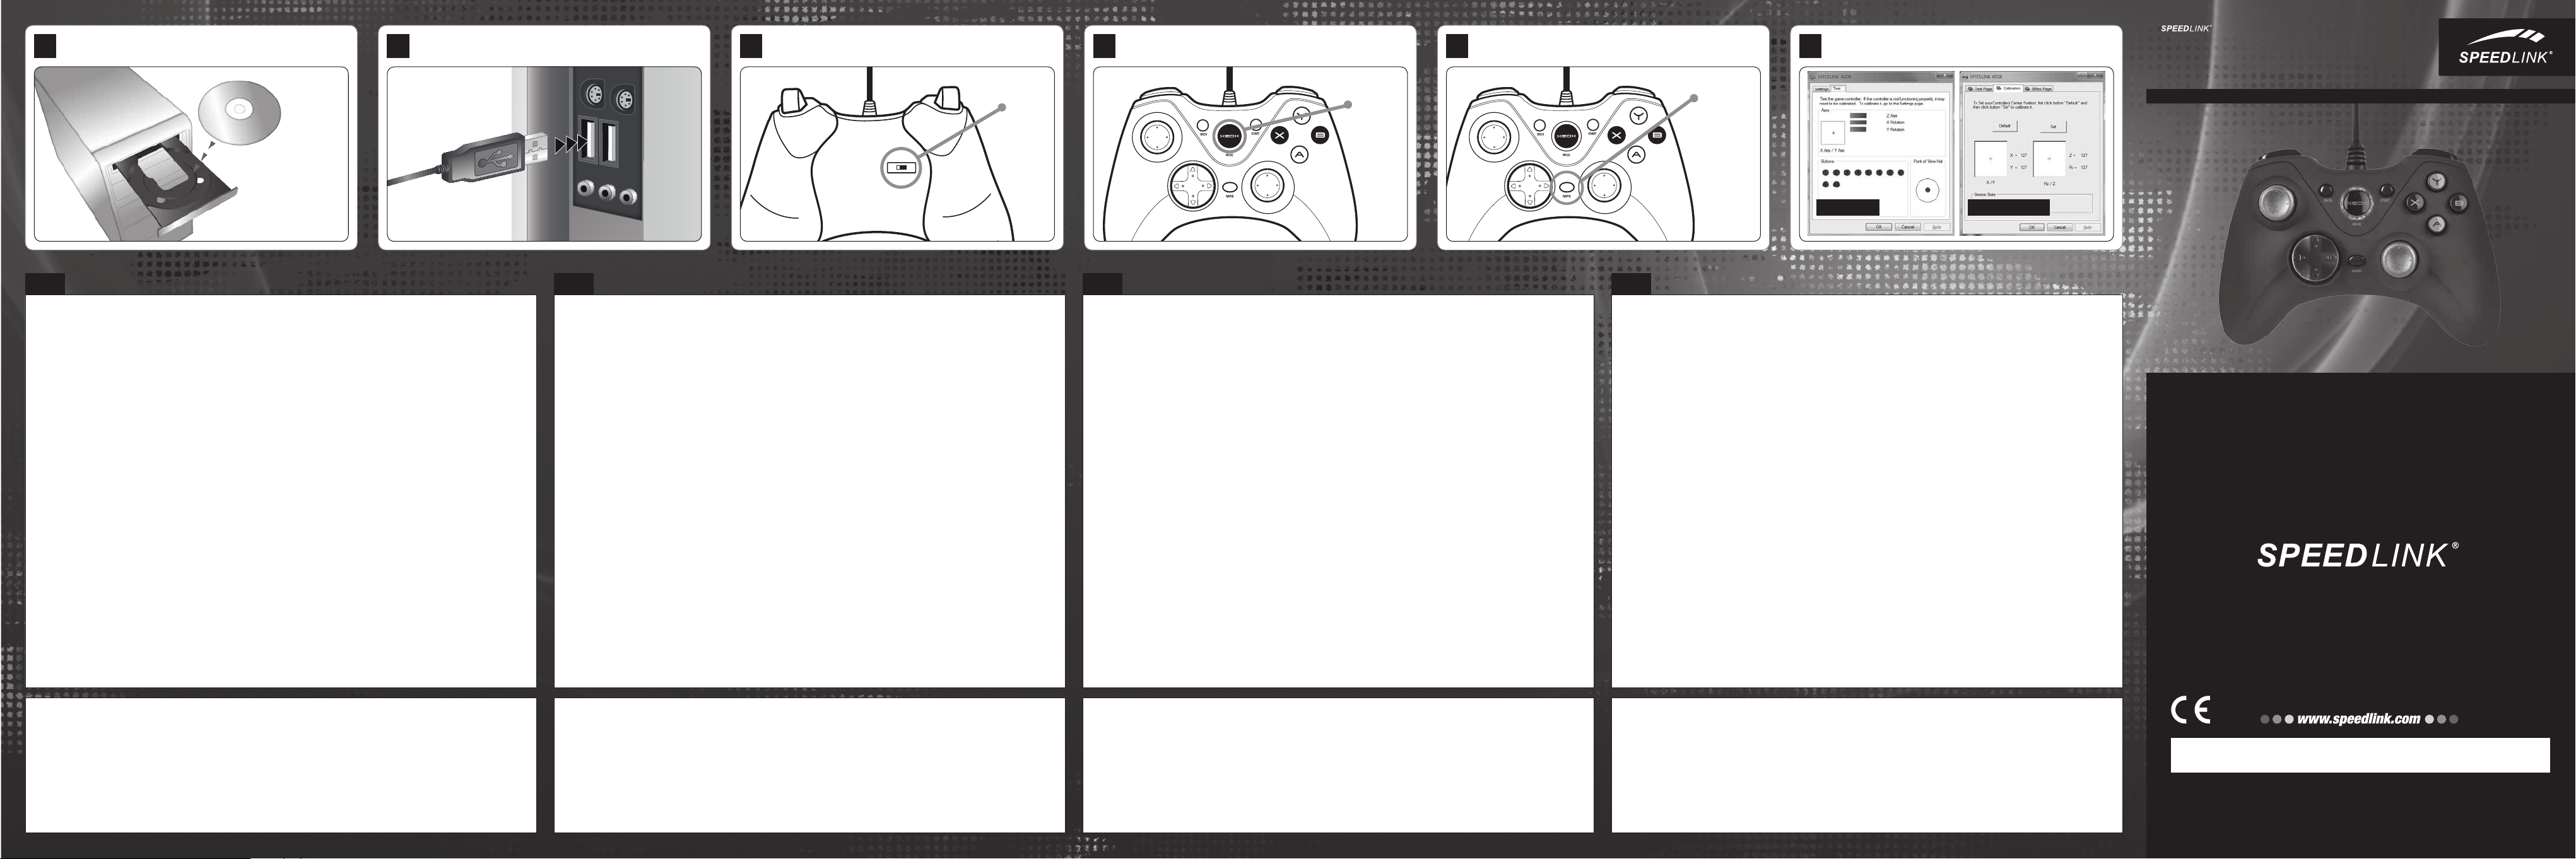
6. Settings
Test the gamepad’s functions by
opening the Windows
and going to the Game Controllers
option (Windows
®
Control Panel
®
7/Vista®/XP).
In DirectInput mode, you will
also nd the options there for the
vibration function; for XInput games,
congure the vibration functions in
the game’s options settings. Please
note, vibration functions only work
if supported by the game and the
relevant option is enabled in the
game’s options settings.
DE
1. Treiberinstallation
Legen Sie die mitgelieferte TreiberCD in das CD-Laufwerk ein, um die
Treibersoftware zu installieren. Sollte
die Installation nicht automatisch
beginnen, wählen Sie im Windows
Explorer Ihr CD-Laufwerk und
starten Sie das Programm
„Setup.exe“. Die Installation ist
notwendig für die Nutzung der
Vibrationsfunktion in einigen Spielen.
Für optimale Leistung verwenden
Sie bitte stets die neueste
Treiberversion, die Sie auf der
SPEEDLINK-Website unter
www.speedlink.com nden.
2. Anschluss
Verbinden Sie das Gamepad
mit einem freien USB-Anschluss
Ihres PCs. Das Gerät wird vom
Betriebssystem automatisch erkannt
und ist nach wenigen Sekunden
einsatzbereit.
3. XInput und DirectInput
Mit dem Schiebeschalter auf der
Rückseite wechseln Sie zwischen
den beiden Betriebsmodi des
Gamepads: „X“ für XInput (für die
meisten aktuellen Spiele) und „D“
für DirectInput (für alle älteren und
einige neuere Spiele). Im XInputModus leuchten alle vier LEDs des
Gamepads.
Bitte versetzen Sie das Gamepad in
den gewünschten Modus, bevor Sie
ein Spiel starten. Das Umschalten im
laufenden Spiel kann dazu führen,
dass der Controller von diesem nicht
mehr korrekt erkannt wird; in diesem
Fall starten Sie bitte das Spiel neu.
®
Mit welchem Modus ein Spiel am
besten funktioniert, erfahren Sie
im zugehörigen Handbuch, beim
Hersteller oder durch Ausprobieren.
4. Steuerkreuz-Modus
Betätigen Sie die „XEOX“-Taste im
DirectInput-Modus, wechseln Sie
zwischen zwei Modi für das digitale
Steuerkreuz (D-Pad): Leuchten
die oberen beiden LEDs nicht, ist
der Rundblickschalter-Modus aktiv.
Leuchten diese LEDs, tauschen
das Steuerkreuz und der linke
Analogstick ihre Funktionen.
5. Schnellfeuerfunktion
Die Schnellfeuerfunktion führt
eine Taste mehrfach in schneller
Folge aus, solange diese gedrückt
wird. Halten Sie dafür die „Rapid“Taste gedrückt und betätigen Sie
gleichzeitig die Taste, für welche die
Funktion aktiviert werden soll.
Betätigen Sie diese Taste bei
gedrückter „Rapid“-Taste erneut,
wechselt sie vom Schnell- in den
Autofeuer-Modus. Dadurch wird die
Taste nach einmaliger Betätigung
automatisch in schneller Folge
ausgeführt. Um die Taste wieder in
den Einzelfeuermodus zu versetzen,
betätigen Sie sie ein weiteres Mal
bei gedrückter „Rapid“-Taste.
6. Einstellungen
Die Funktion des Gamepads
können Sie in der Windows
Systemsteuerung im Abschnitt
„Geräte und Drucker“
(Windows
weise „Gamecontroller“
(Windows
Im DirectInput-Modus nden Sie
dort auch die Optionen für die
Vibrationsfunktion; Vibrationen für
XInput-Titel kongurieren Sie in
den jeweiligen Spieloptionen. Bitte
beachten Sie, dass Vibrationen
nur dann wiedergegeben werden,
wenn ein Spiel diese nutzt und die
entsprechende Funktion in den
Spieloptionen aktiviert ist.
®
7/Vista®) beziehungs-
®
XP) prüfen.
FR
1. Installation du pilote
Insérez dans le lecteur de CDROM le CD fourni avec le pilote à
installer. Si l‘installation ne démarre
®
-
pas automatiquement, cliquez sur
votre lecteur de CD-ROM dans
l‘Explorateur de Windows
le programme « Setup.exe ». Il est
nécessaire d‘installer le pilote pour
bénécier de la fonction vibration
dans certains jeux.
Pour un fonctionnement optimal,
utilisez toujours la dernière version
du pilote que vous trouverez sur le
site SPEEDLINK à l‘adresse
www.speedlink.com.
2. Raccordement
Reliez la manette à une prise
USB libre de votre ordinateur.
Le périphérique est détecté
automatiquement par le système
d‘exploitation et prêt à l‘emploi en
quelques secondes seulement.
3. XInput et DirectInput
L‘interrupteur coulissant au dos
vous permet de commuter entre
les deux modes de la manette : «
X » pour XInput (convient pour la
plupart des jeux actuels) et « D »
pour DirectInput (pour tous les jeux
anciens et quelques jeux récents).
Les quatre voyants de la manette
sont allumés en mode XInput.
Réglez la manette sur le mode
souhaité avant de lancer un jeu. Si
®
et lancez
vous changez de mode en cours de
jeu, il est possible que la manette
ne soit plus reconnue correctement
; dans ce cas, redémarrez le jeu.
Pour connaître le mode le mieux
adapté au jeu, consultez la notice du
jeu, demandez conseil au fabricant
ou bien essayez alternativement les
deux modes.
4. Mode de la croix directionnelle
En mode DirectInput, appuyez sur
la touche « XEOX » pour basculer
entre les deux modes de la croix
directionnelle (D-pad) : lorsque les
deux voyants du haut sont éteints, le
mode vue panoramique est activé.
Lorsque ces voyants sont allumés,
la croix directionnelle et le stick
analogique gauche inversent leurs
fonctions.
5. Fonction de tir rapide
La fonction de tir rapide répète
en rafale la fonction d‘une touche
donnée tant que vous maintenez
cette touche enfoncée. Pour
cela, maintenez la touche «
Rapid » enfoncée et actionnez
simultanément la touche pour
laquelle vous souhaitez activer cette
fonction.
Si vous appuyez à nouveau sur
la touche en gardant la touche
« Rapid » enfoncée, elle passe
du mode de tir rapide au mode
de tir automatique. Dans ce cas,
il suft d‘appuyer une fois sur la
touche en question pour répéter
automatiquement sa fonction en
rafale. Pour ramener la touche au
mode de tir classique, appuyez à
nouveau dessus tout en maintenant
la touche « Rapid » enfoncée.
6. Paramètres
Vous pouvez vérier le bon
fonctionnement de la manette
en allant dans le Panneau de
conguration Windows
la section « Périphériques et
imprimantes » (Windows
ou « Contrôleurs de jeu »
(Windows
En mode DirectInput, vous y
trouverez également les options
de réglage de la fonction vibration
; les vibrations pour les jeux XInput
doivent être congurées dans les
options du jeu en question. Les
vibrations ne sont restituées que
si le jeu les prend en charge et si
la fonction correspondante a été
activée dans les options du jeu.
®
XP).
®
dans
®
7/Vista)
NL
1. Stuurprogramma-installatie
Plaats de meegeleverde cdrom in het cd-romstation om de
stuurprogrammatuur te installeren.
Als de installatie niet automatisch
wordt gestart, selecteert u in de
®
Windows
cd-romstation en start u het
programma „Setup.exe“. De
installatie is noodzakelijk om gebruik
te maken van de trilfunctie in
sommige games.
Gebruik de nieuwste versie van
het stuurprogramma voor optimale
prestaties; die versie staat op de
website van SPEEDLINK:
www.speedlink.com.
2. Aansluiten
Sluit de gamepad aan op een vrije
USB-poort van de computer.
Het apparaat wordt automatisch
herkend door het besturingssysteem
en is na een paar seconden gereed
voor gebruik.
3. XInput und DirectInput
Met de schakelaar op de achterkant
kunt u tussen de beide werkstanden
van de gamepad wisselen: „X“ voor
XInput (voor de meeste huidige
games) en „D“ voor DirectInput
(voor alle oudere en enkele nieuwe
games). In de XInput-modus
branden alle vier de LED‘s van de
gamepad.
-Verkenner uw
Zet de gamepad in de gewenste
modus, voordat u een game start.
Als u tijdens een game overschakelt
op een andere modus, kan het
gebeuren dat de game de controller
niet meer correct herkent; in dat
geval dient u de game opnieuw
op te starten. In welke modus een
game het beste werkt, staat in het
bijbehorende handboek; u kunt het
ook navragen bij de fabrikant of het
uitproberen.
4. Stuurkruismodus
Drukt u op de „XEOX“-knop in
DirectInput-modus, dan wisselt u
tussen twee modi voor het digitale
stuurkruis (D-Pad): Als de beide
bovenste LED‘s zijn gedoofd, is
de rondkijkmodus actief. Als deze
LED‘s branden, is de functie van het
stuurkruis en de linker analoge stick
verwisseld.
5. Snelvuurfunctie
Met behulp van de snelvuurfunctie
kunt u de functie van een knop
meerdere keren achter elkaar
uitvoeren zolang u de knop ingedrukt
houdt. Houd daartoe de „Rapid“knop ingedrukt en druk tegelijkertijd
op de knop waaraan u de functie wilt
toewijzen.
Drukt u opnieuw op deze knop
terwijl u de knop „Rapid“ ingedrukt
houdt, dan schakelt u over van de
snelvuurfunctie naar de functie voor
automatisch vuren. Dat betekent dat
de knop nadat u er één keer op hebt
gedrukt, snel achter elkaar wordt
uitgevoerd. Als u de knop weer wilt
terugschakelen naar de normale
vuurmodus, drukt u opnieuw op
de knop terwijl u de knop „Rapid“
ingedrukt houdt.
6. Instellingen
U kunt in het Conguratiescherm
van Windows
printers“ (Windows
„Spelbesturingen“ (Windows
controleren of de gamepad werkt.
In de DirectInput-modus staan daar
ook de opties voor de trilfunctie;
Trilfuncties voor XInput-games
congureert u steeds bij de opties
van de game. Opties voor de
trilfunctie worden echter alleen
weergegeven als ze relevant zijn
voor een game en als in die game
de desbetreffende functie bij de
instellingen is ingeschakeld.
®
bij „Apparaten en
®
7/Vista®), resp.
®
XP)
QUICK INSTALL GUIDE
EN / DE / FR / NL / ES / IT / TR / RU
VERS. 1.0
Intended use
This product is only intended as an input
device for connecting to a computer.
Jöllenbeck GmbH accepts no liability
whatsoever for any damage to this product
or injuries caused due to careless, improper
or incorrect use of the product or use of the
product for purposes not recommended by
the manufacturer.
Conformity notice
Operation of the device (the devices) may
be affected by strong static, electrical or
high-frequency elds (radio installations,
mobile telephones, microwaves,
electrostatic discharges). If this occurs, try
increasing the distance from the devices
causing the interference.
Technical support
Having technical problems with this
product? Get in touch with our Support
team – the quickest way is via our website:
www.speedlink.com.
Bestimmungsgemäßer Gebrauch
Dieses Produkt ist nur als Eingabegerät
für den Anschluss an einen Computer
geeignet. Die Jöllenbeck GmbH übernimmt
keine Haftung für Schäden am Produkt
oder Verletzungen von Personen aufgrund
von unachtsamer, unsachgemäßer,
falscher oder nicht dem vom Hersteller
angegebenen Zweck entsprechender
Verwendung des Produkts.
Konformitätshinweis
Unter Einwirkung von starken statischen,
elektrischen oder hochfrequenten
Feldern (Funkanlagen, Mobiltelefonen,
Mikrowellen-Entladungen) kann es zu
Funktionsbeeinträchtigungen des Gerätes
(der Geräte) kommen. Versuchen Sie in
diesem Fall, die Distanz zu den störenden
Geräten zu vergrößern.
Technischer Support
Bei technischen Schwierigkeiten mit
diesem Produkt wenden Sie sich bitte an
unseren Support, den Sie am schnellsten
über unsere Webseite www.speedlink.com
erreichen.
Utilisation conforme
Ce produit est uniquement destiné à être
utilisé comme dispositif de pointage sur un
ordinateur. La société Jöllenbeck GmbH
décline toute responsabilité en cas de
dégradations du produit ou de blessures
corporelles dues à une utilisation du
produit inconsidérée, incorrecte, erronée
ou contraire aux instructions données par
le fabricant.
Indication de conformité
La présence de champs statiques,
électriques ou à haute fréquence intenses
(installations radio, téléphones mobiles,
décharges de micro-ondes) peut perturber
le bon fonctionnement de l‘appareil (ou des
appareils). Dans ce cas, essayez d‘éloigner
les appareils à l’origine des perturbations.
Assistance technique
En cas de difcultés techniques concernant
ce produit, veuillez vous adresser à notre
service d‘assistance technique. Le moyen
le plus rapide consiste à le contacter par le
biais de notre site Web www.speedlink.com.
Gebruik conform de doelstellingen
Dit product is uitsluitend geschikt als
invoerapparaat voor aansluiting op een pc.
Jöllenbeck GmbH is niet aansprakelijk voor
schade aan het product of persoonlijk letsel
als gevolg van ondoordacht, ondeskundig,
onjuist gebruik van het product of gebruik
dat niet overeenstemming is met het door
de fabrikant aangegeven doel van het
product.
Opmerking over de conformiteit
Velden met een sterke statische, elektrische
of hoogfrequente lading (radiotoestellen,
draadloze telefoons, ontladingen van
microgolven) kunnen van invloed zijn op de
werking van het apparaat (de apparaten).
Probeer in dat geval de afstand tot de
storende apparaten te vergroten.
Technische ondersteuning
Neem bij technische problemen met dit
product contact op met onze ondersteuning;
u kunt hen het snelste bereiken via onze
website www.speedlink.com.
Having technical problems with this product? Get in touch with our Support team –
©2012 Jö llen beck G mbH. A ll rights re served. SPEEDLINK®, the SPEEDLINK wor d mark a nd the SPEEDLINK
swoosh are registered t rade marks of Jöll enbe ck Gmb H. Windows, Windows XP, Windows Vis ta and
Windows 7 are r egis tere d trademarks of Microsoft Corpor atio n in the U nite d Stat es and /or other countries.
All tr adem arks are the p rope rty of their res pect ive own er. Jöll enbe ck Gmb H shall not be m ade li able f or any
errors tha t may ap pear i n this m anual. Inf orma tion c onta ined h erei n is subject t o chan ge wit hout p rior notice.
JÖLLENBECK GmbH, Kreuzberg 2, 27404 Weertzen, GERMANY
the quickest way is via our website: www.speedlink.com.
TECHNICAL SUPPORT
Page 2
1
X D
DRIVER INSTALLATION
2
CONNECTING
3
XINPUT AND DIRECTINPUT
4
D-PAD MODE (DIRECTINPUT)
5
RAPID-FIRE FUNCTION
6
SETTINGS
ES
1. Instalar el controlador
Inserta el CD ROM adjunto en la
unidad de CDs del ordenador para
instalar el software de controlador.
Si no se instala automáticamente,
en Windows
tu unidad de CD-ROM e inicia
el programa „setup.exe“. Esta
instalación es imprescindible para
utilizar la función vibración en
algunos juegos.
Para obtener el máximo rendimiento,
utiliza siempre la versión más
reciente de controlador que podrás
encontrar y descargarte de la página
web de SPEEDLINK:
www.speedlink.com.
2. Conexión
Conecta el pad a un puerto USB
que esté libre en tu ordenador.
El sistema operativo detecta
automáticamente el dispositivo y
puedes utilizarlo sin más a los pocos
segundos.
3. XInput y DirectInput
Con el interruptor de corredera
que está en la parte trasera,
conmutas entre los dos modos
de funcionamiento del pad: „X“
para XInput (la mayor parte de
los juegos actuales) y DirectInput
(para los antiguos y algunos de los
juegos nuevos). En modo XInput se
encienden los cuatro LEDs del pad
de juegos.
®
Explorer, selecciona
Antes de iniciar cualquier juego
activa el pad en el modo que vas a
utilizar. La conmutación de un modo
a otro mientras estás jugando podría
tener como consecuencia que no se
detectase y funcionase bien el pad,
en tal caso reinicia el juego. Cuál es
el modo con el que mejor funciona
el pad lo averiguarás en el manual
correspondiente, informándote en el
fabricante o simplemente probando.
4. Modo cruceta
Pulsa brevemente el botón „“XEOX“
en modo DirectInput, alterna entre
dos modos para la cruceta digital
(D Pad): Si no se enciende los
dos LEDs de arriba, se encuentra
activado el modo panorámico.
Si dichos LEDs encienden,
intercambian la cruceta y el stick
analógico izquierdo sus funciones.
5. Función ráfagas
La función de fuego rápido, ráfagas,
la ejecuta un botón de manera
constante mientras lo tengas
pulsado. Pulsa y mantén pulsado
el botón „Rapid“ y pulsa al mismo
tiempo el botón en el que quieras
activar esta función.
Si se vuelve a pulsar este botón
manteniendo pulsado el botón
„Rapid“, alternas del modo rápido a
autofuego. De este modo el botón
al pulsarlo una sola vez se ejecuta
de manera automática en continuo.
PC/Notebook
Para volver el botón al modo de
fuego discrecional, púlsalo de nuevo
manteniendo pulsado al mismo
tiempo „Rapid“.
6. Ajustes
La función del pad podrás controlarla
en el panel de control de Windows
„Ver dispositivos e impresoras“
(Windows
„Dispositivos de juegos“
(Windows
En modo DirectInput encontrarás
también las opciones paral a
función de vibración; las vibraciones
para títulos XInput habrá que
congurarlas en las respectivas
opciones del juego. Ten en cuenta
que las vibraciones sólo se
reproducen, si vienen con un juego
y están activadas las opciones
correspondientes del juego.
®
7/Vista®), o bien
®
XP).
DO YOU KNOW THESE?
SWITCH
IT
1. Installazione del driver
Per installare il software del
driver inserire nel drive CD il CD
con i driver in dotazione. In caso
di mancato avvio automatico
dell‘installazione, selezionare l‘unità
®
.
CD nel Windows
avviare il programma „Setup.exe“.
L‘installazione è necessaria per
utilizzare la funzione di vibrazione in
alcuni giochi.
Per la migliore prestazione utilizzare
sempre la versione più recente del
driver, che è disponibile sul sito web
SPEEDLINK all‘indirizzo
www.speedlink.com.
2. Collegamento
Collegare il gamepad a una porta
USB libera del PC. Il dispositivo
viene riconosciuto automaticamente
dal sistema operativo ed è pronto
per l‘uso in pochi secondi.
3. XInput e DirectInput
Per commutare le due modalità
operative del gamepad, azionare
l‘interruttore a scorrimento sul retro:
„X“ per XInput (per la maggior
parte dei giochi attuali) e „D“ per
DirectInput (per tutti i giochi più
vecchi e alcuni nuovi). In modalità
XInput sono accesi tutti e quattro i
LED del gamepad.
Impostare la modalità desiderata
sul gamepad prima di avviare il
gioco. Se la commutazione avviene
®
Explorer ed
durante il gioco in corso, il controller
potrebbe non essere più riconosciuto
correttamente. In tal caso riavviare
il gioco. Per trovare la modalità
più adatta a un gioco, consultare
il manuale relativo, chiedere
informazioni al produttore o fare
delle prove.
4. Modalità croce direzionale
Per commutare tra due modalità per
la croce direzionale digitale (D-Pad),
azionare il tasto „XEOX“ nella
modalità DirectInput: se non sono
accesi i due LED superiori, è attiva
la modalità comando Hat. Se sono
accesi questi LED, sono invertite le
funzioni della croce direzionale e
dello stick analogico sinistro.
5. Funzione di fuoco rapido
La funzione di fuoco rapido
esegue più volte in rapida
successione un tasto a piacere,
nché viene premuto. Tenere
premuto il tasto „Rapid“ e azionare
contemporaneamente il tasto al
quale si vuole assegnare la funzione.
Azionando di nuovo questo tasto
tenendo premuto il tasto „Rapid“
si passa dalla modalità di fuoco
rapido a quella di fuoco automatico.
In questo modo il tasto viene
eseguito automaticamente in rapida
successione premendolo una volta
sola. Per riattivare la modalità di
fuoco singolo del tasto, azionarlo
nuovamente tenendo premuto il
tasto „Rapid“.
6. Impostazioni
La funzione del gamepad può essere
vericata nel Pannello di controllo di
®
Windows
e stampanti“ (Windows
ossia “Gamecontroller“
(Windows
In modalità DirectInput vi troverete
anche le opzioni per la funzione di
vibrazione. Le vibrazioni per titoli
XInput possono essere congurate
nelle opzioni del gioco stesso. Vi
ricordiamo che le vibrazioni saranno
riprodotte solo se supportate dal
gioco e dopo aver attivato questa
funzione nelle opzioni del gioco.
, nella sezione “Dispositivi
®
XP).
®
7/Vista®)
TR
1. Sürücü kurulumu
Sürücü yazılımını yüklemek için
beraberinde gönderilen CD‘yi CD
sürücünüze yerleştirin. Kurulum
işlemi otomatik olarak başlamazsa,
®
Windows
sürücünüzü seçin ve „Setup.exe“
programını başlatın. Bu kurulum,
bazı oyunlardaki titreşim özelliğini
kullanabilmek için gereklidir.
Optimum performans için
daima lütfen SPEEDLINK web
sitesinde (www.speedlink.com)
bulabileceğiniz en yeni sürücü
versiyonunu kullanın.
2. Bağlantı
Oyun pedini PC‘nizin boş bir USB
portuna takın. Aygıt otomatik
algılanır ve birkaç saniye sonra
kullanıma hazırdır.
3. XInput ve DirectInput
Arka taraftaki sürgü şalteri ile oyun
pedinin iki işletim modu arasında
geçiş yapabilirsiniz: XInput için
„X“(güncel oyunların çoğu için)
ve DirectInput için „D“ (tüm eski
ve birkaç yeni oyun için). XInput
modunda oyun pedinin dört LED‘i
de yanar.
Oyuna başlamadan önce lütfen
oyun pedini istenen moda getirin.
Devam eden oyun esnasında
modu değiştirirseniz, kumanda
oyun tarafından doğru bir şekilde
algılanmayabilir; bu durumda lütfen
Explorer‘dan CD
oyunu tekrar başlatın. Bir oyunun en
iyi şekilde hangi modda çalıştığını,
ilgili el kitapçığından, üreticiden veya
deneyerek öğrenebilirsiniz.
4. Dijital kumanda
DirectInput modunda „XEOX“ tuşuna
kısa basarsanız, dijital kumanda
için (D-Pad) iki mod arasında
geçiş yapabilirsiniz: Üstteki iki LED
yanmazsa, genel bakış şalteri modu
aktif demektir.
Bu LED‘ler yanarsa, kumanda ve sol
analog stick işlevlerini değiştirir.
5. Hızlı ateşleme işlevi
Hızlı ateş etme fonksiyonu, bir tuşu,
basılı olduğu sürece hızlı sırada
çalıştırır. Bunun için „Rapid“ tuşunu
basılı tutun ve aynı anda fonksiyonu
etkinleştirmek istediğiniz tuşa basın.
„Rapid“ tuşu basılıyken bu tuşa
yeniden basarsanız, hızlı ateş
etmeden otomatik ateş moduna
geçer. Sonra tuşa bir kez basıldıktan
sonra otomatik olarak hızlı sırada
uygulanır. Bu tuşu tekrar tek ateş
moduna getirmek için „Rapid“ tuşu
basılıyken tuşa bir kez daha basın.
6. Ayarlar
Oyun pedinin işlevini Windows
Denetim Masasında „Cihazlar ve
Yazıcılar“ (Windows
„Oyun Kumandaları“ (Windows
altında kontrol edin.
PRESS
®
®
7/Vista®) ya da
®
XP)
DirectInput modunda, titreşim işlevi
için de seçenekleri bulabilirsiniz;
XInput parçaları için olan titreşimi
ilgili oyun seçeneklerinden
ayarlayabilirsiniz. Sadece bir
oyun titreşimleri kullanıyorsa ve
oyun seçeneklerinde ilgili işlev
etkinleştirilmişse titreşimlerin mevcut
olduğunu dikkate alın.
PRESS
(+ FIRE BUTTON)
RU
1. Инсталляция драйверов
Вставьте компакт-диск с
драйверами из комплекта поставки
в дисковод, чтобы инсталлировать
драйверы. Если инсталляция
не начнется автоматически,
выберите в Проводнике дисковод
и запустите программу „Setup.
exe“. Инсталляция нужна, чтобы
пользоваться виброэффектами в
некоторых играх.
Для достижения оптимального
эффекта всегда используйте
самую новую версию драйверов,
которую нужно взять на веб-сайте
SPEEDLINK по адресу
www.speedlink.com.
2. Подключение
Соедините геймпад со свободным
USB-портом компьютера. Система
автоматически распознает
устройство и оно готово к работе
через несколько секунд.
3. XInput и DirectInput
Ползунковый переключатель
на задней стороне служит для
переключения этих режимов
геймпада: „X“ для XInput (для
большинства современных игр)
и „D“ для DirectInput (для всех
старых и некоторых более новых
игр). В режиме XInput горят все
четыре светодиода геймпада.
Переключите геймпад в
нужный режим до запуска игры.
XInput mode DirectInput mode
Переключение во время игры
может привести к тому, что она
больше не будет правильно
распознавать контроллер,
в этом случае игру нужно
перезапустить. В каком режиме
игра функционирует лучше всего,
можно узнать из соответствующего
руководства, у изготовителя или
методом пробы.
4. Режим крестовины управления
Если в режиме DirectInput нажать
кнопку „XEOX“, производится
переключение между двумя
режимами цифровой крестовины
управления (D-Pad): Если два
верхних светодиода не горят,
активен режим переключателя
кругового обзора. Если эти
светодиоды горят, крестовина
управления и левый аналоговый
стик изменяют свои функции.
5. Функция быстрого огня
Функция быстрого огня
многократно в быстрой
последовательности выполняет
одну кнопку, пока удерживать ее
нажатой. Для этого кнопку „Rapid“
нужно удерживать нажатой и
при этом одновременно нажать
кнопку, для которой должна быть
активизирована функция.
Если нажать эту кнопку при
нажатой кнопке „Rapid“ еще
раз, производится переход из
режима быстрого огня в режим
автоматического огня. Кнопка
после одноразового нажатия
выполняется автоматически в
быстрой последовательности.
Чтобы снова перевести кнопку в
режим одиночного огня, нажмите
ее еще раз при нажатой кнопке
„Rapid“.
6. Настройки
Функционирование геймпада под
Windows
разделе „Устройства и принтеры“
(Windows
контроллеры“ (Windows
В режиме DirectInput там
также имеются опции для
виброфункции; вибрация для
XInput конфигурируется в
опциях соответствующей игры.
Помните о том, что вибрация
воспроизводится только в том
случае, если она используется
в игре, а в настройках игры
активирована соответствующая
функция.
®
можно проверить в
®
7/Vista®) или „Игровые
®
XP).
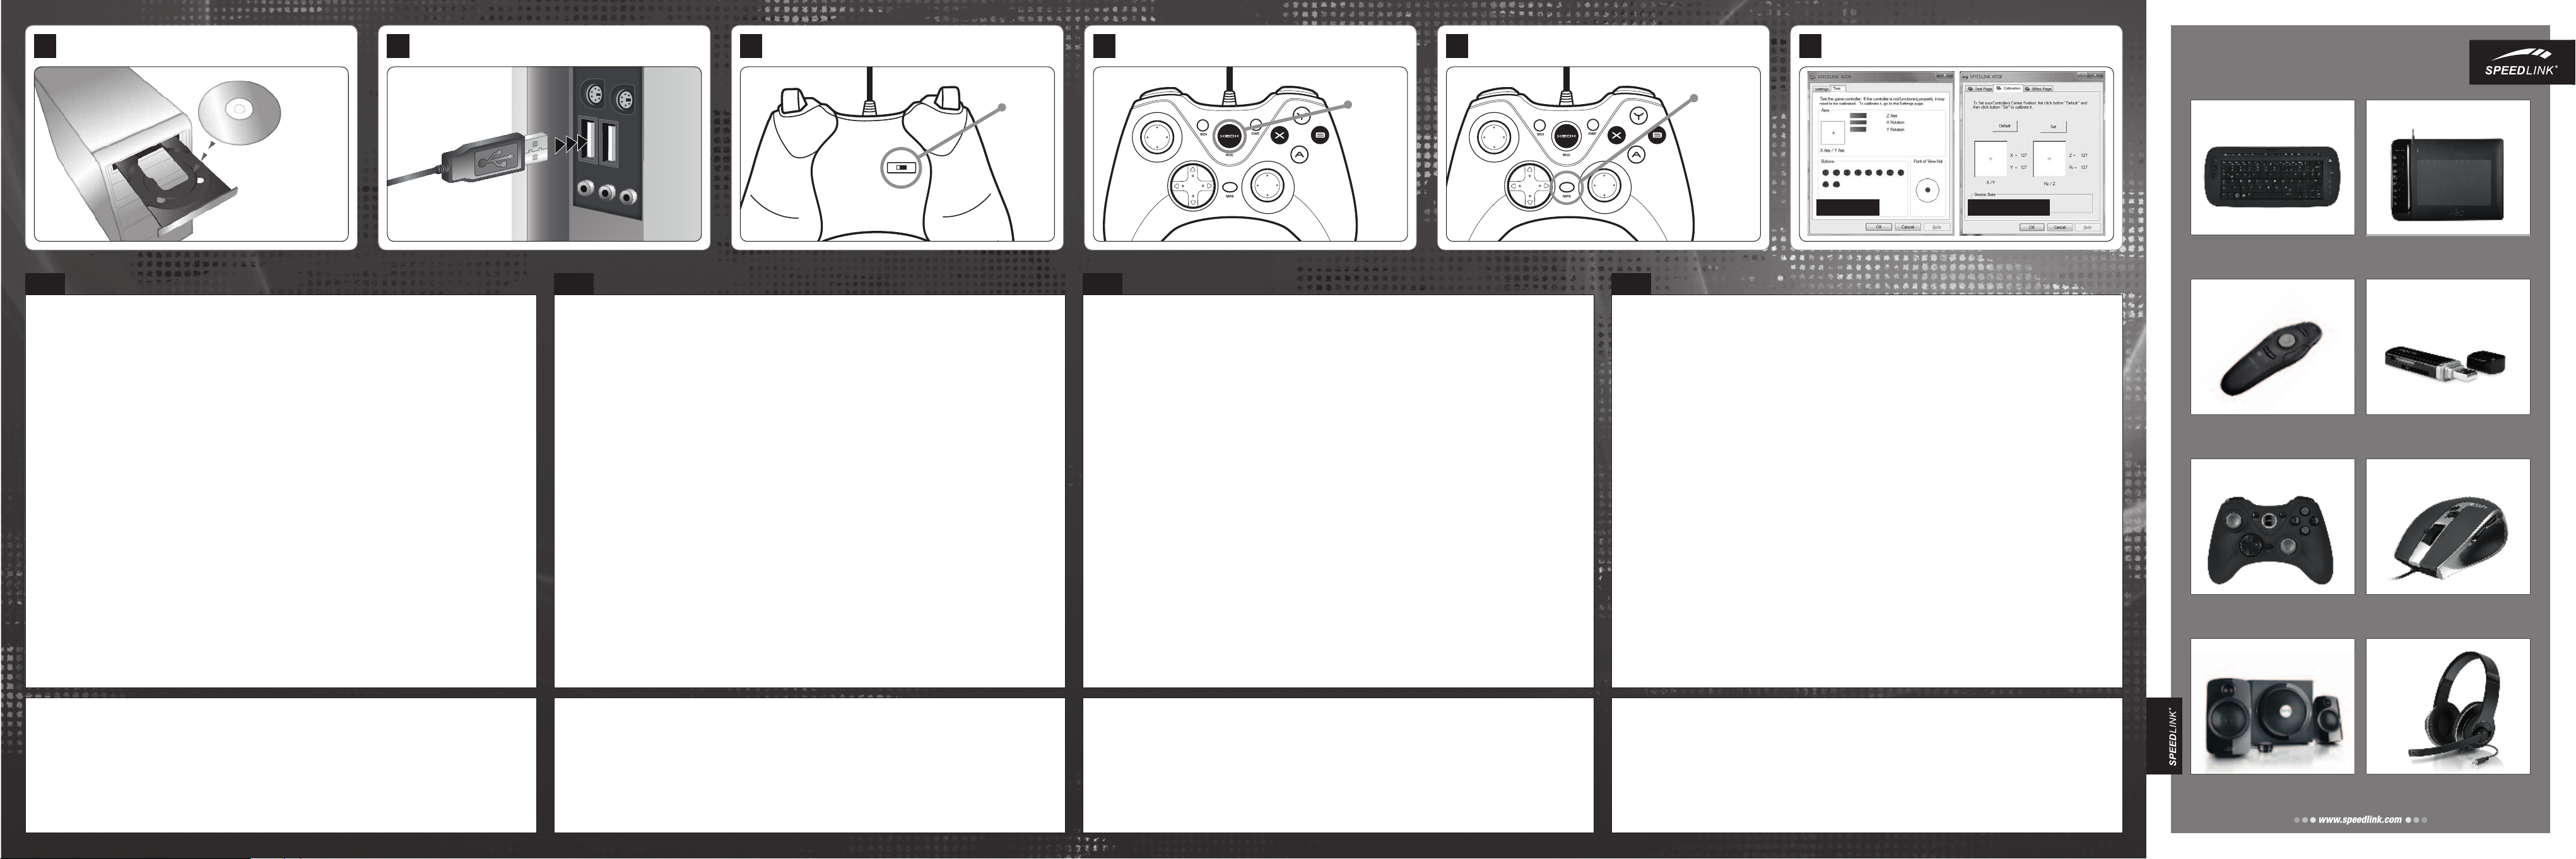
COMET
TRACKBALL MEDIA KEYBOARD
Wireless keyboard with integrated
trackball and mouse wheel
ACUTE PRO
MULTI-FUNCTION PRESENTER
Wireless presenter with mouse mode
and integrated laser pointer
XEOX
PRO ANALOG GAMEPAD – WIRELESS
Wireless gamepad for PS3® and PC
with perfect ergonomics
GRAVITY VEOS
2.1 SUBWOOFER SYSTEM
ARCUS
GRAPHICS TABLET – XL
Graphics tablet with ergonomic stylus
and programmable keys
NOBILÉ
PORTABLE CARD READER
32-in-1 multi-format card reader with
USB plug in a small, portable case
KUDOS RS
GAMING MOUSE
Professional gaming mouse with
5700dpi laser sensor for ultimate control
AUX
STEREO HEADSET
Uso según instrucciones
Este producto sólo vale para conectarlo
a un ordenador como dispositivo de
inserción. Jöllenbeck GmbH no asume la
garantía por daños causados al producto
o lesiones de personas debidas a una
utilización inadecuada o impropia, diferente
de la especicada en el manual, ni por
manipulación, desarme del aparato o
utilización contraria a la puntualizada por el
fabricante del mismo.
Advertencia de conformidad
Bajo los efectos de fuertes campos
eléctricos, estáticos o de alta frecuencia
(emisores, teléfonos inalámbricos y
móviles, descargas de microondas) pueden
aparecer señales parasitarias que perturben
el buen funcionamiento del aparato (los
aparatos). En caso necesario conviene que
la distancia con los aparatos implicados sea
la mayor posible.
Soporte técnico
En caso de surgir complicaciones técnicas
con el producto, dirígete a nuestro servicio
de soporte, podrás entrar rápidamente en la
página web www.speedlink.com.
Utilizzo conforme alle disposizioni
Questo prodotto è adatto unicamente come
dispositivo di input su un computer. La
Jöllenbeck GmbH non risponde di danni al
prodotto o lesioni di persone causati da un
utilizzo del prodotto involontario, improprio,
erroneo o non indicato dal produttore.
Avviso di conformità
L‘esposizione a campi statici, elettrici o
elettromagnetici ad alta frequenza (impianti
radio, cellulari, scariche di microonde)
potrebbe compromettere la funzionalità
del dispositivo (dei dispositivi). In tal caso
cercare di aumentare la distanza dalle fonti
d‘interferenza.
Supporto tecnico
In caso di difcoltà tecniche con questo
prodotto rivolgetevi al nostro supporto che è
facilmente reperibile attraverso il nostro sito
www.speedlink.com.
Tekniğine uygun kullanım
Bu ürün yalnızca bir PC‘ye bağlanmaya
yönelik giriş aygıtı olarak uygundur.
Jöllenbeck GmbH, dikkatsiz, tekniğine
aykırı, hatalı veya üretici tarafından
belirlenmiş amaç doğrultusunda
kullanılmaması durumunda üründeki
hasarlardan ya da yaralanmalardan sorumlu
değildir.
Uygunluk açıklaması
Güçlü statik, elektrikli veya yüksek frekanslı
alanların etkisi ile (radyo istasyonları,
mobil telefonlar, mikrodalga boşalımları)
aygıtın (aygıtların) işlevleri kısıtlanabilir.
Bu durumda parazite yol açan cihazlara
mesafeyi büyütmeye çalışın.
Teknik destek
Bu ürünle ilgili teknik zorluklarla
karşılaşmanız durumunda lütfen müşteri
destek birimimize başvurun. Buraya en hızlı
www.speedlink.com adlı web sayfamızdan
ulaşabilirsiniz.
Использование по назначению
Устройство предназначено только для
использования в качестве устройства для
ввода на компьютере. Jöllenbeck GmbH
не несет ответственности за ущерб
изделию или травмы лиц вследствие
неосторожного, ненадлежащего,
неправильного или не соответствующего
указанной производителем цели
использования изделия.
Информация о соответствии
Из-за влияния сильных статических,
электрических или высокочастотных
полей (излучение радиоустановок,
мобильных телефонов, микроволновых
печей) могут возникнуть радиопомехи. В
этом случае нужно увеличить расстояние
от источников помех.
Техническая поддержка
Если с этим изделием возникают
технические сложности, обращайтесь в
нашу службу поддержки, быстрее всего
это можно сделать через наш веб-сайт
www.speedlink.com.
Active 2.1 speaker system with power
bass and practical desktop remote
PlayStation and PS3 are registered trademarks of Sony Computer Entertainment Inc. This product is neither licensed nor endorsed by Sony Computer Entertainment Inc. All trademarks are the
PlayStation and PS3 are registered trademarks of Sony Computer Entertainment Inc. This product is neither licensed nor endorsed by Sony Computer Entertainment Inc.
property of their respective owner.
All trademarks are the property of their respective owner.
Stylish stereo headset for PCs,
notebooks and smartphones
Page 3

1 2
X D
DRIVER INSTALLATION
CONNECTING
PC/Notebook
3
XINPUT AND DIRECTINPUT
SWITCH
4
D-PAD MODE (DIRECTINPUT)
PRESS
5
RAPID-FIRE FUNCTION
PRESS
(+ FIRE BUTTON)
6
SETTINGS
XInput mode DirectInput mode
XEOX
GAMEPAD – WIRELESS
SL-6556-BK
SE
1. Installera drivrutin
Lägg in medföljande CD i
CD-enheten för att installera
programvaran med drivrutiner. Om
installation inte börjar automatiskt
väljer du CD-enheten i Windows
Explorer och startar programmet
Setup.exe. Den här installationen
krävs för att man ska kunna använda
vibrationsfunktionen i vissa spel.
För bästa möjliga effekt ska
man alltid använda den senaste
drivrutinversionen som nns på
SPEEDLINKs webbplats på
www.speedlink.com.
2. Anslutning
Koppla gamepaden till en ledig USB-
port på din PC. Apparaten upptäcks
automatiskt av operativsystemet
och kan användas efter bara några
sekunder.
3. XInput och DirectInput
Med skjutknappen på baksidan
växlar du mellan gamepadens två
driftlägen: X för XInput (till de esta
aktuella spel) och D för DirectInput
(till alla äldre och några nyare spel). I
XInput-läget lyser alla fyra lamporna
på gamepaden.
Sätt gamepaden på önskat läge
innan du startar ett spel. Om man
byter läge under spelet kan det
hända att kontrollen inte längre
registreras på rätt sätt; i så fall ska
du starta om spelet. Vilket läge som
®
passar bäst till vilket spel kan du ta
reda på i manualen, av tillverkaren
eller genom att prova dig fram.
4. Styrkorsläge
Tryck på XEOX-knappen i
DirectInput-läget för att växla mellan
två lägen för det digitala styrkorset
(D-Pad): Om de båda övre lamporna
inte lyser är riktningsknappläget
aktivt. Om de här lamporna lyser
byter styrkorset och den vänstra
analoga spaken funktioner.
5. Rapid re
Med Rapid re kan en knappfunktion
utföras era gånger i snabb följd så
länge knappen hålls inne. Håll då
Rapid-knappen intryckt och tryck
samtidigt på knappen med den
funktion som ska aktiveras.
Om du fortsätter att hålla Rapidknappen inne och sedan trycker på
samma knapp igen växlar du från
Rapid till Auto re-läget. Då utförs
knappens funktion automatsikt i
snabb följd om man bara trycker på
den en gång.
För att få tillbaka knappens vanliga
funktion trycker du på den en gång
till samtidigt som du håller Rapid-
knappen inne.
6. Inställningar
Gamepadens funktion kan
kontrolleras i Windows
kontrollpanel under Apparater och
®
®
skrivare (Windows
Spelkontroller (Windows
I DirectInput-läget nns där också
alternativ för vibrationsfunktionen;
vibrationer för XInput-spel
kongureras i motsvarande
spelalternativ. Kom ihåg att
vibrationen bara kan användas om
spelet har den funktionen och om
den är aktiverad i spelalternativen.
7/Vista®) eller
®
XP).
DK
1. Installation af driverne
Læg den medleverede driver-CD
ind i dit CD-drev for at installere
driver-softwaren. Hvis installationen
ikke starter automatisk, udvælger
du dit CD-drev i Windows
og starter programmet „Setup.
exe“. Installationen er nødvendigt
for brugen af vibrationsfunktionen i
nogle spil.
For optimal effekt bør du altid bruge
den nyeste driver-version, som du
nder på SPEEDLINK-website under
www.speedlink.com.
2. Tislutning
Forbind din gamepad med en
ledig USB-tilslutning på din PC.
Enheden genkendes automatisk fra
operativsystemet og er klar til brug
efter få sekunder.
3. XInput og DirectInput
Med skydekontakten på bagsiden
skifter du mellem begge driftsformer
af din gamepad: „X” for XInput (for
de este aktuelle spil) og ”D” for
DirectInput (for alle ældre og nogle
nye spil). I XInput-modus lyser alle
re LEDer på din gamepad.
Sæt din gamepad til den ønskede
modus inden du starter spillet. Et
skift under spillet kan resultere i at
controlleren ikke registreres korrekt;
i dette tilfælde starter du spillet igen.
Med hvilken modus et spil fungere
bedst, kan du oplyse i den tilhørende
®
Explorer
vejledning, ved producenten eller
bare ved at prøve selv.
4. Styrekryds-modus
Hvis du trykker kort på „XEOX“-
tasten i DirectInput-modus, skifter du
mellem to modusser til det digitale
styrekryds (D-pad): Hvis de øverste
to LED ikke lyser, er hat-switch
modus aktiv. Hvis disse LED lyser,
bytter styrekrydset og det analoge
stick deres funktioner.
5. Hurtigskud-funktion
Hurtigskud-funktionen gennemfører
en tast-funktion ere gange i hurtig
rækkefølge så længde den trykkes.
Hold hertil „Rapid“-tasten trykt og
tryk samtidigt den tast, hvis funktion
du ønsker at aktivere.
Hvis du trykker tasten igen mens
du samtidigt trykker ”Rapid”tasten, skifter den fra hurtigskudtil autoskud-funktion. Derved
gennemføres tastens funktion
automatisk i hurtig rækkefølge.
For at skifte tastens funktion igen
til enkeltskud-modus, trykker du
tasten igen mens du samtidigt holder
”Rapid”-tasten trykt.
6. Indstillinger
Funktionen til din gamepad kan
du kontrollere under Windows
systemstyringen i afsnit „Enheder
og printer“ (Windows
„Gamecontroller ” under “
(Windows
®
XP).
®
7/Vista®) hhv.
PL
I DirectInput-modus nder
du der også optionerne for
vibrationsfunktionen; vibrationen
for XInput-titel kongurerer du i de
tilsvarende spil-optioner. Bemærk
venligst, at vibrationsfunktionen kun
kan bruges, hvis funktionen bruges
af et spil og hvis den tilsvarende
funktion er aktiveret i spillets
funktioner/egenskaber.
®
-
1. Instalacja sterowników
Włóż załączoną płytę CD ze
sterownikami do napędu CDROM, aby zainstalować sterowniki.
Jeżeli instalacja nie rozpocznie się
automatycznie, w Eksploratorze
®
Windows
ROM i uruchom program „Setup.
exe“. Instalacja jest konieczna do
korzystania z funkcji wibracji w
niektórych grach.
Dla optymalnych wyników
używaj zawsze najnowszych
wersji sterowników, które można
znaleźć na stronie internetowej
SPEEDLINK pod adresem
www.speedlink.com nden.
2. Podłączenie
Podłącz gamepad do wolnego
portu USB komputera. Urządzenie
zostanie automatycznie rozpoznane
i po kilku sekundach będzie gotowe
do pracy.
3. XInput i DirectInput
Za pomocą suwaka z tyłu gamepada
można wybrać jeden z dwóch typów
pracy gamepada: „X“ dla XInput
(do większości aktualnych gier) lub
„D“ dla DirectInput (do starszych i
niektórych nowszych gier). W trybie
XInput świecą wszystkie cztery diody
LED gamepada.
Zanim rozpoczniesz grę, przełącz
gamepad do odpowiedniego trybu.
Przełączanie w trakcie gry może
wybierz napęd CD-
spowodować, że kontroler nie
zostanie poprawnie rozpoznany. W
takim przypadku należy ponownie
rozpocząć grę. Odpowiedni tryb
ustalisz na podstawie instrukcji do
gry, u producenta lub metodą prób
i błędów.
4. Tryb krzyża sterującego
Naciśnij przycisk „XEOX“ w trybie
DirectInput i wybierz jeden z
dwóch trybów cyfrowego krzyża
sterującego: jeśli dwie górne diody
LED nie świecą, aktywny jest tryb
rozglądania się dookoła. Jeśli te
diody świecą, krzyż sterujący i lewy
drążek analogowy zamieniają się
funkcjami.
5. Tryb szybkiego ognia
Funkcja szybkiego ognia jest
odpowiednikiem wielokrotnego,
szybkiego naciskania przycisku tak
długo, jak długo jest on naciśnięty.
Naciśnij i przytrzymaj przycisk
„Rapid“ i jednocześnie naciśnij
przycisk, dla którego chcesz
aktywować tę funkcję.
Jeśli ponownie naciśniesz ten
przycisk przy jednocześnie
naciśniętym przycisku „Rapid“,
gamepad przejdzie z trybu
ognia szybkiego do trybu ognia
automatycznego.
Jednorazowe naciśnięcie daje
wówczas efekt wielokrotnego,
szybkiego naciskania przycisku.
Aby przywrócić przycisk do trybu
pojedynczego ognia, należy
go nacisnąć przy jednocześnie
naciśniętym przycisku „Rapid“.
6. Ustawienia
Funkcje gamepada można
sprawdzić w Panelu sterowania
®
Windows
drukarki“ (Windows
„Kontrolery gier“ (Windows
W trybie DirectInput znajdziesz
tam także opcje funkcji wibracji;
wibracje w trybie XInput konguruje
się bezpośrednio w odpowiednich
opcjach gier. Należy pamiętać,
że wibracje działają tylko wtedy,
gdy są obsługiwane przez grę,
a odpowiednie opcje gry są
aktywowane.
w części „Urządzenia i
®
7/Vista®) lub
®
XP).
HU
1. Meghajtóprogram-telepítés
Tegye bele a meghajtóprogramokat
tartalmazó mellékelt CD-t a CDmeghajtóba a meghajtóprogramok
telepítéséhez. Amennyiben
a telepítés nem indul el
automatikusan, a Windows
programban válassza ki a CDmeghajtót és indítsa el a „Setup.exe“
programot. A telepítés a vibráció
funkció használatához szükséges
néhány játékban.
Az optimális teljesítmény eléréséhez
kérjük, mindig a legújabb
meghajtóprogram-verziót használja,
amit a SPEEDLINK weboldalán, a
www.speedlink.com címen talál meg.
2. Csatlakoztatás
Kösse össze a gamepadet a
számítógép egy szabad USBportjával. Az eszközt az operációs
rendszer automatikusan felismeri
és az néhány másodperc múlva
használható.
3. XInput és DirectInput
A hátoldalon lévő tolókapcsolóval
válthat a gamepad két üzemmódja
között: „X“ az XInput (a legtöbb
aktuális játékhoz) és „D“ a
DirectInput (az összes régebbi és
néhány újabb játékhoz). XInputmódban a gamepad mind a négy
LED-je világít.
Kérjük, tegye a gamepadet a kívánt
módba, mielőtt elindít egy játékot.
®
Explorer
A folyó játék közbeni átkapcsolás
következményeként lehetséges,
hogy a controllert ez nem ismeri fel
helyesen; ebben az esetben kérjük,
indítsa újra a játékot. Azt, melyik
módban működik legjobban a játék,
a megfelelő kézikönyvből, a gyártótól
vagy kipróbálással tudhatja meg.
4. Vezérlőkereszt-mód
Ha a „XEOX“ gombot DirectInput-
módban működteti, azzal átvált a
digitális vezérlőkereszt (D-Pad) két
üzemmódja között: Ha a felső két
LED nem ég, akkor a körkörös nézet
ellenőrzés mód aktív.
Ha világítanak ezek a LED-ek, akkor
a vezérlőkereszt és a bal analóg
stick funkciót cserél.
5. Gyorstüzelésű funkció
A gyorstüzelésű funkció egy gombot
többször egymás után ismétel, amíg
azt nyomva tartja. Tartsa lenyomva a
„Rapid“ gombot és egyszerre nyomja
meg azt a gombot, amelyikhez ezt a
funkciót be szeretné kapcsolni.
Ha ismét nyomja le ezt a gombot,
miközben a „Rapid“ gombot
is lenyomva tartja, a gyorsból
automatikus tüzelési módba
vált át. Így a gomb egyszeri
megnyomással automatikusan gyors
egymásutánban működik.
Ha a gombot megint egyszeri
tüzelési módba szeretné átváltani,
nyomja meg azt újra megnyomott
„Rapid“ gomb mellett.
6. Beállítások
A gamepad funkcióit a Windows
Vezérlőpult „Eszközök és
nyomtatók“ (Windows
„Gamecontroller“ (Windows
részében ellenőrizheti.
DirectInput-módban ott a vibráció
funkció opcióit is megtalálja;
vibrációkat az XInput-címekhez
a megfelelő játékopciókban
kongurálhat. Kérjük, ügyeljen
arra, hogy vibráció csak akkor
érzékelhető, ha azt egy játék
használja és a megfelelő funkció a
játékopciók között aktiválva van.
®
7/Vista®) ill.
®
XP)
®
QUICK INSTALL GUIDE
VERS. 1.0
SE / DK / PL / HU / CZ / EL / FI / NO
Föreskriven användning
Den här produkten ska endast användas
som inputapparat och anslutas till en
dator. Jöllenbeck GmbH tar inget ansvar
för skador på produkt eller person som är
ett resultat av ovarsamhet, slarv, felaktig
användning eller att produkten använts
för syften som inte motsvarar tillverkarens
anvisningar.
Information om funktionsstörningar
Starka statiska, elektriska och högfrekventa
fält (radioanläggningar, mobiltelefoner,
urladdningar från mikrovågsugnar) kan
påverka apparatens/apparaternas funktion.
I så fall ska du försöka öka avståndet till
den apparat som stör.
Teknisk support
Om du får tekniska problem med produkten
kan du vända dig till vår support. Du når
den snabbast genom vår webbsida
www.speedlink.com.
Bestemmelsesmæssig anvendelse
Produktet er kun beregnet som
indtastningsenhed for tilslutning til en PC.
Jöllenbeck GmbH er ikke ansvarligt for
skader på produktet eller personskader på
grund af uforsigtig, uhensigtsmæssig og
ukorrekt anvendelse eller anvendelse til et
formål, som ikke svarer til producentens
anvisninger.
Overensstemmelseshenvisning
Under påvirkning af stærke statiske,
elektriske felter eller felter med høj
frekvens (radioanlæg, mobiltelefoner,
mikrobølge-aadninger), kan der opstå
funktionsforstyrrelser af enheden
(enhederne). I dette tilfælde bør du prøve
på, at forstørre afstanden til forstyrrende
enheder.
Teknisk support
Ved tekniske problemer med dette produkt,
kontakt venligst vores support som du nder
på vores webside www.speedlink.com.
Użytkowanie zgodne z przeznaczeniem
Ten produkt jest przeznaczony tylko do
podłączenia do komputera PC. Jöllenbeck
GmbH nie ponosi żadnej odpowiedzialności
za uszkodzenia produktu lub obrażenia
u ludzi na skutek nieuważnego,
nieprawidłowego, niewłaściwego lub
niezgodnego z określonym przez
producenta użytkowania produktu.
Informacja o zgodności
Silne pola elektrostatyczne, elektryczne
lub elektromagnetyczne o wysokiej
częstotliwości (urządzenia radiowe,
telefony przenośne, telefony komórkowe,
mikrofalówki, rozładowania elektryczne)
mogą być przyczyną zakłóceń w działaniu
urządzenia (urządzeń). W takim wypadku
należy zachować większą odległość od
źródeł zakłóceń.
Pomoc techniczna
W razie problemów technicznych z tym
produktem proszę zwrócić się do naszej
pomocy technicznej, z która najszybciej
można skontaktować się przez naszą
stronę internetową www.speedlink.com.
Rendeltetésszerű használat
A termék csak számítógépre csatlakoztatva
alkalmas beadó készülékként. A
Jöllenbeck GmbH nem vállal felelősséget
a termékben keletkezett kárért vagy vagy
személyi sérülésért, ha az gyelmetlen,
szakszerűtlen, hibás, vagy nem a
gyártó által megadott célnak megfelelő
használatból eredt.
Megfelelőségi tudnivalók
Erős statikus, elektromos
vagy nagyfrekvenciájú mezők
(rádióberendezések, mobiltelefonok,
vezetékmentes telefonok, mikrohullámú
sütők, kisülések) hatására a készülék (a
készülékek) működési zavara léphet fel.
Ebben az esetben próbálja meg növelni a
távolságot a zavaró készülékekhez.
Műszaki támogatás
A termékkel kapcsolatos műszaki
problémák esetén forduljon
Támogatásunkhoz, melyet leggyorsabban
honlapunkon www.speedlink.com
keresztül érhet el.
Having technical problems with this product? Get in touch with our Support team –
©2012 Jö llen beck G mbH. A ll rights re served. SPEEDLINK®, the SPEEDLINK wor d mark a nd the SPEEDLINK
swoosh are registered t rade marks of Jöll enbe ck Gmb H. Windows, Windows XP, Windows Vis ta and
Windows 7 are r egis tere d trademarks of Microsoft Corpor atio n in the U nite d Stat es and /or other countries.
All tr adem arks are the p rope rty of their res pect ive own er. Jöll enbe ck Gmb H shall not be m ade li able f or any
errors tha t may ap pear i n this m anual. Inf orma tion c onta ined h erei n is subject t o chan ge wit hout p rior notice.
JÖLLENBECK GmbH, Kreuzberg 2, 27404 Weertzen, GERMANY
the quickest way is via our website: www.speedlink.com.
TECHNICAL SUPPORT
Page 4

1 2
X D
DRIVER INSTALLATION
CONNECTING
3
XINPUT AND DIRECTINPUT
4
D-PAD MODE (DIRECTINPUT)
5
RAPID-FIRE FUNCTION
6
SETTINGS
CZ
1. Instalace softwarových ovladačů
Chcete-li instalovat softwarové
ovladače, vložte do mechaniky
CD-ROM dodané CD. Jestliže se
instalace nespustí automaticky,
vyberte v Průzkumníkovi Windows
mechaniku CD a spusťte program
„Setup.exe“. Instalace je nutná pro
používání vibrační funkce v určitých
hrách.
Optimálního výkonu dosáhnete při
použití nejnovější verze ovladačů,
kterou najdete na webové stránce
SPEEDLINK na adrese
www.speedlink.com.
2. Připojení
Herní podložku Gamepad připojte
k volnému USB portu počítače.
Proběhne automatická detekce
zařízení a podložka bude během
několika sekund připravena k použití.
3. XInput (X vstup) a DirectInput
(Přímý vstup)
Pomocí přepínače na zadní straně
můžete přepínat mezi oběma
provozními režimy Gamepadu: „X“
pro XInput (pro většinu aktuálních
her) a „D“ pro DirectInput (pro
všechny starší a některé novější
hry). Při režimu XInput se rozsvítí
všechny čtyři LED diody herní
podložky Gamepad.
Před spuštěním hry přepněte
Gamepad do požadovaného režimu.
Přepínání v rámci rozehrané hry
může vést k tomu, že řadič již
nebude hrou správně identikován;
v takovém případě hru restartujte.
V příslušné příručce se dočtete, se
kterým režimem hra nejlépe funguje,
®
nebo se můžete zeptat přímo u
výrobce a nebo to můžete jednoduše
vyzkoušet.
4. Režim ovládacího kříže
Tlačítko „XEOX“ nastavte do režimu
DirectInput, přepínejte mezi dvěma
režimy digitálního ovládacího kříže
(D-Pad): Pokud horní dvě LED diody
nesvítí, je aktivní režim spínače
panoramatického pohledu.
Pokud tyto diody svítí, vymění si
ovládací kříž a levá analogová páčka
své funkce.
5. Funkce rychlopalby
Funkci rychlopalby provádí tlačítko
vícekrát v rychlém sledu tak dlouho,
dokud je stlačeno. Za tímto účelem
podržte stisknuté tlačítko „Rapid“
a současně stiskněte tlačítko pro
funkci, která má být aktivována.
Stisknete-li toto tlačítko ještě
jednou při současně stisknutém
tlačítku „Rapid“, změní se režim z
rychlopalby na režim automatické
palby. Tlačítko tak po jednorázovém
stisknutí automaticky aktivuje
rychlejší střelbu.
Chcete-li tlačítko vrátit zpět do
režimu palby jednotlivých ran,
PC/Notebook
stiskněte toto tlačítko znovu při
současném stisku tlačítka „Rapid“.
6. Nastavení
Funkci Gamepadu můžete
zkontrolovat v Ovládacích panelech
systému Windows
a tiskárny“ (Windows
resp. „Herní zařízení“ (Windows
XP).
V režimu DirectInput najdete i
volby pro vibrační funkci. Vibrace
pro tituly XInput si nakongurujete
v aktuálních herních volbách.
Pamatujte prosím, že vibrace jsou
reprodukovány pouze tehdy, pokud
se tyto používají ve hře a v herních
volbách je současně aktivovaná
příslušná funkce.
®
v části „Zařízení
®
7/Vista®),
DO YOU KNOW THESE?
SWITCH
EL
1. Εγκατάσταση οδηγού
Τοποθετήστε το απεσταλμένο
CD οδηγού στον οδηγό CD, για
να εγκαταστήσετε το λογισμικό
οδηγού. Εάν η εγκατάσταση δεν
ξεκινήσει αυτόματα, επιλέξτε στον
Windows
®
δίσκου και εκκινήστε το πρόγραμμα
„Setup.exe“. Η εγκατάσταση είναι
απαραίτητη για τη χρήση της
λειτουργίας κραδασμών σε ορισμένα
παιχνίδια.
Για βέλτιστη απόδοση παρακαλούμε
χρησιμοποιείτε πάντα τη νεότερη
έκδοση οδηγών, τους οποίους
μπορείτε να βρείτε στην ιστοσελίδα
της SPEEDLINK στη διεύθυνση
www.speedlink.com .
2. Σύνδεση
Συνδέστε το Gamepad με μία
ελεύθερη υποδοχή σύνδεσης
USB του H/Y σας. Η συσκευή
αναγνωρίζεται αυτόματα από το
λειτουργικό σύστημα και μετά από
μερικά δευτερόλεπτα είναι έτοιμη για
χρήση.
3. XInput και DirectInput
Με το συρόμενο διακόπτη στην πίσω
πλευρά εναλλάσσεστε μεταξύ των
δύο ειδών λειτουργίας του Gamepad:
„X“ για XInput (για τα περισσότερα
τρέχοντα παιχνίδια) και „D“ για
DirectInput (για όλα τα παλαιότερα
και ορισμένα νεότερα παιχνίδια). Στη
λειτουργία XInput ανάβουν και τα
®
Explorer τη μονάδα
τέσσερα LED του Gamepad.
Παρακαλούμε θέστε το Gamepad
στην επιθυμητή κατάσταση
λειτουργίας, προτού εκκινήσετε
ένα παιχνίδι. Η αλλαγή στο τρέχον
παιχνίδι μπορεί να οδηγήσει στο να
μην αναγνωρίζεται ο ελεγκτής σωστά
από αυτό. Σε αυτή την περίπτωση
παρακαλούμε εκκινήστε το παιχνίδι
εκ νέου. Μπορείτε να μάθετε με ποια
κατάσταση λειτουργίας λειτουργεί
καλύτερα το παιχνίδι στο αντίστοιχο
εγχειρίδιο, από τον κατασκευαστή ή
μέσω δοκιμής.
4. Κατάσταση λειτουργίας
χειριστηρίου
Εάν πιέσετε το πλήκτρο „XEOX“
στην κατάσταση λειτουργίας
DirectInput, εναλλάσσεστε μεταξύ
δύο καταστάσεων λειτουργίας για
το ψηφιακό χειριστήριο ελέγχου
(D-Pad): Εάν δεν ανάβουν τα
δύο επάνω LED, η κατάσταση
λειτουργίας διακόπτη πανοράματος
είναι ενεργή. Εάν ανάβουν αυτά
τα LED, το χειριστήριο ελέγχου
και το αριστερό αναλογικό στικ
ανταλλάσσουν τις λειτουργίες τους.
5. Λειτουργία γρήγορης εξαπόλυσης
Η λειτουργία γρήγορης εξαπόλυσης
ενεργοποιεί επαναλαμβανόμενα ένα
πλήκτρο σε γρήγορη αλληλουχία,
όσο αυτό πιέζεται. Για αυτό κρατήστε
πιεσμένο το πλήκτρο „Rapid“ και
πιέστε ταυτόχρονα το πλήκτρο, για
το οποίο θέλετε να ενεργοποιήσετε
τη λειτουργία.
Εάν ενεργοποιήσετε εκ νέου αυτό
το πλήκτρο με πιεσμένο το πλήκτρο
„Rapid“, θα γυρίσει από τη λειτουργία
γρήγορης εξαπόλυσης στη
λειτουργία αυτόματης εξαπόλυσης.
Έτσι το πλήκτρο, μετά από μια
ενεργοποίηση, ενεργοποιείται
αυτόματα με γρήγορη αλληλουχία.
Για να μεταθέσετε το πλήκτρο πάλι
στη λειτουργία μονής εξαπόλυσης,
πατήστε το άλλη μια φορά με
πιεσμένο το πλήκτρο „Rapid“.
6. Ρυθμίσεις
Η λειτουργία του Gamepad μπορεί
να ελεγχθεί στο σύστημα ελέγχου
των Windows
και εκτυπωτές“ (Windows
ή στο τμήμα „Ελεγκτής παιχνιδιών“
(Windows
Στη λειτουργία DirectInput θα
βρείτε και τις επιλογές για τη
λειτουργία κραδασμών. Μπορείτε
να διαμορφώσετε τους κραδασμούς
για τίτλους XInput στις εκάστοτε
επιλογές παιχνιδιών. Προσέξτε
ότι οι κραδασμοί αναπαράγονται
μόνο όταν τους χρησιμοποιεί ένα
παιχνίδι και όταν έχει ενεργοποιηθεί
η αντίστοιχη λειτουργία στις επιλογές
παιχνιδιού.
®
στο τμήμα „Συσκευές
®
XP).
®
7/Vista®)
FI
1. Ajurin asentaminen
Aseta toimitukseen sisältyvä
ajuri-CD tietokoneen CD-asemaan
ajuriohjelmiston asennusta varten.
Mikäli asennus ei käynnisty
automaattisesti, valitse Windows
Explorerista tietokoneen CD-asema
ja käynnistä ohjelma ”Setup.exe”.
Asennus on tarpeen joidenkin pelien
tärinätoiminnan käyttöä varten.
Käytä parhaan tehon
saavuttamiseksi aina uusinta
ajuriversiota, jonka voi ladata
SPEEDLINK-verkkosivulta
osoitteesta www.speedlink.com.
2. Liitäntä
Liitä peliohjain tietokoneen
vapaaseen USB-liitäntään.
Käyttöjärjestelmä tunnistaa
laitteen automaattisesti ja laite
on käyttövalmis muutamassa
sekunnissa.
3. XInput ja DirectInput
Taustapuolella olevan liukukytkimen
avulla voi vaihdella edestakaisin
peliohjaimen molempien käyttötilojen
välillä: ”X” tarkoittaa Xinputkäyttötilaa (useimmille ajankohtaisille
peleille) ja ”D” tarkoittaa DirectInputkäyttötilaa (kaikille vanhemmille ja
muutamille uudemmille peleille).
XInput-tilassa peliohjaimen kaikissa
neljässä LED:issä palaa valo.
Aseta peliohjain haluttuun tilaan
ennen pelin käynnistämistä. Vaihto
pelin aikana voi johtaa siihen,
ettei peli enää tunnista ohjainta
oikein. Peli on silloin käynnistettävä
uudelleen. Pelille parhaiten sopiva
®
tila käy ilmi peliin kuuluvasta
käsikirjasta, valmistajalta tai
kokeilemalla.
4. Ohjausristikkotila
Jos painat ”XEOX”-painiketta
DirectInput-tilassa, vaihdat
digitaalisen ohjausristikon (D-Pad)
kahden tilan välillä: Jos kahdessa
ylemmässä LED:issä ei pala valoa,
hattukytkintila on aktiivinen.
Mikäli kyseisissä LED:eissä
palaa valo, ohjausristikko ja
vasemmanpuoleinen analogitikku
vaihtavat toimintojaan.
5. Pikatulitustoiminto
Pikatulitustoiminto suorittaa yhden
painikkeen toiminnon useita kertoja
nopeasti peräkkäin niin kauan kuin
sitä painetaan. Pidä silloin ”Rapid”painiketta painettuna ja paina
samanaikaisesti sitä painiketta, jolle
toiminto halutaan aktivoida.
Kun kyseistä painiketta
painetaan uudelleen ”Rapid”painikkeen ollessa painettuna,
se vaihtaa pikatulitustoiminnosta
automaattitulitukseen. Näin
painikkeen toiminto suoritetaan
kertapainalluksella automaattisesti
nopeasti useita kertoja peräkkäin.
PRESS
Painike palautetaan takaisin
yksittäiseen tulitustilaan painamalla
sitä uudelleen ”Rapid”-painikkeen
ollessa painettuna.
6. Asetukset
Peliohjaimen toiminta voidaan
tarkistaa Windows
kohdasta ”Laitteet ja tulostimet”
(Windows
”Peliohjaimet” (Windows
DirectInput-tilassa kyseisestä
kohdasta löytyy myös
tärinätoiminnon eri vaihtoehdot.
XInput-pelien tärinätoiminnot
konguroidaan kyseisten pelien
pelitoiminnoista. Huomaa, että
tärinätoiminnot ovat käytössä
vain, mikäli peli käyttää niitä
ja tärinätoiminto on aktivoitu
pelitoiminnoista.
®
®
7/Vista®) tai
-ohjauspaneelin
®
XP).
PRESS
(+ FIRE BUTTON)
NO
1. Driverinstallasjon
Legg inn den medfølgende
driver-CD-en i CD-stasjonen for
å installere driverprogramvaren.
Dersom installasjonen ikke starter
automatisk, velger du CD-stasjonen
din i Windows
programmet „Setup.exe“. Du må
installere programmet for å kunne
bruke vibrasjonsfunksjonen i enkelte
spill.
For å sikre optimal ytelse er det
viktig at du alltid bruker den nyeste
driverversjonen fra
www.speedlink.com.
2. Tilkobling
Koble spillkontrollen til en ledig
USB-port på datamaskinen. Enheten
registreres automatisk og er klar til
bruk etter noen få sekunder.
3. XInput og DirectInput
Bruk skyvebryteren på baksiden for
å veksle mellom de to spillmodusene
på spillkontrollen: Velg „X“ for XInput
(for de este av de nyere spillene)
og „D“ for DirectInput (for alle eldre
spill og enkelte av de nye).
I XInput-modus lyser alle de re
LED-lampene på spillkontrollen.
Sett spillkontrollen i ønsket modus
før du starter spillet. Hvis du bytter
modus mens du spiller, kan det
føre til at spillkontrollen ikke lenger
registrerer kontrollenheten. I så fall
må du starte spillet på nytt for å
®
Explorer og starter
XInput mode DirectInput mode
fortsette. Se i bruksanvisningen, les
informasjonen fra produsenten eller
prøv deg frem på egen hånd for å
nne ut hvilken modus som er best
for et bestemt spill.
4. Styrekors-modus
Trykk på XEOX-knappen i
DirectInput-modus for å veksle
mellom de to modusene for det
digitale styrekorset (D-paden): Hvis
de to øverste LED-lampene ikke
lyser, er rotasjonsmodus aktivert.
Hvis disse LED-lampene lyser, vil
styrekorset og venstre styrespak
bytte funksjon.
5. Rapid Fire-funksjon
Rapid Fire-funksjonen gjør at du
kan bruke en knappfunksjon mange
ganger i rask rekkefølge. Hold inne
Rapid-knappen mens du trykker på
knappfunksjonen du ønsker å bruke.
Hvis du trykker en gang til på denne
knappen mens du holder inne
Rapid-knappen, går du over til Auto
Fire-modus. Knappen du trykker på,
brukes da automatisk mange ganger
i rask rekkefølge.
For å gå tilbake til Single Firemodus, trykker du en gang til på
knappen mens du holder inne Rapidknappen.
6. Innstillinger
Spillkontrollfunksjonen kan testes i
®
Windows
-systemkontrollen under
„Enheter og skrivere“ (Windows
7/Vista
(Windows
I DirectInput-modus nner du
der i tillegg alternativene for
vibrasjonsfunksjonene. Vibrering
for XInput-titler kongureres i
de aktuelle spillalternativene.
Merk at vibrasjonsfeedback
kun er tilgjengelig for spill der
vibrasjonsfunksjonen kan aktiveres
som spillalternativ.
®
) eller „Gamecontroller“
®
XP).
COMET
TRACKBALL MEDIA KEYBOARD
Wireless keyboard with integrated
trackball and mouse wheel
ACUTE PRO
®
MULTI-FUNCTION PRESENTER
Wireless presenter with mouse mode
and integrated laser pointer
XEOX
PRO ANALOG GAMEPAD – WIRELESS
Wireless gamepad for PS3® and PC
with perfect ergonomics
GRAVITY VEOS
2.1 SUBWOOFER SYSTEM
ARCUS
GRAPHICS TABLET – XL
Graphics tablet with ergonomic stylus
and programmable keys
NOBILÉ
PORTABLE CARD READER
32-in-1 multi-format card reader with
USB plug in a small, portable case
KUDOS RS
GAMING MOUSE
Professional gaming mouse with
5700dpi laser sensor for ultimate control
AUX
STEREO HEADSET
Použití podle předpisů
Tento produkt je vhodný pouze jako
vstupní zařízení pro připojení na počítač.
Firma Jöllenbeck GmbH nepřebírá ručení
za poškození výrobku nebo zranění
osob, vzniklé v důsledku nedbalého,
neodborného, nesprávného použití výrobku,
nebo v důsledku použití výrobku k jiným
účelům, než byly uvedeny výrobcem.
Informace o konformitě
Za působení silných statických, elektrických,
nebo vysokofrekvenčních polí (rádiová
zařízení, mobilní telefony, mikrovlnné
výboje) může dojít k omezení funkčnosti
přístroje (přístrojů). V takovém případě
se pokuste zvětšit distanci k rušivým
přístrojům.
Technický suport
V případě technických problémů s tímto
produktem kontaktujte prosím náš suport,
který je nejrychleji dostupný prostřednictvím
našich webových stránek
www.speedlink.com.
Χρήση σύμφωνη με τους κανονισμούς
Αυτό το προϊόν ενδείκνυται μόνο ως
συσκευή εισαγωγής για τη σύνδεση σε
έναν υπολογιστή. Η Jöllenbeck GmbH δεν
αναλαμβάνει καμία ευθύνη για ζημιές στο
προϊόν ή για τραυματισμούς ατόμων λόγω
απρόσεκτης, ακατάλληλης, εσφαλμένης
χρήσης ή χρήσης του προϊόντος για
διαφορετικό από τον αναφερόμενο από τον
κατασκευαστή, σκοπό.
Υπόδειξη συμμόρφωσης
Υπό την επίδραση δυνατών στατικών,
ηλεκτρικών πεδίων ή πεδίων υψηλής
συχνότητας (ασύρματες εγκαταστάσεις,
κινητά τηλέφωνα, αποφορτίσεις συσκευών
μικροκυμάτων) ίσως υπάρξουν επιδράσεις
στη λειτουργία της συσκευής (των
συσκευών). Σε αυτή την περίπτωση
δοκιμάστε να αυξήσετε την απόσταση προς
τις συσκευές που δημιουργούν παρεμβολή.
Τεχνική υποστήριξη
Σε τεχνικές δυσκολίες με αυτό το προϊόν,
απευθυνθείτε στο τμήμα υποστήριξης,
στο οποίο μπορείτε να έχετε γρήγορη
πρόσβαση μέσω της ιστοσελίδας μας
www.speedlink.com.
Määräysten mukainen käyttö
Tämä tuote soveltuu vain tietojen
syöttämiseen tietokoneeseen liittämisen
jälkeen. Jöllenbeck GmbH ei ota
minkäänlaista vastuuta tuotteeseen
syntyvistä vaurioista tai henkilöiden
loukkaantumisista, jotka johtuvat
tuotteen huolimattomasta, asiattomasta,
virheellisestä tai valmistajan ohjeiden
vastaisesta, käyttötarkoituksesta
poikkeavasta käytöstä.
Vaatimustenmukaisuutta koskeva
huomautus
Voimakkaat staattiset, sähköiset tai
korkeataajuuksiset kentät (radiolaitteistot,
matkapuhelimet, mikroaaltopurkaukset)
voivat vaikuttaa laitteen (laitteiden)
toimintaan. Laite on silloin yritettävä siirtää
kauemmas häiriön aiheuttavista laitteista.
Tekninen tuki
Jos sinulla on teknisiä ongelmia tämän
tuotteen suhteen, käänny tukemme
puoleen. Tukeen saat nopeimmin yhteyttä
verkkosivumme www.speedlink.com kautta.
Forskriftsmessig bruk
Dette produktet er kun ment som inn-data
apparat for tilkobling til en datamaskin.
Jöllenbeck GmbH ta intet ansvar for
produktet eller for personskader som
skyldes ikke forskriftsmessig eller feil bruk,
eller bruk av produktet utover det som er
angitt fra produsenten.
Samsvarsanvisning
Ved påvirkning av sterke statiske, elektriske
eller høyfrekvente felt (radioanlegg,
mobiltelefoner, mikrobølge-utladninger)
kan det forekomme funksjonsfeil på
apparatet/apparatene. Forsøk i så fall å øke
avstanden til forstyrrende utstyr.
Teknisk Support
Hvis du har tekniske problemer med dette
produktet, må du ta kontakt med vår
Support, som du raskest kan nå via vår
nettside www.speedlink.com.
Active 2.1 speaker system with power
bass and practical desktop remote
PlayStation and PS3 are registered trademarks of Sony Computer Entertainment Inc. This product is neither licensed nor endorsed by Sony Computer Entertainment Inc. All trademarks are the
PlayStation and PS3 are registered trademarks of Sony Computer Entertainment Inc. This product is neither licensed nor endorsed by Sony Computer Entertainment Inc.
property of their respective owner.
All trademarks are the property of their respective owner.
Stylish stereo headset for PCs,
notebooks and smartphones
 Loading...