

Page 1
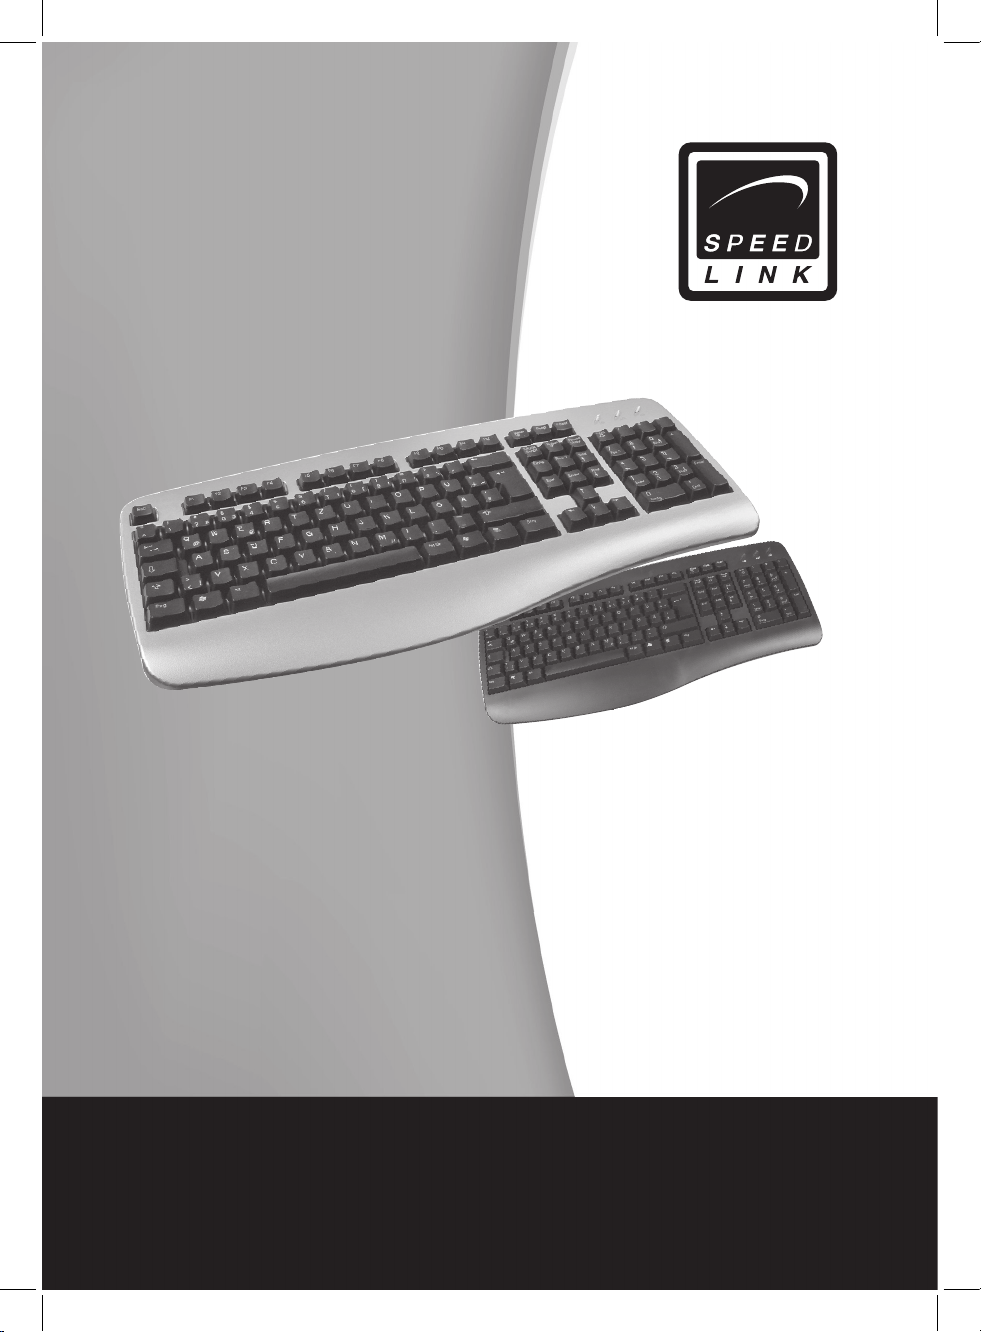
Comfort Combo Keyboard
Bedienungsanleitung
User‘s guide
Mode d‘emploi
Instrucciones de manejo
Manuale d‘istruzioni
SL-6421-SBK/SL-6421-SSV
Page 2

Page 3

3
D
GB
F
E
I
Einleitung
Vielen Dank für den Kauf des Comfort Combo Keyboards! Mit dieser Tastatur
erleichtern Sie sich die alltägliche Arbeit am PC um ein Vielfaches und profitieren
von solider Qualität!
1. Systemvoraussetzungen
• USB oder PS2-Port
• Windows 95/98/2000/ME/NT/XP
Hinweis: Bitte beachten Sie, dass USB-Betrieb nicht von Windows 95/NT unterstützt wird.
2. Lieferumfang
• Tastatur mit USB-Anschluss
• Beiliegender PS2-Adapter
• Bedienungsanleitung
3. Anschluss
a) Anschluss über USB
1. Schließen Sie den USB-Anschlussstecker an den entsprechenden
USB-Anschluss Ihres Computers an. Die Plug&Play-Funktion Ihres
Systems wird automatisch feststellen, dass ein neues Gerät angeschlossen wurde. -
2. Das Betriebssystem wird Sie gegebenenfalls auffordern die Windows
Installations-CD einzulegen. Folgen Sie den Anweisungen auf dem Bildschirm.
Hinweis: Bitte beachten Sie, dass USB-Betrieb nicht von Windows 95/NT unterstützt wird.
b) Anschluss über PS/2
1. Schalten Sie Ihren Computer aus.
2. Verbinden Sie den beiliegenden PS/2-Adapter mit dem USB-Anschluss
der Tastatur. Schließen Sie den Anschlussstecker nun an den entsprechenden PS/2- Anschluss Ihres Computers an, der mit einem
Tastaturzeichen oder einer lilafarbenen Farbmarkierung gekennzeichnet ist.
3. Schalten Sie Ihren Computer ein.
4. Problembehebung
Die Tastatur funktioniert nicht.
1. Vergewissern Sie sich, dass Sie den USB-Stecker richtig am USB-Port
Ihres PCs angeschlossen haben.
Page 4

4
D
GB
F
E
I
2. Überprüfen Sie, ob USB-Eingabegeräte von Ihrem Betriebssystem
erkannt werden. Gehen Sie dazu wie folgt vor:
a) unter Windows ME/98/98SE:
1. Klicken Sie mit der rechten Maustaste auf “Arbeitsplatz” und wählen
Sie “Eigenschaften”.
2. Klicken Sie auf die Registerkarte „Hardware“ und wählen Sie
„Gerätemanager“.
3. Machen Sie einen Doppelklick auf „Eingabegeräte (Human Interface
Device)“.
4. Vergewissern Sie sich, dass USB-Eingabegeräte aufgeführt sind und
davor kein gelbes Ausrufezeichen erscheint.
Wenn die USB-Eingabegeräte nicht angezeigt werden oder gelbe Ausrufezeichen
zu sehen sind, funktionieren die USB-Eingabegeräte nicht richtig. Setzen Sie sich
in diesem Fall mit Ihrem Computerhersteller in Verbindung.
b) unter Windows 2000/XP:
1.) Klicken Sie mit der rechten Maustaste auf das Symbol „Arbeitsplatz“.
HINWEIS: Unter Windows XP muss das Symbol „Arbeitsplatz“
möglicherweise über „Start“ aufgerufen werden.
2.) Klicken Sie auf „Geräte-Manager“.
3.) Machen Sie einen Doppelklick auf „Eingabegeräte (Human Interface Device)“.
4.) Vergewissern Sie sich, dass USB-Eingabegeräte aufgeführt sind und
davor kein gelbes Ausrufezeichen erscheint.
Wenn die USB-Eingabegeräte nicht angezeigt werden oder gelbe Ausrufezeichen
zu sehen sind, funktionieren die USB-Eingabegeräte nicht richtig. Setzen Sie sich
dann mit Ihrem Computerhersteller in Verbindung.
Sicherheitshinweise
• Versuchen Sie nicht, das Gerät selbst zu warten oder zu reparieren.
Überlassen Sie jegliche Wartungsarbeiten dem zuständigen Fachpersonal.
• Nehmen Sie keine Veränderungen am Gerät vor. Dadurch verlieren Sie
jegliche Garantieansprüche.
• Verwenden Sie das Gerät nicht in der Nähe von Wasser (z.B. Wasch-
becken, Badewannen oder Schwimmbecken), und halten Sie es von
Feuchtigkeit, tropfenden oder spritzenden Flüssigkeiten sowie Regen
fern.
Page 5

5
D
GB
F
E
I
Bestimmungsgemäßer Gebrauch:
• Computertastatur zur privaten Nutzung.
• Das Gerät darf nur mit den dafür vorgesehenen Originalteilen verwendet
werden.
• Das Produkt darf nur in geschlossenen und trockenen Räumen verwendet
werden.
• Die bestimmungsgemäße Verwendung beinhaltet das Vorgehen gemäß
der Installationsanleitung. Für Schäden, die durch unsachgemäßen
Gebrauch entstehen übernimmt der Hersteller keine Haftung
Garantie
Für dieses Produkt gewähren wir Ihnen eine Garantie von zwei Jahren ab Kaufdatum auf Verarbeitung und alle eingebauten Teile.
Falls Sie Hilfe benötigen..
Bei technischen Problemen wenden Sie sich bitte an unseren technischen Support. Die Hotline-Nummer finden Sie auf der Rückseite dieser Bedienungsanlei
-
tung.
Page 6

6
D
GB
F
E
I
Introduction
Thank you for purchasing this keyboard. This keyboard offers simple installation
and simple daily work with a PC, enjoy solid quality!
1. System requirements
• USB or PS/2 port
• Windows 95/98/2000/ME/NT/XP
Note: Please note that USB operation is not supported by Windows 95/NT.
2. Packaging content:
• Keyboard with USB connector
• PS2 adapter
• User’s guide
3. Installation
a) Connecting via USB
1. Simply connect the USB cable of the keyboard to a free USB port of your PC.
2. The keyboard is then ready to use. You may be requested to insert
the Windows installation CD.
Note: Please note that USB operation is not supported by Windows
95/NT.
b) Connecting via PS/2
1. Switch off your computer.
2. Connect the supplied PS/2 adapter to the USB socket of your
keyboard. Connect the plug to the appropriate PS/2 port on your computer,
which is identified either by a keyboard symbol or purple colouration.
3. Switch on your computer.
4.Troubleshooting
The keyboard doesn’t work.
1. Make sure you have correctly connected the USB plug to the USB port of
your PC.
2. Check that USB input devices are detected by your operating system.
To do this, proceed as follows:
a) Under Windows Me/98/98SE:
1. Click with the right mouse button on “My Computer” and select
“Properties”.
2. In the System Properties dialogue, click on the “Device manager” tab.
3. Double click on “Human Interface Devices” or “Keyboard”.
Page 7

7
D
GB
F
E
I
4. Make sure USB input devices are listed and there is no yellow ex-
clamation mark in front.
If USB input devices are not displayed or you can see a yellow exclamation mark,
the devices are not working correctly. If that is the case, contact your computer
manufacturer.
b) Under Windows 2000/XP:
1.) Click with the right mouse button on the “My Computer“ icon.
NOTE: In Windows XP, you may have to call the “System Properties”
dialogue via the Start menu.
2.) Click on the Device Manager button.
3.) Double click on “Human Interface Devices“.
4.) Make sure USB input devices are listed and no yellow exclamation
marks appear before them.
If the USB input devices are not displayed or you can see a yellow exclamation
mark, the devices are not working correctly. If that is the case, contact your
computer manufacturer.
Safety advice
• Do not attempt to maintain or repair the device yourself. Get a qualified
specialist to carry out any maintenance.
• Do not make any modifications to the device. Doing so will render the
guarantee void.
• Do not use the device in the vicinity of water (e.g. wash basins, baths
or swimming pools) and keep it away from moisture, dripping or
splashing liquids and rain.
Intended use:
• Keyboard for private use.
• The product may only be used with the original parts intended for it.
• The product may only be used in closed and dry rooms.
• The intended use includes adherence to the specified installation
instructions. The manufacturer accepts no liability for damage arising due to
improper use.
Guarantee
We guarantee this product for two years from the date of purchase in respect of
workmanship and all built-in components.
If you need help..
In the event of technical problems, please contact our technical support. The
hotline number can be found on the back of this manual.
Page 8

8
D
GB
F
E
I
Introduction
Merci d’avoir choisi ce clavier. Avec ce clavier vous simplifiez le travail avec
l’ordinateur et vous profitez d’une qualité solide !
1. Configuration système requise
• Windows 95/98/ME/2000/NT/XP
• Port USB et PS/2
Remarque: Nous attirons votre attention sur le fait que le mode USB n’est pas
supporté sous Windows 95/NT.
2. Contenu de l’emballage
• Clavier avec fiche USB
• Adaptateur PS/2
• Mode d’emploi
3. Raccordement
a) Raccordement sur la prise USB
1. Raccordez tout simplement la fiche USB du clavier à un port USB libre sur
votre ordinateur.
2. Le clavier est aussitôt opérationnel. Le système vous invite éventuellement à
insérer le CD d’installation de Windows.
Remarque
: Nous attirons votre attention sur le fait que le mode USB n’est pas
supporté sous Windows 95/NT.
b) Raccordement sur la prise PS/2
1. Éteignez votre ordinateur.
2. Reliez l’adaptateur PS/2 fourni au connecteur USB du clavier. Puis raccordez
la fiche au port PS/2 clavier de votre ordinateur, reconnaissable à un
symbole représentant un clavier ou à une marque de couleur lilas.
3. Rallumez l’ordinateur.
4. En cas de problème
Le clavier ne fonctionne pas.
1. Assurez-vous que la fiche USB est bien raccordée au port USB de
votre ordinateur.
2. Assurez-vous que les périphériques d’entrée USB sont bien reconnus
par votre système d’exploitation. Pour cela, procédez de la manière suivante :
a) sous Windows ME/98/98SE :
1. Cliquez avec la touche droite de la souris sur « Poste de travail » et allez sur
« Propriétés ».
Page 9

9
D
GB
F
E
I
2. Cliquez sur l’onglet « Matériel » et sélectionnez « Gestionnaire de
périphériques ».
3. Faites un double-clic sur « Périphériques d’interface utilisateur ».
4. Assurez-vous que les périphériques d’entrée USB figurent dans la liste et que
l’entrée n’est pas précédée d’un point d’exclamation jaune.
Si les périphériques d’entrée USB n’apparaissent pas dans la liste ou si les
entrées corresponantes sont précédées d’un point d’exclamation jaune, les
périphériques d’entrée USB ne fonctionneront pas correctement. Dans ce cas,
contactez le fabricant de votre ordinateur.
b) sous Windows 2000/XP :
1) Cliquez avec la touche droite de la souris sur l’icône « Poste de travail ».
REMARQUE : Sous Windows XP, l’icône « Poste de travail » n’est parfois
accessible qu’à partir du menu « Démarrer ».
2.) Cliquez sur « Gestionnaire de périphériques ».
3.) Faites un double-clic sur « Périphériques d’interface utilisateur ».
4.) Assurez-vous que les périphériques d’entrée USB figurent dans la liste et que
l’entrée n’est pas précédée d’un point d’exclamation jaune.
Si les périphériques d’entrée USB n’apparaissent pas dans la liste ou si les
entrées correspondantes sont précédées d’un point d’exclamation jaune, les
périphériques d’entrée USB ne fonctionneront pas correctement. Dans ce cas,
contactez le fabricant de votre ordinateur.
Consignes de sécurité
• N’essayez pas de réparer vous-même l’appareil. Confiez tous les travaux de
maintenance à un technicien qualifié.
• N’apportez aucune modification à l’appareil. Cela annulerait toute possibilité
de recours en garantie.
• N’utilisez pas l’appareil à proximité d’eau (par exemple auprès d’un lavabo,
d’une baignoire ou d’une piscine) et gardez-le à l’abri de l’humidité
(éclaboussures, égouttement, pluie).
Utilisation conforme
• Clavier destiné à une utilisation privée.
• L’appareil ne doit être utilisé qu’avec les pièces originales prévues à cet effet.
• Le produit ne doit être utilisé que dans des locaux fermés et secs.
• L’utilisation conforme implique de respecter les instructions d’installation.
Le fabricant décline toute responsabilité en cas de dommages dus à une utilisation incorrecte.
Page 10

10
D
GB
F
E
I
Garantie
Nous offrons sur ce produit une garantie de deux ans à compter de la date
d’achat couvrant les défauts de fabrication et tous les composants.
Si vous avez besoin d’aide…
En cas de problèmes techniques, veuillez vous adresser à notre service
d’assistance technique. Vous trouverez le numéro de téléphone au dos de ce
mode d’emploi.
Page 11

11
D
GB
F
E
I
Introducción
Muchas gracias por la compra de este teclado de calidad sólido! Este teclado le
simplificara su trabajo con el ordenador!
1. Requerimientos del sistema
• Windows 95/98/ME/2000/NT/XP
• Puerto USB o PS/2
Advertencia: Tenga en cuenta que Windows 95/NT no soportan el sistema
USB.
2. Contenido de la caja
• Teclado con conector USB
• Adaptador PS2
• Instrucciones de manejo
3. Instalación
a) Conexiòn a través del USB
1. Conecte el cable del teclado a un puerto USB de su ordenador que esté libre.
2. El teclado ya está listo para funcionar. Puede que el sistema operativo
emita un aviso para que vuelva colocar el CD del Windows con el que opera.
Hágalo.
Advertencia: Tenga en cuenta que Windows 95/NT no soportan el sistema
USB.
b) Conexión a través del PS/2
1. Desconecte su ordenador.
2. Conecte el adaptador PS/2 adjunto a la conexión USB del teclado. Conecte
el cable del receptor al puerto correspondiente PS/2 de su ordenador que
suele estar marcado con el símbolo de un teclado o una marca de color lila.
3. Conecte su ordenador.
4. Resolución de problemas
El teclado no funciona.
1. Cerciórese de que ha enchufado bien el conector al puerto USB de su
ordenador.
2. Compruebe también si su sistema operativo reconoce y admite dispositivos
USB. Para ello proceda de la siguiente manera:
a) en Windows ME/98/98SE:
1. Haga clic con el botón derecho del ratón en „Mi PC“ y seleccione
„Propiedades“.
Page 12

12
D
GB
F
E
I
2. Haga clic en la lengüeta „Hardware“ y seleccione „Administrador de
dispositivos“.
3. Haga doble clic en „dispositivos de introducción (Human Interface Device)“
4. Verifique que los dispositivos de introducción USB estén listados y no haya
delante de ellos un signo de admiración amarillo.
Si los dispositivos de introducción USB no se muestran o aparecen signos de
admiración amarillos, los dispositivos USB no están funcionando correctamente.
En tal caso, póngase en contacto con el fabricante de su ordenador.
b) en Windows 2000/XP:
1) Haga clic con el botón derecho del ratón en el símbolo“Mi PC“.
ADVERTENCIA: In Windows XP el símbolo „Escritorio“ se muestra
posiblemente a través del botón „Inicio“.
2.) Haga clic en „Administrador de dispositivos“.
3.) Haga doble clic en „dispositivos de introducción (Human Interface Device)“
4.) Verifique que los dispositivos de introducción USB estén listados y no haya
delante de ellos un signo de admiración amarillo.
Si los dispositivos de introducción USB no se muestran o aparecen signos de
admiración amarillos, los dispositivos USB no están funcionando correctamente.
En este caso, póngase en contacto con el fabricante de su ordenador.
Medidas de seguridad
• No intente en ningún caso la reparación o mantenimiento de este sistema.
Deje cualquier trabajo de mantenimiento en manos de personal especializado.
• No haga cambios en el aparato. De lo contrario perderá la garantía que le
ampara.
• No utilice el aparato cerca del agua (p.ej. lavabos, bañeras o piscinas) y
manténgalo alejado de la humedad, líquidos que salpiquen, goteen o de la lluvia.
Uso según instrucciones:
• Teclado para uso personal.
• El dispositivo sólo se puede usar con las piezas originales correspondientes.
• El producto se utilizará siempre en espacios cerrados y secos.
• El uso según las instrucciones incluye un procedimiento de instalación según
las mismas instrucciones. El fabricante no se hace responsable de los daños
que pudieran derivarse de un uso inadecuado del producto.
Page 13

13
D
GB
F
E
I
Garantía
Este producto tiene una garantía de dos años a partir de la fecha de compra tanto para defectos de fabricación como de sus componentes.
Si precisa ayuda...
En caso de surgir cualquier problema técnico, acuda a los especialistas que le
proporcionarán todo tipo de soporte técnico. El número de nuestra línea Hotline,
se encuentra al dorso de estas instrucciones de manejo.
Page 14

14
D
GB
F
E
I
Introduzione
Congratulazioni per aver acquistato la nostra tastiera Comfort Combo Keyboard!
Grazie a questa tastiera dalle ottime rifiniture, il lavoro di routine al PC risulterà
estremamente più facile.
1. Caratteristiche del prodotto
• Comprensiva di appoggiamani dalle forme arrotondate
• Dal facile collegamento grazie all’interfaccia USB o PS/2
• La pressione sui tasti risulta semplice e piacevole
• Di ottima qualità
• Interfacce USB oppure PS/2
• Windows 95/98/2000/ME/NT/XP
NOTA BENE: ricordateVi che in caso di utilizzo del prodotto in ambiente Windows
95 / NT la modalità di collegamento mediante interfaccia USB non sarà suppor
-
tata.
2. Si trovano in dotazione:
• una tastiera con interfaccia USB
• un adattatore per interfaccia PS/2
• un manuale d’istruzioni
3. Collegamento
a) Collegamento del mouse mediante l’interfaccia USB
1. Collegate il connettore USB alla corrispettiva interfaccia USB del
Vostro computer. La funzione Plug&Play del Vostro sistema operativo rileverà
automaticamente la presenza di una nuova componente.
2. Il sistema operativo Vi richiederà eventualmente di inserire il CD-ROM
d’installazione Windows. Seguite le indicazione visualizzate sullo schermo.
NOTA BENE: ricordateVi che in caso di utilizzo del prodotto in ambiente Windows
95 / NT la modalità di collegamento mediante interfaccia USB non sarà suppor
-
tata.
b) Collegamento mediante l’interfaccia PS/2
1. Spegnete il Vostro computer.
2. Collegate l’adattatore PS/2 trovato in dotazione al connettore USB della
Vostra tastiera. Collegate quindi il connettore alla relativa interfaccia PS/2
del Vostro computer, contrassegnata generalmente in viola o con il simbolo
della tastiera.
3. Riaccendete il computer.
Page 15

15
D
GB
F
E
I
Precauzioni per la sicurezza
• Non riparate il dispositivo e non effettuatene la manutenzione da soli.
Per lavori di riparazione o manutenzione rivolgeteVi a personale competente
specializzato.
• Non apportate al dispositivo nessun tipo di modifica. In tal caso, perdereste
diritto ad ogni tipo di garanzia.
• Non utilizzate il dispositivo in prossimità d’acqua (p.es. in prossimità di
lavandini, vasche da bagno o piscine) e tenetelo lontano da luoghi umidi, da
spruzzi o gocce d’acqua, nonché dalla pioggia.
Uso appropriato dei dispositivi:
• Uso a scopo privato di tastiera per computer.
• È consentito utilizzare il dispositivo solo ed esclusivamente con i componenti
originali previsti.
• È consentito utilizzare il prodotto solo ed esclusivamente in ambienti chiusi,
nonché asciutti.
• Un uso appropriato del dispositivo implica un procedimento conforme alle
disposizioni di installazione. Il costruttore esclude ogni tipo di responsabilità
per danni derivanti da un uso improprio del dispositivo
Garanzia
Per questo prodotto concediamo una garanzia della durata di due anni a partire
dalla data di acquisto. La garanzia copre i difetti di fabbricazione, nonché quelli
derivanti dalle componenti integrate.
In caso di supporto tecnico …
Nel caso in cui dovessero verificarsi ulteriori problemi tecnici, Vi preghiamo di
contattare i nostri tecnici. A tale proposito, troverete sul retro di questo manuale
di istruzioni il numero del servizio di assistenza tecnica.
Page 16

Vers.2.0
 Loading...