


SY-7VBA133U
Motherboard
Quick Start Guide
Setup Installation
The SOYO CD Quick BIOS Hardware Introduction

SOYO™
SY-7VBA133U Motherboard
Socket 370 for Intel Pentium® & CeleronTM processors VIA VT82C694T AGP/PCI/ISA Motherboard 66/100/133 MHz Front Side Bus supported
ATX Form Factor
Copyright © 2002 by SOYO Computer Inc.
Trademarks:
SOYO is a registered trademark of SOYO Computer Inc. All trademarks are properties of their owners.
Product Rights:
All names of the product and corporate mentioned in this publication are used for identification purposes only. The registered trademarks and copyrights belong to their respective companies.
Copyright Notice:
All rights reserved. This manual has been copyrighted by SOYO Computer Inc. No part of this manual may be reproduced, transmitted, transcribed, translated into any other language, or stored in a retrieval system, in any form or by any means, such as by electronic, mechanical, magnetic, optical, chemical, manual or otherwise, without permission in writing from SOYO Computer Inc.
Disclaimer:
SOYO Computer Inc. makes no representations or warranties regarding the contents of this manual. We reserve the right to amend the manual or revise the specifications of the product described in it from time to time without obligation to notify any person of such revision or amend. The information contained in this manual is provided to our customers for general use. Customers should be aware that the personal computer field is subject to many patents.All of our customers should ensure that their use of our products does not infringe upon any patents. It is the policy of SOYO Computer Inc. to respect the valid patent rights of third parties and not to infringe upon or to cause others to infringe upon such rights.
Disclaimer:
Please be advised that some SOYO motherboards are designed with overclocking features and may allow users to run the components beyond manufacturer's recommended
specifications. Overclocking beyond manufacturer's specifications is not recommended nor endorsed by SOYO, Inc. and will void your manufacturer's warranty. Overclocking beyond manufacturer's specifications is not encouraged and should be assumed at the user's own risk. Unsafe overclocking can damage the user's system or cause serious personal injury. If the user is unsure or in doubt about overclocking, please seek professional advise. SOYO, Inc. is not responsible for any direct or indirect damage resulting from overclocking.
Restricted Rights Legend:
Use, duplication, or disclosure by the Government is subject to restrictions set forth in subparagraph (c)(1)(ii) of the Rights in Technical Data and Computer Software clause at 252.277-7013.
About This Guide:
This Quick Start Guide can help system manufacturers and end users in setting up and installing the motherboard. Information in this guide has been carefully checked for reliability; however, to the correctness of the contents there is no guarantee given. The information in this document is subject to amend without notice.
For further information, please visit our Web Site on the Internet. The address is
"http://www.soyo.com.tw".
7VBA133U Serial - Version 1.2 - Edition: September 2002
* These specifications are subject to amend without notice
2
SY-7VBA133U Quick Start Guide
1 Introduction
Congratulations on your purchase of the SY-7VBA133U Motherboard. This Quick Start Guide illustrates the steps for installing and setting up your new Motherboard.
This guide provides all users with the basic steps of Motherboard setting and operation. For further information, please refer to the SY-7VBA133U Motherboard User’s Manual that came with your Motherboard.
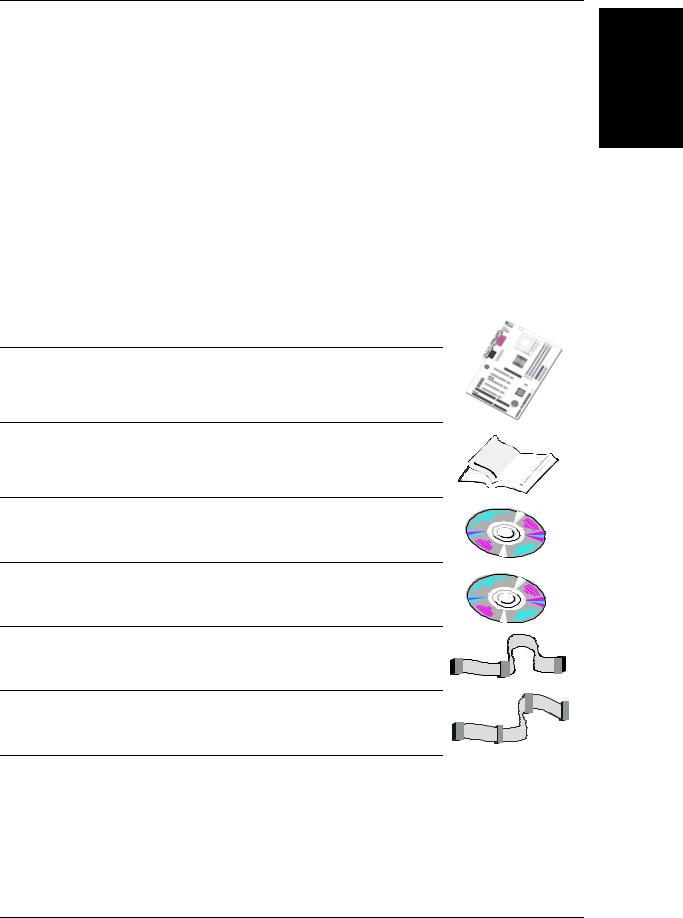
Unpacking
When unpacking the Motherboard, check for the following items:
The SY-7VBA133U VIAVT82C694TAGP/PCI/ISAMotherboard
The Quick Start Guide
The Installation CD-ROM
SOYO Bonus Pack CD-ROM
One IDE Device ATA 100 Flat Cable
One Floppy Disk Drive Flat Cable
Introduction
3

Introduction
SY-7VBA133U Quick Start Guide
SY-7VBA133U Motherboard Layout
 PS/2 KB PS/2 Mouse
Connector Connector
USB 1  USB 2
USB 2
PRT
COM A
|
CPUFAN |
1 |
3 |
|
Socket 370 |
COMB
JOYSTICK
LINE-OUT 
LINE-IN
MIC JACK
ATX Power |
SDRAM |
|
□ |
VT82C694T |
SDRAM |
1 |
1 |
IDE 1 IDE 2 |
|
AGP Slot |
|
Ac97
CODEC
JP10 |
BIOS |
|
3 |
||
|
||
1 |
Flash |
|
|
||
|
5 |
PCI Slot #1 |
|
|
|
3 |
1 |
|
|
JP5 |
3 |
CHAFAN |
|
PCI Slot #2 |
1 |
||
|
|||
|
|
1 |
4 |
PCI Slot #3 |
|
|
CDIN |
VT82C686B |
|
|
|
□ |
FDC1 |
|
|
PCI Slot #4 |
|
|
|
|
1 |
PCI Slot #5 |
|
3V |
|
USB3_4 |
|
Lithium |
|
||
|
ISA Slot #1 |
Battery |
|
|
|
|
|
HDD LED |
|
|
|
Speaker |
|
|
|
|
|
ACPI LED |
|
|
|
|
|
|
1 |
|
|
_ |
|
SIRCON |
ISA Slot #2 |
Power |
|
PWRBT |
|
|
LED |
+ |
Reset |
4

SY-7VBA133U Quick Start Guide
Key Features
Supports Intel® processors
-Celeron (up to 1GHz)
-Pentium® III (up to 1GHz)
-Tualatin (up to 1.4GHz)
Supports 66/100/133 MHz Front Side Bus Frequency
Chipset consists of the VT82C694T system controller and VT82C686B PCI to ISA bridge
Supports SDRAM and VC SDRAM Power failure resume
Supports Suspend to RAM Auto-detect CPU voltage
Easy CPU settings in BIOS with the “SOYO COMBO Setup”
PC99, ACPI
Ultra DMA33/66/100 (ATA 33/66/100)
Supports Wake-On-LAN (WOL) Power-on by modem and alarm Supports onboard hardware monitoring Support AC97 Audio
Supports multiple-boot function
AGP 2.0 Compliant;
AGP Universal Connector supports:
-1.5V and 3.3V AGP cards
-1X/2X/4X data transfer
3 x DIMM slots
2 x 16-bit ISA slots
5 x 32-bit bus mastering PCI slots
1 x 32-bit AGP slot
4 x USB ports onboard
1 x IrDA port
ATX power connector Supports VRM 8.5 S.P.E.C
Introduction
5

Installation
Hardware
SY-7VBA133U Quick Start Guide
2 Installation
To avoid damage to your Motherboard, please follow these simple rules while handling this equipment:
Before handling the Motherboard, ground yourself by touching on to an unpainted portion of the system's metal chassis.
Remove the Motherboard from its anti-static packaging. Hold the motherboard by the edges and avoid touching its components.
Check the Motherboard for damage. If any chip appears to be loose, press carefully to seat it firmly in its socket.
Follow the directions in this section which is designed to guide you through a quick and correct method to install your new SY-7VBA133U Motherboard. For detailed information, please refer to the SY-7VBA133U Motherboard User's Manual and Technical Reference online manual on the CD-ROM package that came with your Motherboard.
Gather and prepare all necessary components to complete the installation successfully:
Pentium® Socket370 processor with built-in CPU cooling fan (boxed type) SDRAM module(s)
Computer case with adequate power supply unit Monitor
PS/2 Keyboard
Pointing Device (PS/2 Mouse) Speaker(s) (optional)
Disk Drives: HDD, CD-ROM, Floppy drive…
External Peripherals: Printer, Plotter, and Modem (optional) Internal Peripherals: Modem and LAN cards (optional)
Note: 1. If you want to use an external speaker connected to "Line-out" port, please make sure to use an "amplified speaker" that can generate proper output sound volume.
6
SY-7VBA133U Quick Start Guide
Install the Motherboard
To perform the installation of your new SY-7VBA133U Motherboard, follow the steps below:
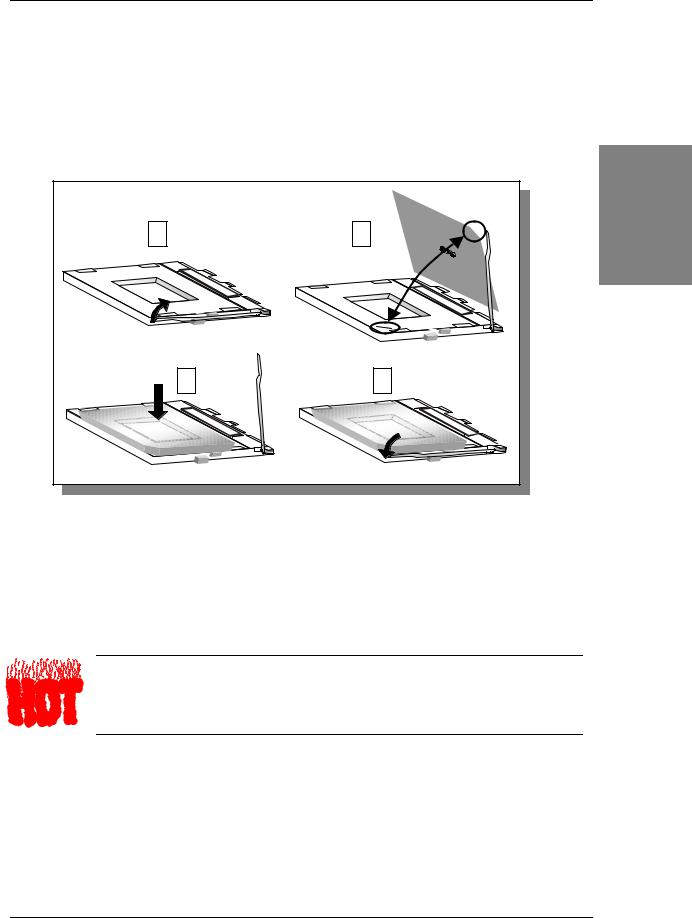
Step 1. CPU Installation
CPU Mount Procedure: To mount the Pentium ®, CeleronTM & Tualatin processor that you have purchased separately, follow these instructions.
1 |
|
|
|
|
|
|
|
|
|
2 |
|
|
|
|
|
|
|
|
|
Hardware Installation |
|
|
|
|
|
|
|
|
|
|
|
|
|
|
|
|
|
|
|
||
0 |
|
|
|
|
|
|
|
|
|
|
|
|
|
|
|
|
|
|
|
|
7 |
|
|
|
|
|
|
|
|
|
|
|
|
|
|
|
|
|
|
|
|
|
3 |
|
|
|
|
|
|
|
|
|
|
|
|
|
|
|
|
|
||
|
|
|
t |
|
|
|
|
|
|
|
|
|
|
|
|
|
|
|
||
|
|
|
|
e |
|
|
|
|
|
|
|
|
|
|
|
|
|
|
||
|
|
|
|
|
|
k |
|
|
|
|
|
|
|
|
|
|
|
|
|
|
|
|
|
|
|
|
|
c |
|
|
|
|
|
|
|
|
|
|
|
|
|
|
|
|
|
|
|
|
o |
|
0 |
|
|
|
|
|
|
|
|
|
||
|
|
|
|
|
|
|
|
|
S |
|
|
|
|
|
|
|
|
|
|
|
|
|
|
|
|
|
|
|
|
|
|
7 |
|
|
|
|
|
|
|
|
|
|
|
|
|
|
|
|
|
|
|
|
|
3 |
|
|
|
|
|
|
|
|
|
|
|
|
|
|
|
|
|
|
|
|
|
t |
|
|
|
|
|
|
|
|
|
|
|
|
|
|
|
|
|
|
|
|
|
e |
|
|
|
|
|
|
|
|
|
|
|
|
|
|
|
|
|
|
|
|
|
k |
|
|
|
||
|
|
|
|
|
|
|
|
|
|
|
|
|
|
|
|
c |
|
|
|
|
|
|
|
|
|
|
|
|
|
|
|
|
|
|
|
|
|
o |
|
|
|
|
|
|
|
|
|
|
|
|
|
|
|
|
|
|
|
|
|
S |
|
|
3 |
|
|
|
|
|
|
|
|
|
|
4 |
|
|
|
|
|
|
|
|
|
0 |
|
|
|
|
|
|
|
|
|
|
|
0 |
|
|
|
|
|
|
|
|
7 |
|
|
|
|
|
|
|
|
|
|
7 |
|
|
|
|
|
|
|||
|
|
3 |
|
|
|
|
|
|
|
|
|
3 |
|
|
|
|
|
|||
|
|
|
|
t |
|
|
|
|
|
|
|
|
|
t |
|
|
|
|
||
|
|
|
|
|
e |
|
|
|
|
|
|
|
|
|
e |
|
|
|
||
|
|
|
|
|
|
k |
|
|
|
|
|
|
|
|
|
k |
|
|
||
|
|
|
|
|
|
|
c |
|
|
|
|
|
|
|
|
|
c |
|
||
|
|
|
|
|
|
|
|
o |
|
|
|
|
|
|
|
|
|
o |
||
|
|
|
|
|
|
|
|
|
S |
|
|
|
|
|
|
|
|
|
|
S |
1.Lift the socket handle up to a vertical position.
2.Align the blunt edge of the CPU with the matching pinhole edge on the socket.
3.Seat the processor in the socket completely and without forcing.
4.Then close the socket handle to secure the CPU in place.
Remember to connect the CPU Cooling Fan to the appropriate power connector on the Motherboard. The fan is a key component that stabilizes the system. It prevents the equipment from overheating and prolongs the life of your CPU.
7
 Loading...