

Page 1
WARNING: Warning devices are strictly
4
WARNING: Warning devices are strictly
regulated and governed by Federal, State and
regulated and governed by Federal, State and
Municipal ordinances. These devices shall be
Municipal ordinances. These devices shall be
used ONLY on approved vehicles. It is the sole
used ONLY on approved vehicles. It is the sole
responsibility of the user of these devices to
responsibility of the user of these devices to
ensure compliance.
ensure compliance.
WINDSHIELD MODEL
ASSEMBLY INSTRUCTIONS
EP2SWS+(x) [single] EP2DWS+(x) [dual]
!
WARNING
This product contains high intensity LED
devices. To prevent eye damage, DO NOT
stare into light beam at close range.
2
FIRM
TRIM
HORIZONTAL
Check for proper installation:
1. Shroud is trimmed correctly.
2. All suction cups are pressed to
windshield as firmly as possible.
3. Unit is mounted horizontally.
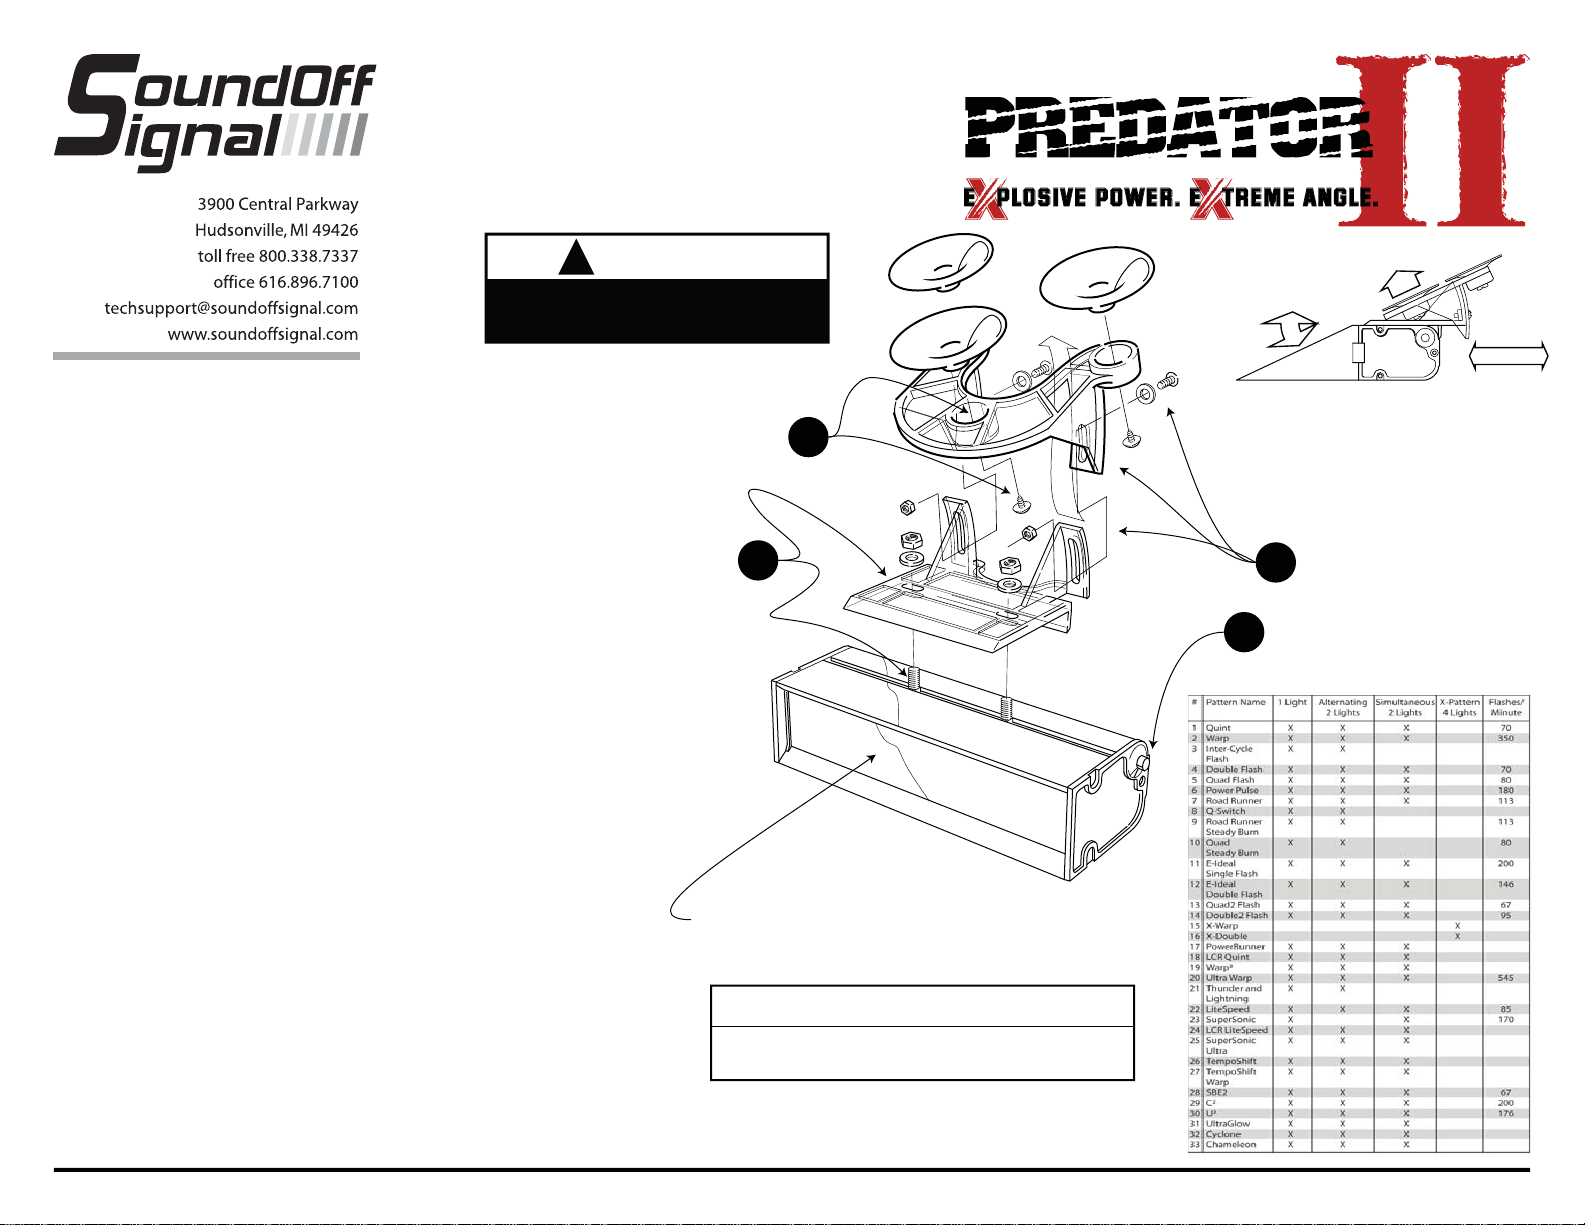
MOUNTING WINDSHIELD BRACKET
Important Note: DO NOT OVER TIGHTEN
NUTS as this could cause permanent damage
to bracket. DO NOT use an Aerobic thread
locking fluid. They are NOT compatible with
plastic used for the bracket.
1. Attach the bottom half of the Windshield
bracket to the PREDATOR II first. Align to
proper position and hand tighten the mounting
nuts plus 1/8 turn. (see #1)
2. Attach the three suction cups to the top half
of the Windshield mounting bracket using the
truss head self tapping screws provided in
kit. (see #2) Important: DO NOT
OVERTIGHTEN SCREWS!
3. Align the top and bottom half of the bracket
as shown (see #3). Connect the two halves
together using the 4mm nut, bolt and flat
washer provided. Loosely tighten nut and
bolt.
4. Install Windshield shroud following the
"Windshield Shroud Instructions".
5. Hold PREDATOR II in place and adjust the
angle of the bracket to the proper position.
Proper position is when light is level
(horizontal). HAND TIGHTEN the adjustment
screws plus 1/8 of a turn.
6. Hold PREDATOR II in desired location and
press the three suction cups firmly against the
windshield.
OPERATING INSTRUCTIONS
1. Plug the PREDATOR II power
cord into the vehicle cigarette
lighter plug.
Note: The PREDATOR II
protection fuse is located in the
nose of the cigarette lighter plug
(not shown). Unscrew metal
retaining ring to expose fuse.
2. To activate the PREDATOR II
push the red button (#4) on the
left (driver's side) of the unit.
3. To deactivate the PREDATOR II
push and HOLD the red button
until unit turns off.
4. The PREDATOR II can generate
33 different light patterns (see
table at right). To change light
patterns, momentarily push the
red button, A, while the unit is
operating. Each push of the red
button will advance the
PREDATOR II to the next
pattern. When desired pattern is
reached release red button. That
pattern will be stored in the
PREDATOR II memory and will
automatically come up every
time the unit is turned on.
1
NOTE: Illustration shows Dual Windshield Model - EP2DWS+(x)
Replacement Parts / Accessories
PPRDWBRKT PREDATOR Windshield Bracket w/ Suction Cups
Optional Mounting Brackets
PZBKT248 Z Bracket for Mounting to Headliner - Permanent Mount
PPRDGMBRKT PREDATOR Permanent Glass Mount Kit w/ Adhesive
4
3
EP2xWS+(x) 4.08
Page 2
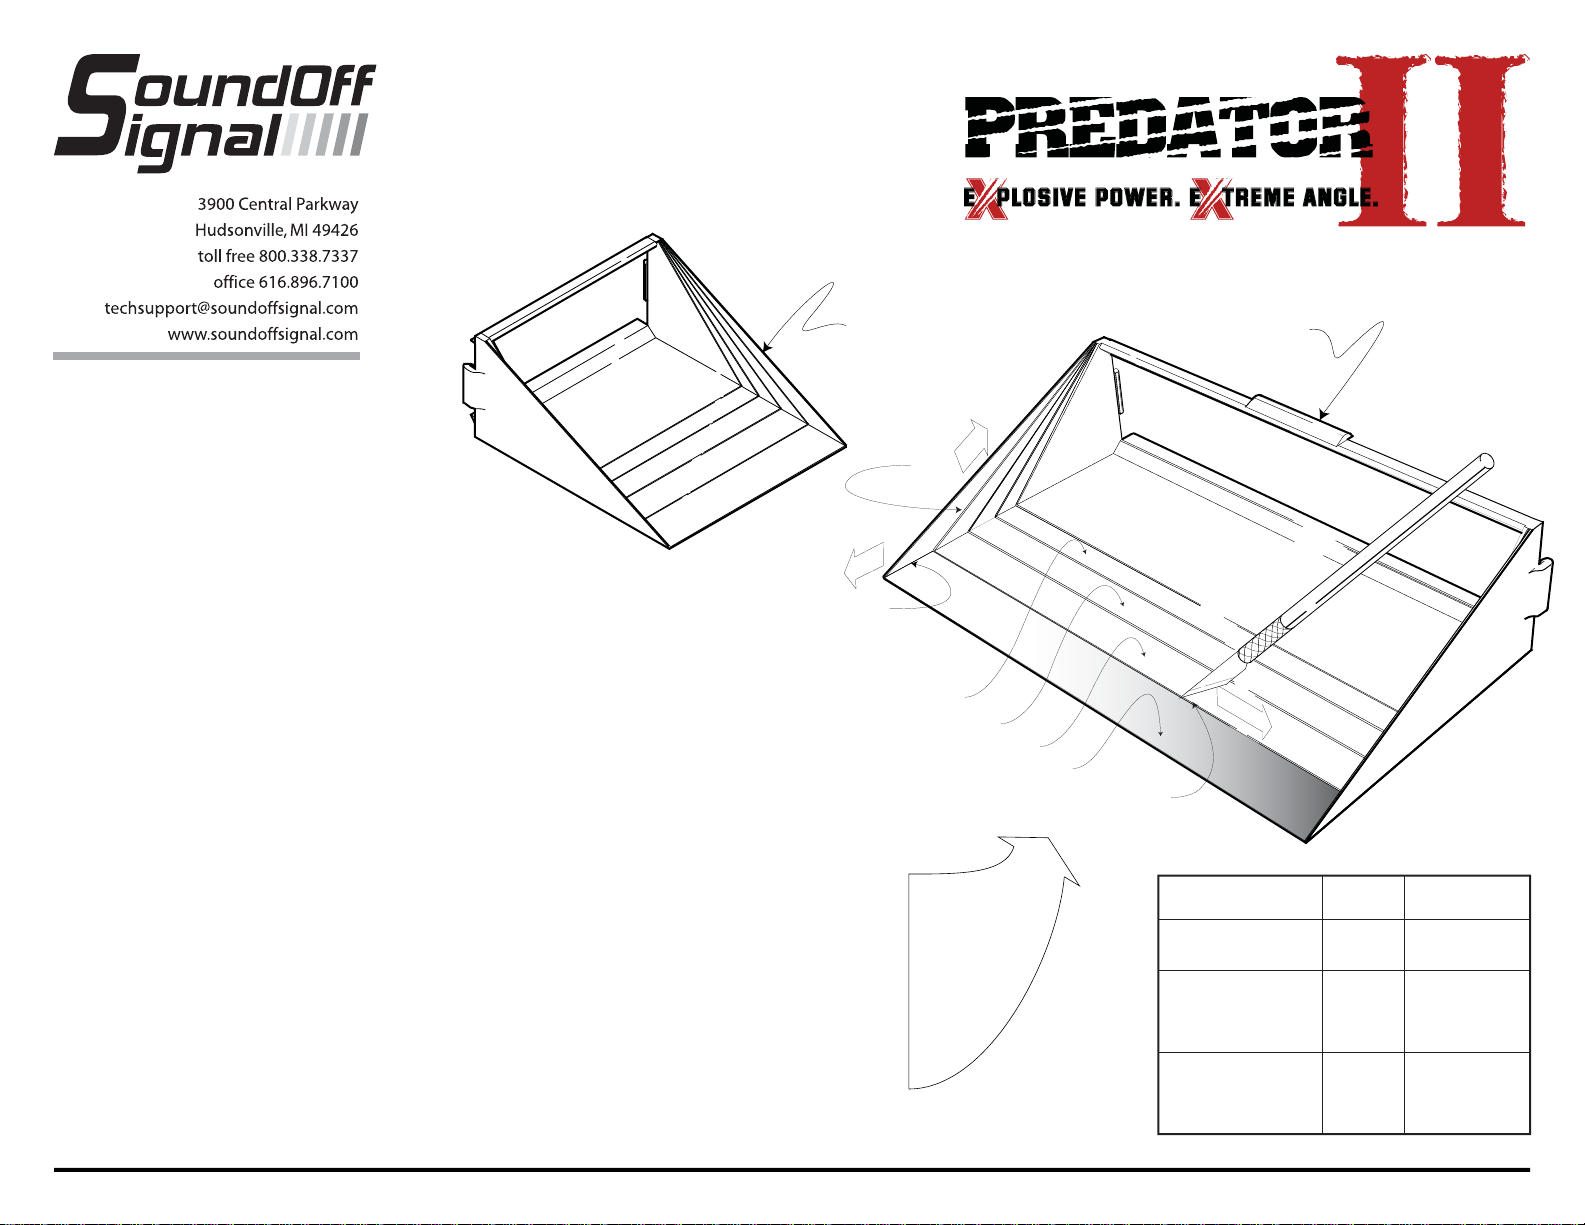
WINDSHIELD SHROUD
MOUNTING INSTRUCTIONS
Single (PPRDWSSWS), Dual (PPRDWSDWS)
WARNING: Warning devices are strictly
regulated and governed by Federal, State and
Municipal ordinances. These devices shall be
used ONLY on approved vehicles. It is the sole
responsibility of the user of these devices to
ensure compliance.
MOUNTING SHROUD
1. Align shroud so that it is square to front face of the
PREDATOR II Light.
2. Push shroud onto PREDATOR II Light. The side
mounting tabs will snap lock it onto the light. See figure 1
Note: The dual shroud has a support tab on the top
and bottom that need to be on the outside of the
PREDATOR II Light housing when shroud is snapped in place.
REMOVING SHROUD
1. Place your thumb on the inside of one of the
sidewalls of the shroud near the mounting clip.
2. Gently push out on the side wall and then
pull back. Mounting clip should disengage
3. Repeat steps #1 and #2 for other side.
ADJUSTING ANGLE OF SHROUD
The shroud comes with built-in guide lines that are used
to adjust the angle to better fit the windshield. See figure 1.
The shroud is produced with a 25o windshield angle - removal
of each section allows 5o adjustment to windshield angle.
ADJUSTING SHROUD
See Chart A for a list of vehicles commonly used by
emergency personnel and the recommended number of
shroud sections that need to be removed for proper fit.
For vehicles not listed, hold the PREDATOR II (with shroud
installed) against the windshield near the final mount position. If
the unit is not level, the angle must be adjusted by removing a
section of the shroud. This must be done one shroud
section at a time and unit then retested for fit.
SHROUD SECTION REMOVAL
Tools Required: Sharp knife.
Procedure
Note: It is strongly recommended that only
one section at a time is removed and unit is
tested for fit in the mount position against the
windshield.
1. Place shroud on firm surface (work bench or
similar) and, using a sharp knife, score along
bottom guide crease. The score should be
about 1/2 the thickness of the plastic and
can be made easily with several light passes
of the knife. DO NOT ATTEMPT TO CUT
ENTIRELY THROUGH THE SHROUD.
2. Score from the first guide crease forward (to
front of shroud) along both side walls.
3. Flex bottom piece of section "A" until it
breaks free. Always remove bottom,
rectangular section before removing the side
triangles.
4. Score along both side guide creases.
5. Flex each side piece until it breaks free.
6. Check shroud for correct position and repeat
steps 1-5 as necessary until correct fit is
achieved.
Single Shield
4
2
D
C
B
A
Dual Shield
1
Vehicle Windshield Shroud sections
Model (2002-03) Angle to be removed
CHRYSLER
Intrepid 25
FORD
Crown Victoria 35
Explorer 30
Expedition 35
GENERAL MOTORS
Camaro 25
Impala 28
Tahoe 40
o
o
A and B
o
o
o
NONE
o
A
o
A, B, and C
NONE
A
A and B
EP2xWS+(x) 4.08
 Loading...