

Page 1
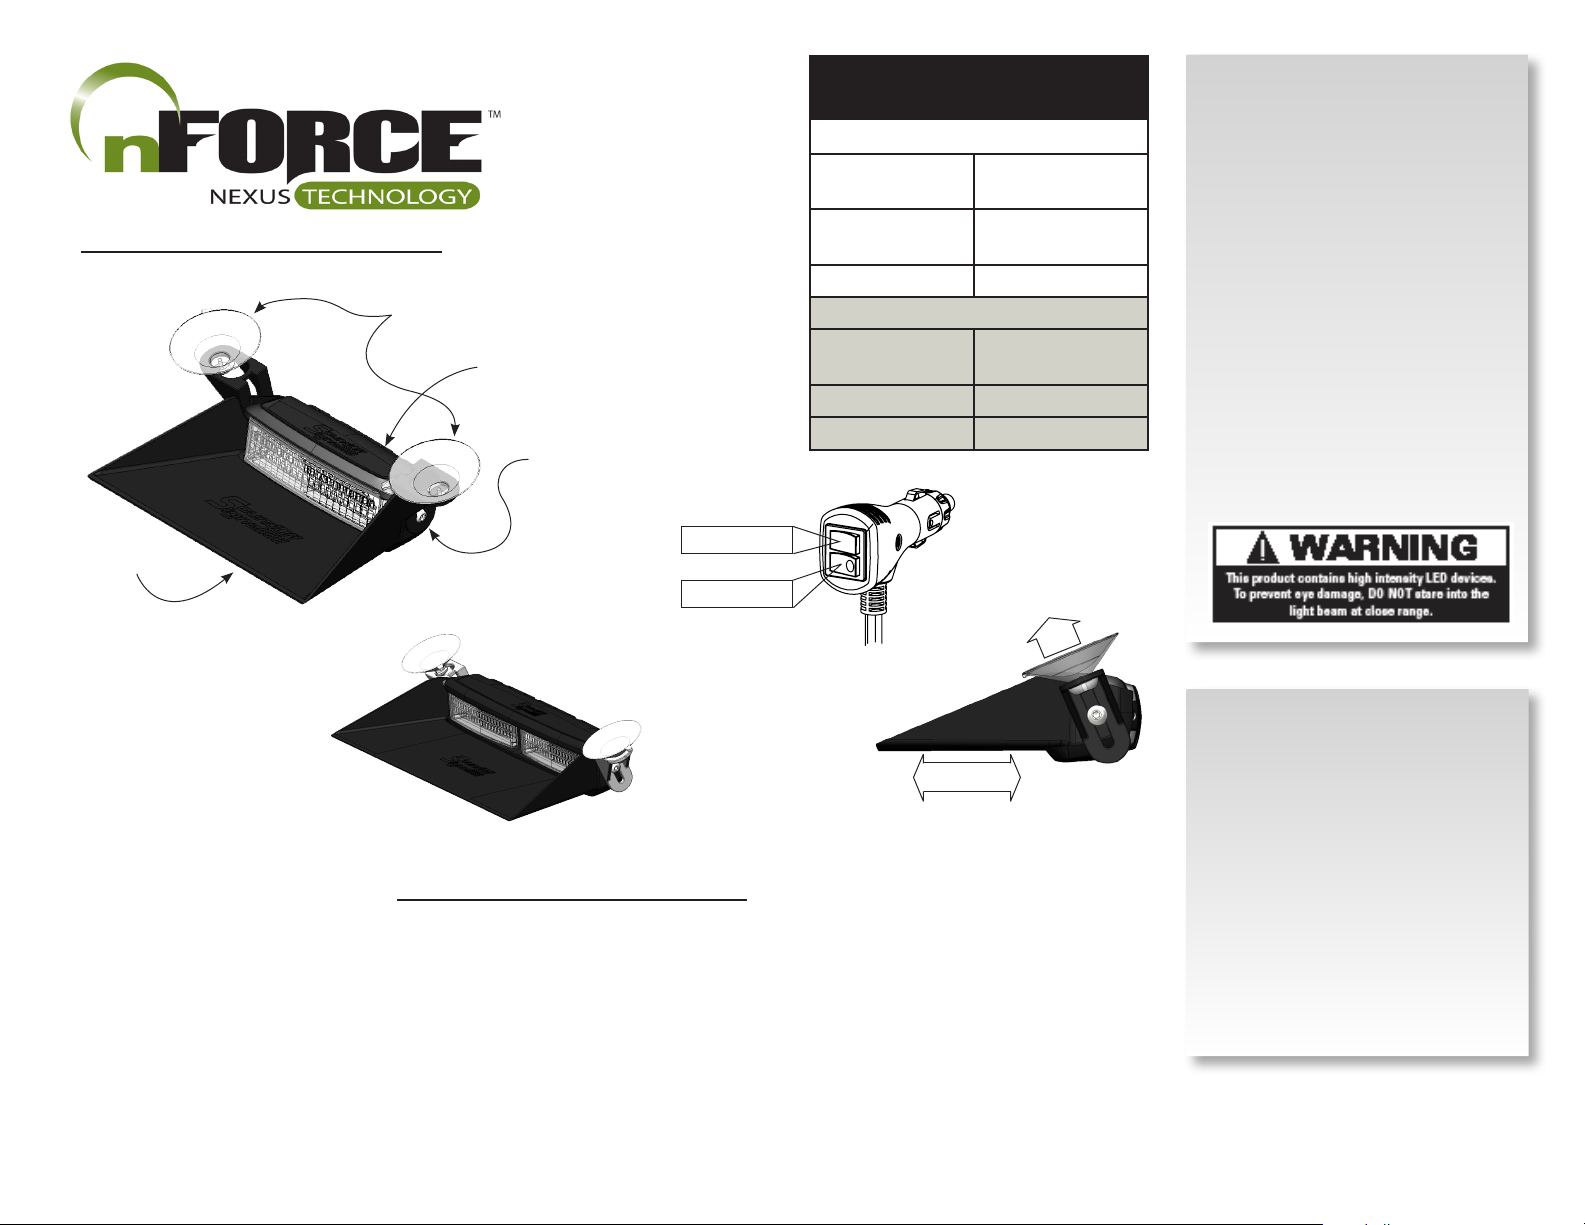
SAE CLASS 1 WINDSHIELD MOUNTS
WINSHIELD SHROUD
SINGLE WINDSHIELD MOUNT NEXUS
INSTALL SUCTION CUPS BY INSERTING BASE
OF CUP THROUGH THE WIDE HOLE IN BRACKET
AND PULLING TOWARD SMALL HOLE.
LIGHT ASSEMBLY
SLIGHTLY LOOSEN SCREW
TO ADJUST UNIT BUT
DO NOT REMOVE
POWER ON/ OFF
PATTERN
CIGARETTE PLUG
TECHNICAL
SPECIFICATIONS
WINDSHIELD MOUNT NEXUS
Single Mount
Dimensions:
Double Mount
Dimensions:
Input Voltage: 10 - 16 Vdc
CURRENT CONSUMPTION
6, 12 Split &
18 Tri-Color
9 LED Single Color <1.5A @ 12.8 Vdc
12 LED Single Color <2.0A @12.8 Vdc
6.80”L x 1.43”H x
5.00”D
11.35”L x 1.43”H x
5.00”D
<1.0A @12.8 Vdc
FIRM
INSTALLATION:
Windshield should be clean and free
of grease or oil. The placement of the
windshield mount Nexus™ should
not restrict driver visibility and the
unit should be placed so that air bag
deployment will not be restricted. The
best place for unit is immediately
behind the rear-view mirror.
1) Press suction cups into the side
yokes of the light as shown in the
illustration.
2) Lightly moisten suction cups and
press unit rmly in place by pressing
the domed shape on the back of
each cup.
Please see reverse for
Technical Specifications
DOUBLE WINDSHIELD MOUNT NEXUS
Important Information:
• Warning devices are strictly regulated and governed by Federal, State and Municipal ordinances.
These devices shall be used ONLY on approved vehicles. It is the sole responsibility of the user of these
devices to ensure compliance.
• DO NOT connect this device to a strobe power supply. This product is self-contained and does not
require an external power supply.
To review our Limited Warranty Statement & Return Policy for this or any SoundOff Signal product please visit our website at www.soundoffsignal.com and select the “Warranty & Returns”
link along the left column of our home page. If you have questions regarding this product please contact Technical Services, Monday - Friday, 8 am to 5 pm at 1.800.338.7337, press #4 to
skip the automated message. Questions or comments that do not require immediate attention may be emailed to techsupport@soundoffsignal.com.
1.800.338.7337. / www.soundoffsignal.com / Thank you for trusting us with your safety!
HORIZONTAL
CHECK FOR PROPER INSTALLATION:
1. All suction cups are pressed to windshield
as firmly as possible.
2. Unit is mounted horizontally.
3. Shroud fits tights against windshield.
ADJUSTMENT:
1) Slightly loosen, but DO NOT REMOVE,
pivot screws on each side of unit.
2) Slide light up until all four edges on shroud
are in contact with windshield.
3) Pivot light so that unit will project a
horizontal pattern
4) Retighten pivot screws. CAUTION! DO
NOT OVERTIGHTEN SCREWS AS UNIT CAN
BE DAMAGED.
ENFSLXWS 7.12
Page 2
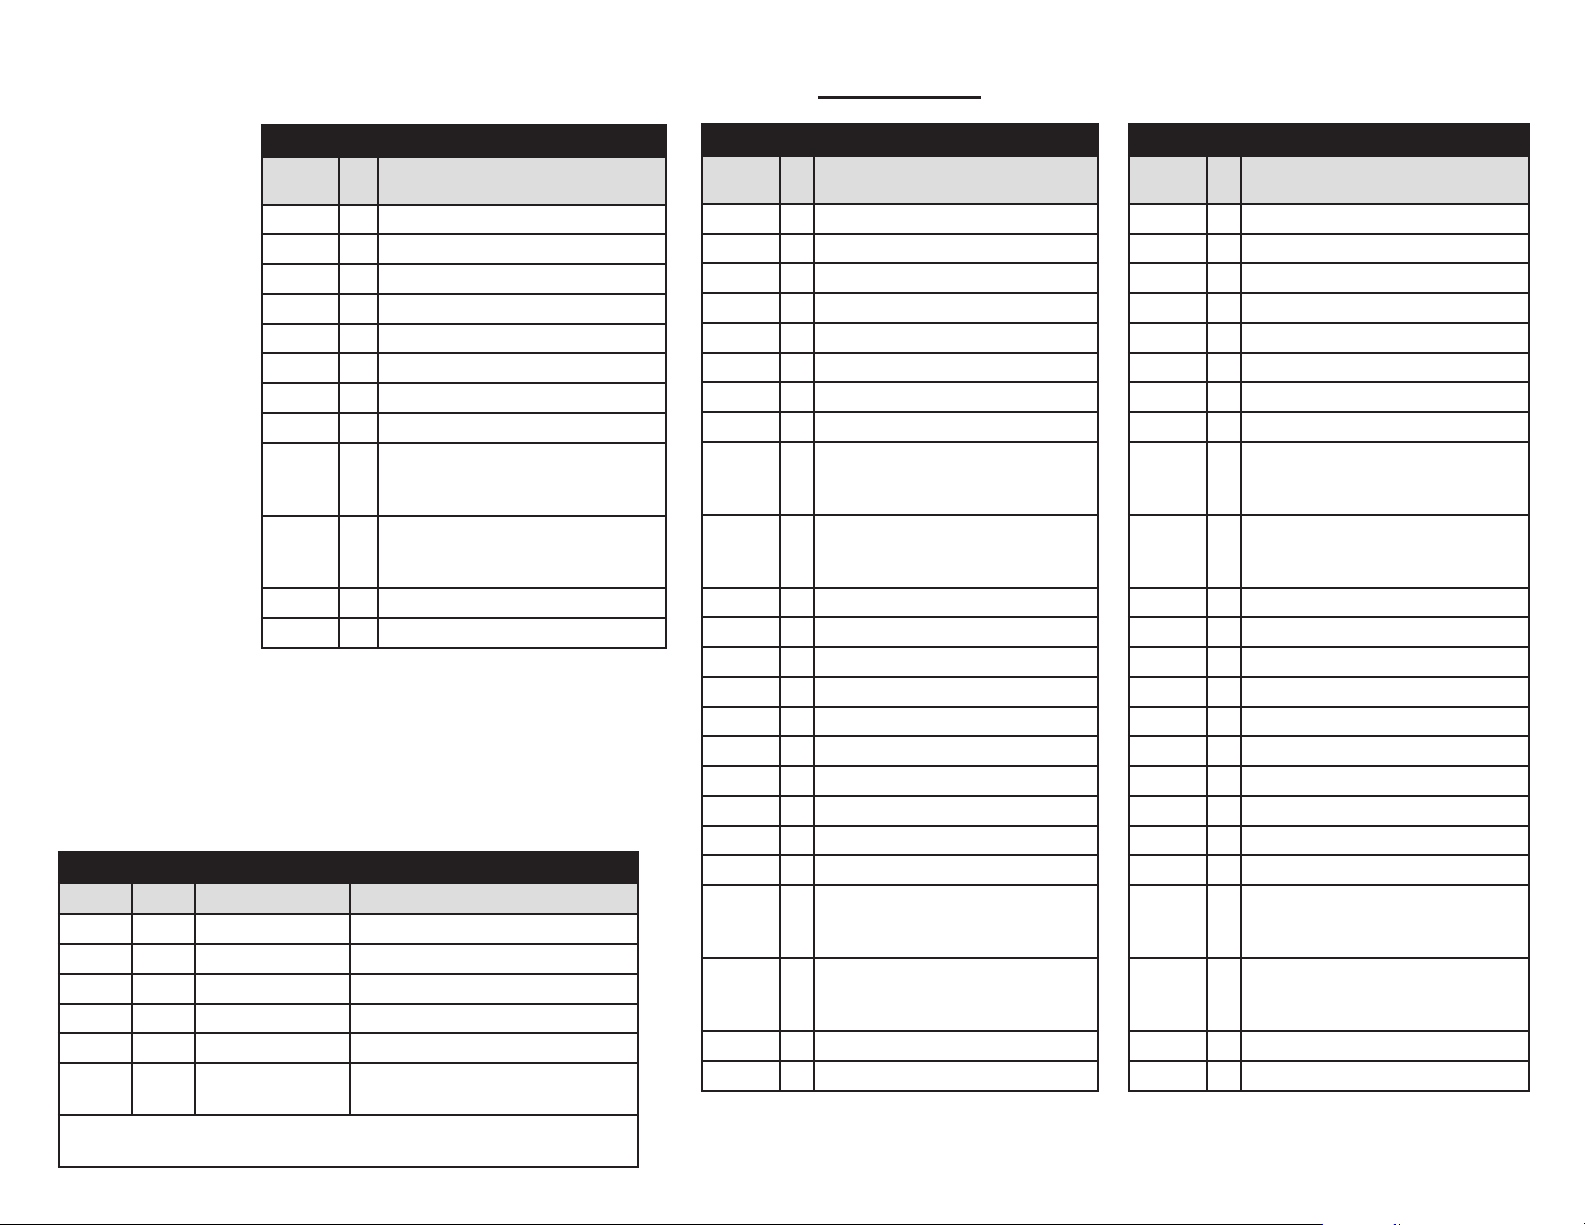
PATTERN LIST
1 COLOR MODULE PATTERNS
# OF
COLORS
# NAME
1 1 QUINT
2 WARP
3 INTER-CYCLE
4 DOUBLE
5 QUAD
6 POWER PULSE
7 ROAD RUNNER
8 Q-SWITCH
STEADY-BURN DRIVER ROADRUNNER
9
(SEQUENCE TYPE 1: STEADY BURN,
SEQUENCE TYPE 2: ROADRUNNER)
STEADY-BURN DRIVER TITLE 13 QUAD
10
(SEQUENCE TYPE 1: STEADY BURN,
SEQUENCE TYPE 2: TITLE 13 QUAD)
11 QUAD 2
12 DOUBLE 2
OPERATION:
Electrical Connections & Flash Pattern Selection:
See diagram on page 1 for Power ON, Power OFF and Pattern SELECT switch
positions. Turn the light on by pressing the Power ON button.
The pattern select switch will allow you to change various settings on the
module. Reference the table below.
SECONDS USER INTERFACE
FROM TO VISUAL FEEDBACK ACTION TAKEN
0 1 STEADY-HIGH (60%) FORWARD ONE PATTERN
1 2 STEADY-LOW (30%) BACKWARD ONE PATTERN
2 3 OFF COLOR SWAP (OFF OR ON )
3 4 STEADY - HIGH SEQUENCE TYPE (1 OR 2)
4 5 STEADY - LOW RESET TO PATTERN 1
5 6 OFF
If held longer than 6 seconds, the light will go back to flashing the current
pattern and no action will be taken.
FACTORY RESET (PATTERN 1, COLOR
SWAP: OFF, SEQUENCE TYPE: 1)
2 COLOR MODULE PATTERNS
# OF
COLORS
# NAME
2 1 QUINT
2 WARP
3 INTER-CYCLE
4 DOUBLE
5 QUAD
6 POWER PULSE
7 ROAD RUNNER
8 Q-SWITCH
STEADY-BURN DRIVER ROADRUNNER
9
(SEQUENCE TYPE 1: STEADY BURN,
SEQUENCE TYPE 2: ROADRUNNER)
STEADY-BURN DRIVER TITLE 13 QUAD
10
(SEQUENCE TYPE 1: STEADY BURN,
SEQUENCE TYPE 2: TITLE 13 QUAD)
11 QUAD 2
12 DOUBLE 2
1 13 QUINT
14 WARP
15 INTER-CYCLE
16 DOUBLE
17 QUAD
18 POWER PULSE
19 ROAD RUNNER
20 Q-SWITCH
STEADY-BURN DRIVER ROADRUNNER
21
(SEQUENCE TYPE 1: STEADY BURN,
SEQUENCE TYPE 2: ROADRUNNER)
STEADY-BURN DRIVER TITLE 13 QUAD
22
(SEQUENCE TYPE 1: STEADY BURN,
SEQUENCE TYPE 2: TITLE 13 QUAD)
23 QUAD 2
24 DOUBLE 2
3 COLOR MODULE PATTERNS
# OF
COLORS
# NAME
3 1 QUINT
2 WARP
3 INTER-CYCLE
4 DOUBLE
5 QUAD
6 POWER PULSE
7 ROAD RUNNER
8 Q-SWITCH
STEADY-BURN DRIVER ROADRUNNER
9
(SEQUENCE TYPE 1: STEADY BURN,
SEQUENCE TYPE 2: ROADRUNNER)
STEADY-BURN DRIVER TITLE 13 QUAD
10
(SEQUENCE TYPE 1: STEADY BURN,
SEQUENCE TYPE 2: TITLE 13 QUAD)
11 QUAD 2
12 DOUBLE 2
2 13 QUINT
14 WARP
15 INTER-CYCLE
16 DOUBLE
17 QUAD
18 POWER PULSE
19 ROAD RUNNER
20 Q-SWITCH
STEADY-BURN DRIVER ROADRUNNER
21
(SEQUENCE TYPE 1: STEADY BURN,
SEQUENCE TYPE 2: ROADRUNNER)
STEADY-BURN DRIVER TITLE 13 QUAD
22
(SEQUENCE TYPE 1: STEADY BURN,
SEQUENCE TYPE 2: TITLE 13 QUAD)
23 QUAD 2
24 DOUBLE 2
ENFSLXWS 7.12
 Loading...