

Page 1

™
Elm
Extended User guide
Page 2

Contents
Getting started..............................................................................5
Phone overview...................................................................................6
Turning on the phone..........................................................................7
Help....................................................................................................8
Charging the battery...........................................................................8
Maximizing battery performance..........................................................9
Screen icons.....................................................................................10
Menu overview..................................................................................11
Navigation.........................................................................................12
Memory............................................................................................13
Phone language................................................................................14
Entering text......................................................................................14
Calling..........................................................................................16
Making and answering calls..............................................................16
Contacts ..........................................................................................18
Speed dial.........................................................................................20
More calling features.........................................................................21
Imaging .......................................................................................25
Viewfinder and camera keys..............................................................25
Using the still camera........................................................................25
Using the video camera.....................................................................27
Working with photos.........................................................................27
Viewing and tagging photos..............................................................27
Using photos.....................................................................................28
Printing photos..................................................................................28
Using web albums............................................................................29
Accessing videos in your phone........................................................29
Music ..........................................................................................31
Stereo portable handsfree.................................................................31
Music player......................................................................................31
Playlists.............................................................................................33
SensMe™ technology.......................................................................33
Audio books......................................................................................34
Buy Now...........................................................................................34
PlayNow™ application......................................................................34
TrackID™ application .......................................................................35
Online music and video clips.............................................................35
Radio ...............................................................................................35
Recording sound ..............................................................................36
2
This is an Internet version of this publication. © Print only for private use.
Page 3

Transferring and handling content...........................................37
Organizing your content....................................................................37
Copyright-protected content.............................................................37
Handling content in the phone..........................................................37
Sending content to another phone....................................................38
Connecting your phone to a computer..............................................38
Transferring content to and from a computer....................................40
Phone name.....................................................................................41
Using Bluetooth™ wireless technology..............................................41
Backing up and restoring..................................................................42
Updating your phone.................................................................44
Updating your phone using Sony Ericsson PC Suite..........................44
Updating your phone wirelessly.........................................................44
Messaging...................................................................................45
Text and picture messages...............................................................45
Conversations...................................................................................46
Voice messages................................................................................46
Email.................................................................................................46
Internet .......................................................................................50
To access the web browser toolbar..................................................50
Web browser shortcuts.....................................................................50
Bookmarks.......................................................................................50
History pages....................................................................................51
More browser features......................................................................51
Internet settings................................................................................51
Modem functionality..........................................................................52
Internet security and certificates........................................................54
File transfers......................................................................................54
Web feeds........................................................................................54
Facebook™ application....................................................................56
Twitter™ application.........................................................................56
Connected home........................................................................57
Wi-Fi™..............................................................................................57
DLNA™............................................................................................57
GPS..............................................................................................59
Using GPS........................................................................................59
Google Maps™ for mobile................................................................60
Tracker.............................................................................................60
Synchronizing.............................................................................62
Synchronization options in Sony Ericsson PC Suite...........................62
Synchronizing using SyncML™.........................................................63
Synchronizing using a Microsoft® Exchange Server..........................63
3
This is an Internet version of this publication. © Print only for private use.
Page 4

Synchronizing using a computer.......................................................64
Synchronizing using an Internet service.............................................64
More features.............................................................................65
Flight mode.......................................................................................65
Alarms..............................................................................................65
Calendar...........................................................................................66
Notes................................................................................................66
Tasks................................................................................................67
Profiles..............................................................................................67
Time and date...................................................................................67
Themes.............................................................................................68
Main menu layout..............................................................................68
Screen orientation.............................................................................68
Ringtones..........................................................................................68
Games..............................................................................................69
Applications......................................................................................69
Antivirus............................................................................................69
PIN codes.........................................................................................70
Keypad lock......................................................................................71
IMEI number.....................................................................................71
Troubleshooting.........................................................................72
Common questions...........................................................................72
Error messages.................................................................................74
Legal information.......................................................................75
Index............................................................................................77
4
This is an Internet version of this publication. © Print only for private use.
Page 5

Getting started
Important information
Please read the Important information leaflet before you use your mobile phone.
5
This is an Internet version of this publication. © Print only for private use.
Page 6
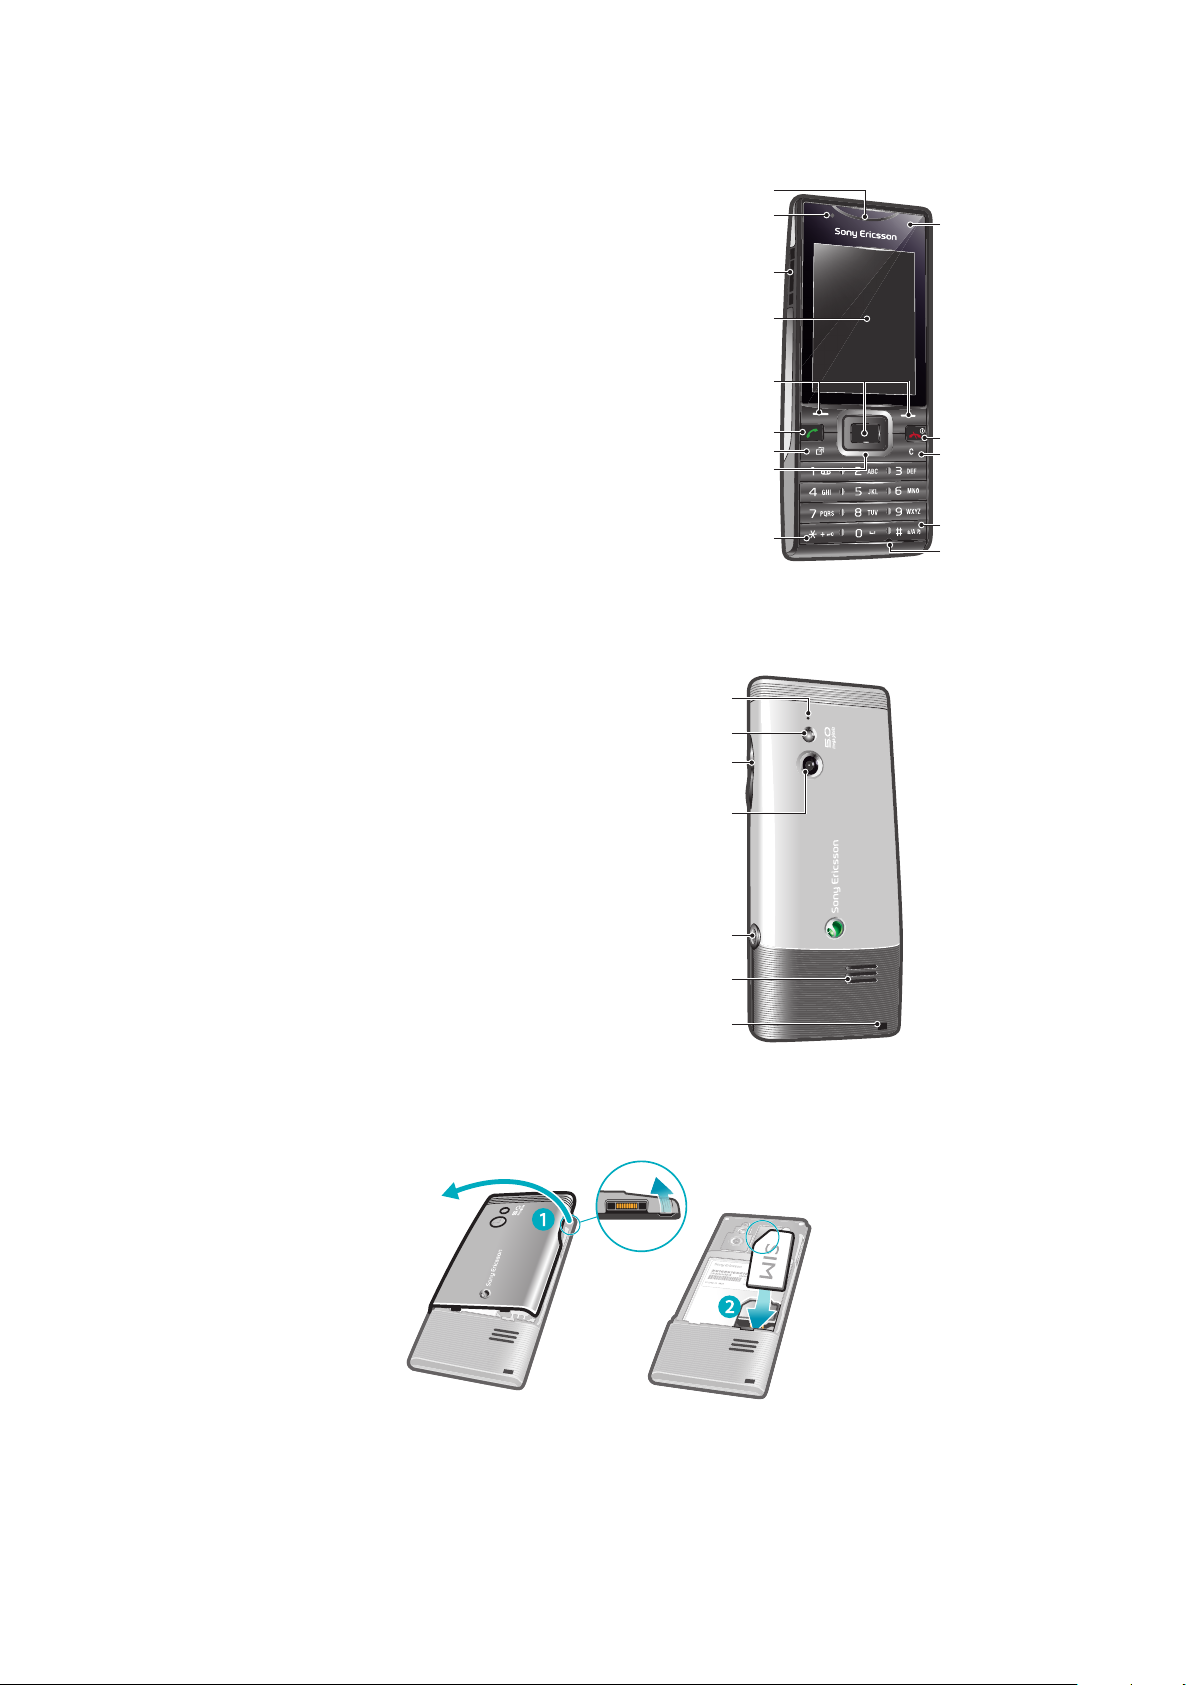
Phone overview
1
11
12
13
14
10
2
3
4
5
6
7
9
8
15
17
16
18
19
20
21
1 Ear speaker
2 Light sensor
3 Connector for charger, handsfree and USB cable
4 Screen
5 Selection keys
6 Call key
7 Activity menu key
8 Navigation key
9 Keylock key
10 Video call camera*
11 End key, On/off key
12 C key (Clear)
13 Silent key
14 Microphone
15 Microphone
16 Flashlight
17 Volume, digital zoom key
18 Main camera lens
19 Camera key
20 Speaker
21 Strap hole
* The video call camera may not be available on your phone.
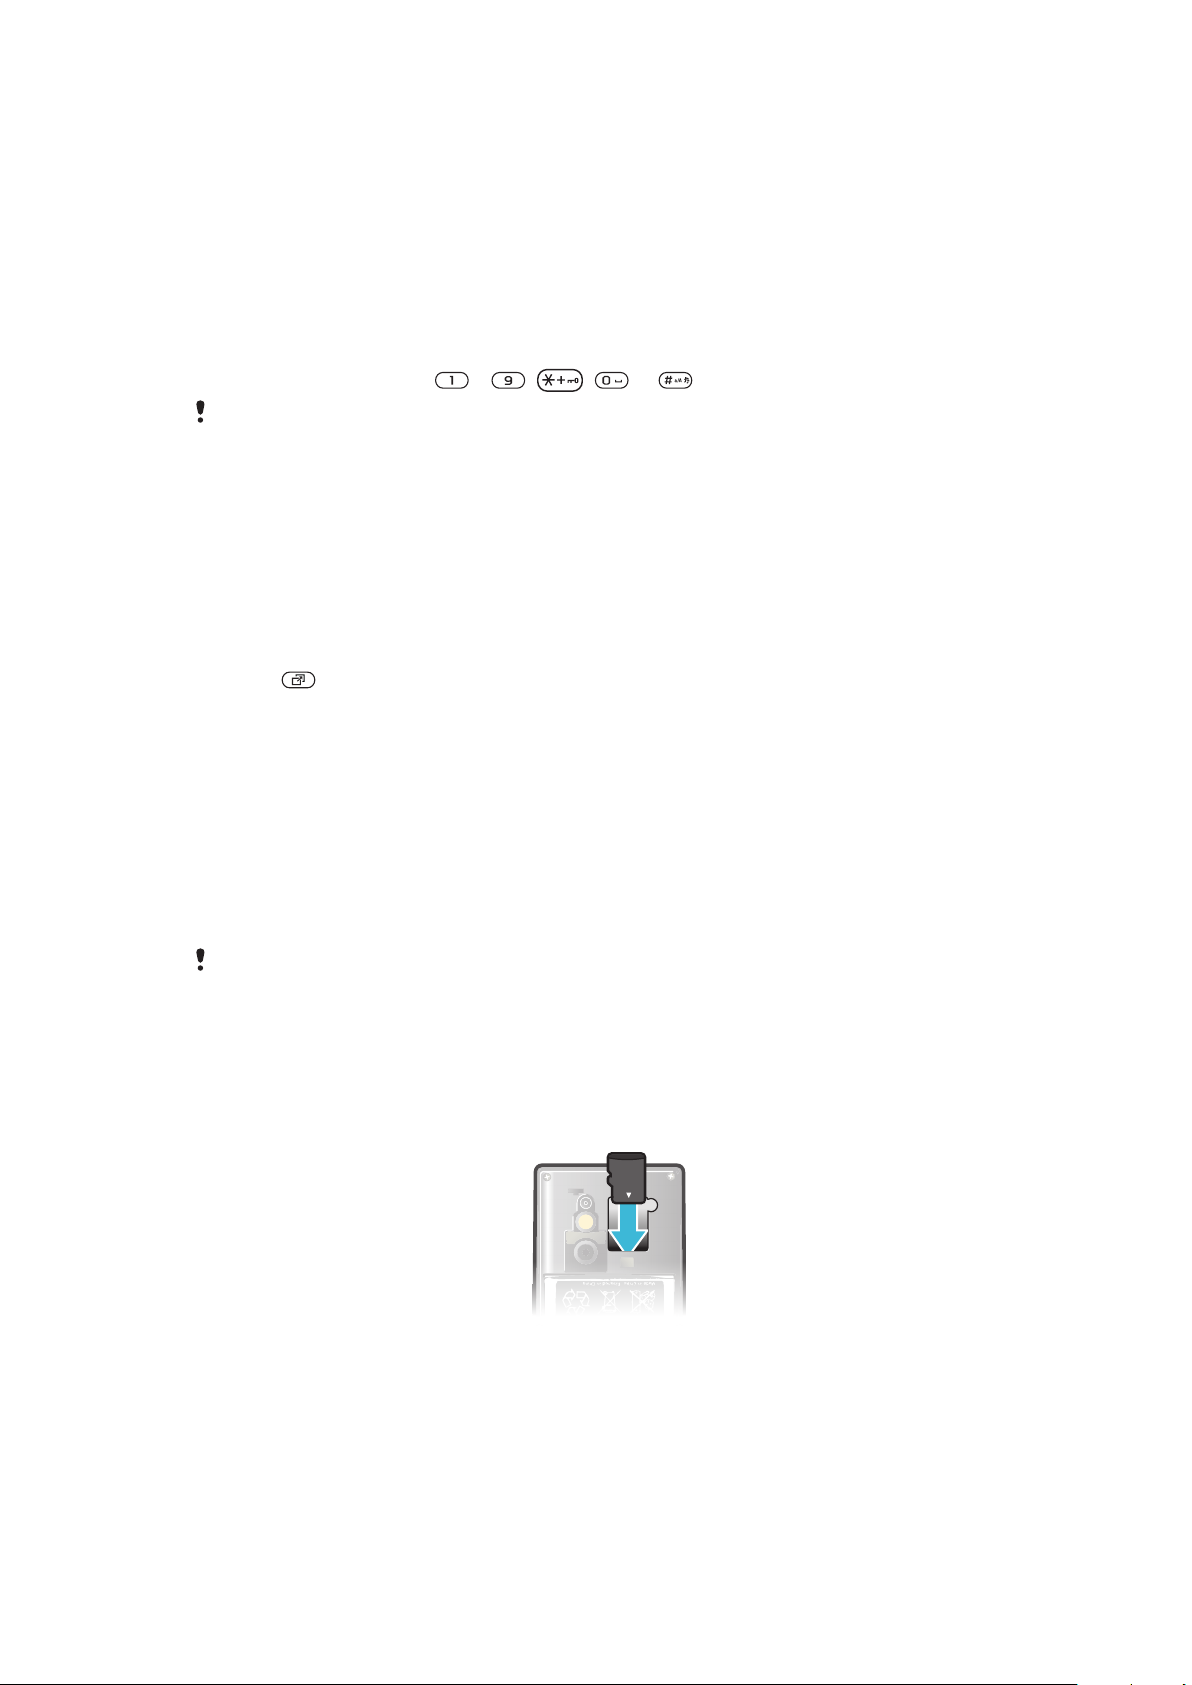
To insert the SIM card
1
Remove the battery cover.
2
Slide the SIM card into its holder with the gold-coloured contacts facing down.
This is an Internet version of this publication. © Print only for private use.
6
Page 7
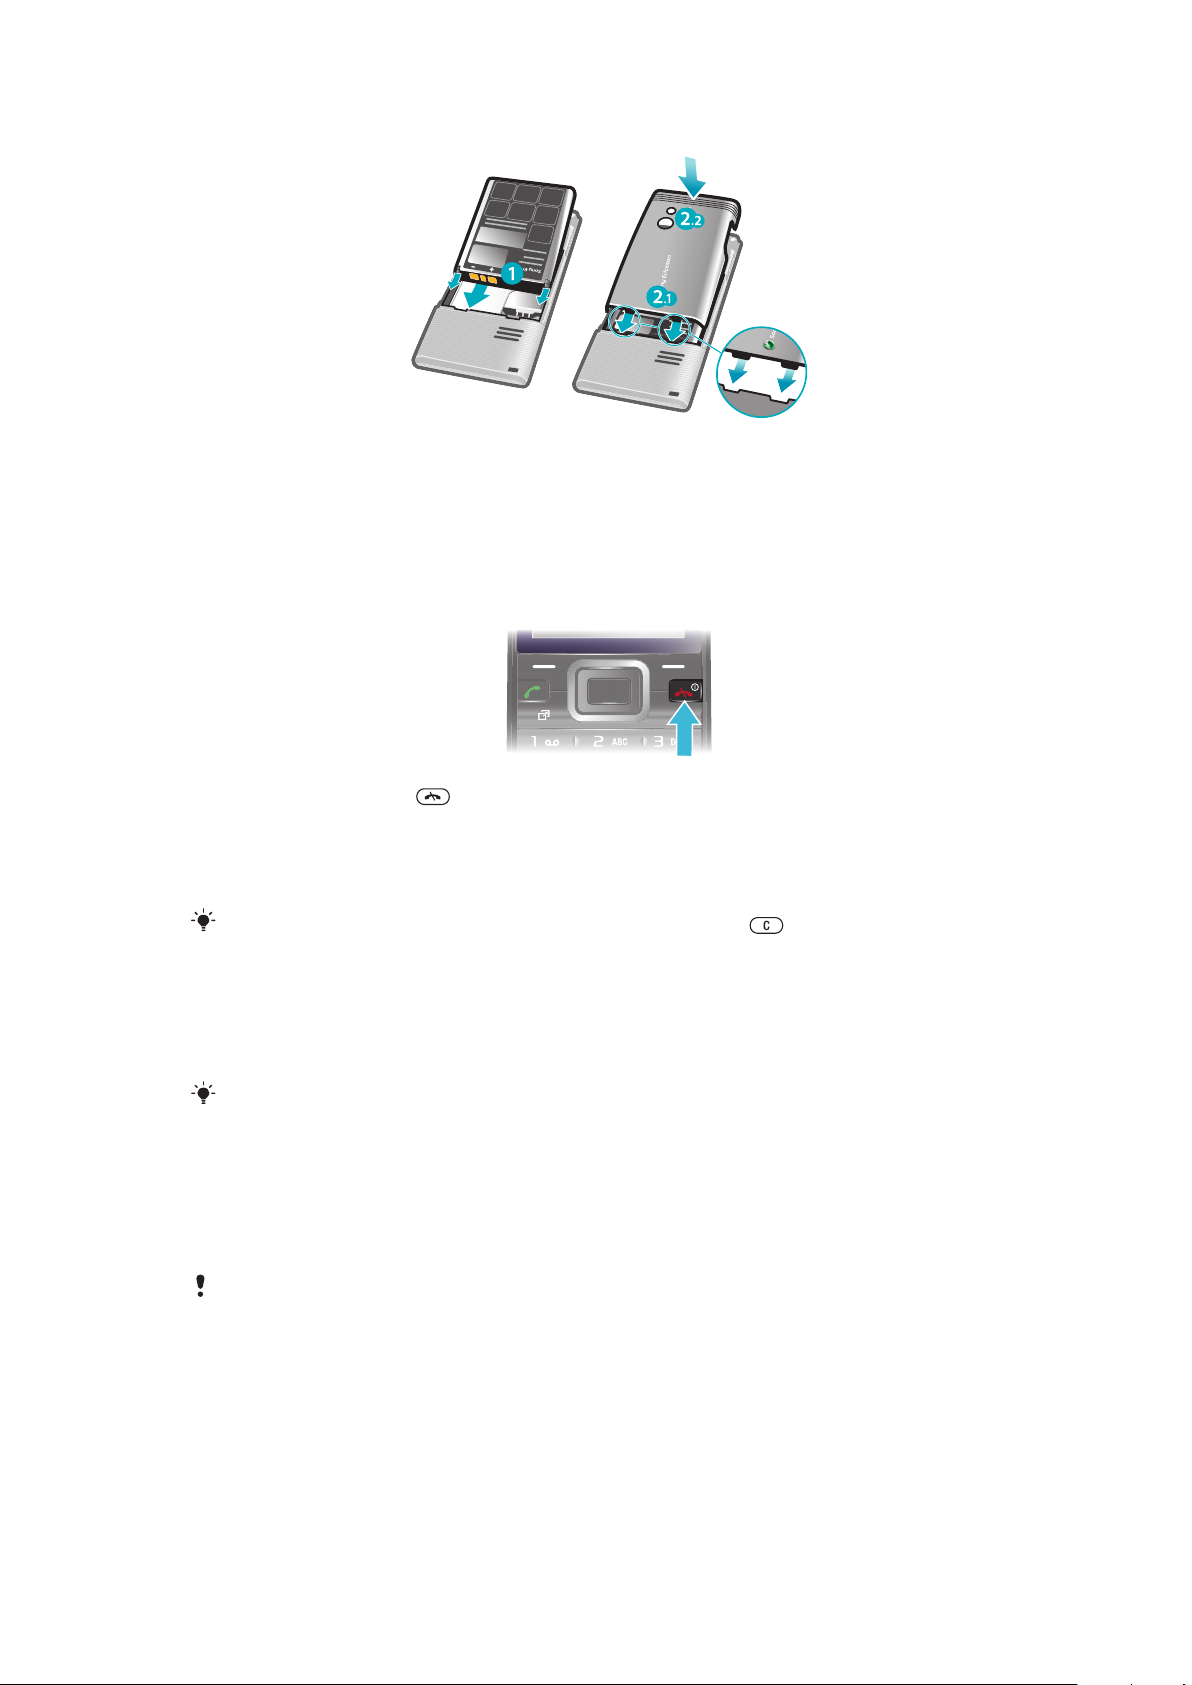
To insert the battery
1
Insert the battery with the label side up and the connectors facing each other.
2
Attach the battery cover.
Turning on the phone
To turn on the phone
1
Press and hold down .
2
Enter your SIM card PIN (Personal Identification Number), if requested, and select
OK.
3
Select a language.
4
Follow the instructions that appear.
If you want to correct a mistake when you enter your PIN, press
.
SIM card
The SIM (Subscriber Identity Module) card, which you get from your network operator,
contains information about your subscription. Always turn off your phone and detach the
charger before you insert or remove the SIM card.
You can save contacts on the SIM card before you remove it from your phone.
PIN
You may need a PIN (Personal Identification Number) to activate the services and functions
in your phone. Your PIN is supplied by your network operator. Each PIN digit appears as
*, unless it starts with emergency number digits, for example, 112 or 911. You can see and
call an emergency number without entering a PIN.
If you enter the wrong PIN three times in a row, the SIM card is blocked. See SIM protection on
page 70.
Standby
After you have turned on your phone and entered your PIN, the name of the network
operator appears. This view is called standby. Your phone is now ready for use.
7
This is an Internet version of this publication. © Print only for private use.
Page 8

Widget Manager
You can show, hide, or add widgets using Widget Manager. A widget is a live update on a
website, web page or desktop, for example, Facebook™, Twitter™. Widgets contain
personalized content or applications selected by the user.
This application may not be available in all markets.
To manage widgets
1
From standby, press the navigation key up.
2
Select Manage. Widget icons appear.
3
To select a widget, press the navigation key left or right.
4
Select Hide to hide a widget or Show if you want the widget to appear in the standby
screen.
To start a widget
1
From standby, press the navigation key up.
2
To select a widget, press the navigation key left or right.
3
Press Select to start the widget.
Using other networks
Making and receiving calls, using messaging and data transfer, for example, Internet-based
services, outside your home network (roaming) may incur additional costs. Contact your
operator for more information.
Help
In addition to this User guide, Feature guides and more information are available at
www.sonyericsson.com/support.
There are also help functions and a User guide in your phone. See the following instructions
on how to access them.
To access the User guide in your phone
•
Select Menu > Settings > User help > User guide.
To view tips and tricks
•
Select Menu > Settings > User help > Tips and tricks.
To view information about functions
•
Scroll to a function and select Info, if available. In some cases, Info appears under
Options.
To view the phone demonstration
•
Select Menu > Entertainment > Demo tour.
To view the phone status
•
Press the volume key. Phone, memory and battery information is shown.
Supported services and features
Some of the services and features described in this User guide are not supported by all networks
and/or service providers in all areas. Without limitation, this applies to the GSM International
Emergency Number 112. Please contact your network operator or service provider to determine
availability of any specific service or feature and whether additional access or usage fees apply.
Charging the battery
The phone battery is partly charged when you buy it.
8
This is an Internet version of this publication. © Print only for private use.
Page 9

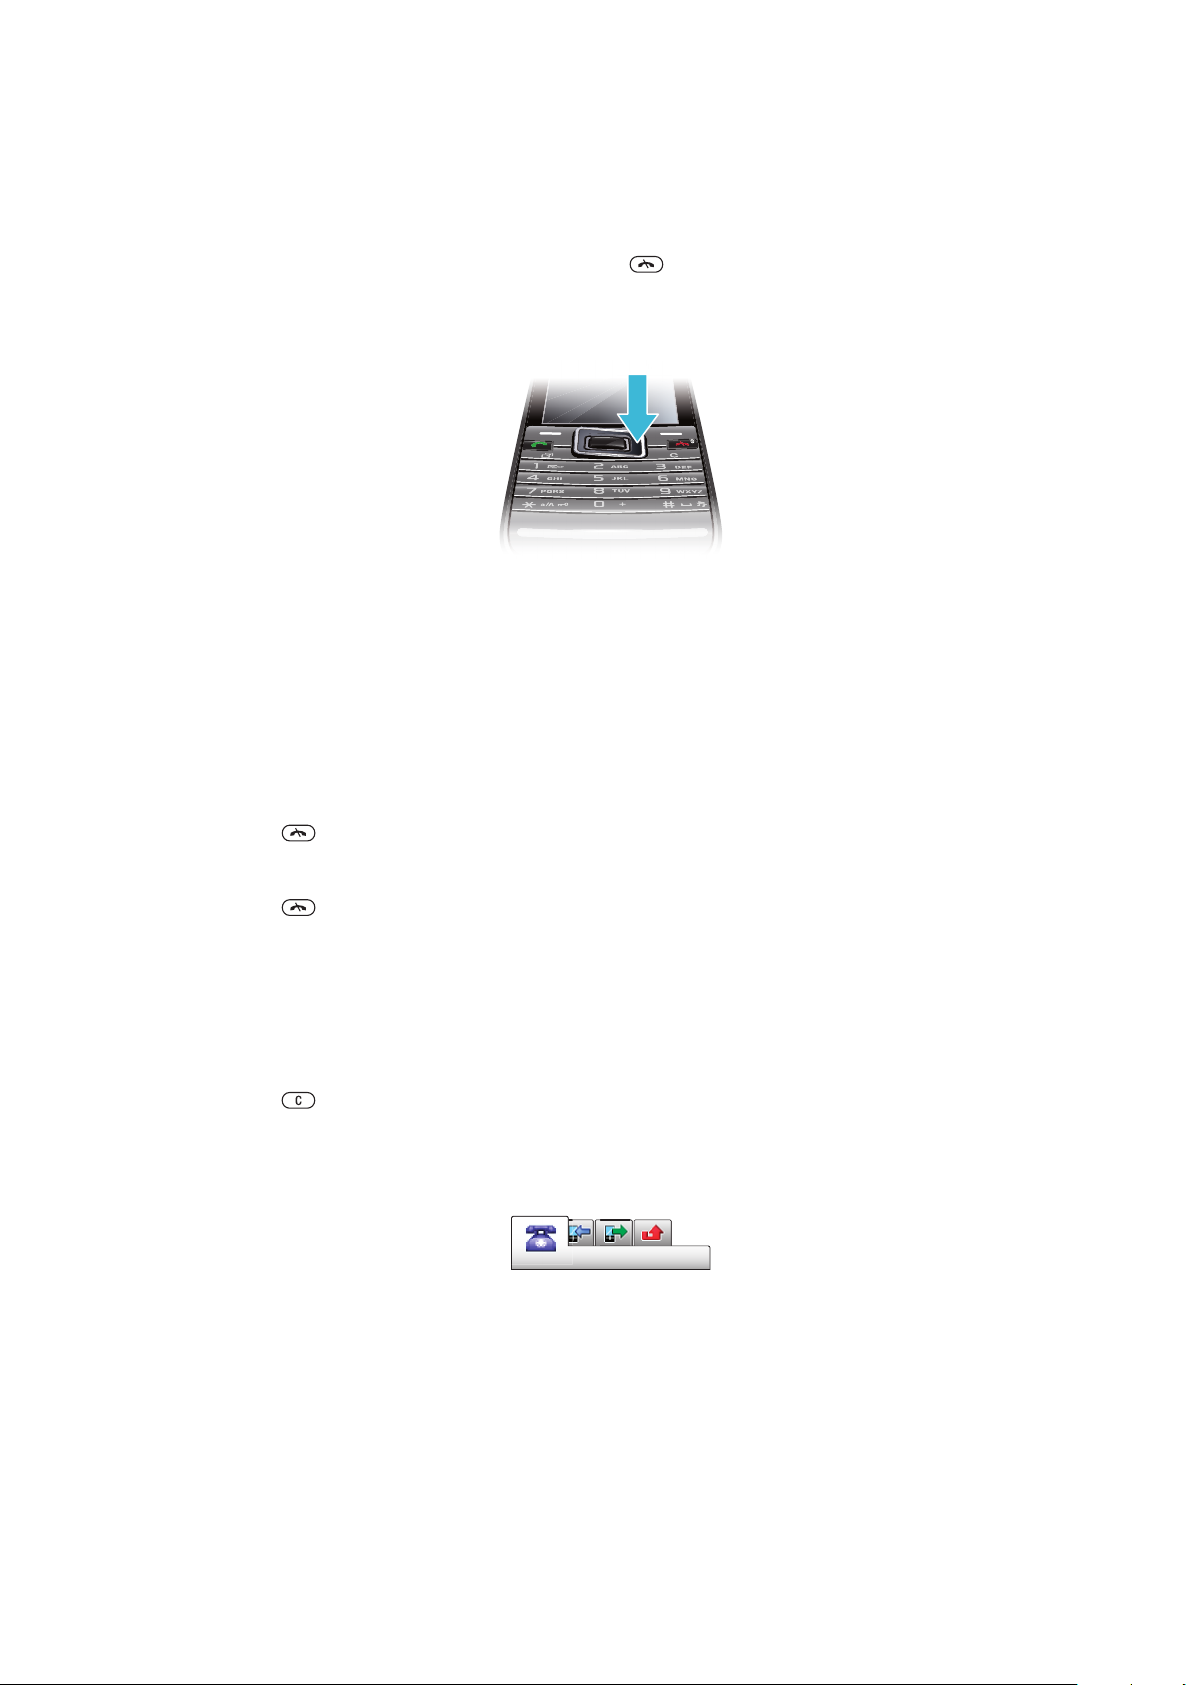
To charge the battery
1
Connect the charger to the phone.
2
Remove the charger by tilting the plug upwards.
Maximizing battery performance
•
Charge your phone often. The battery lasts longer if you charge it frequently.
•
If you're in an area with no coverage, your phone repeatedly scans for available networks.
This consumes power. If you cannot move to an area with better coverage, turn off your
phone temporarily.
•
Turn off 3G, Bluetooth™ wireless technology, any active Wi-Fi™ connection, and GPS
when you do not need these functions.
•
Do not cover the phone antenna when you're engaged in a call.
www.sonyericsson.com/support
Go to
performance.
to learn more about how to maximize the battery
9
This is an Internet version of this publication. © Print only for private use.
Page 10
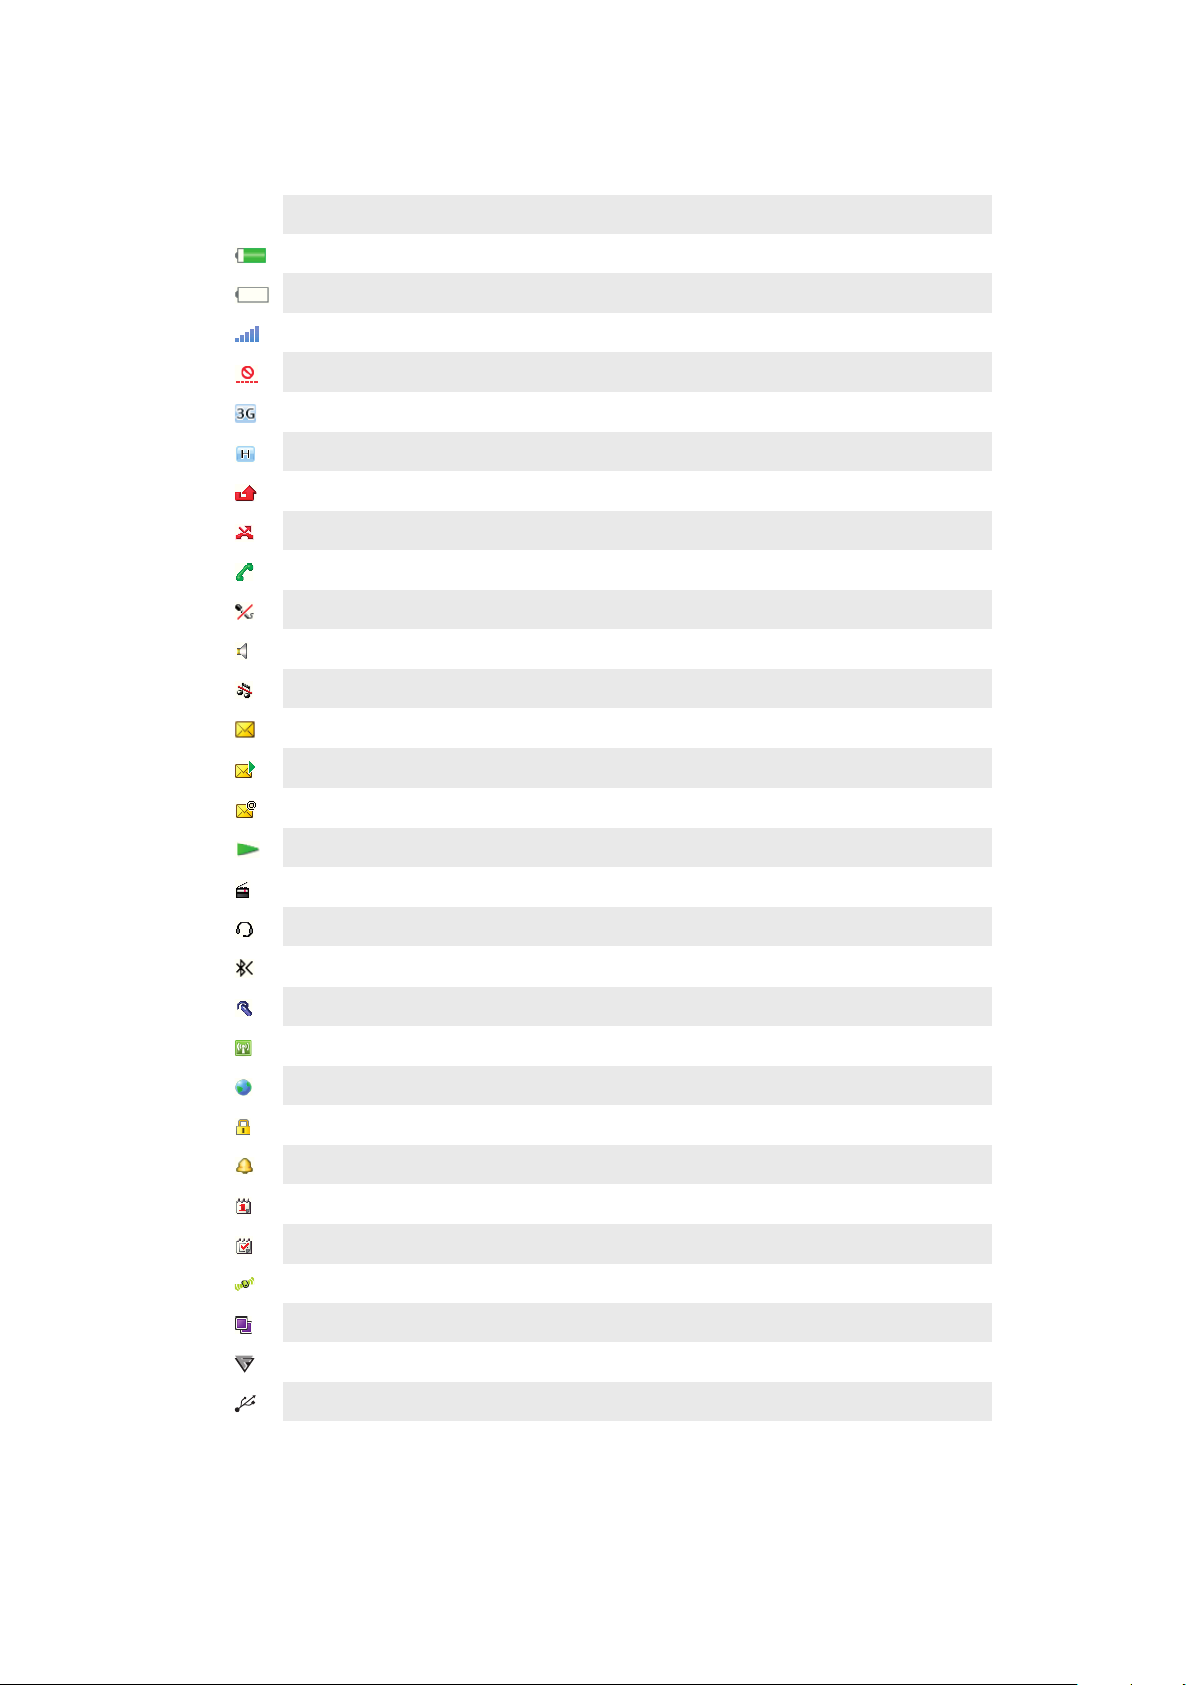
Screen icons
These icons may appear on the screen:
Icon Description
The battery is almost fully charged
The battery needs charging
The network coverage is good
No network coverage (also shown in flight mode)
A 3G network is available
A UMTS HSPA network is available
Missed calls
Diverted calls
Ongoing call
The microphone is muted
The loudspeaker is on
The phone is in silent mode
New text message
New multimedia message
New email
The music player is playing
The radio is playing
A handsfree is connected
The Bluetooth function is activated
A Bluetooth headset is connected
The phone is connected to a Wi-Fi network
The phone is connected to the Internet
Secure website
An alarm is activated
Appointment reminder
Task reminder
GPS is activated
A Java™ application is activated
Activating Antivirus
USB cable is connected
10
This is an Internet version of this publication. © Print only for private use.
Page 11
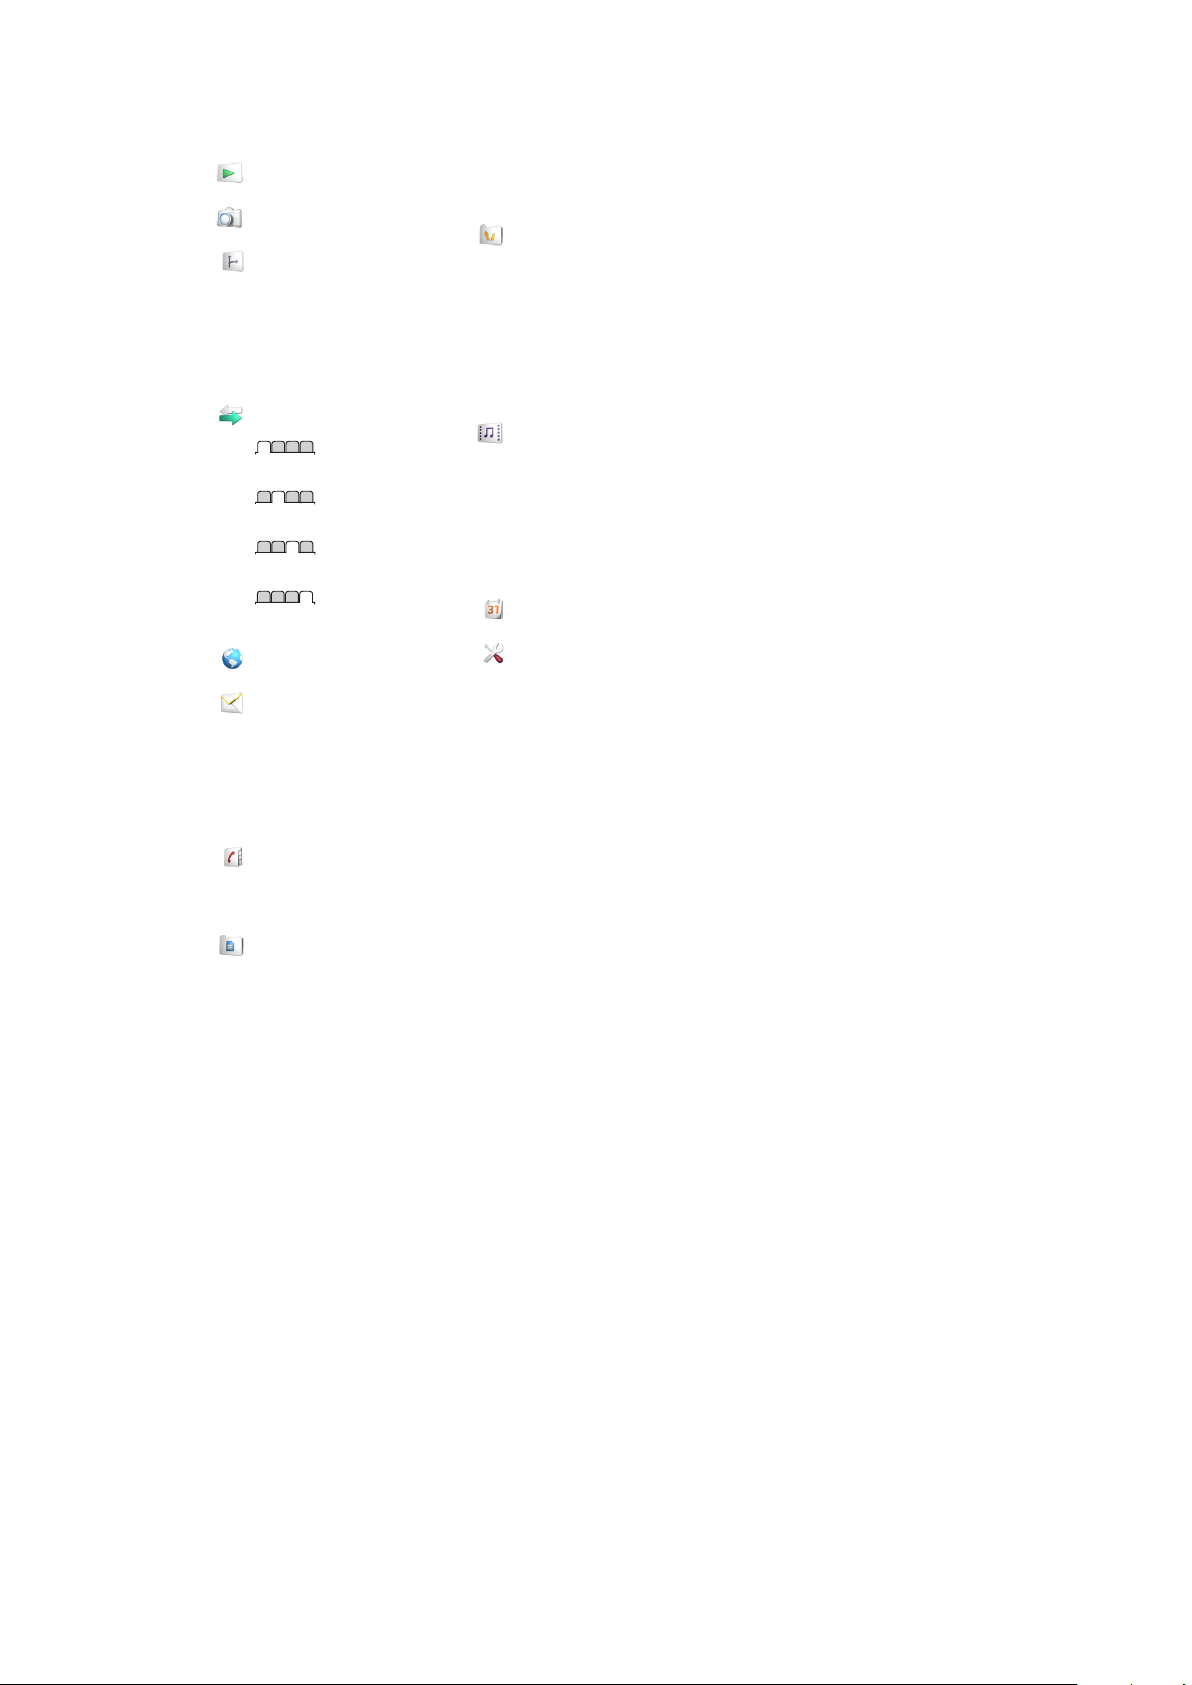
Menu overview*
PlayNow™
Camera
Location services
Google Maps
Navigation
Tracker
My favorites
Settings
Calls**
All
Answered
Dialed
Missed
Internet
Messaging
Write new
Inbox/Conversations
Messages
Email
Call voicemail
Contacts
Myself
New contact
Organizer
Alarms
Applications
File manager **
File transfer
Tasks
Notes
Media Home
Video call
Synchronization
Timer
Stopwatch
Flashlight
Calculator
Entertainment
Online services
Radio
TrackID™
Games
Record sound
GreenHeart™
Demo tour
Media
Photo
Music
Video
Games
Web feeds
Settings
Calendar
Settings
General
Profiles
Time & date
Language
Update software
Voice control
Shortcuts
Flight mode
Automatic keylock
PIN codes
Security
Accessibility
Phone status
Master reset
Sounds & alerts
Ring volume
Ringtone
Silent mode
Increasing ring
Vibrating alert
Message alert
Key sound
Display
Wallpaper
Main menu layout
Theme
Startup screen
Screen saver
Clock size
Brightness
Edit line names
Calls
Speed dial
Noise shield
Clear Voice
Smart search
Forward calls
Switch to line 2
Manage calls
Time
Show/hide my no.
Handsfree
Connectivity
Wi-Fi
Bluetooth
USB
Phone name
Content sharing
Synchronization
Device management
Mobile networks
Data communication
Internet settings
Streaming settings
Message settings
SIP settings
Accessories
User help
User guide
Settings download
Basic setup
Tips and tricks
GreenHeart™
* Some menus are operator-,
network-, and subscriptiondependent.
** You can use the navigation
key to scroll between tabs in
submenus.
11
This is an Internet version of this publication. © Print only for private use.
Page 12
Navigation
To access the main menu
•
When Menu appears on the screen, press the center selection key to select
Menu.
•
If Menu does not appear on the screen, press , and then press the center
selection key to select Menu.
To navigate the phone menus
•
Press the navigation key upwards, downwards, left or right to move through the
menus.
To select actions on the screen
•
Press the left, center or right selection key.
To view options for an item
•
Select Options to, for example, edit.
To end a function
•
Press .
To return to standby
•
Press .
To navigate your media
1
Select Menu > Media.
2
Scroll to a menu item and press the navigation key right.
3
To go back, press the navigation key left.
To delete items
•
Press
to delete items such as numbers, letters, pictures and sounds.
Tabs
Tabs may be available. For example, Calls have tabs.
To scroll between tabs
•
Press the navigation key left or right.
Shortcuts
You can use the navigation key shortcuts to go directly to functions from standby.
To use navigation key shortcuts
•
Press the navigation key upward, downward, left, or right to go directly to a function
12
This is an Internet version of this publication. © Print only for private use.
Page 13
To edit a navigation key shortcut
1
Select Menu > Settings > General > Shortcuts.
2
Scroll to an option and select Edit.
3
Scroll to a menu option and select Shortc..
Main menu shortcuts
Menu numbering starts from the top left icon and moves across and then down row by
row.
To go directly to a main menu item
•
Select Menu and press – , , or .
The Main menu layout must be set to Grid. See To change the main menu layout on page 68.
Activity menu
The activity menu gives you quick access to:
•
New events – missed calls and new messages.
•
Running apps – applications that are running in the background.
•
My shortcuts – add your favorite functions to access them quickly.
•
Internet – connect conveniently to the Internet.
To open the activity menu
•
Press .
Memory
You can save content on a memory card, in the phone memory and on the SIM card. Photos
and music are saved on the memory card, if a memory card is inserted. If not, or if the
memory card is full, photos and music are saved in the phone memory. Messages and
contacts are saved in the phone memory, but you can choose to save them on the SIM
card.
Memory card
You may have to purchase a memory card separately.
Your phone supports a microSD™ memory card, adding more storage space to your
phone. This type of card can also be used as a portable memory card with other compatible
devices.
You can move content between a memory card and the phone memory.
To insert a memory card
•
Remove the battery cover and insert the memory card with the gold-coloured
contacts facing down.
13
This is an Internet version of this publication. © Print only for private use.
Page 14
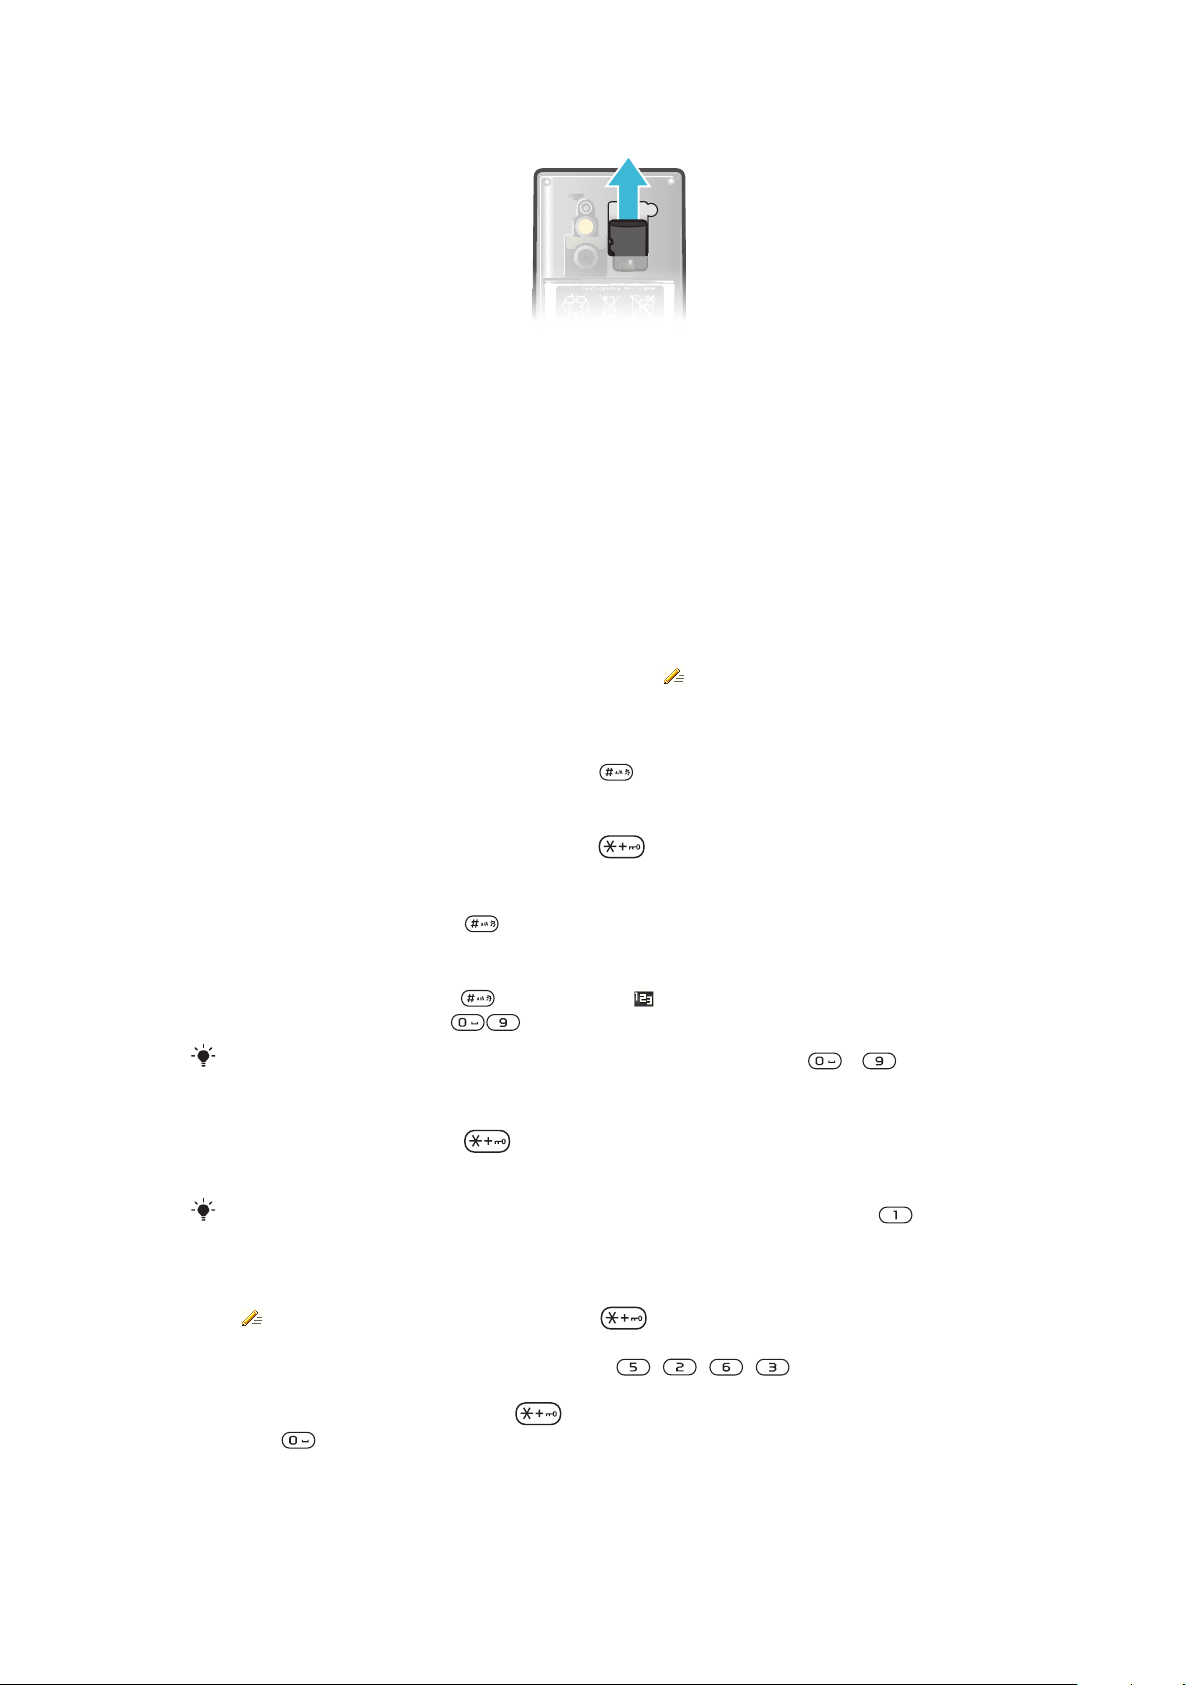
To remove a memory card
•
Remove the battery cover and slide the memory card to remove it.
Phone language
You can select a language to use in your phone.
To change the phone language
1
Select Menu > Settings > General > Language > Phone language.
2
Select an option.
Entering text
You can use multitap text input or Quick text input
method uses a dictionary application in your phone.
To change the writing language
•
When you enter text, press and hold down .
To change the text input method
•
When you enter text, press and hold down .
To shift between upper- and lower-case letters or numbers
•
When you enter text, press .
To enter numbers
1
When you enter text, press repeatedly until appears at the top of the screen.
2
To enter a number, press .
To enter a number from text input mode, you can press and hold down
To enter punctuation marks and symbols
1
When you enter text, press briefly.
2
Scroll to a symbol and select Insert.
To select from the most commonly used punctuation marks, you can also press
to enter text. The Quick text input
– .
.
To enter text using Quick text input
1
Select, for example, Menu > Messaging > Write new > Message.
2
3
4
5
is not displayed, press and hold down to change to Quick text input.
If
Press each key only once, even if the letter you want is not the first letter on the key.
For example, to write the word “Jane”, press
word before looking at the suggestions.
To view word suggestions, press or press the navigation key downwards.
Press to accept a suggestion and add a space.
14
This is an Internet version of this publication. © Print only for private use.
, , , . Write the whole
Page 15

To enter text using the multitap method
1
Select, for example, Menu > Messaging > Write new > Message.
2
If is displayed, press and hold down to change to multitap text input.
3
Press – repeatedly until the desired letter appears.
4
Press to add a space.
To add words to the phone dictionary
1
When you enter text using Quick text input, select Options > Spell word.
2
Write the word using multitap input and select Save.
15
This is an Internet version of this publication. © Print only for private use.
Page 16
Calling
You need to turn on your phone and be within range of a network.
Making and answering calls
To make a call
1
Enter a phone number (with international country code and area code, if applicable).
2
Press .
You can call numbers from your contacts and call list.
To end a call
•
Press .
To make international calls
1
Press and hold down until a “+” sign appears.
2
Enter the country code, area code (without the first zero) and phone number.
3
Press
To redial a number
•
When Retry? appears, select Yes.
Do not hold your phone to your ear when waiting for the call to connect. When the call connects,
your phone gives a loud signal.
.
To answer a call
•
Press .
To reject a call
•
Press .
To change the ear speaker volume during a call
•
Press the volume keys up or down.
To mute the microphone during a call
1
Press and hold down . appears.
2
Press and hold down again to resume.
To turn on the loudspeaker during a call
•
Select Spkr on. appears.
Do not hold the phone to your ear when using the loudspeaker. This could damage your hearing.
To view missed calls from standby
•
appears. Press to open the call list.
Background music
You can add background music to an ongoing call. When activated, background music
can be heard by all participants. When the microphone is muted, the background music
continues to play.
To start playing background music during a call
•
During the call, select Music.
See To play music on page 31.
16
This is an Internet version of this publication. © Print only for private use.
Page 17

To stop playing background music during a call
•
Press the center selection key.
To change the background music volume during a call
•
Press the volume key up or down.
Only the music volume can be changed when the music is playing.
Call sound quality
The Noise Shield filters out sound around you that can make it difficult for the other party
to hear your voice, while the Clear Voice function helps you hear better in a crowded
environment.
To turn on the Noise Shield
•
Select Menu > Settings > Calls > Noise shield > On. When the Noise shield is
turned on, appears during calls.
To turn off the Noise Shield
•
Select Menu > Settings > Calls > Noise shield > Off. When the Noise Shield is
turned off, appears during calls.
To turn on the Clear Voice function
•
Select Menu > Settings > Calls > Clear Voice > On.
To turn off the Clear Voice function
•
Select Menu > Settings > Calls > Clear Voice > Off.
Video call
During a video call, the person you are talking to can see you on their screen.
Before making video calls
3G (UMTS) service is available when
on the call must have a 3G (UMTS) phone subscription that supports 3G (UMTS) service
and 3G (UMTS) coverage.
To make a video call
1
Enter a phone number (with international country code and area code, if applicable).
2
Select Options > Make video call.
To use the zoom with an outgoing video call
•
Press the navigation key upwards or downwards.
To share photos and videos during a video call
1
During a video call, press the navigation key left to switch to the video share mode
tab.
2
Scroll to a video clip or photo and select Share.
To view video call options
•
During the call, select Options.
or appears. To make a video call, both parties
Emergency calls
Your phone supports international emergency numbers, for example, 112 or 911. You can
normally use these numbers to make emergency calls in any country, with or without the
SIM card inserted, if you are within range of a network.
In some countries, other emergency numbers may also be promoted. Your network operator may
therefore have saved additional local emergency numbers on the SIM card.
17
This is an Internet version of this publication. © Print only for private use.
Page 18

To make an emergency call
•
Enter 112 (the international emergency number) and press .
To view your local emergency numbers
1
Select Menu > Contacts.
2
Scroll to New contact and select Options > Special numbers > Emergency
numbers.
Call list
You can view information about answered , dialed and missed or rejected calls.
To call a number from the call list
1
Press and scroll to a tab.
2
Scroll to a name or a number and press
.
Contacts
You can save names, phone numbers and personal information in Contacts. Information
can be saved in the phone memory or on the SIM card.
You can synchronise your contacts using the Sony Ericsson PC Suite.
Default contacts
You can choose which contact information is shown by default. If Phone contacts is
selected as the default, only contact information saved to the phone memory is listed in
Contacts. If you select SIM contacts as the default, only names and numbers saved on
the SIM card are shown in Contacts.
To select default contacts
1
Select Menu > Contacts.
2
Scroll to New contact and select Options > Advanced > Default contacts.
3
Select an option.
Phone contacts
Phone contacts can contain names, phone numbers and personal information. They are
saved in the phone memory.
To add a phone contact
1
Select Menu > Contacts.
2
Scroll to New contact and select Add.
3
Enter the name and select OK.
4
Scroll to New number: and select Add.
5
Enter the number and select OK.
6
Select a number option.
7
Scroll between the tabs and add information to the fields.
8
Select Save.
Calling contacts
To call a contact
1
Select Menu > Contacts.
2
Scroll to a contact and press
.
To go directly to the contacts list
•
Press and hold down
This is an Internet version of this publication. © Print only for private use.
– .
18
Page 19

To make a call using Smart search
1
Press – to enter a sequence of (at least two) digits. All entries that match
the sequence of digits, or corresponding letters, are shown in a list.
2
Scroll to a contact or a phone number and press .
To turn on or off Smart search
1
Select Menu > Settings > Calls > Smart search.
2
Select an option.
Editing contacts
To add information to a phone contact
1
Select Menu > Contacts.
2
Scroll to a contact and select Options > Edit contact.
3
Scroll between the tabs and select Add or Edit.
4
Select an option and an item to add or edit.
5
Select Save.
If your subscription supports Calling Line Identification (CLI) services, you can assign personal
ringtones and pictures to contacts.
To copy names and numbers to phone contacts
1
Select Menu > Contacts.
2
Scroll to New contact and select Options > Advanced > Copy from SIM.
3
Select an option.
To copy names and numbers to the SIM card
1
Select Menu > Contacts.
2
Scroll to New contact and select Options > Advanced > Copy to SIM.
3
Select an option.
When you copy all contacts from your phone to the SIM card, all existing SIM card information
is replaced.
To automatically save names and phone numbers on the SIM card
1
Select Menu > Contacts.
2
Scroll to New contact and select Options > Advanced > Auto save on SIM.
3
Select an option.
To save contacts on a memory card
1
Select Menu > Contacts.
2
Scroll to New contact and select Options > Advanced > Back up to m. card.
SIM contacts
SIM contacts can contain names and numbers only. They are saved on the SIM card.
To add a SIM contact
1
Select Menu > Contacts.
2
Scroll to New contact and select Add.
3
Enter the name and select OK.
4
Enter the number and select OK.
5
Select a number option and add more information, if available.
6
Select Save.
19
This is an Internet version of this publication. © Print only for private use.
Page 20

Deleting contacts
To delete all contacts
1
Select Menu > Contacts.
2
Scroll to New contact and select Options > Advanced > Delete all contacts.
3
Select an option.
Contact memory status
The number of contacts you can save in your phone or on the SIM card depends on
available memory.
To view contact memory status
1
Select Menu > Contacts.
2
Scroll to New contact and select Options > Advanced > Memory status.
Myself
You can enter information about yourself and, for example, send your business card.
To enter information in Myself
1
Select Menu > Contacts.
2
Scroll to Myself and select Open.
3
Scroll to an option and edit the information.
4
Select Save.
To add your own business card
1
Select Menu > Contacts.
2
Scroll to Myself and select Open.
3
Scroll to My contact info and select Add > Create new.
4
Scroll between the tabs and add information to the fields.
5
Enter the information and select Save.
Groups
You can create a group of phone numbers and email addresses from Phone contacts to
send messages to. You can also use groups (with phone numbers) when you create
accepted callers lists.
To create a group of numbers and email addresses
1
Select Menu > Contacts.
2
Scroll to New contact and select Options > Groups.
3
Scroll to New group and select Add.
4
Enter a name for the group and select Continue.
5
Scroll to New and select Add.
6
For each contact phone number or email address you want to mark, scroll to it and
select Mark.
7
Select Continue > Done.
Speed dial
Speed dialing lets you select nine contacts that you can dial quickly from standby. The
contacts can be saved in positions 1-9.
To assign speed dial numbers to contacts
1
Select Menu > Contacts.
2
Scroll to New contact and select Options > Speed dial.
3
Scroll to a position number and select Add.
4
Select a contact.
20
This is an Internet version of this publication. © Print only for private use.
Page 21

To speed dial
•
Enter the position number and press .
More calling features
Voicemail
If your subscription includes an answering service, callers can leave a voicemail message
when you cannot answer a call.
To enter your voicemail number
1
Select Menu > Messaging > Messages > Settings > the Message settings tab
> Voicemail number.
2
Enter the number and select OK.
To call your voicemail service
•
Press and hold down .
Voice control
By creating voice commands you can:
•
Voice dial – call someone by saying their name
•
Answer and reject calls when you use a handsfree
To record a voice command using voice dialing
1
Select Menu > Settings > General > Voice control > Voice dialing > Activate.
2
Select Yes > New voice command and select a contact. If the contact has more
than one number, select the number to add the voice command to.
3
Follow the instructions that appear. Wait for the tone and say the command to
record. Record a voice command such as “John mobile”. The voice command is
played back to you.
4
If the recording sounds OK, select Yes. If not, select No and repeat steps 3 and 4.
Voice commands are saved in the phone memory only. They cannot be used in another phone.
To voice dial a contact
1
Press and hold down a volume key.
2
Wait for the tone and say a recorded voice command, for example “John mobile.”
The phone plays the command back to you and connects the call.
To activate voice answering and record voice answer commands
1
Select Menu > Settings > General > Voice control > Voice answer > Activate.
2
Follow the instructions that appear and select Continue. Wait for the tone and say
“Answer”, or say any other word.
3
Select Yes to accept or No to make a new recording.
4
Wait for the tone and say “Busy”, or say any other word.
5
Select Yes to accept or No to make a new recording.
6
Follow the instructions that appear and select Continue.
7
Select the environments in which you want to activate voice answering.
To answer a call using voice commands
•
Say “Answer.”
To rerecord a voice command
1
Select Menu > Settings > General > Voice control > Voice dialing > Edit
names.
2
Scroll to a command and select Options > Replace voice.
3
Wait for the tone and say the command.
21
This is an Internet version of this publication. © Print only for private use.
Page 22

Forwarding calls
You can forward calls, for example, to an answering service.
When Restrict calls is used, some forward call options are not available.
To forward calls
1
Select Menu > Settings > Calls > Forward calls.
2
Select a call type and a forward option.
3
Select Activate. appears.
4
Enter the number to forward calls to and select OK.
Call waiting
You will hear a beep if you receive a second call while call waiting is active.
To activate call waiting
•
Select Menu > Settings > Calls > Manage calls > Call waiting > Activate.
More than one call
You can handle more than one call at a time. For example, you can put an ongoing call on
hold while you make or answer a second call. You can also switch between the two calls.
You can't answer a third call without ending one of the first two calls.
To switch between two calls
•
During the call, press .
To join two calls
•
During the call, select Options > Join calls.
To end an ongoing call and return to the call on hold
•
First press and then .
To make a second call
1
During the call, press . This puts the ongoing call on hold.
2
Select Options > Add call.
3
Enter the number to call and press
To answer a second call
•
During the call, press . This puts the ongoing call on hold.
To reject a second call
•
During the call, press and continue with the ongoing call.
To end an ongoing call and answer a second call
•
During the call, select Replace active call.
.
Conference calls
With a conference call, you can have a joint conversation with up to five people.
To add a new participant
1
During the call, press
2
Select Options > Add call.
3
Enter the number to call and press
4
Select Options > Join calls to add the new participant.
5
Repeat this task to add more participants.
. This puts the joined calls on hold.
.
22
This is an Internet version of this publication. © Print only for private use.
Page 23

To release a participant
1
Select Options > Release party.
2
Select the participant to release.
To have a private conversation
1
During the call, select Options > Talk to and select the participant to talk to.
2
To resume the conference call, select Options > Join calls.
My numbers
You can view, add and edit your own phone numbers.
To check your phone numbers
1
Select Menu > Contacts.
2
Scroll to New contact and select Options > Special numbers > My numbers.
3
Select an option.
Accept calls
You can choose to receive calls from certain phone numbers only.
To add numbers to the accepted callers list
1
Select Menu > Settings > Calls > Manage calls > Accept calls > Only from list.
2
Scroll to New and select Add.
3
Select a contact or Groups.
To accept all calls
•
Select Menu > Settings > Calls > Manage calls > Accept calls > All callers.
Restricted dialing
You can restrict outgoing and incoming calls. A password from your service provider is
required.
If you forward incoming calls, you cannot use some restrict calls options.
Restrict calls options
Standard options are:
•
All outgoing – restrict all outgoing calls
•
Outgoing intl – restrict all outgoing international calls
•
Outgoing intl roam. – restrict all outgoing international calls except to your home country
•
All incoming – restrict all incoming calls
•
Inc. when roaming – restrict all incoming calls when you are abroad
To restrict calls
1
Select Menu > Settings > Calls > Manage calls > Restrict calls.
2
Select an option.
3
Select Activate.
4
Enter your password and select OK.
Call time and cost
During a call, the phone shows how long you have been talking. You can also check on
the duration of your last call, your outgoing calls and the total time of all your calls.
To check the call time
•
Select Menu > Settings > Calls > Time > Call timers.
Showing or hiding your phone number
You can decide to show or hide the number displayed on the call recipient's phone when
you make a call.
23
This is an Internet version of this publication. © Print only for private use.
Page 24

To hide your phone number
1
Select Menu > Settings > Calls > Show/hide my no..
2
Select Hide number.
24
This is an Internet version of this publication. © Print only for private use.
Page 25

Imaging
12 3 4 5
You can take photos and record videos to view, save or send. You can find saved photos
and videos in Media and in File manager.
Viewfinder and camera keys
1 Zoom in or out
2 Indicates photo mode
3 View photos and video clips
4 Indicates video mode
5 Activate the camera/Take photos/Record video clips
To activate the camera
•
Press .
To change settings
•
Activate the camera and select .
To view information about settings
•
Scroll to a setting and select
.
Using the still camera
To take a photo
1
Activate the camera and press the navigation key to scroll to .
2
Press halfway down to use auto focus.
3
When the dot and focus frame are green, press fully down to take a photo. The
photo is saved automatically.
4
To take another photo, press to return to the viewfinder.
To use zoom
•
Press the volume key.
To adjust brightness
•
Press the navigation key left to decrease the brightness. Press the navigation key
right to increase the brightness. The level of brightness appears beside the
.
Face detection
You can use face detection to bring an off-center face into focus. The camera automatically
detects up to three faces, indicated by white frames. A green frame shows which face has
been selected for focus. Focus is set to the face closest to the camera.
25
This is an Internet version of this publication. © Print only for private use.
Page 26

To set face detection
1
Activate the camera and press the navigation key to scroll to .
2
Select > Focus > Face detection.
Smile detection
Smile detection allows you to capture the smiles of family and friends. The camera detects
up to three faces and selects one face for smile detection and auto focus. A yellow frame
shows which face is selected. When the selected face smiles, the camera automatically
takes a photo.
To set Smile detection
1
Activate the camera and press the navigation key to scroll to .
2
Select > Shoot mode > Smile detection.
3
When appears, the camera is in Smile detection mode.
To use Smile detection
1
With Smile detection set, point the camera at your subject.
2
Press fully down. When appears, smile detection is activated. A yellow frame
shows the face in focus.
3
The camera automatically takes the photo when the subject smiles.
4
To take a photo, although no smile is detected, press fully down again.
Scenes
You can use Scenes to quickly set up the camera for common situations using preprogramd scenes. The camera has determined a number of settings for you to fit the
selected scene, ensuring the best possible photo.
To use Scenes
1
Activate the camera and press the navigation key to scroll to .
2
Select > Scenes.
3
Select a scene.
4
Select
5
Take a photo.
to return to the viewfinder.
Photo fix
You can use Photo fix to improve photos. In a one-click operation, brightness, light and
contrast are adjusted to give you the best possible photo. The improvements are saved as
a copy of the photo. The original photo is not affected.
To improve a photo with Photo fix
1
Activate the camera and press the navigation key to scroll to .
2
Make sure Review is set to On. Select > Settings and scroll to Review > On.
Select to return to the viewfinder.
3
Take a photo.
4
When you review the photo, select Options > Photo fix.
5
Review the improvement and select Save to save.
6
If you do not want to save the improvement, select Back.
Tips on using the camera
Rule of thirds
Don’t place your subject in the middle of the frame. By placing it a third of the way in, you
achieve a better result.
Hold it steady
Avoid blurry photos by holding the camera steady. Try to steady your hand by leaning it
against a solid object. You can also use the self-timer to make sure that the phone is steady
when the photo is taken.
26
This is an Internet version of this publication. © Print only for private use.
Page 27

Get closer
By getting as close as possible to your subject, you can avoid relying on the zoom. Try to
fill the viewfinder with your subject.
Stay within the flash range
Photos taken beyond the maximum flash range will be too dark. The maximum flash range
is about four steps from the subject.
Consider variety
Think about different angles, and move towards the object. Take some vertical photos. Try
different positions.
Use a plain background
A plain background helps highlight your subject.
Keep your lens clean
Phones are used in all kinds of weather and places, and carried in pockets and bags. This
results in the camera lens becoming dirty and covered with fingerprints. Use a soft cloth to
clean the lens.
Using the video camera
To record a video
1
Activate the camera and press the navigation key to scroll to
2
Press fully down to start recording.
3
To stop recording, press fully down. The video is saved automatically.
4
To return to the viewfinder and to record another video, press .
.
Working with photos
You can view, enhance, and organize photos and videos on your computer by installing
the Adobe™ Photoshop™ Album Starter Edition application. It's available for download at
www.sonyericsson.com/support.
Use theMedia Go™ application to transfer content to and from your phone.
Viewing and tagging photos
To view photos
1
Activate the camera and press the navigation key to scroll to
2
Scroll through the photos.
To view videos
1
Activate the camera and press the navigation key to scroll to .
2
Scroll to a video and press the center selection key. Videos are indicated by in
the upper left corner.
To view photos in a slide show
1
Select Menu > Media > Photo > Camera album.
2
Select a month.
3
Scroll to a photo and select View.
4
Select Options > Slide show.
5
Select a mood.
.
27
This is an Internet version of this publication. © Print only for private use.
Page 28

Viewing photos on a map
When you take a photo, you can attach your geographical position to it. This is called geo
tagging. Geo-tagged photos are tagged with in Media. If you cannot view photos on a
map, see I cannot use Internet-based services on page 72.
Information acquired by cell-id is approximate. Sony Ericsson takes no responsibility for the
accuracy of such location data.
To view photos on a map
•
Select Menu > Media > Photo > Geotags.
To turn on or off geo tagging
1
Activate the camera and press the navigation key to scroll to .
2
Select > Settings > Add position.
3
Select an option.
Photo tags
You can organize your photos using photo tags. You can create new tags, assign one or
several tags to a photo, or remove a tag from a photo. Photos with the same tag are saved
together under Photo tags. For example, you can add the tag ’Vacation’ to all your vacation
photos and view them all in Photo tags under the tag ’Vacation’.
To create a new photo tag
1
Select Menu > Media > Photo > Camera album.
2
Select a month.
3
Scroll to a photo and select View.
4
Press the navigation key downward and select Options > New tag.
To tag photos
1
Select Menu > Media > Photo > Camera album.
2
Select a month.
3
Scroll to a photo and select View.
4
Press the navigation key downwards and scroll to a tag.
5
Select Options > Tag this photo.
6
For each photo you want to tag, scroll to the photo and select Options > Tag this
photo.
To delete a tag from a photo
1
When viewing a photo, press the navigation key downward
2
Scroll to a tag and select Options > Undo tag.
Using photos
You can add a photo to a contact, use the photo during phone startup, as a wallpaper in
standby, or as a screen saver.
To use photos
1
Select Menu > Media > Photo > Camera album.
2
Select a month.
3
Scroll to a photo and select View.
4
Select Options > Use as.
5
Select an option.
Printing photos
You can print photos using a USB cable connected to a PictBridge™ compatible printer.
You can also print using a Bluetooth compatible printer that supports the Object Push Profile.
28
This is an Internet version of this publication. © Print only for private use.
Page 29

To print photos using a USB cable
1
Select Menu > Media > Photo > Camera album.
2
Select a month.
3
Select Options > Mark > Mark several or Mark all.
4
Select Options > Print and follow the instructions.
5
Connect the USB cable to the phone.
6
Connect the USB cable to the printer.
7
Wait for feedback in the phone.
8
Set printer settings if required and select Print.
Disconnect and reconnect the USB cable if there is a printer error.
Using web albums
If your subscription supports this service, you can send photos or videos to a web album.
If you cannot send content to a web album, see I cannot use Internet-based services on
page 72.
Web services may require a separate license agreement between you and the service provider.
Additional regulations and charges may apply. Contact your service provider for more
information.
To send photos saved in your phone to a web album
1
Select Menu > Media > Photo > Camera album.
2
Select a month and year.
3
Scroll to the photo and select Options > Send > To web albums.
4
Select a web album service. If requested, enter your login information.
5
Select an album, or add a new album.
6
Enter text and select Send.
To send videos saved in your phone to a web album
1
Select Menu > Media > Video > Videos.
2
Scroll to a video and select Options > Send > To web albums.
3
Select a web album service. If requested, enter your login information.
4
Select a web album, or add a new web album.
5
Enter some text and select Send.
To send photos or videos you have just taken to a web album
1
When you have taken a photo or recorded a video, select Send > To web
albums.
2
Select a web album service. If requested, enter your login information.
3
Select an album, or add a new album.
4
Enter some text and select Send.
To view web albums
1
Select Menu > Media > Photo > Web albums.
2
Select a web album.
To go to a web address from contacts
1
Select Menu > Contacts.
2
Scroll to a contact and select Open.
3
Scroll to a web address and select Go to.
Accessing videos in your phone
You can browse and play videos using the video player from Media and File manager.
You can find videos you recorded using the camera under Camera album. You can access
other videos from Video clips.
29
This is an Internet version of this publication. © Print only for private use.
Page 30

To play videos
1
Select Menu > Media > Video > Videos or Camera album.
2
Scroll to a title and select Play.
To stop playing a video
•
Press the center selection key.
To fast forward and rewind
•
Press and hold down the navigation key right or left.
To move between videos
•
Press the navigation key right or left.
To change the volume
•
Press the volume keys up or down.
To change the video screen size
•
Press the navigation key downwards.
30
This is an Internet version of this publication. © Print only for private use.
Page 31

Music
You can listen to music, audio books, and podcasts. Use the Media Go™ application to
transfer content to and from your phone. For more information, see Transferring content
to and from a computer on page 40.
Stereo portable handsfree
To use a handsfree
•
Connect a portable handsfree. Music stops when you receive a call and resumes
when the call has ended.
If headphones are not included with the phone, you may purchase them separately.
Music player
To play music
1
Select Menu > Media > Music.
2
Browse by category using the navigation key.
3
Scroll to a title and select Play.
Within a category, you can press
To stop playing music
•
Press the center selection key.
To fast forward and rewind
•
Press and hold down the navigation key right or left.
To move between tracks
•
Press the navigation key right or left.
To change the volume
•
Press the volume keys up or down.
To minimise the music player
•
Select Options > Minimise.
To return to the player
•
Select Menu > Media.
– to go to entries beginning with a specific letter.
Supported file formats
The following file formats are supported by your phone:
31
This is an Internet version of this publication. © Print only for private use.
Page 32

Feature Formats Extensions
Ringtone playback 3GP
AAC
MP4
M4A
MP3
AMR
AMR-WB
WAV
SMF (GM, GML, SP-MIDI supported)
iMelody
XMF (Mobile XMF/DLS supported)
WMA
Video and audio
playback
MP4 (Video: MPEG4 or H.264, Audio: AAC, AAC+,
eAAC+)
3GPP™ (Video: MPEG4, H.263 or H.264, Audio:
AMR-NB, AMR-WB, AMR-WB+, AAC, AAC+, eAAC
+)
WMV
Streaming and
progressive
downloading - video
3GPP™ PSS Rel6
MP4 (Video: MPEG4 or H.264, Audio: AAC, AAC+,
eAAC+)
3GPP™ (Video: MPEG4, H.263 or H.264, Audio:
AMR-NB, AMR-WB, AMR-WB+, AAC, AAC+, eAAC
+)
WMV
.3gp
.aac
.mp4
.m4a
.mp3
.amr
.awb
.wav
.mid
.imy
.xmf, .mxmf
.wma
.mp4
.3gp
.wmv, .asf
Streaming and
progressive
downloading audio
3GP
AAC
MP4
AMR
Video recording H.263 Profile 0, Level 10
MPEG-4 Visual Simple Profile Level 4a
Audio recording AMR-NB
AAC (for video recording only)
WAV - PCM linear content (from Java™)
Feature Decoder format Supported in file format
Video playback MPEG-4 Visual Simple Profile
H.264 Baseline Profile
H.263 Profile 0
VC-1 (WMV9) Simple Profile
3GP/MP4
3GP/MP4
3GP
WMV
32
This is an Internet version of this publication. © Print only for private use.
Page 33

Music playback MPEG-1/2/2.5, audio layer 3
AAC/AAC+/eAAC+
WMA version 2,7,8: Class 1
WMA version 9: Level 3
WMA Pro (profile M0a)
Linear/A-law/μ-law PCM
MP3
3GP/AAC/MP4/M4A
WMA
WMA
WMA
WAV
Playlists
You can create playlists to organize your music. You can add tracks and folders to a playlist.
It may take a few minutes for the phone to create a playlist.
To create a playlist
1
Select Menu > Media > Music > Playlists.
2
Scroll to New playlist and select Add.
3
Enter a name and select OK.
4
For each track you want to add, scroll to the track and select Mark.
5
Select Add to add the marked tracks to the playlist.
To add tracks to a playlist
1
Select Menu > Media > Music > Playlists.
2
Select a playlist.
3
Scroll to Add music and select Add.
4
For each track you want to add, scroll to the track and select Mark.
5
Select Add to add the marked tracks to the playlist.
SensMe™ technology
With SensMe™ technology, you can create playlists in two ways: by mood or from all the
tracks in your phone. To create playlists by mood, you first need to use the Media Go™
application to transfer tracks to your phone. Information such as mood, tempo, and chords
is then added. The tracks are displayed as dots on a map with two axes. In the All view,
all the tracks in your phone are placed randomly on the map.
33
This is an Internet version of this publication. © Print only for private use.
Page 34

To create a playlist by mood
1
Select Menu > Media > Music.
2
Scroll to SensMe™ and select Open.
3
Press the navigation key upward, downward, right, or left.
4
Make sure you are in Mood view. If you are not, select Mood.
5
To preview different tracks, press the navigation key upward, downward, right, or
left.
6
To choose an area of tracks, select Add and press the navigation key upward or
downward.
7
To create the playlist and play it in the music player, select Create.
8
Select Options > Save playlist.
9
Enter a name and select OK.
To create a playlist from the All view
1
Select Menu > Media > Music.
2
Scroll to SensMe™ and select Open.
3
Press the navigation key upward, downward, right, or left.
4
Make sure you are in All view. If you are not, select All.
5
To preview different tracks, press the navigation key upward, downward, right, or
left.
6
To choose an area of tracks, select Add and press the navigation key upward or
downward.
7
To create the playlist for playing in the music player, select Create.
8
Select Options > Save playlist.
9
Enter a name and select OK.
Audio books
If you use the Media Go™ application to transfer audio books to your phone from a
computer, you can listen to the audio books in your phone. It may take a few minutes before
a transferred audio book appears in the list of available audio books.
To access audio books
•
Select Menu > Media > Music > Audio books.
You can find audio books in formats other than M4B and those that do not have ID3v2 chapter
tags in the Tracks folder.
Buy Now
If you subscribe to a music service allowing limited, nonpermanent use with your phone,
you can mark a track you are interested in buying later. The next time you synchronize your
music with the Microsoft® Windows Media® Player application on a computer with enabled
Internet access, you should be asked if you want to buy the track you marked earlier. If you
accept, the track is downloaded to your computer and your selected music service account
is charged. This service requires a subscription and account with a downloadable music
service, a computer with the Microsoft® Windows Media® Player 11 application or
subsequent compatible version of the Microsoft® Windows Media® Player application, and
a USB computer connection.
You cannot see that a track is marked. You cannot unmark tracks you have already marked.
To mark a track
•
When the track you want to mark is playing, press and hold down
.
PlayNow™ application
When you open the PlayNow™ application, you enter PlayNow™, where you can
download music, games, ringtones, themes, and wallpapers. You can preview or listen to
34
This is an Internet version of this publication. © Print only for private use.
Page 35

content before you purchase and download it to your phone. If you cannot use the
PlayNow™ application, see I cannot use Internet-based services on page 72.
This service is not available in all countries.
For extended functionality, you can also access the PlayNow™ web store on a computer
from www.sonyericsson.com/playnow. For more information, go to
www.sonyericsson.com/support to read the PlayNow™ Feature guide.
To use the PlayNow™ application
1
Select Menu > PlayNow™.
2
Scroll through PlayNow™ and follow the instructions to preview and purchase
content.
TrackID™ application
TrackID™ technology is a music recognition service. You can search for the title, artist, and
album name of a track you hear playing through a loudspeaker or on the radio in your
phone. If you cannot use the TrackID™ application, see I cannot use Internet-based
services on page 72.
To search for track information
•
When you hear a track playing through a loudspeaker, select Menu > Entertainment >
TrackID™ > Start.
•
When you hear a track playing on your phone radio, select Options > TrackID™ >
TrackID™.
For best results, use TrackID™ in a quiet area.
Online music and video clips
You can view video clips and listen to music by streaming them to your phone from the
Internet. If you cannot use the Internet, see I cannot use Internet-based services on
page 72.
To select a data account for streaming
1
Select Menu > Settings > Connectivity > Streaming settings > Connect using:.
2
Select the data account to use.
3
Select Save.
To stream music and video clips
1
Select Menu > Internet.
2
Select
3
Select a link to stream from.
and then select .
Radio
Don't use your phone as a radio in places where this is prohibited.
To turn on the radio
1
Connect a handsfree to the phone.
2
Select Menu > Entertainment > Radio.
To search for channels automatically
•
Select Search.
To fine tune the frequency
•
Press the navigation key right or left.
This is an Internet version of this publication. © Print only for private use.
35
Page 36

To change the volume
•
Press the volume keys up or down.
To minimize the radio
•
Select Options > Minimise.
To return to the radio
•
Select Menu > Entertainment > Radio.
Saving channels
You can save up to 20 preset channels.
To save channels automatically
•
Select Options > Channels > Auto save.
To save channels manually
1
When you find a radio channel, select Options > Channels > Save.
2
Scroll to a position and select Insert.
3
If you want, you can rename the channel. Select Save.
You can also save a channel in a position by pressing and holding down - .
To switch between saved channels
•
Press the navigation key upwards or downwards.
You can also select a saved channel by pressing
- .
Recording sound
You can record a voice memo or a call. Recorded sounds can also be set as ringtones.
In some countries or states, it is required by law that you inform the other person before recording
a call.
To record a sound
1
Select Menu > Entertainment > Record sound > Record.
2
To stop recording and save, select Save.
To record a call
1
During an ongoing call, select Options > Record.
2
To save the recording, select Save.
To listen to a recording
1
Select Menu > Organizer > File manager.
2
Scroll to Music and select Open.
3
Scroll to a recording and select Play.
36
This is an Internet version of this publication. © Print only for private use.
Page 37

Transferring and handling content
You can transfer and handle content such as pictures and music.
You are not allowed to exchange some copyright-protected material. identifies a protected
item.
Organizing your content
Phone content such as pictures, videos, sounds, themes, web pages, games, and
applications are saved on your phone memory or on your memory card. This content is
saved in separate folders in File manager, which makes it easy to find what you are looking
for.
You can find File manager under Menu > Organizer > File manager. There are three tabs
to explore:
•
All files – all content in the phone memory and on the memory card.
•
On memory card – all content on your memory card.
•
In phone – all content in the phone memory.
Copyright-protected content
Items that are downloaded or received using one of the available transfer methods, may
be copyright-protected by DRM (Digital Rights Management). You may not be able to copy,
send, or transfer such items.
To view copyright information for a file
1
Select Menu > Organizer > File manager.
2
Scroll to a folder and select Open.
3
Scroll to a file and select Options > Information.
Handling content in the phone
You can use File manager in your phone to handle content saved in the phone memory
or on a memory card. Tabs and icons in File manager show where the content is saved.
If the memory is full, delete some content to create space.
To view memory status
1
Select Menu > Organizer > File manager.
2
Select Options > Memory status.
3
Select Memory card or Phone.
To select more than one item in a folder
1
Select Menu > Organizer > File manager.
2
Scroll to a folder and select Open.
3
Select Options > Mark > Mark several.
4
For each item you want to mark, scroll to the item and select Mark.
To select all items in a folder
1
Select Menu > Organizer > File manager.
2
Scroll to a folder and select Open.
3
Select Options > Mark > Mark all.
To move items between the phone memory and the memory card
1
Select Menu > Organizer > File manager.
2
Find an item and select Options > Manage file > Move.
3
Select Memory card or Phone.
4
Scroll to a folder and select Open.
5
Select Paste.
37
This is an Internet version of this publication. © Print only for private use.
Page 38

To view information about content
1
Select Menu > Organizer > File manager.
2
Find an item and select Options > Information.
To copy items
1
Select Menu > Organizer > File manager.
2
Find an item and select Options > Manage file > Copy.
3
Select Memory card or Phone.
4
Scroll to a folder and select Open.
5
Select Paste.
To rename items or a folder
1
Select Menu > Organizer > File manager.
2
Find an item and select Options > Manage file > Rename.
3
Enter a new name and select OK.
To sort content in a folder
1
Select Menu > Organizer > File manager.
2
Scroll to a folder and select Options > Sort by.
3
Select an option.
To create a subfolder
1
Select Menu > Organizer > File manager.
2
Scroll to a folder and select Open.
3
Select Options > New folder.
4
Enter a name and select OK.
To delete items
1
Select Menu > Organizer > File manager.
2
Find an item and select Options > Delete > Yes.
To delete all content on the memory card
1
Select Menu > Organizer > File manager.
2
Select Options > Memory status > Memory card.
3
Select Options > Format mem.card > Yes.
Sending content to another phone
You can send content using different transfer methods, for example, Messages or
Bluetooth wireless technology.
To send content
1
Scroll to an item and select Options > Send.
2
Select a transfer method.
Make sure the receiving device supports the transfer method you select.
Connecting your phone to a computer
There are two ways to establish a connection between your phone and a computer:
•
Using a USB cable
•
Using Bluetooth™ wireless technology
Connecting using a USB cable
You can connect your phone to a computer using a USB cable compatible with your phone.
Before you connect your phone to a computer, you need to select PC mode.
38
This is an Internet version of this publication. © Print only for private use.
Page 39

To select PC mode
•
Select Menu > Settings > Connectivity > USB > Set default mode and then select
PC mode.
To connect your phone to a computer using a USB cable
1
Connect your phone to the computer using a USB cable.
2
Computer: If you have not already installed Sony Ericsson PC Suite, the Install Sony
Ericsson PC software dialog box appears. Click Install to install the necessary
software automatically.
3
In the Portable Device dialog box, select Take no action.
Do not disconnect the USB cable when transferring content as this may corrupt the content.
PC Companion
PC Companion lets you:
•
Explore content in your phone.
•
Use your phone as a modem.
•
Install PC software used to synchronise, transfer and back up phone content.
For more information, including Feature guides, go to www.sonyericsson.com/support.
To download Mac® compatible software, go to www.sonyericsson.com/support.
Required operating systems
You need one of these operating systems to use Sony Ericsson PC software:
•
Microsoft® Windows® 7
•
Microsoft® Windows Vista™
•
Microsoft® Windows® XP, Service Pack 2 or higher
To install PC Companion
If the necessary USB software has not been installed on your PC, you need to install PC
Companion. Also, Autoplay functionality needs to be enabled on your PC.
1
Using a USB cable supported by your phone, connect the phone to a computer that
runs a Microsoft® Windows® operating system.
2
Computer: Follow the on-screen instructions.
Dragging and dropping content
You can drag and drop content between your phone, a memory card and a computer using
the Microsoft® Windows® Explorer application.
To browse the phone memory or memory card from a computer
Do not disconnect the USB cable when transferring content as this may corrupt the content.
1
Connect your phone to the computer.
2
Computer: Double-click the My computer icon on the desktop.
3
To view the Phone Memory and Memory card folders, double-click your phone icon
under Devices with removable storage in the My computer window.
To drag and drop content
1
Connect your phone to a computer using a USB cable supported by the phone.
2
Computer: Wait until the phone memory and memory card appear as external disks
in the Microsoft® Windows® Explorer application.
3
Drag and drop selected files between the phone and the computer.
To disconnect the USB cable safely
Do not disconnect the USB cable when transferring content as this may corrupt the content.
39
This is an Internet version of this publication. © Print only for private use.
Page 40

1
Computer: Right-click the Safely Remove Hardware icon in the Microsoft
®
Windows® Explorer application.
2
Select the drives you want to disconnect. Select Stop.
3
Wait until you are notified that it is safe to remove the drive. Disconnect the USB
cable.
Connecting using Bluetooth™ wireless technology
You can establish a wireless connection between your phone and a computer that supports
Bluetooth™ wireless technology. The Bluetooth™ function on the phone and computer
must be turned on before you start to connect. A maximum range of 10 meters (33 feet),
with no solid objects in between, is recommended for Bluetooth™ communication.
To turn on the Bluetooth™ function
•
Select Menu > Settings > Connectivity > Bluetooth > Turn on.
Make sure the device you want to pair your phone with has the Bluetooth™ function activated
and is visible to other devices.
To turn off the Bluetooth™ function
•
Select Menu > Settings > Connectivity > Bluetooth > Turn off.
To reduce battery consumption, turn off the Bluetooth function when not in use.
To show or hide your phone
1
Select Menu > Settings > Connectivity > Bluetooth.
2
Select Options > Visibility.
3
Select an option.
To connect your phone to a computer using Bluetooth wireless technology
1
Computer: Double-click the Bluetooth™ icon on your computer.
2
Select Bluetooth/Search For Devices.
3
Right-click your phone name and select Pair device.
4
Choose a PIN code and click OK.
5
Phone: When Add to My devices? appears, select Yes.
6
Enter your PIN code and select OK.
7
Computer: Double-click your phone name.
8
Double-click the Serial Port icon.
9
Phone: When Allow? appears, select Yes.
Transferring content to and from a computer
You can use the Media Go™ application to transfer media content between your phone
and a computer. The Media Go™ application is available for download through PC
Companion or from www.sonyericsson.com/support.
Mac® compatible software is also available for download at www.sonyericsson.com/support.
To transfer content using Media Go™
1
Connect your phone to a computer using a USB cable supported by your phone.
2
Computer: When the Portable Device dialog box appears, select Transfer to or from
Device using Media Go and click OK. The Media Go™ application opens.
3
Computer: Wait until your device appears in the Library navigation pane on the left
of the Media Go™ window. You can now select and transfer files between the phone
and computer.
4
Move files between your phone and the computer using the Media Go™ application.
40
This is an Internet version of this publication. © Print only for private use.
Page 41

Media Home
You can use Media Home to transfer content automatically from the Media Go™
application to your phone. You can also use Media Home to download content from a
DLNA server.
Before using Media Home, you must install Media Go™ on your computer and enable
Media sharing. The Media Go™ application is available for download through PC
Companion or from www.sonyericsson.com/support.
To set up Media Home
1
Computer: Open the Media Go™ application and enable Media sharing.
2
Phone: Select Menu > Organizer > Media Home > Options > Setup wizard and
follow the instructions.
To transfer content automatically to your phone using Media Home
1
Open the Media Go™ application on your computer.
2
Connect your phone to the charger. Media Home will start an automatic download
when a charger is connected.
To start Media Home manually
1
Computer: Open the Media Go™ application.
2
Phone: Select Menu > Organizer > Media Home and press Start
To browse and download content from a DLNA server
1
Select Organizer > Media Home > Options > Browse.
2
Select a server and mark the content you want to download.
3
Press Download.
Phone name
You can enter a name for your phone that is shown to other devices when using, for
example, Bluetooth™ wireless technology.
To enter a phone name
1
Select Menu > Settings > Connectivity > Phone name.
2
Enter the phone name and select OK.
Using Bluetooth™ wireless technology
Use Bluetooth™ technology to wirelessly connect to other devices, free of charge. You
can, for example:
•
Connect to handsfree devices.
•
Connect to several devices at the same time.
•
Connect to computers and access the Internet.
•
Exchange MP3 files, virtual business cards, photos, and more.
•
Play multiplayer games.
A range of less than 10 meters (33 feet), with no solid objects in between, is recommended for
Bluetooth communication.
Before using Bluetooth™ wireless technology
You must turn on the Bluetooth™ function to communicate with other devices. You may
also have to pair your phone with other Bluetooth™ devices.
To turn on the Bluetooth™ function
•
Select Menu > Settings > Connectivity > Bluetooth > Turn on.
Make sure the device you want to pair your phone with has the Bluetooth™ function activated
and is visible to other devices.
41
This is an Internet version of this publication. © Print only for private use.
Page 42

To pair the phone with another device
1
Select Menu > Settings > Connectivity > Bluetooth > Add new device.
2
Select a device.
3
Enter a passcode, if required.
To allow connections to the phone
1
Select Menu > Settings > Connectivity > Bluetooth.
2
Select a device from the list.
3
Select Options > Allow connection.
4
Select Always ask or Always allow.
This is only possible with devices that require access to a secure service.
Power saving
You can save battery power with the Power save function. In Power save mode you can
only connect to a single Bluetooth device. If you want to connect to more than one
Bluetooth device at the same time, you must turn off this function.
To turn on Power save
•
Select Menu > Settings > Connectivity > Bluetooth > Options > Power save >
On.
Transferring sound to and from a Bluetooth handsfree
You can transfer sound to and from a Bluetooth handsfree using the phone keypad or the
appropriate key on the handsfree.
To transfer sound
1
Select Menu > Settings > Connectivity > Bluetooth > Options > Incoming call.
2
Select an option. In phone transfers sound to the phone. In handsfree transfers
sound to the handsfree.
If you select the option
handsfree.
In phone and answer using the handsfree key, the sound transfers to the
To transfer sound during a call
1
During a call, select Sound.
2
Select from the list of available handsfree devices.
Backing up and restoring
You can back up and restore your contacts, calendar, tasks, notes, and bookmarks using
the Sony Ericsson PC Suite, which is available through PC Companion or from
www.sonyericsson.com/support
You can also back up and restore contacts in your phone by moving content between the
memory card and the phone memory. See Handling content in the phone on page 37.
Back up your phone content regularly to make sure you do not lose it.
To make a backup using the Sony Ericsson PC Suite
1
Computer: Start the Sony Ericsson PC Suite from Start/Programs/Sony Ericsson/
Sony Ericsson PC Suite.
2
Follow the instructions in the Sony Ericsson PC Suite on how to connect.
3
Go to the backup and restore section in the Sony Ericsson PC Suite and make a
backup of your phone content.
.
To restore phone content using the Sony Ericsson PC Suite
The Sony Ericsson PC Suite overwrites all phone content during the restore process. You may
damage your phone if you interrupt the process.
42
This is an Internet version of this publication. © Print only for private use.
Page 43

1
Computer: Start the Sony Ericsson PC Suite from Start/Programs/Sony Ericsson/
Sony Ericsson PC Suite.
2
Follow the instructions in the Sony Ericsson PC Suite on how to connect.
3
Go to the backup and restore section in the Sony Ericsson PC Suite and restore
your phone content.
43
This is an Internet version of this publication. © Print only for private use.
Page 44

Updating your phone
You can update your phone to the most recent software for optimal performance and to
get the latest enhancements. You need a USB cable and an Internet-connected PC.
To learn how, go to
www.sonyericsson.com/update
Remember to back up your phone content before updating. See Backing up and restoring on
page 42.
Updating your phone using Sony Ericsson PC Suite
You can update your phone using a USB cable and Sony Ericsson PC Suite. When the
phone is connected, it will automatically check for and notify you of new updates.
Updating your phone wirelessly
You can update your phone over the air using the Update Service application in the phone.
You do not lose personal or phone information.
Update Service requires data access such as GPRS, 3G or HSDPA.
To select settings for Update Service
•
Select Menu > Settings > General > Update software > Settings > Internet
settings.
.
To use Update Service
1
Select Menu > Settings > General > Update software.
2
Select Search for update and follow the instructions that appear.
44
This is an Internet version of this publication. © Print only for private use.
Page 45

Messaging
Text and picture messages
Messages can contain text, pictures, sound effects, animations, and melodies.
When sending messages, the phone automatically selects the most suitable method (as a
text or picture message) for sending the message.
If you cannot use picture messages, see I cannot use Internet-based services on
page 72.
Sending messages
You can send messages from your phone. The maximum size of a standard text message
is 160 characters (including spaces) if no other items are added to the message. If you
enter more than 160 characters, a second message is created. Your messages are sent
as one concatenated message.
To create and send a message
1
Select Menu > Messaging > Write new > Message.
2
Enter text. To add items to the message, press the navigation key downwards, scroll
by pressing the navigation key left or right, and select an item.
3
Select Continue > Contacts lookup.
4
Select a recipient and select Send.
If you send a message to a group, you may be charged for each member. Contact your service
provider for details.
To copy and paste text in a message
1
When you write the message, select Options > Copy & paste.
2
Select Copy all or Mark & copy. Scroll to and mark text in the message.
3
Select Options > Copy & paste > Paste.
Receiving and saving messages
You are notified when you receive a message.
automatically saved in the phone memory. When the phone memory is full, you can delete
messages or save them on a memory card or on the SIM card.
To save an incoming message on a memory card
•
Select Menu > Messaging > Messages > Settings > Save to > Memory card.
To save a message on the SIM card
1
Select Menu > Messaging > Messages and select a folder.
2
Scroll to a message and select Options > Save message.
To view a message in the inbox
1
Select Menu > Messaging > Messages > Inbox.
2
Scroll to the message and select View.
To call a number contained in a message
•
When you view the message, scroll to the phone number and press
or appears. Messages are
.
Message options
You can set some options, such as the Message alert and default storage location, to apply
to all messages. You can set other options, such as the Delivery priority and Delivery time,
for each message you send.
45
This is an Internet version of this publication. © Print only for private use.
Page 46

To set options for all messages
1
Select Menu > Messaging > Messages > Settings.
2
Select an option.
To set options for a specific message
1
When the message is ready and a recipient is selected, select Options >
Advanced.
2
Scroll to an option and select Edit.
Conversations
You can choose whether to view your messages in Conversations or the Inbox. A
messaging conversation shows all messaging communication between you and one of
your contacts.
To view messages in Conversations
•
Select Menu > Messaging > Inbox > the Conversations tab.
•
Select Menu > Messaging > Conversations and select a conversation.
To send a message from Conversations
1
Select Menu > Messaging.
2
Select Conversations, or select Inbox > the Conversations tab.
3
Select a conversation.
4
Write a message and select Send.
Voice messages
You can send and receive a sound recording as a voice message.
The sender and recipient must have a subscription supporting multimedia messaging.
To record and send a voice message
1
Select Menu > Messaging > Write new > Voice message.
2
Record the message and select Stop > Send > Contacts lookup.
3
Select a recipient and select Send.
You can get email in your phone and use all standard email functions.
You can synchronize your email using the Microsoft® Exchange ActiveSync® application.
Before using email
You can use the setup wizard to check if settings for your email account can be
automatically downloaded. If this doesn't work, you'll be prompted to enter settings
manually.
To use email, you need the correct Internet settings in your phone. If you can't use the Internet,
see I cannot use Internet-based services on page 72.
Entering email settings manually
You can create an email account on your phone by entering the email settings manually.
Before using the setup wizard, you need the relevant account and settings information. You
can contact your service provider regarding email accounts included in your phone
subscription. Otherwise, you should contact your email service provider.
You need the following information:
•
Email address – the address that others use to send email to you. It always includes the
‘@’ character.
46
This is an Internet version of this publication. © Print only for private use.
Page 47

•
Email username – the name you use to log in to your email account. Depending on your
email account, this may be the same as your email address.
•
Email password – the password you use to log in to your email account.
•
Incoming email server (POP3 or IMAP4). This identifies the server where your incoming
email messages are stored (for example, mail.example.com).
To create an email account for the first time
1
To start the email setup wizard, select Menu > Messaging > Email.
2
Follow the instructions to create the account.
If you need to enter settings manually, you can contact your email provider for more information.
An email provider could be the company that supplied your email address.
To create a POP3 email account manually
1
Select Menu > Messaging > Email.
2
If you have several email accounts, select an account.
3
Select Accounts.
4
Scroll to New account and select Add. The setup wizard opens.
5
Select the type of account.
6
Enter your name and select Continue.
7
Enter your email address and select Continue.
8
Enter your user name for the incoming server and select Continue.
9
Enter your password for the incoming server and select Continue.
10
To complete the configuration manually, select No.
11
Select POP3 and select Continue.
12
Enter the incoming POP3 server name and select Continue.
13
Enter the outgoing server name (SMTP) and select Continue.
Your email service provider may use additional settings in their email setup. If so, you need to
edit your email account before you can use it.
To create an IMAP4 email account manually
1
Select Menu > Messaging > Email.
2
If you have several email accounts, select an account.
3
Select Accounts.
4
Scroll to New account and select Add. The setup wizard opens.
5
Select the type of account.
6
Enter your name and select Continue.
7
Enter your email address and select Continue.
8
Enter your username for the incoming server and select Continue.
9
Enter your password for the incoming server and select Continue.
10
To complete the configuration manually, select No.
11
Scroll to IMAP4 and select Continue.
12
Enter the incoming IMAP4 server name and select Continue.
13
Enter the outgoing server name (SMTP) and select Continue.
Your email service provider may use additional settings in their email setup. If so, you need to
edit your email account before you can use it.
47
This is an Internet version of this publication. © Print only for private use.
Page 48

To write and send an email message
1
Select Menu > Messaging > Email.
2
If you have several email accounts, select the account you want to send the message
from.
3
Select Write new.
4
To add a recipient, scroll to To: and select Add > Enter email address. Enter the
email address and select OK.
5
To add more recipients, scroll to To: and select Edit. Scroll to an option and select
Add. When you are ready, select Done.
6
To enter a subject, scroll to Subject:, select Edit, enter the subject, and select OK.
7
To enter the message text, scroll to Text:, select Edit, enter the text, and select
OK.
8
Select Add to attach a file.
9
Select Continue > Send.
To receive and read an email message
1
Select Menu > Messaging > Email.
2
If you have several email accounts, select an account.
3
Select Inbox > Options > Check new email.
4
Scroll to the message and select View.
To save an email message
1
Select Menu > Messaging > Email.
2
If you have several email accounts, select an account.
3
Select Inbox.
4
Scroll to the message and select View > Options > Save message.
To reply to an email message
1
Select Menu > Messaging > Email.
2
If you have several email accounts, select an account.
3
Select Inbox.
4
Scroll to the message and select Options > Reply.
5
Write the reply and select OK.
6
Select Continue > Send.
To view an attachment in an email message
•
When you view the message, select Options > Attachments > Use > View.
Active email account
If you have several email accounts, you can change which one is active.
To create additional email accounts
1
Select Menu > Messaging > Email.
2
If you have several email accounts, select an account.
3
Select Accounts.
4
Scroll to New account and select Add.
To change the active email account
1
Select Menu > Messaging > Email.
2
If you have several email accounts, select an account.
3
Select Accounts.
4
Select the account you want to activate.
Checking for new email messages automatically
You can set your phone to check for new email messages automatically. You can use a
time interval for the check, or you can let the phone stay connected to the email server
(push email). The phone will only check for email messages for the active email account.
When you receive a new email message,
This is an Internet version of this publication. © Print only for private use.
appears on the screen.
48
Page 49

To set the interval for checking for new email messages
1
Select Menu > Messaging > Email.
2
If you have several email accounts, select an account.
3
Select Settings > the Download tab > Check interval.
4
Select an option.
49
This is an Internet version of this publication. © Print only for private use.
Page 50

Internet
If you cannot use the Internet, see I cannot use Internet-based services on page 72.
To start browsing
1
Select Menu > Internet.
2
Enter a web address, a search phrase or the name of a bookmark.
3
Scroll to an item in the list and select Go to or Search.
To exit the browser
1
When you are browsing the web, select and then select .
2
Select Exit browser.
To access the web browser toolbar
When you are viewing a web page, select
Icon
Function
Pan and zoom the web page
Search the web or enter a web address
Manage your favorite web pages
Manage the files you have downloaded from the Internet
. The following options appear:
Web browser shortcuts
You can use the keypad to go directly to a web browser function.
Key
-
Shortcut
Bookmarks
Enter text to enter an address, search the Internet or search in Bookmarks
Zoom
Overview (when Smart-Fit is off)
Bookmarks
You can create and edit bookmarks as quick links to your favorite web pages.
To create a bookmark
1
When you are viewing a web page you want to add to your bookmarks, select
and then select .
2
Select Add as bookmark.
To select a bookmark
1
Select Menu > Internet.
2
When you are browsing the Internet, select
3
Scroll to a bookmark and select Go to.
To send a bookmark
1
Select Menu > Internet .
2
When you are browsing the Internet, select
3
Scroll to a bookmark, then select Options.
4
Select Send and select a transfer method.
This is an Internet version of this publication. © Print only for private use.
and then select .
and then select .
50
Page 51

History pages
You can view and go to web pages you have previously visited.
To view history pages
1
Select Menu > Internet.
2
Select and then select .
3
Select History.
More browser features
To turn on or off Smart-Fit Rendering™
1
Select Menu > Internet.
2
Select
3
Select Settings > Smart-Fit.
4
Select an option.
To use pan and zoom on a web page
1
When you're viewing a web page, select and then select .
2
Use the navigation key to move the frame.
3
Press the center selection key to zoom in on a part of the web page.
To use pan and zoom, Smart-Fit must be turned off.
To make a call when you are browsing the web
•
Press .
and then select .
To save a picture from a web page
1
When you are viewing a web page, select and then select .
2
Select Save picture.
3
Select a picture.
To find text on a web page
1
When viewing a web page, select
2
Select Find on page.
3
Enter text and select Find.
To send a link
1
When you are viewing a web page, select
2
Select Send link and select a transfer method.
Make sure the receiving device supports the transfer method you select.
and then select .
and then select .
Internet settings
You can receive or enter data account settings in four ways:
•
Automatically by using the Settings download function on your phone.
•
Automatically by using the Sony Ericsson phone settings (if supported by your service
provider).
•
Automatically by receiving them from your service provider.
•
Manually by entering the settings on your phone.
We recommend that you enter settings automatically, as this takes less time and effort than
entering them manually.
Entering settings manually
To enter settings manually, you need settings information from your service provider, for
example, the APN (Access Point Name).
51
This is an Internet version of this publication. © Print only for private use.
Page 52

To enter PS (Packet Switched) data account settings on the phone
1
Select Menu > Settings > Connectivity > Internet settings > Connect using:.
2
Scroll to a data account item and select Options > Create new.
3
Select PS data.
4
Select Name > Edit.
5
Enter a name for your data account and select OK.
6
Select APN > Edit.
7
Enter the APN (Access Point Name) you received from your service provider and
select OK.
8
Select Save to save the account.
9
Select the data account you created and select Save. You are now ready to use the
Internet.
To enter CS (Circuit Switched) data account settings on the phone
1
Select Menu > Settings > Connectivity > Internet settings > Connect using:.
2
Scroll to a data account item and select Options > Create new.
3
Select CS data.
4
Select Name > Edit.
5
Enter a name for your data account and select OK.
6
Select Phone number > Edit.
7
Enter the phone number you received from your service provider and select OK.
8
Select Username > Edit.
9
Enter the user name you received from your service provider and select OK.
10
Select Password > Edit.
11
Enter the password you received from your service provider and select OK.
12
Select Save to save the account.
13
Select the data account you created and select Save. You are now ready to use the
Internet.
Modem functionality
Your phone has a built-in modem. You can use it to connect a computer to your Internet
Service Provider (ISP) to browse the Internet or manage your email messages.
You need to have Sony Ericsson PC Suite installed on your computer.
Before starting
Before you set up your computer and start using the modem you need:
•
A GSM phone subscription that supports EDGE, GPRS or 3G.
•
A phone subscription that covers Internet browsing. If you are not sure whether you have
this, please contact your service provider.
Setting up Internet connections
You can establish an Internet connection through your phone using the following methods:
•
Sony Ericsson PC Suite
•
USB Internet mode on your phone
•
Bluetooth™ wireless technology
Setting up an Internet connection using Sony Ericsson PC Suite
Sony Ericsson PC Suite lets you access the Internet using a cable connection between
your phone and a computer. When you connect the two devices using an approved cable,
the How to connect wizard in the PC Suite guides you through the process. An Internet
connection is established automatically in one of three ways:
•
If there is an Internet data account under Internet settings that corresponds to your current
operator, the connection will be established automatically.
•
If there is no Internet data account under Internet settings that corresponds to your current
operator, the application creates a phone data account.
52
This is an Internet version of this publication. © Print only for private use.
Page 53

•
If there is insufficient space to save the Internet data on your phone, you will be asked to
overwrite an existing data account.
To connect to the Internet using Sony Ericsson PC Suite
1
Double-click the Sony Ericsson PC Suite icon on your computer desktop.
2
To open the How to connect wizard, click the How to connect button.
3
In the How to connect wizard, click Next.
4
Select a connection type: USB cable or Bluetooth wireless technology.
5
Click Next and follow the instructions.
6
Click Internet connection.
7
In the Internet connection window, click Connect.
Make sure the signal strength is good enough to establish a data connection.
To end a connection
•
Click Disconnect in the Internet connection window.
Managing connections in Sony Ericsson PC Suite
When you are connected to the Internet using Sony Ericsson PC Suite, you can manage
your connections from the Advanced settings menu in the Internet connection window.
You can:
•
Use another connection
•
Create a new connection
•
Manage your connections
•
View connection logs
To use a connection other than the default connection
1
Select Manage your connections. The Manage your connections window appears.
2
Double-click the connection. The connection starts up.
To create a new connection
1
Select Manage your connections. The Manage your connections window appears.
2
Double-click Create a new connection. The Internet Connection Wizard opens.
3
Follow the instructions. The connection that is created becomes your default
connection.
To manage your connections
1
Select Manage your connections. The Manage your connections window opens.
2
Right-click the icon of the connection to be changed and select Properties. The
Properties window opens.
3
Make the changes you want in the various tabs.
4
Click OK.
To delete a connection
1
Select Manage your connections. The Manage your connections window opens.
2
Select the icon of the connection to be deleted. Press the Delete key on your
keyboard. A confirmation window opens.
3
Click Yes.
Setting up a USB cable modem
You can use your phone as a modem by connecting the phone to a computer using a USB
cable.
To set up a USB cable modem
1
Connect a USB cable to your phone and the computer.
2
Phone: Select Menu > Settings > Connectivity > USB > Advanced > Internet
access > Internet via phone.
3
Computer: The new connection appears in your Network connections folder.
53
This is an Internet version of this publication. © Print only for private use.
Page 54

Setting up a Bluetooth™ modem
If your computer supports Bluetooth™ wireless technology, you can connect and use your
phone as a modem. The connection appears in the Network connections folder on the
computer. The Bluetooth™ function on the phone and computer must be turned on before
you start setting up the modem. A maximum range of 10 meters (33 feet), with no solid
objects in between, is recommended for Bluetooth™ communication.
To set up a Bluetooth modem
1
Computer: Double-click the Bluetooth™ icon.
2
Click View devices in range. If your phone is not displayed, click Search For Devices
in range.
3
Right-click your phone name and select Pair device.
4
Choose a PIN code and click OK.
5
Phone: When Add to My devices? appears, select Yes.
6
Enter the PIN code (same as before) and select OK.
7
Computer: Double-click your phone name in the Bluetooth devices window.
8
Double-click the serial port icon.
9
Phone: When Allow? appears, select Yes.
Internet security and certificates
Your phone supports secure browsing. Certain Internet services, such as banking, require
certificates in your phone. Your phone may already contain certificates when you buy it or
you can download new certificates.
To view certificates in the phone
•
Select Menu > Settings > General > Security > Certificates.
File transfers
The File transfer manager keeps track of the files you download from the Internet, for
example, media files, podcasts, and games, and helps you access the files. It also tracks
your photo uploads to websites, such as web albums and blogs. In the File transfer
manager, you can also install downloaded Java applications, and to pause, resume, or
cancel downloads.
To access a file using File transfer
1
Select Menu > Organizer > File transfer.
2
Scroll to the file.
3
Press the center selection key to access the file, or select Options for other actions.
Web feeds
Using web feeds, you can subscribe to and download frequently updated content, such
as news, podcasts or photos.
To add new feeds from a web page
1
When you browse a page on the Internet that provides web feeds, indicated by
select and then .
2
For each feed you want to add, scroll to the feed and select Add > Yes.
3
Select an update frequency.
,
To search for web feeds
1
Select Menu > Media > Web feeds.
2
Select New feed and enter a web address.
This is an Internet version of this publication. © Print only for private use.
54
Page 55

To download content via web feeds
1
Select Menu > Media > Web feeds.
2
Select Options >Update feed.
3
Scroll to an updated feed and select View.
4
Scroll to a heading by pressing the navigation key left or right.
5
Scroll to the item you want to download by pressing the navigation key downward,
then select Options > Download file.
You can access downloaded files from the File transfer manager. See File transfers on
page 54.
You can also subscribe to and download web feed content to a computer using the Media Go™
application. See To transfer content using Media Go™ on page 40.
Updating web feeds
You can manually update your feeds, or schedule updates. When updates arrive,
appears on the screen.
To schedule web feed updates
1
Select Menu > Media > Web feeds.
2
Scroll to a feed and select Options > Schedule update.
3
Select an option.
Frequent updates may be costly.
Web feeds in standby
You can show news updates on the standby screen using the ticker application.
This application may not be available in all markets.
To show web feeds in standby
1
Select Menu > Media > Web feeds.
2
Scroll to a feed and select Options > Settings > Standby ticker > Show in
standby.
To access web feeds from standby
1
From standby, select Ticker.
2
To read more about a feed, press the navigation key upwards or downwards to scroll
to a headline, then select View.
Podcasts
Podcasts are files, for example, radio programs or video content, that you can download
and play. You subscribe to and download podcasts using web feeds.
To access audio podcasts
•
Select Menu > Media > Music > Music feeds.
To access video podcasts
•
Select Menu > Media > Video > Video feeds.
Photo feeds
You can subscribe to photo feeds and download photos.
To access photo feeds
•
Select Menu > Media > Photo > Photo feeds.
55
This is an Internet version of this publication. © Print only for private use.
Page 56

Facebook™ application
The Facebook™ application is a social utility that helps you communicate with your friends,
family, and coworkers.
This application may not be available in all markets.
To access Facebook
•
Select Menu > Organizer > Applications > Facebook.
Twitter™ application
Twitter™ is a social networking and micro-blogging service that lets you communicate with
friends, family and web communities via tweets. Tweets are text-based posts of up to 140
characters.
This application may not be available in all markets.
To access Twitter from Widget Manager
1
From standby, press the navigation key up.
2
To select the Twitter™ application, press the navigation key left or right.
3
Press Select to start the application.
4
Enter your Twitter™ username and password.
56
This is an Internet version of this publication. © Print only for private use.
Page 57

Connected home
The Connected home concept makes your phone a part of everyday living in terms of music
and media handling in your home environment. It connects Hi-Fi, TV, movies, gaming, etc.,
on your home network.
Wi-Fi™
Using a Wi-Fi™ connection, you can access the Internet wirelessly with your phone. You
can browse the Internet using personal (home) networks and hotspots (public access
zones).
Personal networks are usually protected by a passphrase or key. Hotspots are usually not
protected, but often require you to log on to an operator's service before you get Internet
access.
Using Wi-Fi™
To be able to browse the Internet using Wi-Fi, you need to search for and connect to an
available network and then open the Internet browser.
To turn on Wi-Fi™
•
Select Menu > Settings > Connectivity > Wi-Fi > Turn on.
To connect to a network
1
Select Menu > Settings > Connectivity > Wi-Fi.
2
Scroll to a network and select Connect.
To start browsing using Wi-Fi™
1
Make sure
2
Select Menu > Internet.
Often used networks can be saved as favorites. If you turn on
networks, your phone will connect automatically to that network when it is within range.
is showing in the status bar.
Auto connect for one of these
DLNA™
Your phone has built-in DLNA™ (Digital Living Network Alliance) functionality that uses WiFi™ technology to connect to your home network. Other DLNA devices connected to the
same home network can access, view, and play images and music saved in your phone.
A compatible DLNA device can be, for example, a computer, camera, TV,
PLAYSTATION®3 console, or another phone with DLNA functionality.
must be turned on and the phone must be connected to a favorite network.
Wi-Fi
To set the phone as a DLNA server
1
Select Menu > Settings > Connectivity > Content sharing.
2
Select a favorite network from the list.
3
Select On > Save.
A DLNA server exposes music, images and videos on the network. Other DLNA units play media
from the media servers on the network.
To view photos saved in your phone on another DLNA device
1
Select Menu > Media > Photo > Camera album.
2
Select a month.
3
Scroll to a photo and select Options > View on.
4
Select a DLNA device from the list.
57
This is an Internet version of this publication. © Print only for private use.
Page 58

To play music stored in your phone on another DLNA device
1
Select Menu > Media > Music.
2
Browse by category using the navigation key.
3
Scroll to and select a title.
4
Select Options > Play on.
5
Select a DLNA device from the list.
To play music stored on another DLNA device in your phone
1
Select Menu > Media > Music > Media servers.
2
Select a Media server from the list.
3
Browse by category using the navigation key.
4
Scroll to a title and select Play.
58
This is an Internet version of this publication. © Print only for private use.
Page 59

GPS
Your phone has a GPS receiver that uses satellite signals to calculate your location. Some
GPS features use the Internet. Data rates and charges may apply.
If you cannot use some GPS features, see I cannot use Internet-based services on page 72.
Using GPS
Your location can be found when you have a clear view of the sky. If your location is not
found after a few minutes, move to another location. To help the search, stand still and do
not cover the GPS antenna.
The first time you use the GPS it may take up to 10 minutes before your location is found.
Assisted start
Assisted start helps calculate your location more quickly. If not turned off, Assisted
start will automatically be used to find your location when Assisted GPS (A-GPS)
technology is available.
To set when to use Assisted start
1
Select Menu > Location services > Settings > Assisted start.
2
Select an option.
Saving locations
You can find all saved locations in My favorites.
To save your current location
1
Select Menu > Location services > My favorites > Add new place.
2
Select Edit and enter the title. Select OK.
3
Scroll to Description: and select Add.
4
Enter the description and select OK.
5
Scroll to Position: and select Add > Current position.
6
When the position is found, select Save.
To view a saved location on a map
1
Select Menu > Location services > My favorites.
2
Scroll to a location and select Go to.
Location requests
External services may ask for your location. You can allow external services to use
information about your location, as well as restrict them from doing so.
To change access for external services
1
Select Menu > Location services > Settings > Privacy.
2
Select an option.
59
This is an Internet version of this publication. © Print only for private use.
Page 60

Turning off GPS
The GPS receiver turns off automatically when it is not in use. You can also turn the GPS
receiver off manually. This saves battery power when you use features that do not require
the GPS receiver to find your location.
To turn on or off GPS manually
1
Select Menu > Location services > Settings.
2
Select Enable GPS or Disable GPS.
Google Maps™ for mobile
The Google Maps™ application lets you view your current location, find other locations,
and calculate routes.
When you start the Google Maps™ application, your approximate location is shown using
information from nearby mobile towers. Your location is updated with a more precise
position when the GPS receiver finds your location.
To use the Google Maps™application
•
Select Menu > Location services > Google Maps.
To access favorites from the Google Maps™ application
•
After opening Google Maps™, press
To learn more about the Google Maps™ application
•
When you use the Google Maps™ application, select Options > Help.
.
Tracker
Tracker is a GPS-based sports application which allows you to keep track of your speed,
distance, route and energy consumption during training. You can base the training on how
long time you want to train or on what distance you want to cover. You can also base it on
a previous training route which has GPS data.
Information provided by use of the Tracker application is approximate.
warranty of any kind with respect to the accuracy of the Tracker application. Any serious health
and fitness concerns should be referred to a health care professional.
To start a training session
1
Select Menu > Location services > Tracker > Start training.
2
Select a training type.
3
Scroll to an item, select Edit and enter the data.
4
To save, select Done.
5
To start training, select Start.
To switch between training views
•
During a training session, press the navigation key left or right to view information on
training duration, progress and live comparison with a previous session.
To compare results during training
1
Select Menu > Location services > Tracker > Start training.
2
Select Route based.
3
Scroll to Route:, select Edit and select a route.
4
Scroll to Live compare and select Edit.
5
Scroll to the result you want to compare and select Compare.
6
Select Done and then Start.
Sony Ericsson makes no
A GPS location is required before results can be compared.
60
This is an Internet version of this publication. © Print only for private use.
Page 61

To end a training session manually
•
During a training session, select Pause > End.
Results
The training result is shown after a session is ended. You can view past results anytime,
and compare them if they have GPS data.
To view a training result
1
Select Menu > Location services > Tracker > Results.
2
Scroll to a month and select View.
3
Scroll to a date and select View.
4
Select a training result. If you have used laps, press the navigation key left or right
to view result per lap.
To compare results
1
Select Menu > Location services > Tracker > Results.
2
Scroll to a result and select Options > Compare.
3
Select a result to compare with.
A GPS location is required before results can be compared.
Energy consumption
To calculate and view the energy consumption for a session you must first set your personal
profile in Settings in Tracker. You view the energy consumption in the result view.
To set the personal profile
1
Select Menu > Location services > Tracker > Settings > Personal profile.
2
Select an item, enter data and select OK.
3
When finished, select Options > Save profile.
To turn on energy consumption
•
Select Menu > Location services > Tracker > Settings > Energy consumption
> On.
61
This is an Internet version of this publication. © Print only for private use.
Page 62

Synchronizing
You can synchronize your phone in two different ways: using a computer program, or using
an Internet service.
Use only one of the synchronization methods at a time with your phone.
For more information, go to www.sonyericsson.com/support to read the Synchronization
Feature guide.
Synchronization options in Sony Ericsson PC Suite
To set synchronization options in Sony Ericsson PC Suite
1
Computer: Start Sony Ericsson PC Suite.
2
Connect your phone to the computer.
3
In the Synchronization window of Sony Ericsson PC Suite, click Settings and choose
your options.
To solve installation problems
1
Check that the cable is connected properly to the phone and to the computer.
2
Make sure that the phone is turned on.
3
Restart the computer without disconnecting the cable or turning off the phone.
4
Try to synchronize again.
5
If the problem persists, reinstall Sony Ericsson PC Suite.
COM port speed
If you experience problems synchronizing with a USB cable, check the COM port speed is
correctly set.
To set the COM port speed
1
Computer: Click Start/Settings/Control Panel/System/Hardware/Device Manager/
Ports (COM & LPT) and double-click Sony Ericsson Device (number) USB WMC
Device Management.
2
Select the Port settings and set the speed to no higher than 115 200 bps.
3
Try to connect again.
Contacts, calendar items, tasks, notes, and bookmarks
In the Settings window of Sony Ericsson PC Suite, you can choose synchronization settings
for your contacts, calendar items, tasks, notes, and bookmarks. For contacts, calendar
items, tasks, and notes, you can use the drop-down list to select your Personal Information
Manager (PIM). The drop-down list includes all applications that have been detected on
your computer. In the Properties window, you can set which folders you want to
synchronize with.
Bookmarks
When installing Sony Ericsson PC Suite, a subfolder for My Sony Ericsson bookmarks is
created in the Internet Explorer bookmarks folder. This becomes the default folder for
synchronization.
If Internet Explorer is not installed or is not the default web browser, the default folder for
the bookmarks is My Documents/Sony Ericsson PC Suite/Bookmarks.
Rules
In the Rules window, you can set rules for what happens when conflicts are found between
your phone and computer during synchronization.
62
This is an Internet version of this publication. © Print only for private use.
Page 63

Schedule
You can activate the Automatic synchronization feature in the Schedule window. This lets
you set how often the phone will synchronize with the computer.
Synchronizing using SyncML™
Before synchronizing
To be able to synchronize your phone with an Internet server, you need to create an account
on your phone. Contact your operator to get the necessary information.
The settings that are required for SyncML synchronization and for registering a
synchronization account online with a service provider are:
•
Server address – server URL
•
Database name – database to synchronize with
To enter settings for SyncML
1
Phone: Select Menu > Organizer > Synchronization.
2
Scroll to New account and select Add > SyncML.
3
Enter a name for the new account and select Continue.
4
Scroll to Server address. Enter the required information and select OK.
5
Enter Username and Password, if required.
6
Scroll to the Applications tab and mark which applications you would like to
synchronize.
7
Scroll to the Application settings tab and select an application.
8
Select Database name and enter the required information.
9
To save settings, select OK.
10
Enter Username and Password, if required.
11
Select Back.
12
To enter additional settings, scroll to the Advanced tab.
13
Select Save.
To delete an account
1
Phone: Select Menu > Organizer > Synchronization.
2
Scroll to the account and select Options > Delete.
Starting the synchronization
1
Phone: Select Menu > Organizer > Synchronization.
2
Scroll to an account and select Start.
™
Synchronizing using a Microsoft® Exchange Server
You can access and synchronize corporate exchange information such as email, contacts,
and calendar entries on your phone using a Microsoft® Exchange Server.
For more information on synchronization settings, contact your IT administrator.
Before you start to synchronize
The settings required for Microsoft® Exchange ActiveSync® to access a Microsoft®
Exchange Server are:
•
Server address – server URL
•
Domain – server domain
•
Username – account username
•
Password – account password
63
This is an Internet version of this publication. © Print only for private use.
Page 64

To enter settings for Microsoft® Exchange ActiveSync
1
Select Menu > Organizer > Synchronization.
2
Scroll to New account and select Add > Exchange ActiveSync.
3
Enter a name for the new account and select Continue.
4
Enter the required settings.
5
Scroll between the tabs to enter additional settings.
6
Select Save.
Starting the synchronization
1
Phone: Select Menu > Organizer > Synchronization.
2
Scroll to an account and select Start.
Synchronizing using a computer
You can use a USB cable or Bluetooth wireless technology to synchronize phone contacts,
appointments, bookmarks, tasks, and notes using an online service or a computer program
such as the Microsoft® Outlook® application.
Before synchronizing, you need to install the Sony Ericsson PC Suite. Sony Ericsson PC
Suite software is available for download through PC Companion or from
www.sonyericsson.com/support
.
Mac® compatible software is also available for download at
www.sonyericsson.com/support
To synchronise using the Sony Ericsson PC Suite
1
Computer: Start Sony Ericsson PC Suite from Start/Programs/Sony Ericsson/
Sony Ericsson PC Suite.
2
Follow the instructions in the Sony Ericsson PC Suite for how to connect.
3
When you are notified that the Sony Ericsson PC Suite has found your phone, you
can start synchronising.
For usage details, see the Sony Ericsson PC Suite Help section once the software has been
installed on your computer.
Synchronizing using an Internet service
You can synchronize your phone data through an Internet service using SyncML™, or you
can use a Microsoft® Windows® Server in combination with the Microsoft® Exchange
ActiveSync® application. For more information, go to www.sonyericsson.com/support to
read the Synchronization Feature guide.
.
64
This is an Internet version of this publication. © Print only for private use.
Page 65

More features
Flight mode
In Flight mode the network and radio transceivers are turned off to prevent disturbance to
sensitive equipment.
When the flight mode menu is activated you are asked to select a mode the next time you
turn on your phone:
•
Normal mode – full functionality
•
Flight mode – limited functionality
To activate the flight mode menu
•
Select Menu > Settings > General > Flight mode > Continue > Show at
startup.
To select flight mode
1
When the flight mode menu is activated, turn off your phone.
2
Turn on your phone and select Flight mode. appears.
Alarms
You can set a sound or the radio as an alarm signal. The alarm sounds even if the phone
is turned off. When the alarm sounds, you can silence it or turn it off.
To set the alarm
1
Select Menu > Organizer > Alarms.
2
Scroll to an alarm and select Edit.
3
Scroll to Time: and select Edit.
4
Enter a time and select OK > Save.
To set the recurring alarm
1
Select Menu > Organizer > Alarms.
2
Scroll to an alarm and select Edit.
3
Scroll to Recurring: and select Edit.
4
Scroll to a day and select Mark.
5
To select another day, scroll to the day and select Mark.
6
Select Done > Save.
To set the alarm signal
1
Select Menu > Organizer > Alarms.
2
Scroll to an alarm and select Edit.
3
Scroll to the
4
Scroll to Alarm signal: and select Edit.
5
Find and select an alarm signal. Select Save.
To silence the alarm
•
When the alarm sounds, press any key.
•
To repeat the alarm, select Snooze.
tab.
To turn off the alarm
•
When the alarm sounds, press any key, then select Turn off.
To cancel the alarm
1
Select Menu > Organizer > Alarms.
2
Scroll to an alarm and select Turn off.
65
This is an Internet version of this publication. © Print only for private use.
Page 66

To set the snooze duration
1
Select Menu > Organizer > Alarms.
2
Scroll to an alarm and select Edit.
3
Scroll to Snooze duration: and select Edit.
4
Select an option.
The alarm in silent mode
You can set the alarm not to sound when the phone is in silent mode.
To set an alarm to sound or not in silent mode
1
Select Menu > Organizer > Alarms.
2
Scroll to an alarm and select Edit.
3
Scroll to the tab.
4
Scroll to Silent mode: and select Edit.
5
Select an option.
Calendar
You can synchronize your phone calendar with a computer calendar, with a calendar on
the web or with the Microsoft® Outlook® application.
Appointments
You can add new appointments or reuse existing appointments.
To add an appointment
1
Select Menu > Calendar.
2
Select a date.
3
Scroll to New entry and select Add.
4
Enter the information and confirm each entry.
5
Select Save.
To view an appointment
1
Select Menu > Calendar.
2
Select a date.
3
Scroll to an appointment and select View.
To edit an appointment
1
Select Menu > Calendar.
2
Select a date.
3
Scroll to an appointment and select View.
4
Select Options > Edit.
5
Edit the appointment and confirm each entry.
6
Select Save.
To set when reminders should sound
1
Select Menu > Calendar.
2
Select a date.
3
Select Options > Advanced > Reminders.
4
Select an option.
A reminders option set in the
Calendar application affects a reminders option set in Tasks.
Notes
You can make notes and save them. You can also show a note in the standby view.
66
This is an Internet version of this publication. © Print only for private use.
Page 67

To add a note
1
Select Menu > Organizer > Notes.
2
Scroll to New note and select Add.
3
Write a note and select Save.
To show a note in standby
1
Select Menu > Organizer > Notes.
2
Scroll to a note and select Options > Show in standby.
To hide a note shown in standby
1
Select Menu > Organizer > Notes.
2
Scroll to the note shown in standby. This is marked with the icon . Select Options >
Hide in standby.
Tasks
You can add new tasks or reuse existing tasks.
To add a task
1
Select Menu > Organizer > Tasks.
2
Select New task and select Add.
3
Select an option.
4
Enter details and confirm each entry.
To set when reminders should sound
1
Select Menu > Organizer > Tasks.
2
Scroll to a task and select Options > Reminders.
3
Select an option.
A reminders option set in Tasks affects a reminders option set in Calendar.
Profiles
You can change settings such as the ring volume and vibrating alert to suit different
locations. You can reset all profiles to the phone’s original settings.
To select a profile
1
Select Menu > Settings > General > Profiles.
2
Select a profile.
To view and edit a profile
1
Select Menu > Settings > General > Profiles.
2
Scroll to a profile and select Options > View and edit.
You cannot rename the
Normal profile.
Time and date
To set the time
1
Select Menu > Settings > General > Time & date > Time.
2
Enter the time and select Save.
To set the date
1
Select Menu > Settings > General > Time & date > Date.
2
Enter the date and select Save.
67
This is an Internet version of this publication. © Print only for private use.
Page 68

To set the time zone
1
Select Menu > Settings > General > Time & date > My time zone.
2
Select the time zone you are in.
If you select a city, My time zone also updates the time when daylight saving time changes.
To change the clock size displayed on the standby screen
1
Select Menu > Settings > Display > Clock size.
2
Select an option.
This application may not be available in all markets.
Themes
You can change the appearance of the screen using options such as different colors and
wallpaper. You can also create new themes and download them. For more information, go
to www.sonyericsson.com/fun.
To set a theme
1
Select Menu > Settings > Display > Theme.
2
Scroll to a theme and select Set.
Main menu layout
You can change the layout of the icons in the main menu.
To change the main menu layout
1
Select Menu > Options > Main menu layout.
2
Select an option.
Screen orientation
You can change between landscape and portrait orientation.
To change screen orientation in the browser
1
Select Menu > Internet.
2
Select
3
Select Settings > the Browsing tab > Display orientation.
4
Select an option.
To change screen orientation in Media
1
Select Menu > Media > Settings > Orientation.
2
Select an option.
and then select .
Ringtones
To set a ringtone
1
Select Menu > Settings > Sounds & alerts > Ringtone.
2
Find and select a ringtone.
To set the ringtone volume
1
Select Menu > Settings > Sounds & alerts > Ring volume.
2
Press the navigation key left or right to adjust the volume.
3
Select Save.
68
This is an Internet version of this publication. © Print only for private use.
Page 69

To turn off the ringtone
•
Press and hold down . appears.
The alarm signal is not affected.
To set the vibrating alert
1
Select Menu > Settings > Sounds & alerts > Vibrating alert.
2
Select an option.
Games
Your phone contains preloaded games. You can also download games. For more
information, go to www.sonyericsson.com/fun. Help texts are available for most games.
To start a game
1
Select Menu > Media > Games.
2
Select a game.
To end a game
•
Press .
Applications
You can download and run Java™ applications. You can also view information or set
different permissions. If you cannot use Java applications, see I cannot use Internet-based
services on page 72.
To select a Java application
1
Select Menu > Organizer > Applications.
2
Select an application.
To set permissions for a Java application
1
Select Menu > Organizer > Applications.
2
Scroll to an application and select Options > Permissions.
3
Set permissions.
Java application screen size
Some Java applications are designed for a specific screen size. For more information,
contact the application vendor.
This application may not be available in all markets.
To set the screen size for a Java application
1
Select Menu > Organizer > Applications.
2
Scroll to an application and select Options > Screen size.
3
Select an option.
To set a Java™ application as a wallpaper
1
Select Menu > Settings > Display.
2
Select Wallpaper > Application.
3
Select a Java application.
You can only see the Java applications that have support for wallpaper.
Antivirus
Antivirus identifies and removes applications you install on your phone that become infected
by viruses. It automatically scans applications during installation. When an infected
application is detected, you can delete or release the infected application. You can select
69
This is an Internet version of this publication. © Print only for private use.
Page 70

a 30-day free evaluation or enter a subscription number. We recommend that you update
the antivirus application with the latest virus protection frequently. You need the correct
Internet settings in your phone to use this function.
Our inclusion or your use of antivirus software does not ensure that your use of this product will
be free from exposure to viruses, malware or other harmful software.
To turn on Antivirus scanning
1
Select Menu > Settings > General > Security > Antivirus.
2
Follow the instructions to use the setup wizard.
To turn off Antivirus scanning
1
Select Menu > Settings > General > Security > Antivirus > Virus scan.
2
Select Off.
PIN codes
SIM protection
This lock only protects your subscription. Your phone will work with a new SIM card. If the
lock is on, you have to enter a PIN (Personal Identity Number).
If you enter your PIN incorrectly three times in a row, the SIM card is blocked and you need
to enter your PUK (Personal Unblocking Key). Your PIN and PUK are supplied by your
network operator.
To unblock the SIM card
1
When PIN blocked appears, enter your PUK and select OK.
2
Enter a new four-to-eight-digit PIN and select OK.
3
Re-enter the new PIN and select OK.
To edit the PIN
1
Select Menu > Settings > General > PIN codes > SIM protection > Change
PIN.
2
Enter your PIN and select OK.
3
Enter a new four-to-eight-digit PIN and select OK.
4
Re-enter the new PIN and select OK.
Codes do not match appears, you entered the new PIN incorrectly. If Incorrect PIN appears,
If
you entered the old PIN incorrectly.
To use the SIM card lock
1
Select Menu > Settings > General > PIN codes > SIM protection > Protection.
2
Select an option.
3
Enter your PIN and select OK.
Phone protection
You can stop unauthorized use of your phone by activating phone lock protection. After
activating, you will be asked to enter your phone lock code every time you restart the phone.
The default phone lock code is 0000. It is recommended that you change this to any fourto-eight-digit personal code.
It is important that you remember your new code. If you forget it, you need to take your phone
to your local Sony Ericsson retailer.
70
This is an Internet version of this publication. © Print only for private use.
Page 71

To activate the phone lock
1
Select Menu > Settings > General > PIN codes > Phone protection >
Protection.
2
Select On if you want to enter a lock code every time you start the phone, or select
Automatic if you want the code to be entered only when the phone restarts after a
new SIM card is inserted.
3
Enter the phone lock code (0000 by default) and select OK.
To unlock the phone
•
When Phone locked appears, enter your phone lock code and select OK.
To change the phone lock code
1
Select Menu > Settings > General > PIN codes > Phone protection > Change
code.
2
Enter the old code and select OK.
3
Enter the new code and select OK.
4
Repeat the code and select OK.
Keypad lock
You can set the keypad lock to avoid accidental dialing.
be answered without unlocking the keypad.
Calls to the international emergency number 112 can still be made.
To unlock the keypad
1
Press .
2
Select Unlock.
appears. Incoming calls can
IMEI number
Keep a copy of your IMEI (International Mobile Equipment Identity) number in case your
phone is stolen.
To view your IMEI number
•
Press , , , , .
71
This is an Internet version of this publication. © Print only for private use.
Page 72

Troubleshooting
Some problems can be fixed using Update Service. Using Update Service on a regular
basis will optimize the phone’s performance. See Updating your phone on page 44.
Some problems will require you to call your network operator.
For more support go to www.sonyericsson.com/support.
Common questions
Where can I find the regulatory information such as my IMEI number if
I cannot turn on my phone?
I have problems with memory capacity or the phone is working slowly
Restart your phone every day to free memory or do a Master reset.
Master reset
If you select Reset settings, the changes that you have made to settings will be deleted.
If you select Reset all, your settings and content, such as contacts, messages, pictures,
sounds and downloaded games, will be deleted. You may also lose content that was in the
phone at purchase.
To reset the phone
1
Select Menu > Settings > General > Master reset.
2
Select an option.
3
Follow the instructions that appear.
I cannot charge the phone or battery capacity is low
The charger is not properly connected or the battery connection is poor. Remove the
battery and clean the connectors.
The battery is worn out and needs to be replaced. See Charging the battery on page 8.
No battery icon appears when I start charging the phone
It may take a few minutes before the battery icon appears on the screen.
Some menu options appear in gray
A service is not activated. Contact your network operator.
I cannot use Internet-based services
Your subscription does not include data capability. Settings are missing or incorrect.
You can download settings using the Settings download or from
www.sonyericsson.com/support.
72
This is an Internet version of this publication. © Print only for private use.
Page 73

To download settings
1
Select Menu > Settings > User help > Settings download.
2
Follow the instructions that appear.
This feature might not be available in all markets. Contact your network operator or service
provider for more information.
I can't send messages from my phone
To send messages, you need to set a service center number. The number is supplied by
your service provider and is usually saved on the SIM card. If the number of your service
center is not saved on your SIM card, you must enter the number yourself.
To send most picture messages, you must set an MMS (Multimedia Messaging Service)
profile and the address of your message server. If no MMS profile or message server exists,
you can receive all the settings automatically from your service provider, using the Settings
download, or go to www.sonyericsson.com/support.
To enter a service center number
1
Select Menu > Settings > Connectivity > Message settings > Text message and
scroll to Service center. The number is shown if it is saved on the SIM card.
2
If there is no number shown, select Edit.
3
Scroll to New Service Center and select Add.
4
Enter the number, including the international “+” sign and country code.
5
Select Save.
To select an MMS profile
1
Select Menu > Settings > Connectivity > Message settings > Multim.
message.
2
Select an existing profile or create a new one.
To set the message server address
1
Select Menu > Settings > Connectivity > Message settings > Multim.
message.
2
Scroll to a profile and select Options > Edit.
3
Scroll to Message server and select Edit.
4
Enter the address and select OK > Save.
The phone does not ring or rings too softly
Make sure that Silent mode has not been set to On. See To turn off the ringtone on
page 69.
Check the ringtone volume. See To set the ringtone volume on page 68.
Check the profile. See To select a profile on page 67.
Check the forward call options. See To forward calls on page 22.
The phone cannot be detected by other devices using Bluetooth
wireless technology
You have not turned the Bluetooth function on. Make sure that the visibility is set to Show
phone. See To turn on the Bluetooth™ function on page 40.
I cannot synchronize or transfer content between my phone and the
computer, when using a USB cable.
The software or the USB drivers have not been properly installed. Go to
www.sonyericsson.com/support to read Feature guides which contain detailed installation
instructions and troubleshooting sections.
73
This is an Internet version of this publication. © Print only for private use.
Page 74

Error messages
Insert SIM
There is no SIM card in your phone or you may have inserted it incorrectly.
See To insert the SIM card on page 6.
The SIM card connectors need cleaning. If the card is damaged, contact your network
operator.
Insert correct SIM card
Your phone is set to work only with certain SIM cards. Check if you are using the correct
operator SIM card.
Incorrect PIN/Incorrect PIN2
You have entered your PIN or PIN2 incorrectly.
Enter the correct PIN or PIN2 and select OK.
PIN blocked/PIN2 blocked
You have entered your PIN or PIN2 code incorrectly three times in a row.
To unblock, see SIM protection on page 70.
Codes do not match
Codes that you have entered do not match. When you want to change a security code, for
example your PIN, you have to confirm the new code. See SIM protection on page 70.
No netw. coverage
•
Your phone is in flight mode. See Flight mode on page 65.
•
Your phone is not receiving any network signal, or the received signal is too weak. Contact
your network operator and make sure that the network has coverage where you are.
•
The SIM card is not working properly. Insert your SIM card in another phone. If this works,
it is probably your phone that is causing the problem. Please contact the nearest
Sony Ericsson service location.
Emergency calls only
You are within range of a network, but you are not allowed to use it. However, in an
emergency, some network operators allow you to call the international emergency number
112. See Emergency calls on page 17.
PUK blocked. Contact service provider.
You have entered your personal unblocking key code (PUK) incorrectly 10 times in a row.
74
This is an Internet version of this publication. © Print only for private use.
Page 75

Legal information
Sony Ericsson J10i2
This User guide is published by Sony Ericsson Mobile Communications AB or its local affiliated company, without any
warranty. Improvements and changes to this User guide necessitated by typographical errors, inaccuracies of current
information, or improvements to programs and/or equipment, may be made by Sony Ericsson Mobile Communications
AB at any time and without notice. Such changes will, however, be incorporated into new editions of this User guide.
All rights reserved.
©Sony Ericsson Mobile Communications AB, 2010
Publication number: 1234-9310.2
Your mobile phone has the capability to download, store, and forward additional content, e.g., ringtones. The use of
such content may be restricted or prohibited by rights of third parties, including, but not limited to, restriction under
applicable copyright laws. You, and not Sony Ericsson, are entirely responsible for additional content that you
download to or forward from your mobile phone. Prior to your use of any additional content, please verify that your
intended use is properly licensed or otherwise authorized. Sony Ericsson does not guarantee the accuracy, integrity,
or quality of any additional content or any other third-party content. Under no circumstances will Sony Ericsson be
liable in any way for your improper use of additional content or other third party content.
This User Guide may reference services or applications provided by third parties. Use of such programming or services
may require separate registration with the third party provider and may be subject to additional terms of use. For
applications accessed on or through a third-party website, please review such website’s terms of use and applicable
privacy policy in advance. Sony Ericsson does not warrant or guarantee the availability or performance of any thirdparty websites or offered services.
Smart-Fit Rendering is a trademark or a registered trademark of ACCESS Co., Ltd.
Bluetooth is a trademark or a registered trademark of Bluetooth SIG, Inc., and any use of such mark by
Sony Ericsson is under license.
The Liquid Identity logo, Elm , PlayNow and TrackID are trademarks or registered trademarks of Sony Ericsson Mobile
Communications AB.
TrackID™ is powered by Gracenote Mobile MusicID™. Gracenote and Gracenote Mobile MusicID are trademarks or
registered trademarks of Gracenote, Inc.
Sony and "make.believe" are trademarks or registered trademarks of Sony Corporation.
Media Go is a trademark or registered trademark of Sony Media Software and Services.
microSD is a trademark or a registered trademark of SanDisk Corporation.
PictBridge is a trademark or registered trademark of Canon Kabushiki Kaisha Corporation.
Wi-Fi is a trademark or a registered trademark of the Wi-Fi Alliance.
DLNA is a trademark or registered trademark of the Digital Living Network Alliance.
Google Maps™ is a trademark or registered trademark of Google, Inc.
Lotus Notes is a trademark or a registered trademark of International Business Machines Corporation.
SyncML is a trademark or registered trademark of Open Mobile Alliance LTD.
Facebook is a trademark or registered trademark of Facebook, Inc.
Ericsson is a trademark or registered trademark of Telefonaktiebolaget LM Ericsson.
Mac is a trademark of Apple Computer, Inc., registered in the U.S. and other countries.
Adobe Photoshop Album Starter Edition is a trademark or registered trademark of Adobe Systems Incorporated in
the United States and/or other countries.
Microsoft, Windows, Outlook, Windows Vista, Windows Server and ActiveSync are registered trademarks or
trademarks of Microsoft Corporation in the United States and/or other countries.
This product is protected by certain intellectual property rights of Microsoft. Use or distribution of such technology
outside of this product is prohibited without a license from Microsoft.
Content owners use Windows Media digital rights management technology (WMDRM) to protect their intellectual
property, including copyrights. This device uses WMDRM software to access WMDRM-protected content. If the
WMDRM software fails to protect the content, content owners may ask Microsoft to revoke the software's ability to
use WMDRM to play or copy protected content. Revocation does not affect unprotected content. When you download
licenses for protected content, you agree that Microsoft may include a revocation list with the licenses. Content owners
may require you to upgrade WMDRM to access their content. If you decline an upgrade, you won't be able to access
content that requires the upgrade.
This product is licensed under the MPEG-4 visual and AVC patent portfolio licenses for the personal and noncommercial use of a consumer for (i) encoding video in compliance with the MPEG-4 visual standard ("MPEG-4 video")
or the AVC standard ("AVC video") and/or (ii) decoding MPEG- 4 or AVC video that was encoded by a consumer
engaged in a personal and non-commercial activity and/or was obtained from a video provider licensed by MPEG LA
to provide MPEG-4 and/or AVC video. No license is granted or shall be implied for any other use. Additional information
including that relating to promotional, internal and commercial uses and licensing may be obtained from MPEG LA,
L.L.C. See http://www.mpegla.com. MPEG Layer-3 audio decoding technology licensed from Fraunhofer IIS and
Thomson.
Java, JavaScript and Java-based trademarks and logos are trademarks or registered trademarks of Sun
Microsystems, Inc. in the U.S. and other countries.
End-user license agreement for Sun Java Platform, Micro Edition.
1. Restrictions: Software is confidential copyrighted information of Sun and title to all copies is retained by Sun and/
or its licensors. Customer shall not modify, decompile, disassemble, decrypt, extract, or otherwise reverse engineer
Software. Software may not be leased, assigned, or sublicensed, in whole or in part.
2. Export Regulations: This product, including any software or technical data contained in or accompanying the
product, may be subject to import and export regulations of the European Union, the United States and other countries.
The user and any possessor of the product agrees to comply strictly with all such regulations and acknowledges that
it is their responsibility to obtain any required licenses to export, reexport, or import this product. Without limiting the
foregoing, and as an example, the user and any possessor of the product: (1) must not knowingly export or reexport
Products to destinations identified pursuant to Articles in Chapter II of European Council Regulation (EC) 1334/2000;
(2), must comply with U.S. Government Export Administration Regulations ("EAR", 15 C.F.R. §§ 730-774, http://
www.bis.doc.gov/ ) administered by Department of Commerce, Bureau of Industry and Security; and (3) must comply
with economic sanctions regulations (30 C.F.R. §§ 500 et. seq., http://www.treas.gov/offices/enforcement/ofac/)
administered by the U.S. Department of Treasury, Office of Foreign Assets Control. The user and any possessor of
the product may not transport or deliver the product, its accessories or separate software to any country, region,
entity or person prohibited by these regulations.
Restricted Rights: Use, duplication or disclosure by the United States government is subject to the restrictions as set
forth in the Rights in Technical Data and Computer Software Clauses in DFARS 252.227-7013(c) (1) (ii) and FAR
52.227-19(c) (2) as applicable.
Includes "protobuf-c", http://code.google.com/p/protobuf-c/.
Copyright 2008, Dave Benson.
Licensed under the Apache License, Version 2.0 (the "License"); you may not use this file except in compliance with
the License. You may obtain a copy of the License at http://www.apache.org/licenses/LICENSE-2.0.
Unless required by applicable law or agreed to in writing, software distributed under the License is distributed on an
“AS IS” BASIS, WITHOUT WARRANTIES OR CONDITIONS OF ANY KIND, either express or implied. See the License
for the specific language governing permissions and limitations under the License.
Other product and company names mentioned herein may be the trademarks of their respective owners.
75
This is an Internet version of this publication. © Print only for private use.
Page 76

Any rights not expressly granted herein are reserved.
All illustrations are for illustrative purposes only and may not accurately depict the actual phone.
76
This is an Internet version of this publication. © Print only for private use.
Page 77

Index
A
activity menu ...........................................................13
alarms ......................................................................65
answering service ....................................................21
antivirus ...................................................................69
applications .............................................................69
appointment ............................................................66
audio book ..............................................................34
automatic email checking .......................................48
B
background music .............................................16, 17
backing up and restoring ........................................42
battery
capacity .............................................................8
charging ............................................................9
inserting .............................................................7
before synchronizing ...............................................63
blog .........................................................................29
Bluetooth™ wireless technology .............................41
bookmarks .........................................................50, 62
business card ..........................................................20
C
calendar ...................................................................66
call forward ..............................................................22
call list ......................................................................18
call numbers in message .........................................45
call time ...................................................................23
caller-specific ringtones ..........................................19
calls
accepting .........................................................23
answering and rejecting ..................................16
emergency .......................................................17
international .....................................................16
making and receiving ......................................16
putting on hold ................................................22
recording .........................................................36
video ................................................................17
camera .....................................................................25
printing ............................................................28
clip ...........................................................................29
conference calls ......................................................22
Connected home .....................................................57
connecting
using a USB cable ...........................................38
using Bluetooth™ wireless technology ...........40
your phone to a computer ...............................38
contacts
adding phone contacts ...................................18
default contacts ...............................................18
groups .............................................................20
smart search ....................................................19
contacts, calendar items, tasks, notes, and
bookmarks ...............................................................62
conversations ..........................................................46
Copyright-protected content ...................................37
costs ..........................................................................8
D
date .........................................................................67
DLNA™ ....................................................................57
download
files ..................................................................54
music ...............................................................35
settings ............................................................73
E
email ........................................................................46
email account ..........................................................46
email settings ..........................................................46
emergency numbers ................................................17
entering settings manually ......................................51
F
face detection ..........................................................25
file manager .............................................................37
file transfers .............................................................54
flight mode ..............................................................65
G
games ......................................................................69
geo tagging .............................................................28
Google Maps™ .......................................................60
GPS .........................................................................59
groups .....................................................................20
H
handsfree ...........................................................21, 31
help ............................................................................8
hiding your phone number ......................................23
How to connect wizard .....................................52, 53
I
imaging ....................................................................25
IMAP4 ................................................................46, 47
IMEI number ............................................................71
Internet ....................................................................54
bookmarks ......................................................50
screen orientation ............................................68
security and certificates ..................................54
settings ............................................................72
K
keypad lock .............................................................71
keys ...........................................................................6
L
language ..................................................................14
location services ......................................................59
lock
keypad .............................................................71
SIM card ..........................................................70
M
master reset ............................................................72
Media Go™ .............................................................40
media transfer .........................................................40
memory ...................................................................13
memory card ...........................................................13
memory status .........................................................20
menu overview ........................................................11
messages
email ................................................................46
picture .............................................................45
text ..................................................................45
voice ................................................................46
microphone .............................................................16
microsoft® exchange server ...................................63
MMS See picture messages
model name ...............................................................8
music feed .........................................................54, 55
music player ............................................................31
SensMe™ technology .....................................33
my numbers .............................................................23
my phone number .....................................................8
77
This is an Internet version of this publication. © Print only for private use.
Page 78

N
navigating menus ....................................................12
NDIS5 ......................................................................53
notes ........................................................................66
O
online
music ...............................................................35
video clips .......................................................35
organizing your content ...........................................37
P
pan and zoom
web pages .......................................................51
PC Companion ........................................................39
PC Suite ..................................................................64
phone
turning on ..........................................................7
phone memory ....................................................8, 13
phone name ............................................................41
photo .......................................................................29
photo feed ...............................................................54
photo fix ..................................................................26
photos .....................................................................27
feeds ................................................................55
geo tagging .....................................................28
improving .........................................................26
printing ............................................................28
tags ..................................................................28
picture messages ....................................................45
pictures ..............................................................27, 29
PIN .......................................................................7, 70
playlists ....................................................................33
PlayNow™ ...............................................................34
podcasts ............................................................54, 55
POP3 .................................................................46, 47
power saving ...........................................................42
profiles .....................................................................67
protection
phone ..............................................................70
PUK .........................................................................70
push email ...............................................................48
Q
Quick text input .......................................................14
R
radio ........................................................................35
recording
listening to .......................................................36
restricted dialing ......................................................23
ringtones ..................................................................68
setting ..............................................................68
roaming .....................................................................8
RSS feeds - see web feeds
rules .........................................................................62
S
Scenes .....................................................................26
schedule ..................................................................63
screen icons ............................................................10
screen orientation ....................................................68
search
on web pages ..................................................51
selection keys ..........................................................12
SensMe™ technology .......................................33, 34
setting
ringtones .........................................................68
Setting up a Bluetooth™ modem ............................54
Setting up a USB cable modem ..............................53
Setting up the modem .............................................52
settings
download .........................................................73
Internet ............................................................72
shortcuts .................................................................12
web browser ....................................................50
SIM card
copying to/from ...............................................19
inserting .............................................................6
locking .............................................................70
unblocking .......................................................70
SMS See text messages
SOS See emergency numbers
sound recorder ........................................................36
speed dialing ...........................................................20
standby ......................................................................7
notes ................................................................67
still camera ..............................................................25
streaming .................................................................35
synchronizing ..........................................................62
T
tagging photos ........................................................27
tasks ........................................................................67
text messages .........................................................45
themes .....................................................................68
time ....................................................................67, 68
time zone .................................................................68
Tracker ....................................................................60
TrackID™ technology ..............................................35
training .....................................................................60
transfer methods
Bluetooth™ wireless technology .....................41
transferring
music ...............................................................40
photos .............................................................40
sound ..............................................................42
transferring content .................................................37
turning on/off
Bluetooth™ function .................................40, 41
phone lock .......................................................71
SIM lock protection .........................................70
U
updating phone software ........................................44
V
video ........................................................................29
video camera ...........................................................27
video feed ................................................................54
video player .............................................................30
video recorder .........................................................25
video ringtones ........................................................68
voice control ............................................................21
voice messages .......................................................46
voicemail .................................................................21
volume
ear speaker ......................................................16
ringtone ...........................................................68
W
web ..........................................................................54
web album ...............................................................29
web feeds ................................................................54
web pages history ...................................................51
website ....................................................................29
Wi-Fi™ .....................................................................57
Widget Manager ........................................................8
Z
zoom ........................................................................25
78
This is an Internet version of this publication. © Print only for private use.
 Loading...