

Sony ZS-YN7, ZS-YN7L User Manual
2-023-041-33 (1)
Personal Audio
System
Operating Instructions page 2
This manual describes how to use the player. For the supplied software
SonicStage, please see “Installation/Operating Guide.”
Manual de instrucciones página 2
En este manual se describe cómo utilizar el reproductor. En el caso del
software SonicStage suministrado, consulte “Guía de instalación/
instrucciones”.
GB
ES
ZS-YN7
GB
ES
ZS-YN7L
©2004 Sony Corporation

Warning
To prevent fire or shock hazard,
do not expose the player to rain
or moisture.
About this manual
The instructions in this manual are for the ZSYN7 and ZS-YN7L. Before you start reading,
check your model number. The ZS-YN7L is the
model used for illustration purpose.
To avoid electrical shock, do not
open the cabinet. Refer
servicing to qualified personnel
only.
Warning
Do not install the appliance in a confined space,
such as a bookcase or built-in cabinet.
To prevent fire or shock hazard, do not place
objects filled with liquids, such as vases, on the
appliance.
Connect the apparatus to an easily accessible AC
outlet. Should you notice an abnormality in the
apparatus, disconnect the main plug from the AC
outlet immediately.
Notice for customers in the United
Kingdom
A moulded plug complying with BS 1363 is fitted
to this equipment for your safety and convenience.
Should the fuse in the plug supplied need to be
replaced, same rating fuse approved by ASTA or
BSI to BS 1362, (i.e. marked with or mark)
must be used.
If the plug supplied with this equipment has a
detachable fuse cover, be sure to attach the fuse
cover after you change the fuse. Never use the
plug without the fuse cover. If you should lose the
fuse cover, please contact your nearest Sony
service station.
Note
The name of the switch to turn on/off this player is
indicated as below:
“OPERATE”: ZS-YN7L
“POWER”: ZS-YN7
GB
2

Table of contents
Enjoy lots of songs on your original CD ........ 4
Basic Operations
Playing a CD .................................................. 6
Listening to the radio.................................... 10
The CD Player
Using the display .......................................... 12
Locating a specific track............................... 13
Searching for your favourite tracks/files ...... 14
Playing a specific group
(ATRAC CD/MP3 CD only).................... 15
Playing a single track
(Single track play) .................................... 16
Playing tracks in random order
(Shuffle play)............................................ 16
Playing your favourite tracks by adding
Bookmarks (Bookmark track play) .......... 17
Playing your favourite play lists
(m3u play list play) (MP3 CD only) ........ 18
Creating your own programme
(Programme play) ..................................... 19
Playing tracks repeatedly (Repeat play) ....... 20
Additional Information
Precautions ................................................... 28
Troubleshooting............................................ 29
Maintenance ................................................. 31
Specifications ............................................... 32
Index ............................................................. 33
GB
The Radio
Presetting radio stations................................ 21
Playing preset radio stations ......................... 22
The Audio Emphasis
Selecting the audio emphasis ....................... 23
The Timer
Falling asleep to music ................................. 24
Setting Up
Choosing the power sources ......................... 25
Connecting optional components
(ZS-YN7L only) ....................................... 26
GB
3
Enjoy lots of songs on your original CD
In addition to the usual audio CDs, you can play an original CD, called “ATRAC CD,” that
you create with the supplied software, SonicStage. Using SonicStage, about 30 audio CDs*
can be recorded on one CD-R or CD-RW.
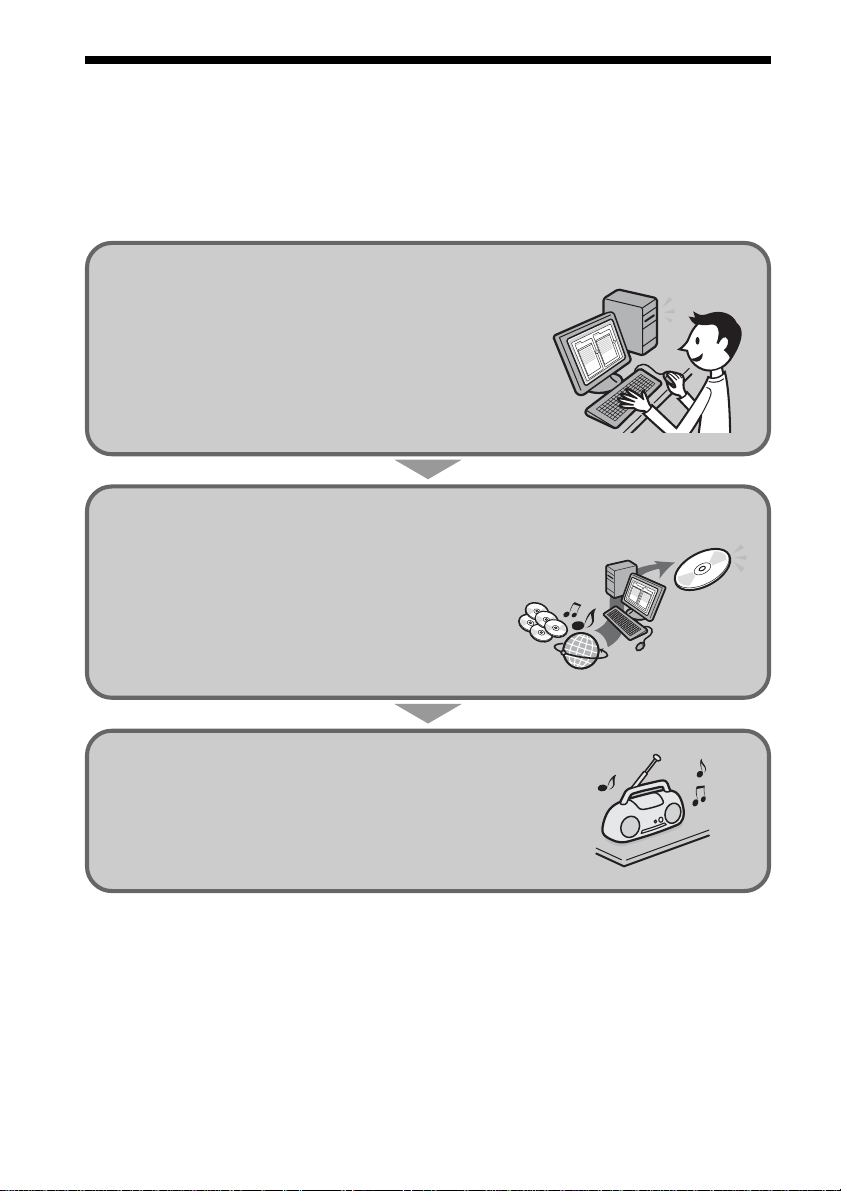
The following is a quick overview of how you listen to music on your ATRAC CD.
Install SonicStage on your computer.
SonicStage is software that takes music downloaded
from audio CDs and the Internet on your computer and
creates original CDs. It can be installed from the
supplied CD-ROM.
Create an ATRAC CD.
After selecting your favourite songs from music stored
ATRAC CD
on your computer, record them on a CD-R/CD-RW
using SonicStage.
Audio CDs
MP3 files
Internet
Listen to them with this CD player.
You can enjoy lots of songs on your original CD.
Please see the supplied “Installation/Operating Guide” for how to install SonicStage and how
to create ATRAC CDs.
* When the total playing time of one CD (album) is estimated at 60 minutes and you are recording on a
700MB CD-R/CD-RW at 48kbps in ATRAC3plus format.
GB
4
Which discs can you play on this CD player?
Audio CDs:
CDDA format CDs
CDDA (Compact Disc Digital Audio) is a recording standard
used for Audio CDs.
ATRAC CDs:
CD-R/CD-RW on which audio data compressed in the ATRAC3plus
or/and ATRAC3 format has been recorded*
ATRAC3 (Adaptive Transform Acoustic Coding3) is audio compression technology
that satisfies the demand for high sound quality and high compression rates.
ATRAC3plus is audio compression technology developed from the ATRAC3 format
and can compress audio files to about 1/20 of their original size at 64kbps.
You can create an ATRAC CD using SonicStage.
MP3 CDs:
CD-R/CD-RW on which audio data compressed in the MP3 format
has been recorded*
MP3 (MPEG-1 Audio Layer3) is audio compression technology that can compress
audio files to about 1/10 of their original size.
CD-R/CD-RW on which mixed audio data compressed in the ATRAC3plus/ATRAC3, or MP3
formats has been recorded by using an software other than SonicStage can also be played.
With SonicStage, you cannot create a CD on which mixed audio data is recorded.
Enjoy lots of songs on your original CD
* Only ISO 9660 Level 1/2 and Joliet extension format discs can be played.
Note
Characters that can be displayed on this CD player are listed below.
–A to Z
–a to z
–0 to 9
–! " # $ % & ' ( ) * + , - . / : ; < = > ? @ [ \ ] ^ _ ` { | } ~
If you use other characters on you computer using software such as SonicStage, they are displayed as “–”
on this CD player.
Music discs encoded with copyright protection technologies
This product is designed to play back discs that conform to the Compact Disc (CD) standard.
Recently, various music discs encoded with copyright protection technologies are marketed by
some record companies. Please be aware that among those discs, there are some that do not
conform to the CD standard and may not be playable by this product.
ATRAC, ATRAC3, ATRAC3plus, SonicStage and their logos are trademarks of Sony Corporation.
GB
5
Basic Operations
Playing a CD
1
Connect the supplied mains lead (see page 25).
3
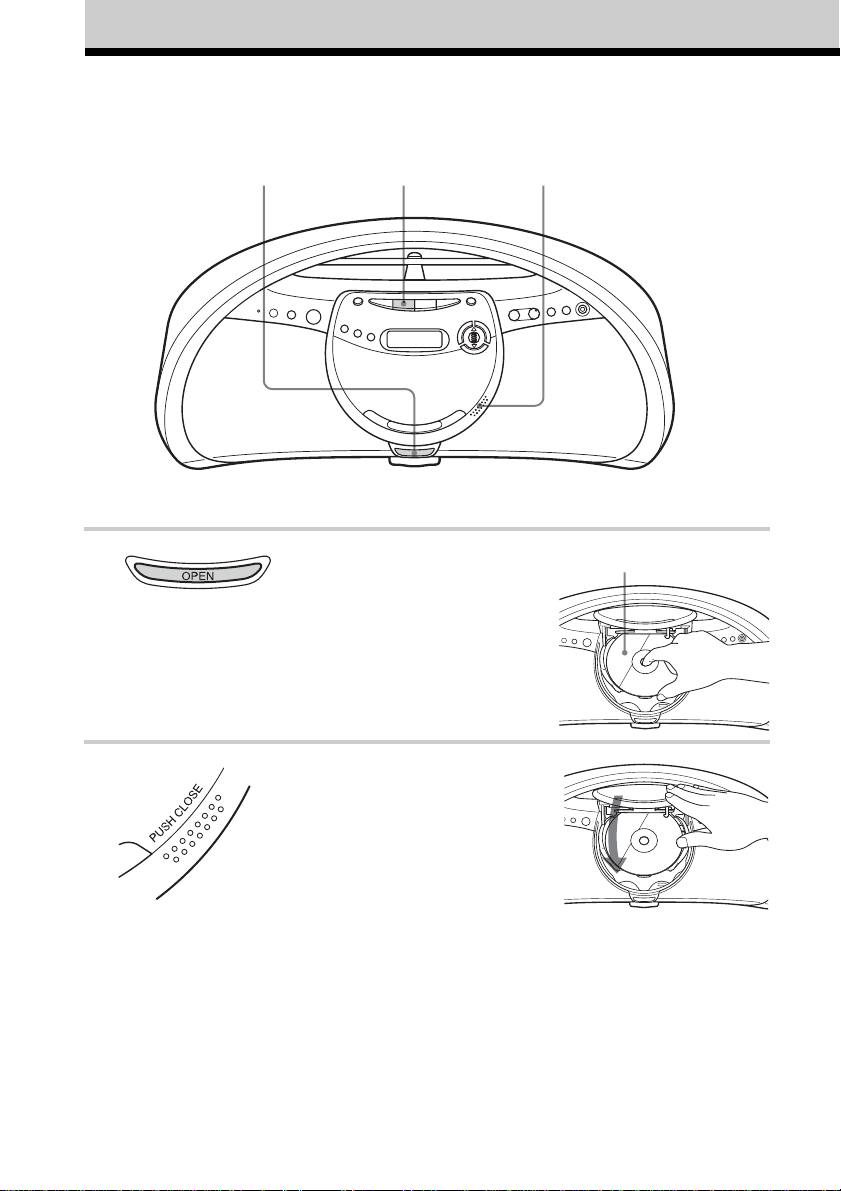
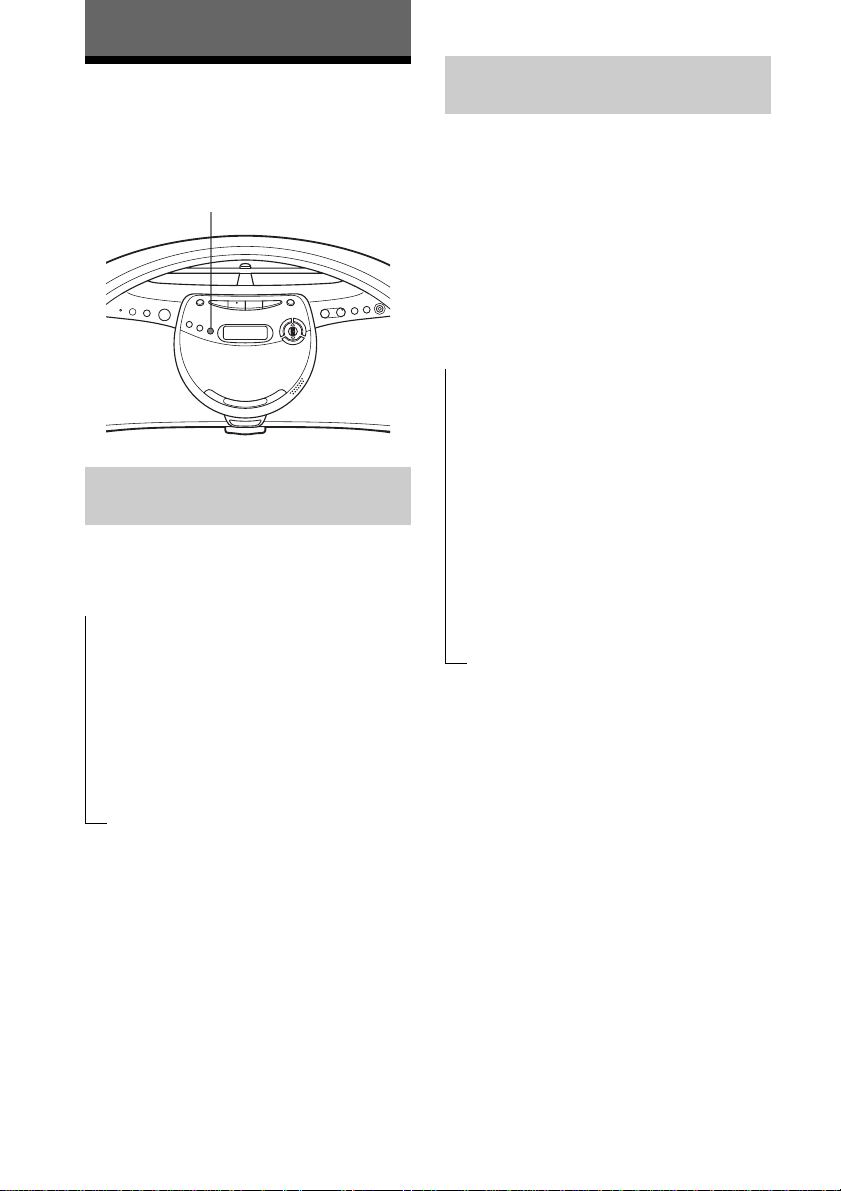
1 Press OPEN to open the CD lid
(direct power-on) and place the CD
on the CD tray.
Note
Make sure that the CD is placed properly
on the CD tray. Don’t place it under the
CD tray.
2
With the label side up
2 Press PUSH CLOSE to close the CD
lid.
GB
6
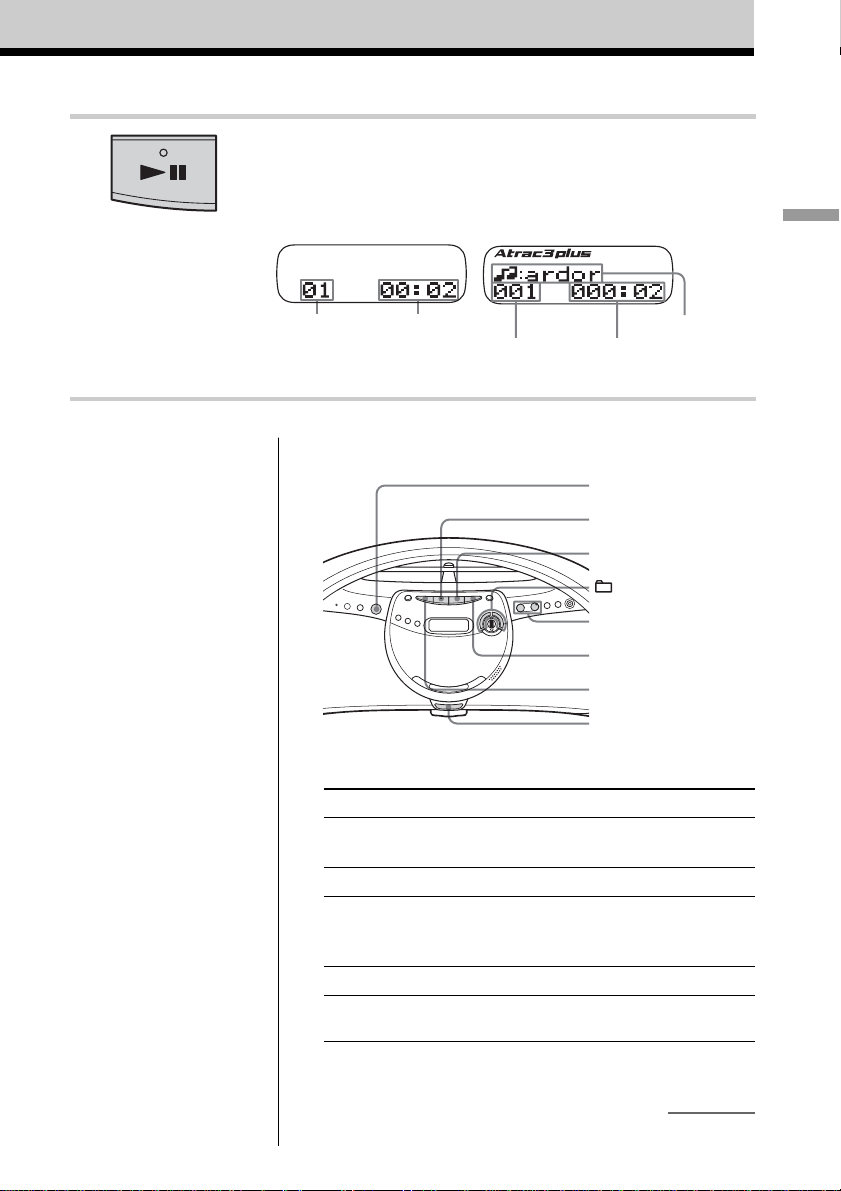
3 Press u (N on the remote).
The player plays all the tracks once.
Display
Audio CD
ATRAC CD/MP3 CD*
Basic Operations
Note
Before playing an ATRAC
CD/MP3 CD, this player
reads all file and group
information on the CD.
Depending on the file
structure, it may take more
than a minute to read them.
During this time, “Reading”
is displayed.
Tips
• To listen through
headphones, connect the
headphones to the i
(headphones) jack.
• Playback starts from the
point you last stopped
playing (Resume play).
During stop, the point to be
played is displayed.
To cancel the resume play
to start play from the
beginning of the first track,
press x in stop mode.
Playing timeTrack number
Playing timeFile number
* When playing an MP3 CD, “MP3”
appears in the display.
File name
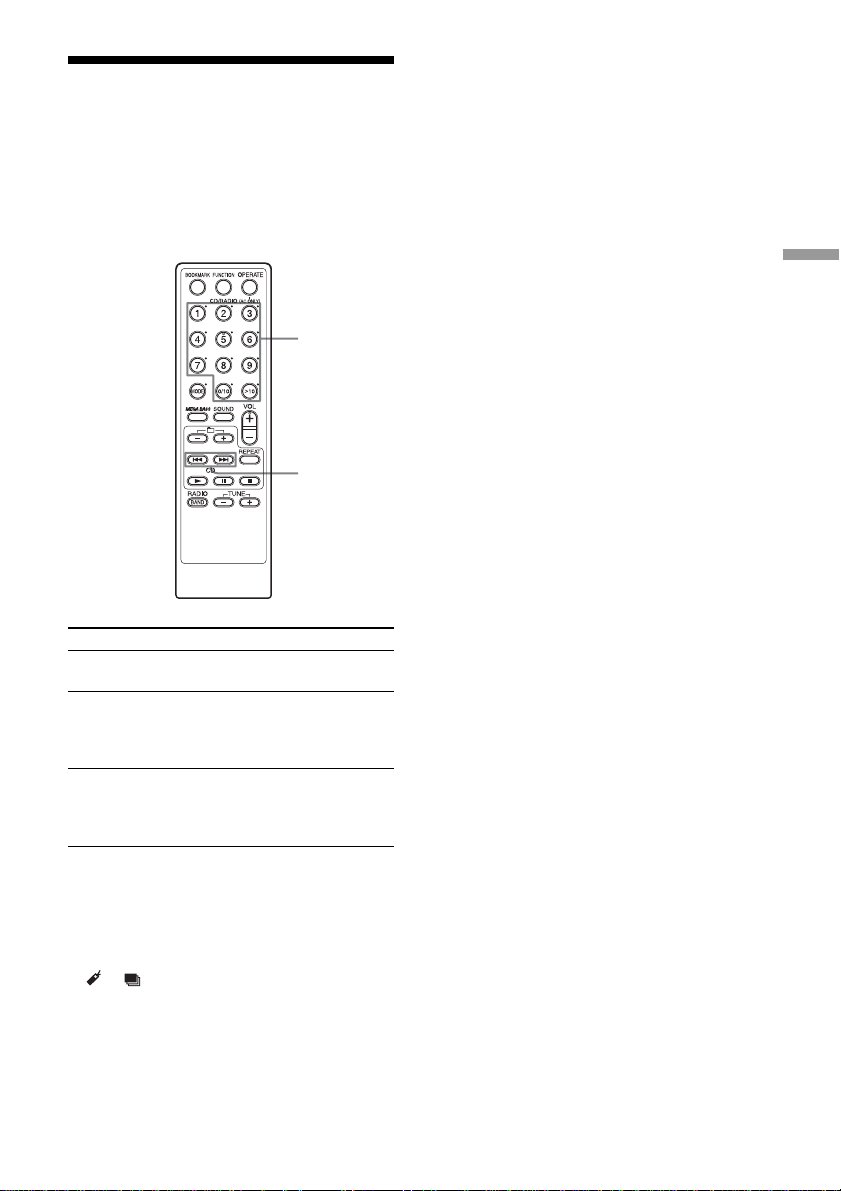
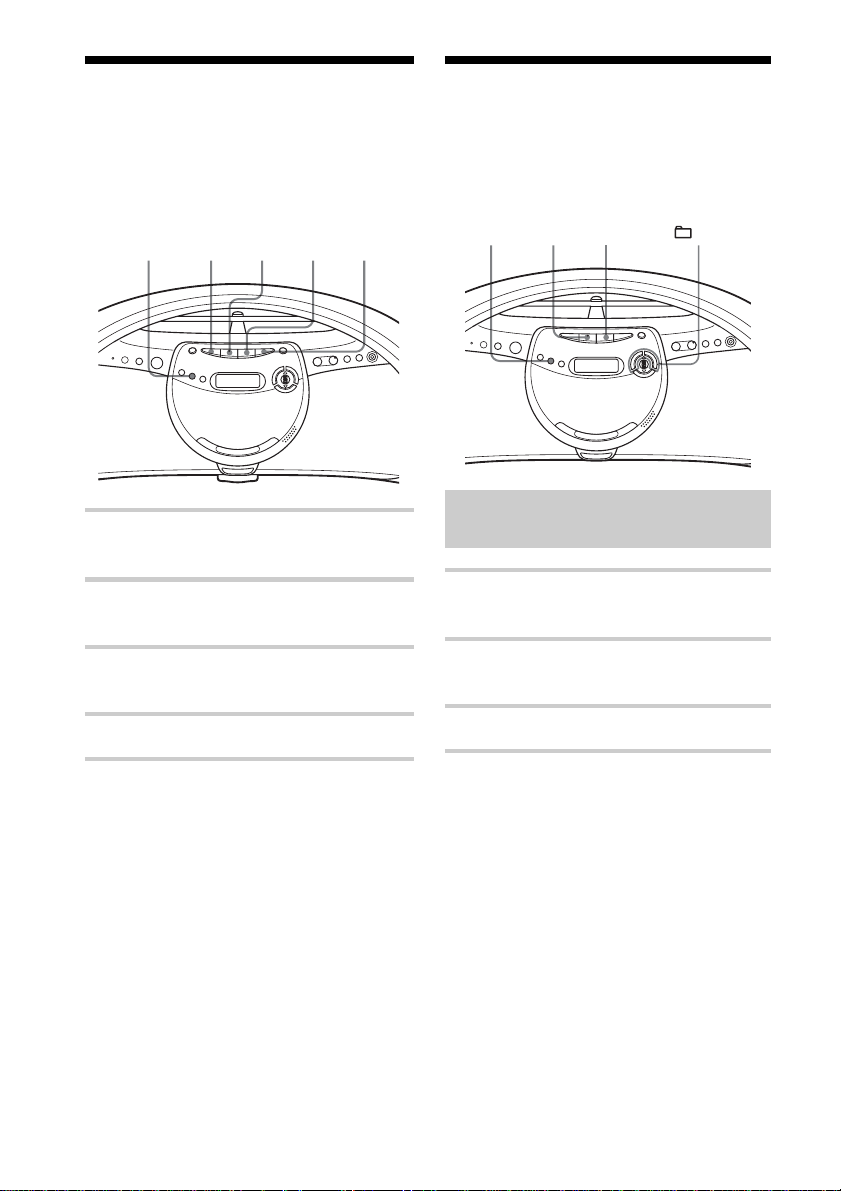
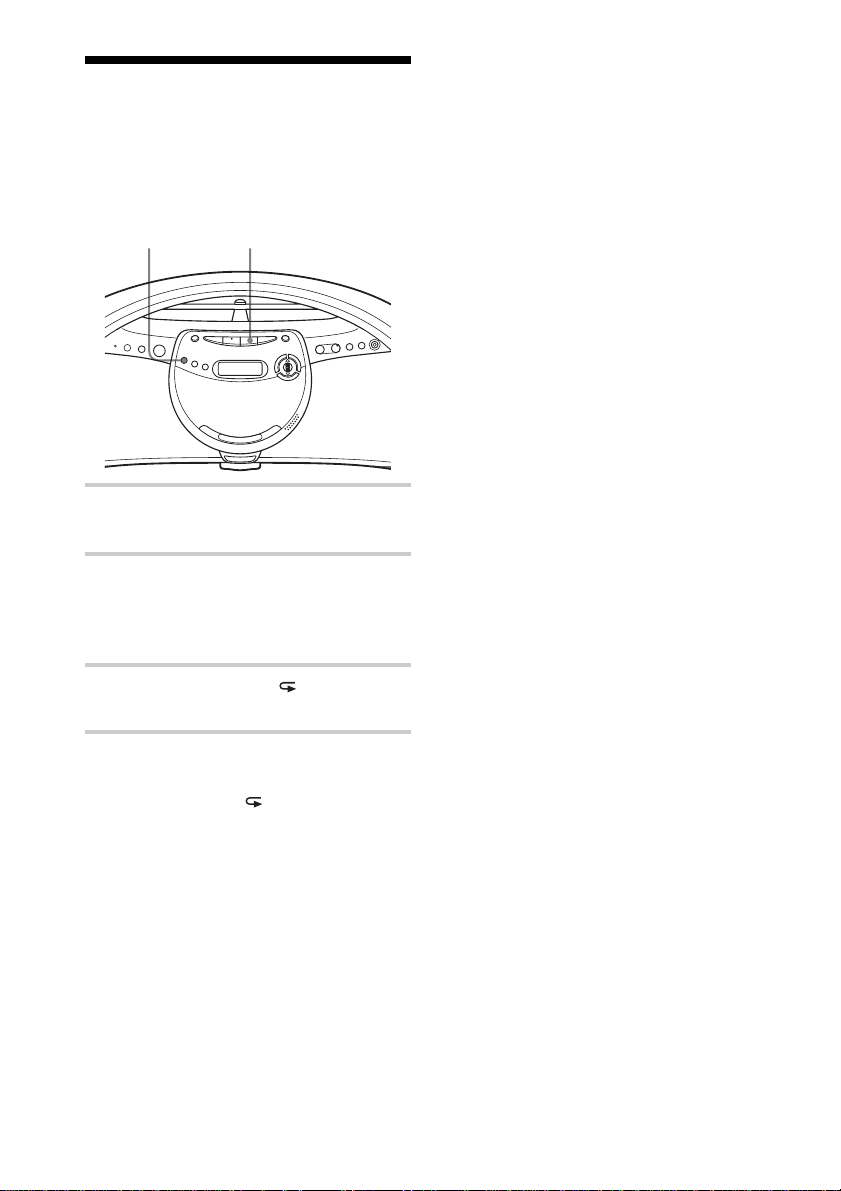
Use these buttons for additional operations
OPERATE
(or POWER)
u
x
+, –
VOLUME +, –
>
.
OPEN
To Press
adjust the volume VOLUME +*1, – (VOL +*1, – on the
remote)
stop playback x
pause playback u*1 (X on the remote)
go to the next track >
go back to the .
previous track
*1The button has a tactile dot.
Press the button again to resume play after
pause.
continued
GB
7
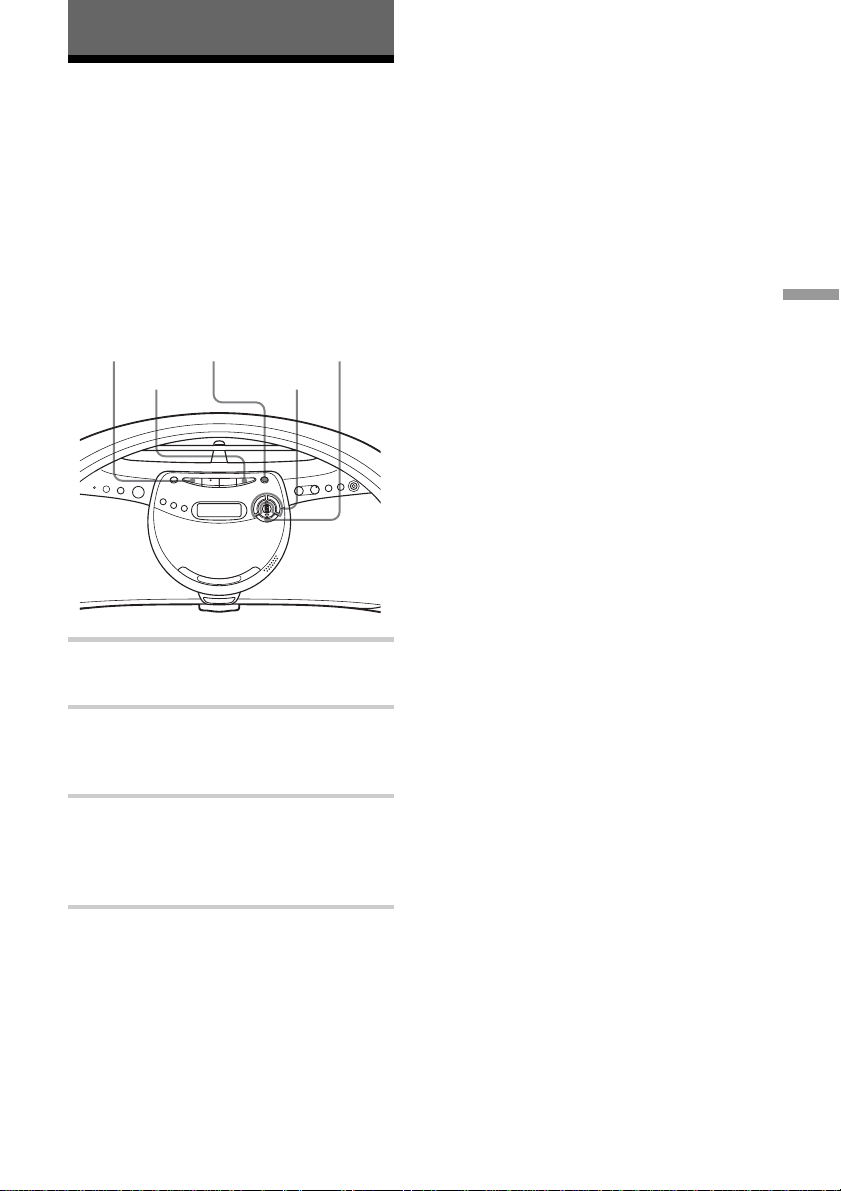
To Press
select a group*
select a file*
remove the CD OPEN*
turn on/off the player OPERATE (or POWER, see page 2)
*2You can operate during play of ATRAC CDs/MP3 CDs.
*3Once you open the CD tray, the track to start play will change to
the beginning of the first track.
2
+ to go forward and – to go
backward
2
> to go forward and . to go
backward
3
Notes
• If ATRAC3plus/ATRAC3
files and MP3 files are
recorded on the same CD,
this CD player plays the
ATRAC3plus/ATRAC3
only.
• The playback capability of
this CD player may vary
depending on the quality of
the disc and the condition of
the recording device.
• Characters that can be
displayed on this CD player
are listed below.
–A to Z
–a to z
–0 to 9
–! " # $ % & ' ( ) * + , - . / :
; < = > ? @ [ \ ] ^ _ ` { | }
~
If you use other characters
on you computer using
software such as
SonicStage, they are
displayed as “–” on this CD
player.
• On a disc that has
ATRAC3plus/ATRAC3/
MP3 files, do not save files
in other formats and do not
make unneccessary groups.
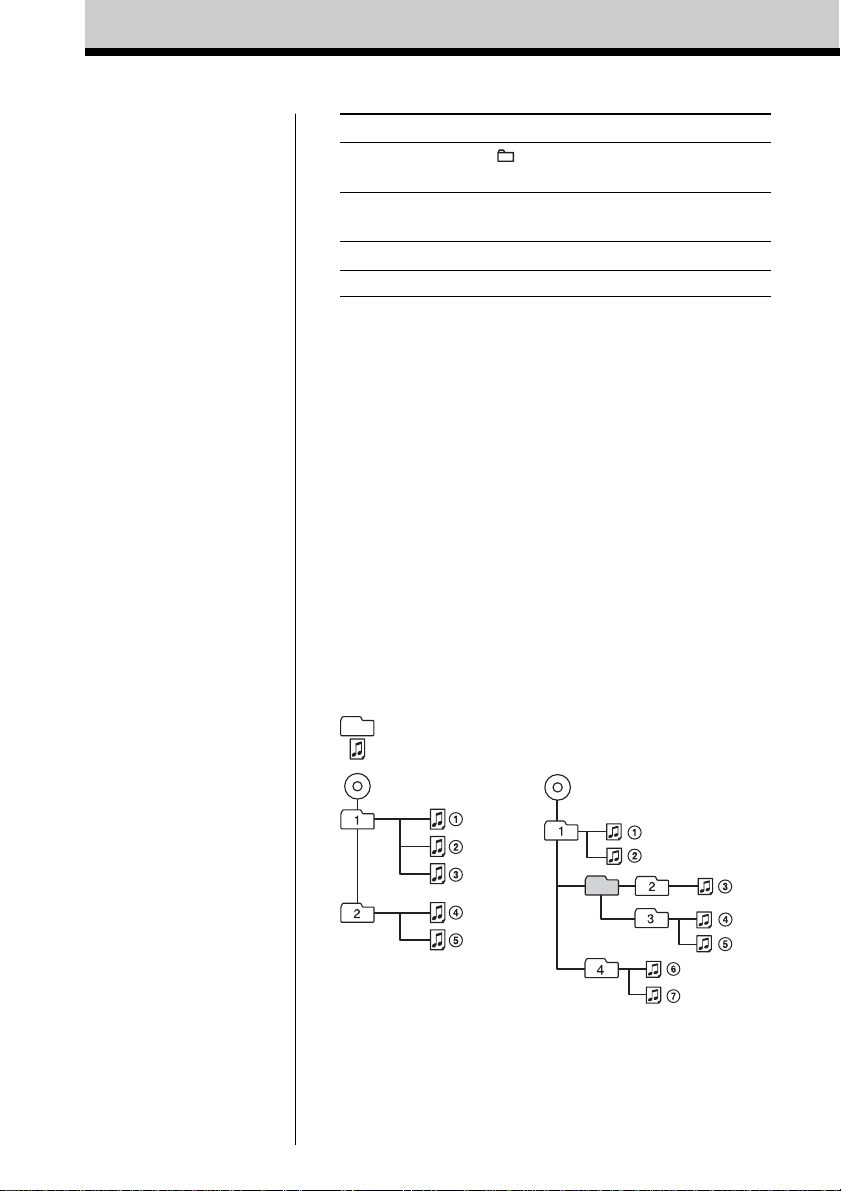
The structure of ATRAC CDs/MP3 CDs
ATRAC CDs/MP3 CDs consist of “files” and “groups.” A
“file” is equivalent to a “track” of an audio CD. A “group”
is a bundle of files and is equivalent to an “album.”
For MP3 CDs, this CD player recognizes an MP3 folder as
a “group” so that ATRAC CDs and MP3 CDs can be
operated in the same way.
Playing order of ATRAC CDs and MP3 CDs
For ATRAC CDs, files are played in the order selected in
SonicStage.
For MP3 CDs, the playing order may differ depending on
the method used to record MP3 files on the disc. In the
following example, files are played in order of 1 to 7.
Group
File
ATRAC CD
MP3 CD
GB
8

Notes on ATRAC CDs
• Maximum number of groups: 255
Maximum number of files: 999
• CD-Rs/CD-RWs recorded in the ATRAC3plus/ATRAC3 format
cannot be played on your computer.
Notes on MP3 CDs
• Maximum number of groups: 100
Maximum number of files: 400
Maximum directory level: 8
•A group that does not include an MP3 file is skipped.
• Be sure to add the file extension “mp3” to the file name.
However, if you add the file extension “mp3” to a file other than
an MP3 file, the player will not be able to recognize the file
properly.
• This player can play bit rates of 16 to 320 kbps, and sampling
frequencies of 32/44.1/ 48 kHz. Variable Bit Rate (VBR) file
can also be played.
• To compress a source in an MP3 file, we recommend setting the
compression parameters to “44.1 kHz,” “128 kbps,” and
“Constant Bit Rate.”
• To record up to the maximum capacity, set the writing software
to “halting of writing.”
• To record to the maximum capacity at one time up on media that
has nothing recorded on it, set the writing software to “Disc at
Once.”
Basic Operations
GB
9
Listening to the radio
Connect the supplied mains lead (see page 25).
1 2
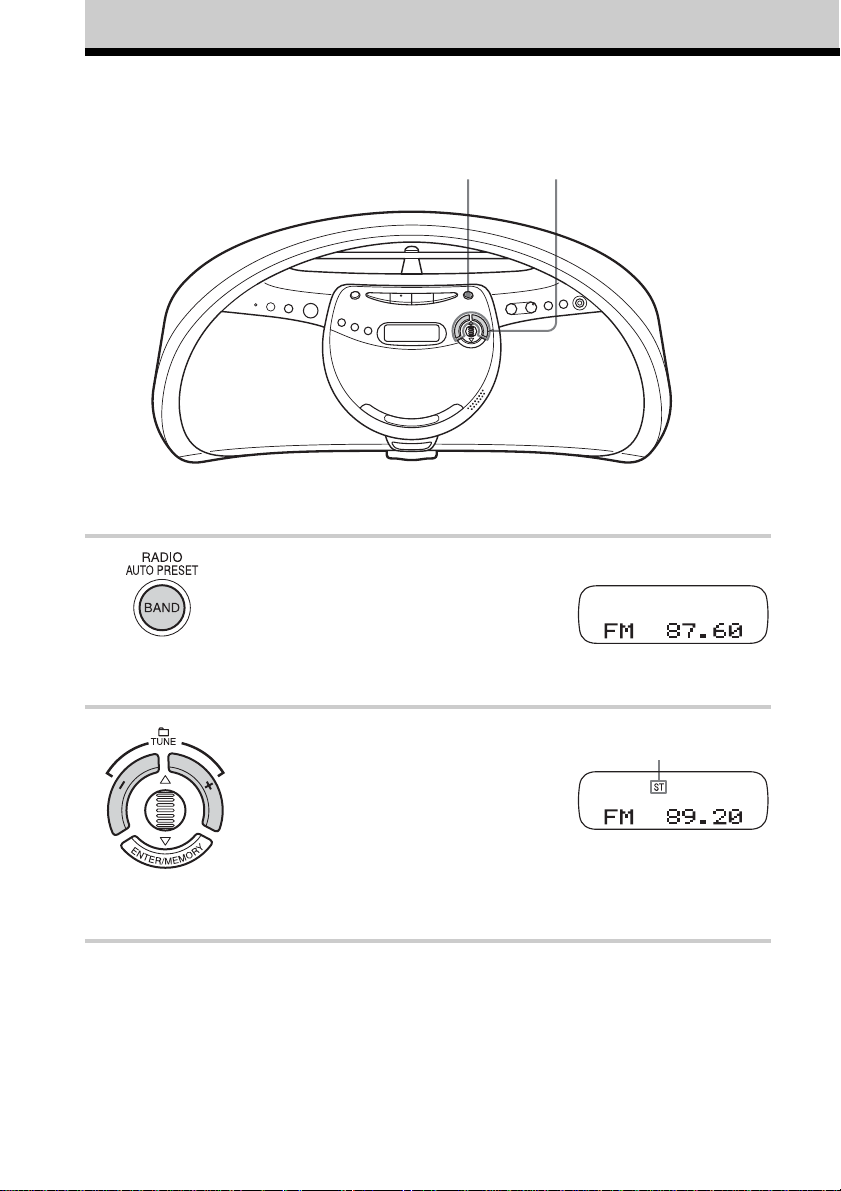
1 Press RADIO•BAND•AUTO
PRESET until the band you want
appears in the display (direct poweron).
ZS-YN7: “FM” t “AM”
ZS-YN7L: “FM” t “MW” t “LW”
2 Press TUNE + or – and hold it until
the frequency digits begin to change
in the display.
The player automatically scans the
radio frequencies and stops when it
finds a clear station.
If you can’t tune in a station, press
TUNE + or – repeatedly to change
the frequency step by step.
GB
10
Display
Indicates an FM
stereo broadcast
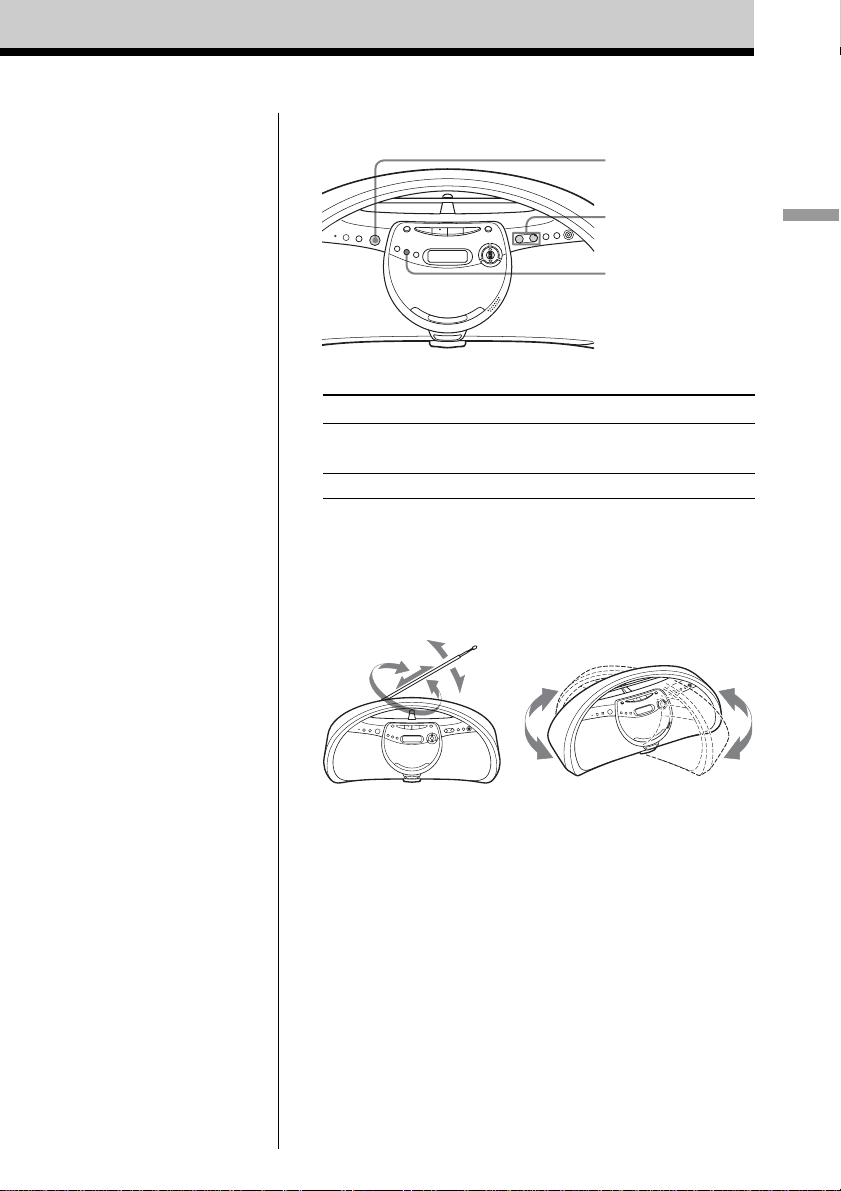
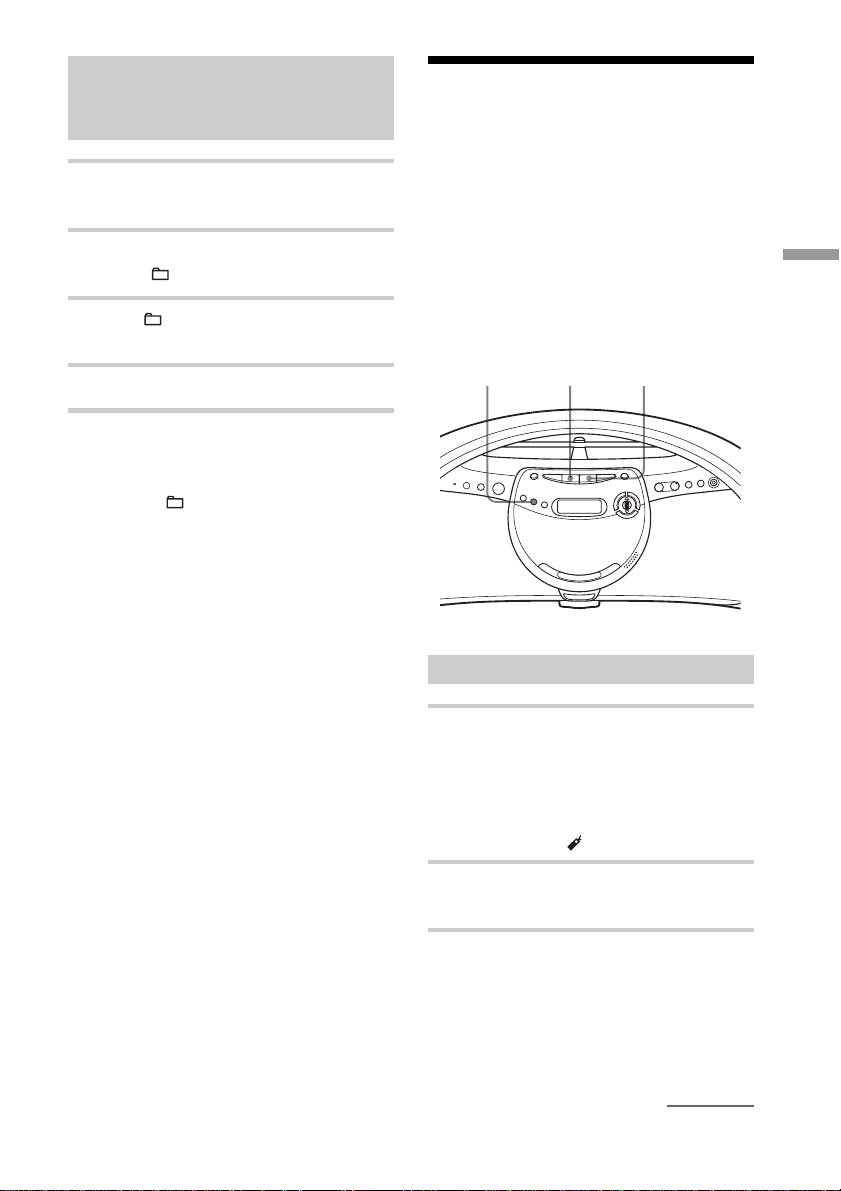
Use these buttons for additional operations
OPERATE
(or POWER)
Tips
• If the FM broadcast is
noisy, press MODE until
“Mono” appears in the
display and radio will play
in monaural.
• If you need to change the
AM/MW tuning interval,
see page 25.
VOLUME +, –
MODE
To Press
adjust the volume VOLUME +*, – (VOL +*, – on the
remote)
turn on/off the radio OPERATE (or POWER, see page 2)
* The button has a tactile dot.
To improve broadcast reception
Reorient the aerial for FM. Reorient the player itself for
AM or MW/LW.
Basic Operations
for FM
for AM/MW/LW
11
GB
The CD Player
Using the display
You can check information about the CD
using the display.
DISPLAY
Checking the information on
an audio CD
Press DISPLAY. The display changes as
follows:
t
The current track number and playing
time
r
The current track number and the
remaining time of the current track
r
The number of tracks left and the time
remaining on the CD
r
The total track number and total playing
time on the CD
Checking the information on
an ATRAC CD/MP3 CD
Press DISPLAY. The display changes as
follows:
When you are playing an MP3 CD
containing files with an ID3 tag*, ID3 tag
information is displayed.
* ID3 tag is a format for adding ceratin
information (track name, album name, artist
name, etc.) to MP3 files. This player conforms
to Version 1.0/1.1/2.3 of the ID3 tag format (for
MP3 files only).
The file name, the current file number
t
and playing time
r
The group name*
number and playing time
r
The artist name*
number and playing time
r
The transfer rate/frequency, the current
file number and the remaining time of
the current file
r
Total number of groups, total number of
files
*1If the file does not belong to any group, the
group name is desplayed as “Root”.
*2If the file does not have an artist name,
“– – – –” is displayed.
1
, the current file
2
, the current file
Tip
When you are playing an audio CD containing text
information such as CD-TEXT, information is
displayed.
GB
12
Locating a specific track
You can quickly locate any track on a CD
using the number buttons on the remote.
You can also find a specific point in
a track while playing a CD.
Number
buttons
., >
To locate Press
a specific track the number button of the track.
directly
a point while > (forward) or, .
listening to (backward) while playing
the sound and hold it until you find the
point
a point while > (forward) or .
observing (backward) in pause
the display and hold down until
you find the point.
Tips
• When you locate a track numbered over 10,
press >10 first, then the corresponding number
buttons.
Example: To play track number 23, press >10
first, then 2 and 3.
• To select a track numbered over 100, press >10
twice, then the corresponding number buttons.
The CD Player
Notes
• Locating a specific track using the number
buttons is only available for the tracks in the
selected group.
• You cannot locate a specific track if “SHUF”,
“ ”, “ ” or “PGM” is lit in the display. Turn
off the indication by pressing x.
• When you find a specific point in a file while
playing ATRAC3plus/ATRAC3/MP3 files, the
sound may not be heard for a few seconds.
13
GB
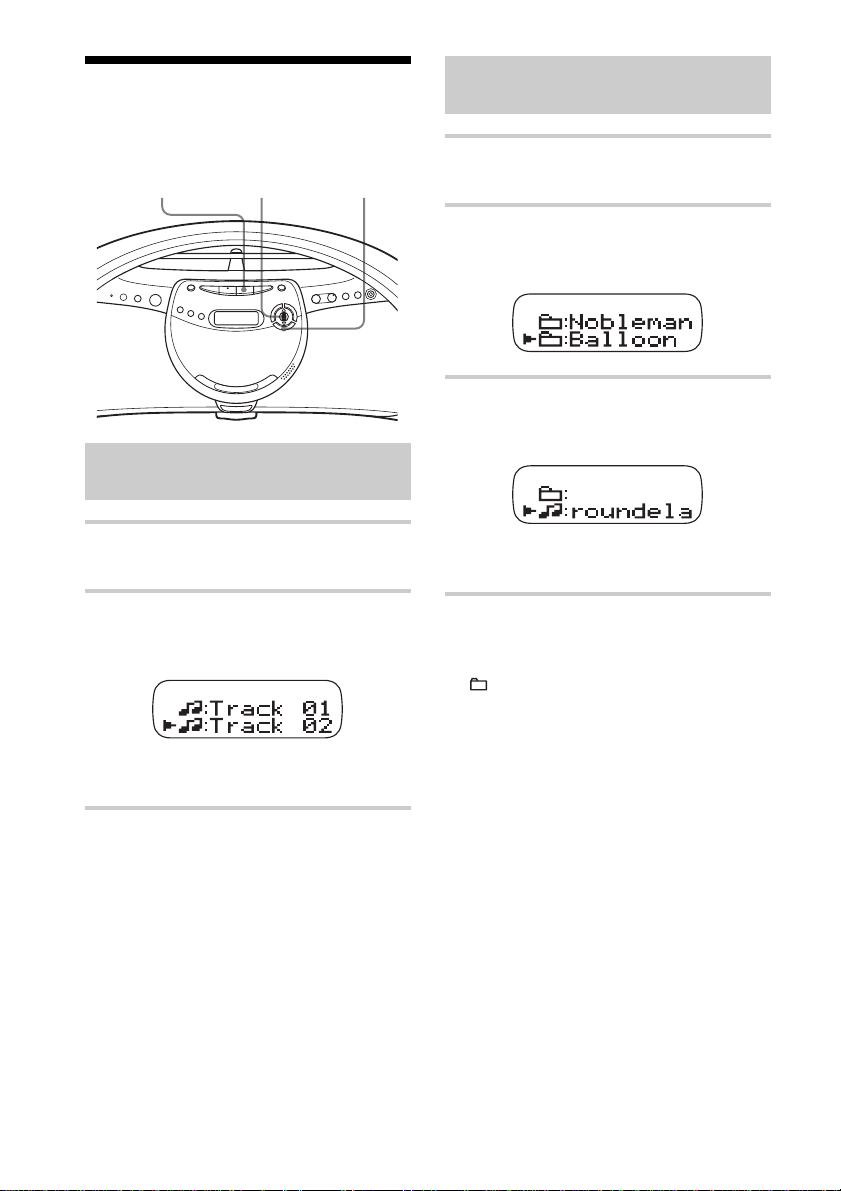
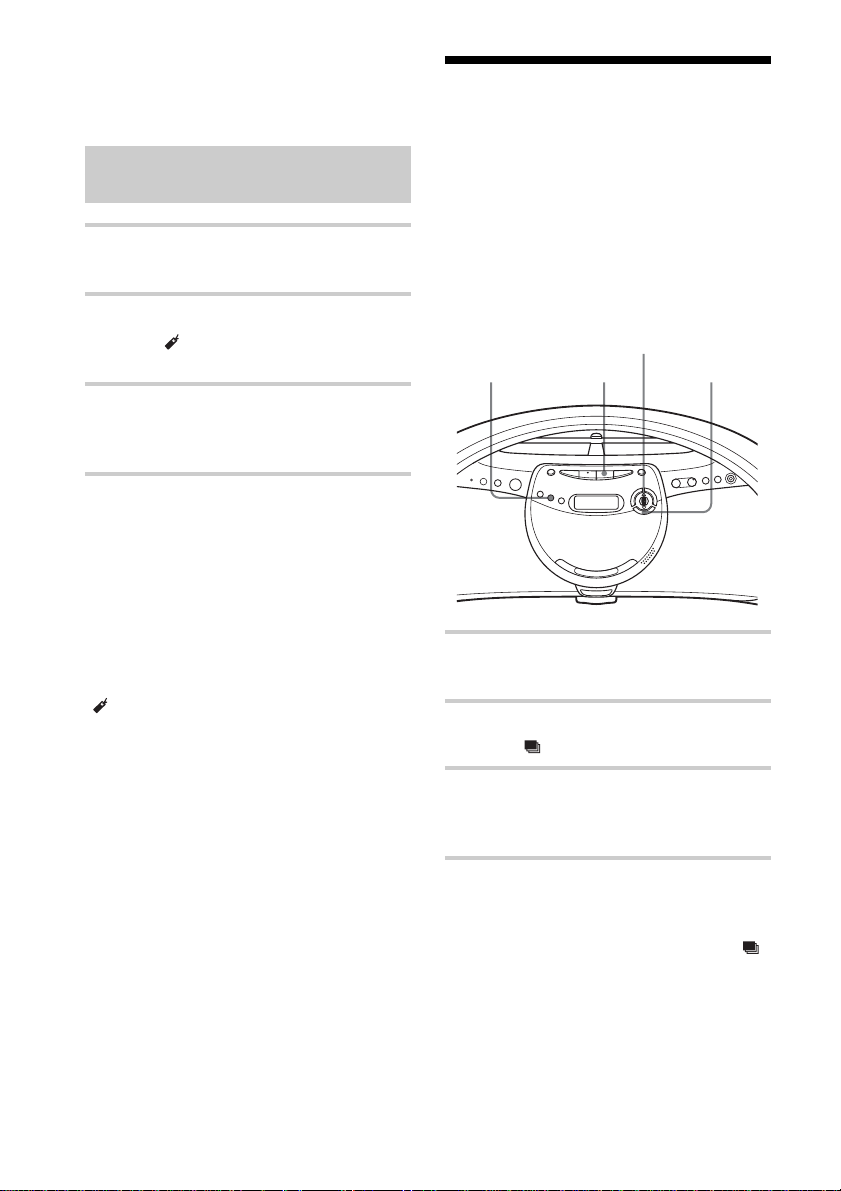
Searching for your favourite tracks/files
ENTER/
x Jog dial MEMORY
Searching for a track on an
audio CD
Searching for a file on an
ATRAC CD/MP3 CD
1 Press x.
“CD” appears in the display.
2 While play is stopped, turn the jog dial
toward v or V to select the group you
want, then press ENTER/MEMORY.
3 Turn the jog dial toward v or V to
select the file you want, then press
ENTER/MEMORY.
1 Press x.
“CD” appears in the display.
2 Turn the jog dial toward v or V to
select the track you want, then press
ENTER/MEMORY.
The playback starts from the track
selected.
To cancel the track search
Turn the jog dial until “CANCEL” appears,
then press ENTER/MEMORY.
The playback starts from the file
selected.
To cancel the file search
1 Turn the jog dial toward v or V until
“
:” appears, then press ENTER/
MEMORY.
2 Turn the jog dial until “CANCEL”
appears, then press ENTER/MEMORY.
14
GB
Tip
You can also search a file while playing an
ATRAC CD/MP3 CD. When you turn the jog dial
during playback, the file list of the group in which
the current file is will be displayed. To select a file
of another group, turn the jog dial toward v or V
until “ :” appears, then press ENTER/
MEMORY to select the group first and select the
file you want by turning the jog dial.
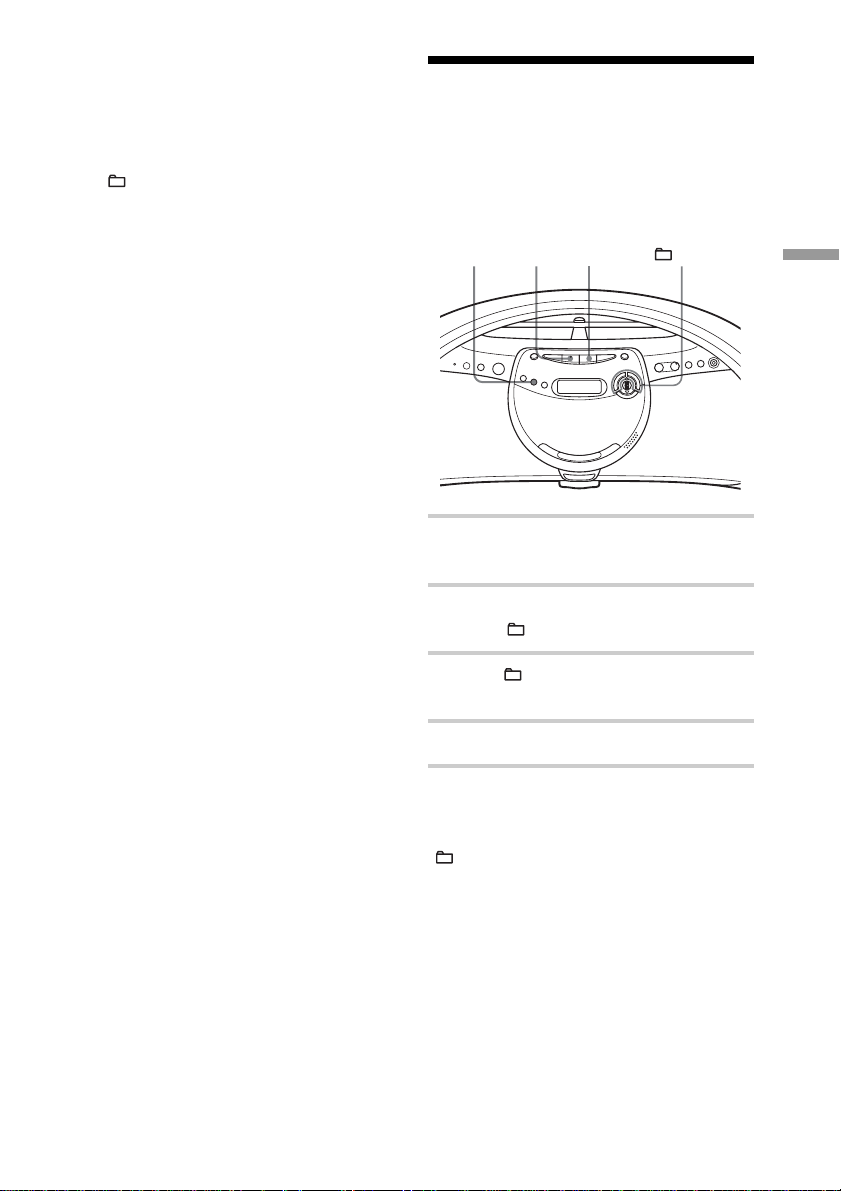
Playing a specific group
(ATRAC CD/MP3 CD only)
You can play all the files in a specific group,
and stop the player automatically.
Note
When using an ATRAC CD, up to 400 file names
or up to 100 group names can be displayed. If the
number of files or groups surpasses these figures,
a file name such as “401 – – –” or a group name
such as “101 – – –” will be displayed instead of
names.
MODE u x +, –
1 Press x.
“CD” appears in the display.
2 Press MODE repeatedly in stop mode
until “
” appears in the display.
3 Press + or – to select the group you
want to play.
4 Press u.
To cancel the group play
Stop playing first. Then press MODE until
“ ” disappears from the display.
The CD Player
15
GB
Playing a single track
Playing tracks in
(Single track play)
You can play a single track once, and stop
the player automatically.
MODE . u x >
1 Press x.
“CD” appears in the display.
2 Press MODE repeatedly in stop mode
until “1” appears in the display.
3 Press . or > to select the track
you want to play.
random order (Shuffle play)
You can play tracks in random order.
MODE u x +, –
Playing all tracks on a CD in
random order
1 Press x.
“CD” appears in the display.
2 Press MODE repeatedly in stop mode
until “SHUF” appears in the display.
4 Press u.
To cancel the single track play
Stop playing first. Then press MODE until
“1” disappears from the display.
On the remote
1 Press x.
2 Press MODE repeatedly in stop mode until “1”
appears in the display.
3 Press the number buttons to select the track you
want.
GB
16
3 Press u to start Shuffle play.
Playing all files in a selected
group in random order
CD/MP3 CD only)
(ATRAC
1 Press x.
“CD” appears in the display.
Playing your favourite
tracks by adding
Bookmarks
(Bookmark track play)
2 Press MODE repeatedly in stop mode
until “
SHUF” appears in the display.
3 Press + or – to select the group you
want to play.
4 Press u to start Shuffle play.
To cancel Shuffle play
Stop playing first. Then press MODE until
“SHUF” or “ SHUF” disappears from the
display.
Tip
During Shuffle play, you cannot select the
previous track by pressing ..
You can add Bookmarks to up to 99 tracks
(audio CD), up to 999 files (ATRAC CD) or
up to 400 files (MP3 CD) for a CD.
When you open the CD tray, all Bookmarks
stored in memory will be erased.
MODE u x
Adding Bookmarks
1 During playback of the track to which
you want to add a Bookmark, press and
hold u until “Bookmark Set” appears
in the display.
When the Bookmark has been added
successfully, “ ” flashes slower.
The CD Player
2 Repeat step 1 to add Bookmarks to the
tracks you want.
On the remote
Use BOOKMARK instead of u.
continued
17
GB
Playing your favourite tracks by
adding Bookmarks (Bookmark
track play) (continued)
Playing your favourite
play lists (m3u play list play)
Playing the tracks with
Bookmarks
1 Press x.
“CD” appears in the display.
2 Press MODE repeatedly in stop mode
until “
the display.
” and “Bookmark” appear in
3 Press u.
The playback of the tracks with the
Bookmarks starts.
To remove Bookmarks
During playback of a track with a
Bookmark, press and hold u
(BOOKMARK on the remote) until
“Bookmark Cancel” appears in the display.
To check tracks with Bookmarks
During playback of tracks with Bookmarks,
“ ” flashes slowly in the display.
Notes
• During playback of tracks with Bookmarks,
tracks are played in order of track number, and
not in the order you added the Bookmarks.
• If you open the CD tray, all Bookmarks stored in
memory will be erased.
• You cannot select a track with a Bookmark
directly by using the number bottons on the
remote.
(MP3 CD only)
You can play your favourite m3u play lists*.
* An “m3u play list” is a file for which an MP3
file playing order has been encoded. To use the
play list function, record MP3 files on a CD-R/
CD-RW using encoding software that supports
the m3u format.
MODE
Jog dial
x
ENTER/
MEMORY
1 Press x.
“CD” appears in the display.
2 Press MODE repeatedly in stop mode
until “
” appears in the display.
3 Turn the jog dial toward v or V to
select a play list you want then press
ENTER/MEMORY.
On the remote
1 Press x.
2 Press MODE repeatedly in stop mode until “ ”
appears in the display.
3 Press . or > to select a play list you want
then press N.
18
Note
You can only play the top two play lists when two
or more play lists are stored.
GB
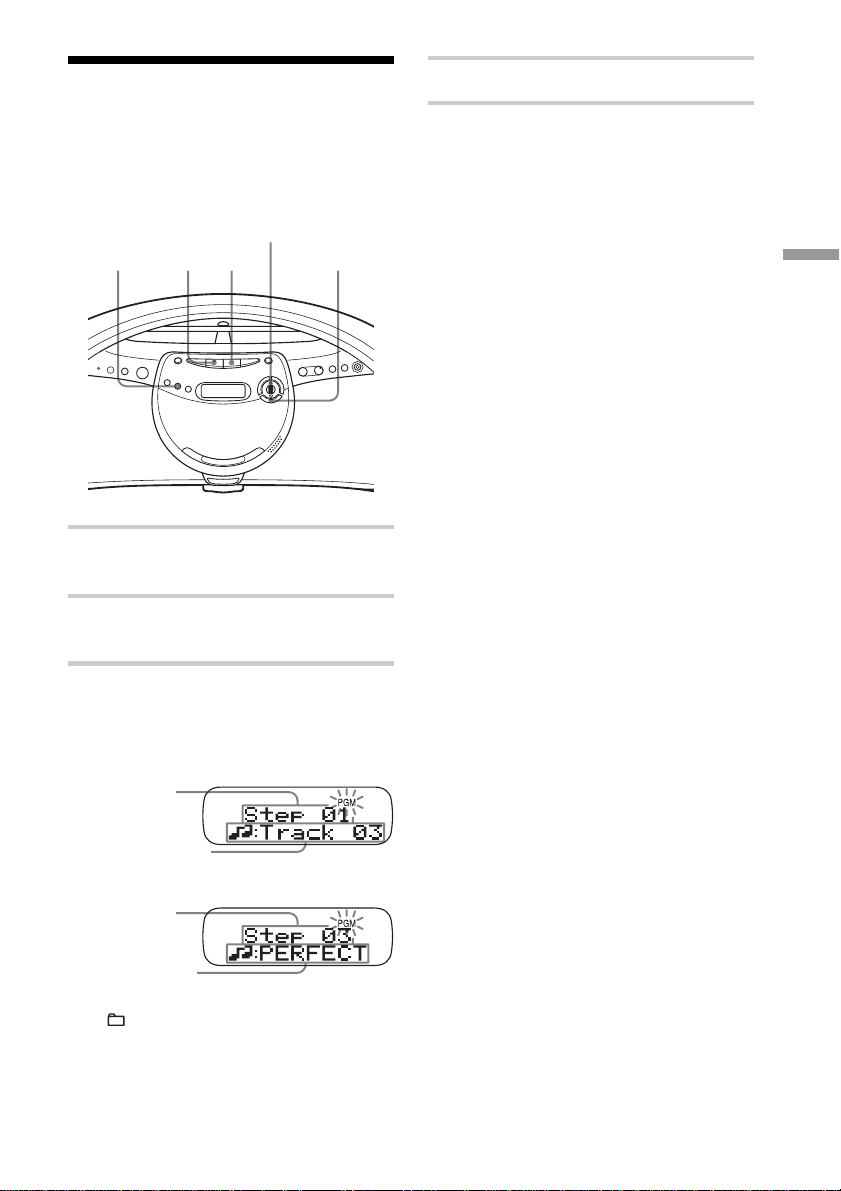
Creating your own
4 Press u to start Programme play.
programme (Programme play)
You can arrange the playing order of up to
20 tracks or files on a CD.
Jog dial
MODE u x
1 Press x.
“CD” appears in the display.
2 Press MODE repeatedly in stop mode
until “PGM” appears in the display.
3 Turn the jog dial toward v or V then
press ENTER/MEMORY for the tracks
or files you want to programme in the
order you want.
Playing order
Audio CD
ENTER/
MEMORY
To cancel Programme Play
Stop playing first. Then press MODE until
“PGM” disappears from the display.
To check the order of tracks
before play
Press ENTER/MEMORY while
programming.
Every time you press the button, the track or
file number appears in the programmed
order.
To change the current
programme
Press x once while programming. The
current programme will be erased. Then
create a new programme following the
programming procedure.
Tip
You can play the same programme again, since
the programme is saved until you open the CD
tray.
On the remote
1 Press x.
2 Press MODE repeatedly until “PGM” appears in
the display.
3 Press the number buttons for the tracks or files
you want to programme in the order you want.
4 Press N.
The CD Player
Programmed track
ATRAC CD/
Playing order
Programmed file
*You can also select another group pressing
+ or –.
MP3 CD*
19
GB
Playing tracks repeatedly (Repeat play)
You can play tracks repeatedly in normal
play mode and other play modes you want.
REPEAT x
1 Press x.
“CD” appears in the display.
2 Play the CD.
You can play tracks repeatedly in
normal play mode and other play modes
you want (see pages 15 – 19).
3 Press REPEAT until “ ” appears in the
display.
To cancel Repeat play
Press REPEAT until “ ” disappears from
the display.
GB
20
The Radio
Presetting radio stations
You can store radio stations into the player’s
memory. You can preset up to 30 radio
stations (ZS-YN7), 20 for FM and 10 for
AM in any order or 40 radio stations (ZSYN7L), 20 for FM and 10 for MW and LW
in any order.
RADIO
BAND
PRESET – AUTO PRESET
PRESET + TUNE +, –
1 Press RADIO•BAND•AUTO PRESET
to select the band.
ENTER/
MEMORY
If a station cannot be preset
automatically
You need to preset a station with a weak
signal manually.
1 Press RADIO•BAND•AUTO PRESET to
select the band.
2 Tune in a station you want by pressing
TUNE + or –.
3 Hold down ENTER/MEMORY for about
2 seconds.
4 Press PRESET + or PRESET – until the
preset number you want for the station on
flashes.
5 Press ENTER/MEMORY.
The new station replaces the old one.
On the remote
1 Press RADIO•BAND until the band you want
appears in the display.
2 Press TUNE + or – until you tune in the station
you want.
3 Hold down the number button that you want to
preset the new station on for 2 seconds.
To select the preset number over 10, press >10
first, then the corresponding number buttons.
You need to hold down the last number button to
enter for about 2 seconds. (Example: To select
12, press >10 and 1 first, then hold down 2 for
about 2 seconds.)
The Radio
2 Hold down RADIO•BAND•AUTO
PRESET until “Auto Preset” flashes in
the display.
3 Press ENTER/MEMORY.
The stations are stored in memory from
the lower frequencies to the higher
ones.
21
GB
 Loading...