

Page 1
Customizing Your VAIO® Z505
SuperSlim Pro Notebook
You can customize the settings of your notebook. The following sections
briefly describe how to change your computer’s default settings. You can
also refer to Sony Notebook Setup Help for more detailed information.
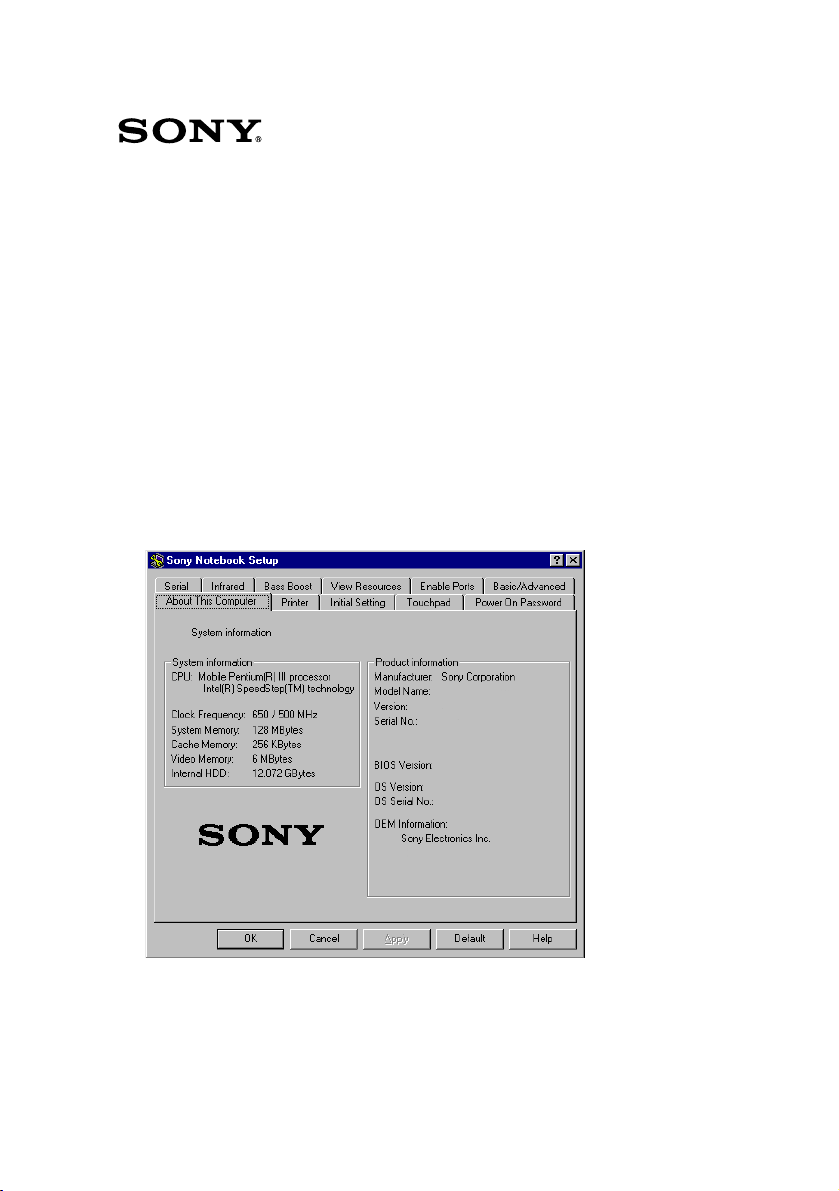
Displaying the Sony Notebook Setup Screen
To display the Sony Notebook Setup screen:
1
Click the Start button on the Windows® taskbar.
2
Point to VAIO and click Sony Notebook Setup.
3
Select the tab for the item you want to change. See “Sony Notebook
Setup Tabs” on page 2.
4
After you finish, click OK.
Page 2
Customizing Your VAIO® Z505 SuperSlim Pro Notebook
Sony Notebook Setup Tabs
Tab De s c r i p t i o n
About This Computer Display system information, including memory
capacity, serial number, and BIOS version.
Printer Change printer port mode settings.
Initial Setting Change the volume of the sounds that play while the
operating system is loading. Select the order of
drives and devices from which you want to load the
operating system.
Touchpad When you connect an optional mouse to your
computer, you can make your touchpad inactive.
You can also customize your mouse settings using
the mouse utility.
Power On Password Set the password to secure your computer.
Bass Boost Turn the Bass Boost function on/off (available only
when headphone is used). You can also check the
effect of the Bass Boost function by selecting a
sample from “Sound file” and playing it.
Enable Ports Enable or disable ports. Disabling ports releases
resources to the system . To change the serial or
Infrared settings, click Advanced on the Basic/
Advanced tab.
Basic/Advanced T oggle b etween Advanced mode (additi onal scr eens
with advanced settings) and Basic mode of display.
Advanced mode includes Serial, Infrared, and View
Resources tabs.
For more information about each option, click Help on the Sony Notebook Setup screen to
✍
display the Help file.
Page 3

Controlling Power Management
!
Controlling Power Management
The PowerPanel utility allows you to control the power management of
your notebook and provides key information about system activity. The
following sections briefly describe how to conserve your computer’s
battery power. You can also refer to the PowerPanel Help for more
detailed information. To activate a profile or command, see “Displaying
Battery Information” on page 7.
Viewing the PowerPanel icon
The PowerPanel icon (displayed in the task tray) indicates the level of
performance of the CPU. The tooltip will display information about the
active profile.
To activate PowerPanel
1
Right-click the taskbar at the bottom of the screen.
2
Select Toolbars from the pop-up menu, and then click PowerPanel.
The PowerPanel toolbar appears on the taskbar.
The current profile icon appears on the PowerPanel toolbar. It is the icon
farthest to the left, and its appearance changes depending on which
power management profile is currently selected. To change the power
management profile, click the current profile icon, and then select a
profile from the list. See “Power Management Profiles” on page 4 for a
description of available options. To select another power profile
command, click that option in the PowerPanel toolbar.
✍
Refer to PowerPanel Help for information on customizing the PowerPanel toolbars.
When you use the battery pack to power your computer, your system selects the Maximum
Battery Life power management profile by default. If you select a different power
management profile while using battery power, that profile is selected automatically the next
time you use the battery pack to power your computer.
Page 4
"
Customizing Your VAIO® Z505 SuperSlim Pro Notebook
To customize power management settings
You can customize power management settings, such as the system timer
and the brightness of the screen, to your individual tastes. To customize a
setting:
1
Click the Current Profile icon on the PowerPanel toolbar.
2
Select Edit/Create Profiles from the menu.
3
Click a profile whose setting you want to change from the list in the
left panel.
4
Double-click an item whose setting you want to change from the list
in the right panel.
5
Click the desired setting.
6
Click the File menu, and then click Save.
7
Click the File menu, then click Exit.
Power Management Profiles
PowerPanel provides several predefined power management profiles.
Each profile consists of a group of specific power management settings
that are designed to meet specific power management goals — ranging
from maximum power management to no power management. You can
change the settings for any of the predefined profiles or you can create
your own profile to suit your portable computing needs. The predefined
profiles are:
Icon Description
Maximum Battery Life
you maximum battery life and good performance. It slows the
computer and puts it into System Suspend mode after a specified
period of inactivity.
Maximum Performance
while still conserving power.
Wo rd Processing
timeouts on the hard disk and display screen. You can also establish
settings for LCD (Video) Standby and System Susp end to opti mize
power management for your system.
Spreadsheet
spreadsheet applications.
Provides power saving features to give
–
Provides the best system performance
–
Optimizes power management with longer
–
Optimizes performance and power requirements for
–
Page 5
Controlling Power Management
Presentation – Keeps the display on at all times while it conserves
power. This option is ideal for slide show presentations. You can
establish settings for LCD (Video) Standby, Hard Disk Sleep, and
System Suspend to optimize power management for your system.
Communications
timeout. The Internal modem remains powered. You can also
establish settings for LCD (Video) Standby and System Suspend to
optimize power management for your system.
Games
timer.
Camera – Optimizes performance and power requirements for
camera usage.
AC Power – The power management state when AC power is in
use. Similar to the Power Management Off setting. PowerPanel
automatically loads the AC profile unless you disable this feature.
Disables the display and the Hard Disk Spindle Down
–
Extends battery life by initiating a quick display
–
#
Power Management Off
such as System Suspend and System Hibernation modes.
DVD
usage.
Automatic Profile Selection – Automatically switches to a profile
suitable for active applications.
Optimizes performance and power requirements for DVD
–
T urns off all power management features
–
Page 6

$
Customizing Your VAIO® Z505 SuperSlim Pro Notebook
Power Management Commands
PowerPanel also provides power management commands that you can
use to activate specific power management functions and to control
power for a specific device. You might use these commands when you
want to override a profile setting or initiate an immediate action, such as
putting the system into Video Standby mode before the Video Standby
timer expires.
Icon Description
System Idle
power consumption. This state stops the CPU clock and puts all
peripherals into low power mode. T o re turn the system to the active
state, press any key or power switch on your system.
System Suspend
power management state that saves the state of the system and
peripheral devices in memory (RAM). Pow er consumption r ed uces
to a minimum, and the system remains on. To return the system to
the active state, press any key or the power switch on your
computer.
System Hibernation
consumption. The system writes the state of the system and
peripheral devices to the hard disk and turns off the system power.
To return the system to the original state, use the power switch to
turn on power. The system saves the data in the Save to Disk
Partition on the hard drive.
LCD (Video) Standby
turn off the Video Standby timer in the AC Power-Profile Editor,
the display remains active except when the system enters System
Suspend mode. The video display system is one of the largest
consumers of power in the system.
– Puts the system into System Idle mode, a state of low
Puts the system into System Suspend mode, a
–
Provides for the lowest level of power
–
Turns off the LCD to save power. If you
–
Conserving Battery Power
When using the notebook with a battery, the LCD display and the hard
drive can be set to switch off automatically to conserve battery power.
For details, see “Power Management Profiles” on page 4.
Page 7

Displaying Battery Information
%
Displaying Battery Information
You can display detailed information about th e battery in your c omput er.
The following sections briefly describe how to display your computer’s
general battery information. You can also refer to BatteryScope Help for
more detailed information.
To Activate BatteryScope
1
Right-click the taskbar at the bottom of the screen.
2
Select Toolbar from the pop-up menu, and then click BatteryScope.
The BatteryScope appears on the taskbar.
You can also view the total capacity remaining in the battery by
placing the pointer over the battery icon in the task tray on the lower
right side of the screen.
❑
Percentage indicator
Displays the percentage of the remaining capacity.
❑
Time indicator
Displays estimated time (hours/minutes) remaining before the
battery fully drains; also referred to as the time-to-empty.
Battery Icon Descriptions
Battery icon Battery status
Charging
Fully Charged
Discharging
No battery
Page 8

&
Customizing Your VAIO® Z505 SuperSlim Pro Notebook
Displaying Detailed Battery Information
Double-click the battery icon in the system tray to display the
BatteryScope window. The screen appears displaying the Battery tab,
which contains information such as the estimated time to empty and the
charging time.
To customize the BatteryScope toolbar and alarm system
You can customize the BatteryScope toolbar to suit your portable
computing needs, including modifications to the alarm settings. Refer to
BatteryScope Help for more information.
Page 9

Changing the Window Design of Sony Software
'
Changing the Window Design of Sony Software
To change the window design of Sony software
1
Click the Start button, point to Settings, and then click Control Panel.
2
Click UI Design Selector.
3
Click << or >> and select the desired design.
4
Click Apply. The “UI Design Selector” window design changes.
The window design for your Sony software will match the UI Design
Selector window when you click OK.
To try another selection, click << or >> and then, click OK.
The UI Design Selector closes and the new window design of your Sony
software displays.
✍
Note: This feature is available with UI Design Selector-compatible software only.
Page 10

Customizing Your VAIO® Z505 SuperSlim Pro Notebook
Selecting the Display Mode
This notebook uses the NeoMagic® video controller . You can select which
display is used when the computer is connected to an external display.
1
Click the Start button on the Windows taskbar.
2
Point to Settings and click Control Panel.
3
Click the Display icon.
4
Click the Settings tab, and then click the Advanced button. In
Windows 98, the NeoMagic MagicMedia 256XL+ Pr operties window
displays. In Windows 2000, the Digital Flat Panel (1024x768) and
NeoMagic 256XL+... window displays.
5
Click the NeoMagic tab.
(Windows® 98 only) (Windows® 2000 only)
6
Select the type of display.
Display mode Function
Internal
Display (LCD)
External
Display (CRT/
Projector)
Activates your computer’s LCD.
Activates an external computer display or an RGB
projector connected to the Monitor port on your
computer.
Page 11

Selecting the Display Mode
✍
You can turn off the computers LCD display by removing the checkmark from the LCD option
under Internal Display.
If you turn off the LCD when you select a display, the Projector option will no longer be
available.
If you select CRT/Projector and turn off the LCD, you can use the Refresh Rate slider to change
the display's horizontal frequency. This setting can be made only for CRT display.
If you select Independent Display Timing (see page 12), you can change both the resolution
and the refresh rate.
7
Click OK. The Display Properties window appears and the display
mode you selected is now available.
✍
Some displays do not support using both the computers LCD and an external display
simultaneously.
Using a CRT or Projector
When you select CRT/Projector as the display mode, you can choose
additional settings as follows:
1
After selecting CRT/Projector as the type of external display (step 6
of Selecting the Display Mode), click Advanced Settings.
(Windows® 98 only)
Page 12

Customizing Your VAIO® Z505 SuperSlim Pro Notebook
(Windows® 2000 only)
2
Select the following options:
External Display
Device Function
CRT Enables the external computer display option.
Projector Enables the projector option.
Monitor Settings
Independent Display
Timing
Projector Settings
Type Select the projector’s resolution from the drop-
Click to place a checkmark when you want to
set the resolution and refresh rate differently
from the computer’s LCD. To change the
resolution and refresh rate, see step 6 of
Selecting the Display Mode.
down box.
3
Click OK.
✍
You cannot select Independent Display Timing when the display is set to True Color (24 bit).
Page 13

Selecting the Display Mode
Customizing for external display/projector use
If you selected CRT/Projector in step 6 of Selecting the Display Mode,
you can set the resolution and so forth as appropriate for the type of
external computer display or projector.
1
Click Details in step 6 of Selecting the Display Mode on the previous
page. Advanced Settings appears.
2
Select the display type.
Setting Function
CRT Connection to an external computer display.
Projector Connection to a projector.
Set the refresh rate/resolution (for Independent display/Timing). When
Independent display/Timing is selected in Monitor settings, you can set
separate values for the refresh rate and resolution of the internal and
external displays.
Set the resolution. Select the resolution for the projector that you are going
to use.
3
Click OK
Important! It is not possible to select Independent display/Timing when True
!
Color (24 bit) is selected for the number of colors.
!
Page 14

"
Customizing Your VAIO® Z505 SuperSlim Pro Notebook
Using the Dual Display Function
The dual display function allows you to distribute portions of your
desktop across separate displays. For example, if you have an external
monitor attached to the monitor connector, your LCD display and the
monitor can function as a single desktop. Y ou can move the cursor off one
display and onto the other. This allows you to drag objects, such as an
open application window or a toolbar , fr om one display to the other. This
configuration of a single desktop distributed across separate displays is
referred to as a virtual desktop.
Virtual desktop
External monitor
Your LCD display
Selecting Dual Display mode
Y ou must restart W indows to use dual display mode. Save your work and
close any open applications before changing to dual display mode, then
follow these steps:
1
Click the Start button on the Windows taskbar.
2
Point to Settings and then click Control Panel.
3
Click the Display icon.
4
Click the Settings tab.
Page 15

Using the Dual Display Function
5
Click the Advanced button.
6
Click the NeoMagic tab.
7
Check the Set Dual-Display option and click OK. The System Settings
Change dialog box appears.
8
Click Yes to restart your system.
#
Setting the colors and resolution for each display
You can set the display colors and resolution for each display that is part
of a virtual desktop.
Follow steps 1 to 4 above to display the Display Properties screen. Select
the display you wish to change (1 or 2) by clicking on the icon of the
display. You can change colors by selecting an option from the Colors list.
Use the slider in the Screen area to change the resolution. Click OK or
Apply. Click OK to confirm that you want to make the changes.
Customizing the virtual desktop
Y ou can customize dual display mode by ch anging the position of the two
desktops that comprise the virtual desktop.
In the Display Properties screen, drag the icons of display 1 or display 2,
moving them to a new position relative to each other. The two display
icons must be connected to create a virtual desktop. Click OK to apply the
change.
Releasing the dual display setting
You must restart Windows to return to single display mode. Save your
work and close any open applications before returning to single display
mode. Follow the steps in the section above on Selecting dual display
mode. In step 7, remove the check from the Set Dual-Display option. You
must restart Windows before the change takes effect.
Page 16

$
Customizing Your VAIO® Z505 SuperSlim Pro Notebook
 Loading...