

Page 1
FM/AM
Cassette
Car Stereo
3-047-781-12 (1)
Operating Instructions
Mode d’emploi
Manual de instrucciones
Owner’s Record
The model and serial numbers are located on the bottom of the unit.
Record these numbers in the space provided below.
Refer to these numbers whenever you call upon your Sony dealer regarding this
product.
Model No. XR-M550 Serial No.
For installation and connections, see the supplied installation/connections manual.
En ce qui concerne l’installation et les connexions, consulter le manuel
d’installation/connexions fourni.
Para obtener información sobre la instalación y las conexiones, consulte el manual
de instalación/conexiones suministrado.
US
FR
ES
XR-M550
© 2000 Sony Corporation
Page 2

Warning
This equipment has been tested and found to
comply with the limits for a Class B digital
device, pursuant to Part 15 of the FCC Rules.
These limits are designed to provide
reasonable protection against harmful
interference in a residential installation. This
equipment generates, uses, and can radiate
radio frequency energy and, if not installed
and used in accordance with the instructions,
may cause harmful interference to radio
communications. However, there is no
guarantee that interference will not occur in a
particular installation. If this equipment does
cause harmful interference to radio or
television reception, which can be determined
by turning the equipment off and on, the user
is encouraged to try to correct the interference
by one or more of the following measures:
— Reorient or relocate the receiving antenna.
— Increase the separation between the
equipment and receiver.
— Connect the equipment into an outlet on a
circuit different from that to which the
receiver is connected.
— Consult the dealer or an experienced radio/
TV technician for help.
Supplied card remote commander complies
with Part 15 of the FCC Rules. Operation is
subject to the following two conditions: (1)
This device may not cause harmful
interference, and (2) this device must accept
any interference received, including
interference that may cause undesired
operation.
Welcome !
Thank you for purchasing this Sony Cassette
Player. This unit lets you enjoy a variety of
features using the following controller
accessory:
Supplied accessory
Card remote commander RM-X94
Optional accessory
Rotary commander RM-X4S
In addition to the cassette playback and radio
operations, you can expand your system by
connecting an optional CD/MD unit*1.
When you operate this unit or a connected
optional CD unit with the CD TEXT function,
the CD TEXT information will appear in the
display when you play a CD TEXT disc*2.
*1You can connect a CD changer, an MD changer,
a CD player, or an MD player.
*2A CD TEXT disc is an audio CD that includes
information such as the disc name, artist name,
and track names.
This information is recorded on the disc.
You are cautioned that any changes or
modifications not expressly approved in this
manual could void your authority to operate
this equipment.
2
Page 3
Precautions
• If your car was parked in direct sunlight
resulting in a considerable rise in
temperature inside the car, allow the unit to
cool off before operating it.
• If no power is being supplied to the unit,
check the connections first. If everything is in
order, check the fuse.
• If no sound comes from the speakers of a
two-speaker system, set the fader control to
the center position.
• When a tape is played back for a long period,
the cassette may become warm because of
the built-in power amplifier. However, this is
not a sign of malfunction.
• Do not use the Custom file feature while
driving, or perform any other function which
could divert your attention from the road.
Notes on Cassettes
Cassette care
• Do not touch the tape surface of a cassette, as
any dirt or dust will contaminate the heads.
• Keep cassettes away from equipment with
built-in magnets such as speakers and
amplifiers, as erasure or distortion on the
recorded tape could occur.
• Do not expose cassettes to direct sunlight,
extremely cold temperatures, or moisture.
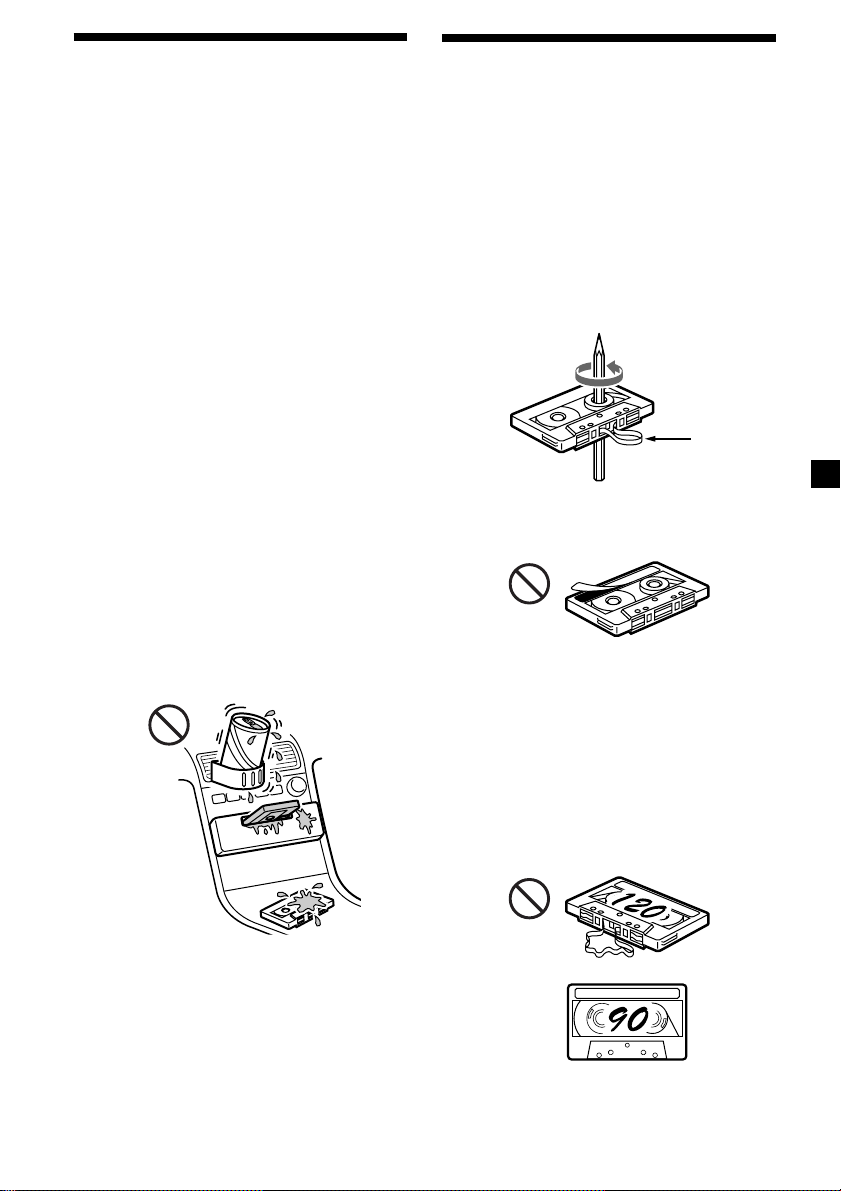
• Slack in the tape may cause the tape to be
caught in the machine. Before you insert the
tape, use a pencil or similar object to turn the
reel and take up any slack.
If you have any questions or problems
concerning your unit that are not covered in
this manual, please consult your nearest Sony
dealer.
To maintain high quality sound
If you have drink holders near your audio
equipment, be careful not to splash juice or
other soft drinks onto the car audio. Sugary
residues on this unit or cassette tapes may
contaminate the playback heads, reduce the
sound quality, or prevent sound reproduction
altogether.
Cassette cleaning kits cannot remove sugar
from the tape heads.
Slack
• Distorted cassettes and loose labels can cause
problems when inserting or ejecting tapes.
Remove or replace loose labels.
• The sound may become distorted while
playing the cassette. The cassette player head
should be cleaned after each 50 hours of use.
Cassettes longer than 90 minutes
The use of cassettes longer than 90 minutes is
not recommended except for long continuous
play. The tape used for these cassettes is very
thin and tends to stretch easily. Frequent
playing and stopping of these tapes may cause
them to become entangled in the cassette deck
mechanism.
3
Page 4

Table of Contents
This Unit Only
Location of controls ................................................. 5
Getting Started
Resetting the unit ................................................ 8
Turning the unit on/off ...................................... 8
How to use the menu ......................................... 8
Setting the clock .................................................. 9
Cassette Player
Listening to a tape ............................................. 10
Playing a tape in various modes ......................11
Radio
Memorizing stations automatically
— Best Tuning Memory (BTM) .................. 12
Memorizing only the desired stations ........... 12
Receiving the memorized stations.................. 13
Storing the station names
— Station Memo .......................................... 14
Locating a station by name
— List-up ...................................................... 15
Other Functions
Labeling the rotary commander ..................... 15
Using the rotary commander .......................... 16
Adjusting the sound characteristics ............... 18
Attenuating the sound ..................................... 18
Changing the sound and display settings ..... 18
Selecting the spectrum analyzer ..................... 19
Adjusting the sound and frequency of the
equalizer preamplifier................................. 19
With Optional Equipment
CD/MD Unit
Playing a CD or MD ......................................... 20
Playing tracks repeatedly
— Repeat Play .............................................. 21
Playing tracks in random order
— Shuffle Play .............................................. 22
Labeling a CD
— Disc Memo ............................................... 22
Locating a disc by name
— List-up ...................................................... 24
Selecting specific tracks for playback
— Bank .......................................................... 24
TV/Video
Watching the TV................................................ 25
Watching a video............................................... 25
Memorizing TV channels automatically ....... 26
Memorizing only the desired TV channels ... 26
Storing the TV channel names ........................ 27
Displaying the information stored on discs .. 27
Watching the TV or video while listening to a
tape, CD or MD
— Simultaneous Play .................................. 28
Additional Information
Maintenance....................................................... 29
Dismounting the unit ....................................... 30
Specifications ..................................................... 31
Troubleshooting guide ..................................... 32
4
Page 5
Location of controls
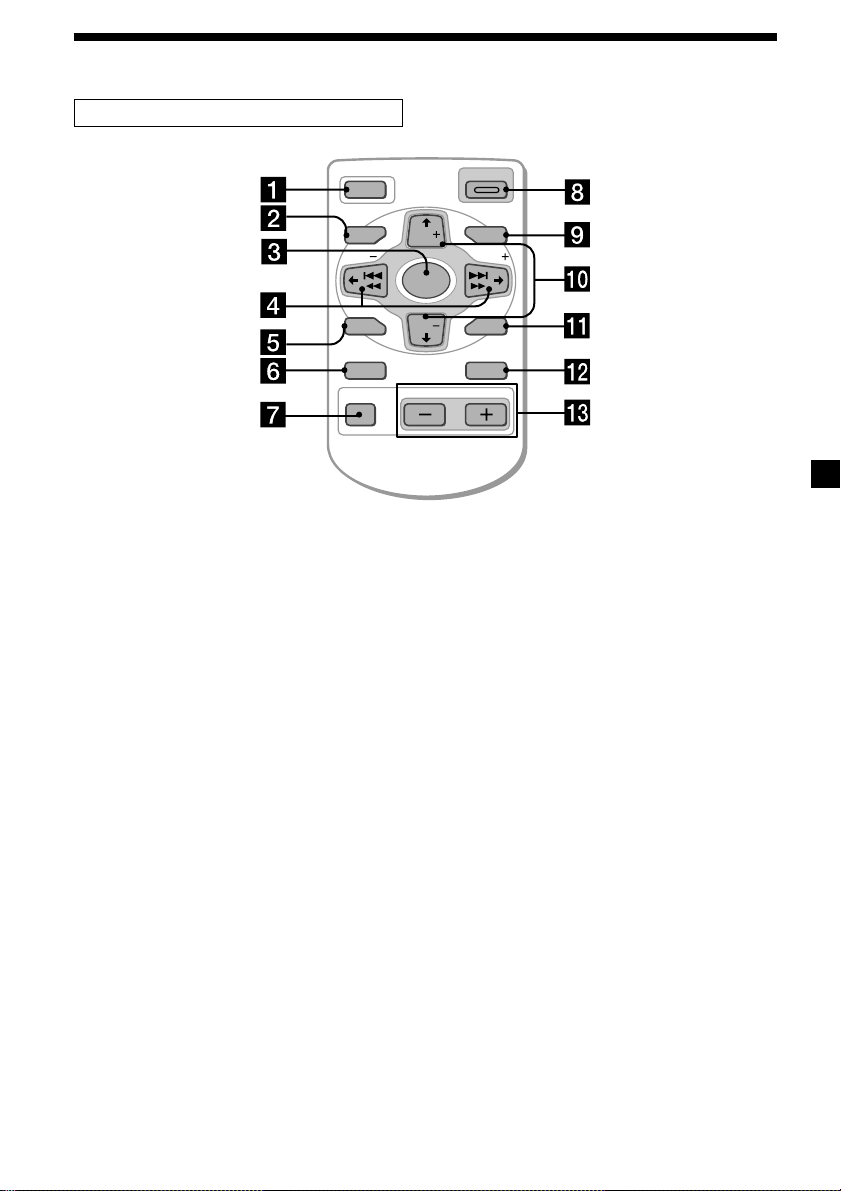
Card remote commander RM-X94
OFF
MENU LIST
SEEK SEEK
SOUND
DSPL MODE
Refer to the pages listed for details.
1 OFF button 8, 10
2 MENU button 9, 11, 12, 13, 14, 19, 20,
21, 22, 23, 24, 25, 26, 28
3 SOURCE (Tuner/TAPE/CD/MD/TV)
button
8, 10, 12, 13, 19, 20, 23, 25, 26, 28
4 </, (SEEK/AMS –/+) buttons
8, 9, 10, 11, 13, 14, 18, 19, 20, 21, 22, 24,
25, 26, 28
Automatic Music Sensor (./>)
10, 21
Manual search (m/M) 21
Seek 13
5 SOUND button 18
6 DSPL (display mode change) button
14, 20, 23
7 ATT (attenuate) button 18
8 OPEN/CLOSE button 10
9 LIST button 14, 15, 23, 24, 27
List-up 15, 24, 27
OPEN/CLOSE
D-BASS
DISC
SOURCE
DISC
ENTER
VOLATT
q; M/m (DISC/PRST +/–) buttons 8, 9, 11,
13, 14, 15, 19, 20, 21, 22, 23, 24, 25, 26
During radio reception:
Preset stations select 13
During CD/MD playback:
Disc change 21
During TV reception:
Band select 26
qa ENTER button 9, 11, 12, 13, 14, 19, 20,
22, 23, 24, 25, 26, 28
qs MODE button
10, 11, 12, 13, 20, 23, 25, 28
During tape palyback:
Playback direction change 10
During radio reception:
BAND select 12, 13
During CD/MD playback:
CD/MD unit select 20
During TV reception:
Unit select 25, 28
qd VOL (volume adjust) buttons
A unit turned off by pressing (OFF) for two
seconds cannot be operated with the card
remote commander unless (SOURCE) on the
unit is pressed or a cassette is inserted to
activate the unit first.
5
Page 6
Location of controls
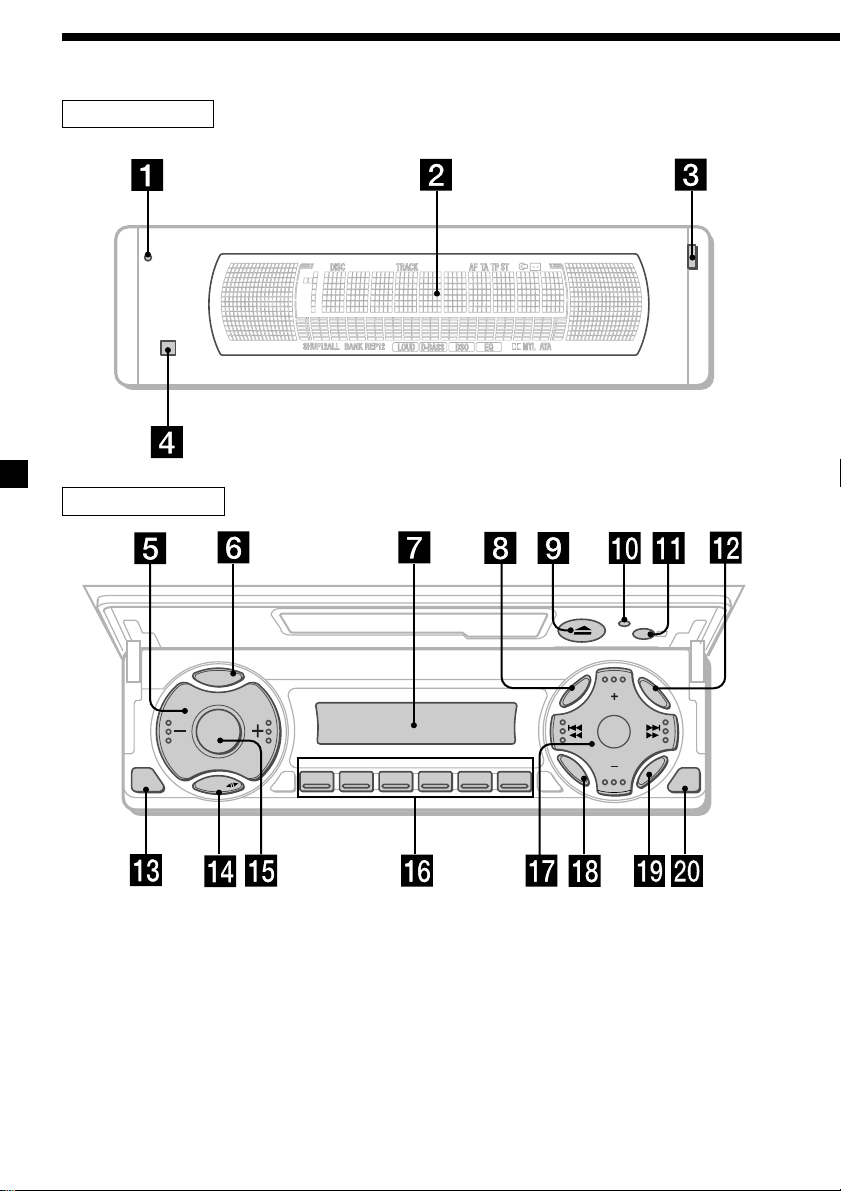
Security side
Operation side
P
S
L
OFF
D
SOURCE
M
O
D
E
REP SHUF
123456
MENU
SOUND
DISC
DISC
LIST
ENTER
CLOSE
XR-M550
6
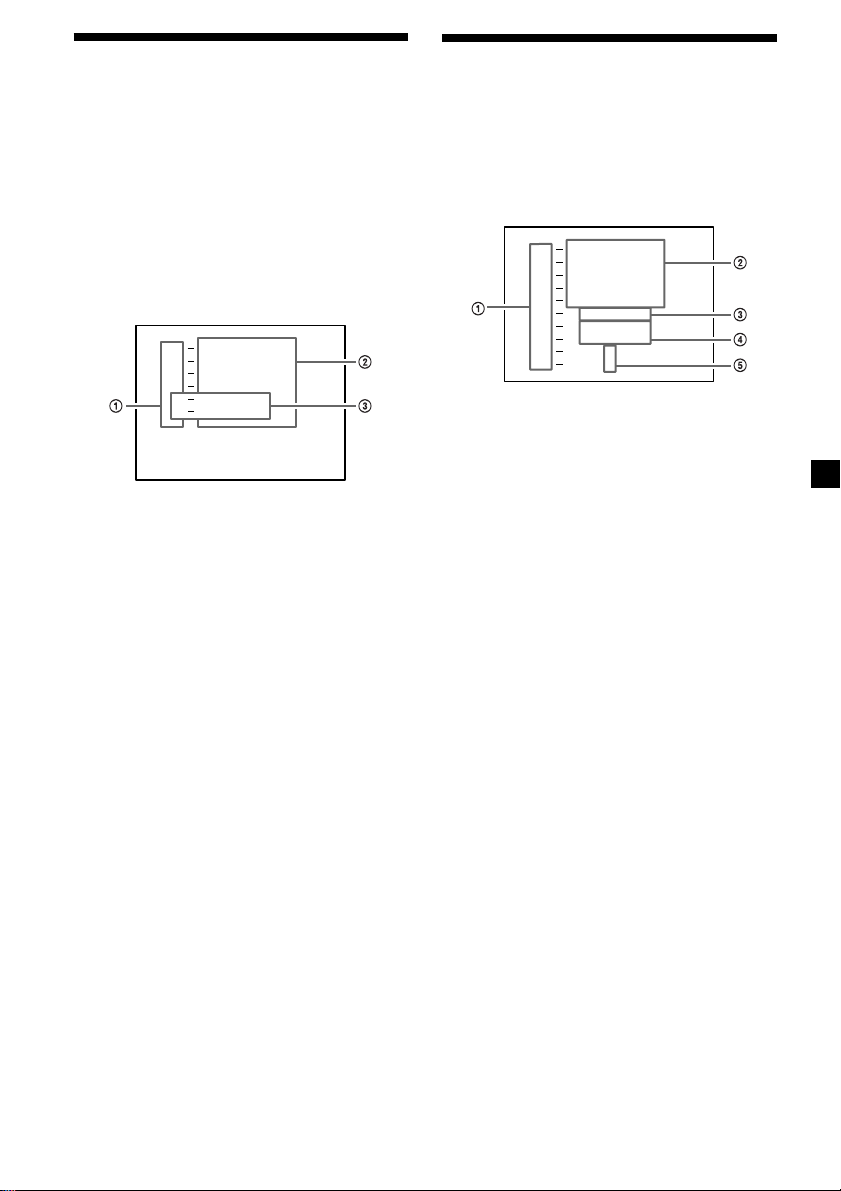
Page 7

The corresponding buttons of the unit
control the same functions as those on
the card remote commander.
1q; Reset button (located on the front
side of the unit behind the front
panel) 8
2 Main display window
3 OPEN button
4qa Receptor for the card remote
commander
5 Volume adjust buttons
6 DSPL (display mode change) button
7 Sub display window
8 MENU button
9
Z (eject) button 10
qs LIST button
qd OFF button* 8
qf MODE button
qg SOURCE button
qh Number buttons
During tape playback:
(1) REP 11
During radio reception
Preset number select 12, 13
During CD/MD playback:
(1) REP 21
(2) SHUF 22
During TV reception:
Preset number select 26
qj PRST/DISC +/– (cursor up/down) buttons
SEEK/AMS –/+ (cursor left/right) buttons
12
qk SOUND button
ql ENTER button
w; CLOSE button
* Warning when installing in a car
without ACC (accessory) position on
the ignition key switch
Be sure to press (OFF) on the unit for two
seconds to turn off the clock display after
turning off the engine.
When you press (OFF) only momentarily,
the clock display does not turn off and this
causes battery wear.
7
Page 8
Getting Started
Resetting the unit
Before operating the unit for the first time or
after replacing the car battery, you must reset
the unit.
Press the reset button with a pointed object,
such as a ball-point pen.
Reset button
Note
Pressing the reset button will erase the clock
setting, preset memory and some memorized
functions.
Turning the unit on/off
Turning on the unit
Press (SOURCE) or insert a cassette in the unit.
For details on operation, refer to page 10
(cassette player) and page 12 (radio).
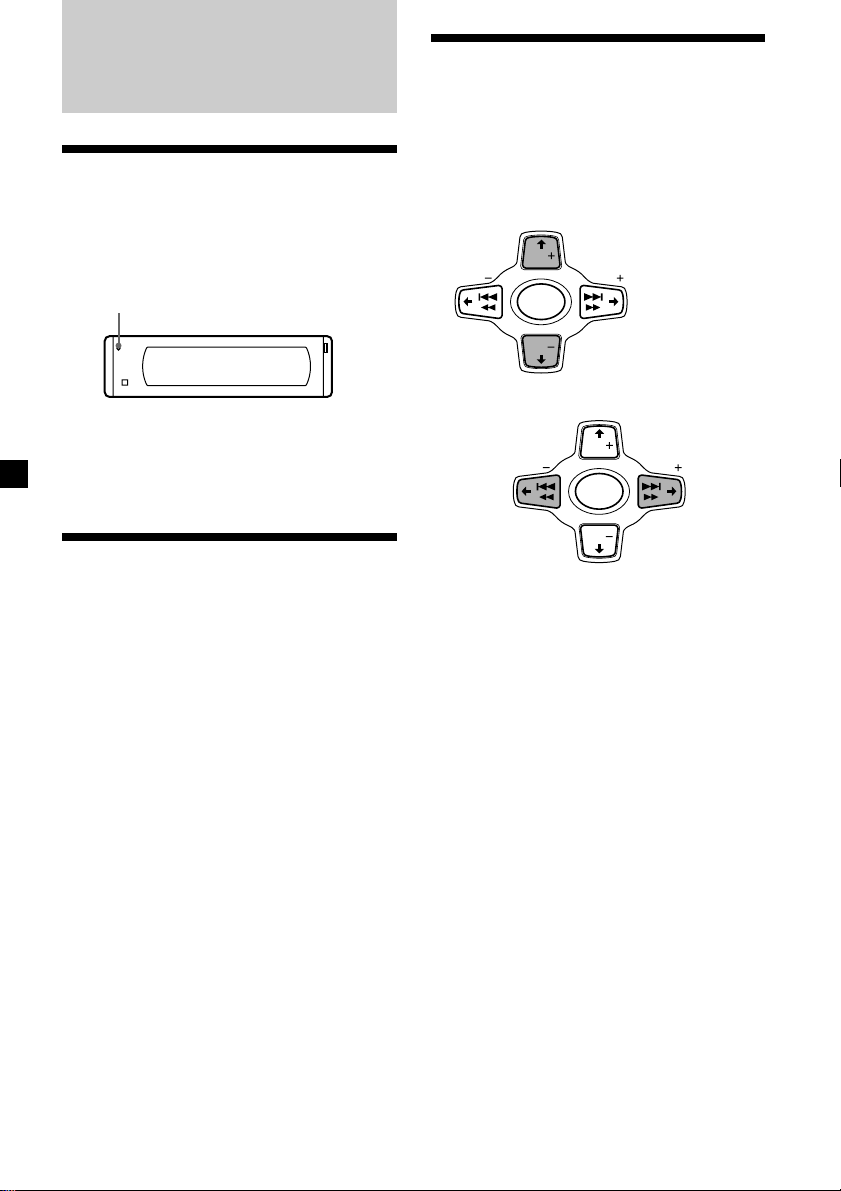
How to use the menu
This unit is operated by selecting items from a
menu.
To select, first enter the menu mode and
choose M/m (up/down), or choose </,
(left/right).
M/m
M : To select upwards
DISC
SEEK SEEK
SOURCE
DISC
m : To select downwards
</,
DISC
< :
To select
leftwards
SEEK SEEK
SOURCE
DISC
, :
To select
rightwards
Turning off the unit
Press (OFF) to stop tape playback or FM/AM
reception (the key illumination and display
remains on.)
Press (OFF) for two seconds to completely
turn off the unit.
Note
If your car has no ACC position on the ignition key
switch, be sure to turn the unit off by pressing
(OFF) for two seconds to avoid car battery wear.
8
Page 9
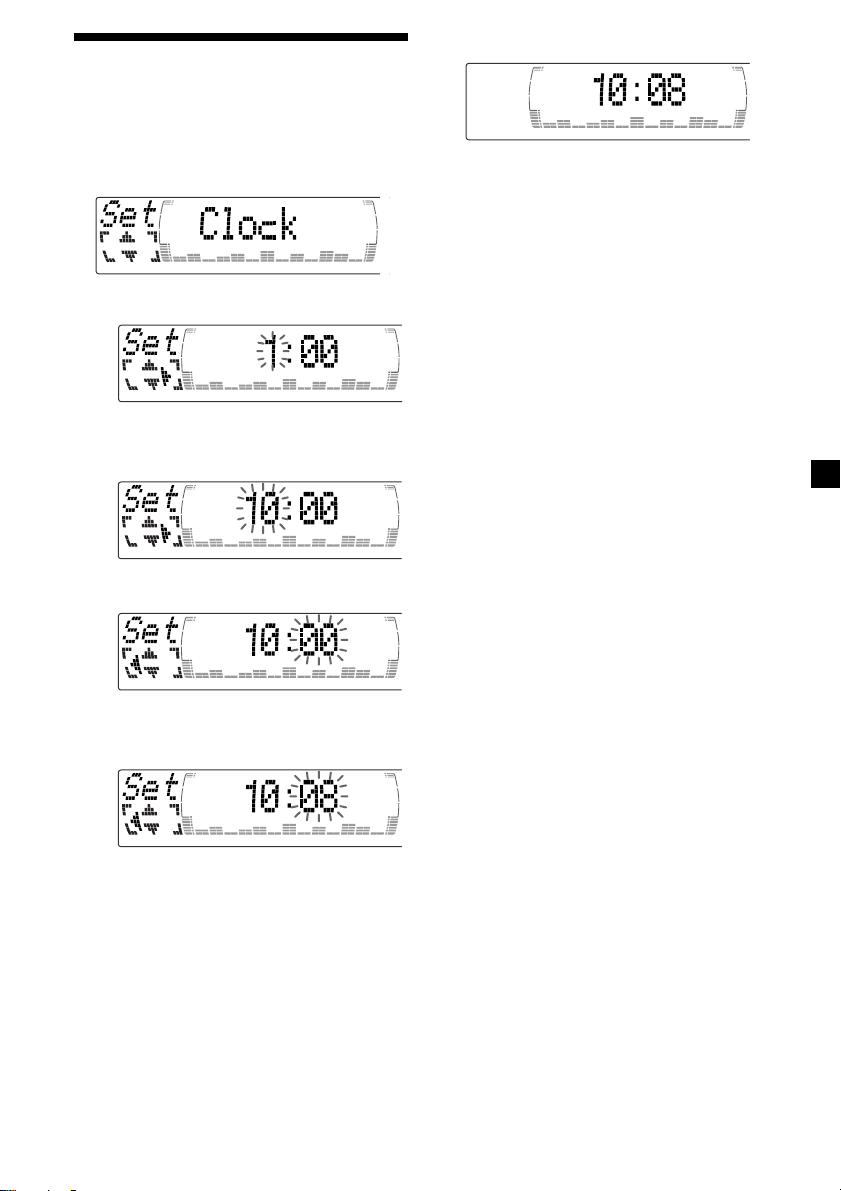
Setting the clock
The clock uses a 12-hour digital indication.
Example: To set the clock to 10:08
1 Press (MENU), then press M or m
repeatedly until “Clock” appears.
1 Press (ENTER).
The hour indication flashes.
2 Press M or m to set the hour.
3 Press ,.
2 Press (ENTER).
The clock starts.
Tip
In the initial setting, the clock indication appears
while the unit is turned off.
When the D.Info mode is set to “on,” the time is
always displayed (except for some functions of SA
mode) (page 18).
The minute indication flashes.
4 Press M or m to set the minute.
9
Page 10
Cassette Player
SEEK SEEK
DISC
DISC
SOURCE
SEEK SEEK
DISC
DISC
SOURCE
Fast-winding the tape
During playback, press and hold m or
M.
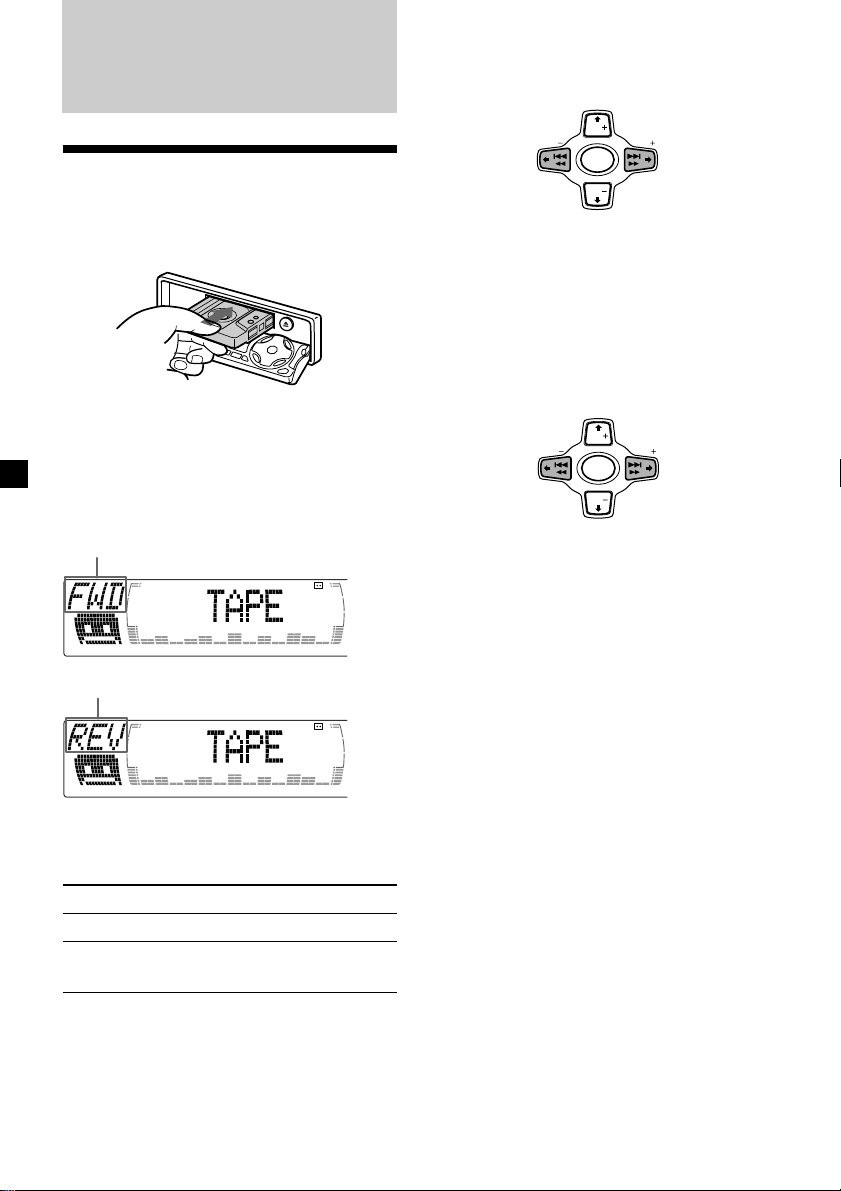
Listening to a tape
1 Press (OPEN/CLOSE) of the card remote
commander and insert a cassette.
Playback starts automatically.
2 Press (OPEN/CLOSE) of the card remote
commander to close the front panel.
If a cassette is already inserted, to start
playback, press (SOURCE) repeatedly until
“FWD” or “REV” appears.
The side facing up is played.
The side facing down is played.
m :
Rewind
m :
Fast-forward
To start playback during fast-forwarding or
rewinding, press (MODE) (o).
Locating a specific track
— Automatic Music Sensor (AMS)
During playback, press . or >
momentarily for each track you want to
skip.
You can skip up to nine tracks at one time.
. :
To locate
preceding
tracks
Note
The AMS function may not work when:
— the blanks between tracks are shorter than
four seconds
— there is noise between tracks
— there are long sections of low volume or quiet
sections.
In the Motion Display mode, all the items are
scrolled in the display one by one in order.
> :
To locate
succeeding
tracks
Tip
To change the tape‘s playback direction, press
(MODE) (o).
To Press
Stop playback (OFF)
Eject the cassette (OPEN/CLOSE)
10
then Z
Tip
The Motion Display mode can be turned off. (See
“Changing the sound and display settings” on
page 18.)
Page 11
Playing a tape in various
modes
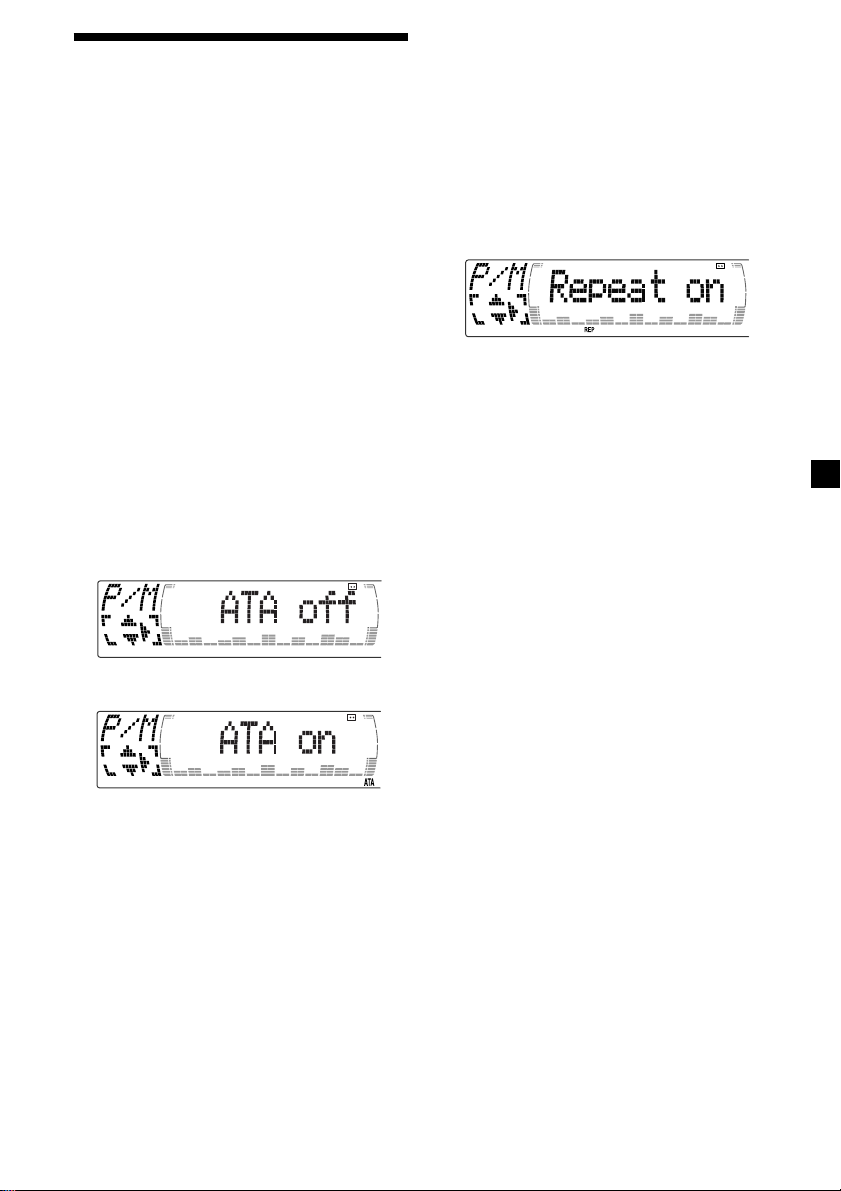
Playing tracks repeatedly
— Repeat Play
1 During playback, press (MENU).
You can play the tape in various modes:
•Repeat (Repeat Play) repeats the current
track.
•NR (Dolby NR) lets you select the Dolby* NR
B system.
•Metal lets you play a metal or CrO2 tape.
•B.Skip (Blank Skip) skips blanks longer than
eight seconds.
•ATA (Automatic Tuner Activation) turns on
the tuner automatically when fast-winding
the tape.
* Dolby noise reduction manufactured under
license from Dolby Laboratories.
“DOLBY” and the double-D symbol are
trademarks of Dolby Laboratories.
1 During playback, press (MENU).
2 Press M or m repeatedly until the desired
item appears.
Each time you m, the item changes as
follows:
Repeat t NR t Metal t B.Skip t ATA
3 Press , to select “on.”
2 Press M or m repeatedly until “Repeat”
appears.
3 Press , repeatedly until “Repeat on” in
the display appears.
Repeat on y Repeat off
Repeat Play starts.
To return to normal playback mode, select
“Repeat off” in step 3.
Tips
• If you select the mode using the buttons on the
unit, press (1) (REP) repeatedly until the desired
mode appears.
• During repeat playback, press (MODE). “REP”
disappears from the display and repeat mode is
canceled.
Play mode starts.
4 Press (ENTER).
To return to normal playback mode, select
“off” in step 3.
Tip
While the ATA function is activated, the display
(TAPE y TUNER) can be changed by pressing
(DSPL).
11
Page 12

Radio
Memorizing stations
automatically
— Best Tuning Memory (BTM)
The unit selects the stations with the strongest
signals and memorizes them in the order of
their frequencies. You can store up to 6 stations
on each band (FM1, FM2, FM3, AM1, and
AM2).
Caution
When tuning in stations while driving, use
Best Tuning Memory to prevent accidents.
1 Press (SOURCE) repeatedly to select the
tuner.
Each time you press (SOURCE), the source
changes as follows:
B Tuner B CD* B MD*
TV*b TAPE b
* If the corresponding optional equipment is
not connected, this item will not appear.
2 Press (MODE) repeatedly to select the
band.
Each time you press (MODE), the band
changes as follows:
B FM1 B FM2 B FM3
AM2 b AM1 b
Memorizing only the
desired stations
You can preset up to 18 FM stations (6 each for
FM1, 2, and 3) and up to 12 AM stations (6
each for AM1 and 2) in the order of your
choice.
1 Press (SOURCE) repeatedly to select the
tuner.
2 Press (MODE) repeatedly to select the
band.
3 Press . or > of the unit to tune in
the station that you want to store on the
number button.
4 Press the desired number button ((1) to
(6)) of the unit until “MEM” appears.
The number button indication appears in
the display.
Note
If you try to store another station on the same
number button, the previously stored station will
be erased.
3 Press (MENU), then press M or m
repeatedly until “BTM” appears.
4 Press (ENTER).
The unit stores stations in the order of their
frequencies on the number buttons.
A beep sounds when the setting is stored.
Notes
• The unit does not store stations with weak
signals. If only a few stations can be received,
some number buttons will retain their former
setting.
• When a number is indicated in the display, the
unit starts storing stations from the one currently
displayed.
12
Page 13

Receiving the memorized
stations
1 Press (SOURCE) repeatedly to select the
tuner.
2 Press (MODE) repeatedly to select the
band.
If FM stereo reception is poor
— Monaural Mode
1 During radio reception, press (MENU),
then press M or m repeatedly until
“Mono” appears.
2 Press , until “Mono on” appears.
The sound improves, but becomes
monaural (“ST” disappears).
3 Press M (preset up) or m (preset down)
repeatedly to receive the stations in the
order they are stored in the memory.
Tip
If you memorizing the station using the buttons on
the unit, press the number button ((1) to (6)) on
which the desired station is stored.
If you cannot tune in a preset
station
Press < or , to search for the station
(automatic tuning).
Scanning stops when the unit receives a
station. Press < or , repeatedly until the
desired station is received.
Note
If the automatic tuning stops too frequently, press
(MENU), then press M or m repeatedly until
“Local” (local seek mode) is displayed. Then press
, to select “Local on.” Press (ENTER).
During local reception and station selection,
“LCL Seek” appears in the display.
Only the stations with relatively strong signals will
be tuned in.
Tip
If you know the frequency of the station you want
to listen to, press and hold < or , until the
desired frequency appears (manual tuning).
3 Press (ENTER).
To return to normal mode, select
“Mono off” in step 2.
If FM stereo broadcast becomes
monaural
If interference occurs, the “IF Auto” function of
this unit will automatically avoid noise and
narrow the reception frequency. In such cases,
some FM stereo broadcasts may become
monaural. If you would like to listen to such
broadcasts in stereo, manually switch to the
“Wide” setting.
1 During radio reception, press (MENU),
then press M or m repeatedly until “IF
Auto” appears.
2 Press , until “Wide” appears.
3 Press (ENTER).
Note
When you widen the frequency signal reception
setting (“Wide” mode), some interference may
occur.
In the Motion Display mode, all the items are
scrolled in the display one by one in order.
Tip
The Motion Display mode can be turned off. (See
“Changing the sound and display settings” on
page 18.)
13
Page 14
Storing the station names
— Station Memo
You can assign a name to each radio station
and store it in memory. The name of the
station currently tuned in appears in the
display. You can assign a name of up to eight
characters for a station.
Storing the station names
1 Tune in a station whose name you want
to store.
2 Press (MENU), then press M or m
repeatedly until “Name edit” appears.
Tip
There is another way to start storing station
names. Press (LIST) for two seconds instead of
steps 2 and 3. You can also complete the operation
by pressing (LIST) for two seconds instead of step
5.
Displaying the station name
Press (DSPL) during radio reception.
Each time you press (DSPL), the item
changes as follows:
B Station name* B Frequency
3 Press (ENTER).
4 Enter the characters.
1 Press M repeatedly to select the
desired characters.
(A t B t C t ··· Z t 0 t 1 t 2 t
··· 9 t + t – t * t / t \ t > t <
t . t )
If you press m repeatedly, the characters
appear in the reverse order.
If you want to put a blank space
between characters, select “ .”
2 Press , after locating the desired
character.
The next character flashes.
* If the station name of a station is not stored,
“NO Name” appears in the display for one
second.
Erasing the station name
1 Tune in a station you want to erase.
2 Press (MENU), then press M or m
repeatedly until “Name Del” appears.
3 Press (ENTER).
4 Press M or m to select the station name
you want to erase.
5 Press (ENTER) for two seconds.
The name is erased.
Repeat steps 1 through 4 if you want to
erase other names.
6 Press (MENU) twice.
The unit returns to the normal radio
reception mode.
Note
When you erase all of the station names, “NO
Data” appears in step 5.
If you press <, the previous character
flashes.
3 Repeat steps 1 and 2 to enter the
entire name.
5 To return to the normal radio reception,
press (ENTER).
14
Page 15

Locating a station by
name — List-up
Other Functions
1 Press (LIST) momentarily.
The name assigned to the station currently
tuned appears in the display.
2 Press M or m repeatedly until you find
the desired station.
When no name is assigned to the selected
station, the frequency appears in the
display.
3 Press (ENTER) to tune in the desired
station.
Note
When you connect a TV tuner, the list-up
indication will not appear in the display of the
unit.
You can also control this unit with the rotary
commander (optional).
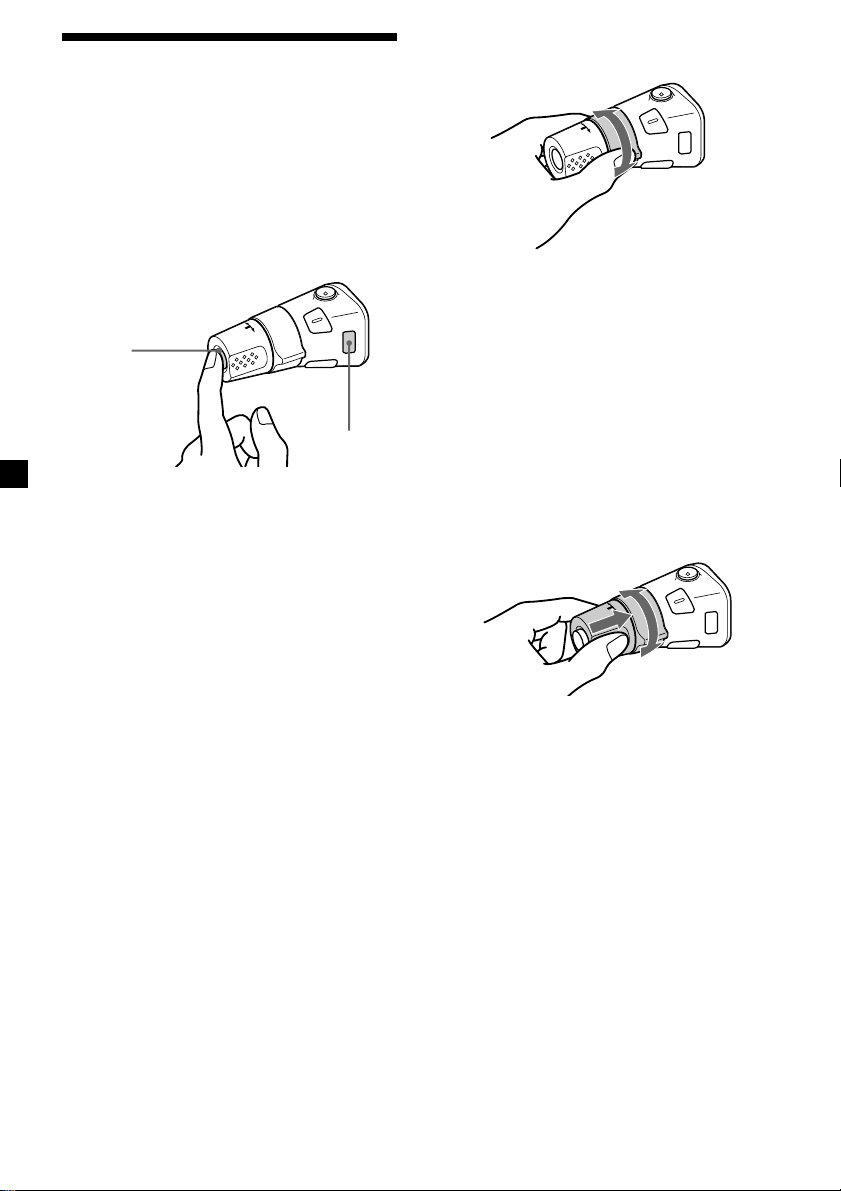
Labeling the rotary
commander
Depending on how you mount the rotary
commander, attach the appropriate label as
shown in the illustration below.
SOUND
MODE
DSPL
DSPL
MODE
SOUND
GB
15
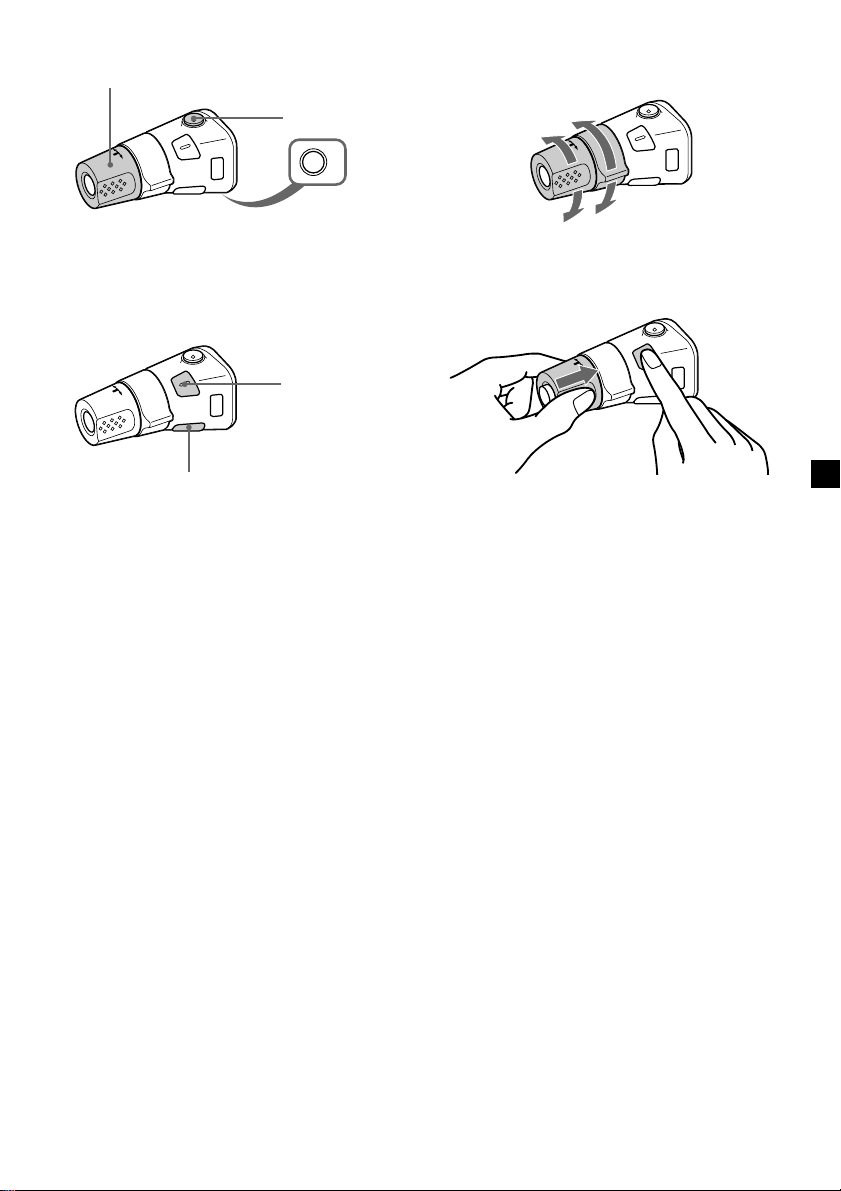
Page 16
Using the rotary
commander
The rotary commander works by pressing
buttons and/or rotating controls.
You can also control the optional CD or MD
units with the rotary commander.
By pressing buttons
(the SOURCE and MODE buttons)
(SOURCE)
(MODE)
Each time you press (SOURCE), the
source changes as follows:
TUNER t CD* t MD* t TAPE t TV*
Pressing (MODE) changes the operation
in the following ways;
• Tuner: FM1 t FM2 t FM3 t AM1
• CD unit*: CD1 t CD2 t …
• MD unit*: MD1 t MD2 t …
• Tape: playback direction
• TV/Video*: TV1 t TV2 t AUX
* If the corresponding optional equipment is
not connected, the item will not appear.
t AM2
By rotating the control
(the SEEK/AMS control)
Rotate the control and release it to:
•Locate the beginnings of tracks on the
tape. Rotate and hold the control, and
release it to fast-wind the tape. To start
playback while fast-winding the tape,
press (MODE).
•Locate a specific track on a disc. Rotate
and hold the control until you locate the
specific point in a track, then release it to
start playback.
•Tune in stations automatically. Rotate and
hold the control to find a specific station.
By pushing in and rotating the
control (the PRESET/DISC control)
Push in and rotate the control to:
•Receive the stations memorised on the
number buttons.
•Change the disc.
16
Page 17
Other operations
Rotate the VOL control to
adjust the volume.
Press (ATT) to
attenuate the
sound.
OFF
Changing the operative direction
The operative direction of controls is factoryset as shown below.
To increase
Press (OFF) to turn
off the unit.
Note
When installing in a car without ACC (accessory)
position on the ignition key switch, press (OFF) for
two seconds to turn off the clock display after
turning off the engine.
Press (SOUND) to
adjust sound
menu.
Press (DSPL) to change
the displayed items.
Tip
While the ATA function is activated, the display
(TAPE y TUNER) can be changed by pressing
(DSPL).
To decrease
If you need to mount the rotary commander on
the right hand side of the steering column, you
can reverse the operative direction.
Press (SOUND) for two seconds while
pushing the VOL control.
Tip
You can also change the operative direction of
these controls with the unit (see “Changing the
sound and display settings” on page 18).
GB
17
Page 18

Adjusting the sound
characteristics
Changing the sound and
display settings
You can adjust the bass, treble, balance, and
fader.
You can store the bass and treble levels
independently for each source.
1 Select the item you want to adjust by
pressing (SOUND) repeatedly.
Each time you press (SOUND), the item
changes as follows:
BAS (bass) t TRE (treble) t
BAL (left-right) t FAD (front-rear) t
SUB (Sub woofer)
2 Adjust the selected item by pressing
< or ,.
When adjusting with the rotary
commander, press (SOUND) and rotate the
VOL control.
Note
Adjust within three seconds after selecting the
item.
Attenuating the sound
Press (ATT) on the card remote
commander or rotary commander.
“ATT on” appears momentarily.
To restore the previous volume level, press
(ATT) again.
Tip
When the interface cable of a car telephone is
connected to the ATT lead, the unit decreases the
volume automatically when a telephone call comes
in (Telephone ATT function).
The following items can be set:
Set (Setting)
•Clock (page 9).
•Beep — to turn the beep sound on or off.
•RM (Rotary Commander) — to change the
operative direction of the rotary commander.
— Select “norm” to use the rotary
commander as the factory-set position.
— Select “rev” when you mount the rotary
commander on the right side of the
steering column.
•English/French/Spanish — to change the
display language to English, French, or
Spanish.
Dis (Display)
•D.Info (Dual Information)*1 — to display the
clock and the play mode simultaneously (on),
or to display the information alternately (off).
•SA (Spectrum Analyzer) — to change the
display pattern of the equalizer display
(page 19).
•Dimmer — to change the brightness of the
display (When the illumination cord
connected).
— Select “Auto” to dim the display only
when you turn the interior lights on.
— Select “on” to dim the display.
— Select “off” to deactivate Dimmer.
•Contrast — to adjust the contrast if the
indications in the display are not
recognizable because of the unit’s installed
position.
•M.Dspl (Motion Display) — to turn the
motion display on or off.
•A.Scrl (Auto Scroll)*2 (page 20).
Snd (Sound)
•HPF (High pass filter for the pre-output) —
to select the cut-off frequency of the preoutput.
•LPF (Low pass filter for the subwoofer
output) — to select the cut-off frequency of
the subwoofer output.
•Loud (Loudness)*1 — to enjoy bass even at
low volumes. The bass will be reinforced.
18
Page 19
1 Press (MENU).
2 Press M or m repeatedly until the desired
item appears.
Each time you press m, the item changes as
follows:
Example
Clock t Beep t RM t English/French/
Spanish t D.Info*1 t SA*1 t Dimmer t
Contrast t M.Dspl t A.Scrl*
LPF*1 t Loud*
*1When the radio is off, or when no tape, CD,
or MD is playing, this item will not appear.
*2When no CD or MD is playing, this item will
not appear.
Note
The displayed item will differ depending on the
source.
Tip
You can easily switch among categories (“Set,”
“Snd,” “P/M” (Play Mode) and “Dis”) by pressing
an holding M or m for two seconds.
1
2
t HPF*1 t
3 Press , to select the desired setting
(Example: on or off) or press < or ,
repeatedly to select the frequency
(Example: off, 78 Hz or 125 Hz).
For the “Contrast” setting, pressing ,
makes the contrast higher, and pressing <
makes the contrast lower.
4 Press (ENTER).
After the mode setting is complete, the
display returns to normal playback mode.
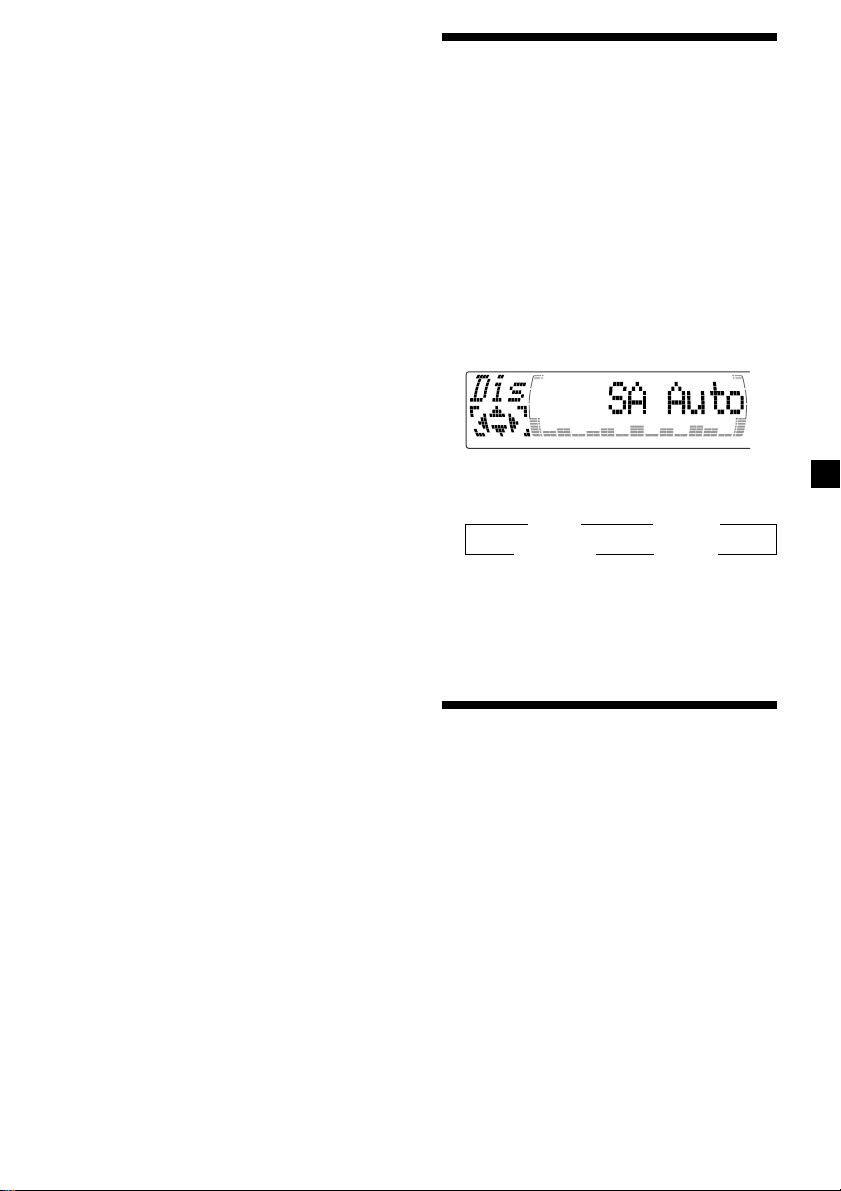
Selecting the spectrum
analyzer
The sound signal level is displayed on a
spectrum analyzer. You can select a display
pattern from 1 to 6, or the automatic display
mode.
1 Press (SOURCE) to select a source (tuner,
tape, CD, or MD).
2 Press (MENU).
3 Press M or m repeatedly until “SA”
appears.
4 Press < or , repeatedly to select the
desired setting.
B SA 1 bB … SA 6 b
B SA Auto* bB SA off b
* All of these display patterns appear one by
one automatically.
5 Press (ENTER).
Adjusting the sound and
frequency of the equalizer
preamplifier
This unit can also control an optional equalizer
preamplifier.
This lets you add some effects to the sound
field of the currently selected source.
GB
For details, refer to the instructions manual
supplied with the equalizer preamplifier.
19
Page 20

With Optional Equipment
CD/MD Unit
This unit can control external CD/MD units.
If you connect an optional CD unit with the
CD TEXT function and the custom file
function, the CD TEXT information will appear
in the display when you play a CD TEXT disc.
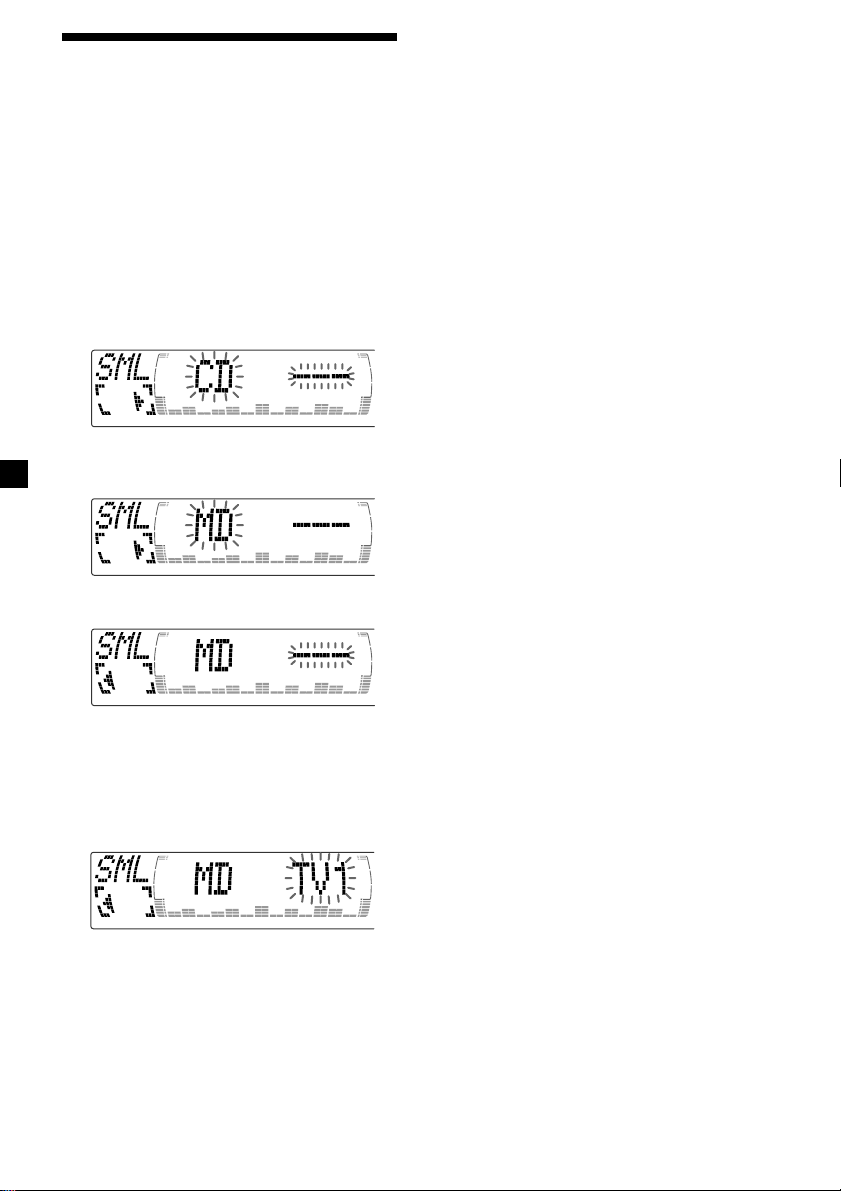
Playing a CD or MD
1 Press (SOURCE) repeatedly to select CD
or MD.
2 Press (MODE) until the desired unit
appears.
CD/MD playback starts.
When a CD/MD unit is connected, all the
tracks play from the beginning.
Changing the display item
Each time you press (DSPL) during CD, CD
TEXT, or MD playback, the item changes as
follows:
Disc number/Track number/
Elapsed playing time
Disc name*
V
V
1
/Artist name*
V
Track name*
2
3
After you select the desired item, the display
will automatically change to the Motion
Display mode after a few seconds.
In the Motion Display mode, all the items are
scrolled in the display one by one in order.
Tip
The Motion Display mode can be turned off. (See
“Changing the sound and display settings” on
page 18.)
Automatically scrolling a disc name
— Auto Scroll
If the disc name, artist name, or track name on
a CD TEXT disc or MD exceeds 10 characters
and the Auto Scroll function is on, information
automatically scrolls across the display as
follows:
• The disc name appears when the disc has
changed (if the disc name is selected).
• The track name appears when the track has
changed (if the track name is selected).
If you press (DSPL) to change the display
item, the disc or track name of the CD TEXT
disc or MD is scrolled automatically whether
you set the function on or off.
1 During playback, press (MENU).
2 Press M or m repeatedly until “A.Scrl”
appears.
3 Press , to select “A.Scrl on.”
4 Press (ENTER).
To cancel Auto Scroll, select “A.Scrl off” in
step 3.
*1If you have not labeled the disc or if there is no
disc name prerecorded on the MD, “NO
D.Name” appears momentarily in the display.
2
If you play a CD TEXT disc, the artist name
*
appears in the display after the disc name.
(Only for CD TEXT discs with the artist name.)
3
If the track name of a CD TEXT disc or MD is not
*
prerecorded, “NO T.Name” appears
momentarily in the display.
20
Note
For some discs with very many characters, the
following cases may happen:
—Some of the characters are not displayed
—Auto Scroll does not work.
Page 21
Locating a specific track
— Automatic Music Sensor (AMS)
During playback, press < or ,
momentarily for each track you want to
skip.
< (.) : To locate preceding tracks
, (>) : To locate succeeding tracks
Locating a specific point in a track
— Manual Search
During playback, press and hold < or
,. Release when you have found the
desired point.
< (m) : To search backward
, (M) : To search forward
Switching to other discs
During playback, press M or m.
M (DISC +) : For succeeding discs
m (DISC –) : For preceding discs
The desired disc in the current unit begins
playback.
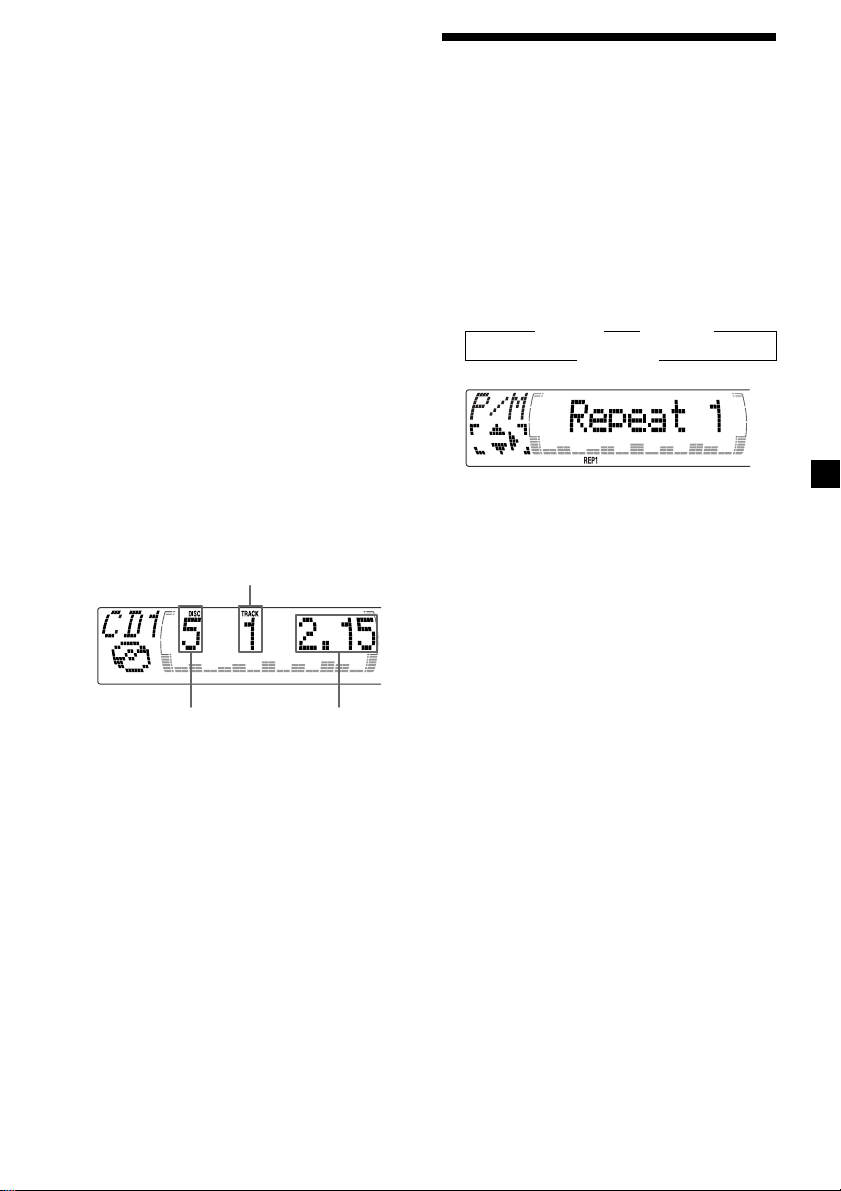
Track number
Playing tracks repeatedly
— Repeat Play
You can select:
•Repeat 1 – to repeat a track.
•Repeat 2 – to repeat a disc.
1 During playback, press (MENU).
2 Press M or m repeatedly until “Repeat”
appears.
3 Press , repeatedly until the desired
setting appears in the display.
B Repeat 1 B Repeat 2
Repeat off b
Repeat Play starts.
To return to normal play mode, select “Repeat
off” in step 3.
Tip
If you select the mode using the buttons on the
unit, press (1) (REP) repeatedly until the desired
mode appears.
GB
Disc number Elapsed playback time
21
Page 22
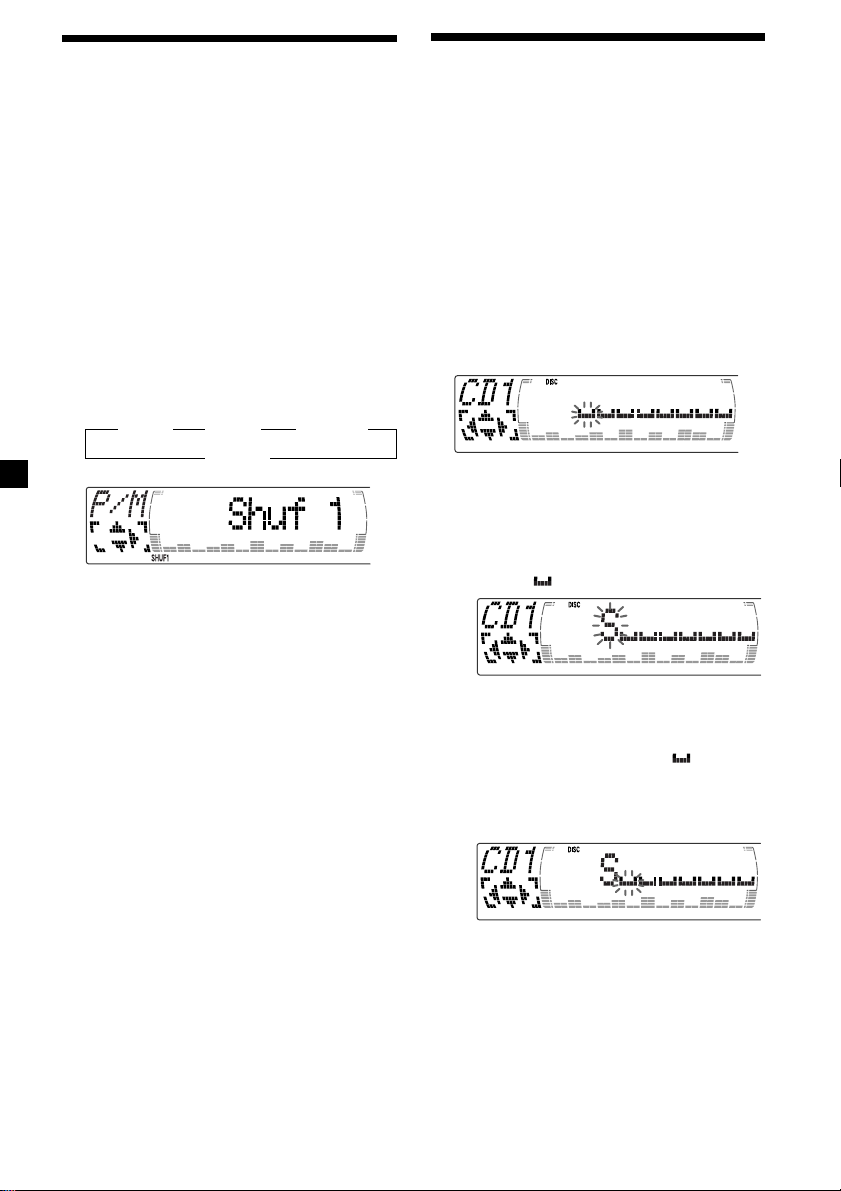
Playing tracks in random
order — Shuffle Play
You can select:
•Shuf 1 – to play the tracks on the current disc
in random order.
•Shuf 2 – to play the tracks in the current unit
in random order.
•Shuf All* – to play all the tracks in all the
units in random order.
1 During playback, press (MENU).
2 Press M or m repeatedly until “Shuf”
appears.
3 Press , repeatedly until the desired
setting appears in the display.
B Shuf 1 B Shuf 2 B Shuf All*
Shuf off b
Shuffle Play starts.
* “Shuf All” is only available when you connect
two or more optional CD/MD units.
Labeling a CD — Disc Memo
(For a CD unit with the custom file function)
You can label each disc with a personalized
name. You can enter up to eight characters for
a disc. If you label a CD, you can locate the
disc by name (page 24) and select the specific
tracks for playback (page 24).
1 Start playing the disc you want to label.
2 Press (MENU), then press M or m
repeatedly until “Name Edit” appears.
3 Press (ENTER).
Name edit mode
4 Enter the characters.
1 Press M repeatedly to select the
desired characters.
(A t B t C t ··· Z t 0 t 1 t 2 t
··· 9 t + t – t * t / t \ t > t <
t . t )
To return to normal play mode, select “Shuf
off” in step 3.
Tip
If you select the mode using the buttons on the
unit, press (2) (SHUF) repeatedly until the desired
mode appears.
22
If you press m repeatedly, the characters
will appear in reverse order.
If you want to put a blank space
between characters, select “ .”
2 Press , after locating the desired
character.
The next character flashes.
If you press <, the previous character
flashes.
Page 23
3 Repeat steps 1 and 2 to enter the
entire name.
5 To return to normal CD play mode, press
(ENTER).
Tip
There is another way to start labeling a CD. Press
(LIST) for two seconds instead of steps 2 and 3.
You can also complete the operation by pressing
(LIST) for two seconds instead of step 5.
Erasing the disc memo
1 Press (SOURCE) repeatedly to select
“CD.”
2 Press (MODE) repeatedly to select the CD
unit with the custom file function.
3 Press (MENU), then press M or m
repeatedly until “Name Del” appears.
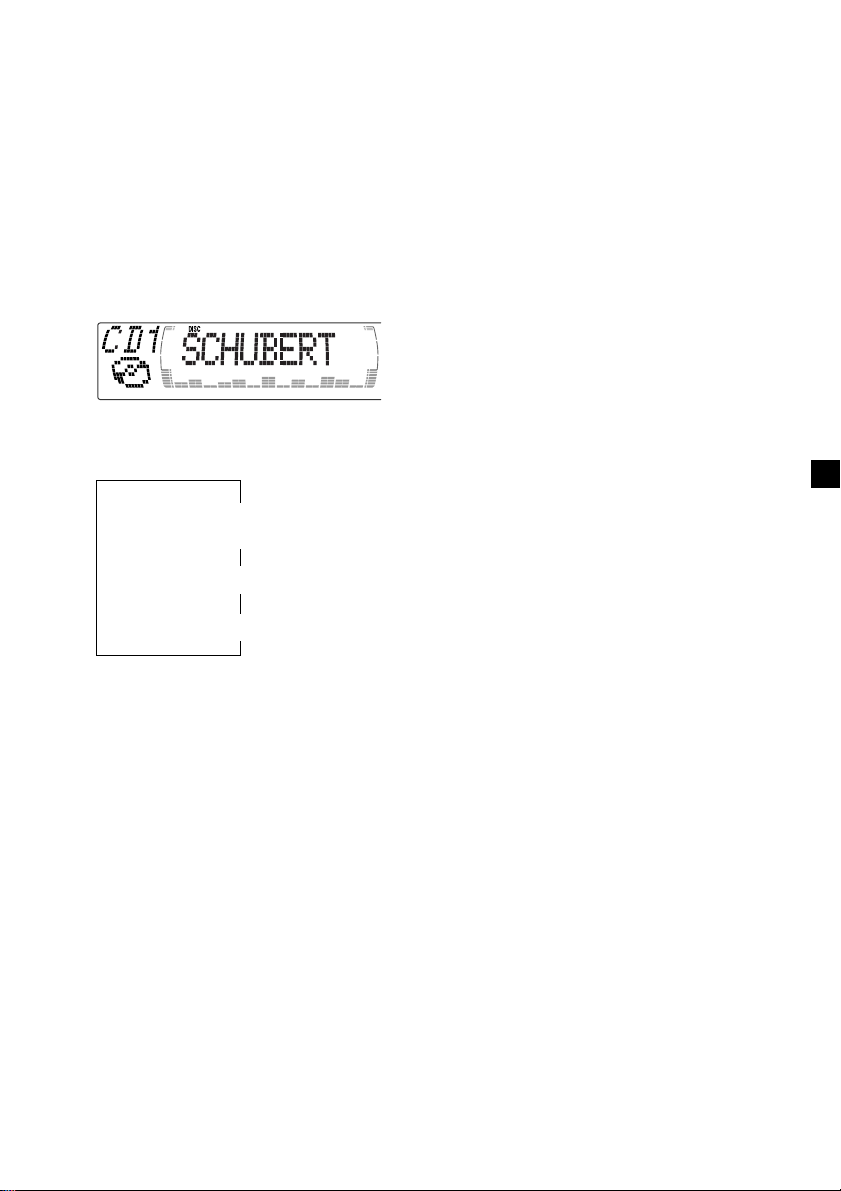
Displaying the disc memo
Press (DSPL) during CD or CD TEXT disc
playback.
Each time you press (DSPL) during CD or
CD TEXT disc playback, the item changes
as follows:
Disc number/Track number/
Elapsed playing time
* If you connect an optional CD unit with the
CD TEXT function, the CD TEXT information
will appear in the display when you play a CD
TEXT disc.
Note
Do not use the Custom file feature while driving,
or perform any other function which could divert
your attention from the road.
V
V
Disc memo name
V
Track name*
4 Press (ENTER).
5 Press M or m repeatedly to select the disc
name you want to erase.
6 Press (ENTER) for two seconds.
The name is erased.
Repeat steps 5 and 6 if you want to erase
other names.
7 Press (MENU) twice.
The unit returns to normal CD play mode.
Notes
• When a personalized label is erased, the original
CD TEXT information will appear in the display.
• When you erase all of the disc names, “NO Data”
appears in step 6.
GB
23
Page 24
Locating a disc by name
— List-up (For a CD unit with the custom
file function or an MD unit)
You can use this function for discs that have
been assigned a custom name. For more
information on disc memo names, refer to
“Labeling a CD” (page 22).
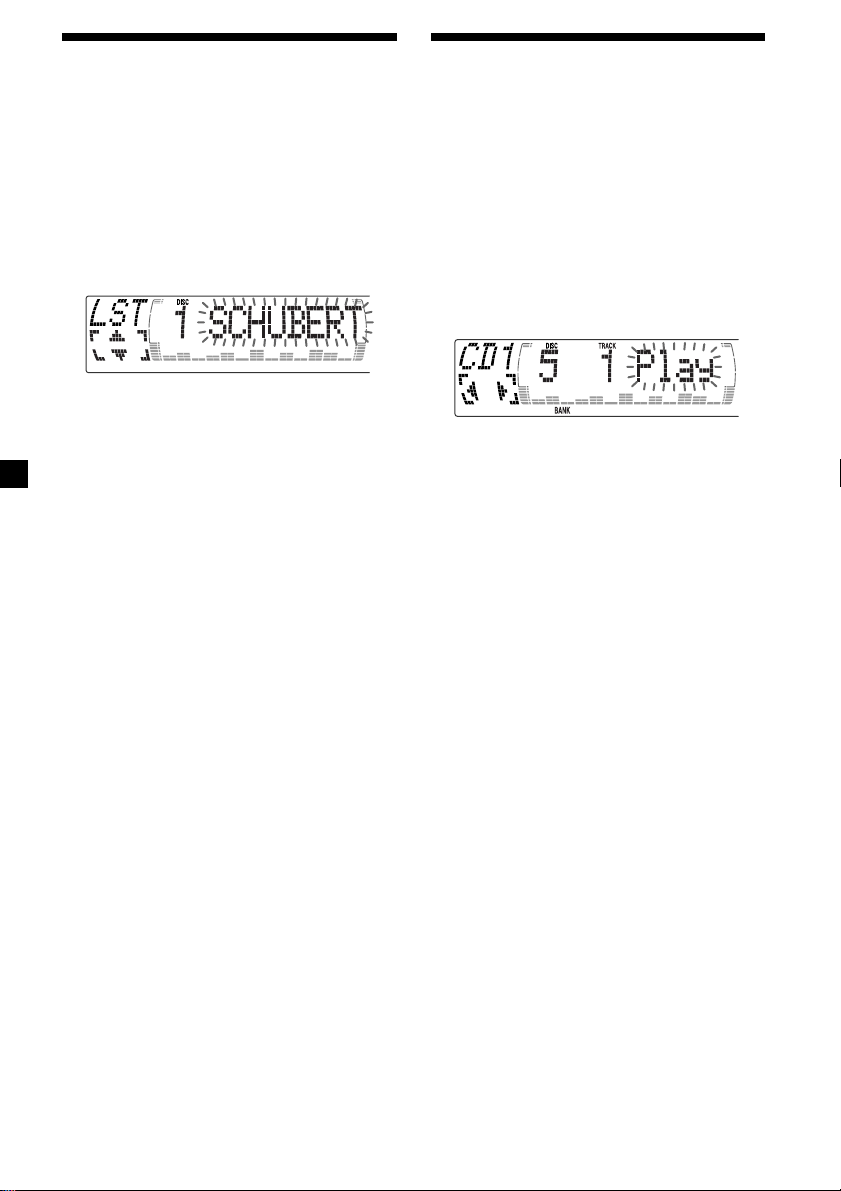
Selecting specific tracks
for playback
(For a CD unit with the custom file function)
If you label the disc, you can set the unit to
skip or play the tracks of your choice.
1 Start playing the disc you want to label.
— Bank
1 Press (LIST).
The name assigned to the current disc
appears in the display.
When you assign a disc memo name to a
CD TEXT disc, it takes priority over the
original CD TEXT information.
2 Press M (DISC +) or m (DISC –) repeatedly
until you find the desired disc.
3 Press (ENTER) to play the disc.
Notes
• The track names are not displayed during MD or
CD TEXT disc playback.
• If there are no discs in the magazine, “NO Disc”
appears in the display.
• If a disc has not been assigned a custom file,
“********” appears in the display.
• If the disc information has not been read by the
unit, “?” appears in the display. To load a disc,
first press the number button, then choose the
disc that has not been loaded.
• Some letters cannot be displayed during MD or
CD TEXT disc playback.
• If an optional TV system is connected, the disc
memo name appears in the display of the TV
system but not in the unit’s display.
2 Press (MENU), then press M or m
repeatedly until “Bank Sel” appears.
3 Press (ENTER).
Bank edit mode
4 Label the tracks.
1 Press < or , repeatedly to select the
track you want to label.
2 Press (ENTER) repeatedly to select
“Play” or “Skip.”
5 Repeat step 4 to set “Play” or “Skip” for
all the tracks.
6 Press (MENU) twice.
The unit returns to normal CD play mode.
Notes
• You can set “Play” and “Skip” for up to 24
tracks.
• You cannot set “Skip” for all the tracks on a CD.
24
Page 25
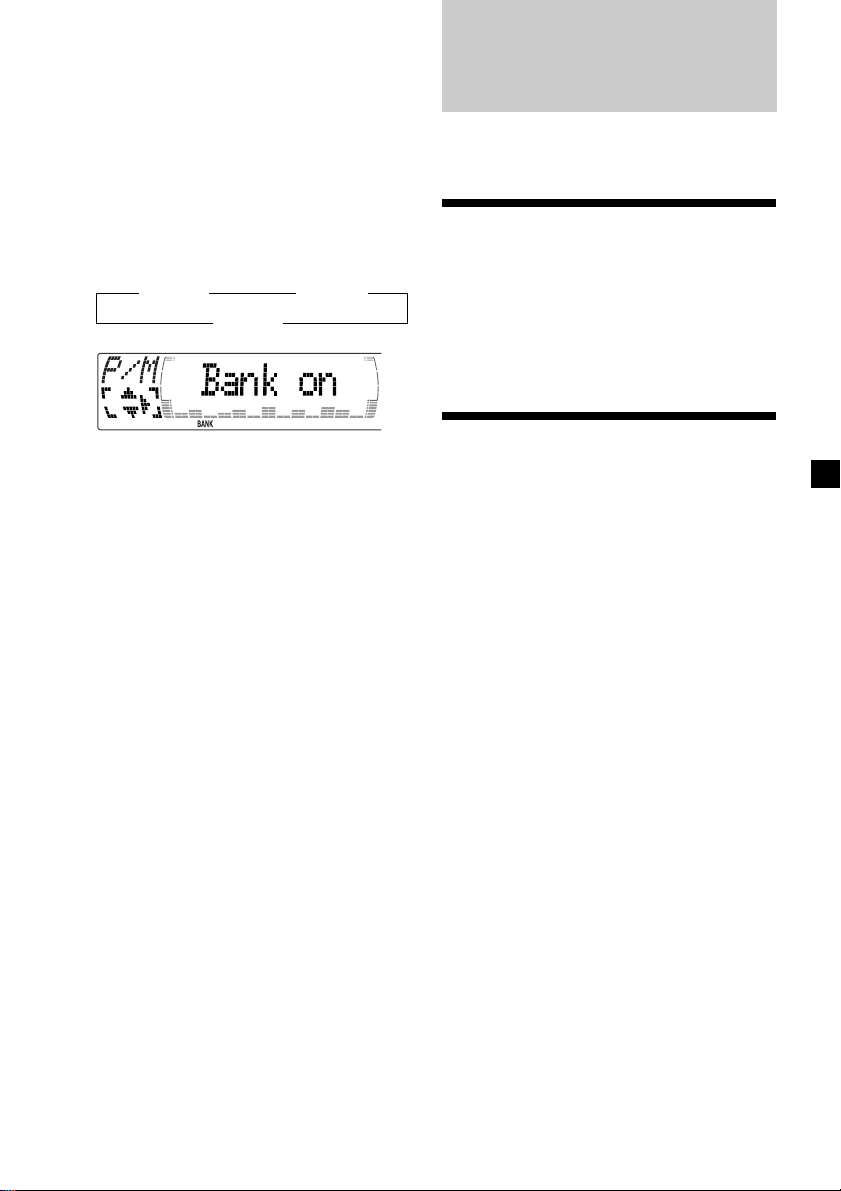
Playing specific tracks only
You can select:
•“Bank on” — to play the tracks with the
“Play” setting.
•“Bank inv” (Inverse) — to play the tracks
with the “Skip” setting.
1 During playback, press (MENU), then
press M or m repeatedly until “Bank”
appears.
2 Press , repeatedly until the desired
setting appears.
B Bank on B Bank inv
Bank off b
3 Press (ENTER).
Playback starts from the track following the
current one.
To return to normal play mode, select “Bank
off” in step 2.
TV/Video
You can connect an optional TV tuner and TV
monitor to this unit.
Watching the TV
1 Press (SOURCE) repeatedly until “TV”
appears.
2 Press (MODE) repeatedly to select the
desired TV band.
Watching a video
1 Press (SOURCE) repeatedly until “TV”
appears.
2 Press (MODE) repeatedly to select
“AUX.”
Playback the video.
GB
25
Page 26

Memorizing TV channels
automatically
The unit selects the TV channels with the
strongest signals and memorizes them in the
order of their frequency.
Memorizing only the
desired TV channels
You can store up to 12 channels (6 each for
TV1 and 2) on the number buttons in the order
of your choice.
Caution
When tuning in a station while driving, use
Best Tuning Memory to prevent accidents.
1 Press (SOURCE) repeatedly until “TV”
appears.
2 Press (MENU), then press M or m until
“Auto Mem” appears.
3 Press (ENTER).
The unit stores TV channels in the order of
their frequencies on the number buttons.
A beep sounds when the setting is stored.
Notes
• The unit does not store TV channels with weak
signals. If only a few TV channels can be
received, some number buttons will remain
empty.
• When a preset number is indicated in the display,
the unit starts storing TV channels from the one
currently displayed.
1 Press (SOURCE) repeatedly until “TV”
appears.
2 Press < or , to tune in the TV channel
you want to store on each number
button.
3 Press and hold the desired number
button ((1) to (6)) of the unit until you
hear a beep sound.
The number button indication and “Mem”
appears in the display.
Note
If you try to store another channel on the same
number button, the previously stored channel will
be erased.
26
Page 27
Storing the TV channel
names
Follow the steps in “Storing the station
names” (page 14).
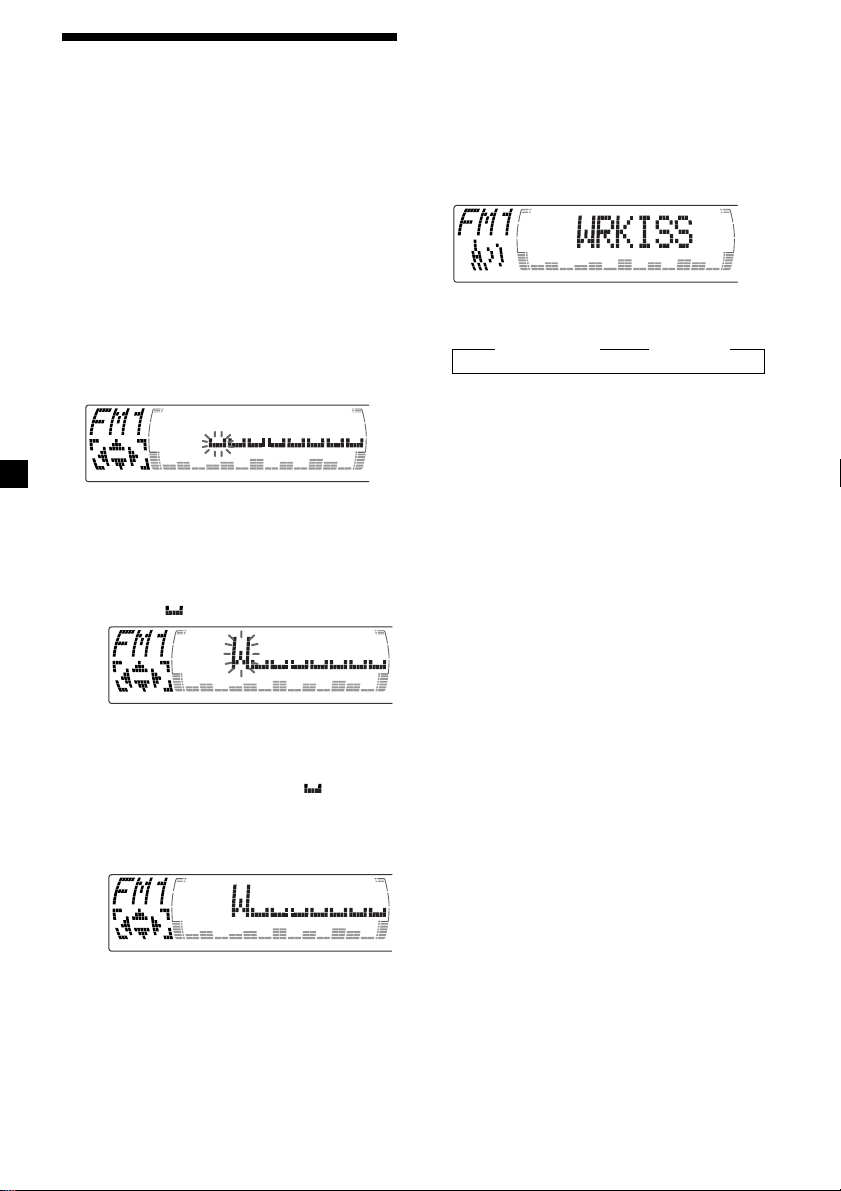
Displaying the TV or radio station
names
Press (LIST) during TV or radio
reception.
Example: When receiving the FM1 band
FM
1
1
W
C
B
W
B
L
W
K
T
WR K I
1
0
1
0
S
S
U
S
S
.9
1
.7
2
2
3
4
5
6
1 Preset numbers
2 Stored station names
3 Frequencies*
* If the name of a station is not stored, the
frequency of that station will be displayed
instead.
Notes
• It may take some time before all indications
appear in the display.
• The TV channel does not appear during list
display.
• The contents of the preset memory cannot be
listed when the unit is in simultaneous play
mode (page 28).
Turning off the display
During radio reception, press (LIST)
again.
During TV reception, the list display on the
TV monitor will automatically turn off after
a few seconds.
Displaying the
information stored on
discs
Press (LIST) during CD/MD playback.
Example: When CD unit 1 is selected.
CD 1
1
S
C
H
U
B
E
Z
A
C
H
I
S
Z
O
P
*****
?
?
1
RT
R
T
T
I
N
2
M
O
3
B
A
4
L
5
C
H
6
7
*
8
******
9
1 0
1 Disc numbers
2 Titles stored as custom files
3 No disc is loaded*
4 No stored titles*
2
5 TOC information has not been identified yet*
*1A blank space is displayed next to a disc
number represents empty slots in the disc
magazine.
2
If a title is not registered in the custom file,
*
“******” is displayed.
*3If the disc information has not yet been read
by the unit, “?” is displayed.
Notes
• It may take some time before all indications
appear in the display.
• The TV channel does not appear during list
display.
• The contents of the preset memory cannot be
listed when the unit is in the simultaneous play
mode.
Turning off the display
Press (LIST) again.
3
GB
27
Page 28
Watching the TV or video
while listening to a tape,
CD or MD
The simultaneous play function does not work
while you are listening to the radio.
1 Press (MENU), then press M or m
repeatedly until “Simul sel” appears.
2 Press (ENTER).
3 Press <.
4 Press (SOURCE) repeatedly to select CD
or MD.
5 Press ,.
— Simultaneous Play
Returning to normal mode
To cancel the CD or MD, select “– – –” in
step 4.
To cancel the TV or video, select “– – –”
in step 6.
Note
If you press Z (EJECT) on this unit or a CD/MD unit
while the unit is in simultaneous play mode,
Simultaneous Play is canceled.
6 Press (SOURCE) repeatedly until “TV”
appears, then press (MODE) repeatedly
to select a TV or video.
Each time you press (MODE), the item
changes as follows:
TV 1 t TV 2 t V 1 (VIDEO 1)
7 Press (ENTER).
Simultaneous Play starts.
If you are already watching the TV or video
and want to listen to a tape, CD or MD as well,
follow the same steps.
28
Page 29
Additional
Information
Maintenance
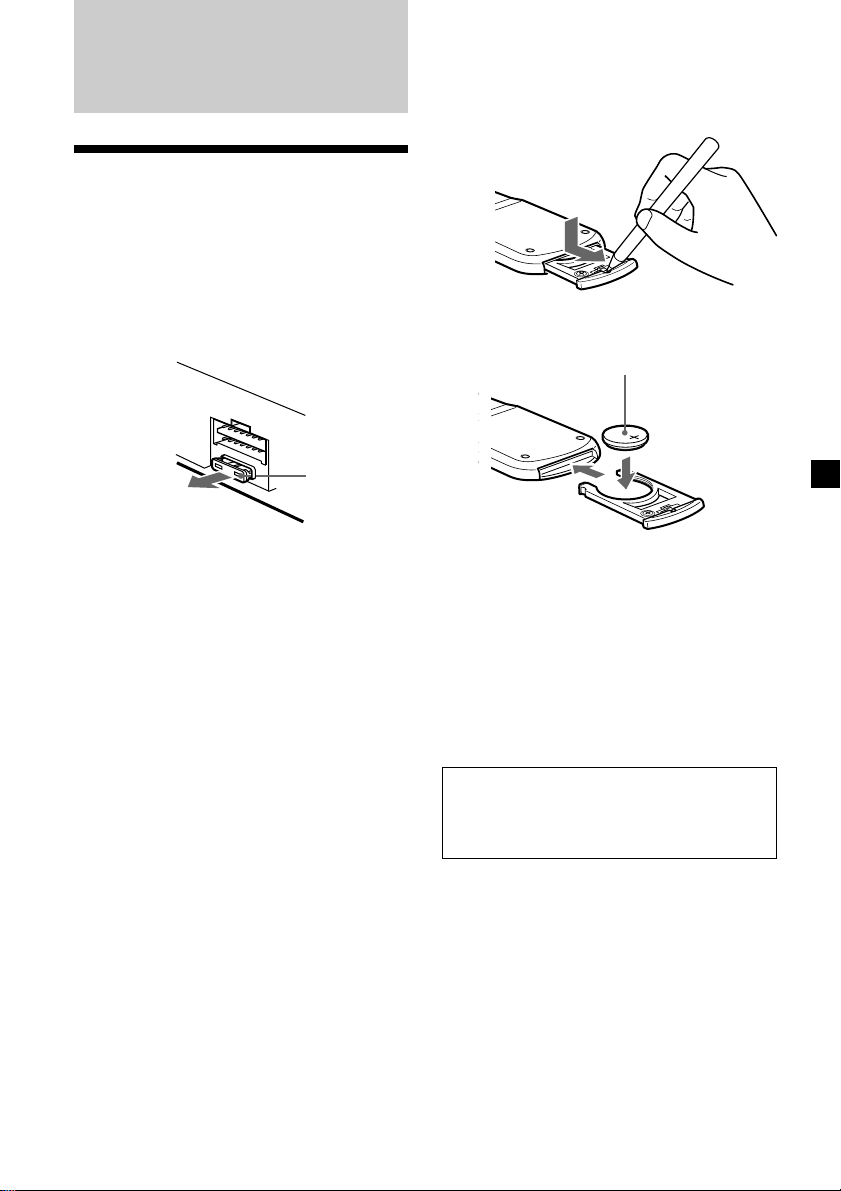
Fuse replacement
When replacing the fuse, be sure to use one
matching the amperage rating stated on the
original fuse. If the fuse blows, check the
power connection and replace the fuse. If the
fuse blows again after replacement, there may
be an internal malfunction. In such a case,
consult your nearest Sony dealer.
Fuse (10 A)
Replacing the lithium battery
When the battery becomes weak, the range of
the card remote commander becomes shorter.
Replace the battery with a new CR2025 lithium
battery.
x
+ side up
Warning
Never use a fuse with an amperage rating
exceeding the one supplied with the unit as
this could damage the unit.
Notes on lithium battery
•Keep the lithium battery out of the reach of
children. Should the battery be swallowed,
immediately consult a doctor.
•Wipe the battery with a dry cloth to assure a
good contact.
•Be sure to observe the correct polarity when
installing the battery.
•Do not hold the battery with metallic
tweezers, otherwise a short-circuit may
occur.
WARNING
Battery may explode if mistreated.
Do not recharge, disassemble, or dispose of
in fire.
29
Page 30
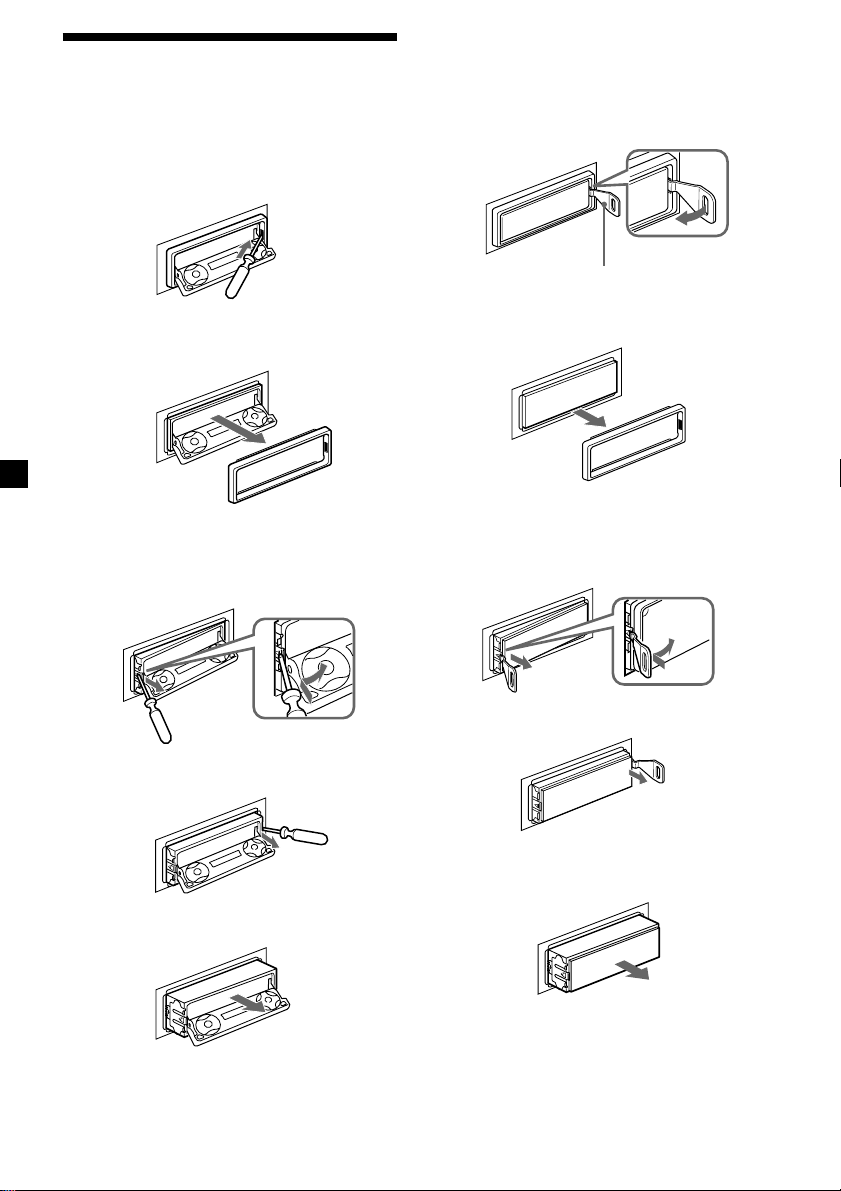
Dismounting the unit
With the front panel open
1 Press (OPEN) of the unit, then press the
clip inside the front cover with a thin
screwdriver, and gently pry the front
cover free.
2 Repeat step 1 on the left side.
The front cover is removed.
3 Use a thin screwdriver to push in the clip
on the left side of the unit, then pull out
the left side of the unit until the catch
clears the mounting.
If the front panel does not open
because of a blown fuse
1 Press the clip inside the front cover with
a release key (supplied), and pry the
front cover free.
Release key (supplied)
2 Repeat step 1 on the left side.
The front cover is removed.
3 Use a release key to push in the clip on
the left side of the unit, then pull out the
left side of the unit until the catch clears
the mounting.
4 Repeat step 3 on the right side.
5 Slide the unit out of the mounting.
30
4 Repeat step 3 on the right side.
5 Slide the unit out of the mounting.
Page 31

Specifications
AUDIO POWER SPECIFICATIONS
POWER OUTPUT AND TOTAL HARMONIC DISTORTION
19 watts per channel minimum continuous average power into
4 ohms, 4 channels driven from 20 Hz to 20 kHz with no more
than 1 % total harmonic distortion.
Other specifications
Cassette player section
Tape track 4-track 2-channel stereo
Wow and flutter 0.08 % (WRMS)
Frequency response 30 – 20,000 Hz
Signal-to-noise ratio
Cassette type
TYPE II, IV
TYPE I
Dolby B NR
67 dB
64 dB
Dolby NR off
61 dB
58 dB
Tuner section
FM
Tuning range 87.5 – 107.9 MHz
Antenna terminal External antenna connector
Intermediate frequency 10.7 MHz/450kHz
Usable sensitivity 8 dBf
Selectivity 75 dB at 400 kHz
Signal-to-noise ratio 66 dB (stereo),
Harmonic distortion at 1 kHz
Separation 35 dB at 1 kHz
Frequency response 30 – 15,000 Hz
72 dB (mono)
0.6 % (stereo),
0.3 % (mono)
AM
Tuning range 530 – 1,710 kHz
Antenna terminal External antenna connector
Intermediate frequency 10.7 MHz/450 kHz
Sensitivity 30 µV
Power amplifier section
Outputs Speaker outputs
Speaker impedance 4 – 8 ohms
Maximum power output 50 W × 4 (at 4 ohms)
General
Outputs Audio output (3)
Inputs Telephone ATT control
Tone controls Bass ±9 dB at 100 Hz
Power requirements 12 V DC car battery
Dimensions Approx. 178 × 50 × 182 mm
Mounting dimensions Approx. 182 × 53 × 163 mm
Mass Approx. 1.3 kg (2 lb. 14 oz.)
Supplied accessories Card remote commander
Optional accessories Rotary commander
Optional equipment CD changer (10 discs)
Design and specifications are subject to change
without notice.
Power antenna relay
control lead
Power amplifier control
lead
lead
Illumination control lead
Treble ±9 dB at 10 kHz
(negative ground)
1
/8 × 2 × 7 1/4 in.)
(7
(w/h/d)
1
/4 × 2 1/8 × 6 1/2 in.)
(7
(w/h/d)
RM-X94
Parts for installation and
connections (1 set)
RM-X4S
BUS cable (supplied with
an RCA pin cord)
RC-61 (1 m), RC-62 (2 m)
CDX-838, CDX-737,
CDX-636
MD changer (6 discs)
MDX-65
Other CD/MD changers
with the Sony-BUS system
Source selector
XA-C30
TV tuner
XT-40V
Digital equalizer
preamplifier
XDP-210EQ, XDP-4000X
31
Page 32

Troubleshooting guide
The following checklist will help you remedy the problems you may encounter with your unit.
Before going through the checklist below, check the connections and operating procedures.
General
Problem
No sound.
The contents of the memory
have been erased.
The sound is noisy.
Tape playback
Problem
The sound is distorted.
The AMS does not operate
correctly.
Cause/Solution
•Cancel the ATT function.
•Set the fader control to the center position for two-speaker
systems.
•Press (+) of the VOL buttons to adjust the volume.
• The power cord or battery has been disconnected.
• The reset button was pressed.
t Store again into the memory.
You are using a mobile phone.
Cause/Solution
The tape head is contaminated.
t Clean the head with a commercially available dry-type
cleaning cassette.
• There is noise in the space between tracks.
• A blank space is too short (less than four seconds).
• A long pause, or a passage of low frequencies or very low
sound level is treated as a blank space.
Radio reception
Problem
Preset tuning is not possible.
Automatic tuning is not
possible.
The stations cannot be
received.
The sound is hampered by
noises.
The “ST” indication flashes.
Interference occurs during FM
reception.
32
Cause/Solution
• Store the correct frequency in the memory.
• The broadcast signal is too weak.
•The broadcast signal is too weak.
t Use manual tuning.
•The local seek mode is set to “on.”
t Set the local seek mode to “off” (page 13).
Connect a power antenna control lead (blue) or accessory
power supply lead (red) to the power supply lead of a car’s
antenna booster. (When your car has built-in FM/AM antenna
in the rear/side glass only.)
•Tune in the frequency accurately.
•The broadcast signal is too weak.
t Set to the Mono mode (page 13).
The Wide mode is selected.
t Set the IF mode to IF Auto (page 13).
Page 33

CD/MD playback
Problem
The sound skips.
Cause/Solution
A dirty or defective disc.
Error displays (when an optional CD/MD unit is connected)
The following indications will flash for about five seconds, and an alarm sound will be heard.
Display
NO Mag
NO Disc
NG Discs
1
Error
Blank
*
1
*
PushReset
Not Ready
High Temp
Cause
The disc magazine is not inserted in
the CD/MD unit.
No disc is inserted in the CD/MD unit.
A CD/MD cannot play because of
some problem (dirty CD, defective MD
etc.).
A CD is dirty or inserted upside
2
down.*
An MD does not playback because of
some problem.*
No tracks have been recorded on an
2
MD.*
The CD/MD unit cannot be operated
because of some problem.
The lid of the MD unit is open or the
MDs are not inserted properly.
The ambient temperature is more than
50°C (122°F).
2
Solution
Insert the disc magazine in the CD/
MD unit.
Insert discs in the CD/MD unit.
Insert another CD/MD.
Clean or insert the CD correctly.
Insert another MD.
Play an MD with tracks recorded on
it.
Press the reset button of the unit.
Close the lid or insert the MDs
properly.
Wait until the temperature goes
down below 50°C (122°F).
*1 When an error occurs during playback of a CD or MD, the disc number of the CD or MD does not appear
in the display.
2
The disc number of the disc causing the error appears in the display.
*
If the above-mentioned solutions do not help improve the situation, consult your nearest Sony
dealer.
33
Page 34

Félicitations !
Précautions
Nous vous remercions d’avoir fait l’acquisition
de ce lecteur de cassettes Sony.
Cet appareil vous permet d’exploiter de
multiples fonctions d’utilisation ainsi que
l’accessoire de commande suivant:
Accessorie fourni
Télécommande carte RM-X94
Accessoire facultatif
Satellite de commande RM-X4S
En plus de la lecture de cassettes et de l’écoute
d’émissions de radio, vous pouvez étendre les
possibilités de votre système en raccordant une
unité CD/MD disponible en option*1.
Lorsque vous faites fonctionner cet appareil ou
une unité CD en option raccordée et dotée de
la fonction CD TEXT, les informations CD
TEXT apparaissent dans la fenêtre d’affichage
pendant la lecture d’un disque CD TEXT*2.
*1Vous pouvez également connecter un changeur
CD, un changeur MD, un lecteur CD ou un
lecteur MD.
2
Un disque CD TEXT est un disque audio qui
*
contient des informations telles que le titre du
disque, le nom de l’artiste et le titre des plages.
Ces informations sont enregistrées sur le disque.
•Si votre voiture est parquée en plein soleil et
si la température à l’intérieur de l’habitacle a
considérablement augmenté, laissez refroidir
l’appareil avant de l’utiliser.
•Si l’appareil n’est pas alimenté, vérifiez
d’abord les connexions. Si tout est en ordre,
vérifiez le fusible.
•Si aucun son n’est diffusé par les hautparleurs d’un système à deux haut-parleurs,
réglez la commande de balance de volume
avant-arrière sur la position centrale.
•Si la cassette est reproduite pendant une
longue durée, il se peut qu’elle s’échauffe en
raison de l’amplificateur de puissance
intégré. Il ne s’agit cependant pas d’un
dysfonctionnement.
•N’utilisez pas la fonction de fichier
personnalisé pendant que vous conduisez ou
que vous effectuez toute autre opération qui
pourrait distraire votre attention de la
conduite.
Si vous avez des questions ou des problèmes
concernant le fonctionnement de cet appareil
qui ne sont pas abordés dans le présent mode
d’emploi, consultez votre revendeur Sony.
Pour préserver la qualité sonore
Si les porte-gobelets se trouvent à proximité de
votre installation audio, veillez à ce qu’aucune
éclaboussure de jus de fruit ou de boisson
rafraîchissante ne soit projetée sur votre
autoradio. Des résidus de sucre sur cet
appareil ou sur la bande magnétique d’une
cassette risquent d’encrasser les têtes de
lecture, entraînant ainsi une altération de la
qualité sonore ou empêchant carrément la
reproduction sonore.
Les cassettes de nettoyage ne permettent pas
d’éliminer les résidus de sucre sur les têtes de
lecture.
2
Page 35

Remarques à propos des
cassettes
Entretien des cassettes
• Evitez de toucher la bande magnétique
d’une cassette parce que la poussière et les
souillures entraînent un encrassement des
têtes.
• Gardez les cassettes à l’écart des appareils
intégrant des aimants, tels que des hautparleurs et des amplificateurs qui risquent
de provoquer une distorsion ou un
effacement des cassettes enregistrées.
• N’exposez pas les cassettes au rayonnement
direct du soleil, aux températures
extrêmement froides ou à l’humidité.
• Si la bande magnétique de la cassette est
détendue, elle risque de s’emmêler dans le
mécanisme interne de l’appareil. Avant
d’introduire une cassette, tendez
correctement la bande magnétique en
tournant les bobines à l’aide d’un stylo ou
d’un tournevis.
Bande
détendue
Cassettes de plus de 90 minutes
Les cassettes d’une durée supérieure à 90
minutes sont déconseillées, sauf dans le cas
d’une lecture continue de longue durée. La
bande magnétique de ces cassettes est très fine
et a par conséquent tendance à se détendre
plus facilement. Des opérations de lecture et
arrêt répétées avec de telles cassettes risquent
par conséquent d’emmêler la bande
magnétique dans le mécanisme d’entraînement
de la platine.
• Les cassettes déformées et les étiquettes qui
se décollent risquent de poser des problèmes
lors de l’introduction ou de l’éjection.
Retirez ou remplacez les étiquettes qui se
décollent.
• Le son peut comporter des distorsions
pendant la lecture d’une cassette. La tête du
lecteur de cassette doit être nettoyée toutes
les 50 heures d’utilisation.
3
Page 36

Table des matières
Description de cet appareil
Emplacement des commandes.......................... 5
Préparation
Réinitialisation de l’appareil ............................. 8
Mise sous/hors tension de l’appareil .............. 8
Utilisation du menu ............................................ 8
Réglage de l’horloge ........................................... 9
Lecteur de cassettes
Ecouter une cassette.......................................... 10
Lecture d’une cassette dans différents
modes ............................................................ 11
Radio
Mémorisation automatique des stations
— Mémorisation du meilleur accord
(BTM) ............................................................. 12
Mémorisation de stations déterminées .......... 12
Réception des stations présélectionnées ........ 13
Mémorisation de noms de stations
— Mémorisation des stations.................... 14
Localisation d’une station par son nom
— Répertoire ................................................ 15
Autres fonctions
Etiquetage du satellite de commande ............ 15
Utilisation du satellite de commande ............ 16
Réglage des caractéristiques du son............... 18
Coupure du son................................................. 18
Modification des réglages du son et de
l’affichage ...................................................... 18
Sélection de l’analyseur de spectre................. 19
Réglage du son et de la fréquence du
préamplificateur égaliseur ......................... 19
Appareils optionnels
Appareil CD/MD
Lecture d’un CD ou d’un MD ......................... 20
Lecture de plages répétée
— Lecture répétée ........................................ 21
Lecture de plages dans un ordre quelconque
— Lecture aléatoire...................................... 22
Identification d’un CD
— Mémo de disque ..................................... 22
Localisation d’un disque par son titre
— Répertoire ................................................ 24
Sélection de plages déterminées pour la lecture
— Bloc............................................................ 24
Télévision/Vidéo
Regarder la télévision ....................................... 25
Regarder une source vidéo .............................. 25
Mémorisation automatique des chaînes de
télévision ....................................................... 26
Mémorisation de chaînes de télévision
particulières .................................................. 26
Mémorisation des noms des chaînes de
télévision ....................................................... 27
Affichage des informations mémorisées
sur les disques .............................................. 27
Regarder la télévision ou une source vidéo tout
en écoutant une cassette, un CD ou un MD
— Lecture simultanée ................................. 28
Informations supplémentaires
Entretien ............................................................. 29
Démontage de l’appareil.................................. 30
Spécifications ..................................................... 31
Dépannage ......................................................... 32
4
Page 37

Emplacement des commandes
Télécommande á carte RM-X94
OFF
D-BASS
MENU LIST
SEEK SEEK
SOUND
DSPL MODE
DISC
SOURCE
DISC
VOLATT
Pour plus de détails, reportez-vous aux pages indiquées.
1 Touche OFF 8, 10
qa Touche ENTER 9, 11, 12, 13, 14, 19, 20,
2 Touche MENU 9, 11, 12, 13, 14, 19, 20,
21, 22, 23, 24, 25, 26, 28
qs Touche MODE 10, 11, 12, 13, 20, 23, 25,
3 Touche SOURCE (TUNER/TAPE/CD/MD/
TV) 8, 10, 12, 13, 19, 20, 23, 25, 26, 28
4 Touches </, (SEEK/AMS –/+)
8, 9, 10, 11, 13, 14, 18, 19, 20, 21, 22, 24,
25, 26, 28
Détecteur automatique de musique
(./>) 10, 21
Recherche manuelle (m/M) 21
Recherche 13
5 Touche SOUND 18
qd Touches VOL (réglage du volume)
6 Touche DSPL (modification du mode
d’affichage) 14, 20, 23
7 Touche ATT (atténuation) 18
8 Touche OPEN/CLOSE 10
9 Toushe LIST 14, 15, 23, 24, 27
List-up 15, 24, 27
q; Touches M/m (DISC/PRST +/–) 8, 9, 11,
Un appareil mis hors tension en appuyant sur
la touche pendant deux secondes sur la touche
(OFF) ne peut être contrôlé au moyen de la
télécommande carte sauf si la touche
(SOURCE) de l’appareil est actionnée ou si une
cassette est introduite de manière à activer
l’appareil.
13, 14, 15, 19, 20, 21, 22, 23, 24, 25, 26
En cours de réception radio:
Sélection des stations de présélection
13
En cours de lecture CD/MD:
Changement de disque 21
En cours de réception télévisée:
Sélection de bande 26
OPEN/CLOSE
ENTER
22, 23, 24, 25, 26, 28
28
En cours de lecture de cassette:
Changement du sens de lecture 10
En cours de réception radio:
Sélection BAND 12, 13
En cours de lecture CD/MD:
Sélection de l’unité CD/MD 20
En cours de réception télévisée:
Sélection de l’unité 25, 28
5
Page 38

Emplacement des commandes
Face de sécurité
Face de commande
P
S
L
OFF
D
SOURCE
M
O
D
E
REP SHUF
123456
MENU
SOUND
DISC
DISC
LIST
ENTER
CLOSE
XR-M550
6
Page 39

Les touches correspondantes de
l’appareil contrôlent les mêmes
fonctions que celles de la
télécommande à carte.
10 Touche de réinitialisation (située sur
la face avant de l’appareil, derrière la
façade) 8
2 Fenêtre d’affichage principale
3 Touche OPEN
4qa Récepteur pour la télécommande à
carte
5 Touches de réglage du volume
6 Touche DSPL (modification du mode
d’affichage)
7 Fenêtre d’affichage secondaire
8 Touche MENU
9 Touche Z (éjection) 10
qs Touche LIST
qd Touche OFF* 8
qf Touche MODE
qg Touche SOURCE
qh Touches numériques
En cours de lecture de cassette:
(1) REP 11
En cours de réception radio:
Touches de numéro de présélection
12, 13
En cours de la lecture CD/MD:
(1) REP 21
(2) SHUF 22
En cours de réception TV:
Sélection du numéro de présélection
26
qj Touches PRST/DISC +/– (curseur vers le
haut/bas)
Touches SEEK/AMS –/+ (curseur vers le
gauche/droite) 12
qk Touche SOUND
ql Touche ENTER
w; Touche CLOSE
* Attention lors de l’installation dans
une voiture dépourvue de la position
ACC (accessoire) sur le contacteur
d’allumage
Veillez à appuyer sur (OFF) de l’appareil
pendant deux secondes pour désactiver
l’affichage de l’horloge après avoir coupé
le moteur.
Lorsque vous appuyez brièvement sur
(OFF), l’affichage de l’horloge ne s’éteint pas
et cela provoque une usure de la batterie.
7
Page 40

Préparation
Réinitialisation de
l’appareil
Avant la première mise en service de l’appareil
ou après avoir remplacé la batterie de la
voiture, vous devez réinitialiser l’appareil.
Appuyez sur la touche de réinitialisation à
l’aide d’un objet pointu comme un stylo à bille.
Touche de réinitialisation
Utilisation du menu
Cet appareil se commande en sélectionnant
des paramètres dans un menu.
Pour sélectionner, entrez d’abord en mode de
menu et choisissez M/m (haut/bas) ou
choisissez </, (gauche/droite).
M/m
DISC
SEEK SEEK
SOURCE
DISC
</,
M : Pour sélectionner
vers le haut
m : Pour sélectionner
vers le bas
Remarque
Une pression sur la touche de réinitialisation
effacera le réglage de l’horloge, les préréglages en
mémoire et d’autres fonctions mémorisées.
Mise sous/hors tension de
l’appareil
Mise sous tension de l’appareil
Appuyez sur (SOURCE) ou introduisez une
cassette dans l’appareil. Pour plus de détails
sur le fonctionnement, reportez-vous à la page
10 (lecteur de cassette) et à la page 12 (radio).
Mise hors tension de l’appareil
Appuyez sur (OFF) pour arrêter la lecture de
la cassette ou la réception FM/AM
(l’illumination des touches et de la fenêtre
d’affichage reste activée).
Appuyez sur (OFF) pendant deux secondes
pour mettre l’appareil complètement hors
tension.
Remarque
Si le contact de votre voiture ne comporte pas de
position ACC (accessoires), n’oubliez pas de mettre
l’appareil hors tension en appuyant sur la touche
(OFF) pendant deux secondes pour éviter de
décharger la batterie de votre voiture.
< : Pour
sélectionner
vers la
gauche
DISC
SEEK SEEK
SOURCE
DISC
, : Pour
sélectionner
vers la
droite
8
Page 41

Réglage de l’horloge
L’horloge à affichage numérique fonctionne
suivant un cycle de 12 heures.
2 Appuyez sur (ENTER).
Exemple: Pour régler l’horloge sur 10:08
1 Appuyez sur (MENU), puis appuyez
plusieurs fois sur M ou m jusqu’à ce que
“Clock” apparaisse.
1 Appuyez sur (ENTER).
L’indication des heures se met à clignoter.
2 Appuyez sur M ou m pour régler
l’heure.
3 Appuyez sur ,.
L’horloge démarre.
Conseil
Pendant le réglage initial, l’indication de l’horloge
apparaît lorsque l’appareil est hors tension.
Lorsque le mode D.Info est réglé sur “on”, l’heure
est toujours affichée (à l’exeption de certaines
fonctions du mode SA) (page 18).
L’indication des minutes se met à clignoter.
4 Appuyez sur M ou m pour régler les
minutes.
9
Page 42

Lecteur de cassettes
Ecouter une cassette
1 Appuyez sur la touche (OPEN/CLOSE) de
la télécommande carte et introduisez
une cassette.
La lecture démarre automatiquement.
2 Appuyez sur la touche (OPEN/CLOSE) de
la télécommande carte pour refermer le
panneau frontal.
Si une cassette se trouve déjà à l’intérieur de
l’appareil, appuyez plusieurs fois de suite sur
(SOURCE) jusqu’à ce que “FWD” ou “REV”
apparaisse pour démarrer la lecture.
La face supérieure est reproduite.
La face inférieure est reproduite.
Avance rapide de la bande
En cours de lecture, maintenez enfoncé
m ou M.
DISC
m :
Rembobinage
SEEK SEEK
SOURCE
DISC
M :
Avance
rapide
Pour activer la lecture pendant l’avance rapide
ou le rembobinage, appuyez sur (MODE)
(o).
Localisation d’une plage
déterminée
— Détecteur automatique de musique (AMS)
En cours de lecture, appuyez brièvement
sur . ou > pour chaque plage que
vous désirez sauter.
Vous pouvez sauter jusqu’à neuf plages à la
fois.
. :
Pour localiser
les plages
précédentes
Remarque
Il est possible que la fonction AMS soit inactive si:
— les blancs entre les plages sont inférieurs à
quatre secondes
— Il y a des parasites entre les plages
— Il y a de longs passages à faible volume ou
silencieux.
DISC
SEEK SEEK
SOURCE
DISC
En mode d’affichage défilant, tous les
paramètres défilent un par un et dans cet ordre
dans la fenêtre d’affichage.
> :
Pour
localiser les
plages
suivantes
Conseil
Pour changer le sens de lecture de la cassette,
appuyez sur (MODE) (o).
Pour Appuyez sur
Arrêter la lecture (OFF)
Ejecter la cassette (OPEN/CLOSE) et puis sur Z
10
Conseil
Le mode Motion Display (affichage défilant) peut
être désactivé. (Voir “Modification des réglages du
son et de l’affichage” à la page 18).
Page 43

Lecture d’une cassette
dans différents modes
Lecture répétée des plages
— Lecture répétée
1 Pendant la lecture, appuyez sur (MENU).
La cassette peut être reproduite dans différents
modes:
•Repeat (lecture répétée) répète la lecture de la
plage en cours.
•NR(Dolby NR) pour activer le système de
réduction de bruit Dolby* NR B.
•Metal pour reproduire une cassette
métallique ou CrO2.
•B.Skip (saut des blancs) pour sauter les
blancs de plus de huit secondes.
•ATA (activation automatique du
syntoniseur) met automatiquement le
syntoniseur sous tension en cours d’avance
rapide de la cassette.
* Réduction de bruit Dolby fabriquée sous
licence de Dolby Laboratories Licensing
Corporation.
“DOLBY” et le symbole double-D ; sont des
marques de Dolby Laboratories Licensing
Corporation.
1 En cours de lecture, appuyez sur (MENU).
2 Appuyez plusieurs fois sur M ou m
jusqu’à ce que le paramètre désiré
apparaisse.
Chaque fois que vous appuyez sur m, le
paramètre change comme suit:
Repeat t NR t Metal t B.Skip t ATA
2 Appuyez plusieurs fois sur M ou m
jusqu’à ce que “Repeat” apparaisse.
3 Appuyez plusieurs fois sur , jusqu’à ce
que “Repeat on” apparaisse dans la
fenêtre d’affichage.
Repeat on y Repeat off
La lecture répétée débute.
Pour revenir au mode de lecture normale,
sélectionnez “Repeat off” à l’étape 3.
Conseils
• Si vous sélectionnez le mode à l’aide des touches
de l’appareil, appuyez plusieurs fois sur (1) (REP)
jusqu’à ce que le mode désiré apparaisse.
• En cours de lecture répétée, appuyez sur
(MODE). L’indication “REP” disparaît de la
fenêtre d’affichage et le mode de répétition est
annulé.
3 Appuyez sur , pour sélectionner “on”.
La lecture démarre dans le mode
sélectionné.
4 Appuyez sur (ENTER).
Pour revenir en mode de lecture normal,
sélectionnez “off” à l’étape 3.
Conseil
Lorsque la fonction ATA est activée, l’affichage
(TAPE y TUNER) peut être changé par une
pression sur (DSPL).
11
Page 44

Radio
Mémorisation
automatique des stations
— Mémorisation du meilleur accord (BTM)
L’appareil sélectionne les stations de radio
émettant avec le signal le plus puissant et les
mémorise dans l’ordre de leur fréquence. Vous
pouvez mémoriser jusqu’à 6 stations dans
chaque bande (FM1, FM2, FM3, AM1 et AM2).
Attention
Pour syntoniser des stations pendant que vous
conduisez, nous vous conseillons d’utiliser la
fonction de mémorisation du meilleur accord
(BTM) de façon à éviter les accidents.
1 Appuyez plusieurs fois sur (SOURCE)
pour sélectionner le syntoniseur.
Chaque fois que vous appuyez sur
(SOURCE), la source change comme suit:
B Tuner B CD* B MD*
TV* b TAPE b
* Si l’appareil en option correspondant n’est
pas connecté, le paramètre ne s’affiche pas.
Remarques
• L’appareil ne mémorise pas les stations émettant
avec de faibles signaux. Si seules quelques
stations sont captables, certaines touches
numériques conserveront leur réglage préalable.
• Si un numéro est indiqué dans la fenêtre
d’affichage, l’appareil commence la
mémorisation des stations à partir de la station
affichée.
Mémorisation de stations
déterminées
Vous pouvez présélectionner 18 stations FM (6
stations en FM1, FM2 et FM3) et 12 stations
AM (6 stations en AM1 et en AM2) dans
l’ordre de votre choix.
1 Appuyez plusieurs fois de suite sur
(SOURCE) pour sélectionner le
syntoniseur.
2 Appuyez plusieurs fois de suite sur
(MODE) pour sélectionner la bande de
fréquence.
3 Appuyez sur . ou sur > de
l’appareil pour syntoniser la station que
vous désirez sauvegarder sous la touche
numérique.
2 Appuyez plusieurs fois sur (MODE) pour
sélectionner la bande de fréquence.
Chaque fois que vous appuyez sur
(MODE), la bande change comme suit:
B FM1 B FM2 B FM3
AM2 b AM1 b
3 Appuyez sur (MENU), puis appuyez
plusieurs fois sur M ou m jusqu’à ce que
“BTM” apparaisse.
4 Appuyez sur (ENTER).
L’appareil mémorise les stations sous les
touches numériques dans l’ordre de leur
fréquence.
Un bip retentit lorsque le réglage est
mémorisé.
12
4 Appuyez sur la touche numérique
désirée ((1) à (6)) de l’appareil jusqu’à
ce que “MEM” apparaisse.
Le numéro de la touche numérique de
présélection apparaît dans la fenêtre
d’affichage.
Remarque
Si vous essayez de mémoriser une autre station
sous une touche numérique déjà utilisée, la station
précédemment mémorisée est supprimée.
Page 45

Réception des stations
présélectionnées
1 Appuyez plusieurs fois de suite sur
(SOURCE) pour sélectionner le
syntoniseur.
2 Appuyez plusieurs fois de suite sur
(MODE) pour sélectionner la bande de
fréquence.
Si la réception FM est faible
— Mode monaural
1 En cours de réception radio, appuyez sur
(MENU), puis appuyez plusieurs fois sur
M ou m jusqu’à ce que “Mono”
apparaisse.
2 Appuyez sur , jusqu’à ce que “Mono
on” apparaisse.
Le son s’améliore, mais passe en mono
(“ST” disparaît).
3 Appuyez plusieurs fois sur M
(présélection vers le haut) ou m
(présélection vers le bas) pour capter les
stations dans l’ordre de leur
mémorisation.
Conseil
Si vous choisissez de mémoriser la station à l’aide
des touches de l’appareil, appuyez sur la touche
numérique ((1) à (6)) sous laquelle la station
désirée est sauvegardée.
Si vous ne parvenez pas à
syntoniser une station
présélectionnée
Appuyez sur < ou , pour rechercher la
station (syntonisation automatique).
Le balayage s’arrête lorsque l’appareil capte
une station. Appuyez plusieurs fois sur
< ou , jusqu’à ce que la station désirée
soit captée.
Remarque
Si la syntonisation automatique s’arrête trop
fréquemment, appuyez sur (MENU), puis appuyez
plusieurs fois sur M ou m jusqu’à ce que “Local”
(mode de recherche locale) s’affiche. Appuyez
ensuite sur , pour sélectionner “Local on”.
Appuyez sur (ENTER).
En cours de réception locale et de sélection de
station, “LCL Seek” apparaît dans la fenêtre
d’affichage.
Seules les stations dont les signaux sont
suffisamment puissants seront accordées.
Conseil
Si vous connaissez la fréquence de la station que
vous désirez écouter, appuyez et maintenez
enfoncé < ou , jusqu’à ce que la fréquence
désirée apparaisse (syntonisation manuelle).
3 Appuyez sur (ENTER).
Pour revenir au mode normal, sélectionnez
“Mono off” à l’étape 2.
Si la réception FM stéréo devient
monaurale
Si des interférences se produisent, la fonction
“IF Auto” de cet appareil élimine
automatiquement les parasites et rétrécit la
fréquence de réception. En pareil cas, certaines
retransmissions FM stéréo peuvent devenir
monaurales. Si vous préférez écouter de telles
émissions en stéréo, commutez manuellement
le réglage “Wide”.
1 En cours de réception radio, appuyez sur
(MENU), puis appuyez plusieurs fois sur
M ou m jusqu’à ce que “IF Auto”
apparaisse.
2 Appuyez sur , jusqu’à ce que “Wide”
apparaisse.
3 Appuyez sur (ENTER).
Remarque
Lorsque vous élargissez le réglage de la fréquence
de réception du signal (mode “Wide”), des
interférences peuvent se produire.
En mode d’affichage défilant, tous les
paramètres défilent un par un et dans cet ordre
dans la fenêtre d’affichage.
Conseil
Le mode Motion Display (affichage défilant) peut
être désactivé. (Voir “Modification des réglages du
son et de l’affichage” à la page 18).
13
Page 46

Mémorisation de noms de
stations — Mémorisation des stations
Vous pouvez attribuer un nom à chaque station
de radio et l’enregistrer dans la mémoire. Le
nom de la station syntonisée apparaît dans la
fenêtre d’affichage. Vous pouvez introduire
jusqu’à huit caractères par station.
Enregistrement de noms de stations
1 Syntonisez une station dont vous
souhaitez mémoriser le nom.
2 Appuyez sur (MENU), puis appuyez
plusieurs fois sur M ou m jusqu’à ce que
“Name edit” apparaisse.
3 Appuyez sur (ENTER).
4 Introduisez les caractères.
1 Appuyez plusieurs fois sur M pour
sélectionner les caractères désirés.
(A t B t C t ··· Z t 0 t 1 t 2 t
··· 9 t + t – t * t / t \ t > t <
t . t )
5 Pour revenir au mode de réception radio
normal, appuyez sur (ENTER).
Conseil
Il y a une autre méthode pour mémoriser des noms
de stations. Appuyez sur (LIST) pendant deux
secondes au lieu des étapes 2 et 3. Vous pouvez
également terminer l’opération en appuyant sur
(LIST) pendant deux secondes au lieu de l’étape 5.
Affichage du nom de la station
Appuyez sur (DSPL) pendant la
réception radio.
Chaque fois que vous appuyez sur (DSPL),
l’affichage change selon la séquence
suivante:
B Nom de la station* B Fréquence
* Si le nom de la station n’a été enregistré,
l’indication “NO Name” apparaît pendant
une seconde dans la fenêtre d’affichage.
Suppression des noms de station
1 Syntonisez une station de radio que vous
désirez effacer.
2 Appuyez sur (MENU), puis appuyez
plusieurs fois sur M ou m jusqu’à ce que
“Name Del” apparaisse.
Si vous appuyez plusieurs fois sur m, les
caractères apparaissent dans l’ordre
inverse.
Pour insérer un espace entre des
caractères, sélectionnez “ ”.
2 Appuyez sur , après avoir localisé le
caractère désiré.
Le caractère suivant se met à clignoter.
Si vous appuyez sur <, le caractère
précédent se met à clignoter.
3 Répétez les étapes 1 et 2 pour
introduire le titre en entier.
14
3 Appuyez sur (ENTER).
4 Appuyez sur M ou m pour sélectionner le
nom de la station que vous voulez
effacer.
5 Appuyez sur (ENTER) pendant deux
secondes.
Le titre est effacé.
Répétez les étapes 1 à 4 si vous désirez
effacer d’autres noms.
6 Appuyez deux fois sur (MENU).
L’appareil revient en mode de réception
radio normal.
Remarque
Lorsque vous effacez tous les noms de stations,
“NO Data” apparaît à l’étape 5.
Page 47

Localisation d’une station
par son nom — Répertoire
Autres fonctions
1 Appuyez sur (LIST).
Le nom assigné à la station actuellement
accordée apparaît dans la fenêtre
d’affichage.
2 Appuyez plusieurs fois sur M ou m
jusqu’à ce que vous trouviez la station
voulue.
Lorsqu’aucun nom n’est assigné à la station
sélectionnée, la fréquence apparaît dans la
fenêtre d’affichage.
3 Appuyez sur (ENTER) pour syntoniser la
station voulue.
Remarque
Lorsque vous raccordez un syntoniseur TV, le
répertoire n’apparaîtra pas dans la fenêtre
d’affichage de l’appareil.
Vous pouvez également commander cet
appareil à l’aide d’un satellite de commande
(en option).
Etiquetage du satellite de
commande
Suivant la position de montage du satellite de
commande, apposez les étiquettes appropriées
comme indiqué dans l’illustration ci-dessous.
SOUND
MODE
DSPL
DSPL
MODE
SOUND
15
Page 48

Utilisation du satellite de
commande
Le satellite de commande fonctionne en
appuyant sur les touches et/ou en faisant
tourner les commandes.
Vous pouvez également commander les unités
CD ou MD en option à l’aide du satellite de
commande.
En appuyant sur les touches
(les touches SOURCE et MODE)
(SOURCE)
(MODE)
Chaque fois que vous appuyez sur
(SOURCE), la source change selon la
séquence suivante:
Tuner t CD* t MD* t TAPE t TV*
Une pression sur la touche (MODE)
change le mode de fonctionnement
comme suit:
• Syntoniseur: FM1 t FM2 t FM3 t
• Appareil CD*: CD1 t CD2 t …
• Appareil MD*: MD1 t MD2 t …
• Cassette: sens de lecture de cassette
• TV/Vidéo*: TV1 t TV2 t AUX
* Si l’appareil en option correspondant n’est
pas connecté, le paramètre ne s’affiche pas.
AM1 t AM2
En tournant la commande
(la commande SEEK/AMS)
Tournez la commande et relâchez-la
pour:
•Localiser le début des plages de la
cassette. Tournez et maintenez la
commande et relâchez-la pour faire
avancer rapidement la cassette. Pour
démarrer la lecture en cours d’avance
rapide, appuyez sur (MODE).
•Localiser une plage spécifique sur un
disque. Tournez et maintenez la
commande jusqu’à ce que vous ayez
localisé l’endroit spécifique d’une plage,
ensuite relâchez-la pour entamer la
lecture.
•Syntoniser automatiquement les stations.
Faites tourner la commande et maintenezla pour localiser une station déterminée.
En pressant et en tournant la
commande
(la commande PRESET/DISC)
Appuyez et tournez la commande pour:
•Recevoir les stations mémorisées sur les
touches numériques.
•Changer le disque.
16
Page 49

Autres opérations
Faites tourner la commande
VOL pour régler le volume.
Appuyez sur (ATT)
pour atténuer le
son.
OFF
Appuyez sur (OFF)
pour éteindre
l’appareil.
Remarque
Attention lors de l’installation dans une voiture
dépourvue de la position ACC (accessoire) sur le
contacteur d’allumage. Veillez à appuyer sur
(OFF) de l’appareil pendant deux secondes pour
désactiver l’affichage de l’horloge après avoir
coupé le moteur.
Appuyez sur (SOUND)
pour régler le menu
audio.
Appuyez sur (DSPL) pour modifier
les paramètres affichés.
Conseil
Lorsque la fonction ATA est activée, l’affichage
(TAPE y TUNER) peut être changé par une
pression sur (DSPL).
Modification du sens de
fonctionnement
Le sens de fonctionnement des commandes est
réglé par défaut comme indiqué ci-dessous.
Pour augmenter
Pour diminuer
Si vous devez monter le satellite de commande
du côté droit de la colonne de direction, vous
pouvez inverser le sens de fonctionnement des
commandes.
Appuyez sur (SOUND) pendant deux
secondes tout en maintenant la
commande VOL enfoncée.
Conseil
Vous pouvez changer le sens de fonctionnement
des commandes avec l’appareil (voir “Modification
des réglages du son et de l’affichage” à la page 18).
17
Page 50

Réglage des
caractéristiques du son
Modification des réglages
du son et de l’affichage
Vous pouvez régler les graves, les aiguës ainsi
que la balance gauche-droite et la balance
avant-arrière.
Vous pouvez mémoriser les niveaux de graves
et d’aigus pour chaque source.
1 Sélectionnez le paramètre que vous
voulez régler en appuyant plusieurs fois
de suite sur (SOUND).
Chaque fois que vous appuyez sur
(SOUND), la source change comme suit:
BAS (graves) t TRE (aiguës) t
BAL (gauche-droite) t FAD (avant-arrière) t
SUB (haut-parleur d’extrêmes-graves)
2 Ajustez le paramètre sélectionné en
appuyant sur < ou ,.
Pour effectuer le réglage à l’aide du satellite
de commande, appuyez sur (SOUND) et
tournez la commande VOL.
Remarque
Procédez au réglage dans les trois secondes suivant
la sélection du paramètre.
Coupure du son
Appuyez sur (ATT) du satellite de
commande ou sur la télécommande à
carte en option.
”ATT on” apparaît brièvement.
Pour restaurer le niveau précédent du volume,
appuyez à nouveau sur (ATT).
Conseil
Lorsque le câble d’interface d’un téléphone de
voiture est raccordé au fil ATT, l’appareil diminue
le volume automatiquement lorsqu’un appel
téléphonique entre (fonction Telephone ATT).
Les paramètres suivants peuvent être réglés:
Set (réglage)
•Clock (page 9).
•Beep — pour activer ou désactiver le bip
sonore.
•RM (satellite de commande) — pour inverser
le sens de fonctionnement du satellite de
commande.
— Sélectionnez “norm” pour utiliser le
satellite de commande dans la position
définie par défaut.
— Sélectionnez “rev” si vous montez le
satellite de commande du côté droit de la
colonne de direction.
•English/French/Spanish — pour commuter
l’affichage en anglais, en français ou en
espagnol.
Dis (affichage)
•D.Info (double information)*1 — pour
afficher simultanément l’horloge et le mode
de lecture (on) ou pour afficher ces
informations alternativement (off).
•SA (analyseur de spectre) — pour changer le
mode d’affichage de la fenêtre d’affichage de
l’égaliseur (page 19).
•Dimmer (gradateur) — pour régler l’intensité
lumineuse de l’affichage (lorsque le câble
d’illumination est connecté).
— Sélectionnez “Auto” pour atténuer
l’intensité lumineuse de la fenêtre
d’affichage uniquement lorsque vous
allumez l’éclairage de l’habitacle.
— Sélectionnez “on” pour foncer l’affichage.
— Sélectionnez “off” pour désactiver
l’atténuateur d’affichage.
•Contrast — pour régler le contraste si les
indications de la fenêtre d’affichage ne sont
pas visibles en raison de la position
d’installation de l’appareil.
•M.Dspl (affichage animé) — pour activer ou
désactiver l’affichage défilant.
•A.Scrl (défilement automatique)*2 (page 20).
Snd (son)
•HPF (filtre passe-haut pour la présortie)
— pour sélectionner la fréquence de coupure
de la présortie.
•LPF (filtre passe-bas pour la sortie du hautparleur d’extrêmes-graves) — pour
sélectionner la fréquence de coupure de la
sortie du haut-parleur d’extrêmes-graves.
•Loud (correction physiologique)*1 — pour
exploiter les graves même à faible volume.
Les fréquences graves seront accentuées.
18
Page 51

1 Appuyez sur (MENU).
2 Appuyez plusieurs fois sur M ou m
jusqu’à ce que le paramètre désiré
apparaisse.
Chaque fois que vous appuyez sur m, le
paramètre change comme suit:
Exemple
Clock t Beep t RM t English/French/
Spanish t D.Info*1 t SA*1 t Dimmer t
Contrast t M.Dspl t A.Scrl*
LPF*1 t Loud*
*1Lorsque la radio est coupée ou qu‘il n‘y a pas
de cassette, de CD ou de MD en cours de
lecture, cette indication n‘apparaît pas.
2
Lorsqu’aucun CD ou MD n’est en cours de
*
lecture, ce paramètre n’apparaît pas.
Remarque
Le paramètre affiché diffère suivant la source.
Conseil
Vous pouvez aisément commuter les catégories
(“Set”, “Snd”, “P/M (Mode de lecture)” et “Dis”)
en appuyant sur M ou m pendant deux secondes.
1
2
t HPF*1 t
Sélection de l’analyseur
de spectre
Le niveau du signal audio est affiché sur un
analyseur de spectre. Vous pouvez
sélectionner un mode d’affichage de 1 à 6 ou le
mode d’affichage automatique.
1 Appuyez sur (SOURCE) pour
sélectionner une source (syntoniseur,
cassette CD ou MD).
2 Appuyez sur (MENU).
3 Appuyez plusieurs fois de suite sur M ou
m jusqu’à ce que l’indication “SA”
apparaisse.
3 Appuyez sur , pour sélectionner le
réglage désiré (Exemple: activé ou
désactivé) ou appuyez plusieurs fois sur
< ou , pour sélectionner la fréquence
(Exemple: désactivée, 78 Hz ou 125 Hz).
Pour le réglage de “Contrast”, appuyez sur
la touche , pour accentuer le contraste et
sur la touche < pour l’atténuer.
4 Appuyez sur (ENTER).
Lorsque le réglage de mode est terminé, la
fenêtre d’affichage revient au mode de
lecture normale.
4 Appuyez sur plusieurs fois sur < ou ,
pour sélectionner le réglage voulu.
B SA 1 bB … SA 6 b
B SA Auto* bB SA off b
* Tous ces modes apparaissent
automatiquement les uns après les autres.
5 Appuyez sur (ENTER).
Réglage du son et de la
fréquence du
préamplificateur égaliseur
Cet appareil peut également commander un
préamplificateur égaliseur en option.
Cela vous permet d’ajouter des effets au
champ sonore de la source sélectionnée.
Pour plus de détails, reportez-vous au mode
d’emploi qui accompagne votre
préamplificateur égaliseur.
19
Page 52

Appareils optionnels
Appareil CD/MD
Cet appareil peut commander des unités CD/
MD externes.
Si vous raccordez une unité CD en option
dotée de la fonction CD TEXT et la fonction de
fichier de personnalisatin, les informations CD
TEXT apparaissent dans la fenêtre d’affichage
pendant la lecture des disques CD TEXT.
Lecture d’un CD ou d’un MD
1 Appuyez plusieurs fois de suite sur
(SOURCE) pour sélectionner le CD ou le
MD.
2 Appuyez sur (MODE) jusqu’à ce que
l’appareil voulu apparaisse.
La lecture CD/MD commence.
Si un appareil CD/MD est raccordé, toutes les
plages sont reproduites depuis le début.
Changement des paramètres
affichés
Chaque fois que vous appuyez sur (DSPL) en
cours de lecture CD, CD TEXT ou MD, le
paramètre change selon la séquence suivante :
Après que vous avez sélectionné le paramètre
de votre choix, l’affichage passe
automatiquement au mode d’affichage défilant
au bout de quelques secondes.
En mode d’affichage défilant, tous les
paramètres défilent un par un et dans cet ordre
dans la fenêtre d’affichage.
Conseil
Le mode Motion Display (affichage défilant) peut
être désactivé. (Voir “Modification des réglages du
son et de l’affichage” à la page 18).
Défilement automatique du titre
d’un disque — Défilement automatique
Lorsqu’un titre de disque, un nom d’artiste ou
un titre de plage d’un disque CD TEXT ou
d’un MD dépasse 10 caractères et que la
fonction de défilement automatique est
activée, les informations défilent
automatiquement dans la fenêtre d’affichage
comme suit:
• Le titre du disque lorsque le disque a changé
(si le titre du disque est sélectionné).
• Le titre de la plage lorsque la plage a changé
(si le titre de la plage est sélectionné).
Si vous appuyez sur (DSPL) pour changer le
paramètre affiché, le titre du disque ou de la
plage du MD ou du disque CD TEXT défile
automatiquement, que la fonction soit activée
ou non.
1 En cours de lecture, appuyez sur (MENU).
Numéro de disque/Numéro de plage/
Durée de lecture écoulée
Titre du disque*
*1Si vous n’avez pas identifié le disque ou s’il n’y a
pas de titre de disque préenregistré sur le MD,
l’indication “NO D.Name” apparaît brièvement
dans la fenêtre d’affichage.
2
Si vous reproduisez un disque CD TEXT, le nom
*
de l’artiste apparaît dans la fenêtre d’affichage
après le titre du disque. (Uniquement pour les
disques CD TEXT avec le nom de l’artiste.)
*3Si une plage d’un disque CD TEXT ou d’un MD
n’a pas de titre préenregistré, l’indication “NO
T.Name” apparaît brièvement dans la fenêtre
d’affichage.
V
V
1
/Nom de l’artiste*
V
Titre de la plage*
3
20
2 Appuyez plusieurs fois sur M ou m
jusqu’à ce que “A.Scrl” apparaisse.
2
3 Appuyez sur , pour sélectionner
“A.Scrl on”.
4 Appuyez sur (ENTER).
Pour désactiver la fonction de défilement
automatique, sélectionnez “A.Scrl off” à l’étape
3.
Remarque
Sur certains disques comportant de très nombreux
caractères, les situations suivantes peuvent se
produire:
—certains caractères ne sont pas affichés
—la fonction de défilement automatique est
inopérante.
Page 53

Localisation d’une plage
déterminée
— Détecteur automatique de musique (AMS)
En cours de lecture, appuyez brièvement
sur < ou , pour chaque plage que
vous désirez sauter.
< (.) : Pour localiser les plages précédentes
, (>) : Pour localiser les plages suivantes
Localisation d’un passage
déterminé sur une plage
— Recherche manuelle
En cours de lecture, maintenez enfoncé
< ou ,. Relâchez-le lorsque vous avez
localisé l’endroit désiré.
< (m) : Pour chercher vers l’arrière
, (M) : Pour chercher vers l’avant
Changer de disque
En cours de lecture, appuyez sur M ou m.
M (DISC+) : Pour les disques suivants
m (DISC–) : Pour les disques précédents
La lecture du disque voulu dans l’appareil
démarre.
Lecture de plages répétée
— Lecture répétée
Vous pouvez sélectionner:
• Repeat 1 – pour répéter une plage.
• Repeat 2 – pour répéter un disque.
1 Pendant la lecture, appuyez sur (MENU).
2 Appuyez plusieurs fois sur M ou m
jusqu’à ce que “Repeat” apparaisse.
3 Appuyez plusieurs fois sur , jusqu’à ce
que le réglage désiré apparaisse dans la
fenêtre d’affichage.
B Repeat 1 B Repeat 2
Repeat off b
La lecture répétée démarre.
Pour revenir au mode de lecture normale,
sélectionnez “Repeat off” à l’étape 3.
Numéro de plage
Numéro de disque
Temps de
lecture écoulé
Conseil
Si vous sélectionnez le mode à l’aide des touches
de l’appareil, appuyez plusieurs fois sur (1) (REP)
jusqu’à ce que le mode désiré apparaisse.
21
Page 54

Lecture de plages dans un
ordre quelconque
— Lecture aléatoire
Vous pouvez sélectionner:
• Shuf-1 – pour reproduire les plages du
disque en cours dans un ordre aléatoire.
•Shuf-2 – pour reproduire les plages de l’unité
en cours dans un ordre aléatoire.
• Shuf-All* – pour reproduire toutes les plages
de tous les appareils dans un ordre aléatoire.
1 Pendant la lecture, appuyez sur (MENU).
Identification d’un CD
—
Mémo de disque (Pour un appareil de CD
avec fonction de personnalisation de lecture)
Vous pouvez identifier chaque disque au
moyen d’un nom personnalisé. Vous pouvez
entrer jusqu’à huit caractères pour un disque.
Si vous identifiez un CD, vous pouvez localiser
le disque par nom (page 24) et sélectionner les
plages spécifiques pour la lecture (page 24).
1 Lancez la lecture du disque que vous
désirez identifier.
2 Appuyez plusieurs fois sur M ou m
jusqu’à ce que “Shuf” apparaisse.
3 Appuyez plusieurs fois sur , jusqu’à ce
que le réglage désiré apparaisse dans la
fenêtre d’affichage.
B Shuf 1 B Shuf 2 B Shuf All*
Shuf off b
La lecture aléatoire démarre.
* “Shuf All” est uniquement accessible lorsque
vous raccordez deux unités CD/MD en option
ou plus.
Pour revenir au mode de lecture normale,
sélectionnez “Shuf off” à l’étape 3.
Conseil
Si vous sélectionnez le mode à l’aide des touches
de l’appareil, appuyez plusieurs fois sur (2) (SHUF)
jusqu’à ce que le mode désiré apparaisse.
2 Appuyez sur (MENU), puis appuyez
plusieurs fois sur M ou m jusqu’à ce que
“Name Edit” apparaisse.
3 Appuyez sur (ENTER).
Mode d’édition de nom
4 Introduisez les caractères.
1 Appuyez plusieurs fois sur M pour
sélectionner les caractères désirés.
(A t B t C t ··· Z t 0 t 1 t 2 t
··· 9 t + t – t * t / t \ t > t <
t . t )
Si vous appuyez plusieurs fois sur m, les
caractères apparaîtront dans l’ordre
inverse.
Si vous souhaitez insérer un espace
entre des caractères, sélectionnez “ ”.
2 Appuyez sur , après avoir localisé le
caractère désiré.
Le caractère suivant se met à clignoter.
22
Si vous appuyez sur <, le caractère
précédent se met à clignoter.
Page 55

3 Répétez les étapes 1 et 2 pour
introduire le titre en entier.
5 Pour revenir en mode de lecture CD
normal, appuyez sur (ENTER).
Conseil
Il y a une autre méthode d’identifier un CD.
Maintenez enfoncé (LIST) pendant deux secondes
au lieu des étapes 2 et 3. Vous pouvez également
terminer l’opération en appuyant et en
maintenant (LIST) pendant deux secondes au lieu
de l’étape 5.
Suppression du mémo de disque
1 Appuyez plusieurs fois sur (SOURCE)
pour sélectionner le “CD”.
2 Appuyez plusieurs fois sur (MODE) pour
sélectionner le lecteur CD avec la
fonction de fichier personnalisé.
3 Appuyez sur (MENU), puis appuyez
plusieurs fois sur M ou m jusqu’à ce que
“Name Del” apparaisse.
Affichage du mémo de disque
Appuyez sur (DSPL) pendant la lecture
d’un CD ou d’un disque CD TEXT.
Chaque fois que vous appuyez sur la
touche (DSPL) en cours de lecture d’un CD
ou d’un disque CD TEXT, le paramètre
change selon la séquence suivante:
Numéro de disque/Numéro de plage/
Durée de lecture écoulée
Nom du mémo de disque
* Si vous raccordez une unité CD en option
doté de la fonction CD TEXT, les informations
CD TEXT apparaissent dans la fenêtre
d’affichage quand vous reproduisez un
disque CD TEXT.
Remarque
N’utilisez pas la fonction de fichier personnalisé
pendant que vous conduisez ou que vous effectuez
toute autre opération qui pourrait distraire votre
attention de la conduite.
V
V
V
Titre de la plage*
4 Appuyez sur (ENTER).
5 Appuyez plusieurs fois sur M ou m pour
sélectionner le nom du disque que vous
désirez effacer.
6 Appuyez sur (ENTER) pendant deux
secondes.
Le titre est effacé.
Répétez les étapes 5 et 6 pour effacer
d’autres titres.
7 Appuyez deux fois sur (MENU).
L’appareil revient en mode de lecture CD
normale.
Remarques
• Lorsque l’identification personnalisée est
supprimée, les informations CD TEXT d’origine
apparaîtront dans la fenêtre d’affichage.
• Lorsque vous effacez tous les noms de disques,
“NO Data” apparaît à l’étape 6.
23
Page 56

Localisation d’un disque
par son titre
— Répertoire (Pour un appareil de CD avec
fonction de personnalisation de lecture ou
un appareil de MD)
Cette fonction est opérante avec les disques
auxquels vous avez attribué un titre
personnalisé. Pour des informations plus
détaillées sur les titres de disques, reportezvous à la section “Identification d’un CD”
(page 22).
1 Appuyez sur (LIST).
Le titre attribué au disque en cours apparaît
dans la fenêtre d’affichage.
Lorsque vous attribuez un titre de mémo
de disque sur un disque CD TEXT, il aura
priorité sur les informations CD TEXT
d’origine.
Sélection de plages
déterminées pour la
lecture
— Bloc (Pour un appareil de CD avec
fonction de personnalisation de lecture)
Si vous identifiez le disque, vous pouvez régler
l’appareil pour qu’il ignore ou reproduise les
plages de votre choix.
1 Lancez la lecture du disque que vous
désirez identifier.
2 Appuyez sur (MENU), puis appuyez
plusieurs fois sur M ou m jusqu’à ce que
“Bank Sel” apparaisse.
3 Appuyez sur (ENTER).
Mode de lecture de bloc
2 Appuyez plusieurs fois sur M (DISC+) ou
m (DISC–) jusqu’à ce que vous trouviez le
disque désiré.
3 Appuyez sur (ENTER) pour reproduire le
disque.
Remarques
• Le titre des plages n’est pas affiché pendant la
lecture d’un MD ou d’un disque CD TEXT.
• S’il n’y a aucun disque dans le magasin,
l’indication “NO Disc” apparaît dans la fenêtre
d’affichage.
• Si aucun titre personnalisé n’a été attribué à un
disque donné, l’indication “********” apparaît
dans la fenêtre d’affichage.
• Si les informations relatives au disque n’ont pas
encore été lues par l’appareil, l’indication “?”
apparaît dans la fenêtre d’affichage. Pour
exécuter le chargement, appuyez d’abord sur la
touche numérique et choisissez ensuite le disque
qui n’a pas été chargé.
• Certaines lettres ne peuvent pas être affichées
(pendant la lecture d’un MD ou d’un disque CD
TEXT).
• Si un téléviseur optionnel est raccordé, le titre du
disque apparaît dans la fenêtre d’affichage du
téléviseur mais pas dans celle de cet appareil.
24
4 Identifiez les plages.
1 Appuyez plusieurs fois sur < ou ,
pour sélectionner la plage que vous
désirez identifier.
2 Appuyez plusieurs fois sur (ENTER)
pour sélectionner “Play” ou “Skip”.
5 Répétez l’étape 4 pour choisir “Play” ou
“Skip” pour toutes les plages.
6 Appuyez deux fois sur (MENU).
L’appareil revient au mode de lecture CD
normale.
Remarques
• Vous pouvez régler “Play” ou “Skip” pour un
maximum de 24 plages.
• Vous ne pouvez pas régler “Skip” pour toutes les
plages d’un CD.
Page 57

Lecture de plages déterminées
Vous pouvez sélectionner:
•“Bank on” — pour reproduire les plages avec
le réglage “Play”.
•“Bank inv” (Inverse) — pour reproduire les
plages avec le réglage “Skip”.
1 En cours de lecture, appuyez sur (MENU),
puis appuyez plusieurs fois sur M ou m
jusqu’à ce que “Bank” apparaisse.
2 Appuyez plusieurs fois sur , jusqu’à ce
que le réglage désiré apparaisse.
B Bank on B Bank inv
Bank off b
Télévision/Vidéo
Vous pouvez raccorder un syntoniseur et un
moniteur de téléviseur en option à cet appareil.
Regarder la télévision
1 Appuyez plusieurs fois de suite sur
(SOURCE) jusqu’à ce que l’indication
“TV” apparaisse.
2 Appuyez plusieurs fois sur (MODE) pour
sélectionner la fréquence de télévision
souhaitée.
3 Appuyez sur (ENTER).
La lecture démarre à partir de la plage
suivant la plage en cours.
Pour revenir au mode de lecture normale,
sélectionnez “Bank off” à l’étape 2 ci-dessus.
Regarder une source vidéo
1 Appuyez plusieurs fois de suite sur
(SOURCE) jusqu’à ce que l’indication
“TV” apparaisse.
2 Appuyez plusieurs fois de suite sur
(MODE) pour sélectionner “AUX”.
Démarrez la lecture de la source vidéo.
25
Page 58

Mémorisation
automatique des chaînes
de télévision
L’appareil sélectionne les chaînes de télévision
émettant avec les signaux les plus puissants et
les mémorise dans l’ordre de leur fréquence.
Attention
Lorsque vous conduisez, il est recommandé
d’utiliser la fonction BTM de mémorisation du
meilleur accord afin d’éviter des accidents.
1 Appuyez plusieurs fois de suite sur
(SOURCE) jusqu’à ce que l’indication
“TV” apparaisse.
2 Appuyez sur (MENU), puis appuyez sur
M ou m jusqu’à ce que “Auto Mem”
apparaisse.
3 Appuyez sur (ENTER).
L’appareil mémorise les chaînes de
télévision dans l’ordre de leur fréquence
sous les touches numériques.
La mémorisation du réglage est confirmée
par un bip sonore.
Remarques
• L’appareil ne mémorise pas les chaînes émettant
avec un signal faible. Si seules quelques chaînes
de télévision sont captables, certaines touches
numériques resteront inemployées.
• Si un numéro de présélection est indiqué dans
l’affichage, l’appareil entame la mémorisation
des chaînes de télévision à partir de celle qui est
affichée.
Mémorisation de chaînes
de télévision particulières
Vous pouvez mémoriser jusqu’à 12 chaînes (6
chaînes en TV1 et TV2) sous les touches
numériques dans l’ordre de votre choix.
1 Appuyez plusieurs fois de suite sur
(SOURCE) jusqu’à ce que l’indication
“TV” apparaisse.
2 Appuyez sur < ou , pour syntoniser la
chaîne de télévision que vous désirez
sauvegarder sous chaque touche
numérique.
3 Maintenez enfoncée la touche
numérique désirée ((1) à (6)) de
l’appareil jusqu’à ce que vous entendiez
un bip sonore.
L’indication de la touche numérique et
“Mem” apparaissent dans la fenêtre
d’affichage.
Remarque
Si vous essayez de mémoriser une autre chaîne
sous une touche numérique déjà occupée, la
chaîne précédemment mémorisée est effacée.
26
Page 59

Mémorisation des noms
des chaînes de télévision
Exécutez la procédure de “Mémorisation
automatique des stations” (page 14).
Affichage des noms des stations de
télévision ou de radio
Appuyez sur (LIST) en cours de
réception télévisée ou radio.
Exemple: Réception de la bande FM1
FM
1
1
W
C
B
W
B
L
W
K
T
WR K I
1
0
1
0
S
S
U
S
S
.9
1
.7
2
2
3
4
5
6
1 Numéro de présélection
2 Noms des stations présélectionnées
3 Fréquences*
* Si aucun nom n’a été mémorisé pour une
station donnée, c’est la fréquence de cette
station qui apparaît dans l’affichage.
Remarques
• Il peut falloir un certain temps avant que toutes
les indications apparaissent dans la fenêtre
d’affichage.
• La chaîne de télévision n’apparaît pas pendant
que la liste est affichée.
• Le contenu de la mémoire de présélections ne
peut être affiché lorsque l’appareil se trouve en
mode de lecture simultanée (page 28).
Désactivation de l’affichage
En cours de réception radio, appuyez à
nouveau sur (LIST).
En cours de réception télévisée, l’affichage
de la liste sur le moniteur de télévision est
automatiquement désactivé au bout de
quelques secondes.
Affichage des
informations mémorisées
sur les disques
Appuyez sur (LIST) en cours de lecture
CD/MD.
Exemple: Si l’unité CD 1 est sélectionnée.
CD 1
1
S
C
H
U
B
E
Z
A
C
H
I
S
Z
O
P
*****
?
?
RT
R
T
T
I
N
1
2
2
M
O
3
B
A
4
L
5
C
H
6
7
*
8
******
9
1 0
1 Numéros des disques
2 Titres mémorisés comme fichiers personnalisés
3 Ne contient pas de disque*
4 Aucun titre mémorisé*
5 Table des matières en cours d’identification*
*1Un espace blanc affiché à côté d’un numéro de
disque représente un logement vide dans le
magasin à disques.
2
Si aucun titre n’a été enregistré dans le fichier
*
personnalisé, l’indication “******” s’affiche.
3
Si les informations de disque n’ont pas encore
*
été lues par l’appareil, “?” s’affiche.
Remarques
• Il peut falloir un certain temps avant que toutes
les indications apparaissent dans la fenêtre
d’affichage.
• La chaîne de télévision n’apparaît pas pendant
que la liste est affichée.
• Le contenu de la mémoire de présélections ne
peut être affiché lorsque l’appareil se trouve en
mode de lecture simultanée.
Désactivation de l’affichage
Appuyez à nouveau sur (LIST).
3
27
Page 60

Regarder la télévision ou
une source vidéo tout en
écoutant une cassette, un
CD ou un MD
— Lecture simultanée
La fonction de lecture simultanée est
inopérante pendant que vous écoutez la radio.
1 Appuyez sur (MENU), puis appuyez
plusieurs fois sur M ou m jusqu’à ce que
“Simul sel” apparaisse.
2 Appuyez sur (ENTER).
3 Appuyez sur <.
4 Appuyez plusieurs fois sur (SOURCE)
pour sélectionner CD ou MD.
Si vous avez déjà regardé la télévision ou la
source vidéo et désirez écouter un CD ou MD
également, suivez les mêmes étapes.
Pour revenir au mode normal
Pour désactiver la lecture CD ou MD,
sélectionnez “– – – ” à l’étape 4.
Pour désactiver le téléviseur ou la source
vidéo, sélectionnez “– – – ” à l’étape 6.
Remarque
Si vous appuyez sur Z (EJECT) de cet appareil ou
d’un appareil CD/MD pendant que l’appareil est en
mode de lecture simultanée, la lecture simultanée
est annulée.
5 Appuyez sur ,.
6 Appuyez plusieurs fois sur (SOURCE)
jusqu’à ce que “TV” apparaisse, puis
appuyez plusieurs fois sur (MODE) pour
sélectionner TV ou VIDEO.
Chaque fois que vous appuyez sur
(MODE), le paramètre change comme suit:
TV 1 t TV 2 t V 1 (VIDEO 1)
7 Appuyez sur (ENTER).
La lecture simultanée commence.
28
Page 61

Informations
supplémentaires
Entretien
Remplacement du fusible
Lors du remplacement d’un fusible, veillez à
utiliser un fusible dont l’intensité est identique
à celle inscrite sur le fusible d’origine. Si le
fusible grille, vérifiez le raccordement de la
source d’alimentation et remplacez le fusible.
Si le fusible grille une nouvelle fois après avoir
été remplacé, cela peut révéler une défaillance
interne de l’appareil. Le cas échéant, consultez
un revendeur Sony.
Fusible (10 A)
Avertissement
N’utilisez jamais de fusible dont l’intensité
dépasse celle du fusible fourni avec l’appareil,
car vous risqueriez d’endommager l’appareil.
Remplacement de la pile au lithium
Lorsque la pile faiblit, la portée de la
télécommande à carte se réduit. Remplacez la
pile par une nouvelle pile au lithium CR2025.
x
Côté + vers le haut
Remarques concernant la pile au
lithium
•Gardez la pile au lithium hors de portée des
enfants.
En cas d’ingestion de la pile, consultez un
médecin sans tarder.
•Nettoyez la pile avec un chiffon sec afin
d’assurer un contact optimal.
•Respectez les polarités lorsque vous installez
la pile.
•Ne manipulez pas la pile avec des pinces
métalliques. Cette opération pourrait
provoquer un court-circuit.
ATTENTION
Utilisée de façon incorrecte, la pile peut
exploser. Ne pas la recharger, la démonter ni
la jeter au feu.
29
Page 62

Démontage de l’appareil
Le panneau frontal étant ouvert
1 Appuyez sur (OPEN) de l’appareil, puis
appuyez sur l’attache à l’intérieur du
panneau frontal à l’aide d’un fin
tournevis et dégagez doucement le
panneau frontal.
2 Répétez l’étape 1 du côté gauche.
Le couvercle avant est retiré.
3 Utilisez un fin tournevis pour enfoncer
l’attache du côté gauche de l’appareil,
puis tirez le côté gauche de l’appareil
jusqu’au dégagement complet du côté
gauche.
Si le panneau frontal ne s’ouvre
pas parce qu’un fusible est grillé
1 Appuyez sur l’attache à l’intérieur du
couvercle frontal à l’aide de la clé de
dégagement (fournie), et libérez le
couvercle frontal.
Clé de dégagement (fournie)
2 Répétez l’étape 1 du côté gauche.
Le couvercle avant est retiré.
3 Utilisez la clé de dégagement pour
pousser l’attache sur le côté gauche de
l’appareil, puis retirez le côté gauche de
l’appareil jusqu’au dégagement complet.
4 Répétez l’étape 3 du côté droit.
5 Sortez l’appareil de son emplacement.
30
4 Répétez l’étape 3 du côté droit.
5 Sortez l’appareil de son emplacement.
Page 63

Spécifications
Lecteur de cassette
Pistes sonores 4 pistes 2 canaux stéréo
Pleurage et scintillement 0,08 % (WRMS)
Réponse en fréquence 30 – 20.000 Hz
Rapport signal/bruit
Type de
cassette
TYPE II, IV
TYPE I
Dolby B NR
67 dB
64 dB
Dolby NR
désactivé
61 dB
58 dB
Radio
FM
Plage de syntonisation 87,5 – 107,9 MHz
Borne d’antenne Connecteur d’antenne
Fréquence intermédiaire 10,7 MHz/450 kHz
Sensibilité utile 8 dBf
Sélectivité 75 dB à 400 kHz
Rapport signal-bruit 66 dB (stéréo),
Distorsion harmonique à 1 kHz
Séparation 35 dB à 1 kHz
Réponse en fréquence 30 – 15.000 Hz
externe
72 dB (mono)
0,6 % (stéréo),
0,3 % (mono)
AM
Plage de syntonisation 530 – 1.710 kHz
Borne d’antenne Connecteur d’antenne
Fréquence intermédiaire 10,7 MHz/450 kHz
Sensibilité 30 µV
externe
Amplificateur de puissance
Sorties Sorties pour haut-parleurs
Impédance de haut-parleurs
Puissance de sortie maximum
4 – 8 ohms
50 W × 4 (à 4 ohms)
Caractéristiques générales
Sorties Sortie audio (3)
Entrées Câble de commande de la
Commandes de tonalité Graves ±9 dB à 100 Hz
Puissance de raccordement
Dimensions Approx. 178 × 50 × 182 mm
Dimensions de montage Approx. 182 × 53 × 163 mm
Poids Approx. 1,3 kg (2 li. 14 on.)
Accessoires fournis Télécommande à carte
Accessoires optionnels Satellite de commande
Appareils optionnels Changeur de CD
Fil de commande de relais
d’antenne électrique
Fil de commande
d’amplificateur de
puissance
fonction ATT du
téléphone
Fil de commande
d’éclairage
Aiguës ±9 dB à 10 kHz
Batterie de voiture
12 V CC (masse négative)
1
/8 × 2 × 7 1/4 po.)
(7
(L/H/P)
1
/4 × 2 1/8 × 6 1/2 po.)
(7
(L/H/P)
RM-X94
Eléments d’installation et
de raccordement (1 jeu)
RM-X4S
Câble BUS (fourni avec un
cordon à broche RCA)
RC-61 (1 m), RC-62 (2 m)
(10 disques)
CDX-838, CDX-737,
CDX-636
Changeur MD (6 disques)
MDX-65
Autres changeurs CD/MD
intégrant le système
Sony-BUS
Sélecteur de source
XA-C30
Syntoniseur de téléviseur
XT-40V
Préamplificateur égaliseur
numérique
XDP-210EQ, XDP-4000X
La conception et les spécifications sont sujettes à
modifications sans préavis.
31
Page 64

Dépannage
La liste de contrôles suivante vous aidera à remédier aux problèmes que vous pourriez rencontrer
avec cet appareil.
Avant de parcourir la liste ci-dessous, vérifiez les connexions et les procédures d’utilisation.
Généralités
Problème
Pas de son.
Le contenu de la mémoire a été
effacé.
Le son est parasité.
Lecture cassette
Problème
Distorsion du son.
L’AMS ne fonctionne pas
correctement.
Cause/Solution
• Annulez la fonction ATT.
• Réglez la commande de balance avant-arrière sur la position
centrale, si vous utilisez un système à 2 haut-parleurs.
• Appuyez sur (+) du bouton VOL pour régler le volume.
• Le cordon d’alimentation ou la batterie a été déconnecté.
• La touche de réinitialisation a été enfoncée.
t Recommencez la procédure d’enregistrement dans la
mémoire.
Vous êtes en train d’utiliser un téléphone mobile.
Cause/Solution
La tête de lecture de cassette est contaminée.
t Nettoyez la tête à l’aide d’une cassette de nettoyage de type
sec disponible dans le commerce.
• Bruit dans les blancs entre les plages.
• Un blanc est trop court (moins de 4 secondes).
• Une longue pause, un passage de basses fréquences ou un
passage de faible volume sont considérés comme un blanc.
Réception radio
Problème
Impossible de syntoniser une
présélection.
La syntonisation automatique
est impossible.
Impossible de capter les
stations.
Le son comporte des parasites.
L’indication “ST” clignote.
Il y a des interférences pendant
la réception FM.
32
Cause/Solution
• Mémorisez la fréquence correcte.
• Le signal d’émission est trop faible.
• Le signal d’émission est trop faible.
t Utilisez la syntonisation manuelle.
• Le mode de recherche locale est réglé sur “on”.
t Réglez le mode de recherche locale sur “off” (page 13).
Raccordez un fil de commande d’antenne électrique (bleu) ou
un fil d’alimentation électrique d’accessoire (rouge) au fil
d’alimentation électrique de l’amplificateur d’antenne de la
voiture. (Lorsque votre voiture dispose d’une antenne FM/AM
dans la vitre arrière/latérale uniquement.)
• Syntonisez la fréquence correctement.
• Le signal d’émission est trop faible.
t Activez le mode Mono (page 13).
• Le mode Wide a été sélectionné.
t Réglez le mode IF sur IF Auto (page 13).
Page 65

Lecture CD/MD
Problème
Pertes de son.
Cause/Solution
Disque souillé ou défectueux.
Affichages d’erreur (lorsque l’appareil de CD/MD en option est raccordé)
Les indications suivantes clignotent pendant environ cinq secondes et un bip d’alarme retentit.
Affichage
NO Mag
NO Disc
NG Discs
1
Error
Blank
*
1
*
Push Reset
Not Ready
High Temp
Cause
Le magasin à disques n’a pas été
introduit dans l’appareil CD/MD.
Il n’y a aucun disque dans l’appareil
CD/MD.
La lecture d’un CD/MD ne démarre
pas en raison d’un problème (CD
souillé, MD défectueux, etc.).
Un CD est souillé ou a été introduit à
l’envers.*
Impossible de reproduire un MD en
raison d’un problème.*
Aucune plage n’a été enregistrée sur
un MD.*
L’appareil CD/MD ne peut
fonctionner en raison d’un problème.
Le couvercle de l’appareil de MD est
ouvert ou les MD ne sont pas bien en
place.
La température ambiante dépasse
50°C (122°F).
2
2
2
Solution
Introduisez le magasin à disques
dans l’appareil CD/MD.
Introduisez des disques dans
l’appareil de CD/MD.
Introduisez un autre CD/MD.
Nettoyez ou introduisez
correctement le CD.
Introduisez un autre MD.
Reproduisez un MD sur lequel des
plages ont été enregistrées.
Appuyez sur la touche de
réinitialisation de l’appareil.
Fermez le couvercle ou remettez les
MD en place correctement.
Attendez que la température baisse
sous 50°C (122°F).
*1Si une erreur se produit pendant la lecture d’un CD ou d’un MD, le numéro de disque du CD ou du MD
n’apparaît pas dans la fenêtre d’affichage.
2
Le numéro du disque qui pose un problème apparaît dans la fenêtre d’affichage.
*
Si les solutions proposées ci-dessus ne permettent pas de remédier au problème, consultez votre
revendeur Sony.
33
Page 66

¡Bienvenido!
Precauciones
Gracias por adquirir este reproductor de
cassettes Sony. Esta unidad permite disfrutar
de una serie de funciones mediante el uso del
siguiente accesorio de control:
Accesorios suministrados
Control remoto de tarjeta RM-X94
Accesorios opcionales
Mando rotativo RM-X4S
Además de las operaciones de reproducción de
cassettes y de la radio, es posible ampliar el
sistema mediante la conexión de una unidad*
de CD/MD opcional.
Cuando emplee esta unidad o una unidad de
CD opcional conectada con la función CD
TEXT, la información CD TEXT aparecerá en el
visualizador al reproducir discos CD TEXT*2.
*1Es posible conectar un cambiador de CD, un
cambiador de MD, un reproductor de CD o un
reproductor de MD.
2
Un disco CD TEXT es un CD de audio que
*
contiene información, como el título del disco,
nombre del cantante y títulos de los temas.
Esta información está registrada en el disco.
•Si aparca el automóvil bajo la luz solar
directa y se produce un considerable
aumento de temperatura en su interior, deje
que la unidad se enfríe antes de utilizarla.
•Si la unidad no recibe alimentación,
compruebe las conexiones en primer lugar. Si
todo está en orden, examine el fusible.
•Si los altavoces no emiten sonido con un
sistema de dos altavoces, ajuste el control de
equilibrio en la posición central.
•Si reproduce la cinta durante mucho tiempo,
el cassette puede calentarse debido al
1
amplificador de potencia incorporado. No
obstante, esto es normal.
•No utilice la función de archivo
personalizado mientras conduce. Tampoco
realice ninguna función que pueda distraer
su atención de la conducción.
Si desea realizar alguna consulta o solucionar
algún problema referentes a la unidad que no
se mencionen en este manual, póngase en
contacto con el proveedor Sony más próximo.
Para mantener una alta calidad de
sonido
Si existen soportes para bebidas cerca del
equipo de audio, tenga cuidado de que no
salpiquen zumos u otras bebidas dulces sobre
el mismo, ya que la existencia de residuos
azucarados en la unidad o en las cintas de
cassette pueden ensuciar los cabezales de
reproducción, reducir la calidad de sonido o
eliminar el sonido de reproducción.
Los kits de limpieza para cassettes no eliminan
las sustancias azucaradas de los cabezales de
cinta.
2
Page 67

Notas sobre los cassettes
Cuidados de los cassettes
•No toque la superficie de la cinta del cassette,
ya que la suciedad o el polvo ensucian los
cabezales.
•Mantenga los cassettes alejados de equipos
provistos de imanes incorporados, como
altavoces y amplificadores, ya que el sonido
de la cinta grabada podría borrarse o
distorsionarse.
•No exponga los cassettes a la luz solar
directa, a temperaturas extremadamente frías
ni a la humedad.
•La existencia de holguras en la cinta puede
provocar que ésta se enrede en el mecanismo.
Antes de insertarla, utilice un lápiz o un
objeto similar para girar la bobina y eliminar
holguras.
Holgura
•Los cassettes deformados y las etiquetas mal
adheridas pueden causar problemas al
insertar o expulsar las cintas. Retire o adhiera
con firmeza las etiquetas.
Cassettes de duración superior a 90 minutos
No se recomienda el uso de cassettes de
duración superior a 90 minutos excepto para
reproducciones largas y continuas. La cinta
utilizada en estos cassettes es muy fina y
tiende a estirarse con facilidad. Las
operaciones frecuentes de reproducción y
parada de estas cintas pueden hacer que éstas
se enreden con el mecanismo de la platina de
cassettes.
•Es posible que el sonido se distorsione
mientras se reproduce el cassette. El cabezal
del reproductor de cassettes debe limpiarse
después de 50 horas de uso.
3
Page 68

Indice
Sólo esta unidad
Localización de los controles ............................. 5
Procedimientos iniciales
Restauración de la unidad ................................. 8
Encendido y apagado de la unidad.................. 8
Cómo utilizar el menú........................................ 8
Ajuste del reloj ..................................................... 9
Reproductor de cassettes
Escucha de cintas .............................................. 10
Reproducción de cintas en diversos
modos ............................................................ 11
Radio
Memorización automática de emisoras
— Memorización de la mejor sintonía
(BTM) ............................................................. 12
Memorización de las emisoras deseadas....... 12
Recepción de emisoras memorizadas ............ 13
Almacenamiento de nombres de emisora
— Memo de emisora ................................... 14
Localización de una emisora por nombre
— Listado ...................................................... 15
Otras funciones
Etiquetado del mando rotativo ....................... 15
Uso del mando rotativo ................................... 16
Ajuste de las características de sonido ........... 18
Atenuación del sonido ..................................... 18
Cambio de los ajustes de sonido y
visualización ................................................. 18
Selección del analizador de espectro.............. 19
Ajuste del sonido y la frecuencia del
preamplificador ecualizador ...................... 19
Equipo opcional
Unidad de CD/MD
Reproducción de discos compactos (CD) o de
minidiscos (MD) .......................................... 20
Reproducción repetida de temas
— Reproducción repetida.......................... 21
Reproducción de temas en orden aleatorio
— Reproducción aleatoria .......................... 22
Asignación de títulos a los discos compactos
— Memorando de discos ............................ 22
Localización de discos mediante el título
— Función de listado .................................. 24
Selección de temas específicos para su
reproducción
— Función de banco .................................... 24
TV/Video
Visualización de la TV...................................... 25
Visualización de un vídeo ............................... 25
Memorización automática de canales de TV 26
Memorización únicamente de determinados
canales de TV................................................ 26
Almacenamiento de los nombres de los
canales de TV................................................ 27
Visualización de la información almacenada
en discos ........................................................ 27
Visualización de la TV o de vídeo mientras se
escucha un CD o un MD
— Reproducción simultánea ...................... 28
Información complementaria
Mantenimiento .................................................. 29
Desmontaje de la unidad ................................. 30
Especificaciones................................................. 31
Guía de solución de problemas ...................... 32
4
Page 69

Localización de los controles
Control remoto de tarjeta RM-X94
D-BASS
DISC
SOURCE
DISC
OPEN/CLOSE
ENTER
VOLATT
OFF
MENU LIST
SEEK SEEK
SOUND
DSPL MODE
Consulte las páginas enumeradas para obtener más información.
1 Botón OFF 8, 10
2 Botón MENU 9, 11, 12, 13, 14, 19, 20, 21,
22, 23, 24, 25, 26, 28
3 Botón SOURCE (Tuner/TAPE/CD/MD/TV)
8, 10, 12, 13, 19, 20, 23, 25, 26, 28
4 Botones </, (SEEK/AMS –/+) 8, 9, 10,
11, 13, 14, 18, 19, 20, 21, 22, 24, 25, 26,
28
Sensor de música automático
(./>) 10, 21
Búsqueda manual (m/M) 21
Búsqueda 13
5 Botón SOUND 18
6 Botón DSPL (cambio del modo de
indicación) 14, 20, 23
7 Botón ATT (atenuación) 18
8 Botón OPEN/CLOSE 10
9 Botón LIST 14, 15, 23, 24, 27
List-up 15, 24, 27
0 Botones M/m (DISC/PRST +/–) 8, 9, 11,
13, 14, 15, 19, 20, 21, 22, 23, 24, 25, 26
qa Botón ENTER 9, 11, 12, 13, 14, 19, 20,
22, 23, 24, 25, 26, 28
qs Botón MODE 10, 11, 12, 13, 20, 23, 25,
28
Durante la reproducción de cintas:
Cambio del sentido de
reproducción 10
Durante la recepción de radio:
Selección de banda (BAND) 12, 13
Durante la reproducción de CD/MD:
Selección de unidad de CD/MD 20
Durante la recepción de TV:
Selección de unidad 25, 28
qd Botones VOL (ajuste de volumen)
No es posible utilizar con el control remoto de
tarjeta una unidad que se haya apagado
presionando (OFF) durante dos segundos, a
menos que presione (SOURCE) en la unidad o
que inserte un casette para que ésta se active
primero.
Durante la recepción de radio:
Selección de emisoras memorizadas
13
Durante la reproducción de CD/MD:
Cambio de discos 21
Durante la recepción de TV:
Selección de banda 26
5
Page 70

Localización de los controles
Lado de seguridad
Lado de utilización
P
S
L
OFF
D
SOURCE
M
O
D
E
REP SHUF
123456
MENU
SOUND
DISC
DISC
LIST
ENTER
CLOSE
XR-M550
6
Page 71

Los botones correspondientes de la
unidad controlan las mismas funciones
que los del control remoto de tarjeta.
10 Botón de restauración (situado en el
lado frontal de la unidad, oculto por
el panel frontal) 8
2 Visualizador principal
3 Botón OPEN
4qa Receptor para el control remoto de
tarjeta
5 Botones de ajuste de volumen
6 Botón DSPL (cambio del modo de
indicación)
7 Visualizador secundario
8 Botón MENU
9 Botón Z (expulsión) 10
qs Botón LIST
qd Botón OFF* 8
qf Botón MODE
qg Botón SOURCE
qh Botones numéricos
Durante la reproducción de cintas:
(1) REP 11
Durante la recepción de radio:
Selección de números de
memorización 12, 13
Durante la reproducción de CD/MD:
(1) REP 21
(2) SHUF 22
Durante la recepción de TV:
Selección de números de
memorización 26
qj Botones PRST/DISC +/– (cursor arriba/
abajo)
Botones SEEK/AMS –/+ (cursor
izquierda/derecha) 12
qk Botón SOUND
ql Botón ENTER
w; Botón CLOSE
* Advertencia sobre la instalación en
un automóvil que no disponga de
posición ACC (accesorios) en el
interruptor de la llave de encendido
Asegúrese de presionar (OFF) en la
unidad durante dos segundos para
desactivar la indicación del reloj después
de apagar el motor.
Si presione (OFF) momentáneamente, la
indicación del reloj no se desactivará y esto
causará el desgaste de la batería.
7
Page 72

Procedimientos
iniciales
Restauración de la unidad
Antes de utilizar la unidad por primera vez o
después de sustituir la batería del automóvil,
es necesario restaurar dicha unidad.
Presione el botón de restauración con un objeto
puntiagudo, como un bolígrafo.
Botón de restauración
Cómo utilizar el menú
Esta unidad se utiliza mediante la selección de
elementos de un menú.
Para realizar la selección, entre primero en el
modo de menú y elija M/m (arriba/abajo ), o
</, (izquierda/derecha ).
M/m
DISC
SEEK SEEK
SOURCE
DISC
</,
M : Para seleccionar hacia
arriba
m : Para seleccionar hacia
abajo
Nota
Al presione el botón de restauración, se borrará el
ajuste del reloj, la memoria predefinida y algunas
funciones memorizadas.
Encendido y apagado de
la unidad
Encendido de la unidad
Presione (SOURCE) o inserte un cassette en la
unidad. Para obtener información detallada
sobre la utilización, consulte las páginas 10
(reproductor de cassettes) y 12 (radio).
Apagado de la unidad
Presione (OFF) para detener la reproducción
de la cinta o la recepción de FM/AM (la
iluminación de las teclas y el visualizador
permanecerán activados).
Presione (OFF) durante dos segundos para
apagar la unidad por completo.
Nota
Si el automóvil no dispone de posición ACC en el
interruptor de la llave de encendido, asegúrese de
apagar la unidad presionando (OFF) durante dos
segundos para evitar el desgaste de la batería del
automóvil.
< :
Para
seleccionar
hacia la
izquierda
DISC
SEEK SEEK
SOURCE
DISC
, :
Para
seleccionar
hacia la
derecha
8
Page 73

Ajuste del reloj
El reloj dispone de una indicación digital de 12
horas.
2 Presione (ENTER).
Ejemplo: Para ajustar el reloj a las 10:08
1
Presione (MENU) y, a continuación, M o m
varias veces hasta que aparezca “Clock”.
1 Presione (ENTER).
La indicación de hora parpadea.
2 Presione M o m para ajustar la hora.
3 Presione ,.
La indicación de minutos parpadea.
El reloj se pone en funcionamiento.
Consejo
Con el ajuste inicial, la indicación del reloj aparece
mientras la unidad está apagada.
Si el modo D.Info está ajustado en “on” la hora
siempre se mostrará (excepto para algunas
funciones del modo SA) (página 18).
4 Presione M o m para ajustar los
minutos.
9
Page 74

Reproductor de
cassettes
Escucha de cintas
1
Presione (OPEN/CLOSE) en el control
remoto de tarjeta e inserte un cassette.
La reproducción se iniciará de forma
automática.
2 Presione (OPEN/CLOSE) en el control
remoto de tarjeta para cerrar el panel
frontal.
Si ya hay un cassette insertado, para iniciar la
reproducción presione (SOURCE) varias veces
hasta que aparezca “FWD” o “REV”.
Se reproduce la cara orientada hacia arriba.
Se reproduce la cara orientada hacia abajo.
Bobinado rápido de la cinta
Durante la reproducción, mantenga
presionado m o M.
DISC
m :
Rebobinado
SEEK SEEK
SOURCE
DISC
M :
Avance
rápido
Para iniciar la reproducción durante el avance
rápido o el rebobinado, presione (MODE)
(o).
Localización de un tema específico
— Sensor de música automático (AMS)
Durante la reproducción, presione . o
> momentáneamente por cada tema
que desee omitir.
Es posible omitir un máximo de nueve
temas de una vez.
DISC
. :
Para localizar
temas
anteriores
Nota
La función AMS puede no activarse si:
— los espacios en blanco entre los temas son
inferiores a cuatro segundos
— hay ruido entre los temas
— existen largas secciones con volumen bajo o sin
sonido.
En el modo de desplazamiento de
indicaciones, todos los elementos se desplazan
por el visualizador uno por uno en orden.
SEEK SEEK
SOURCE
DISC
> :
Para
localizar
temas
posteriores
Consejo
Para cambiar el sentido de reproducción de la
cinta, presione (MODE) (o).
Para Presione
Detener la reproducción (OFF)
Expulsar el cassette
(OPEN/CLOSE) y,
continuación, Z
10
Consejo
Es posible desactivar el modo de desplazamiento
de indicaciones (consulte “Cambio de los ajustes de
sonido y visualización” en la página 18).
a
Page 75

Reproducción de cintas en
diversos modos
Es posible reproducir la cinta en los siguientes
modos:
•Repeat (reproducción repetida), que permite
repetir el tema actual.
•NR (Dolby NR), que permite seleccionar el
sistema Dolby* NR B.
•Metal, que permite reproducir una cinta
metálica o CrO2.
•B.Skip (omisión de espacios en blanco), que
omite espacios en blanco superiores a ocho
segundos.
•ATA (activación automática del
sintonizador), que activa automáticamente el
sintonizador durante el bobinado rápido de
la cinta.
* Reducción de ruido Dolby fabricado bajo
licencia de Dolby Laboratories Licensing
Corporation.
“DOLBY” y el símbolo de la D doble ; son
marcas de Dolby Laboratories Licensing
Corporation.
1 Durante la reproducción, presione
(MENU).
2 Presione M o m varias veces hasta que
aparezca el elemento deseado.
Cada vez que presione m, el elemento
cambiará de la siguiente forma:
Repeat t NR t Metal t B.Skip t ATA
Reproducción repetida de temas
— Reproducción repetida
1 Durante la reproducción, presione
(MENU).
2 Presione M o m varias veces hasta que
aparezca “Repeat”.
3 Presione , varias veces hasta que
“Repeat on” aparezca en el visualizador.
Repeat on y Repeat off
Se inicia la reproducción repetida.
Para recuperar el modo de reproducción
normal, seleccione “Repeat off” en el paso 3.
Consejos
• Si selecciona el modo con los botones de la
unidad, presione (1) (REP) varias veces hasta que
aparezca el modo deseado.
• Durante la reproducción repetida, presione
(MODE). “REP” desaparecerá del visualizador y
el modo de repetición se cancelará.
3 Presione , para seleccionar “on”.
Se inicia el modo de reproducción.
4 Presione (ENTER).
Para volver al modo normal de reproducción,
seleccione “off” en el paso 3.
Consejo
Mientras la función ATA está activada, la
indicación (TAPE y TUNER) puede cambiarse
presionando (DSPL).
11
Page 76

Radio
Memorización automática
de emisoras
— Memorización de la mejor sintonía (BTM)
Esta unidad selecciona las emisoras de señal
más intensa y las memoriza por orden de
frecuencia. Es posible almacenar hasta 6
emisoras de cada banda (FM1, FM2, FM3, AM1
y AM2).
Precaución
Para sintonizar emisoras durante la
conducción, utilice la función de
memorización de la mejor sintonía para evitar
accidentes.
1 Presione (SOURCE) varias veces para
seleccionar el sintonizador.
Cada vez que presione (SOURCE), la fuente
cambia de la siguiente forma:
B Tuner B CD* B MD*
TV* b TAPE b
* Si el equipo opcional correspondiente no está
conectado, el elemento no aparecerá.
Memorización de las
emisoras deseadas
Es posible memorizar hasta 18 emisoras de FM
(6 para cada una de las siguientes: FM1, 2, y 3),
hasta 12 de AM (6 cada una para AM1 y 2) en
el orden que prefiera.
1 Presione (SOURCE) varias veces para
seleccionar el sintonizador.
2 Presione (MODE) varias veces para
seleccionar la banda.
3 Presione . o > en la unidad para
sintonizar la emisora que desee
almacenar en el botón numérico.
4 Presione el botón numérico que desee
((1) a (6)) de la unidad hasta que
aparezca “MEM”.
En el visualizador aparecerá la indicación
del botón numérico.
Nota
Si almacena otra emisora en el mismo botón
numérico, la emisora previamente almacenada se
borrará.
2 Presione (MODE) varias veces para
seleccionar la banda.
Cada vez que presione (MODE), la banda
cambia de la siguiente forma:
B FM1 B FM2 B FM3
AM2 b AM1 b
3 Presione (MENU) y, a continuación, M o
m varias veces hasta que aparezca “BTM”
4 Presione (ENTER).
La unidad almacena en los botones
numéricos las emisoras por orden de
frecuencia.
La unidad emite un pitido cuando el ajuste
se almacena.
Notas
• La unidad no almacena emisoras de señales
débiles. Si se reciben pocas emisoras, algunos
botones numéricos conservarán su ajuste
anterior.
• Si el visualizador muestra algún número, la
unidad almacenará las emisoras a partir del
mostrado en el visualizador.
12
Page 77

Recepción de emisoras
memorizadas
1 Presione (SOURCE) varias veces para
seleccionar el sintonizador.
2 Presione (MODE) varias veces para
seleccionar la banda.
3 Presione M (memorización arriba) o m
(memorización abajo) varias veces para
recibir las emisoras en el orden en el que
están almacenadas en la memoria.
Consejo
Si memoriza la emisora utilizando los botones de
la unidad, presione el botón numérico ((1) a (6))
en el que esté almacenada la emisora deseada.
Si no puede sintonizar una emisora
programada
Presione < o , para buscar la emisora
(sintonización automática).
La exploración se detiene cuando la unidad
recibe una emisora. Presione < o , varias
veces hasta que reciba la emisora deseada.
Nota
Si la sintonización automática se detiene con
demasiada frecuencia, presione (MENU) y, a
continuación, M o m varias veces hasta que
aparezca “Local” (modo de búsqueda local).
A continuación, presione , para seleccionar
“Local on”. Presione (ENTER).
Durante la recepción local y la selección de
emisoras, el visualizador muestra “LCL Seek”.
Sólo se sintonizarán las emisoras de señal
relativamente intensa.
Consejo
Si sabe cuál es la frecuencia de la emisora que
desea escuchar, mantenga presionado < o ,
hasta que aparezca la frecuencia deseada
(sintonización manual).
Si la recepción de FM en estéreo es
de mala calidad — Modo monofónico
1 Durante la recepción de la radio,
presione (MENU) y, a continuación,
M o m varias veces hasta que aparezca
“Mono”.
2 Presione , hasta que aparezca
“Mono on”.
El sonido mejorará, aunque será
monofónico (“ST“ desaparece).
3 Presione (ENTER).
Para volver al modo normal, seleccione
“Mono off” en el paso 2.
Si la emisión de FM en estéreo se
recibe en monofónico
Si se producen interferencias, la función
“IF Auto” de esta unidad evitará
automáticamente los ruidos y estrechará la
frecuencia de recepción. En tales casos, es
posible que algunas emisiones de FM en
estéreo se reciban en monofónico. Si desea
escuchar tales emisiones en estéreo, cambie
manualmente al ajuste “Wide”.
1 Durante la recepción de la radio,
presione (MENU) y, a continuación,
M o m varias veces hasta que aparezca
“IF Auto”.
2 Presione , hasta que aparezca “Wide”.
3 Presione (ENTER).
Nota
Si amplía el ajuste de recepción de la señal de
frecuencia (modo “Wide”), es posible que se
produzcan interferencias.
En el modo de desplazamiento de
indicaciones, todos los elementos se desplazan
por el visualizador uno por uno en orden.
Consejo
Es posible desactivar el modo de desplazamiento
de indicaciones (consulte “Cambio de los ajustes de
sonido y visualización” en la página 18).
13
Page 78

Almacenamiento de
nombres de emisora
— Memo de emisora
Es posible asignar un nombre a cada emisora
de radio y almacenarlo en la memoria. El
nombre de la emisora sintonizada aparece en
el visualizador. Es posible asignar un nombre
con hasta ocho caracteres a una emisora.
Almacenamiento de nombres de
emisora
1 Sintonice una emisora cuyo nombre
desee almacenar.
2 Presione (MENU) y, a continuación,
presione M o m varias veces hasta que
aparezca la indicación “Name edit”.
3 Repita los pasos 1 y 2 para
introducir el nombre completo.
5 Para volver a la recepción de radio
normal, presione (ENTER).
Consejo
Existe otro método para comenzar a almacenar
nombres de emisoras. Presione (LIST) durante dos
segundos en lugar de realizar los pasos 2 y 3.
También puede completar la operación
manteniendo presionado (LIST) durante dos
segundos en lugar de realizar el paso 5.
Visualización del nombre de
emisora
Presione (DSPL) durante la recepción de
radio.
3 Presione (ENTER).
4 Introduzca los caracteres.
1 Presione M varias veces para
seleccionar los caracteres deseados.
(A t B t C t ··· Z t 0 t 1 t 2 t
··· 9 t + t – t * t / t \ t > t
< t . t )
Si presiona m varias veces, los caracteres
aparecerán en orden inverso.
Si desea introducir un espacio en blanco
entre los caracteres, seleccione “ ”.
2 Pulse , una vez localizado el
carácter deseado.
El siguiente carácter parpadea.
Si presiona <, parpadeará el carácter
anterior.
Cada vez que presione (DSPL), el elemento
cambiará de la siguiente forma:
B Nombre de emisora* B Frecuencia
* Si el nombre de emisora no se almacena, la
indicación “NO Name” aparecerá en el
visualizador durante un segundo.
Borrado del nombre de emisora
1 Sintonice una emisora cuyo nombre
desee borrar.
2 Presione (MENU) y, a continuación,
presione M o m varias veces hasta que
aparezca la indicación “Name Del”.
3 Presione (ENTER).
4 Presione M o m para seleccionar el
nombre de emisora que desee borrar.
5 Presione (ENTER) durante dos segundos.
El nombre se borra.
Repita los pasos 1 a 4 si desea borrar otros
nombres.
6 Presione (MENU) dos veces.
La unidad vuelve a la recepción de radio
normal.
Nota
Una vez borrados todos los nombres de emisora, la
indicación “NO Data” aparecerá en el paso 5.
14
Page 79

Localización de una
emisora por nombre
— Listado
1 Presione (LIST).
El nombre asignado a la emisora
sintonizada aparece en el visualizador.
2 Presione M o m varias veces hasta que
encuentre la emisora deseada.
Si no hay ningún nombre asignado a la
emisora seleccionada, la frecuencia aparece
en el visualizador.
Otras funciones
Esta unidad también puede controlarse con el
mando rotativo (opcional).
Etiquetado del mando
rotativo
En función de cómo monte el mando rotativo,
adhiera la etiqueta adecuada como se muestra
en la siguiente ilustración.
3 Presione (ENTER) para sintonizar la
emisora deseada.
Nota
Si conecta un sintonizador de TV, la indicación de
listado no aparecerá en el visualizador de la
unidad.
MODE
SOUND
DSPL
SOUND
MODE
DSPL
15
Page 80

Uso del mando rotativo
Este mando funciona mediante la presión de
botones y/o el giro de controles.
También es posible controlar las unidades de
CD o de MD opcionales con el mando rotativo.
Mediante la presión de botones
(SOURCE y MODE)
(SOURCE)
(MODE)
Cada vez que presione (SOURCE), la
fuente cambiará de la siguiente forma:
TUNER t CD* t MD* t TAPE t TV*
Al presionar (MODE), el funcionamiento
cambiará de la siguiente forma;
• Sintonizador : FM1 t FM2 t FM3 t
• Unidad de CD* : CD1 t CD2 t …
• Unidad de MD* : MD1 t MD2 t …
• Cinta : sentido de reproducción
• TV/video* : TV1 t TV2 t AUX
* Si el equipo opcional correspondiente no está
conectado, el elemento no aparecerá.
AM1 t AM2
Mediante el giro del control
(SEEK/AMS)
Gire el control y suéltelo para:
•Localizar el principio de los temas de la
cinta. Gire y mantenga girado el control y
suéltelo para realizar un avance rápido de
la cinta. Para iniciar la reproducción
durante el avance rápido de la cinta,
presione (MODE).
•Localizar un tema específico de un disco.
Gire y mantenga girado el control hasta
localizar el punto específico de un tema y,
a continuación, suéltelo para iniciar la
reproducción.
•Sintonizar emisoras automáticamente.
Gire y mantenga girado el control para
localizar una emisora específica.
Mediante la presión y giro del
control (PRESET/DISC)
16
Presione y gire el control para:
•Recibir emisoras memorizadas en los
botones numéricos.
•Cambiar el disco.
Page 81

Otras operaciones
Gire el control VOL para
ajustar el volumen.
Nota
Si realiza la instalación en un automóvil que no
disponga de posición ACC (accesorios) en el
interruptor de la llave de encendido, presione
(OFF) en la unidad durante dos segundos para
desactivar la indicación del reloj después de apagar
el motor.
Presione (DSPL) para cambiar
los elementos mostrados.
Consejo
Mientras la función ATA está activada, la
indicación (TAPE y TUNER) puede cambiarse
presionando (DSPL).
Presione (ATT)
para atenuar el
sonido.
OFF
Presione (OFF)
para desactivar
la unidad.
Presione (SOUND)
para ajustar el
menú de sonido.
Cambio de la dirección de
funcionamiento
La dirección de funcionamiento de los
controles está ajustada de fábrica como se
muestra en la siguiente ilustración.
Para aumentar
Para disminuir
Si precisa instalar el mando rotativo en el lado
derecho de la columna de dirección, puede
invertir la dirección de funcionamiento.
Presione (SOUND) durante dos segundos
al tiempo que presiona el control VOL.
Consejo
También es posible cambiar la dirección de
funcionamiento de estos controles con la unidad
(consulte “Cambio de los ajustes de sonido y
visualización” en la página 18).
17
Page 82

Ajuste de las
características de sonido
Cambio de los ajustes de
sonido y visualización
Es posible ajustar los graves, los agudos, el
balance y el equilibrio entre altavoces.
Es posible almacenar los niveles de graves y
agudos de forma independiente para cada
fuente.
1 Presione (SOUND) varias veces para
seleccionar el elemento que desee ajustar.
Cada vez que presione (SOUND), los
elementos cambian de la siguiente forma:
BAS (graves) t TRE (agudos) t
BAL (izquierdo y derecho) t
FAD (delantero y trasero) t
SUB (Altavoz potenciador de graves)
2 Ajuste el elemento seleccionado
presionando < o ,.
Al realizar el ajuste con el mando rotativo,
presione (SOUND) y gire el control VOL.
Nota
Realice el ajuste antes de que transcurran tres
segundos después de seleccionar el elemento.
Atenuación del sonido
Presione (ATT) en el control remoto de
tarjeta o en el mando rotativo.
“ATT on” aparece momentáneamente.
Para restaurar el nivel de volumen anterior,
vuelva a presionar (ATT).
Consejo
Si el cable de interfaz de un teléfono para
automóvil está conectado al cable ATT, la unidad
disminuirá el volumen automáticamente cuando se
reciba una llamada telefónica (Función ATT de
teléfono).
18
Es posible ajustar los siguientes elementos:
Set (ajuste)
•Clock (Reloj) (página 9).
•Beep — que permite activar o desactivar los
pitidos.
•RM (Mando rotativo) — que permite cambiar
la dirección de funcionamiento del mando
rotativo.
— Seleccione “norm” para utilizar el mando
rotativo en la posición ajustada de
fábrica.
— Seleccione “rev” si monta el mando
rotativo en el lado derecho de la columna
de dirección.
•English/French/Spanish — que permite
cambiar el idioma de las indicaciones a
inglés, francés o español.
Dis (indicación)
•D.Info (Información Dual)*1 — que permite
visualizar el reloj y el modo de reproducción
simultáneamente (on) o bien la información
alternativamente (off).
•SA (Analizador de espectros) — que permite
cambiar el patrón de visualización de la
indicación del ecualizador (página 19).
•Dimmer — que permite cambiar el brillo del
visualizador (si el cable de iluminación está
conectado).
— Seleccione “Auto” para que el brillo del
visualizador se atenúe sólo al encender la
luz del interior.
— Seleccione “on” para atenuar el brillo del
visualizador.
— Seleccione “off” para desactivar Dimmer.
•Contrast — para ajustar el contraste si las
indicaciones del visualizador no son visibles
debido a la posición de instalación de la
unidad.
•M.Dspl (Desplazamiento de indicaciones) —
para activar o desactivar el desplazamiento
de indicaciones por el visualizador.
•A.Scrl (Desplazamiento automático)*
(página 20).
2
Snd (Sonido)
•HPF (Filtro de paso alto para la presalida) —
que permite seleccionar la frecuencia de corte
de la presalida.
•LPF (Filtro de paso bajo para la salida de
potenciación de graves) — que permite
seleccionar la frecuencia de corte de la salida
de potenciación de graves.
•Loud (Sonoridad)*1 — que permite disfrutar
de graves incluso con el volumen bajo. Los
graves se potenciarán.
Page 83

1 Presione (MENU).
2 Presione M o m varias veces hasta que
aparezca el elemento deseado.
Cada vez que presione m, el elemento
cambiará de la siguiente forma:
Ejemplo
Clock t Beep t RM t English/French/Spanish
t D.Info*
M.Dspl t A.Scrl*2 t HPF*1 t LPF*1 t Loud*
*1Si la radio está apagada o si no hay ninguna
2
*
Nota
El elemento mostrado varía en función de la
fuente.
Consejo
Es posible cambiar fácilmente las categorías (“Set”,
“Snd”, “P/M (Mode de reproducción)” y “Dis”)
presionando y manteniendo presionado M o m
durante dos segundos.
1
t SA*1 t Dimmer t Contrast t
cinta, CD o MD en reproducción, este
elemento no aparecerá.
Cuando no se está reproduiendo ningún CD
o MD,este elemento no aparece.
3 Presione , para seleccionar el ajuste
que desee (ejemplo: on u off) o presione
< o , varias veces para seleccionar la
frecuencia (ejemplo: off, 78 Hz o 125 Hz).
Con respecto al ajuste “Contrast”, al
presionar , el contraste aumenta,
mientras que al presionar < disminuye.
4 Presione (ENTER).
Una vez finalizado el ajuste de modo, el
visualizador vuelve a la indicación de
modo de reproducción normal.
Selección del analizador
de espectro
El nivel de señal de sonido se muestra en un
analizador de espectro. Es posible seleccionar
un patrón de visualización de 1 a 6 o el modo
de visualización automática.
1
1 Presione (SOURCE) para seleccionar una
fuente (sintonizador, cinta CD o MD).
2 Presione (MENU).
3 Presione M o m varias veces hasta que
aparezca “SA”.
4 Presione < o , varias veces para
seleccionar el ajuste deseado.
B SA 1 bB … SA 6 b
B SA Auto* bB SA off b
* Todos estos patrones del visor aparecerán
uno por uno de forma automática.
5 Presione (ENTER).
Ajuste del sonido y la
frecuencia del
preamplificador
ecualizador
Esta unidad también puede controlar un
preamplificador ecualizador opcional.
De esta forma, podrá añadir ciertos efectos al
campo de sonido de la fuente actualmente
seleccionada.
Para más información, consulte el manual de
instrucciones suministrado con el
preamplificador ecualizador.
19
Page 84

Equipo opcional
Unidad de CD/MD
Esta unidad puede controlar unidades de CD/
MD externas.
Si conecta una unidad opcional de CD con las
funciones CD TEXT y de archivo
personalizado, la información CD TEXT
aparecerá en el visualizador al reproducir
discos CD TEXT.
Reproducción de discos
compactos (CD) o de
minidiscos (MD)
1 Presione (SOURCE) varias veces para
seleccionar CD o MD.
2 Presione (MODE) hasta que aparezca la
unidad que desee.
Se inicia la reproducción de CD/MD.
Si una unidad de CD/MD se encuentra
conectada, todos los temas se reproducen
desde el principio.
Cambio de los elementos del
visualizador
Cada vez que presione (DSPL) durante la
reproducción de CD, CD TEXT o MD, el
elemento cambiará de la siguiente forma:
Número de disco/Número de tema/
Tiempo de reproducción transcurrido
Título del disco*
*1Si no ha asignado título al disco o si no hay
ningún título de disco registrado en el MD, el
visualizador mostrará “NO D.Name”
momentáneamente.
2
Si reproduce un disco CD TEXT, el nombre del
*
cantante aparecerá en el visualizador después
del título del disco. (Sólo para discos CD TEXT
con nombre del cantante.)
*3Si el título del tema de un disco CD TEXT o MD
no está previamente registrado, el visualizador
mostrará “NO T.Name” momentáneamente.
V
V
1
/Nombre del cantante*
V
Título del tema*
2
3
Después de seleccionar el elemento deseado, el
visualizador cambiará automáticamente al
modo de desplazamiento de indicaciones
después de unos segundos.
En dicho modo, todos los elementos se
desplazan por el visualizador uno por uno en
orden.
Consejo
Es posible desactivar el modo de desplazamiento
de indicaciones por el visuzlizador (consulte
“Cambio de los ajustes de sonido y visualización”
en la página 18).
Desplazamiento automático del
título de un disco
— Desplazamiento automático
Si el título del disco, el nombre del artista o el
título del tema de un disco CD TEXT o MD es
superior a 10 caracteres y la función de
desplazamiento automático está activada, la
información se desplaza por el visualizador
automáticamente como se indica a
continuación:
• El título del disco aparece al cambiar éste (si se
ha seleccionado el título de disco).
• El título del tema aparece al cambiar éste (si se
ha seleccionado el título de tema).
Si presiona (DSPL) para cambiar el elemento
mostrado, el título del disco o del tema del MD
o del disco CD TEXT se desplaza
automáticamente tanto si activa como si
desactiva la función.
1 Durante la reproducción, presione
(MENU).
2 Presione M o m varias veces hasta que
aparezca “A.Scrl”.
3 Presione , para seleccionar “A.Scrl on”.
4 Presione (ENTER).
Para cancelar la función de desplazamiento
automático, seleccione “A.Scrl off” en el paso
3.
Nota
Para algunos discos con un gran número de
caracteres, pueden ocurrir los siguientes casos:
—Algunos de los caracteres no se muestran.
—La función de desplazamiento automático no
funciona.
20
Page 85

Localización de un tema específico
— Sensor de música automático (AMS)
Durante la reproducción, presione
< o , momentáneamente por cada
tema que desee omitir.
< (.) : Para localizar temas anteriores
, (>) : Para localizar temas posteriores
Localización de un punto específico
de un tema — Búsqueda manual
Durante la reproducción, mantenga
presionado < o ,. Deje de presionarlo
cuando encuentre el punto que desee.
< (m) : Para buscar hacia atrás
, (M) : Para buscar hacia delante
Conmutación a otros discos
Durante la reproducción, presione M o m.
M (DISC +) : Para discos posteriores
m (DISC –) : Para discos anteriores
Reproducción repetida de
temas — Reproducción repetida
Es posible seleccionar:
•Repeat 1 – para repetir un tema.
•Repeat 2 – para repetir un disco.
1 Durante la reproducción, presione
(MENU).
2 Presione M o m varias veces hasta que
aparezca “Repeat”.
3 Presione , varias veces hasta que el
visualizador muestre el ajuste deseado.
B Repeat 1 B Repeat 2
Repeat off b
Se inicia la reproducción del disco que se
encuentra en la unidad actual.
Número del tema
Número del disco
Tiempo de reproducción
transcurrido
Se inicia la reproducción repetida.
Para recuperar el modo de reproducción
normal, seleccione “Repeat off” en el paso 3.
Consejo
Si selecciona el modo con los botones de la unidad,
presione (1) (REP) varias veces hasta que aparezca
el modo deseado.
21
Page 86

Reproducción de temas en
orden aleatorio
— Reproducción aleatoria
Es posible seleccionar:
•Shuf 1 – para reproducir los temas del disco
actual en orden aleatorio.
•Shuf 2 – para reproducir los temas de la
unidad actual en orden aleatorio.
•Shuf All* – para reproducir todos los temas
de todas las unidades en orden aleatorio.
1 Durante la reproducción, presione
(MENU).
2 Presione M o m varias veces hasta que
aparezca “Shuf”.
3 Presione , varias veces hasta que el
visualizador muestre el ajuste deseado.
B Shuf 1 B Shuf 2 B Shuf All*
Shuf off b
Se inicia la reproducción en orden aleatorio.
* “Shuf All” sólo se encuentra disponible si
conecta dos o más unidades de CD/MD
opcionales.
Para recuperar el modo de reproducción
normal, seleccione “Shuf off” en el paso 3.
Asignación de títulos a los
discos compactos
— Memorando de discos
(unidad de CD con función de archivo
personalizado)
Es posible asignar un título personalizado a
cada disco, utilizando un máximo de ocho
caracteres para cada uno de éstos. La
asignación de títulos permitirá localizar discos
mediante el título (página 24) y seleccionar
temas específicos para su reproducción
(página 24).
1 Inicie la reproducción del disco que desee
etiquetar.
2 Presione (MENU) y, a continuación, M o
m varias veces hasta que aparezca
“Name Edit”.
3 Presione (ENTER).
Modo de edición de títulos
4 Introduzca los caracteres.
1 Presione M varias veces para
seleccionar los caracteres deseados.
(A t B t C t ··· Z t 0 t 1 t 2 t
··· 9 t + t – t * t / t \ t > t <
t . t )
Consejo
Si selecciona el modo con los botones de la unidad,
presione (2) (SHUF) varias veces hasta que
aparezca el modo deseado.
22
Si presiona m varias veces, los caracteres
aparecerán en orden inverso.
Si desea introducir un espacio en blanco
entre caracteres, seleccione “ ”.
2 Presione , una vez localizado el
carácter deseado.
El siguiente carácter parpadeará.
Si presiona <, parpadeará el carácter
anterior.
Page 87

3 Repita los pasos 1 y 2 para
introducir el título completo.
5 Para volver al modo normal de
reproducción de CD, presione (ENTER)
durante dos segundos.
Consejo
Existe otro método para comenzar a asignar título
al CD. Mantenga presionado (LIST) durante dos
segundos en lugar de realizar los pasos 2 y 3.
También puede completar la operación
manteniendo presionado (LIST) durante dos
segundos en lugar de realizar el paso 5.
Visualización del memorando de
discos
Presione (DSPL) durante la reproducción
de un CD o de un disco CD TEXT.
Cada vez que presione (DSPL) durante la
reproducción de un CD o de un disco CD
TEXT, los elementos cambiarán de la
siguiente forma:
Número de disco/Número de tema/
Tiempo de reproducción transcurrido
Nombre del memorando de discos
V
V
V
Título del tema*
Borrado del memorando de discos
1 Presione (SOURCE) varias veces para
seleccionar “CD”.
2 Presione (MODE) varias veces para
seleccionar la unidad de CD con función
de archivo personalizado.
3 Presione (MENU) y, a continuación, M o
m varias veces hasta que aparezca
“Name Del”.
4 Presione (ENTER).
5 Presione M o m varias veces para
seleccionar el título del disco que desee
borrar.
6 Presione (ENTER) durante dos segundos.
El nombre se borrará.
Repita los pasos 5 y 6 para borrar otros
nombres.
7 Presione (MENU) dos veces.
La unidad vuelve al modo normal de
reproducción de CD.
Notas
• Si se borra el nombre personalizado, el
visualizador mostrará la información CD TEXT
original.
• Si borra todos los nombres de los discos, “NO
Data” aparecerá en el paso 6.
* Si conecta una unidad opcional de CD con la
función CD TEXT, el visualizador mostrará la
información CD TEXT al reproducir discos CD
TEXT.
Nota
No utilice la función de archivo personalizado
mientras conduce. Tampoco realice ninguna
función que pueda distraer su atención de la
conducción.
23
Page 88

Localización de discos
mediante el título
— Función de listado (unidad de CD con
función de archivo personalizado o unidad
de MD)
Esta función puede utilizarse con discos a los
que se ha asignado un título personalizado.
Para obtener más información sobre los títulos
de disco, consulte “Asignación de títulos a los
discos compactos” (página 22).
1 Presione (LIST).
El título asignado al disco actual aparece en
el visualizador.
Si asigna una etiqueta de memorando de
discos a un disco CD TEXT, tendrá
prioridad sobre la información CD TEXT
original.
Selección de temas
específicos para su
reproducción
— Función de banco (unidad de CD con
función de archivo personalizado)
Si asigna una etiqueta al disco, puede
programar la unidad para omitir o reproducir
los temas que desee.
1 Comience a reproducir el disco al que
desee asignar título.
2 Presione (MENU) y, a continuación, M o
m varias veces hasta que aparezca “Bank
Sel”.
3 Presione (ENTER).
Modo de edición de banco
2 Presione M (DISC+) o m (DISC–) varias
veces hasta que encuentre el disco
deseado.
3 Presione (ENTER) para reproducir el
disco.
Notas
• Los títulos de los temas no aparecen durante la
reproducción de discos CD TEXT o MD.
• Si no hay discos en el cargador, el visualizador
mostrará “NO Disc”.
• Si no se ha asignado un archivo personalizado a
un disco, aparecerá “********” en el visualizador.
• Si la unidad no ha leído la información de discos,
el visor mostrará “?”. Para introducir el disco,
presione en primer lugar el botón numérico y, a
continuación, seleccione el disco que no se ha
introducido.
• No es posible mostrar ciertas letras durante la
reproducción de discos CD TEXT o MD.
• Si conecta un sistema opcional de TV, el nombre
del memorando de discos aparecerá en la
pantalla del sistema de TV y no en el visualizador
de la unidad.
4 Asigne título a los temas.
1 Presione < o , varias veces para
seleccionar el tema al que desee asignar
título.
2 Presione (ENTER) varias veces para
seleccionar “Play” o “Skip”.
5 Repita el paso 4 para definir “Play”
(reproducción) o “Skip” (omisión) para
todos los temas.
6 Presione (MENU) dos veces.
La unidad vuelve al modo normal de
reproducción de CD.
Notas
• Es posible definir el modo “Play” y “Skip” para
un máximo de 24 temas.
• No es posible definir el modo “Skip” para todos
los temas de un CD.
24
Page 89

Reproducción sólo de temas
específicos
Es posible seleccionar:
•“Bank on” — para reproducir los temas con
el ajuste “Play”.
•“Bank inv” (Inverso) — para reproducir los
temas con el ajuste “Skip”.
1 Durante la reproducción, presione
(MENU) y, a continuación, M o m varias
veces hasta que aparezca “Bank”.
2 Presione , varias veces hasta que
aparezca el ajuste deseado.
B Bank on B Bank inv
Bank off b
TV/Video
Es posible conectar un sintonizador y monitor
de TV opcionales con esta unidad.
Visualización de la TV
1 Presione (SOURCE) varias veces hasta
que aparezca “TV”.
2 Presione (MODE) varias veces para
seleccionar la banda de TV deseada.
Visualización de un video
3 Presione (ENTER).
La reproducción se inicia a partir del tema
siguiente.
Para recuperar el modo de reproducción
normal, seleccione “Bank off” en el anterior
paso 2.
1 Presione (SOURCE) varias veces hasta
que aparezca “TV”.
2 Presione (MODE) varias veces para
seleccionar “AUX”.
Reproduzca el video.
25
Page 90

Memorización automática
de canales de TV
La unidad selecciona los canales de TV de
señal más intensa y los memoriza según el
orden de frecuencia.
Precaución
Para sintonizar emisoras mientras maneja,
emplee la función de memorización de la
mejor sintonía con el fin de evitar accidentes.
Memorización únicamente
de determinados canales
de TV
Es posible almacenar un máximo de 12 canales
(seis de TV1 y 6 de TV2) en los botones
numéricos en el orden que desee.
1 Presione (SOURCE) varias veces hasta
que aparezca “TV”.
1 Presione (SOURCE) varias veces hasta
que aparezca “TV”.
2 Presione (MENU)y, a continuación,
presione M o m hasta que aparezca la
indicación “Auto Mem”.
3 Presione (ENTER).
La unidad almacena los canales de TV
según el orden de frecuencia en los botones
numéricos.
La unidad emite un pitido al almacenar el
ajuste.
Notas
• La unidad no almacena canales de TV de señal
débil. Si sólo pueden recibirse unos pocos canales
de TV, algunos botones numéricos permanecerán
vacíos.
• Si el visualizador muestra un número de
memorización, la unidad comenzará a almacenar
canales de TV a partir del mostrado actualmente.
2 Presione < o , para sintonizar el canal
de TV que desee almacenar en cada
botón numérico.
3 Mantenga presionado el botón numérico
que desee ((1) a (6)) hasta que oiga un
pitido.
La indicación de botón numérico y “Mem”
aparece en el visualizador.
Nota
Si intenta almacenar otro canal en el mismo botón
numérico, se borrará el canal anterior.
26
Page 91

Almacenamiento de los
nombres de los canales de
TV
Realice los pasos de la sección
“Almacenamiento de los nombres de las
emisoras” (página 14).
Visualización de los nombres de las
emisoras de TV o de radio
Presione (LIST) durante la recepción de
TV o radio.
Ejemplo: Al recibir la banda de FM 1
FM
1
1
W
C
B
W
B
L
W
K
T
WR K I
1
0
1
0
S
S
U
S
S
.9
1
.7
2
2
3
4
5
6
1 Número de memorización
2 Nombres de emisoras almacenados
3 Frecuencias*
*Si el nombre de una emisora no está
almacenado, aparecerá la frecuencia de esa
emisora en su lugar.
Notas
• Pueden transcurrir unos instantes hasta que
todas las indicaciones aparezcan en el
visualizador.
• El canal de TV no aparece durante la
visualización de lista.
• El contenido de la memoria programada no
puede enumerarse cuando la unidad se
encuentra en el modo de reproducción
simultánea (página 28).
Desactivación de la indicación
Durante la recepción de la radio, vuelva
a presionar (LIST).
Durante la recepción de TV, la indicación
de listado del monitor de TV se desactivará
automáticamente transcurridos unos
segundos.
Visualización de la
información almacenada
en discos
Presione (LIST) durante la reproducción
de CD/MD.
Ejemplo: Si está seleccionada la unidad 1 de
1 Números de disco
2 Títulos almacenados como archivos
3 No hay ningún disco cargado*
4 No hay títulos almacenados*
5 La información de índice (TOC) no se ha
*1Aparece un espacio en blanco junto a números
2
*
*3Si la unidad aún no ha leído la información del
Notas
• Pueden transcurrir unos instantes hasta que
• El programa de TV no aparece durante la
• El contenido de la memoria programada no
Desactivación de la indicación
CD.
CD 1
1
S
C
H
U
B
E
Z
A
C
H
I
S
Z
O
P
*****
?
?
RT
R
T
T
I
N
1
2
2
M
O
3
B
A
4
L
5
C
H
6
7
*
8
******
9
1 0
personalizados
identificado aún*
de disco que representa ranuras vacías en el
cargador de discos.
Si un título no está registrado en el archivo
personalizado, aparecerá “******”.
disco, aparece “?”.
todas las indicaciones aparezcan en el
visualizador.
visualización del listado.
puede enumerarse cuando la unidad se
encuentra en el modo de reproducción
simultánea.
3
Vuelva a presionar (LIST).
27
Page 92

Visualización de la TV o de
video mientras se escucha
un CD o un MD
— Reproducción simultánea
La función de reproducción simultánea no se
activa mientras se escucha la radio.
1 Presione (MENU)y, a continuación,
presione M o m varias veces hasta que
aparezca la indicación “Simul Sel”.
2 Presione (ENTER).
3 Presione <.
4 Presione (SOURCE) varias veces para
seleccionar un CD o MD.
Regreso al modo normal
Para cancelar el CD o MD, siga los pasos
anteriores y seleccione “– – –” en el paso
4.
Para cancelar el TV o video, siga los
pasos anteriores y seleccione “– – –” en el
paso 6.
Nota
Si presiona Z (EJECT) en una unidad de CD/MD
mientras la unidad se encuentra en el modo de
reproducción simultánea, se cancela la
reproducción simultánea.
5 Presione ,.
6 Presione (SOURCE) varias veces hasta
que aparezca “TV”, y después presione
(MODE) varias veces para seleccionar un
TV o video.
Cada vez que presione (MODE), el
elemento cambiará de la siguiente forma:
TV1 t TV2 t V1 (VIDEO1)
7 Presione (ENTER).
Se inicia la reproducción simultánea.
Si ya está viendo el televisor o un video y
desea escuchar también un CD o MD, siga los
pasos anteriores.
28
Page 93

Información
complementaria
Mantenimiento
Sustitución del fusible
Al sustiuir el fusible, asegúrese de utilizar uno
que coincida con el amperaje indicado en el
fusible original. Si el fusible salta, compruebe
la conexión de alimentación y sustitúyalo. Si
después de sustituirlo vuelve a saltar, es
posible que exista un funcionamiento interno
defectuoso. En tal caso, póngase en contacto
con el proveedor Sony más próximo.
Fusible (10 A)
Advertencia
No utilice nunca un fusible con un amperaje
superior al del suministrado con la unidad, ya
que ésta podría dañarse.
Sustitución de la pila de litio
Cuando la pila dispone de poca energía, el
margen de control del control remoto de tarjeta
será menor. Sustituya dicha pila por otra de
litio CR2025 nueva.
x
Cara + hacia arriba
Notas sobre la pila de litio
•Mantenga la pila fuera del alcance de los
niños. En caso de ingestión, póngase
inmediatamente en contacto con un médico.
•Limpie la pila con un paño seco para
garantizar un contacto óptimo.
•Cuando instale la pila, insértela con la
polaridad correcta.
•No maneje la pila con pinzas metálicas, ya
que puede producirse un cortocircuito.
PRECAUCIÓN
La pila puede explotar si la trata mal.
No la recargue, desarme, ni la tire al fuego.
29
Page 94

Desmontaje de la unidad
Con el panel frontal abierto
1 Presione (OPEN) en la unidad y, a
continuación, presione el clip del interior
de la cubierta frontal con un
destornillador fino, y haga palanca
cuidadosamente para liberar dicha
cubierta.
Si el panel frontal no se abre
debido a que el fusible se ha
fundido
1 Presione el clip del interior de la cubierta
frontal con la llave de liberación
(suministrada), y libere la cubierta
frontal.
Llave de liberación
(suministrada)
2 Repita el paso 1 en el lado izquierdo.
La cubierta frontal podrá extraerse.
3 Emplee un destornillador fino para
ejercer presión sobre el clip de la parte
izquierda de la unidad; a continuación,
tire del lado izquierdo de la unidad hasta
que el enganche salga del marco.
4 Repita el paso 3 en el lado derecho.
2 Repita el paso 1 en el lado izquierdo.
La cubierta frontal podrá extraerse.
3 Utilice la llave de liberación para ejercer
presión sobre el clip del lado izquierdo
de la unidad, y después tire de dicho
lado de la unidad hasta que el retén
libere la fijación.
4 Repita el paso 3 en el lado derecho.
5 Saque la unidad del marco.
30
5 Saque la unidad del marco.
Page 95

Especificaciones
Sección del reproductor de cassettes
Pista de cinta 4 pistas, 2 canales, estéreo
Fluctuación y trémolo 0,08 % (WRMS)
Respuesta de frecuencia 30 – 20.000 Hz
Relación señal-ruido
Tipo de
cassette
TYPE II, IV
TYPE I
Dolby B NR
67 dB
64 dB
Dolby NR
desactivado
61 dB
58 dB
Sección del sintonizador
FM
Gama de sintonía 87,5 – 107,9 MHz
Terminal de antena Conector para antena
Frecuencia intermedia 10,7 MHz/450kHz
Sensibilidad útil 8 dBf
Selectividad 75 dB a 400 kHz
Relación señal-ruido 66 dB (estéreo),
Distorsión armónica a 1 kHz
Separación 35 dB a 1 kHz
Respuesta de frecuencia 30 – 15.000 Hz
exterior
72 dB (monoaural)
0,6 % (estéreo),
0,3 % (monoaural)
AM
Gama de sintonía 530 – 1.710 kHz
Terminal de antena Conector para antena
Frecuencia intermedia 10.7 MHz/450 kHz
Sensibilidad 30 µV
exterior
Sección del amplificador de potencia
Salidas Salidas de altavoz
Impedancia de altavoz 4 – 8 ohmios
Salida máxima de potencia
50 W × 4 (a 4 ohmios)
Generales
Salidas Salida de audio (3)
Entradas Cable de control de
Controles de tono Graves ±9 dB a 100 Hz
Requisitos de alimentación
Dimensiones Aprox. 178 × 50 × 182 mm
Dimensiones de montaje Aprox. 182 × 53 × 163 mm
Masa Aprox. 1,3 kg (2 lbs. 14 oz.)
Accesorios suministrados
Accesorios opcionales Mando rotativo RM-X4S
Equipo opcional Cambiador de CD
Cable de control de relé de
antena motorizada
Cable de control de
amplificador de potencia
atenuación ATT para
teléfono
Cable de control de
iluminación
Agudos ±9 dB a 10 kHz
Batería de automóvil de
12 V CC (toma a tierra
negativa)
1
/8 × 2 × 7 1/4 pulgadas)
(7
(an/al/prf)
1
/4 × 2 1/8 × 6 1/2
(7
pulgadas) (an/al/prf)
Control remoto de tarjeta
RM-X94
Componentes para
instalación y conexiones
(1 juego)
Cable BUS (suministrado
con un cable de pines
RCA)
RC-61 (1 m), RC-62 (2 m)
(10 discos)
CDX-838, CDX-737,
CDX-636
Cambiador de MD
(6 discos)
MDX-65
Otros cambiadores de
CD/MD con el sistema
BUS de Sony
Selector de fuente
XA-C30
Sintonizador de TV
XT-40V
Preamplificador
ecualizador digital
XDP-210EQ, XDP-4000X
Diseño y especificaciones sujetos a cambios sin
previo aviso.
31
Page 96

Guía de solución de problemas
La siguiente lista de comprobaciones resulta útil para solucionar los problemas que puedan
producirse al utilizar la unidad.
Antes de consultar la lista que aparece a continuación, compruebe los procedimientos de conexión
y funcionamiento.
Generales
Problema
Ausencia de sonido.
Se ha borrado el contenido de
la memoria.
El sonido se oye con ruido.
Reproducción de cintas
Problema
El sonido se distorsiona.
AMS no funciona
correctamente.
Causa/Solución
•Cancele la función ATT.
•Ajuste el control de equilibrio entre los altavoces en la
posición central para sistemas de 2 altavoces.
•Presione (+) del botón VOL para ajustar el volumen.
•Ha desconectado el cable de alimentación o la batería.
•Ha presionado el botón de restauración.
t Vuelva a realizar el almacenamiento en la memoria.
Está utilizando un teléfono móvil.
Causa/Solución
Contaminación del cabezal de cinta.
t Limpie el cabezal con un cassette de limpieza de tipo seco
disponible en el mercado.
• Se produce ruido en el espacio entre temas.
• Un espacio en blanco es demasiado corto (inferior a cuatro
segundos).
• Una pausa larga o una parte de bajas frecuencias, o un nivel
de sonido muy bajo se interpreta como un espacio en blanco.
Recepción de radio
Problema
No es posible realizar la
sintonización programada.
No es posible realizar la
sintonización automática.
No es posible recibir las
emisoras.
Los ruidos obstaculizan el
sonido.
La indicación “ST” parpadea.
Se producen interferencias
durante la recepción en FM.
32
Causa/Solución
• Memorice la frecuencia correcta.
• La emisión es demasiado débil.
• La emisión es demasiado débil.
t Utilice la sintonización manual.
•El modo de búsqueda local está ajustado en “on”.
t Ajústelo en “off” (página 13).
Conecte un cable de control de la antena motorizada (azul) o un
cable de fuente de alimentación auxiliar (rojo) al cable de fuente
de alimentación del amplificador de antena del automóvil.
(Sólo si el automóvil incorpora una antena de recepción de
FM/AM en el cristal posterior/lateral.)
•Sintonice la frecuencia con precisión.
•La emisión es demasiado débil.
t Realice el ajuste en el modo monofónico Mono (página 13).
Ha seleccionado el modo Wide.
t Ajuste el modo IF en IF Auto (página 13).
Page 97

Reproducción de CD/MD
Problema
El sonido se recibe entrecortado.
Causa/Solución
Disco sucio o defectuoso.
Indicaciones de error (cuando se ha conectado una unidad de CD/MD opcional)
Las siguientes indicaciones parpadearán durante cinco segundos aproximadamente y se oirá una
alarma.
Indicación
NO Mag
NO Disc
NG Discs
1
Error
Blank
*
1
*
Push Reset
Not Ready
High Temp
Causa
No ha insertado el cargador de discos
en la unidad de CD/MD.
No ha insertado ningún disco en la
unidad de CD/MD.
No es posible reproducir un CD/MD
debido a algún problema (CD sucio,
MD defectuoso, etc.).
Un CD está sucio o insertado al
2
revés.*
No es posible reproducir un MD
debido a algún problema.*
No ha grabado ningún tema en el
2
MD.*
No es posible emplear la unidad de
CD/MD debido a algún problema.
La tapa de la unidad de MD está
abierta o los minidiscos no se han
insertado correctamente.
La temperatura ambiente es superior a
50°C (122°F).
2
Solución
Inserte el cargador de discos en la
unidad de CD/MD.
Inserte los discos en la unidad de
CD/MD.
Inserte otro CD/MD.
Limpie el CD o insértelo
correctamente.
Inserte otro MD.
Reproduzca un MD con temas
grabados.
Presione el botón de restauración de
la unidad.
Cierre la tapa o inserte los
minidiscos correctamente.
Espere hasta que la temperatura
descienda por debajo de 50°C (122°F).
*1Cuando se produce algún error durante la reproducción de un CD o MD, el número del CD o del MD no
aparece en el visualizador.
2
El visualizador mostrará el número del disco que causa el error.
*
Si el problema no se soluciona con las sugerencias anteriormente enumeradas, póngase en contacto
con el proveedor Sony más próximo.
33
Page 98

343532Sony Corporation Printed in Korea
Page 99

Page 100

 Loading...