

Page 1
FM/MW/LW
3-047-783-11 (1)
FM/MW/LW Cassette Car Stereo
XR-M500R
Cassette
Car Stereo
Operating Instructions
Manual de instrucciones
Bruksanvisning
Manual de instruções
For installation and connections, see the supplied installation/connections
manual.
Para obtener información sobre la instalación y las conexiones, consulte el manual
de instalación/conexiones suministrado.
Vi hänvisar till det medföljande häftet angående montering/anslutningar.
Para a instalação e as ligações, consulte o manual de instalação/ligações
fornecido.
GB
ES
SE
PT
XR-M500R
2000 Sony Corporation
Page 2
Welcome !
Precautions
Thank you for purchasing this Sony Cassette
Player. This unit lets you enjoy a variety of
features using the following controller
accessory:
Supplied accessory
Card remote commander RM-X96
Optional accessory
Rotary commander RM-X4S
In addition to the cassette playback and radio
operations, you can expand your system by
connecting an optional CD/MD unit*1.
When you operate this unit or a connected
optional CD unit with the CD TEXT function,
the CD TEXT information will appear in the
display when you play a CD TEXT disc*2.
*1You can connect a CD changer, an MD changer,
a CD player, or an MD player.
2
A CD TEXT disc is an audio CD that includes
*
information such as the disc name, artist name,
and track names.
This information is recorded on the disc.
• If your car was parked in direct sunlight
resulting in a considerable rise in
temperature inside the car, allow the unit to
cool off before operating it.
• If no power is being supplied to the unit,
check the connections first. If everything is
in order, check the fuse.
• If no sound comes from the speakers of a
two-speaker system, set the fader control to
the centre position.
• When a tape is played back for a long
period, the cassette may become warm
because of the built-in power amplifier.
However, this is not a sign of malfunction.
If you have any questions or problems
concerning your unit that are not covered in
this manual, please consult your nearest Sony
dealer.
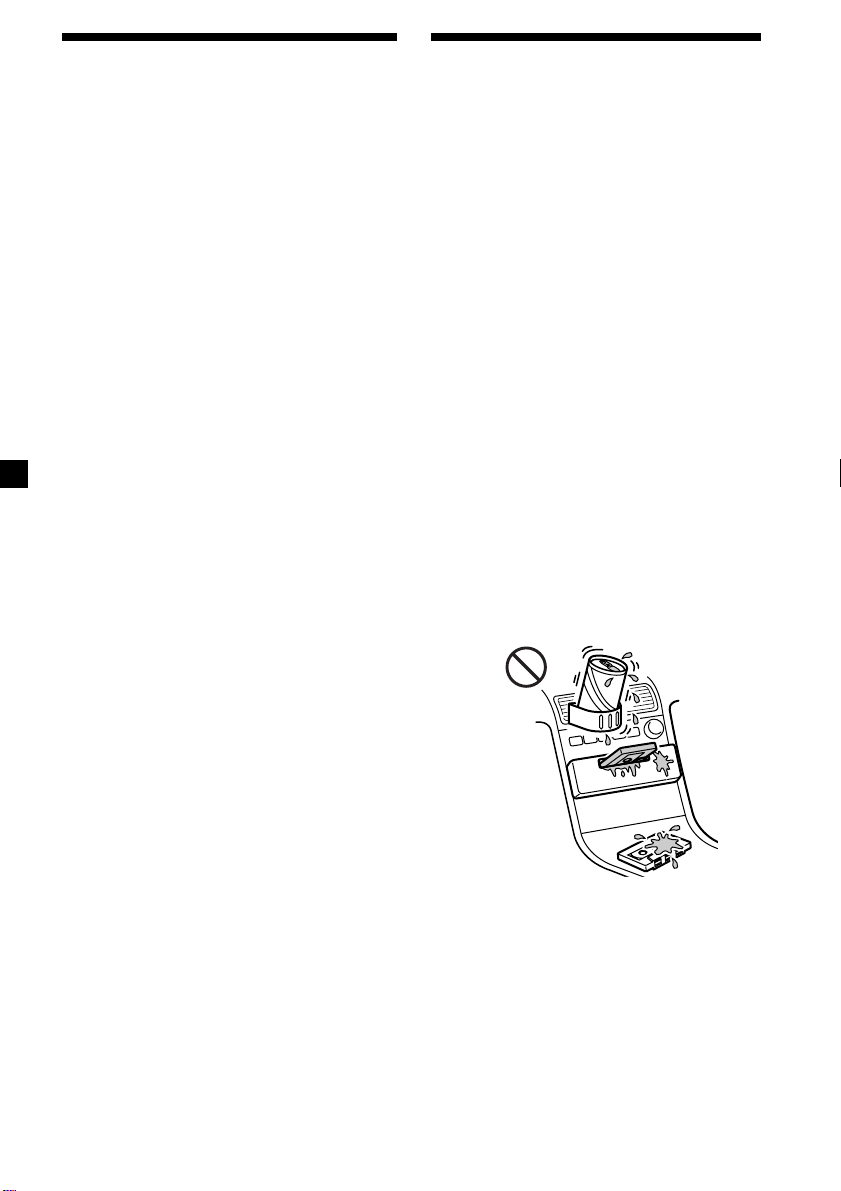
To maintain high quality sound
If you have drink holders near your audio
equipment, be careful not to splash juice or
other soft drinks onto the car audio. Sugary
residues on this unit or cassette tapes may
contaminate the playback heads, reduce the
sound quality, or prevent sound reproduction
altogether.
Cassette cleaning kits cannot remove sugar
from the tape heads.
2
Page 3
Notes on Cassettes
Cassette care
• Do not touch the tape surface of a cassette, as
any dirt or dust will contaminate the heads.
• Keep cassettes away from equipment with
built-in magnets such as speakers and
amplifiers, as erasure or distortion on the
recorded tape could occur.
• Do not expose cassettes to direct sunlight,
extremely cold temperatures, or moisture.
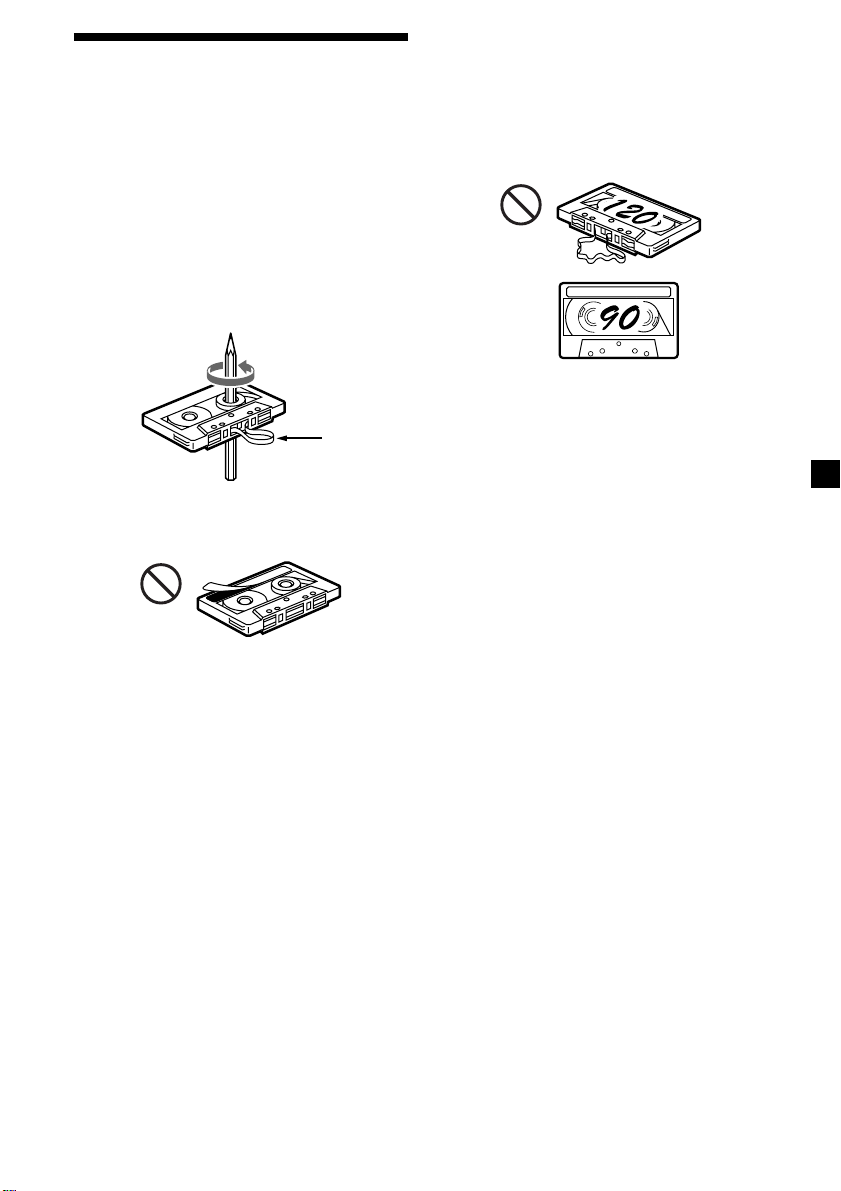
• Slack in the tape may cause the tape to be
caught in the machine. Before you insert the
tape, use a pencil or similar object to turn the
reel and take up any slack.
Slack
• Distorted cassettes and loose labels can cause
problems when inserting or ejecting tapes.
Remove or replace loose labels.
Cassettes longer than 90 minutes
The use of cassettes longer than 90 minutes is
not recommended except for long continuous
play. The tape used for these cassettes is very
thin and tends to stretch easily. Frequent
playing and stopping of these tapes may cause
them to become entangled in the cassette deck
mechanism.
• The sound may become distorted while
playing the cassette. The cassette player head
should be cleaned after each 50 hours of use.
3
Page 4

Table of Contents
This Unit Only
Location of controls ................................................. 5
Getting Started
Resetting the unit ................................................ 8
Security release settings ..................................... 8
Turning the unit on/off ..................................... 9
How to use the menu ......................................... 9
Setting the clock ................................................ 10
Cassette Player
Listening to a tape ............................................. 11
Playing a tape in various modes ..................... 12
Radio
Memorising stations automatically
— Best Tuning Memory (BTM) ................. 13
Memorising only the desired stations............ 13
Receiving the memorised stations .................. 14
RDS
Overview of the RDS function ........................ 15
Displaying the station name............................ 15
Retuning the same programme automatically
— Alternative Frequencies (AF) ................ 16
Listening to traffic announcements ................ 17
Presetting the RDS stations with the AF
and TA data .................................................. 18
Locating a station by programme type .......... 19
Setting the clock automatically ....................... 20
With Optional Equipment
CD/MD Unit
Playing a CD or MD ......................................... 26
Playing tracks repeatedly
— Repeat Play .............................................. 28
Playing tracks in random order
— Shuffle Play .............................................. 28
Labelling a CD
— Disc Memo ............................................... 29
Locating a disc by name
— List-up ...................................................... 30
Selecting specific tracks for playback
— Bank .......................................................... 31
DAB
Overview of DAB .............................................. 32
Basic operations of DAB .................................. 32
Presetting DAB services automatically
— BTM .......................................................... 33
Presetting DAB services manually
— Manual Preset Memory ......................... 34
Listening to a DAB programme ...................... 35
Settings on the audio reception....................... 36
Locating a DAB service by programme type
(PTY) .............................................................. 36
Other Functions
Labelling the rotary commander .................... 20
Using the rotary commander .......................... 21
Adjusting the sound characteristics ............... 23
Attenuating the sound ..................................... 23
Changing the sound and display settings ..... 23
Boosting the bass sound
— D-bass ....................................................... 24
Selecting the spectrum analyser ..................... 25
Adjusting the sound and frequency of the
equalizer preamplifier................................. 25
4
Additional Information
Maintenance....................................................... 37
Dismounting the unit ....................................... 38
Specifications ..................................................... 39
Troubleshooting guide ..................................... 40
Page 5
Location of controls
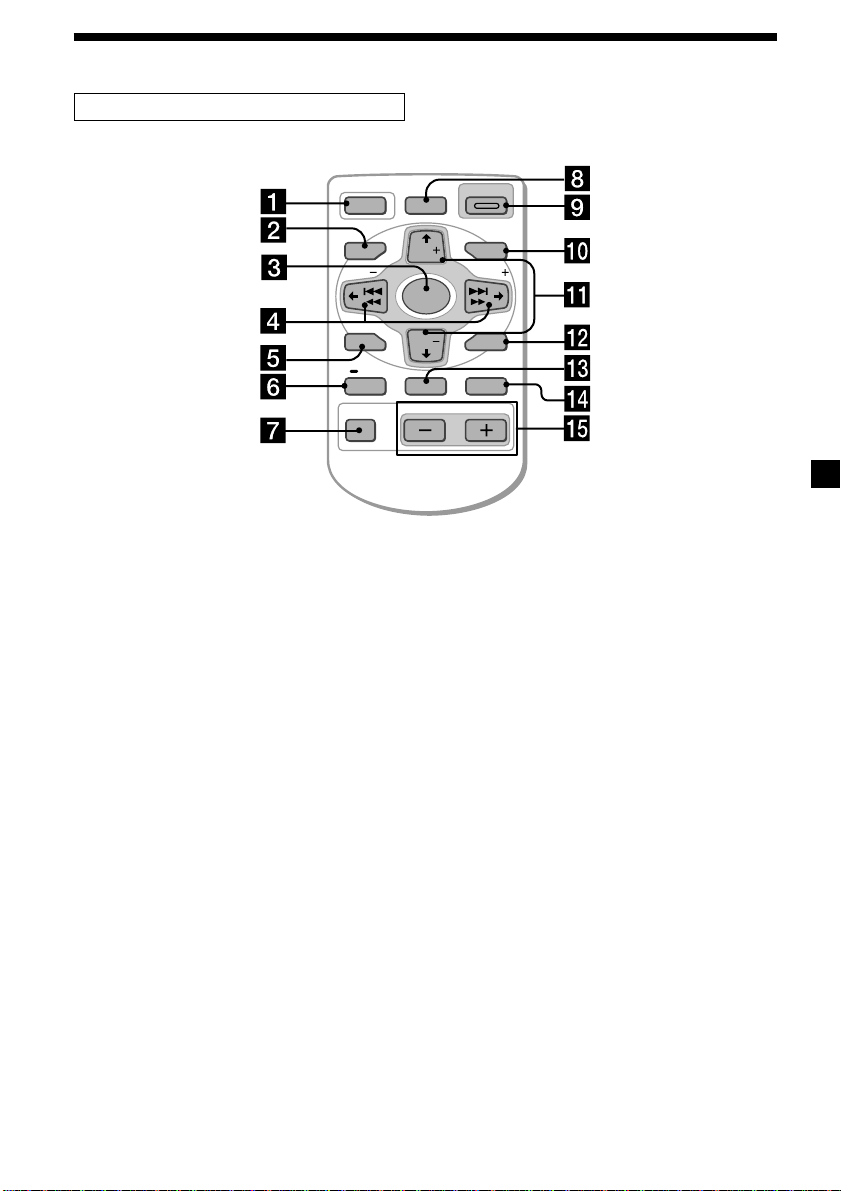
Card remote commander RM-X96
OFF
MENU LIST
SEEK
SOUND
PTY
DSPL AF/TA MODE
Refer to the pages listed for details.
1 OFF button 9, 11
2 MENU button 10, 12, 13, 14, 16, 18, 20,
24, 25, 27, 28, 29, 31, 33, 34, 36
3 SOURCE (TUNER/TAPE/CD/MD) button
9, 11, 13, 14, 25, 26, 30, 32, 33
4 </, (SEEK/AMS –/+) buttons
9, 10, 11, 12, 14, 16, 20, 23, 24, 25, 27, 28,
29, 31, 32, 34, 36
Automatic Music Sensor (./>)
11, 27
Manual search (m/M) 27
Seek 14
5 SOUND button 23
6 DSPL/PTY (display mode change/
programme type) button
19, 26, 27, 29, 36
7 ATT (attenuate) button 23
8 D-BASS button 24
9 OPEN/CLOSE button 11
0 LIST button 29, 30, 35
qa M/m (DISC/PRST +/–) buttons
9, 10, 12, 13, 14, 16, 18, 19, 20, 24, 25,
27, 28, 29, 30, 31, 32, 33, 34, 36
During radio reception:
Preset stations select 14
During CD/MD playback:
Disc change 27
OPEN/CLOSE
D-BASS
DISC
SEEK
SOURCE
DISC
ENTER
VOLATT
qs ENTER button 10, 12, 13, 14, 16, 18, 19,
20, 24, 25, 27, 29, 30, 31, 33, 34, 35, 36
qd AF/TA button 16, 17, 18
qf MODE button
11, 12, 13, 14, 26, 30, 32, 33
During tape playback:
Playback direction change 11
During radio reception:
BAND select 13, 14
During CD/MD playback:
CD/MD unit select 26
qg VOL (Volume adjust) buttons
A unit turned off by pressing (OFF) for two
seconds cannot be operated with the card
remote commander unless (SOURCE) on the
unit is pressed or a cassette is inserted to
activate the unit first.
5
Page 6
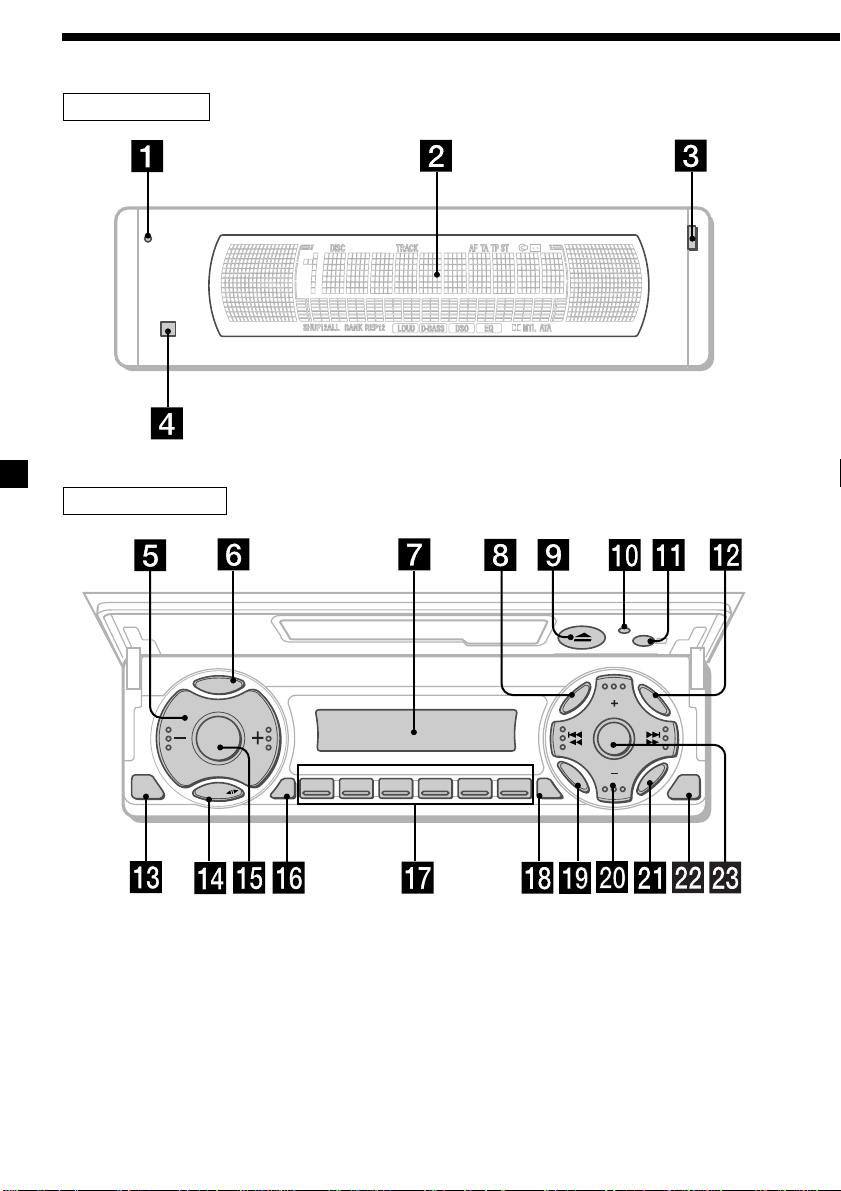
Location of controls
Security side
Operation side
T
Y
P
P
S
L
OFF
D
SOURCE
M
O
D
E
REP SHUF
123456
MENU
SOUND
TAAF
DISC
D-BASS
DISC
LIST
ENTER
CLOSE
XR-M500R
6
Page 7

The corresponding buttons of the unit
control the same functions as those on
the card remote commander.
10 Reset button 8
2 Main display window
3 OPEN button 38
4qa Receptor for the card remote
commander
5 Volume adjust buttons
6 DSPL/PTY (display mode change/
programme type) button
7 Sub display window
8 MENU button
9
Z (eject) button 11
qs LIST button
qd OFF button*
qf MODE button
qg SOURCE (TUNER/TAPE/CD/MD) button
qh AF button 16, 18
qj Number buttons
During radio reception:
Preset number select
13, 14, 17, 33, 34
During tape playback:
(1) REP 12
During CD/MD playback:
(1) REP 28
(2) SHUF 28
9
qk TA button 16, 17, 18
ql SOUND button
w; PRST/DISC +/– (cursor up/down) buttons
SEEK/AMS –/+ (cursor left/right) buttons
13
wa ENTER button
ws CLOSE button
wd D-BASS button
* Warning when installing in a car
without ACC (accessory) position on
the ignition key switch
Be sure to press (OFF) on the unit for
two seconds to turn off the clock display
after turning off the engine.
When you press (OFF) only momentarily,
the clock display does not turn off and this
causes battery wear.
7
Page 8
Getting Started
Resetting the unit
Before operating the unit for the first time or
after replacing the car battery, you must reset
the unit.
Press the reset button with a pointed object,
such as a ballpoint pen.
Reset button
Note
Pressing the reset button will erase the clock
setting and some memorised functions.
Security release settings
Do the following initial settings before you
operate the unit for the first time, after
replacing the car battery, or after resetting the
unit.
Be sure to make these settings, otherwise the
front panel remains disabled and you will be
unable to operate the unit.
1 Press the reset button.
“Code in” appears.
2 Press the buttons on the card remote
commander, and send the security code.
Please refer to the supplied insert for details
on the security code buttons.
When the code has been confirmed, the
display changes to clock, and you can
operate the unit normally.
Notes
• When you leave the car, take the card remote
control with you.
• If you forget the security code, consult your Sony
Service Centre. Be sure to bring the card remote
control with you.
8
Page 9
Turning the unit on/off
Turning on the unit
Press (SOURCE) or insert a cassette in the unit.
For details on operation, refer to page 11
(cassette player) and page 13 (radio).
Turning off the unit
Press (OFF) to stop tape playback or FM/
MW/LW reception (the key illumination and
display remains on).
Press (OFF) for two seconds to completely
turn off the unit.
Note
If your car has no ACC position on the ignition key
switch, be sure to turn the unit off by pressing
(OFF) for two seconds to avoid car battery wear.
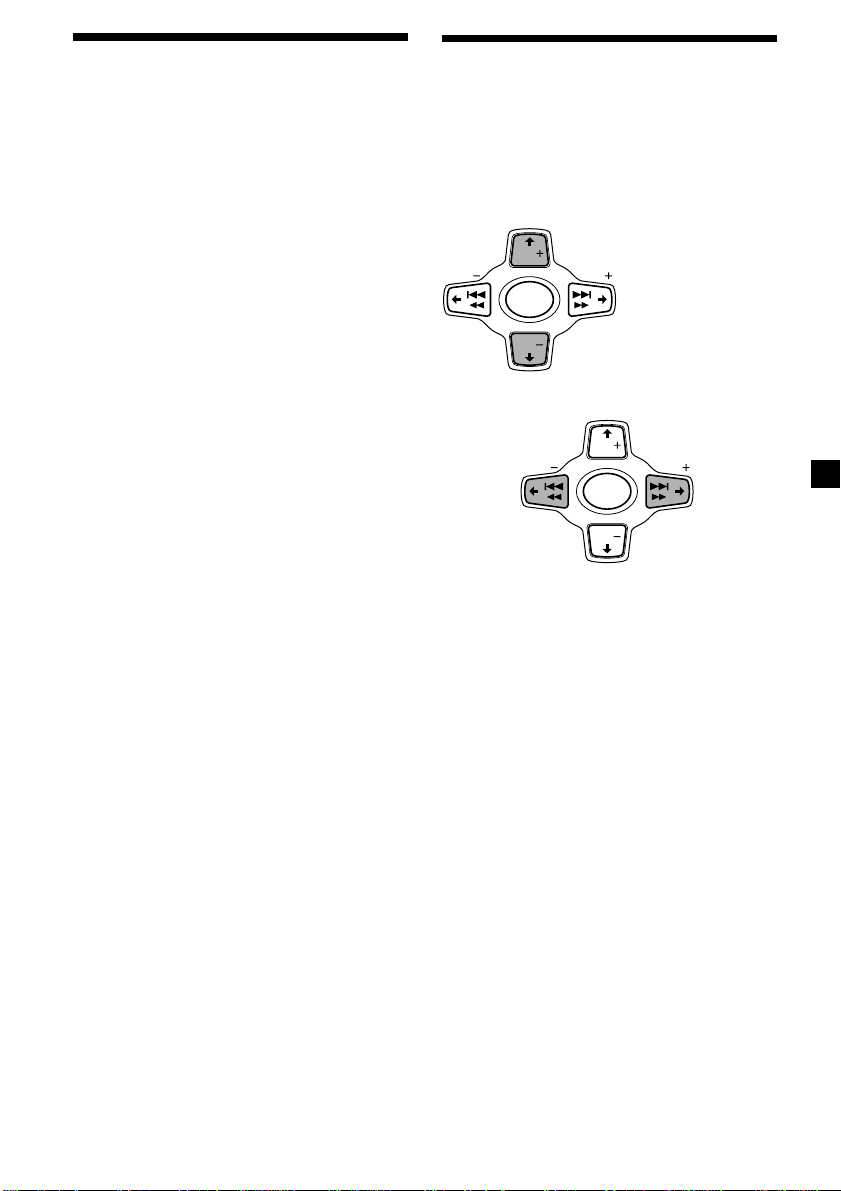
How to use the menu
This unit is operated by selecting items from a
menu.
To select, first enter the menu mode and
choose M/m (up/down), or choose </,
(left/right).
M/m
DISC
SEEK SEEK
SOURCE
DISC
</,
< :
To select
leftwards
SEEK SEEK
M : To select upwards
m : To select downwards
DISC
SOURCE
DISC
, :
To select
rightwards
9
Page 10
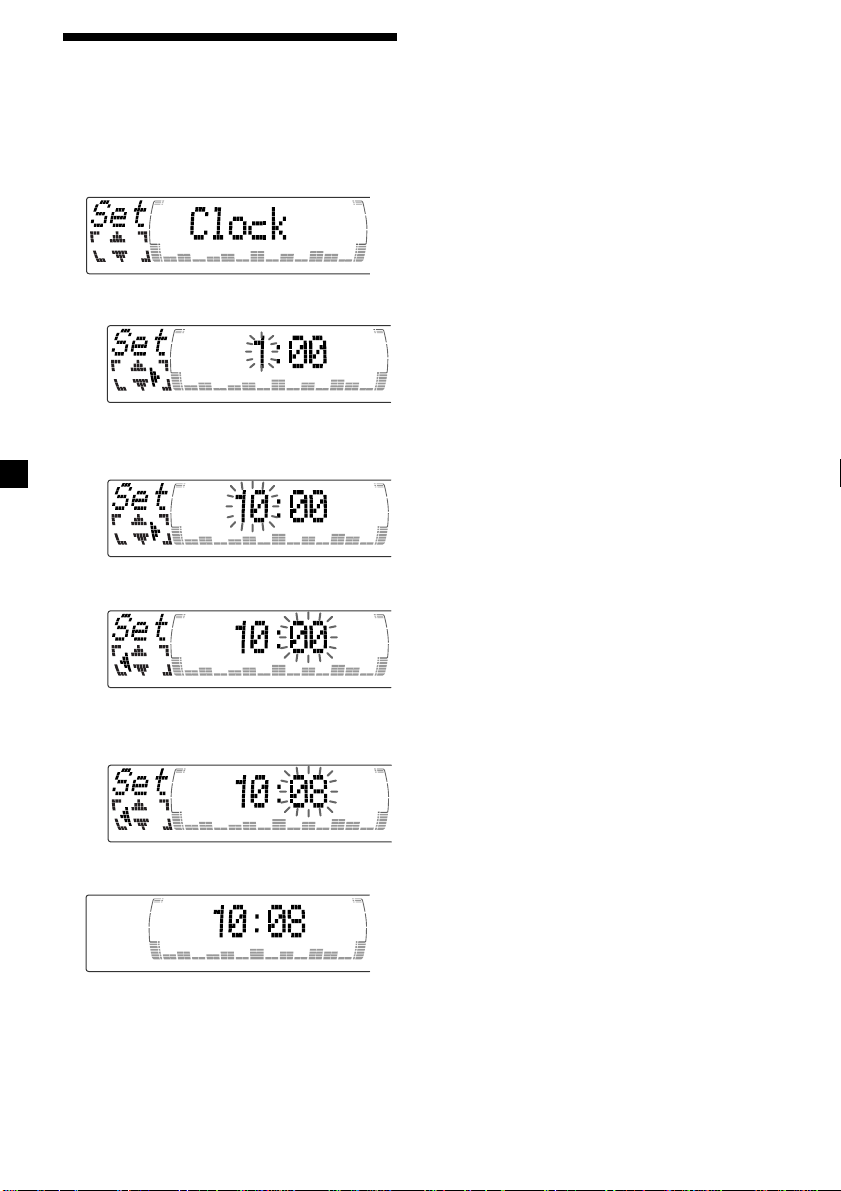
Setting the clock
The clock uses a 24-hour digital indication.
Example: To set the clock to 10:08
1 Press (MENU), then M or m repeatedly
until “Clock” appears.
1 Press (ENTER).
The hour indication flashes.
2 Press M or m to set the hour.
3 Press ,.
Tips
• You can use the convenient CT function to set
the clock automatically (page 20).
• When the D.Info mode is set to “on,” the time is
always displayed (except for some functions of
SA mode) (page 23).
The minute indication flashes.
4 Press M or m to set the minute.
2 Press (ENTER).
The clock starts.
10
Page 11
Cassette Player
Listening to a tape
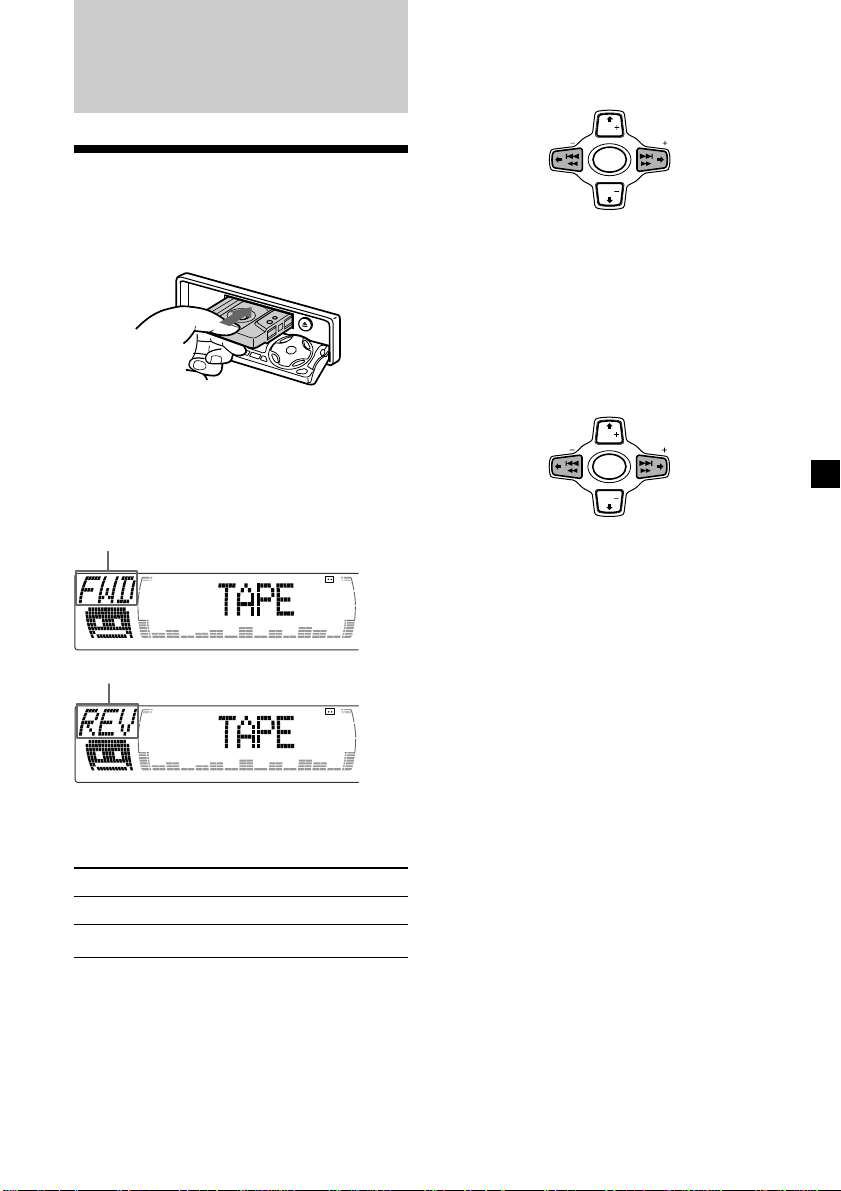
1 Press (OPEN/CLOSE) of the card remote
commander and insert a cassette.
Playback starts automatically.
2 Press (OPEN/CLOSE) of the card remote
commander to close the front panel.
If a cassette is already inserted, to start
playback, press (SOURCE) repeatedly until
“FWD” or “REV” appears.
The side facing up is played.
Fast-winding the tape
During playback, press and hold
m or M.
DISC
m :
Rewind
SEEK SEEK
SOURCE
DISC
M :
Fast-forward
To start playback during fast-forwarding or
rewinding, press (MODE) (o).
Locating a specific track
— Automatic Music Sensor (AMS)
During playback, press . or >
momentarily for each track you want to
skip.
You can skip up to nine tracks at one time.
. :
To locate
preceding
tracks
Note
The AMS function may not work when:
— the blanks between tracks are shorter than
four seconds
— there is noise between tracks
— there are long sections of low volume or quiet
sections.
DISC
SEEK SEEK
SOURCE
DISC
> :
To locate
succeeding
tracks
The side facing down is played.
Tip
To change the tape‘s playback direction, press
(MODE) (o).
To Press
Stop playback (OFF)
Eject the cassette (OPEN/CLOSE) then Z
In the Motion Display mode, all the items are
scrolled in the display one by one in order.
Tip
The Motion Display mode can be turned off. (See
“Changing the sound and display settings” on
page 23.)
11
Page 12
Playing a tape in various
modes
Playing tracks repeatedly
— Repeat Play
1 During playback, press (MENU).
You can play the tape in various modes:
•Repeat (Repeat Play) repeats the current
track.
•NR (Dolby NR) lets you select the Dolby* NR
B system.
•Metal lets you play a metal or CrO2 tape.
•B.Skip (Blank Skip) skips blanks longer than
eight seconds.
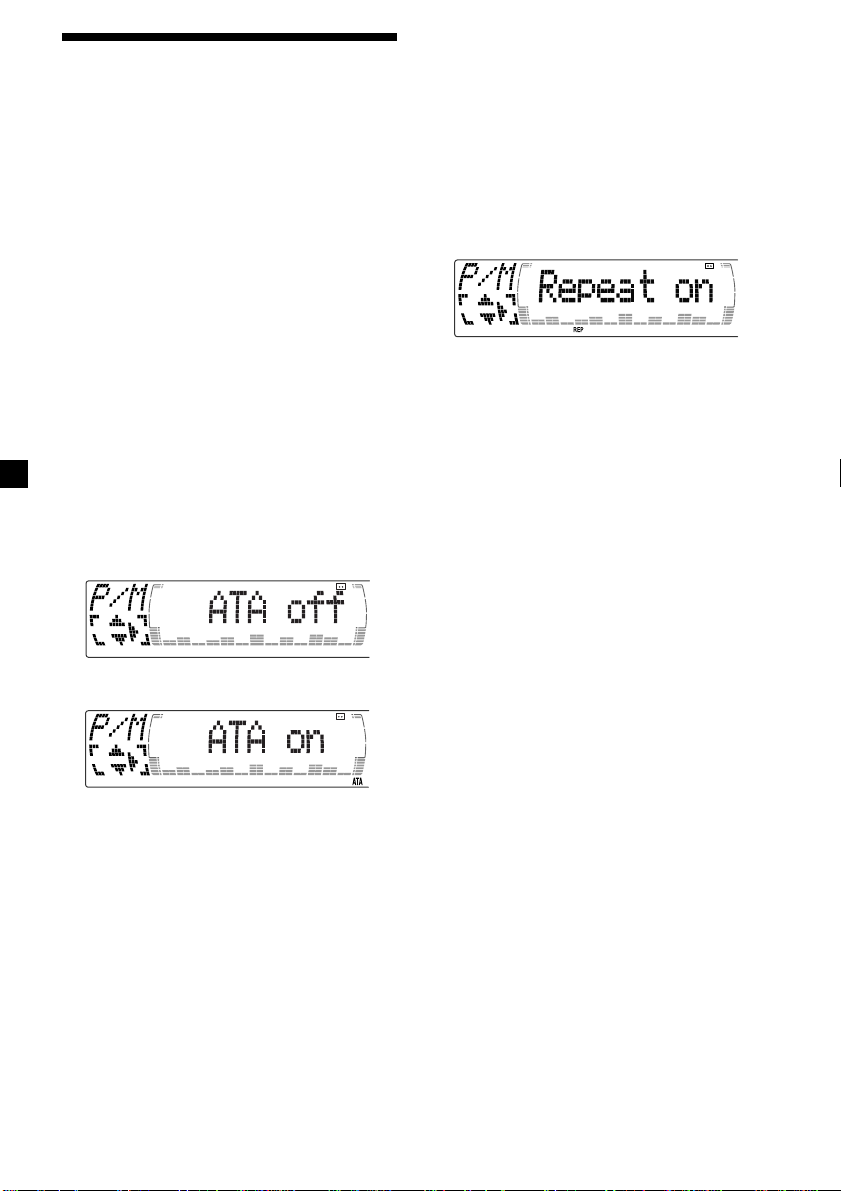
•ATA (Automatic Tuner Activation) turns on
the tuner automatically when fast-winding
the tape.
* Dolby noise reduction manufactured under
license from Dolby Laboratories.
”DOLBY“ and the double-D symbol are
trademarks of Dolby Laboratories.
1 During playback, press (MENU).
2 Press M or m repeatedly until the desired
item appears.
Each time you press m, the item changes as
follows:
Repeat t NR t Metal t B.Skip t ATA
3 Press , to select “on.”
2 Press M or m repeatedly until “Repeat”
appears.
3 Press , repeatedly until “Repeat on” in
the display appears.
Repeat on y Repeat off
Repeat Play starts.
To return to normal playback mode, select
“Repeat off” in step 3.
Tips
• If you select the mode using the buttons on the
unit, press (1) (REP) repeatedly until the desired
mode appears.
• During repeat playback, press (MODE). “REP”
disappears from the display and repeat mode is
cancelled.
Play mode starts.
4 Press (ENTER).
To return to normal playback mode, select
“off” in step 3.
Tip
While the ATA function is activated, the display
(TAPE y TUNER) can be changed by pressing
(DSPL/PTY).
12
Page 13

Radio
Memorising stations
automatically
— Best Tuning Memory (BTM)
The unit selects the stations with the strongest
signals and memorises them in the order of
their frequencies. You can store up to 6 stations
on each band (FM1, FM2, FM3, MW, and LW).
Caution
When tuning in stations while driving, use
Best Tuning Memory to prevent accidents.
1 Press (SOURCE) repeatedly to select the
tuner.
Each time you press (SOURCE), the source
changes as follows:
B Tuner B CD* B MD* B TAPE
* If the corresponding optional equipment is
not connected, this item will not appear.
2 Press (MODE) repeatedly to select the
band.
Each time you press (MODE), the band
changes as follows:
B FM1 B FM2 B FM3 B MW B LW
Memorising only the
desired stations
You can preset up to 18 FM stations (6 each for
FM1, 2, and 3), up to 6 MW stations, and up to
6 LW stations in the order of your choice.
1 Press (SOURCE) repeatedly to select the
tuner.
2 Press (MODE) repeatedly to select the
band.
3 Press . or > of the unit to tune in
the station that you want to store on the
number button.
4 Press the desired number button ((1) to
(6)) of the unit until “MEM” appears.
The number button indication appears in
the display.
Note
If you try to store another station on the same
number button, the previously stored station will
be erased.
3 Press (MENU), then press M or m
repeatedly until “BTM” appears.
4 Press (ENTER).
The unit stores stations in the order of their
frequencies on the number buttons.
A beep sounds when the setting is stored.
Notes
• The unit does not store stations with weak
signals. If only a few stations can be received,
some number buttons will retain their former
setting.
• When a number is indicated in the display, the
unit starts storing stations from the one currently
displayed.
13
Page 14

Receiving the memorised
stations
1 Press (SOURCE) repeatedly to select the
tuner.
2 Press (MODE) repeatedly to select the
band.
If FM stereo reception is poor
— Monaural Mode
1 During radio reception, press (MENU),
then press M or m repeatedly until
“Mono” appears.
2 Press , until “Mono on“ appears.
The sound improves, but becomes
monaural (“ST” disappears).
3 Press M (preset up) or m (preset down)
repeatedly to receive the stations in the
order they are stored in the memory.
Tip
If you memorising the station using the buttons on
the unit, press the number button ((1) to (6)) on
which the desired station is stored.
If you cannot tune in a preset
station
Press < or , to search for the station
(automatic tuning).
Scanning stops when the unit receives a
station. Press < or , repeatedly until the
desired station is received.
Note
If the automatic tuning stops too frequently, press
(MENU), then press M or m repeatedly until
“Local” (local seek mode) is displayed. Then press
, to select “Local on.” Press (ENTER).
During local reception and station selection,
“LCL Seek” appears in the display.
Only the stations with relatively strong signals will
be tuned in.
Tip
If you know the frequency of the station you want
to listen to, press and hold < or , until the
desired frequency appears (manual tuning).
3 Press (ENTER).
To return to normal mode, select
“Mono off” in step 2.
In the Motion Display mode, all the items are
scrolled in the display one by one in order.
Tip
The Motion Display mode can be turned off. (See
“Changing the sound and display settings” on
page 23.)
14
Page 15
RDS
Overview of the RDS
function
Radio Data System (RDS) is a broadcasting
service that allows FM stations to send
additional digital information along with the
regular radio programme signal. Your car
stereo offers you a variety of services. Here are
just a few: retuning the same programme
automatically, listening to traffic
announcements, and locating a station by
programme type.
Notes
• Depending on the country or region, not all of
the RDS functions are available.
• RDS may not work properly if the signal strength
is weak or if the station you are tuned to is not
transmitting RDS data.
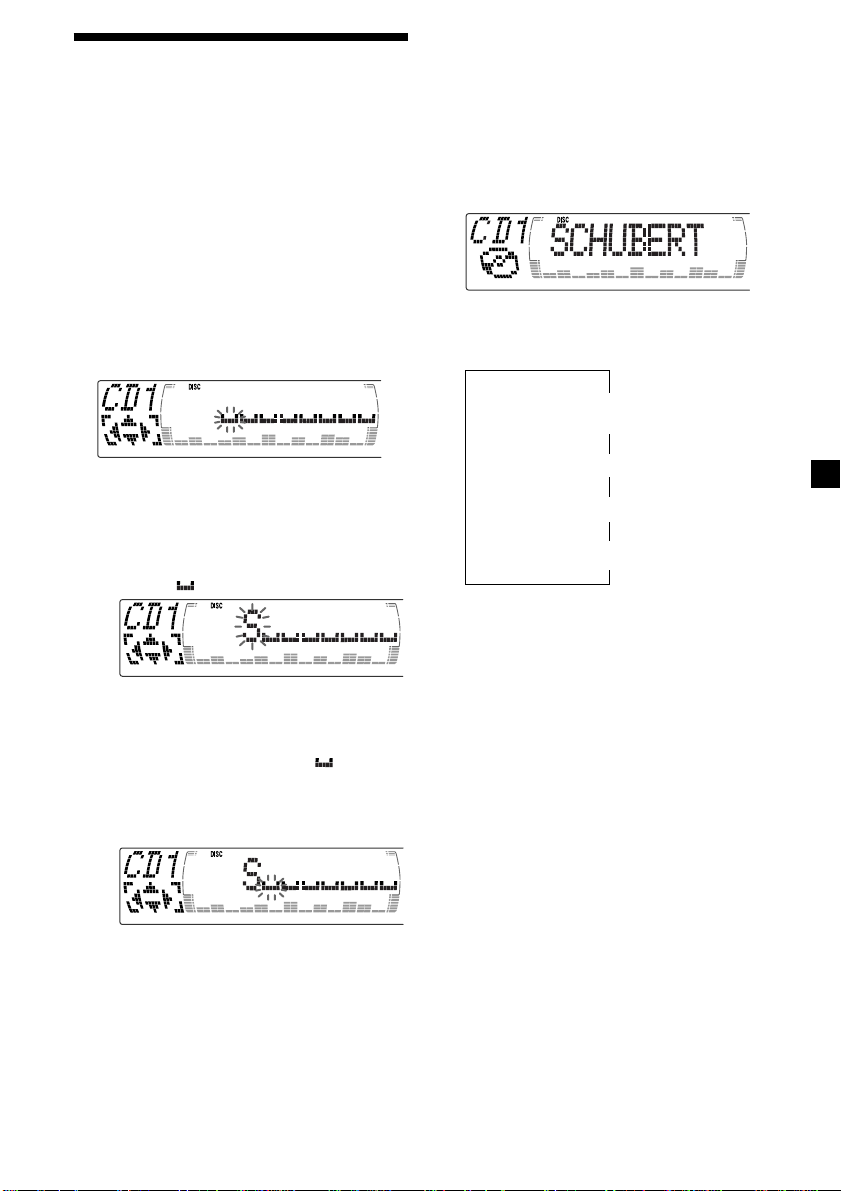
Displaying the station
name
In the Motion Display mode, all the items are
scrolled in the display one by one in order.
Tip
The Motion Display mode can be turned off. (See
“Changing the sound and display settings” on
page 23.)
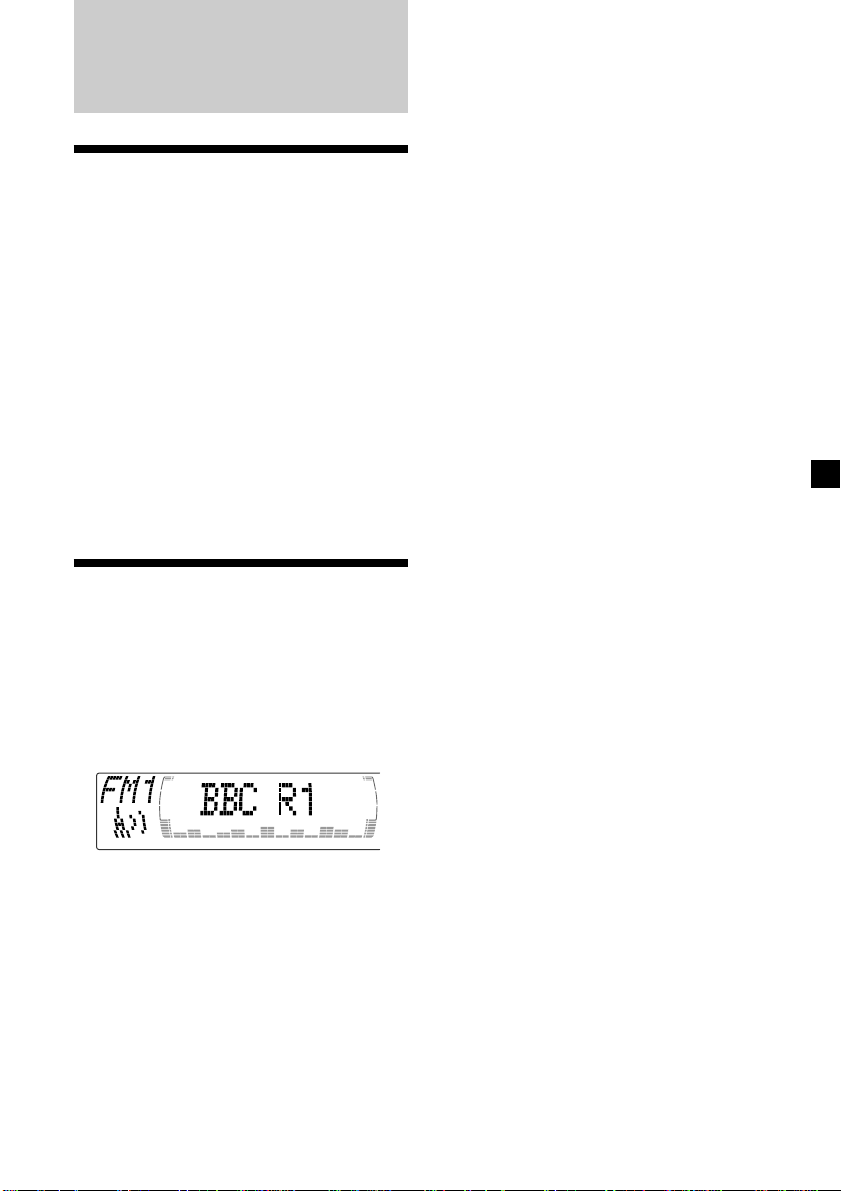
The name of the current station lights up in the
display.
Select an FM station (page 13).
When you tune in an FM station that
transmits RDS data, the station name
appears in the display.
Note
The “*” indication means that an RDS station is
being received.
15
Page 16
Retuning the same
programme automatically
— Alternative Frequencies (AF)
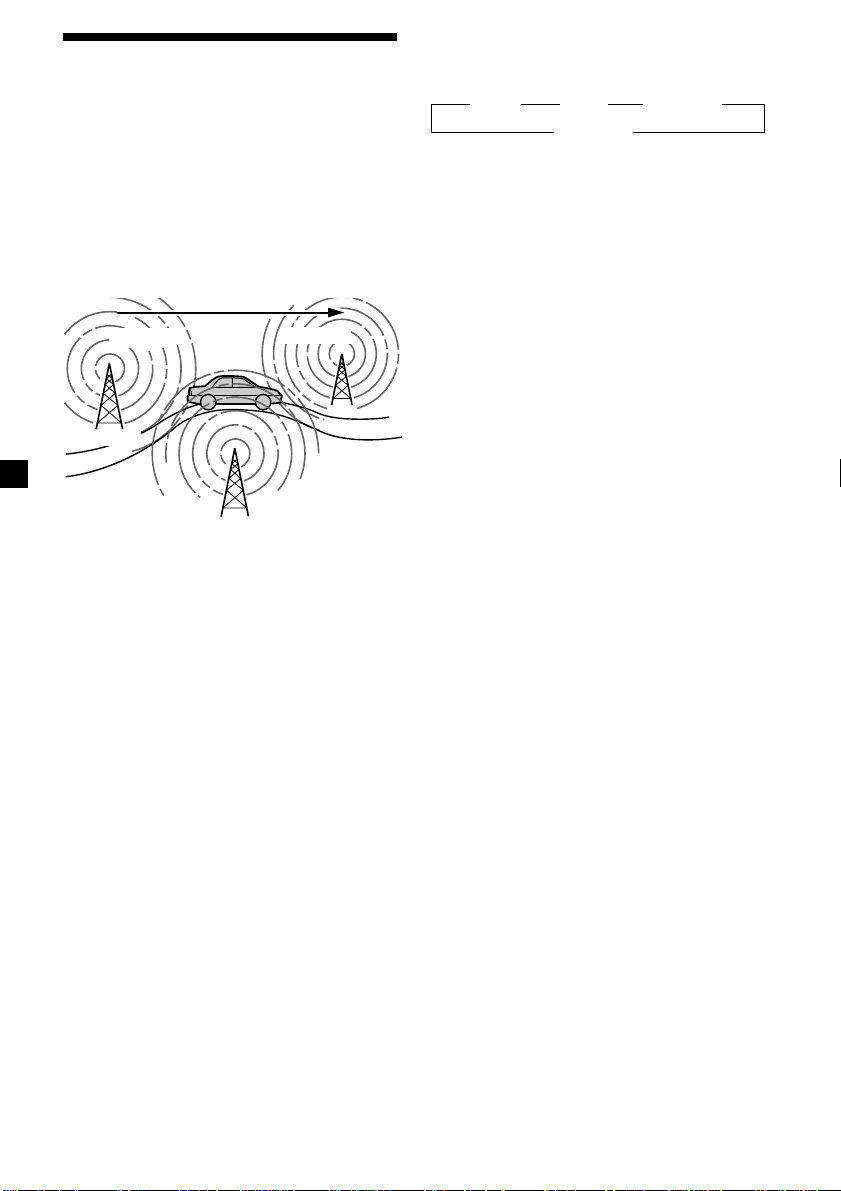
The Alternative Frequencies (AF) function
automatically selects and retunes the station
with the strongest signal in a network. By
using this function, you can continuously
listen to the same programme during a longdistance drive without having to retune the
station manually.
Frequencies change automatically.
98.5MHz
Station
1 Select an FM station (page 13).
2 Press (AF/TA) repeatedly until “AF on”
appears.
The unit starts searching for an alternative
station with a stronger signal in the same
network.
Tip
If you select the mode using the buttons on the
unit, press (AF) until “AF on” appears.
96.0MHz
102.5MHz
Changing the display item
Each time you press (AF/TA), the item changes
as follows:
B AF on B TA on B AF TA on*
AF TA off b
* Select this to turn on both the AF and TA
functions.
Tips
• Each time you press (AF) on the unit, the item
changes as follows:
AF on y AF off
• Each time you press (TA) on the unit, the item
changes as follows:
TA on y TA off
Notes
• When there is no alternative station in the area
and you do not need to search for an alternative
station, turn the AF function off by pressing
(AF/TA) repeatedly until “AF TA off” appears.
• When “NO AF” and the station name flash
alternately, it means that the unit cannot find an
alternative station in the network.
• If the station name starts flashing after selecting
a station with the AF function on, this indicates
that no alternative frequency is available. Press
< or , while the station name is flashing
(within eight seconds). The unit starts searching
for another frequency with the same PI
(Programme Identification) data (“PI Seek”
appears and no sound is heard). If the unit
cannot find another frequency, “NO PI” appears,
and the unit returns to the previously selected
frequency.
Listening to a regional programme
The “REG on” (regional on) function lets you
stay tuned to a regional programme without
being switched to another regional station.
(Note that you must turn the AF function on.)
The unit is factory preset to “REG on,” but if
you want to turn off the function, do the
following.
16
1 During radio reception, press (MENU),
then press M or m repeatedly until “REG”
appears.
2 Press , until “REG off” appears.
3 Press (ENTER).
Note that selecting “REG off” might cause
the unit to switch to another regional
station within the same network.
To return to regional on, select “REG on” in
step 2.
Note
This function does not work in the United
Kingdom and in some other areas.
Page 17

Local link function
(United Kingdom only)
The Local Link function lets you select other
local stations in the area, even if they are not
stored on your number buttons.
1 Press a number button of the unit that
has a local station stored on it.
2 Within five seconds, press the number
button of the local station again.
3 Repeat this procedure until the desired
local station is received.
To cancel the current traffic
announcement
Press (AF/TA).
To cancel all traffic announcements, turn off
the function by pressing (AF/TA) until
“TA off” appears.
Presetting the volume of traffic
announcements
You can preset the volume level of the traffic
announcements beforehand so you won’t
miss the announcement. When a traffic
announcement starts, the volume will be
automatically adjusted to the preset level.
1 Select the desired volume level.
Listening to traffic
announcements
The Traffic Announcement (TA) and Traffic
Programme (TP) data let you automatically
tune in an FM station that is broadcasting
traffic announcements even if you are listening
to other programme sources.
Press (AF/TA) repeatedly until “TA on” or
“AF TA on” appears.
The unit starts searching for traffic
information stations. “TP” appears in the
display when the unit finds a station
broadcasting traffic announcements.
When the traffic announcement starts,
“TA” flashes. The flashing stops when the
traffic announcement is over.
Tips
• If the traffic announcement starts while you are
listening to another programme source, the unit
automatically switches to the announcement and
goes back to the original source when the
announcement is over.
• If you select the mode using the buttons on the
unit, press (TA) until “TA on” appears.
Note
“NO TP” flashes for five seconds if the received
station does not broadcast traffic announcements.
Then, the unit starts searching for a station that
broadcasts it.
2 Press (AF/TA) for two seconds.
“TA” appears and the setting is stored.
Receiving emergency
announcements
If an emergency announcement comes in while
you are listening to the radio, the programme
will automatically switch to it. If you are
listening to a source other than the radio, the
emergency announcements will be heard if
you set AF or TA to on. The unit will then
automatically switch to these announcements
no matter which source you are listening to at
the time.
17
Page 18

Presetting the RDS
stations with the AF and
TA data
When you preset RDS stations, the unit stores
each station’s data as well as its frequency, so
you don’t have to turn on the AF or TA
function every time you tune in the preset
station. You can select a different setting (AF,
TA, or both) for individual preset stations, or
the same setting for all preset stations.
Presetting the same setting for all
preset stations
1 Select an FM band (page 13).
2 Press (AF/TA) repeatedly to select either
“AF on,” “TA on” or “AF TA on” (for both
AF and TA functions).
Note that selecting “AF TA off” stores not
only RDS stations, but also non-RDS
stations.
Tip
If you select the mode using the buttons on the
unit, press (AF) and/or (TA) to select “AF on”
and/or “TA on.”
Note that selecting “AF off” or “TA off” stores
not only RDS stations, but also non-RDS
stations.
Presetting different settings for
each preset station
1 Select an FM band, and tune in the
desired station.
2 Press (AF/TA) repeatedly to select either
“AF on,” “TA on” or “AF TA on” (for both
AF and TA functions).
Tip
If you select the mode using the buttons on the
unit, press (AF) and/or (TA) to select “AF on”
and/or “TA on.”
3 Press the desired number button of the
unit and hold until “MEM” appears.
Repeat from step 1 to preset other stations.
Tip
If you want to change the preset AF and/or TA
setting after you tune in the preset station, you
can do so by turning the AF or TA function on or
off.
3 Press (MENU), then press M or m
repeatedly until “BTM” appears.
4 Press (ENTER).
“BTM” flashes.
18
Page 19
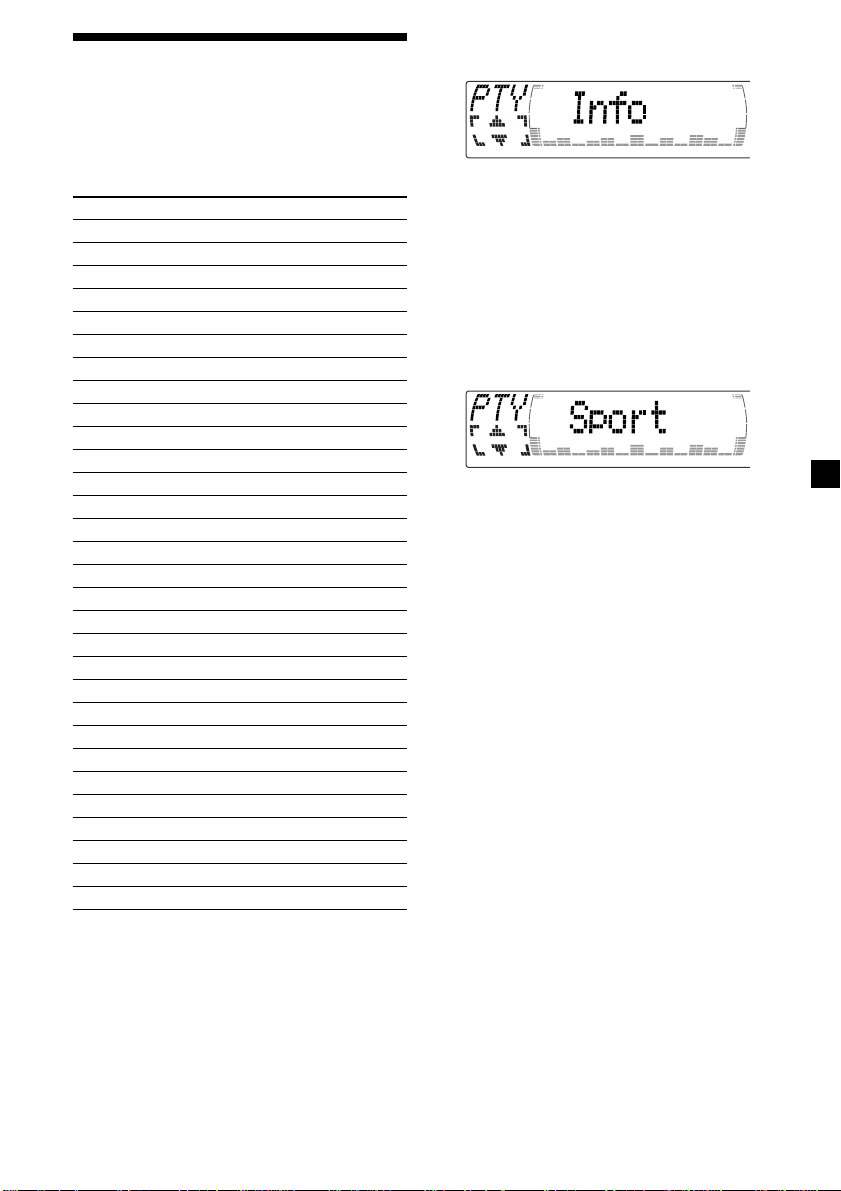
Locating a station by
programme type
You can locate the station you want by
selecting one of the programme types shown
below.
Programme types Display
News News
Current Affairs Affairs
Information Info
Sports Sport
Education Educate
Drama Drama
Culture Culture
Science Science
Varied Varied
Popular Music Pop M
Rock Music Rock M
Easy Listening Easy M
Light Classical Light M
Classical Classics
Other Music Type Other M
Weather Weather
Finance Finance
Children’s Programmes Children
Social Affairs Social A
Religion Religion
Phone In Phone In
Travel Travel
Leisure Leisure
Jazz Music Jazz
Country Music Country
National Music Nation M
Oldies Music Oldies
Folk Music Folk M
Documentary Document
Not specified None
1 Press (DSPL/PTY) during FM reception
until “PTY” appears.
The current programme type name appears
if the station is transmitting the PTY data.
“- - - - -” appears if the received station is
not an RDS station, or if the RDS data has
not been received.
2 Press M or m repeatedly until the desired
programme type appears.
The programme types appear in the order
shown in the table. Note that you cannot
select “None” (Not specified) for searching.
3 Press (ENTER).
The unit starts searching for a station
broadcasting the selected programme type.
Note
You cannot use this function in some countries
where no PTY (Programme Type selection) data is
available.
19
Page 20
Setting the clock
automatically
Other Functions
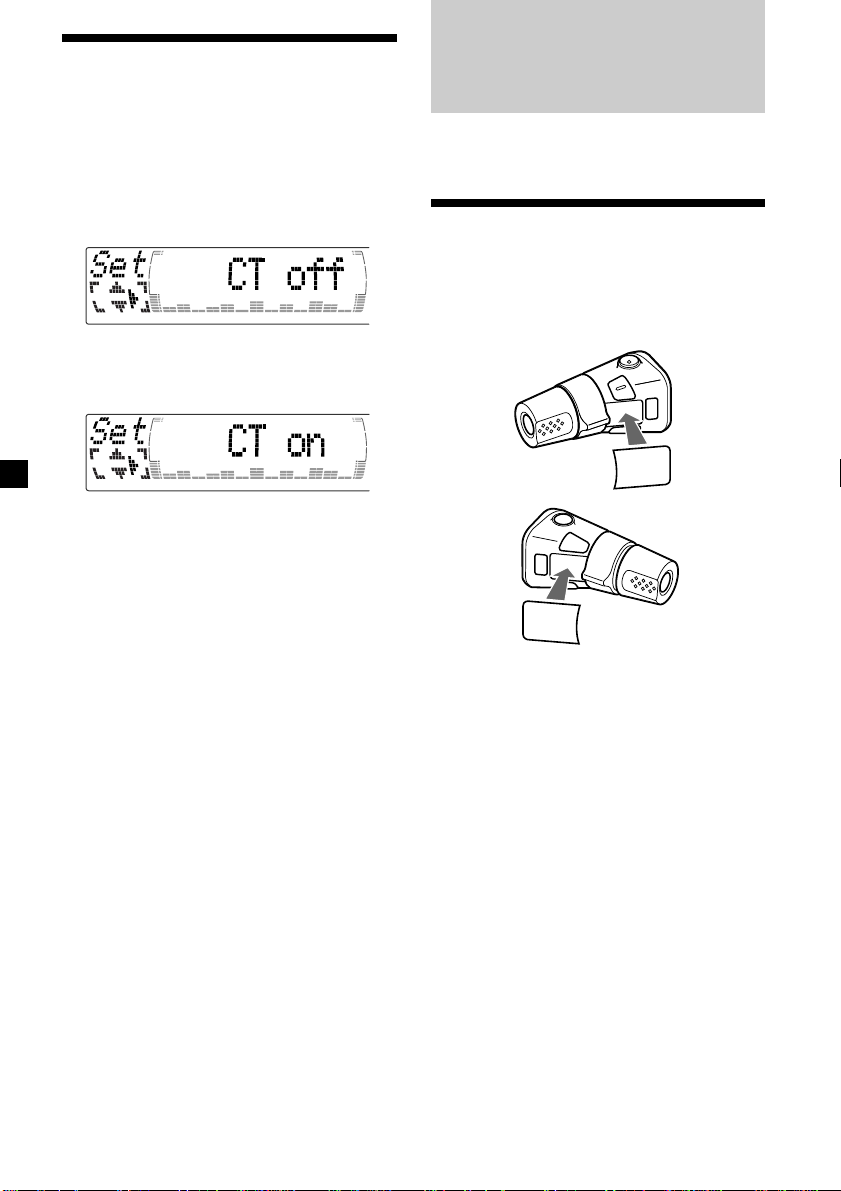
The CT (Clock Time) data from the RDS
transmission sets the clock automatically.
1 During radio reception, press (MENU),
then press M or m repeatedly until “CT”
appears.
2 Press , repeatedly until “CT on”
appears.
The clock is set.
3 Press (ENTER) to return to the normal
display.
To cancel the CT function
Select “CT off” in step 2.
Notes
• The CT function may not work even though an
RDS station is being received.
• There might be a difference between the time
set by the CT function and the actual time.
You can also control this unit with the rotary
commander (optional).
Labelling the rotary
commander
Depending on how you mount the rotary
commander, attach the appropriate label as
shown in the illustration below.
SOUND
MODE
DSPL
DSPL
MODE
SOUND
20
Page 21
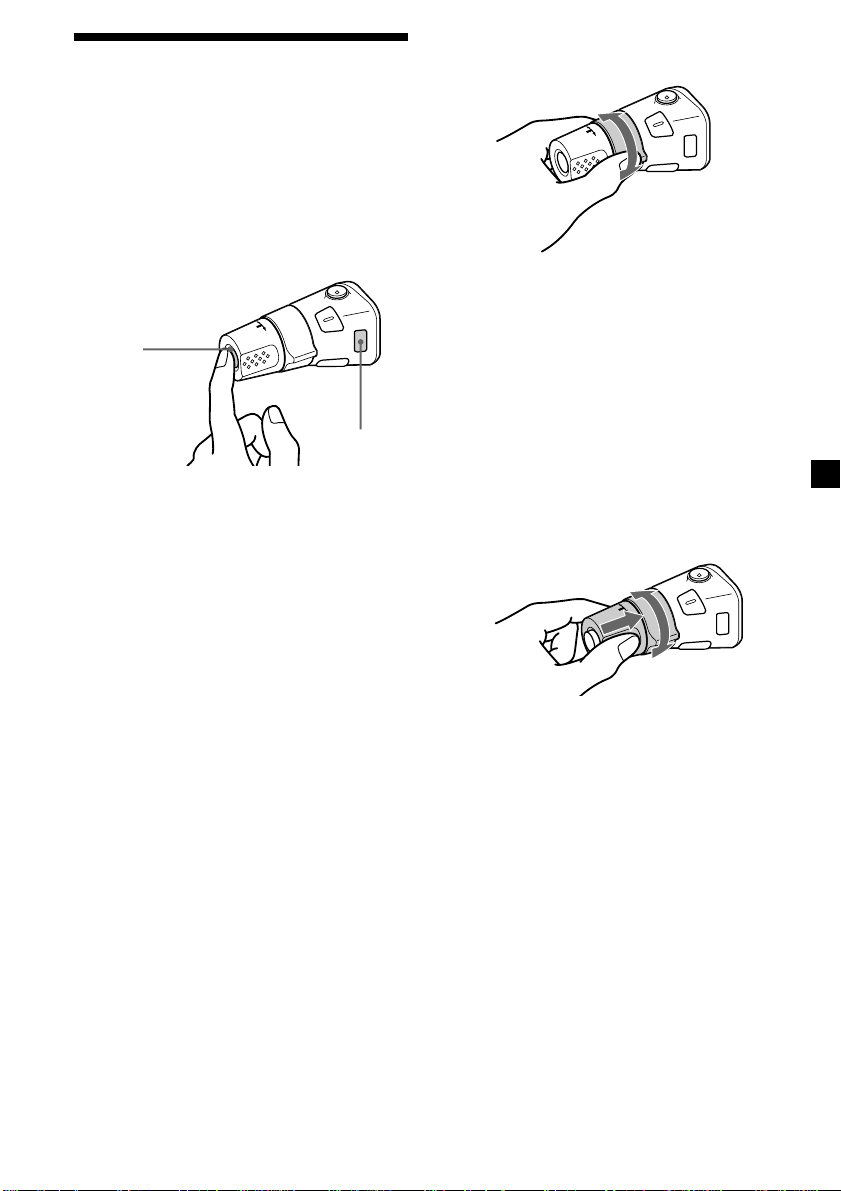
Using the rotary
commander
The rotary commander works by pressing
buttons and/or rotating controls.
You can also control the optional CD or MD
units with the rotary commander.
By pressing buttons
(the SOURCE and MODE buttons)
(SOURCE)
(MODE)
Each time you press (SOURCE), the
source changes as follows:
TUNER t CD* t MD* t TAPE
Pressing (MODE) changes the operation
in the following ways;
• Tuner: FM1 t FM2 t FM3 t
• CD unit*: CD1 t CD2 t …
• MD unit*: MD1 t MD2 t …
• Tape: playback direction
* If the corresponding optional equipment is
not connected, the item will not appear.
MW t LW
By rotating the control
(the SEEK/AMS control)
Rotate the control and release it to:
•Locate the beginnings of tracks on the
tape. Rotate and hold the control, and
release it to fast-wind the tape. To start
playback while fast-winding the tape,
press (MODE).
•Locate a specific track on a disc. Rotate
and hold the control until you locate the
specific point in a track, then release it to
start playback.
•Tune in stations automatically. Rotate and
hold the control to find a specific station.
By pushing in and rotating the
control (the PRESET/DISC control)
Push in and rotate the control to:
•Receive the stations memorised on the
number buttons.
•Change the disc.
21
Page 22
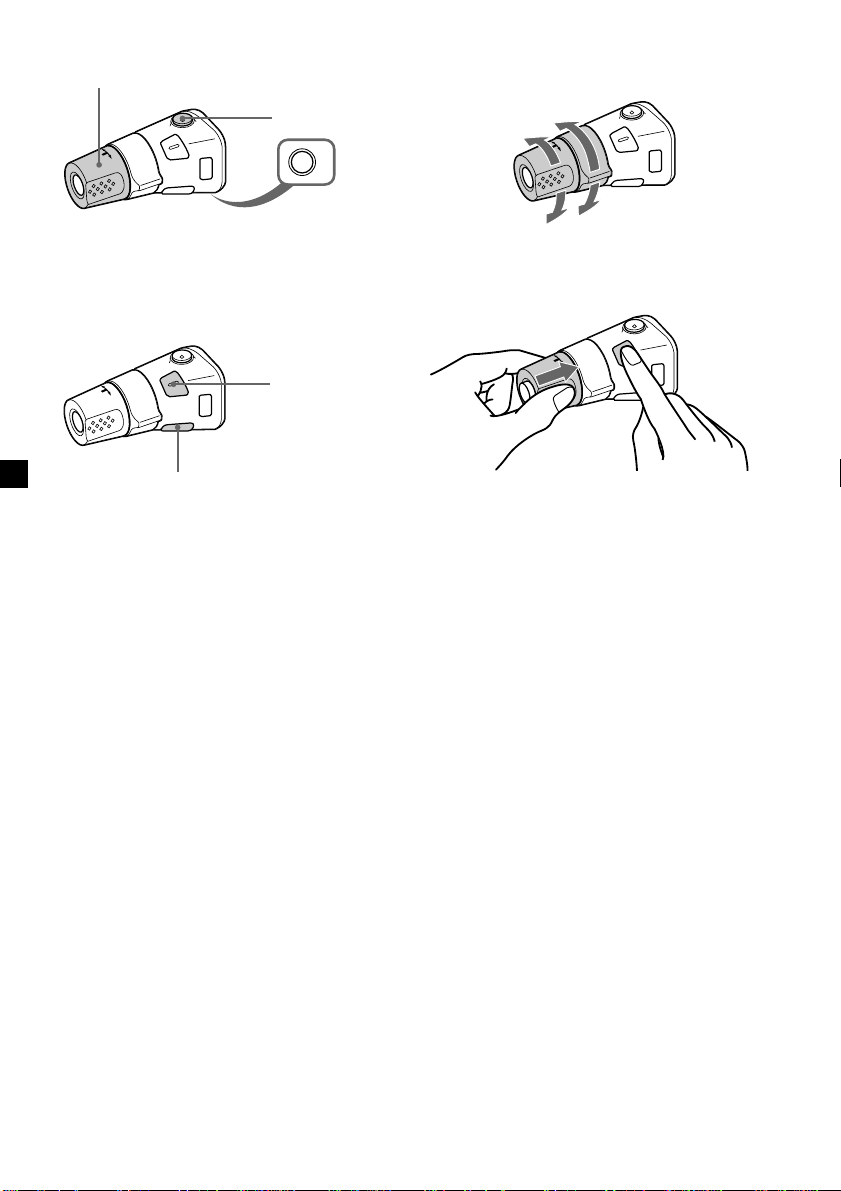
Other operations
Rotate the VOL control to
adjust the volume.
Press (ATT) to
attenuate the
sound.
OFF
Changing the operative direction
The operative direction of controls is factoryset as shown below.
To increase
Press (OFF) to turn
off the unit.
Note
When installing in a car without ACC (accessory)
position on the ignition key switch, press (OFF) for
two seconds to turn off the clock display after
turning off the engine.
Press (SOUND) to
adjust sound
menu.
Press (DSPL) to change
the displayed items.
Tip
While the ATA function is activated, the display
(TAPE y TUNER) can be changed by pressing
(DSPL).
To decrease
If you need to mount the rotary commander on
the right hand side of the steering column, you
can reverse the operative direction.
Press (SOUND) for two seconds while
pushing the VOL control.
Tip
You can also change the operative direction of
these controls with the unit (see “Changing the
sound and display settings” on page 23).
22
Page 23

Adjusting the sound
characteristics
Changing the sound and
display settings
You can adjust the bass, treble, balance, and
fader.
You can store the bass and treble levels
independently for each source.
1 Select the item you want to adjust by
pressing (SOUND) repeatedly.
Each time you press (SOUND), the item
changes as follows:
BAS (bass) t TRE (treble) t
BAL (left-right) t FAD (front-rear)
2 Adjust the selected item by pressing
< or ,.
When adjusting with the rotary
commander, press (SOUND) and rotate the
VOL control.
Note
Adjust within three seconds after selecting the
item.
Attenuating the sound
Press (ATT) on card remote commander
or the rotary commander.
“ATT on” appears momentarily.
To restore the previous volume level, press
(ATT) again.
Tip
When the interface cable of a car telephone is
connected to the ATT lead, the unit decreases the
volume automatically when a telephone call comes
in.
The following items can be set:
Set (Setting)
•Clock (page 10).
•CT (Clock Time) (page 20).
•Beep — to turn the beep sound on or off.
•RM (Rotary Commander) — to change the
operative direction of the rotary commander.
— Select “norm” to use the rotary
commander as the factory-set position.
— Select “rev” when you mount the rotary
commander on the right side of the
steering column.
•English/Spanish/Portuguese/Swedish — to
change the display language to English,
Spanish, Portuguese or Swedish.
Dis (Display)
•D.Info (Dual Information) — to display the
clock and the play mode simultaneously (on),
or to display the information alternately (off).
•SA (Spectrum Analyzer) — to change the
display pattern of the equalizer display
(page 25).
•Dimmer — to change the brightness of the
display (When the Illumination terminal
connected).
— Select “on” to dim the display.
— Select “off” to deactivate Dimmer.
•Contrast — to adjust the contrast if the
indications in the display are not
recognisable because of the unit’s installed
position.
•M.Dspl (Motion Display) — to turn the
motion display on or off.
•A.Scrl (Auto Scroll) (page 27).
continue to next page t
23
Page 24
1 Press (MENU).
2 Press M or m repeatedly until the desired
item appears.
Each time you press m, the item changes as
follows:
Example
Clock t CT t Beep t RM t English/
Spanish/Portuguese/Swedish t D.Info t SA
t Dimmer t Contrast t M.Dspl*
*1When no CD or MD is playing, this item will
not appear.
*2When the radio is off, or when no tape, CD,
or MD is playing, this item will not appear.
Note
The displayed item will differ depending on the
source.
Tip
You can easily switch among categories (“Set,”
“Snd” (Sound), “P/M” (Play Mode) and “Dis”) by
pressing M or m for two seconds.
1
t A.Scrl*
3 Press , to select the desired setting
(Example: on or off).
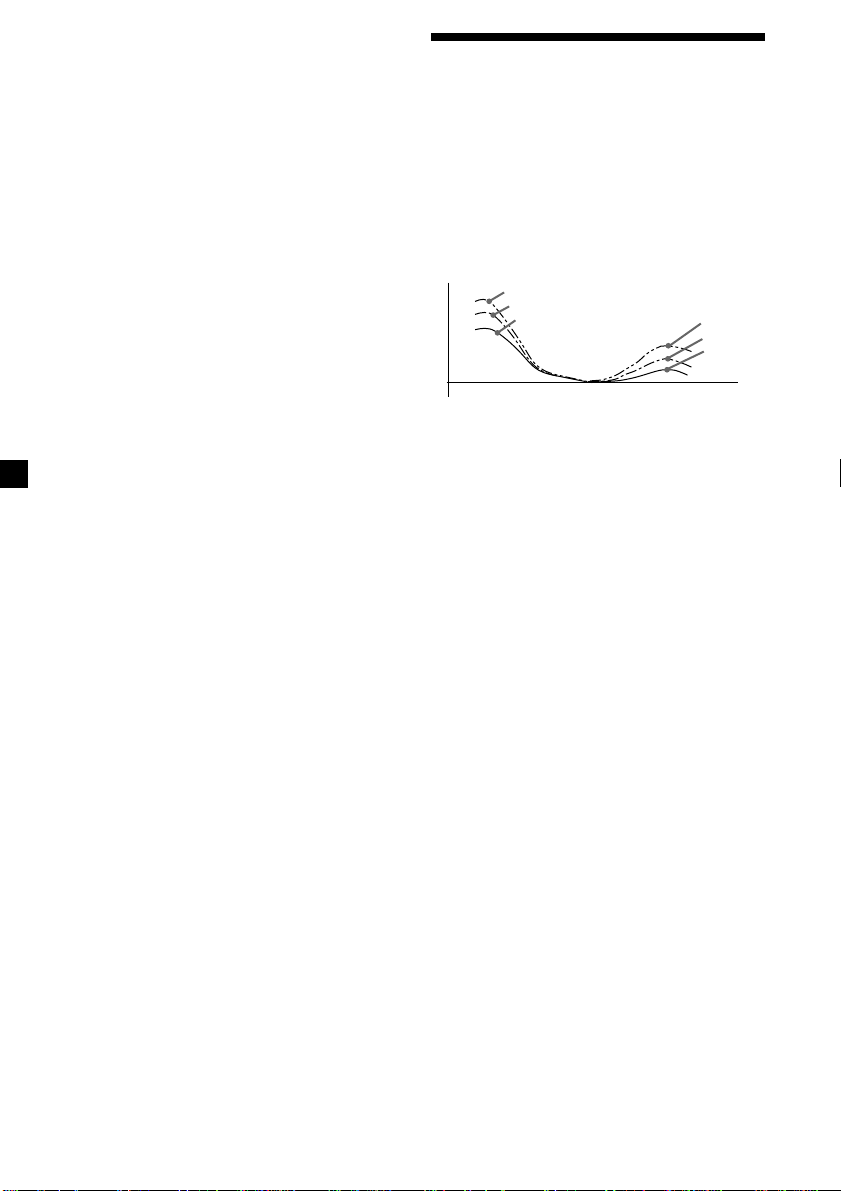
Boosting the bass sound
— D-bass
You can enjoy a clear and powerful bass
sound. The D-bass function boosts the low
frequency signal and high frequency signal
with a sharper curve than conventional bass
boost.
You can hear the bass line more clearly even
2
while the vocal volume remains the same. You
can emphasize and adjust the bass sound
easily with the D-BASS button.
D-BASS 3
Level
0dB
Adjusting the bass curve
D-BASS 2
D-BASS 1
Frequency (Hz)
Press (D-BASS) repeatedly to select the
desired bass curve.
As the D-BASS number increases so does
the effect.
D-BASS 3
D-BASS 2
D-BASS 1
4 Press (ENTER).
After the mode setting is complete, the
display returns to normal playback mode.
D-BASS 1 t D-BASS 2 t D-BASS 3 t
D-BASS off
Note
The bass sound may distort at same volume. If the
bass sound distorts, select less effective bass curve.
24
Page 25
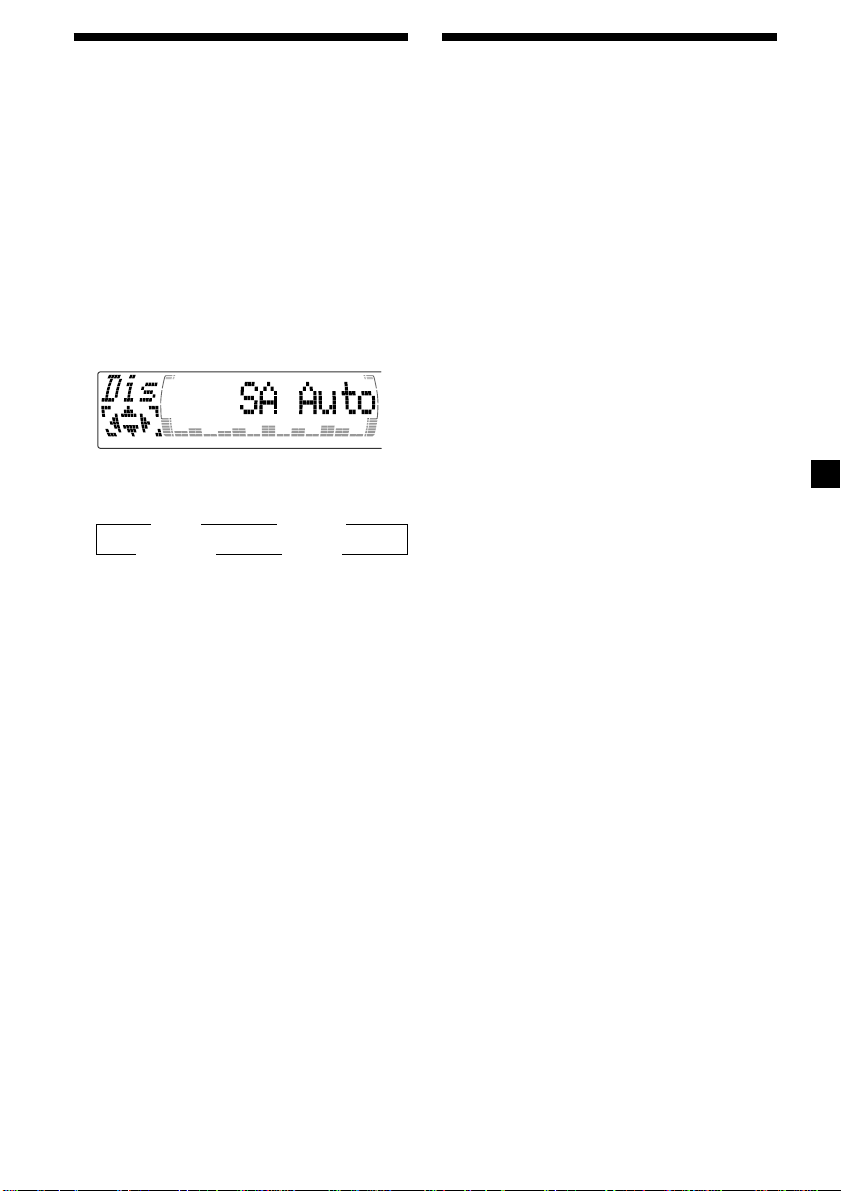
Selecting the spectrum
analyser
The sound signal level is displayed on a
spectrum analyser. You can select a display
pattern from 1 to 6, or the automatic display
mode.
1 Press (SOURCE) to select a source (tuner,
tape, CD, or MD).
2 Press (MENU).
3 Press M or m repeatedly until “SA”
appears.
4 Press < or , repeatedly to select the
desired setting.
B SA 1 bB … SA 6 b
B SA Auto* bB SA off b
* All of these display patterns appear one by
one automatically.
5 Press (ENTER).
Adjusting the sound and
frequency of the equalizer
preamplifier
This unit can also control an optional equalizer
preamplifier.
This lets you add some effects to the sound
field of the currently selected source.
For details, refer to the instructions manual
supplied with the equalizer preamplifier.
25
Page 26

With Optional Equipment
CD/MD Unit
This unit can control external CD/MD units.
If you connect an optional CD unit with the
CD TEXT function and the custom file
function, the CD TEXT information will appear
in the display when you play a CD TEXT disc.
Playing a CD or MD
1 Press (SOURCE) repeatedly to select CD
or MD.
2 Press (MODE) until the desired unit
appears.
CD/MD playback starts.
When a CD/MD unit is connected, all the
tracks play from the beginning.
Changing the display item
Each time you press (DSPL/PTY) during CD,
CD TEXT, or MD playback, the item changes
as follows:
*1If you have not labelled the disc or if there is no
disc name prerecorded on the MD,
“NO D.Name” appears momentarily in the
display.
2
If you play a CD TEXT disc, the artist name
*
appears in the display after the disc name.
(Only for CD TEXT discs with the artist name.)
3
If the track name of a CD TEXT disc or MD is not
*
prerecorded, “NO T.Name” appears
momentarily in the display.
4
While the AF/TA function is activated.
*
After you select the desired item, the display
will automatically change to the Motion
Display mode after a few seconds.
In the Motion Display mode, all the items are
scrolled in the display one by one in order.
Tip
The Motion Display mode can be turned off. (See
“Changing the sound and display settings” on
page 23.)
26
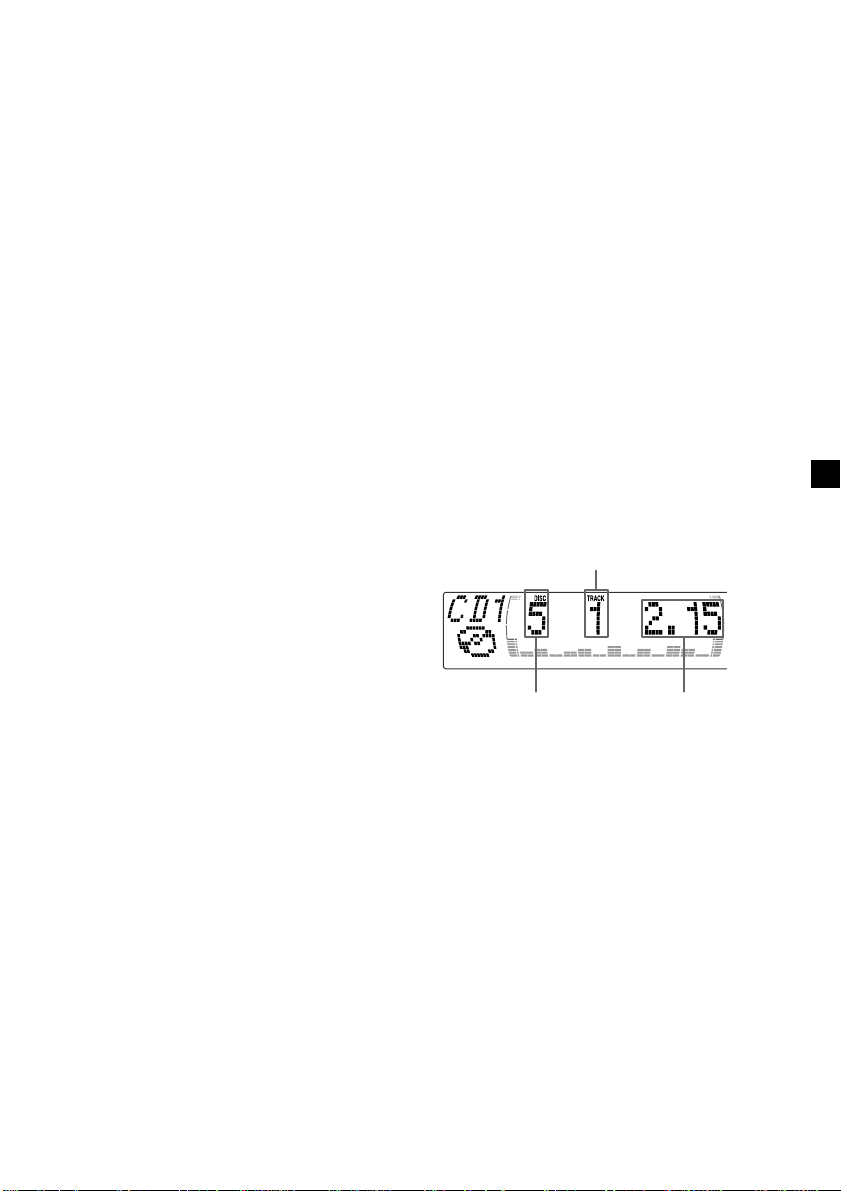
Disc number/Track number/
Elapsed playing time
Disc name*
V
V
1
/Artist name*
V
Track name*
V
FM1 frequency*
3
4
2
Page 27
Automatically scrolling a disc name
— Auto Scroll
If the disc name, artist name, or track name on
a CD TEXT disc or MD exceeds 10 characters
and the Auto Scroll function is on, information
automatically scrolls across the display as
follows:
• The disc name appears when the disc has
changed (if the disc name is selected).
• The track name appears when the track has
changed (if the track name is selected).
If you press (DSPL/PTY) to change the display
item, the disc or track name of the MD or CD
TEXT disc is scrolled automatically whether
you set the function on or off.
1 During playback, press (MENU).
2 Press M or m repeatedly until “A.Scrl”
appears.
3 Press , to select “A.Scrl on.”
4 Press (ENTER).
Locating a specific track
— Automatic Music Sensor (AMS)
During playback, press < or ,
momentarily for each track you want to
skip.
< (.) : To locate preceding tracks
, (>) : To locate succeeding tracks
Locating a specific point in a track
— Manual Search
During playback, press and hold < or
,. Release when you have found the
desired point.
< (m) : To search forward
, (M) : To search backward
Switching to other discs
During playback, press M or m.
The desired disc in the current unit begins
playback.
M (DISC +) : For succeeding discs
m (DISC –) : For preceding discs
To cancel Auto Scroll, select “A.Scrl off” in
step 3.
Note
For some discs with very many characters, the
following cases may happen:
— Some of the characters are not displayed
— Auto Scroll does not work.
Track number
Disc number Elapsed playback time
27
Page 28
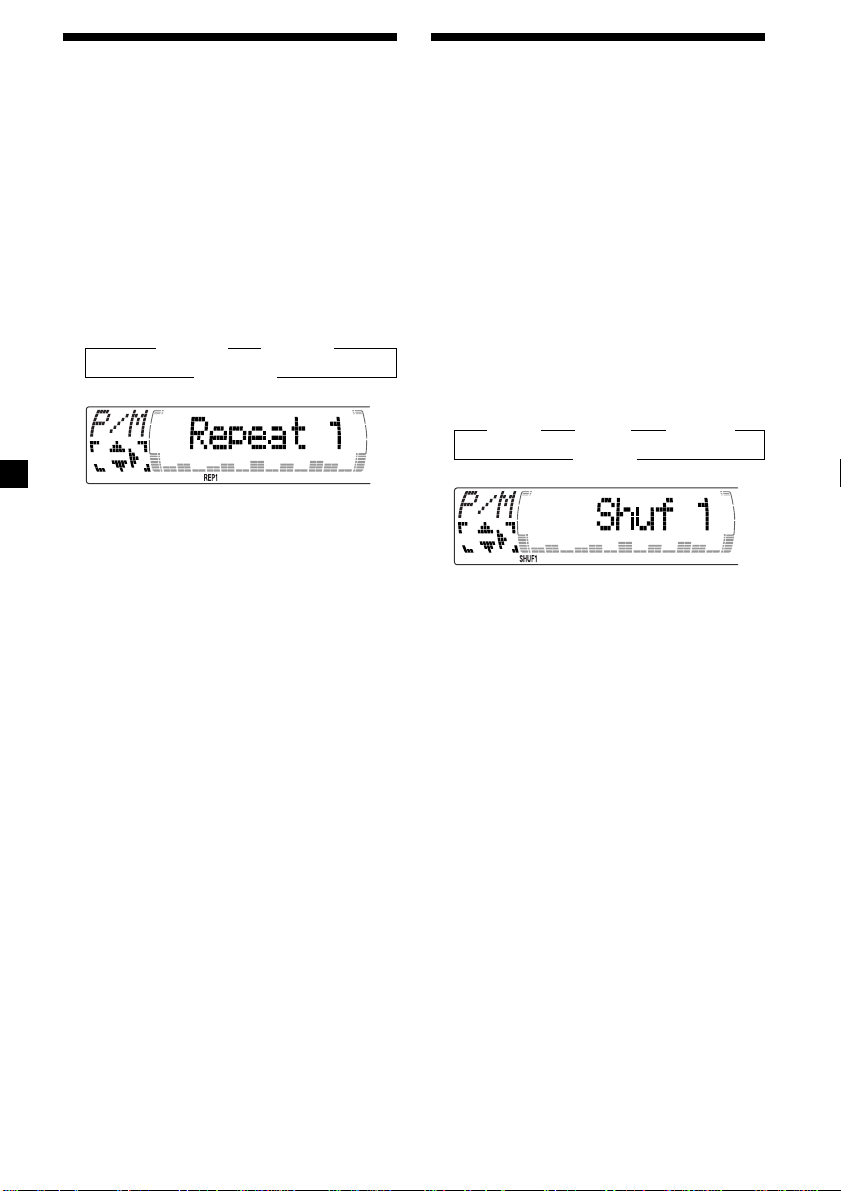
Playing tracks repeatedly
— Repeat Play
You can select:
•Repeat 1 – to repeat a track.
•Repeat 2 – to repeat a disc.
1 During playback, press (MENU).
2 Press M or m repeatedly until “Repeat”
appears.
3 Press , repeatedly until the desired
setting appears in the display.
B Repeat 1 B Repeat 2
Repeat off b
Repeat Play starts.
To return to normal play mode, select “Repeat
off” in step 3.
Tip
If you select the mode using the buttons on the
unit, press (1) (REP) repeatedly until the desired
mode appears.
Playing tracks in random
order — Shuffle Play
You can select:
•Shuf 1 – to play the tracks on the current disc
in random order.
•Shuf 2 – to play the tracks in the current unit
in random order.
•Shuf All* – to play all the tracks in all the
units in random order.
1 During playback, press (MENU).
2 Press M or m repeatedly until “Shuf”
appears.
3 Press , repeatedly until the desired
setting appears in the display.
B Shuf 1 B Shuf 2 B Shuf All*
Shuf off b
Shuffle Play starts.
* “Shuf All” is only available when you connect
two or more optinal CD/MD units.
To return to normal play mode, select “Shuf
off” in step 3.
28
Tip
If you select the mode using the buttons on the
unit, press (2) (SHUF) repeatedly until the desired
mode appears.
Page 29
Labelling a CD — Disc Memo
(For a CD unit with the custom file function)
You can label each disc with a personalised
name. You can enter up to eight characters for
a disc. If you label a CD, you can locate the
disc by name (page 30) and select the specific
tracks for playback (page 31).
1 Start playing the disc you want to label.
2 Press (MENU), then press M or m
repeatedly until ”Name Edit” appears.
3 Press (ENTER).
Name edit mode
4 Enter the characters.
1 Press M repeatedly to select the
desired characters.
(A t B t C t ··· Z t 0 t 1 t 2 t
··· 9 t + t – t * t / t \ t > t <
t . t )
If you press m repeatedly, the characters
will appear in reverse order.
If you want to put a blank space
between characters, select “ .”
Tip
There is another way to start labelling a CD. Press
(LIST) for two seconds instead of steps 2 and 3.
You can also complete the operation by pressing
(LIST) for two seconds instead of step 5.
Displaying the disc memo
Press (DSPL/PTY) during CD or CD TEXT
disc playback.
Each time you press (DSPL/PTY) during CD
or CD TEXT disc playback, the item
changes as follows:
Disc number/Track number/
Elapsed playing time
*1If you connect an optional CD unit with the
CD TEXT function, the CD TEXT information
will appear in the display when you play a
CD TEXT disc.
2
While the AF/TA function is activated.
*
V
V
Disc memo name
V
Track name*
FM1 frequency*
1
V
2
2 Press , after locating the desired
character.
The next character flashes.
If you press < , the previous character
flashes.
3 Repeat steps 1 and 2 to enter the
entire name.
5 To return to normal CD play mode, press
(ENTER).
29
Page 30

Erasing the disc memo
1 Press (SOURCE) repeatedly to select
“CD.“
2 Press (MODE) repeatedly to select the CD
unit with the custom file function.
3 Press (MENU), then press M or m
repeatedly until “Name Del” appears.
4 Press (ENTER).
5 Press M or m repeatedly to select the disc
name you want to erase.
6 Press (ENTER) for two seconds.
The name is erased.
Repeat steps 5 and 6 if you want to erase
other names.
Locating a disc by name
— List-up (For a CD unit with the custom
file function or an MD unit)
You can use this function for discs that have
been assigned a custom name. For more
information on disc memo names, refer to
“Labelling a CD” (page 29).
1 Press (LIST).
The name assigned to the current disc
appears in the display.
When you assign a disc memo name to a
CD TEXT disc, it takes priority over the
original CD TEXT information.
7 Press (MENU) twice.
The unit returns to normal CD play mode.
Notes
• When a personalised label is erased, the original
CD TEXT information will appear in the display.
• When you erase all of the disc names, “No Data”
appears in step 6.
2 Press M (DISC +) or m (DISC –) repeatedly
until you find the desired disc.
3 Press (ENTER) to play the disc.
Notes
• The track names are not displayed during MD or
CD TEXT disc playback.
• If there are no discs in the magazine, “NO Disc”
appears in the display.
• If a disc has not been assigned a custom file,
“********” appears in the display.
• If the disc information has not been read by the
unit, “?” appears in the display. To load a disc,
first press the number button, then choose the
disc that has not been loaded.
• Some letters cannot be displayed during MD or
CD TEXT disc playback.
30
Page 31

Selecting specific tracks
for playback
(For a CD unit with the custom file function)
If you label the disc, you can set the unit to
skip or play the tracks of your choice.
1 Start playing the disc you want to label.
2 Press (MENU), then press M or m
repeatedly until “Bank Sel” appears.
3 Press (ENTER).
Bank edit mode
— Bank
Playing specific tracks only
You can select:
•“Bank on” — to play the tracks with the
“Play” setting.
•“Bank inv” (Inverse) — to play the tracks
with the “Skip” setting.
1 During playback, press (MENU), then
press M or m repeatedly until “Bank”
appears.
2 Press , repeatedly until the desired
setting appears.
B Bank on B Bank inv
Bank off b
4 Label the tracks.
1 Press < or , repeatedly to select the
track you want to label.
2 Press (ENTER) repeatedly to select
“Play” or “Skip.”
5 Repeat step 4 to set “Play” or “Skip” for
all the tracks.
6 Press (MENU) twice.
The unit returns to normal CD play mode.
Notes
• You can set “Play” and “Skip” for up to 24
tracks.
• You cannot set “Skip” for all the tracks on a CD.
3 Press (ENTER).
Playback starts from the track following the
current one.
To return to normal play mode, select
“Bank off” in step 2.
31
Page 32

With Optional Equipment
DAB
Overview of DAB
DAB (Digital Audio Broadcasting) is a new
multimedia broadcasting system that transmits
audio programmes with a quality comparable
to that of CDs. This is made possible by the use
of a microcomputer in the DAB tuner which
uses the radio signals sent from multiple
aerials and multi-path signals (reflected radio
waves) to boost the strength of the main signal.
This makes DAB almost immune to radio
interference even in a moving object such as a
car.
Each DAB station bundles radio programmes
(services) into an ensemble which it then
broadcasts. Each service contains one or more
components. All ensembles, services, and
components are identified by name, so you can
access any of them without having to know
their frequencies.
DAB programme
Ensemble
Service
Service
Service
Component
Component
Component
Basic operations of DAB
Searching for the Ensemble and
Service
— Automatic Tuning
1 Press (SOURCE) repeatedly to select the
tuner.
2 Press (MODE) repeatedly to select
“DAB.”
3 Press and hold < or , until “Seek +” or
“Seek –” appears.
4 Press < or , to search the desired
service.
Note
The “
” indication flashes while the unit is
searching for the Ensemble.
Selecting the Ensemble
— Manual Tuning
If you know the channel number of Ensemble,
follow the procedure below to tune in.
1 Press (SOURCE) repeatedly to select the
tuner.
2 Press (MODE) repeatedly to select
“DAB.”
Notes
• The DAB system is actually in a testing phase.
This means some services have not been
sufficiently defined or are presently being tested.
At present, such services are not supported by
the optional DAB tuner unit XT-100DAB.
• DAB programmes are broadcast in Band-III (174
to 240 MHz) and L-Band (1,452 to 1,492 MHz),
with each band divided into channels (41 in
Band-III and 23 in L-Band). One ensemble is
broadcast per channel by each DAB station.
• When you change the mode from FM3 to DAB,
all the AF TA modes stay active.
• When you change any of the AF TA modes in
DAB, that mode stays active in FM1.
32
3 Press M or m until “Ch. XXX” appears.
4 Press M or m repeatedly until the desired
channel number appears.
Tips
• More than one channel may broadcast the same
Ensemble.
• If you select the Ensemble service but cannot
receive it, the “
” indication flashes.
Page 33

Receiving the memorised services
Following procedure is available after
presetting the service. For details on presetting
the services, refer to “Presetting DAB services
automatically” (page 33), and “Presetting DAB
services manually” (page 34).
1 Press (SOURCE) repeatedly to select the
tuner.
2 Press (MODE) repeatedly to select
“DAB.”
3 Press M or m repeatedly to select the
preset service.
Tip
There is another way to receive the preset service.
Press the number buttons ((1) to (6)) of the unit
on which the desired service is stored.
The receiving mode of the DAB tuner is
displayed according to the chart below:
Indication Level Receive mode
(flash) 0 cannot receive
Presetting DAB services
automatically — BTM
The BTM (Best Tuning Memory) function picks
out DAB ensembles and automatically assigns
the services within the ensembles to preset
service numbers. The unit can preset up to 40
services. If services have been previously set,
the BTM function operates under the following
conditions:
•If you activate the BTM function while
listening to a preset service, the unit will
store detected services (by overwriting) only
to preset numbers higher than that of the
current present service.
•If you activate the function while listening to
a service that is not preset, the unit will
replace the contents of all preset numbers.
•In both cases above, if the unit detects a
service that is identical to one already preset,
the previously stored service remains
unchanged and the newly detected service is
not preset.
1 While listening to a DAB programme,
press (MENU).
1 poor reception
2 so-so
3 moderate
4 good reception
2 Press M or m repeatedly until “BTM”
appears.
3 Press (ENTER).
A beep sounds when the service is stored.
After activating the BTM function, the unit
tunes the service assigned in the preset
memory 1 automatically.
Note
If the unit can only tune in a few services, the BTM
function may not assign services to all the preset
service numbers.
33
Page 34

Presetting DAB services
manually
You can also preset DAB services manually or
delete a service which is already preset. Note
that up to 40 services (preset either by the BTM
function or manually) can be preset to the
unit’s memory.
1 While listening to a DAB programme,
press (MENU).
2 Press M or m repeatedly until
“PresetEdit” appears, then press
(ENTER).
3 Select the service and the preset number
you want to preset.
1 Press < or , to select the service.
2 Press M or m to select the preset
number.
3 Press (ENTER).
— Manual Preset Memory
Replacing the services in preset
memories
Press M or m to select “Over Wrt” in step 4,
then press (ENTER).
Adding the services in preset
memories
Press M or m to select “Insert” in step 4, then
press (ENTER).
Erasing the services in preset
memories
Press M or m to select “Delete” in step 4, then
press (ENTER).
Tip
There is another way to preset the service.
After receiving the service, press the number
buttons ((1) to (6)) of the unit until a beep
sounds.
4 Press M or m to select “Over Wrt.”
Each time you press m, the edit command
changes as follows:
B Over Wrt B Insert* B Delete
* “Insert” does not appear if the maximum
number of services (40) is already preset in
memory.
To preset other services, repeat steps 3 and
4.
5 Press (ENTER).
34
Page 35

Listening to a DAB
programme
Follow the procedure below to tune in a DAB
programme manually.
You can also store DAB services in the unit’s
memory for instant tuning (see “Presetting
DAB services automatically (BTM)” on page
35).
1 While listening to a DAB programme,
press (LIST) repeatedly until the
Ensemble List appears.
2 Press M or m until the desired ensemble
appears, then press (ENTER).
3 Press (LIST) repeatedly to until the
Service List appears.
4 Press M or m repeatedly until the desired
service appears, then press (ENTER).
5 Press (LIST) repeatedly until the
Component List appears.
6 Press M or m until the desired component
appears, then press (ENTER).
Tip
To check the name of the current component,
ensemble or service, press (LIST) repeatedly until
the respective list appears in the display. The name
of the currently selected item flashes.
Changing the display item
When you press (LIST) once, the list selected
last time appears.
Each time you press (LIST), the list changes as
follows:
V
ENS (Ensemble list)
V
SRV (Service list)
CMP (Component list)
V
V
PRS (Preset list)
V
DAB (Cancel)
Automatic updating of the
ensemble list
When you perform the BTM function for the
first time, all the ensembles available in your
area are automatically stored. When you
perform the BTM function again, the contents
of these lists are updated in accordance with
the conditions described on page 32.
An ensemble is added to the respective list
when it is received during Automatic Tuning
or Manual Tuning but is unlisted.
An unlisted ensemble is also deleted from the
respective list when:
•you select an ensemble from the list, but it
cannot be received.
•you perform Automatic Tuning or Manual
Tuning to receive a listed ensemble, service,
or the component, but it cannot be received.
35
Page 36

Settings on the audio
reception
DAB can contain multi-channel audio. You can
select main or sub-channel for reception. Also,
if you turn on the DRC (Dynamic Range
Control) function, the dynamic range on the
service which supports DRC can automatically
be extended.
The following items can be set:
•Main/Sub — to selects chennel between
“Main”(main-cannel) and “Sub”(sub-cannel).
•DRC — to turn on or off the function.
1 While listening to a DAB programme,
press (MENU).
Locating a DAB service by
programme type (PTY)
You can use the PTY (Programme type
selection) function to tune in the programme
you want.
1 While listening to a DAB programme,
press (DSPL/PTY).
2 Press M or m repeatedly to select the
programme type.
2 Press M or m repeatedly until “DRC” or
“Main (or Sub)” appears.
3 Press < or , to select the desired
setting (Example: “on” or “off” ).
4 Press (ENTER).
Note
“Main (or Sub)” appears in the menu only when
the unit is receiving a multi-channel programme.
The programme types appear in the order
shown on the page 19.
3 Press (ENTER).
36
Page 37

Additional
Information
Maintenance
Fuse replacement
When replacing the fuse, be sure to use one
matching the amperage rating stated on the
original fuse. If the fuse blows, check the
power connection and replace the fuse. If the
fuse blows again after replacement, there may
be an internal malfunction. In such a case,
consult your nearest Sony dealer.
Fuse (10 A)
Warning
Never use a fuse with an amperage rating
exceeding the one supplied with the unit as
this could damage the unit.
Replacing the lithium battery
When the battery becomes weak, the range of
the card remote commander becomes shorter.
Replace the battery with a new CR2025 lithium
battery.
x
+ side up
Notes on lithium battery
•Keep the lithium battery out of the reach of
children. Should the battery be swallowed,
immediately consult a doctor.
•Wipe the battery with a dry cloth to assure a
good contact.
•Be sure to observe the correct polarity when
installing the battery.
•Do not hold the battery with metallic
tweezers, otherwise a short-circuit may
occur.
WARNING
Battery may explode if mistreated.
Do not recharge, disassemble, or dispose of
in fire.
37
Page 38

Dismounting the unit
With the front panel open
1 Press (OPEN) of the unit, then press the
clip inside the front cover with a thin
screwdriver, and gently pry the front
cover free.
2 Repeat step 1 on the left side.
The front cover is removed.
3 Use a thin screwdriver to push in the clip
on the left side of the unit, then pull out
the left side of the unit until the catch
clears the mounting.
If the front panel does not open
because of a blown fuse
1 Press the clip inside the front cover with
a release key (supplied), and pry the
front cover free.
Release key (supplied)
2 Repeat step 1 on the left side.
The front cover is removed.
3 Use a release key to push in the clip on
the left side of the unit, then pull out the
left side of the unit until the catch clears
the mounting.
4 Repeat step 3 on the right side.
5 Slide the unit out of the mounting.
38
4 Repeat step 3 on the right side.
5 Slide the unit out of the mounting.
Page 39

Specifications
Cassette player section
Tape track 4-track 2-channel stereo
Wow and flutter 0.08 % (WRMS)
Frequency response 30 – 20,000 Hz
Signal-to-noise ratio
Cassette type
TYPE II, IV
TYPE I
Dolby B NR
67 dB
64 dB
Dolby NR off
61 dB
58 dB
Tuner section
FM
Tuning range 87.5 – 108.0 MHz
Aerial terminal External aerial connector
Intermediate frequency 10.7 MHz/450kHz
Usable sensitivity 8 dBf
Selectivity 75 dB at 400 kHz
Signal-to-noise ratio 66 dB (stereo),
Harmonic distortion at 1 kHz
Separation 35 dB at 1 kHz
Frequency response 30 – 15,000 Hz
72 dB (mono)
0.6 % (stereo),
0.3 % (mono)
MW/LW
Tuning range MW: 531 – 1,602 kHz
Aerial terminal External aerial connector
Intermediate frequency 10.7 MHz/450 kHz
Sensitivity MW: 30 µV
LW: 153 – 279 kHz
LW: 40 µV
Power amplifier section
Outputs Speaker outputs
Speaker impedance 4 – 8 ohms
Maximum power output 50 W × 4 (at 4 ohms)
General
Outputs Audio output (2)
Inputs Telephone ATT control
Tone controls Bass ±9 dB at 100 Hz
Power requirements 12 V DC car battery
Dimensions Approx. 178 × 50 × 182 mm
Mounting dimensions Approx. 182 × 53 × 163 mm
Mass Approx. 1.3 kg
Supplied accessories Card remote commander
Optional accessories Rotary commander
Optional equipment CD changer (10 discs)
Power aerial relay control
lead
Power amplifier control
lead
lead
Illumination control lead
Treble ±9 dB at 10 kHz
(negative earth)
(w/h/d)
(w/h/d)
RM-X96
Parts for installation and
connections (1 set)
RM-X4S
BUS cable (supplied with
an RCA pin cord)
RC-61 (1 m), RC-62 (2 m)
CDX-828, CDX-737
MD changer (6 discs)
MDX-65
Other CD/MD units with
the Sony-BUS system
Source selector
XA-C30
DAB tuner unit
XT-100DAB
Digital equalizer
preamplifier
XDP-210EQ, XDP-4000X
Design and specifications are subject to change
without notice.
39
Page 40

Troubleshooting guide
The following checklist will help you remedy the problems you may encounter with your unit.
Before going through the checklist below, check the connections and operating procedures.
General
Problem
No sound.
The contents of the memory
have been erased.
The sound is noisy.
Tape playback
Problem
The sound is distorted.
The AMS does not operate
correctly.
Cause/Solution
•Cancel the ATT function.
•Set the fader control to the centre position for two-speaker
systems.
•Press (+) of the VOL buttons to adjust the volume.
• The power cord or battery has been disconnected.
• The reset button was pressed.
t Store again into the memory.
You are using a mobile phone.
Cause/Solution
The tape head is contaminated.
t Clean the head with a commercially available dry-type
cleaning cassette.
• There is noise in the space between tracks.
• A blank space is too short (less than four seconds).
• A long pause, or a passage of low frequencies or very low
sound level is treated as a blank space.
Radio reception
Problem
Preset tuning is not possible.
Automatic tuning is not
possible.
The stations cannot be
received.
The sound is hampered by
noises.
The “ST” indication flashes.
40
Cause/Solution
• Store the correct frequency in the memory.
• The broadcast signal is too weak.
•The broadcast signal is too weak.
t Use manual tuning.
•The local seek mode is set to “on.”
t Set the local seek mode to “off” (page 14).
Connect a power aerial control lead (blue) or accessory power
supply lead (red) to the power supply lead of a car’s aerial
booster. (When your car has built-in FM/MW/LW aerial in the
rear/side glass only.)
•Tune in the frequency accurately.
•The broadcast signal is too weak.
t Set to Mono mode (page 14).
Page 41

RDS
Problem
The SEEK starts after a few
seconds of listening.
No traffic announcements.
PTY displays “None.”
CD/MD playback
Problem
The sound skips.
Cannot turn off the “--------”
indication.
Cause/Solution
The station is non-TP or has a weak signal.
t Press (AF/TA) to select “AF TA off.”
•Activate “TA.”
•The station does not broadcast any traffic announcements
despite being TP.
t Tune to another station.
The station does not specify the programme type.
Cause/Solution
A dirty or defective disc.
You cannot label CDs unless you connect a CD unit with the
custom file function.
t Press (LIST) for two seconds.
41
Page 42

Error displays (when an optional CD/MD unit is connected)
The following indications will flash for about five seconds, and an alarm sound will be heard.
Display
NO Mag
NO Disc
NG Discs
Error
Blank
PushReset
Not Ready
High Temp
*1 When an error occurs during playback of a CD or MD, the disc number of the CD or MD does not appear
in the display.
*2 The disc number of the disc causing the error appears in the display.
If the above-mentioned solutions do not help improve the situation, consult your nearest Sony
dealer.
Cause
The disc magazine is not inserted in
the CD/MD unit.
No disc is inserted in the CD/MD unit.
A CD/MD cannot play because of
some problem.
A CD is dirty or inserted upside
2
down.*
1
*
An MD does not play because of some
problem.*
No tracks have been recorded on an
1
*
MD.*
The CD/MD unit cannot be operated
because of some problem.
The lid of the MD unit is open or MDs
are not inserted properly.
The ambient temperature is more than
50°C.
2
2
Solution
Insert the disc magazine in the CD/
MD unit.
Insert discs in the CD/MD unit.
Insert another CD/MD.
Clean or insert the CD correctly.
Insert another MD.
Play an MD with tracks recorded on
it.
Press the reset button of the unit.
Close the lid or insert the MDs
properly.
Wait until the temperature goes
down below 50°C.
42
Page 43

43
Page 44

Bienvenido!
Precauciones
Gracias por adquirir este reproductor de
cassettes Sony. Esta unidad permite disfrutar
de una serie de funciones mediante el uso del
siguiente accesorio de control:
Accesorios suministrados
Mando a distancia de tarjeta RM-X96
Accesorios opcionales
Mando rotativo RM-X4S
Además de las operaciones de reproducción de
cassettes y de la radio, es posible ampliar el
sistema mediante la conexión de una unidad*
de CD/MD opcional.
Cuando emplee esta unidad o una unidad de
CD opcional conectada con la función CD
TEXT, la información CD TEXT aparecerá en el
visor al reproducir discos CD TEXT*2.
*1Es posible conectar un cambiador de CD, un
cambiador de MD, un reproductor de CD o un
reproductor de MD.
2
Un disco CD TEXT es un CD de audio que
*
contiene información, como el título del disco,
nombre del cantante y títulos de los temas.
Esta información está registrada en el disco.
•Si aparca el automóvil bajo la luz solar
directa y se produce un considerable
aumento de temperatura en su interior, deje
que la unidad se enfríe antes de utilizarla.
•Si la unidad no recibe alimentación,
compruebe las conexiones en primer lugar. Si
todo está en orden, examine el fusible.
•Si los altavoces no emiten sonido con un
sistema de dos altavoces, ajuste el control de
equilibrio en la posición central.
•Si reproduce la cinta durante mucho tiempo,
el cassette puede calentarse debido al
1
amplificador de potencia incorporado. No
obstante, esto es normal.
Si desea realizar alguna consulta o solucionar
algún problema referentes a la unidad que no
se mencionen en este manual, póngase en
contacto con el proveedor Sony más próximo.
Para mantener una alta calidad de
sonido
Si existen soportes para bebidas cerca del
equipo de audio, tenga cuidado de que no
salpiquen zumos u otras bebidas dulces sobre
el mismo, ya que la existencia de residuos
azucarados en la unidad o en las cintas de
cassette pueden ensuciar los cabezales de
reproducción, reducir la calidad de sonido o
eliminar el sonido de reproducción.
Los kits de limpieza para cassettes no eliminan
las sustancias azucaradas de los cabezales de
cinta.
2
Page 45

Notas sobre los cassettes
Cuidados de los cassettes
•No toque la superficie de la cinta del cassette,
ya que la suciedad o el polvo ensucian los
cabezales.
•Mantenga los cassettes alejados de equipos
provistos de imanes incorporados, como
altavoces y amplificadores, ya que el sonido
de la cinta grabada podría borrarse o
distorsionarse.
•No exponga los cassettes a la luz solar
directa, a temperaturas extremadamente frías
ni a la humedad.
•La existencia de holguras en la cinta puede
provocar que ésta se enrede en el mecanismo.
Antes de insertarla, utilice un lápiz o un
objeto similar para girar la bobina y eliminar
holguras.
Holgura
•Los cassettes deformados y las etiquetas mal
adheridas pueden causar problemas al
insertar o expulsar las cintas. Retire o adhiera
con firmeza las etiquetas.
Cassettes de duración superior a 90 minutos
No se recomienda el uso de cassettes de
duración superior a 90 minutos excepto para
reproducciones largas y continuas. La cinta
utilizada en estos cassettes es muy fina y
tiende a estirarse con facilidad. Las
operaciones frecuentes de reproducción y
parada de estas cintas pueden hacer que éstas
se enreden con el mecanismo de la platina de
cassettes.
•Es posible que el sonido se distorsione
mientras se reproduce el cassette. El cabezal
del reproductor de cassettes debe limpiarse
después de 50 horas de uso.
3
Page 46

Indice
Sólo esta unidad
Localización de los controles............................. 5
Procedimientos iniciales
Restauración de la unidad ................................. 8
Ajustes de cancelación de la seguridad ........... 8
Encendido y apagado de la unidad.................. 9
Cómo utilizar el menú........................................ 9
Ajuste del reloj ................................................... 10
Reproductor de cassettes
Escucha de cintas ...............................................11
Reproducción de cintas en diversos
modos ............................................................ 12
Radio
Memorización automática de emisoras
— Memorización de la mejor sintonía
(BTM) ............................................................. 13
Memorización de las emisoras deseadas....... 13
Recepción de emisoras memorizadas ............ 14
RDS
Descripción general de la función RDS ......... 15
Visualización del nombre de la emisora........ 15
Resintonización automática del mismo
programa
— Frecuencias alternativas (AF)................ 16
Recepción de anuncios de tráfico ................... 17
Programación de emisoras RDS con los datos
AF y TA.......................................................... 18
Localización de emisoras mediante el tipo de
programa....................................................... 19
Ajuste automático del reloj .............................. 20
Otras funciones
Etiquetado del mando rotativo ....................... 20
Uso del mando rotativo.................................... 21
Ajuste de las características de sonido ........... 23
Atenuación del sonido ..................................... 23
Cambio de los ajustes de sonido y
visualización ................................................. 23
Refuerzo de los graves
— D-bass ....................................................... 24
Selección del analizador de espectros ............ 25
Ajuste del sonido y la frecuencia del
ecualizador preamplificador ...................... 25
Equipo opcional
Unidad de CD/MD
Reproducción de discos compactos (CD) o de
minidiscos (MD) .......................................... 26
Reproducción repetida de temas
— Reproducción repetida........................... 28
Reproducción de temas en orden aleatorio
— Reproducción aleatoria .......................... 28
Asignación de títulos a los discos compactos
— Memorando de discos ............................ 29
Localización de discos mediante el título
— Función de listado .................................. 30
Selección de temas específicos para su
reproducción
— Función de banco .................................... 31
DAB
Descripción general de la función DAB......... 32
Operaciones básicas de DAB ........................... 32
Memorización automática de servicios DAB
— BTM .......................................................... 33
Memorización manual de servicios DAB
— Memorización manual ........................... 34
Recepción de programas DAB ........................ 35
Ajustes de recepción de audio ........................ 36
Localización de un servicio DAB por tipo de
programa (PTY)............................................ 36
Información complementaria
Mantenimiento .................................................. 37
Desmontaje de la unidad ................................. 38
Especificaciones................................................. 39
Guía de solución de problemas....................... 40
4
Page 47

Localización de los controles
Mando a distancia de tarjeta RM-X96
D-BASS
DISC
SOURCE
DISC
OPEN/CLOSE
SEEK
ENTER
VOLATT
OFF
MENU LIST
SEEK
SOUND
PTY
DSPL AF/TA MODE
Consulte las páginas enumeradas para obtener más información.
1 Botón OFF 9, 11
2 Botón MENU
10, 12, 13, 14, 16, 18, 20, 24, 25, 27, 28,
29, 31, 33, 34, 36
3 Botón SOURCE (TUNER/TAPE/CD/MD)
9, 11, 13, 14, 25, 26, 30, 32, 33
4 Botones </, (SEEK/AMS –/+)
9, 10, 11, 12, 14, 16, 20, 23, 24, 25, 27, 28,
29, 31, 32, 34, 36
Sensor de música automático
(./>) 11, 27
Búsqueda manual (./>) 27
Búsqueda 14
qs Botón ENTER
10, 12, 13, 14, 16, 18, 19, 20, 24, 25, 27,
29, 30, 31, 33, 34, 35, 36
qd Botón AF/TA 16, 17, 18
qf Botón MODE
11, 12, 13, 14, 26, 30, 32, 33
Durante la reproducción de cintas:
Cambio del sentido de reproducción 11
Durante la recepción de radio:
Selección de banda (BAND) 13, 14
Durante la reproducción de CD/MD:
Selección de unidad de CD/MD 26
qg Botones VOL (ajuste de volumen)
5 Botón SOUND 23
6 Botón DSPL/PTY (cambio del modo de
indicación/tipo de programa)
19, 26, 27, 29, 36
7 Botón ATT (atenuar) 23
8 Botón D-BASS 24
9 Botón OPEN/CLOSE 11
No es posible utilizar con el mando a distancia
de tarjeta una unidad que se haya apagado
pulsando (OFF) durante dos segundos, a
menos que pulse (SOURCE) en la unidad o
que inserte un casette para que ésta se active
primero.
0 Botón LIST 29, 30, 35
qa Botones M/m (DISC/PRST +/–)
9, 10, 12, 13, 14, 16, 18, 19, 20, 24, 25,
27, 28, 29, 30, 31, 32, 33, 34, 36
Durante la recepción de radio:
Selección de emisoras memorizadas 14
Durante la reproducción de CD/MD:
Cambio de discos 27
5
Page 48

Localización de los controles
Lado de seguridad
Lado de utilización
T
Y
P
P
S
L
OFF
D
SOURCE
M
O
D
E
REP SHUF
123456
MENU
SOUND
TAAF
DISC
D-BASS
DISC
LIST
ENTER
CLOSE
XR-M500R
6
Page 49

Los botones correspondientes de la
unidad controlan las mismas funciones
que los del mando a distancia de
tarjeta.
10 Botón de restauración 8
2 Visor principal
3 Botón OPEN 38
4qa Receptor para el mando a distancia
de tarjeta
5 Botones de ajuste de volumen
6 Botón DSPL/PTY (cambio del modo de
indicación/tipo de programa)
7 Visor secundario
8 Botón MENU
9 Botón Z (expulsión) 11
qs Botón LIST
qd Botón OFF* 9
qf Botón MODE
qg Botón SOURCE (TUNER/TAPE/CD/MD)
qh Botón AF 16, 18
qj Botones numéricos
Durante la recepción de la radio:
Selección de números de
memorización 13, 14, 17, 33, 34
Durante la reproducción de cintas:
(1) REP 12
Durante la reproducción de CD/MD:
(1) REP 28
(2) SHUF 28
qk Botón TA 16, 17, 18
ql Botón SOUND
w; Botones PRST/DISC +/– (cursor arriba/
abajo)
Botones SEEK/AMS –/+ (cursor
izquierda/derecha) 13
wa Botón ENTER
ws Botón CLOSE
wd Botón D-BASS
* Advertencia sobre la instalación en
un automóvil que no disponga de
posición ACC (accesorios) en el
interruptor de la llave de encendido
Asegúrese de pulsar (OFF) en la unidad
durante dos segundos para desactivar la
indicación del reloj después de apagar el
motor.
Si pulsa (OFF) momentáneamente, la
indicación del reloj no se desactivará y esto
causará el desgaste de la batería.
7
Page 50

Procedimientos
iniciales
Restauración de la unidad
Antes de utilizar la unidad por primera vez o
después de sustituir la batería del automóvil,
es necesario restaurar dicha unidad.
Pulse el botón de restauración con un objeto
puntiagudo, como un bolígrafo.
Botón de restauración
Nota
Al pulsar el botón de restauración, se borrará el
ajuste del relo y algunas funciones memorizadas.
Ajustes de cancelación de
la seguridad
Realice los siguientes ajustes iniciales antes de
utilizar la unidad por primera vez, tras
sustituir la batería del automóvil o después de
restaurar la unidad.
Asegúrese de realizar estos ajustes, ya que en
caso contrario el panel frontal permanecerá
desactivado y no podrá utilizar la unidad.
1 Pulse el botón de restauración.
Aparecerá “Code in”.
2 Pulse los botones del mando a distancia
de tarjeta y envíe el código de seguridad.
Consulte la documentación suministrada
para obtener información detallada sobre
los botones del código de seguridad.
Una vez confirmado el código, el visor
mostrará el reloj y podrá utilizar la unidad
con normalidad.
Notas
• Lleve consigo el mando a distancia de tarjeta
cuando se ausente del automóvil.
• Si olvida el código de seguridad, consulte con un
centro de servicio técnico Sony. Asegúrese de
llevar consigo el mando a distancia de tarjeta.
8
Page 51

Encendido y apagado de
la unidad
Encendido de la unidad
Pulse (SOURCE) o inserte un cassette en la
unidad. Para obtener información detallada
sobre la utilización, consulte las páginas 11
(reproductor de cassettes) y 13 (radio).
Apagado de la unidad
Pulse (OFF) para detener la reproducción de
la cinta o la recepción de FM/MW/LW (la
iluminación de las teclas y el visor
permanecerán activados).
Pulse (OFF) durante dos segundos para
apagar la unidad por completo.
Nota
Si el automóvil no dispone de posición ACC en el
interruptor de la llave de encendido, asegúrese de
apagar la unidad pulsando (OFF) durante dos
segundos para evitar el desgaste de la batería del
automóvil.
Cómo utilizar el menú
Esta unidad se utiliza mediante la selección de
elementos de un menú.
Para realizar una selección, entre en el modo
de menús y elija M/m (arriba/abajo) o </,
(izquierda/derecha).
M/m
M : Para seleccionar
DISC
SEEK SEEK
SOURCE
DISC
</,
< :
Para
seleccionar
hacia la
izquierda
SEEK SEEK
hacia arriba
m : Para seleccionar
hacia abajo
DISC
SOURCE
DISC
, :
Para
seleccionar
hacia la
derecha
9
Page 52

Ajuste del reloj
El reloj dispone de una indicación digital de 24
horas.
2 Pulse (ENTER).
Ejemplo: Para ajustar el reloj a las 10:08
1 Pulse (MENU) y, a continuación, pulse
M o m varias veces hasta que aparezca
“Clock”.
1 Pulse (ENTER).
La indicación de hora parpadea.
2 Pulse M o m para ajustar la hora.
3 Pulse ,.
La indicación de minutos parpadea.
El reloj se pone en funcionamiento.
Consejos
• Puede utilizar la función CT para ajustar el reloj
automáticamente (página 20).
• Si el modo D.Info está ajustado en “on”, la hora
siempre se mostrará (excepto para algunas
funciones del modo SA) (página 23).
4 Pulse M o m para ajustar los minutos.
10
Page 53

Reproductor de
cassettes
Escucha de cintas
1
Pulse (OPEN/CLOSE) en el mando de
distancia de tarjeta e inserte un cassette.
La reproducción se iniciará de forma
automática.
2 Pulse (OPEN/CLOSE) en el mando a
distancia de tarjeta para cerrar el panel
frontal.
Si ya hay un cassette insertado, para iniciar la
reproducción pulse (SOURCE) varias veces
hasta que aparezca “FWD” o “REV”.
Se reproduce la cara orientada hacia arriba.
Bobinado rápido de la cinta
Durante la reproducción, pulse y
mantenga pulsado m o M.
DISC
m :
Rebobinado
SEEK SEEK
SOURCE
DISC
M :
Avance rápido
Para iniciar la reproducción durante el avance
rápido o el rebobinado, pulse (MODE) (o).
Localización de un tema específico
— Sensor de música automático (AMS)
Durante la reproducción, pulse . o
> momentáneamente para cada tema
que desee omitir.
Es posible omitir un máximo de nueve
temas de una vez.
. :
Para
localizar
temas
anteriores
Nota
La función AMS puede no activarse si:
— los espacios en blanco entre los temas son
inferiores a cuatro segundos
— hay ruido entre los temas
— existen largas secciones con volumen bajo o sin
sonido.
DISC
SEEK SEEK
SOURCE
DISC
> :
Para localizar
temas
posteriores
Se reproduce la cara orientada hacia abajo.
Consejo
Para cambiar el sentido de reproducción de la
cinta, pulse (MODE) (o).
Para Pulse
Detener la reproducción (OFF)
Expulsar el cassette
(OPEN/CLOSE)
continuación, Z
y, a
En el modo de desplazamiento de
indicaciones, todos los elementos se desplazan
por el visor uno por uno en orden.
Consejo
Es posible desactivar el modo de desplazamiento
de indicaciones (consulte “Cambio de los ajustes de
sonido y visualización” en la página 23).
11
Page 54

Reproducción de cintas en
diversos modos
Reproducción repetida de temas
— Reproducción repetida
1 Durante la reproducción, pulse (MENU).
Es posible reproducir la cinta en los siguientes
modos:
•Repeat (reproducción repetida), que permite
repetir el tema actual.
•NR (Dolby NR), que permite seleccionar el
sistema Dolby* NR B.
•Metal que permite reproducir una cinta
metálica o CrO2.
•B.Skip (omisión de espacios en blanco), que
omite espacios en blanco superiores a ocho
segundos.
•ATA (activación automática del
sintonizador), que activa automáticamente el
sintonizador durante el bobinado rápido de
la cinta.
* Reducción de ruido Dolby fabricado bajo
licencia de Dolby Laboratories Licensing
Corporation.
“DOLBY” y el símbolo de la D doble ; son
marcas de Dolby Laboratories Licensing
Corporation.
1 Durante la reproducción, pulse (MENU).
2 Pulse M o m varias veces hasta que
aparezca el elemento deseado.
Cada vez que pulse m, el elemento
cambiará de la siguiente forma:
Repeat t NR t Metal t B.Skip t ATA
2 Pulse M o m varias veces hasta que
aparezca “Repeat”.
3 Pulse , varias veces hasta que el ajuste
deseado aparezca en el visor.
Repeat on y Repeat off
Se inicia la reproducción repetida.
Para volver al modo de reproducción normal,
seleccione “Repeat off” en el paso 3.
Consejos
• Si selecciona el modo con los botones de la
unidad, pulse (1) (REP) varias veces hasta que
aparezca el modo deseado.
• Durante la reproducción repetida, pulse (MODE).
“REP” desaparecerá del visor y el modo de
repetición se cancelará.
3 Pulse , para seleccionar “on”.
Se inicia el modo de reproducción.
4 Pulse (ENTER).
Para volver al modo normal de reproducción,
seleccione “off” en el paso 3.
Consejo
Mientras la función ATA está activada, la
indicación (TAPE y TUNER) puede cambiarse
pulsando (DSPL/PTY).
12
Page 55

Radio
Memorización automática
de emisoras
— Memorización de la mejor sintonía (BTM)
Esta unidad selecciona las emisoras de señal
más intensa y las memoriza por orden de
frecuencia. Es posible almacenar hasta 6
emisoras de cada banda (FM1, FM2, FM3, MW
y LW).
Precaución
Para sintonizar emisoras durante la
conducción, utilice la función de
memorización de la mejor sintonía para evitar
accidentes.
1 Pulse (SOURCE) varias veces para
seleccionar el sintonizador.
Cada vez que pulse (SOURCE), la fuente
cambia de la siguiente forma:
B Tuner B CD* B MD* B TAPE
* Si el equipo opcional correspondiente no está
conectado, el elemento no aparecerá.
Memorización de las
emisoras deseadas
Es posible memorizar hasta 18 emisoras de FM
(6 para cada una de las siguientes: FM1, 2 y 3),
hasta 6 de MW y 6 de LW en el orden que
prefiera.
1 Pulse (SOURCE) varias veces para
seleccionar el sintonizador.
2 Pulse (MODE) varias veces para
seleccionar la banda.
3 Pulse . o > en la unidad para
sintonizar la emisora que desee
almacenar en el botón numérico.
4 Pulse el botón numérico que desee ((1) a
(6)) en la unidad hasta que aparezca
“MEM”.
En el visor aparecerá la indicación del
botón numérico.
Nota
Si almacena otra emisora en el mismo botón
numérico, la emisora previamente almacenada se
borrará.
2 Pulse (MODE) varias veces para
seleccionar la banda.
Cada vez que pulse (MODE), la banda
cambia de la siguiente forma:
B FM1 B FM2 B FM3 B MW B LW
3 Pulse (MENU) y, a continuación, pulse
M o m varias veces hasta que aparezca
“BTM”.
4 Pulse (ENTER).
La unidad almacena en los botones
numéricos las emisoras por orden de
frecuencia.
La unidad emite un pitido cuando el ajuste
se almacena.
Notas
• La unidad no almacena emisoras de señales
débiles. Si se reciben pocas emisoras, algunos
botones numéricos conservarán su ajuste
anterior.
• Si el visor muestra algún número, la unidad
almacenará las emisoras a partir del mostrado en
el visor.
13
Page 56

Recepción de emisoras
memorizadas
1 Pulse (SOURCE) varias veces para
seleccionar el sintonizador.
2 Pulse (MODE) varias veces para
seleccionar la banda.
3 Pulse M (memorizar arriba) o m
(memorizar abajo) varias veces para
recibir las emisoras en el orden en el que
se almacenaron en la memoria.
Consejo
Si opta por memorizar la emisora con los botones
de la unidad, pulse el botón numérico ((1) a (6))
donde se haya almacenado la emisora deseada.
Si no puede sintonizar una emisora
programada
Pulse < o , para buscar la emisora
(sintonización automática).
La exploración se detiene cuando la unidad
recibe una emisora. Pulse < o , varias
veces hasta que se reciba la emisora
deseada.
Nota
Si la sintonización automática se detiene con
demasiada frecuencia, pulse (MENU) y, a
continuación, M o m varias veces hasta que
aparezca “Local” (modo de búsqueda local). A
continuación, pulse ,, para seleccionar “Local
on”. Pulse (ENTER).
Durante la recepción local y la selección de
emisoras, el visor muestra “LCL Seek”.
Sólo se sintonizarán las emisoras de señal
relativamente intensa.
Consejo
Si sabe cuál es la frecuencia de la emisora que
desea escuchar, pulse y mantenga pulsado < o ,
hasta que aparezca la frecuencia deseada
(sintonización manual).
Si la recepción de FM en estéreo es
de mala calidad — Modo monofónico
1 Durante la recepción de radio, pulse
(MENU) y, a continuación, pulse M o m
varias veces hasta que aparezca “Mono”.
2 Pulse , hasta que aparezca “Mono on”.
El sonido mejorará, aunque será
monofónico (“ST“ desaparece).
3 Pulse (ENTER).
Para volver al modo normal, seleccione
“Mono off” en el paso 2.
En el modo de desplazamiento de
indicaciones, todos los elementos se desplazan
por el visor uno por uno en orden.
Consejo
Es posible desactivar el modo de desplazamiento
de indicaciones (consulte “Cambio de los ajustes de
sonido y visualización” en la página 23).
14
Page 57

RDS
Descripción general de la
función RDS
El sistema de datos de radio (RDS) es un
servicio de radiodifusión que permite a las
emisoras de FM transmitir información digital
complementaria junto con las señales normales
de programas de radio. Este sistema estéreo
para automóvil ofrece, entre otros, los
siguientes servicios: resintonización
automática del mismo programa, recepción de
anuncios de tráfico y localización de emisoras
mediante el tipo de programa.
Notas
• La disponibilidad de todas las funciones RDS está
determinada por el país o la región.
• La función RDS puede no activarse
correctamente si la señal es débil o si la emisora
sintonizada no transmite datos RDS.
Visualización del nombre
de la emisora
El nombre de la emisora actual se ilumina en el
visor.
Seleccione una emisora de FM
(página 13).
Al sintonizar una emisora de FM que
transmita datos RDS, el nombre de la
misma se ilumina en el visor.
En el modo de desplazamiento de
indicaciones, todos los elementos se desplazan
por el visor uno por uno en orden.
Consejo
Es posible desactivar el modo de desplazamiento
de indicaciones (consulte “Cambio de los ajustes de
sonido y visualización” en la página 23).
Nota
La indicación “*” significa que se recibe una
emisora RDS.
15
Page 58

Resintonización
automática del mismo
programa
— Frecuencias alternativas (AF)
La función de frecuencias alternativas (AF)
selecciona y resintoniza automáticamente la
emisora de señal más intensa dentro de una
red. Mediante el uso de esta función, es posible
escuchar continuamente el mismo programa
durante un largo viaje sin necesidad de volver
a sintonizar la emisora manualmente.
Las frecuencias cambian automáticamente.
98,5MHz
Emisora
96,0MHz
102,5MHz
Notas
• Si no hay ninguna emisora alternativa en la zona
o no necesita buscar una emisora alternativa,
desactive la función AF pulsando (AF/TA) varias
veces hasta que aparezca “AF TA off”.
• La indicación “NO AF” y el nombre de la emisora
parpadean alternativamente si la unidad no
encuentra una emisora alternativa en la red.
• Si el nombre de la emisora comienza a parpadear
después de seleccionar una emisora con la
función AF activada, esto indica que no hay
ninguna frecuencia alternativa disponible. Pulse
< o , mientras parpadea el nombre de
emisora (en un intervalo de ocho segundos). La
unidad comenzará a buscar otra frecuencia con
los mismos datos PI (Identificación de programa)
(“PI Seek“ aparecerá y no se oirá el sonido). Si la
unidad no encuentra otra frecuencia, aparecerá
“NO PI“ y volverá a la frecuencia anteriormente
seleccionada.
Recepción de programas regionales
La función de activación regional (“REG on”)
de esta unidad permite permanecer en la
sintonía de un programa regional sin cambiar
a otra emisora. (Observe que es necesario
activar la función AF.) El ajuste de fábrica de la
unidad es “REG on”. No obstante, si desea
desactivar la función, realice lo siguiente:
1 Seleccione una emisora de FM (página
13).
2 Pulse (AF/TA) varias veces hasta que
“AF on” se ilumine en el visor.
La unidad comienza a buscar una emisora
alternativa de señal más intensa dentro de
la misma red.
Consejo
Si selecciona el modo con los botones de la unidad,
pulse (AF) hasta que aparezca “AF on”.
Cambio de los elementos
mostrados
Cada vez que pulse (AF/TA), el elemento
cambiará de la siguiente forma:
B AF on B TA on B AF TA on*
AF TA off b
* Seleccione esta opción para activar las funciones
AF y TA.
Consejos
• Cada vez que pulse (AF) en la unidad, el
elemento cambiará de la siguiente forma:
AF on y AF off
• Cada vez que pulse (TA) en la unidad, el
elemento cambiará de la siguiente forma:
TA on y TA off
1 Durante la recepción de radio, pulse
(MENU) y, a continuación, pulse M o m
varias veces hasta que aparezca “REG”.
2 Pulse , hasta que aparezca “REG off”.
3 Pulse (ENTER).
Observe que al seleccionar “REG off” la
unidad podría cambiar a otra emisora
regional de la misma red.
Para volver a la activación regional, seleccione
“REG on” en el paso 2.
Nota
Esta función no se activa en el Reino Unido ni en
determinadas zonas.
16
Page 59

Función de enlace local
(sólo Reino Unido)
La función de enlace local permite seleccionar
otras emisoras locales de la zona, aunque no
estén almacenadas en los botones numéricos.
1 Pulse un botón numérico de la unidad en
el que haya almacenado una emisora
local.
2 En un intervalo de cinco segundos,
vuelva a pulsar el botón numérico de la
emisora local.
3 Repita este procedimiento hasta recibir
la emisora local que desee.
Recepción de anuncios de
tráfico
Los datos de anuncios de tráfico (TA) y de
programas de tráfico (TP) permiten sintonizar
automáticamente una emisora de FM que esté
emitiendo anuncios de tráfico, aunque esté
escuchando otras fuentes de programa.
Pulse (AF/TA) varias veces hasta que
aparezca “TA on” o “AF TA on”.
La unidad comienza a buscar emisoras que
emitan información sobre tráfico. “TP” se
ilumina en el visor al encontrar una emisora
que emita anuncios de tráfico.
Al iniciarse el anuncio de tráfico, “TA”
parpadea. Esta indicación deja de
parpadear cuando el anuncio finaliza.
Para cancelar el anuncio de tráfico
actual
Pulse (AF/TA).
Para cancelar todos los anuncios de tráfico,
desactive la función pulsando (AF/TA)
hasta que “TA off” se ilumine.
Programación del volumen de los
anuncios de tráfico
Es posible programar previamente el nivel de
volumen de los anuncios de tráfico, de forma
que éstos no pasen inadvertidos. Al comenzar
un anuncio, el volumen se ajustará
automáticamente al nivel programado.
1 Seleccione el nivel de volumen que
desee.
2 Pulse (AF/TA) durante dos segundos.
Se muestra “TA” y se almacena el ajuste.
Recepción de anuncios de urgencia
Si se emite un anuncio de urgencia mientras
escucha la radio, el programa cambiará
automáticamente al anuncio. Si escucha una
fuente que no sea la radio, es posible recibir
anuncios de urgencia si activa la función AF o
TA. En este caso, la unidad cambiará
automáticamente a dichos anuncios
independientemente de la fuente que esté
escuchando en ese momento.
Consejos
• Si el anuncio de tráfico comienza mientras
escucha otra fuente de programa, la unidad
cambia automáticamente al anuncio y vuelve a la
fuente original al finalizar éste.
• Si selecciona el modo con los botones de la
unidad, pulse (TA) hasta que aparezca “TA on”.
Nota
“NO TP” parpadea durante cinco segundos si la
emisora recibida no emite anuncios de tráfico. A
continuación, la unidad comienza a buscar una
emisora que emita dichos anuncios.
17
Page 60

Programación de emisoras
RDS con los datos AF y TA
Al programar las emisoras RDS, la unidad
almacena los datos de cada emisora, así como
su frecuencia, de forma que no sea necesario
activar la función AF o TA cada vez que
sintonice la emisora programada. Es posible
seleccionar un ajuste diferente (AF, TA o
ambos) para cada emisora programada, o bien
el mismo para todas.
Programación del mismo ajuste para
todas las emisoras programadas
1 Seleccione una banda de FM (página 13).
2 Pulse (AF/TA) varias veces para
seleccionar “AF on”, “TA on” o “AF TA
on” (tanto para la función AF como la
TA).
Tenga en cuenta que al seleccionar “AF TA
off” se almacenarán no sólo las emisoras
RDS, sino también las que no lo son.
Consejo
Si selecciona el modo con los botones de la
unidad, pulse (AF) y/o (TA) para seleccionar
“AF on” y/o “TA on”.
Tenga presente que al seleccionar “AF off” o
“TA off”, se almacenarán no sólo las emisoras
RDS, sino también las que no lo son.
Programación de ajustes diferentes
para cada emisora programada
1 Seleccione una banda de FM y sintonice
la emisora que desee.
2 Pulse (AF/TA) varias veces para
seleccionar “AF on”, “TA on” o “AF TA
on” (tanto para la función AF como la
TA).
Consejo
Si selecciona el modo con los botones de la
unidad, pulse (AF) y/o (TA) para seleccionar
“AF on” y/o “TA on”.
3 Pulse el botón numérico deseado de la
unidad y manténgalo pulsado hasta que
aparezca “MEM”.
Repita el procedimiento a partir del paso 1
para programar otras emisoras.
Consejo
Si desea cambiar el ajuste AF y/o TA predefinido
después de sintonizar la emisora memorizada,
active o desactive la función AF o TA.
3 Pulse (MENU) y, a continuación, pulse
M o m varias veces hasta que aparezca
“BTM”.
4 Pulse (ENTER).
“BTM” parpadea.
18
Page 61

Localización de emisoras
mediante el tipo de
programa
Es posible localizar la emisora que desee
mediante la selección de uno de los tipos de
programa que aparecen a continuación.
Tipos de programa Indicación
Noticias News
Temas de actualidad Affairs
Información Info
Deportes Sport
Educación Educate
Drama Drama
Cultura Culture
Ciencia Science
Variedades Varied
Música pop Pop M
Música rock Rock M
Música fácil de escuchar Easy M
Clásica ligera Light M
Clásica Classics
Otros tipos de música Other M
Información meteorológica Weather
Economía Finance
Programas infantiles Children
Asuntos sociales Social A
Religión Religion
Conversación telefónica Phone In
Viajes Travel
Ocio Leisure
Música jazz Jazz
Música country Country
Música nacional Nation M
Melodías de ayer Oldies
Música folk Folk M
Documentales Document
Sin especificar None
1 Pulse (DSPL/PTY) durante la recepción de
FM hasta que “PTY” se ilumine en el
visor.
El nombre del tipo de programa actual
aparece si la emisora transmite datos PTY.
Aparece “- - - - -” si la emisora recibida no
es RDS o si no se reciben los datos RDS.
2 Pulse M o m varias veces hasta que
aparezca el tipo de programa que desee.
Los tipos de programa aparecen en el orden
mostrado en la tabla. Observe que no es
posible seleccionar “None” (sin especificar)
para realizar la búsqueda.
3 Pulse (ENTER).
La unidad comienza a buscar una emisora
que transmita el tipo de programa
seleccionado.
Nota
No es posible utilizar esta función en los países en
los que no se disponga de datos PTY (selección de
tipo de programa).
19
Page 62

Ajuste automático del
reloj
Otras funciones
Los datos de hora (CT) de las transmisiones
RDS ajustan el reloj automáticamente.
1 Durante la recepción de radio, pulse
(MENU) y, a continuación, pulse M o m
varias veces hasta que aparezca “CT”.
2 Pulse , varias veces hasta que aparezca
“CT on”.
El reloj se ajusta.
3 Pulse (ENTER) para volver a la indicación
normal.
Para cancelar la función CT
Seleccione “CT off” en el paso 2.
Notas
• La función CT puede no activarse aunque se
reciba una emisora RDS.
• Es posible que la hora real y la ajustada mediante
la función CT no coincidan.
Esta unidad también puede controlarse con el
mando rotativo (opcional).
Etiquetado del mando
rotativo
En función de cómo monte el mando rotativo,
adhiera la etiqueta adecuada como se muestra
en la siguiente ilustración.
SOUND
MODE
DSPL
DSPL
MODE
SOUND
20
Page 63

Uso del mando rotativo
Este mando funciona mediante la pulsación de
botones y/o el giro de controles.
También es posible controlar las unidades de
CD o de MD opcionales con el mando rotativo.
Mediante la pulsación de los
botones (SOURCE y MODE)
(SOURCE)
(MODE)
Cada vez que pulse (SOURCE), la fuente
cambiará de la siguiente forma:
TUNER t CD* t MD* t TAPE
Al pulsar (MODE), el funcionamiento
cambiará de la siguiente forma;
• Sintonizador : FM1 t FM2 t FM3 t MW
• Unidad de CD* : CD1 t CD2 t …
• Unidad de MD* : MD1 t MD2 t …
• Cinta : sentido de reproducción
* Si el equipo opcional correspondiente no está
conectado, el elemento no aparecerá.
t LW
Mediante el giro del control
(SEEK/AMS)
Gire el control y suéltelo para:
•Localizar el principio de los temas de la
cinta. Gire y mantenga girado el control y
suéltelo para realizar un avance rápido de
la cinta. Para iniciar la reproducción
durante el avance rápido de la cinta, pulse
(MODE).
•Localizar un tema específico de un disco.
Gire y mantenga girado el control hasta
localizar el punto específico de un tema y,
a continuación, suéltelo para iniciar la
reproducción.
•Sintonizar emisoras automáticamente.
Gire y mantenga girado el control para
localizar una emisora específica.
Mediante la presión y giro del
control (PRESET/DISC)
Presione y gire el control para:
•Recibir emisoras memorizadas en los
botones numéricos.
•Cambiar el disco.
21
Page 64

Otras operaciones
Gire el control VOL para
ajustar el volumen.
Nota
Si realiza la instalación en un automóvil que no
disponga de posición ACC (accesorios) en el
interruptor de la llave de encendido pulse (OFF)
en la unidad durante dos segundos para desactivar
la indicación del reloj después de apagar el motor.
Pulse (DSPL) para cambiar
los elementos mostrados.
Consejo
Mientras la función ATA está activada, la
indicación (TAPE y TUNER) puede cambiarse
pulsando (DSPL).
Pulse (ATT)
para atenuar el
sonido.
OFF
Pulse (OFF) para
desactivar la unidad.
Pulse (SOUND)
para ajustar el
menú de sonido.
Cambio de la dirección de
funcionamiento
La dirección de funcionamiento de los
controles está ajustada de fábrica como se
muestra en la siguiente ilustración.
Para aumentar
Para disminuir
Si precisa instalar el mando rotativo en el lado
derecho de la columna de dirección, puede
invertir la dirección de funcionamiento.
Pulse (SOUND) durante dos segundos al
tiempo que presiona el control VOL.
Consejo
También es posible cambiar la dirección de
funcionamiento de estos controles con la unidad
(consulte “Cambio de los ajustes de sonido y
visualización” en la página 23).
22
Page 65

Ajuste de las
características de sonido
Cambio de los ajustes de
sonido y visualización
Es posible ajustar los graves, los agudos, el
balance y el equilibrio entre altavoces.
Es posible almacenar los niveles de graves y
agudos de forma independiente para cada
fuente.
1 Pulse (SOUND) varias veces para
seleccionar el elemento que desee ajustar.
Cada vez que pulse (SOUND), los
elementos cambian de la siguiente forma:
BAS (graves) t TRE (agudos) t
BAL (izquierdo y derecho) t
FAD (delantero y trasero)
2 Ajuste el elemento seleccionado con
< o ,.
Al realizar el ajuste con el mando rotativo,
pulse (SOUND) y gire el control VOL.
Nota
Realice el ajuste antes de que transcurran tres
segundos después de seleccionar el elemento.
Atenuación del sonido
Pulse (ATT) en el mando a distancia de
tarjeta o en el mando rotativo.
“ATT on” aparece momentáneamente.
Para restaurar el nivel de volumen anterior,
vuelva a presionar (ATT).
Consejo
Si el cable de interfaz de un teléfono para
automóvil está conectado al cable ATT, la unidad
disminuirá el volumen automáticamente cuando se
reciba una llamada telefónica.
Es posible ajustar los siguientes elementos:
Set (ajuste)
•Clock (Reloj) (página 10).
•CT (Hora del reloj) (página 20).
•Beep — que permite activar o desactivar los
pitidos.
•RM (Mando rotativo) — que permite cambiar
la dirección de funcionamiento del mando
rotativo.
— Seleccione “norm” para utilizar el mando
rotativo en la posición ajustada de
fábrica.
— Seleccione “rev” si monta el mando
rotativo en el lado derecho de la columna
de dirección.
•English/Spanish/Portuguese/Swedish —
que permite cambiar el idioma de las
indicaciones a inglés, español, portugués o
sueco.
Dis (visor)
•D.Info (Información dual) — que permite
visualizar el reloj y el modo de reproducción
simultáneamente (on) o bien la información
alternativamente (off).
•SA (Analizador de espectros) — que permite
cambiar el patrón de visualización de la
indicación del ecualizador (página 25).
•Dimmer (Atenuador) — que permite cambiar
el brillo del visor.
— Seleccione “on” para atenuar el brillo del
visor.
— Seleccione “off” para desactivar Dimmer.
•Contrast — para ajustar el contraste si las
indicaciones del visor no están reconocibles
debido a la posición de instalación de la
unidad.
•M.Dspl (Desplazamiento de indicaciones) —
para activar o desactivar el desplazamiento
de indicaciones por el visor.
•A.Scrl (Desplazamiento automático)
(página 27).
Continúa en la pàgina siguiente t
23
Page 66

1 Pulse (MENU).
2 Pulse M o m varias veces hasta que
aparezca el elemento que desee.
Cada vez que presione m, el elemento
cambiará de la siguiente forma:
Ejemplo
Clock t CT t Beep t RM t English/
Spanish/Portuguese/Swedish t D.Info t SA
t Dimmer t Contrast t M.Dspl*
*1Si no hay ningún CD o MD en reproducción,
este elemento no aparecerá.
*2Si la radio está apagada o si no hay ninguna
cinta, CD o MD en reproducción, este
elemento no aparecerá.
Nota
El elemento mostrado varía en función de la
fuente.
Consejo
Es posible cambiar fácilmente las categorías (“Set”,
“Snd” (Sonido), “P/M (Modo de reproducción)” y
“DIS”) pulsando M o m durante dos segundos.
1
t A.Scrl*
3 Pulse , para seleccionar el ajuste
deseado (Ejemplo: on u off).
4 Pulse (ENTER).
Una vez finalizado el ajuste de modo, el
visor vuelve a la indicación de modo de
reproducción normal.
Refuerzo de los graves
— D-bass
Es posible disfrutar de graves nítidos e
intensos. La función D-bass refuerza las
señales de baja y alta frecuencia con una curva
más marcada que la del refuerzo de graves
convencional.
Es posible recibir la línea de graves con mayor
2
nitidez aunque el volumen del sonido vocal no
haya variado. Puede potenciar y ajustar los
graves fácilmente con el botón D-BASS.
D-BASS 3
Nivel
0dB
Ajuste de la curva de graves
D-BASS 1 t D-BASS 2 t D-BASS 3 t
D-BASS off
Nota
Los graves pueden distorsionarse con el mismo
volumen. Si esto ocurre, seleccione una curva de
graves menos efectiva.
D-BASS 2
D-BASS 1
Frecuencia (Hz)
Pulse (D-BASS) varias veces para
seleccionar la curva de graves deseada.
Al aumentar el número D-BASS, también lo
hará el efecto.
D-BASS 3
D-BASS 2
D-BASS 1
24
Page 67

Selección del analizador
de espectros
El nivel de señal de sonido se visualiza en un
analizador de espectros. Es posible seleccionar
un patrón de visualización, de 1 a 6, o el modo
de visualización automático.
1 Pulse (SOURCE) para seleccionar una
fuente (sintonizador, cinta, CD o MD).
2 Pulse (MENU).
3 Pulse M o m varias veces hasta que
aparezca “SA”.
4 Pulse < o , varias veces para
seleccionar el ajuste deseado.
B SA 1 b B … SA 6 b
B SA Auto* b B SA off b
* Todos estos patrones de visualización
aparecerán uno por uno automáticamente.
5 Pulse (ENTER).
Ajuste del sonido y la
frecuencia del ecualizador
preamplificador
Esta unidad también puede controlar un
ecualizador preamplificador opcional.
Ello permite añadir algunos efectos al campo
de sonido de la fuente seleccionada.
Para obtener información detallada, consulte el
manual de instrucciones suministrado con el
ecualizador preamplificador.
25
Page 68

Equipo opcional
Unidad de CD/MD
Esta unidad puede controlar unidades de CD/
MD externas.
Si conecta una unidad opcional de CD con las
funciones CD TEXT y de archivo
personalizado, la información CD TEXT
aparecerá en el visor al reproducir discos CD
TEXT.
Reproducción de discos
compactos (CD) o de
minidiscos (MD)
1 Pulse (SOURCE) varias veces para
seleccionar CD o MD.
2 Pulse (MODE) hasta que aparezca la
unidad que desee.
Se inicia la reproducción de CD/MD.
Si una unidad de CD/MD se encuentra
conectada, todos los temas se reproducen
desde el principio.
*1Si no ha asignado título al disco o si no hay
ningún título de disco previamente registrado
en el MD, el visor mostrará “NO D.Name”
momentáneamente.
2
Si reproduce un disco CD TEXT, el nombre del
*
cantante aparecerá en el visor después del título
del disco. (Sólo para discos CD TEXT con nombre
del cantante).
*3Si el título del tema de un disco CD TEXT o MD
no está previamente registrado, el visor
mostrará “NO T.Name” momentáneamente.
4
Mientras esté activada la función AF/TA.
*
Después de seleccionar el elemento deseado, el
visor cambiará automáticamente al modo de
desplazamiento de indicaciones después de
unos segundos.
En dicho modo, todos los elementos se
desplazan por el visor uno por uno en orden.
Consejo
Es posible desactivar el modo de desplazamiento
de indicaciones por el visor (consulte “Cambio de
los ajustes de sonido y visualización” en la página
23).
Cambio de los elementos del visor
Cada vez que pulse (DSPL/PTY) durante la
reproducción de CD, CD TEXT o MD, el
elemento cambiará de la siguiente forma:
Número del disco/Número del tema/
Tiempo de reproducción transcurrido
Título del disco*
V
V
1
/Nombre del cantante*
V
Título del tema*
V
Frecuencia FM1*
3
4
26
2
Page 69

Desplazamiento automático del
título de un disco
— Desplazamiento automático
Si el título del disco, el nombre del artista o el
título del tema de un disco CD TEXT o MD es
superior 10 caracteres y la función de
desplazamiento automático está activada, la
información se desplaza por el visor
automáticamente como se indica a
continuación:
• El título del disco aparece al cambiar éste (si se
ha seleccionado el título de disco).
• El título del tema aparece al cambiar éste (si se
ha seleccionado el título de tema).
Si pulsa (DSPL/PTY) para cambiar el elemento
mostrado, el título del disco o del tema del MD
o del disco CD TEXT se desplaza
automáticamente tanto si activa como si
desactiva la función.
1 Durante la reproducción, pulse (MENU).
2 Pulse M o m varias veces hasta que
aparezca “A.Scrl”.
3 Pulse , para seleccionar “A.Scrl on”.
Localización de un tema específico
— Sensor de música automático (AMS)
Durante la reproducción, pulse < o ,
momentáneamente para cada tema que
desee omitir.
< (.): Para localizar temas anteriores
, (>) : Para localizar temas posteriores
Localización de un punto específico
de un tema — Búsqueda manual
Durante la reproducción, pulse y
mantenga pulsado < o ,. Deje de
pulsarlo cuando encuentre el punto que
desee.
< (m) : Para buscar hacia atrás
, (M) : Para buscar hacia delante
Conmutación a otros discos
Durante la reproducción, pulse M o m.
Se inicia la reproducción del disco que se
encuentra en la unidad actual.
M (DISC +) : Para discos posteriores
m (DISC –) : Para discos anteriores
4 Pulse (ENTER).
Para cancelar la función de desplazamiento
automático, seleccione “A.Scrl off” en el paso 3.
Nota
Para algunos discos con un gran número de
caracteres, pueden ocurrir los siguientes casos:
— Algunos de los caracteres no se muestran.
— La función de desplazamiento automático no
funciona.
Número del tema
Número del disco Tiempo de reproducción
transcurrido
27
Page 70

Reproducción repetida de
temas — Reproducción repetida
Es posible seleccionar:
•Repeat 1 – para repetir un tema.
•Repeat 2 – para repetir un disco.
1 Durante la reproducción, pulse (MENU).
2 Pulse M o m varias veces hasta que
aparezca “Repeat”.
3 Pulse , varias veces hasta que el ajuste
deseado aparezca en el visor.
B Repeat 1 B Repeat 2
Repeat off b
Se inicia la reproducción repetida.
Para volver al modo de reproducción normal,
seleccione “Repeat off” en el paso 3.
Reproducción de temas en
orden aleatorio
— Reproducción aleatoria
Es posible seleccionar:
•Shuf 1 – para reproducir los temas del disco
actual en orden aleatorio.
•Shuf 2 – para reproducir los temas de la
unidad actual en orden aleatorio.
•Shuf All* – para reproducir todos los temas
de todas las unidades en orden aleatorio.
1 Durante la reproducción, pulse (MENU).
2 Pulse M o m varias veces hasta que
aparezca “Shuf”.
3 Pulse , varias veces hasta que el ajuste
deseado aparezca en el visor.
B Shuf 1 B Shuf 2 B Shuf All*
Shuf off b
Consejo
Si selecciona el modo con los botones de la unidad,
pulse (1) (REP) varias veces hasta que aparezca el
modo deseado.
28
Se inicia la reproducción en orden aleatorio.
* “Shuf All” sólo se encuentra disponible si
conecta dos o más unidades de CD/MD
opcionales.
Para volver al modo de reproducción normal,
seleccione “Shuf off” en el paso 3.
Consejo
Si selecciona el modo con los botones de la unidad,
pulse (2) (SHUF) varias veces hasta que aparezca el
modo deseado.
Page 71

Asignación de títulos a los
discos compactos
— Memorando de discos
(unidad de CD con función de archivo
personalizado)
Es posible asignar un título personalizado a
cada disco, utilizando un máximo de ocho
caracteres para cada uno de éstos. La
asignación de títulos permitirá localizar discos
mediante el título (página 30) y seleccionar
temas específicos para su reproducción
(página 31).
1 Inicie la reproducción del disco que desee
etiquetar.
2 Pulse (MENU) y, a continuación, M o m
varias veces hasta que aparezca “Name
Edit”.
3 Repita los pasos 1 y 2 para
introducir el título completo.
5 Para volver al modo normal de
reproducción de CD, pulse (ENTER).
Consejo
Existe otro método para comenzar a asignar título
al CD. Pulse (LIST) durante dos segundos en lugar
de realizar los pasos 2 y 3. También puede
completar la operación manteniendo pulsado
(LIST) durante dos segundos en lugar de realizar
el paso 5.
Visualización del memorando de
discos
Pulse (DSPL/PTY) durante la
reproducción de un CD o de un disco CD
TEXT.
3 Pulse (ENTER).
Modo de edición de títulos
4 Introduzca los caracteres.
1 Pulse M varias veces para seleccionar
los caracteres que desee.
(A t B t C t ··· Z t 0 t 1 t 2 t
··· 9 t + t – t * t / t \ t > t <
t . t )
Si pulsa m varias veces, los caracteres
aparecerán en orden inverso.
Si desea introducir un espacio en blanco
entre caracteres, seleccione “ ”.
2 Pulse , después de localizar el
carácter deseado.
El siguiente carácter parpadeará.
Cada vez que pulse (DSPL/PTY) durante la
reproducción de un CD o de un disco CD
TEXT, los elementos cambiarán de la
siguiente forma:
Número de disco/Número de tema/
Tiempo de reproducción transcurrido
Nombre del memorando de discos
Frecuencia de FM1 o
nombre de la emisora*
*1Si conecta una unidad opcional de CD con la
función CD TEXT, el visor mostrará la
información CD TEXT al reproducir discos CD
TEXT.
2
Con la función AF/TA activada.
*
V
V
V
Título del tema*
V
1
2
Si pulsa <, el carácter anterior
parpadeará.
29
Page 72

Borrado del memorando de discos
1 Pulse (SOURCE) varias veces para
seleccionar “CD”.
2 Pulse (MODE) varias veces para
seleccionar la unidad de CD con función
de archivo personalizado.
3 Pulse (MENU) y, a continuación, pulse
M o m varias veces hasta que aparezca
“Name Del”.
Localización de discos
mediante el título — Función
de listado (unidad de CD con función de
archivo personalizado o unidad de MD)
Esta función puede utilizarse con discos a los
que se ha asignado un título personalizado.
Para obtener más información sobre los
nombres de memorando de disco, consulte
“Asignación de títulos a los discos compactos”
(página 29).
4 Pulse (ENTER).
5 Pulse M o m varias veces para seleccionar
el nombre de disco que desee borrar.
6 Pulse (ENTER) durante dos segundos.
El nombre se borrará.
Repita los pasos 5 y 6 para borrar otros
nombres.
7 Pulse (MENU) dos veces.
La unidad vuelve al modo normal de
reproducción de CD.
Notas
• Si se borra el nombre personalizado, el visor
mostrará la información CD TEXT original.
• Si borra todos los nombres de disco, “No Data”
aparecerá en el paso 6.
1 Pulse (LIST).
El título asignado al disco actual aparece en
el visor.
Al asignar un nombre de memorando a un
disco CD TEXT, dicho nombre tendrá
prioridad sobre la información original de
CD TEXT.
2 Pulse M (DISC +) o m (DISC –) varias veces
hasta que encuentre el disco deseado.
3 Pulse (ENTER) para reproducir el disco.
Notas
• Los títulos de tema no aparecen durante la
reproducción de un MD o de un disco CD TEXT.
• Si no hay discos en el cargador, el visor mostrará
“NO Disc”.
• Si no se ha asignado ningún archivo
personalizado a un disco, el visor mostrará
“********”.
• Si la unidad no ha leído la información del disco,
el visor mostrará “?”. Para cargar un disco,
primero pulse el botón numérico y, a
continuación, elija el disco que no se haya
cargado.
• No es posible mostrar ciertas letras durante la
reproducción de un disco MD o CD TEXT.
30
Page 73

Selección de temas
específicos para su
reproducción — Función de banco
(unidad de CD con función de archivo
personalizado)
Si asigna una etiqueta al disco, puede
programar la unidad para omitir o reproducir
los temas que desee.
Reproducción sólo de temas
específicos
Es posible seleccionar:
•“Bank on” — para reproducir los temas con
el ajuste “Play”.
•“Bank inv” (inverso) — para reproducir los
temas con el ajuste “Skip”.
1 Durante la reproducción, pulse (MENU) y,
a continuación, M o m varias veces hasta
que aparezca “Bank”.
1 Comience a reproducir el disco al que
desee asignar título.
2 Pulse (MENU) y, a continuación, pulse
M o m varias veces hasta que aparezca
“Bank Sel”.
3 Pulse (ENTER).
Modo de edición de banco
4 Asigne título a los temas.
1 Pulse < o , varias veces para
seleccionar el tema que desee etiquetar.
2 Pulse (ENTER) varias veces para
seleccionar “Play” o “Skip”.
5 Repita el paso 4 para definir “Play”
(reproducción) o “Skip” (omisión) para
todos los temas.
6 Pulse (MENU) dos veces.
La unidad vuelve al modo normal de
reproducción de CD.
Notas
• Es posible definir el modo “Play” y “Skip” para
un máximo de 24 temas.
• No es posible definir el modo “Skip” para todos
los temas de un CD.
2 Pulse , varias veces hasta que aparezca
el ajuste deseado.
B Bank on B Bank inv
Bank off b
3 Pulse (ENTER).
La reproducción se inicia a partir del tema
siguiente.
Para recuperar el modo de reproducción
normal, seleccione “Bank off” en el paso 2.
31
Page 74

Equipo opcional
DAB
Descripción general de la
función DAB
DAB (emisión de audio digital) es un nuevo
sistema de emisión multimedia que transmite
programas de audio con una calidad
comparable a la de los CDs. Ello es posible
gracias al uso de un microordenador en el
sintonizador DAB que utiliza las señales de
radio enviadas desde múltiples antenas y
señales multiruta (ondas de radio reflejadas)
para amplificar la intensidad de la señal
principal. Así, DAB prácticamente no sufre los
efectos de las interferencias de radio, incluso
en un automóvil en movimiento.
Cada emisora DAB junta los programas de
radio (servicios) para formar un conjunto que
luego se emite. Cada servicio contiene uno o
más componentes. Todos los conjuntos,
servicios y componentes se identifican con un
nombre, de forma que es posible acceder a
cualquiera de ellos sin necesidad de conocer
las frecuencias.
DAB programa
Conjunto
Servicio
Servicio
Servicio
Componente
Componente
Componente
Notas
• El sistema DAB aún se encuentra en fase de
pruebas, lo cual implica que algunos servicios no
se han definido lo suficiente o se están probando
actualmente. En estos momentos, el sintonizador
XT-100DAB opcional no soporta estos servicios.
• Los programas DAB se emiten en la banda III (174
a 240 MHz) y en la banda L (1.452 a 1.492 MHz),
con cada banda dividida en canales (41 en la
banda III y 23 en banda L). Cada emisora DAB
emite un conjunto por canal.
• Cuando cambie el modo de FM3 a DAB, todos los
modos AF TA permanecerán activos.
• Si cambia alguno de los modos AF TA en DAB,
ese modo permanecerá activo en FM1.
Operaciones básicas de
DAB
Búsqueda del conjunto y del
servicio
— Sintonización automática
1 Pulse (SOURCE) varias veces para
seleccionar el sintonizador.
2 Pulse (MODE) varias veces para
seleccionar “DAB”.
3 Pulse y mantenga pulsado < o ,hasta
que aparezca “Seek +” o “Seek –”.
4 Pulse < o , para buscar el servicio
deseado.
Nota
La indicación “
busca el conjunto.
Selección del conjunto
— Sintonización manual
Si sabe cuál es el número de canal del
conjunto, realice el siguiente procedimiento
para realizar la sintonización.
1 Pulse (SOURCE) varias veces para
seleccionar el sintonizador.
2 Pulse (MODE) varias veces para
seleccionar “DAB”.
3 Pulse M o m hasta que aparezca “Ch.
XXX”.
4 Pulse M o m varias veces hasta que
aparezca el número de canal deseado.
Consejos
• Es posible que más de un canal emita el mismo
conjunto.
• Si selecciona el servicio de conjuntos pero no
puede recibirlo, la indicación “
” parpadea mientras la unidad
” parpadeará.
32
Page 75

Recepción de los servicios
memorizados
El siguiente procedimiento estará disponible
tras memorizar el servicio. Para obtener
información detallada sobre la memorización
de los servicios, consulte “Memorización
automática de los servicios DAB” y
“Memorización manual de los servicios DAB”
(página 34).
1 Pulse (SOURCE) varias veces para
seleccionar el sintonizador.
2 Pulse (MODE) varias veces para
seleccionar “DAB”.
3 Pulse M o m varias veces para seleccionar
el servicio memorizado.
Consejo
Hay otro método para recibir el servicio
memorizado.
Pulse el botón numérico ((1) a (6)) de la unidad
en el que esté almacenado el servicio deseado.
El modo de recepción del sintonizador DAB
aparece en función de la siguiente tabla:
Indicación Nivel Modo de recepción
(parpadeo) 0 recepción imposible
1 mala recepción
2 regular
3 moderado
4 buena recepción
Memorización automática
de servicios DAB — BTM
La función BTM (memoria de la mejor
sintonía) detecta los conjuntos DAB y asigna
los servicios a los números de memorización
automáticamente dentro de los conjuntos. La
unidad puede memorizar hasta 40 servicios.
Si los servicios se han memorizado
anteriormente, la función BTM funciona bajo
las siguientes condiciones:
•Si activa la función BTM mientras escucha un
servicio memorizado, la unidad sólo
almacenará los servicios detectados
(mediante la sobrescritura) a los números de
memorización superiores al número del
servicio actual.
•Si activa la función mientras escucha un
servicio no memorizado, la unidad sustituirá
el contenido de todos los números de
memorización.
•En los dos casos anteriores, si la unidad
detecta un servicio idéntico a uno ya
memorizado, el servicio almacenado
anteriormente no se modifica y el recién
detectado no se memoriza.
1 Mientras escucha un programa DAB,
pulse (MENU).
2 Pulse M o m varias veces hasta que
aparezca “BTM”.
3 Pulse (ENTER).
Al almacenarse el servicio, suena un pitido.
Una vez activada la función BTM, la unidad
sintonizará el servicio asignado en la
memoria predefinida 1 automáticamente.
Nota
Si la unidad sólo puede sintonizar unos pocos
servicios, es posible que la función BTM no asigne
servicios a todos los números de memorización de
servicios.
33
Page 76

Memorización manual de
servicios DAB
— Memorización manual
También es posible memorizar los servicios
DAB manualmente o eliminar un servicio ya
memorizado. Recuerde que puede memorizar
hasta 40 servicios (mediante la función BTM o
bien de forma manual) en la memoria de la
unidad.
1 Mientras escucha un programa DAB,
pulse (MENU).
Sustitución de los servicios de las
memorias predefinidas
Pulse M o m para seleccionar “Over Wrt” en el
paso 4, y pulse (ENTER).
Adición de los servicios de las
memorias predefinidas
Pulse M o m para seleccionar “Insert” en el
paso 4, y pulse (ENTER).
Borrado de los servicios de las
memorias predefinidas
Pulse M o m para seleccionar “Delete” en el
paso 4, y pulse (ENTER).
2 Pulse M o m varias veces hasta que
aparezca “PresetEdit” y, a continuación,
pulse (ENTER).
3 Seleccione el servicio y el número de
memorización que desee predefinir.
1 Pulse < o , para seleccionar el
servicio.
2 Pulse M o m para seleccionar el
número de memorización.
3 Pulse (ENTER).
4 Pulse M o m para seleccionar “Over Wrt”.
Cada vez que pulse m, el comando de
edición cambiará de la siguiente forma:
B Over Wrt B Insert* B Delete
* “Insert” no aparecerá si el número máximo
de servicios (40) ya está almacenado en la
memoria.
Consejo
Hay otro método para memorizar el servicio.
Tras recibir el servicio, pulse el botón numérico
((1) a (6)) de la unidad hasta que oiga un pitido.
Para memorizar otros servicios, repita los
pasos 3 y 4.
5 Pulse (ENTER).
34
Page 77

Recepción de programas
DAB
Siga este procedimiento para sintonizar un
programa DAB manualmente.
También puede almacenar servicios DAB en la
memoria de la unidad para su sintonización
instantánea (consulte “Memorización
automática de servicios DAB (BTM)” en la
página 32).
1 Mientras escucha un programa DAB,
pulse (LIST) varias veces hasta que
aparezca la lista de conjuntos.
Cambio de los elementos del visor
Al pulsar (LIST) una vez, aparece la última
lista seleccionada.
Cada vez que pulse (LIST), la lista cambiará de
la siguiente forma:
ENS (Lista de conjuntos)
SRV (Lista de servicios)
CMP (Lista de componentes)
PRS (Lista predefinida)
V
V
V
V
V
DAB (Cancelación)
2 Pulse M o m hasta que aparezca el
conjunto deseado y, a continuación,
pulse (ENTER).
3 Pulse (LIST) varias veces hasta que
aparezca la lista de servicios.
4 Pulse M o m varias veces hasta que
aparezca el servicio deseado y, a
continuación, pulse (ENTER).
5 Pulse (LIST) varias veces hasta que
aparezca la lista de componentes.
6 Pulse M o m hasta que aparezca el
componente deseado y, a continuación,
pulse (ENTER).
Consejo
Para comprobar el nombre del componente,
conjunto o servicio actual, pulse (LIST) varias veces
hasta que la lista respectiva aparezca en el visor. El
nombre del elemento actualmente seleccionado
parpadeará.
Actualización automática de las
lista de conjuntos
Al utilizar la función BTM por primera vez,
todos los conjuntos disponibles en la zona se
almacenan de forma automática. Al volver a
emplear dicha función, el contenido de estas
listas se actualiza de acuerdo con las
condiciones descritas en la página 32.
Un conjunto se añade a la lista correspondiente
si se recibe durante la sintonización automática
o manual pero no está incluido en la lista.
Un conjunto también se elimina de la lista
correspondiente cuando:
•se selecciona en la lista un conjunto que no
puede recibirse.
•se realiza una sintonización automática o
manual para recibir un conjunto, servicio o
componente que está incluido en la lista pero
no puede recibirse.
35
Page 78

Ajustes de recepción de
audio
DAB puede contener audio multicanal. Es
posible seleccionar el canal principal o un
subcanal para la recepción. Además, si activa
la función DRC (control de rango dinámico), el
rango dinámico de un servicio que soporta
DRC puede ampliarse de forma automática.
Es posible definir los siguientes elementos:
•Main/Sub — que permite seleccionar canales
entre “Main” (canal principal) y “Sub”
(subcanal).
•DRC — que permite activar o desactivar la
función.
1 Mientras escucha un programa DAB,
pulse (MENU).
Localización de un servicio
DAB por tipo de programa
(PTY)
Puede utilizar la función PTY (selección de
tipo de programa) para sintonizar el programa
que desee.
1 Mientras escucha un programa DAB,
pulse (DSPL/PTY).
2 Pulse M o m varias veces para seleccionar
el tipo de programa.
2 Pulse M o m varias veces hasta que
aparezca “DRC” o “Main (o Sub)”.
3 Pulse < o , para seleccionar el ajuste
deseado (ejemplo: “on” u “off”).
4 Pulse (ENTER).
Nota
”Main (o Sub)” sólo aparece en el menú cuando la
unidad recibe un programa multicanal.
Los tipos de programa aparecen en el orden
que se muestra en la página 19.
3 Pulse (ENTER).
36
Page 79

Información
complementaria
Mantenimiento
Sustitución del fusible
Al sustiuir el fusible, asegúrese de utilizar uno
que coincida con el amperaje indicado en el
fusible original. Si el fusible salta, compruebe
la conexión de alimentación y sustitúyalo. Si
después de sustituirlo vuelve a saltar, es
posible que exista un funcionamiento interno
defectuoso. En tal caso, póngase en contacto
con el proveedor Sony más próximo.
Fusible (10 A)
Sustitución de la pila de litio
Cuando la pila dispone de poca energía, el
margen de control del mando a distancia de
tarjeta será menor. Sustituya dicha pila por
otra de litio CR2025 nueva.
x
Cara + hacia arriba
Advertencia
No utilice nunca un fusible con un amperaje
superior al del suministrado con la unidad, ya
que ésta podría dañarse.
Notas sobre la pila de litio
•Mantenga la pila fuera del alcance de los
niños. En caso de ingestión, póngase
inmediatamente en contacto con un médico.
•Limpie la pila con un paño seco para
garantizar un contacto óptimo.
•Cuando instale la pila, insértela con la
polaridad correcta.
•No maneje la pila con pinzas metálicas, ya
que puede producirse un cortocircuito.
PRECAUCIÓN
La pila puede explotar si la trata mal.
No la recargue, desarme, ni la tire al fuego.
37
Page 80

Desmontaje de la unidad
Con el panel frontal abierto
1 Pulse (OPEN) en la unidad y, a
continuación, presione el clip del interior
de la cubierta frontal con un
destornillador fino, y haga palanca
cuidadosamente para liberar dicha
cubierta.
Si el panel frontal no se abre
debido a que el fusible se ha
fundido
1 Presione el clip del interior de la cubierta
frontal con la llave de liberación
(suministrada), y libere dicha cubierta.
Llave de liberación
(suministrada)
2 Repita el paso 1 en el lado izquierdo.
La cubierta frontal podrá extraerse.
3 Emplee un destornillador fino para
ejercer presión sobre el clip de la parte
izquierda de la unidad; a continuación,
tire del lado izquierdo de la unidad hasta
que el enganche salga del marco.
4 Repita el paso 3 en el lado derecho.
2 Repita el paso 1 en el lado izquierdo.
La cubierta frontal podrá extraerse.
3 Utilice la llave de liberación para ejercer
presión sobre el clip del lado izquierdo
de la unidad, y después tire de dicho
lado hasta que el retén libere la fijación.
4 Repita el paso 3 en el lado derecho.
5 Saque la unidad del marco.
5 Saque la unidad del marco.
38
Page 81

Especificaciones
Sección del reproductor de
cassettes
Pista de cinta 4 pistas, 2 canales, estéreo
Fluctuación y trémolo 0,08 % (WRMS)
Respuesta de frecuencia 30 – 20.000 Hz
Relación señal-ruido
Tipo de
cassette
TYPE II, IV
TYPE I
Dolby B NR
67 dB
64 dB
Dolby NR
desactivado
61 dB
58 dB
Sección del sintonizador
FM
Gama de sintonización 87,5 – 108,0 MHz
Terminal de antena Conector de antena externa
Frecuencia intermedia 10,7 MHz/450 kHz
Sensibilidad utilizable 8 dBf
Selectividad 75 dB a 400 kHz
Relación señal-ruido 66 dB (estéreo),
Distorsión armónica a 1 kHz
Separación 35 dB a 1 kHz
Respuesta de frecuencia 30 – 15.000 Hz
72 dB (mono)
0,6 % (estéreo),
0,3 % (mono)
MW/LW
Gama de sintonización MW: 531 – 1.602 kHz
Terminal de antena Conector de antena externa
Frecuencia intermedia 10,7 MHz/450 kHz
Sensibilidad MW: 30 µV
LW: 153 – 279 kHz
LW: 40 µV
Sección del amplificador de
potencia
Salidas Salidas de altavoz
Impedancia de altavoz 4 – 8 ohmios
Salida máxima de potencia
50 W × 4 (a 4 ohmios)
Generales
Salidas Salida de audio (2)
Entradas Cable de control de
Controles de tono Graves ±9 dB a 100 Hz
Requisitos de alimentación
Dimensiones Aprox. 178 × 50 × 182 mm
Dimensiones de montaje Aprox. 182 × 53 × 163 mm
Masa Aprox. 1,3 kg
Accesorios suministrados Mando a distancia de
Accesorios opcionales Mando rotativo RM-X4S
Equipo opcional Cambiador de CD
Cable de control de relé de
antena motorizada
Cable de control de
amplificador de potencia
atenuación para teléfono
Cable de control de
iluminación
Agudos ±9 dB a 10 kHz
Batería de automóvil de
12 V CC (toma a tierra
negativa)
(an/al/prf)
(an/al/prf)
tarjeta RM-X96
Componentes para
instalación y conexiones
(1 juego)
Cable BUS (suministrado
con un cable de pines
RCA)
RC-61 (1 m), RC-62 (2 m)
(10 discos)
CDX-828, CDX-737
Cambiador de MD
(6 discos)
MDX-65
Otros cambiadores de
CD/MD con el sistema
BUS de Sony
Selector de fuente
XA-C30
Unidad de sintonización
DAB
XT-100DAB
Ecualizador
preamplificador digital
XDP-210EQ, XDP-4000X
Diseño y especificaciones sujetos a cambios sin
previo aviso.
39
Page 82

Guía de solución de problemas
La siguiente lista de comprobaciones resulta útil para solucionar los problemas que puedan
producirse al utilizar la unidad.
Antes de consultar la lista que aparece a continuación, compruebe los procedimientos de conexión
y funcionamiento.
Generales
Problema
Ausencia de sonido.
Se ha borrado el contenido de
la memoria.
El sonido se oye con ruido.
Reproducción de cintas
Problema
El sonido se distorsiona.
AMS no funciona
correctamente.
Causa/Solución
•Cancele la función ATT.
•Ajuste el control de equilibrio entre los altavoces en la
posición central para sistemas de 2 altavoces.
•Pulse (+) de los botones VOL para ajustar el volumen.
•Ha desconectado el cable de alimentación o la batería.
•Ha pulsado el botón de restauración.
t Vuelva a realizar el almacenamiento en la memoria.
•Está utilizando un teléfono móvil.
Causa/Solución
Contaminación del cabezal de cinta.
t Limpie el cabezal con un cassette de limpieza de tipo seco
disponible en el mercado.
• Se produce ruido en el espacio entre temas.
• Un espacio en blanco es demasiado corto (inferior a cuatro
segundos).
• Una pausa larga o una parte de bajas frecuencias, o un nivel
de sonido muy bajo se interpreta como un espacio en blanco.
Recepción de radio
Problema
No es posible realizar la
sintonización programada.
No es posible realizar la
sintonización automática.
No es posible recibir las
emisoras.
Los ruidos obstaculizan el
sonido.
La indicación “ST” parpadea.
40
Causa/Solución
•Memorice la frecuencia correcta.
•La emisión es demasiado débil.
•La emisión es demasiado débil.
t Utilice la sintonización manual.
•El modo de búsqueda local está ajustado en “on”.
t Ajústelo en “off”. (página 14).
Conecte un cable de control de la antena motorizada (azul) o
un cable de fuente de alimentación auxiliar (rojo) al cable de
fuente de alimentación del amplificador de antena del
automóvil.
(Sólo si el automóvil incorpora una antena de recepción de
FM/MW/LW en el cristal posterior/lateral.)
•Sintonice la frecuencia con precisión.
•La emisión es demasiado débil.
t Realice el ajuste en el modo monofónico Mono
(página 14).
Page 83

Funciones RDS
Problema
La búsqueda (SEEK) se inicia
después de unos segundos de
escucha.
Ausencia de anuncios de tráfico.
PTY muestra “None”.
Reproducción de CD/MD
Problema
El sonido se recibe entrecortado.
No es posible desactivar la
indicación “--------”.
Causa/Solución
La emisora no es TP o es de señal débil.
t Pulse (AF/TA) para seleccionar “AF TA off”.
•Active “TA”.
•La emisora no emite anuncios de tráfico a pesar de ser TP.
t Sintonice otra emisora.
La emisora no especifica el tipo de programa.
Causa/Solución
Disco sucio o defectuoso.
No es posible asignar títulos a los discos compactos, a menos
que conecte una unidad de CD con función de archivo
personalizado.
t Pulse (LIST) durante dos segundos.
41
Page 84

Indicaciones de error (cuando se ha conectado una unidad de CD/MD opcional)
Las siguientes indicaciones parpadearán durante cinco segundos aproximadamente y se oirá una
alarma.
Indicación
NO Mag
NO Disc
NG Discs
Error
Blank
Push Reset
Not Ready
High Temp
*1Cuando se produce algún error durante la reproducción de un CD o MD, el número del CD o del MD no
aparece en el visor.
*2El visor mostrará el número del disco que causa el error.
Causa
No ha insertado el cargador de discos
en la unidad de CD/MD.
No ha insertado ningún disco en la
unidad de CD/MD.
No es posible reproducir un CD/MD
debido a algún problema.
Un CD está sucio o insertado al
1
*
1
*
2
revés.*
No es posible reproducir un MD
debido a algún problema.*
No ha grabado ningún tema en el
2
MD.*
No es posible emplear la unidad de
CD/MD debido a algún problema.
La tapa de la unidad de MD está
abierta o los minidiscos no se han
insertado correctamente.
La temperatura ambiente es superior
a 50°C.
2
Solución
Inserte el cargador de discos en la
unidad de CD/MD.
Inserte los discos en la unidad de
CD/MD.
Inserte otro CD/MD.
Limpie el CD o insértelo
correctamente.
Inserte otro MD.
Reproduzca un MD con temas
grabados.
Pulse el botón de restauración de la
unidad.
Cierre la tapa o inserte los
minidiscos correctamente.
Espere hasta que la temperatura
descienda por debajo de 50°C.
Si el problema no se soluciona con las sugerencias anteriormente enumeradas, póngase en contacto
con el proveedor Sony más próximo.
42
Page 85

43
Page 86

Välkommen !
Säkerhetsföreskrifter
Tack för att du visade oss förtroendet att välja
denna Sony bilstereo med kassettdel. Med den
här enheten får du tillgång till ytterligare
funktioner med hjälp av följande tillbehör:
Medföljande tillbehör
Kortfjärrkontroll RM-X96
Valfria tillbehör
Vridkontroll RM-X4S
Förutom att spela upp band och lyssna på
radion kan du bygga ut systemet genom att
ansluta en valfri CD-/MD-spelare*1.
Då du använder den här enheten eller en
ansluten CD spelare med CD TEXT-funktion,
kommer textinformationen att visas i
teckenfönstret då du spelar en CD TEXTskiva*2.
*1Du kan ansluta en CD-växlare, MD-växlare, CD-
spelare eller en MD-spelare.
*2En CD TEXT-skiva är en ljud-CD-skiva som
innehåller information som t ex skivans namn,
artistens namn och spårnamn.
Denna information spelas in på skivan.
•Om du har parkerat bilen i direkt solljus så
att temperaturen i bilen har stigit markant,
bör du låta enheten svalna innan du
använder den.
•Om ingen ström tillförs enheten, kontrollerar
du först anslutningarna. Kontrollera
säkringen om allt i övrigt är i sin ordning.
•Om inget ljud kommer från ett system med
två högtalare, ställer du uttoningskontrollen i
mittenläget.
•När bandet spelas under en lång tid blir
kassetten varm p g a den inbyggda
effektförstärkaren. Detta är normalt.
Om du har några frågor eller problem som rör
enheten och som inte tas upp i
bruksanvisningen, tar du kontakt med
närmaste Sony-återförsäljare.
Så här bibehåller du högsta
ljudkvalitet
Se till att inte spilla juice eller läsk på bilstereon
om du har drickhållare placerade i närheten.
Om du råkar spilla något på enheten eller
kassettbanden kan bandhuvudena skadas och
detta reducerar ljudkvaliteten eller förstör den
helt och hållet.
Kassettrengöringsvätskorna avlägsnar inte
socker från bandhuvudena.
2
Page 87

Sköta kassetterna
Skötselföreskrifter
•Vidrör inte bandets yta, eftersom smuts och
damm kan smutsa ned bandhuvudena.
•Förvara inte kassetterna tillsammans med
utrustning som t ex högtalare eller
förstärkare som kan ha inbyggda magneter,
eftersom detta kan leda till att bandet raderas
eller förstörs.
•Utsätt inte kassetter för direkt solljus, extremt
låga temperaturer eller fukt.
•Om bandet inte är tillräckligt spänt kan det
fastna i maskinen. Sätt in en penna eller
liknande i hjulet för att rulla in bandet så att
det blir ordentligt spänt innan du sätter i det.
Slakt band
•Kassetter i dålig kondition och lösa etiketter
kan orsaka problem när du sätter i eller tar ut
ett kassettband. Ta bort eller byt ut lösa
etiketter.
Kassetter som är längre än 90 minuter
Undvik att använda kassetter med längre
speltid än 90 minuter annat än för långa och
oavbrutna spelningar. Bandet i dessa kassetter
är mycket tunt och har tendens att tänjas lätt.
Om du stoppar och startar dessa band ofta kan
de lätt trassla in sig i kassettdäckets mekanism.
• Ljudet kan bli förvrängt medan kassetten
spelas. Efter var 50e timmes speltid bör du
göra rent kassettspelarens huvud.
3
Page 88

Innehållsförteckning
Endast den här enheten
Reglagens placering ............................................ 5
Komma igång
Återställa enheten ............................................... 8
Frigöra säkerhetsspärren ................................... 8
Slå på/stänga av enheten .................................. 9
Använda menyn.................................................. 9
Ställa klockan ..................................................... 10
Kassettbandspelare
Lyssna på band................................................... 11
Spela upp ett band i olika lägen...................... 12
Radio
Lagra kanaler automatiskt
— BTM-funktionen...................................... 13
Lagra endast de önskade kanalerna ............... 13
Motta de lagrade kanalerna............................. 14
RDS
Översikt av
RDS-funktionen ........................................... 15
Visa kanalnamnet.............................................. 15
Ställa in samma program automatiskt
— Alternativa frekvenser (AF) .................. 16
Lyssna på trafikmeddelanden......................... 17
Förinställa RDS-kanalerna med AF- och
TA-data.......................................................... 18
Söka en kanal efter programtyp...................... 19
Ställa klockan automatiskt............................... 20
Övriga funktioner
Fästa etiketten på vridkontrollen.................... 20
Använda vridkontrollen .................................. 21
Ljudjustering...................................................... 23
Dämpa ljudet ..................................................... 23
Ändra ljud- och teckeninställningarna .......... 23
Höja basljudet
— D-bass ....................................................... 24
Välja spektrumanalysator ................................ 25
Ställa in ljud och frekvens på
equalizerförförstärkaren ............................. 25
Med tillvalet
CD-/MD-spelare
Spela en CD eller MD ....................................... 26
Spela upp spår flera gånger
— Upprepad uppspelning.......................... 28
Spela upp spår i slumpmässig ordning
— Slumpmässig uppspelning .................... 28
Namnge en CD-skiva
— Skivminne ................................................ 29
Hitta en CD-skiva efter namn
— Lista namn ............................................... 30
Välja spår för uppspelning
— Bank .......................................................... 31
DAB
DAB - Översikt .................................................. 32
Grundläggande DAB-funktioner.................... 32
Förinställa DAB-tjänster automatiskt
— BTM .......................................................... 33
Förinställa DAB-tjänster manuellt
— Manual Preset Memory -
manuellt förinställningsminne .................. 34
Lyssna på ett DAB-program............................ 35
Inställningar för ljudmottagning .................... 36
Söka efter en DAB-tjänst med hjälp av
programtypen (PTY) ................................... 36
Ytterligare information
Underhåll ........................................................... 37
Demontera enheten........................................... 38
Tekniska data..................................................... 39
Felsökning .......................................................... 40
4
Page 89

Reglagens placering
Kortfjärrkontroll RM-X96
OFF
MENU LIST
SEEK
SOUND
PTY
DSPL AF/TA MODE
Mer information finns på de angivna sidorna.
1 OFF-knappen 9, 11
2 MENU knappen 10, 12, 13, 14, 16, 18,
20, 24, 25, 27, 28, 29, 31, 33, 34, 36
3 SOURCE-knappen (TUNER/TAPE/CD/MD)
9, 11, 13, 14, 25, 26, 30, 32, 33
4 </, (SEEK/AMS –/+) knappar
9, 10, 11, 12, 14, 16, 20, 23, 24, 25, 27, 28,
29, 31, 32, 34, 36
Automatisk musiksökning (AMS)
(./>) 11, 27
Manuell sökning (m/M) 27
Söka 14
5 SOUND-knappen 23
6 DSPL/PTY-knappen (ändra visningsläge/
programtyp) 19, 26, 27, 29, 36
7 ATT (dämpning) knapp 23
8 D-BASS-knappen 24
9 OPEN/CLOSE-knappen 11
0 LIST-knappen 29, 30, 35
qa M/m (DISC/PRST +/–) knappar
9, 10, 12, 13, 14, 16, 18, 19, 20, 24, 25,
27, 28, 29, 30, 31, 32, 33, 34, 36
Under radiomottagning:
Lagra kanaler automatiskt 14
Under CD/MD-uppspelning:
Byta skiva 27
OPEN/CLOSE
D-BASS
DISC
SEEK
SOURCE
DISC
ENTER
VOLATT
qs ENTER knappen
10, 12, 13, 14, 16, 18, 19, 20, 24, 25, 27,
29, 30, 31, 33, 34, 35, 36
qd AF/TA-knappen 16, 17, 18
qf MODE-knappen
11, 12, 13, 14, 26, 30, 32, 33
Under uppspelning av band:
Ändra riktning på bandtransport 11
Under radiomottagning:
Välj BAND 13, 14
Under CD- eller MD-uppspelning:
Välj CD/MD-spelare 26
qg VOL (volyminställning) knappar
Om du har stängt av enheten genom att trycka
på (OFF) under två sekunder, kan du inte
längre manövrera den med hjälp av
kortfjärrkontrollen, om du inte först har tryck
på (SOURCE) på enheten eller aktiverat den
genom att sätta in en kassett i den.
5
Page 90

Reglagens placering
Frontpanel
Reglagepanel
T
Y
P
P
S
L
OFF
D
SOURCE
M
O
D
E
REP SHUF
123456
MENU
SOUND
TAAF
DISC
D-BASS
DISC
LIST
ENTER
CLOSE
XR-M500R
6
Page 91

Knapparna på spelaren har samma
funktion som motsvarande knappar på
kortfjärrkontrollen.
10 Återställningsknappen 8
2 Huvudteckenfönster
3 OPEN-knappen 38
4qa Sensor för kortfjärrkontroll
5 Volymknappar
6 DSPL/PTY-knappen (ändra visningsläge/
programtyp)
7 Sidoteckenfönster
8 MENU knappen
9 Z Utmatningsknapp 11
qs LIST-knappen
qd OFF-knappen* 9
qf MODE-knappen
qg SOURCE-knappen (TUNER/TAPE/CD/MD)
qh AF-knappen 16, 18
qj Sifferknappar
Under radiomottagning:
Välja förinställningsnummer
13, 14, 17, 33, 34
Under uppspelning av band:
(1) REP 12
Under uppspelning av CD/MD:
(1) REP 28
(2) SHUF 28
qk TA knappen 16, 17, 18
ql SOUND-knappen
w; PRST/DISC +/– (markör upp/ned)
knappar
SEEK/AMS –/+ (markör vänster/höger)
knappar 13
wa ENTER knappen
ws CLOSE knappen
wd D-BASS-knappen
* Varning vid installering i en bil vars
tändlås saknar tillbehörsläge (ACC)
Glöm inte att stänga av klockvisningen
när du har stängt av motorn. Du stänger
av den genom att trycka på (OFF) på
enheten under två sekunder.
Om du bara trycker på (OFF) för ett kort
ögonblick stängs inte klockvisningen av,
vilket leder till att batteriet belastas.
7
Page 92

Komma igång
Återställa enheten
Innan du använder enheten för första gången
eller när du har bytt bilbatteri, måste du
återställa enheten.
Tryck på återställningsknappen med ett
spetsigt föremål, t.ex. en kulspetspenna.
Återställningsknapp
Observera
När du trycker på återställningsknappen raderas
klockinställningarna och vissa av de inställningar
som du har lagrat i minnet.
Frigöra säkerhetsspärren
Om du har bytt batteri på bilen eller återställt
enheten av något annat skäl, måste du utföra
följande procedur innan du kan manövrera
den igen.
Om du inte gör dessa inställningar kommer
frontpanelen att förbli avaktiverad och du kan
inte manövrera enheten.
1 Tryck på återställningsknappen.
“Code in” visas.
2 Tryck på knapparna på
kortfjärrkontrollen och ange
säkerhetskoden.
Se bifogad information för mer information
om knapparna till säkerhetskoden.
När koden har bekräftats visas klockan i
teckenfönstret och du kan manövrera
enheten som normalt.
Observera
• Ta med dig kortfjärrkontrollen när du lämnar
bilen.
• Om du glömmer bort säkerhetskoden kontaktar
du närmaste Sony-service. Ta med dig
kortfjärrkontrollen.
8
Page 93

Slå på/stänga av enheten
Använda menyn
Slå på enheten
Tryck på (SOURCE) eller sätt in en kassettskiva i enheten. Mer information om hur du
använder enheten finns på sidan 11
(kassettbandspelare) och sidan 13 (radio).
Stänga av enheten
Tryck på (OFF) för att stoppa kassettuppspelningen eller radiomottagningen av
FM/MW/LW (knappen lyser fortfarande,
likaså teckenfönstret).
Om du vill stänga av enheten helt trycker du
på (OFF) och håller den intryckt under två
sekunder.
Observera
Om din bils tändningslås saknar tillbehörsläge
(ACC) bör du se till att du stänger av enheten
genom att tryck på (OFF) och hålla den intryckt
under två sekunder, så undviker du att bilbatteriet
laddas ur.
Du kontrollerar den här enheten med hjälp av
alternativ som du väljer från en meny.
För att göra en inställning eller ett val växlar
du först över till menyläget och väljer
alternativ med hjälp av M/m (uppåt/nedåt)
eller </, (vänster/höger).
M/m
DISC
SEEK SEEK
SOURCE
DISC
M : flytta uppåt
m : flytta nedåt
</,
DISC
< :
flytta åt
vänster
SEEK SEEK
SOURCE
DISC
, :
flytta åt
höger
9
Page 94

Ställa klockan
Klockan visar en 24-timmars digital
tidsangivelse.
2 Tryck på (ENTER).
Exempel: Ställ klockan på 10:08
1 Tryck på (MENU) och sedan på M eller m
flera gånger tills “Clock” visas.
1 Tryck på (ENTER).
Timsiffrorna blinkar.
2 Ställ in timmarna genom att trycka på
M eller m.
3 Tryck på ,.
Klockan aktiveras.
Tips
• Du kan ställa in klockan bekvämt och
automatiskt med CT-funktionen (sidan 20).
• När D.Info är ställt på “on”, visas tiden i alla
lägen (utom för vissa funktioner i SA-läge) (sidan
23).
Minutsiffrorna blinkar.
4 Ställ in minuterna genom att trycka
på M eller m.
10
Page 95

Kassettbandspelare
Lyssna på band
1 Tryck på (OPEN/CLOSE) på
kortfjärrkontrollen och sätt i en kassett.
Uppspelningen startas automatiskt.
2 Stäng frontpanelen genom att trycka på
(OPEN/CLOSE) på kortfjärrkontrollen.
Om en kassett redan finns isatt startar du
uppspelningen genom att trycka på (SOURCE)
flera gånger tills “FWD” eller “REV” visas.
Den sidan som vetter uppåt är den som spelas.
Den sidan som vetter nedåt är den som spelas.
Snabbspola bandet
Under uppspelning trycker du ned
m eller M och håller den nedtryckt.
DISC
m :
Spola bakåt
SEEK SEEK
SOURCE
DISC
M :
Spola framåt
Om du vill börja uppspelningen under
snabbspolningen trycker du på (MODE)
(o).
Hitta ett visst spår
— Automatisk musiksökning (AMS)
Under uppspelning trycker du ett kort
ögonblick på . eller > för varje spår
som du vill hoppa förbi.
Du kan hoppa över upp till nio spår på en
gång.
. :
Hitta
föregående
spår
Observera
Det är inte säkert att AMS-funktionen fungerar
om:
— mellanrummet mellan spåren är kortare är 4
sekunder
— mellanrummet mellan spåren är brusigt
— det finns långa avsnitt med låg volym eller
inget ljud alls.
DISC
SEEK SEEK
SOURCE
DISC
> :
Hitta
efterföljande
spår
Tips
Om du vill ändra på bandtransportens riktning,
trycker du på (MODE) (o).
Funktion Tryck på
Stoppa bandet (OFF)
Mata ut kassetten (OPEN/CLOSE) och sedan
Z
I Motion Display-läget rullas alla nämnda
ikoner i teckenfönstret, en efter en.
Tips
Motion Display-läget kan slås av. (Se “Ändra ljud
och teckeninställningarna” på sid 23).
11
Page 96

Spela upp ett band i olika
lägen
Spela upp spår upprepade gånger
— Upprepad uppspelning
1 Tryck på (MENU) under uppspelning.
Bandet kan spelas upp i olika lägen:
•Repeat (Upprepad spelning) upprepar det
aktuella spåret.
•Med NR (Dolby NR) kan du välja något av
systemen Dolby* NR B.
•Metal använder du när du spelar upp ett
metall eller CrO2 band.
•B.Skip (Hoppa över oinspelade delar) hoppar
över oinspelade avsnitt som är längre än åtta
sekunder.
•Med ATA (Automatisk Tuner-aktivering)
slås radion på automatiskt medan du
snabbspolar ett band.
* Dolby brusreducering tillverkas under licens av
Dolby Laboratories Licensing Corporation.
“DOLBY” och dubbel D-kännetecknet ; är
Dolby Laboratories Licensing Corporation:s
varumärken.
1 Under uppspelning trycker du på
(MENU).
2 Tryck på M eller m flera gånger tills
önskat alternativ visas.
Varje gång du trycker på m ändras
alternativet enligt följande:
Repeat t NR t Metal t B.Skip t ATA
2 Tryck på M eller m flera gånger tills
“Repeat” visas.
3 Tryck på , flera gånger tills “Repeat
on” visas i teckenfönstret.
Repeat on y Repeat off
Den upprepade uppspelningen börjar.
När du vill återgå till normalt
uppspelningsläge trycker du på “Repeat off” i
steg 3.
Tips
• Om du väljer läge med hjälp av knapparna på
enheten trycker du på (1) (REP) flera gånger tills
önskat läge visas.
• Under upprepad uppspelning trycker du på
(MODE). “REP” släcks i teckenfönstret och den
upprepade uppspelningen avbryts.
3 Välj “on” genom att trycka på ,.
Det önskade läget startar.
4 Tryck på (ENTER).
För att återgå till normalt uppspelningsläge
väljer du “off” i steg 3.
Tips
När ATA-funktionen är aktiverad kan du ändra
teckenfönstret (TAPE y TUNER) genom att trycka
på (DSPL/PTY).
12
Page 97

Radio
Lagra kanaler automatiskt
— BTM-funktionen
Enheten väljer ut kanalerna med de starkaste
signalerna och lagrar dem efter frekvens. Du
kan lagra upp till 6 kanaler på varje band
(FM1, FM2, FM3, MW och LW).
Varning
För att undvika olyckor bör du använda BTMfunktionen om du tar in en kanal under
körning.
Lagra endast de önskade
kanalerna
Du kan förinställa högst 18 FM-kanaler(6
kanaler för vardera FM1, 2, och 3), 6 MWkanaler och 6 LW-kanaler i den ordning som
du själv bestämmer.
1 Tryck på (SOURCE) flera gånger för att
välja tunern.
2 Tryck på (MODE) flera gånger för att
välja band.
3 Ställ in den station som du vill lagra på
sifferknappen genom att trycka på
. eller > på enheten.
1 Tryck på (SOURCE) flera gånger för att
välja önskad radiokanal.
Varje gång du trycker på (SOURCE) växlas
källorna på följande sätt:
B Tuner B CD* B MD* B TAPE
* Ikonen visas inte om inte motsvarande
tillbehör är anslutet.
2 Tryck på (MODE) flera gånger för att
välja band.
Varje gång du trycker på (MODE) växlas
banden på följande sätt:
B FM1 B FM2 B FM3 B MW B LW
3 Tryck på (MENU) och sedan på M eller m
flera gånger tills “BTM” visas.
4 Tryck på (ENTER).
Kanalerna lagras i enheten efter frekvens på
sifferknapparna.
En ljudsignal hörs när inställningen lagras.
Observera
• Du kan inte lagra kanaler med svaga signaler.
Om bara ett fåtal kanaler kan tas emot behåller
vissa snabbvalsknappar den tidigare
inställningen.
• När ett nummer visas i teckenfönstret lagras
kanalerna från och med detta nummer.
4 Tryck på önskad sifferknapp ((1) till (6))
på enheten tills “MEM” visas.
Snabbvalsknappens nummer visas i
teckenfönstret.
Observera
Om du försöker lagra en annan kanal på samma
förinställda nummerknapp raderas den tidigare
lagrade kanalen.
13
Page 98

Motta de lagrade
kanalerna
1 Tryck på (SOURCE) flera gånger för att
välja tunern som källa.
2 Tryck på (MODE) flera gånger för att
välja band.
Om FM stereo-mottagningen är
dålig — Enkanaligt läge
1 Under radiomottagning trycker du på
(MENU) och trycker sedan på M eller m
flera gånger tills “Mono” visas.
2 Tryck på , tills “Mono on” visas.
Ljudet blir bättre, fast i mono (“ST”
slocknar).
3 Tryck på M (stega uppåt) eller m (stega
nedåt) flera gånger om du vill ta emot
stationerna i den ordning de har lagrats i
minnet.
Tips
Om du valt att lagra stationerna i minnet med
hjälp av knapparna på enheten rycker du på den
sifferknapp ((1) till (6)) som stationen du vill
lyssna på har lagrats.
Om du inte kan ställa in en
förinställd kanal
Du söker efter stationerna (automatisk
sökning) genom att trycka på
< eller ,.
Avsökningen avbryts när enheten tar emot
en station. Tryck på < eller , flera
gånger tills du fått in önskad station.
Observera
Om den automatiska avsökningen stannar alltför
ofta trycker du på (MENU) och sedan på M eller m
flera gånger tills “Local” (lokalt sökläge) visas.
Därefter trycker du på , för att välja “Local on”
och avslutar med att trycka på (ENTER).
Under lokal mottagning och stationsval visas “LCL
Seek” i teckenfönstret.
Nu kommer sökningen bara att stanna för
stationer som sänder med relativt stark signal.
Tips
Om du vet på vilken frekvens den station du vill
ställa in sänder, trycker du ned < eller , och
håller den nedtryckt tills stationens frekvens visas
(manuell stationsinställning).
3 Tryck på (ENTER).
Återgå till det normala uppspelningsläget
genom att välja “Mono off” i steg 2.
I Motion Display-läget rullas alla nämnda
ikoner i teckenfönstret, en efter en.
Tips
Motion Display-läget kan stängas av. (Se “Ändra
ljud och teckenfönsterinställningarna” på sid 23).
14
Page 99

RDS
Översikt av
RDS-funktionen
RDS (Radio Data System) är en radiotjänst som
gör att FM-kanalerna kan sända ytterligare
digital information tillsammans med den
vanliga radioprogramsignalen. Några
exempel: ställa in samma kanal automatiskt,
lyssna på trafikmeddelanden och hitta kanal
efter programtyp.
Observera
• Landet eller regionen avgör vilka RDS-funktioner
som finns tillgängliga.
• RDS fungerar inte ordentligt om signalen är för
svag eller om den inställda kanalen inte överför
RDS-data.
Visa kanalnamnet
Den aktuella kanalens namn tänds i
teckenfönstret.
I Motion Display-läget rullas alla nämnda
ikoner i teckenfönstret, en efter en.
Tips
Motion Display-läget kan stängas av. (Se ”Ändra
ljud- och teckeninställningarna” på sid 23).
Välj en FM-kanal (sidan 13).
När du ställer in en FM-kanal som överför
RDS-data tänds kanalnamnet i
teckenfönstret.
Observera
Beteckningen “*” innebär att en RDS-kanal
mottas.
15
Page 100

Ställa in samma program
automatiskt
— Alternativa frekvenser (AF)
AF-funktionen väljer automatiskt och ställer in
den station som har den starkaste signalen i
nätverket. Om du använder den här
funktionen kan du lyssna på samma program
under en långkörning utan att behöva ställa in
kanalen manuellt igen.
Frekvenserna ändras automatiskt.
98,5MHz
Kanal
1 Välj en FM-kanal (sidan 13).
2 Tryck på (AF/TA) flera gånger tills “AF
on” visas i teckenfönstret.
Enheten börjar söka efter en alternativ kanal
med en starkare signal i samma nätverk.
96,0MHz
102,5MHz
Ändra visningen i teckenfönstret
Varje gång du trycker på (AF/TA) ändras
alternativet enligt följande:
B AF on B TA on B AF TA on*
AF TA off b
* Det här väljer du om du vill aktivera både AF-
och TA-funktionerna.
Tips
• Varje gång du trycker på (AF) på enheten ändras
alternativet enligt följande:
AF på (on) y AF av (off)
• Varje gång du trycker på (TA) på enheten ändras
alternativet enligt följande:
TA på (on) y TA av (off)
Observera
• När det inte finns någon alternativ kanal i
området och du inte vill söka efter en alternativ
kanal, stänger du av AF-funktionen genom att
trycka på (AF/TA) flera gånger tills “AF TA off”
visas.
• “NO AF” och kanalnamnet blinkar omväxlande
om enheten inte kan hitta en alternativ station i
nätverket.
• Om kanalnamnet börjar blinka när du har valt en
kanal med AF-funktionen aktiverad, betyder det
att inga alternativa frekvenser finns tillgängliga.
Tryck på < eller , medan stationens namn
visas blinkande (inom åtta sekunder). Enheten
börjar söka efter en annan frekvens med samma
PI-information (Programme Identification) (“PI
Seek” visas och inget ljud hörs). Om enheten inte
kan hitta en annan frekvens visas “NO PI” och
den återgår till den tidigare valda frekvensen.
Tips
Om du väljer läge med hjälp av knapparna på
enheten trycker du på (AF) tills “AF on” visas.
16
Lyssna på ett regionalt program
Funktionen “REG on” (regional on) på enheten
gör att du kan bibehålla inställningen till ett
regionalt program utan att kopplas om till en
annan regional kanal. (Observera att du måste
sätta på AF-funktionen). Enheten är
fabriksinställd på “REG on”, men om du vill
stänga av funktionen gör du följande.
1 Under radiomottagning trycker du på
(MENU) och sedan trycker du på
M eller m flera gånger tills “REG” visas.
2 Tryck på , tills “REG off” visas.
3 Tryck på (ENTER).
Observera att när du väljer “REG off” kan
detta göra att enheten växlar över till en
annan regional kanal inom samma nätverk.
Återgå till regional avlyssning genom att välja
“REG on” i steg 2.
Observera
Den här funktionen fungerar inte i Storbritannien
och några andra områden.
 Loading...