

Sony XBR-55HX950, KDL-55HX850, KDL-46HX850 Setup Guide
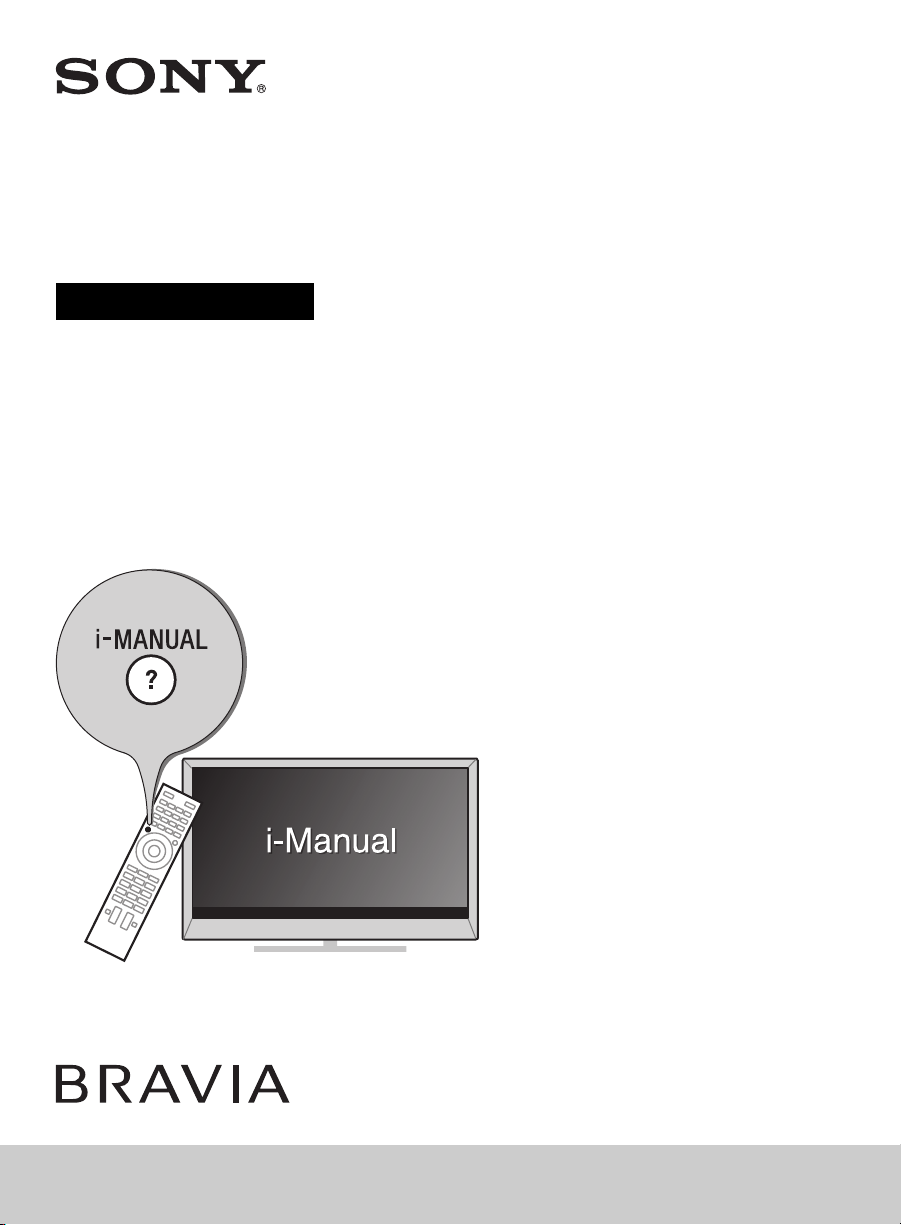
LCD TV
Operating Instructions
(Setup Guide)
4-411-986-12(1)
XBR-65HX950 / 55HX950
KDL-55HX850 / 46HX850
Sony Customer Support
U.S.A.:
http://www.sony.com/tvsupport
Canada:
http://www.sony.ca/support
United States Canada
1.800.222.SONY 1.877.899.SONY
Please Do Not Return
the Product to the Store
Owner’s Record
The model and serial numbers
are located at the side and rear
of the TV. Record these
numbers in the spaces provided
below. Refer to them whenever
you call upon your Sony dealer
regarding this TV.
Model Name
Serial No.
CAUTION
To prevent electric shock and blade
exposure, do not use this polarized
AC plug with an extension cord,
receptacle or other outlet unless the
blades can be fully inserted.
• Operate the TV only on 110-240 V
AC (U.S.A./Canada 120 V AC)
• Some people may experience
discomfort (such as eye strain,
fatigue, or nausea) while watching
3D video images or playing
stereoscopic 3D games. Sony
recommends that all viewers take
regular breaks while watching 3D
video images or playing
stereoscopic 3D games. The length
and frequency of necessary breaks
will vary from person to person. You
must decide what works best. If you
experience any discomfort, you
should stop watching the 3D video
images or playing stereoscopic 3D
games until the discomfort ends;
consult a doctor if you believe
necessary. You should also review
(i) the instruction manual of any
other device or media used with
this television and (ii) our website
(http://www.sony.com/tvsupport) for
the latest information. The vision of
young children (especially those
under six years old) is still under
development. Consult your doctor
(such as a pediatrician or eye
doctor) before allowing young
children to watch 3D video images
or play stereoscopic 3D games.
Adults should supervise young
children to ensure they follow the
recommendations listed above.
• Do not use, store, or leave the 3D
Glasses or battery near a fire, or in
places with a high temperature,
e.g., in direct sunlight, or in sunheated cars.
• When using the simulated 3D
function, please note that the
displayed image is modified from
the original due to the conversion
done by this television.
Licensing Information
HDMI, the HDMI Logo, and HighDefinition Multimedia Interface are
trademarks or registered trademarks
of HDMI Licensing LLC in the United
States and other countries.
Fergason Patent Properties, LLC:
U.S. Patent No. 5,717,422
U.S. Patent No. 6,816,141
Manufactured under license from
Dolby Laboratories. Dolby and the
double-D symbol are trademarks of
Dolby Laboratories.
Rovi and Rovi On Screen Guide are
trademarks of Rovi Corporation and/
or its subsidiaries.
The Rovi On Screen Guide system is
manufactured under license from
Rovi Corporation and/or its
subsidiaries.
The Rovi On Screen Guide system is
protected by one or more United
States patents of Rovi Corporation
and/or its subsidiaries.
Rovi Corporation and/or its
subsidiaries and related affiliates are
not in any way liable for the accuracy
or availability of the program
schedule information or other data in
the Rovi On Screen Guide system
and cannot guarantee service
availability in your area. In no event
shall Rovi Corporation and/or its
related affiliates be liable for any
damages in connection with the
accuracy or availability of the
program schedule information or
other data in the Rovi On Screen
Guide system.
“Blu-ray Disc”, “Blu-ray” and “Blu-ray
Disc” logo are trademarks of Blu-ray
Disc Association.
“BRAVIA” and , S-Force,
Motionflow, BRAVIA Sync, and are
trademarks or registered marks of
Sony Corporation.
®
DLNA
, the DLNA Logo and DLNA
CERTIFIED
marks, or certification marks of the
Digital Living Network Alliance.
TrackID is a trademark or registered
trademark of Sony Ericsson Mobile
Communications AB.
®
are trademarks, service
Music and video recognition
technology and related data are
provided by Gracenote
is the industry standard in music
recognition technology and related
content delivery. For more
information, please visit
www.gracenote.com.
CD, DVD, Blu-ray Disc, and music
and video-related data from
Gracenote, Inc., copyright © 2000present Gracenote. Gracenote
Software, copyright © 2000-present
Gracenote. One or more patents
owned by Gracenote apply to this
product and service. See the
Gracenote website for a
nonexhaustive list of applicable
Gracenote patents. Gracenote,
CDDB, MusicID, MediaVOCS, the
Gracenote logo and logotype, and
the “Powered by Gracenote” logo are
either registered trademarks or
trademarks of Gracenote in the
United States and/or other countries.
®
Opera
Browser from Opera
Software ASA. Copyright 1995-2012
Opera Software ASA. All rights
reserved.
Wi-Fi Direct is a mark of the Wi-Fi
Alliance.
“Sony Entertainment Network logo”
and “Sony Entertainment Network”
are trademarks of Sony Corporation.
®
. Gracenote
2
Your BRAVIA TV is
ENERGY STAR
qualified in the
“Home” mode.
It meets strict energy
set by the U.S. Environmental
Protection Agency and Department
of Energy. ENERGY STAR is a joint
program of these government
agencies, designed to promote
energy efficient products and
practices.
Changes to certain features, settings,
and functionalities of this TV (i.e. Rovi
On Screen Guide, Picture/Sound,
Light Sensor, Power Savings) can
increase or change the power
consumption.
Depending upon such changed
settings, the power consumption may
exceed the limits required for the
ENERGY STAR qualification in the
“Home” mode.
The 55 class has a 54.6 inch
viewable image size and the 65
class has a 64.5 inch viewable
image size (measured diagonally).
efficiency guidelines
®
~
• The illustrations of the remote
control used in this manual are of
the RM-YD073 unless otherwise
stated.
• The illustrations used in this manual
may differ depending on your TV
model.
• Retain this manual for future
reference.
3
The BRAVIA® Full HDTV
Experience
Thank you for choosing Sony! Your new
BRAVIA
HDTV Experience.” This document will help
you get the most out of your TV.
Please take a moment to register your TV
at:
U.S.A.: http://productregistration.sony.com
Canada: http://www.sony.ca/registration
Four Steps to a Full HD Experience
Set, Source, Sound, and Setup.
®
TV opens the door to the “Full
1 Set
Now that you have made the best selection
in LCD TV technology, be sure to remove all
accessory contents from the packaging
before setting up your TV.
2 Source
To experience the stunning detail of your
BRAVIA TV, you need access to HD
programming.
• Upgrade your signal or content source to
high-definition (HD) by contacting your
HD service provider.
This TV displays all video input signals in a resolution of 1,920 dots × 1,080 lines.
• Receive over-the-air HD broadcasts with
an HD-quality antenna connected
directly to the back of your TV.
Visit http://www.antennaweb.org for
more information on antenna selection
and setup.
• Discover the wealth of entertainment now
available on super-high resolution
Blu-ray Disc™ player and other Sony HD
equipment.
3 Sound
Complete the high-definition experience
with a BRAVIA Sync™ surround sound
system or A/V receiver from Sony.
4 Setup
Install your TV and connect your sources.
See page 12 for sample connection
diagrams. To help assure the highest
quality for your HD experience, use Sony
HDMI (High-Definition Multimedia
Interface) cables.
To learn more about HDTV, visit:
U.S.A.: http://www.sony.com/HDTV
Canada: http://www.sony.ca/hdtv
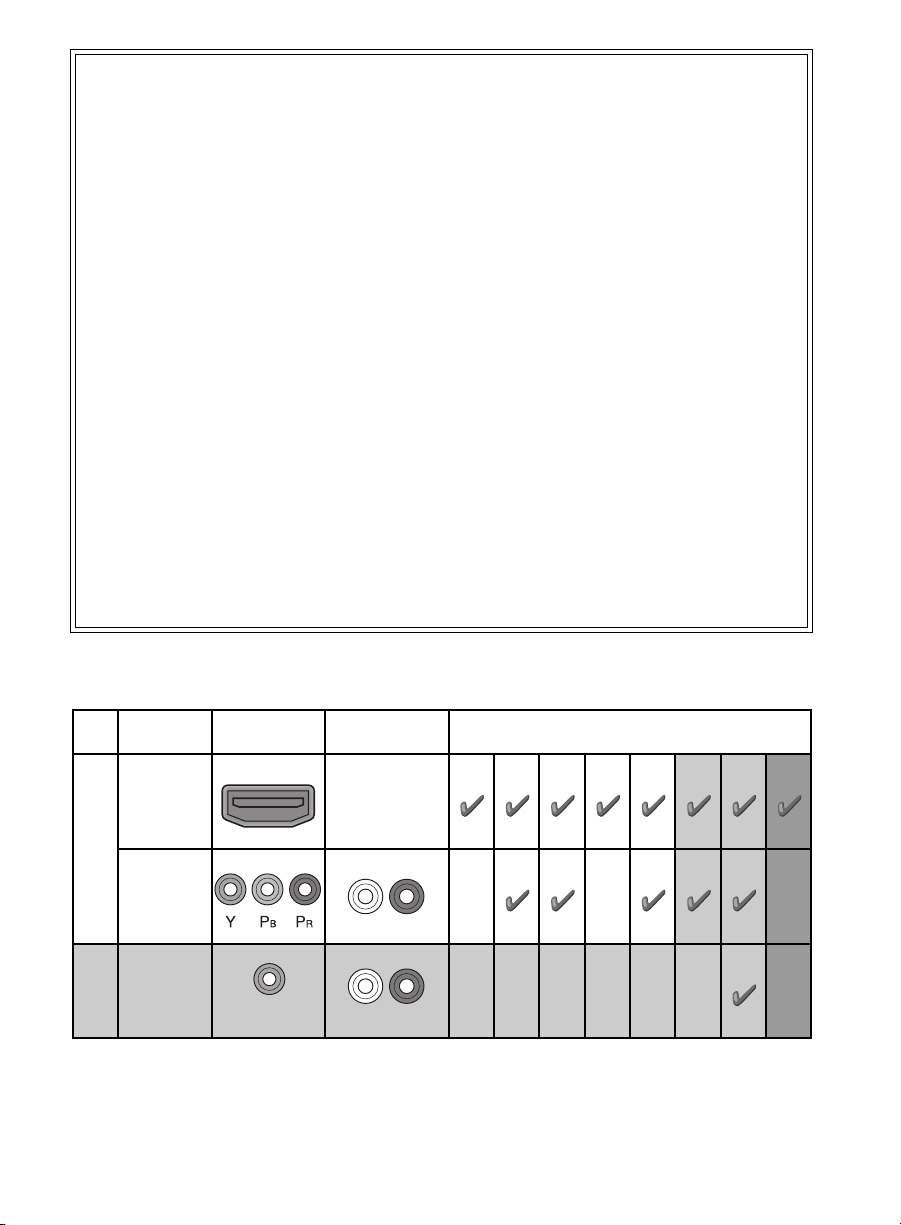
The following chart shows the high-definition (HD) and standard-definition (SD) video formats
supported by your BRAVIA TV inputs.
INPUT VIDEO AUDIO
When HDMI is
HDMI
connected to DVI
with an adapter, a
separate Audio
L/R is necessary.
1080/24p/30p
SUPPORTED FORMATS
1080p*11080i
720/24p/30p
720p*1480p 480i PC*
2
HD
COMPONENT
Audio L/R
VIDEO
SD
*1For details of supported frame rates, refer to the “Specifications” in this manual.
*2For supported PC formats refer to the i-Manual.
Composite video
connection
Audio L/R
4

5
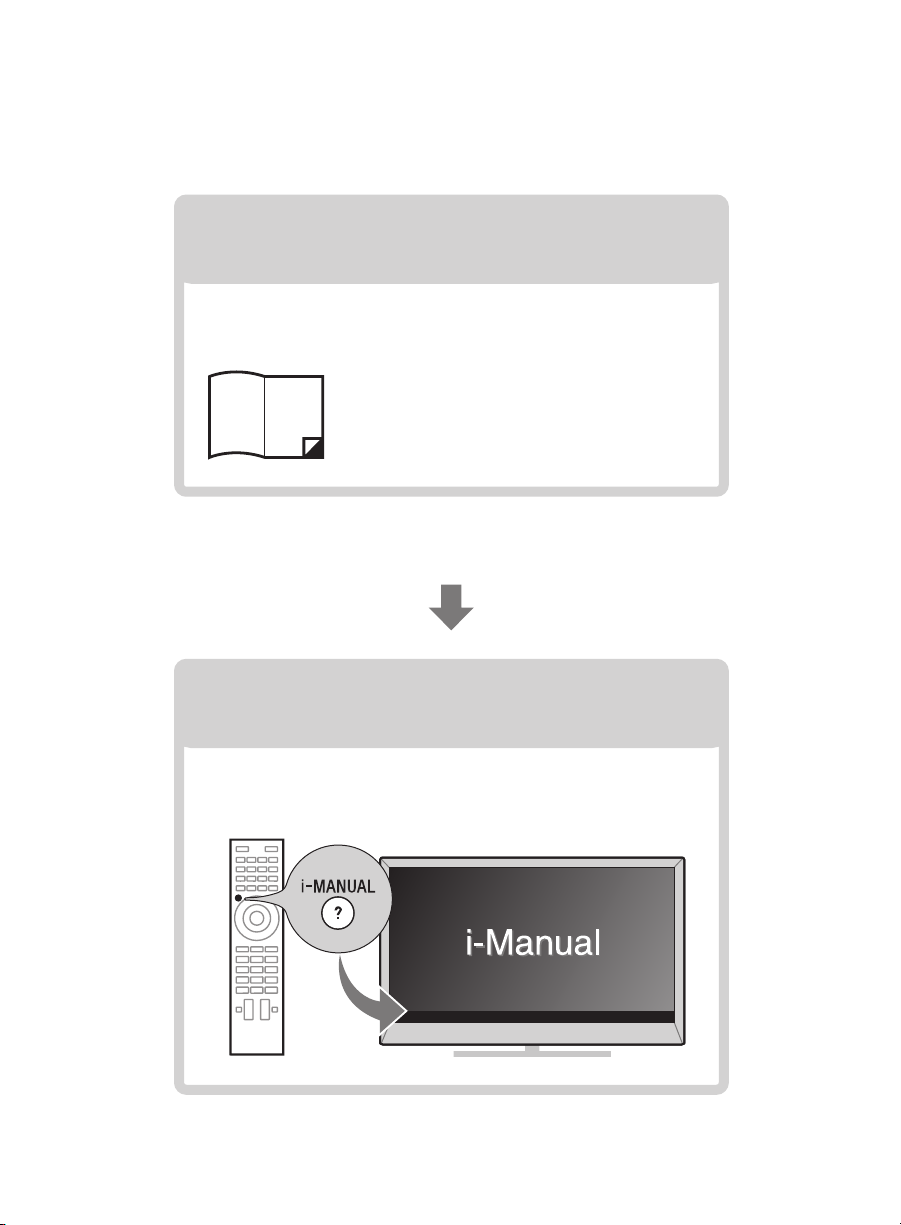
About this manual (Operating Instructions)
This manual explains how to setup your TV. For more
information on how to use BRAVIA TV, refer to the “Electronic
manual”.
Operating Instructions
Explains how to setup your TV such as connections,
initial setup, and basic operations.
For more information, press the i-MANUAL button
Electronic manual
(i-Manual)
Explains how to use all the features. See page 30 on
how to use the i-Manual.
Images and illustrations used in this manual may differ from
the actual screen.
6

Table of Contents
Getting Started
Checking the accessories........................................................................8
Inserting batteries into the remote control................................................8
Before setting up your TV.........................................................................9
1: Attaching the Table-Top Stand (except XBR-65HX950) ....................10
2: Adjusting the viewing angle of the TV (except XBR-65HX950)..........12
3: Connecting the TV..............................................................................12
4: Securing the TV..................................................................................16
5: Bundling the cables ...........................................................................18
6: Connecting the TV to the Internet.......................................................19
7: Running initial setup...........................................................................20
Using a Wall-Mount Bracket...................................................................21
Installing the TV Against a Wall or Enclosed Area .................................22
Using Your BRAVIA TV
Watching TV B..............................wf
Selecting various functions and settings (Home Menu).........................26
Watching Internet Video.........................................................................29
Looking for Instructions
Looking for instructions in the
electronic manual (i-Manual)
Additional Information
Troubleshooting......................................................................................33
How to Care for Your BRAVIA TV ...........................................................34
Specifications.........................................................................................35
Safety Information...................................................................................37
B
...e;
7
Getting Started
Checking the accessories
Remote control (1)*
Size AAA batteries (2)
Table-Top Stand (1)*
(except XBR-65HX950)
Fixing screws for Table-Top Stand
(M5 × 16) (3)
(except XBR-65HX950)
Assembling screws for Table-Top Stand
(M5 x 16) (4)
(except XBR-65HX950)
Operating Instructions (this manual) and
other documents
*1Please refer to the model name printed on the
remote control.
*2Assembling the Table-Top Stand is required.
Refer to the supplied Table-Top Stand leaflet to
assemble the Table-Top Stand.
1
2
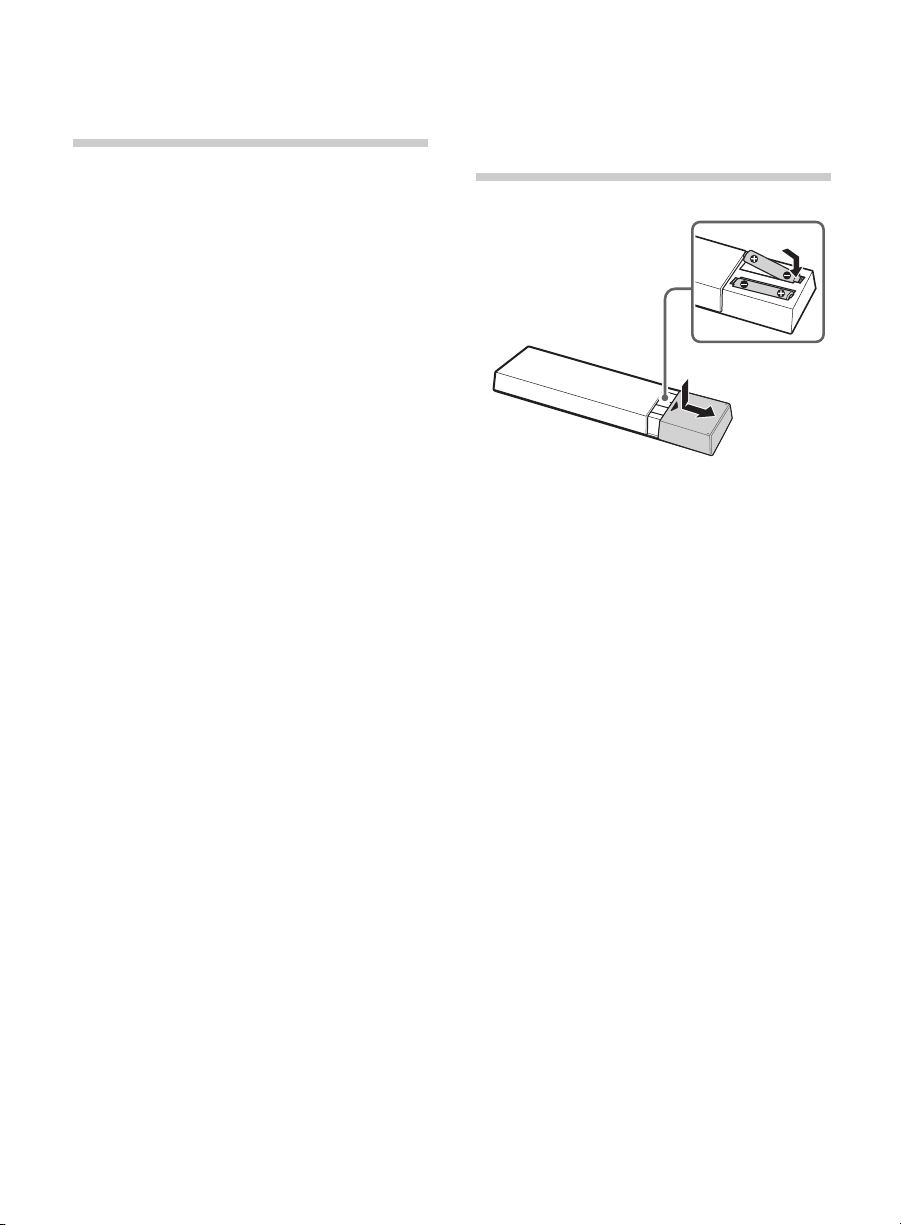
Inserting batteries into the remote control
1 Remove the protection sheet.
2 Push and slide the cover to open.
8
x Guidelines for Remote Control
• Point your remote control directly at the
IR sensor located on your TV.
• Make sure that no objects are blocking
the path between the remote control and
the IR sensor on your TV.
• Fluorescent lamps can interfere with your
remote control; try turning off the
fluorescent lamps.
• If you are having problems with the
remote control, reinsert or replace your
batteries and make sure that they are
correctly inserted.
Before setting up your TV
Some TV models are packaged with a
detached Table-Top Stand so you can
mount your TV to a wall right away. See
page 21 (Using a Wall-Mount Bracket) if you
want to mount the TV to a wall. If you are not
mounting the TV to a wall, you will need to
attach the Table-Top Stand. You will need a
Phillips screwdriver (not supplied) and the
supplied screws to complete the task. Look
for the supplied Table-Top Stand instruction
leaflet.
Be sure to consider the following while
setting up your TV:
• Disconnect all cables when carrying the
TV.
• Carry the TV with the adequate number
of people; larger size TVs require two or
more people.
• Correct hand placement while carrying
the TV is very important for safety and to
avoid damage.
Getting Started
• Ensure your TV has adequate ventilation,
see page 22.
• For best picture quality, do not expose
the screen to direct illumination or
sunlight.
• Avoid installing the TV in a room with
reflective wall and floor materials.
• Avoid moving the TV from a cold area to
a warm area. Sudden room temperature
changes may cause moisture
condensation. This may cause the TV to
show poor picture and/or poor color.
Should this occur, allow moisture to
evaporate completely before powering
the TV on.
(Continued)
9
• Ensure that there are no objects in front
of the TV.
3D Sync
Transmitter
IR Sensor
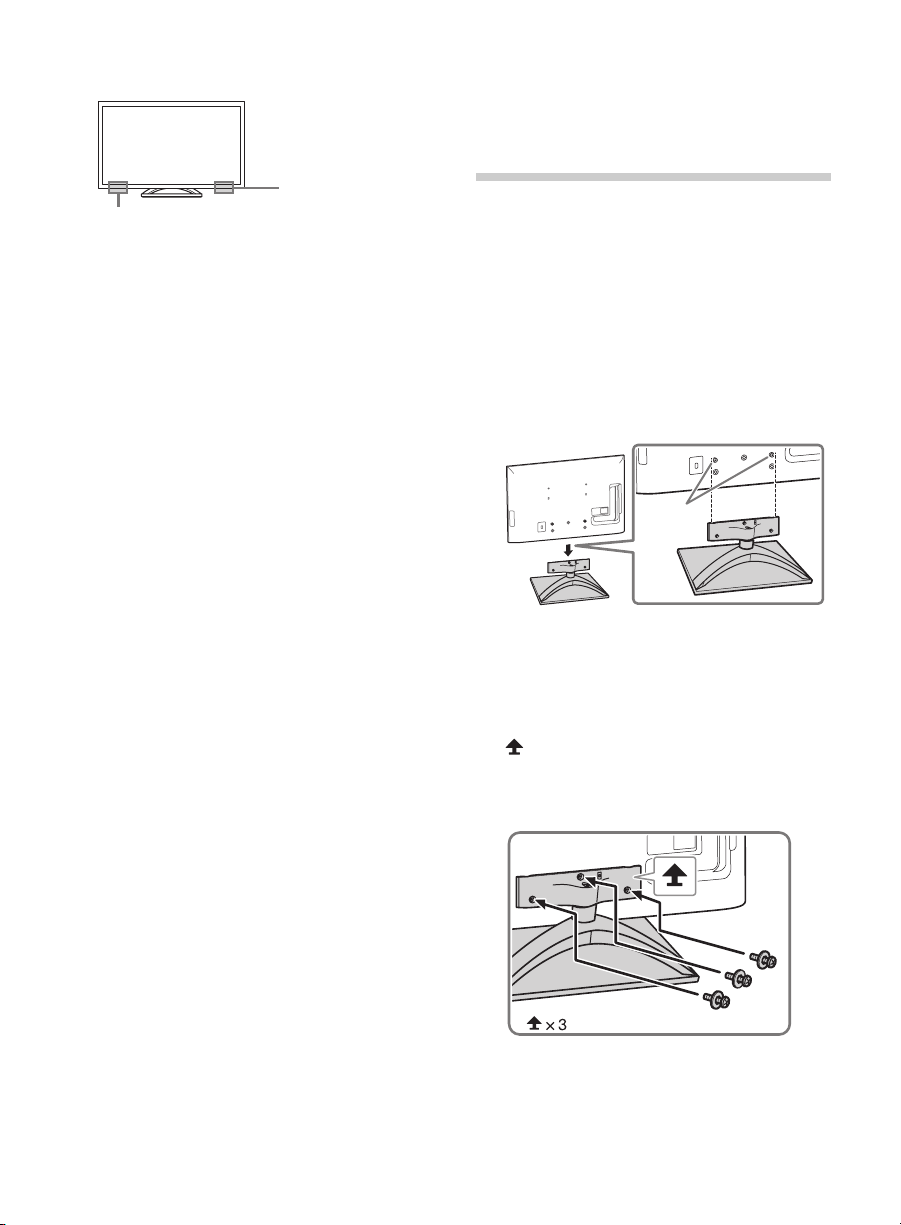
1: Attaching the
Table-Top Stand
(except XBR-65HX950)
Refer to the supplied Table-Top Stand
leaflet for proper attachment.
~
• Do not put stress on the LCD panel or the
frame around the screen.
• Be careful to not pinch your hands or the AC
power cord when you install the TV set to the
Table-Top Stand.
1 Place the TV set on the Table-Top Stand.
Guide
pins
10
~
• Align the TV from the top, slide it in until
the guide pins cannot be seen.
2 Fix the TV to the Table-Top Stand using
the supplied screws. The arrow marks
indicate the location of the screw
holes used for securing the Table-Top
Stand.
~
• If using an electric screwdriver, set the
torque at approximately 1.5 N·m
{15 kgf·cm}.
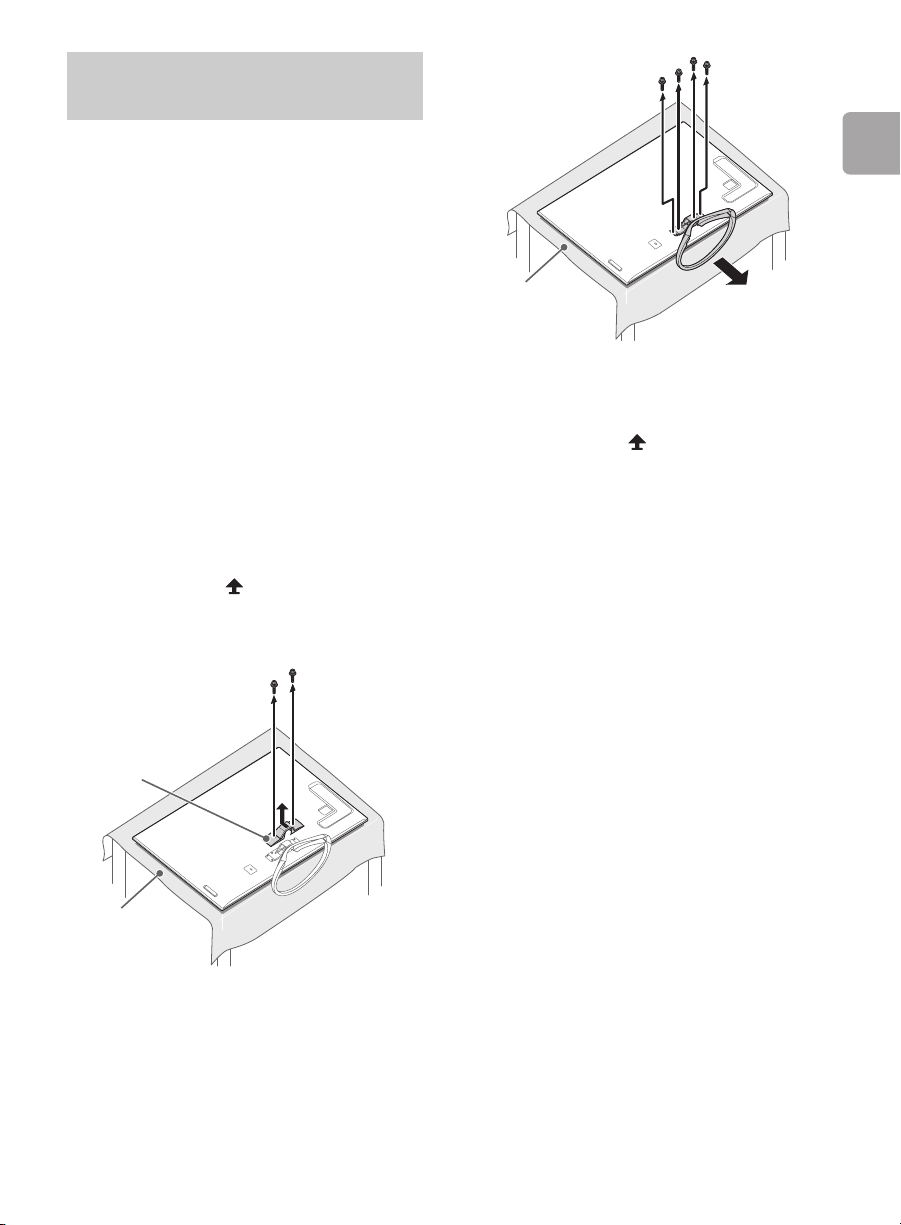
Detaching the Table-Top
Stand from the TV
~
• Do not remove the Table-Top Stand for any
reason other than to install corresponding
accessories on the TV.
• When removing the Table-Top Stand from
the TV, lay the display face down on a stable
work surface that is larger than the TV.
• To prevent damaging the surface of the LCD
display, make sure to place a soft cloth on
the work surface.
• When installing the TV on a wall, remove the
screws from the rear of the TV. (They are
fastened in the screw holes for wall
mounting.) Be sure to store the removed
screws in a safe place, keeping them away
from children.
• When attaching the Table-Top Stand again,
be sure to fasten the screws (previously
removed) to the original holes on the rear of
the TV.
XBR-65HX950
To detach the Table-Top Stand from the TV,
remove the screws at the head of the
Table-Top Stand. Slide upward to remove
the head. Then, remove the screws fixed on
the Table-Top Stand.
Getting Started
Soft cloth
XBR-55HX950, KDL-55/46HX850
To detach the Table-Top Stand from the TV,
remove the screws fixed in step 2
(page 10).
Head
Soft cloth
11
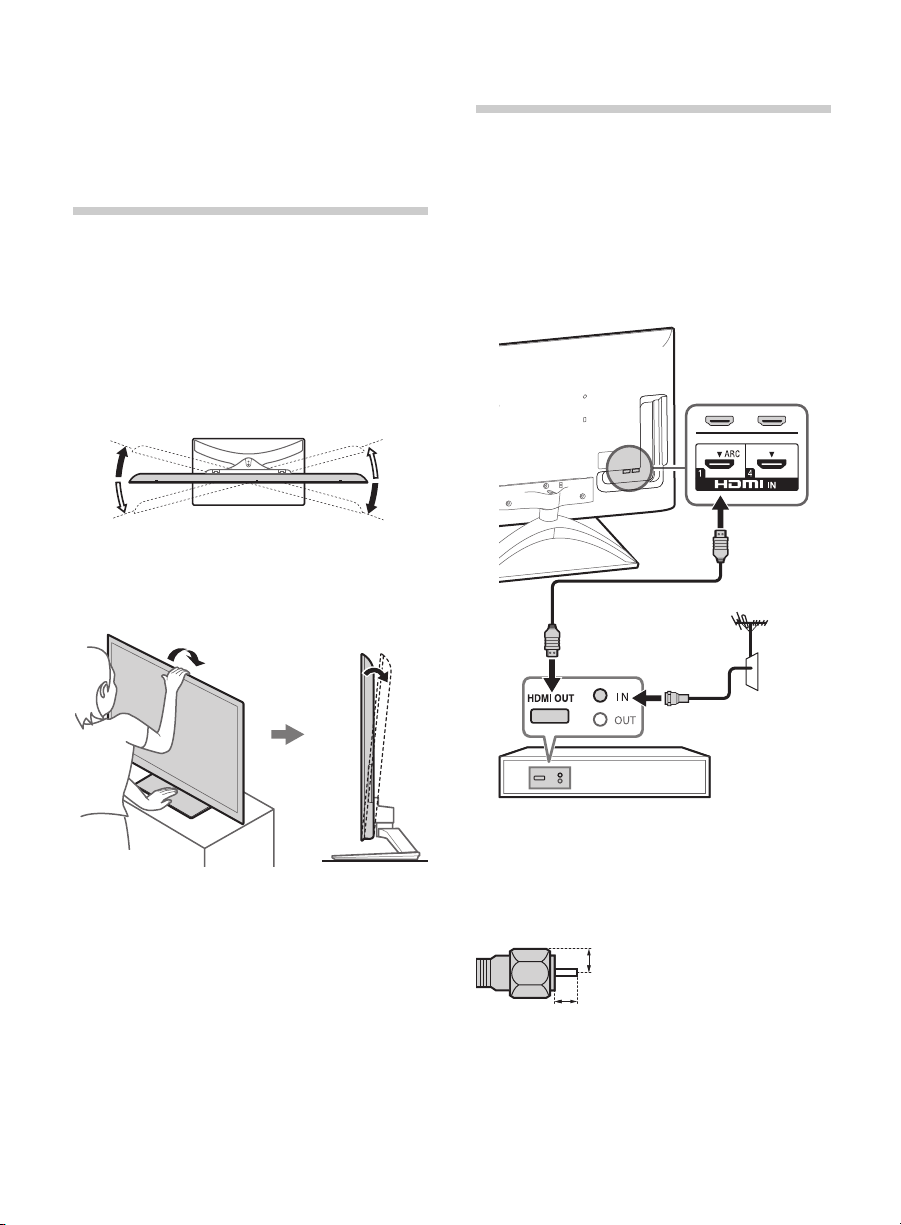
2: Adjusting the
viewing angle of
the TV (except
XBR-65HX950)
This TV can be adjusted within the angles as
illustrated.
x Angle adjustment (Swivel)
~
• When adjusting the angle, hold the stand
with one hand to avoid having the stand slip
or TV tip over.
3: Connecting the TV
~
• Use an antenna cable connector no greater
than 14 mm thick.
• Use an HDMI cable connector within 12 mm
(thickness) × 21 mm (width).
x Shown with a Set Top Box with
HDMI connection
*15°
*15°
x Angle adjustment (Tilt)
* The angle is approximate value.
*15°
*15°
*6°
Set Top Box
Recommendation of the F type plug
Projection of the inner wire from the
connection part must be less than 1.5 mm.
7 mm max.
1.5 mm max.
(Reference drawing of the F type plug)
12
 Loading...