

Page 1
Speaker Stand
Operating Instructions
Mode d’emploi
WS-WV10C
4-239-661-11(1)
Precautions
On safety
• Recommended for use with the Sony small speaker
system.
• Be sure to attach the speaker stand to a wall that is
sufficiently thick and strong.
Précautions
Sécurité
• Utilisation recommandée avec le système de petits hautparleurs Sony.
• Veillez à fixer le support à un mur suffisamment épais et
résistant.
Specifications
Dimensions
Approx. 60 × 110 × 95 mm
(2 3/8 × 4 3/8 × 3 3/4 in.)
(w/h/d)
Mass
Approx. 0.06 kg (2 oz)
Sony Corporation 2002 Printed in China
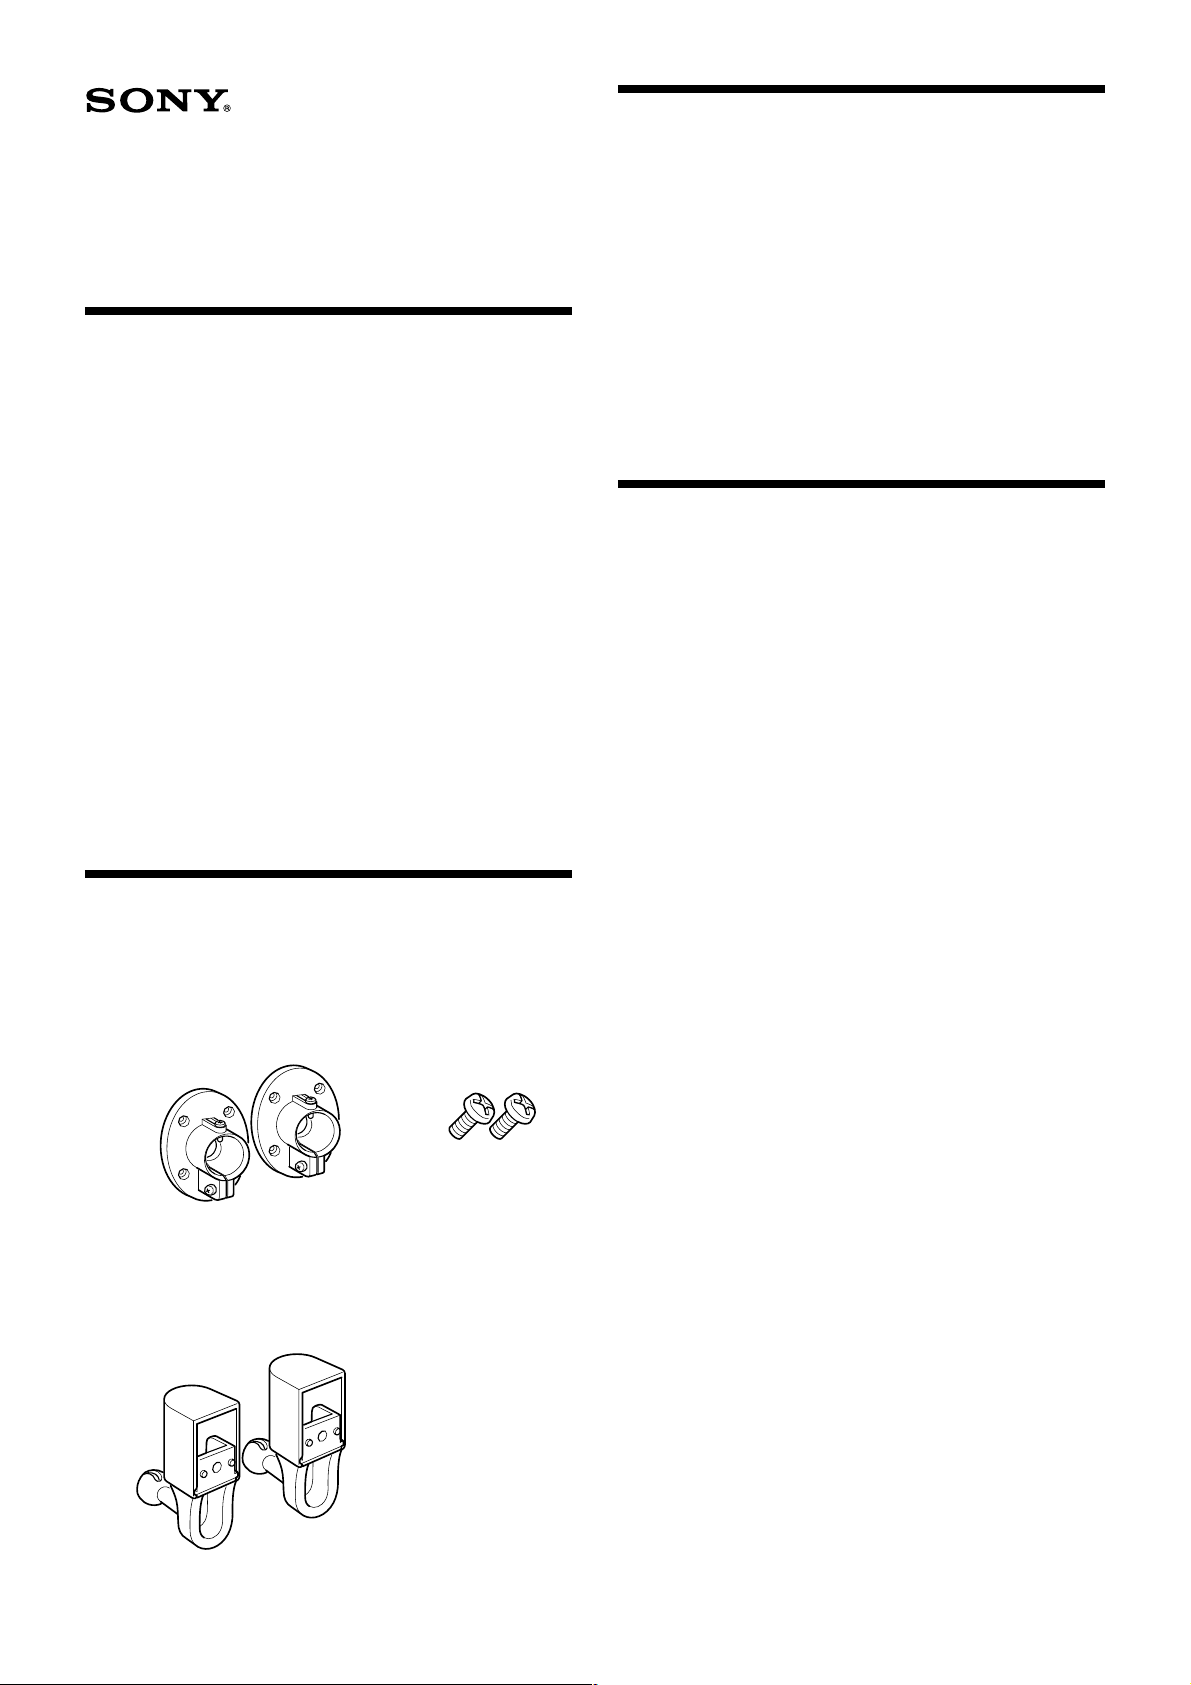
Supplied Items
Eléments fournis
AB
Design and specifications are subject to change
without notice.
Spécifications
Dimensions
Env. 60 × 110 × 95 mm
(2 3/8 × 4 3/8 × 3 3/4 po)
(l/h/p)
Poids
Env. 0,06 kg (2 on.)
La conception et les spécifications sont modifiables
sans préavis.
C
Page 2
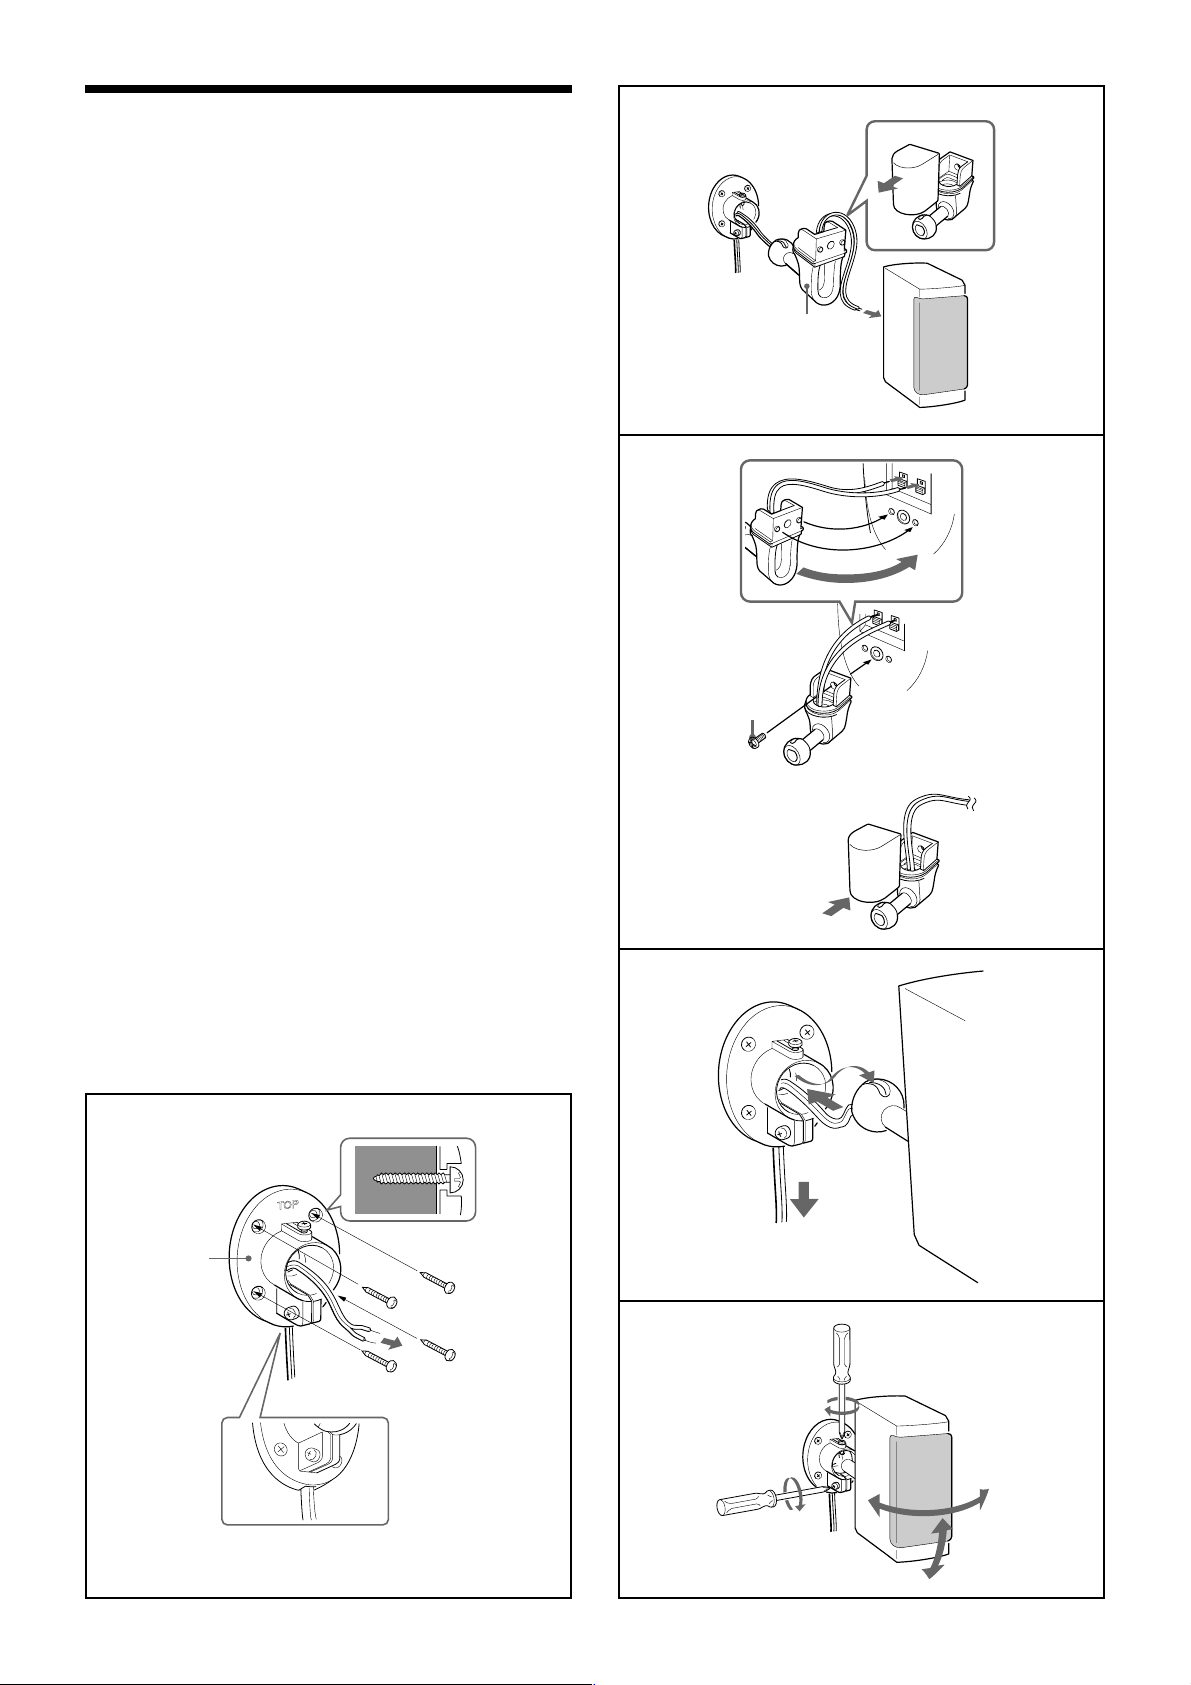
Assembly
1 Pass the speaker cord through the mounting plate (A), then
attach the mounting plate to the wall (making sure that the
wall is sufficiently thick) using commercially available wood
screws. The word “TOP” should be at the top of the plate.
2 Pass the speaker cord into the hole on the back side of the
mounting bracket (C) and out from the front side of the
bracket, then connect the speaker cord to the speaker
terminals.
3 Tightly secure the speaker to the mounting bracket with the
screw (B).
4 Adjust the length of the speaker cord as you bring the shaft
knob together with the mounting plate. Position the notch on
the shaft knob so that the screw at the top of the mounting
plate passes into the notch. Insert the knob until it stops.
5 Move the speaker to the desired angle, then tightly secure it
by tightening the screw at the bottom of the mounting plate.
Note
• Do not loosen the screws at the mounting plate or the screw to
secure the speaker to the mounting bracket during the assembly
process. If you do, the speaker may drop, causing an accident.
Montage
1 Faites passer les fils d’enceintes dans l’applique murale (A)
puis fixez l’applique à un mur suffisamment épais avec des
vis à bois (en vente dans le commerce).
Le repère “TOP” indique le haut de l’applique murale.
2 Faites passer les fils d’enceintes dans l’orifice à l’arrière de la
console (C) et ressortir par l’avant de la console, puis
branchez les fils d’enceintes sur les bornes d’enceintes.
3 Fixez solidement l’enceinte au support de fixation avec les
vis (B).
4 Réglez la longueur des cordons d’enceintes lorsque vous
insérez la rotule dans l’applique murale.
Positionnez la fente de la rotule de sorte que la vis au haut
de l’applique murale passe dans la fente. Insérez la rotule
jusqu’à ce qu’elle se bloque.
5 Réglez l’angle de l’enceinte, puis fixez-la solidement en
serrant la vis située sous la console.
2
C
3
B
v
Remarque
• Ne desserrez pas les vis de l’applique murale ou la vis de fixation
de l’enceinte au support de montage pendant le montage. Dans le
cas contraire, l’enceinte risque de tomber et de provoquer un
accident.
1
A
4
5
 Loading...