How it Works
Log In / Sign Up
Buy Points
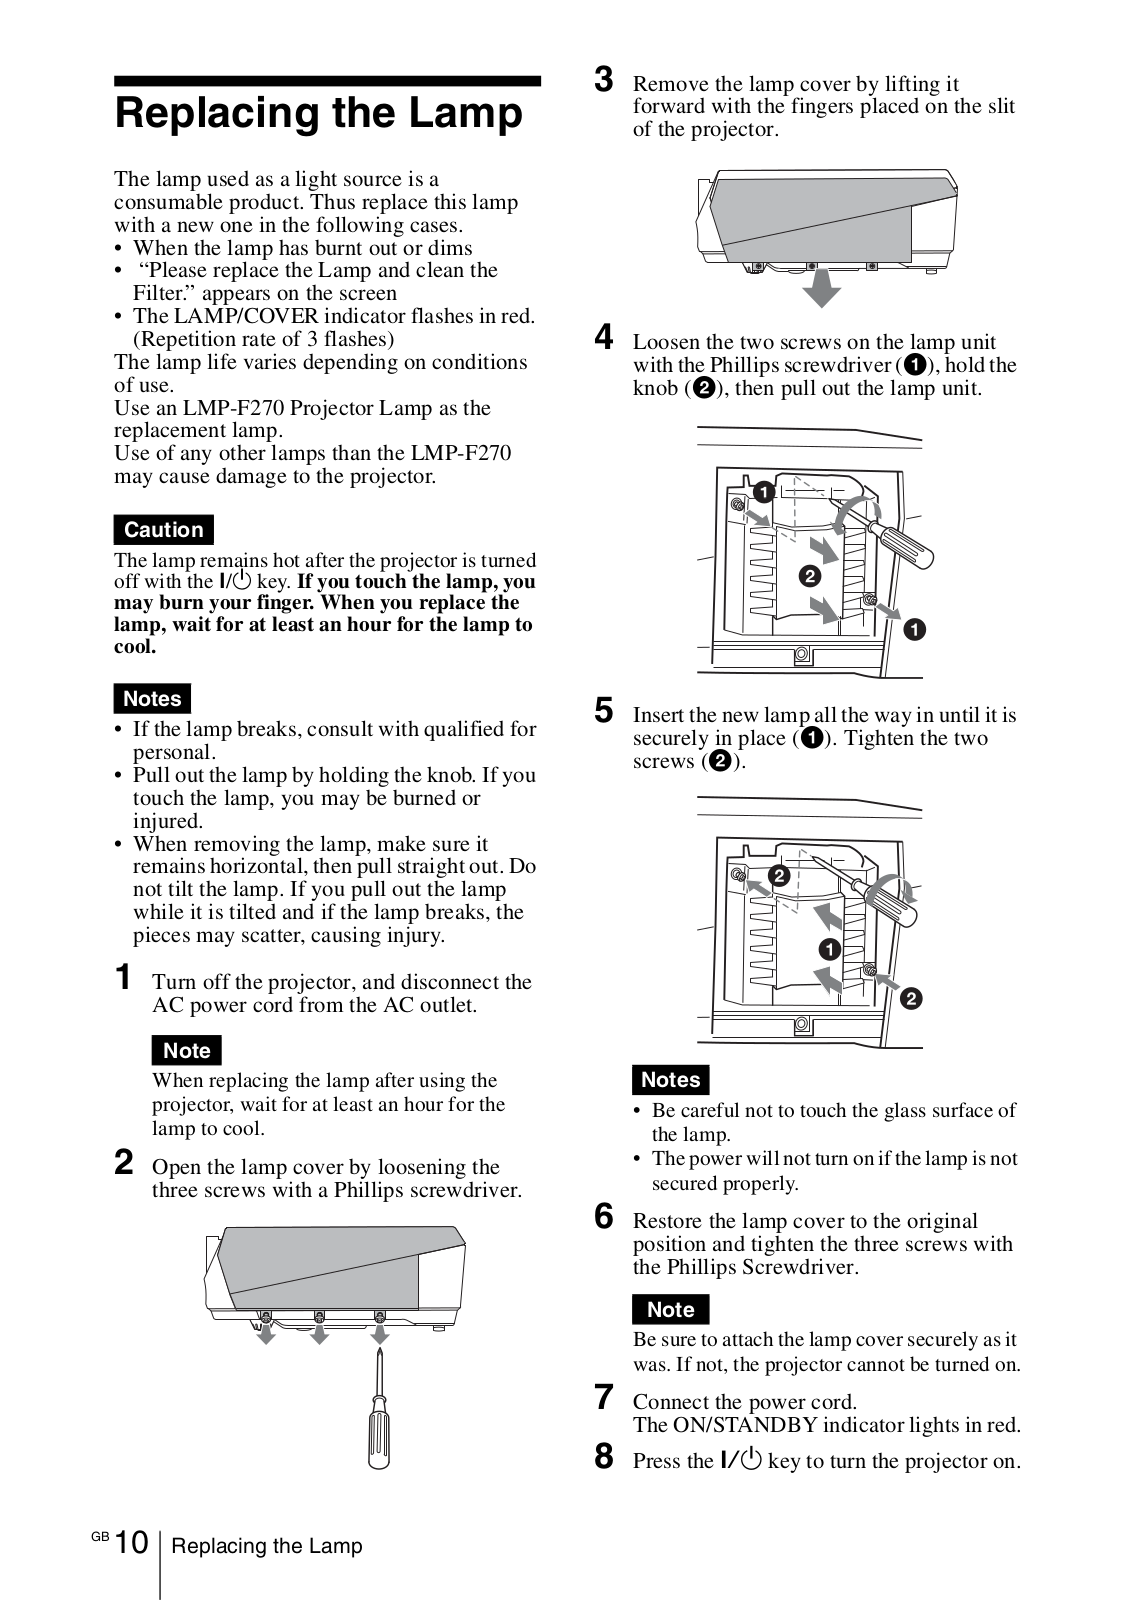
How it Works
FAQ
Contact Us
Questions and Suggestions
Users
Sony
Loading...
V
VPL-FH500L
9
VPL-FH60
4
VPL-FH60B
2
VPL-FH60W
2
VPL-FH65
4
VPL-FH65B
2
VPL-FH65W
2
VPL-FHZ101L
3
VPL-FHZ101LW
VPL-FHZ101L without lens
VPL-FHZ120L
4
VPL-FHZ120LB
2
VPL-FHZ120LW
2
VPL-FHZ131LW
VPL-FHZ55
7
VPL-FHZ55B
2
VPL-FHZ55W
3
VPL-FHZ57
3
VPL-FHZ57B
VPL-FHZ57W
VPL-FHZ58
4
VPL-FHZ58B
2
VPL-FHZ58W
2
VPL-FHZ60
8
VPL-FHZ60B
2
VPL-FHZ60W
2
VPL-FHZ61
4
VPL-FHZ61B
2
VPL-FHZ61W
2
VPL-FHZ65
6
VPL-FHZ65B
2
VPL-FHZ65 BJ
2
VPL-FHZ65W
2
VPL-FHZ66
4
VPL-FHZ66B
2
VPL-FHZ66W
2
VPL-FHZ70
3
VPL-FHZ700L
9
VPL-FHZ700LB
VPL-FHZ700LW
2
VPL-FHZ70B
2
VPL-FHZ70W
2
VPL-FHZ75
2
VPL-FHZ75B
2
VPL-FHZ75W
2
VPL-FHZ90L
6
VPL-FHZ90LB
2
VPL-FHZ90LW
2
VPL-FHZ91L
2
VPL-FW300L
7
VPL-FW41
5
VPL-FW41L
5
VPL-FW60
4
VPL-FW65
4
VPL-FWZ60
5
VPL-FWZ65
3
VPL-FX200E
VPL-FX200M
VPL-FX200U
3
VPL-FX30
13
VPL-FX35
12
VPL-FX37
7
VPL-FX40
16
VPL-FX40L
11
VPL-FX41
11
VPL-FX41L
6
VPL-FX50
5
VPL-FX500
VPL-FX500L
8
VPL-FX51
10
VPL-FX52
18
VPL-FX52L
16
VPL-GH10
4
VPL-GT100
2
VPL-GTZ1
3
VPL-GTZ240
2
VPL-GTZ270
2
VPL-GTZ280
2
VPL-GTZ380
2
VPL-HS1
7
VPL-HS10
10
VPL-HS10 Marketing Specifications & Features
VPL-HS1FP
2
VPL-HS2
9
VPL-HS20
7
VPL-HS2 Marketing Specifications & Features
VPL-HS3
8
VPL-HS50
6
VPL-HS51
3
VPL-HS51A
5
VPL-HS60
8
VPL-HW10
7
VPL-HW15
9
VPL-HW15 Marketing
VPL-HW20
3
VPL-HW20A
3
VPL-HW20A,VPL-VW85 - Bravia Sxrd 1080p Home Cinema Projector
VPL-HW30
VPL-HW30AES
3
VPL-HW30ES
6
Loading...
Loading...
Nothing found
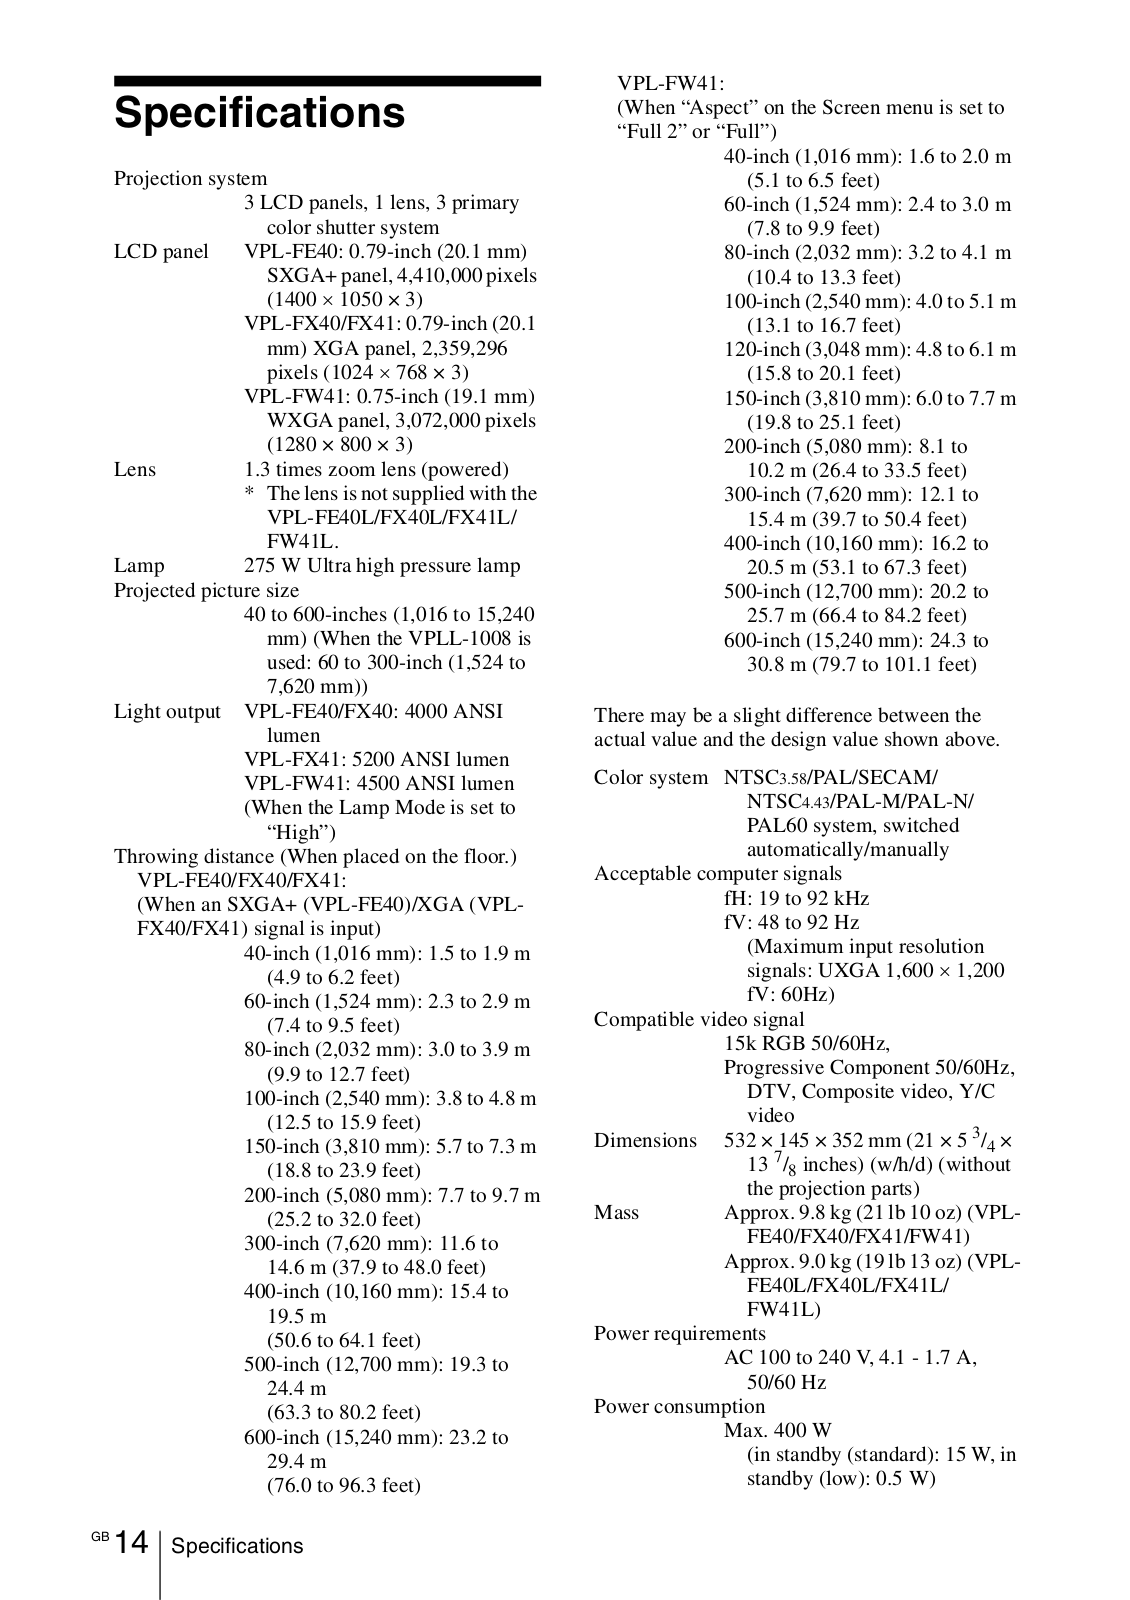
VPL-FW41
Product Sheet
10 pgs
662.22 Kb
0
User Manual
61 pgs
1.56 Mb
0
Brochure & Specs
10 pgs
841.96 Kb
0
Installation Manual
71 pgs
4.72 Mb
0
Operating Instruction
111 pgs
4.64 Mb
0
Table of contents
Loading...
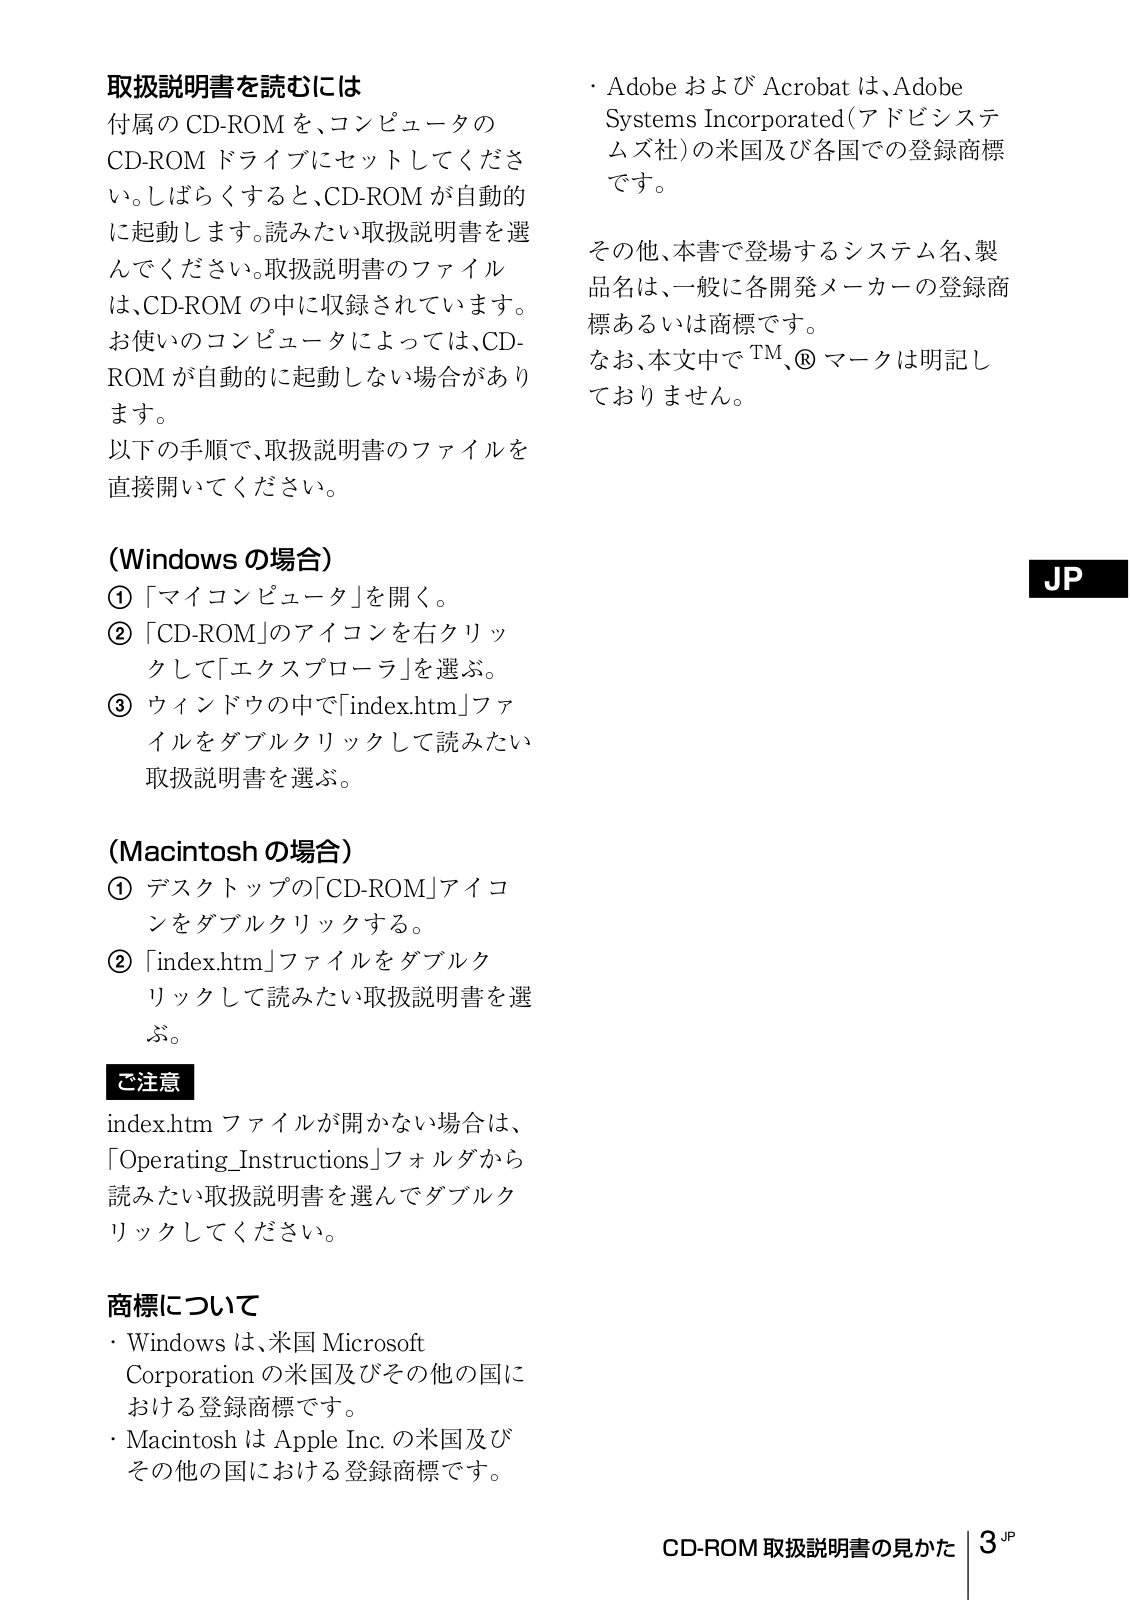
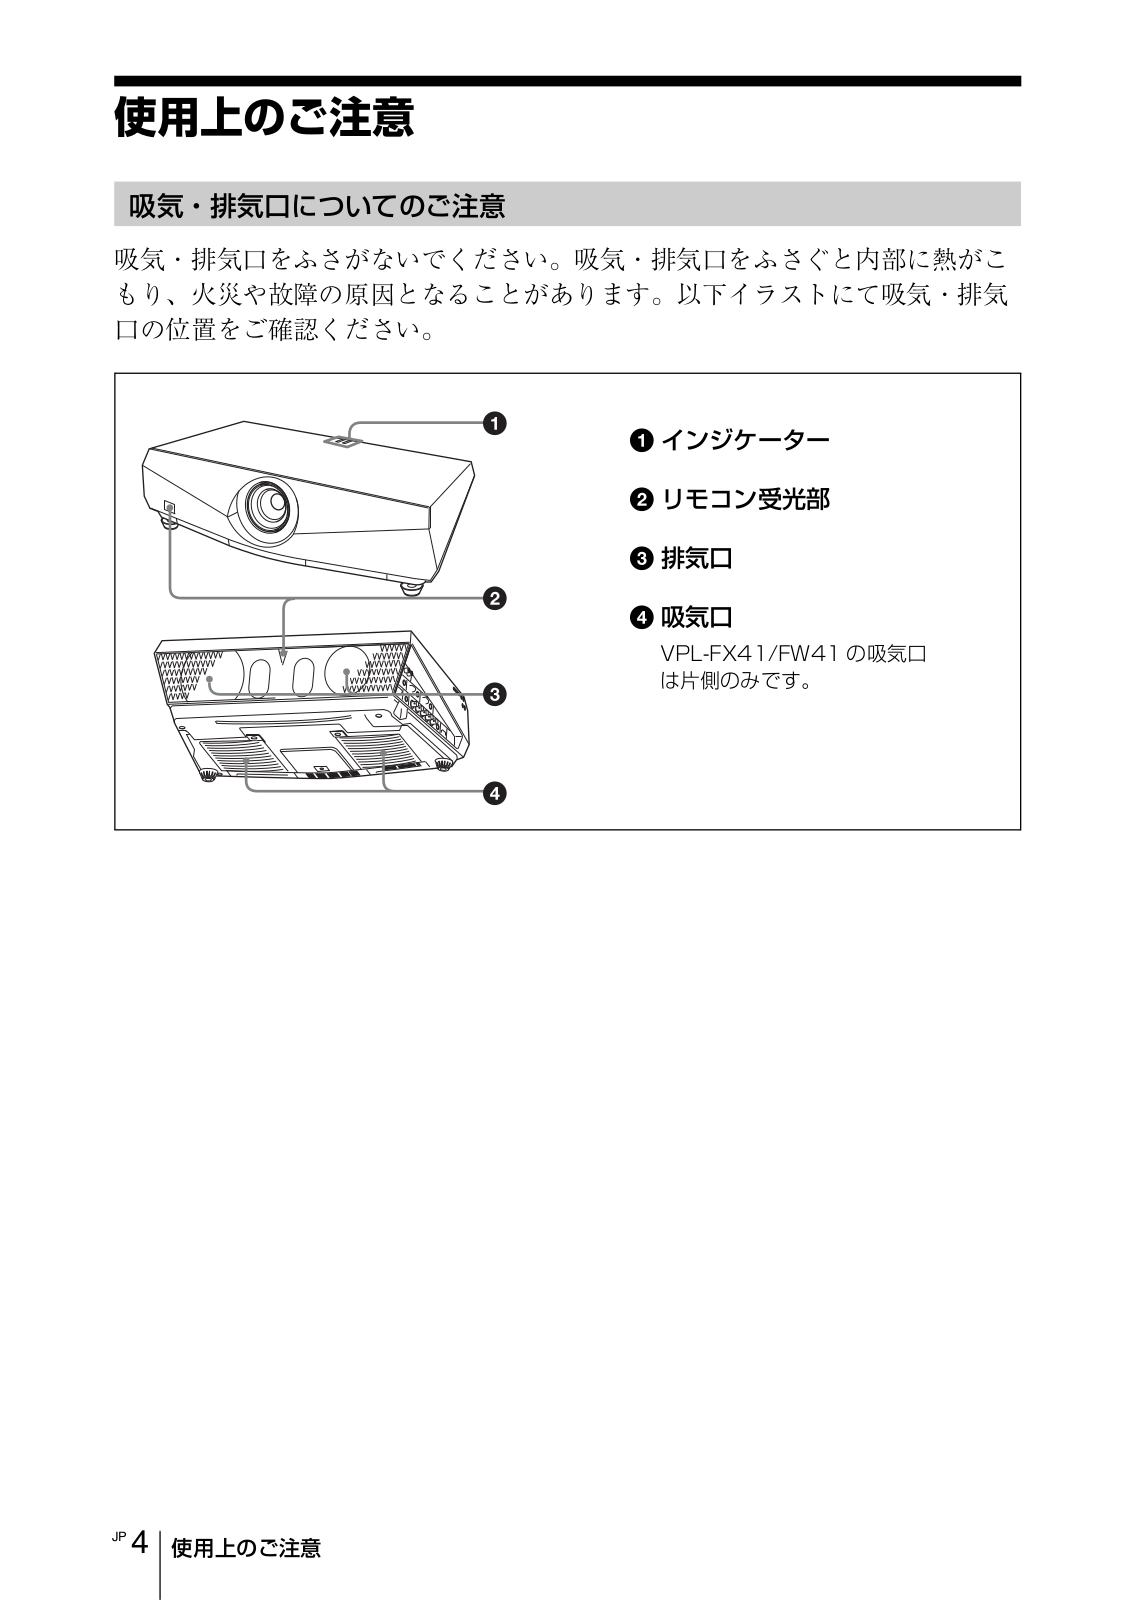
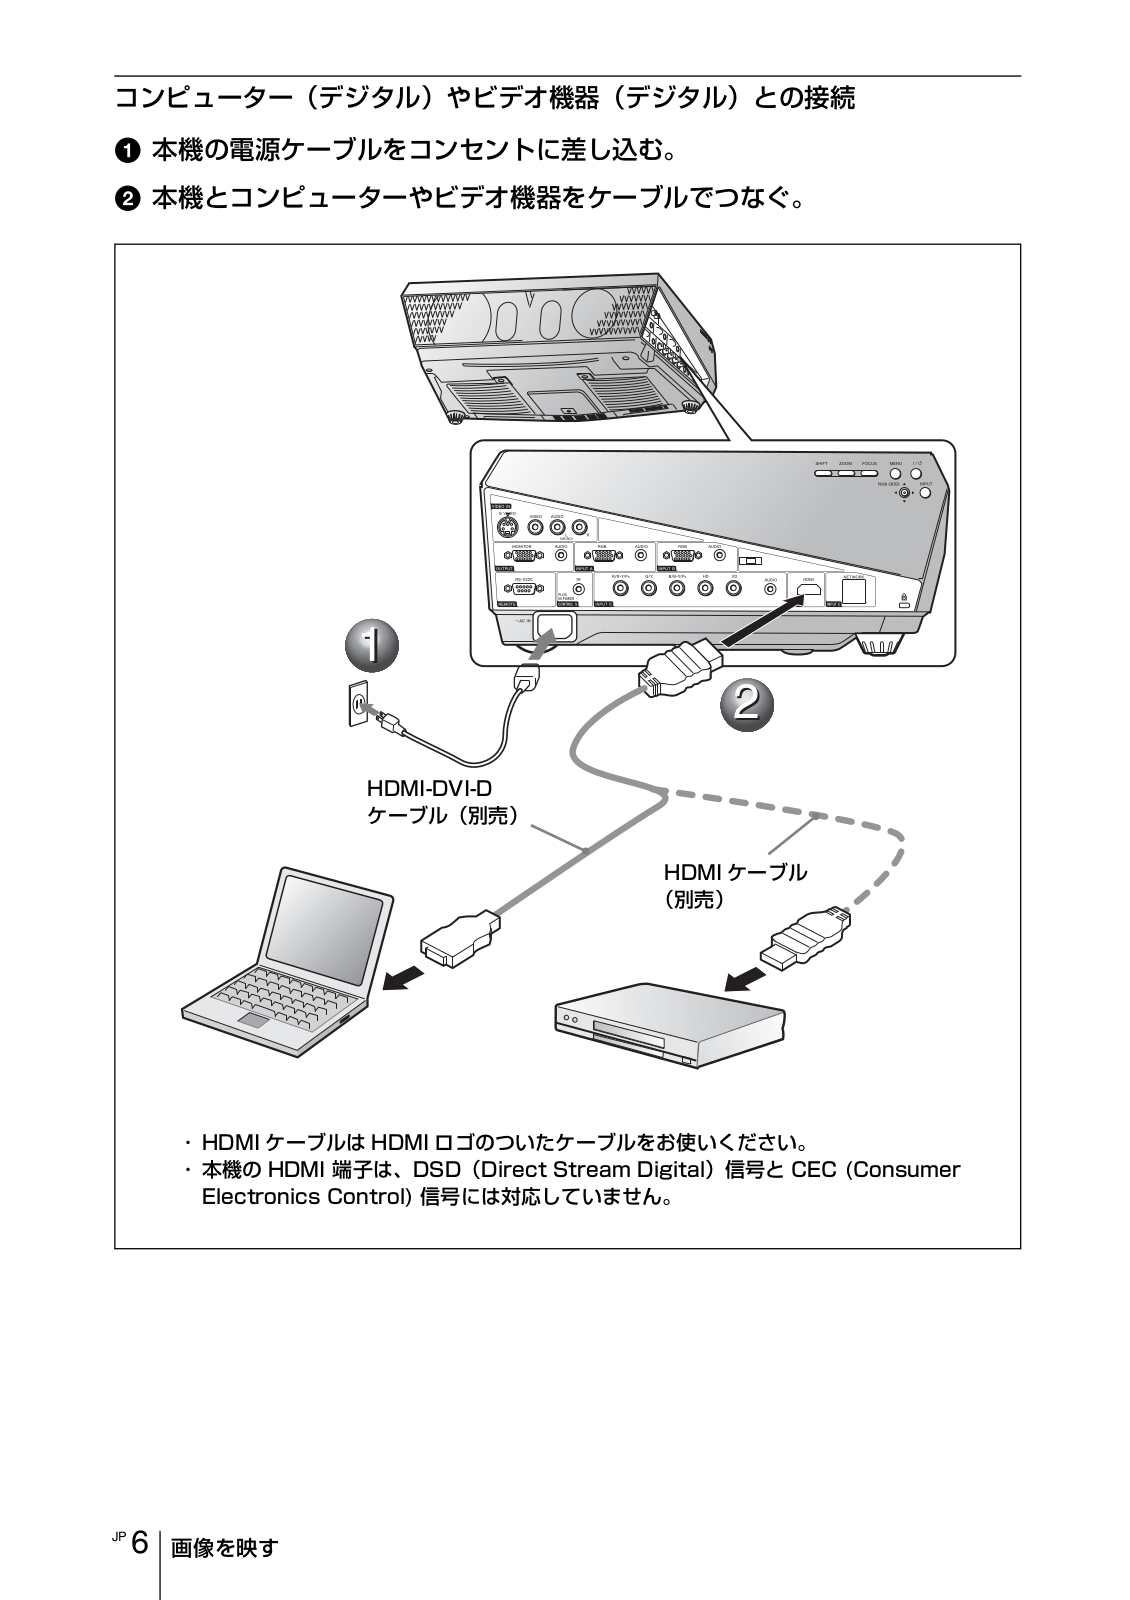
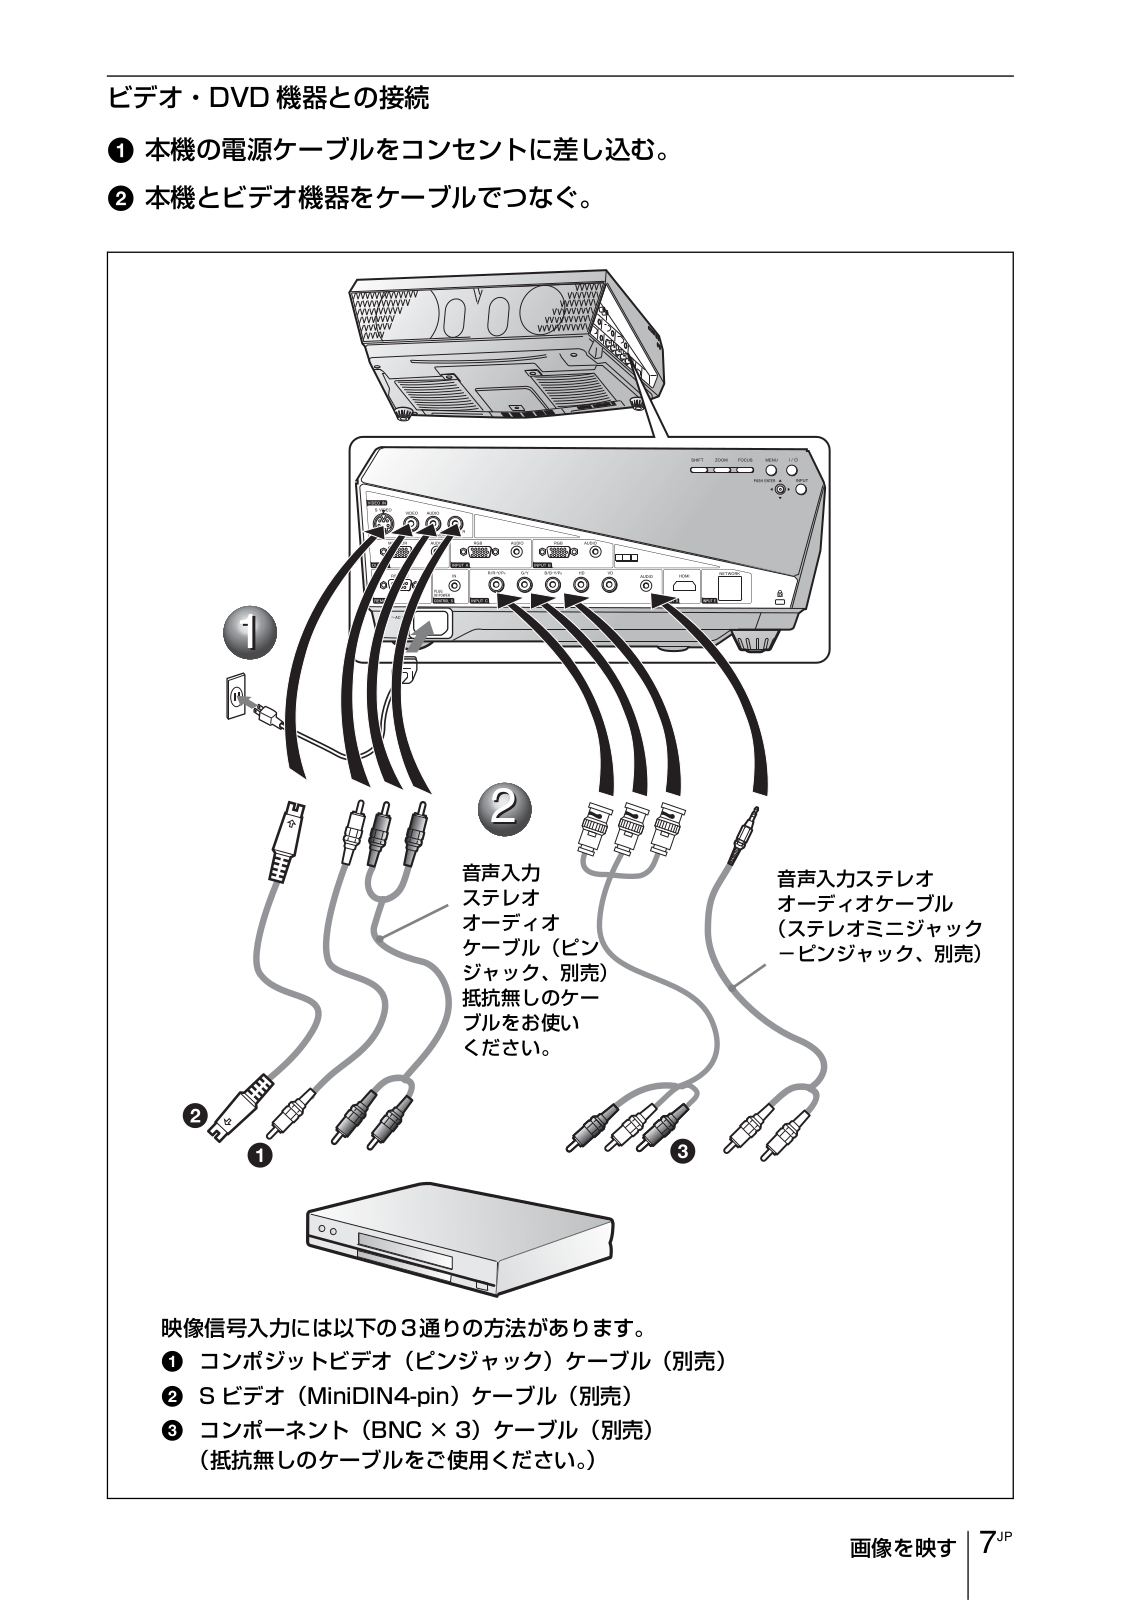
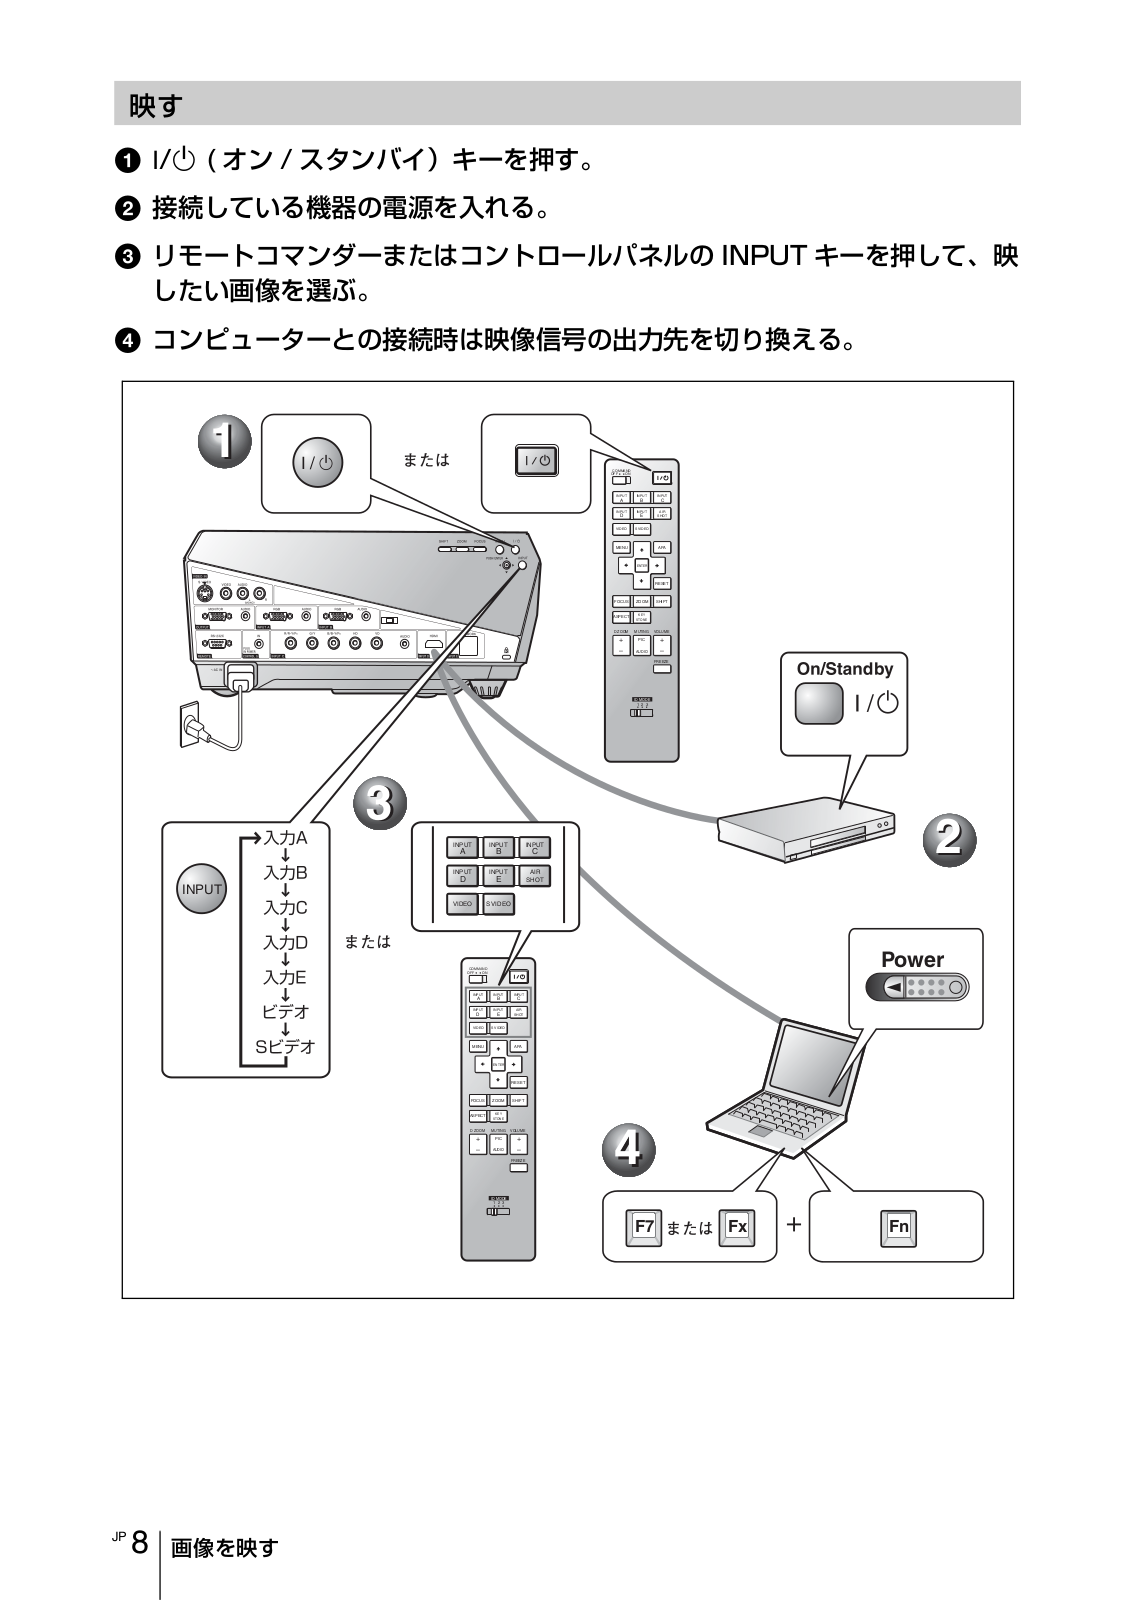
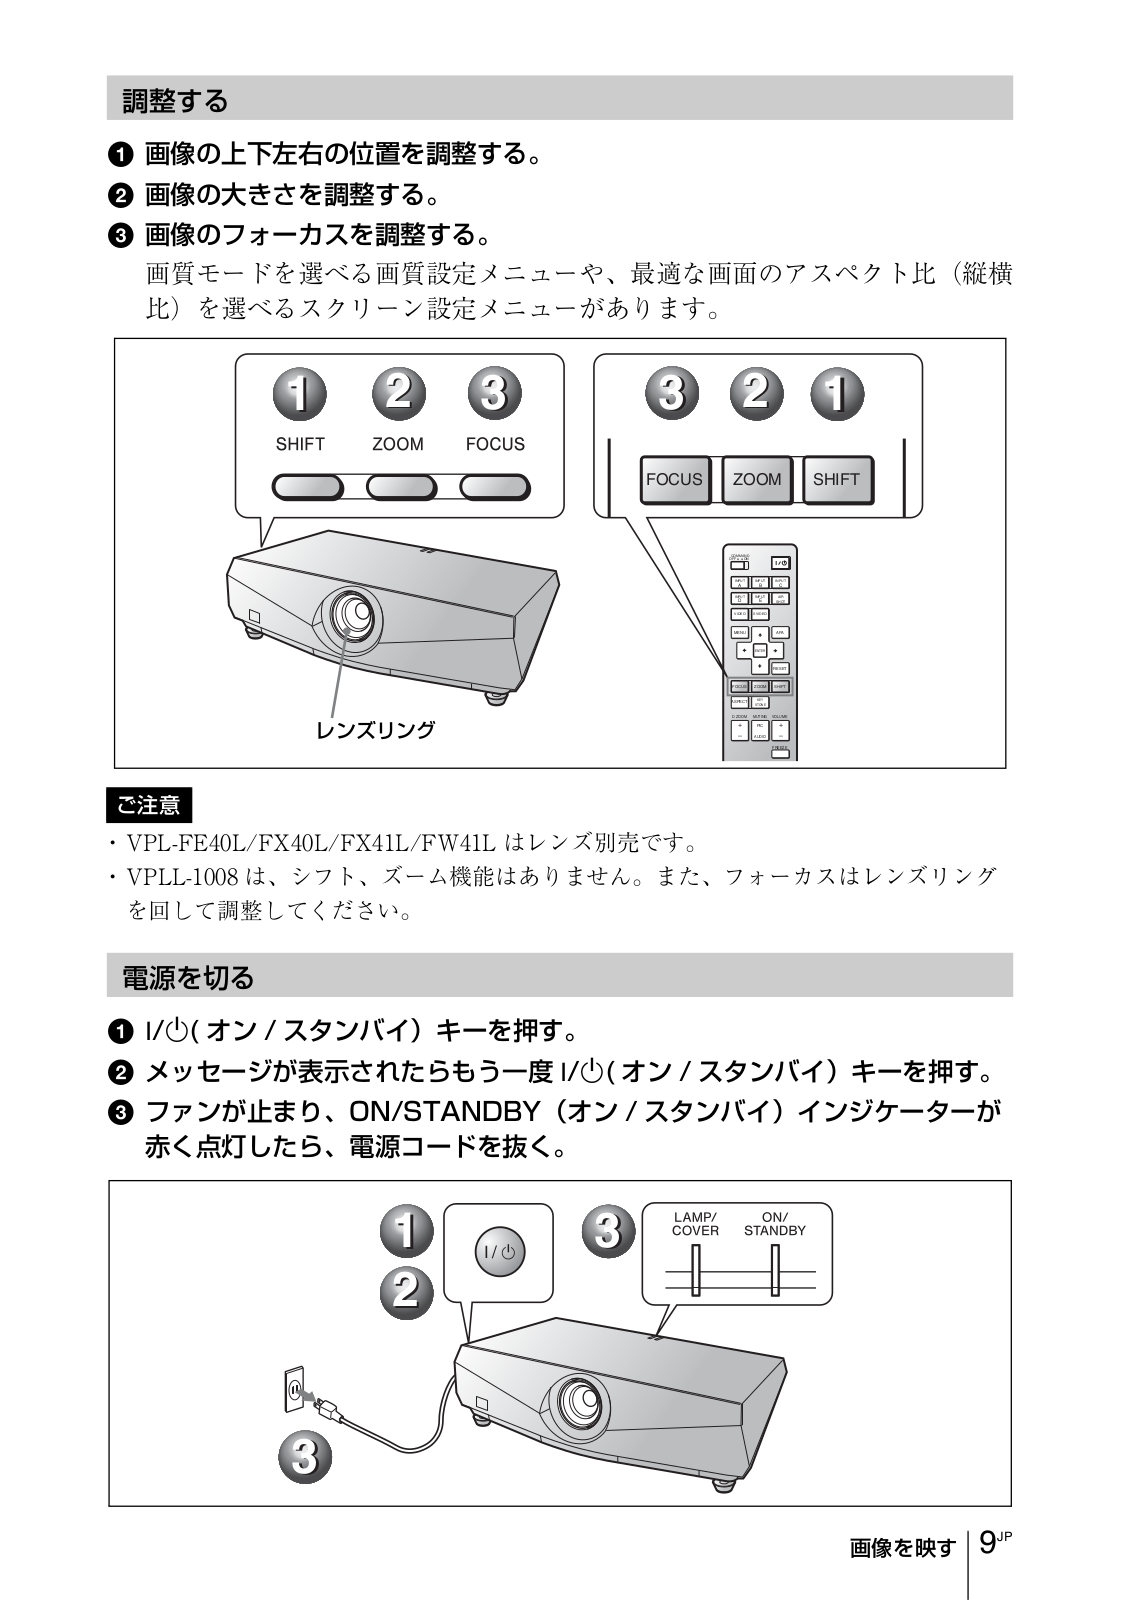
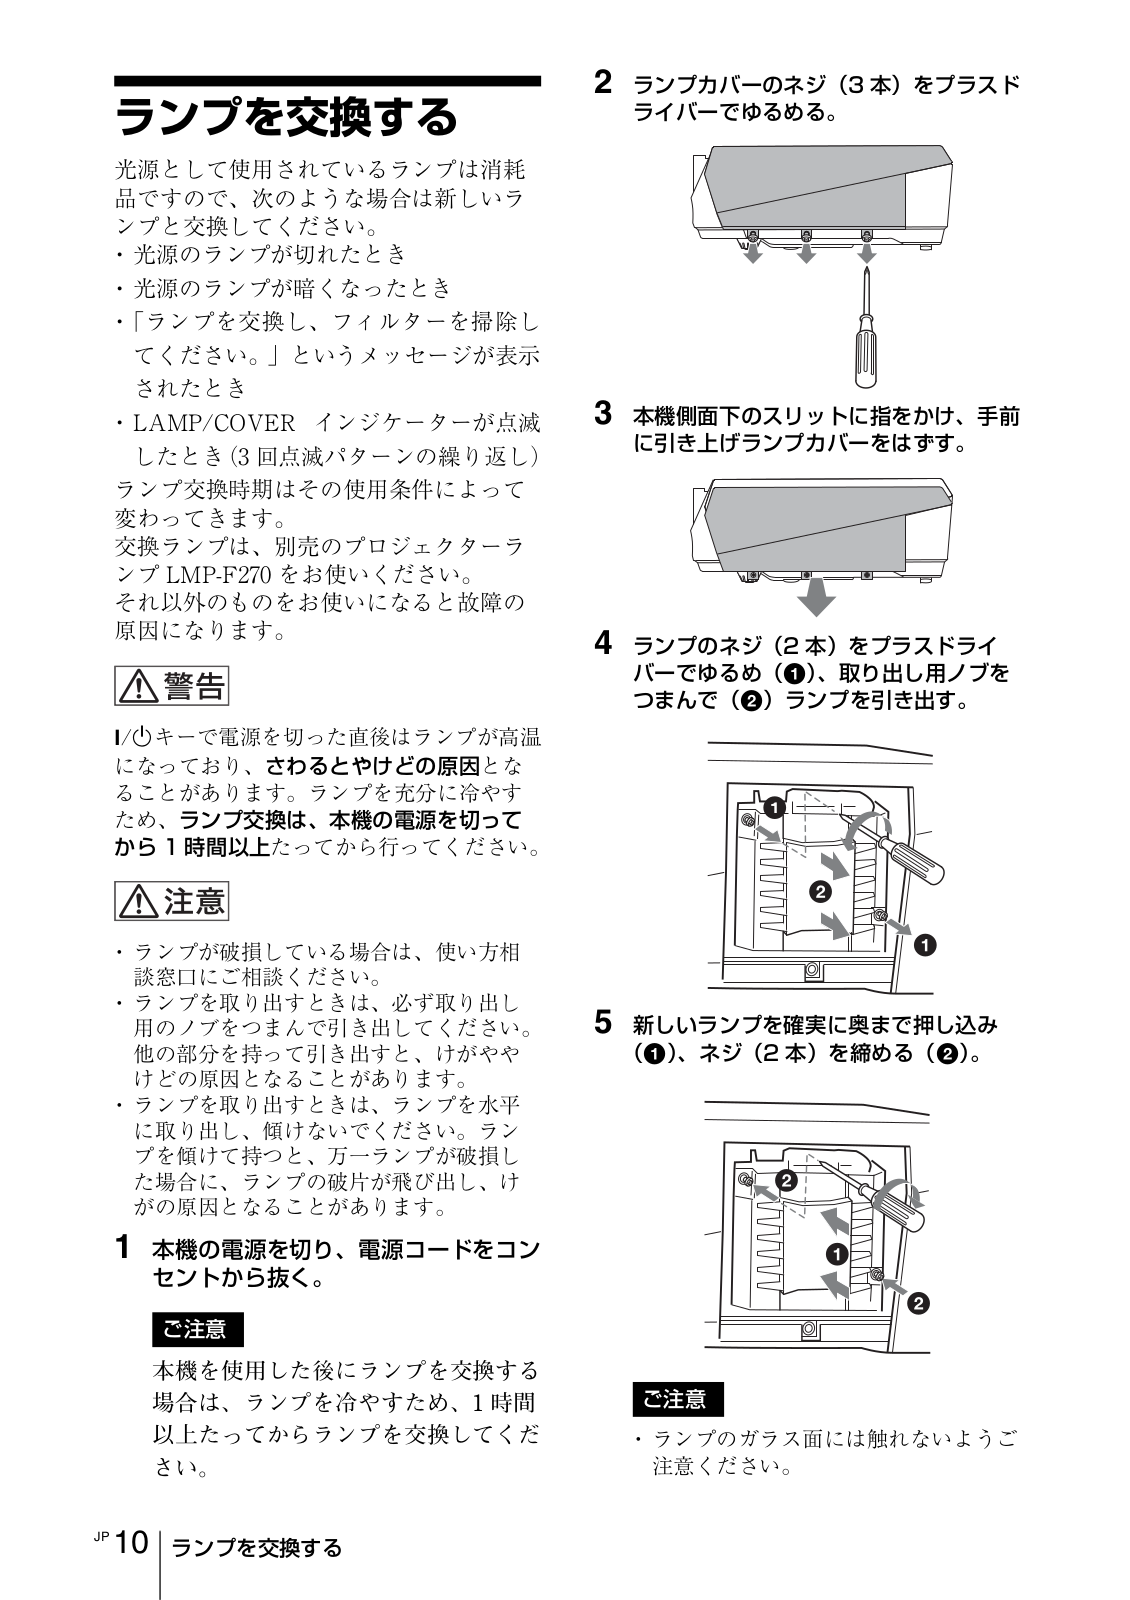
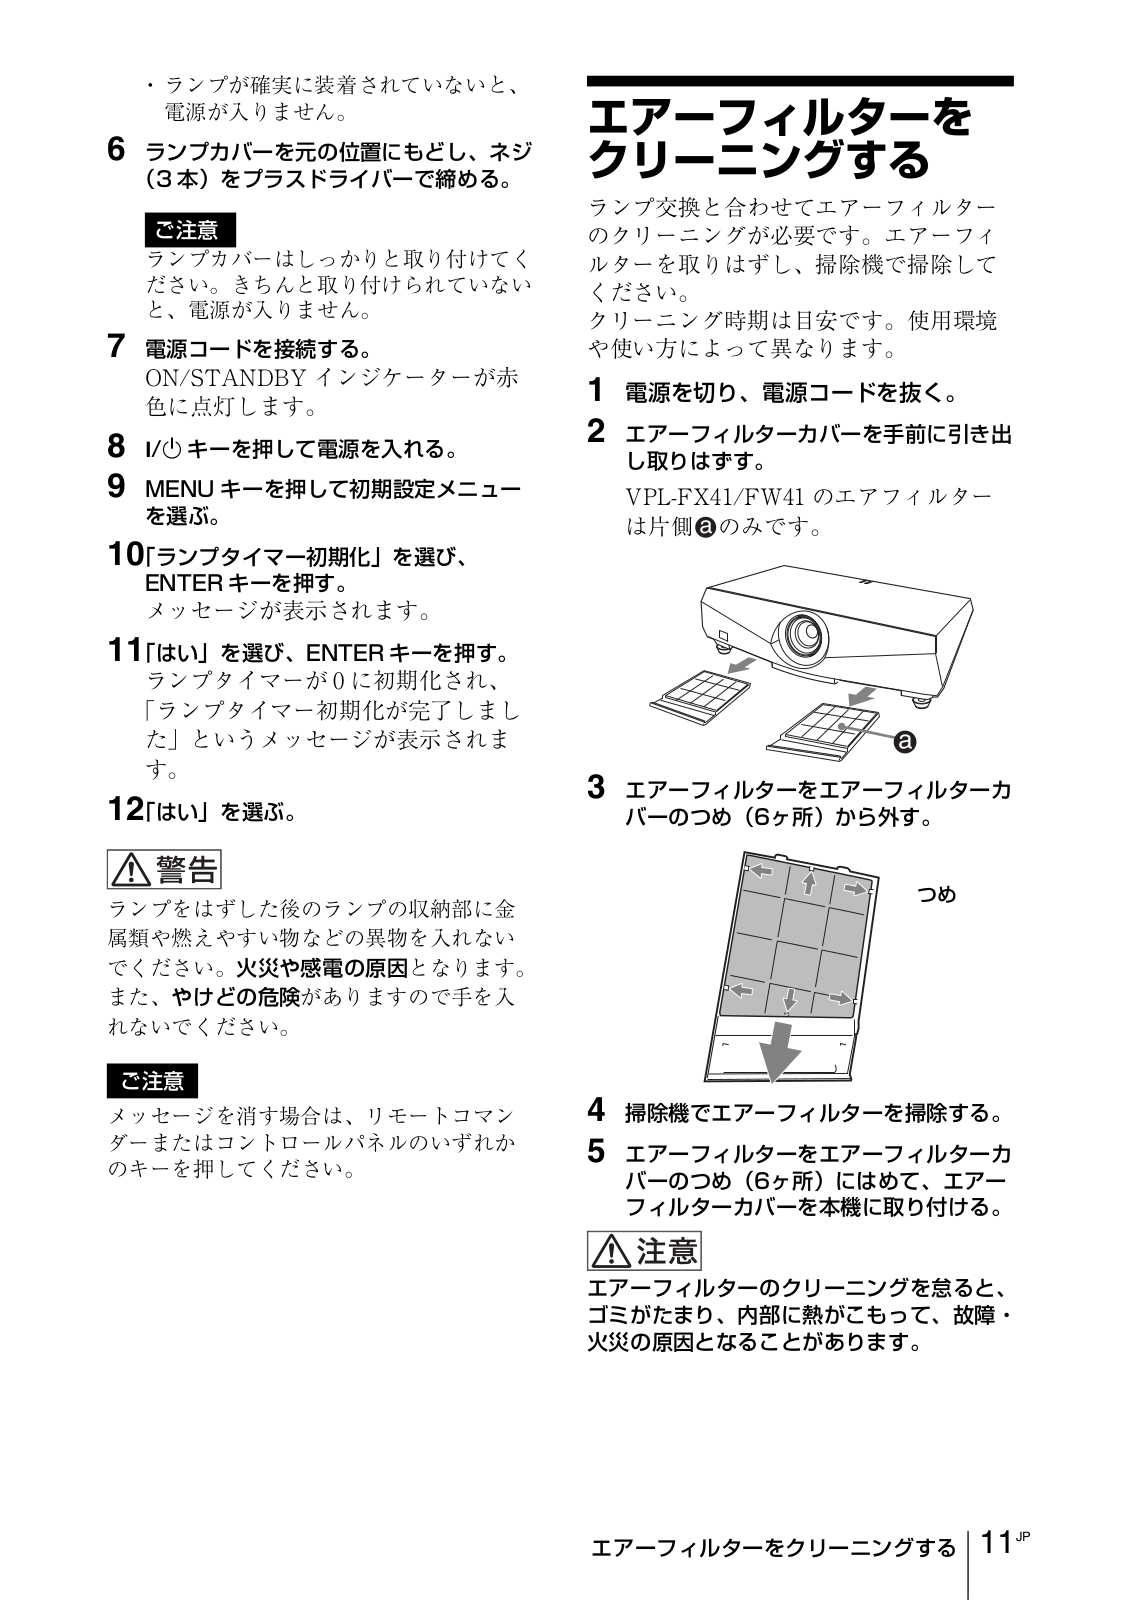
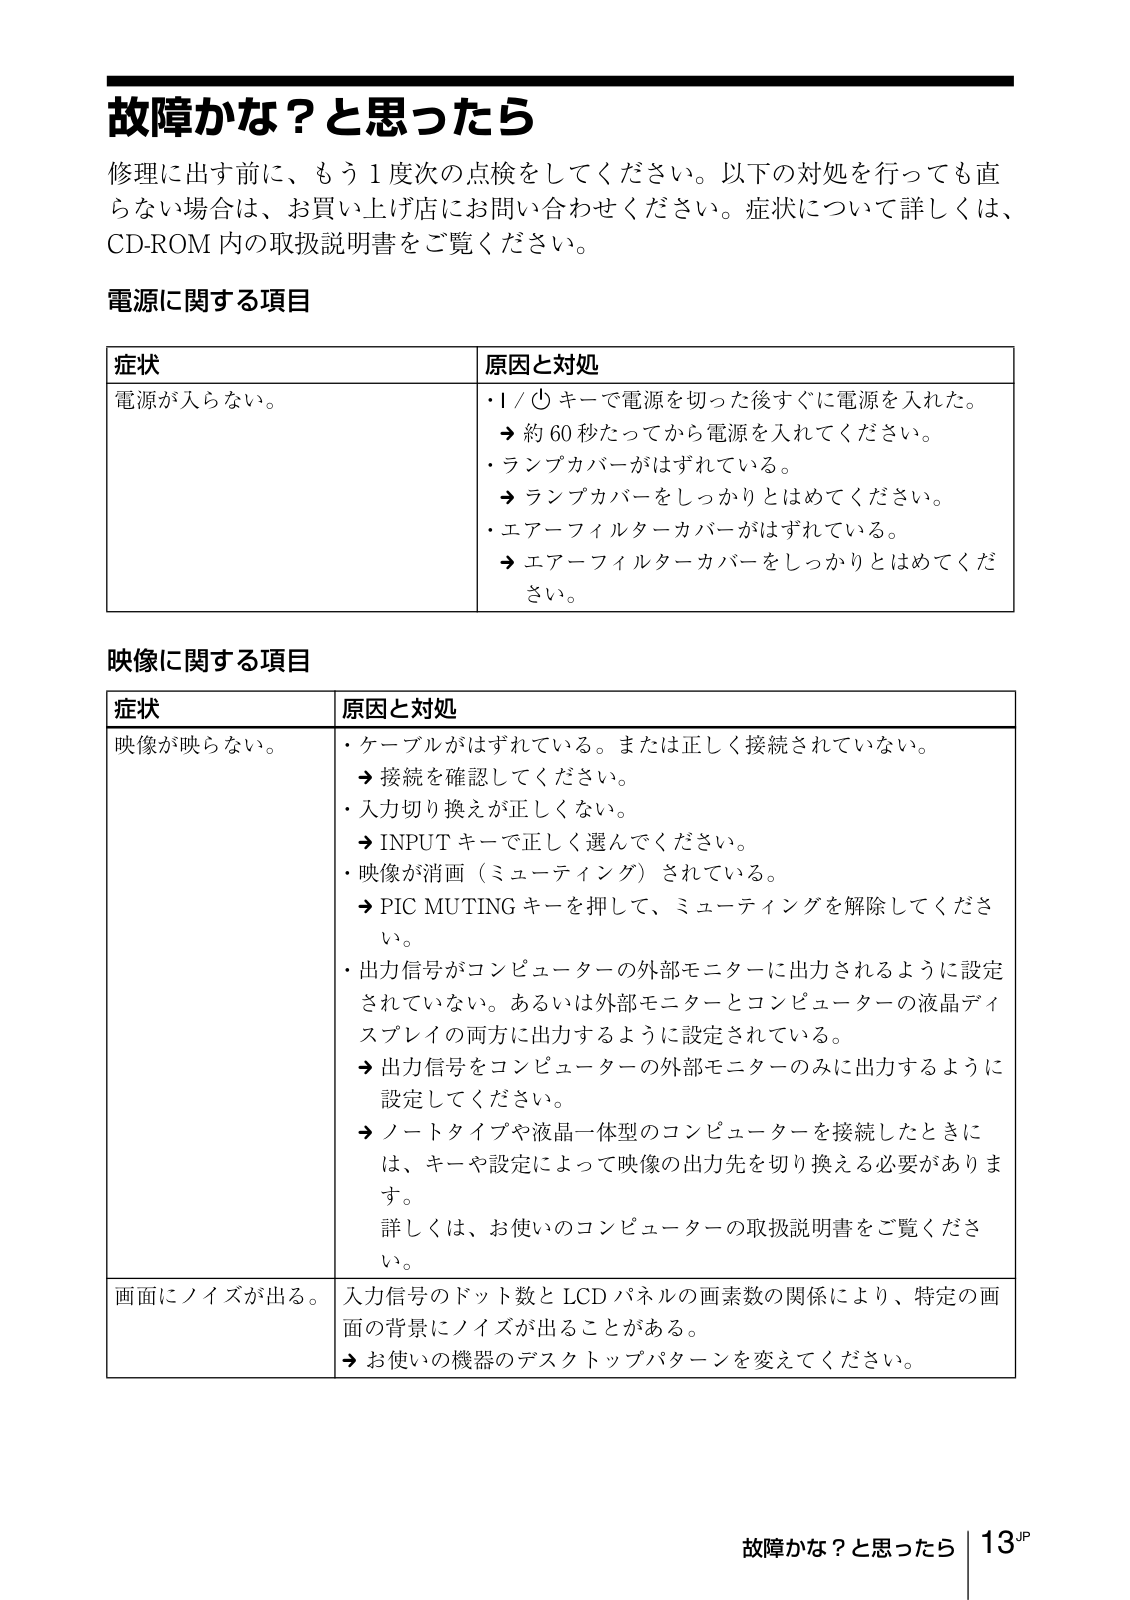
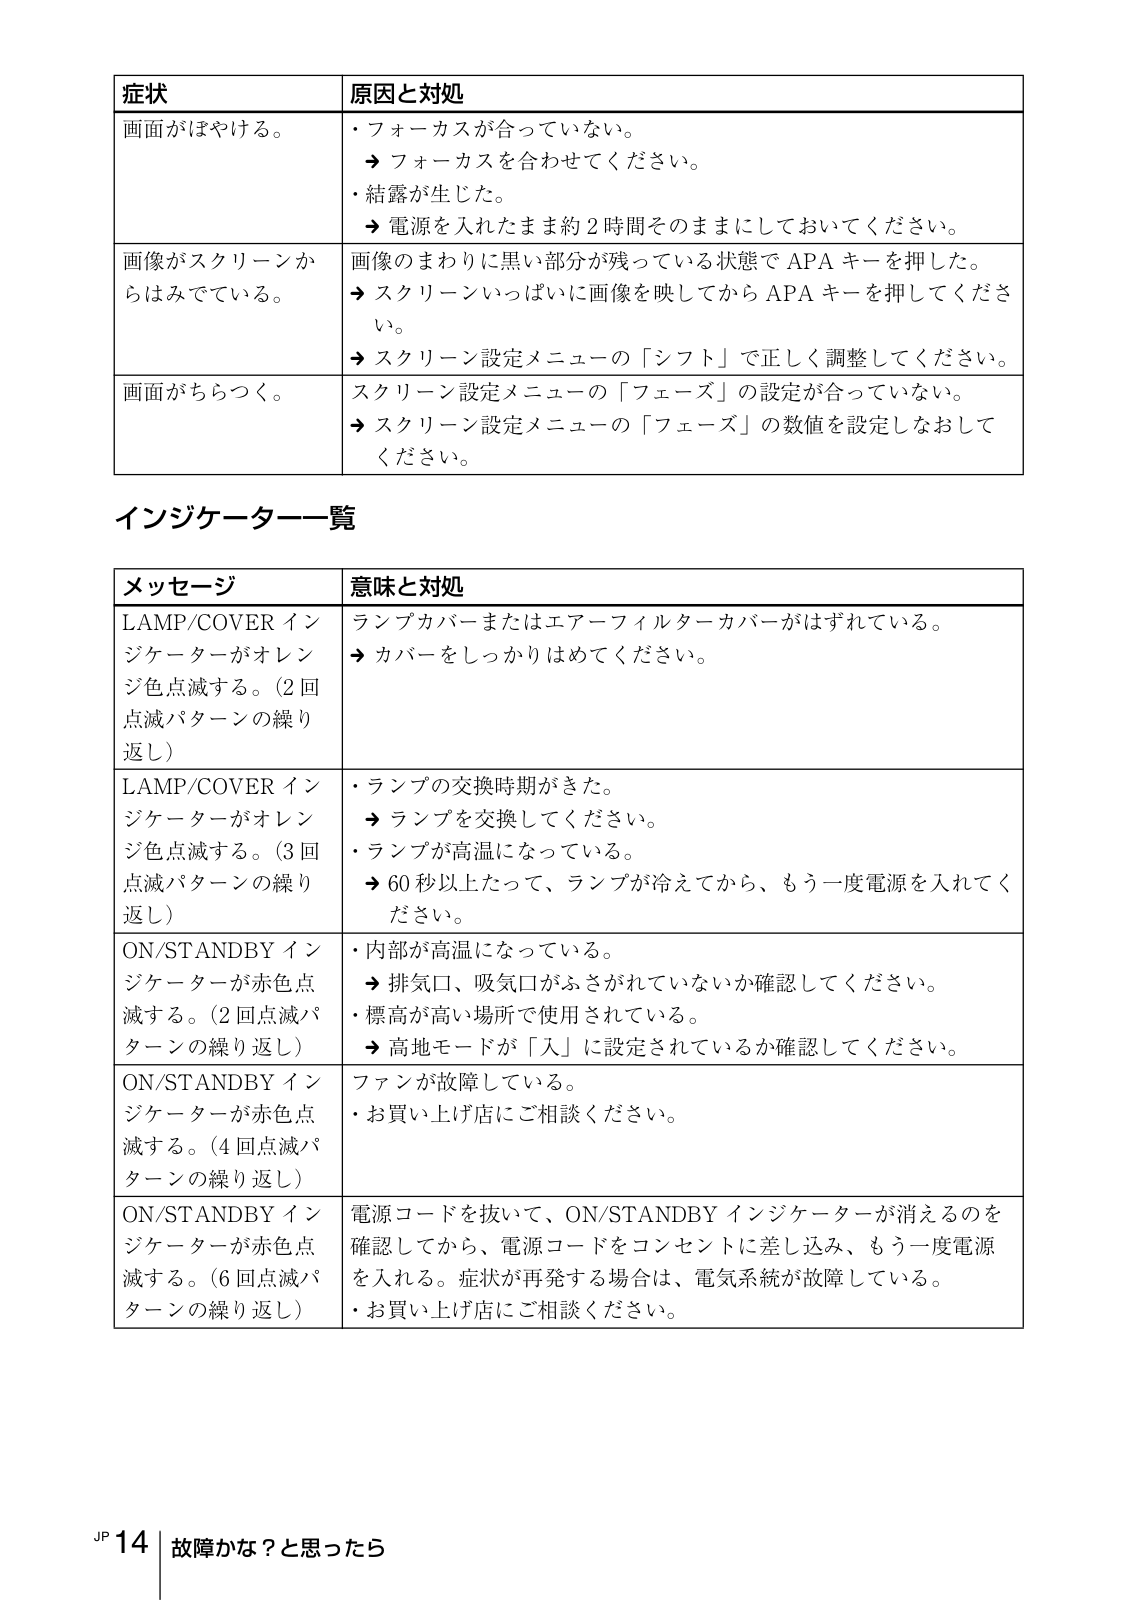
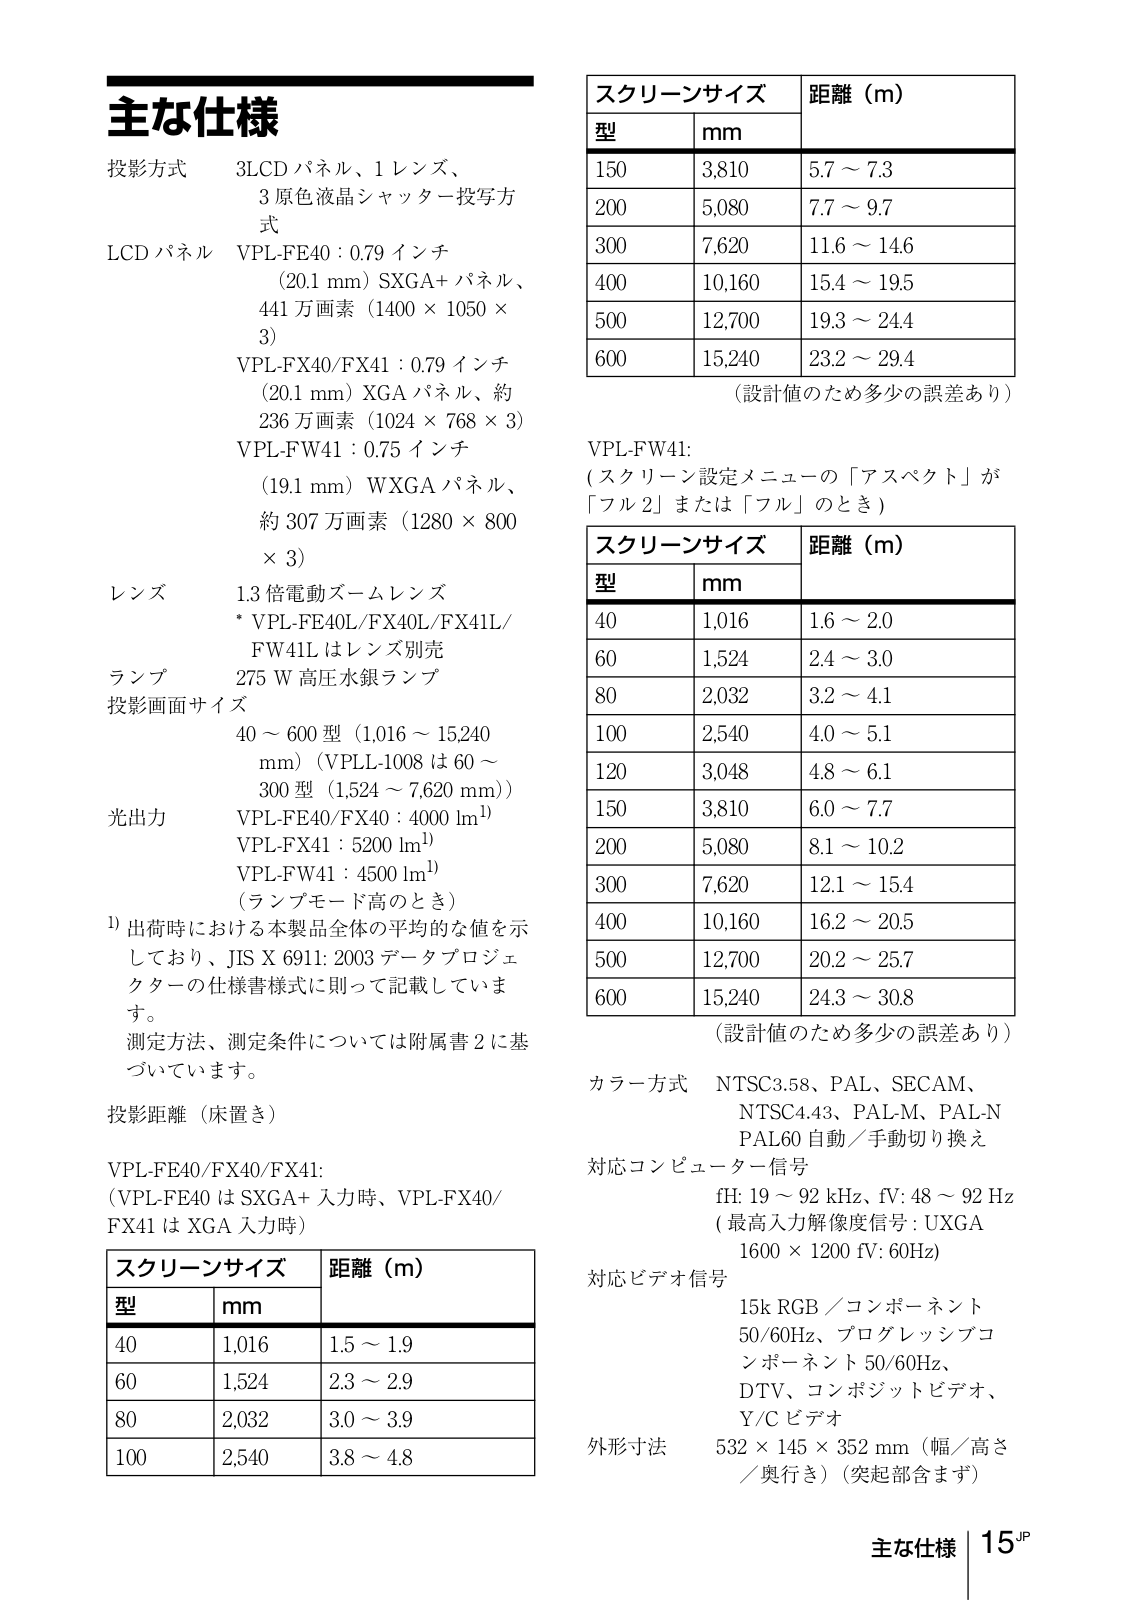
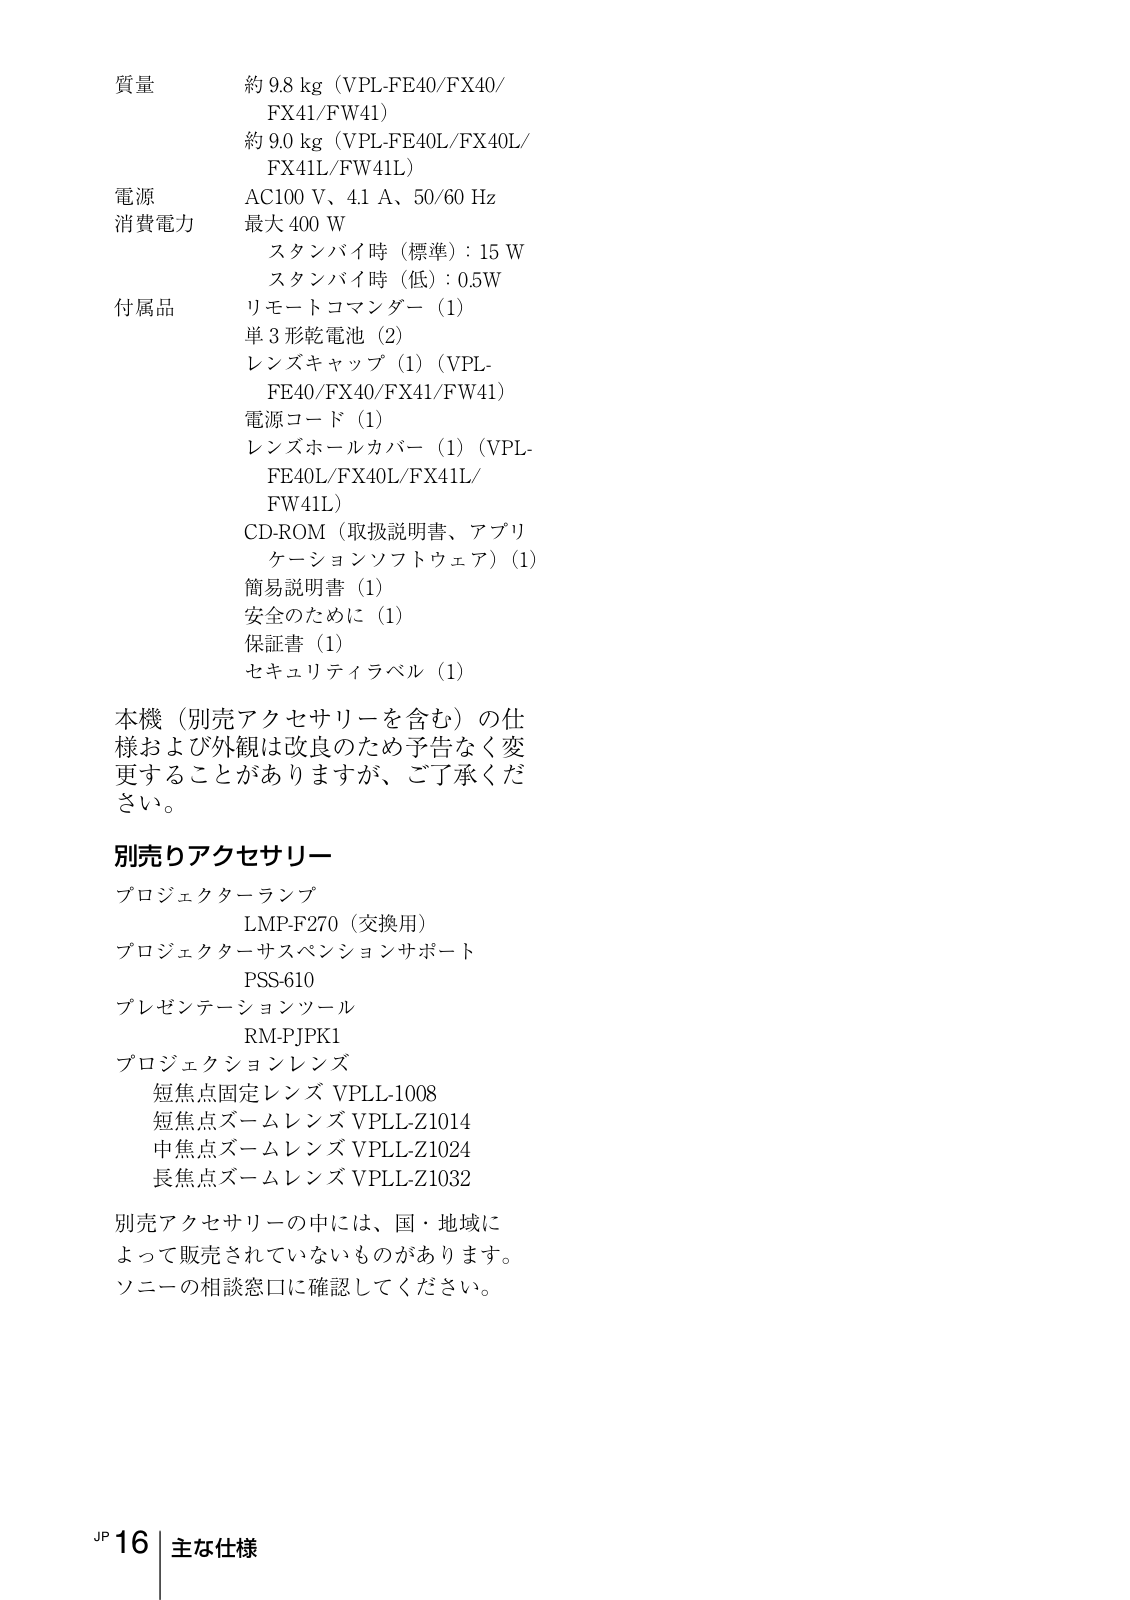
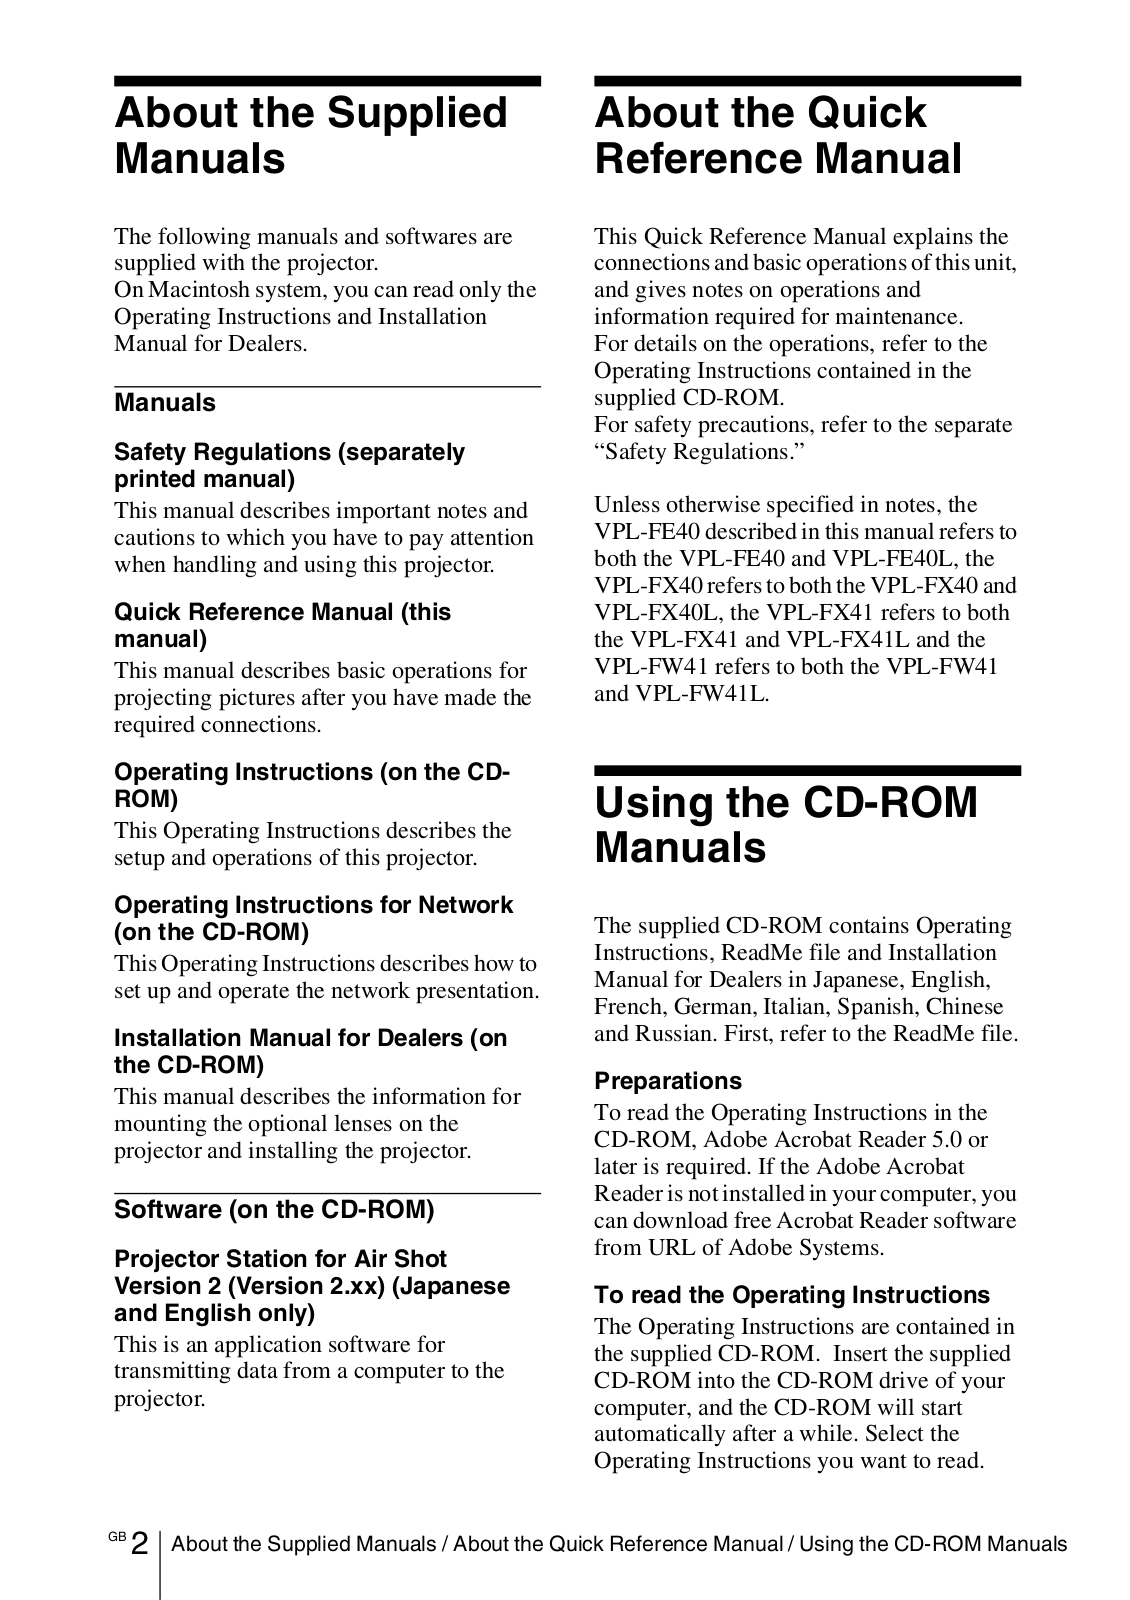
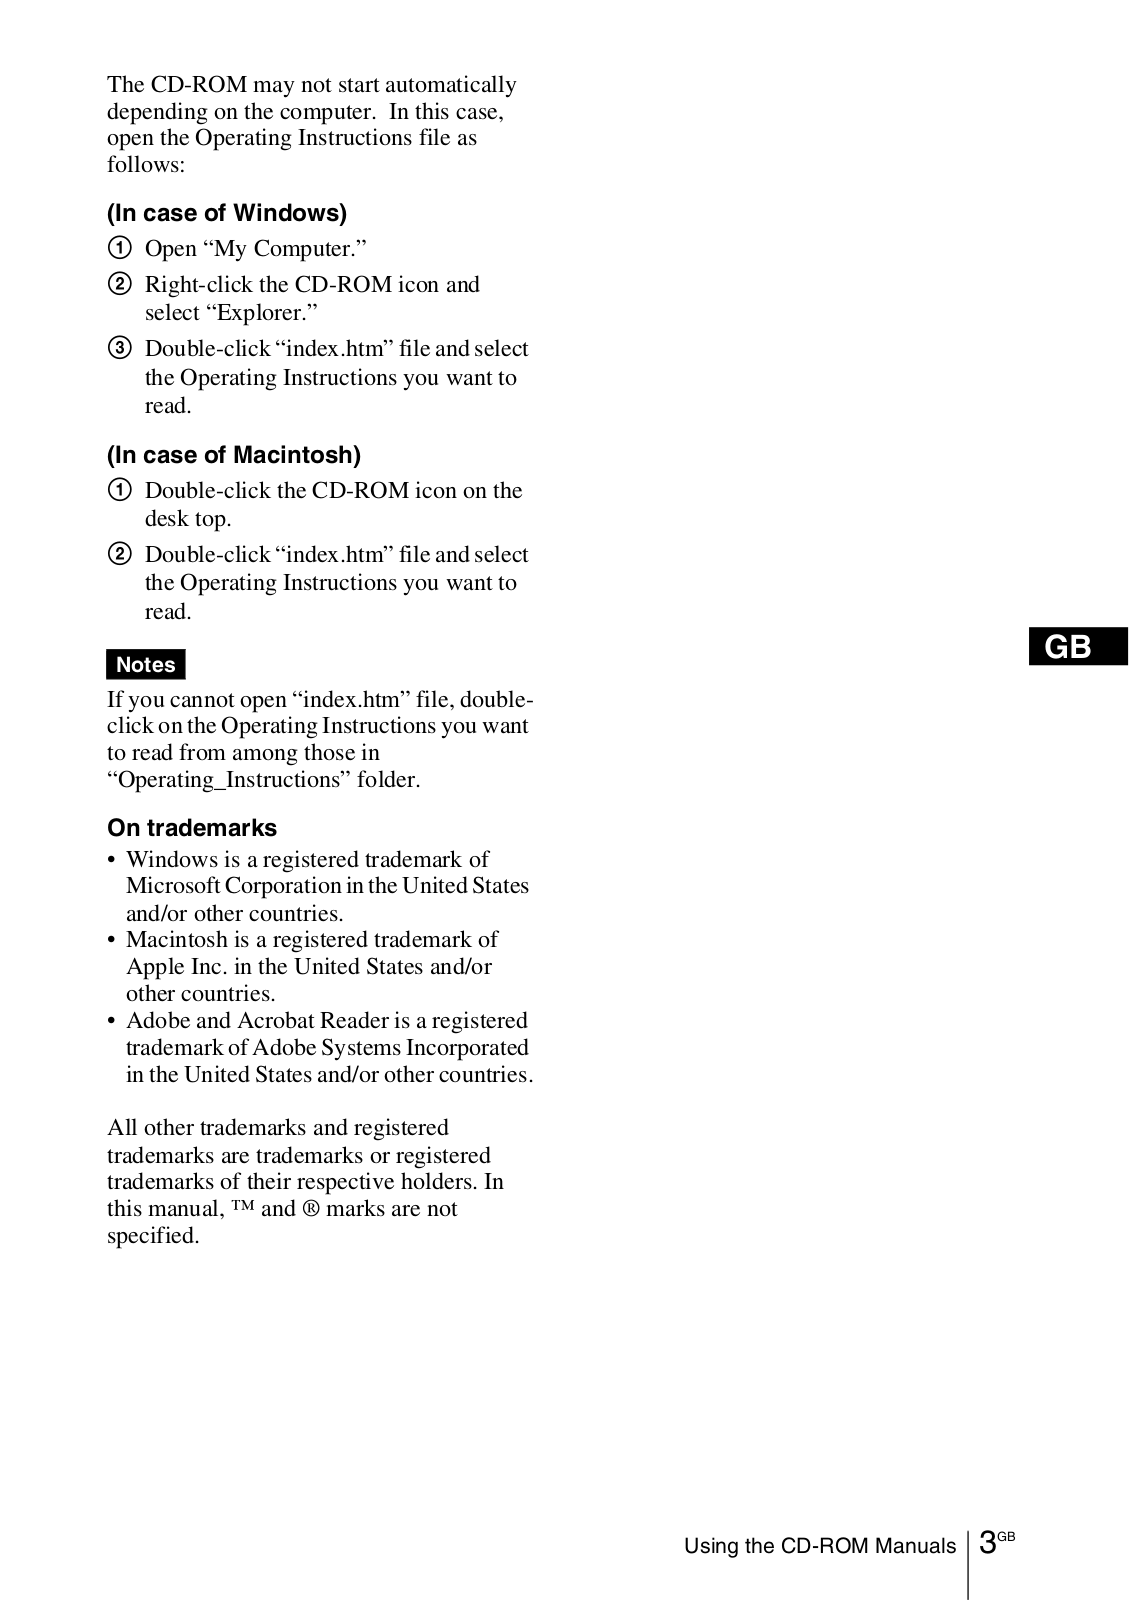
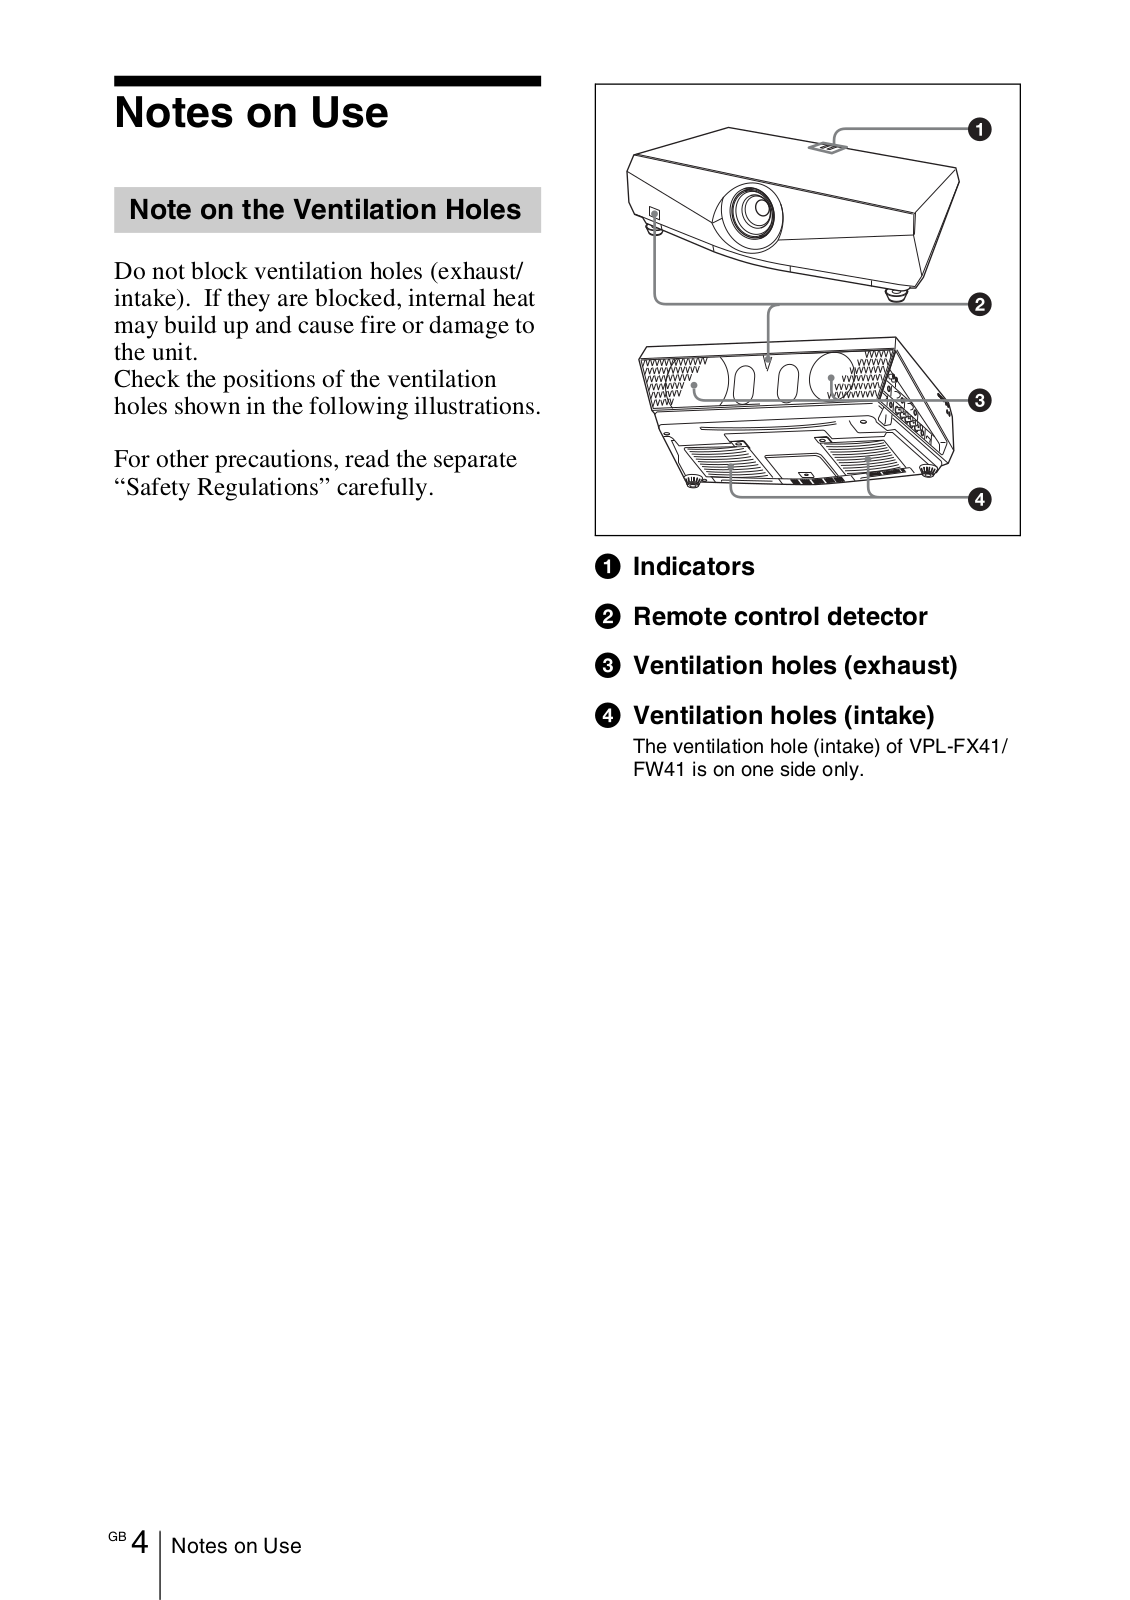
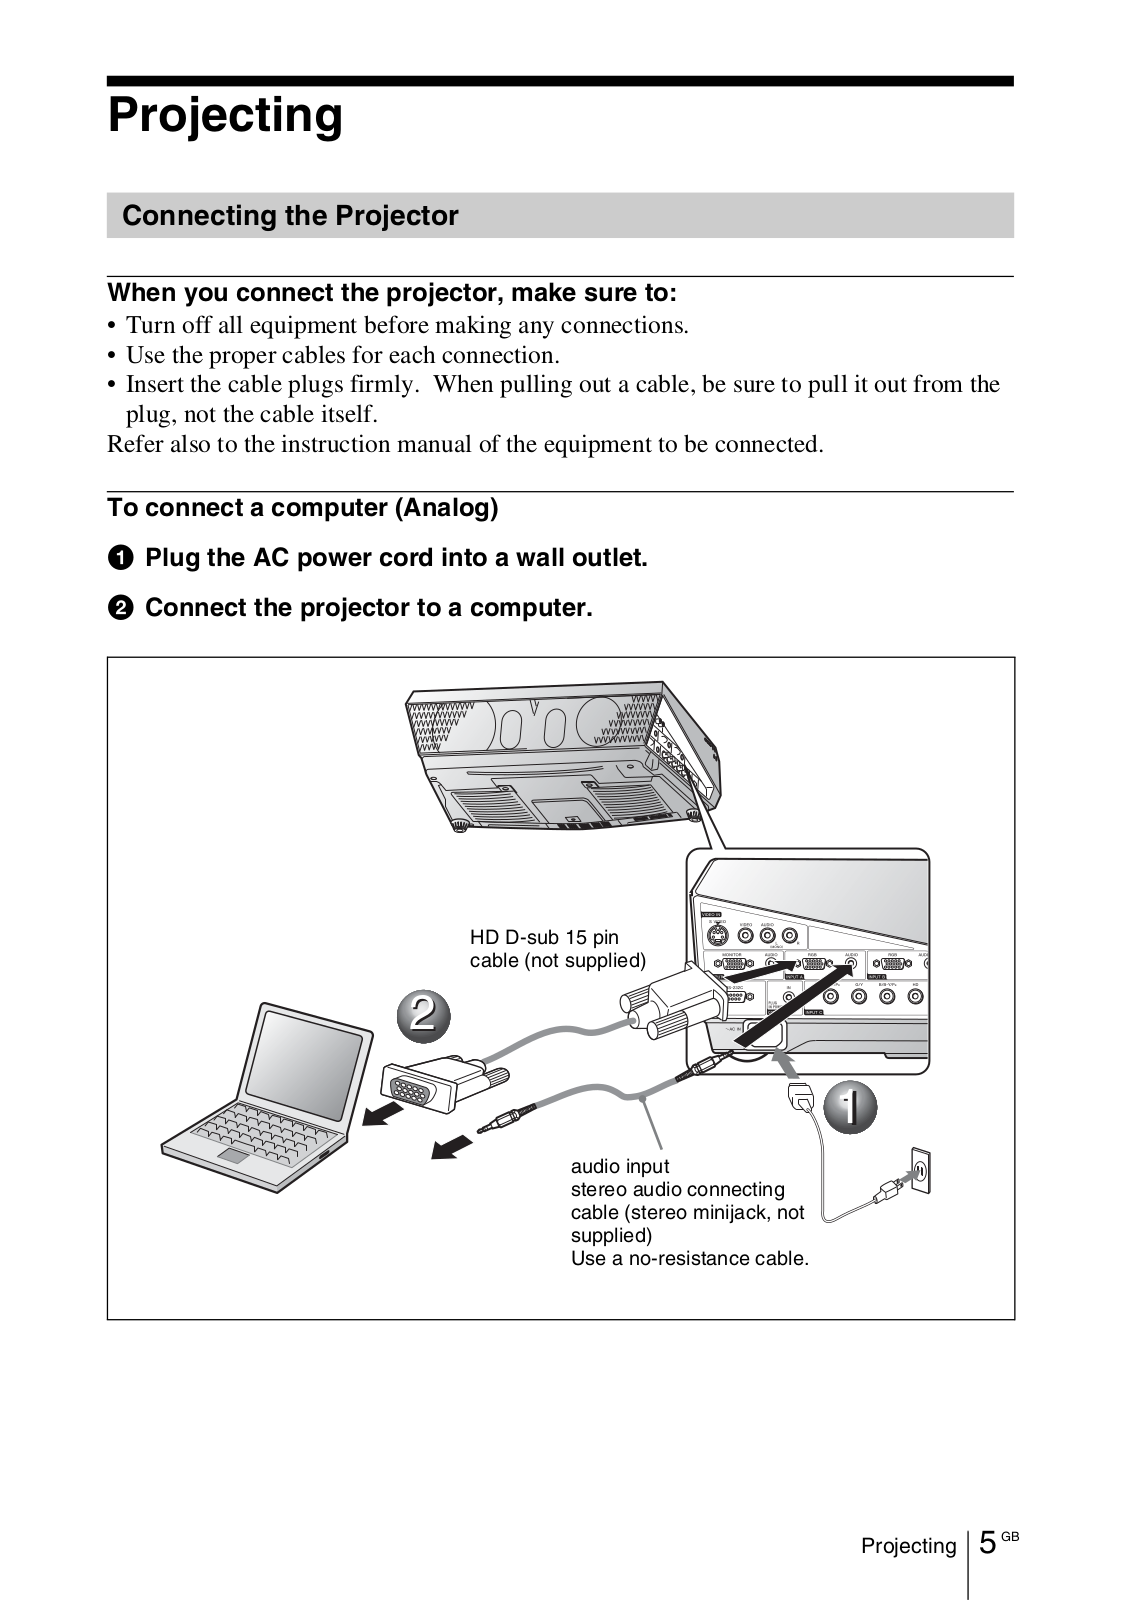
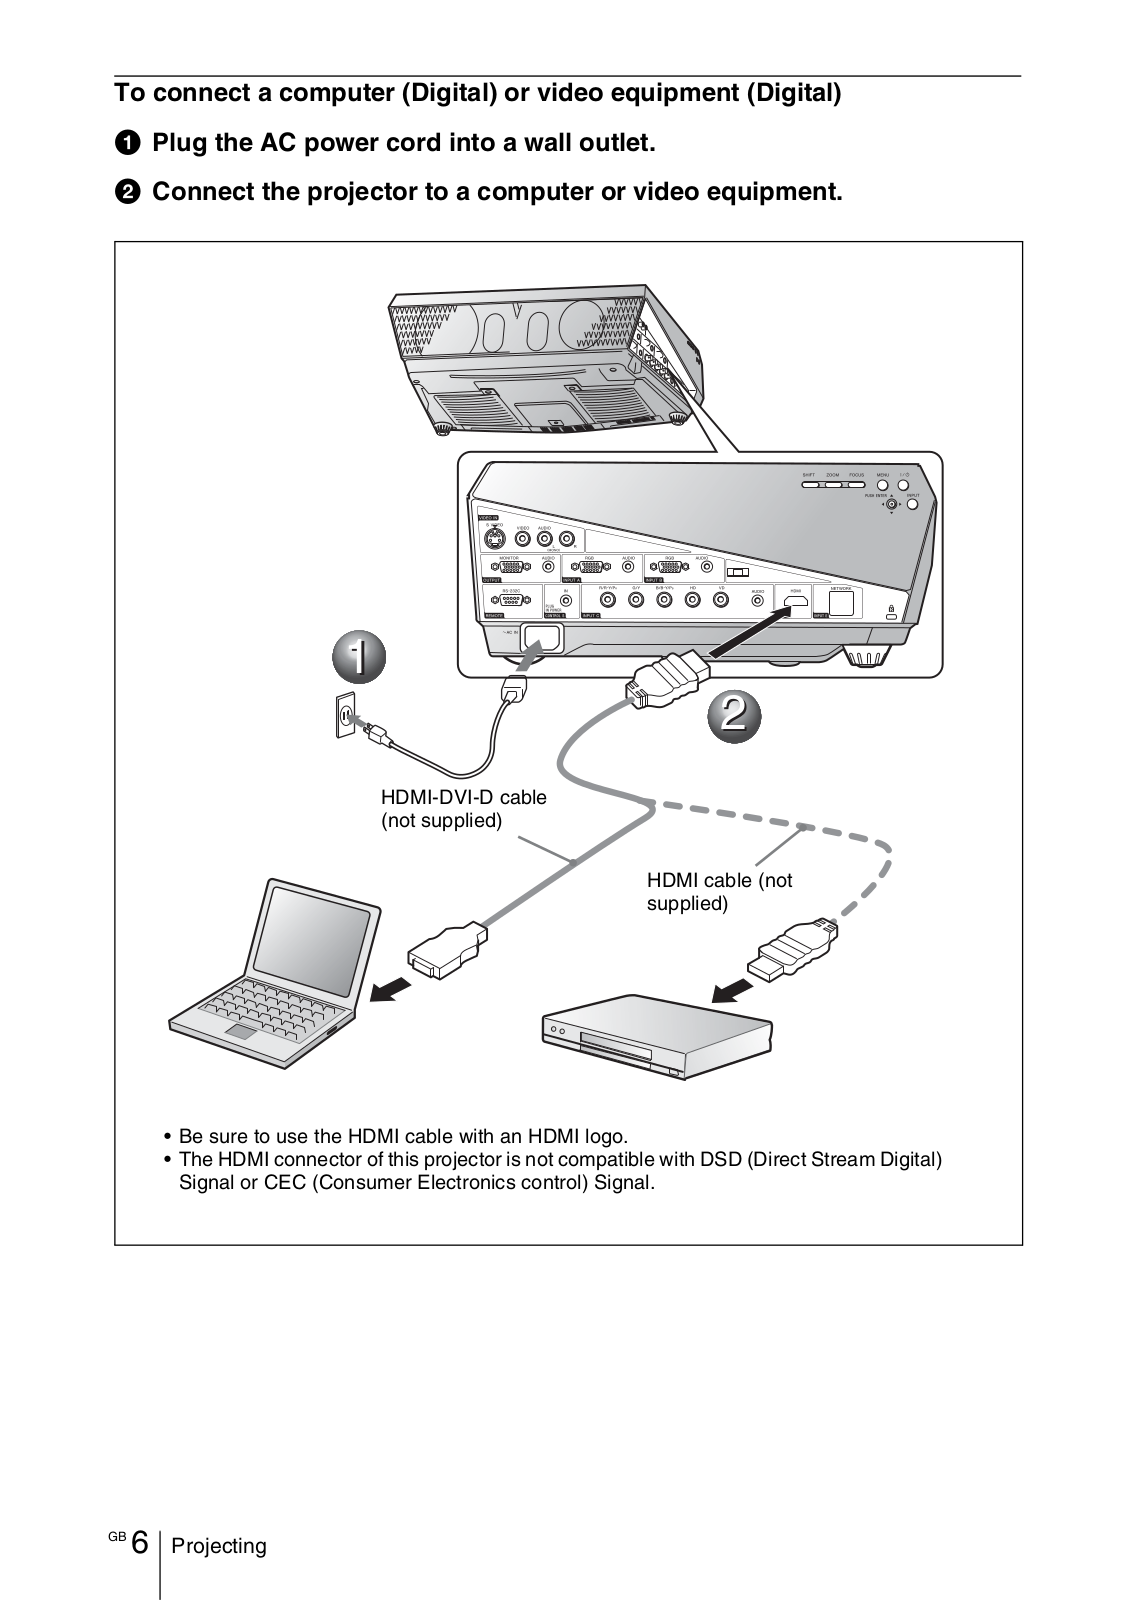
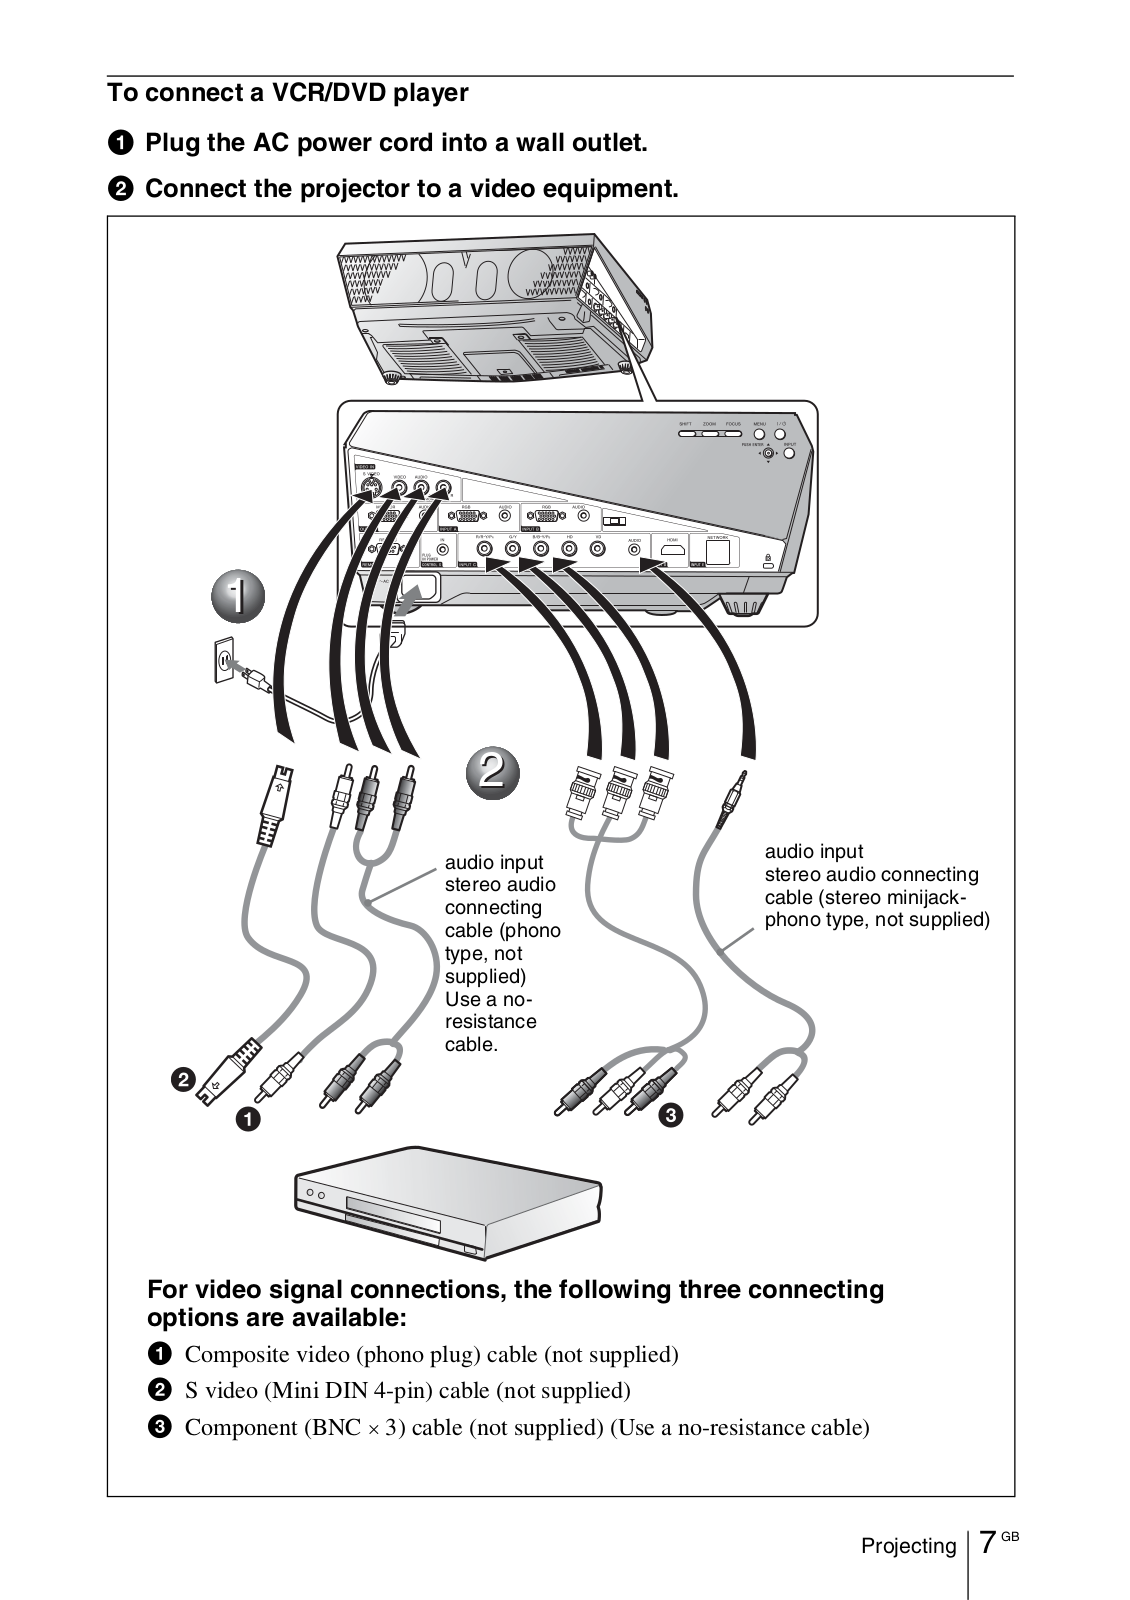
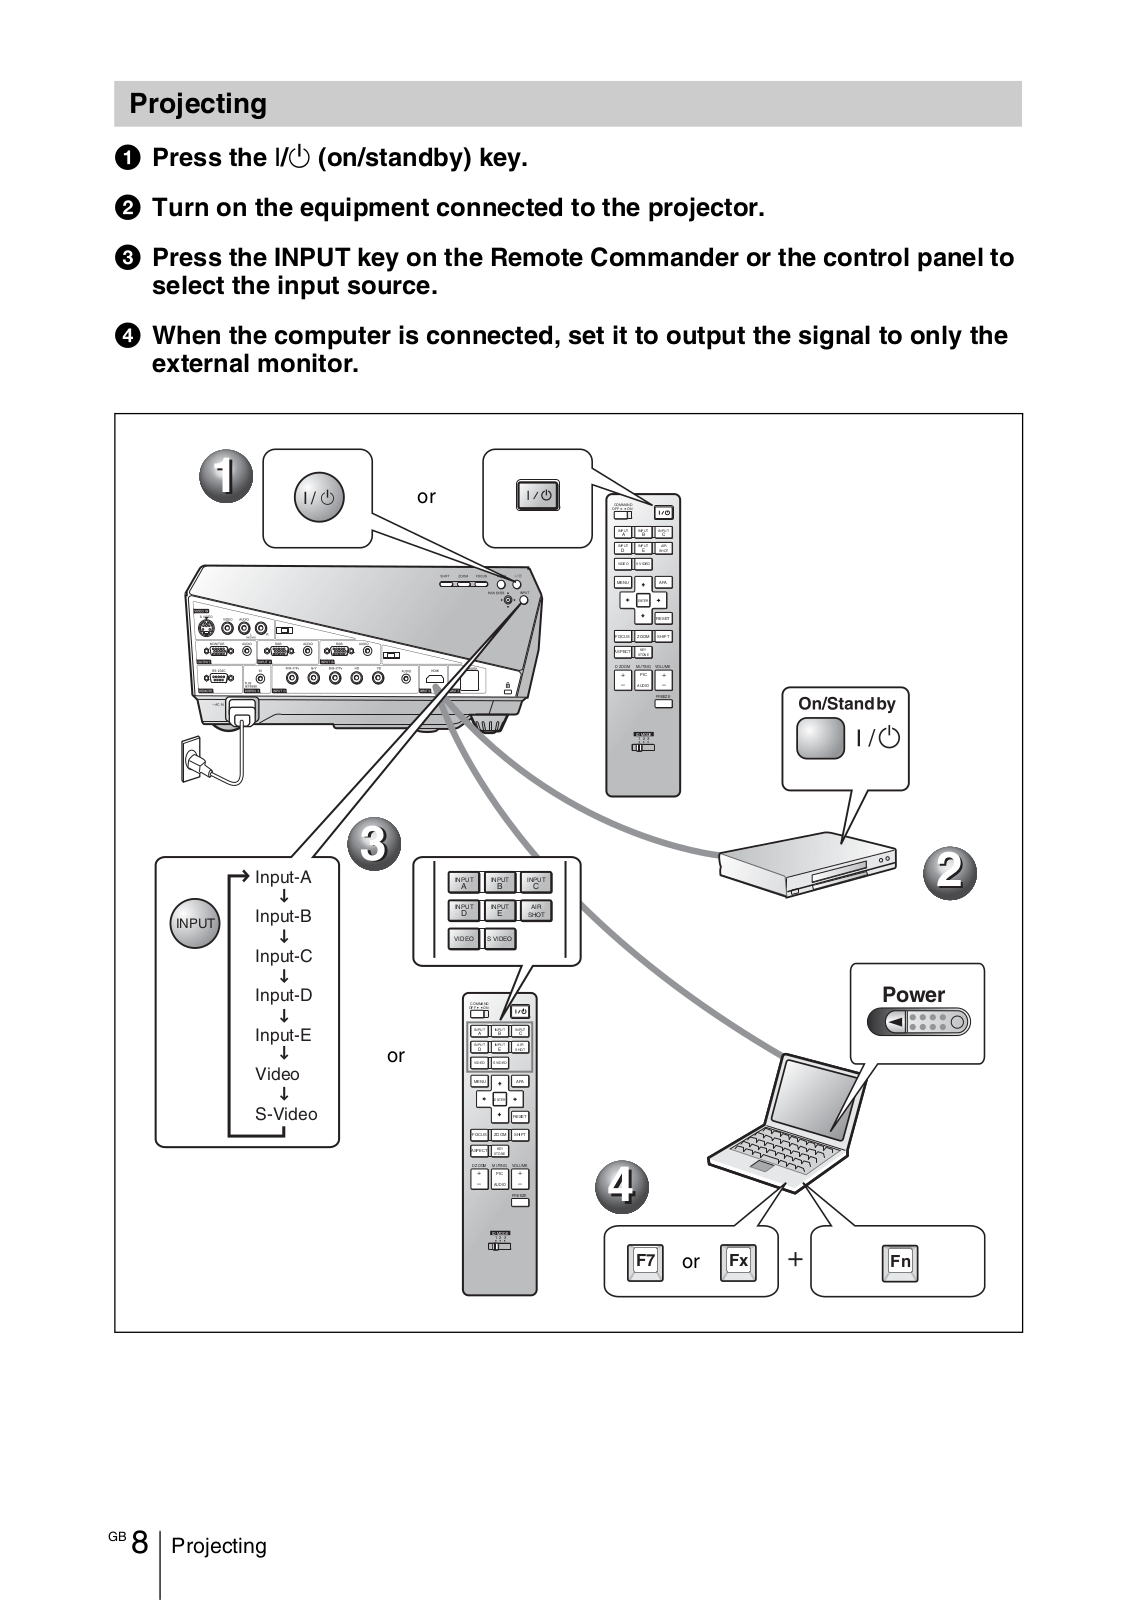
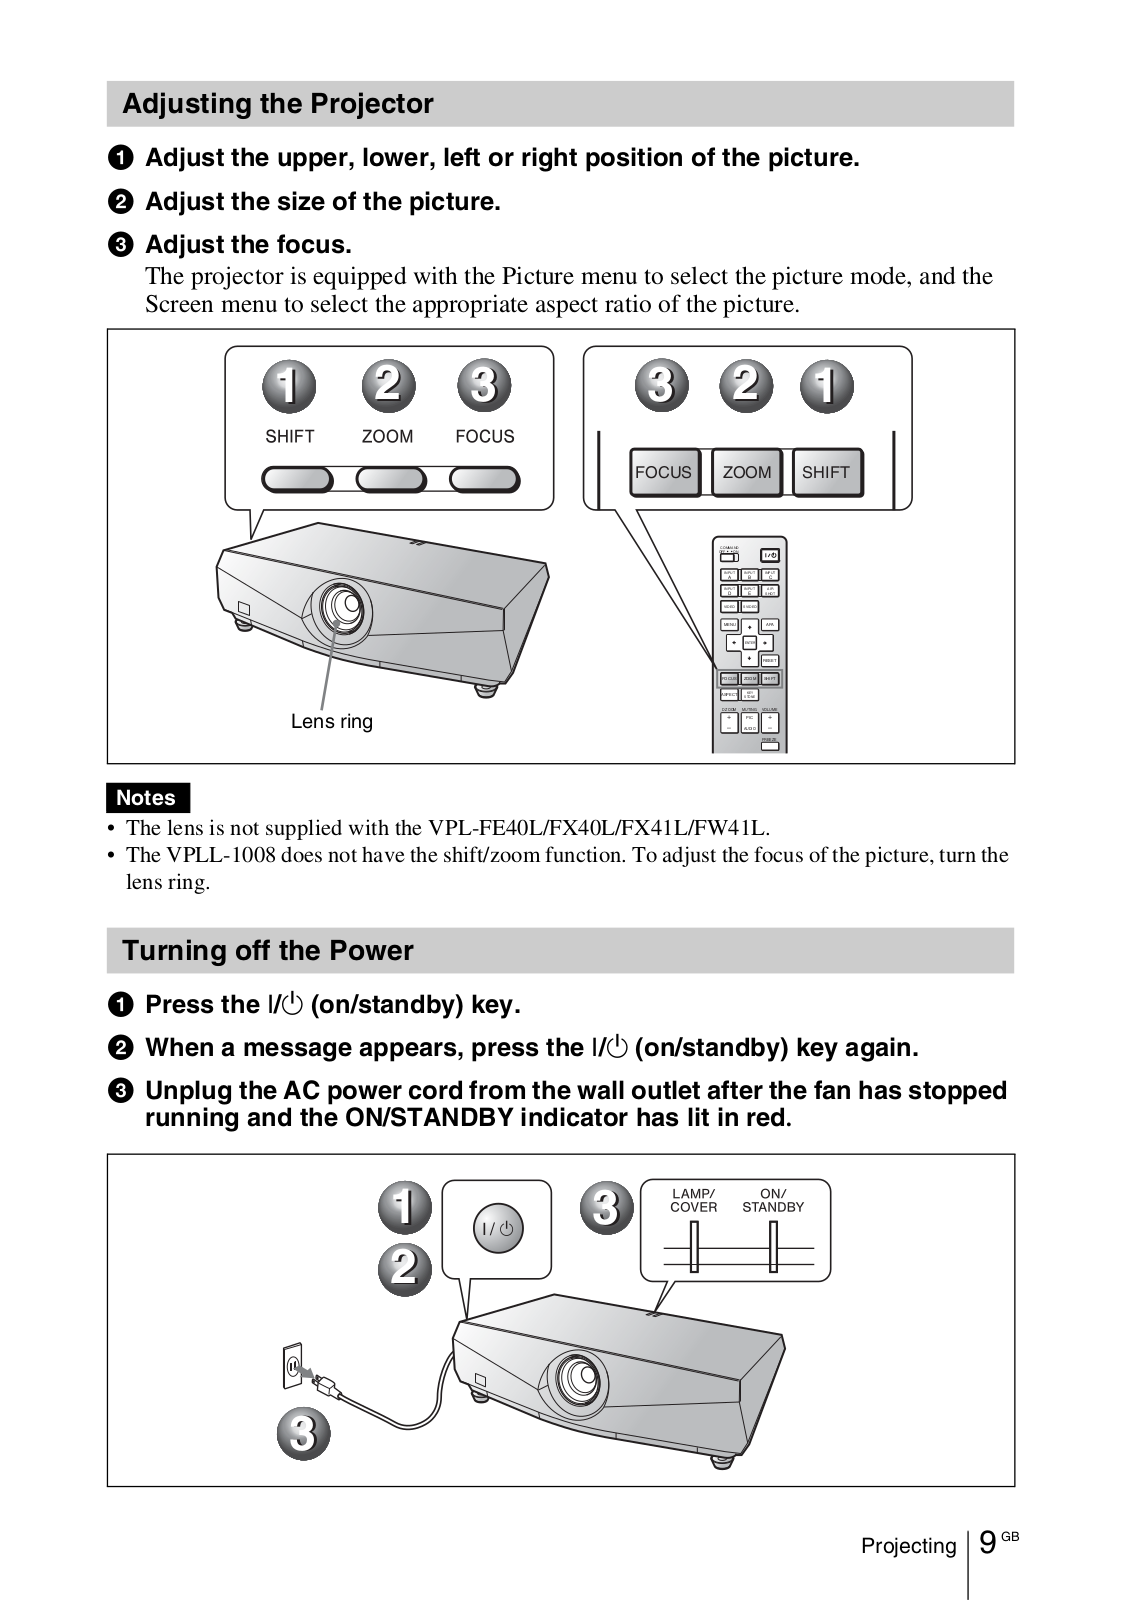
Sony VPL-FX41, VPL-FX41L, VPL-FW41, VPL-FW41L Operating Instruction
...
Sony Operating Instruction
Download
Specifications and Main Features
Frequently Asked Questions
User Manual
Download
Loading...
+
81
hidden pages
Unhide
You need points to download manuals.
1 point = 1 manual.
You can buy points or you can get point for every manual you upload.
Buy points
Upload your manuals