

Page 1
3-862-730-41(1)
Integrated
Ster eo Amplifier
Operating Instructions
Instrukcja obsługi
Инструкция по эксплуатации
EN
PL
RF
TA-FE520R
TA-FE320R
1998 by Sony Corporation
Page 2
WARNING
To prevent fire or shock
hazard, do not expose the unit
to rain or moisture.
To avoid electrical shock, do
not open the cabinet. Refer
servicing to qualified
personnel only.
Do not install the appliance in
a confined space, such as a
bookcase or built-in cabinet.
Precautions
On safety
• Do not disassemble the cabinet as this
may result in an electrical shock.
Refer servicing to qualified personnel
only.
• Should any solid object or liquid fall
into the cabinet, unplug the amplifier
and have it checked by qualified
personnel before operating it any
further.
On power sources
• Before operating the amplifier, check
that the operating voltage of the
amplifier is identical with your local
power supply. The operating voltage
is indicated on the nameplate at the
rear of the amplifier.
• The unit is not disconnected from the
AC power source (mains) as long as it
is connected to the wall outlet, even if
the unit itself has been turned off.
• If you are not going to use the
amplifier for a long time, be sure to
disconnect the amplifier from the wall
outlet. To disconnect the AC power
cord (mains lead), grasp the plug
itself; never pull the cord.
• AC power cord must be changed only
at the qualified service shop.
On the prevention of howling
Do the following:
—lower the volume.
—keep the turntable as far from the
speakers as possible.
—use commercially available audio
insulators on the bottom of the
turntable.
—keep the microphone away from the
speakers during use.
For further protection against howling,
set the speakers or turntable on top of a
heavy wooden board or concrete slab.
If you have any questions or problems
concerning your amplifier, please
consult your nearest Sony dealer.
On placement
• Place the amplifier in a location with
adequate ventilation to prevent heat
built-up and prolong the life of the
amplifier.
• Do not place the amplifier near heat
sources, or in a place subject to direct
sunlight, excessive dust or mechanical
shock.
• Do not place anything on top of the
cabinet that might block the
ventilation holes and cause
malfunctions.
On operation
Before connecting other components, be
sure to turn off and unplug the
amplifier.
On cleaning the amplifier
Clean the cabinet, panel and controls
with a soft cloth slightly moistened with
a mild detergent solution. Do not use
any type of abrasive pad, scouring
powder or solvent such as alcohol or
benzine.
EN
2
Page 3
Welcome!
Thank you for purchasing the Sony
Integrated Stereo Amplifier. Before
operating the amplifier, please read this
manual thoroughly and retain it for
future reference.
About This Manual
The instructions in this manual are for
models TA-FE520R and FE320R. Check
your model number by looking at the
rear panel of your amplifier. The TAFE520R is the model used for illustration
purposes unless stated otherwise.
Any difference in operation is clearly
indicated in the text, for example, “TAFE520R only.”
Type of differences
Model FE320RFE520R
Feature
Switched AC
outlets
EON reception
Tape monitor
function
* Unavailable on U.K. model
Conventions
• Instructions in this manual describe
the controls on the amplifier.
For details on the remote buttons
control, see ”Remote Button
Descriptions” on page 11.
• The following icon is used in this
manual:
•
•
•
•*
TABLE OF CONTENTS
Getting Started
Hookup Overview 4
Audio Component Hookups 4
Speaker System Hookups 5
Mains Lead Hookups 6
Listening to the Music 7
Recording 9
Additional Information
Troubleshooting 10
Specifications 10
Rear Panel Descriptions 11
Remote Button Descriptions 11
EN
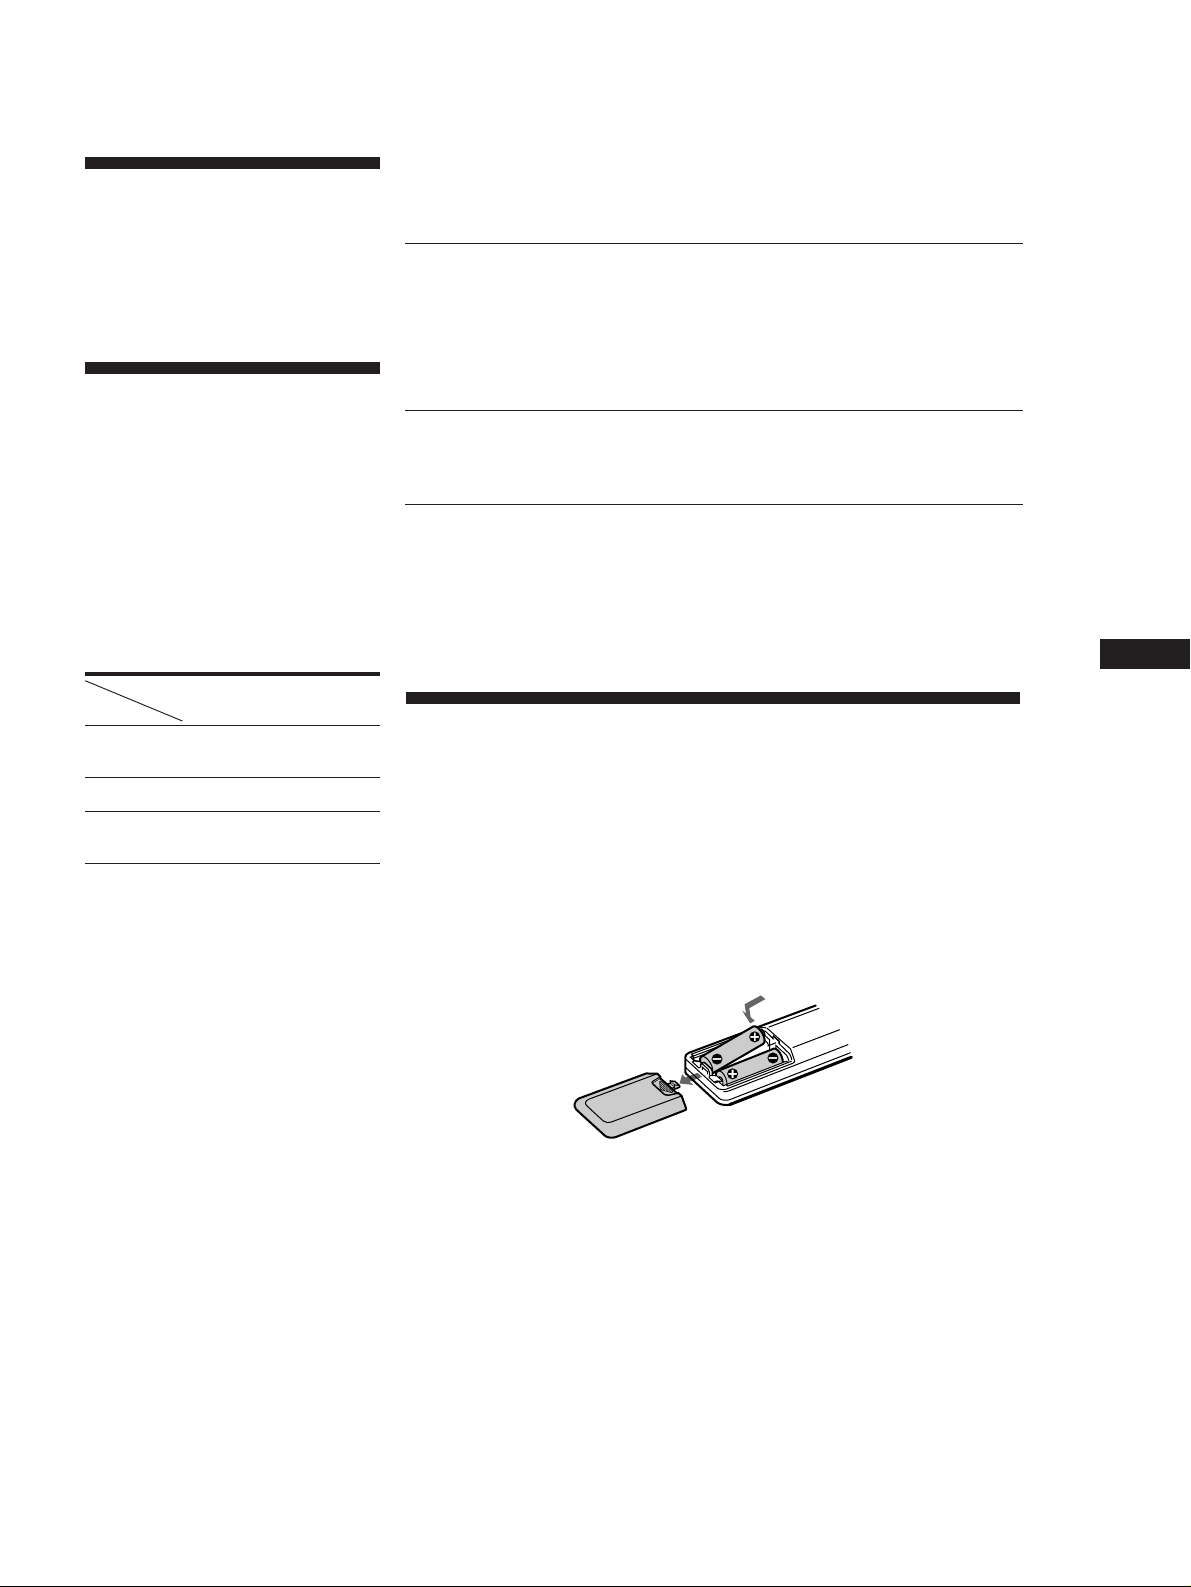
Unpacking
Check that you have received the following supplied items:
• Remote commander (remote) RM-S325 (1)
• Sony batteries R6 (size-AA) (2)
Inserting batteries into the remote
Insert two R6 (size-AA) batteries, matching the + and – on the batteries with
the markings inside the battery compartment. When using the remote, point
it at the remote control sensor g on the amplifier.
z Indicates hints and tips for making
the task easier.
z When to replace batteries
With normal use, the batteries should last for about 6 months. When the remote
no longer operates the amplifier, replace all the batteries.
Notes
• Do not leave the remote near an extremely hot or humid place.
• Do not drop any foreign object into the remote casing, particularly when replacing
the batteries.
• Do not expose the remote sensor to direct sunlight or lighting equipment. Doing
so may cause a malfunction.
• If you don’t use the remote for an extended period of time, remove the batteries to
avoid possible damage from battery leakage and corrosion.
EN
3
Page 4
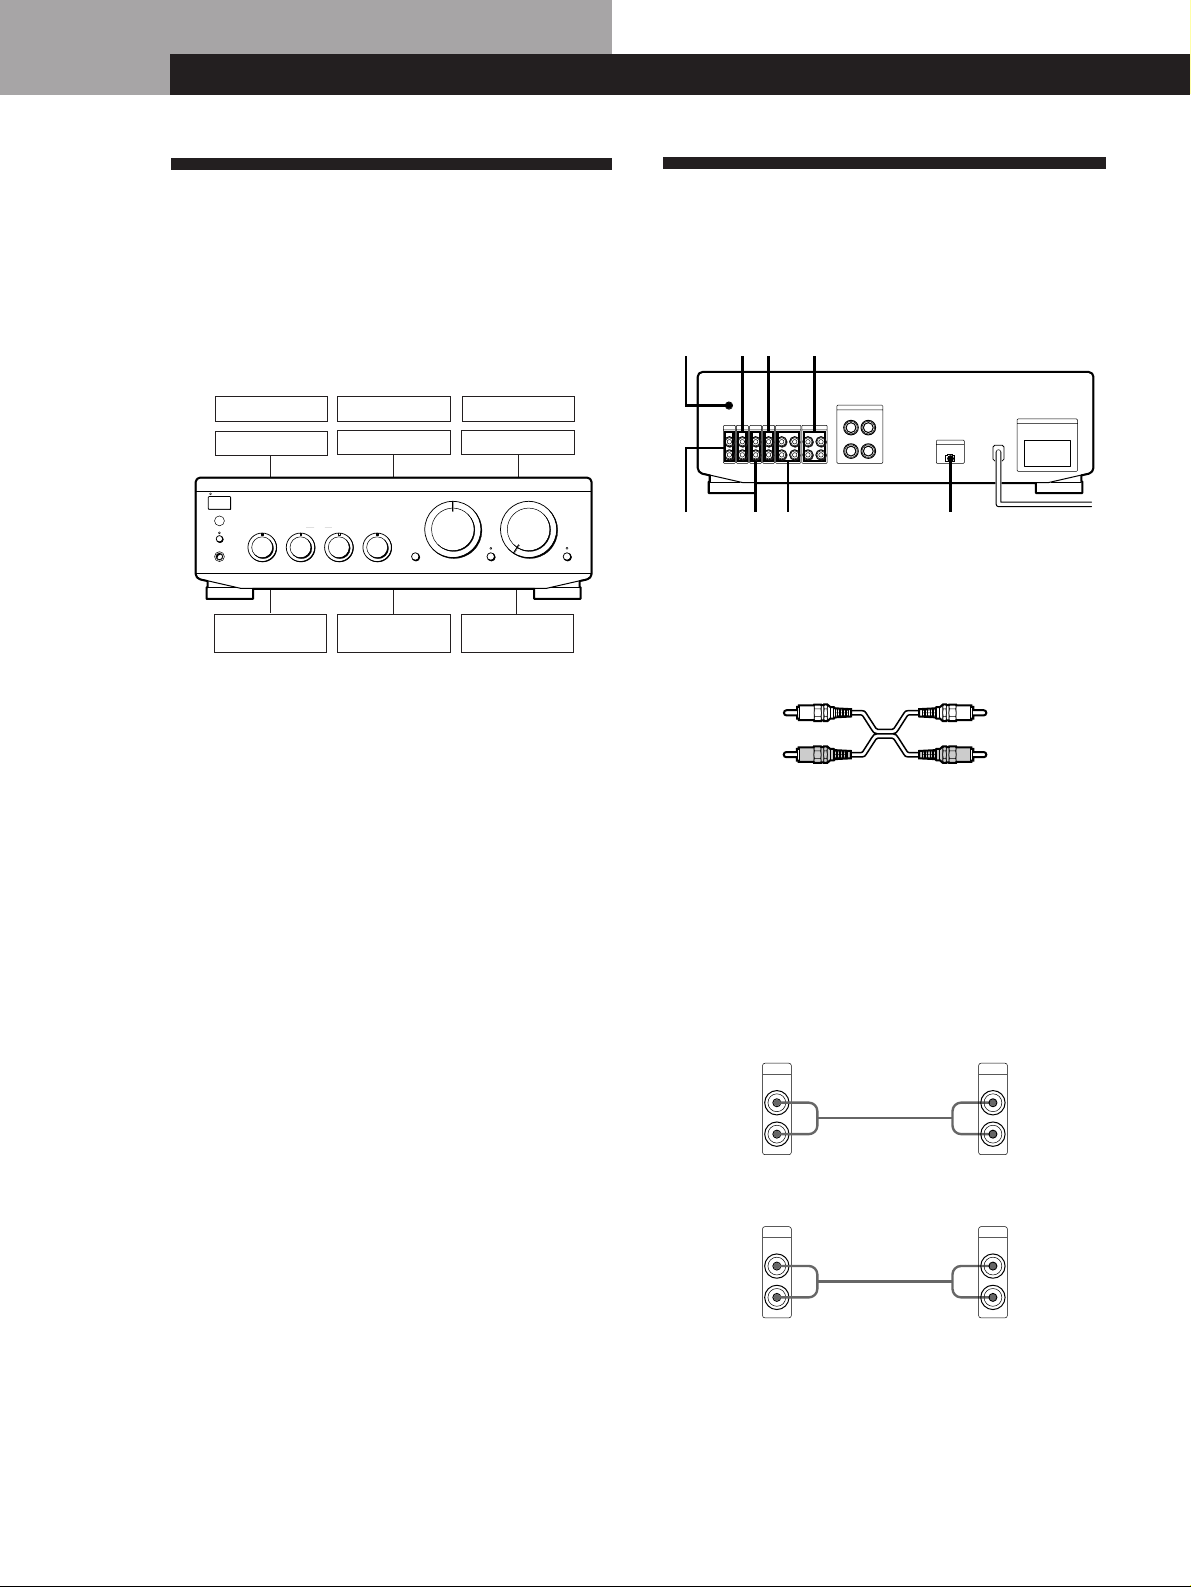
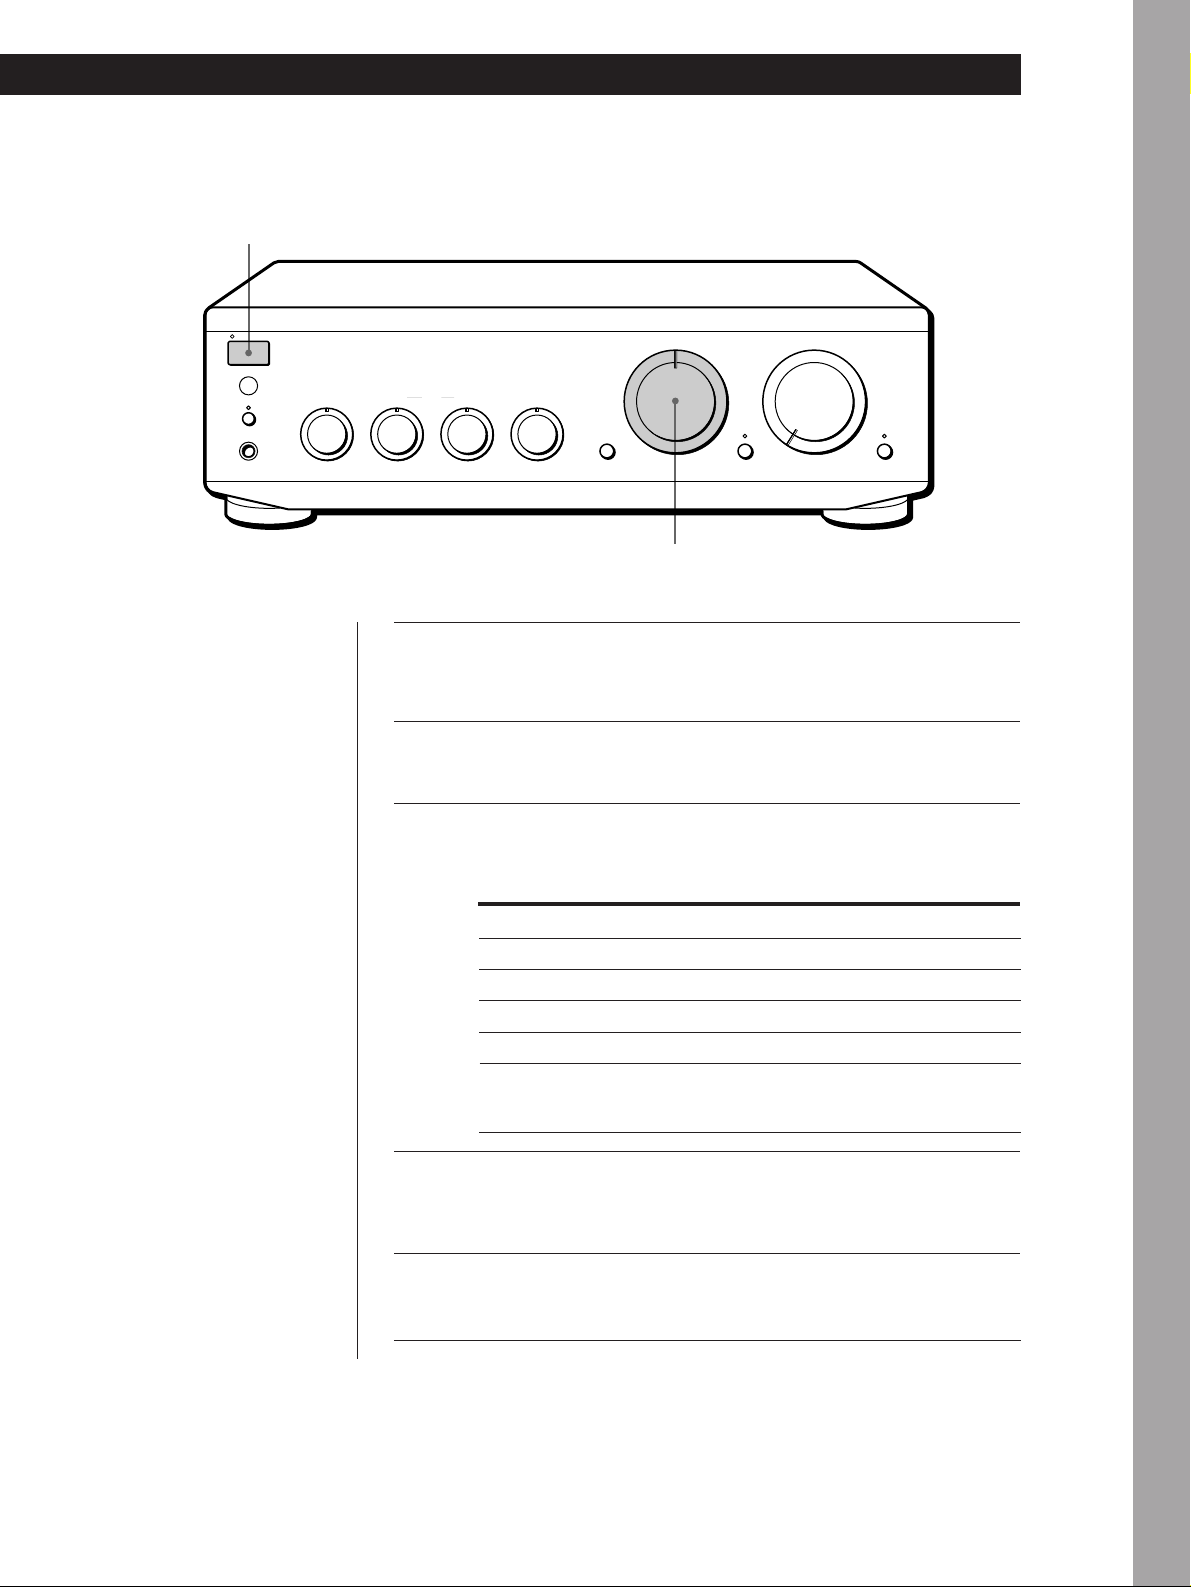
Getting Started
PHONO
y
TUNER
TAPE2/MD EON CONTROL INCD
TAPE1/DATAUX
IN
REC OUT
IN
PHONOINTUNER
IN IN
RECOUT
IN
CD
AUX
TAPE2/MD
TAPE1/DAT
EON CONTROL
AC OUTLET
SPEAKERS
L
R
IMPEDANCE USE 4 - 16 Ω
SWITCHED 100W MAX
+–+
–
RL
S
I
G
N
A
L
G
N
D
y
IN
Getting Started
Hookup Overview
The amplifier allows you to connect and control the
following audio components. Follow the hookup
procedure indicated for each component that you want
to connect.
To learn the location and name of each jack, see ”Rear
Panel Descriptions” on page 11.
DAT deck
MD deck
S
T
A
N
D
B
Y
g
SPEAKERS
E
O
N
L
I
N
K
ON
OFF
P
H
O
N
E
S
–10+
Speaker (L)
Before you get started
• Turn off the power to all components before making
any connections.
• Do not connect the mains leads of the various
components until all connections are completed.
• Use the audio connecting cords supplied with each
component for hooking up with the amplifier.
Purchase and use optionally available cords as
required.
• Be sure to make connections firmly to prevent hum
and noise.
• When connecting an audio connecting cord, be sure
to match the R (right) and L (left) jacks of the
amplifier to the R and L jacks on the other
components.
BASS
•
10
Tape deck
Turntable
TREBLETONE
BALANCE
•
–10+
10
LEFT RIGHT
TV or video
•
deck
Tuner
CD player
INPUT SELECTOR
CD
AUX
TAPE2/MD
TAPE1/DAT
LOUDNESS
ØON øOFF
VOLUME
TUNER
PHONO
SOURCE DIRECT TAPE MONITOR
010
Speaker (R)
Audio Component Hookups
Overview
Here you learn how to connect your audio components
to the amplifier.
(TA-FE520R only)
What cords will I need?
Audio connecting cord (not supplied) (2 for each tape deck,
DAT deck, or MD deck; 1 for other components)
White (L)
Red (R)
Hookups
The arrow ç indicates signal flow.
Note
The jacks on the TA-FE520R are shown in the following
illustrations.
CD player
Amplifier
CD
IN
L
R
Ç
White (L)
Red (R)
CD player
OUTPUT
LINE
L
R
Tuner
Amplifier Tuner
TUNER
IN
L
R
Ç
EN
4
OUTPUT
LINE
L
R
Page 5
Tape deck, DAT deck, or MD deck
TAPE1/DAT
RECOUT
IN
L
R
Ç
ç
Tape deckAmplifier
OUTPUT
INPUT
LINE LINE
Getting Started
Speaker System Hookups
L
R
Overview
Here you learn how to connect speakers to the
amplifier.
Use the configuration above to connect the OUTPUT and
INPUT jacks of:
—a tape deck or DAT deck to the TAPE1/DAT jacks.
—a tape deck or MD deck to the TAPE2/MD jacks.
Turntable
1 Remove the shorting plugs from the PHONO jacks before
connecting the cables (but not unless you connect a
turntable).
Do not attach the shorting plugs to any set of the RECOUT
jacks. Doing so may stop output from the amplifier or
cause the unit to malfunction.
2 Connect the audio connecting cords.
Amplifier
PHONO
IN
L
R
Ç
Turntable
Note
To prevent hum, connect the earth lead to SIGNAL GND (y)
on the amplifier.
TV or video deck
Amplifier
AUX
IN
L
R
Ç
TV or video deck
OUTPUT
LINE
L
R
SPEAKERS
SPEAKERS
PHONOINTUNER
L
R
D
N
G
L
A
N
G
I
S
y
CD
AUX TAPE2/MD
IN
REC OUT
IN
IN IN
TAPE1/DAT
RECOUT
IN
IMPEDANCE USE 4 - 16 Ω
RL
+–+
AC OUTLET
EON CONTROL
–
IN
SWITCHED 100W MAX
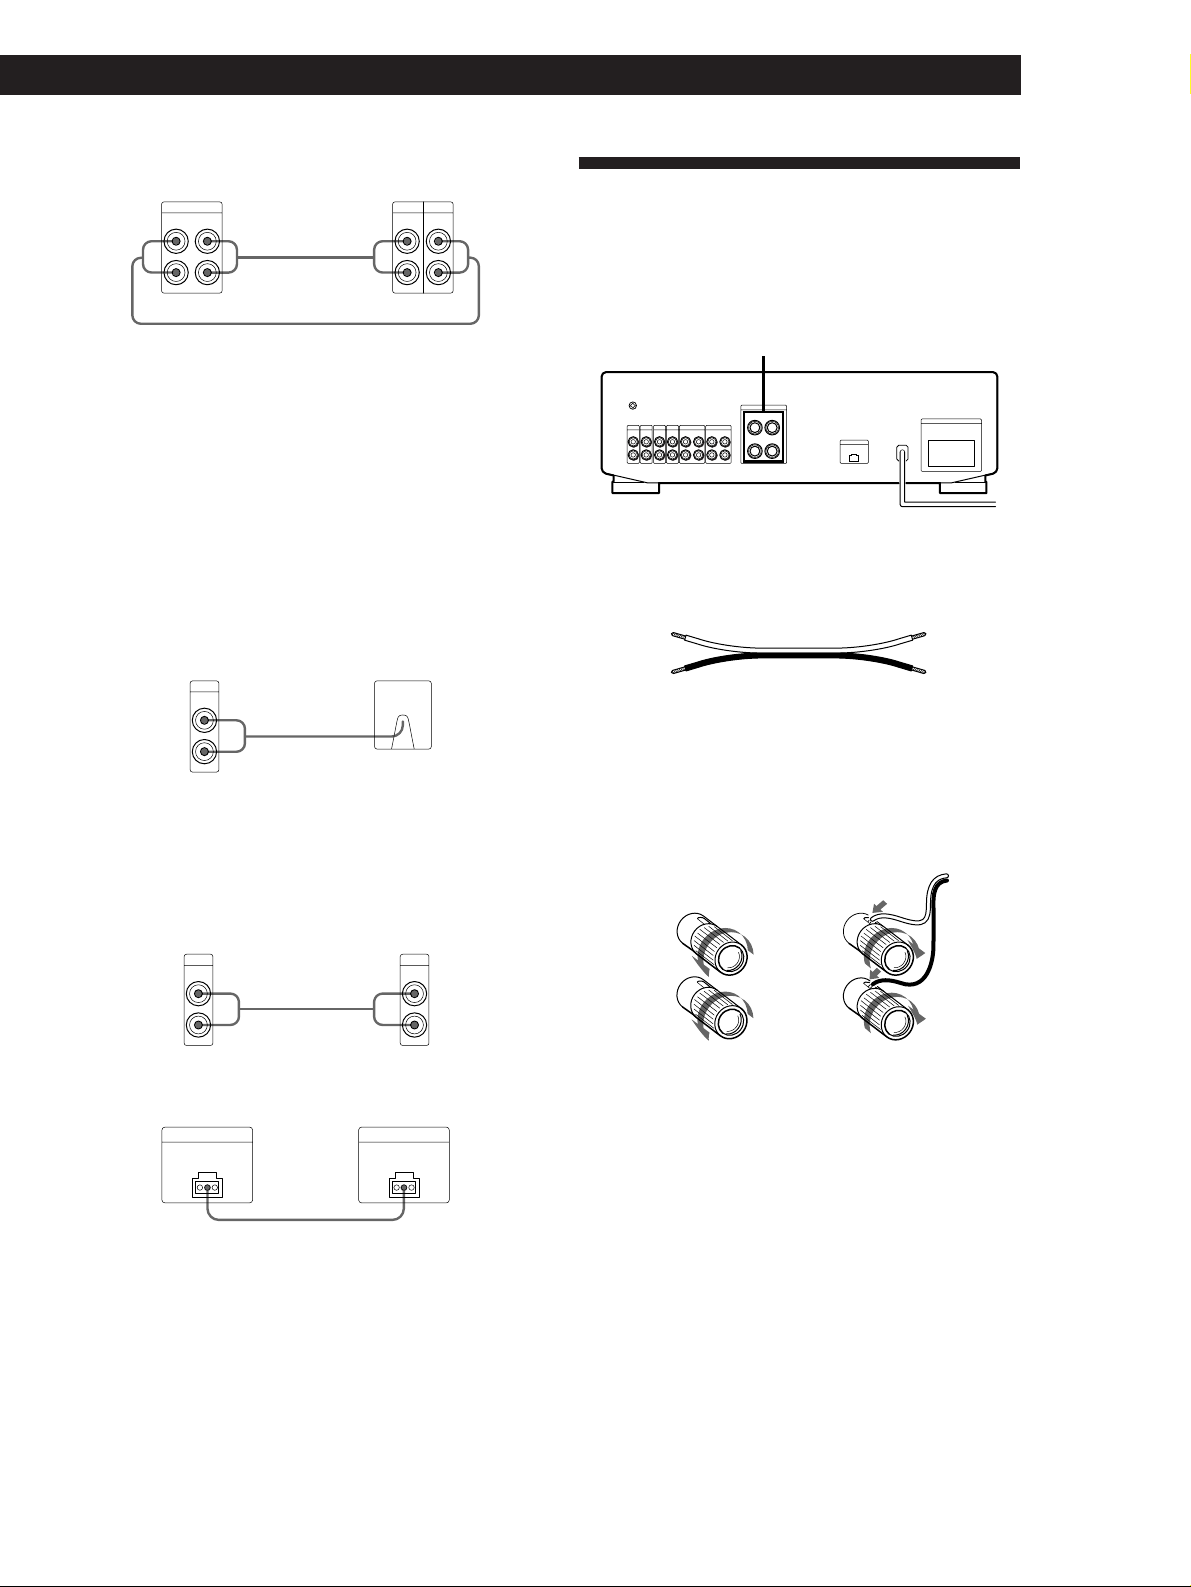
What cords will I need?
Speaker cord (not supplied) (1 for each speaker)
(+)
(–)
(+)
(–)
Twist the stripped ends of the cord about 15mm. Be sure to
match the speaker cord to the appropriate terminal on the
components: + to + and – to –. If the cords are reversed, the
sound will be distorted and will lack bass.
Hookups
]
]
}
}
EON CONTROL (TA-FE520R only)
Amplifier
EON CONTROL
IN
Tuner
EON CONTROL
OUT
Ç
If your tuner is equipped with an EON CONTROL OUT
terminal, connect it to the EON CONTROL IN terminal on
the amplifier to allow use of the EON (Enhanced Other
Networks) function of the RDS (Radio Data System) (see
page 8).
EN
5
Page 6
Getting Started
Mains Lead Hookups
SPEAKERS
L
R
IG
S
y
PHONOINTUNER
IN
G
L
A
N
D
N
CD
IN IN
AUX TAPE2/MD
REC OUT
IN
TAPE1/DAT
RECOUT
IN
IMPEDANCE USE 4 - 16 Ω
RL
+–+
EON CONTROL
–
IN
AC OUTLET
SWITCHED 100W MAX
to a wall
outlet
Connecting the mains lead
b
Connect the mains lead from this amplifier and from
your audio/video components to wall outlets.
z You can power other components through AC
OUTLET on the amplifier (unavailable on the TAFE320R (U.K. model))
By connecting other audio components to AC OUTLET
on the amplifier, you can supply power to the
connected components through the amplifier and turn
them all on or off when you turn the amplifier on or off.
Caution
Make sure that the total power consumption of all
components connected to the outlets on the amplifier does
not exceed 100 watts. Do not connect electrical home
appliances such as an electric iron, fan, TV, or other highwattage appliances to these outlets.
Note
Separate the mains lead, audio connecting cords and speaker
cords. Noise or sound deterioration may occur when audio
connecting cords are in contact with the mains lead, or when
the mains lead or speaker cords are placed near the tuner’s
loop aerial or aerial wire.
EN
6
Page 7
Basic Operations
Listening to the Music
1
S
T
A
N
D
B
EON LINK
PHONES
Y
g
OFF
SPEAKERS
ON
BASS
–10+
•
TREBLETONE
10
–10+
BALANCE
•
10
•
LEFT RIGHT
TAPE2/MD
TAPE1/DAT
LOUDNESS
ØON øOFF
INPUT SELECTOR
AUX
CD
TUNER
PHONO
SOURCE DIRECT TAPE MONITOR
Basic Operations
VOLUME
010
z If 1/u is pressed down
You can turn the amplifier
on and off by pressing 1/u
on the remote.
z To listen through the
headphones
Connect the headphones to
PHONES and set
SPEAKERS to OFF.
z To listen directly to the
input signal
Press SOURCE DIRECT so
that the indicator lights up.
Since the circuits of TONE
controls, BALANCE control
and LOUDNESS button are
bypassed, you cannot adjust
bass, treble, the balance,
reinforce the bass and treble
while listening to a source
directly.
Note
Avoid high speaker output at
which the sound is distorted.
High-frequency distortion may
damage the tweeters.
3
5
Press 1/u to turn on the amplifier and turn VOLUME fully
1
counterclockwise to prevent damaging the speakers with
excessive output.
Turn on the programme source you want to listen to.
2
Set INPUT SELECTOR to the respective programme source.
3
To listen to a Turn INPUT SELECTOR for
Record
Radio broadcast
Compact disc
Source connected to AUX
Source connected to:
—TAPE1/DAT
—TAPE2/MD
PHONO
TUNER
CD
AUX
TAPE1/DAT
TAPE2/MD
Start the programme source.
4
Adjust the volume by turning VOLUME.
5
Press or turnTo
Adjust the bass
Adjust the treble
Adjust the balance
Reinforce the bass and treble at low
listening level
BASS
TREBLE
BALANCE
LOUDNESS
Basic Operations
EN
7
Page 8
Basic Operations
z What is the Enhanced
Other Networks (EON)?
One convenient RDS service
is ”Enhanced Other
Networks” (or ”EON”).
This allows the unit to
automatically switch to a
programme type of your
choice when one starts in
your broadcast area.
To receive the Enhanced Other Networks (EON) programmes (TAFE520R only)
When your ampifier is connected to a Sony tuner with the EON CONTROL
system, the amplifier switches to any EON programme that is broadcast in
your EON area, and switches back to the last selected programme source
when the programme ends.
EON LINK
S
T
A
N
D
B
Y
g
SPEAKERS
BASS
TREBLETONE
–10 +10
BALANCE
•
•
LEFT RIGHT
E
O
N
L
I
N
K
P
H
O
N
E
S
•
ON
OFF
–10 +10
INPUT SELECTOR
CD
AUX
TAPE2/MD
TAPE1/DAT
LOUDNESS
ØON øOFF
VOLUME
TUNER
PHONO
SOURCE DIRECT TAPE MONITOR
010
1 Make sure that the amplifier and the tuner are connected through the
EON CONTROL terminals (see page 5).
2 Press EON LINK so that the indicator lights up.
Whenever an EON programme starts on the radio frequency that your
tuner is set to, you will receive it.
To cancel EON reception
Press EON LINK again so that the indicator goes off.
Notes
• If you select another programme source while receiving an EON programme, EON
reception ends. However, as long as the EON LINK indicator lights up, you can
receive EON programmes automatically.
• Make sure to cancel EON reception before starting to record since an EON
programme may interfere with your recording.
• If you activate the Tape Monitor function (see page 9) while the EON LINK indicator
is lit, the indicator goes off and you cannot receive EON programmes. If this
happens, deactivate the Tape Monitor function so that the indicator lights up again.
EN
8
Page 9
Recording
1
S
T
A
N
D
B
Y
g
EON LINK
PHONES
OFF
SPEAKERS
ON
–10+
Basic Operations
INPUT SELECTOR
CD
AUX
TAPE2/MD
BASS
TREBLETONE
•
10
–10+
BALANCE
•
10
LEFT RIGHT
TAPE1/DAT
•
LOUDNESS
ØON øOFF
TUNER
PHONO
SOURCE DIRECT TAPE MONITOR
VOLUME
010
3
z You can record the same
source on two recording
components at the same
time
z You can monitor the
recorded sound (Tape
Monitor function) (TAFE520R only)
You can monitor the
recorded sound if the tape
deck you are recording on
has separate playback and
recording heads.
To monitor the sound, press
TAPE1 MONITOR.
Note that you can monitor
the only sound being
recorded from the TAPE1/
DAT jacks.
Press 1/u to turn on the amplifier.
1
Turn on the programme source you want to record.
2
Select the programme source that you want to record by
3
turning INPUT SELECTOR.
To record a
Record
Radio broadcast
Compact disc
Source connected to AUX
Source connected to:
—TAPE1/DAT
—TAPE2/MD
Prepare the recording component for recording, then start
4
recording.
Set INPUT SELECTOR to
PHONO
TUNER
CD
AUX
TAPE1/DAT
TAPE2/MD
Basic Operations
Start playing the programme source.
5
EN
9
Page 10

Additional Information
Additional Information
Troubleshooting
If you experience any of the following difficulties while
using the amplifier, use this troubleshooting guide to
help you remedy the problem. Should any problem
persist, consult your nearest Sony dealer.
No sound output.
/ Connect the audio connecting cords firmly.
/ Connect the amplifier and other audio components
correctly.
/ Turn INPUT SELECTOR to the appropriate programme
source.
No audio from one channel or unbalanced speaker
output.
/ Turn BALANCE to adjust the balance.
/ Check the speaker and input connections of silent
channel.
Weak bass or treble.
/ Adjust the TONE controls.
/ Change speaker positions or room conditions to
eliminate obstructions in sound path.
Distorted sound.
/ Improperly selected input signal.
/ Insufficient input capacity of speakers. Lower the
volume.
Lack of bass or ambiguity in instrument positions.
/ Speaker cord and terminal polarity are reversed.
Reconnect the cords with correct polarity.
Hum or noise.
/ Ground the turntable system (see page 5).
/ Connect the audio connecting cords firmly.
/ The amplifier is picking up interference from a TV set.
Move the amplifier away from the TV set or turn the TV
set off.
The remote does not function.
/ Remove any obstructions between the remote control
sensor on the amplifier and the remote.
/ Point the remote towards the remote sensor on the front
of the amplifier.
/ The remote is too far from the amplifier. Move closer to
the amplifier.
/ Replace the batteries in the remote.
Sudden loss of audio.
/ Check if a short-circuit has occurred. Turn off the
amplifier and check the connected components and
speakers.
Specifications
Amplifier section
DIN power output
TA-FE520R: 100 W + 100 W (4 ohms at 1 kHz)
85 W + 85 W (8 ohms at 1 kHz)
TA-FE320R: 60 W + 60 W (4 ohms at 1 kHz)
50 W + 50 W (8 ohms at 1 kHz)
Frequency response
PHONO (20 Hz - 20 kHz): RIAA equalization curve
±1.0 dB
TUNER, CD, AUX, TAPE1/DAT, TAPE2/MD:
7 Hz - 70 kHz
S/N (network A)
PHONO: 80 dB
TUNER, CD, AUX, TAPE1/DAT, TAPE2/MD: 105 dB
Output voltage / impedance
RECOUT: 200 mV, 1 kilohm
PHONES: 5 mW (at 8 ohms)
Speakers impedance
4 - 16 ohms
Damping factor
80 (8 ohms, 1 kHz)
General
System
Power amplifier with all stages directly coupled
Preamplifier: Low-noise, equalizer amplifier
Power requirements
230 V AC, 50/60 Hz
Power consumption
TA-FE520R: 190 W
TA-FE320R: 160 W
Dimensions (approx.) (w/h/d)
430 × 130 × 310 mm
incl. projecting parts and controls
Mass (approx.)
TA-FE520R: 6.5 kg
TA-FE320R: 5.5 kg
Supplied accessories
Remote commander (remote) RM-S325 (1)
Sony batteries R6 (size-AA) (2)
Design and specifications are subject to change without
notice.
+0–3
dB
10
EN
Page 11

Additional Information
Rear Panel Descriptions
87653421
SPEAKERS
TAPE1/DAT
RECOUT
IN
IMPEDANCE USE 4 - 16 Ω
RL
+–+
AC OUTLET
EON CONTROL
–
IN
SWITCHED 100W MAX
90!¡
D
N
G
L
A
N
G
I
S
y
PHONOINTUNER
CD
AUX
TAPE2/MD
IN
REC OUT
IN
IN IN
L
R
1 y (SIGNAL GND)
2 TUNER
3 AUX
4 TAPE2/MD
5 TAPE1/DAT
6 SPEAKERS
7 EON CONTROL IN (TA-FE520R only)
8 AC OUTLET (unavailable on the TA-FE320R (U.K.
model))
9 Mains lead
!º CD
!¡ PHONO
Remote Button Descriptions
You can use the supplied remote to control other Sony
audio components equipped with the g (remote
control sensor) mark.
Remote
Button(s)
1/u Amplifier Turns the amplifier on and
FUNCTION
CD Amplifier
TUNER Amplifier Selects input signal from
PHONO Amplifier Selects input signal from
TAPE1/DAT
TAPE2/MD Amplifier Selects input signal from
AUX Amplifier Selects input signal from
TUNER
PRESET +/–
CD
(
P CD player Pauses playback.
p CD player Stops playback.
=/+ CD player Locates tracks (AMS*).
D.SKIP CD player Skips a disc (for CD player
MD
( MD deck Starts playback.
P MD deck Pauses playback.
p MD deck Stops playback.
=/+ MD deck Locates tracks.
TAPE DECK A/B
9/(
p Deck A or B Stops all tape operations.
0/) Deck A or B
VOL +/– Amplifier Controls the volume.
*Automatic Music Sensor
For operating
Function
the
off.
Selects input signal from
the CD jacks.
the TUNER jacks.
the PHONO jacks.
Amplifier Selects input signal from
Tuner
CD player Starts playback.
Deck A or B Starts playback.
the TAPE1/DAT jacks.
the TAPE2/MD jacks.
the AUX jacks.
Scans and selects preset
stations.
equipped with a multi-disc
changer).
Fast-forwards or rewinds
the tape.
11
EN
Page 12

Ostrzeżenie
Aby uniknąć pożaru lub
porażenia prądem
elektrycznym nie wystawiaj
urządzenia na działanie
deszczu lub wilgoci.
Aby uniknąć porażenia
prądem elektrycznym nie
otwieraj obudowy. Naprawy
zlecaj wyłącznie
wykfalifikowanemu
personelowi.
Nie instaluj urządzenia w
przestrzeni zamkniętej
zamkniej takiej jak półka na
książki, czy wbudowana
szafka.
Środki ostrożności
O bezpieczeństwie
• Nie zdejmuj obudowy, gdyż może to
spowodować porażenie prądem
elektrycznym. Naprawy zlecaj wyłącznie
wykwalifikowanemu personelowi.
• Jeżeli jakikolwiek przedmiot lub płyn
dostanie się do wnętrza obudowy, wyłącz
wzmacniacz z gniazdka i przed
ponownym użytkowaniem zleć jego
sprawdzenie wykwalifikowanemu
personelowi.
O źrodłach mocy
• Przed rozpoczęciem użytkowania
wzmacniacza sprawdź, czy napięcie
operacyjne wzmacniacza jest identyczne
z napięciem w Twojej lokalnej sieci
zasilania. Napięcie operacyjne
wyszczególnione jest na plakietce z tyłu
obudowy.
• Wzmacniacz pozostaje podłączony do
źródła zasilania prądem zmiennym (sieci)
dopóki podłączony jest do gniazdka
ściennego, nawet jeżeli sam wzmacniacz
jest wyłączony.
• Jeżeli wzmacniacz nie będzie używany
przez dłuższy okres czasu, koniecznie
wyłącz go z gniazdka ściennego. Aby
odłączyć przewód zasilania prądem
zmiennym (kabel zasilania) uchwyć za
wtyczkę; nigdy nie ciągnij za sam
przewód.
• Przewód zasilania prądem zmiennym
może być zmieniany wyłącznie w
wykwalifikowanym punkcie usługowym.
O lokalizacji
• Umieść wzmacniacz w miejscu
zapewniającym wystarczającą wentylację
aby uniknąć przegrzania i przedłużyć
żywotność wzmacniacza.
• Nie umieszczaj wzmacniacza w pobliżu
źródeł ciepła, w miejscach bezpośrednio
nasłonecznionych, szczególnie
zapylonych lub narażonych na wstrząsy
mechaniczne.
• Nie umieszczaj na obudowie nic, co
mogłoby blokować otwory wentylacyjne i
powodować wadliwe funkcjonowanie.
O użytkowaniu
Przed podłączeniam komponentów upewnij
się, że wyłączyłeś wzmacniacz i odlączyłeś
go z gniazdka ściennego.
O czyszczeniu wzmacniacza
Czyść obudowę, panel i regulatory miekką
ściereczką lekko zwilżoną łagodnym
detergentem. Nie używaj szorstkich tkanin,
proszku czyszczącego lub środków takich
jak alkohol czy benzyna.
O zabezpieczeniu przed wyciem
Wykonaj co następuje:
––ścisz głośność.
––umieść gramofon możliwie najdalej od
głośników.
––używaj dostępnych w handlu izolatorów
audio pod spodem gramofonu.
––podczas używania umieść mikrofon z dala
od głośników.
W celu dalszego zabezpieczania przed
wyciem zainstaluj głośniki lub gramofon na
grubej desce lub płycie cementowej.
W przypadku jakichkolwiek pytań lub
problemów dotyczących niniejszego
wzmacniacza skonsultuj się z najbliższym
punktem sprzedaży sprzętu produkcji firmy
Sony.
PL
2
Page 13

Witaj !
Dziękujemy za nabycie złożonego
wzmacniacza stereofonicznego
produkcji firmy Sony. Przed
rozpoczęciem użytkowania
wzmacniacza prosimy zapoznać się
dogłębnie z niniejszą instrukcją obsługi i
pozostawić ją w celu odwoływania się
do niej w przyszłości.
O niniejszej
instrukcji
Niniejsza instrukcja obsługi odnosi się
do modeli TA-FE520R i FE320R.
Sprawdź posiadany model odczytując
numer modelu na tylnym panelu
Twojego wzmacniacza. Jeżeli nie
zaznaczono inaczej w celach
ilustracyjnych posłużono się modelem
TA-FE520R. Wszelkie różnice
użytkowania są wyraźnie zaznaczone w
tekście, np.: “tylko model TA-FE520R”.
Rodzaje różnic
Model FE520R FE320R
Cecha
Przełączane wyjścia
prądu zmiennego
Odbiór EON
Funkcja monitora
taśmy
* Niemożliwe w modelach brytyjskich.
•
•
•*•
Spis treści
Czynności wstępne
Ogólnie o podłączaniu 4
Podłączanie komponentów audio 4
Podłączanie zestawu głośników 5
Podłączanie przewodu zasilania 6
Słuchanie muzyki 7
Nagrywanie 9
Dodatkowe informacje
W razie trudności 10
Dane techniczne 10
Opis tylnego panela 11
Opis przycisków pilota 11
PL
Rozpakowywanie
Sprawdź, czy dostarczono Ci następujące przedmioty:
• Pilota zdalnego sterowania (pilota) RM-S325 (1)
• Baterie Sony R6 (rozmiaru AA) (2)
Wkładanie baterii do pilota
Włóż dwie baterie R6 (rozmiaru AA) dopasowując + i – na bateriach do
oznaczeń wewnątrz pojemnika na baterie. Podczas użytkowania pilota
skieruj go na sensor zdalnego sterowania g na wzmacniaczu.
Zasady
• Objaśnienia w niniejszej instrukcji obsługi
opisują regulatory wzmacniacza. Po
szczegóły dotyczące przycisków pilota
zdalnego sterowania odwołaj się do “Opis
przycisków pilota” na str. 11.
• W niniejszej instrukcji obsługi użyto
następujacego znaku:
z Wskazuje naprowadzenia i
wskazówki ułatwiające zadanie.
z Kiedy wymieniać baterie
Przy normalnym użytkowaniu baterie powinny wystarczyć na pól roku. Jeżeli
pilot przestanie sterować wzmacniaczem, wymień obie baterie.
Uwagi
• Nie pozostawiaj pilota w miejscu szczególnie gorącym lub wilgotnym.
• Nie dopuść aby cokolwiek dostało się do wnętrza pilota szczególnie podczas
wymiany baterii.
• Nie wystawiaj sensora zdalnego sterowania na bezpośrednie nasłonecznienie lub
oświetlenie. Może to powodować wadliwe funkcjonowanie.
• Jeżeli pilot nie będzie używany przez dłuższy okres czasu, wyjmij z niego baterie aby
uniknąć wycieku z baterii i korozji.
PL
3
Page 14

Czynności wstępne
PHONO
y
TUNER
TAPE2/MD EON CONTROL INCD
TAPE1/DATAUX
IN
REC OUT
IN
PHONOINTUNER
IN IN
RECOUT
IN
CD
AUX TAPE2/MD
TAPE1/DAT
EON CONTROL
AC OUTLET
SPEAKERS
L
R
IMPEDANCE USE 4 - 16 Ω
SWITCHED 100W MAX
+–+
–
RL
S
IG
N
A
L
G
N
D
y
IN
Czynności wstępne
Ogólnie o podłączaniu
Wzmacniacz umożliwia podłączenie i obsługę
następujących komponentów audio. Wykonaj
czynności podłączania opisane w instrukcjach obsługi
każdego z komponentów, który chcesz podłączyć.
Aby zapoznać się z lokalizacją i nazwą
poszczególnych gniazdek patrz “Opis tylnego panela”
na str. 11.
–10+
BASS
•
10
magnetofon
gramofon
TREBLETONE
BALANCE
•
•
–10+
10
LEFT RIGHT
telewizor lub
magnetowid
INPUT SELECTOR
AUX
TAPE2/MD
TAPE1/DAT
LOUDNESS
ØON øOFF
tuner
odtwarzacz CD
CD
VOLUME
TUNER
PHONO
SOURCE DIRECT TAPE MONITOR
010
głośnik
(R-prawy)
deck DAT
deck MD
S
T
A
N
D
B
Y
g
SPEAKERS
E
O
N
L
IN
K
ON
OFF
P
H
O
N
E
S
głośnik
(L-lewy)
Zanim rozpoczniesz
• Wyłącz zasilanie wszystkich komponentów przed
przystąpieniem do jakichkolwiek podłączeń.
• Nie podłączaj przewodów zasilania różnych
komponentów przed ukończeniem wszystkich
podłączeń.
• Do podłączeń do wzmacniacza użyj przewodów
połączeniowych audio znajdujących się w
wyposażeniu poszczególnych komponentów.
Nabądź i używaj wymaganych dodatkowych
przewodów.
• Upewnij się, że podłączenia są solidnie wykonane
aby uniknąć przydźwięku i zakłóceń.
• Podczas podłączania przewodu połączeniowego
audio upewnij się, że dopasowałeś R (prawe) i L
(lewe) gniazdka wzmacniacza do gniazdek R i L
innych komponentów.
Podłączanie komponentów
audio
Ogólne
Tu znajdziesz instrukcję, jak podłączyć posiadane
komponenty audio do wzmacniacza.
(tylko TA-FE520R)
Jakie przewody będą mi potrzebne ?
Przewód połączeniowy audio (brak w wyposażeniu) (po 2
dla magnetofonu, decka DAT lub decka MD; po 1 dla
każdego innego komponentu)
biały (L)
czerwony (R) czerwony (R)
Podłączenia
Strzałka ç wskazuje kierunek przepływu sygnału.
Uwaga
Gniazdka TA-FE520R są ukazane na następujących
ilustracjach.
odtwarzacz CD
wzmacniacz odtwarzacz CD
CD
IN
L
R
Ç
biały (L)
OUTPUT
LINE
L
R
tuner
wzmacniacz tuner
TUNER
IN
L
R
Ç
PL
4
OUTPUT
LINE
L
R
Page 15

magnetofon, deck DAT lub deck MD
TAPE1/DAT
RECOUT
L
R
IN
Ç
magnetofonwzmacniacz
OUTPUT
LINE LINE
INPUT
L
R
ç
Użyj powyższej konfiguracji aby podłączyć gniazdka
OUTPUT i INPUT:
––magnetofonu lub decka DAT do gniazdek TAPE1/DAT.
––magnetofonu lub decka MD do gniazdek TAPE2/MD.
Gramofon
1 Przed podłączeniem przewodów wyjmij wtyczki zwierające z
gniazdek PHONO (ale dopiero wówczas gdy podłączasz
gramofon).
Nie wkładaj wtyczek zwierających do żadnego z zestawów
gniazdek RECOUT. Robiąc to możesz wstrzymać wyjście ze
wzmacniacza lub spowodować wadliwe działanie urządzenia.
2 Podłącz przewody połączeniowe audio.
wzmacniacz
PHONO
IN
L
R
Ç
Uwaga
Aby uniknąć przydźwięku podłącz przewód uziemienia do
SIGNAL GND (y) wzmacniacza.
gramofon
Czynności wstępne
Podłączanie zestawu
głośników
Ogólne
Tu znajdziesz instrukcje, jak podłączyć głośniki do
wzmacniacza.
SPEAKERS
SPEAKERS
TAPE1/DAT
RECOUT
IN
IMPEDANCE USE 4 - 16 Ω
RL
+–+
AC OUTLET
EON CONTROL
–
IN
SWITCHED 100W MAX
(+)
(–)
D
N
G
L
A
N
G
I
S
y
PHONOINTUNER
CD
AUX TAPE2/MD
IN
REC OUT
IN
IN IN
L
R
Jakie przewody będą mi potrzebne ?
Przewód głośnika (brak w wyposażeniu) (1 dla każdego
głośnika)
(+)
(–)
Skręć 15 mm odcinki kabla, z których zdjęta jest izolacja.
Upewnij się, że kolory przewodów głośników pasują do
odpowiedniego gniazdka komponentu, + do + a – do –.
Jeżeli przewody są odwrocóne, dźwięk będzie
zniekształcony i pozbawiony basów.
Telewizor lub magnetowid
wzmacniacz
AUX
IN
L
R
Ç
EON CONTROL (tylko TA-FE520R)
wzmacniacz
EON CONTROL
IN
telewizor lub
magnetowid
OUTPUT
LINE
L
R
tuner
EON CONTROL
OUT
Ç
Jeżeli Twoj tuner posiada łącze EON CONTROL OUT,
połącz je z łączem EON CONTROL IN wzmacniacza aby
umożliwić korzystanie z funkcji EON (wybiórczość pewnych
stacji) RDS (systemu danych radiowych) (patrz str. 8).
Podłączenia
]
}
]
}
PL
5
Page 16

Czynności wstępne
Podłączanie przewodu
zasilania
SPEAKERS
L
R
I
S
y
PHONOINTUNER
IN
L
A
N
G
D
N
G
CD
IN IN
AUX
TAPE2/MD
REC OUT
IN
TAPE1/DAT
RECOUT
IN
IMPEDANCE USE 4 - 16 Ω
RL
+–+
EON CONTROL
–
IN
AC OUTLET
SWITCHED 100W MAX
do gniazdka
ściennego
Podłączanie przewodu zasilania
b
Podłącz przewód zasilania ze wzmacniacza i
komponentów audio/wideo do gniazdka ściennego.
z Możesz zasilać inne komponenty przez
gniazdko AC OUTLET wzmacniacza
(niemożliwe w TA-FE320R (model brytyjski))
Dzięki podłączeniu innych komponentów do AC
OUTLET wzmacniacza możesz dostarczać zasilanie do
podłączonych komponentów oraz włączać i wyłączać je
wraz z włączaniem i wyłączaniem wzmacniacza.
Ostrzeżenie
Upewnij się, że całkowite zużycie mocy wszystkich
komponentów podłączonych do gniazdek wzmacniacza nie
przekracza 100 watów. Nie podłączaj do tych gniazdek
elektrycznego sprzętu domowego jak np. żelazko,
wentylator, telewizor, czy innych urządzeń o wysokim
napięciu.
Uwaga
Rozdziel przewód zasilania, przewody podłączeniowe audio
i przewody głośników. Gdy stykają się ze sobą przwód
zasilania i przewody połączeniowe audio lub przewody
głośników znajdują się w pobliżu anteny przewodowej lub
ramowej tunera, mogą nastąpić zakłócenia i zniekształcenia
dźwięku.
PL
6
Page 17

Podstawowe funkcje
Słuchanie muzyki
1
S
T
A
N
D
B
Y
g
EON LINK
PHONES
OFF
SPEAKERS
ON
BASS
–10+
•
TREBLETONE
10
–10+
BALANCE
•
10
•
LEFT RIGHT
TAPE2/MD
TAPE1/DAT
LOUDNESS
ØON øOFF
INPUT SELECTOR
AUX
Podstawowe funkcje
CD
TUNER
PHONO
SOURCE DIRECT TAPE MONITOR
010
VOLUME
z Jeżeli 1/u jest wciśnięte
Możesz włączać i wyłączać
wzmacniacz naciskając 1/u
na pilocie.
z Aby słuchać przez
słuchawki
Podłącz słuchawki do
PHONES i ustaw
SPEAKERS na OFF.
z Aby słuchać
bezpośrednio
nadawanego sygnału
Naciśnij SOURCE DIRECT
aby zapalił się wskaźnik.
Ponieważ pominięte są
obwody regulatorów TONE,
regulatora BALANCE i
przycisku LOUDNESS
możesz słuchając
bezpośrednio źrodła
regulować basy, wysoki
tony i równowagę oraz
wzmacniać wysokie i niskie
tony.
3
5
Naciśnij 1/u aby włączyć wzmacniacz i przekręć VOLUME
1
całkowicie przeciwnie do ruchu wskazówek zegara aby
zabezpieczyć głośniki przed uszkodzeniem z powodu zbyt
głośnego dźwięku.
Włącz źródło dźwięku, które chcesz odbierać.
2
Ustaw selektor wejścia INPUT SELECTOR na odpowiednie
3
źródło programu.
Aby słuchać Nastaw INPUT SELECTOR na
Płyty
Audycji radiowej
Płyty kompaktowej
Źródła podłączonego do AUX
Źródła podłączonego do:
–– TAPE1/DAT TAPE1/DAT
–– TAPE2/MD TAPE2/MD
PHONO
TUNER
CD
AUX
Rozpocznij odbiór źródła.
4
Podstawowe funkcje
Uwaga
Unikaj zbyt głośnego dźwięku z
głośników aż dźwięk jest
zniekształcony. Zniekształcenia w
wysokich częstotliwościach mogą
uszkodzić głośniki wysokotonowe.
Wyreguluj głośność przekrecając VOLUME.
5
Wyregulować basy
Wyregulować wysokie tony
Wyregulować równowagę
Wzmocnić niskie i wysokie tony na niskim
poziomie odbioru
Naciśnij lusb przekręćAby
BASS
TREBLE
BALANCE
LOUDNESS
PL
7
Page 18

Podstawowe funkcje
z Na czym polega
wybiórczość pewnych
stacji (EON)?
“Wybiórczość pewnych
stacji”(lub “EON”) jest
wygodną ustugą RDS.
Pozwala to urządzeniu
przełączyć się
automatycznie na wybrany
rodzaj programu gdy tylko
rozpoczyna się on w Twoim
rejonie nadawania.
Aby odbierać programy z funkcją wybiórczości
pewnych stacji (EON) (tylko TA-FE520R)
Jeżeli Twój wzmacniacz podłączony jest do tunera produkcji Sony
wyposażonego w system EON CONTROL, wzmacniacz przestawi się na
program EON nadawany w Twojej okolicy emisji EON oraz przestawi się
ponownie na uprzednio odbierane źródło programu, gdy ów program się
skończy.
EON LINK
S
T
A
N
D
B
Y
g
SPEAKERS
BASS
TREBLETONE
–10 +10
BALANCE
•
•
LEFT RIGHT
E
O
N
L
I
N
K
P
H
O
N
E
S
•
ON
OFF
–10 +10
INPUT SELECTOR
CD
AUX
TAPE2/MD
TAPE1/DAT
LOUDNESS
ØON øOFF
VOLUME
TUNER
PHONO
SOURCE DIRECT TAPE MONITOR
010
1 Upewnij się, że wzmacniacz i tuner połączone są przez łącza EON
CONTROL (patrz str. 5).
2 Naciśnij EON LINK aby zapalił się wskaźnik.
Za każdym razem gdy rozpocznie się emisja programu EON w paśmie
częstotliwości, na która nastawiony jest Twój tuner, będziesz odbierać
ten program.
Aby skasować odbiór EON
Naciśnij EON LINK aby wskaźnik zgasł.
Uwagi
• Jeżeli podczas odbioru programu EON wybierzesz inne źródło programu, odbiór EON
zakończy się. Jednakże dopóki wskaźnik EON LINK pali się, możesz automatycznie
odbierać programy EON.
• Upewnij się, że odwołałeś funkcję EON przed rozpoczęciem nagrywania, ponieważ program
EON przerwie Twoje nagrywanie.
• Jeżeli korzystasz z funkcji monitorowania taśmy (patrz str. 9) podczas gdy pali się wskaźnik
EON LINK, wskaźnik zgaśnie, gdy niemożliwe jest odbieranie programów EON W takim
przypadku odwołaj funkcję monitorowania taśmy aby wskaźnik ponownie się zapalił.
PL
8
Page 19

Nagrywanie
1
S
T
A
N
D
B
Y
g
EON LINK
PHONES
OFF
SPEAKERS
ON
BASS
–10+
•
Podstawowe funkcje
INPUT SELECTOR
CD
AUX
TAPE2/MD
TREBLETONE
10
–10+
BALANCE
•
10
LEFT RIGHT
TAPE1/DAT
•
LOUDNESS
ØON øOFF
TUNER
PHONO
SOURCE DIRECT TAPE MONITOR
VOLUME
010
3
z Możesz nagrywać to
samo źródło na dwa
komponenty
nagrywające
jednocześnie.
z Możesz monitorować
nagrywany dżwięk
(funkcja monitorowania
taśmy) (tylko TAFE520R)
Możesz monitorować
nagrywany dźwięk jeżeli
magnetofon, na który
nagrywasz ma oddzielne
głowice odtwarzającą i
nagrywającą.
Aby monitorować dźwięk
naciśnij TAPE1 MONITOR.
Zauważ, że możesz
monitorować jedynie dźwięk
nagrywany z gniadek
TAPE1/DAT.
Naciśnij 1/u aby włączyć wzmacnmiacz.
1
Włącz źródło programu, który chesz nagrywać.
2
Wybierz źródło programu, który chcesz nagrywać za pomocą
3
selektora wejścia INPUT SELECTOR.
Aby nagrywać
Płytę
Audycję radiową
Płytę kompaktową
Źródło podłączone do AUX
Źródło podłączone do:
–– TAPE1/DAT TAPE1/DAT
–– TAPE2/MD TAPE2/MD
Przygotuj komponent nagrywający do nagrywania, a następnie
4
rozpocznij nagrywanie.
Nastaw INPUT SELECTOR na
PHONO
TUNER
CD
AUX
Podstawowe funkcje
Rozpocznij odtwarzanie źródła programu.
5
PL
9
Page 20

Dodatkowe informacje
Dodatkowe informacje
W razie trudności
Jeżeli wystąpią poniższe tudnosci podczas
użytkowania wzmacniacza, posłóż się niniejszą tabelą
aby zlikwidować problem. Jeżeli problem pozostaje,
skonsultuj się z punktem sprzedaży sprzętu firmy
Sony.
Brak dźwięku.
/ Podłącz solidnie przewody połączeniowe audio.
/ Podłącz właściwie wzmacniacz i pozostałe
komponenty audio.
/ Nastaw INPUT SELECTOR na odpowiednie źródło
programu.
Brak dźwięku z jednego kanału lub
nierównoważny poziom dźwięku w głośnikach.
/ Przekręć BALANCE aby wyregulować równowagę.
/ Sprawdź podłączenia głośników i wejścia niemego
kanału.
Słabe niskie lub wysokie tony.
/ Wyreguluj regulatory TONE.
/ Zmień pozycje głośników lub warunki przestrzenne aby
wyeliminować przeszkody na drodze dźwięku.
Zniekształcenia dźwięku.
/ Nie właściwie wybrany sygnał wejścia.
/ Nie wystarczające możliwości wyjścia głośnikow. Ścisz
głośność.
Zanik basów lub odchylenia w rozmieszczeniu
instrumentów.
/ Odwrocóne są przewód głośnika i biegunowość łącza.
Podłącz przewód ponownie z właściwą
biegunowością.
Przydźwięk lub szumy.
/ Uziem gramofon (patrz str. 5).
/ Podłącz solidnie przewody połączeń audio.
/ Wzmacniacz narażony jest na wpływ odbiornika TV.
Odsuń wzmacniacz od odbiornika TV lub wyłącz
telewizor.
Pilot nie działa.
/ Usuń jakiekolwiek przeszkody spomiędzy pilota i
sensora zdalnego sterowania wzmacniacza.
/ Skieruj pilota na sensor zdalnego sterowania z przodu
wzmacniacza.
/ Pilot jest zbytnio oddalony od wzmacniacza. Zbliż go
bardziej do wzmacniacza.
/ Wymień baterie pilota.
Nagły zanik dźwięku.
/ Nastąpiło zwarcie. Wyłącz wzmacniacz i sprawdź
podłączone komponenty i głośniki.
Dane techniczne
Sekcja wzmacniacza
Wyjście mocy NNP
TA-FE520R: 100 W + 100 W (4 omy na 1 kHz)
85 W + 85 W (8 omów na 1 kHz)
TA-FE320R: 60 W + 60 W (4 omy na 1 kHz)
50 W + 50 W (8 omów na 1 kHz)
Odpowiedź cząstotliwościowa
PHONO (20 Hz - 20 kHz): Krzywa wyrównywacza
RIAA (Amerykański Związek Rejestrów
Przemysłowych) ±1.0 dB
TUNER, CD, AUX,TAPE1/DAT, TAPE2/MD:
7 Hz - 70 kHz
Odstęp psofometryczny(sieć A)
PHONO: 80 dB
TUNER, CD, AUX, TAPE1/DAT, TAPE2/MD: 105 dB
Napięcie wyjścia/impedancja
RECOUT: 200 mV, 1 kiloom
PHONES: 5 mW (na 8 omów)
Impedancja głośników
4 - 16 omów
Czynnik opadania
80 (8 omów, 1 kHz)
Ogólne
System
Wzmacniacz mocy ze wszystkimi fazami
bezpośrednio sprzężonymi.
Przedwzmacniacz: nisko-szumowy wzmacniacz
wyrównujący.
Zapotrzebowania mocy
230 V prądu zmiennego, 50/60 Hz
Konsumpcja mocy
TA-FE520R: 190 W
TA-FE320R: 160 W
Wymiary (w przybliżeniu) (szer./wys./głęb.)
430 × 130 × 310 mm
łącznie z częściami wystającymi
Ciężar (w przybliżeniu)
TA-FE520R: 6.5 kg
TA-FE320R: 5.5 kg
Wyposażenie
Pilot zdalnego sterowania (pilot) RM-S325 (1)
Baterie Sony R6 (rozmiaru AA) (2)
Projekt i dane techniczne mogą ulec zmianie bez
uprzedzenia.
+0–3
dB
10
PL
Page 21

Dodatkowe informacje
Opis tylnego panela
87653421
SPEAKERS
TAPE1/DAT
RECOUT
IN
IMPEDANCE USE 4 - 16 Ω
RL
+–+
AC OUTLET
EON CONTROL
–
IN
SWITCHED 100W MAX
90!¡
D
N
G
L
A
N
G
I
S
y
PHONOINTUNER
CD
AUX
TAPE2/MD
IN
REC OUT
IN
IN IN
L
R
1 y (SIGNAL GND)
2 TUNER
3 AUX
4 TAPE2/MD
5 TAPE1/DAT
6 SPEAKERS (głośniki)
7 EON CONTROL IN (tylko TA-FE520R)
8 AC OUTLET (niemożliwe dla TA-FE320R (model
brytyjski))
9 Przewód zasilania
0 CD
!⁄ PHONO (słuchawki)
Opis przycisków pilota
Aby obsługiwać pozostałe komponenty audio produkcji
Sony oznaczone znakiem g (sensor zdalnego
sterowania) możesz korzystać ze znajdującego się w
wyposażeniu pilota zdalnego sterowania.
Przycisk(i) Do obsługi Funkcja
pilota
1/u? Wzmacniacza Włącza i wyłącza
FUNCTION
CD Wzmacniacza Wybiera sygnał
TUNER Wzmacniacza
PHONO Wzmacniacza
TAPE1/DAT Wzmacniacza
TAPE2/MD Wzmacniacza
AUX Wzmacniacza
TUNER
PRESET+/– Tunera
CD
(
P
p
=/+
D.SKIP
Odtwarzacza CD
Odtwarzacza CD
Odtwarzacza CD
Odtwarzacza CD
Odtwarzacza CD
MD
( Decka MD
P Decka MD Wprowadza pauzę w
p Decka MD
=/+ Decka MD Lokalizuje utwory.
TAPE DECK A/B
9/( Magnetofonu
A lub B
p Magnetofonu Zatrzymuje wszelkie
A lub B funkcje.
0/) Magnetofonu
A lub B
VOL +/– Wzmacniacza Reguluje głośność.
wzmacniacz
wejścia z gniazdek CD.
Wybiera sygnał wejścia z
gniazdek TUNER.
Wybiera sygnał wejścia z
gniazdek PHONO.
Wybiera sygnał wejścia z
gniazdekTAPE1/DAT.
Wybiera sygnał wejścia z
gniazdekTAPE2/MD.
Wybiera sygnał wejścia z
gniazdek AUX.
Przeszukuje i wybiera
zaprogramowane stacje.
Rozpoczyna odtwarzanie.
Wprowadza pauzę w
odtwarzaniu.
Zatrzymuje odtwarzanie.
Lokalizuje utwory (AMS*).
Pomija płyty (dla
CD odtwarzacza
wyposażonego w
wielopłytowy wymiennik).
Rozpoczyna odtwarzanie.
odtwarzaniu.
Zatrzymuje odtwarzanie.
Rozpoczyna odtwarzanie.
Przewija wprzód lub cofa.
*Automartyczny sensor muzyczny.
11
PL
Page 22

ПРЕДУПРЕЖДЕНИЕ
Во избежание
возникновения пожара или
поражения электрическим
током нельзя подвергать
аппарат воздействию дождя
и влаги.
Не открыть аппарат во
избежание поражения
электрическим током. Для
техобслуживания
обратиться только к
квалифицированному
персоналу.
Нельзя устанавливать
аппарат в ограниченном
месте, в том числе и в
книжном шкафу и стенке.
Меры
Предосторожности
Безопасность
• Нельзя разбирать аппарат, иначе
может вызваться поражение
электрическим током. Обратиться
к квалифицированному
обслуживающему персоналу.
• В случае, если жидкие или
твердые посторонние предметы
попали в корпус усилителя,
отсоединить усилитель от
электросети и подвергнуть его
проверке квалифицированным
персоналом. Затем включить
усилитель повторно.
Питающая электросеть
• Перед использованием усилителя
надо убедиться, что его рабочее
напряжение соответствует
напряжению питающей
электросети. Рабочее напряжение
указано на табличке,
установленной на задней панели
усилителя.
• Усилитель не отсоединится от
источника питания (главного), пока
он подключен к настенной
розетке, если даже выключить его
выключатель питания.
• При длительной остановке
усилителя надо отсоединить его
питающий шнур от настенной
розетки. При этом оттянуть
штепсель, а не сам шнур.
• Замена питающего шнура
переменного тока должна
производиться только
квалифицированным персоналом в
сервисной мастерской.
Установка
• Установить усилитель в хорошо
проветриваемом месте во
избежание накопления тепла, а
также для обеспечения более
длительного срока службы.
• Нельзя устанавливать усилитель в
месте, близком к источнику тепла,
в запыленном месте, а также в
месте, где он может подвергаться
непосредственным солнечным
излучениям или механическим
ударам.
• Нельзя класть на верхнюю
поверхность усилителя предметов,
которыми могли бы забиваться
вентиляционные отверстия. В
противном случае может
вызваться неполадка усилителя.
Эксплуатация
Перед подключением других
компонентов обязательно надо
выключить питание и отсоединить
питающий шнур от сети.
Очистка усилителя
Очистить наружные поверхности
корпуса, панелей и органов
управления мягкой тряпкой,
смоченной раствором моющего
средства. Строго запрещается
применять абразивные материалы
или такие растворители, как спирт и
бензин.
Защита от подвывания
Выполнить нижеследующие:
—снизить громкость.
—установить проигрыватель как
можно дальше от
громкоговорителей.
—под проигрыватель подложить
аудиоизолятор, приобретаемый на
рынке.
—установить микрофон на большом
расстоянии от громкоговорителей
во время его использования.
Для дальнейшего повышения
защищенности от подвывания
установить громкоговорители или
проигрыватель на плотной
деревянной доске или бетонной
плите.
Если возникнет какой-либо вопрос
или проблема по аппарату,
посоветоваться с ближайшим
дилером фирмы Sony.
RF
2
Page 23

Добро
Пожаловать!
Большое спасибо за покупку
интегрированного стереоусилителя
фирмы Sony. Перед пользованием
усилителем просим прочитать
настоящую инструкцию полностью и
всегда иметь ее под рукой для
позволения советоваться с ней при
необходимости.
Содержание
Подготовка
Общие сведения о соединениях 4
Подключение аудиокомпонентов 4
Подключение акустической системы 5
Подключение питающего шнура к сети 6
Слушание Музыки 7
Запись 9
О Настоящей
Инструкции
Настоящая инструкция охватывает
модели TA-FE520R и FE320R.
Проверить номер модели, указанный
на задней панели вашего усилителя.
Рисунки приведены на примере
модели TA-FE520R, если иначе не
указано. Разность в операции четко
указана в тексте, как, например,
“Только для модели TA-FE520R”.
Разность по функциям
Модель
Функция
Выводы перем.
тока
Прием по усиленные
сети станций
Текущий контроль
записи на ленту
* Невозможна для английских
моделей
FE320RFE520R
•*•
•
•
Дополнительная информация
Возможные неисправности и способы их устранения 10
Технические характеристики 10
Расположение Соединителей на Задней Панели 11
Назначения кнопок на пульте дистанционного управления 11
Распаковка
Проверить, что вместе с усилителем поставлены следующие детали:
• Пульт дистанционного управления модели RM-S325 (1 шт.);
• Батарейка марки R6 (AA) фирмы Sony (2 шт.).
Установка батареек в пульте дистанционного
управления
Установить две батарейки размером R6 (АА) в отсеке для них,
согласовывая их положительный (+) и отрицательный (–) полюсы с
маркировками, выполненными внутри отсека. При использовании
пульта дистанционного управления направить его на датчик сигнала
дистанционного управления g, предусмотренный на усилителе.
RF
Общие правила
• В настоящей инструкции
упомянуты операции управления
усилителем. Подробности об
управлении с пульта
дистанционного управления
смотреть в подразделе
“Назначения кнопок на пульте
дистанционного управления” на
стр. 11.
• В настоящей инструкции
применено условное обозначение:
z Укаывает на советы,
облегчающие операцию.
z Периодичность замены батареек
В нормальных условиях батарейки работают примерно на 6 месяцев.
Заменить обе батарейки в случае, когда стало невозможно управлять
усилителем с пульта дистанционного управления.
Примечания
• Нельзя оставлять пульт дистанционного управления близко к месту со
слишком высокой температурой или влажностью.
• Обратить внимание, чтобы посторонние предметы не попали в корпус
пульта дистанционного управления, в частности при замене батареек.
• Нельзя подвергать датчик сигнала дистанционного управления
непосредственным солнечным излучениям или излучениям осветительных
приборов. В противном случае вызовется неполадка.
• При неиспользовании пульта дистанционного пульта управления в течение
длительного времени снять батарейки во избежание повреждения,
вызываемого утечкой и коррозией.
RF
3
Page 24

Подготовка
PHONO
y
TUNER
TAPE2/MD EON CONTROL INCD
TAPE1/DATAUX
IN
REC OUT
IN
PHONOINTUNER
IN IN
RECOUT
IN
CD
AUX
TAPE2/MD
TAPE1/DAT
EON CONTROL
AC OUTLET
SPEAKERS
L
R
IMPEDANCE USE 4 - 16 Ω
SWITCHED 100W MAX
+–+
–
RL
S
I
G
N
A
L
G
N
D
y
IN
Подготовка
Общие Сведения о
Соединениях
К настоящему усилителю можно подключить
нижеуказанные аудиокомпоненты. Подключить
требуемые компоненты в порядке, указанном в
отдельности.
Наименования каждых гнезд и их расположение
смотреть в подразделе “Расположение
соединителей на задней панели” на стр. 11.
Дека для
цифровой
звукозаписи
Записывающий-
плеер мини-
дисков
S
T
A
N
D
B
Y
g
SPEAKERS
E
O
N
L
I
N
K
P
H
O
N
E
S
BASS
•
ON
OFF
–10+
10
Громко-
говоритель
(левый)
Перед приступлением к работе
• Перед выполнением каких-либо соединений
выключить питание всех компонентов.
• Не подключить питающий шнур к сети, пока не
будут завершены все соединения.
• Для подключения каждого компонента к
усилителю применить соединительные
аудиошнуры, поставляемые вместе с ним. При
необходимости купить и применить опционные
шнуры.
• Соединения выполнить надежно во избежание
шумов и гудения.
• При соединении аудиошнура обратить внимание,
чтобы им были соединены гнезда R (правое) и L
(левое) усилителя с гнездами R и L
подключаемого к нему компонента
соответственно.
Дека
Проигрыватель
AUX
BALANCE
•
LEFT RIGHT
TAPE2/MD
TAPE1/DAT
LOUDNESS
ØON øOFF
–10+
TREBLETONE
•
10
Телевизор или
видео-
магнитофон
Тюнер
Плеер компакт-
дисков
INPUT SELECTOR
CD
TUNER
PHONO
SOURCE DIRECT TAPE MONITOR
010
Громко-
говоритель
(правый)
VOLUME
Подключение
Аудиокомпонентов
Общие сведения
В настоящем подразделе указан порядок
подключения аудиокомпонентов к усилителю.
(Только для модели
TA-FE520R)
Какие шнуры нужны?
Соединительные аудиошнуры (не поставляемые вместе
с усилителем) (По 2 шт. для деки, деки для цифровой
звукозаписи и записывающего плеера мини-дисков, а по
1 шт. для прочих компонентов)
Белый
(L (левый))
Красный
(R (правый))
Выполнение соединений
Стрелкой ç указано направление потока
сигналов.
Примечание
Ниже на рисунках указаны гнезда для модели TAFE520R.
Плеер компакт-дисков
Усилитель Плеер компакт-дисков
CD
IN
L
R
Ç
Белый
(L (левый))
Красный
(R (правый))
OUTPUT
LINE
L
R
Тюнер
Усилитель
L
R
TUNER
IN
Ç
RF
4
Тюнер
OUTPUT
LINE
L
R
Page 25

Дека, дека для цифровой звукозаписи или
записывающий плеер мини-дисков
Усилитель
TAPE1/DAT
RECOUT
IN
L
R
Ç
Дека
OUTPUT
LINE LINE
INPUT
L
R
ç
Согласно вышеуказанной схеме подключить компонент
гнездами OUTPUT и INPUT к:.
— гнездам TAPE1/DAT для деки для цифровой
звукозаписи;
— гнездам TAPE2/MD для записывающего плеера мини-
дисков.
Проигрыватель
1 Снять короткозамыкающие штыри из гнезд PHONO
перед соединением кабелей (Не снять штыри, пока не
потребуется подключение проигрывателя.)
Нельзя вставлять короткозамыкающие штыри в
никакие пары гнезд RECOUT. В противном случае
может прерваться выход из усилителя или вызваться
неполатка аппарата.
Подготовка
Подключение
Акустической Системы
Общие сведения
Ниже указан порядок подключения акустической
системы к усилителю.
SPEAKERS
SPEAKERS
TAPE1/DAT
RECOUT
IN
IMPEDANCE USE 4 - 16 Ω
RL
+–+
AC OUTLET
EON CONTROL
–
IN
SWITCHED 100W MAX
D
N
G
L
A
N
G
I
S
y
PHONOINTUNER
CD
AUX
TAPE2/MD
IN
REC OUT
IN
IN IN
L
R
Какие шнуры нужны?
Шнуры для громкоговорителей (не поставляемые
вместе с усилителем) (по 1 шт. для каждого
громкоговорителя)
2 Соединить соединительные аудиошнуры.
Усилитель
PHONO
IN
L
R
Проигрыватель
Ç
Примечание
Для защиты от гудения подсоединить заземляющий
провод ко клемме SIGNAL GND (y) на усилителе.
Телевизор или видеомагнитофон
Усилитель
AUX
IN
L
R
Телевизор или
видеомагнитофон
Ç
OUTPUT
LINE
L
R
EON CONTROL (Только для модели TA-FE520R)
Усилитель
EON CONTROL
IN
Тюнер
EON CONTROL
OUT
(+)
(–)
(+)
(–)
Скручить полосатые концы шнура примерно на 15 мм.
Обязательно надо присоединить проводы + и – шнура ко
клемме + и – на усилителе соответственно. В случае
обратного соединения могут вызваться искажение
звука и пропадание низкочастотного звука.
Выполнение соединений
]
]
}
}
Ç
В случае, когда ваш тюнер оснащен клеммой EON
CONTROL OUT, подсоединить ее ко клемме EON
CONTORL IN, предусмотренной на усилителе, для
позволения выполнять функцию EON (Усиленная сеть
станций) системы радиоинформации (RDS). (См. стр. 8.)
RF
5
Page 26

Подготовка
Подключение Питающего
Шнура к Сети
SPEAKERS
TAPE1/DAT
RECOUT
IN
IMPEDANCE USE 4 - 16 Ω
RL
+–+
AC OUTLET
EON CONTROL
–
IN
SWITCHED 100W MAX
К настенной
розетке
D
N
G
L
A
N
IG
S
y
PHONOINTUNER
CD
AUX TAPE2/MD
IN
REC OUT
IN
IN IN
L
R
Подключение питающего шнура к
сети
Подключить питающие шнуры усилителя и других
ваших аудио/видеокомпонентов к настенным
розеткам.
b
z Можно питать другие компоненты через AC
OUTLET (Выводы перем.тока) на усилителе
(Не предусмотрено для модели TA-FE320R
(Английская модель))
Подключив другие аудиокомпоненты к AC
OUTLET на усилителе, можно питать подключенные
компоненты через усилитель, и, в результате,
включать и выключать их одновременно путем
вкючения и выключения питания усилителя.
Внимание
Надо учесть, что общая потребляемая мощность всех
компонентов, подключаемых к выводам перем.тока
усилителя не должна превысить 100 Вт. Не
разрешается подключить к этим выводам бытовую
электроаппаратуру, в том числе и утюг, вентилятор,
телевизор, а также другие высокомощные приборы.
Примечание
Питающий шнур, соединительные аудиошнуры и шнуры
для громкоговорителей должны быть проложены
раздельно. Шумы или ухудшение качества звука могут
возникнуть, если соединительные аудиошнуры
находятся в контакте с питающим шнуром, или если
питающий шнур или шнуры для громкоговорителей
проложены близко от рамочной или проволочной
антенны тюнера.
RF
6
Page 27

Основные Операции
Слушание Музыки
1
S
T
A
N
D
B
Y
EON LINK
PHONES
g
OFF
SPEAKERS
ON
BASS
–10+
•
TREBLETONE
10
–10+
BALANCE
•
10
•
LEFT RIGHT
TAPE2/MD
TAPE1/DAT
LOUDNESS
ØON øOFF
INPUT SELECTOR
AUX
Основные Операции
CD
TUNER
PHONO
SOURCE DIRECT TAPE MONITOR
010
VOLUME
z Нажатие кнопки I/u
Усилитель может
включиться и отключиться
с нажатием кнопки I/u на
пульте дистанционного
управления.
z Слушание музыки
через головной
телефон
Подключить головной
телефон к гнезду PHONES
(Головные телефоны) и
установить выключатель
SPEAKERS
(Громкоговорители) на
OFF (Откл.).
z Непосредственное
слушание входного
сигнала
Нажать кнопку SOURCE
DIRECT (Непосредственное
слушание от источника),
чтобы индикатор
загорелся. Так как схемы
регуляторов TONE (Тембр)
и BALANCE (Баланс) и
кнопки LOUDNESS
(Громкость) пропускаются,
нижние и верхние частоты
и балансгромкоговорителей
не могут регулироваться, и
нижние и верхние частоты
держатся в заданном
уровне во время
непосредственного
слушания источника.
Примечание
Надо избежать такого выходного
сигнала высоких частот
громкоговорителей, при котором
искажение звука происходит.
Искажение высоких частот
может привести к повреждению
громкоговорителей верхних
частот.
3
Нажав кнопку I/
1
VOLUME (Регулятор громкости) против часовой стрелки
uu
u, включить усилитель и повернуть ручку
uu
5
до отказа во избежание повреждения громкоговорителей
из-за чрезмерной выходной мощности.
Включить требуемый источник программы.
2
Установить INPUT SELECTOR (Селектор входного
3
источника) на требуем0ый источник программы.
Для слушания
радиовещания
компакт-диска
источника подключенного к
гнезду AUX
источника подключенного к
гнезду:
— TAPE1/DAT
Установить INPUT SELECTOR на
PHONO (Фоно)грампластинки
TUNER (Тюнер)
CD (Компакт-диск)
AUX (Вспом.)
TAPE1/DAT
(Дека 1/Цифровая звукозапись)
TAPE2/MD (Дека 2/Мини-диск)— TAPE2/MD
Включить источник программы.
4
Отрегулировать громкость, поворачивая ручку VOLUME.
5
Чтобы Нажать кнопку и
поворачивать ручку
отрегулировать нижние частоты
отрегулировать верхние частоты TREBLE (Верхние частоты)
отрегулировать баланс громкоговорителей
держать нижние и верхние частоты в
низком уровне слушания
BASS (Нижние частоты)
BALANCE (Баланс)
LOUDNESS (Громкость)
Основные Операции
RF
7
Page 28

Основные Операции
z Что такое усиленные
сети станций (EON)?
Одной из удобных
функций RDS (Система
радиоинформации)
является “Усиленные сети
станций” (или “EON”).
Данная функция
позволяет
автоматическое
переключение аппарата
на тип программы,
выбранный при
приступлении к операции
в вашей зоне вещания.
Прием программ усиленных сетей станций (EON)
(только для модели TA-FE520R)
Усилитель, подключенный к тюнеру фирмы Sony с системой EON
CONTROL (Управление усиленными сетями станций), может
переключиться на любую программу EON, передаваемую в вашей зоне
EON, а при окончании данной программы возвратиться к первоначально
выбранному источника программы.
EON LINK
S
T
A
N
D
B
Y
g
SPEAKERS
BASS
TREBLETONE
–10 +10
BALANCE
•
•
LEFT RIGHT
E
O
N
L
I
N
K
P
H
O
N
E
S
•
ON
OFF
–10 +10
INPUT SELECTOR
CD
AUX
TAPE2/MD
TAPE1/DAT
LOUDNESS
ØON øOFF
VOLUME
TUNER
PHONO
SOURCE DIRECT TAPE MONITOR
010
1 Убедиться, что усилитель и тюнер соединены через клеммы EON
CONTROL (см. стр. 5).
2 Нажать кнопку EON LINK (Подключение EON), чтобы индикатор
загорелся. Программа EON принимается, когда она начинается
при установленном тюнером частоте радиопередач.
Отмена приема программы EON
Нажать кнопку EON LINK опять, чтобы индикатор погас.
Примечания
• Если другой источник программы выбран во время приема программы EON,
то прием программы EON будет окончаться. Но, пока индикатор EON LINK
загорается, программы EON могут приниматься автоматически.
• Перед приступлением к записи необходимо отменить прием программы EON,
так как программа EON может помешать в записи.
• Если функция контроля ленты (см. стр. 9) включится при горении индикатора
EON LINK, то данный индикатор погаснет и программы EON не может
приниматься. В таком случае, выключить функцию контроля ленты, чтобы
индикатор загорелся опять.
RF
8
Page 29

Запись
1
S
T
A
N
D
B
Y
g
EON LINK
PHONES
OFF
SPEAKERS
ON
BASS
–10+
Основные Операции
INPUT SELECTOR
CD
AUX
TAPE2/MD
TREBLETONE
•
10
–10+
BALANCE
•
10
LEFT RIGHT
TAPE1/DAT
•
LOUDNESS
ØON øOFF
TUNER
PHONO
SOURCE DIRECT TAPE MONITOR
VOLUME
010
3
z Один источник не
может записываться
на двух
записывающих
компонентах
одновременно
z Записанный звук
может
контролироваться
(Функция контроля
ленты) (только для
модели TA-FE520R)
Записанный звук может
контролироваться когда
дека, на которой
производится запись,
имеет головки
воспроизведения и
записи отдельно. Для
контроля звука нажать
кнопку TAPE1 MONITOR
(Контроль деки 1). Надо
помнить, что только звук,
записанный с гнезда
TAPE1/DAT (Дека 1/
Цифровая звукозапись),
может контролироваться.
Нажав кнопку I/u, включить усилитель.
1
Включить требуемый источник программы.
2
Выбрать требуемый источник программы, поворачивая
3
ручку INPUT SELECTOR (Селектор входного источника).
Для записи с
грампластинки
радиовещания
компакт-диска
источника подключенного к
гнезду AUX
источника подключенного к гнездам:
— TAPE1/DAT
— TAPE2/MD
Подготовить записывающий компонент к записи, затем
4
включить запись.
Установить INPUT
SELECTOR
PHONO(Фоно)
TUNER (Тюнер)
CD (Компакт-диск)
AUX (Вспом.)
TAPE1/DAT
(Дека 1/Цифровая
звукозапись)
TAPE2/MD (Дека 2/Мини-диск)
Основные Операции
Включить воспроизведение источника программы.
5
RF
9
Page 30

10
Дополнительная информация
Дополнительная информация
Неожиданная потерь звука.
Возможные Неисправности
и Способы их Устранения
/ Проверить, произошло ли короткое замыкание.
Отключив усилитель, проверить подключенные
компоненты и громкоговорители.
При возникновении каких-либо неисправностей во
время работы усилителя устранить их, ссылаясь на
нижеприведенные указания по их диагностике.
Если возникшие неисправности не устраняются,
посоветоваться с ближайшим дилером фирмы
Sony.
Отсутствие звука.
/ Подключить соединительные аудиошнуры надежно.
/ Подключить усилитель и другие аудиокомпоненты
правильно.
/ Поворачивая ручку INPUT SELECTOR, выбрать
надлежащий источник программы.
Отсутствие звука с одного канала или
Технические
Характеристики
Усилитель
Выходная мощность по DIN
TA-FE520R: 100 Вт + 100 Вт (4 Ом при 1 кГц)
85 Вт + 85 Вт (8 Ом при 1 кГц)
TA-FE320R: 60 Вт + 60 Вт (4 Ом при 1 кГц)
50 Вт + 50 Вт (8 Ом при 1 кГц)
Частотная характеристика
Гнездо PHONO (20 Гц - 20 кГц): ±1,0 дБ по
компенсационной характеристике RIAA
Гнезда TUNER, CD, AUX, TAPE 1/DAT, TAPE 2/MD:
7 Гц - 70 кГц
+0–3
дБ
несбалансированные выходные сигналы
громкоговорителей.
/ Поворачивая ручку BALANCE, отрегулировать
баланс громкоговорителей.
/ Проверить подключение громкоговорителя и
входного источника канала, с которого не выходит
звук.
Слабые звуки нижних и верхних частот.
/ Отрегулировать регуляторы TONE.
/ Изменив положения громкоговорителей или условия
комнаты, устранить препятствия на пути передачи
звука.
Искаженный звук.
/ Входной сигнал выбран неправильно.
/ Входная мощность громкоговорителей
недостаточна. Снизить уровень громкости.
Отсутствие звука нижних частот или неясность
положений инструментов.
/ Громкоговорительный шнур подключен к клемме с
обратной полярностью. Подключить шнуры с
правильной полярностью.
Гудение или шум.
/ Заземлить проигрыватель (см. стр. 5).
/ Подключить соединительные аудиошнуры надежно.
/ Усилитель подвергается помехам от телевизора.
Переместить усилитель дальше телевизора или
отключить телевизор.
Пульт дистанционного управления не
работает.
/ Удалить препятствие, находящееся между датчиком
дистанционного управления на усилителе и пультом
дистанционного управления.
/ Направить пульт дистанционного управления в
сторону датчика дистанционного управления на
передней стороне усилителя.
/ Пульт дистанционного управления расположен
слишком дальше от усилителя. Переместить пульт
ближе к усилителю.
/ Заменить батарейки, встроенные в пульт
RF
дистанционного управления.
Отношение сигнал-шум (Сеть А)
Гнездо PHONO: 80 дБ
Гнезда TUNER, CD, AUX, TAPE 1/DAT, TAPE 2/MD:
105 дБ
Выходное напряжение/импеданс
Гнездо RECOUT: 200 мВ, 1 кОм
Гнездо PHONES: 5 мВ (при 8 Ом)
Импеданс громкоговорителей
4 - 16 Ом
Коэффициент затухания
80 (8 Ом, 1 кГц)
Общие данные
Система
Силовой усилитель с прямой связью всех
ступеней
Предусилитель: Эквалайзер с низким шумом
Электропитание
230 В переменного тока, 50/60 Гц
Потребляемая мощность
TA-FE520R: 190 Вт
TA-FE320R: 160 Вт
Габаритные размеры (ориентировочная) (шир./выс./гл.)
430 х 130 х 310 мм,
включая выступные части и регуляторы
Масса (ориентировочная)
TA-FE520R: 6,5 кг
TA-FE320R: 5,5 кг
Поставляемые принадлежности
Пульт дистанционного управления модели RMS325 (1 шт.)
Батарейки марки R6 (AA) фирмы Sony (2 шт.)
Конструкция и технические характеристики могут
изменяться без дополнительной информации.
Page 31

Дополнительная информация
Расположение
Соединителей на Задней
Панели
87653421
SPEAKERS
PHONOINTUNER
L
R
D
N
G
L
A
N
G
I
S
y
CD
AUX
TAPE2/MD
IN
REC OUT
IN
IN IN
TAPE1/DAT
RECOUT
IN
IMPEDANCE USE 4 - 16 Ω
RL
+–+
AC OUTLET
EON CONTROL
–
IN
SWITCHED 100W MAX
90!¡
1 Клемма y(SIGNAL GND) (Заземление сигналов)
2 Гнездо TUNER (Тюнер)
3 Гнездо AUX (Вспом.)
4 Гнездо TAPE2/MD (Дека 2/Мини-диск)
5 Гнездо TAPE1/DAT (Дека 1/Цифровая
звукозапись)
6 Гнездо SPEAKERS (Громкоговорители)
7 Клемма EON CONTROL IN (системы управления
EON) (только для модели TA-FE520R)
8 Гнездо AC OUTLET (Выход переменного тока)
(не предусмотрено на модели TA-FE320R
(Английская модель))
9 Питающий шнур
0 Гнездо CD (Компакт-диск)
!¡ Гнездо PHONO (Фоно)
Назначения Кнопок на
Пульте Дистанционного
Управления
Поставляемый пульт дистанционного управления
служит для управления другими
аудиокомпонентами фирмы Sony, обозначенными
маркой g (датчика дистанционного управления).
Кнопка(и)
НазначениеУправляемый
компонент
I/u Усилитель Включение и
FUNCTION
CD Усилитель Выбор входного
TUNER Усилитель Выбор входного сигнала
PHONO Выбор входного сигнала
TAPE1/DAT Выбор входного сигнала
TAPE2/MD Выбор входного сигнала
AUX Выбор входного сигнала
Усилитель
Усилитель
Усилитель
Усилитель
TUNER
PRESET +/–
Тюнер Сканирование и выбор
CD
(
Плеер компактдисков
P
Плеер компактдисков
p
Плеер компактдисков
=/+
Плеер компактдисков
D.SKIP
Плеер компактдисков
MD
(
Плеер минидисков
P
Плеер минидисков
p
Плеер минидисков
=/+
Плеер минидисков
TAPE DECK А/В
9/(
p
0/)
Дека А или В Включение
Дека А или В Выключение всех
Дека А или В Ускоренная перемотка
VOL +/– Усилитель
отключение питания
сигнала с гнезда CD
с гнезда TUNER
с гнезда PHONO
с гнезда TAPE1/DAT
с гнезда TAPE2/MD
с гнезда AUX
предварительно
установленных станций
Включение
воспроизведения
Пауза при
воспроизведении
Выключение
воспроизведения
Поиск фонограмм
(AMS*)
Пропуск диска (для
плеера, оснащенного
многодисковым
ченджером)
Включение
воспроизведения
Пауза при
воспроизведении
Выключение
воспроизведения
Поиск фонограмм
воспроизведения
операций ленты
ленты вперед или назад
Регулирование
громкости
*Датчик автоматического детектирования музыки
11
RF
Page 32

Sony Corporation Printed in China
 Loading...