

Sony TA-DK2 Operating Instructions Manual

2-894-123-12 (2)
Integrated
Stereo Amplifier
Operating Instructions
TA - D K 2
©2006 Sony Corporation
WARNING
To reduce the risk of fire or electric
shock, do not expose this apparatus to
rain or moisture.
To prevent fire, do not cover the ventilation of the
apparatus with newspapers, table-cloths, curtains,
etc. And don’t place lighted candles on the
apparatus.
To prevent fire or shock hazard, do not place objects
filled with liquids, such as vases, on the apparatus.
Do not install the appliance in a confined space,
such as a bookcase or built-in cabinet.
Install this system so that the power cord can be
unplugged from the wall socket immediately in the
event of trouble.
Don’t throw away batteries with
general house waste; dispose of
them correctly as chemical waste.
About This Manual
• The instructions in this manual are for model
TA-DK2. Check your model number by looking at
the lower right corner of the front panel. In this
manual, models of area code SP is used for
illustration purposes unless stated otherwise. Any
difference in operation is clearly indicated in the
text, for example, “Models of area code SP only”.
• The instructions in this manual describe the
controls on the supplied remote. You can also use
the controls on the amplifier if they have the same
or similar names as those on the remote.
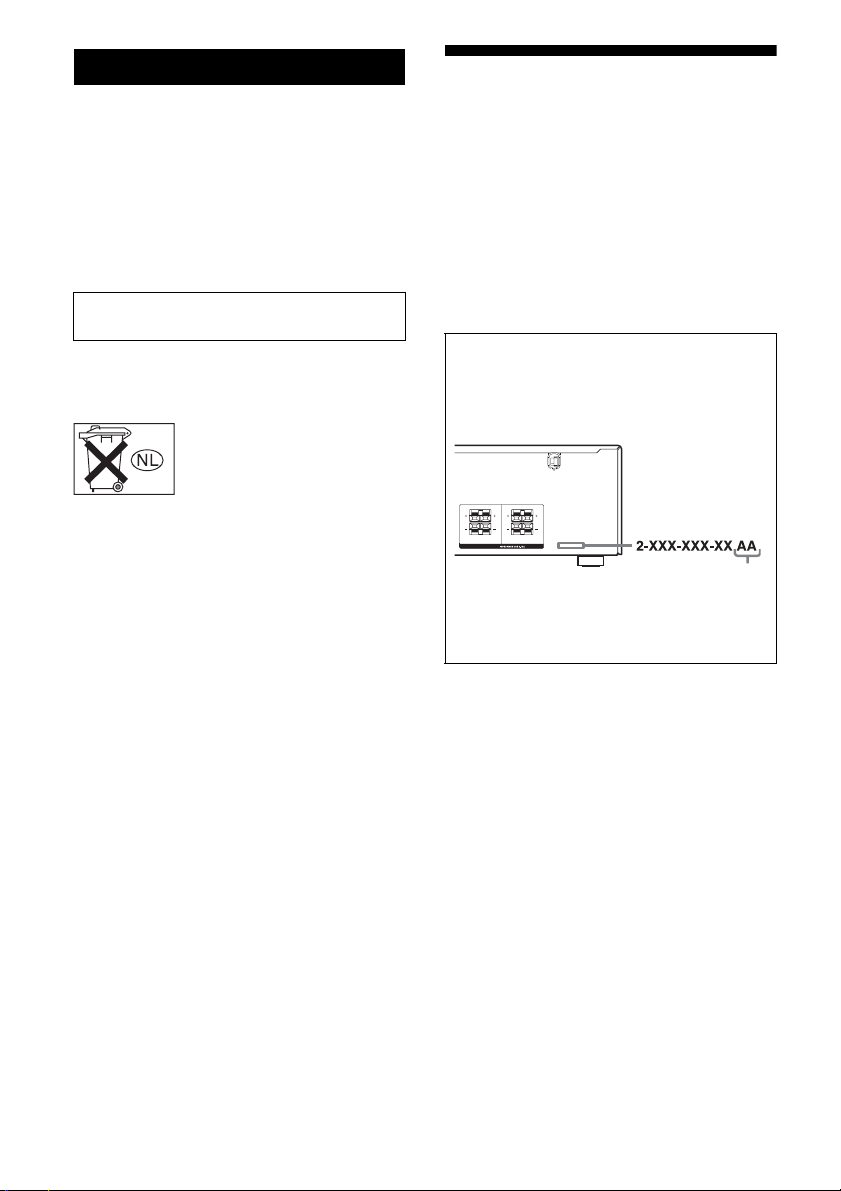
About area codes
The area code of the amplifier you purchased is
shown on the lower right portion of the rear panel
(see the illustration below).
LR
LR
R
LR
L
FRONT A
FRONT B
SPEAKERS
Area code
Any differences in operation, according to the area
code, are clearly indicated in the text, for example,
“Models of area code AA only”.
GB
2

Table of Contents
Getting Started
Description and location of parts .................. 4
1: Installing speakers................................... 11
2: Connecting speakers ............................... 12
3: Connecting the audio/video
components ............................................ 13
4: Preparing the amplifier and the remote... 16
5: Selecting the speaker system .................. 17
Playback
Selecting a component ................................ 18
Listening/Watching a component................ 19
Amplifier Operations
Adjusting the speaker level ......................... 21
Karaoke Operations
Using the karaoke........................................ 22
Settings for the advance karaoke
function .................................................. 24
Adjusting echo effect .................................. 26
Using the Remote
Changing button assignments...................... 29
Additional Information
Precautions .................................................. 30
Troubleshooting...........................................31
Specifications .............................................. 33
Index............................................................ 34
Other Operations
Changing the display................................... 28
Using the sleep timer................................... 28
Using the optional karaoke scoring
system .................................................... 29
GB
3
Getting Started
2 3 845 76q
9
1
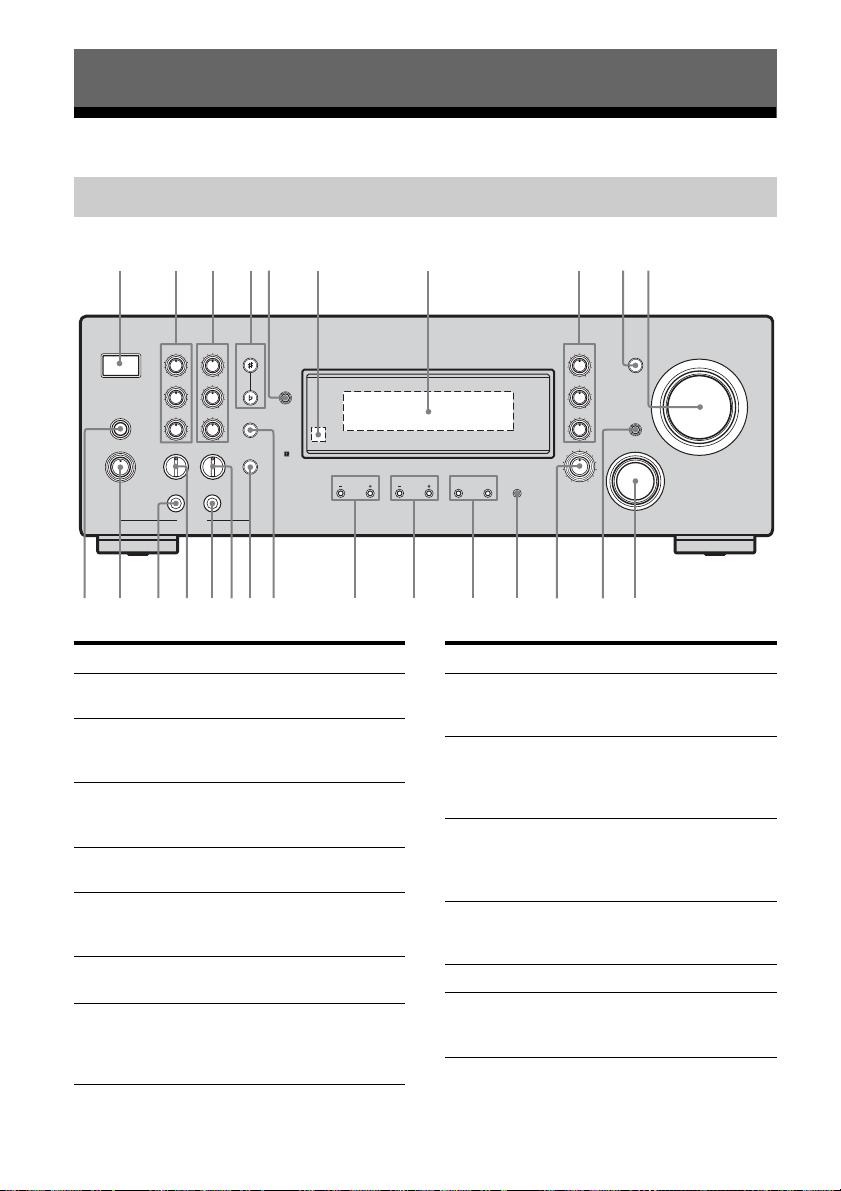
Description and location of parts
Front panel
;
HIGH HIGH
?/1
MID
KARAOKE
ON/OFF
ECHO LEVEL
MIN MAX
LOW
MIC 1 VOL MIC 2 VOL
MIN MAX MIN MAX
MIC 1 MIC 2
KARAOKE
Name Function
A ?/1
(on/standby)
B MIC 1 Tone
knobs
(LOW/MID/HIGH)
C MIC 2 Tone
knobs
(LOW/MID/HIGH)
D KEY CONTROL
#/2
E DISPLAY Press to select information
F Remote sensor Receives signals from
G Display The current status of the
KEY
CONTROL
MID
LOW
VOCAL
SELECT
SCORE
DISPLAY
Press to turn the amplifier
on or off (page 16, 19, 20).
Turn to adjust the
microphone 1 tone level
(page 23).
Turn to adjust the
microphone 2 tone level
(page 23).
Press to adjust the pitch of
the music (page 25).
displayed on the display
(page 28).
remote commander.
selected component or a
list of selectable items
ECHO
DELAY
HIGH
D.B.F.B. MASTER VOLUME
MID
LOW
MUTING
MUSIC VOLUME
INPUT SELECTOR
BALANCE
LR
(OFF/A/B/A+B)
SPEAKERS
qawf qfqlwaws qkw; qgqhqj
qsqdwdwg
ECHO
REPEAT
Name Function
H Music Tone
knobs
(LOW/MID/HIGH)
I D.B.F.B. Press to activate the
J MASTER
VOLUME
K INPUT
SELECTOR
L MUTING Press to mute the sound.
M MUSIC VOLUME Turn to adjust the music
Turn to adjust the music
tone level (page 23).
Dynamic Bass Feedback
(D.B.F.B.) function (page
22).
Turn to adjust the volume
level of all speakers at the
same time (page 18, 19,
20).
Turn to select the input
source to playback (page
18, 19, 20, 22).
volume level (page 22,
23).
appears here (page 6).
GB
4

Name Function
N SPEAKERS
(OFF/A/B/A+B)
O BALANCE L/R Press to adjust the front
P ECHO REPEAT
+/–
Q ECHO DELAY
+/–
R VOCAL SELECT Press to select the vocal
S SCORE Press to activate the
T MIC 2 VOL Turn to adjust the
U MIC 2 jack Connects to a microphone.
V MIC 1 VOL Turn to adjust the
W MIC 1 jack Connects to a microphone.
X ECHO LEVEL Turn to adjust the
Y KARAOKE
ON/OFF
Press to select OFF, A, B,
A+B of the front speakers
(page 17).
speakers balance level.
Press to adjust the
microphone’s echo repeat
times (page 27).
Press to adjust the
microphone’s echo delay
time (page 27).
type when singing
karaoke.
scoring system (page 25).
microphone 2 volume
level (page 22).
microphone 1 volume
level (page 22).
microphone’s echo level
(page 23, 26).
Press to turn karaoke
function on or off (page
22).
Getting Started
GB
5

About the indicators on the display
123
SW
SP A
SP B
SLEEP
L R
Name Function
A Playback
channel
indicators
SW
L
R
B SP A/SP B Lights up according to the
C SLEEP Lights up when the sleep timer
Indicate that audio signal is
output from the front left
speaker, front right speaker and
sub woofer.
Sub Woofer
Front Left
Front Right
speaker system used. However,
these indicators do not light up
if the speaker output is turned
off.
is activated (page 28).
GB
6
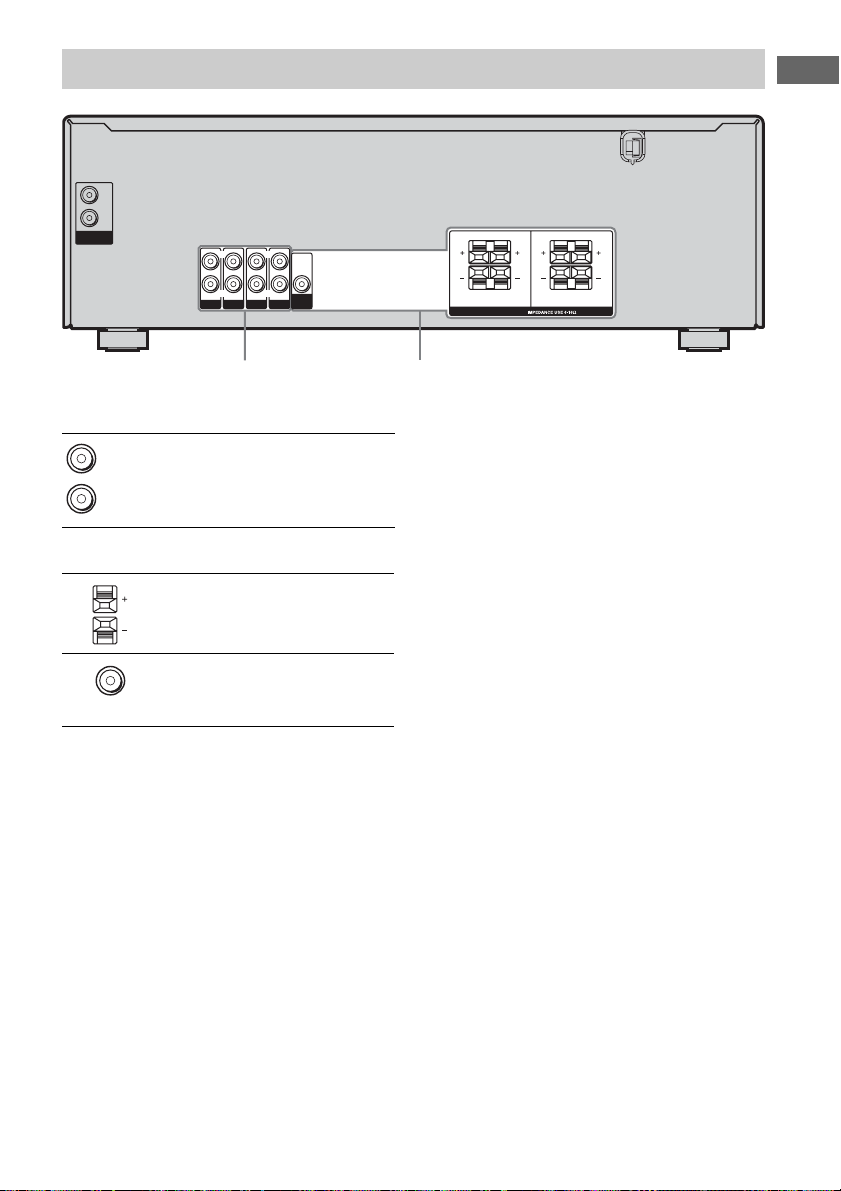
Rear panel
L
R
MIC OUTPUT
R
AUDIO IN AUDIO IN
AUDIO IN
SA-CD/CD
VIDEO 2
DVD
1 2
A AUDIO INPUT section
White (L)
Red (R)
B SPEAKER section
AUDIO IN
jack
LL
AUDIO
OUT
R
AUDIO IN
SUB
WOOFER
VIDEO 1
Connects to a
Super Audio CD or
CD player, etc.
(page 14, 15).
Connects to front
speakers (page 12).
LR
R
LR
FRONT A
SPEAKERS
FRONT B
LR
L
Getting Started
Connects to sub
woofer (page 12).
GB
7
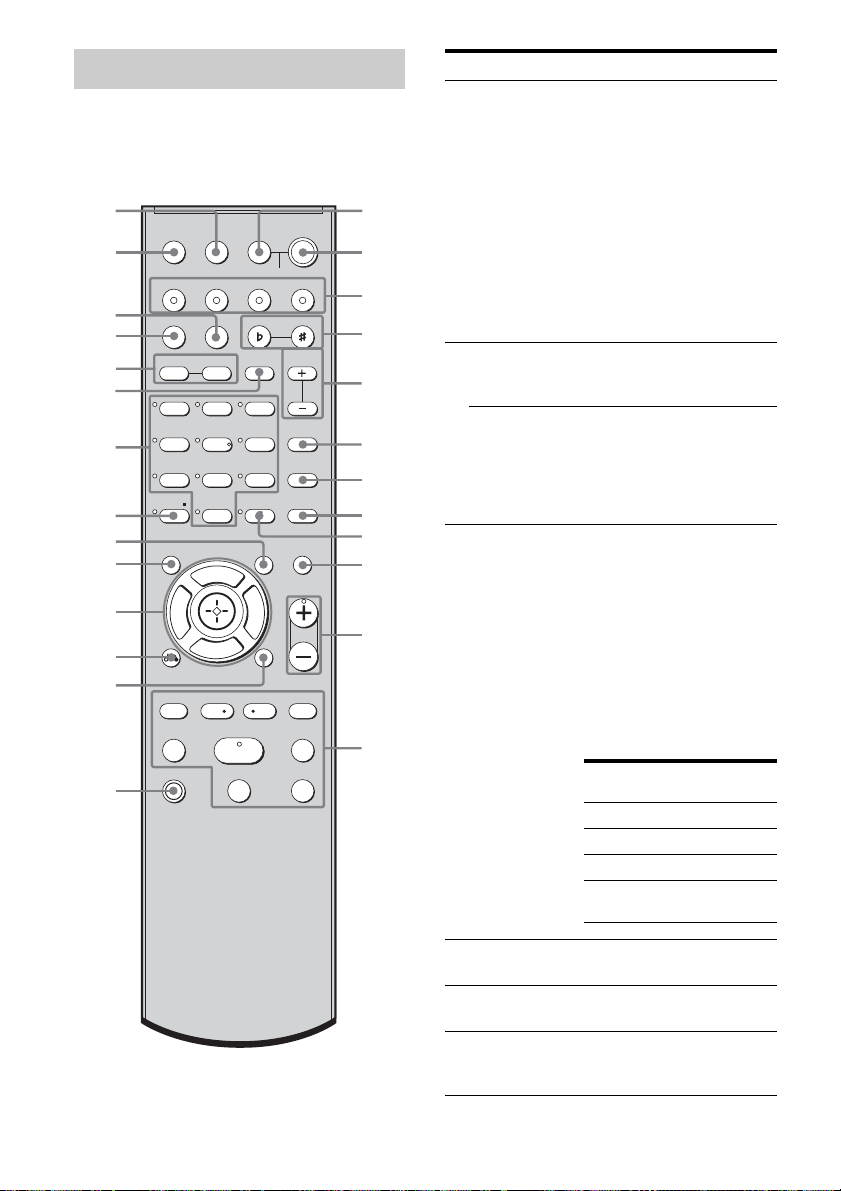
Remote commander
1
You can use the supplied remote RM-AAU011
to operate the amplifier and to control the Sony
audio/video components that the remote is
assigned to operate (page 29).
wh
TV/VIDEO SLEEP
wg
VIDEO 1 VIDEO 2
wf
KARAOKE SCORE
wd
ws
BALANCE
LR
wa
123
w;
46
78
>10/
ql
qk
-
CLEAR
qj
qh
qg
qf
Gg
RETURN/EXIT
TV CH – TV CH +
.
TV
qd
5
0/10
F
f
REPLAY ADVANCE
<
TV ?/1
AV
?/1
?/1
2
SYSTEM STANDBY
DVD SA-CD/CD
KEY CONTROL
3
4
VOCAL
SUB
SELECT
WOOFER
5
9
ENTER
TOOLSDISPLAY
D.B.F.B.
D.SKIP
DVD MENU
MUTING
TV VOL
MASTER VOL
6
7
8
9
q;
qa
MENU
<
>
HmM
Xx
qs
Name Function
A AV ?/1
(on/standby)
B TV ?/1
(on/standby)
?/1
(on/standby)
C Input buttons Press one of the buttons to
Press to turn on or off the
Sony audio/video
components that the remote is
assigned to operate (page 29).
If you press ?/1 (B) at the
same time, it will turn off the
amplifier and other
components (SYSTEM
STANDBY).
Note
The function of the AV ?/1
switch changes automatically
each time you press the input
buttons (C).
Press TV ?/1 and TV (M) at
the same time to turn the TV
on or off.
Press to turn the amplifier on
or off.
To turn off all components,
press ?/1 and AV ?/1 (A) at
the same time (SYSTEM
STANDBY).
select the component you
want to use. When you press
any of the input buttons, the
amplifier turns on. The
buttons are factory assigned
to control Sony components
as follows. You can change
the button assignments
following the steps in
“Changing button
assignments” on page 29.
Button Assigned Sony
VIDEO 1 VCR (VTR mode 3)
VIDEO 2 VCR (VTR mode 2)
DVD DVD player
SA-CD/CD Super Audio CD/
component
CD player
D KEY
CONTROL #/2
E SUB WOOFER
+/–
Press to adjust the pitch of a
music (page 25).
Press to adjust the subwoofer
level (page 21).
F D.B.F.B. Press to activate the Dynamic
Bass Feedback (D.B.F.B.)
function (page 22).
GB
8
Name Function
G D.SKIP Press to skip disc of the CD
H DVD MENU Press to display the menu of
I ENTER Press to enter the value after
J MUTING Press to mute the sound (page
K TV VOL
a)
+
/–
MASTER
a)
VOL +
L ./> Press to skip tracks of the CD
REPLAY /
ADVANCE
m/M Press to
a)
H
X Press to pause playback of the
x Press to stop playback of the
TV CH +/– Press TV CH +/– and TV (M)
M TV Press TV and the button you
player or DVD player (multidisc changer only).
the DVD player on the TV
screen. Then, use the control
buttons to perform menu
operations.
selecting a channel, disc or
track using the numeric
buttons.
18).
Press TV VOL +/– and TV
(M) at the same time to adjust
the TV volume level.
Press to adjust the volume
/–
level of all speakers at the
same time.
player or DVD player.
<
Press to replay the previous
<
scene or fast forward the
current scene of the VCR or
DVD player.
– search tracks in the forward/
backward direction of the
DVD player.
– fast forward/rewind of the
VCR, CD player, MD deck,
or tape deck.
Press to start playback of the
VCR, CD player or DVD
player.
VCR, CD player or DVD
player.
VCR, CD player or DVD
player.
at the same time to select
preset TV channels.
want at the same time to
activate the buttons with
orange printing.
Name Function
N MENU Press to display the menus of
O RETURN/
EXIT O
P Control
buttons
Q DISPLAY Press to select information
R TOOLS Press to display options
S -/-- Press -/-- and TV (M) at the
x
>10/
CLEAR Press to
the VCR, DVD player, or
satellite tuner on the TV
screen. Then, use the control
buttons to perform menu
operations.
Press to
– return to the previous menu.
– exit the menu while the menu
or on-screen guide of the
VCR, DVD player, or
satellite tuner is displayed on
the TV screen.
After pressing DVD MENU
(H), or MENU (N), press the
control button V, v, B or b to
select the settings. When you
press DVD MENU or MENU,
press the control button to
enter the selection.
displayed on the TV screen of
the VCR, satellite tuner, CD
player or DVD player.
applicable to the entire disc
(e.g. disc protection), or
multiple items on a list menu
(e.g. erasing multiple titles).
same time to select the channel
entry mode, either one or two
digits of the TV.
Press to select
– track numbers over 10 of the
VCR, satellite tuner or CD
player.
– channel numbers of the
Digital CATV terminal.
– clear a mistake when you
press the incorrect numeric
button.
– return to continuous
playback, etc. of the satellite
tuner or DVD player.
Getting Started
continued
GB
9

Name Function
T Numeric
buttons
(number 5
U VOCAL
SELECT
V BALANCE
L/R
W KARAOKE Press to activate the karaoke
X SCORE Press to show the score after
Y TV/VIDEO Press TV/VIDEO and TV
Z SLEEP Press to activate the Sleep
a)
The number 5, MASTER VOL +, TV VOL +, and
H buttons have tactile dots. Use the tactile dots as
references when operating the amplifier.
Press to
– select track numbers of the
a)
)
CD player or DVD player.
Press 0/10 to select track
number 10.
– select channel numbers of
the VCR or satellite tuner.
Press the numeric buttons and
TV (M) at the same time to
select the TV channels.
Press to select the vocal cut
parameter when you sing a
song (page 24).
Press to adjust the front
speakers balance level (page
21).
function.
you sing a song (page 25).
Note
The scoring system will only
activate when you press
SCORE. If you press SCORE
again, it will show the score
marks.
(M) at the same time to select
the input signal (TV input or
video input).
Timer function and the
duration which the amplifier
turns off automatically.
Notes
• Some functions explained in this section may not
work depending on the model.
• The above explanation is intended to serve as an
example only. Therefore, depending on the
component, the above operation may not be
possible or may operate differently than described.
10
GB
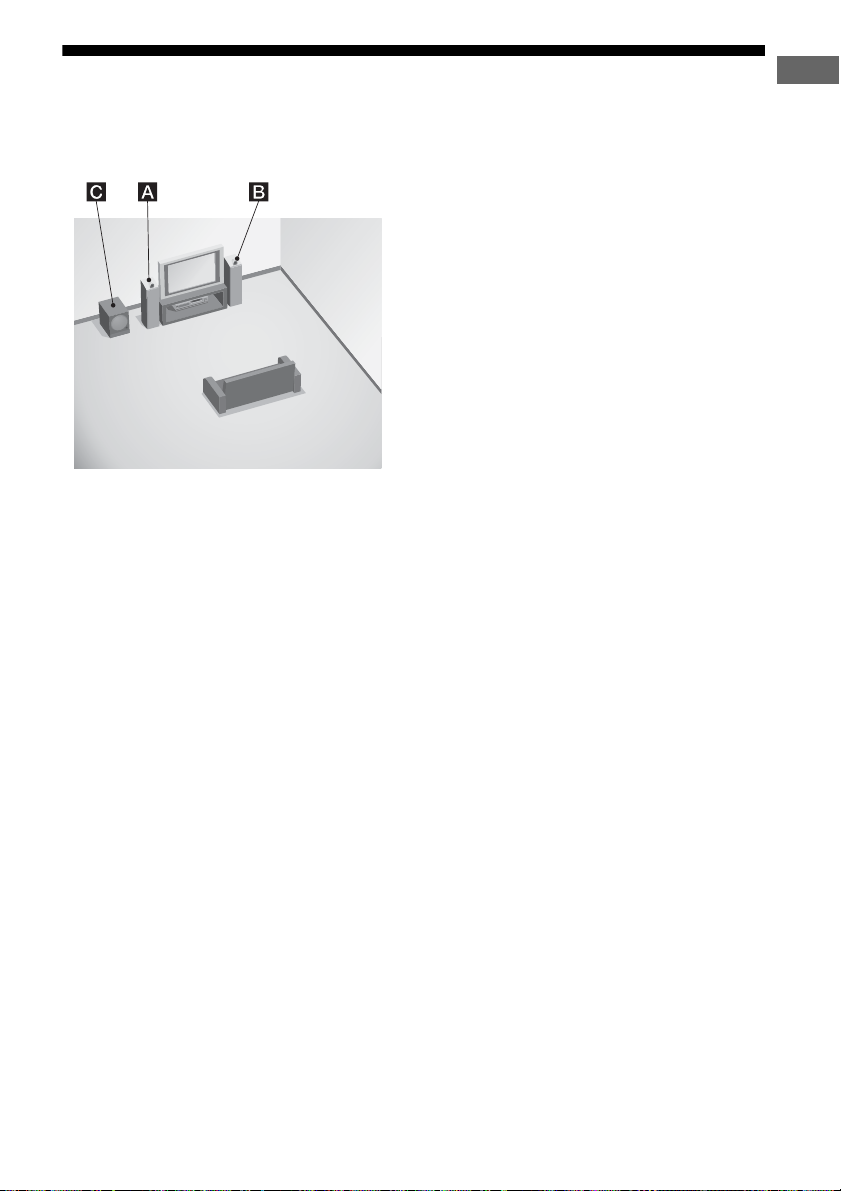
1: Installing speakers
This amplifier allows you to use a 2.1 channel
system (2 front speakers and one sub woofer).
AFront speaker (Left)
BFront speaker (Right)
CSub woofer
Tip
Since the sub woofer does not emit highly
directional signals, you can place it wherever you
want.
Getting Started
11
GB
 Loading...