

Page 1
3-864-117-12 (1)
FM Data Receiver
Operating instructions see 2-GB
Mode d’emploi voir 2-FR
Bedienungsanleitung seite 2-DE
Gebruiksaanwijzing zie 2-NL
Istruzioni per l’uso vedere 2-IT
SRF-DR2000
1998 by Sony Corporation
GB
FR
DE
NL
IT
Page 2

General Information
For your assistance in reporting this unit in case of loss or
theft, please record below the model number and serial
number which are located on the back of the unit.
Please retain this information.
Model number
Serial number
Your ID number
Date of purchase
Place of purchase
FOR YOUR RECORDS
Digital DJ System E2 is a registered
trademark of Digital DJ Inc.
2-GB
Page 3

Table of Contents
Before You Begin........................................................................... 4
Features .......................................................................................... 4
Getting Started
Installing the Batteries ................................................................. 5
Selecting a Language.................................................................... 7
Operating the Radio
Manual Tuning.............................................................................. 9
Presetting Stations ...................................................................... 10
Seeing FM data
Seeing the Information on Your Receiver ............................... 12
Saving Information That You Can See ..................................... 17
Deleting the Information that Has Been Saved ...................... 19
Setting the Functions.................................................................. 20
Additional Information
ID Numbers ................................................................................. 23
Using the Stand ........................................................................... 27
Specifications............................................................................... 27
Precautions .................................................................................. 28
Troubleshooting .......................................................................... 29
Index to Parts and Controls ...................................................... 30
Index ............................................................................................. 32
GB
3-GB
Page 4

Before You Begin
Thank you for choosing the Sony FM data receiver!
The FM data receiver will give you many hours of listening
pleasure and will display up-to-date information.
Before operating the FM data receiver, please read these
instructions thoroughly and retain them for future reference.
Features
•FM stereo radio
•High-speed data receiver which can receive text and
graphics.
•Five Function buttons for user-friendly operations and
intuitive information-receiving operations.
•Urgent message information is displayed automatically
during the FM multiplex broadcast mode only.
•You can set the unit to automatically turn off the power
approximately after 120 minutes, (Auto Power OFF
function).
•You can choose from 7 languages (English, French, German,
Italian, Spanish, Dutch, Swedish) for the indications in the
display only.
About FM multiplex broadcast
FM multiplex broadcast provides text and graphic data
through the open signal space in the frequency of the
normal radio broadcasts. It is transmitted by specific FM
broadcasting stations and the information cannot be
received using an ordinary radio.
4-GB
Page 5
”Getting Started
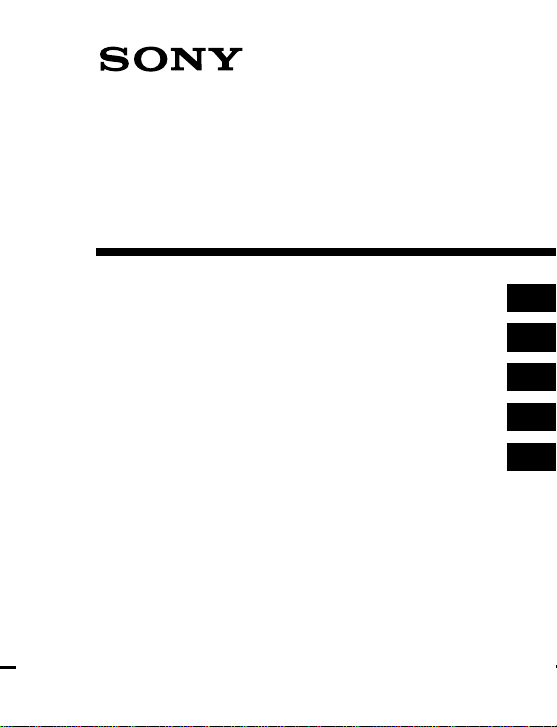
Installing the Batteries
Open the battery compartment lid and insert two R6 (size AA)
batteries (not supplied) with the correct polarity.
DC IN 3V
÷
Battery Life (Approx. hours)
Sony Alkaline LR6(SG) Sony R6(SR)
Audio only 35 14
FM multiplex reception 23 9
* For maximum performance we recommend that you use alkaline
batteries.
When to Replace the Batteries
Replace the batteries when “LOW BATTERY” is displayed.
Notes
• Insert the batteries with correct polarity.
• The dry batteries cannot be charged.
• Turn off the radio, and then replace the batteries within 20
seconds after the batteries are removed from the battery
compartment. Otherwise, the information that has been saved
and the preset stations will be erased. In this case, preset the
stations again. Be sure to take note of your important data that is
saved in the memory.
• When you are not going to use your unit for an extended period
of time, remove the batteries to prevent possible damage from
battery leakage and corrosion.
R6 (size AA) × 2
5-GB
Getting Started
Page 6

When the radio turns off unexpectedly
When you set the Auto Power OFF function to ON, the radio
turns off automatically approximately after 120 minutes to
prevent unnecessary wear of the batteries. To listen to the
radio continuously, press POWER.
If the radio does not turn on after pressing POWER, or if the
radio turns off unrelated to the Auto Power OFF feature, the
batteries are exhausted.
Replace both batteries with new ones.
To set this function see “To set the Auto Power OFF” (page 21)
under “Setting the Functions” (page 20).
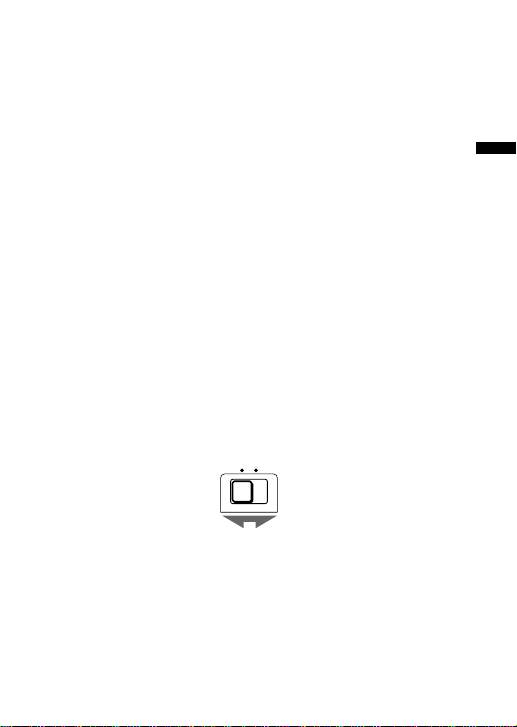
Using External Power Sources
You can connect the following external power sources through
the DC IN 3 V jack located on the left side of the unit. (When
you plug a cord into the DC IN 3 V jack, the internal batteries
are automatically bypassed.)
•House current using a Sony AC-E30HG (not supplied) AC
power adaptor
•12/24 V car battery using a Sony DCC-E230 (not supplied)
car battery cord
Notes
• When operating the unit with an external power source, do not
remove the batteries in the battery compartment which serve as a
backup of the memory.
• Use only the recommended AC power adaptor or car battery cord
manufactured by Sony. The polarity of the plugs of other
manufacturers may be different.
6-GB
Polarity of the plug
Page 7
Selecting a Language
You can select one of the seven languages (English, French,
German, Italian, Spanish, Dutch, Swedish) for the indications
in the display. The explanation here is when the language is set
in English, and the explanation of the indications in the display
will be in English.
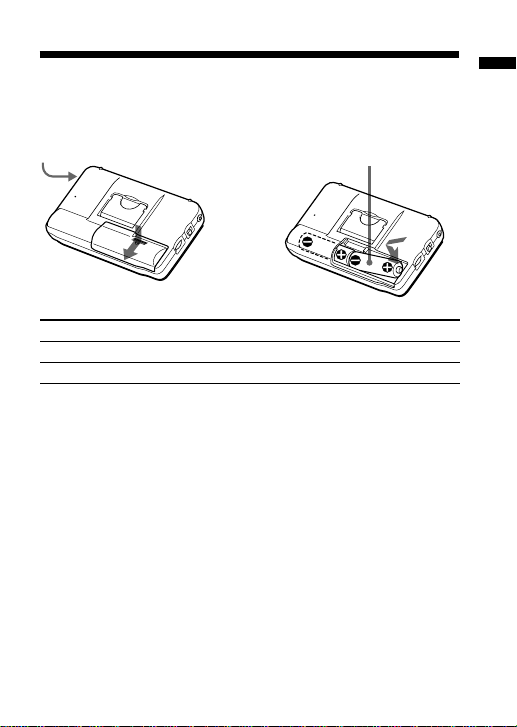
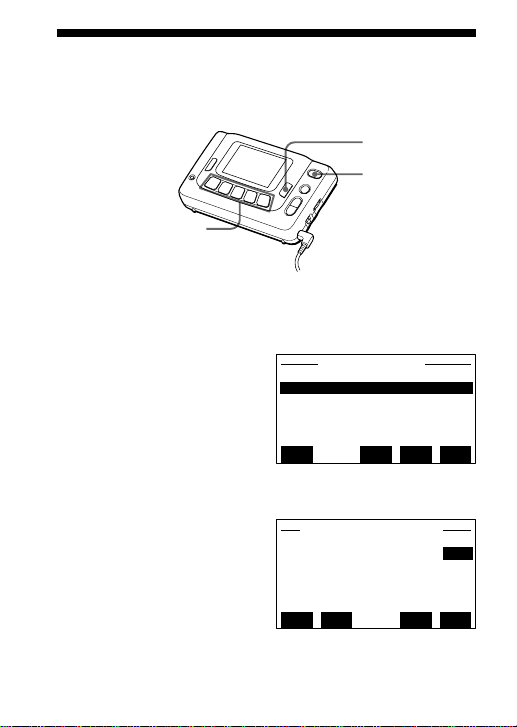
POWER
ENTER
Function buttons
2
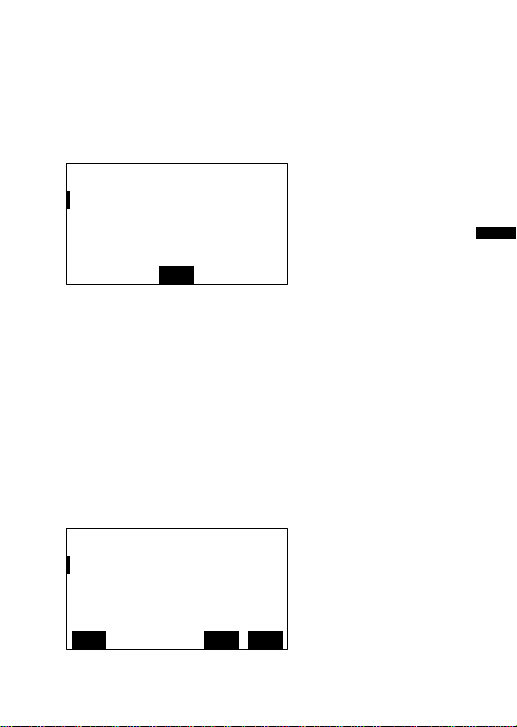
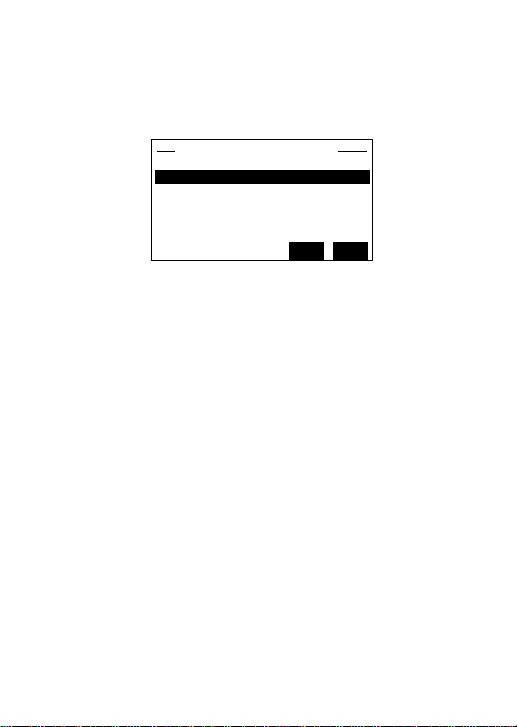
1 While holding down ENTER press POWER to turn on
the unit. The LANGUAGE SELECT MENU appears.
LANGUAGE SELECT MENU
1:English
2:French
3:German
4:Italian
5:Spanish
2 Press the corresponding Function button to ↑ UP or
↓ DWN to move the cursor to the language you want,
and press the Function button corresponding to ENT.
The indications in the display will switch over to the
selected language.
ENTVUP
vDWN
Getting Started
7-GB
Page 8
To change the selected language
Press POWER to turn off the unit and repeat from step 1.
Notes
• The selected language does not translate the FM data. Only the
indications in the display will switch over to the selected
language, and the FM data will be displayed in the language of
that area.
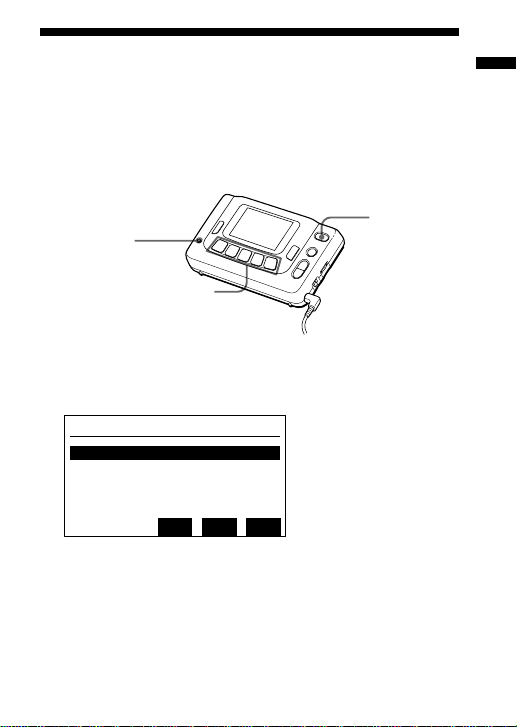
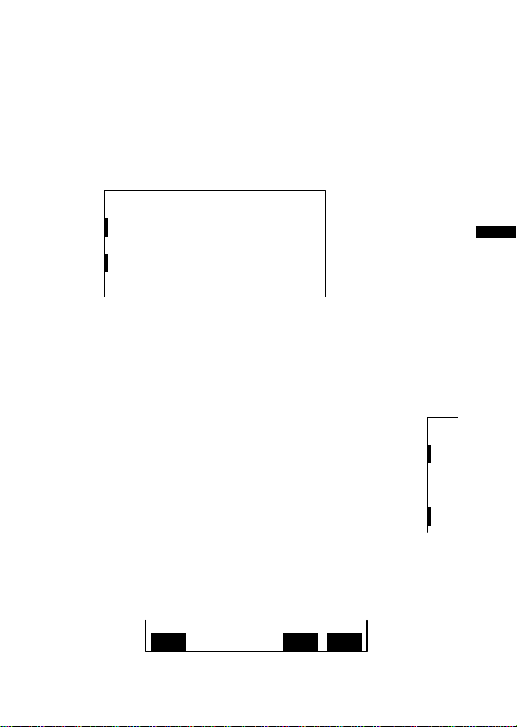
• The three display windows shown below will be displayed in
English, even when you set the language other than English.
LANGUAGE SELECT MENU
1:English
2:French
3:German
4:Italian
5:Spanish
(see page 7)
To Retrieve Stored
Data While Receiver
Downloads.
M2:Free Programs
ENTVUP
vDWN
(see page 13)
Choices for
Retrieving
Stored Data.
H-PAGE:Station Menu
MSG:Last Message
PAGE:Last Page
H-PAGE
(see page 13)
8-GB
M2
MSG
PAGE
Page 9
”Operating the Radio
Manual Tuning
POWER
ENTER
Function
buttons
2
TUNE +/–
VOLUME
NEWS•MUSIC
1 Connect the stereo headphones to the 2 jack.
2 Press POWER to turn on the unit.
3 Press TUNE +/– to manually tune in to the desired
station.
If you press and hold TUNE +/–, the frequency is scanned
rapidly. Release the button to stop scanning.
4 Adjust the volume with VOLUME.
To turn off the unit
Press POWER.
Operating the Radio
9-GB
Page 10
Presetting Stations
The unit is initially preset with 5 FM radio stations. You can
preset up to 5 of your favorite stations.
1 Press POWER to turn on the unit.
2 Press TUNE +/– to manually tune in to the desired
station.
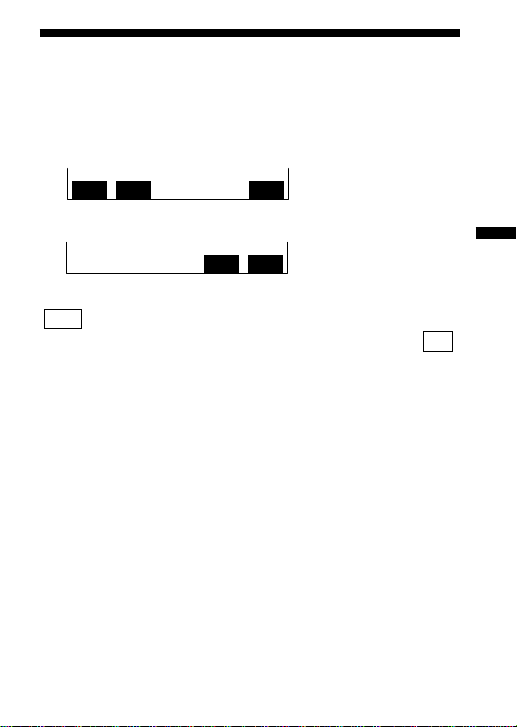
3 Press ENTER.
When “PRESET” flashes in the display, press one of the
Function buttons to preset the station.
The beep sounds twice through the headphones and your
favorite station is preset to the desired Function button.
FM
97.5
PRESET
87.5
92.0 98.0
0
MHz
108.0104.3
FM
97.5
PRESET
97.5
92.0 98.0
0
MHz
108.0104.3
To change an existing preset station
Repeat from step 1 and press the desired Function button you
wish to change on step 3.
The existing preset station of the selected Function button will
be erased and replaced with your new favorite station.
10-GB
Page 11
Listening to a Preset Station
Once your favorite FM radio stations are preset, simply press
the corresponding Function button to recall and tune in to the
desired station.
1 Press POWER to turn on the unit.
2 Press the desired Function button which corresponds to
the preset station you wish to recall.
Improving FM radio reception
Fully extend the headphones cord which functions as an FM
antenna.
To listen with a clearer sound
When listening to the news, set the NEWS•MUSIC selector to
NEWS for optimum results. Vocal output will be sharper and
clearer. When listening to music, set the NEWS•MUSIC selector
to MUSIC for optimum results.
NEWS MUSIC
11-GB
Operating the Radio
Page 12
”Seeing FM Data
Seeing the Information on Your Receiver
You can receive up-to-date information that you can read on
the display while receiving the FM radio broadcast through
FM multiplex reception which is transmitted by a specific FM
broadcasting station only. Also, you can choose from 7
languages (English, French, German, Italian, Spanish, Dutch,
Swedish) for the indications in the display. (see page 7
“Selecting a Language”)
DATA indicator( )
Function buttons
POWER
FM DATA
2
1 Connect the stereo headphones to the 2 jack.
Since the headphones cord serves as an FM wire antenna, be
sure to connect the headphones even when reading the FM data
broadcast.
2 Press POWER to turn on the unit.
3 Tune in to a FM multiplex broadcasting station.
12-GB
Page 13
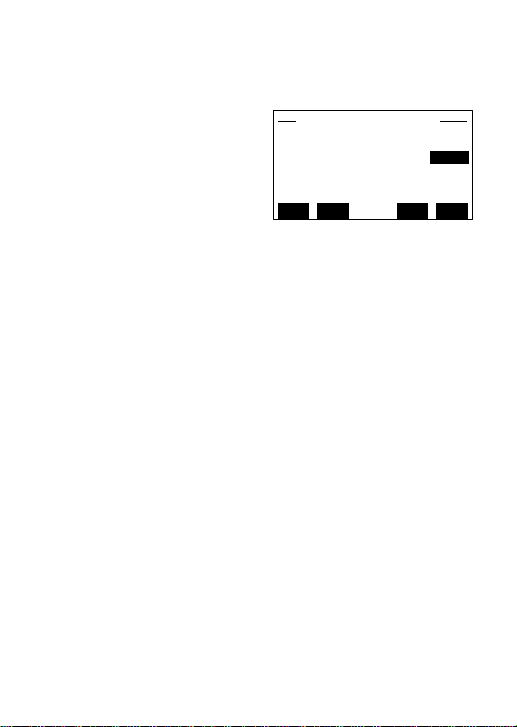
4 Press FM DATA to receive FM multiplex broadcasts.
The DATA indication appears when an FM multiplex broadcast
is receivable in the area. (For details on the DATA indication
see page 14)
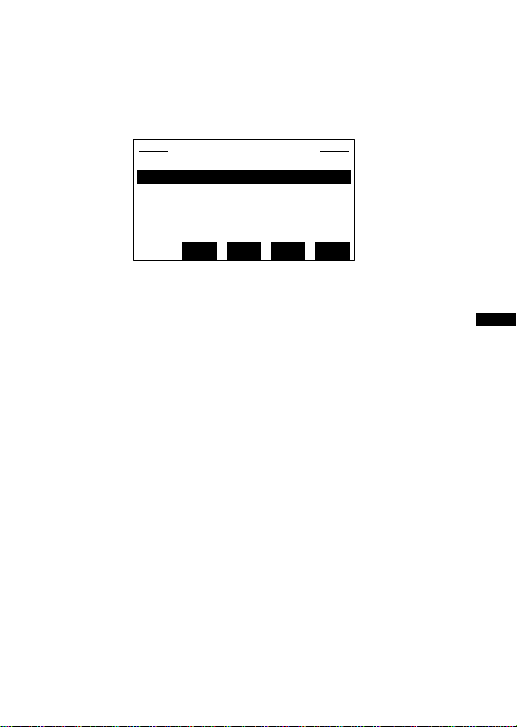
Then, the window below (Total Index display) appears with the
menus which correspond to the Function buttons.*
To Retrieve Stored
Data While Receiver
Downloads.
M2:Free Programs
M2
* The menus may differ depending on the participating radio
stations in your area.
5 Press the corresponding Function button to M2.
Then, the selecting window for the information you
want to see appears.
H-PAGE: FM Multiplex Broadcast
MSG: Urgent Message
PAGE: Paging Message
Choices for
Retrieving
Stored Data.
H-PAGE:Station Menu
MSG:Last Message
PAGE:Last Page
H-PAGE
MSG
PAGE
Seeing FM Data
13-GB
Page 14

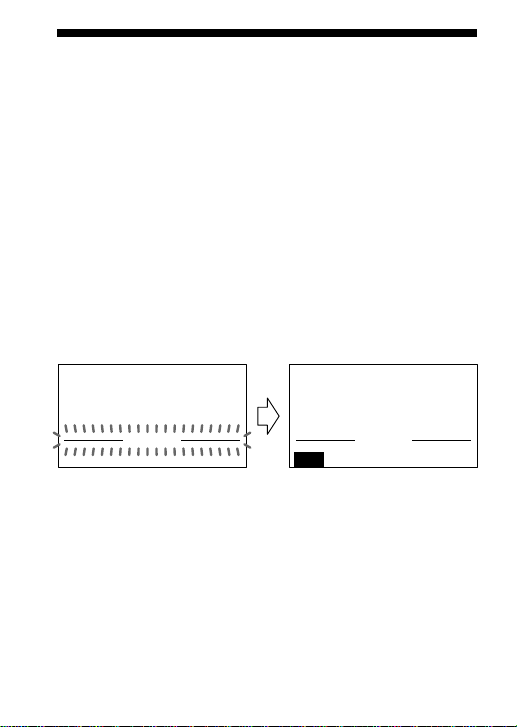
To See the FM data Broadcast
1 Press the corresponding Function button to H-PAGE.
2 Select the desired menu by pressing the corresponding
Function button to receive further information where
applicable.
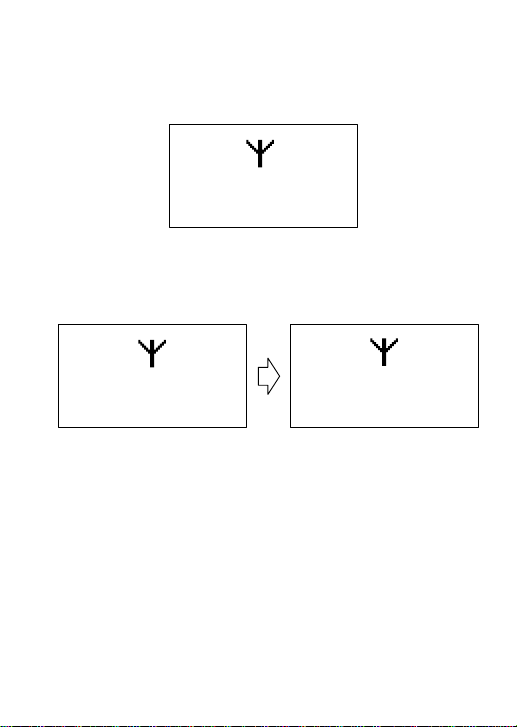
DATA indicator
Appearance of the DATA indicator(1) shows you the
availability of FM multiplex reception.
DATA
Indicator is on
The station you tune in to is transmitting FM multiplex
information and the reception is strong.
Indicator is off
The station you tune in to does not transmit FM multiplex
information or the reception is weak.
When receiving FM multiplex broadcast
Depending on the reception, the audio is received but the data
may not be received for FM Data broadcast. Inside buildings or
underground areas, the data may not be received or the
reception may be poor, and receiving the FM data fully may
take a while. Since the headphones cord serves as an FM wire
antenna, fully extend the headphones cord.
14-GB
Page 15
When receiving urgent Information
When an urgent information is broadcasted while receiving
FM Data Broadcast, you will hear a beeping sound through the
headphones and the FM Data Broadcast display will
automatically switch over to the urgent information. When
you receive the urgent information the DATA and MSG
indications appear at the left side of the display. Press any
button to stop the beep.
DATA
MSG
To move to the next page, follow the instructions to the
contents of the receiving broadcast.
To return to the FM data broadcast display, press BACK.
When receiving paging message
When you receive a paging message, you will
hear a beeping sound through the headphones
and the PAGE indicator will flash at the left
side of the display. (There is no incut indication)
Press any button to stop the beep.
When you display the Paging Message, the
PAGE indicator stops flashing and appears.
To see a paging message, use BACK to display the selecting
window below, and then press the corresponding Function
button to PAGE.
H-PAGE
To return to the FM Data Broadcast display, press BACK.
MSG
DATA
PAGE
PAGE
15-GB
Seeing FM Data
Page 16
Notes
• When you press H-PAGE program, MSG or PAGE to receive the
data, “RECEIVING DATA!” will be displayed. If there is no data
to be received, approximately after 20 seconds the display will
return to the previous screen.
(( ))
RECEIVING DATA!
• When the reception is poor, the DATA indicator disappears, but
“RECEIVING DATA!” will be displayed for approximately 10
seconds. Then “SIGNAL TOO WEAK.” will be displayed for
approximately 10 seconds and return to the previous display.
(( ))
RECEIVING DATA! SIGNAL TOO WEAK.
To receive FM audio broadcast only, to
change stations or pre-set stations
Press FM DATA.
To return to the screen one level above
Press BACK.
To return to the Home Page
Press the Function button corresponding to H-PAGE on
the display window.
16-GB
Page 17
Saving Information That You Can See
You can save up to 8 pages of important information that you
can recall for later use.
SAVE/MENU
Function buttons
2
1 Display the information you wish to save.
2 Press SAVE/MENU.
WRITE
READ
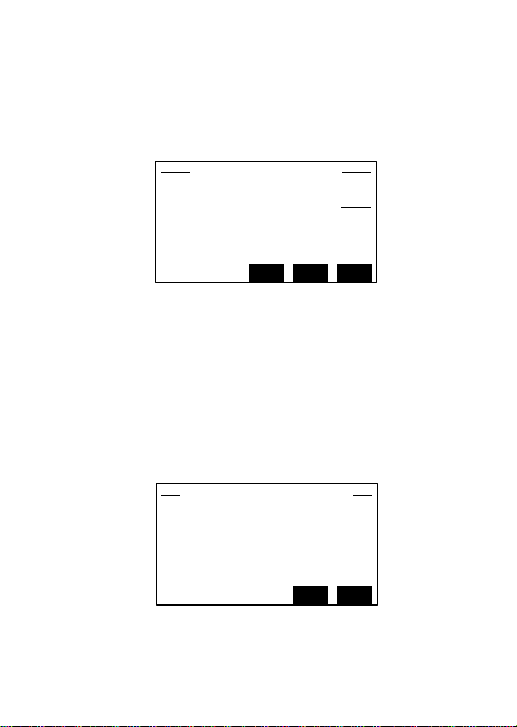
3 Press the Function button corresponding to WRITE on
the display.
Note
If you try to save another page of
information when 8 pages of
information have already been
saved, the message will be displayed
(at the right). In this case, delete
unnecessary data from the saved
information. (For details see “Deleting the Information that Has
Been Saved” page 19)
CONFIG
Memory FULL!
Please delete
unnecessary data to
create space!
BACK:Return
Seeing FM Data
17-GB
Page 18

To recall information that has been
saved
Press SAVE/MENU. Then, press the Function button
corresponding to READ on the display window.
To scroll to the next page press the Function button
corresponding to READ again.
DEL
READ
8
CONFIG
18-GB
Page 19
Deleting the Information that Has Been Saved
1 Press the Function button corresponding to READ to
display the information you want to delete.
DEL
READ
8
2 Press the Function button corresponding to DEL.
DELETE? YES NO
To delete, press the Function button corresponding to
YES .
To cancel, press the Function button corresponding to NO .
CONFIG
Seeing FM Data
19-GB
Page 20
Setting the Functions
You can set the functions such as Auto Power OFF and Reception
Area.
SAVE/MENU
POWER
Function buttons
2
1 Press POWER to turn on the unit.
2 Press SAVE/MENU.
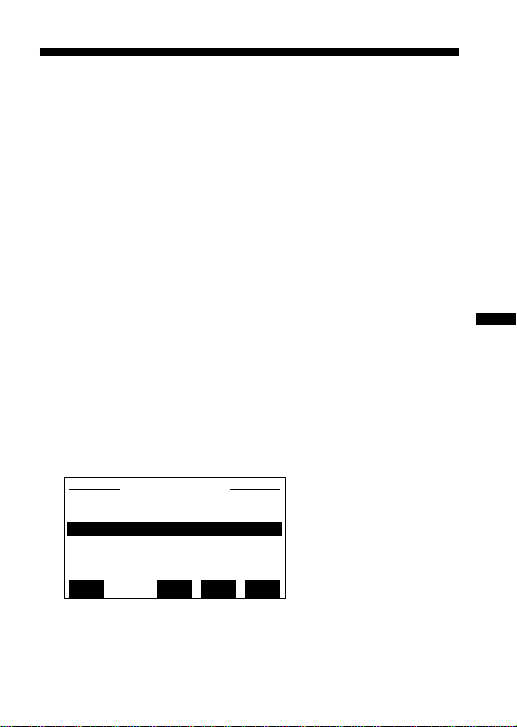
3 Press the Function button
corresponding to CONFIG.
The Mode 1 Main Menu
will be displayed.
4 Press the Function button
corresponding to SETUP
on the display.
5 Press the Function button
corresponding to ↑ UP or
↓ DWN to move the cursor
to the Function Setup, and
press the Function button
corresponding to ENT.
The Function titles will be
displayed.
20-GB
Set Up Menu
Function Setup
Maintenance Mode
TOP ENTVUP
Set Up Function
Auto Power OFF OFF
Reception Area EURO
+–VUP
vDWN
vDWN
Page 21

Note
If you enter the “Maintenance Mode” at the “Set Up Menu”, press
BACK to return to previous display. The Maintenance Mode is not
needed for radio operations.
To set the Auto Power OFF
When you turn this to ON and there is no key operation for 120
minutes while the power is turned on, the power automatically
turns off.
1 Press the Function button
corresponding to ↑ UP or
↓ DWN to move the
cursor to Auto Power OFF.
2 Press the Function button
corresponding to + or – to
set to either ON or OFF.
Note
If there is no key operation during the FM data mode and the
DATA indicator is not lit (which means that the FM multiplex
broadcast is not received). The FM data mode will be cancelled
automatically in about 20 minutes and only the audio will be
received.
Set Up Function
Auto Power OFF OFF
Reception Area EURO
+–VUP
vDWN
Seeing FM Data
21-GB
Page 22
To set the Reception Area
To set the format of the receiving signal to the area, select from
one of these modes : EURO or USA.
1 Press the Function button
corresponding to ↑ UP or
↓ DWN to move the
cursor to Reception Area.
2 Press the Function button
corresponding to + or – to
set to either EURO or USA.
When using the unit in the United States of America,
set it to USA.
Note
When you press the Function button corresponding to ID’S on the
display, you can see Your ID and Password ID, but it is not needed
for the radio operations. Press the Function button corresponding
to TOP on the display to return to the previous display.
(For details see “ID Numbers”page 23)
Set Up Function
Auto Power OFF OFF
Reception Area EURO
+–VUP
vDWN
22-GB
Page 23
”Additional Information
ID Numbers
ID refers to the following three ID numbers.
Your ID: for personal messaging (Radio Paging Message)
services.
DDJ Group ID: for group information services.
Password ID: for free additional information services.
These ID Numbers are factory set. You do not need to register
or confirm these ID Numbers for radio operation.
If the service company contacts you, follow the steps below.
1 Press POWER to turn on the unit.
2 Press SAVE/MENU.
3 Press the Function button corresponding to CONFIG on
the display.
4 Press the Function button corresponding to ID’S on the
display.
ID Numbers
Your ID 00########
DDJ Group ID ##
Password ID #
Expiration Dates ##
TOP ENTVUP
At this display you can confirm Your ID of which receivers
individually has as a Receiver ID.
vDWN
23-GB
Additional Information
Page 24
To confirm the DDJ Group ID
Press the Function button corresponding to ↑ UP or ↓ DWN to
move the cursor to the “DDJ Group ID”, press the Function
button corresponding to ENT to select the DDJ Group ID.
DDJ Group ID ##
########## Jan. 9,99
########## TFN
DG-ID 3
DG-ID 4
DG-ID 5
When the DDJ Group ID is registered, the ID Number and
Expiration dates appear in the display. You can register up to
12 subscription services of DDJ-ID. Press the Function button
corresponding to ↑ UP and ↓ DWN to scroll the display.
If the Expiration Date is displayed as TFN, it is for an
indefinite period of time.
VUPvDWN
24-GB
Page 25
To confirm the Password ID
Press the Function button corresponding to ↑ UP or ↓ DWN to
move the cursor to the Password ID, and press the Function
button corresponding to ENT to select the Password ID.
Password ID ##
Pwd-ID 1 2281701###
Pwd-ID 2
Pwd-ID 3
Pwd-ID 4
Pwd-ID 5
DEL ENTVUP
When the Password ID is registered, the ID Number appears
in the display. You can register up to 8 passwords. Press the
Function button corresponding to ↑ UP and ↓ DWN to scroll
the display.
vDWN
Additional Information
25-GB
Page 26
To register and correct the Password ID
Press the Function button corresponding to ↑ UP or ↓ DWN to
move the cursor to an empty Password ID or a Password ID to
correct at the display above, and press the Function button
corresponding to ENT to switch over the display to a
Password ID editing display.
Password ID ##
Pwd-ID # 2281701###
END + –
Press the Function button corresponding to + or – to enter the
value of the Password ID. The range of the value is 2281701376
to 2281701631. After setting the value range, press the Function
button corresponding to END to input and finish the setting.
To confirm the Expiration Dates
Press the Function button corresponding to ↑ UP or ↓ DWN to
move the cursor to the Expiration Dates. Press the Function
button corresponding to ENT to select the Expiration Dates.
Expiration Dates
Category 1 TFN
Category 2 Sep.10,99
Category 3
Category 4
Category 5
When the Expiration Dates is registered, the Expiration date
appears in the display. You may register up to 15 Expiration
Dates. Press the Function button corresponding to ↑ UP and
↓ DWN to scroll the display.
26-GB
VUPvDWN
Page 27
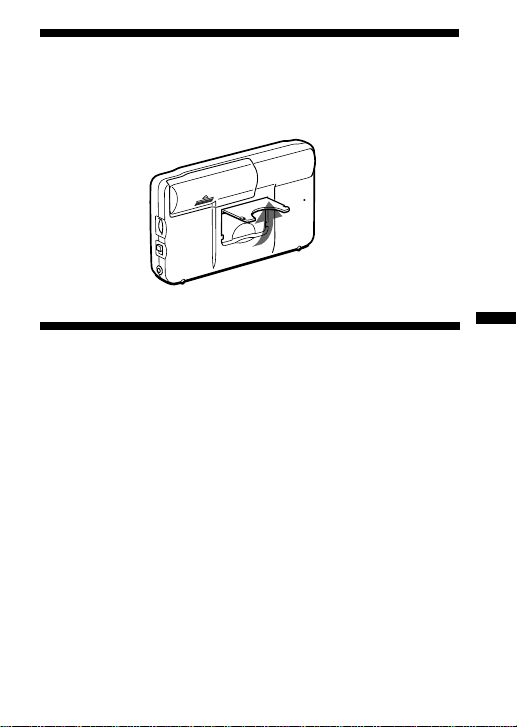
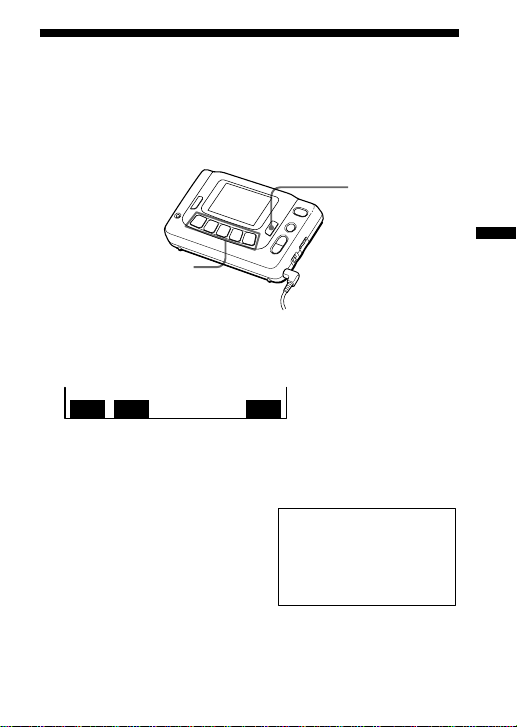
Using the Stand
Lift and use the stand on the base of the unit to see the display
at an optimum angle.
Specifications
Frequency range 87.5 – 108 MHz
FM multiplex DARC type
Output 2 jack (stereo minijack)
Power output 8 mW + 8 mW (at 10 % harmonic
Power requirements DC 3 V, two R6 (size AA)/LR6 batteries
Auto power off function Approx. 120 minutes
Dimensions 116 x 70.5 x 28 mm (w/h/d)
Mass Approx. 150 g (5.3 oz) incl. batteries
Supplied accessory Stereo headphones (1)
Design and specifications are subject to change without notice.
64 x 132 FSTN LCD display
distortion)
5
(Approx. 4
projecting parts and controls
⁄8 x 27⁄8 x 11⁄8 inches) not incl.
Additional Information
27-GB
Page 28

Precautions
• Operate the unit only on 1.5 V DC with two R6 (size AA)
batteries.
• Avoid exposure to temperature extremes, direct sunlight,
moisture, sand, dust or mechanical shock. Never leave the unit
in a car parked in the sun.
• Should anything fall into the unit, remove the batteries and have
the unit checked by qualified personnel before operating it any
further.
• To clean the casing, use a soft cloth dampened with a mild
detergent solution.
• In vehicles or buildings, radio reception may be difficult or
noisy. Try listening near a window.
Notes on Headphones
Road safety
Do not use headphones while driving, cycling, or operating
any motorized vehicle. It may create a traffic hazard and is
illegal in many areas. It can also be potentially dangerous to
play your headphones at high volume while walking,
especially at pedestrian crossings. You should exercise extreme
caution or discontinue use in potentially hazardous situations.
Preventing hearing damage
Avoid using headphones at high volume.
Hearing experts advise against continuous, loud and extended
play. If you experience a ringing in your ears, reduce volume
or discontinue use.
Caring for others
Keep the volume at a moderate level. This will allow you to
hear outside sounds and to be considerate to people around
you.
28-GB
Page 29

Warning
If there is lightning when you are using the unit, take off the
headphones immediately.
If you have any questions or problems concerning your unit,
please consult your nearest Sony dealer.
Troubleshooting
Should any problem occur with the unit, make the following
checks to determine whether or not servicing is required. If the
problem persists, consult your nearest Sony dealer.
The reception is unstable and contains noise.
• The batteries may be weak. Replace with new ones.
• Reception may be poor when there are obstructions such as
buildings, etc, or when listening to the radio inside a moving
vehicle. Move to another location free of obstacles for optimum
reception conditions, or listen to the radio near the window of the
moving vehicle.
The desired preset station is not received when
the corresponding Function button is pressed.
• Make sure you have pressed the correct Function button.
FM multiplex reception is not possible.
• Make sure that the headphones are connected.
• Make sure that the radio station which you are listening to offers
FM multiplex services.
• Make sure the DATA indication is on.
Operation is not possible when a button is
pressed.
Press the RESET button on the back of the unit with a thin pointed
object. All preset stations and information that have been saved
will be erased. In this case, preset the stations again.
Additional Information
29-GB
Page 30
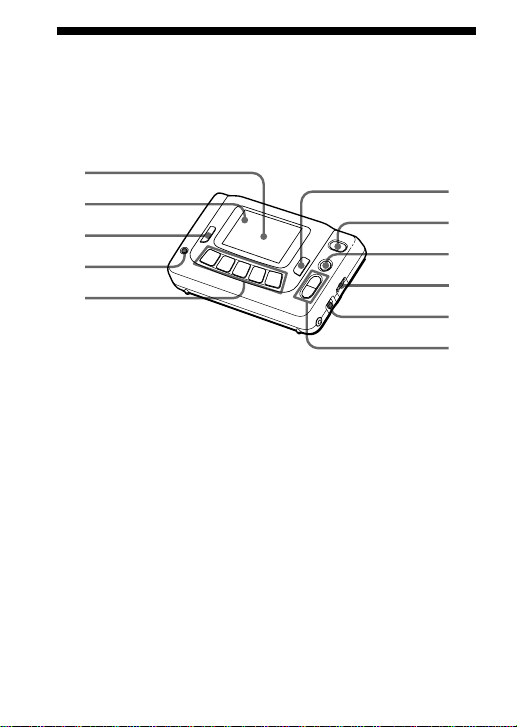
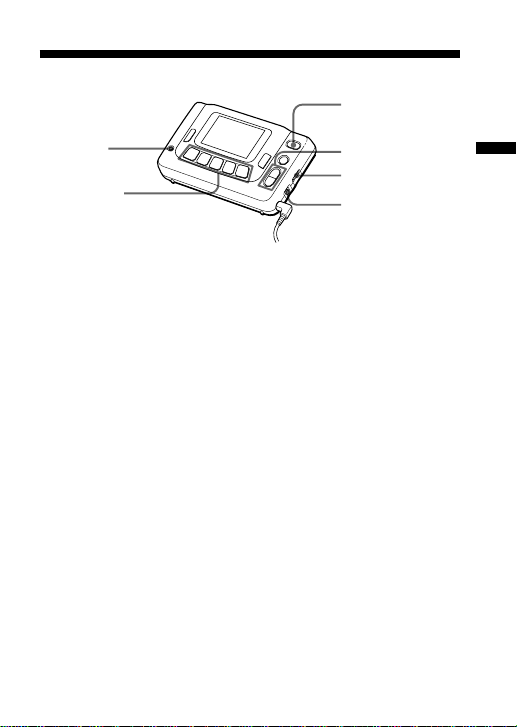
Index to Parts and Controls
Refer to the pages indicated in parentheses for details.
Main unit
1
2
3
4
5
1 Display (31)
2 DATA indicator (1) (14)
3 BACK button (15)
4 ENTER button (7, 9)
5 Function buttons (7, 9,
12, 17, 20)
30-GB
6
7
8
9
!º
!¡
6 SAVE/MENU button
(17, 20)
7 POWER button (7, 9,
12, 20)
8 FM DATA button (12)
9 VOLUME (9)
0 NEWS•MUSIC
selector (11)
!¡ TUNE +/– (9, 10)
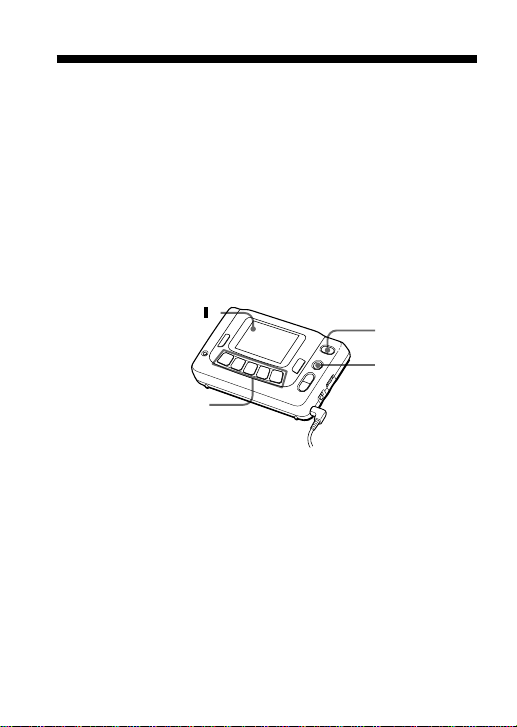
Page 31

Display
1
2
3
1 DATA indicator (1) (14)
2 MSG (Message)
indicator (15)
3 PAGE (Paging)
indicator (15)
FM
DATA
87.5
MSG
PAGE
PRESET
87.5
92.0 9 8.0
0
MHz
108.0104.3
4 Frequency (10)
5 Preset stations (10)
4
5
Additional Information
31-GB
Page 32

Index
A
Auto Power OFF .................... 21
B, C
Batteries..................................... 5
D
DATA indicator ...................... 14
DDJ Group ID ........................ 24
E
External Power sources........... 6
Expiration Dates .................... 26
F, G, H
FM multiplex broadcast.... 4, 14
I, J, K, L, M, N, O
Improving FM radio
reception ................................. 11
P, Q
Paging Message ..................... 15
Password ID ..................... 25, 26
R, S, T
Reception Area ....................... 22
U, V, W, X, Y, Z
Using the Stand ...................... 27
Urgent Information ............... 15
32-GB
Page 33

Additional Information
Page 34

Information d’ordre général
Pour toute référence en cas de perte ou de vol, veuillez
inscrire ci-dessous le numéro de votre modèle et le numéro
de série qui sont indiqués à l’arrière de l’appareil.
Conservez ces informations en lieu sûr.
Numéro de modèle
Numéro de série
Numéro ID de l’utilisateur
Date d’achat
Lieu d’achat
Référence de l’utilisateur
Digital DJ System E2 est une
marque déposée de Digital DJ Inc.
2-FR
Page 35

Table des matières
Informations préliminaires ......................................................... 4
Caractéristiques ............................................................................ 4
Préparatifs
Mise en place des piles................................................................. 5
Sélection de la langue................................................................... 7
Fonctionnement de la radio
Accord manuel .............................................................................. 9
Préréglage des stations .............................................................. 10
Visualisation de données FM
Visualisation d’informations sur le récepteur ........................ 12
Sauvegarde des informations affichées ................................... 18
Suppression d’informations sauvegardées ............................. 19
Réglage des fonctions................................................................. 20
Informations diverses
Numéros d’identification (ID) .................................................. 23
Utilisation du pied...................................................................... 27
Spécifications............................................................................... 27
Précautions .................................................................................. 28
En cas de panne .......................................................................... 29
Description des éléments et commandes ................................ 30
Index ............................................................................................. 32
FR
3-FR
Page 36

Informations préliminaires
Félicitations pour l’achat de ce récepteur de données FM Sony !
Ce récepteur vous offrira de nombreuses heures d’écoute
agréables et des informations de dernière heure que vous
pourrez lire sur l’afficheur.
Avant de mettre le récepteur de données FM en service,
veuillez lire attentivement ce mode d’emploi que vous
conserverez pour toute référence future.
Caractéristiques
•Radio stéréo FM
•Récepteur de données ultra-rapide permettant l’affichage
d’informations sous forme de texte et de graphiques.
•Cinq touches de fonction assurant un emploi convivial et une
exploitation intuitive des informations reçues.
•Affichage automatique des messages urgents dans le mode
de diffusion FM multiplex seulement.
•Mécanisme économisant l’énergie (Arrêt automatique) :
l’appareil peut être réglé pour s’éteindre automatiquement
au bout de 120 minutes.
•Sélection de 7 langues (anglais, français, allemand, italien,
espagnol, hollandais, suédois) pour l’affichage des
indications seulement.
A propos de la diffusion d’émissions FM multiplex
La diffusion d’émissions FM multiplex s’effectue sous
forme de texte ou de graphiques sur l’espace libre de la
fréquence normale de radiodiffusion. Les émissions FM
multiplex sont diffusées par certaines stations FM
seulement. Vous ne pourrez pas lire les informations
qu’elles transmettent sur une radio ordinaire.
4-FR
Page 37

”Préparatifs
Mise en place des piles
Ouvrez le couvercle du logement des piles et insérez deux
piles R6 (format AA) (non fournies) en tenant compte de la
polarité.
DC IN 3V
÷
Autonomie des piles (Approx. en heures)
Alcalines Sony LR6 (SG) Sony R6 (SR)
Son seulement 35 14
Réception FM multiplex 23 9
* Pour une performance optimale, il est conseillé d’utiliser des piles
alcalines.
Remplacement des piles
Remplacez les piles lorsque “PILE FAIBLE” apparaît sur
l’afficheur.
Remarques
• Tenez compte de la polarité lorsque vous insérez les piles.
• Les piles sèches ne peuvent pas être rechargées.
• Eteignez la radio et remplacez les piles dans les 20 secondes qui
suivent leur retrait du logement, sinon les informations qui ont
été sauvegardées et les stations préréglées seront supprimées. Le
cas échéant, préréglez à nouveau les stations. N’oubliez pas de
noter quelque part les informations importantes que vous avez
sauvegardées en mémoire.
• Si vous prévoyez de ne pas utiliser l’appareil pendant un certain
temps, enlevez les piles pour éviter tout dommage pouvant
provenir d’une fuite des piles et de la corrosion qu’elle entraîne.
2 piles R6 (format AA)
5-FR
Préparatifs
Page 38

Si la radio s’arrête tout à coup
Si vous avez validé la fonction d’arrêt automatique, la radio
s’arrêtera automatiquement dans les 120 minutes pour éviter
une usure inutile des piles. Pour continuer à écouter la radio,
appuyez sur POWER.
Si la radio ne se met pas en marche après une pression sur
POWER, ou Si elle s’arrête avant l’arrêt automatique, c’est que
les piles sont usées.
Remplacez-les par des neuves.
Pour mettre l’arrêt automatique en service, reportez-vous à
“Pour valider l’arrêt automatique” (page 21) dans “Réglage
des fonctions” (page 20).
Utilisation d’autres sources
d’alimentation
Vous pouvez raccorder les sources d’alimentation suivantes à
la prise DC IN 3 V sur la gauche de l’appareil. (Lorsque vous
raccordez un cordon à la prise DC IN 3 V, les piles sont
automatiquement déconnectées.)
•Courant secteur avec l’adaptateur secteur Sony AC-E30HG
(non fourni)
•Batterie de voiture 12/24 V avec le cordon allume-cigares
Sony DCC-E230 (non fourni)
Remarques
• Lorsque vous faites fonctionner l’appareil sur une source
d’alimentation externe, n’enlevez pas les piles du logement, car
elles servent pour la sauvegarde des informations en mémoire.
• Utilisez seulement l’adaptateur secteur ou le cordon allumecigares de marque Sony recommandés, à l’exclusion de tout
autre. La polarité des fiches d’autres marques peut être différente.
6-FR
Polarité de la fiche
Page 39

Sélection de la langue
Vous pouvez sélectionner une des sept langues (anglais,
français, allemand, italien, espagnol, hollandais, suédois) pour
l’affichage des indications.
POWER
ENTER
Touches de
fonction
1 Tout en tenant la touche ENTER enfoncée, appuyez sur
POWER pour mettre l’appareil sous tension. Le
message LANGUAGE SELECT MENU apparaît.
LANGUAGE SELECT MENU
1:English
2:French
3:German
4:Italian
5:Spanish
ENTVUP
vDWN
2 Appuyez sur la touche de fonction correspondant à
↑ UP ou ↓ DWN pour amener le curseur sur la langue
souhaitée et appuyez sur la touche de fonction
correspondant à ENT.
Les indications sur l’afficheur apparaissent maintenant
dans la langue sélectionnée.
2
7-FR
Préparatifs
Page 40

Pour changer de langue
Appuyez sur POWER pour éteindre l’appareil et répétez
l’étape 1.
Remarques
• La langue sélectionnée ne s’applique qu’aux indications affichées
et non pas aux données FM transmises. Les données FM seront
donc dans la langue de la zone de diffusion.
•Les trois fenêtres d’affichage indiquées ci-dessous seront en
anglais, même si vous sélectionnez une autre langue.
LANGUAGE SELECT MENU
1:English
2:French
3:German
4:Italian
5:Spanish
(voir page 7)
To Retrieve Stored
Data While Receiver
Downloads.
M2:Free Programs
ENTVUP
vDWN
(voir page 13)
Choices for
Retrieving
Stored Data.
H-PAGE:Station Menu
MSG:Last Message
PAGE:Last Page
H-PAGE
(voir page 13)
8-FR
M2
MSG
PAGE
Page 41

”Fonctionnement de la radio
Accord manuel
POWER
ENTER
Touches
de fonction
2
TUNE +/–
VOLUME
NEWS•MUSIC
1 Branchez un casque stéréo sur la prise 2 .
2 Appuyez sur POWER pour mettre l’appareil sous
tension.
3 Appuyez sur TUNE +/– pour accorder manuellement la
station souhaitée.
Si vous maintenez la pression sur TUNE +/–, les fréquences
seront parcourues plus rapidement. Relâchez la touche pour
vous arrêter sur une station.
4 Ajustez le volume avec VOLUME.
Pour éteindre l’appareil
Appuyez sur POWER.
9-FR
Fonctionnement de la radio
Page 42

Préréglage des stations
Cet appareil a été préréglé initialement sur 5 stations radio FM.
Vous pouvez cependant changer ces 5 stations et choisir vos
stations préférées.
1 Appuyez sur POWER pour mettre l’appareil sous
tension.
2 Appuyez sur TUNE +/– pour accorder manuellement la
station souhaitée.
3 Appuyez sur ENTER.
Lorsque “PRÉRÉGLAGE” clignote sur l’afficheur, appuyez sur
une des touches de fonction pour prérégler la station. Le bip
retentit deux fois par le casque et votre station préférée est
préréglée sur la touche de fonction sélectionnée.
FM
97.5
PRÉRÉGLAGE
87.5
92.0 98.0
0
MHz
108.0104.3
FM
97.5
PRÉRÉGLAGE
97.5
92.0 98.0
0
MHz
108.0104.3
Pour changer une station radio
préréglée
Recommencez à partir de l’étape 1 et appuyez sur la touche de
fonction dont vous voulez changer la station à l’étape 3.
La station préréglée sur la touche de fonction sélectionnée est
supprimée et remplacée par la nouvelle station.
10-FR
Page 43

Ecoute d’une station préréglée
Une fois que vos stations préférées ont été préréglées, appuyez
simplement sur la touche de fonction correspondante pour
rappeler et accorder la station souhaitée.
1 Appuyez sur POWER pour mettre l’appareil sous
tension.
2 Appuyez sur la touche de fonction souhaitée
correspondant à la station préréglée que vous voulez
accorder.
Amélioration de la réception radio FM
Déployez complètement le cordon de casque qui sert
d’antenne FM.
Restitution d’un son plus clair
Pour écouter des informations, réglez le sélecteur
NEWS•MUSIC sur NEWS pour obtenir de meilleurs résultats.
Les voix seront plus aiguës et claires. Pour écouter de la
musique, réglez le sélecteur NEWS•MUSIC sur MUSIC pour
obtenir de meilleurs résultats.
NEWS MUSIC
11-FR
Fonctionnement de la radio
Page 44

”Visualisation de données FM
Visualisation d’informations sur le récepteur
Vous pouvez recevoir des informations de dernière heure et les
lire pendant la réception d’une émission radio FM par grâce à
la réception FM multiplex qui est transmise par une station de
radiodiffusion FM spéciale. Vous pouvez aussi choisir une des
7 langues (anglais, français, allemand, italien, espagnol,
hollandais, suédois) pour l’affichage des indications. (Voir
page 7 “Sélection de la langue”.)
Indicateur de
données (DATA)( )
Touches de
fonction
1 Branchez un casque stéréo sur la prise 2 .
Comme le cordon de casque sert d’antenne FM, veillez à
raccorder le casque même lorsque vous lisez seulement les
données FM diffusées.
2 Appuyez sur POWER pour mettre l’appareil sous
tension.
3 Accordez une station de diffusion FM multiplex.
POWER
FM DATA
2
12-FR
Page 45

4 Appuyez sur FM DATA pour recevoir les émissions FM
multiplex.
L’indicateur de données (DATA) apparaît lorsqu’une émission
FM multiplex peut être reçue dans la région. (Pour les détails
sur l’indicateur de données, voir page 14.)
Ensuite, le menu suivant (Affichage complet d’index) apparaît
avec les menus correspondant aux touches de fonction.*
To Retrieve Stored
Data While Receiver
Downloads.
M2:Free Programs
M2
* Les menu varient selon les stations radio de la région diffusant
des émissions FM multiplex.
5 Appuyez sur la touche de fonction correspondant à M2.
La fenêtre de sélection de type d’informations apparaît.
H-PAGE: Emission FM multiplex
MSG: Message urgent
PAGE: Message personnel
Choices for
Retrieving
Stored Data.
H-PAGE:Station Menu
MSG:Last Message
PAGE:Last Page
H-PAGE
MSG
PAGE
Visualisation de données FM
13-FR
Page 46

Pour voir les données FM transmises
1 Appuyez sur la touche de fonction correspondant à
H-PAGE.
2 Sélectionnez le menu souhaité en appuyant sur la
touche de fonction correspondante pour recevoir
d’autres informations, le cas échéant.
Indicateur de données
L’apparition de l’indicateur de données (DATA) (1) signale que
des informations FM multiplex sont disponibles.
DATA
Indicateur allumé
La station accordée transmet des informations FM
multiplex et le signal de réception est suffisamment
puissant.
Indicateur éteint
La station accordée ne transmet pas d’informations FM
multiplex ou le signal de réception n’est pas assez
puissant.
Lors de la réception d’informations FM
multiplex
Selon la puissance du signal, le son est reçu mais les données
FM peuvent ne pas apparaître. A l’intérieur de bâtiments et
dans des zones souterraines, la réception des données peut être
impossible ou de très mauvaise qualité et, par conséquent,
durer un certain temps. Dans ce cas, essayez de déployer
complètement le cordon de casque puisqu’il sert d’antenne
FM.
14-FR
Page 47

Réception d’informations urgentes
Si une information urgente est diffusée pendant la réception de
données FM, vous entendrez un bip par le casque et
l’information urgente sera automatiquement affichée à la place
des données FM. Lorsque vous recevez des informations
urgentes, l’indicateur de données (DATA) et l’indicateur de
message urgent (MSG) apparaissent sur la gauche de
l’afficheur. Appuyez sur une touche quelconque pour arrêter
le bip.
DATA
MSG
Pour passer à la page suivante, suivez les instructions
contenues dans l’émission reçue.
Pour revenir à l’affichage des données FM, appuyez sur BACK.
Réception d’un message personnel
Lorsque vous recevez un message personnel, vous
pouvez entendre des bips par le casque et
l’indicateur de message personnel (PAGE)
correspondant clignote sur la gauche de l’afficheur.
(Il n’y a pas d’indication)
Appuyer sur une touche pour arrêter le bip.
Lorsque vous affichez le message personnel reçu,
l’indicateur cesse de clignoter et reste allumé.
Pour lire un message personnel, utilisez BACK pour afficher la
fenêtre de sélection suivante, puis appuyez sur la touche de
fonction correspondant à PAGE.
Pour revenir à l’affichage des données FM, appuyez sur BACK.
H-PAGE
MSG
PAGE
DATA
PAGE
15-FR
Visualisation de données FM
Page 48

Remarques
• Lorsque vous appuyez sur l’option H-PAGE, MSG ou PAGE
pour recevoir des données, “Réception données!” apparaît. Si
aucune donnée n’est reçue dans les 20 secondes qui suivent,
l’affichage précédent réapparaîtra.
(( ))
Réception données!
• Si la réception est de mauvaise qualité, l’indicateur de données
(DATA) disparaît, mais “Réception données!” reste affiché
pendant 10 secondes environ. Ensuite, “Signal trop faible” este
affiché pendant 10 secondes environ, puis l’affichage précédent
est rétabli.
(( ))
Réception données! Signal trop faible
Pour recevoir seulement des émissions
audio FM et changer de station ou de
station préréglée
Appuyez sur FM DATA.
Pour revenir à de l’écran ci-dessus
Appuyez sur BACK.
16-FR
Page 49

Pour revenir à la première page
Appuyez sur la touche de fonction correspondant à H-PAGE
sur l’afficheur.
Visualisation de données FM
17-FR
Page 50

Sauvegarde des informations affichées
Vous pouvez sauvegarder jusqu’à 8 pages d’informations
importantes que vous pourrez rappeler par la suite.
SAVE/MENU
Touches de
fonction
1 Affichez l’information que vous voulez sauvegarder.
2 Appuyez sur SAVE/MENU.
INSCR
LIRE
3 Appuyez sur la touche de fonction correspondant à
INSCR sur l’afficheur.
Remarque
Si vous essayez de sauvegarder une
nouvelle page d’information alors
que 8 pages sont déjà sauvegardées,
le message de droite apparaîtra.
Le cas échéant, supprimez les
données dont vous n’avez plus
besoin. (Pour les détails, voir “Suppression d’informations
sauvegardées” page 19.)
2
CONFIG
Mme pleine !
Supprimer données
inutiles pour créer
espace !
BACK : Retour
18-FR
Page 51

Pour rappeler des informations
sauvegardées
Appuyez sur SAVE/MENU. Appuyez ensuite sur la touche de
fonction correspondant à LIRE sur l’afficheur.
Pour afficher la page suivante, appuyez une seconde fois sur la
touche de fonction correspondant à LIRE.
SUPP LIRE
8
CONFIG
Suppression d’informations sauvegardées
1 Appuyez sur la touche de fonction correspondant à
LIRE pour afficher l’information que vous voulez
supprimer.
SUPP LIRE
8
2 Appuyez sur la touche de fonction correspondant à
SUPP.
SUPP ? OUI NON
Appuyez sur la touche de fonction correspondant à OUI
pour supprimer.
Appuyez sur la touche de fonction correspondant à NON
pour annuler.
CONFIG
19-FR
Visualisation de données FM
Page 52

Réglage des fonctions
Vous pouvez régler certaines fonctions, comme l’arrêt
automatique de l’appareil et la zone de réception.
SAVE/MENU
POWER
Touches de
fonction
1 Appuyez sur POWER pour mettre l’appareil sous
tension.
2 Appuyez sur SAVE/MENU.
3 Appuyez sur la touche de
fonction correspondant à
CONFIG.
L’affichage Menu principal
Mode 1 apparaît.
4 Appuyez sur la touche de
fonction correspondant à CONFG sur l’afficheur.
5 Appuyez sur la touche de
fonction correspondant à
↑ HAUT ou ↓ BAS pour
amener le curseur sur
“Confg Fonctions”, puis
appuyez sur la touche de
fonction correspondant à ENT.
Les noms des fonctions apparaissent.
20-FR
2
Menu de réglage
Confg Fonctions
Mode d'entretien
DÉBUT
Fonction de réglage
Arrêt Auto OUI
Zone réception EURO
+–VHAUT
ENTVHAUT
vBAS
vBAS
Page 53

Remarque
Si vous entrez dans “Mode d’entretien” de “Menu de réglage”,
appuyez sur BACK pour revenir à l’affichage précédent, Le Mode
d’entretien ne sert pas pour le fonctionnement de la radio.
Pour valider l’arrêt automatique
Lorsque que vous validez l’arrêt automatique (ON) et ne
touchez aucune touche en l’espace de 120 minutes, lorsque
l’appareil est sous tension, l’alimentation de l’appareil est
automatiquement coupée.
1 Appuyez sur la touche de
fonction correspondant à
↑ HAUT ou ↓ BAS pour
Fonction de réglage
Arrêt Auto OUI
Zone réception EURO
amener le curseur sur
“Arrêt Auto”.
+–VHAUT
vBAS
2 Appuyez sur la touche de fonction correspondant à +
ou – pour valider ou non la fonction.
Remarque
Si vous n’appuyez sur aucune touche pendant la réception de
données (DATA) FM et si l’indicateur de données n’est pas
allumé (ce qui signifie que l’émission FM multiplex n’est pas
reçue), le mode de données FM sera annulé automatiquement
dans les 20 minutes et seul le son sera reçu.
Visualisation de données FM
21-FR
Page 54

Pour sélectionner la zone de réception
Pour sélectionner le format du signal de réception,
sélectionnez un des deux modes de réception: EURO ou USA.
1 Appuyez sur la touche de
fonction correspondant à
↑ HAUT ou ↓ BAS pour
Fonction de réglage
Arrêt Auto OUI
Zone réception EURO
amener le curseur sur
“Zone réception”.
+–VHAUT
vBAS
2 Appuyez sur la touche de fonction correspondant à +
ou – pour régler le mode de réception sur EURO ou
USA.
Si vous utilisez l’appareil aux Etats-Unis, réglez le
mode sur USA.
Remarque
Si vous appuyez sur la touche de fonction correspondant à des ID
sur l’afficheur, vous pourrez voir votre ID et mot de passe, mais ils
sont inutiles pour la réception d’émissions radio. Appuyez sur la
touche de fonction correspondant à DÉBUT sur l’afficheur pour
revenir à l’affichage précédent.
(Pour les détails, voir “Numéros d’identification (ID)” à la page 23.)
22-FR
Page 55

”Informations diverses
Numéros d’identification (ID)
Il y a trois types de numéros d’identification, comme suit:
Votre ID: pour la messagerie personnelle (radiomessagerie)
ID de groupe DDJ: pour les services d’informations groupés.
ID de code: pour d’autres services libres.
Ces trois numéros d’identification ont été préréglés en usine.
Vous n’avez pas besoin d’enregistrer vos numéros ni de
confirmer ces numéros auprès des opérateurs pour la réception
radio.
Si l’opérateur vous contacte, veuillez procédez de la façon
suivante.
1 Appuyez sur POWER pour mettre l’appareil sous
tension.
2 Appuyez sur SAVE/MENU.
3 Appuyez sur la touche de fonction correspondant à
CONFIG sur l’afficheur.
4 Appuyez sur la touche de fonction correspondant à
C ID sur l’afficheur.
Numéro ID
Votre ID ##########
ID de groupe DDJ ##
ID de code ##
Dates expiration ##
DÉBUT
Vous pouvez vérifier votre numéro d’identification sur cet
afficheur.
ENTVHAUT
vBAS
Informations diverses
23-FR
Page 56

Pour vérifier un ID de groupe DDJ
Appuyez sur la touche de fonction correspondant à ↑ HAUT
ou ↓ BAS pour amener le curseur sur “ID de groupe DDJ”,
puis appuyez sur la touche de fonction correspondant à ENT
pour sélectionner “ID de groupe DDJ.
ID Groupe DDJ ##
########## Jan. 9,99
########## DENF
DG-ID 3 Fév.11,99
DG-ID 4 Mar.12,00
DG-ID 5 Avr.13,01
Si le numéro ID de groupe DDJ est enregistré, le numéro ID et
les dates d’expiration apparaîtront sur l’afficheur. Vous
pouvez souscrire un abonnement à 12 services DDJ-ID.
Appuyez sur la touche de fonction correspondant à ↑ HAUT
ou ↓ BAS pour faire défiler l’affichage.
Si DENF est affiché comme date d’expiration, la période de
souscription est illimitée.
V
HAUT
vBAS
Pour vérifier le code
Appuyez sur la touche de fonction correspondant à ↑ HAUT
ou ↓ BAS pour amener le curseur sur “ID de code”, puis
appuyez sur la touche de fonction correspondant à ENT pour
sélectionner “ID de code”.
24-FR
Page 57

ID de code ##
Code-ID1 2281701###
Code-ID2
Code-ID3
Code-ID4
Code-ID5
SUPP
ENTVHAUT
Lorsque le code est enregistré, le numéro ID apparaît sur
l’afficheur. Vous pouvez enregistrer en tout 8 codes. Appuyez
sur la touche de fonction correspondant à ↑ HAUT ou ↓ BAS
pour faire défiler l’affichage.
vBAS
Pour enregistrer et corriger un code
Appuyez sur la touche de fonction correspondant à ↑ HAUT
ou ↓ BAS pour amener le curseur sur un code vide ou sur le
code à corriger sur l’affichage précédent. Appuyez sur la
touche de fonction correspondant à ENT pour passer à
l’affichage d’édition de code.
ID de code ##
Code-ID # 2281701###
FIN + –
Appuyez sur la touche de fonction correspondant à + ou –
pour entrer la valeur du code. La plage de valeur va de
2281701376 à 2281701631.
Après avoir indiqué la valeur, appuyez sur la touche de
fonction correspondant à FIN pour la valider et terminer le
réglage.
25-FR
Informations diverses
Page 58

Pour vérifier les dates d’expiration
Appuyez sur la touche de fonction correspondant à ↑ HAUT
ou ↓ BAS pour amener le curseur sur les dates d’expiration.
Appuyez sur la touche de fonction correspondant à ENT pour
sélectionner les dates d’expiration.
Dates expiration
Catégor. 1 DENF
Catégor. 2 Sep.10,99
Catégor. 3 Jun. 2,99
Catégor. 4 Jul. 3,00
Catégor. 5 Aoû. 4,01
Lorsque les dates d’expiration sont enregistrées, elles
apparaissent sur l’afficheur. Vous pouvez enregistrer en tout
15 dates d’expiration. Appuyez sur la touche de fonction
correspondant à ↑ HAUT ou ↓ BAS pour faire défiler
l’affichage.
V
HAUT
vBAS
26-FR
Page 59

Utilisation du pied
Levez le pied derrière l’appareil pour incliner l’appareil de
manière à mieux voir l’afficheur.
Spécifications
Plage de fréquences 87,5 – 108 MHz
FM multiplex Type DARC
Sortie Prise 2 (minijack stéréo)
Puissance de sortie 8 mW + 8 mW (à 10% de distorsion
Alimentation CC 3 V, deux piles R6 (format AA)/
Fonction d’arrêt automatique
Dimensions 116 x 70,5 x 28 mm (l/h/p)
Poids Approx. 150 g (5,3 on) avec les piles
Accessoire fourni Casque stéréo (1)
Pour les utilisateurs en France
En cas de remplacement du casque/écouteurs, référez-vous
aux modèles de casques/écouteurs adaptés à votre appareil et
indiqués ci-dessous.
MDR-E741
La conception et les spécifications peuvent être modifiées sans
préavis.
Afficheur LCD FSTN 64 x 132
harmonique)
Piles LR6
Approx. 120 minutes
5
⁄8 x 27⁄8 x 11⁄8 pouces) projections
(Env. 4
et saillies non comprises
27-FR
Informations diverses
Page 60

Précautions
• Faites fonctionner l’appareil sur le courant continu de 1,5 V
seulement avec deux piles R6 (format AA).
• Evitez d’exposer l’appareil à des températures extrêmes, à la
lumière directe du soleil, à l’humidité, au sable, à la poussière et
à des chocs mécaniques. Ne laissez jamais l’appareil dans une
voiture garée en plein soleil.
• Si un solide ou un liquide tombe dans l’appareil, enlevez les
piles et faites-le vérifier par un technicien avant de le remettre
sous tension.
• Pour nettoyer le coffret, utilisez un chiffon doux imprégné d’une
solution neutre de détergent.
• Dans les véhicules et les bâtiments, la réception radio peut être
difficile ou parasitée. Essayez d’écouter près d’une fenêtre.
Remarques sur le casque
A pleine puissance, l’écoute prolongée du baladeur peut
endommager l’oreille de l’utilisateur.
Sécurité routière
N’écoutez pas au casque pendant la conduite d’une voiture, d’une
moto ou de tout autre véhicule motorisé. Vous risquez de causer un
accident de la circulation. Il est interdit dans certains pays
d’écouter au casque en conduisant.
Il peut être également dangereux d’écouter au casque à volume
élevé en marchant, en particulier aux croisements. Soyez toujours
extrêmement prudent et n’utilisez pas l’appareil dans les situations
présentant des risques d’accident.
Prévention des lésions auditives
Evitez d’écouter au casque à volume élevé. Les spécialistes
déconseillent une écoute continue à un volume trop élevé. Si vous
percevez un sifflement dans les oreilles, réduisez le volume ou
cesser d’écouter.
28-FR
Page 61

Civisme
Ecoutez à un volume modéré. Vous pourrez entendre les sons
extérieurs et ne gênerez pas les gens autour de vous.
Avertissement
En cas d’éclairs, cessez d’écouter et enlevez immédiatement le
casque.
Pour toute question ou difficulté concernant cet appareil, veuillez
consulter votre revendeur Sony.
En cas de panne
Si un problème se présente lorsque vous utilisez l’appareil,
faites les vérifications suivantes pour déterminer si une
réparation est nécessaire. Si le problème persiste, consultez
votre revendeur Sony.
La réception est instable et parasitée.
• Les piles sont faibles. Remplacez-les par des neuves.
• La réception est de mauvaise qualité, lorsque des obstacles,
bâtiments, etc. font obstruction, ou lorsque vous écoutez dans
une voiture. Allez dans un endroit dégagé pour mieux recevoir le
signal, ou écouter la radio près d’une fenêtre.
Vous ne recevez pas la station souhaitée lorsque
vous appuyez sur la touche de fonction
correspondante.
• Assurez-vous d’avoir appuyé sur la bonne touche.
La réception FM multiplex est impossible.
• Assurez-vous que le casque est raccordé.
• Assurez-vous que la station radio que vous écoutez offre des
services FM multiplex.
• Assurez-vous que l’indicateur de données est affiché.
L’appareil ne fonctionne pas lorsque vous
appuyez sur une touche.
Appuyez sur la touche RESET au dos de l’appareil avec un objet fin
et pointu. Toutes les stations radio et les informations sauvegardées
seront supprimées. Le cas échéant, préréglez à nouveau les stations.
29-FR
Informations diverses
Page 62

Description des éléments et commandes
Reportez-vous aux pages entre parenthèses pour les détails.
Appareil principal
1
2
3
4
5
1 Afficheur (31)
2 Indicateur de données
(DATA) (1) (14)
3 Touche de retour
(BACK) (15)
4 Touche de validation
(ENTER) (7, 9)
5 Touches de fonction (7,
9, 12, 18, 20)
30-FR
6
7
8
9
!º
!¡
6 Touche de
sauvegarde/menu
(SAVE/MENU) (18, 20)
7 Interrupteur
d’alimentation
(POWER) (7, 9, 12, 20)
8 Touche de données FM
(FM DATA) (12)
9 Réglage de volume
(VOLUME) (9)
0 Sélecteur
Informations/Musique
(NEWS•MUSIC) (11)
!¡ Touche d’accord
(TUNE +/–) (9, 10)
Page 63

Afficheur
1
2
3
1 Indicateur de données
(DATA) (1) (14)
2 Indicateur de message
urgent (MSG) (15)
3 Indicateur de message
personnel (PAGE) (15)
FM
DATA
87.5
MSG
PAGE
87.5
PRÉRÉGLAGE
92.0 9 8.0
0
MHz
108.0104.3
4 Fréquence (10)
5 Stations préréglées (10)
4
5
Informations diverses
31-FR
Page 64

Index
A, B, C
Amélioration de la
réception radio FM ............. 11
Arrêt automatique .............. 21
D
Dates d’expiration .............. 26
E, F, G, H
Emission FM multiplex.. 4, 14
I, J, K, L
ID de code ...................... 24, 25
ID de groupe DDJ ............... 24
Indicateur de données
(DATA) ................................. 14
Informations urgentes........ 15
M, N, O
Message
personnel (PAGE) ............... 15
P, Q, R
Piles......................................... 5
S, T
Sources d’alimentation
externes .................................. 6
U, V, W, X, Y
Utilisation du pied.............. 27
Z
Zone de réception ............... 21
32-FR
Page 65

Page 66

Vor dem Betrieb
Füllen Sie bitte die folgende Liste aus, um die
Informationen zur Hand zu haben, wenn Sie das Gerät als
gestohlen melden müssen. Serien- und Modellnummer
stehen auf der Rückseite des Geräts.
Wichtige Informationen zum Gerät:
Modellnummer
Seriennummer
ID-Nummer
Kaufdatum
Kaufort
Bitte Eintragen
Digital DJ System E2 ist ein
eingetragenes Warenzeichen der
Digital DJ Inc.
2-DE
Page 67

Inhaltsverzeichnis
Vorbereitungen .............................................................................. 4
Merkmale ....................................................................................... 4
Die ersten Schritte
Einlegen der Batterien.................................................................. 5
Wahl der Sprache.......................................................................... 7
Radiobetrieb
Manuelle Abstimmung ................................................................ 9
Stationsvorwahl .......................................................................... 10
Anzeigen der UKW-Daten
Anzeigen der Informationen im Display des Receivers ....... 12
Sichern der angezeigten Informationen .................................. 17
Löschen von gesicherten Informationen ................................. 19
Funktionseinstellungen ............................................................. 20
Zusatzinformationen
Die ID-Nummern ....................................................................... 23
Verwendung des Ständers ......................................................... 27
Technische Daten........................................................................ 27
Zur besonderen Beachtung ....................................................... 28
Störungsüberprüfungen ............................................................ 29
Bezeichnung der Bedienungselemente ................................... 30
Stichwortverzeichnis .................................................................. 32
DE
3-DE
Page 68

Vorbereitungen
Wir beglückwünschen Sie zu diesem Sony UKW-DatenReceivers und sind überzeugt davon, daß Sie lange Freude an
diesem modernen Gerät haben werden.
Bevor Sie das Gerät in Betrieb nehmen, lesen Sie bitte diese
Anleitung sorgfältig durch, und bewahren Sie sie zum
Nachschlagen gut auf.
Merkmale
•UKW-Stereoempfang
•Empfang von Text- und Grafikdaten mit hoher
Geschwindigkeit.
•Fünf praktische Funktionstasten zur bequemen Steuerung
des Datenempfangs.
•Automatische Anzeige von Alarmmeldungen (nur bei UKWMultiplexempfang).
•Ausschaltautomatik schaltet das Gerät automatisch nach
etwa 120 Minuten aus, um unnötigen Stromverbrauch zu
vermeiden.
•Für die Menüanzeige kann zwischen sieben Sprachen
(Englisch, Französisch, Deutsch, Italienisch, Spanisch,
Holländisch und Schwedisch) gewählt werden.
Was ist UKW-Multiplexempfang?
Einige UKW-Sender strahlen im sogenannten
Multiplexverfahren neben dem eigentlichen Programm
noch Zusatzdaten (Text und Grafik) aus. Mit normalen
Radios können diese Zusatzdaten nicht empfangen
werden.
4-DE
Page 69

”Die ersten Schritte
Einlegen der Batterien
Öffnen Sie den Batteriefachdeckel und legen zwei R6/AA-Batterien
(nicht mitgeliefert) mit richtiger Polarität ein.
DC IN 3V
÷
Batterie-Lebensdauer (ungefähre Angaben in Stunden)
Sony Alkalibatterie LR6(SG) Sony Batterie R6(SR)
Nur Tonwiedergabe 35 14
UKW-Multiplexempfang 23 9
• Für optimale Leistung wird die Verwendung von Alkalibatterien
empfohlen.
Wann müssen die Batterien ausgewechselt werden?
Wechseln Sie die Batterien aus, wenn „BATTERIE SCHWACH”
angezeigt wird.
Hinweise
• Legen Sie die Batterien mit richtiger Polarität ein.
• Trockenbatterien können nicht wieder aufgeladen werden.
• Schalten Sie das Gerät vor dem Batteriewechsel aus. Der
Batteriewechsel sollte nicht länger als 20 Sekunden dauern, da
sonst die gespeicherten Informationen und die gespeicherten
Sender gelöscht werden. Notieren Sie sich vor dem
Batteriewechsel sicherheitshalber alle wichtigen Daten. Falls
erforderlich, speichern Sie die Sender nach dem Batteriewechsel
erneut ab.
• Wenn das Gerät längere Zeit nicht verwendet wird, nehmen Sie
die Batterien heraus, um Korrosionsschäden durch ausgelaufene
Batterien zu vermeiden.
zwei Mignonzellen
(R6/Größe AA)
5-DE
Die ersten Schritte
Page 70

Automatische Ausschaltung
Wenn die Funktion „Automatische Ausschaltung” aktiviert ist,
schaltet sich das Radio automatisch nach etwa 120 Minuten
aus, um unnötigen Stromverbrauch zu vermeiden. Wenn Sie
weiter Radio hören wollen, drücken Sie in einem solchen Fall
POWER.
Wenn sich das Radio vor Ablauf der Zeitspanne ausschaltet
und mit POWER nicht mehr eingeschaltet werden kann, sind
die Batterien erschöpft. Wechseln Sie die Batterien dann aus.
Zum Einstellen der Funktionen siehe „Einstellen der
automatischen Ausschaltfunktion” auf Seite 21 im Kapitel
„Funktionseinstellungen”.
Externe Stromversorgung
An der DC IN 3V-Buchse an der Seite des Geräts können
folgende externe Stromquellen angeschlossen werden. (Die
internen Batterien werden dabei automatisch abgeschaltet.)
•Sony Netzadapter AC-E30HG (nicht mitgeliefert) für Betrieb
am Stromnetz.
•Sony Autobatteriekabel DCC-E230 (nicht mitgeliefert) für
Betrieb an 12/24-V-Autobatterie.
Hinweise
• Auch bei externer Stromversorgung sollten die internen Batterien
nicht herausgenommen werden, da sie als Pufferbatterien für den
Speicher dienen.
• Verwenden Sie nur den empfohlenen Sony Netzadapter und das
empfohlene Sony Autobatteriekabel. Polarität und Steckerform
sind bei anderen Herstellern möglicherweise unterschiedlich.
6-DE
Polarität des Steckers
Page 71

Wahl der Sprache
Für die Anzeigen im Display kann unter den Sprachen
Englisch, Französisch, Deutsch, Italienisch, Spanisch,
Holländisch und Schwedisch gewählt werden.
POWER
ENTER
Funktionstasten
2
1 Halten Sie ENTER gedrückt, und drücken Sie
gleichzeitig POWER, um das Gerät einzuschalten. Das
LANGUAGE SELECT MENU erscheint.
LANGUAGE SELECT MENU
1:English
2:French
3:German
4:Italian
5:Spanish
2 Drücken Sie die Funktionstaste ↑ UP oder ↓ DWN, um
die gewünschte Sprache zu wählen, und drücken Sie
dann die Funktionstaste ENT. Die Anzeigen im Display
ändern sich entsprechend der gewählten Sprache.
ENTVUP
vDWN
Die ersten Schritte
7-DE
Page 72

Erneutes Ändern der Sprache
Schalten Sie das Gerät durch Drücken von POWER aus,
und beginnen Sie dann erneut ab Schritt 1.
Hinweise
•Die Sprache der empfangenen UKW-Daten hängt vom
Sender ab und kann nicht umgeschaltet werden. Die
Umschaltung der Sprache betrifft nur die Menüanzeigen im
Display.
•Die folgenden drei Menüs sind stets in English, auch wenn
Sie einen andere Sprache gewählt haben.
LANGUAGE SELECT MENU
1:English
2:French
3:German
4:Italian
5:Spanish
(auf Seite 7)
To Retrieve Stored
Data While Receiver
Downloads.
M2:Free Programs
ENTVUP
vDWN
(auf Seite 13)
Choices for
Retrieving
Stored Data.
H-PAGE:Station Menu
MSG:Last Message
PAGE:Last Page
H-PAGE
(auf Seite 13)
8-DE
M2
MSG
PAGE
Page 73

”Radiobetrieb
Manuelle Abstimmung
POWER
ENTER
Funktionstasten
2
TUNE +/–
VOLUME
NEWS•MUSIC
1 Schließen Sie den Stereo-Kopfhörer an die 2 -Buchse
an.
2 Drücken Sie POWER, um das Gerät einzuschalten.
3 Drücken Sie TUNE +/–, um auf den gewünschten
Sender abzustimmen.
Wenn Sie TUNE +/– gedrückt halten, ändern sich die
Frequenzziffern in schneller Folge. Beim Loslassen der Taste
stoppen die Frequenzziffern.
4 Stellen Sie mit VOLUME die Lautstärke ein.
Zum Abschalten des Geräts
Drücken Sie POWER.
Radiobetrieb
9-DE
Page 74

Stationsvorwahl
Werksseitig sind bereits fünf UKW-Sender gespeichert. Wenn
Sie fünf eigene Sender speichern wollen, verfahren Sie wie
folgt:
1 Drücken Sie POWER, um das Gerät einzuschalten.
2 Drücken Sie TUNE +/–, um manuell auf den Sender
abzustimmen.
3 Drücken Sie ENTER.
Wenn „VORWAHL” im Display blinkt, drücken Sie die
Funktionstaste, auf der der Sender gespeichert werden
soll.
Mit zwei Pieptönen meldet das Gerät über den Kopfhörer, daß
der Sender gespeichert ist.
FM
0
97.5
VORWAHL VORWAHL
87.5
92.0 98.0
MHz
108.0104.3
FM
97.5
97.5
92.0 98.0
0
MHz
108.0104.3
Ändern der Stationsvorwahl
Wiederholen Sie den obigen Vorgang ab Schritt 1. Drücken Sie
im Schritt 3 die Funktionstaste, deren Speicherung geändert
werden soll.
Die alte Speicherung dieser Taste wird überschrieben.
10-DE
Page 75

Abrufen eines gespeicherten Senders
Die gespeicherten UKW-Sender können wie folgt durch
einfaches Drücken der betreffenden Funktionstasten abgerufen
werden.
1 Drücken Sie POWER, um das Gerät einzuschalten.
2 Drücken Sie die Funktionstaste des gewünschten
Senders.
Für optimalen Empfang
Breiten Sie das Kopfhörerkabel auf volle Länge aus. Das Kabel
dient gleichzeitig als UKW-Antenne.
Für optimale Verständlichkeit bzw.
optimalen Klang
Stellen Sie den NEWS•MUSIC-Wähler bei
Nachrichtensendungen auf NEWS. Die Sprecherstimme ist
dann klarer und besser verständlich. Bei Musiksendungen
stellen Sie den NEWS•MUSIC-Wähler auf MUSIC, um optimale
Klangqualität zu erhalten.
NEWS MUSIC
11-DE
Radiobetrieb
Page 76

”Anzeigen der UKW-Daten
Anzeigen der Informationen im Display des Receivers
Die Multiplexdaten, die von einigen UKW-Sendern
ausgestrahlt werden, können im Display dieses Geräts
angezeigt werden. Für die Menüanzeige im Display können
Sie unter sieben Sprachen (Englisch, Französisch, Deutsch,
Italienisch, Spanisch, Holländisch, Schwedisch) wählen (siehe
„Wahl der Sprache” auf Seite 7).
DATA-Anzeige( )
Funktionstasten
POWER
FM DATA
2
1 Schließen Sie den Stereo-Kopfhörer an die 2-Buchse an.
Da das Kopfhörerkabel als UKW-Antenne dient, muß es auch
dann angeschlossen werden, wenn nur die UKW-Daten im
Display angezeigt werden sollen.
2 Drücken Sie POWER, um das Gerät einzuschalten.
3 Stimmen Sie auf einen UKW-Multiplexsender ab.
12-DE
Page 77

4 Drücken Sie FM DATA, um ein UKW-
Multiplexprogramm zu empfangen.
Wenn ein solches Programm in Ihrem Gebiet empfangen
werden kann, erscheint die DATA-Anzeige. (Einzelheiten zur
DATA-Anzeige finden Sie auf Seite 14.)
Im Display erscheint eine Übersichtsanzeige (siehe folgendes
Beispiel) mit den über die Funktionstasten wählbaren Menüs*.
To Retrieve Stored
Data While Receiver
Downloads.
M2:Free Programs
M2
* Die Menüs hängen von den Sendern Ihres Gebietes ab.
5 Drücken Sie die Funktionstaste M2.
Ein Menü mit den wählbaren Optionen erscheint.
H-PAGE: UKW-Multiplexempfang
MSG: Alarmmeldungen
PAGE: Pager-Meldung
Choices for
Retrieving
Stored Data.
H-PAGE:Station Menu
MSG:Last Message
PAGE:Last Page
H-PAGE
MSG
PAGE
Anzeigen von UKW-Daten
13-DE
Page 78

Anzeigen der UKW-Multiplexdaten
1 Drücken Sie die Funktionstaste H-PAGE.
2 Wenn mehrere Optionen zur Auswahl angeboten
werden, wählen Sie mit den Funktionstasten die
Informationen, die Sie sehen möchten.
Die DATA-Anzeige
Die DATA-Anzeige (1) signalisiert, daß der Sender UKWMultiplexdaten ausstrahlt.
DATA
DATA-Anzeige erscheint
Der Sender wird mit ausreichender Stärke empfangen und
überträgt UKW-Multiplexdaten.
DATA-Anzeige erloschen
Der empfangene Sender überträgt keine UKWMultiplexdaten oder der Empfang ist zu schwach.
Wissenswertes zum UKWMultiplexempfang
Manchmal ist zwar der Ton des Senders zu hören, die
Multiplexdaten werden jedoch nicht einwandfrei empfangen.
Insbesondere in Gebäuden und unter der Erde ist häufig kein
oder kein einwandfreier Datenempfang möglich oder es
dauert relativ lange, bis die Daten vollständig empfangen sind.
Beachten Sie in diesem Zusammenhang auch, daß das
Kopfhörerkabel als UKW-Antenne dient und auf volle Länge
ausgebreitet werden sollte.
14-DE
Page 79

Empfang von Alarmmeldungen
DATA
PAGE
Wenn der empfangene UKW-Multiplexsender eine
Alarmmeldung ausstrahlt, ertönt über den Kopfhörer ein
Piepton und im Display erscheint statt der Datenanzeige
automatisch die Alarmmeldung. Dabei erscheint links im
Display die DATA- und MSG-Anzeige. Durch Drücken einer
beliebigen Taste können Sie den Piepton abschalten.
DATA
MSG
Wenn Sie die nächste Seite sehen wollen, folgen Sie den
Anweisungen im Display.
Durch Drücken von BACK können Sie auf Anzeige der UKWMultiplexdaten zurückschalten.
Empfang von Pager-Meldungen
Wenn eine Pager-Meldung empfangen wird,
ertönt ein Piepton über Kopfhörer und die
PAGE-Anzeige blinkt links im Display.
(Das empfangene Programm wird jedoch
nicht unterbrochen.) Durch Drücken einer
beliebigen Taste können Sie den Piepton abschalten.
Wenn die Pager-Meldung im Display angezeigt wird, hört die
PAGE-Anzeige auf zu blinken (sie erscheint dann ständig).
Zum Anzeigen der Pager-Meldung, rufen Sie durch Drücken
von BACK das Wahlmenü ab und drücken Sie dann die
Funktionstaste PAGE.
Um wieder die UKW-Multiplexdaten anzuzeigen, drücken Sie
BACK.
H-PAGE
MSG
Anzeigen von UKW-Daten
PAGE
15-DE
Page 80

Hinweise
• Nach Drücken von H-PAGE, MSG oder PAGE erscheint
„EMPFANGSDATEN” im Display. Wenn keine Daten
empfangen werden, schaltet das Gerät nach etwa 20 Sekunden
auf die vorausgegangene Anzeige zurück.
(( ))
EMPFANGSDATEN
• Bei schwachem Empfang verschwindet die DATA-Anzeige,
„EMPFANGSDATEN” bleibt jedoch noch etwa zehn Sekunden
lang angezeigt. Danach erscheint „SIGNAL ZU SCHWACH”
etwa zehn Sekunden lang und schließlich wieder die
ursprüngliche Anzeige.
(( ))
EMPFANGSDATEN
Zum ausschließlichen Empfangen des
UKW-Tons und Wahl eines anderen
Senders
Drücken Sie FM DATA.
Zum Zurückschalten auf die
vorausgegangene Anzeige
Drücken Sie BACK.
SIGNAL ZU SCHWACH
Zum Zurückschalten auf die H-PAGE-Anzeige
Drücken Sie die Funktionstaste H-PAGE.
16-DE
Page 81

Sichern der angezeigten Informationen
Bis zu acht Informationsseiten können für gespeichert werden.
SAVE/MENU
Funktionstasten
2
1 Bilden Sie die gewünschte Information im Display ab.
2 Drücken Sie SAVE/MENU.
SCHRB
LESE KQNF
3 Drücken Sie die Funktionstaste SCHRB.
Hinweis
Wenn versucht wird, noch weitere
Seiten zu speichern, obwohl
bereits acht Seiten gespeichert
sind, erscheint die rechts stehende
Meldung. Bevor Sie weitere Seiten
speichern können, müssen Sie
nicht mehr benötigte Seiten löschen. (Einzelheiten finden Sie
unter „Löschen von gespeicherten Informationen” auf Seite
19.)
Speicher voll!
Nicht mehr benötigte
Daten bitte löschen!
BACK : Return
17-DE
Anzeigen von UKW-Daten
Page 82

Zum Abrufen von gespeicherten
Informationen
Drücken Sie SAVE/MENU und dann die Funktionstaste LESE.
Durch nochmaliges Drücken der Funktionstaste LESE können
Sie zur nächsten Seite blättern.
LöSCH
LESE KONF
8
18-DE
Page 83

Löschen von gesicherten Informationen
1 Drücken Sie die Funktionstaste LESE, um die zu
löschende Information anzuzeigen.
LöSCH
LESE KONF
8
2 Drücken Sie die Funktionstaste LÖSCH.
LöSCH? JA
Drücken Sie die Funktionstaste JA , um den
Löschvorgang zu bestätigen.
Oder drücken Sie die Funktionstaste NIEN , um den
Löschvorgang abzubrechen.
NEIN
Anzeigen von UKW-Daten
19-DE
Page 84

Funktionseinstellungen
Zum Einstellen der Optionen „Automatische Ausschaltung”
und „Empfangsbereich” verfahren Sie wie folgt:
SAVE/MENU
POWER
Funktionstasten
2
1 Drücken Sie POWER, um das Gerät einzuschalten.
2 Drücken Sie SAVE/MENU.
3 Drücken Sie die
Funktionstaste KONF.
Das Model 1 Hauptmenü
erscheint.
4 Drücken Sie die Funktionstaste SETUP.
5 Wählen Sie mit den
Funktionstasten ↑ OBN
oder ↓ UNT die Option
„Setup-Funktion”, und
drücken Sie dann die
Funktionstaste EING.
Die Funktionsnamen erscheinen.
Hinweis
Wenn Sie im Setup Menü auf „Wartung” geschaltet haben, können
Sie durch Drücken von BACK auf die ursprüngliche Anzeige
zurückschalten. Der Wartungs-Modus wird nicht für Radiobetrieb
benötigt.
20-DE
Setup-Menü
Funktion Setup
Wartung
HAUPT
Setup-Funktion
Auto Aussch
Empfengsbereich EURO
+–VOBN
EINGVOBN
vUNT
EIN
vUNT
Page 85

Einstellen der automatischen
Ausschaltfunktion
Bei Einstellung auf „Auto Aussch EIN” schaltet sich das Gerät
automatisch aus, wenn 120 Minuten lang keine Taste gedrückt
wird.
1 Wählen Sie mit der
Funktionstaste ↑ OBN
oder ↓ UNT die Option
„Auto Aussch”.
2 Schalten Sie mit der
Funktionstaste + oder –
die Funktion ein oder aus.
Hinweis
Wenn im UKW-Daten-Empfangsmodus keine Taste gedrückt wird
und die DATA-Anzeige nicht leuchtet (also kein
Multiplexprogramm empfangen wird), schaltet das Gerät den
UKW-Daten-Empfangsmodus automatisch ab, so daß nur der Ton
zu hören ist.
Setup-Funktion
Auto Aussch
Empfengsbereich EURO
+–VOBN
EIN
vUNT
Einstellen des Empfangsbereiches
Wählen Sie je nach dem Land des Senders die Option EURO
oder USA.
1 Wählen Sie mit der
Funktionstaste ↑ OBN
oder ↓ UNT die Option
„Empfengsbereich”.
2 Schalten Sie mit der
Funktionstaste + oder – auf EURO oder USA.
Setup-Funktion
Auto Aussch
Empfengsbereich EURO
+–VOBN
EIN
vUNT
Anzeigen von UKW-Daten
21-DE
Page 86

Hinweis
Wenn Sie die Funktionstaste für die IDs drücken, können Sie Ihr ID
und Ihr Paßwort sehen. Diese Informationen werden für
Radiobetrieb jedoch nicht benötigt. Durch Drücken der
Funktionstaste HAUPT können Sie auf die vorausgegangene
Anzeige zurückschalten. (Einzelheiten finden Sie unter „Die IDNummern” auf Seite 23.)
22-DE
Page 87

”Zusatzinformationen
Die ID-Nummern
Zwischen den folgenden drei ID-Nummern wird
unterschieden.
Ihr ID: für persönlichen Rufmeldungsservice.
DDJ Gruppen-ID: für Gruppeninformationsservice.
Paßwort-ID: für freie Zusatzinformationen.
Diese ID-Nummern sind werksseitig voreingestellt. Für
Radioempfang ist es nicht erforderlich, die ID-Nummern
abzuspeichern oder zu bestätigen. Wenn Sie von dem Anbieter
kontaktiert werden, führen Sie die folgenden Schritte aus:
1 Drücken Sie POWER, um das Gerät einzuschalten.
2 Drücken Sie SAVE/MENU.
3 Drücken Sie die Funktionstaste KONF.
4 Drücken Sie die Funktionstaste des betreffenden ID-S.
ID-Nummem
Ihr ID 00########
DDJ Gruppen-ID ##
Paßwort-ID #
Lösch-Datum ##
HAUPT
In diesem Menü können Sie Ihren ID, der im Gerät
abgespeichert ist, überprüfen.
EINGVOBN
vUNT
Zusatzinformationen
23-DE
Page 88

Überprüfen des DDJ Gruppen-ID
Wählen Sie mit der Funktionstaste ↑ OBN oder ↓ UNT die
Option „DDJ Gruppen-ID”, und bestätigen Sie die Wahl dann
durch Drücken der Funktionstaste EING.
DDJ Gruppen-ID ##
########## Jan. 9,99
########## KLD
DG-ID 3
DG-ID 4
DG-ID 5
Wenn ein DDJ Gruppen-ID registriert ist, erscheinen die IDNummer und das Lösch-Datum im Display. Bis zu 12 DDJ-IDAnbieter können registriert werden. Mit den Funktionstasten
↑ OBN und ↓ UNT können Sie die Anzeige nach oben oder
unten verschieben. Wenn das Lösch-Datum nicht festgelegt ist,
erscheint die Anzeige KLD.
V
OBN
vUNT
24-DE
Page 89

Überprüfen des Paßwort-IDs
Wählen Sie mit den Funktionstasten ↑ OBN oder ↓ UNT die
Option „Paßwort-ID”, und bestätigen Sie die Wahl dann durch
Drücken von EING.
Paßwort-ID ##
Paßw-ID 1 2281701###
Paßw-ID 2
Paßw-ID 3
Paßw-ID 4
Paßw-ID 5
LÖSCH
EINGVOBN
Wenn ein Paßwort-ID registriert ist, erscheint die ID-Nummer
im Display. Bis zu acht Paßwörter können registriert werden.
Mit den Funktionstasten ↑ OBN und ↓ UNT können Sie die
Anzeige nach oben oder unten verschieben.
vUNT
Zusatzinformationen
25-DE
Page 90

Registrieren und Korrigieren eines
Paßwort-IDs
Wählen Sie mit der Funktionstaste ↑ OBN oder ↓ UNT ein
freies Paßwort-ID-Feld bzw. den Paßwort-ID, den Sie
korrigieren wollen, und drücken Sie dann die Funktionstaste
EING, um das Paßwort-ID-Editiermenü aufzurufen.
Paßwort-ID ##
Paßw-ID # 2281701###
ENDE
+–
Geben Sie das Paßwort mit der Funktionstaste + oder - ein.
Werte zwischen 2281701376 und 2281701631 können
eingegeben werden.
Beenden Sie die Eingaben durch Drücken der Funktionstaste
ENDE.
Überprüfen des Lösch-Datums
Wählen Sie mit der Funktionstaste ↑ OBN oder ↓ UNT die
Option „Lösch-Datum”, und bestätigen Sie die Wahl dann
durch Drücken von EING.
Lösch-Datum
Kategor. 1 KLD
Kategor. 2 Mai.10,99
Kategor. 3
Kategor. 4
Kategor. 5
Die registrierten Lösch-Daten werden angezeigt. Bis zu 15
Lösch-Daten können registriert werden. Mit den
Funktionstasten ↑ OBN und ↓ UNT können Sie die Anzeige
nach oben oder unten verschieben.
V
OBN
vUNT
26-DE
Page 91

Verwendung des Ständers
Mit dem Ständer können Sie das Gerät so aufstellen, daß das
Display optimal zu sehen ist.
Technische Daten
Empfangsbereich 87,5 – 108 MHz
UKW-Multiplexverfahren DARC,
Ausgang 2-Buchse (Stereo-Minibuchse)
Ausgangsleistung 8 mW + 8 mW (bei 10% Klirrgrad)
Stromversorgung 3V Gleichspannung, zwei Mignonzellen
Automatische Ausschaltung
Abmessungen 116 x 70,5 x 28 mm (B/H/T), ausschl.
Gewicht ca. 150 g, einschl. Batterie
Mitgeliefertes Zubehör Stereo-Kopfhörer (1)
Änderungen, die dem technischen Fortschritt dienen, bleiben
vorbehalten.
64 x 132 FSTN LCD-Anzeige
(R6/LR6, Größe AA)
nach ca. 120 Minuten
vorspringender Teile und
Bedienungselemente
Zusatzinformationen
27-DE
Page 92

Zur besonderen Beachtung
• Betreiben Sie das Gerät nur mit 1,5 V Gleichspannung (zwei R6/
AA-Batterien).
• Halten Sie das Gerät vor extremen Temperaturen, direktem
Sonnenlicht, Feuchtigkeit, Sand, Staub und mechanischen
Stößen fern. Lassen Sie es niemals in einem in der Sonne
geparkten Auto zurück.
• Wenn ein Fremdkörper in das Gerät gelangt, nehmen Sie die
Batterien heraus, und lassen Sie das Gerät von Fachpersonal
überprüfen, bevor Sie es weiterverwenden.
• Zur Reinigung des Gehäuses verwenden Sie ein weiches, leicht
mit mildem Haushaltsreiniger angefeuchtetes Tuch.
• In Fahrzeugen und Gebäuden ist der Empfang häufig schwach.
Betreiben Sie das Gerät dann möglichst in der Nähe eines
Fensters.
Hinweise zum Kopfhörer
Verkehrssicherheit
Verwenden Sie den Kopfhörer nicht beim Auto-, Motorrad-,
Radfahren usw., da dies gegen die Verkehrsregeln verstößt
und gefährlich ist. Auch als Fußgänger sollten Sie den
Kopfhörer nicht mit zu hoher Lautstärke verwenden, da dies
insbesondere an Fußgängerüberwegen sehr gefährlich ist.
Nehmen Sie den Kopfhörer in Gefahrensituationen sofort ab.
Vermeidung von Gehörschäden
Betreiben Sie den Kopfhörer nicht mit sehr hoher Lautstärke,
da dies schädlich für Ihre Hörorgane ist. Wenn Sie ein
dumpfes Gefühl in Ihren Ohren verspüren, reduzieren Sie die
Lautstärke oder nehmen Sie den Kopfhörer ab.
Rücksicht auf andere
Bedenken Sie, daß der Schall auch nach außen abgestrahlt
wird und Leute in Ihrer Nähe gestört werden können. Wenn
sich Leute in Ihrer Nähe befinden, stellen Sie nur eine geringe
Lautstärke ein.
28-DE
Page 93

Vorsicht
Nehmen Sie bei einem Gewitter umgehend den Kopfhörer ab.
Bei weiterführenden Fragen wenden Sie sich bitte an den
nächsten Sony Händler.
Störungsüberprüfungen
Gehen Sie bei Problemen die folgende Liste durch, um zu
entscheiden, ob eine Reparatur erforderlich ist oder nicht.
Wenn Sie das Problem nicht selbst beheben können, wenden
Sie sich an Ihren Sony Händler.
Der Empfang ist unstabil und verrauscht.
• Die Batterien sind erschöpft und müssen ausgewechselt werden.
• Das Sendesignal wird durch hohe Gebäude usw. abgeschattet.
Betreiben Sie das Gerät an einer anderen Stelle. Auch in einem
fahrenden Auto ist häufig kein einwandfreier Empfang
gewährleistet. Betreiben Sie das Gerät möglichst in der Nähe
eines Fensters.
Der gespeicherte Sender kann nicht mit der
Funktionstaste abgerufen werden.
• Vergewissern Sie sich, daß Sie die richtige Funktionstaste
gedrückt haben.
Die UKW-Multiplexdaten können nicht empfangen
werden.
• Überprüfen Sie, ob ein Kopfhörer angeschlossen ist.
• Überprüfen Sie, ob der empfangene Sender einen UKWMultiplexservice bietet.
• Überprüfen Sie, ob die DATA-Anzeige erscheint.
Das Gerät reagiert nicht auf Drücken einer Taste.
Drücken Sie mit einem dünnen Stift die RESET-Taste an der
Rückseite des Geräts, um das Gerät zurückzusetzen. Alle
gespeicherten Sender und Informationen werden dabei gelöscht.
Speichern Sie die Sender anschließend wieder ab.
Zusatzinformationen
29-DE
Page 94

Bezeichnung der Bedienungselemente
Einzelheiten finden Sie auf den in Klammern angegebenen
Seiten.
Gerät
1
2
3
4
5
1 Display (32)
2 DATA-Anzeige (1) (14)
3 BACK-Taste (15)
4 ENTER-Taste (7, 9)
5 Funktionstasten (7, 9,
12, 17, 20)
30-DE
6
7
8
9
!º
!¡
6 SAVE/MENU-Taste
(17, 20)
7 POWER-Taste (7, 9, 12,
17, 20)
8 FM DATA-Taste (12)
9 VOLUME-Regler (9)
0 NEWS•MUSIC-
Wahlschalter (11)
!¡ +/– TUNE-Tasten (9,
10)
Page 95

Display
1
2
3
1 DATA-Anzeige (1) (14)
2 MSG-Anzeige (15)
3 PAGE-Anzeige (15)
FM
DATA
87.5
MSG
PAGE
VORWAHL
87.5
92.0 9 8.0
0
MHz
108.0104.3
4 Frequenz (10)
5 Stationsspeicher (10)
4
5
Zusatzinformationen
31-DE
Page 96

Stichwortverzeichnis
A
Alarmmeldungen ............... 15
Automatische
Ausschaltung....................... 21
B, C
Batterien ................................. 5
D
DATA-Anzeige .................... 14
DDJ Gruppen-ID................. 25
E, F, G, H, I, J, K
Empfangsbereich ................ 21
Externe Stromversorgung ... 6
L, M, N
Lösch-Datum ....................... 27
O
Optimaler UKW-
Empfang ............................... 11
P, Q, R, S, T
Pager-Meldung ................... 15
Paßwort-ID .................... 26, 27
U
UKW
-Multiplexempfang......... 4, 14
V, W, X, Y, Z
Verwendung des
Ständers................................ 28
32-DE
Page 97

33-DE
Page 98

Algemene informatie
Aan de achterzijde van het apparaat vindt u het model- en
serienummer. Noteer deze nummers hieronder, zodat u ze
vlot bij de hand heeft in geval van diefstal of verlies van het
apparaat.
Bewaar deze informatie op een veilige plaats.
Modelnummer
Serienummer
Uw identificatiecode
Datum van aankoop
Plaats van aankoop
Memorandum eigenaar
Digital DJ System E2 is een
gedeponeerd handelsmerk van
Digital DJ Inc.
2-NL
Page 99

Inhoudsopgave
Woord vooraf ................................................................................4
Kenmerken .................................................................................... 4
Voorbereidingen
Inleggen van de batterijen ........................................................... 5
Kiezen van de taal ........................................................................ 7
Bediening van de radio
Handmatige afstemming ............................................................. 9
Vastleggen van zenders ............................................................. 10
Kijken naar FM-data
Kijken naar informatie in het uitleesvenster .......................... 12
Opslaan van de informatie die u ziet ...................................... 18
Wissen van de informatie die opgeslagen is...........................19
Instellen van de functies ............................................................ 20
Aanvullende informatie
Identificatiecodes (ID-codes) .................................................... 23
Gebruik van de standaard ......................................................... 27
Technische gegevens .................................................................. 27
Voorzorgsmaatregelen ............................................................... 28
Verhelpen van storingen ............................................................ 29
Plaats van de bedieningsorganen............................................. 30
Index ............................................................................................. 32
NL
3-NL
Page 100

Woord vooraf
Hartelijk dank voor de aanschaf van deze Sony FM datareceiver.
Dit apparaat zal u vele uren luisterplezier verschaffen en kan
tevens ontvangen informatie in het uitleesvenster tonen.
Lees de gebruiksaanwijzing aandachtig door voordat u het
apparaat in gebruik neemt. Bewaar de gebruiksaanwijzing
voor eventuele naslag in de toekomst.
Kenmerken
•FM-stereo radio
•Data-receiver; ontvangst van tekst en grafische gegevens met
hoge snelheid.
•Vijf functietoetsen voor een gebruiksvriendelijke en
intuïtieve bediening.
•Automatische weergave van urgente berichten in het
uitleesvenster tijdens ontvangst van FM-multiplex
uitzendingen.
•Apparaat kan worden ingesteld om na ongeveer 120 minuten
automatisch te worden uitgeschakeld. (Automatische
uitschakelfunctie)
•Keuze uit 7 talen (Engels, Frans, Duits, Italiaans, Spaans,
Nederlands en Zweeds) voor de aanduidingen die in het
uitleesvenster worden getoond.
Omtrent FM-multiex uitzendingen
FM-multiplex uitzendingen verschaffen tekst en
grafische informatie via de vrije signaalruimte in de
frequentie van de normale radio-uitzendingen. Deze
informatie wordt door bepaalde FM-zenders
uitgezonden en kan niet met een normale radio
ontvangen worden.
4-NL
 Loading...