

Page 1
Keypad
4-253-729-11(1)
Installation Guide
RMR-K100
© 2004 Sony Corporation Printed in Malaysia
For the instructions on hookups and setups of the Keypad, see
the CAV-M1000ES Installation Manual.
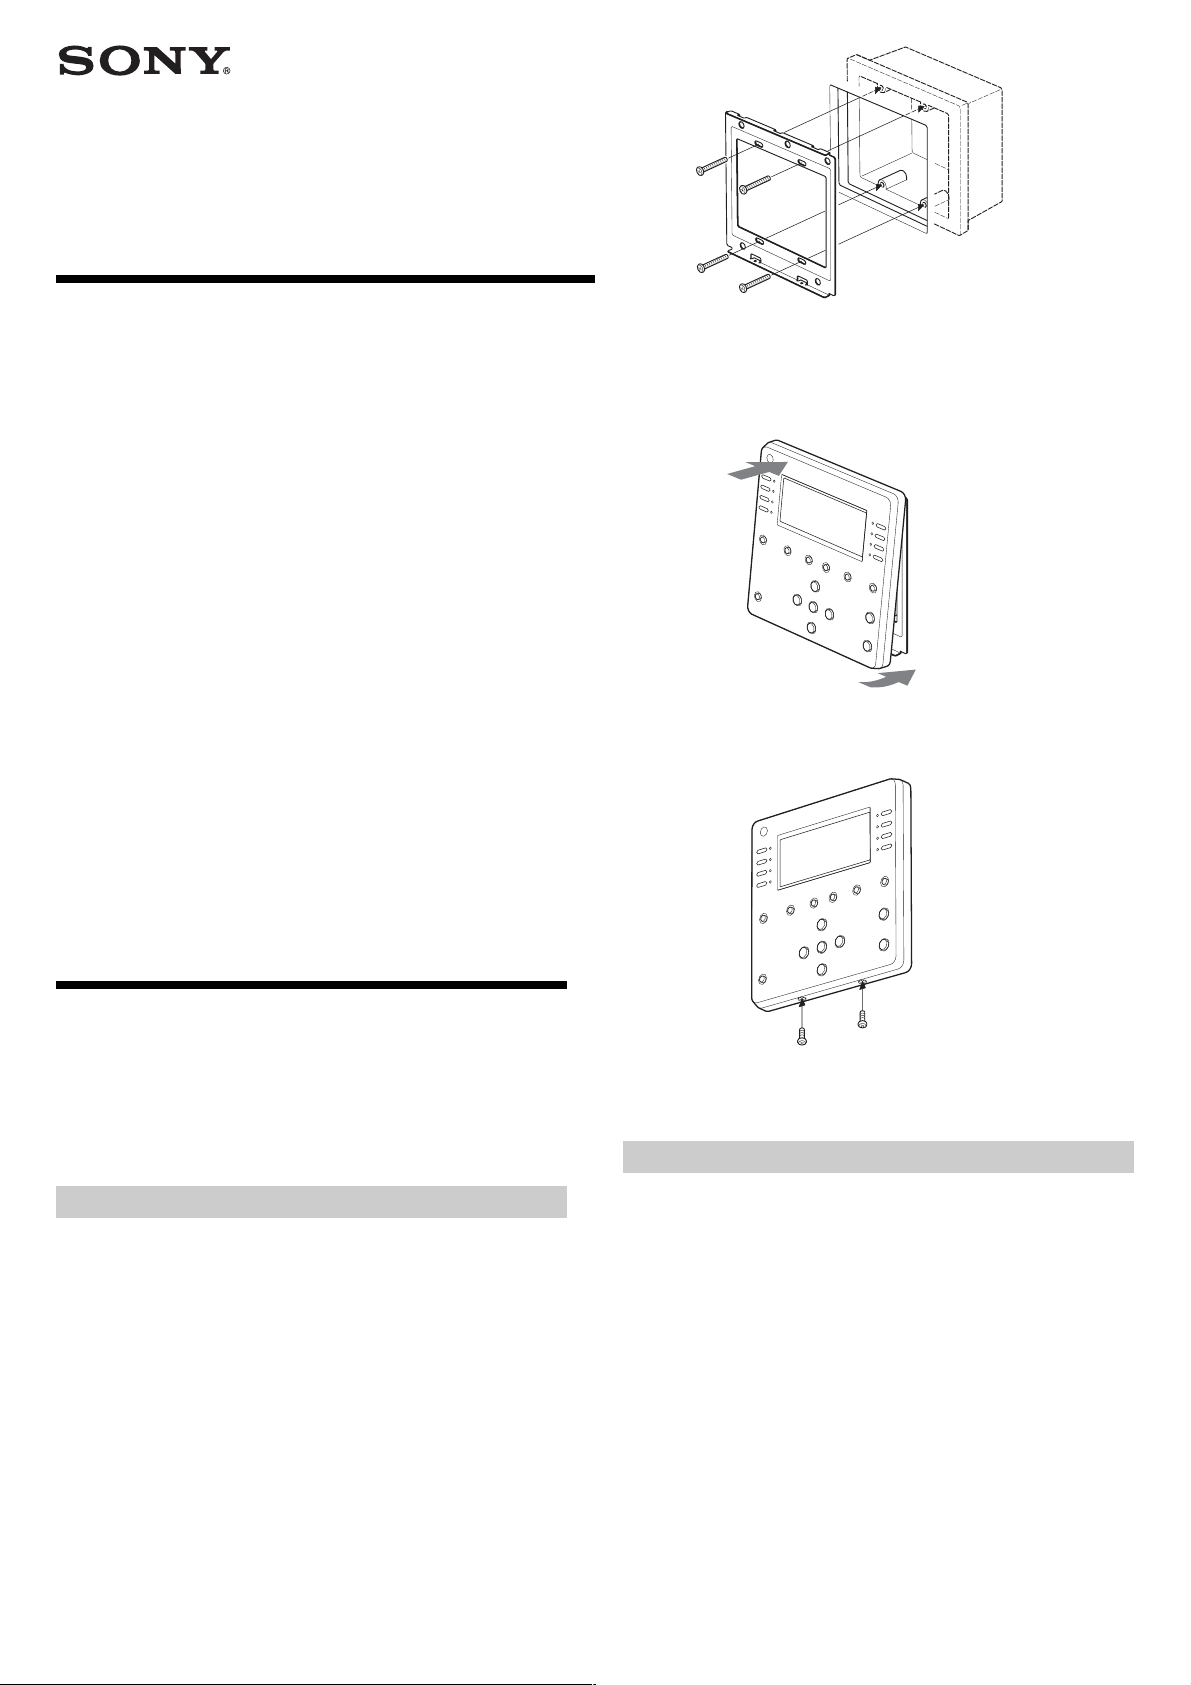
3 Insert the top of the Keypad onto the mounting bracket
first, in the direction of the arrow 1 until it clicks, then
push the bottom of the Keypad onto the bracket in the
direction of the arrow 2.
1
2
4 Fix and tighten the Keypad mounting screws as shown
below.
Installing the Keypad
A Keypad must be installed in a junction box (optional). Follow
the procedures below to mount a Keypad mounting bracket
and a Keypad on the wall.
Installing the Keypad
1 Place the Keypad mounting bracket over a junction box
which has already been installed on the wall with the
mounting lips facing out.
2 Attach the Keypad mounting bracket to the junction box
with the supplied screws at the four points as shown
below.
Proceed to the steps in “Zone related cables hookups” on
page 17 before mounting the Keypad.
Note
The Keypad mounting bracket may not fit easily over some junction
boxes. In this case, loosen the screws and move the Keypad
mounting bracket left to right to center on the junction box.
5 When you have finished mounting the Keypad, check
that it operates properly.
Specifications
Operating system: Wired controller
LCD size: 3 inches (80 ✕ 36 dots)
LCD type: Reflection system (mirror type)
Power requirements:
Connect to CAV-M1000ES via CAT5 cable
Maximum external dimensions:
125 ✕ 125 ✕ 53mm (5 ✕ 5 ✕ 2 1/8 inches)
(w/h/d, including projecting part and controls)
Mass: 240 g (8 oz)
Supplied accessories:
Bracket frame for KEYPAD attachment to a junction box
Screw B2 ✕ 8 for fixing KEYPAD to a Keypad mounting bracket (2)
Screw M3 ✕ 30 for Keypad mounting bracket fixing to a junction box (4)
RM-KP10 IR Remote Control for the Keypad
Design and specifications are subject to change without notice.
 Loading...