

Page 1
Live-View Remote
RM-LVR3
Read This First
Identifying the parts [1]
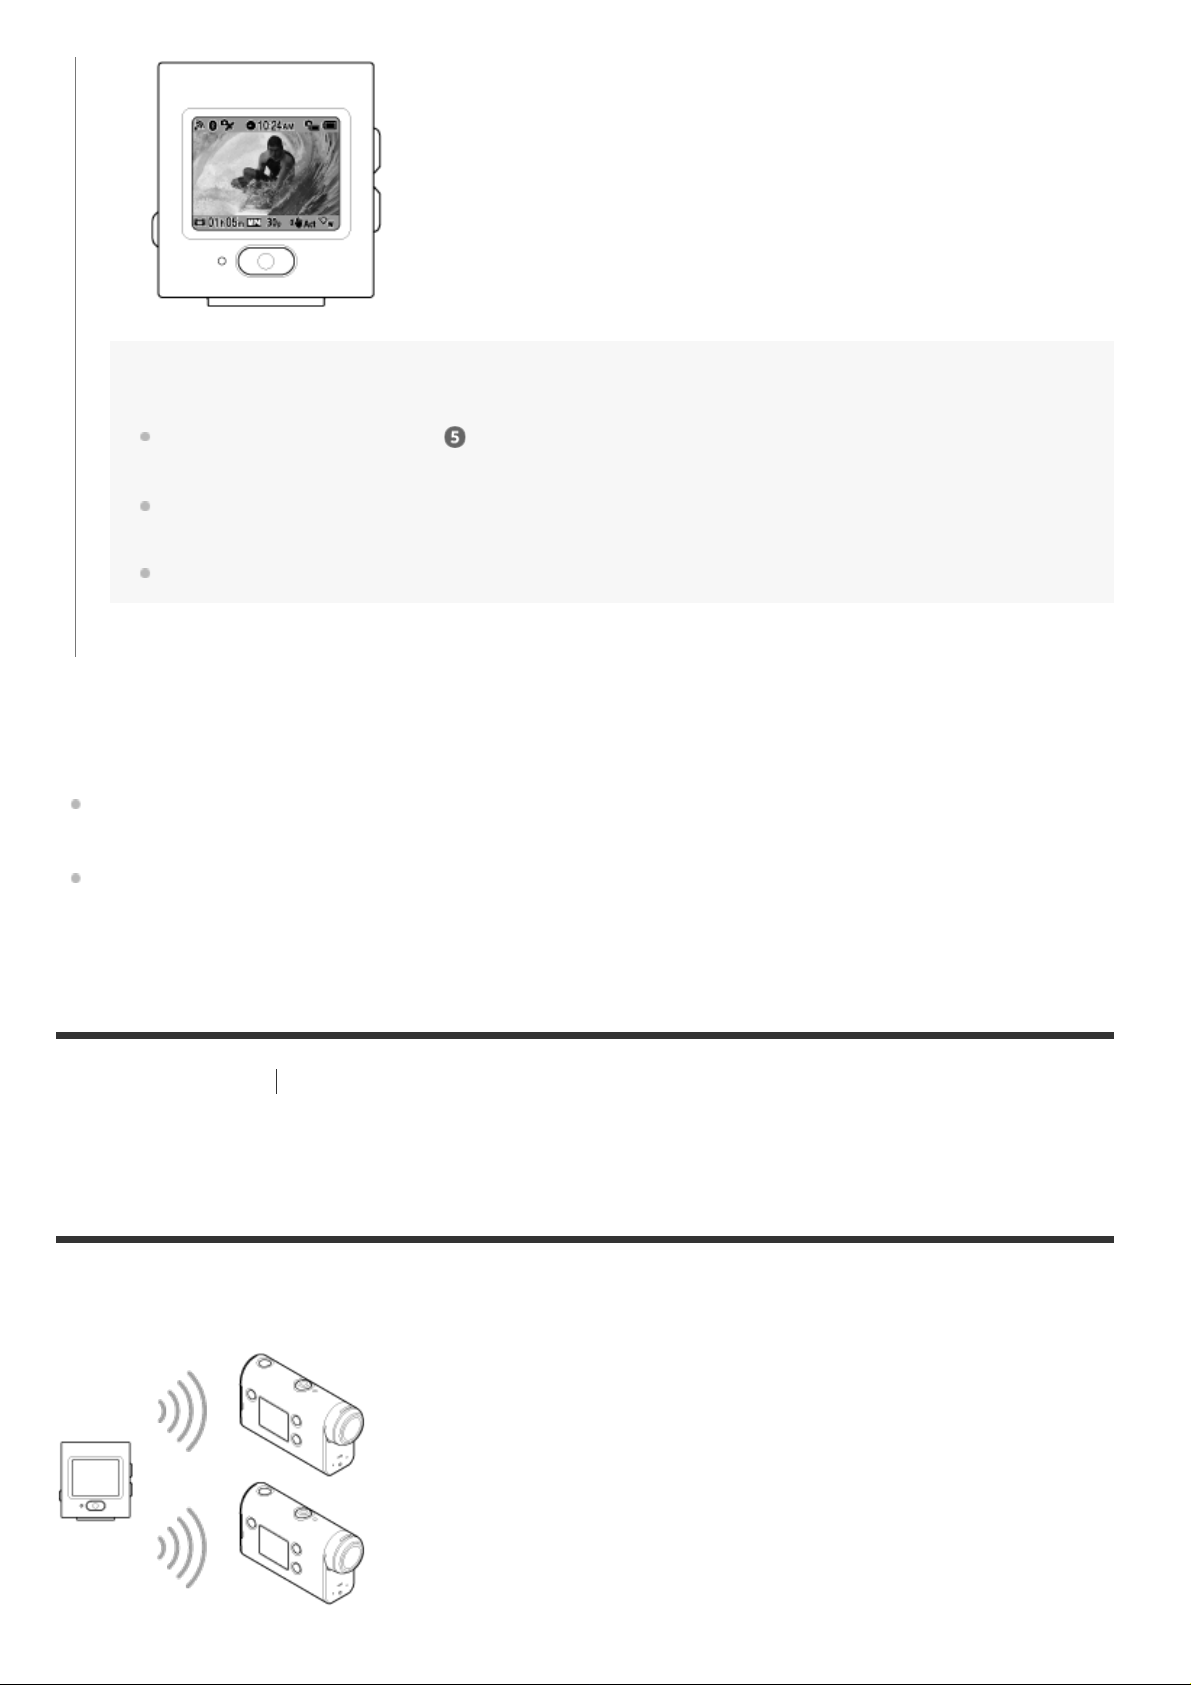
Screen display during single connection [2]
Screen display during multi connection [3]
Getting Started
Charging the remote control [4]
Attaching the remote control to the belt [5]
Attaching the remote control to the Mount Adaptor [6]
Turning on/off the power of the remote control [7]
Setting the date and time [8]
Connecting the remote control to a camera via Wi-Fi (Single connection)
Connecting the remote control to multiple cameras via Wi-Fi (Multi connection)
Checking the connection mode [9]
Connecting the remote control to a single camera via Wi-Fi [10]
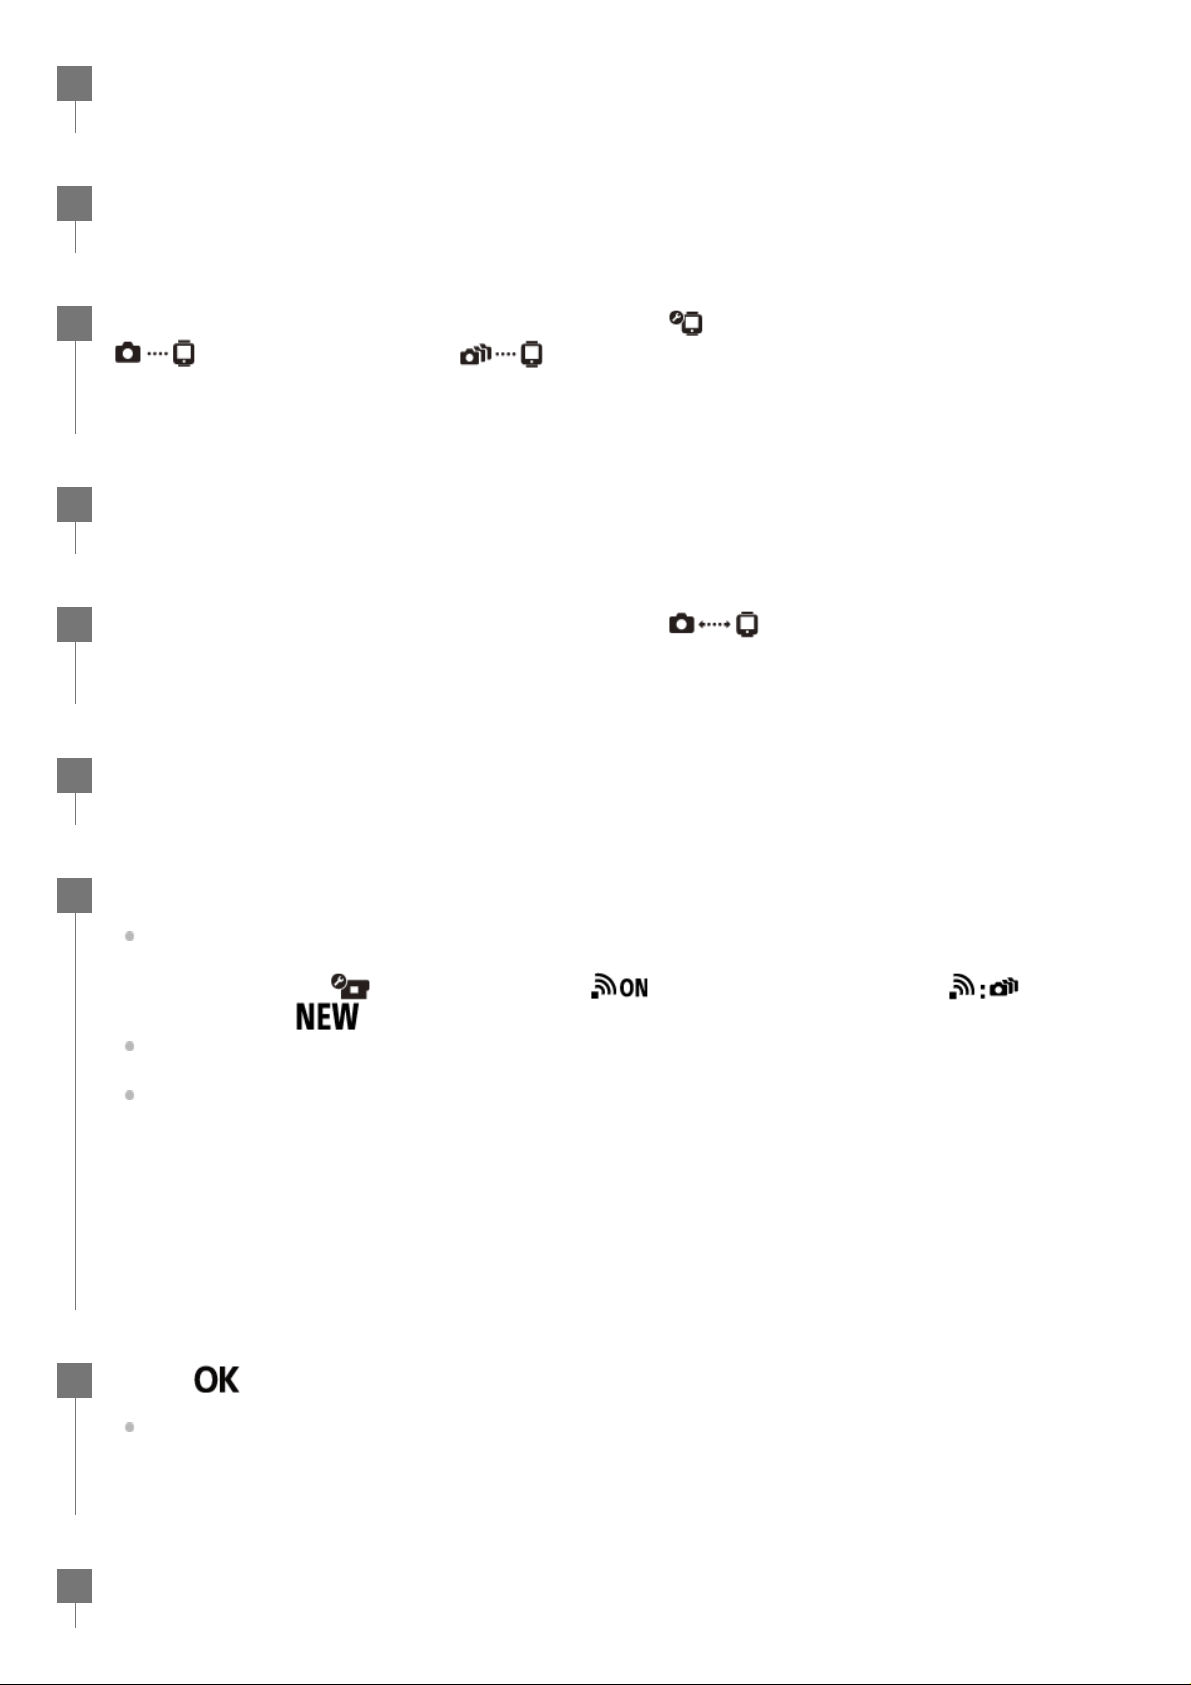
Connecting the remote control to multiple cameras via Wi-Fi [11]
Resetting the connection information of the registered camera [12]
Page 2

Shooting
Shooting movies and still images
Changing the Settings
List of setting items
Shooting settings
Switching shooting modes [13]
Shooting [14]
Using the zoom [15]
Operating with the multi camera control [16]
Button hold function [17]
List of setting items [18]
How to set the setting items [19]
Image quality setting [20]
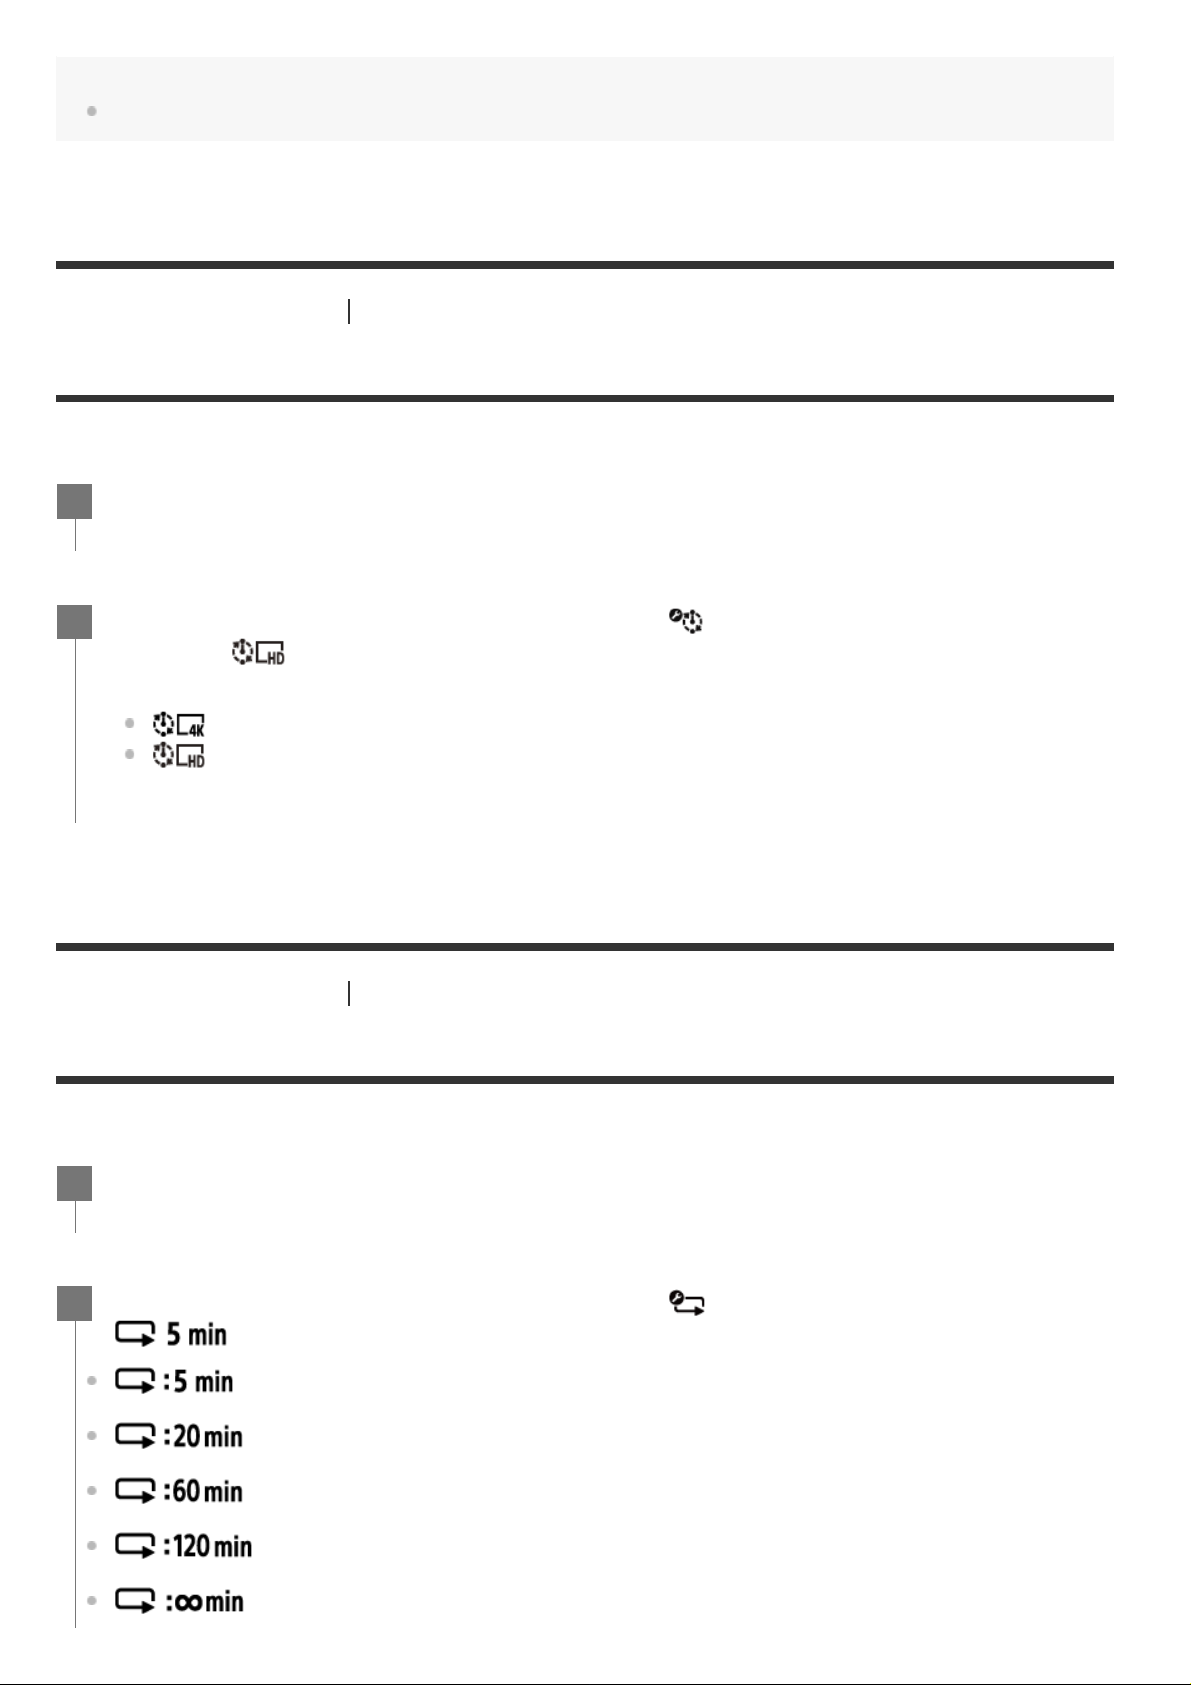
Movie format [21]
Time-lapse capture image size [22]
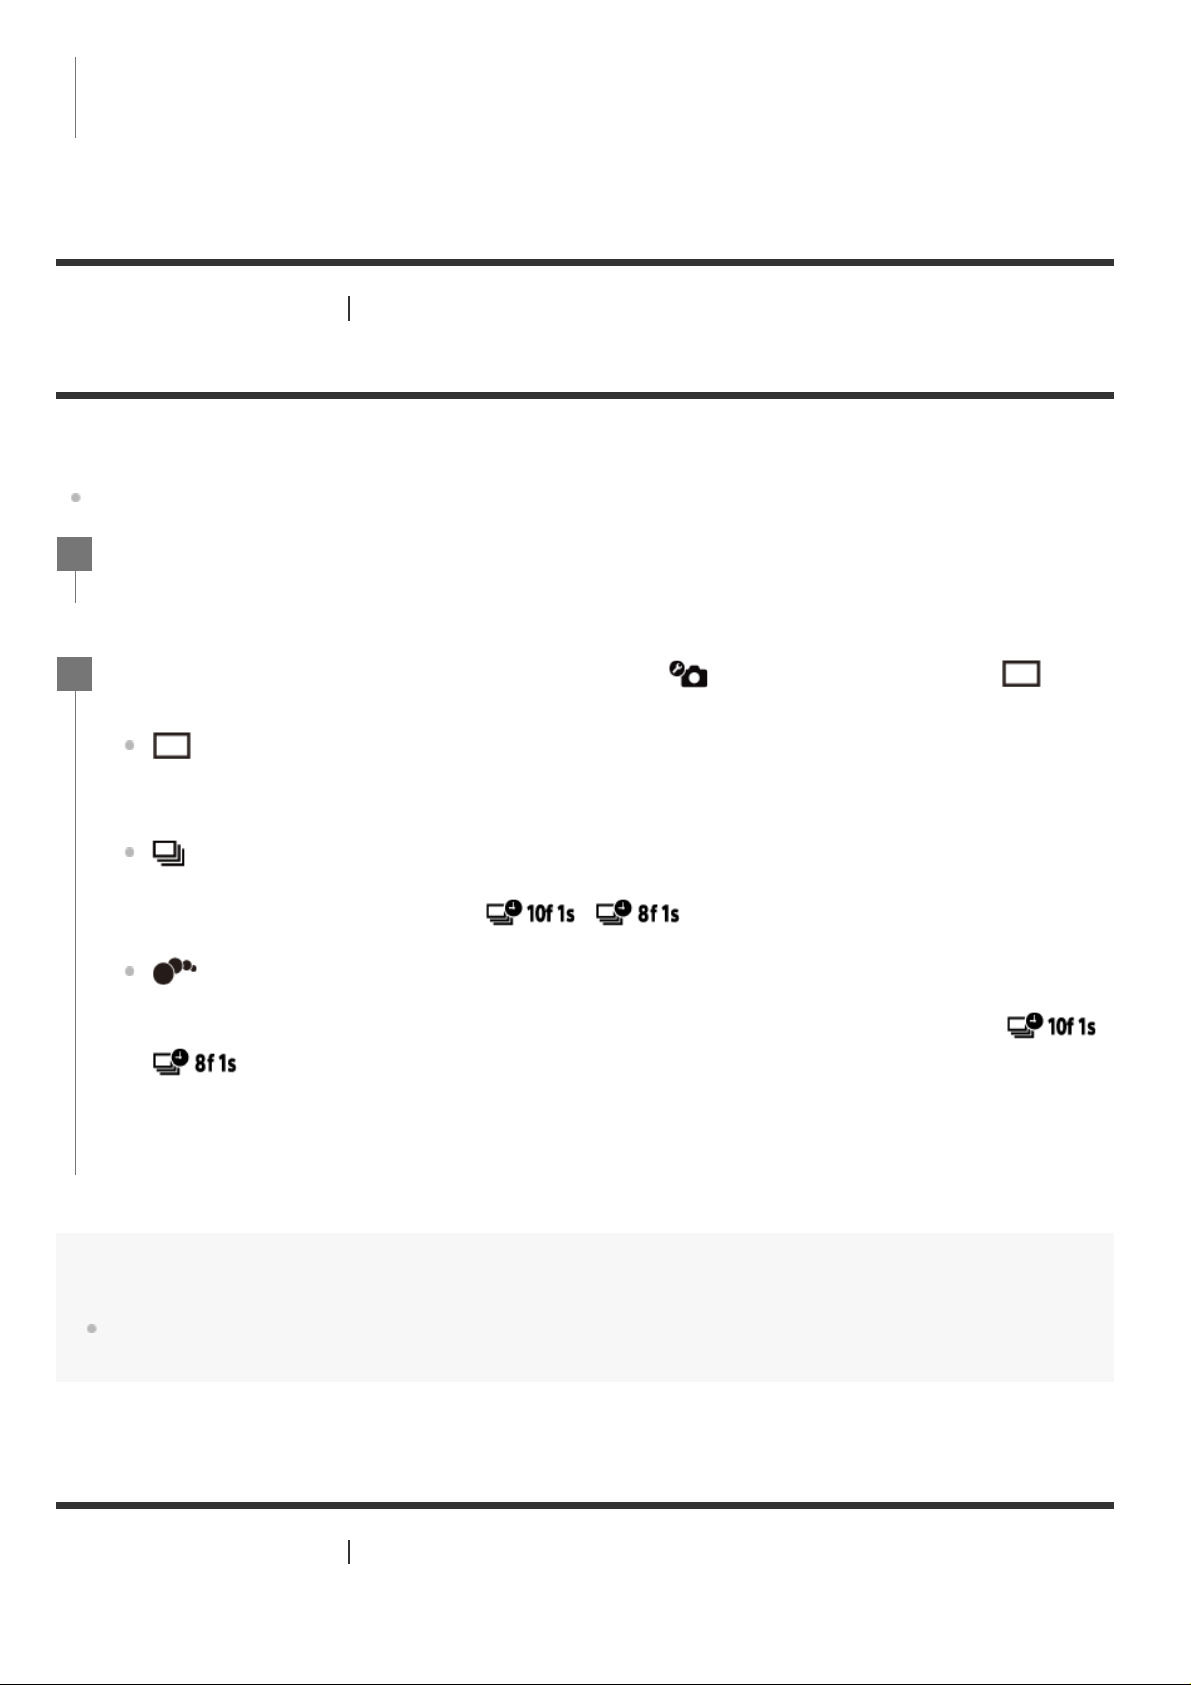
Loop recording time [23]
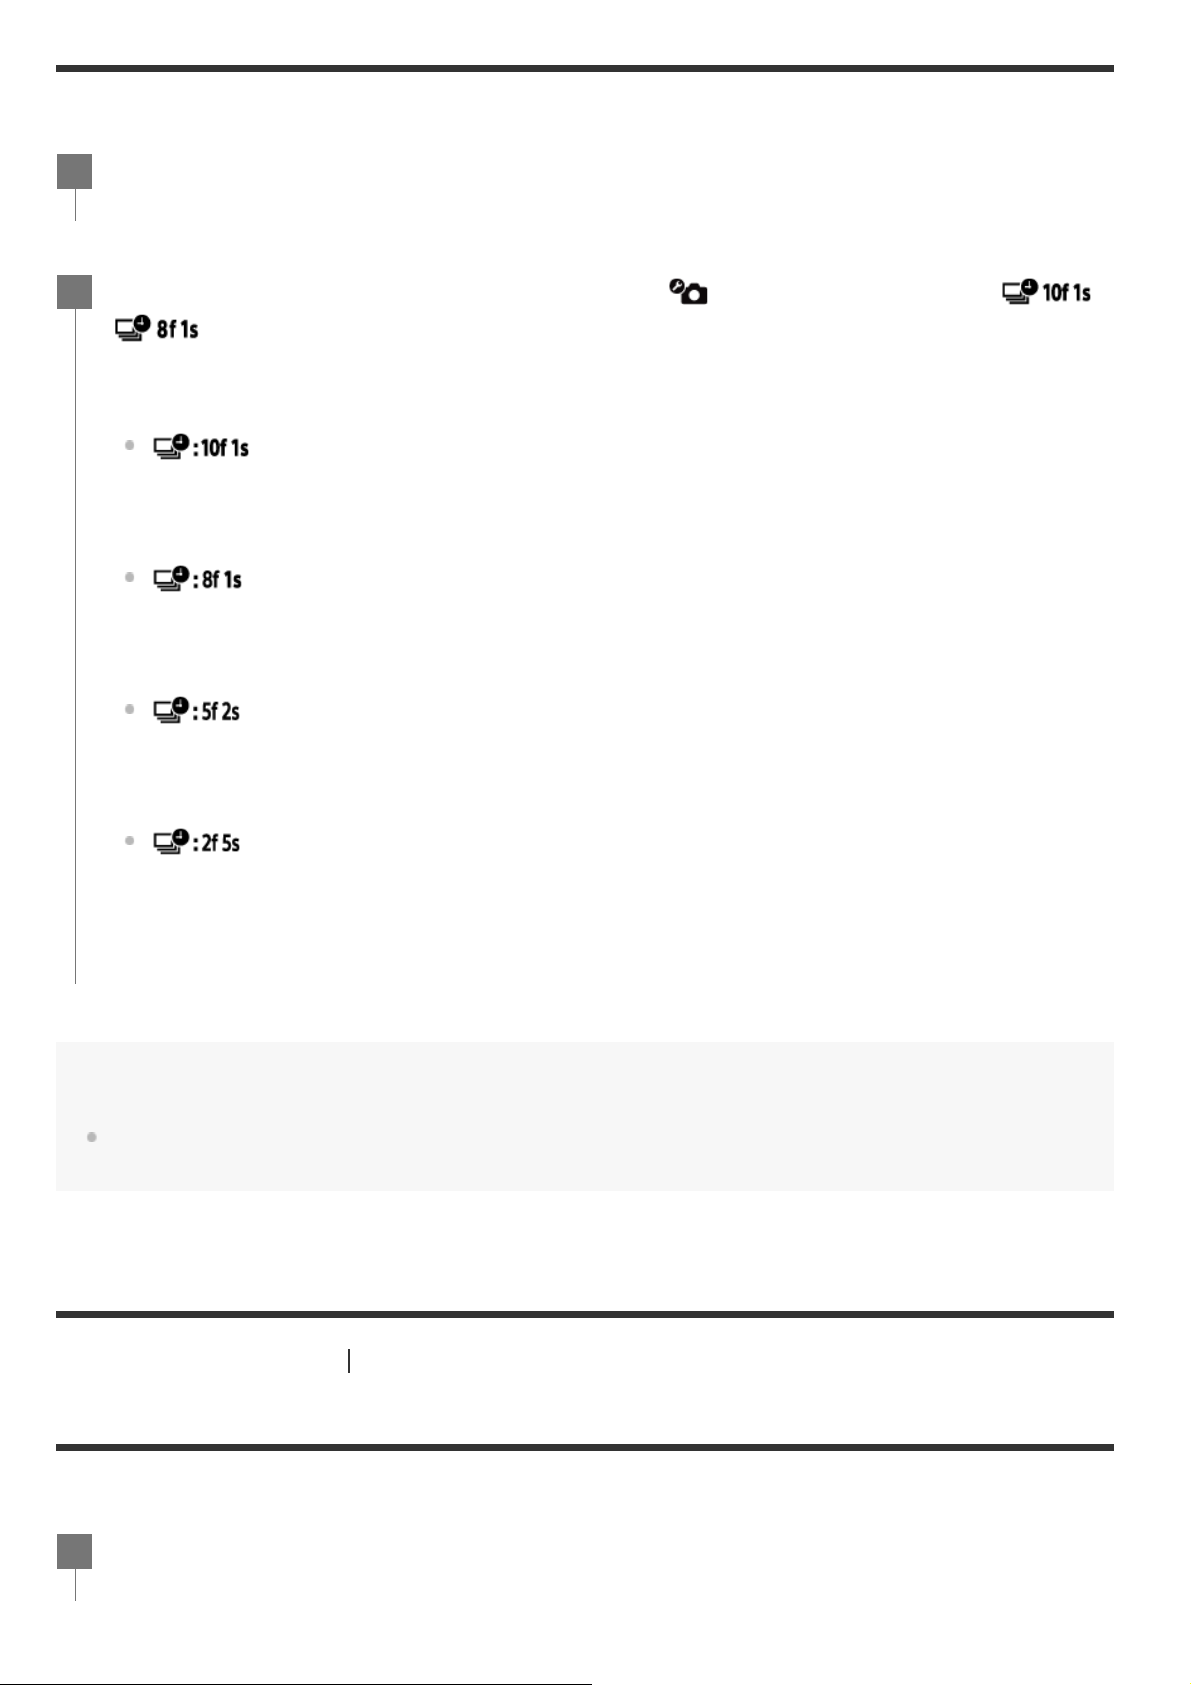
Still image mode switching [24]
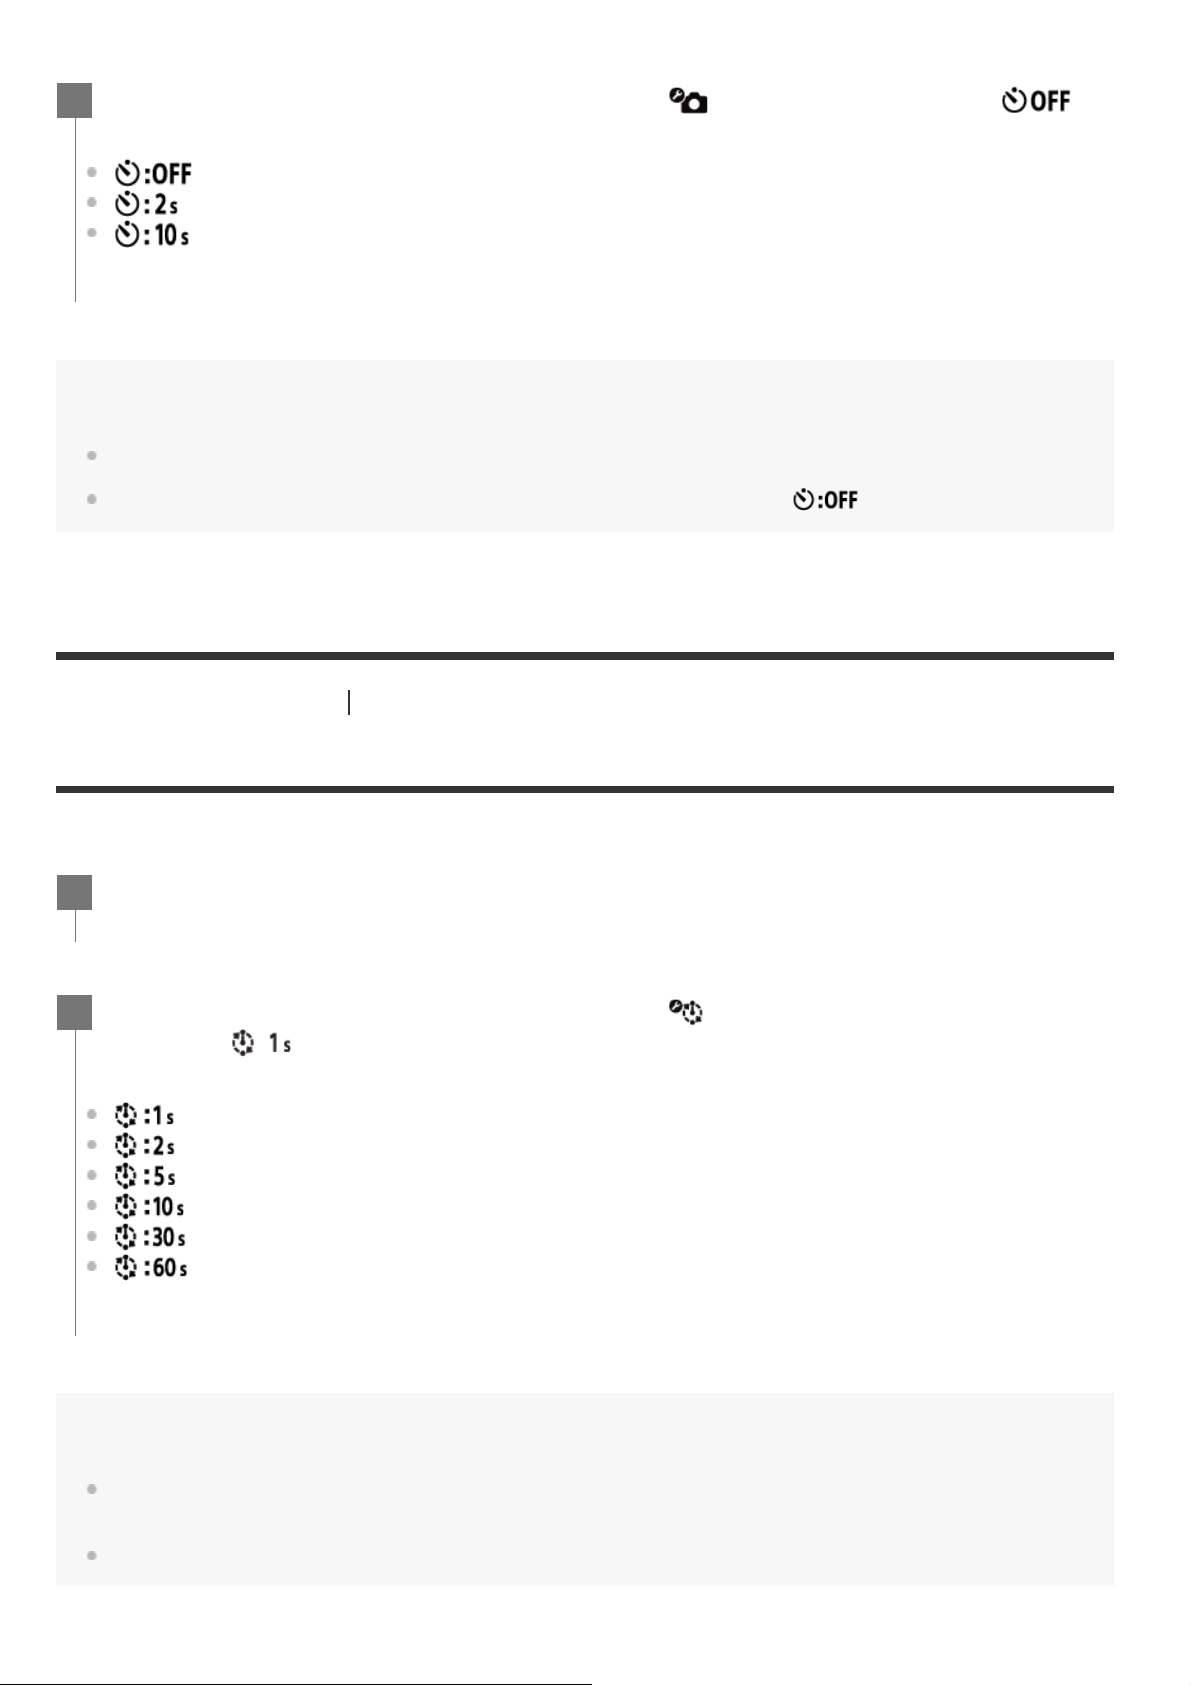
Still image shooting interval [25]
Self-timer [26]
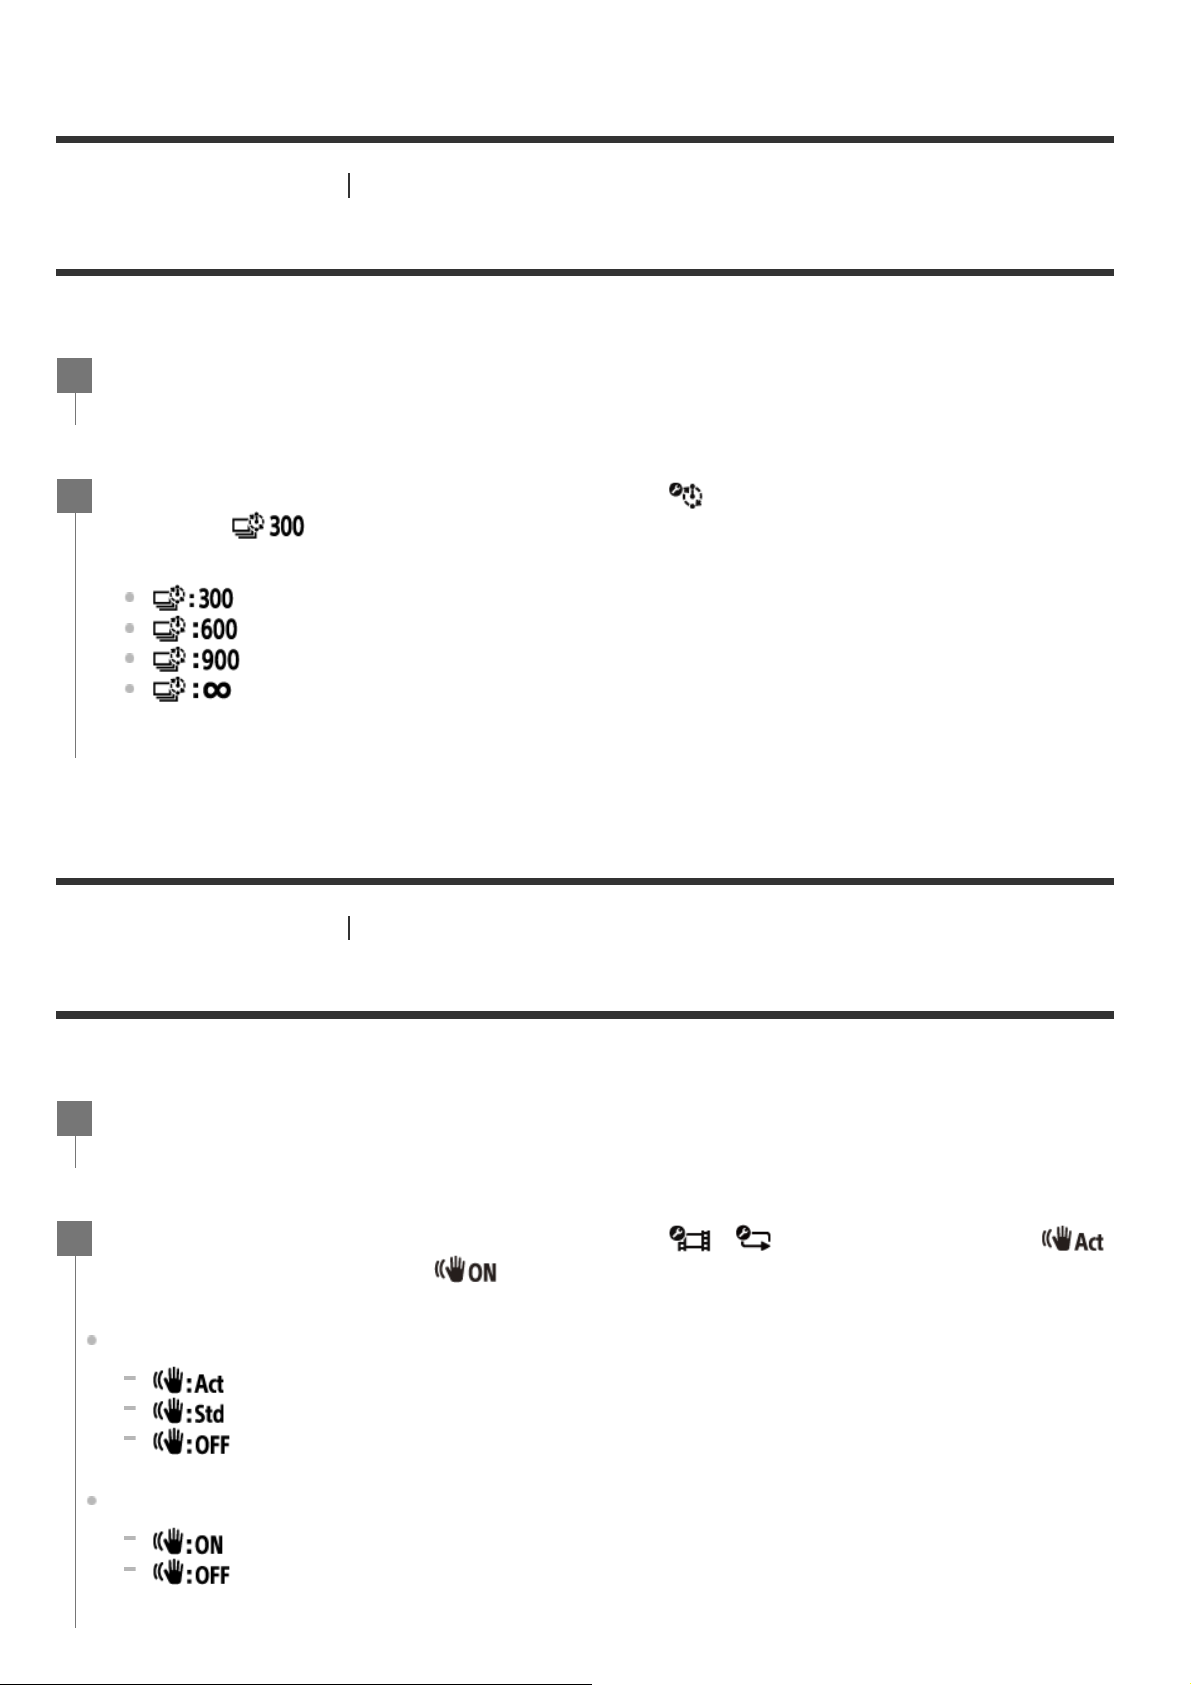
Time-lapse shooting interval [27]
Time-lapse shot number [28]
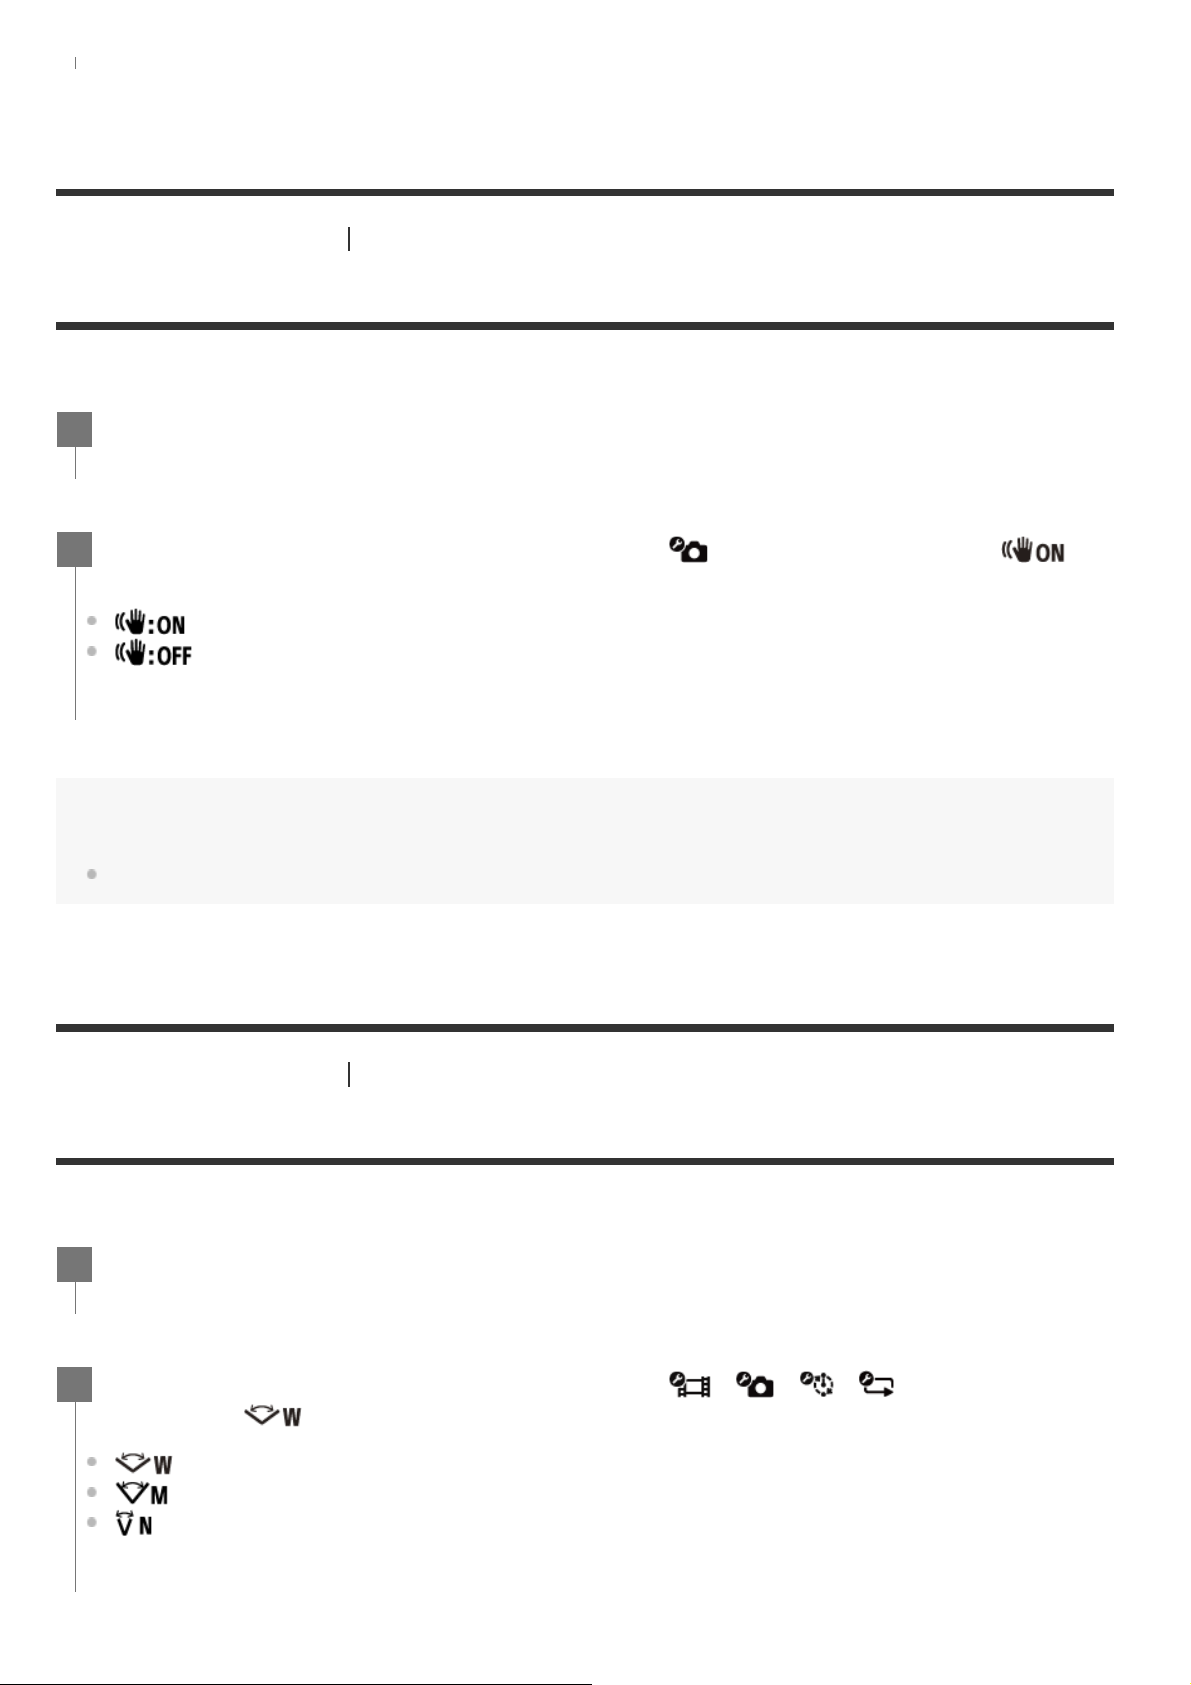
SteadyShot (Movie) [29]
SteadyShot (Still) (FDR-X3000/HDR-AS300) [30]
Angle setting [31]
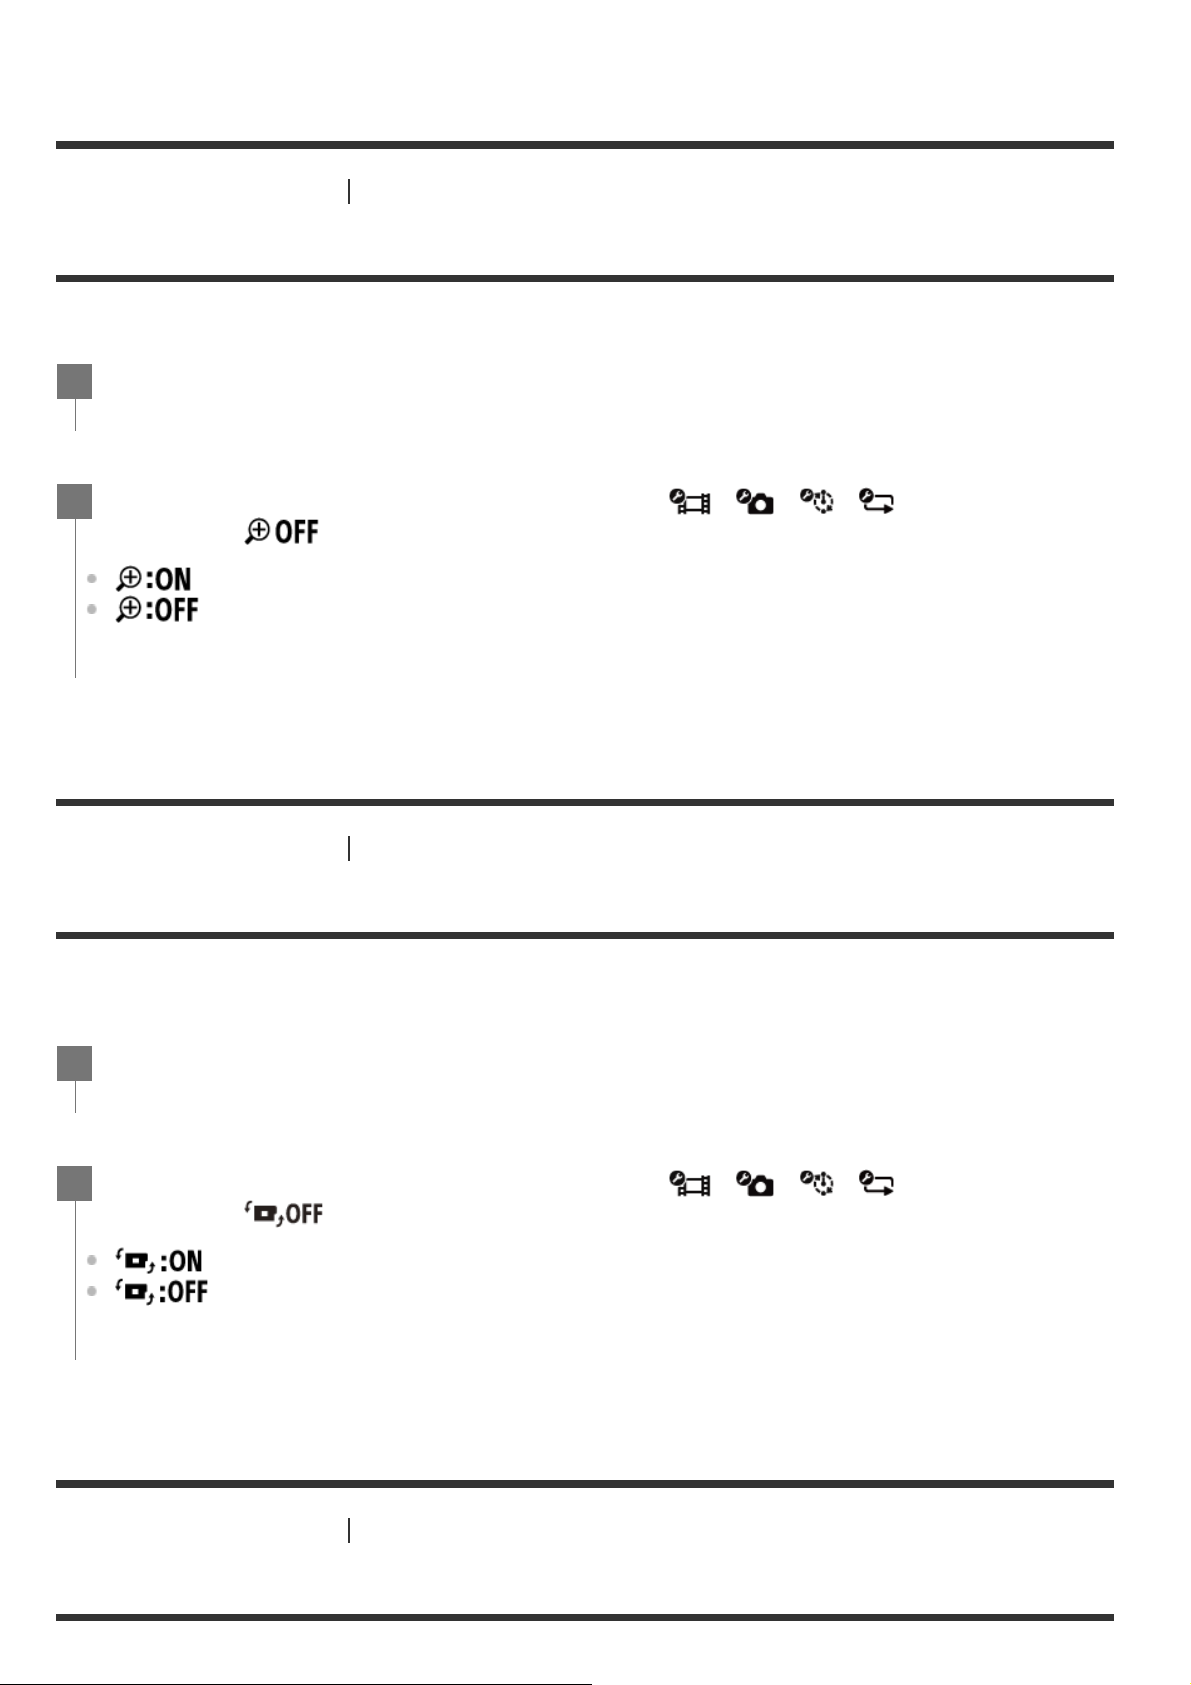
Zoom setting [32]
Flip [33]
Page 3

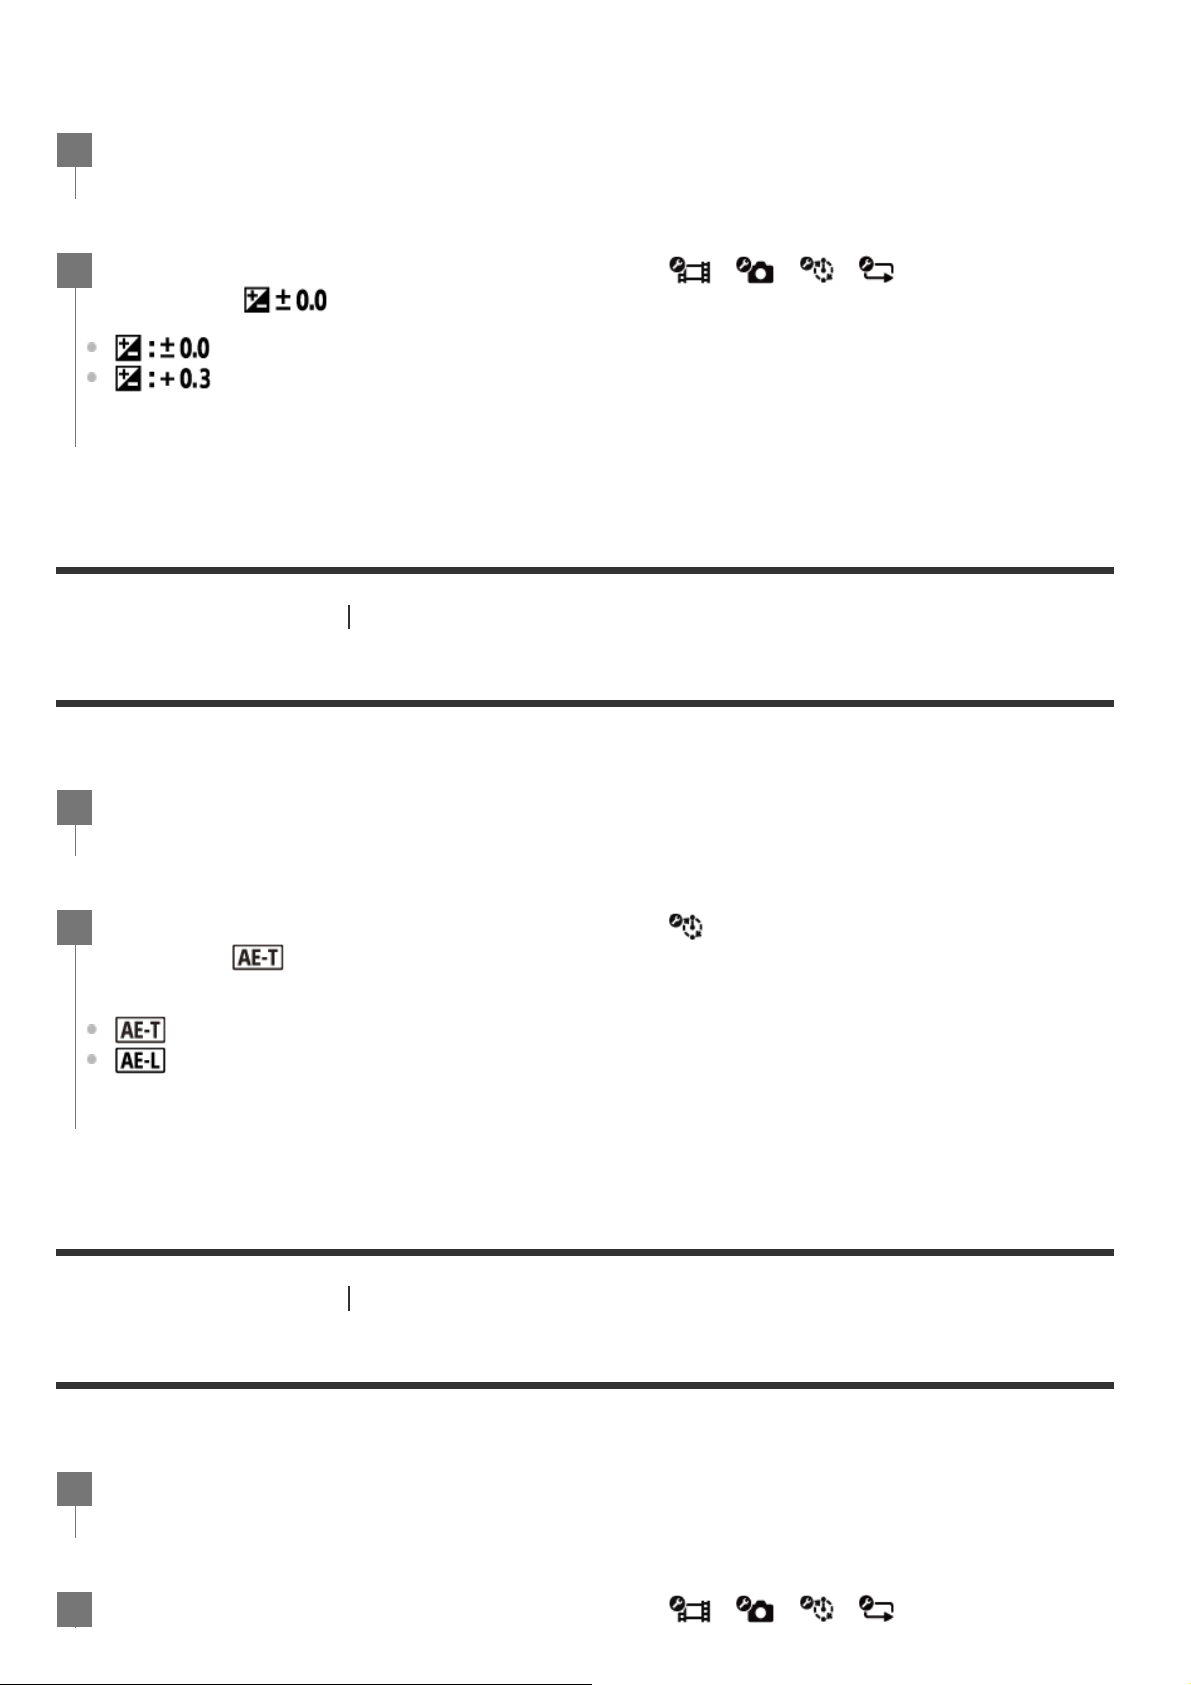
AE shift [34]
Time-lapse AE mode [35]
Camera settings
Remote control settings
Scene [36]
White balance [37]
Color mode [38]
Audio recording setting [39]
Wind noise reduction [40]
Bluetooth remote controller power setting [41]
Format [42]
Time code/user bit [43]
IR remote [44]
Beep [45]
Beep volume [46]
Lamp setting [47]
One touch recording [48]
Auto power off [49]
Switching NTSC/PAL [50]
Version (Camera) [51]
Airplane mode [52]
Connection mode [53]
Bluetooth setting [54]
Network reset settings [55]
Auto monitor off while shooting [56]
Mirror Mode [57]
Display rotate [58]
Monitor brightness [59]
Date & time setting [60]
Area setting [61]
Daylight saving time (summer time) setting [62]
Date format [63]
Version [64]
Page 4

Resetting the settings [65]
Viewing
Playing back images [66]
Deleting images [67]
Information
Precautions
The list of time differences for world capitals [74]
Specifications [75]
Trademarks [76]
Note on the License [77]
Care and storage
Handling [68]
On moisture condensation [69]
On carrying [70]
On operating temperatures [71]
Handling the LCD screen [72]
Waterproof performance [73]
Care and storage [78]
Maintenance of the LCD screen [79]
Maintenance of the remote control in water or at a waterfront [80]
Page 5

Battery pack
Disposal of the remote control [83]
Troubleshooting
Cannot connect the remote control and the camera via Wi-Fi. [84]
Cannot turn on the remote control. [85]
The power of the remote control turns off suddenly. [86]
Cannot charge the remote control. [87]
The remaining charge indicator is incorrect. [88]
Warning indicators and error messages
Error display on the Live-View Remote [89]
[1] Read This First
Identifying the parts
Battery pack [81]
To reduce the battery consumption of the remote control [82]
Page 6
[2] Read This First
Screen display during single connection
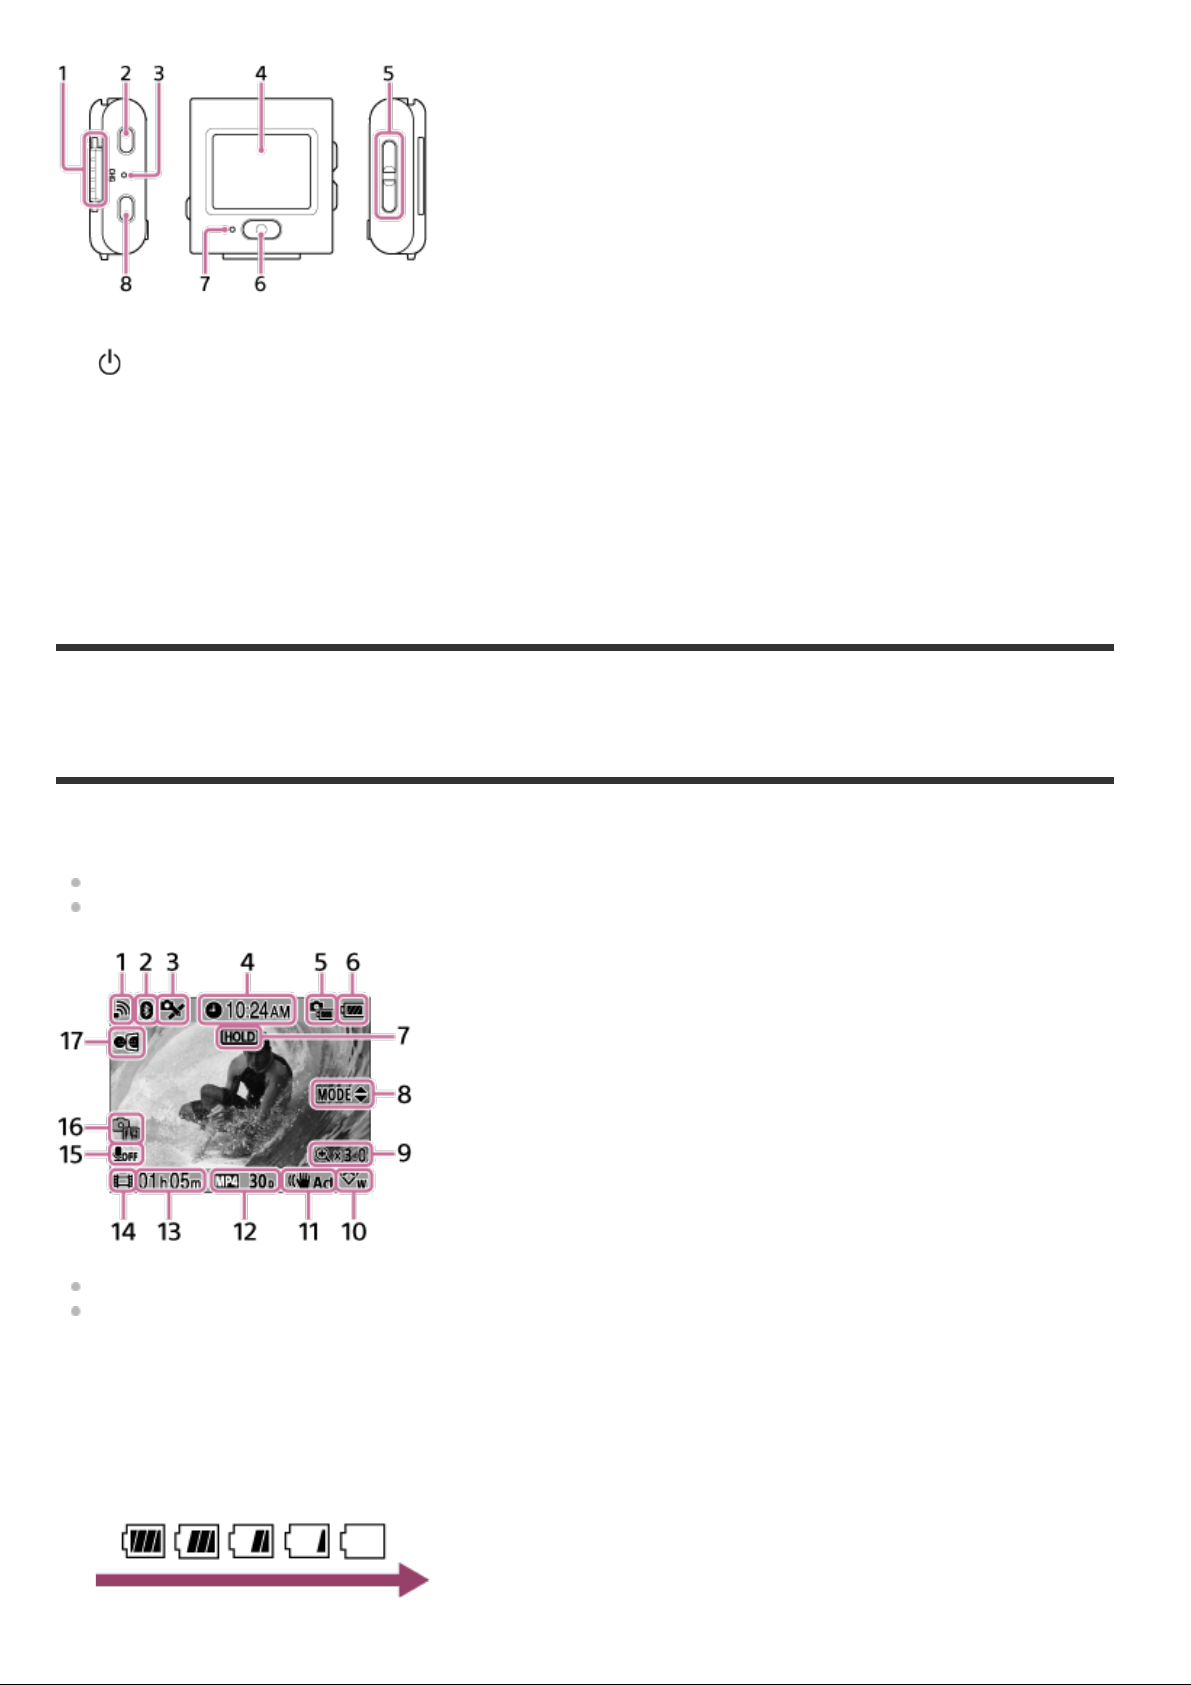
The indicators described below are displayed on the LCD screen during single connection.
Terminal section
1.
2.
3.
4.
5.
6.
7.
8.
(on/standby) button
CHG (Charge) lamp
LCD screen
UP button/DOWN button
REC/ENTER button
REC/Wi-Fi lamp
MENU button
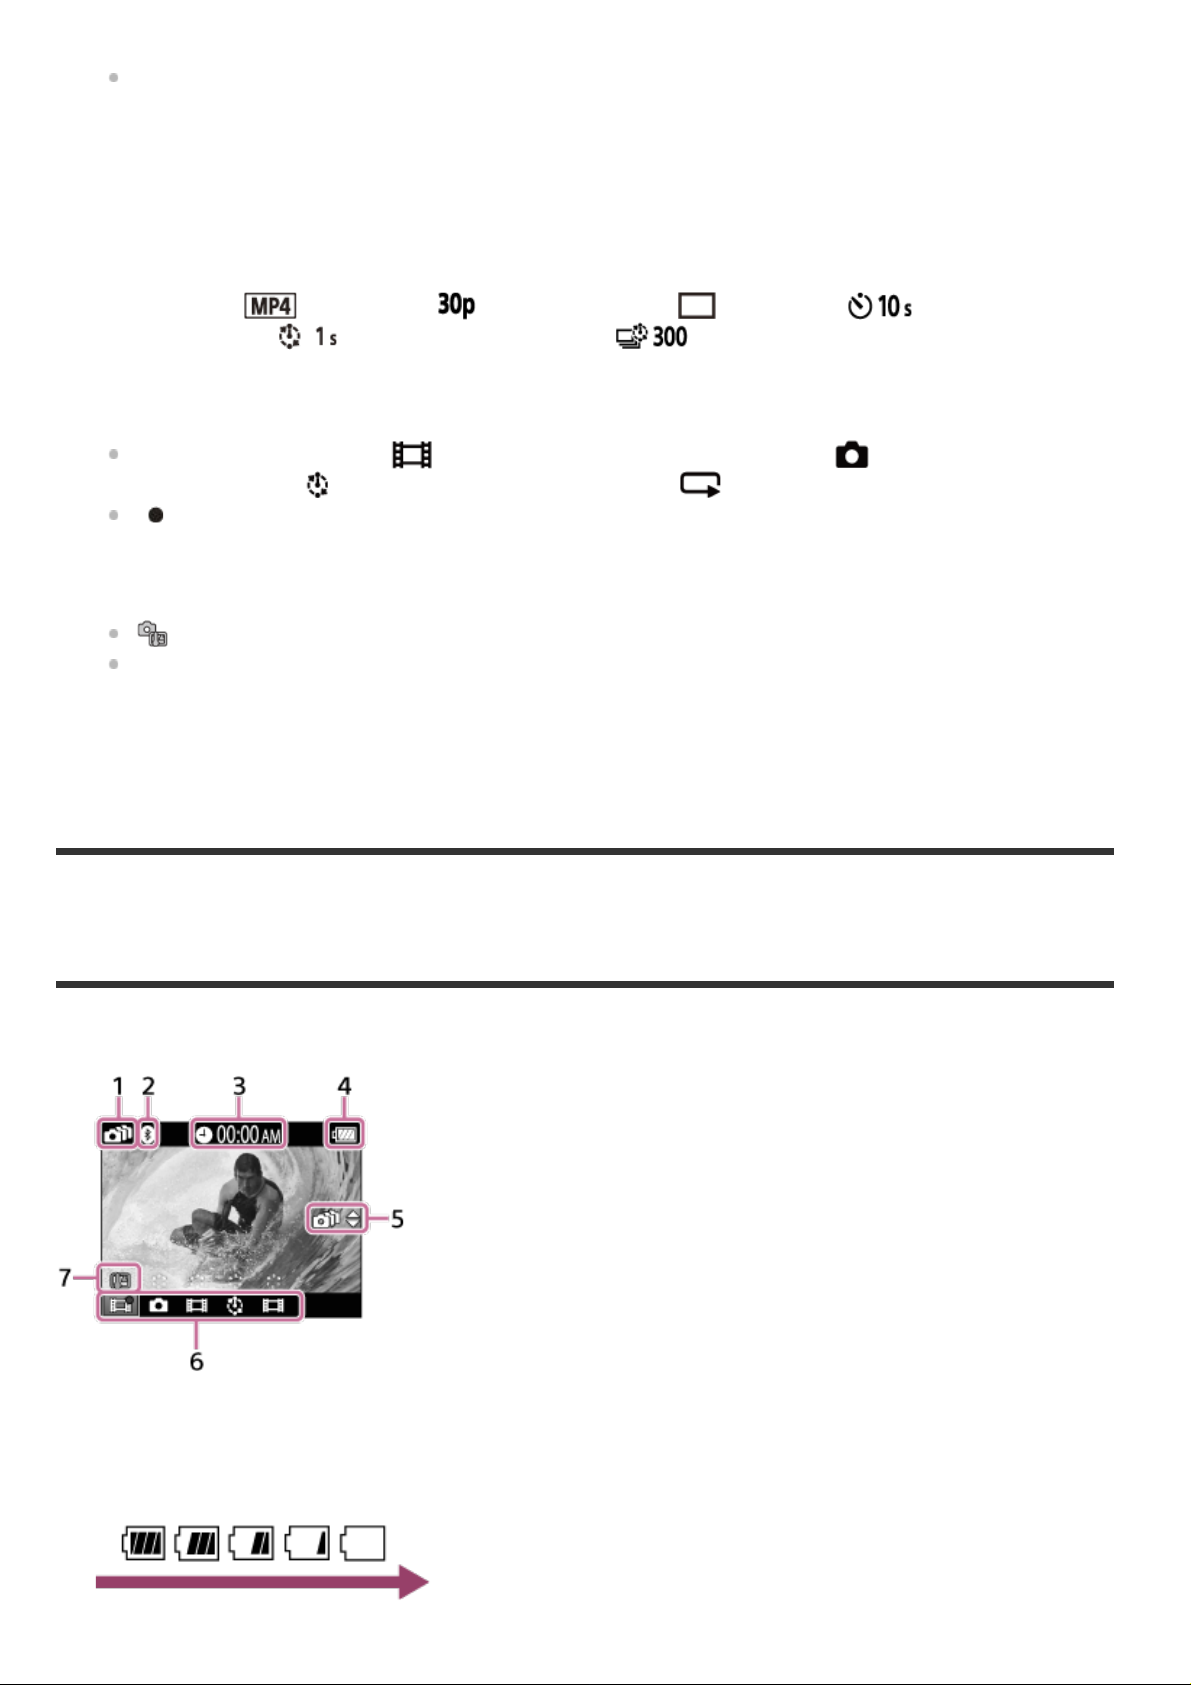
The indicators differ depending on the connected camera.
The following illustration is an example shown in movie mode.
The indicators in parentheses are displayed when shooting still images.
Icons differ depending on the settings.
Wi-Fi connection setting
1.
Bluetooth connection status
2.
GPS receiving status of a camera
3.
Clock time
4.
Remaining battery charge indicator of the camera
5.
Battery level indicator of the remote control
6.
Page 7
[3] Read This First
Screen display during multi connection
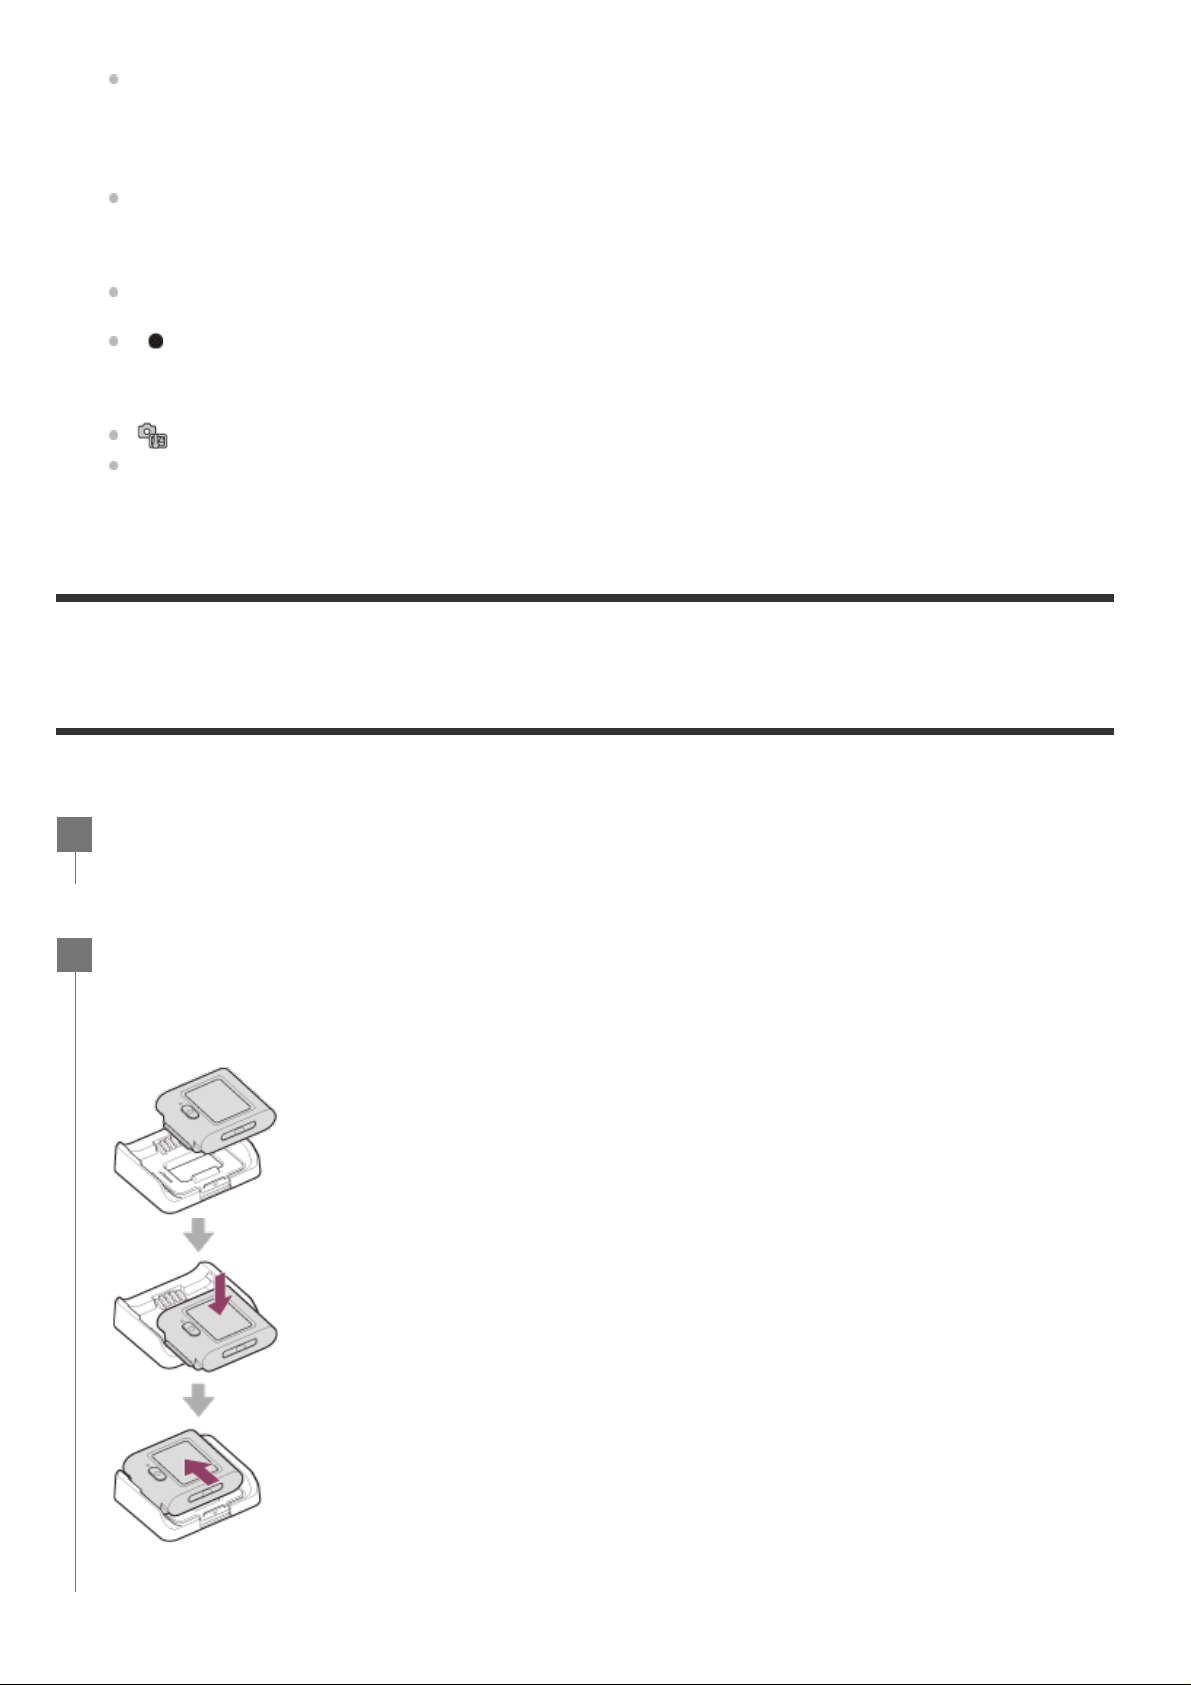
The indicators described below are displayed on the LCD screen during multi connection.
When the remaining battery charge decreases, the battery level indicator will change in the
direction of an arrow.
Button hold icon
7.
UP button/DOWN button operation guide
8.
Zoom ratio
9.
Angle setting
SteadyShot setting
.
Shooting setting
.
movie format
.
shooting interval
Recordable time/Recording time/Memory card warning icon
(recordable number)
.
Shooting mode indicator
.
During movie recording,
lapse capturing,
“
” is displayed on the upper right area of an icon while recording.
Audio recording setting
Temperature increase indicator
.
.
is displayed when the temperature of the connected camera increases.
Leave the power turned off to allow the temperature of the camera or the battery to decrease.
, frame rate , still image mode , self-timer , time-lapse
, time-lapse shot number
appears. During still image shooting, appears. During time-
appears. During loop recording, appears.
Mirror Mode setting
.
Wi-Fi connection setting
1.
Bluetooth connection status
2.
Clock time
3.
Battery level indicator of the remote control
4.
Page 8
[4] Getting Started
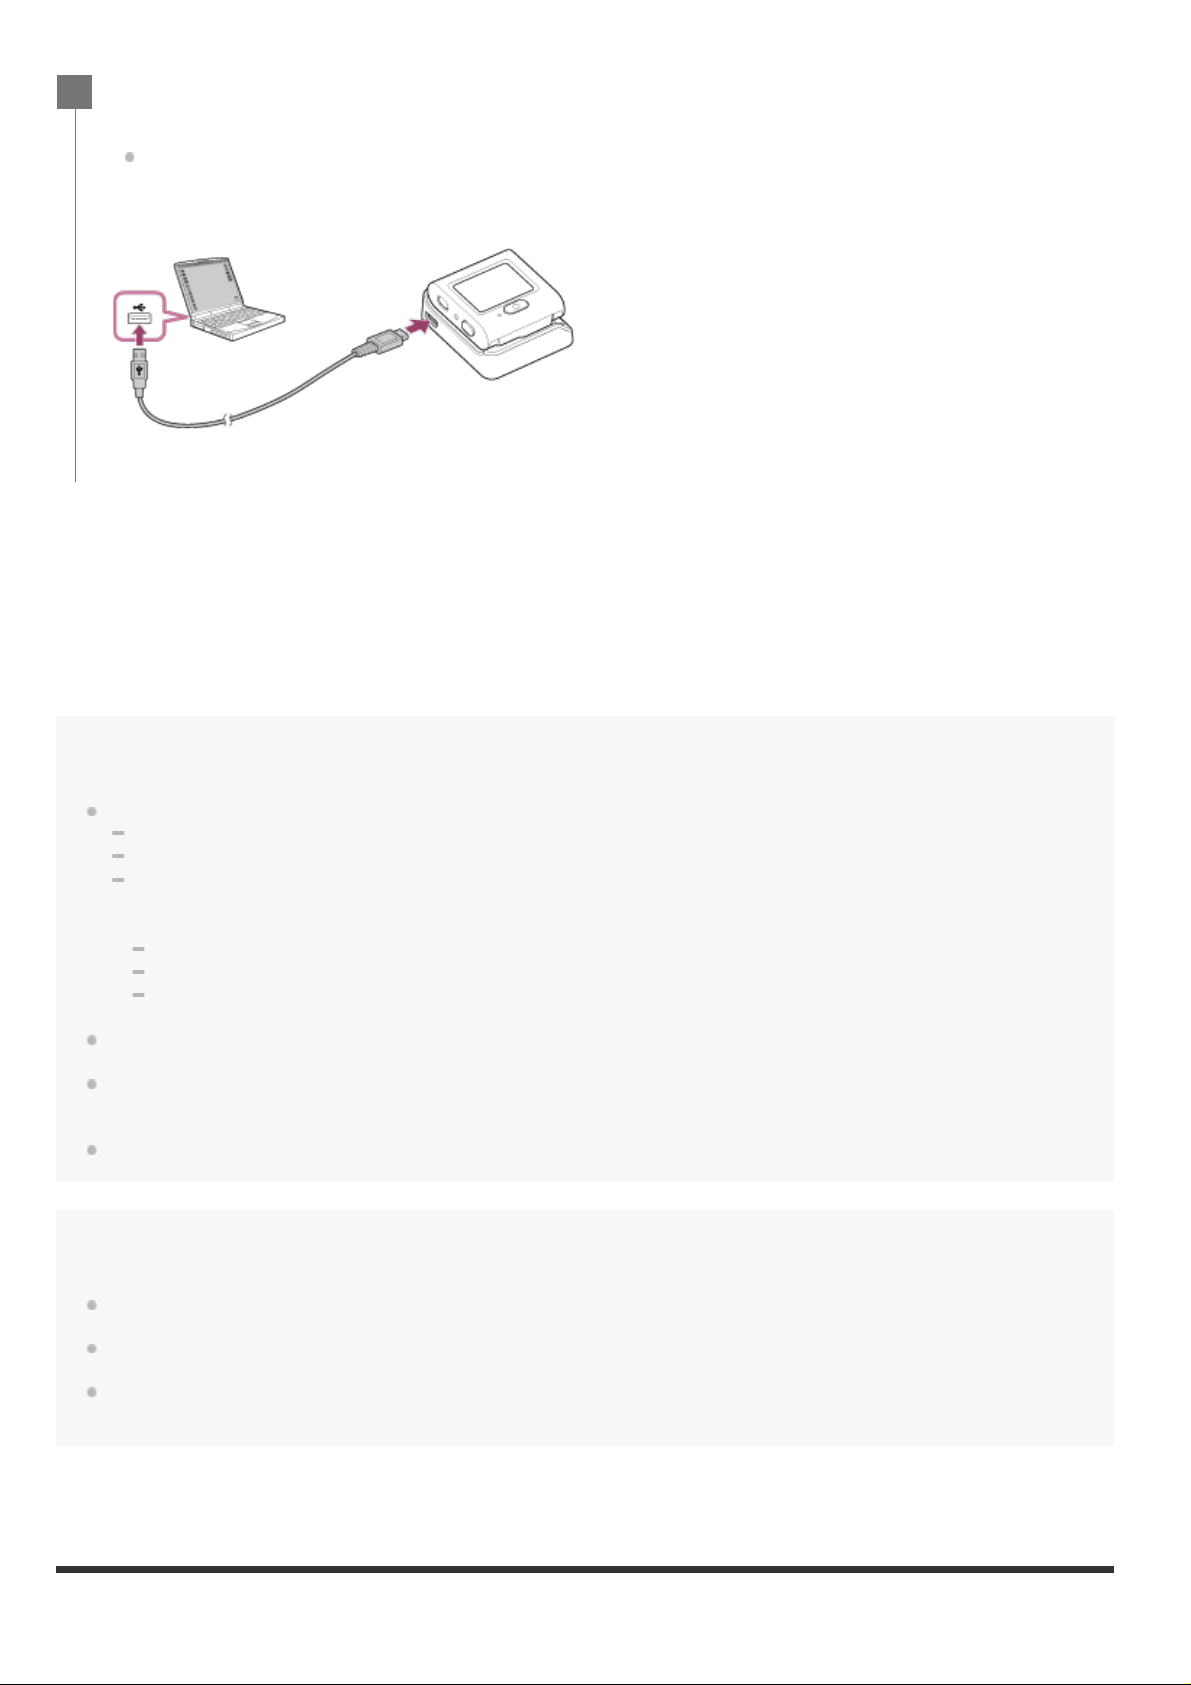
Charging the remote control
Charge the remote control using power supplied from the computer.
When the remaining battery charge decreases, the battery level indicator will change in the
direction of an arrow.
UP button/DOWN button operation guide
5.
Switches the connected camera.
Shooting mode indicator/REC icon
6.
The shooting mode and recording status of the connected camera are displayed. The position
of the orange cursor indicates which camera is currently displaying Live-View.
“
” is displayed on the upper right area of an icon while recording.
Temperature increase indicator
7.
is displayed when the temperature of the connected camera increases.
Leave the power turned off to allow the temperature of the camera or the battery to decrease.
Check that the power of the remote control is turned off.
1
Attach the remote control to the cradle (supplied).
2
If the terminal section of the remote control is wet or dirty, wipe away the moisture or dust
before attaching.
Page 9
Battery charging time
Via a computer: Approx. 2 hours 25 minutes
[5] Getting Started
Connect the remote control to an activated computer with the micro USB cable
*1
*2
3
(supplied).
The CHG (Charge) lamp lights up in amber and charging begins.
The CHG (Charge) lamp turns off when charging is completed.
*1
as follows.
*2
Time required to charge a fully depleted battery pack at a temperature of 25°C (77°F). Charging may take longer under
certain circumstances or conditions.
Rapid charging is possible by using the AC Adaptor (sold separately). To connect to the AC Adaptor, use the micro USB
cable (supplied).
Hint
A remaining charge indicator appears on the upper right area of the LCD screen.
The displayed remaining charge indicator may not be correct under certain circumstances.
It takes about 30 seconds until the correct remaining charge indicator appears.
If the battery pack runs out quickly even though the remaining charge indicator is high, fully charge the
remote control again. The remaining charge indicator will be then displayed correctly. Note that it may not
be displayed correctly in the following situations:
The remote control is used for a long time at high ambient temperature.
The remote control is left fully charged.
The remote control is used heavily.
Use the AC Adaptor (sold separately) for charging if you do not have a computer.
You can charge the remote control even if it is not completely discharged. Also, even if the remote control is
not fully charged, you can use the partial charge capacity of the battery pack as is.
When the remote control is fully charged, the CHG (Charge) lamp turns off immediately.
Note
When the power of the remote control is turned on, it is supplied with power but not charged.
Be careful not to short out the terminal section of the cradle by using materials such as metals.
To maintain the remote control’s function, fully charge the remote control at least once from six months to a
year while storing. Also, store it in a cool, dry place.
Page 10
Attaching the remote control to the belt
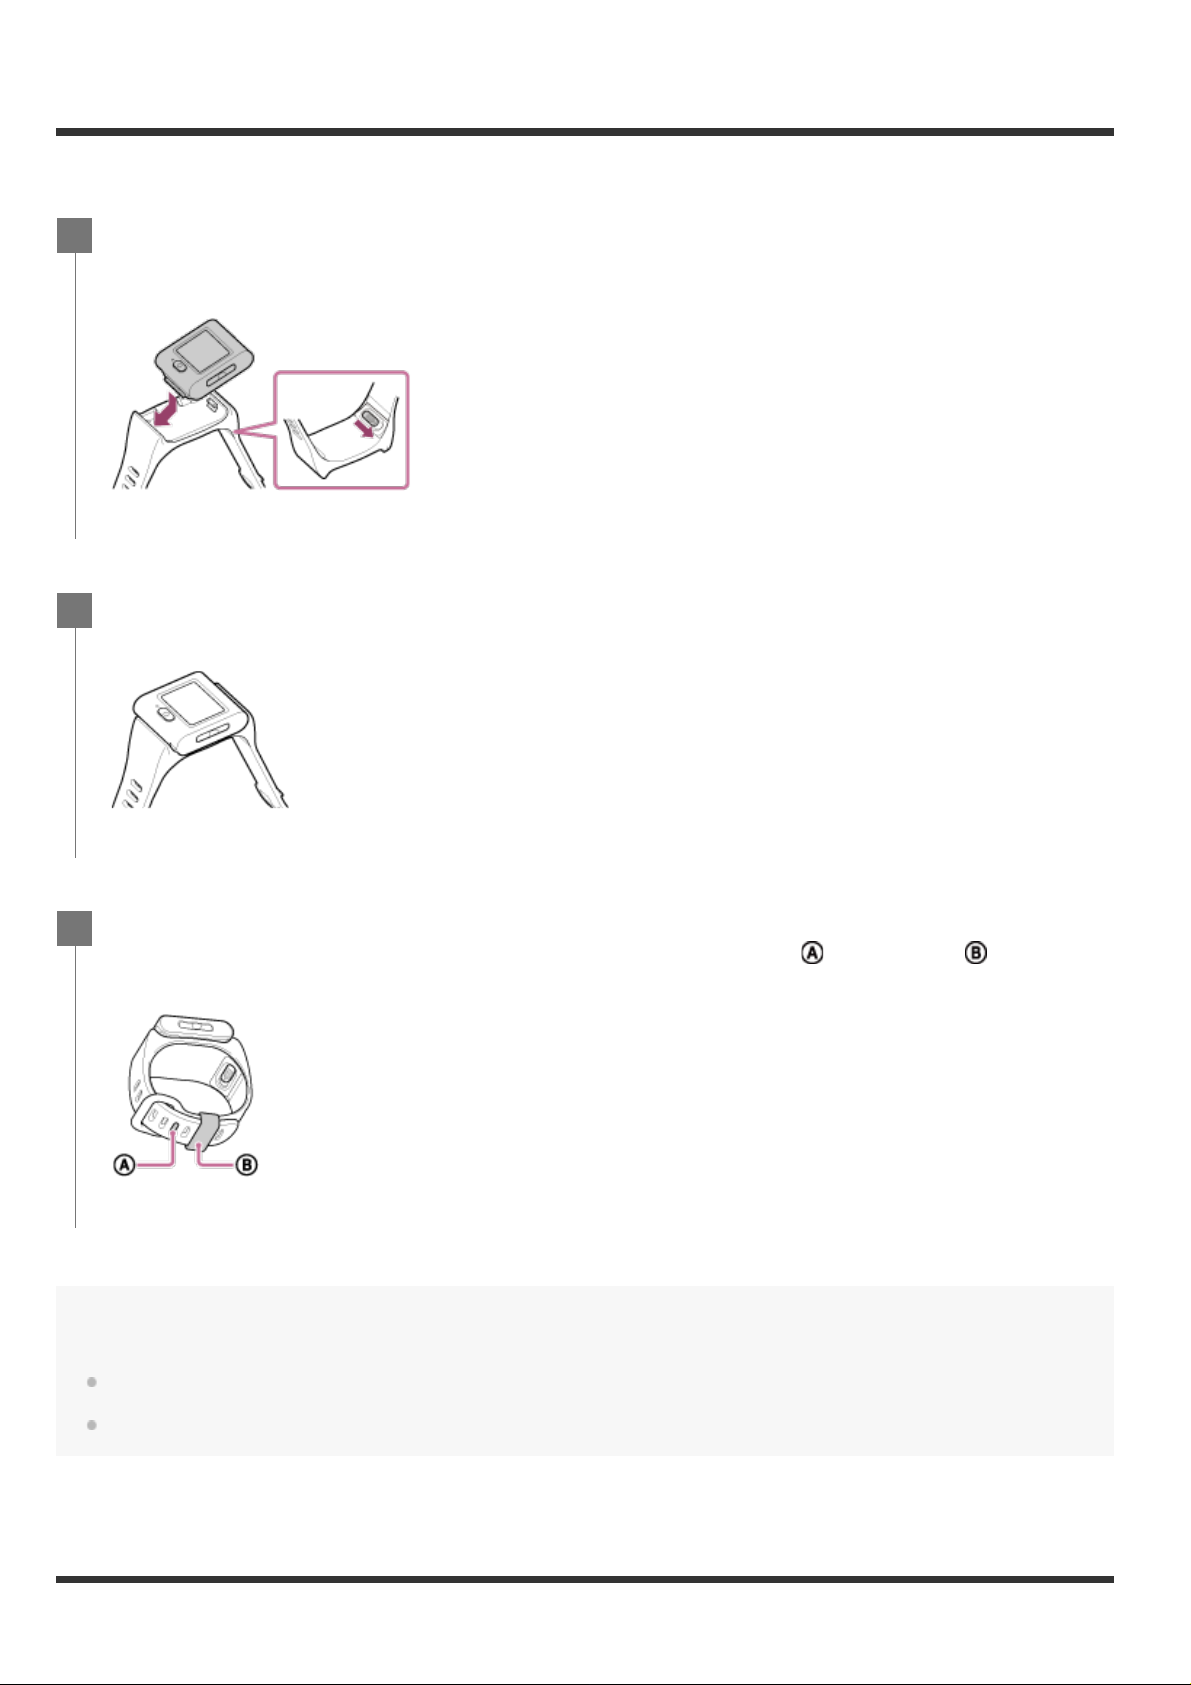
Attach the remote control to the belt.
Align the protruding portion of the remote control with the concave portion of the
1
belt, while pulling the release lever on the rear of the belt toward the opposite side
with your finger.
Make sure that the remote control is set into the belt, then remove your finger from
2
the release lever.
To fasten the remote control to your arm, pass the one end of the belt through the
3
hole on the other end of the belt, and fasten the belt with
the belt securely.
Note
Attaching the belt incorrectly may cause injury.
Be careful not to drop the remote control when unfastening the belt.
. Then slide to hold
Page 11
[6] Getting Started
Attaching the remote control to the Mount Adaptor
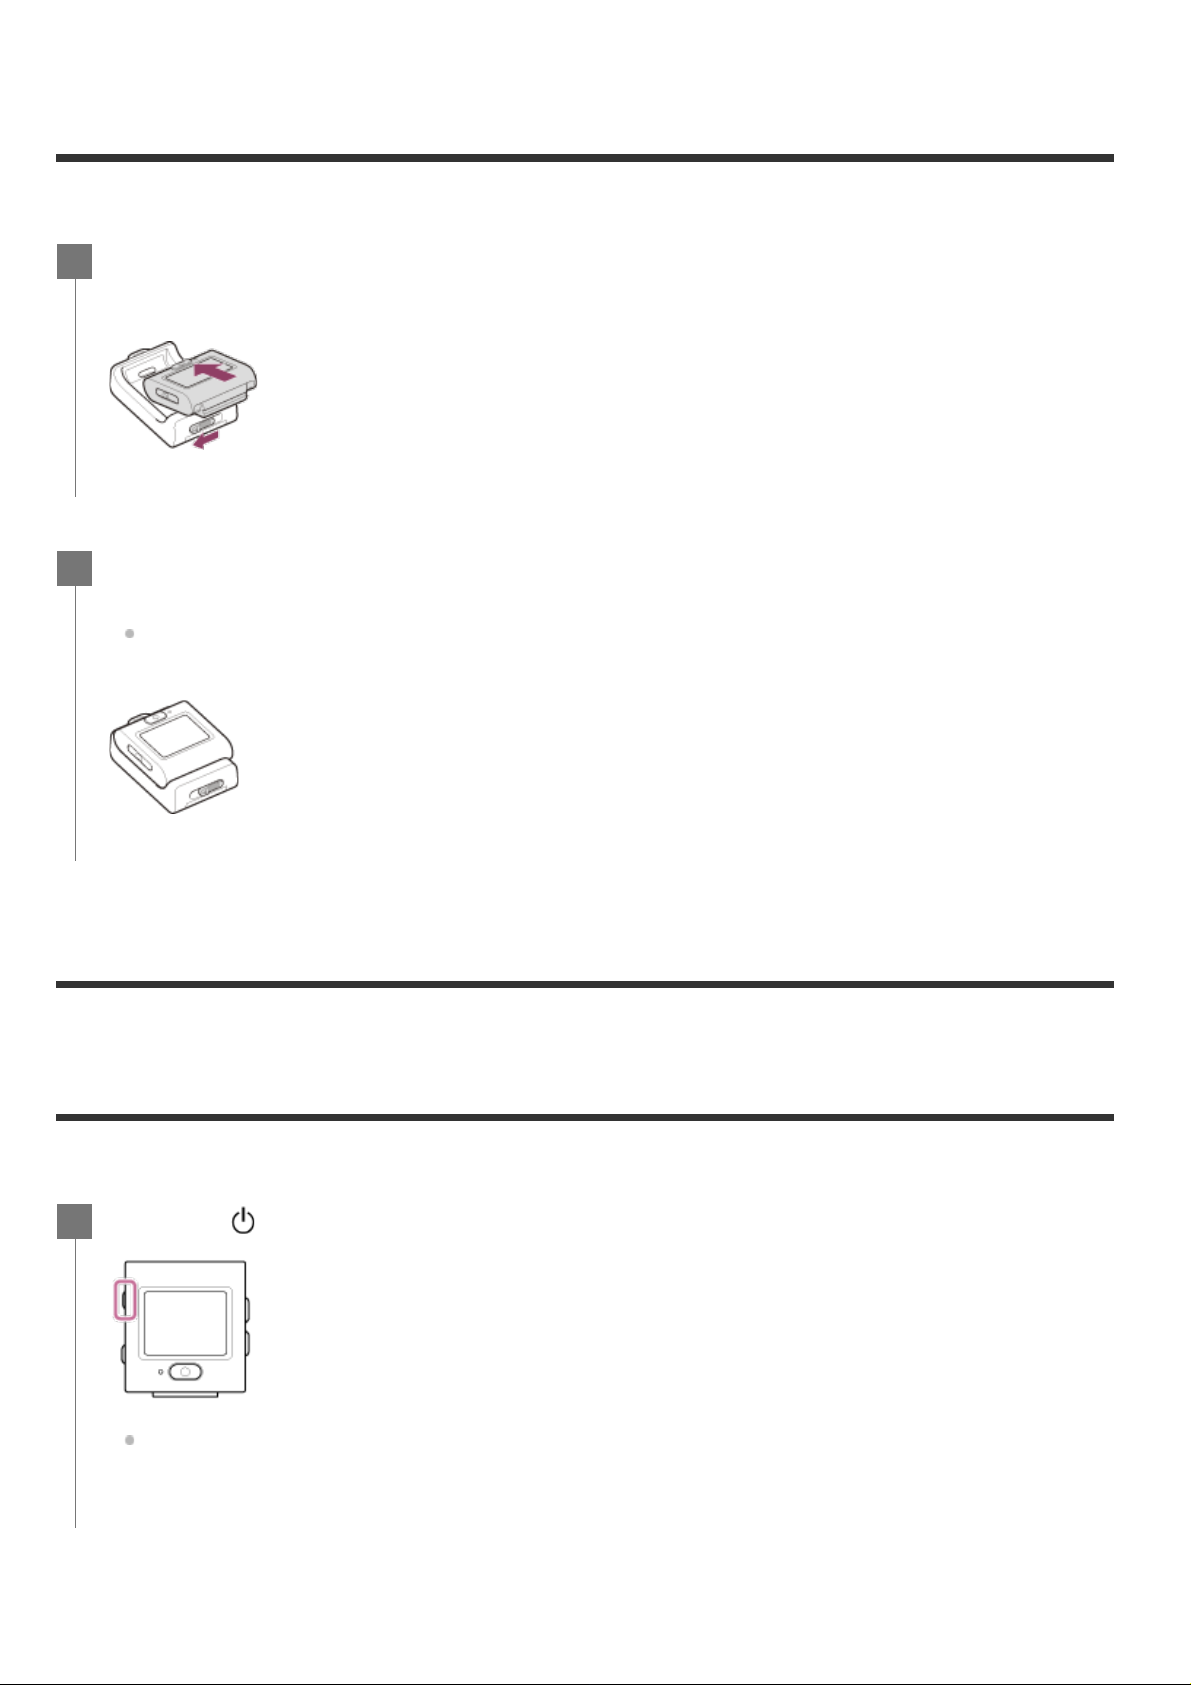
The remote control set into the Mount Adaptor (supplied) can be used with a tripod.
[7] Getting Started
Turning on/off the power of the remote control
Turn on/off the power of the remote control.
Turning off the power
Align the protruding portion of the remote control with the concave portion of the
1
Mount Adaptor, while pulling the release lever of the Mount Adaptor toward the
opposite side with your finger.
Make sure that the remote control is set into the Mount Adaptor, then remove your
2
finger from the release lever.
The release lever returns to the original position and the remote control is attached to the
Mount Adaptor.
Press the (on/standby) button.
1
When the remote control is turned on for the first time, the area/daylight saving time
(summer time)/date and time setting screen is displayed.
Page 12
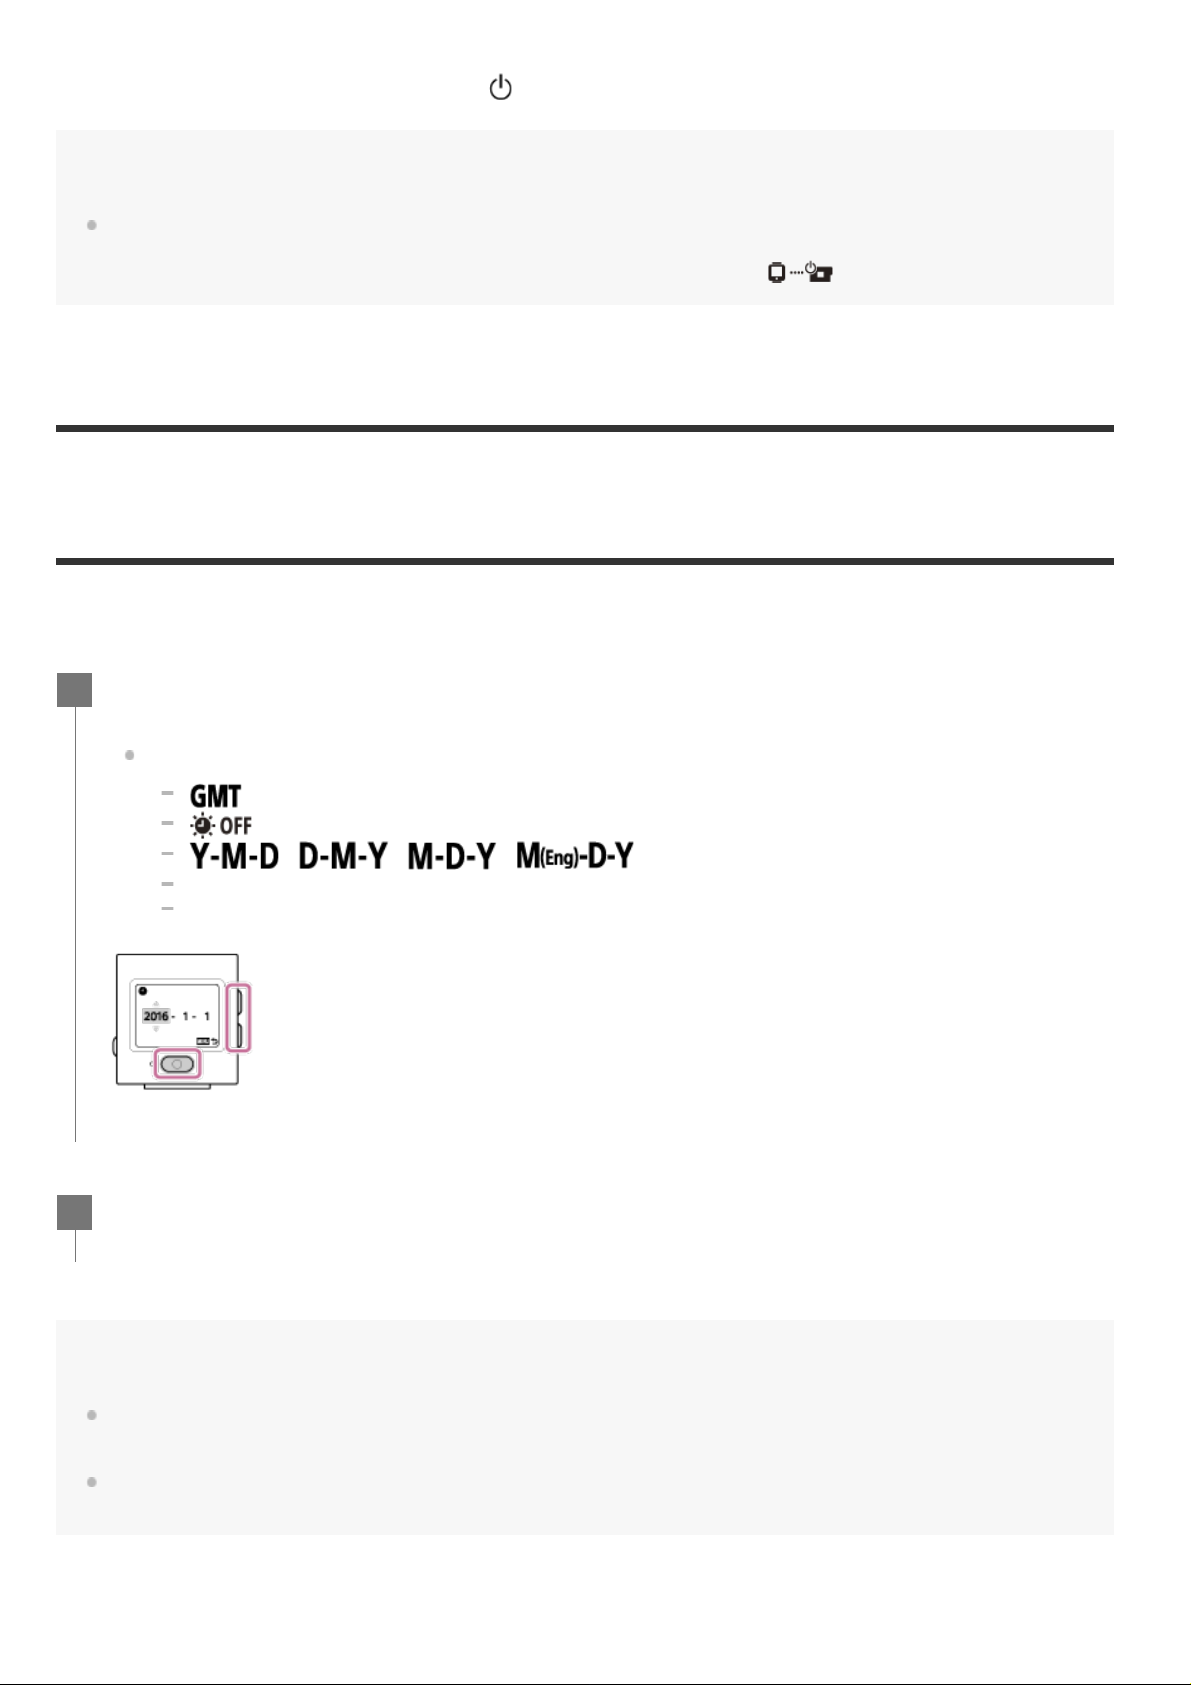
To turn off the remote control, press the
[8] Getting Started
Setting the date and time
When you use the remote control for the first time, the setting screens such as the date and time or
date format are displayed. Set the date and time before using the remote control.
Hint
When the remote control is turned on/off, the compatible camera (Bluetooth remote controller power
compatible) can also be turned on/off (only when the Bluetooth setting is set to ON on the remote control
and camera, and the Bluetooth remote controller power setting is set to
(on/standby) button again.
on the camera).
Press the UP button or DOWN button to select the desired item, then press the
1
REC/ENTER button.
The following items are displayed in turn on the LCD screen.
: Area setting
: Daylight saving time (summer time) setting
/ / / : Date format
Year-Month-Day setting
Clock setting
Check the settings on the displayed screen, then press the REC/ENTER button.
2
Hint
Regions are defined by the time difference between Greenwich Mean Time (GMT) and the standard time of
your residence. For details on the time difference, see “The list of time differences for world capitals.”
You can set the above settings from the remote control settings. See “Date & time setting,” “Area setting,”
“Daylight saving time (summer time) setting,” and “Date format.”
Page 13
[9] Getting Started
Connecting the remote control to a camera via Wi-Fi (Single connection)
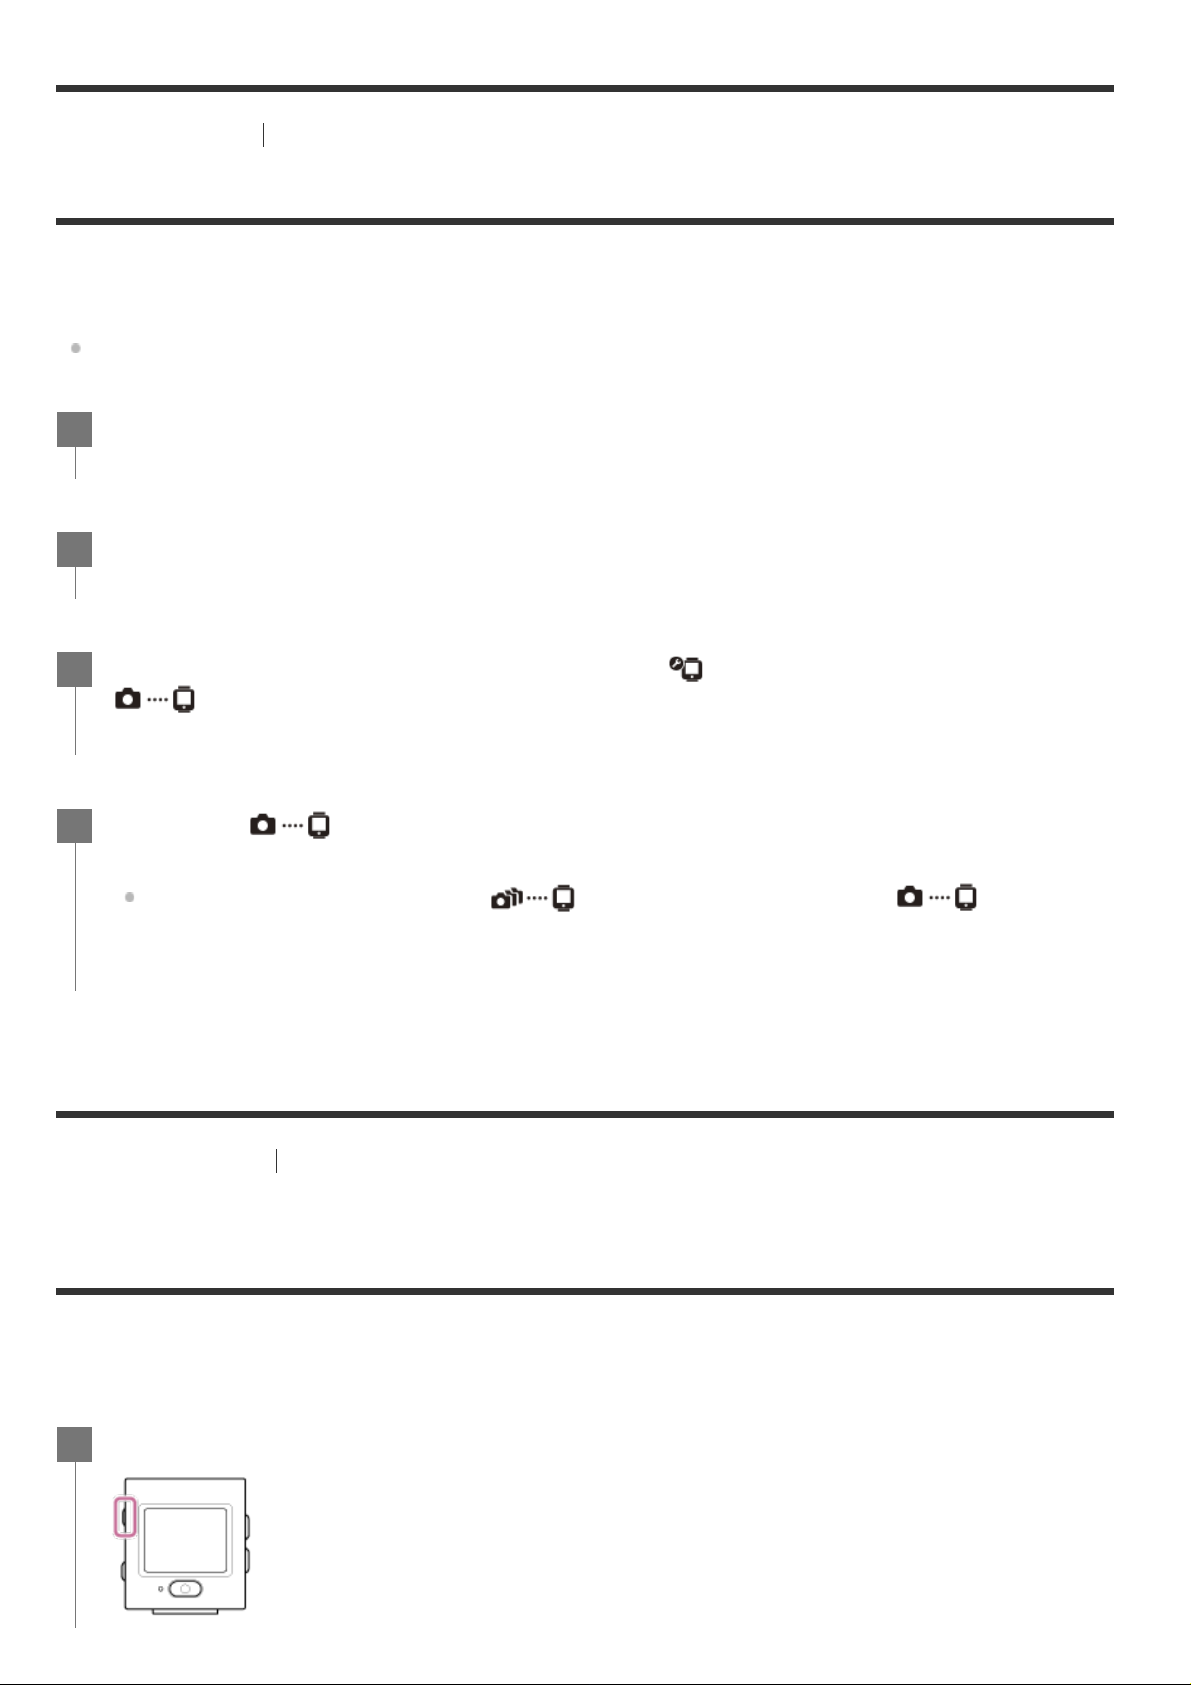
Checking the connection mode
Check that the connection mode of the remote control is set to the single connection before
connecting the remote control and the camera via Wi-Fi.
[10] Getting Started
Connecting the remote control to a single camera via
Wi-Fi
You can operate a single camera at a distance when the remote control is connected to the camera
via Wi-Fi.
For details about how to operate a camera, refer to the operating instructions of the camera.
Refer to the Help Guide of the camera on the website for how to confirm the connection mode of
the camera.
Turn on the power.
1
Press the MENU button.
2
Press the UP button or DOWN button to select
3
Check that (single connection) is selected, then press the REC/ENTER
4
button.
If the connection mode is set to
connection).
(Remote control settings) -
(connection mode), then press the REC/ENTER button.
(multi connection), switch to (single
Connecting the remote control to a camera via Wi-Fi (Single connection)
Turn on the remote control.
1
Page 14
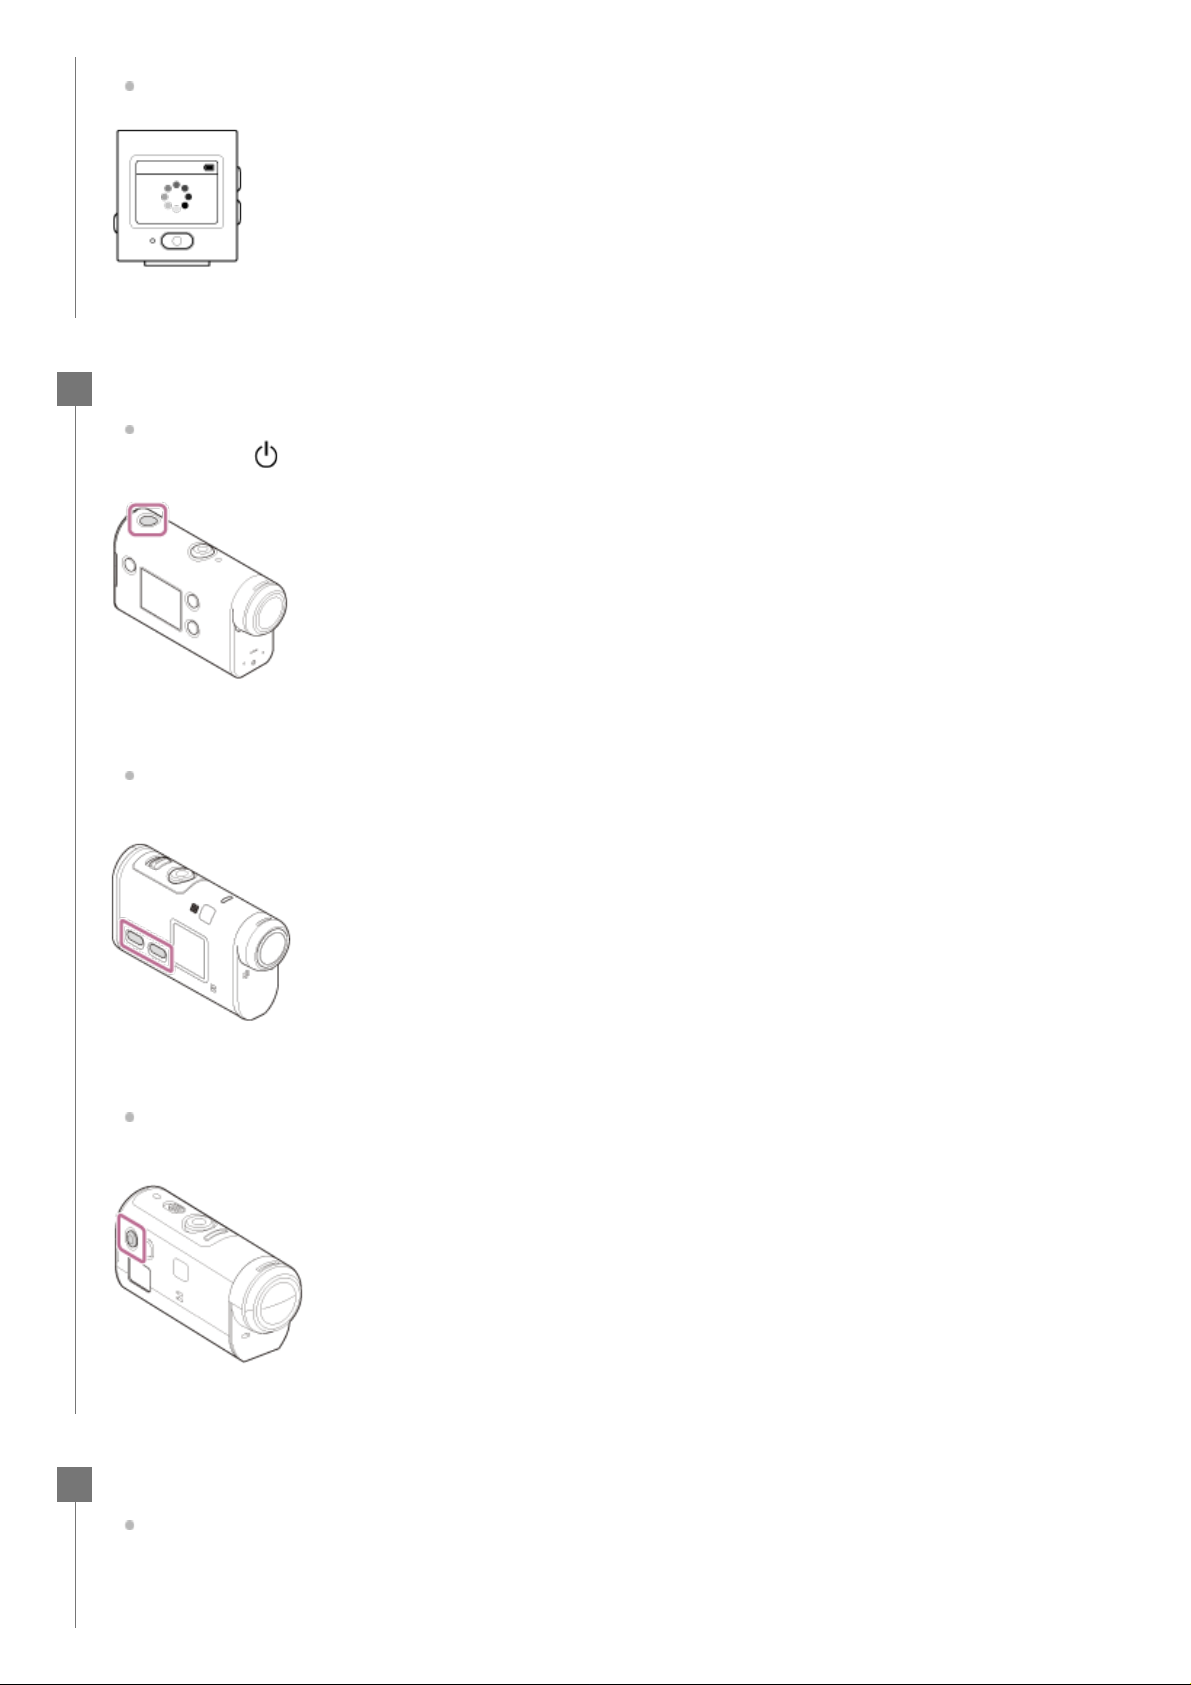
The Wi-Fi standby screen is displayed when the remote control is activated.
Turn on the camera.
2
FDR-X3000/HDR-AS300/HDR-AS50
Press the
(on/standby) button.
The
camera excluding FDR-X3000/HDR -AS300/HDR- AS50/HDR -AZ1
Press the NEXT or PREV button.
HDR
-AZ1/Lens-style Camera (QX series)
Press the ON/OFF (Power) button.
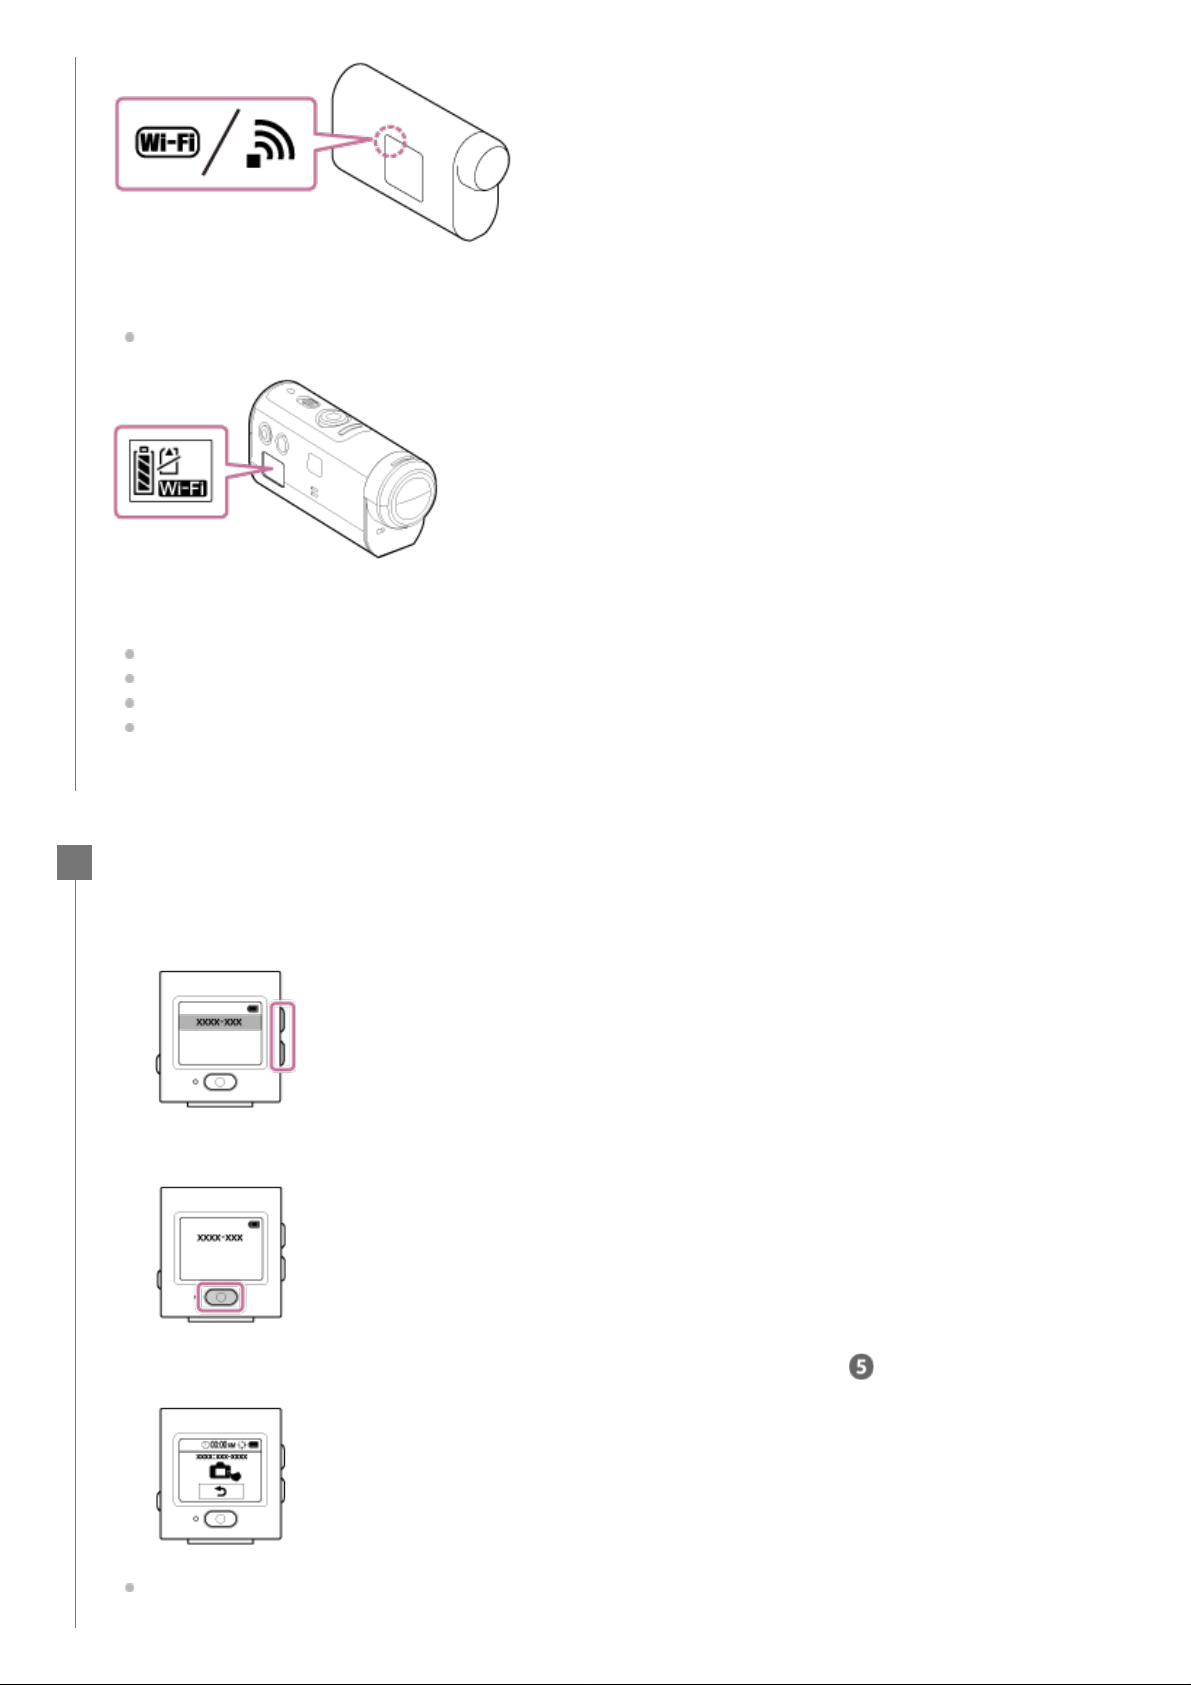
Check the camera settings.
3
The camera excluding HDR-AZ1
Page 15
HDR
-AZ1/Lens-style Camera (QX series)
Check
For DSC-QX100/QX10, the Wi-Fi mark is not displayed on the camera display.
If the connection mode of the camera is set to multi connection, switch to single connection.
For HDR-AS15/AS30V, insert a memory card to the camera.
Select the camera you want to connect to the remote control.
4
1.
2.
that a Wi-Fi mark is displayed on the display panel of the camera.
Press the UP button or DOWN button to select the model name of the camera which you
want to connect to the remote control.
Press the REC/ENTER button.
When the remote control is in the standby status, proceed to step .
3.
If you press the REC/ENTER button in the standby status, the remote control will be released
from the standby status. In this case, select the model name of the camera again.
Page 16
If the model name is not displayed, check that the camera is in single connection mode.
Refer to the Help Guide of the camera on the website for how to check the connection mode
of the camera.
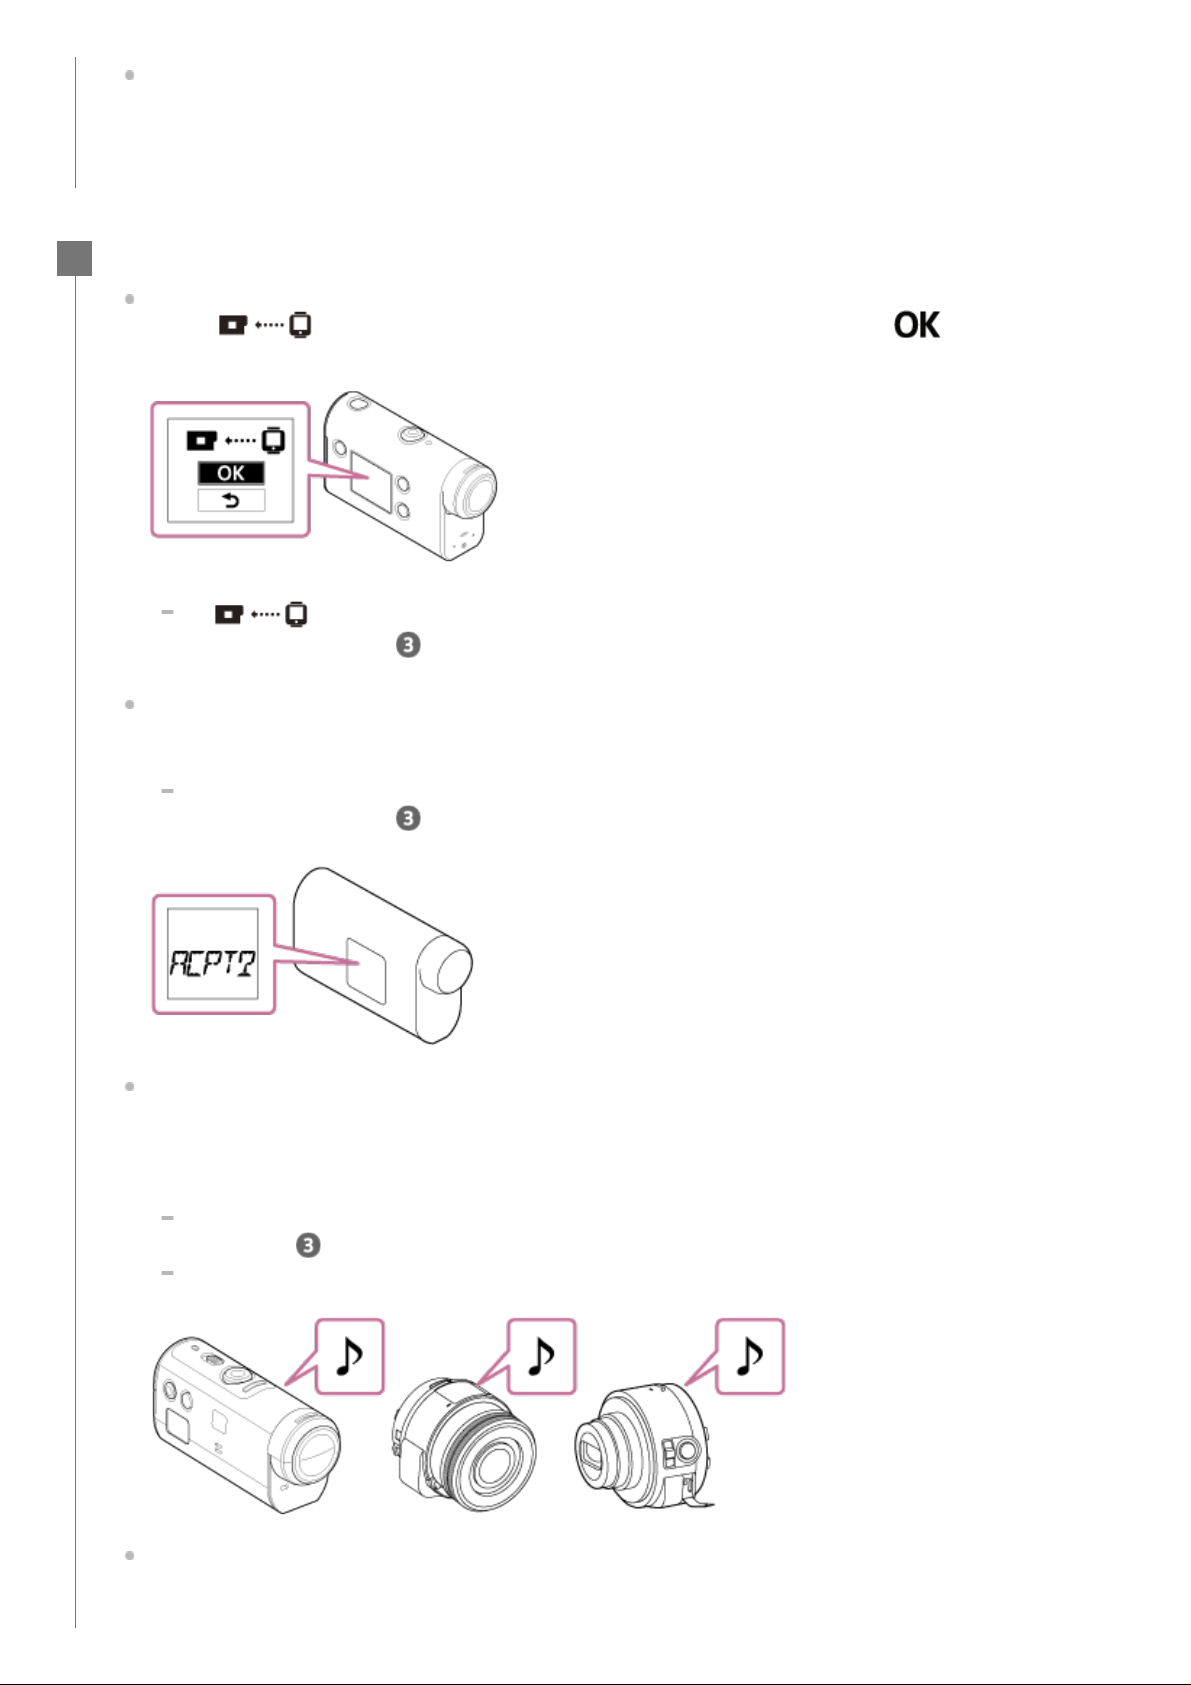
Register the remote control to the camera.
5
FDR-X3000/HDR-AS300/HDR-AS50
When
the camera, then press the REC/ENTER button of the camera .
If is not displayed on the display panel of the camera, restart the camera and
try again from step
is displayed on the display panel of the camera, select (execute) of
.
The camera excluding FDR-X3000/HDR-AS300/HDR -AS50/HDR -AZ1
When [ACPT?] is displayed on the display panel of the camera, press the REC/ENTER
button of the camera.
If [ACPT?] is not displayed on the display panel of the camera, restart the camera and
try again from step
HDR-AZ1/Lens-style Camera (QX series)
When you hear the connection confirmation beep, press and hold the Wi-Fi button of the
camera (Shutter button for the DSC-QX100/QX10) until you hear the connection beep.
If the connection confirmation beep does not sound, restart the camera and try again
from step
If the beep is set to OFF, the connection confirmation beep does not sound.
.
.
After the connection is established, the LCD screen of the remote control switches to the
Live-View display and the REC/Wi-Fi lamp lights in blue.
Page 17
If you cannot connect the remote control to the camera via Wi-Fi/ if the
connection is not established
[11] Getting Started
connection)
Connecting the remote control to multiple cameras via
Wi-Fi
You can connect the remote control to a maximum of five cameras and operate all cameras
simultaneously.
Note
Once all procedures until step are completed, the remote control and the camera will automatically
be connected when you turn on the power.
The shortened character string of the camera is displayed on the remote control with “DIRECT-”
removed from the SSID.
You cannot copy images recorded in the camera to the remote control.
If the remote control cannot connect to the camera via Wi-Fi, check that the remote control is in
single connection mode. If the remote control is not in the single connection mode, change the
connection mode and try again.
If the connection to the camera is not established, the signal traffic may be heavy. In this case,
move to another location and try again.
Connecting the remote control to multiple cameras via Wi-Fi (Multi
Page 18
Turn on the remote control.
1
Press the MENU button.
2
Press the UP button or DOWN button to select
3
(connection mode) - (multi connection), then press the REC/ENTER
button.
Press MENU button.
4
Press the UP button or DOWN button to select
5
press the REC/ENTER button.
Turn on the camera.
6
Register the remote control to the camera.
7
(Remote control settings) -
(device registration), then
FDR-X3000/HDR-AS300/HDR-AS50
Press the MENU button of the camera and press the UP button or DOWN button of the
camera to select
connection) The camera excluding FDR-X3000/HDR-AS300/HDR -AS50/HDR -AZ1
Select [MULTI] - [NEW] in the Wi-Fi settings.
HDR-AZ1/Lens-style Camera (QX series)
Press the Wi-Fi button of the camera and switch the connection mode of the camera to the
multi connection mode, then press and hold the Wi-Fi button of the camera.
Refer to the Help Guide of the camera on the website for how to switch the connection mode
of the camera.
Select (execute) of the remote control, then press the REC/ENTER button.
8
The requested connection is accepted and the LCD screen of the remote control switches to
Live-View display.
(Camera Settings) - (Wi-Fi connection setting) - (multi
, then press the REC/ENTER button of the camera.
If you will continue to connect multiple cameras, repeat from step 4.
9
Page 19
Note
[12] Getting Started
connection)
Resetting the connection information of the registered
camera
This function is only available when the camera is in multi connection.
[13] Shooting
Switching shooting modes
Switch the shooting mode by pressing the UP button or DOWN button on the Live-View display of the
remote control during single connection.
Register cameras before connection standby mode of the remote control is canceled.
The multi camera control function is only available with the compatible cameras.
When operating a camera that does not support the multi camera control function, set the connection mode
to
You cannot copy images recorded in the camera to the remote control.
The WPS method is used for connecting the remote control to multiple cameras. If there is another device
using the WPS method in the vicinity of the cameras, the registration may fail. If the registration fails,
reconnect by performing each step again.
(single connection).
Connecting the remote control to multiple cameras via Wi-Fi (Multi
Press the MENU button.
1
Press the UP button or DOWN button to select
2
(reset network settings), then press the REC/ENTER button.
Press the UP button or DOWN button to select
3
press the REC/ENTER button.
(Remote control settings) -
(execute) or (cancel), then
Shooting movies and still images
Page 20
Some shooting modes cannot be set depending on the connected camera. Refer to the instruction
The switchable shooting modes are as follows.
[14] Shooting
Shooting
Shoot movies or still images and record sound.
manual of the connected camera.
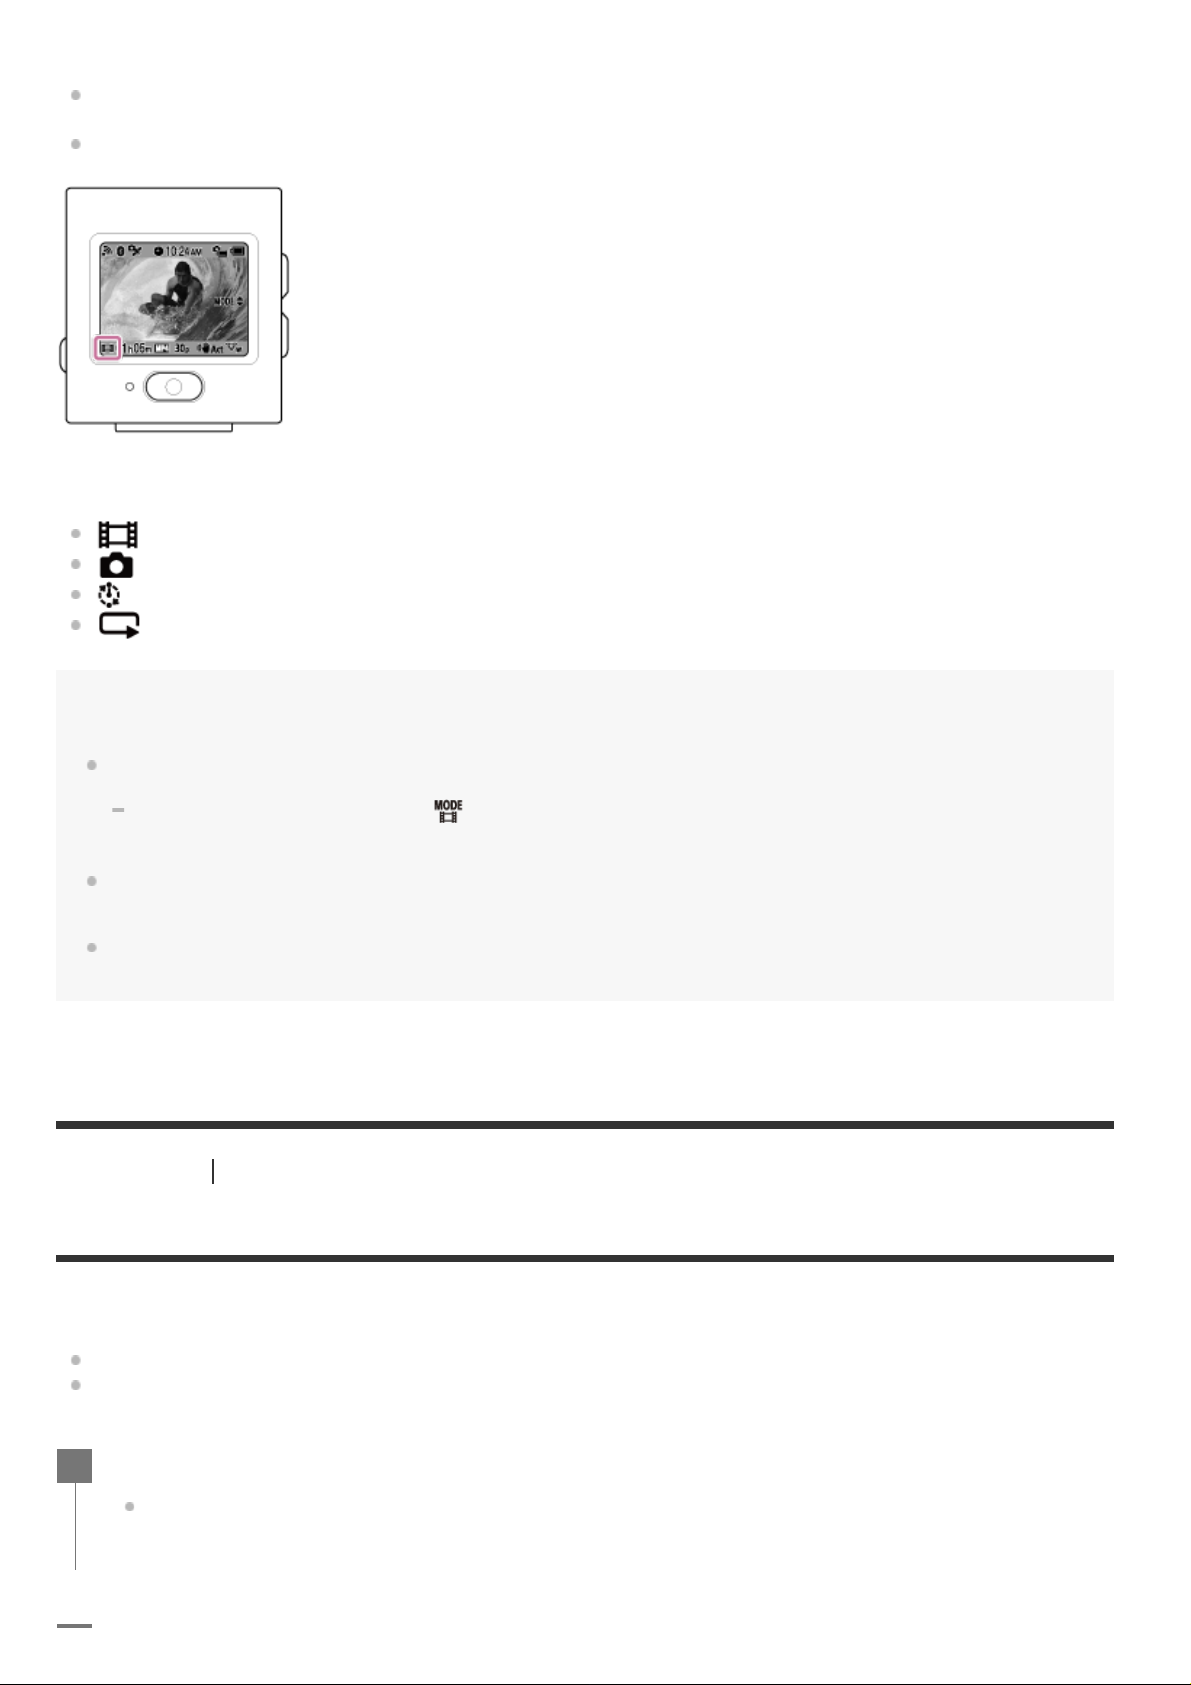
The shooting mode icon is displayed on the bottom left area of the display.
Movie mode: Shoots movies.
Photo mode: Shoots still images.
Time-lapse capture mode: Keeps shooting still images at regular intervals.
Loop recording mode: Keeps recording movies according to the set time.
Hint
You can also switch the shooting mode via MENU items on the remote control. The procedure for switching
via MENU items is described below.
Press the MENU button to select
button to select the shooting mode, then press the REC/ENTER button.
If you connect to the zoom function compatible camera while the Zoom setting of the camera is ON, press
the UP button or DOWN button to operate camera zoom in the Live-View display.
If you connect to a Lens-style Camera (QX series), press the UP button or DOWN button to operate the
camera zoom in the Live-View display.
(shooting mode) in the setting items. Press the UP button or DOWN
Shooting movies and still images
Check the shooting mode before shooting.
Some setting items cannot be set depending on the connected cameras. Refer to the instruction
manual of the camera.
Press the REC/ENTER button of the remote control to start shooting.
1
The REC/Wi-Fi lamp turns from blue to red.
Page 21
[15] Shooting
Using the zoom
When the zoom setting of the camera is ON in the single connection mode, you can change the zoom
magnification of the camera on the remote control.
[16] Shooting
Operating with the multi camera control
To stop shooting, press the REC/ENTER button again.
2
Note
The REC/Wi-Fi lamp turns from red to blue.
You can shoot a still image by pressing the REC/ENTER button in photo mode.
The REC/Wi-Fi lamp does not turn to red.
Shooting movies and still images
Be sure that
1
If
Press the UP button or DOWN button to change the zoom magnification.
2
UP button: Telephoto
DOWN button: Wide angle
Note
When the remote control is connected to multiple cameras, press the UP button or DOWN button to switch
the Live-View display of the connected cameras on the remote control.
Some cameras may not be compatible with this function.
is not displayed, check “Zoom setting.”
is displayed on the LCD screen and the Zoom setting is ON.
Shooting movies and still images
Page 22
Operate multiple cameras on the remote control with multi connection.
Press the REC/ENTER button of the remote control to start recording on all connected cameras.
[17] Shooting
Button hold function
This function prevents you from accidentally pressing the buttons of the remote control while carrying
the remote control around.
Press the MENU button for 2 seconds or more to set the button hold function.
You can connect up to five cameras at the same time with multi connection.
Some setting items cannot be set depending on the connected cameras. Refer to the instruction
manual of the camera.
Press the UP button or DOWN button of the remote control to move the cursor and switch the
Live-View display on the LCD screen of the remote control to the display of any of the connected
cameras.
The remote control operates according to the shooting mode of the connected camera.
To stop recording in Movie mode, Time-lapse capture mode, or Loop recording mode, press the
REC/ENTER button of the remote control again.
Note
The operation command from the remote control under multi camera control is sent to all connected
cameras.
The following camera operations are available on the remote control. Other camera settings such as image
quality etc. should be performed on the camera.
Changing the shooting mode
Starting/Stopping recording in Movie mode, Time-lapse capture mode, or Loop recording mode
Shutter operation for shooting still images
The reaction time of the connected cameras may change depending on the situation of each camera. There
may be a time lag between the connected cameras when starting recording, etc.
If one or more of the connected cameras are recording, the REC/Wi-Fi lamp lights up in red.
If you press the REC/ENTER button of the remote control at this time, the command to stop recording is
sent to all the connected cameras.
Shooting movies and still images
Page 23
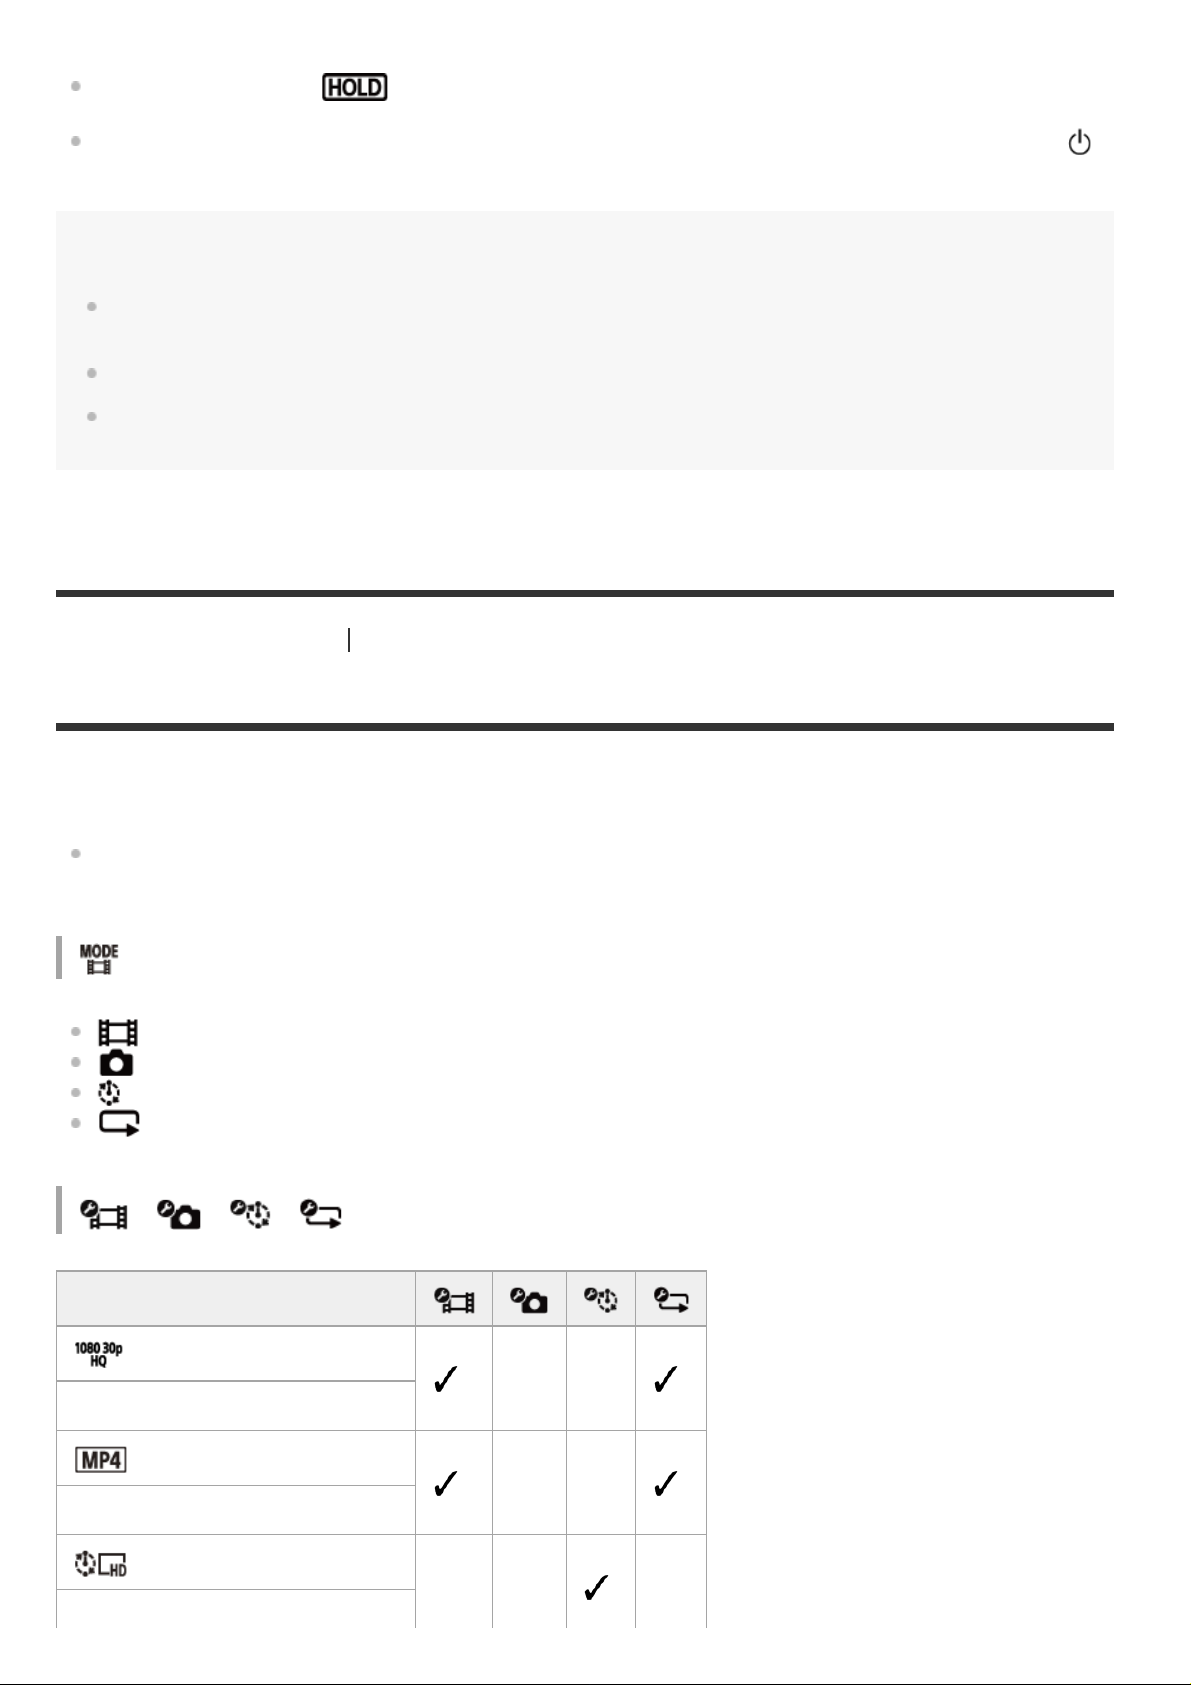
In button hold mode, appears on the LCD screen of the remote control. The REC/ENTER
[18] Changing the Settings
List of setting items
You can display and change the settings by pressing the MENU button while the camera and remote
control are connected via Wi-Fi.
Time-lapse capture image size
button, MENU button, UP button and DOWN button of the remote control are disabled.
To cancel the button hold mode, press the MENU button for 2 seconds or more, or press the
(on/standby) button to turn off the power of the remote control.
Note
The button hold function is only available when the remote control is connected to a camera via Wi-Fi. When
not connected, the button hold function cannot be used.
The button hold function cannot be used while the MENU item is displayed.
When the Wi-Fi connection between the remote control and the camera is disconnected, the button hold
function is canceled.
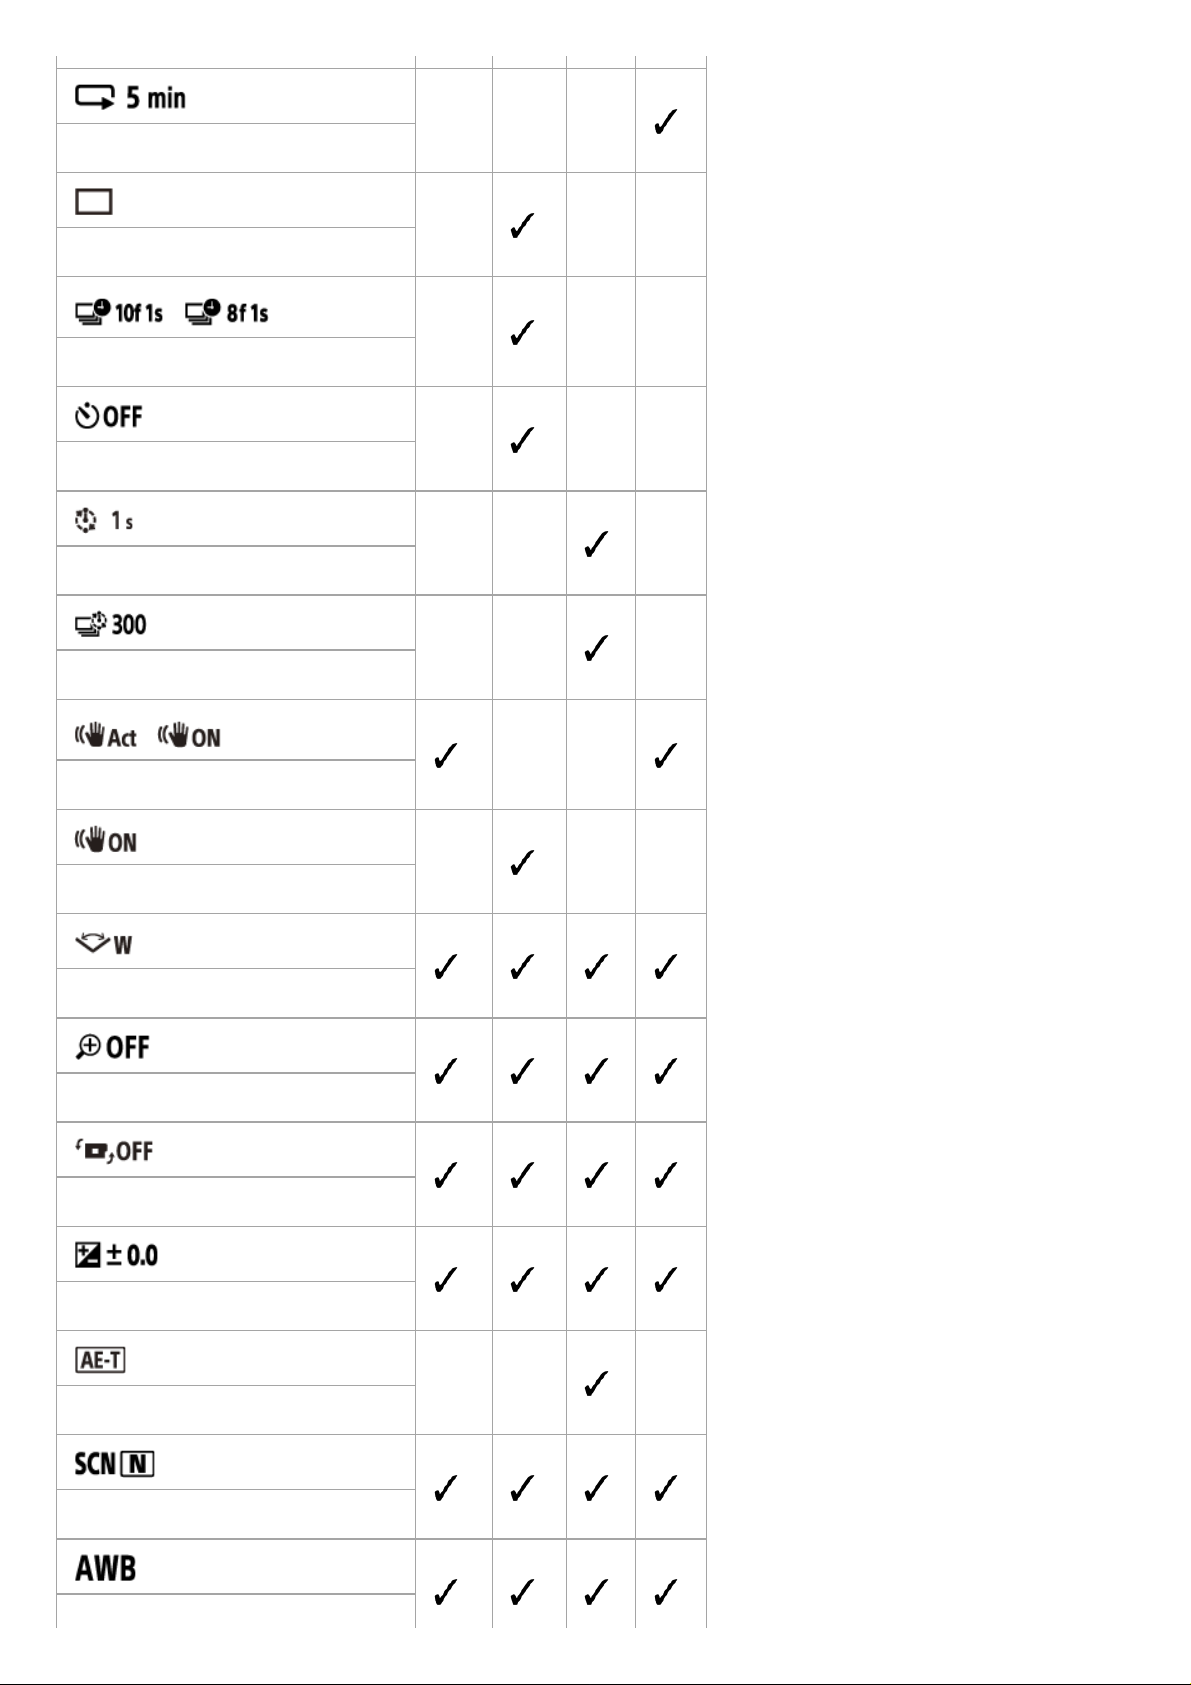
List of setting items
Some setting items cannot be set depending on the connected cameras or selected shooting
mode. Refer to the instruction manual of the camera.
Shooting modes
: Movie mode
: Photo mode
: Time-lapse capture mode
: Live streaming mode
/ / / Shooting settings
*1
Setting items
Image quality setting
Movie format
– –
– –
– – –
Page 24
Loop recording time
Still image mode switching
– – –
– – –
/
*2
Still image shooting interval
Self-timer
Time-lapse shooting interval
Time-lapse shot number
/
*2
SteadyShot (Movie)
(FDR-X3000/HDR-AS300)
SteadyShot (Still)
– – –
– – –
– – –
– – –
– –
–
– –
Angle setting
Zoom setting
Flip
AE shift
Time-lapse AE mode
Scene
– – –
Page 25
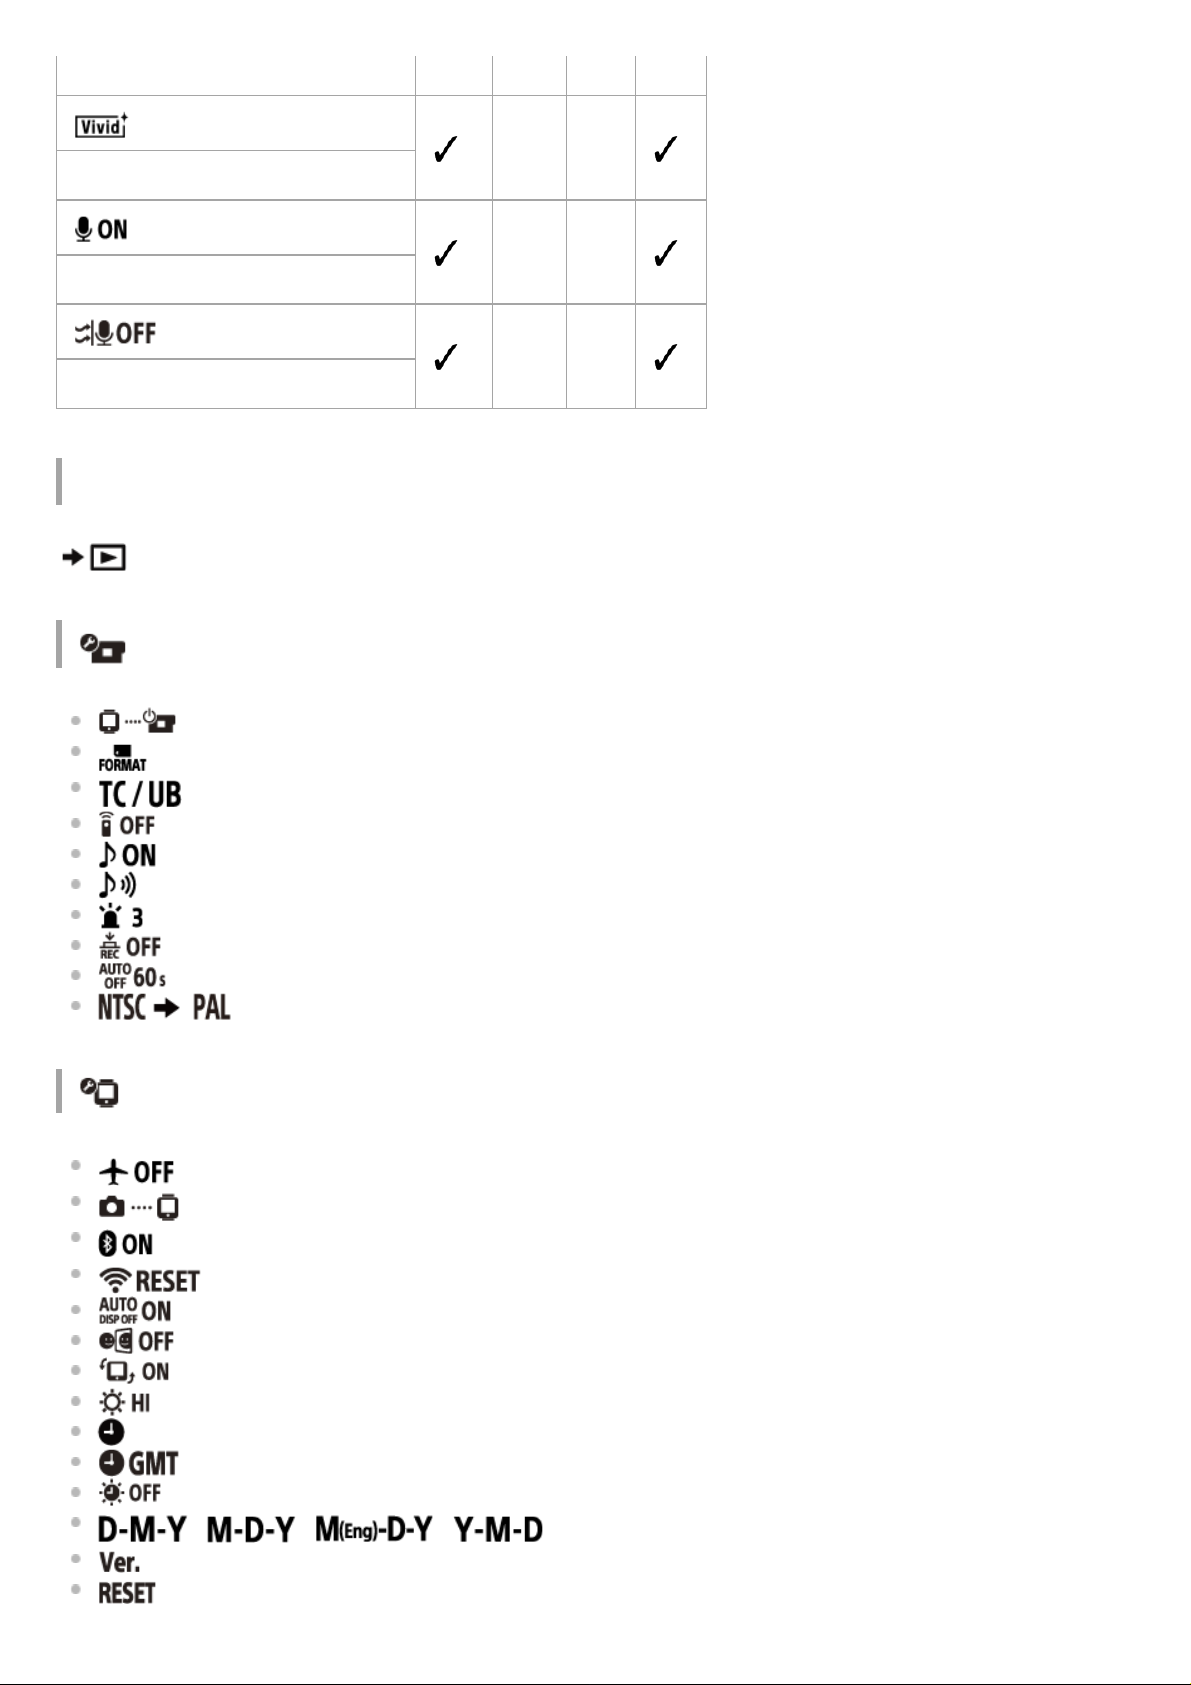
White balance
Color mode
Audio recording setting
Wind noise reduction
– –
– –
– –
Play mode
*1
Plays and deletes movies/images using the remote control.
Camera Settings
*1
: Bluetooth remote controller power setting
: Format
*3
: Time code/user bit
*4
: IR remote
: Beep
: Beep volume
: Lamp setting
: One touch recording
: Auto power off
: Switching NTSC/PAL
Remote control settings
: Airplane mode
: Connection mode
: Bluetooth setting
: Network setting reset
: Auto monitor off while shooting
: Mirror Mode
: Display rotate
: Monitor brightness
: Date & time setting
: Area setting
:Daylight saving time (summer time) setting
/ / / : Date format
: Version
: Resetting the settings
*5
*5, *6
*5, *6
*6, *7
*8
Page 26
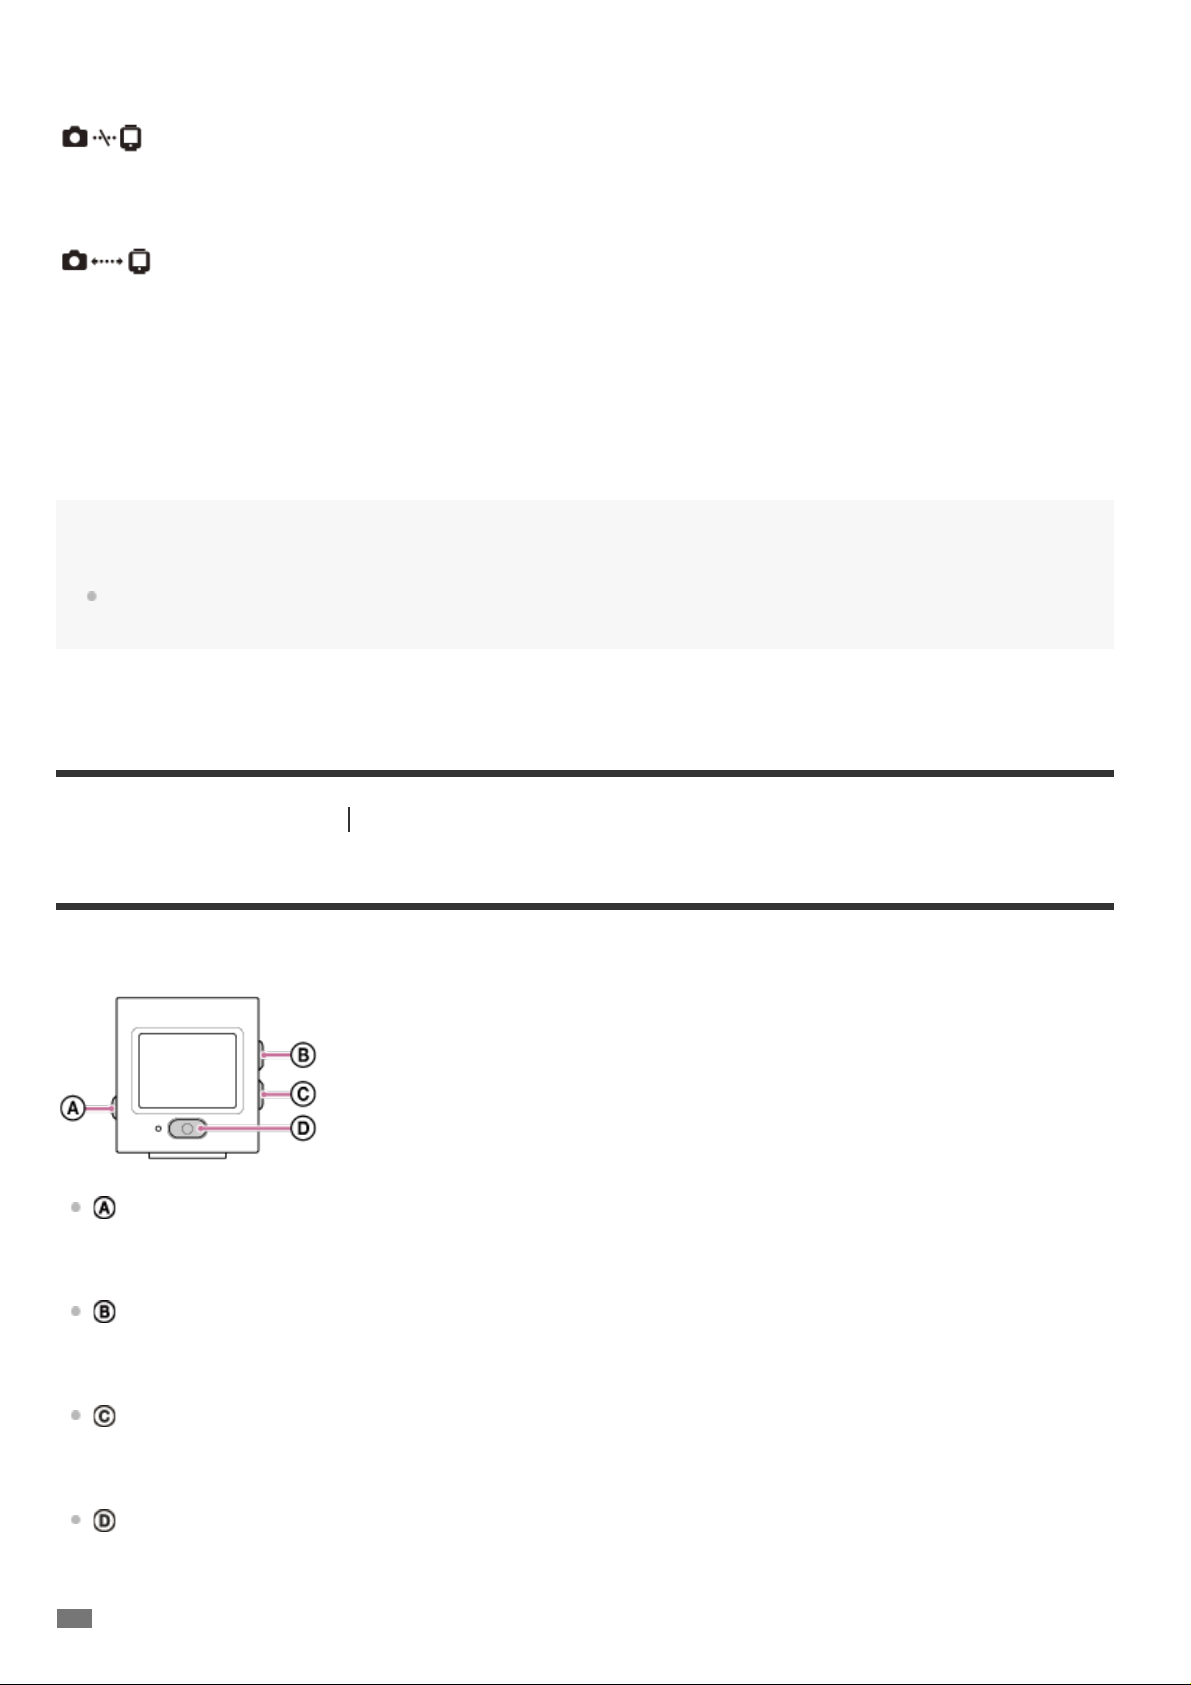
Disconnect
Device registration
[19] Changing the Settings
How to set the setting items
You can set items using the following 4 buttons on the remote control.
*1
*2
*3
*4
*5
*6
*7
*8
Disconnects the Wi-Fi connection and returns to the Wi-Fi device selection screen.
*7
Displayed only in the single connection.
The icon varies depending on the connected camera.
Displayed only when a memory card is inserted into the camera.
Displayed only when set to movie mode/loop recording mode.
Not displayed when the camera and the remote control are connected via Wi-Fi.
Not displayed when the Airplane mode is set to ON.
Displayed only in multi connection.
The display varies depending on which country or region you purchased the remote control.
Registers a camera to connect to the remote control for multi connection.
Note
The setting items of the camera are displayed only when the camera and the remote control are connected
via Wi-Fi (excluding the remote control settings).
List of setting items
: MENU button
Displays the menu
: UP button
Goes to the previous menu
: DOWN button
Goes to the next menu
: REC/ENTER button
Executes the menu
Page 27
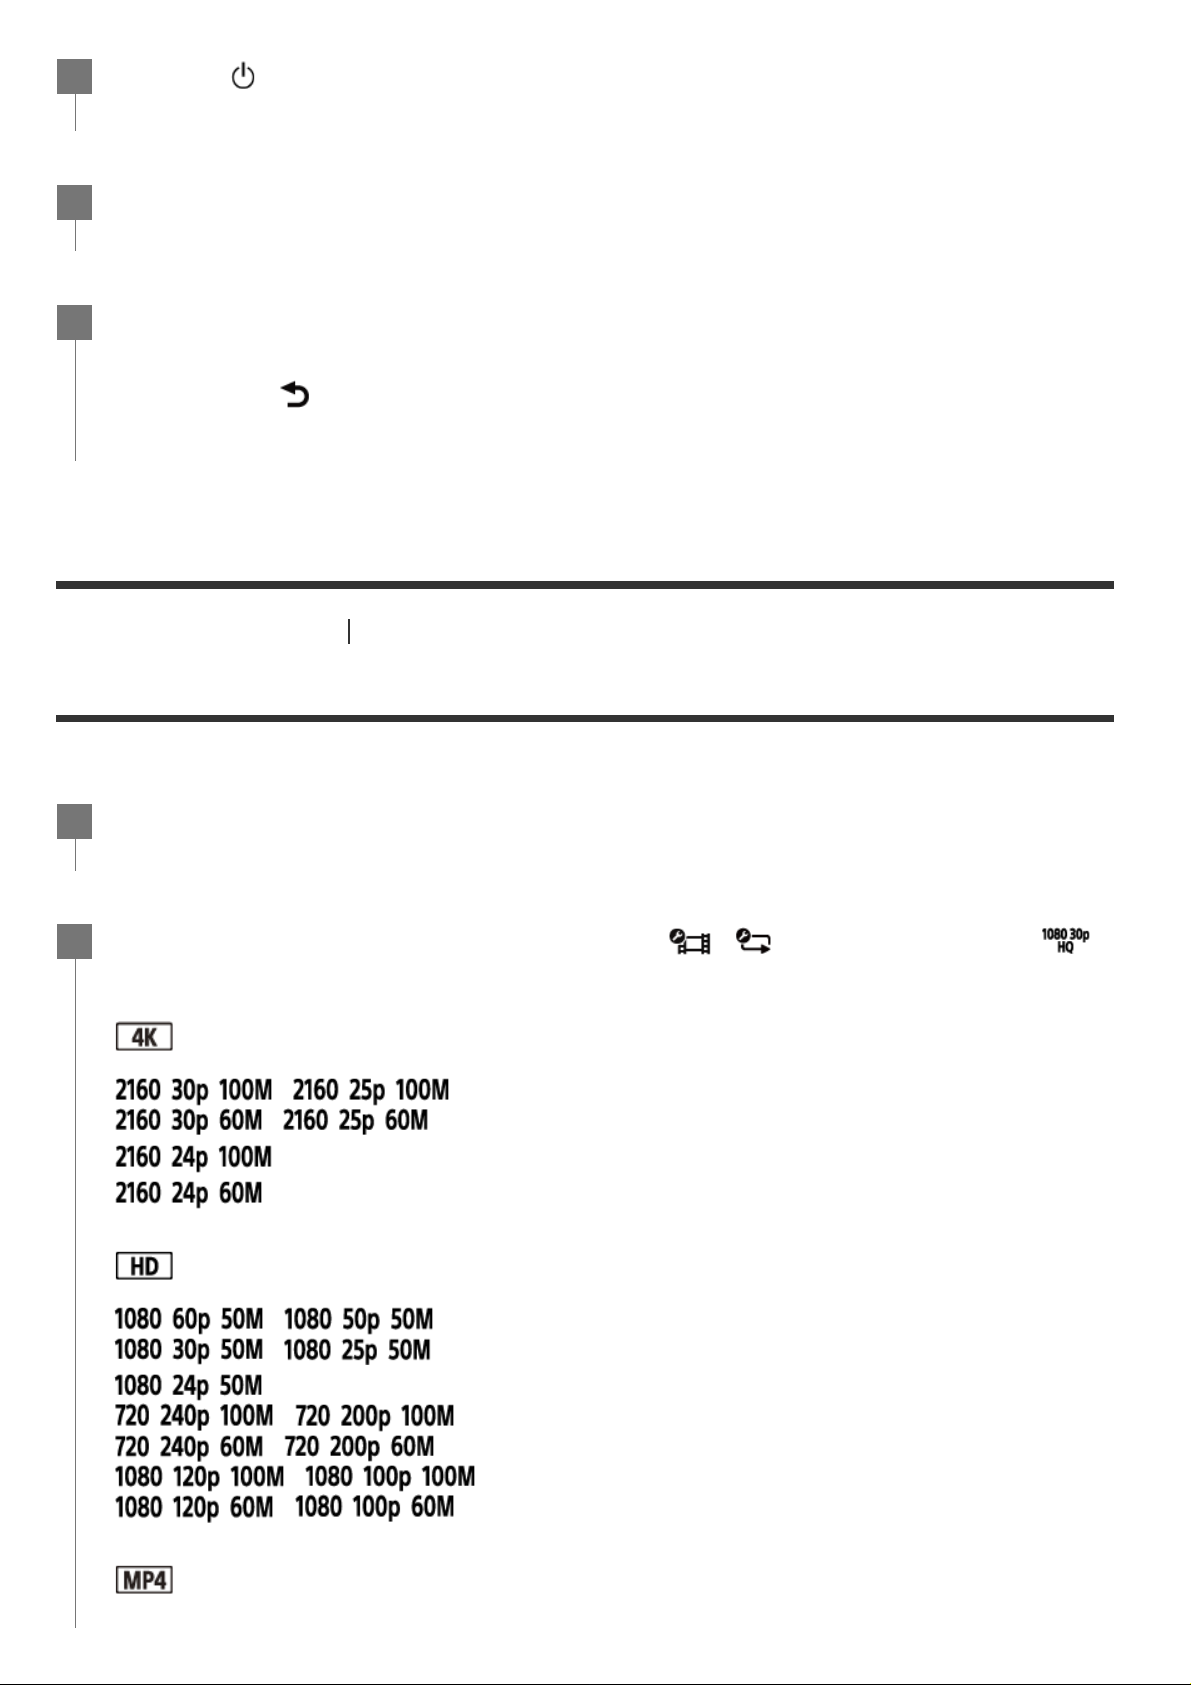
[20] Changing the Settings
Image quality setting
You can set the image resolution and frame rate for shooting movies or loop recording.
Press the
(on/standby) button to turn on the power.
1
Press the MENU button.
2
Press the UP button or DOWN button to select the icon of the item, then press the
3
REC/ENTER button.
To retry, select
(cancel), then press the REC/ENTER button.
Shooting settings
Press the MENU button.
1
Press the UP button or DOWN button to select
2
(Image quality setting) - setting value, then press the REC/ENTER button.
(When the movie record format is set to XAVC S 4K)
/ XAVC S 4K 100Mbps
/ XAVC S 4K 60Mbps
XAVC S 4K 100Mbps
XAVC S 4K 60Mbps
*2
*2
(When the movie record format is set to XAVC S HD)
/ (Shooting settings) -
*1
*1
/ XAVC S HD 50Mbps
/ XAVC S HD 50Mbps
XAVC S HD 50Mbps
/ XAVC S HD 100Mbps
/ XAVC S HD 60Mbps
/ XAVC S HD 100Mbps
/ XAVC S HD 60Mbps
*2
(When the movie record format is set to MP4)
*1
Page 28
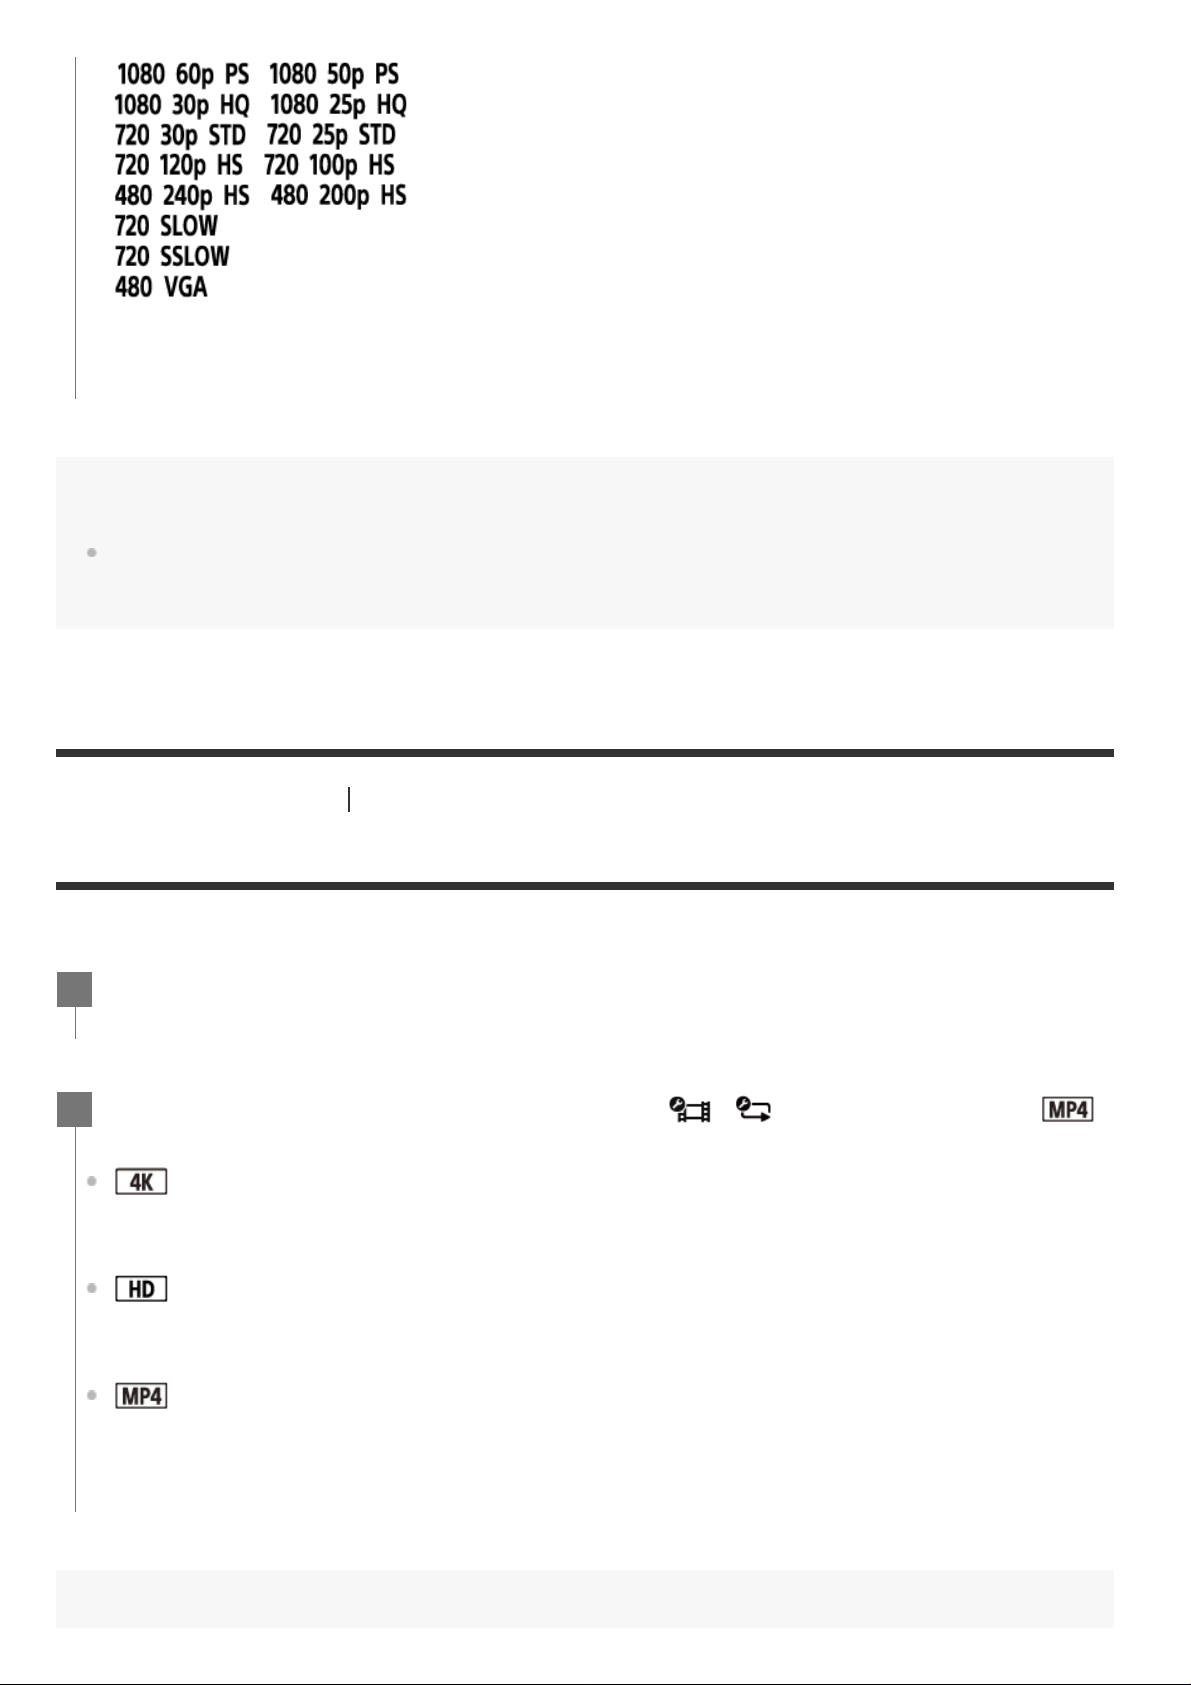
[21] Changing the Settings
Movie format
You can select the movie format for shooting movies or loop recording.
/ Highest resolution (smooth image recorded at 2× frame rate)
/ Highest resolution
/ High resolution
/ High speed recording (smooth image recorded at 4× frame rate)
/ High speed recording (smooth image recorded at 8× frame rate)
Slow recording (slow motion image recorded at 2× frame rate)
Super slow recording (slow motion image recorded at 4× frame rate)
Standard resolution
*1 Frame rate changes depending on the NTSC/PAL setting.
*2 The setting is available only when the NTSC/PAL setting is set to NTSC.
Note
The playback image frame rate displayed on the LCD screen will change according to the Wi-Fi
communication status between the camera and the remote control (and it is different from the one used
when shooting).
Shooting settings
Press the MENU button.
1
Press the UP button or DOWN button to select / (Shooting settings) -
2
(Movie format) - setting value, then press the REC/ENTER button.
: Records a 4K (XAVC S) movie.
Select the desired image quality.
: Records a HD (XAVC S) movie.
Select the desired image quality.
: Records an MP4 movie
Select this format if you want to upload to your smartphone or a website.
Page 29
Note
[22] Changing the Settings
Time-lapse capture image size
You can set the image size of still images shot during time-lapse capture.
[23] Changing the Settings
Loop recording time
Set the time range (media area) for loop recording.
After selecting the Format, set “Image quality setting.”
Shooting settings
Press the MENU button.
1
Press the UP button or DOWN button to select (Time - lapse capture mode
2
setting) REC/ENTER button.
(Shoots still image in 4K (3840 x 2160) (image size 8.3 M))
(Shoots still image in HD (1920 x 1080) (image size 2.1 M))
(Time-lapse capture image size) - setting value, then press the
Shooting settings
Press the MENU button.
1
Press the UP button or DOWN button to select (Loop recording mode setting) -
2
(Loop recording time) - setting value, then press the REC/ENTER button.
(Sets the loop recording time to 5 minutes. The size of created movie is 1 minute
per file.)
(Sets the loop recording time to 20 minutes. The size of created movie is 5
minutes per file.)
(Sets the loop recording time to 60 minutes. The size of created movie is 15
minutes per file.)
(Sets the loop recording time to 120 minutes. The size of created movie is 15
minutes per file.)
(Keeps recording continuously up to the limit of free space of a memory. The size
Page 30
[24] Changing the Settings
Still image mode switching
You can select either single shooting or continuous shooting when shooting still images.
[25] Changing the Settings
Still image shooting interval
of created movie is 15 minutes per file.)
Shooting settings
Single shooting and continuous shooting can only be set when shooting still images.
Press the MENU button.
1
Press the UP button or DOWN button to select (Photo mode setting) - (Still
2
image mode switching) - setting value, then press the REC/ENTER button.
: Single shooting
Shoots a single still image.
: Burst shooting
Shoots at the interval set in the
: Motion Shot LE
Generates a still image from still image continuously shot at the interval set in the
*
(Still image shooting interval).
/
*
(Still image shooting interval)
/
*
The icon varies depending on the connected camera.
Note
After shooting with Burst Shooting or Motion Shot LE mode, there is a processing time during which the next
operation cannot be operated.
Shooting settings
Page 31
You can select the continuous shooting setting for using burst shooting or Motion Shot LE.
[26] Changing the Settings
Self-timer
You can use self-timer when shooting still images.
Press the MENU button.
1
Press the UP button or DOWN button to select (Photo mode setting) - /
2
*
(Still image shooting interval) - setting value, then press the REC/ENTER
button.
*
The icon varies depending on the connected camera.
(Records a total of 10 still images in 1 second at a speed of 10 still images per
second)
Suitable for shooting fast-moving objects.
(Records a total of 10 still images in 1.25 seconds at a speed of 8 still images per
second)
Suitable for shooting fast-moving objects.
(Records a total of 10 still images in 2 seconds at a speed of 5 still images per
second)
Suitable for action shots of objects.
(Records a total of 10 still images in 5 seconds at a speed of 2 still images per
second)
Suitable for shooting slow-moving objects.。
Note
“10f1s”, “8f1s”, “5f2s”, and “2f5s” are estimates of the maximum speed. The maximum speed may not be
reached depending on the shooting conditions.
Shooting settings
Press the MENU button.
1
Page 32
[27] Changing the Settings
Time-lapse shooting interval
You can set the interval of the time-lapse shooting.
Press the UP button or DOWN button to select (Photo mode setting) -
2
(Self-timer) - setting value, then press the REC/ENTER button.
(Does not use self-timer)
(Sets the self-timer to 2-second)
(Sets the self-timer to 10-second)
Note
You cannot use self-timer when recording movies.
The self-timer function is enabled until it is cancelled. Set the self-timer to
Shooting settings
Press the MENU button.
1
Press the UP button or DOWN button to select (Time - lapse capture mode
2
setting) -
(Time-lapse shooting interval) - setting value, then press the
REC/ENTER button.
after you finish using it.
(Continues to record still images at about 1-second intervals)
(Continues to record still images at about 2-second intervals)
(Continues to record still images at about 5-second intervals)
(Continues to record still images at about 10-second intervals)
(Continues to record still images at about 30-second intervals)
(Continues to record still images at about 60-second intervals)
Note
The first photo is recorded immediately when recording starts, without waiting for the completion of the set
interval. The second and subsequent still images are recorded at the set intervals.
Depending on your shooting condition, the speed may not reach the set speed.
Page 33
[28] Changing the Settings
Shooting settings
Time-lapse shot number
You can set the number of still images shot during time-lapse capture.
[29] Changing the Settings
SteadyShot (Movie)
You can activate the camera-shake reduction when shooting movie.
Press the MENU button.
1
Press the UP button or DOWN button to select (Time - lapse capture mode
2
setting) REC/ENTER button.
(Shoots 300 still images)
(Shoots 600 still images)
(Shoots 900 still images)
(Continues to shoot still images until stop shooting)
(Time-lapse shot number) - setting value, then press the
Shooting settings
Press the MENU button.
1
Press the UP button or DOWN button to select / (Shooting settings) -
2
(FDR-X3000/HDR-AS300)/ (except for FDR-X3000/HDR-AS300) (SteadyShot
(Movie)) - setting value, then press the REC/ENTER button.
FDR-X3000/HDR-AS300
(Uses all-encompassing the SteadyShot function when shooting movies)
(Uses the SteadyShot function when shooting movies)
(Does not use the SteadyShot function when shooting movies)
Except for FDR-X3000/HDR-AS300
(Uses the SteadyShot function when shooting movies)
(Does not use the SteadyShot function when shooting movies)
Page 34
[30] Changing the Settings
Shooting settings
SteadyShot (Still) (FDR -X3000/HDR -AS300)
You can activate the camera-shake reduction when shooting still images.
[31] Changing the Settings
Angle setting
You can configure the angle of view of the camera.
Press the MENU button.
1
Press the UP button or DOWN button to select (Photo mode setting) -
2
(SteadyShot (Still)) – setting value, then press the REC/ENTER button.
(Uses the SteadyShot function when shooting still images)
(Does not uses the SteadyShot function when shooting still images)
Note
This function cannot be used in the Time-lapse capture mode.
Shooting settings
Press the MENU button.
1
Press the UP button or DOWN button to select / / / (Shooting
2
settings) -
: Wide (Records with a wide angle of view)
: Medium (Records with a standard angle of view) (FDR-X3000/HDR-AS300)
: Narrow (Records with a narrow angle of view)
(Angle setting) - setting value, then press the REC/ENTER button.
Page 35
[32] Changing the Settings
Zoom setting
You can set whether to use the digital zoom.
[33] Changing the Settings
Flip
You can record the image upside down. This function is useful when the camera is attached upside
down.
[34] Changing the Settings
AE shift
Shooting settings
Press the MENU button.
1
Press the UP button or DOWN button to select / / / (Shooting
2
settings) -
(Uses the digital zoom function)
(Does not use the digital zoom function)
(Zoom setting) - setting value, then press the REC/ENTER button.
Shooting settings
Press the MENU button.
1
Press the UP button or DOWN button to select / / / (Shooting
2
settings) -
(Flips the image vertically and swaps the left and right sound channels)
(Does not flip the image)
(Flip) - setting value, then press the REC/ENTER button.
Shooting settings
Page 36
You can adjust the exposure according to your preference.
[35] Changing the Settings
Time-lapse AE mode
Set the adjustment method of automatic exposure (AE) during time-lapse capture.
[36] Changing the Settings
Scene
You can set the shooting scene.
Press the MENU button.
1
Press the UP button or DOWN button to select / / / (Shooting
2
settings) -
(Does not use the AE shift)
(Uses the AE shift (Set +0.3EV for example))
(AE shift) - setting value, then press the REC/ENTER button.
Shooting settings
Press the MENU button.
1
Press the UP button or DOWN button to select (Time - lapse capture mode
2
setting) button.
(Adjusts the exposure for each shot. Smoothly follows changes in brightness)
(Sets a fixed exposure when shooting starts)
(Time-lapse AE mode) - setting value, then press the REC/ENTER
Shooting settings
Press the MENU button.
1
Press the UP button or DOWN button to select
2
/ / / (Shooting
Page 37
[37] Changing the Settings
White balance
You can adjust the color balance to the recording environment.
[38] Changing the Settings
Color mode
You can change the image color tone when shooting movie or loop recording.
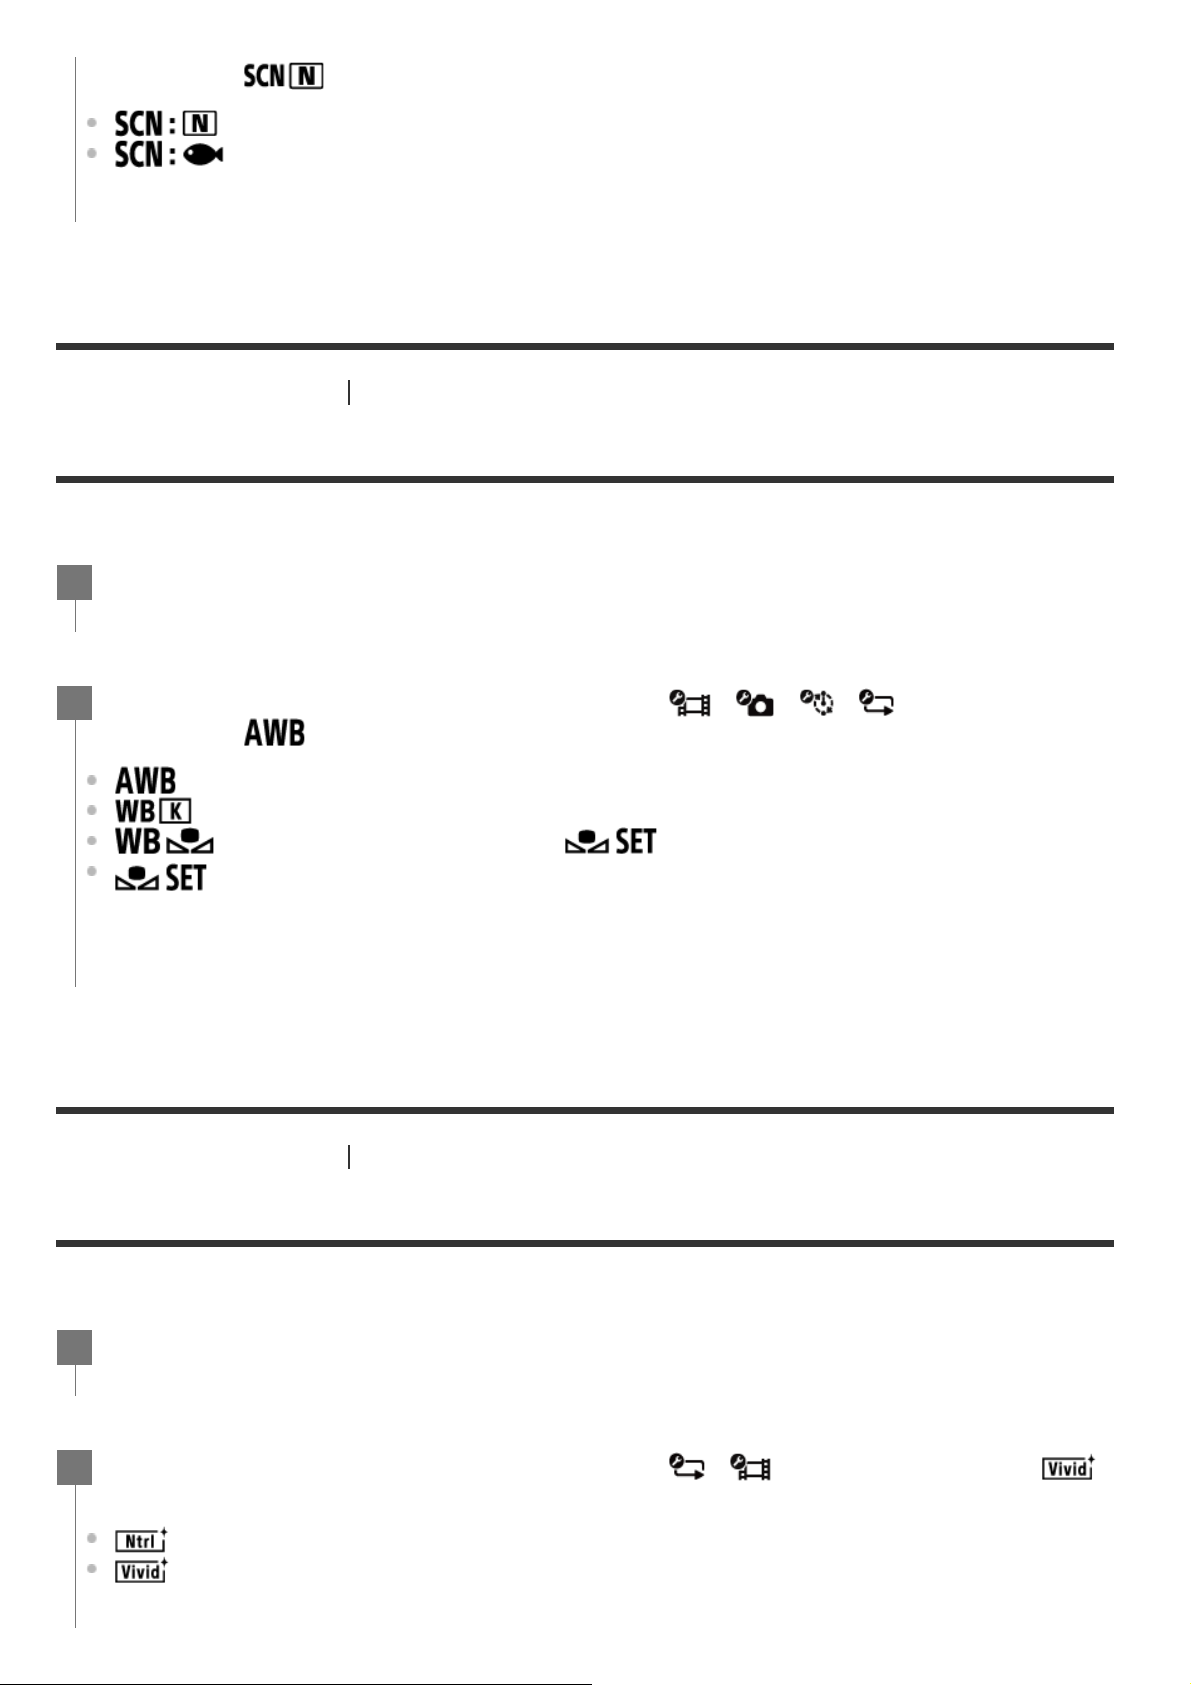
settings) - (Scene) - setting value, then press the REC/ENTER button.
(Shoots images in the standard quality)
(Shoots images in an image quality suitable for underwater shooting)
Shooting settings
Press the MENU button.
1
Press the UP button or DOWN button to select / / / (Shooting
2
settings) -
(Adjusts the white balance automatically so that the colors appear natural)
(Adjusts for the color temperature of the light source (from 2500K to 9900K)
(Uses the setting acquired from )
(Acquires the base white color for shooting under the light source)
*
Place a white reference object under the same lighting conditions as the subject and press the REC/ENTER button.
(White balance) - setting value, then press the REC/ENTER button.
Shooting settings
*
Press the MENU button.
1
Press the UP button or DOWN button to select / (Shooting settings) -
2
(Color mode) - setting value, then press the REC/ENTER button.
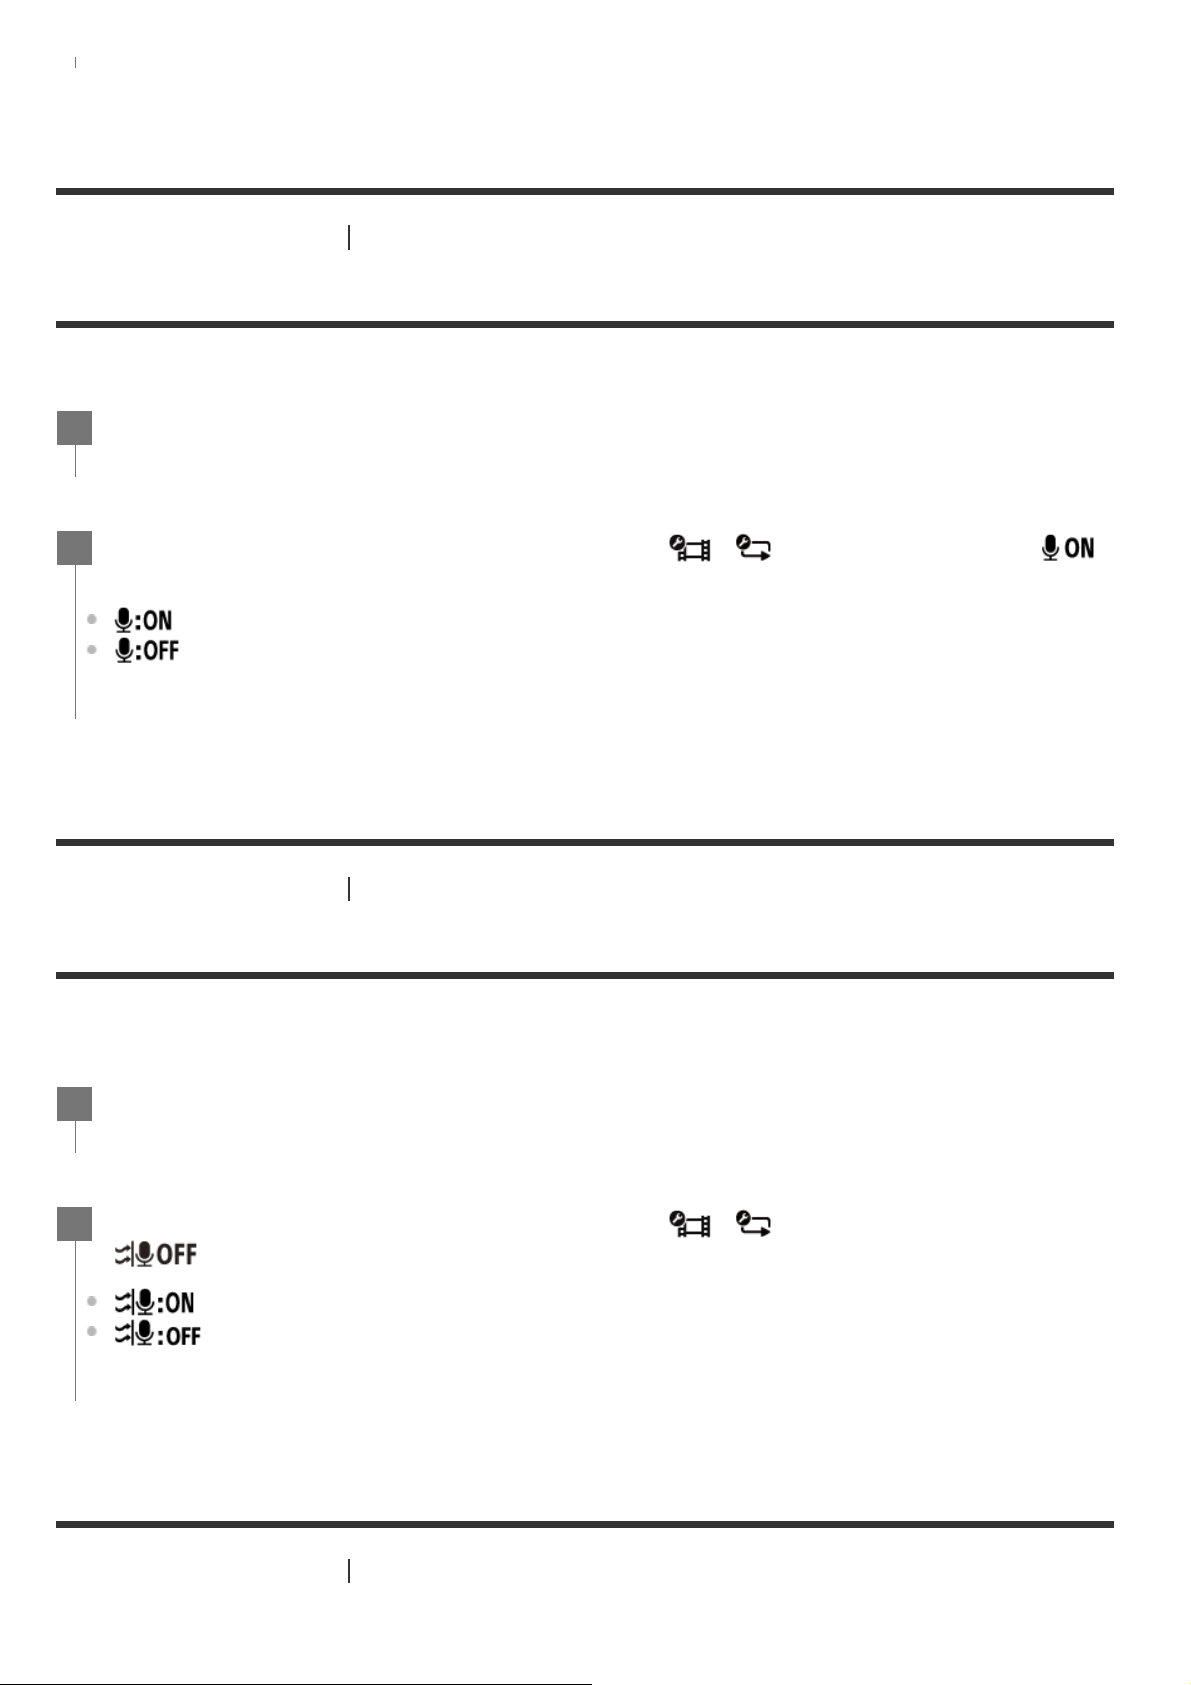
(Records in natural colors)
(Records in vivid colors)
Page 38
[39] Changing the Settings
Shooting settings
Audio recording setting
Set whether to record audio while shooting movies.
[40] Changing the Settings
Wind noise reduction
This function automatically cuts low-range wind noise while recording audio using the built-in
microphone of the camera.
[41] Changing the Settings
Bluetooth remote controller power setting
Press the MENU button.
1
Press the UP button or DOWN button to select / (Shooting settings) -
2
(Audio recording setting) - setting value, then press the REC/ENTER button.
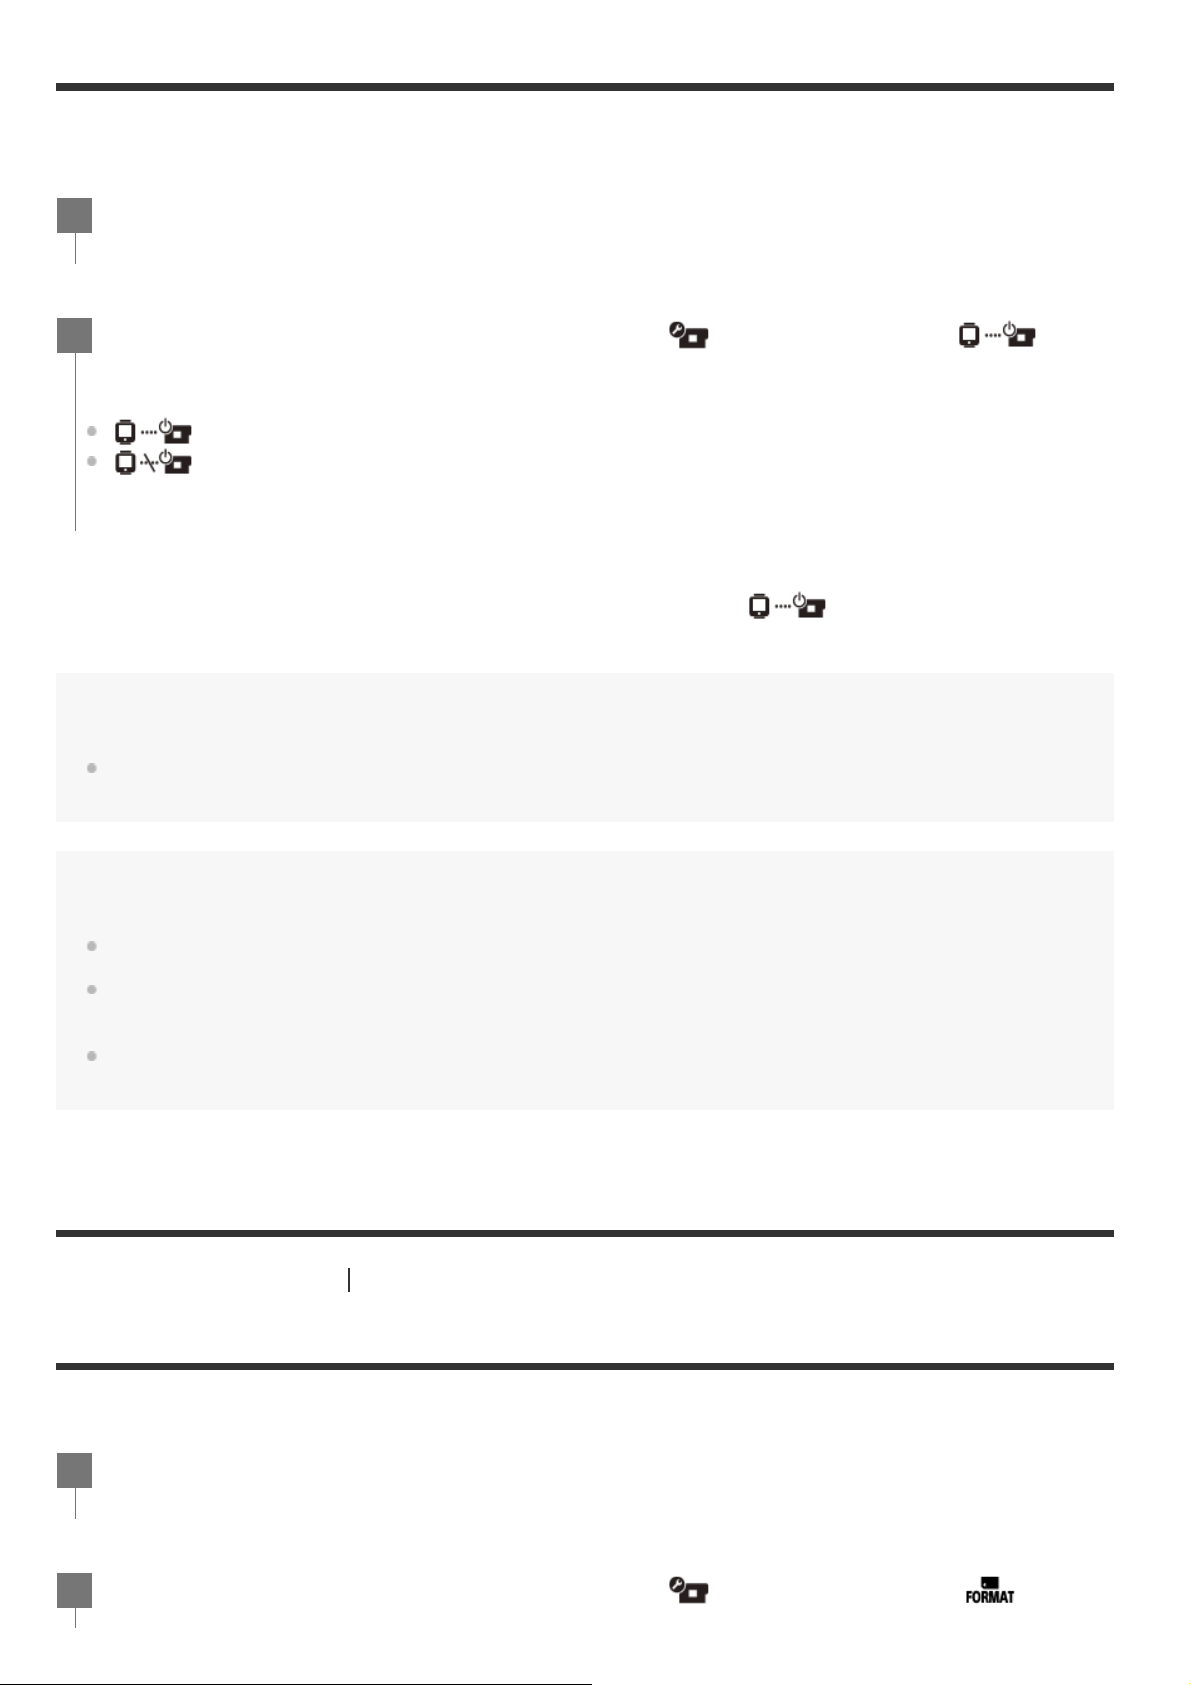
(Records sound when shooting a movie)
(Does not record sound when shooting a movie)
Shooting settings
Press the MENU button.
1
Press the UP button or DOWN button to select / (Shooting settings) -
2
(Wind noise reduction) - setting value, then press the REC/ENTER button.
(Cuts low-range to reduce wind noise)
(Does not reduce wind noise)
Camera settings
Page 39
The remote control is able to turn on/off cameras that have already been paired with the remote
control by communicating via Bluetooth.
To enable this function, it is necessary to set the above setting to
of both the remote control and camera to ON in advance.
[42] Changing the Settings
Format
Delete all movies and still images in the media on the camera to restore the media to its initial state.
(Format), then press the REC/ENTER button.
Press the MENU button.
1
Press the UP button or DOWN button to select (Camera Settings) -
2
(Bluetooth remote controller power setting) - setting value, then press the
REC/ENTER button.
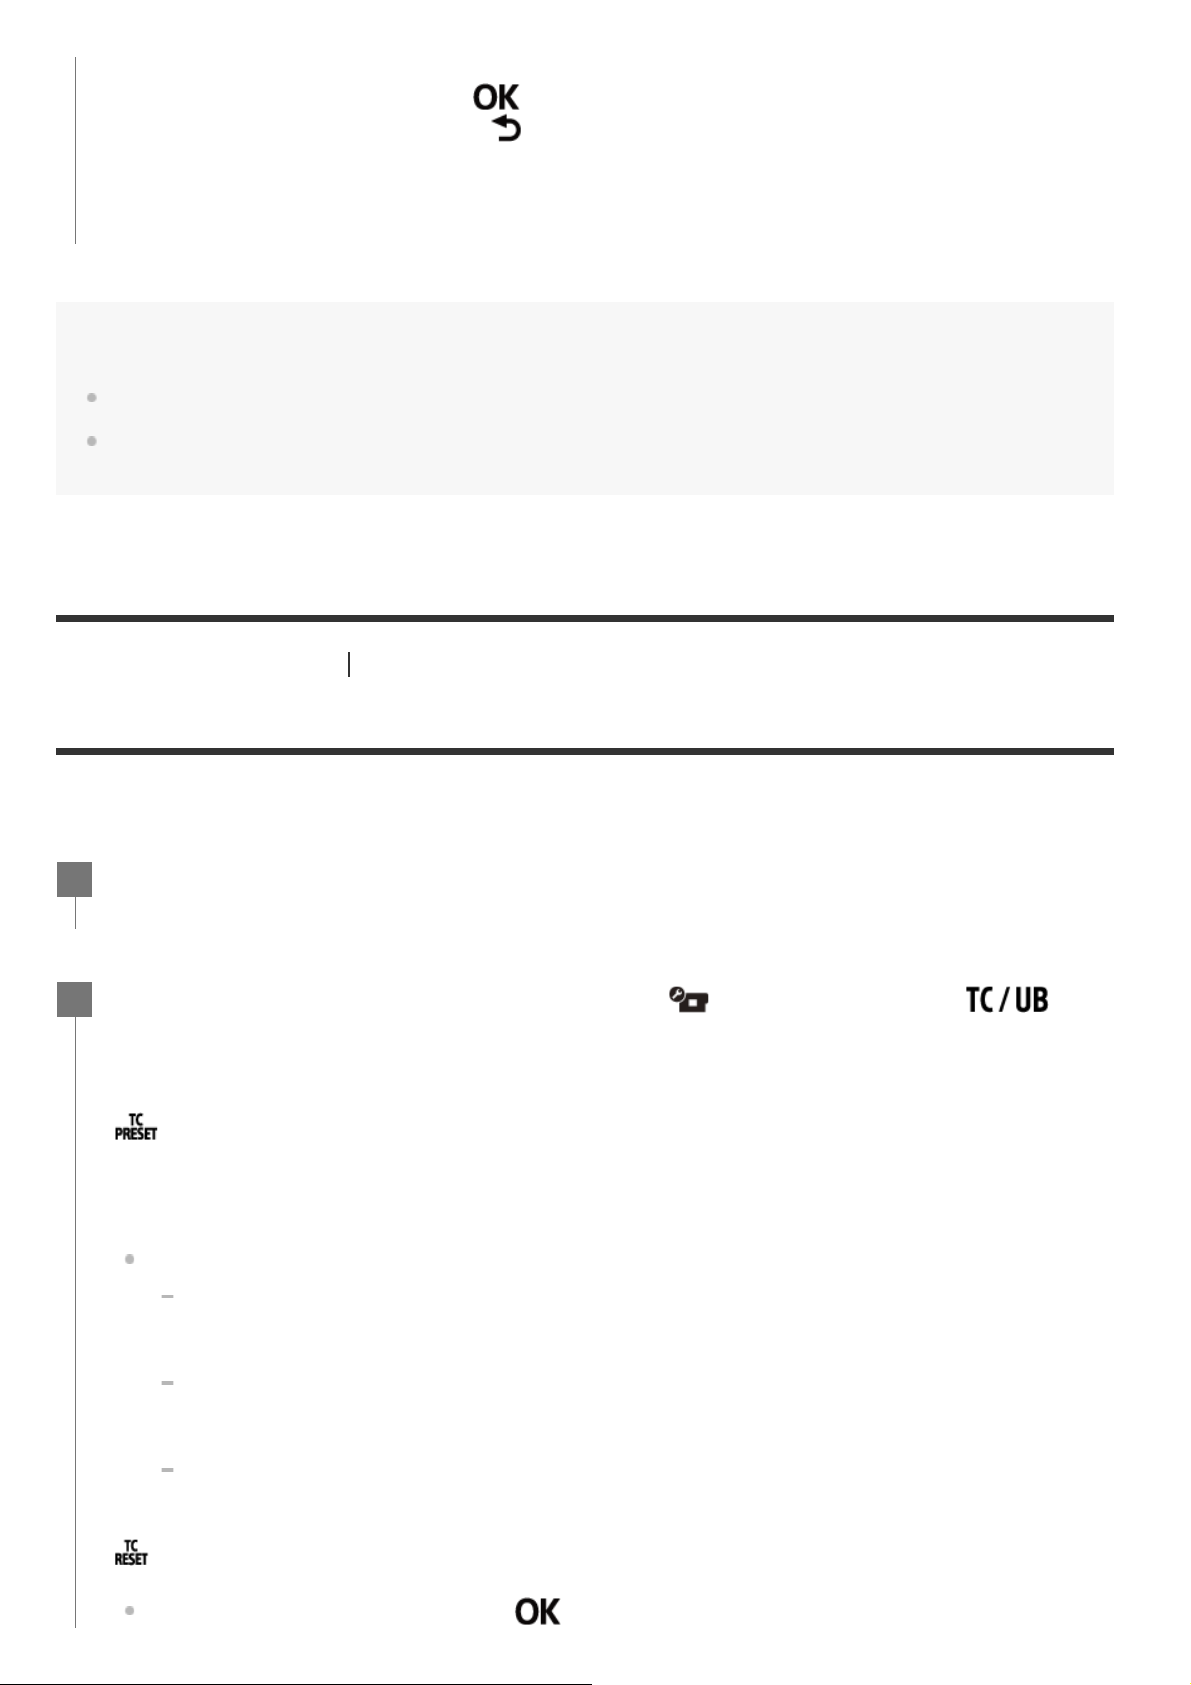
(Ability to turn the camera on/off with the remote control is enabled.)
(Ability to turn the camera on/off with the remote control is disabled.)
and the Bluetooth setting
Hint
When the camera has a multi connection with the remote control, up to five cameras can be turned on
simultaneously when the remote control is turned on.
Note
This function cannot be used when the Airplane mode is ON.
You can operate the power of the remote control simultaneously with the camera while the remote control is
connected to the camera.
The power of the camera may not be operated with the remote control simultaneously depending on your
surroundings when in use. In this case, operate the power of the remote control again.
Camera settings
Press the MENU button.
1
Press the UP button or DOWN button to select
2
(Camera Settings) -
Page 40
[43] Changing the Settings
Time code/user bit
You can use the time code/user bit function when the shooting mode is set to the movie mode and
the movie record format is set to XAVC S.
Formatting starts when you select (execute), then press the REC/ENTER button.
Formatting cancels when you select
The formatting completes when a screen with check mark is displayed. Press the REC/ENTER
button to return to the previous MENU.
Note
Save important images to devices such as a computer before formatting.
You cannot format the camera from the remote control when the remote control is not connected to the
camera via Wi-Fi.
Camera settings
(cancel), then press the REC/ENTER button.
Press the MENU button.
1
Press the UP button or DOWN button to select (Camera Settings) -
2
(Time code/user bit) - setting item, then press the REC/ENTER button.
The set items and details are as follows.
(Sets the time code)
1. Press the UP button or DOWN button to select 2-digit numbers, then press the REC/ENTER
button.
2. Repeat step 1 until you set four 2-digit numbers, then return to the previous MENU.
The time code can be selected within the following range.
When selecting 30p or 60p
00:00:00:00 - 23:59:59:29
When selecting 25p or 50p
00:00:00:00 - 23:59:59:24
When selecting 24p, you can set the last 2 time code digits of the frames in multiples of
4, between 0 and 23.
(Resets the time code)
Reset is executed when you select
, then press REC/ENTER button.
Page 41
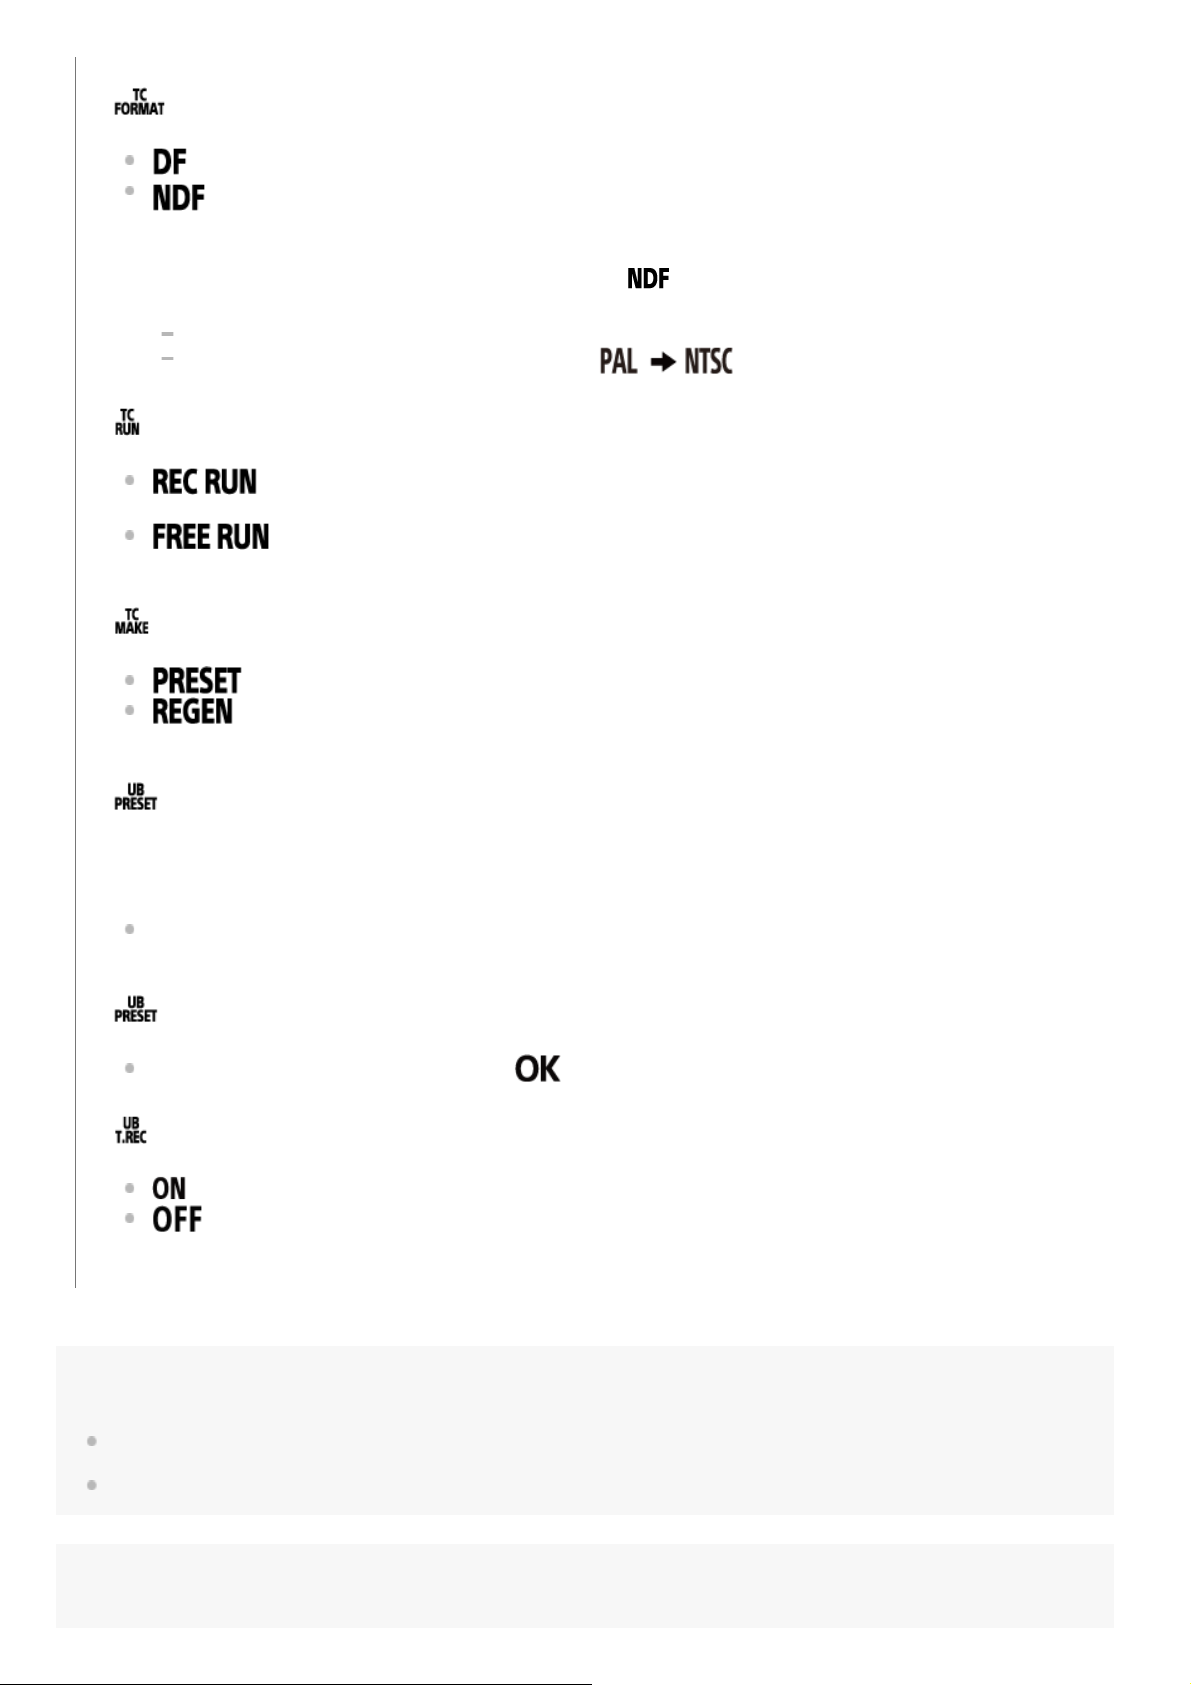
(Selects the time code recording method)
: Records the time code in drop frame.
: Records the time code in non-drop frame.
*
*
In the following situations, the time code is fixed to .
the image quality is set to 24p
When
When the NTSC/PAL switching is set to
(Sets the time code count up format)
: The time code advances only while recording XAVC S movies. It is recorded
sequentially from the time code on the image recorded last time.
: The time code advances sequentially, regardless of the operation of the
camera.
(Sets the time code to be recorded)
: The newly set-up time code is recorded on recording media.
: The last time code of the previous recording is read out from the recording media
and the new time code is recorded sequentially from the last time code.
(Sets the user bit)
1. Press the UP button or DOWN button to select 2-digit numbers, then press the REC/ENTER
button.
2. Repeat step 1 until you set four 2-digit numbers, then return to the previous MENU.
The user bit can be selected within the following range.
00 00 00 00 - FF FF FF FF
(Initializes the user bit)
Reset is executed when you select
, then press REC/ENTER button.
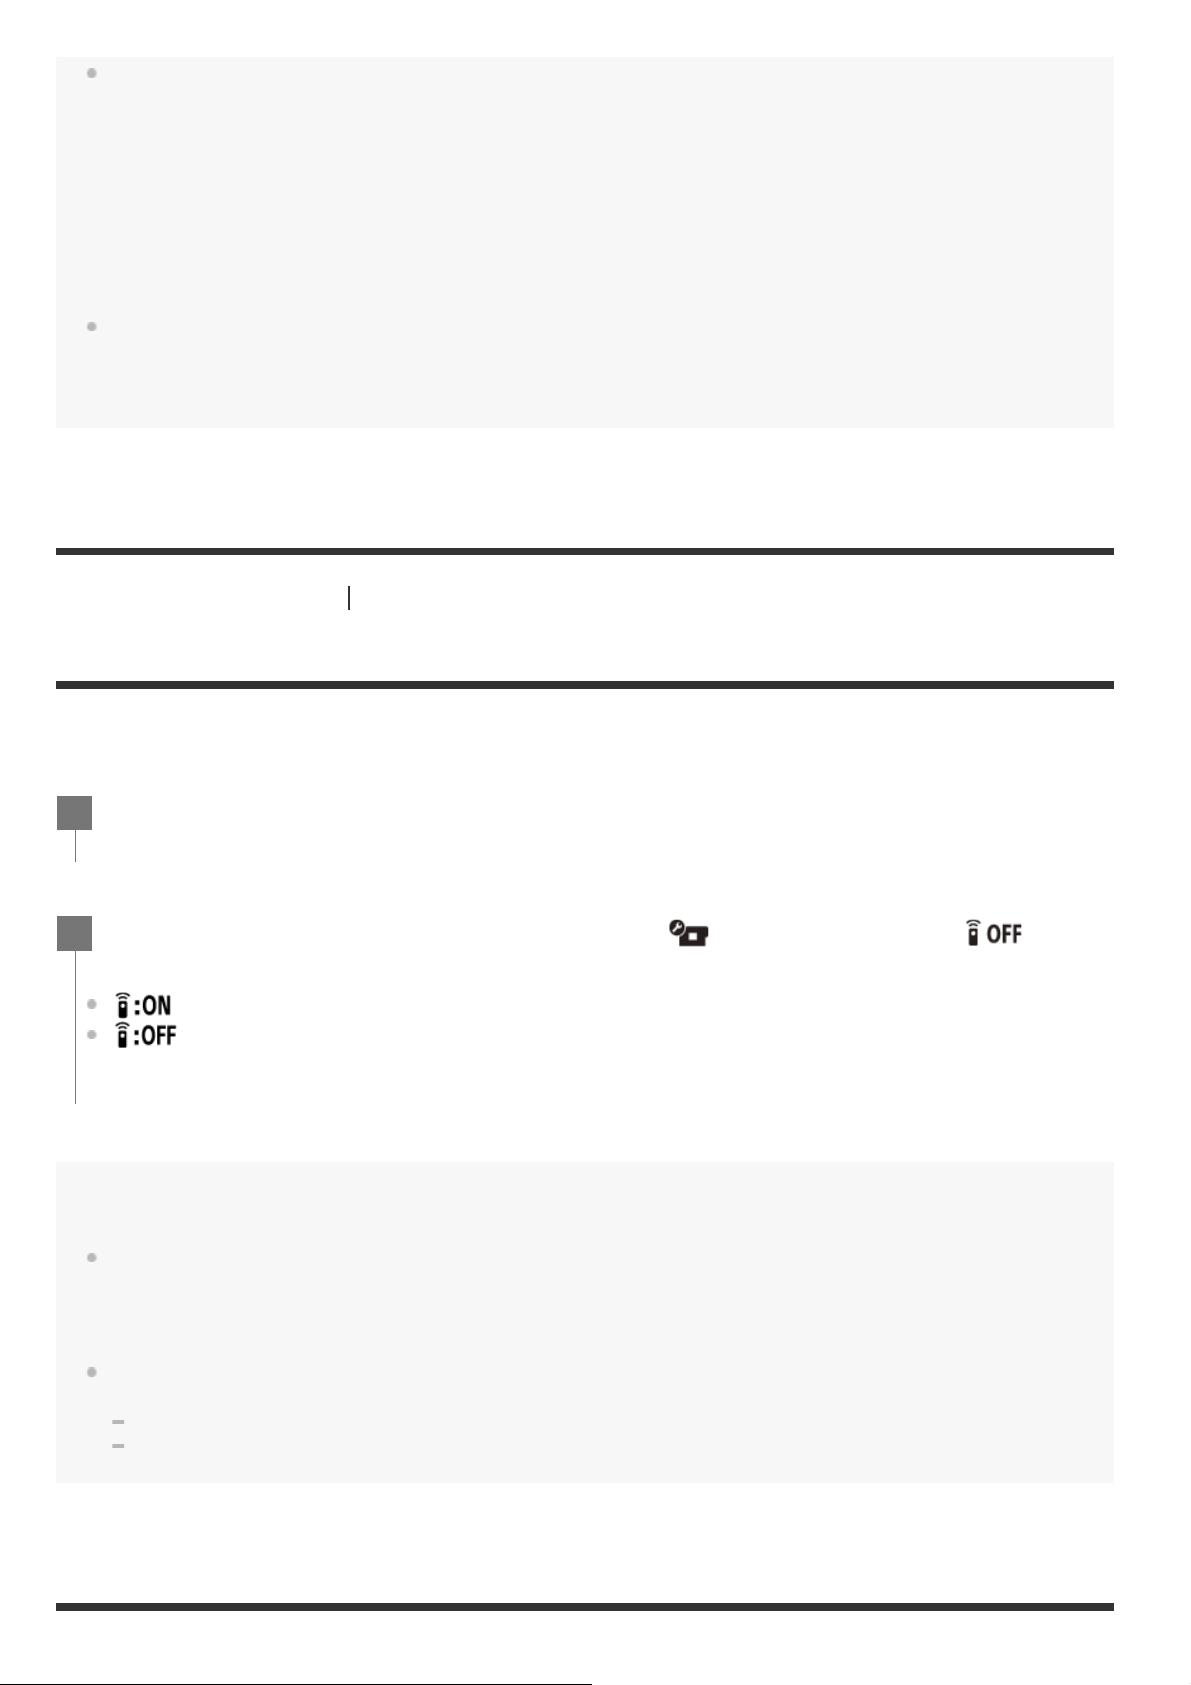
(Sets the recording time of the user bit)
: Does not record the time as a user bit.
: Records the time as a user bit.
Note
Time code/user bit can be set only for the movie mode.
When the remote control is not connected to the camera via Wi-Fi, the camera settings cannot be changed.
Hint
Page 42
About time code
Time code is a useful function for advanced image editing, which records hours/minutes/seconds/frames on
[44] Changing the Settings
IR remote
You can initialize the time code of the camera and start/stop recording using the infrared remote
control (sold separately).
the image data.
When TV system is set to NTSC and the frame rate is 30p or 60p, gaps between the actual time and the
time code occur during extended periods of recording because there is a slight difference between the
number of frames per second of the time code and the actual frame frequency of NTSC image signal. Drop
frame corrects this gap to ensure that the time code matches the actual time. The first frame numbers (the
first 2 frame numbers for 30p, or the first 4 frame numbers for 60p) are removed every minute except in
every tenth minute. Time code without this correction is called non-drop frame.
About user bit
User bit is a function that can record information (8-digit hexadecimal numbers) such as date/time/scene
number. This function is useful for editing movies created using two or more cameras.
Camera settings
Press the MENU button.
1
Press the UP button or DOWN button to select (Camera Settings) - (IR
2
remote) - setting value, then press the REC/ENTER button.
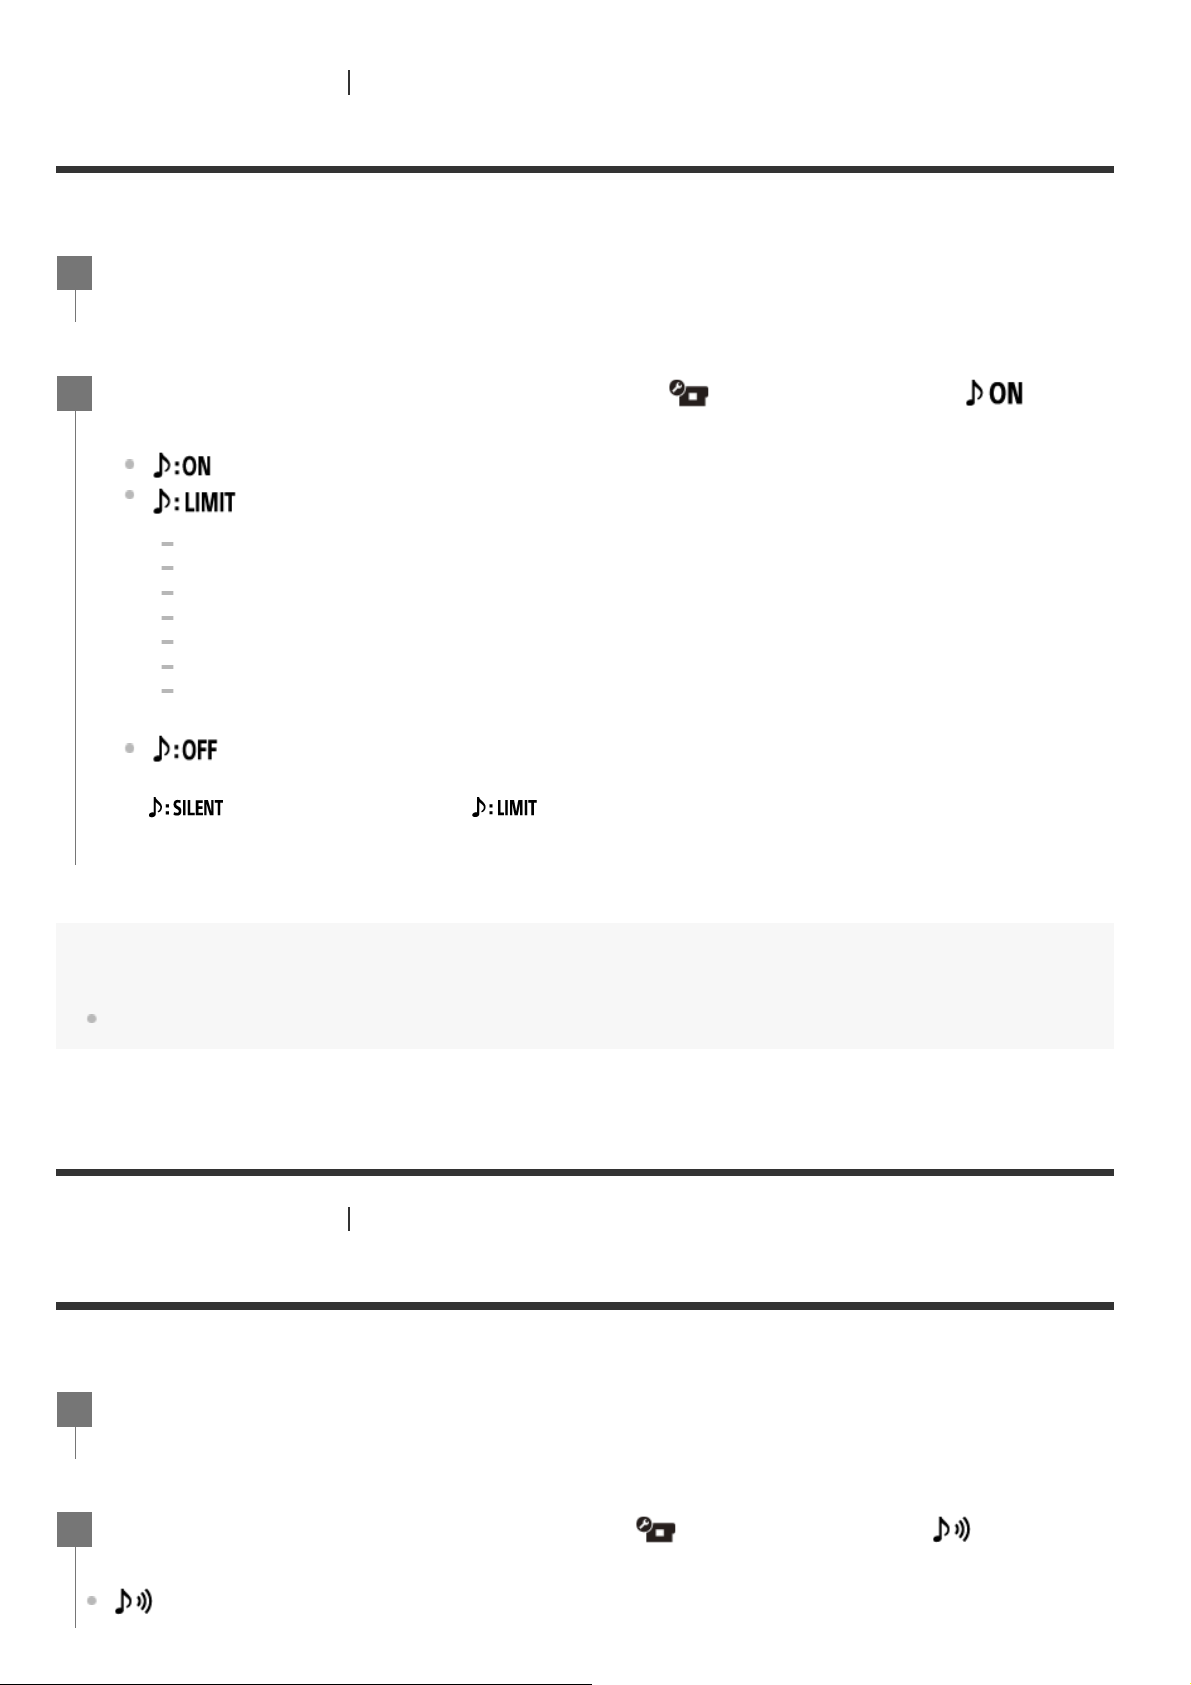
(Allows you to operate the camera using the infrared remote control)
(Prevents operation of the camera using the infrared remote control)
Note
The remote commander & IR receiver kit RMT-VP1K and infrared remote control RMT-845 (sold separately)
are required to use this function.
Purchase RMT-845 at a Sony service center.
You can operate only the following settings using the RMT-845 (sold separately). Other settings are
inoperable.
Reset the time code.
Start/stop recording.
Page 43
[45] Changing the Settings
Beep
You can set the audible notification for camera operation.
[46] Changing the Settings
Beep volume
You can set the beep volume of the camera when operating the camera with the remote control.
Camera settings
Press the MENU button.
1
Press the UP button or DOWN button to select (Camera Settings) -
2
(Beep) - setting value, then press the REC/ENTER button.
(All operation sounds are enabled)
(Operation sounds are emitted for the following operations only)
Power turned on
Recording started
Recording stopped
Shutter pressed
A disabled operation was selected or an error occurred
Connection confirmation beep
Power turned off (FDR-X3000/HDR-AS300)
(All operation sounds are disabled)
*
will be displayed instead of depending on the connected camera.
*
Note
When the remote control is not connected to the camera via Wi-Fi, the camera settings cannot be changed.
Camera settings
Press the MENU button.
1
Press the UP button or DOWN button to set (Camera Settings) - (Beep
2
volume) - setting value, then press the REC/ENTER button.
(loud beep volume)
Page 44
[47] Changing the Settings
Lamp setting
To prevent the lamp light from reflecting off of the subject, you can limit the number of REC lamps
that turn on when recording.
[48] Changing the Settings
One touch recording
Press the REC/ENTER button of the camera while the camera is off, and the camera will turn on and
start recording.
This function is available when the shooting mode is movie, time-lapse capture, live streaming, or
loop recording.
(soft beep volume)
Note
When the Beep is set to OFF, this function cannot be set.
Camera settings
Press the MENU button.
1
Press the UP button or DOWN button to set (Camera Settings) - (Lamp
2
setting) - setting value, then press the REC/ENTER button.
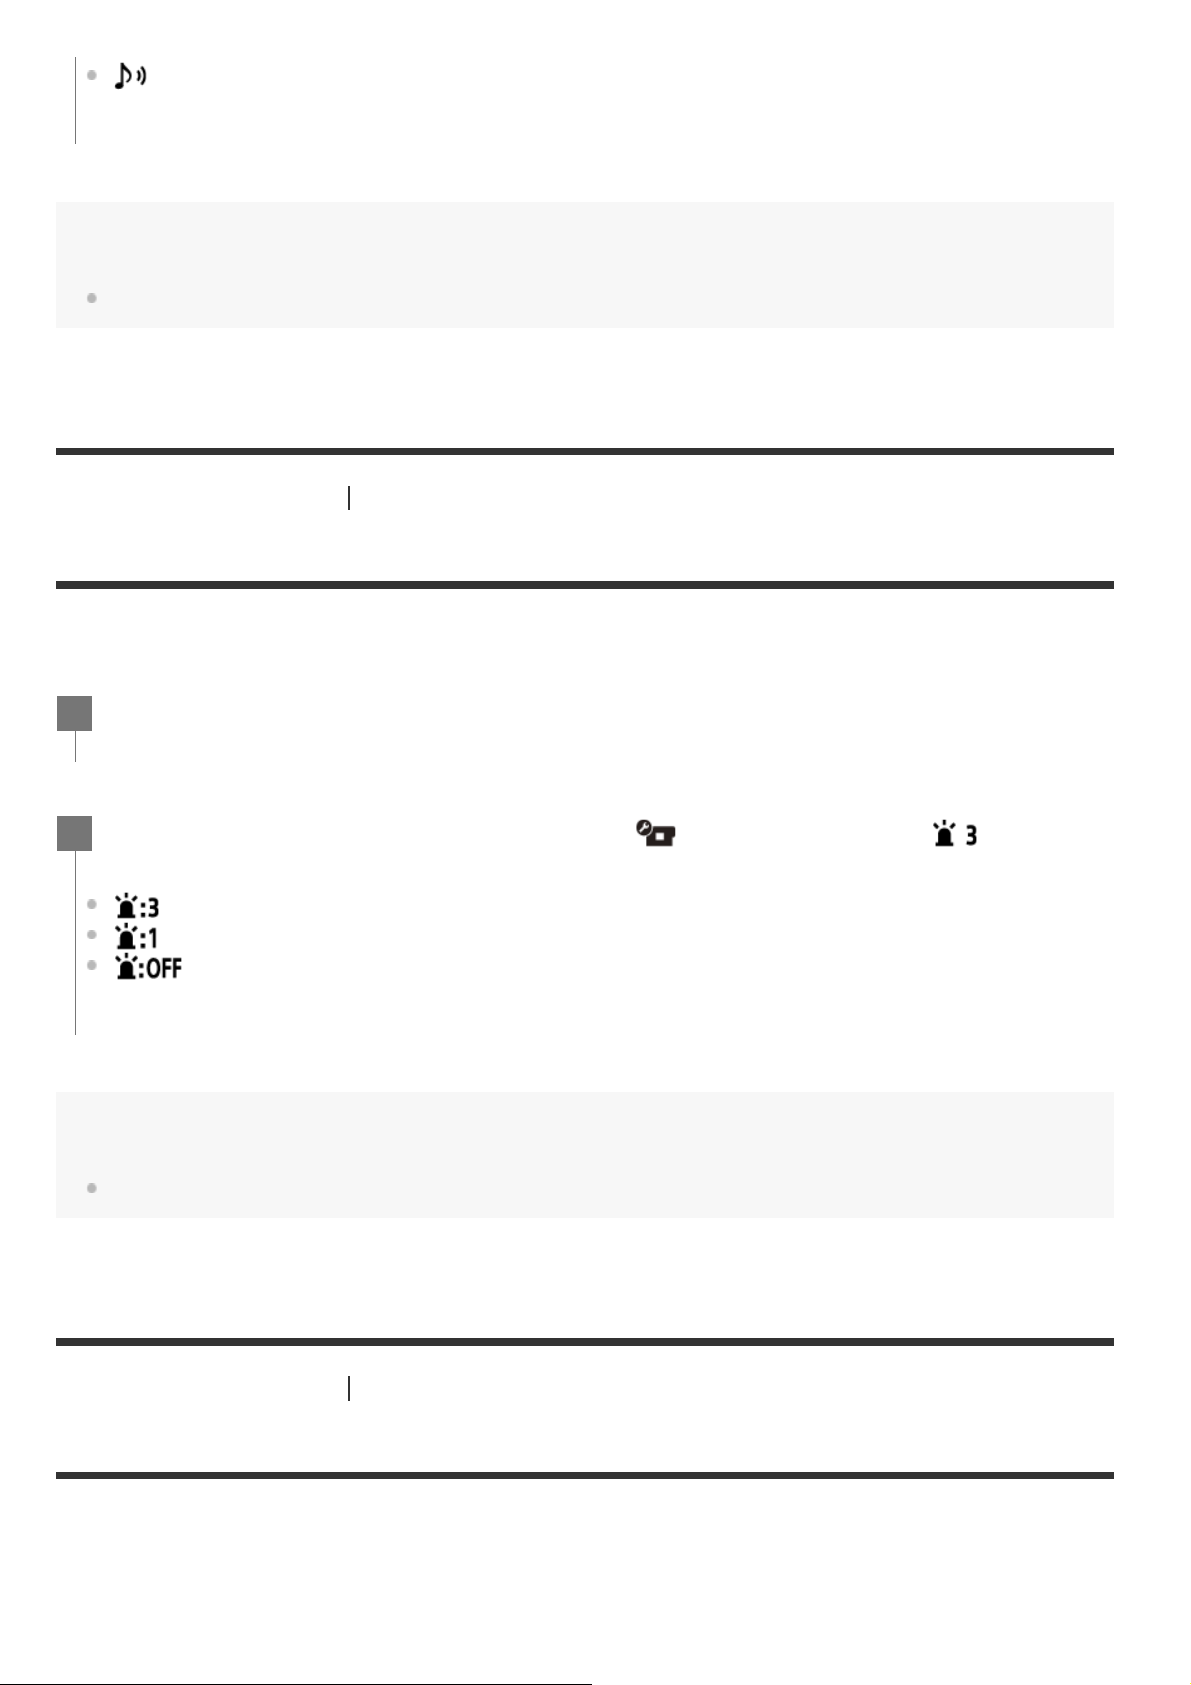
(all of the REC lamps of the camera light up)
(only the REC lamp on the connector cover of the camera lights up)
(REC lamps of the camera do not light up)
Hint
Change the lamp setting for the camera if objects such as glass may be reflected on the shooting direction.
Camera settings
Page 45
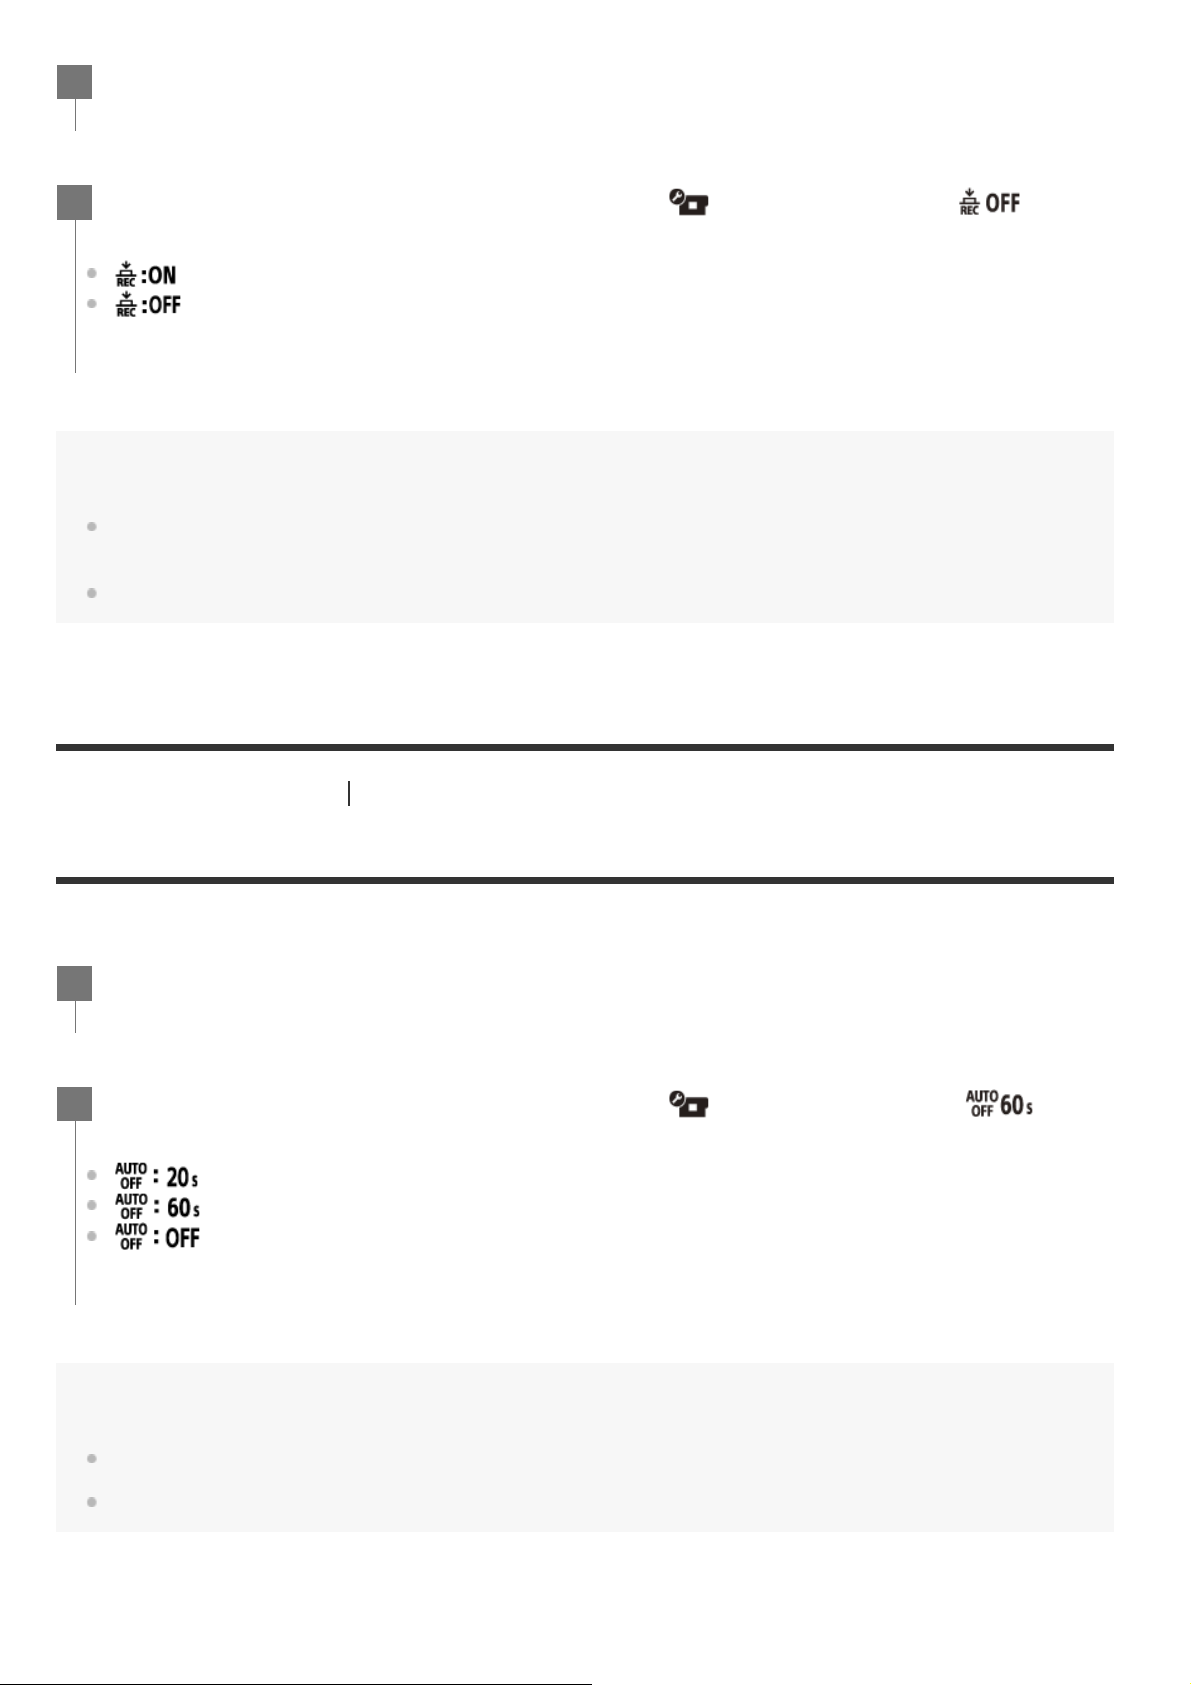
[49] Changing the Settings
Auto power off
You can set whether to turn off the camera automatically depending on the setting time.
Press the MENU button.
1
Press the UP button or DOWN button to select (Camera Settings) - (One
2
touch recording) - setting value, then press the REC/ENTER button.
(One touch recording enabled)
(One touch recording disabled)
Note
With One touch recording, the recording will start in the shooting mode that was set immediately before the
power was turned off.
When the remote control is not connected to the camera via Wi-Fi, the camera settings cannot be changed.
Camera settings
Press the MENU button.
1
Press the UP button or DOWN button to select (Camera Settings) - (Auto
2
power off) - setting value, then press the REC/ENTER button.
(Turns the power off after about 20 seconds)
(Turns the power off after about 60 seconds)
(Does not turn off automatically)
Note
The Auto power off function is disabled while the remote control is connected to the camera via Wi-Fi.
When the remote control is not connected to the camera via Wi-Fi, the camera settings cannot be changed.
Page 46
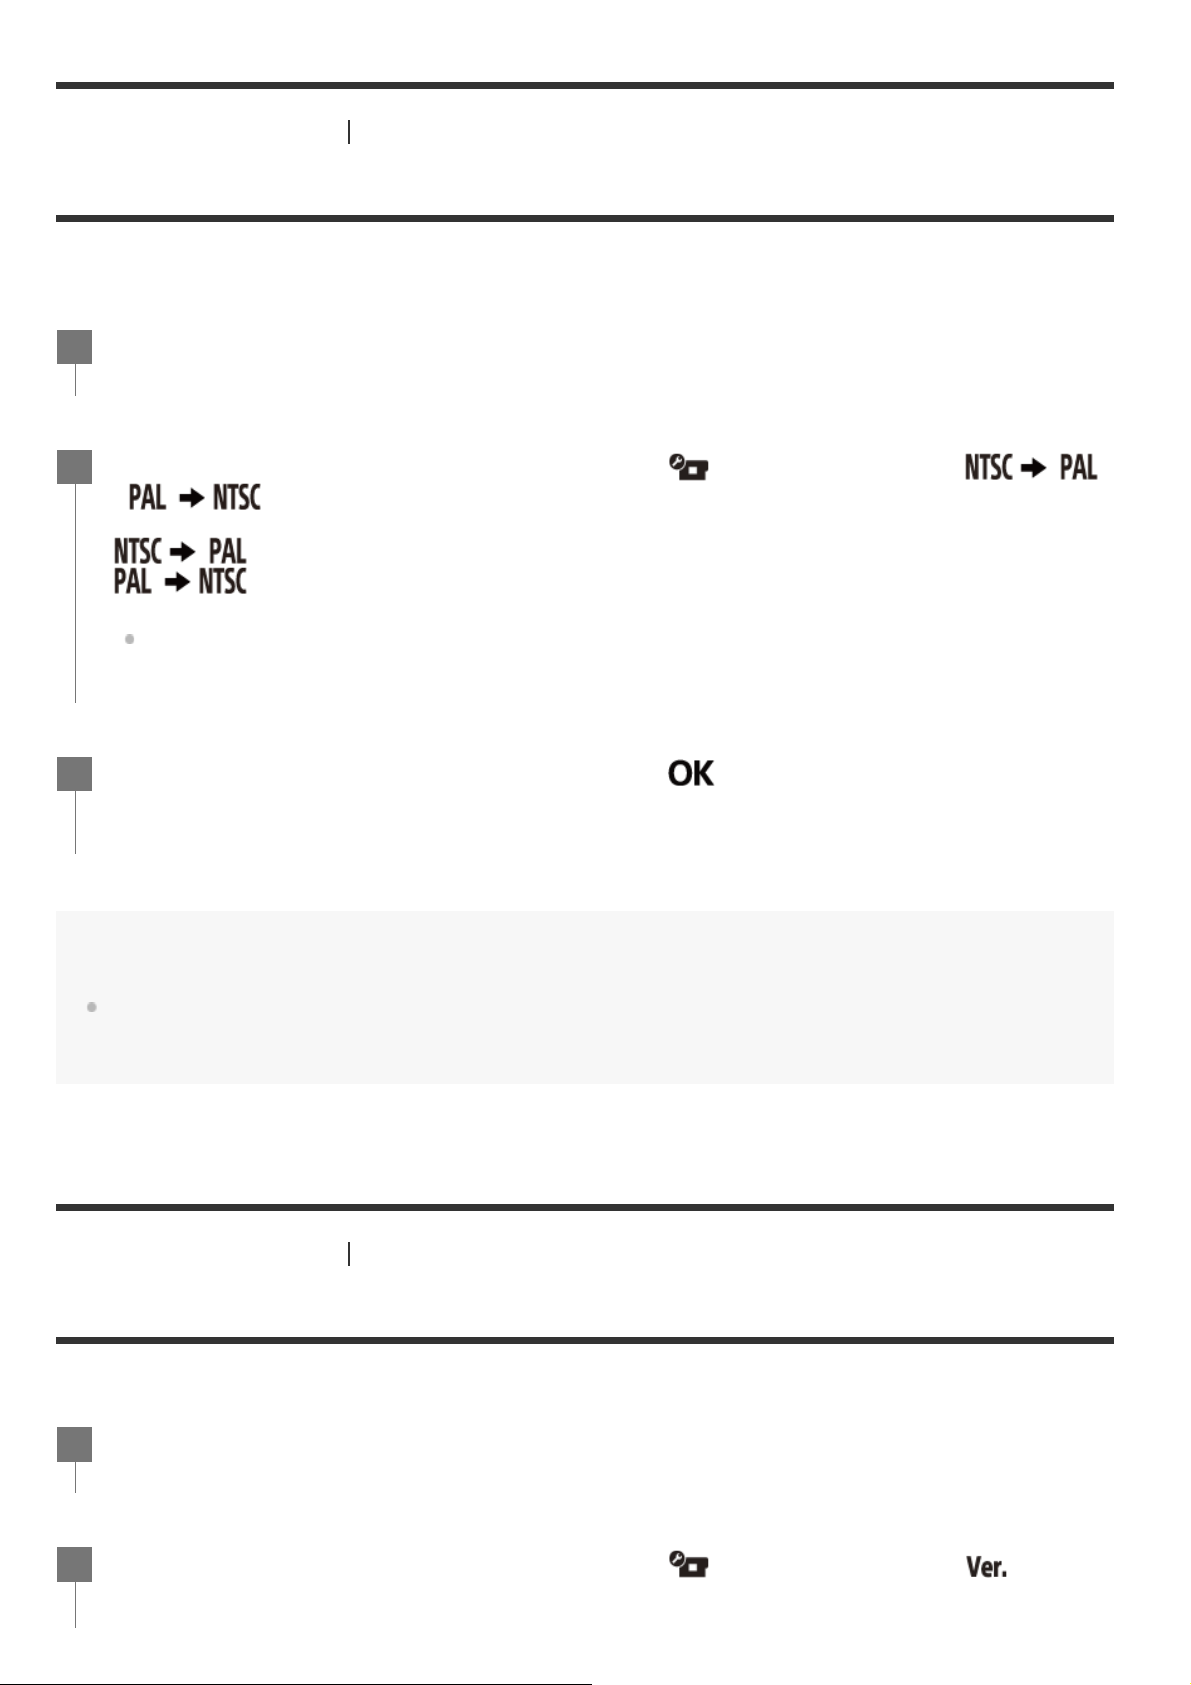
[50] Changing the Settings
Camera settings
Switching NTSC/PAL
You can select the NTSC/PAL setting, depending on the TV system of the country or region where you
use the camera.
[51] Changing the Settings
Version (Camera)
Displays the software version of the camera.
Press the MENU button.
1
Press the UP button or DOWN button to select (Camera Settings) -
2
/ (Switching NTSC/PAL), then press the REC/ENTER button.
(Switches the TV system of the camera from NTSC to PAL)
(Switches the TV system of the camera from PAL to NTSC)
When you try to change the current setting, the confirmation screen appears. Go to step 3.
Press the UP button or DOWN button to select
3
REC/ENTER button.
Note
When you change the NTSC/PAL setting on the remote control, the Wi-Fi connection with the camera is
disconnected and the camera will be restarted automatically. After that, the remote control will be
reconnected with the camera automatically.
(execute), then press the
Camera settings
Press the MENU button.
1
Press the UP button or DOWN button to select
2
(Version), then press the REC/ENTER button.
(Camera Settings) -
Page 47
Note
[52] Changing the Settings
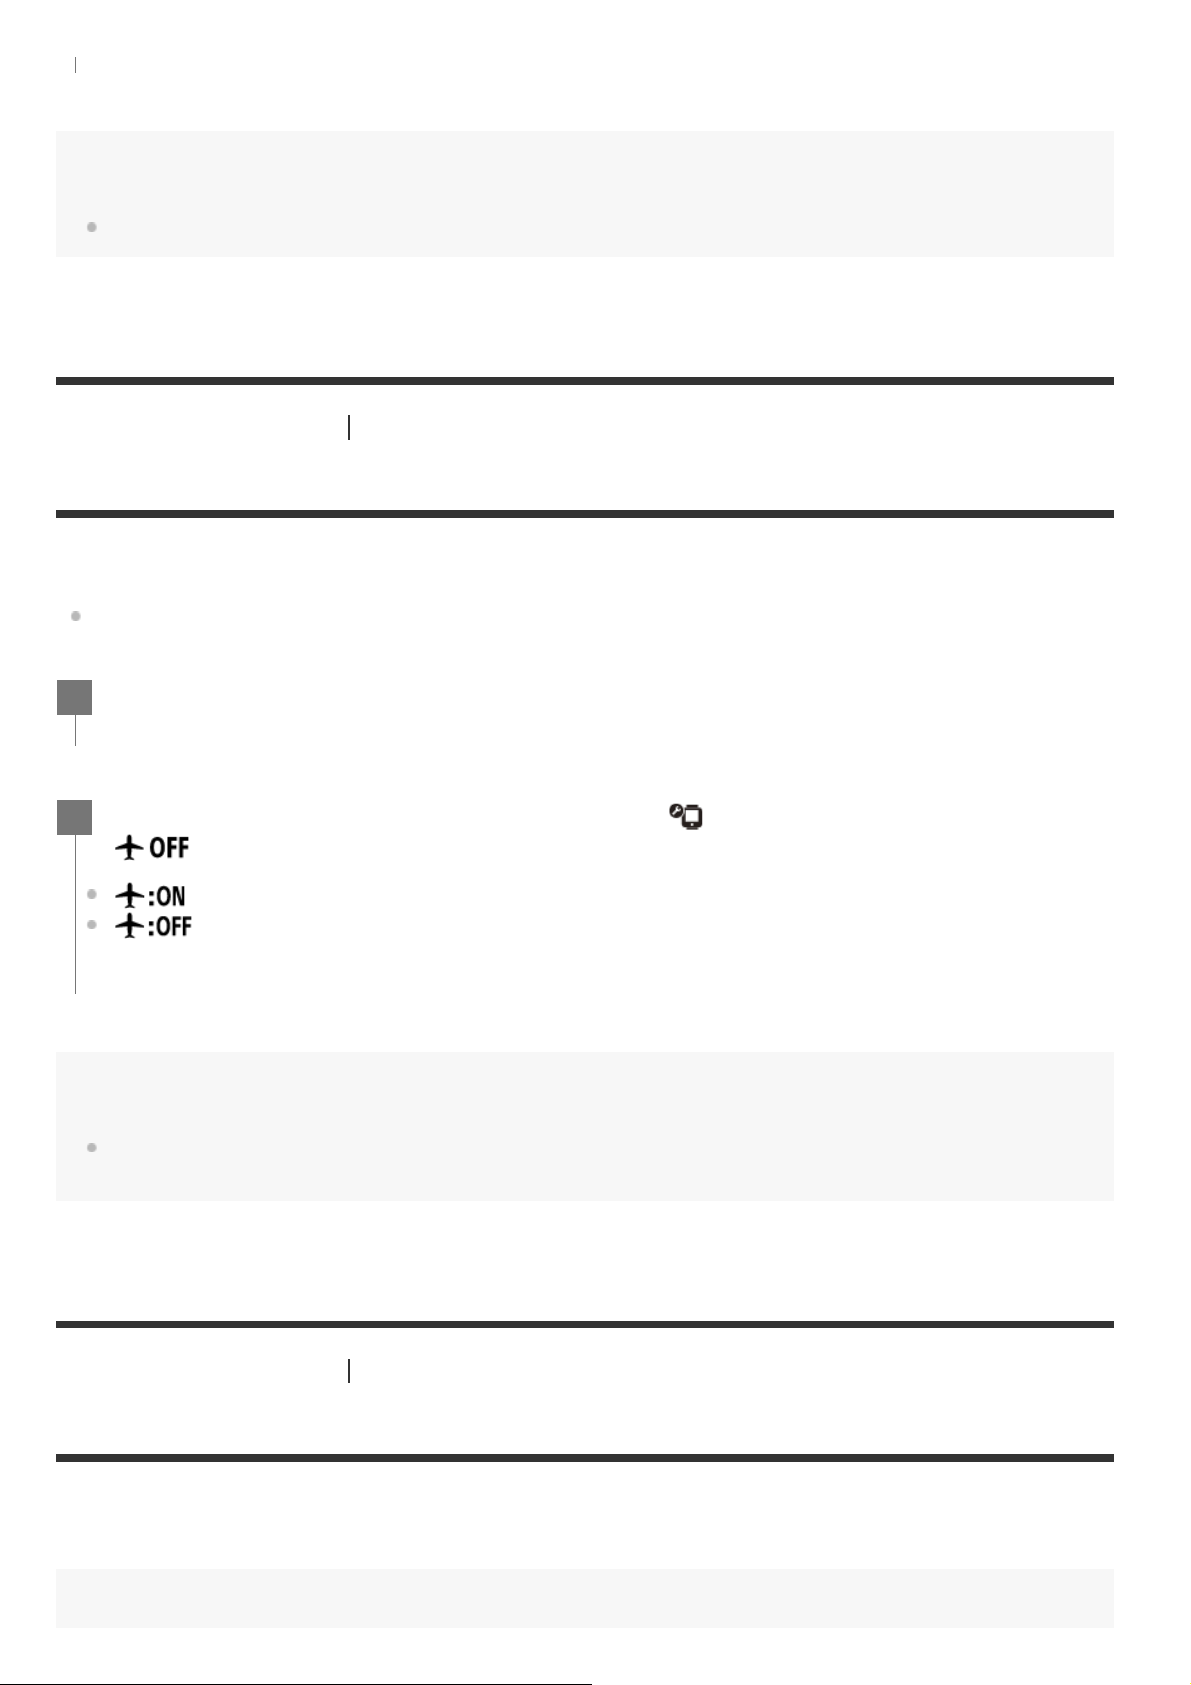
Airplane mode
You can set the remote control to disable all the Wi-Fi/Bluetooth functions.
[53] Changing the Settings
Connection mode
Set the number of cameras (a “single” camera or “multiple” cameras) to which the remote control is
connected.
This function is available only in the single connection mode.
Remote control settings
When you are in an airplane or other restricted areas, set the Airplane mode of the remote control
and camera to ON.
Press the MENU button.
1
Press the UP button or DOWN button to select (Remote control settings) -
2
(Airplane mode) - setting value, then press the REC/ENTER button.
(The Wi-Fi/Bluetooth function is disabled)
(default) (The Wi-Fi/Bluetooth function is enabled)
Note
Airplane mode cannot be set while the remote control is connected to the camera in the single connection
mode.
Remote control settings
Page 48
Note
[54] Changing the Settings
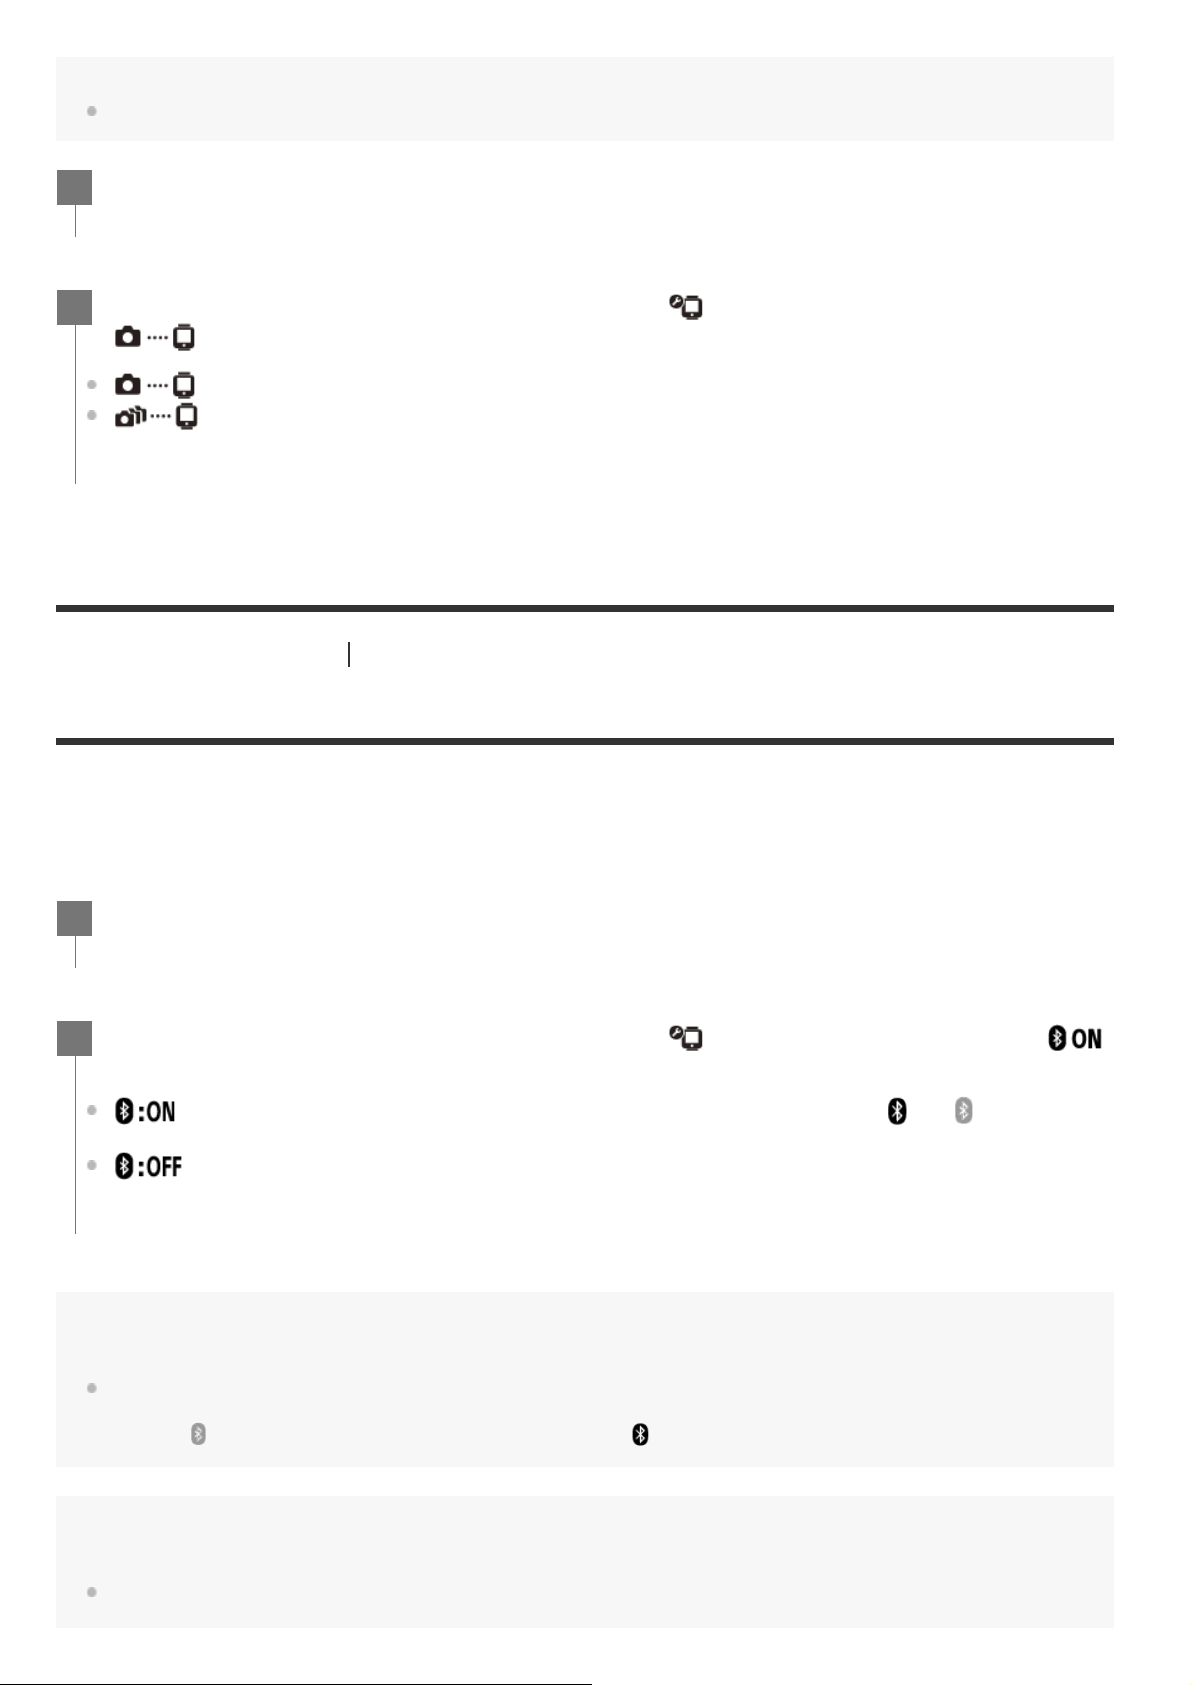
Bluetooth setting
The remote control can be communicated with the camera via Bluetooth.
The mutual registration process that allows the devices (the remote control and camera) to
communicate with each other via Bluetooth is called “pairing.” Once pairing is complete, these devices
can automatically communicate via Bluetooth when they are connected again.
The connection mode cannot be set while the remote control is connected to the camera via Wi-Fi.
Press the MENU button.
1
Press the UP button or DOWN button to select (Remote control settings) -
2
(connection mode) - setting value, then press the REC/ENTER button.
(default) (single connection)
(multi connection)
Remote control settings
Press the MENU button.
1
Press the UP button or DOWN button to select (Remote control settings) -
2
(Bluetooth setting) - setting value, then press the REC/ENTER button.
(default) (Bluetooth communication enabled. The Bluetooth icon ( or ) is displayed
on the LCD screen.)
(No Bluetooth communication. The Bluetooth icon is not displayed on the LCD screen.)
Hint
The default Bluetooth setting for the remote control is ON. When the Bluetooth compatible camera is
connected to Wi-Fi for the first time, Bluetooth pairing with the remote control is automatically completed,
and the
icon displayed on the LCD screen switches to .
Note
When Airplane mode is ON, the Bluetooth icon does not appear on the LCD screen, and Bluetooth
communications are disabled, even if the Bluetooth setting is ON.
Page 49
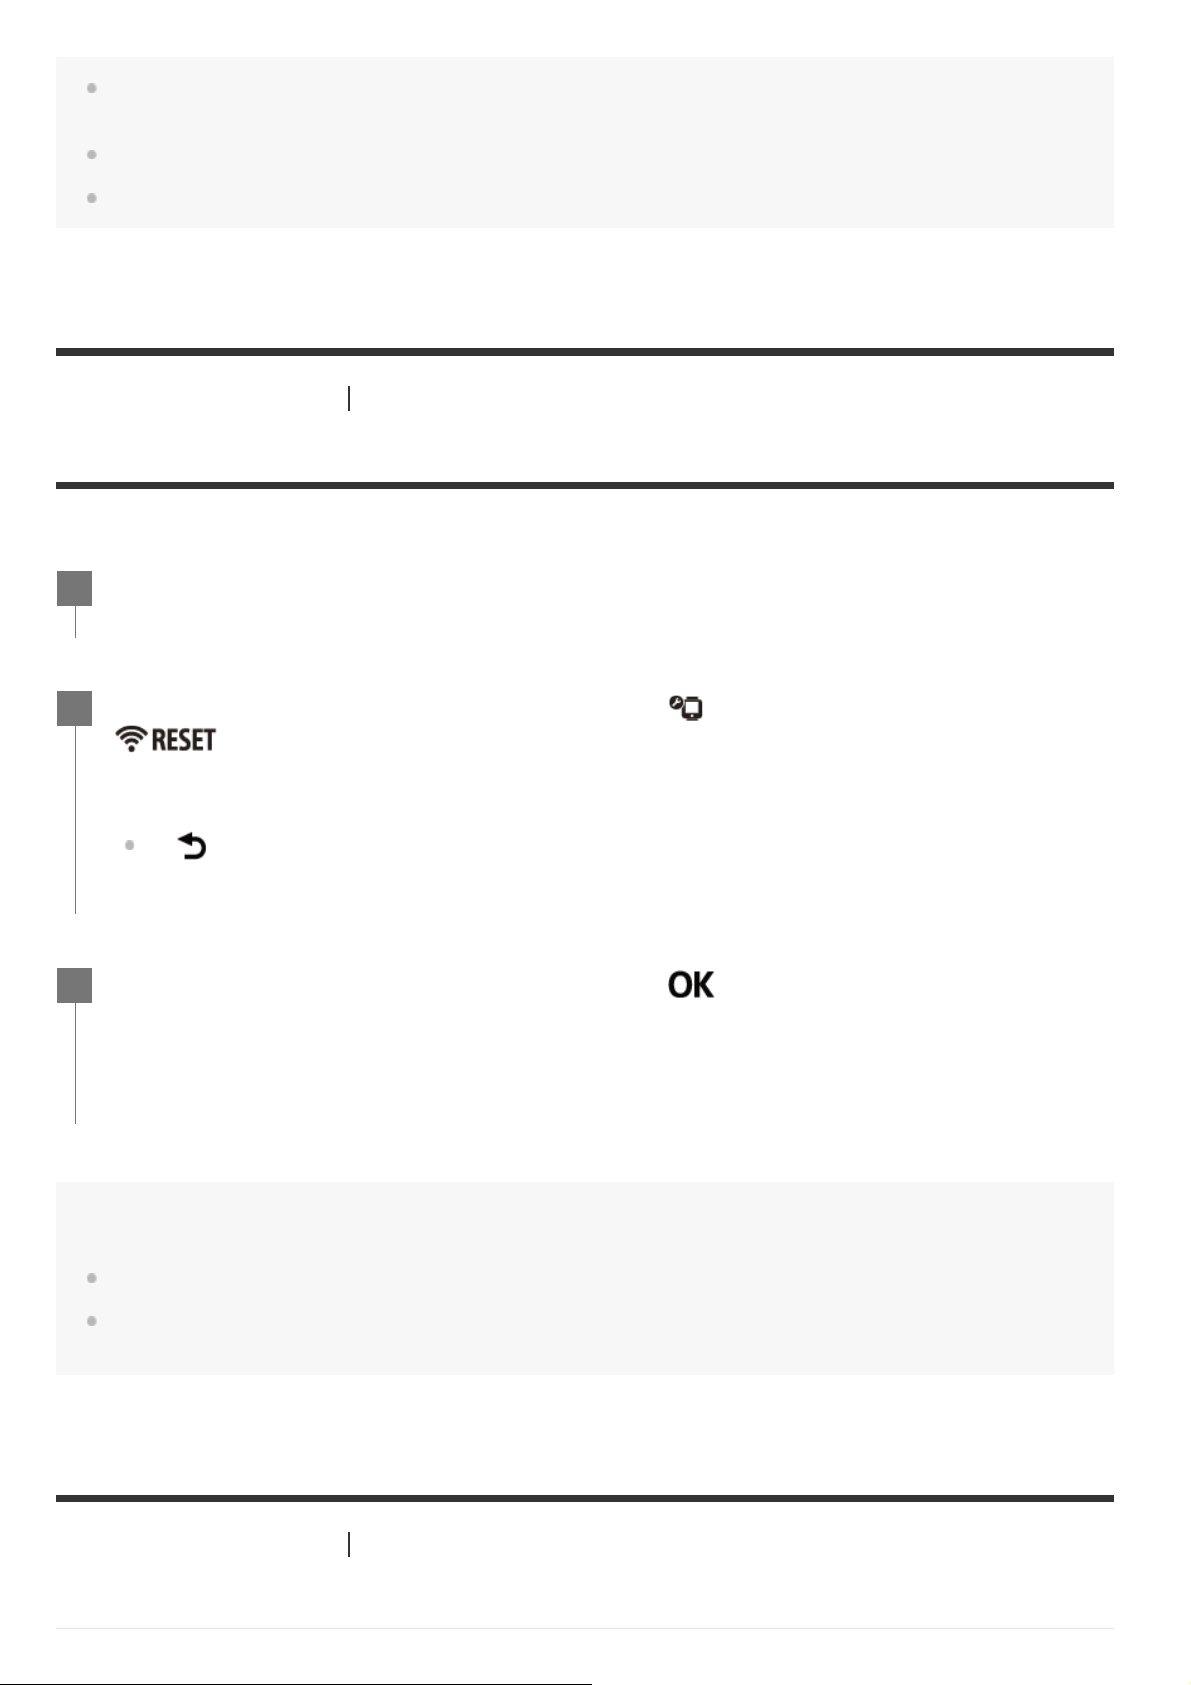
The remote control can be paired with up to 15 Bluetooth devices. If a 16th device is paired with the remote
[55] Changing the Settings
Network reset settings
The multi connection network settings can be reset.
[56] Changing the Settings
Auto monitor off while shooting
control, the pairing information of the first registered device is deleted.
When the remote control is communicating via Bluetooth, another device cannot be paired.
When the remote control is initialized, the pairing information is also reset. Perform pairing again.
Remote control settings
Press the MENU button.
1
Press the UP button or DOWN button to select (Remote control settings) -
2
(network reset settings), then press the REC/ENTER button.
The confirmation screen is displayed.
If
Press the UP button or DOWN button to select
3
button.
The network settings will be reset.
(cancel) is selected on the confirmation screen, the resetting is canceled.
, then press the REC/ENTER
Note
You cannot reset the network settings in single connection mode.
If multi connection is established after having reset the network settings, register devices once again even if
they had already been registered before.
Remote control settings
Page 50
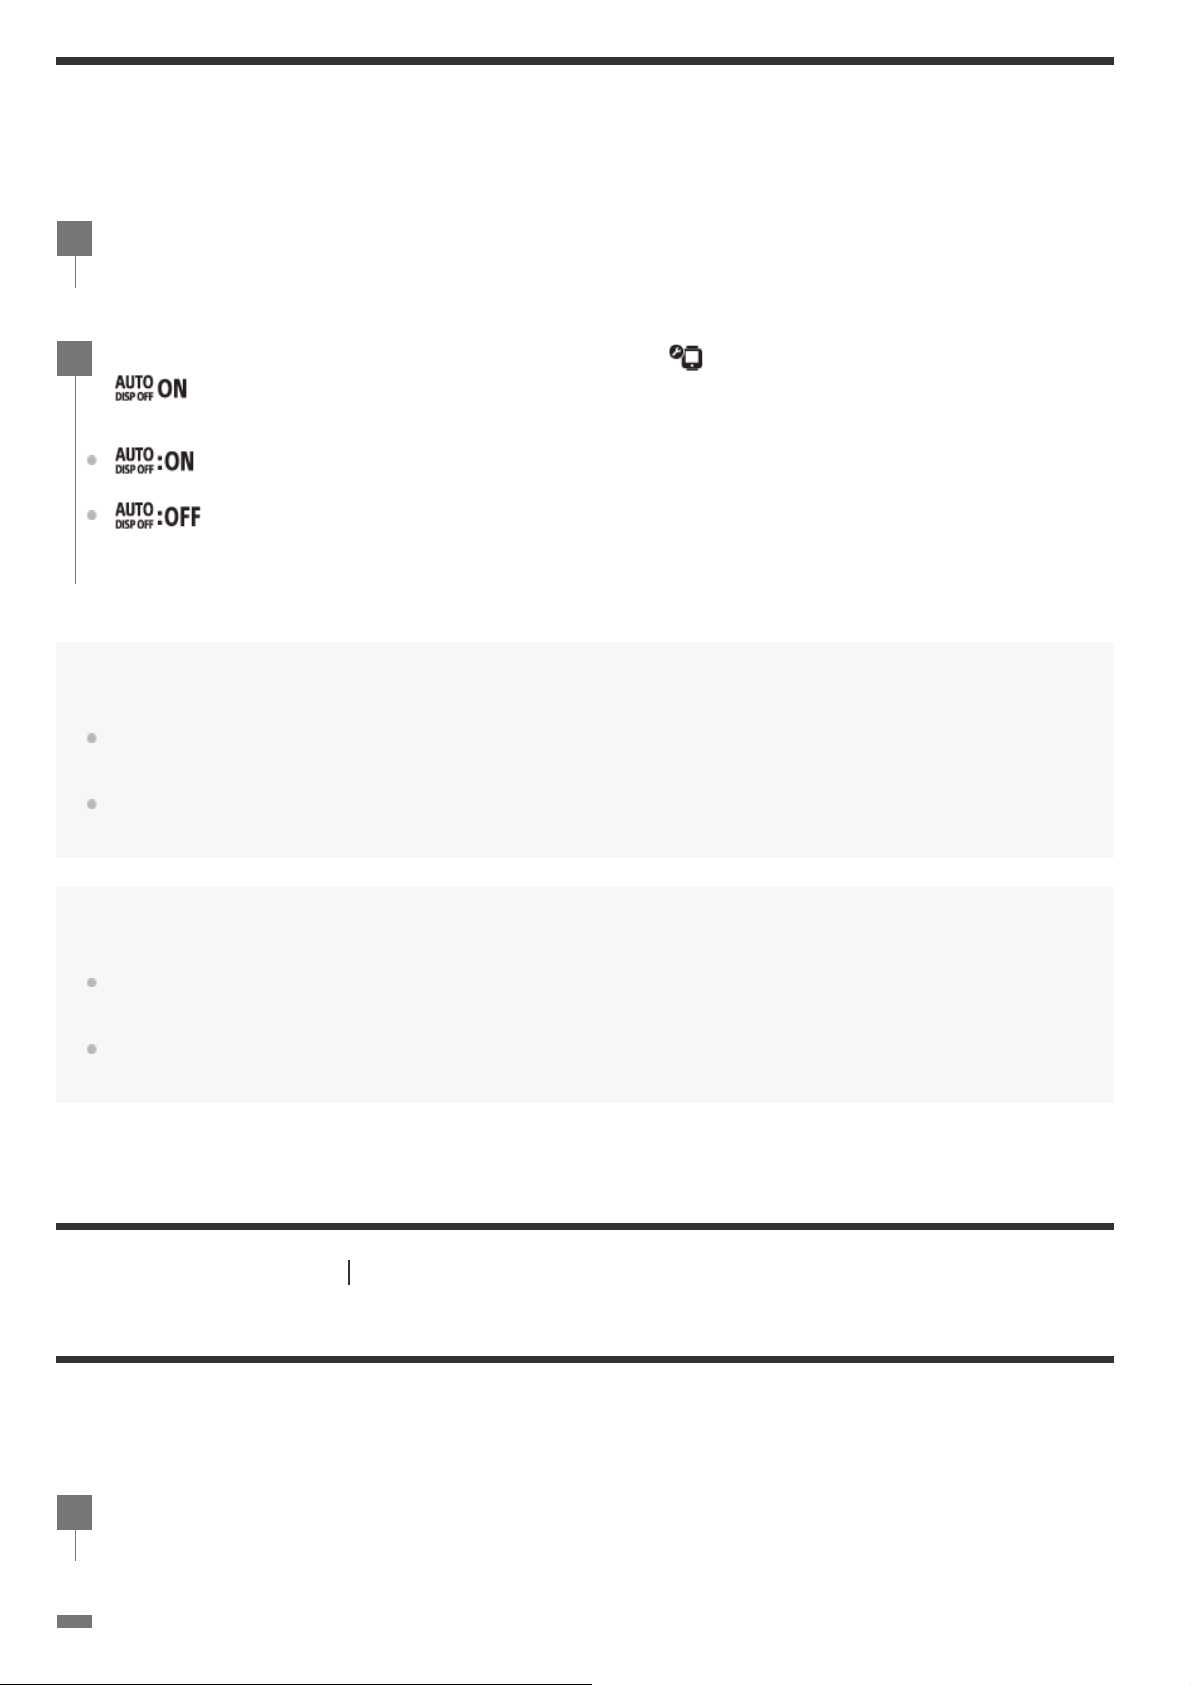
If the remote control has not been operated for more than 10 seconds while shooting movies, timelapse capturing, or loop recording, the LCD screen display of the remote control is turned off
automatically to reduce battery consumption. Operate the remote control to turn on the LCD screen
display again.
[57] Changing the Settings
Mirror Mode
Images on the LCD monitor are displayed as mirror-reversed. This is useful when you take selfportraits with the camera mounted to an accessory, such as the Shooting Grip. Actual shot images are
not mirror-reversed.
Press the MENU button.
1
Press the UP button or DOWN button to select (Remote control settings) -
2
(Auto monitor off while shooting) - setting value, then press the REC/ENTER
button.
(default) (The LCD screen display is turned off automatically, if the remote control has
not been operated for more than 10 seconds while shooting)
(The LCD screen display is turned on while shooting)
Hint
Battery consumption can be reduced if the Bluetooth setting of the remote control is set to ON and the
remote control is registered with Bluetooth-supported devices.
To turn on the LCD screen display again, operate the remote control with the LCD screen display turned off,
or stop shooting on the camera.
Note
If you operate the remote control after 1 minute has exceeded since the LCD screen display was turned off,
it takes 5 to 6 seconds until the LCD screen display is turned on.
This function is available only when the remote control is connected to the camera in the single connection
mode.
Remote control settings
Press the MENU button.
1
Page 51
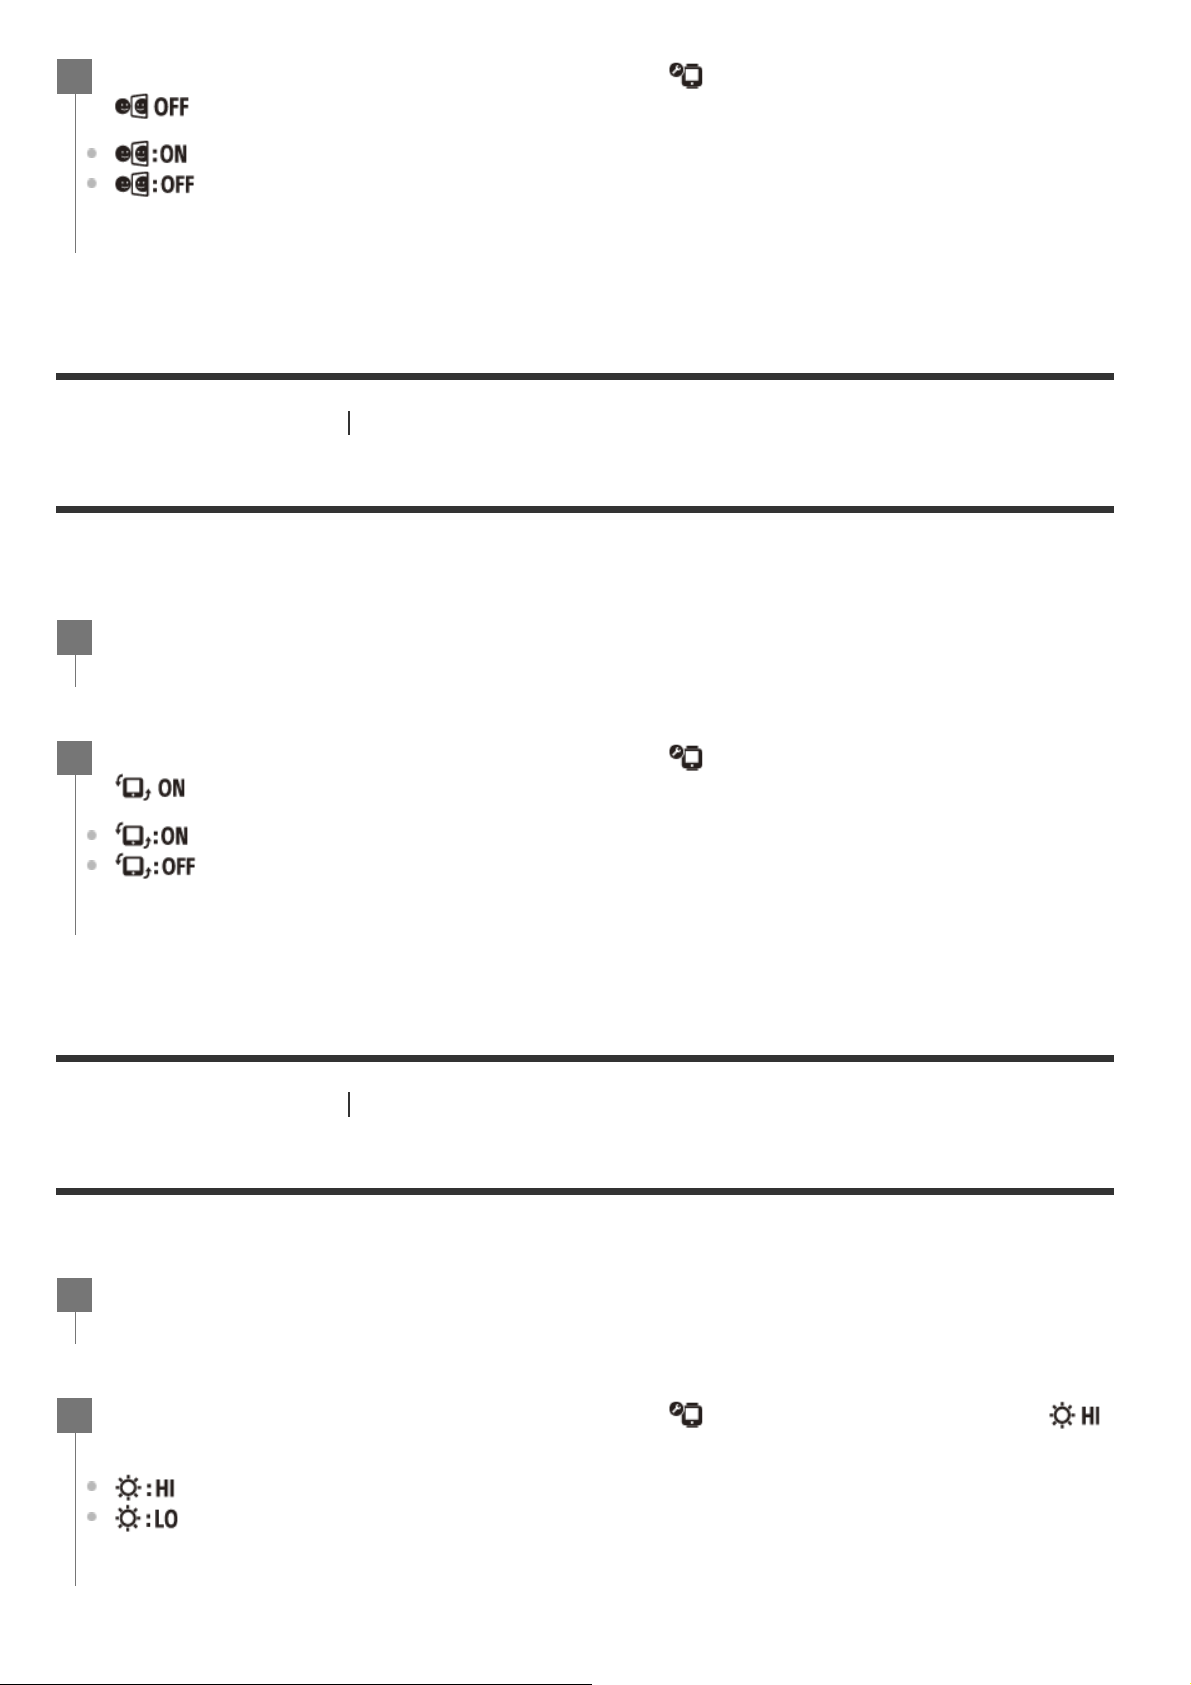
[58] Changing the Settings
Display rotate
You can rotate the LCD screen display and change the orientation of the UP button/DOWN button on
the remote control.
[59] Changing the Settings
Monitor brightness
Set the brightness of the LCD screen.
Press the UP button or DOWN button to select (Remote control settings) -
2
(Mirror Mode) - setting value, then press the REC/ENTER button.
(Images are displayed as mirror-reversed)
(default) (Images are not displayed as mirror-reversed)
Remote control settings
Press the MENU button.
1
Press the UP button or DOWN button to select (Remote control settings) -
2
(display rotate) - setting value, then press the REC/ENTER button.
(Rotates the screen)
(default) (Does not rotate the screen)
Remote control settings
Press the MENU button.
1
Press the UP button or DOWN button to select (Remote control settings) -
2
(monitor brightness) - setting value, then press the REC/ENTER button.
(default) (Bright)
(Dark)
Page 52
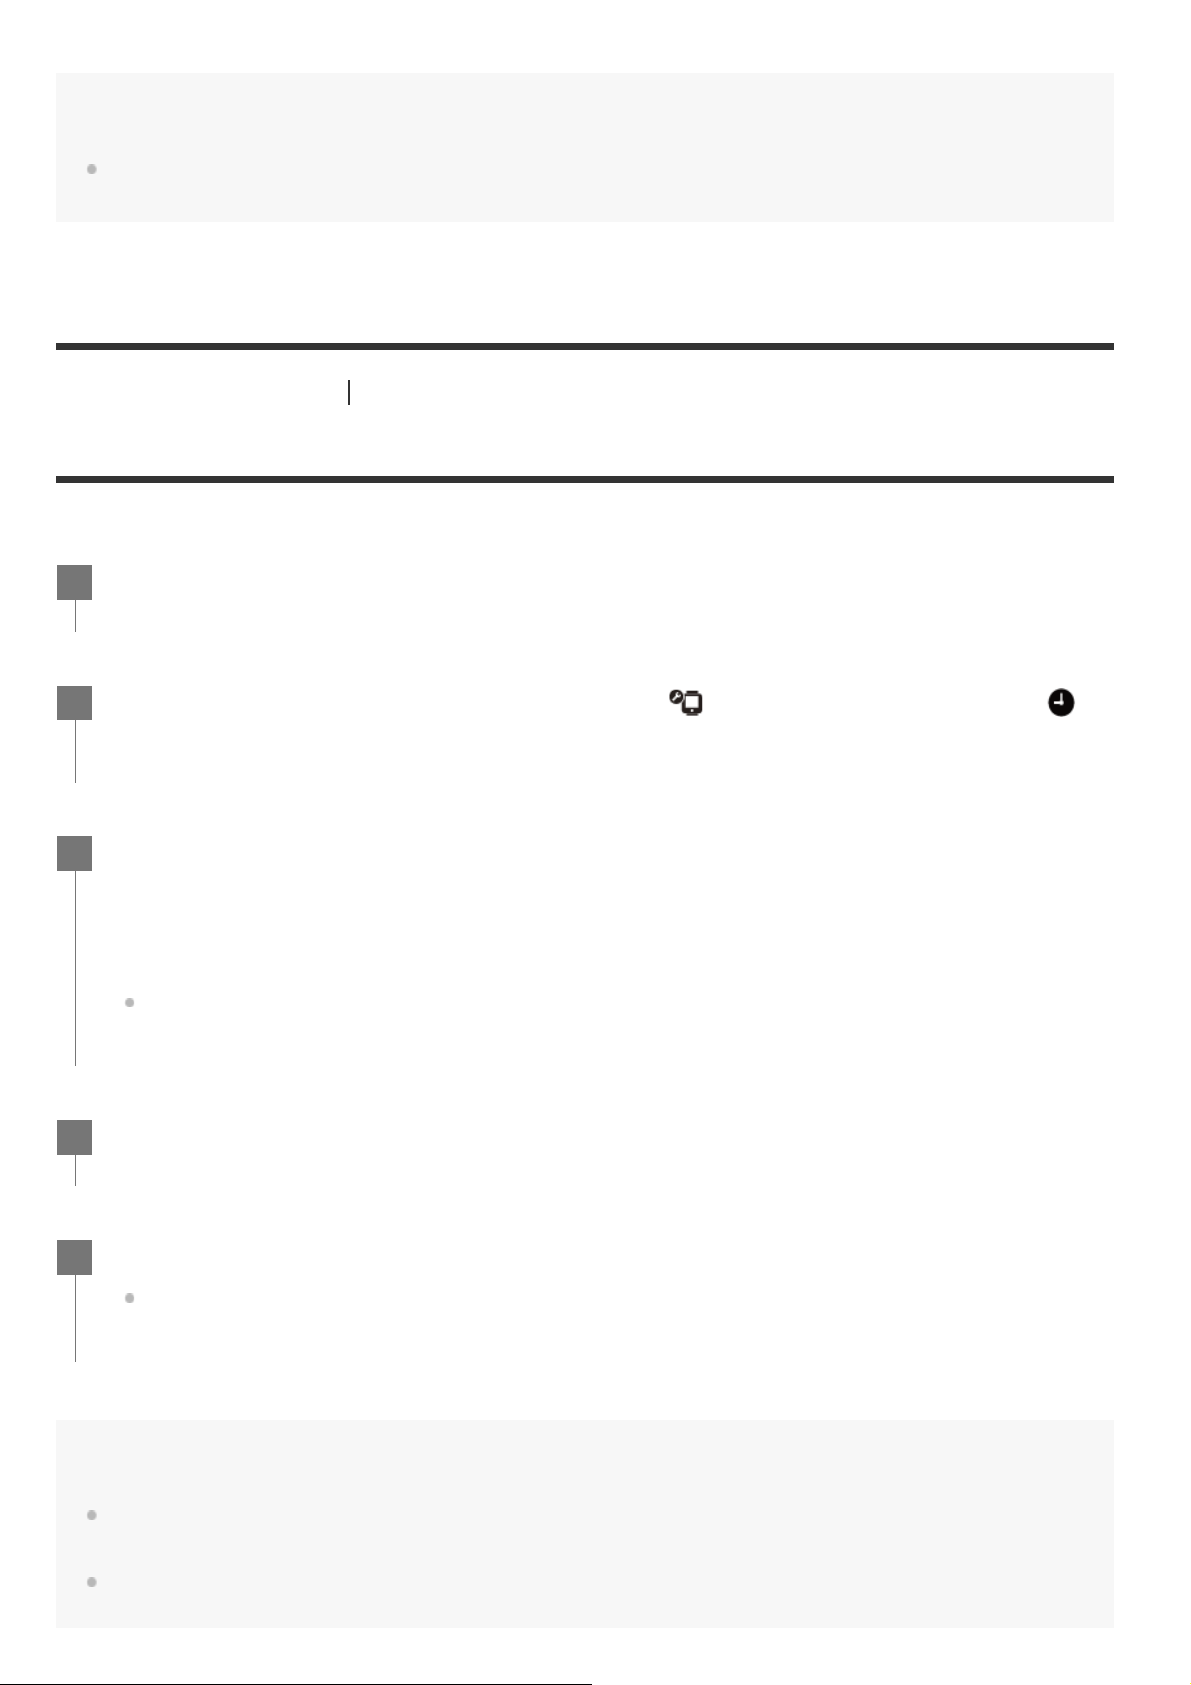
Note
[60] Changing the Settings
Date & time setting
Set the date and time.
You cannot set the monitor brightness when supplying power from a Micro USB terminal. The setting is fixed
to “Bright.”
Remote control settings
Press the MENU button.
1
Press the UP button or DOWN button to select
2
(Date & time setting), then press the REC/ENTER button.
Set the year/month/day.
3
Press the UP button or DOWN button to set the year, then press the REC/ENTER button. The
cursor moves to month so, repeat the same operation to set the month and day.
(The display order of the date differs depending on the date format.)
The time setting screen appears.
Set the time by repeating the same procedure as step 3.
4
(Remote control settings) -
Check the date and time on the displayed screen, then press the REC/ENTER button.
5
The time is set and the display returns to the previous menu.
Hint
To return to the setting item selection screen from the setting value selection screen, press the MENU
button.
If the remote control is connected to a Lens-style Camera (QX series) or HDR-AZ1, the date & time setting
of the remote control is reflected to the camera automatically.
Page 53
[61] Changing the Settings
Remote control settings
Area setting
You can adjust the clock on the remote control to match the time in your area without stopping the
clock. The area is determined by the time difference from Greenwich Mean Time (GMT). See “The list
of time differences for world capitals” for more.
[62] Changing the Settings
Daylight saving time (summer time) setting
Set whether to reflect the daylight saving time (summer time) in the date and time setting.
Press the MENU button.
1
Press the UP button or DOWN button to select
2
(Area setting) - time difference, then press the REC/ENTER button.
Confirm the time on the displayed screen, then press the REC/ENTER button.
3
Remote control settings
(Remote control settings) -
Press the MENU button.
1
Press the UP button or DOWN button to select (Remote control settings) -
2
(Daylight saving time (summer time) setting) - setting value, then press the
REC/ENTER button.
(Sets the daylight saving time (summer time))
(default) (Does not set the daylight saving time (summer time))
Page 54
[63] Changing the Settings
Date format
Set the display order of the date displayed on the remote control.
[64] Changing the Settings
Version
The software version of the remote control can be displayed.
[65] Changing the Settings
Resetting the settings
Reset each setting of the remote control to its default.
Remote control settings
Press the MENU button.
1
Press the UP button or DOWN button to select (Remote control settings) -
2
/ / / (date format) - setting value, then press the
REC/ENTER button.
(Day-Month-Year)
(Month-Day-Year)
(Month (in English)-Day-Year)
(Year-Month-Day)
Remote control settings
Press the MENU button.
1
Press the UP button or DOWN button to select
2
(Version), then press the REC/ENTER button.
Remote control settings
(Remote control settings) -
The camera settings are not reset even if the remote control settings are reset.
Page 55
[66] Viewing
Playing back images
Play back movies/images recorded with the camera on the remote control.
The procedure below explains how to play back movies.
Returning to the shooting mode
Press the MENU button, the UP button or DOWN button to select
mode), then press the REC/ENTER button.
Press the MENU button.
1
Press the UP button or DOWN button to select
2
(Resetting the settings), then press the REC/ENTER button.
Press the UP button or DOWN button to select the setting, then press the
3
REC/ENTER button.
Select
Select
(Remote control settings) -
(cancel) to return to the remote control settings menu screen.
(execute) to reset the remote control settings.
Press the MENU button.
1
Press the UP button or DOWN button to select
2
control), then press the REC/ENTER button.
Press the UP button or DOWN button to select the image, then press the REC/ENTER
3
button.
Playback starts.
(playback on the remote
Note
Audio cannot be played back.
(switching to the shooting
Page 56
The frame rate displayed on the LCD screen while playing back varies with the Wi-Fi communication status
between the remote control and the camera. It is different from the one displayed while shooting.
[67] Viewing
Deleting images
Delete unnecessary images saved in the memory card of the camera.
Hint
You can use the following operations while playing back the movie.
Fast-rewind: Press the UP button.
Fast-forward: Press the DOWN button.
Pause: Press the REC/ENTER button.
Press the MENU button.
1
Press the UP button or DOWN button to select
2
control), then press the REC/ENTER button.
Press the UP button or DOWN button to select the image, then press the MENU
3
button.
Select
4
Select (execute) on the confirmation screen, then press the REC/ENTER button.
5
(delete), then press the REC/ENTER button.
(playback on the remote
The selected image will be deleted.
Note
You can delete images only in the single connection.
You can delete each image once. You cannot delete multiple images simultaneously.
Format the memory card when you want to delete all of the images.
Page 57
[68] Information
Handling
Do not use/store the remote control in the following places
[69] Information
On moisture condensation
If the remote control is brought directly from a cold to a warm location, moisture may condense
inside or outside the remote control. This moisture condensation may cause a malfunction to the
remote control.
If moisture condensation occurs
Turn off the remote control and wait about 1 hour for the moisture to evaporate.
Note on moisture condensation
Moisture may condense when you bring the remote control from a cold place into a warm place (or
vice versa) or when you use the remote control in a humid place, as shown below.
How to avoid moisture condensation
When you bring the remote control from a cold place into a warm place, put the remote control in a
plastic bag and seal it tightly. Remove the bag when the air temperature inside the plastic bag has
reached the ambient temperature (after about 1 hour).
Precautions
In an extremely hot, cold or humid place
In places such as in a car parked in the sun, the remote control body may become deformed and
this may cause a malfunction.
Under direct sunlight or near a heater
The remote control body may become discolored or deformed, and this may cause a malfunction.
In a location subject to strong vibration
Near strong magnetic fields
Near a location that generates strong radio waves or emits radiation
In sandy or dusty places
Be careful not to let sand or dust get into the remote control. This may cause the remote control
to malfunction, and in some cases it may be irreparable.
Precautions
When you bring the remote control from a ski slope into a warm place
When you bring the remote control from an air conditioned car or room into a hot place outside
When you use the remote control after a squall or a shower
When you use the remote control in a hot and humid place such as a bath
Page 58
[70] Information
Precautions
On carrying
[71] Information
On operating temperatures
[72] Information
Handling the LCD screen
On the LCD screen
Bright point and vanishing point on the LCD screen
The LCD panel fitted to the remote control is manufactured with high precision technology, but a very
small proportion of pixels may be “stuck”, either always off (black), always on (red, green, or blue),
or flashing. In addition, because of the physical characteristics of the liquid crystal display, such
“stuck” pixels may appear spontaneously over a long period of use. These problems are not a
malfunction.
[73] Information
Waterproof performance
Do not sit down in a chair or other place with the remote control in the back pocket of your
trousers or skirt, as this may cause malfunction or damage the remote control.
Precautions
The remote control is designed for use in temperatures between –10°C and +40°C (14°F and
104°F). Shooting in extremely cold or hot places that exceed this range is not recommended.
The LCD screen and the cabinet may become warm during operation. This is normal.
Precautions
Do not leave the LCD screen facing the sun as it may be damaged. Be careful when placing the
remote control by a window.
If the remote control is used in a cold place, horizontal lines or a residual image may appear on
the LCD screen. This is not a malfunction. The LCD screen returns to normal when the remote
control warms up.
If a still picture or a fixed picture is displayed for a long time, an image may remain superimposed
on the LCD screen as a ghosting image.
Precautions
Page 59
Notes on the waterproof performance
The remote control is designed to be waterproof. Damage caused by misuse, abuse, or improper
maintenance is not covered by the limited warranty.
Notes before using the remote control under/near water
Notes on using the remote control under/near water
[74] Information
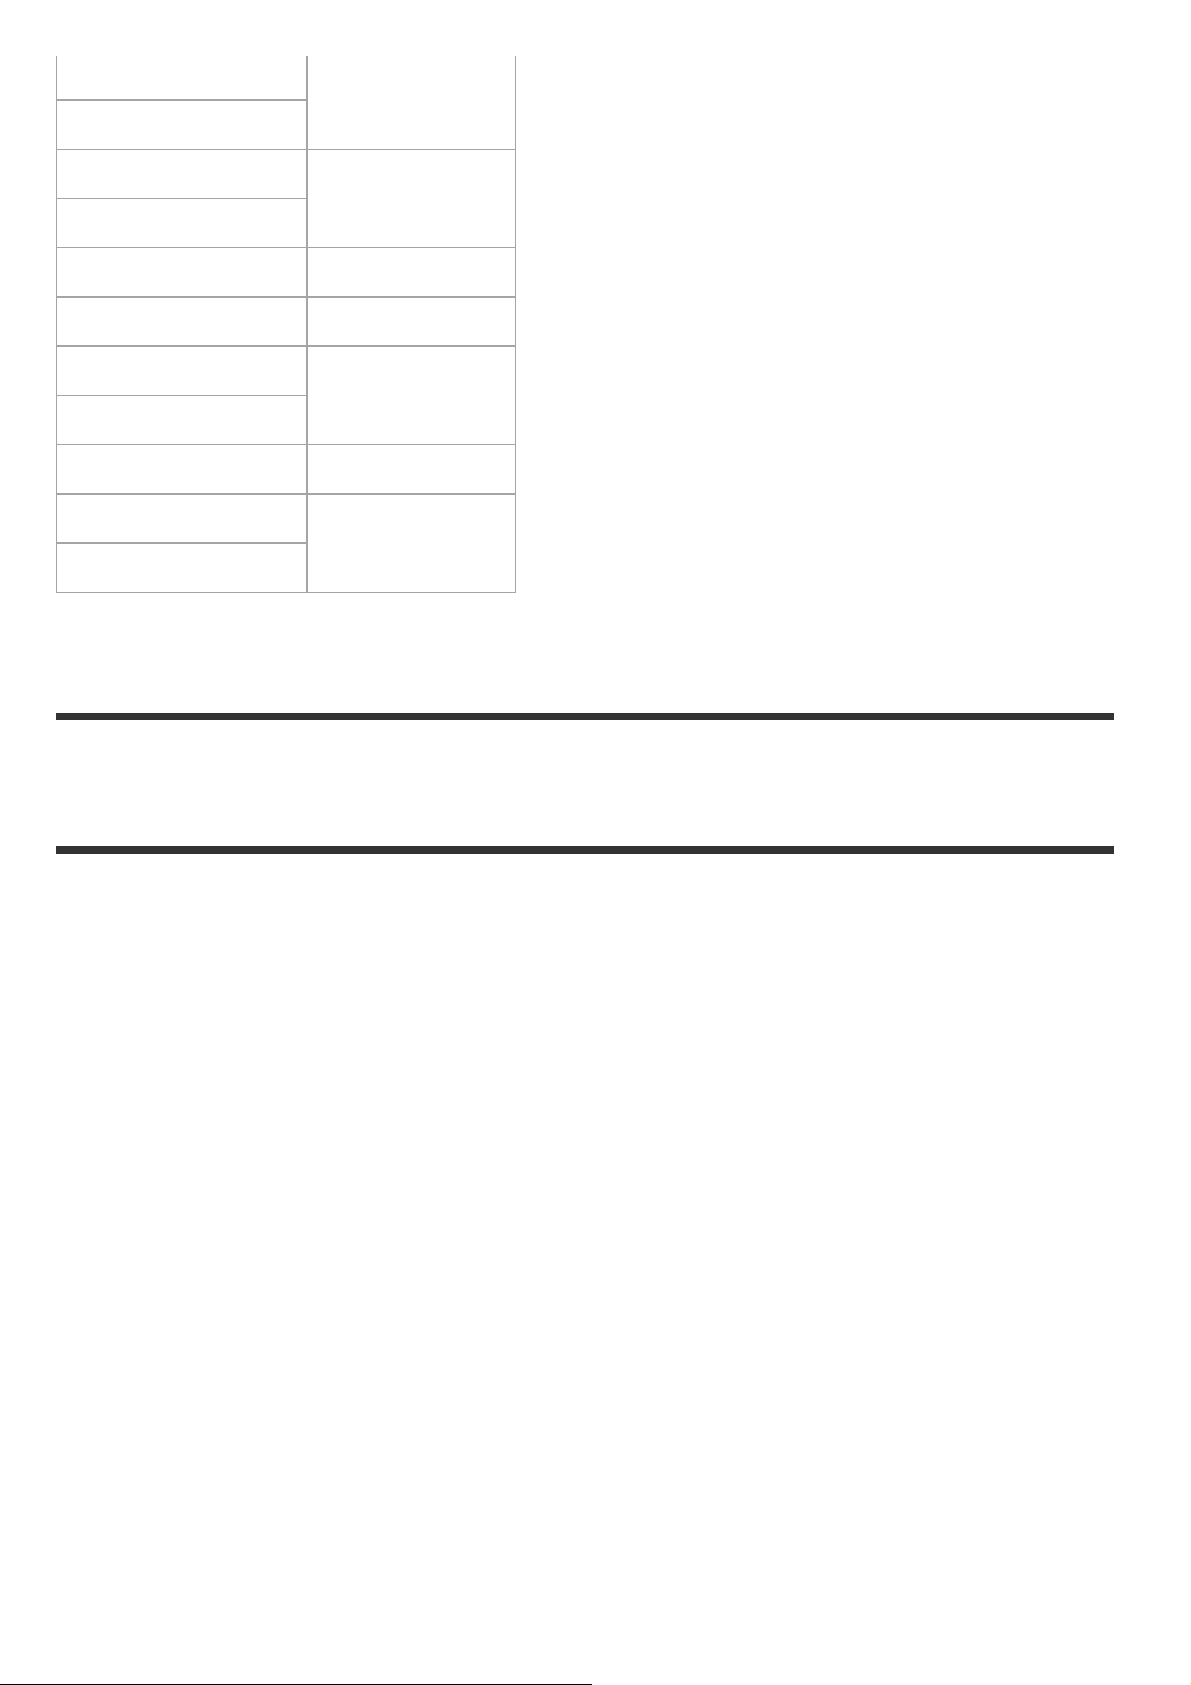
The list of time differences for world capitals
Time differences with the standard times of world cities (as of 2016).
Do not subject the remote control to pressurized water, such as from a tap.
Do not use in hot springs.
Use the remote control in the recommended operating water temperature range of 0°C to 40°C
(32°F to 104°F).
The remote control has continuous waterproof performance at a water depth of 3 m (10 feet) for
30 minutes.
If dirt or sand gets on the terminal section of the remote control (where it connects to the
cradle), wipe the area clean with a soft cloth that does not leave behind any fibers.
If you have used the remote control near water or with wet or sandy hands, perform the
procedure described in “Maintenance of the remote control in water or at a waterfront” before
charging the remote control with the cradle.
Do not subject the remote control to shock such as by jumping into water.
The remote control sinks in water. Use the belt supplied with the remote control to prevent it
from sinking.
Bubbles may appear when the remote control is placed underwater. This is not a malfunction.
You cannot use the Wi-Fi/Bluetooth function of the remote control underwater.
Lisbon
London
Berlin
Paris
Helsinki
Istanbul
Moscow
Nairobi
City Time difference
GMT
+01:00
+02:00Cairo
+03:00
Page 60

Tehran +03:30
Abu Dhabi
Baku
Kabul +04:30
Karachi
Islamabad
Kolkata
New Delhi
Almaty
Dhaka
Yangon +06:30
Bangkok
Jakarta
+04:00
+05:00
+05:30
+06:00
+07:00
Hong Kong
+08:00Singapore
Beijing
Tokyo
+09:00
Seoul
Adelaide
+09:30
Darwin
Melbourne
+10:00
Sydney
New Caledonia +11:00
Fiji
+12:00
Wellington
Midway -11:00
Hawaii -10:00
Alaska -09:00
San Francisco
-08:00
Tijuana
Denver
-07:00
Arizona
Page 61
[75] Information
Specifications
[Input terminal]
Micro USB Terminal: micro-B/USB
(For charging)
[Power]
Power requirements:
Charging method:
Charging time:
Power supply method:
Power consumption:
Continuous operating time:
Battery:
Chicago
-06:00
Mexico City
New York
-05:00
Bogota
Santiago -04:00
St.John’s -03:30
Brasilia
-03:00
Montevideo
Fernando de Noronha -02:00
Azores
-01:00
Cape Verde Is.
Rechargeable battery pack: 3.7 V (Internal battery)
Micro USB Terminal: 5.0 V
USB charging: DC 5.0 V, 500 mA
Via a computer
Internal battery: Approx. 2 h 25 min
USB power supply (1.5 A or more is recommended)
0.8 W (when connected by Wi-Fi and during Live-View display)
155 min
*1
Page 62
Rechargeable battery pack: Internal battery
Maximum output voltage: DC 4.2 V
[General]
Waterproof performance:
[76] Information
Trademarks
[77] Information
Note on the License
*1
*2
Output voltage: DC 3.7 V
Maximum charge voltage: DC 4.2 V
Maximum charge current: 975 mA
Capacity: 2.4 Wh (640 mAh)
Type: Li-ion
Depth of water 3 m (10 feet), 30 minutes continuously
Operating temperature: -10°C to +40°C (14°F to 104°F)
Storage temperature: -20°C to +60°C (-4°F to +140°F)
Dimensions (approx.): 47.8 mm × 52.6 mm × 19.0 mm (1 15/16 in. × 2 1/8 in. × 3/4 in.)
(W/H/D, excluding protrusions)
Mass: Approx. 46 g (1.6 oz) (only the main body)
Total mass in use: Approx. 83 g (2.9 oz) (including the supplied belt)
The continuous operating time is the approximate available time when you use a fully charged battery pack and display
the Live-View continuously.
The waterproof performance is not guaranteed under all circumstances.
Design and specifications are subject to change without notice.
*2
Wi-Fi, the Wi-Fi logo and Wi-Fi PROTECTED SET-UP are trademarks or registered trademarks of
the Wi-Fi Alliance.
Adobe, the Adobe logo, and Adobe Acrobat are either registered trademarks or trademarks of
Adobe Systems Incorporated in the United States and/or other countries.
The Bluetooth® word mark and logos are registered trademarks owned by Bluetooth SIG, Inc.
and any use of such marks by Sony Corporation is under license. Other trademarks and trade
names are those of their respective owners.
In addition, system and product names used in this guide are, in general, trademarks or
registered trademarks of their respective developers or manufacturers. However, the ™ or ®
marks may not be described in this guide.
On GNU GPL/LGPL applied software
Page 63
The software that is eligible for the following GNU General Public License (hereinafter referred to as
“GPL”) or GNU Lesser General Public License (hereinafter referred to as “LGPL”) are included in the
remote control. This informs you that you have a right to have access to, modify, and redistribute
source code for these software programs under the conditions of the supplied GPL/LGPL.
Source code is provided on the web. Use the following URL to download it.
http://www.sony.net/Products/Linux/
We would prefer you do not contact us about the contents of source code.
Copies of the licenses (in English) are stored in the internal memory of the remote control. Connect
the remote control and a computer with the USB cable, then read the files in the “LICENSE” folder in
“PMHOME.”
[78] Information
Care and storage
Wipe the surface
Clean the remote control surface with a soft cloth slightly moistened with water, then wipe the
surface with a dry cloth. Do not use any of the following as they may damage the finish or the casing:
Remove the battery pack when not in use for a long time
Remove the USB cable from the cradle when not in use for a long time and store it. If not, it may
cause a fire.
[79] Information
Maintenance of the LCD screen
The LCD screen surface is specially treated to reduce the reflection of light.
Incorrect maintenance may impair the performance of the LCD screen, so take care with respect to
the following:
[80] Information
Care and storage
Chemical products such as thinner, benzine, alcohol, disposable cloths, insect repellent, sunscreen
or insecticide, etc.
Do not touch the remote control with any of the above on your hand.
Do not leave the remote control in contact with rubber or vinyl for a long time.
Care and storage
Wipe the LCD screen gently with a soft cloth such as a cleaning cloth or glasses cloth.
Stubborn stains may be removed with a soft cloth such as a cleaning cloth or glasses cloth slightly
dampened with water.
Never use a solvent such as alcohol, benzene or thinner, or acid, alkaline or abrasive detergent,
or chemical cleaning cloth, as they will damage the LCD screen surface.
Care and storage
Page 64
Maintenance of the remote control in water or at a
waterfront
[81] Information
Battery pack
On charging the battery pack
Effective use of the battery pack
Remaining battery charge
On battery pack life
Always clean the remote control with water within 60 minutes of use, and do not remove the belt
before cleaning is finished. Sand or water may get inside where it cannot be seen, and will
degrade water-proof performance if not rinsed out.
Allow the remote control to sit in pure water poured into a cleaning bowl for about 5 minutes.
Then, gently shake the remote control and press each button under the water to clean away any
salt, sand or other matter lodged around the buttons.
After rinsing, wipe away any drops of water with a soft cloth. Allow the remote control to dry
completely in a shady location with good ventilation. Do not blow dry with a hair dryer as there is
a risk of deformation and/or degraded waterproof performance.
Wipe away any drops of water or dust with a soft dry cloth.
Attach the remote control to the cradle when the remote control is completely dry.
The remote control body may become discolored if it comes into contact with sunscreen or suntan
oil. If the remote control comes into contact with sunscreen or suntan oil, quickly wipe it clean.
Do not allow the remote control to sit with salt water inside it or on its surface. This may lead to
corrosion or discoloration, and degradation of the waterproof performance.
Battery pack
Charge the battery pack before using the remote control.
We recommend charging the battery pack in an ambient temperature of between 10°C to 30°C
(50°F to 86°F) until the CHG (Charge) lamp turns off. The battery pack may not be effectively
charged in temperatures outside this range.
The CHG (Charge) lamp may blink during charging in the following situations:
Battery pack is damaged.
The temperature of the remote control is low. Put it in a warm place.
The temperature of the remote control is high. Put it in a cool place.
Battery pack performance decreases at a low ambient temperature lower than 10°C (50°F). In
cold places, therefore, the operational time of the battery pack is shorter.
If the battery pack runs out quickly even though the remaining charge indicator is high, fully
charge the remote control again. The remaining charge indicator will be then displayed correctly.
Note that it may not be displayed correctly in the following situations:
The remote control is used for a long time at high ambient temperature.
The remote control is left fully charged.
The remote control is used heavily.
The battery pack has a limited life. Battery capacity decreases over time and through repeated
use. If decreased usage time between charges becomes significant, the battery pack life has been
shortened. In this case, contact your Sony dealer.
Page 65
The battery pack life varies according to how the battery pack is stored or used.
[82] Information
To reduce the battery consumption of the remote
control
The following settings enable the battery consumption to be reduced when in use.
(Example)
If the Live-View display is displayed for 5 minutes and movies are recorded for 55 minutes after the
above settings are applied, you can use the remote control about two times longer than before.
[83] Information
Disposal of the remote control
Remove the built-in battery pack before disposing of the remote control.
The built-in battery pack of the remote control is recyclable. When disposing of the remote control,
remove the built-in battery pack and take it to your dealer.
Battery pack
Auto monitor off while shooting:
Monitor brightness:
When you operate FDR-X3000/HDR-AS300/HDR-AS50, set the Bluetooth remote controller power
setting of the camera to
remote control while in shooting standby mode. This enables further reduction of battery
consumption on both the camera and remote control.
and turn off the power of the camera frequently from the
Do not remove the screws except when disposing of the remote control. We will refuse repairs or
replacement if we judge there to have been unwarranted disassembly.
Press the (on/standby) button to turn off the power of the remote control.
1
Remove the screws with a Phillips-head screwdriver (4 screws).
2
Page 66
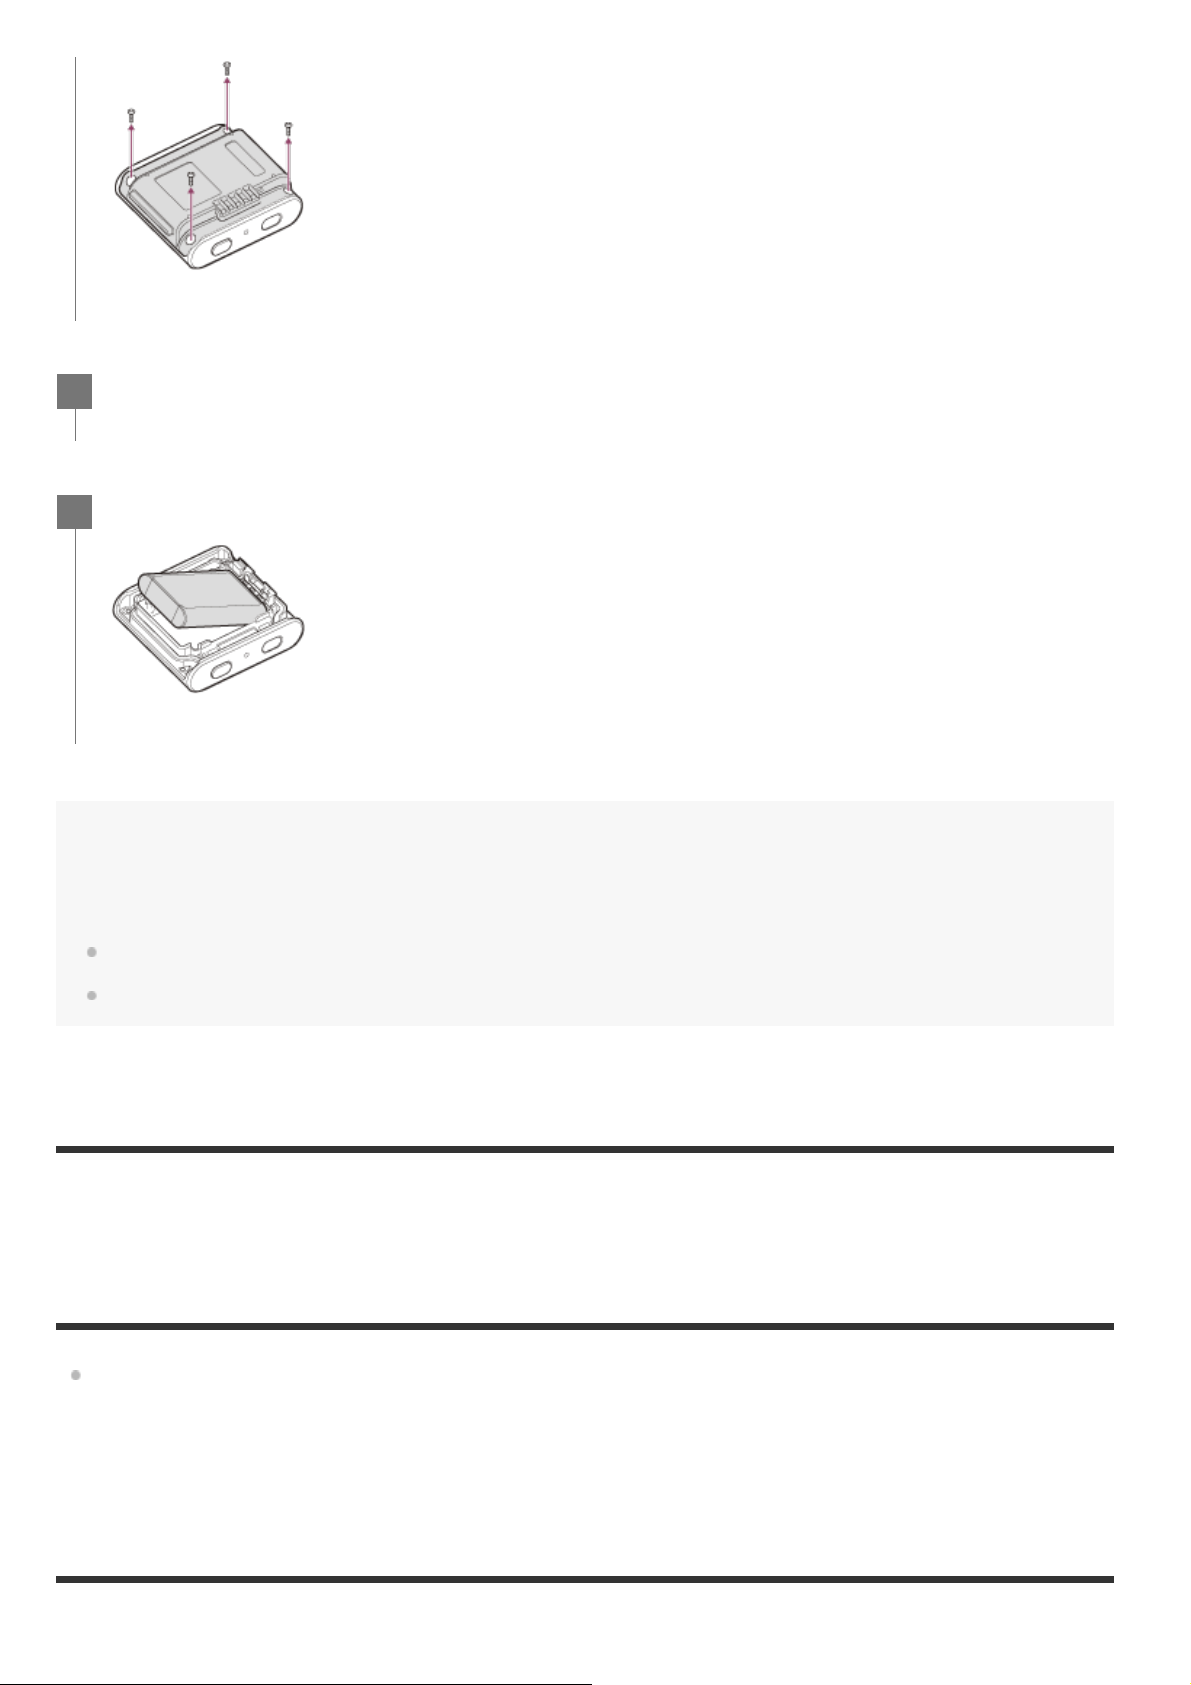
[84] Troubleshooting
Cannot connect the remote control and the camera via
Wi-Fi.
Detach the cover.
3
Remove the battery pack.
4
Note
When removing the built-in battery pack of the remote control, be careful of the followings.
Remove the screws, etc. away from small children to prevent accidental swallowing.
Be careful not to injure your nails or fingers.
If you cannot connect the camera to the remote control properly, try the operation below.
Check the camera and the remote control connection mode are set to the single connection mode.
If not, change the connection mode and connect again.
Page 67
[85] Troubleshooting
Cannot turn on the remote control.
[86] Troubleshooting
The power of the remote control turns off suddenly.
[87] Troubleshooting
Cannot charge the remote control.
[88] Troubleshooting
The remaining charge indicator is incorrect.
Charge the battery pack sufficiently.
Charge the battery pack sufficiently.
If you have not used the remote control for a prolonged period, the efficiency of the battery will
be improved by repeatedly charging and discharging it.
Turn off the remote control and make the USB connection.
Disconnect the micro USB cable (supplied), and then reconnect it.
Use the micro USB cable (supplied).
Charge the battery pack in an ambient temperature of 10°C to 30°C (50°F to 86°F).
Turn on the computer, then connect it to the cradle to which the remote control is attached.
Release the computer from sleep or hibernation status.
Connect the micro USB cable (supplied) directly to the USB connector of the computer.
This phenomenon occurs when you use the remote control in an extremely hot or cold location.
A discrepancy arises between the remaining charge indicator and the actual remaining battery
charge. Fully discharge the battery pack once, then charge it to correct the indication.
Fully charge the battery pack again. If the problem persists, the battery pack is worn out. Consult
your nearest Sony dealer.
Page 68

[89] Warning indicators and error messages
Error display on the Live-View Remote
If the following messages appear, follow the instructions.
01-01/02-02
Failed to connect the camera to the remote control.
01-02
Failed to connect the camera to the remote control.
01-03/01-04
Failed to connect the camera to the remote control.
02-01
No memory card is inserted into the camera.
The memory card is inserted in the incorrect direction.
02-03
Camera error
03-01
Signal traffic is heavy.
The camera operation for connecting to the remote control has failed.
03-02
Failed to connect the camera to the remote control.
The camera is not recognized. Follow the steps in “Connecting the remote control to a single camera
via Wi-Fi” or “Connecting the remote control to multiple cameras via Wi-Fi.”
03-03/03-04
Signal traffic may be heavy or the remote control may be too far from the access point.
Follow the steps in “Connecting the remote control to a single camera via Wi-Fi” or “Connecting
the remote control to multiple cameras via Wi-Fi.”
The camera is not compatible.
Insert the memory card in the correct direction, then turn on the camera.
Confirm the accessing camera or memory card.
Change the conditions and try the connecting procedure again.
Check the connecting procedure.
Signal traffic may be heavy or the remote control may be too far from the access point.
Page 69

Failed to connect the camera to the remote control.
03-05
Cannot connect to the camera.
04-03
Request to the camera failed.
04-04
No response from the camera.
05-01
Failed to shoot still images.
05-02
Recording with the memory card inserted in the incorrect direction.
No memory card is inserted into the camera.
The memory card has no free memory space.
05-03
Cannot stop recording.
05-04
Failed to start loop recording.
The camera is not recognized. You need to do some operation on the camera you want to
connect.
Signal traffic may be heavy or the remote control may be too far from the access point.
The remote control has already connected to the maximum number of connectable cameras.
Check the number of cameras you are connecting.
Check the camera.
Check the camera.
Signal traffic may be heavy or the remote control may be too far from the access point.
Check the camera.
Check the orientation of the memory card.
Make sure that a memory card is inserted into the camera.
Use a memory card that has free memory space.
Check the camera.
Check the remaining memory card level.
Page 70

06-01
Failed to format the recording medium.
06-02
The memory card does not support XAVC S movie recording.
06-03
The NTSC/PAL setting of the media and the NTSC/PAL setting of the camera are different.
06-04
The memory card does not support XAVC S 100 Mbps movie recording.
07-01/07-02/07-03
Failed to play.
07-04
Failed to delete the file.
10-01
The camera’s temperature has risen. Turn the power of the camera off and leave the camera alone
for 10 minutes or longer.
Code starting with an E or a C (Example: E41:00)
When a code starting with a letter appears in the monitor, the self-diagnosis of the remote control is
working.
Press the MENU button, REC/ENTER button, and DOWN button of the remote control simultaneously
to reset it.
If the problem persists, some repairs may be necessary. Please consult your nearest Sony dealer and
inform them of all codes starting with an E or a C.
Use an SDHC or SDXC memory card faster than Class10 when recording movies in XAVC S.
Set the movie format to MP4.
Switch the NTSC/PAL setting of the camera or format the media.
Use the memory card that supports UHS-I U3 standard when you are shooting in XAVC S 100
Mbps.
There is an abnormality in the recording media.
Signal traffic may be heavy or the remote control may be too far from the access point.
Signal traffic may be heavy or the remote control may be too far from the access point.
 Loading...