

Sony PJ380, PJ230, PJ320E, PJ390E User Manual
"Handycam" User Guide
1
PrintSearch
Top page
Operation Search
Before use
Getting started
Recording
Playback
Playing images on a TV
Saving images with an external
device
Customizing your camcorder
Troubleshooting
Maintenance and precautions
Contents list
HDR-CX220/ CX220E/ CX230/ CX230E/ CX280/ CX280E/
CX290/ CX290E/ CX320/ CX320E/ CX380/ CX380E/
CX390E/ PJ220/ PJ220E/ PJ230/ PJ230E/ PJ320E/ PJ380/
PJ380E/ PJ390E
User Guide
Use this manual if you encounter any problems, or have any questions about the camcorder.
Back to top
Copyright 2013 Sony Corporation
"Handycam" User Guide
2
PrintSearch
Top page > Operation Search
Operation Search
Before use
Getting started
Recording
Playback
Playing images on a TV
Saving images with an external
device
Customizing your camcorder
Troubleshooting
Maintenance and precautions
Contents list
Operation Search
Operation Search
Search by operation
Back to top
Copyright 2013 Sony Corporation
"Handycam" User Guide
3
PrintSearch
Top page > Before use
Operation Search
Before use
Getting started
Recording
Playback
Playing images on a TV
Saving images with an external
device
Customizing your camcorder
Troubleshooting
Maintenance and precautions
Contents list
Before use
How to use this User Guide
How to use this User Guide
Model Information
Parts and controls/Screen indicators
Parts and controls
Screen indicators
About language setting
About language setting
Operating your camcorder
Selecting items on the LCD screen
Back to top
Copyright 2013 Sony Corporation
"Handycam" User Guide
4
PrintSearch
Top page > Getting started
Operation Search
Before use
Getting started
Recording
Playback
Playing images on a TV
Saving images with an external
device
Customizing your camcorder
Troubleshooting
Maintenance and precautions
Contents list
Getting started
Checking the supplied items
Supplied items
Charging the battery pack
Charging the battery pack using the AC Adaptor (Models with an AC Adaptor)
Charging the battery pack using your computer
Turning the power on, and setting the date and time
Turning the power on, and setting the date and time
Preparing the recording media
Selecting a recording medium (Models with internal memory)
Inserting a memory card
Back to top
Copyright 2013 Sony Corporation
"Handycam" User Guide
5
PrintSearch
Top page > Recording
Operation Search
Before use
Getting started
Recording
Playback
Playing images on a TV
Saving images with an external
device
Customizing your camcorder
Troubleshooting
Maintenance and precautions
Contents list
Recording
Recording
Recording movies
Shooting photos
Screen indicators during recording
Useful functions for recording images
Zooming
Capturing photos during movie recording (Dual Capture)
Recording in mirror mode
Intelligent Auto
Recording the selected subject clearly (Face Priority) (Models with touch panel)
Back to top
Copyright 2013 Sony Corporation
"Handycam" User Guide
6
PrintSearch
Top page > Playback
Operation Search
Before use
Getting started
Recording
Playback
Playing images on a TV
Saving images with an external
device
Customizing your camcorder
Troubleshooting
Maintenance and precautions
Contents list
Playback
Playback
Playing movies and photos from the Event View screen
Dividing a movie
Capturing a photo from a movie (Models with internal memory or models with a USB input
function)
Highlight playback
Enjoying a digest of your movies (Highlight Playback)
Changing the settings for Highlight Playback
Saving Highlight Playback in high definition image quality (HD) (Scenario Save)
Converting Highlight Playback scenes or Highlight Scenarios to standard definition image
quality (STD) (Highlight Movie)
Using the built-in projector
Using the built-in projector (Models with a projector)
Using the projector for your computer or smartphone (Models with the PROJECTOR IN
jack)
Back to top
Copyright 2013 Sony Corporation

"Handycam" User Guide
7
PrintSearch
Top page > Playing images on a TV
Operation Search
Before use
Getting started
Recording
Playback
Playing images on a TV
Saving images with an external
device
Customizing your camcorder
Troubleshooting
Maintenance and precautions
Contents list
Playing images on a TV
Playing images on a high definition TV
Connecting the camcorder to a high definition TV
Playing images on a non-high-definition TV
Connecting the camcorder to a non-high-definition TV
Setting the aspect ratio according to the connected TV (16:9/4:3)
When your TV is monaural (When your TV has only one audio input jack)
Connecting the camcorder to a TV via a VCR
Playing images on a TV supporting “BRAVIA” Sync
Using “BRAVIA” Sync
Back to top
Copyright 2013 Sony Corporation
"Handycam" User Guide
8
PrintSearch
Top page > Saving images with an external device
Operation Search
Before use
Getting started
Recording
Playback
Playing images on a TV
Saving images with an external
device
Customizing your camcorder
Troubleshooting
Maintenance and precautions
Contents list
Saving images with an external device
Using the “PlayMemories Home” software
Playing images on a computer
Checking the computer system
Installing the “PlayMemories Home” software in your computer
Disconnecting your camcorder from the computer
The devices on which the created disc can be played back
Starting the “PlayMemories Home” software
Downloading the dedicated software for the camcorder
Saving images on an external media device
Saving images on an external media device easily (models with an AC Adaptor)
Saving the desired images in the camcorder to the external media device (models with an
AC Adaptor)
Playing back images in the external media device on the camcorder (models with an AC
Adaptor)
Devices that cannot be used as an external media device
Creating a disc with a recorder
Creating a standard definition image quality (STD) disc with a recorder
Copyright 2013 Sony Corporation
Back to top
"Handycam" User Guide
9
PrintSearch
Top page > Customizing your camcorder
Operation Search
Before use
Getting started
Recording
Playback
Playing images on a TV
Saving images with an external
device
Customizing your camcorder
Troubleshooting
Maintenance and precautions
Contents list
Customizing your camcorder
Using menu items
Setting up menu items
Shooting Mode
Movie
Photo
Camera/Mic
White Balance
Spot Meter/Fcs (Spot meter/focus) (HDR -CX320/ CX320E/ CX380/ CX380E/ CX390E/
PJ320E/ PJ380/ PJ380E/ PJ390E)
Spot Meter (Flexible spot meter) (HDR -CX320/ CX320E/ CX380/ CX380E/ CX390E/
PJ320E/ PJ380/ PJ380E/ PJ390E)
Spot Focus (HDR- CX320/ CX320E/ CX380/ CX380E/ CX390E/ PJ320E/ PJ380/ PJ380E/
PJ390E)
Exposure
Focus
Low Lux
Scene Selection
Fader
Self-Timer
Tele Macro
SteadyShot (movie)
SteadyShot (photo) (HDR -CX280/ CX280E/ CX290/ CX290E/ CX320/ CX320E/ CX380/
CX380E/ CX390E/ PJ320E/ PJ380/ PJ380E/ PJ390E)
Digital Zoom
Auto Back Light
Face Detection
Smile Shutter
Smile Sensitivity
Closer Voice (HDR -CX320/ CX320E/ CX380/ CX380E/ CX390E/ PJ320E/ PJ380/ PJ380E/
PJ390E)
Blt-in Zoom Mic
Auto Wind NR (HDR- CX320/ CX320E/ CX380/ CX380E/ CX390E/ PJ320E/ PJ380/
PJ380E/ PJ390E)
Wind Noise Reduct. (HDR -CX220/ CX220E/ CX230/ CX230E/ CX280/ CX280E/ CX290/
CX290E/ PJ220/ PJ220E/ PJ230/ PJ230E)
Micref Level (Microphone reference level)
My Button
Grid Line
Display Setting
Image Quality/Size
REC Mode

Frame Rate
HD/MP4/STD Setting
10
Wide Mode
x.v.Color
Image Size
Playback Function
Event View
Highlight Movie
Scenario
Edit/Copy
Delete
Protect
Copy
Direct Copy
Setup
Media Select (HDR - CX230/ CX230E/ CX290/ CX290E/ CX380/ CX380E/ CX390E/ PJ230/
PJ230E/ PJ380/ PJ380E/ PJ390E)
Media Info
Format
Repair Img. DB F.
File Number
Data Code
Volume
Download Music (HDR-CX220/ CX230/ CX280/ CX290/ CX320/ CX380/ PJ220/ PJ230/
PJ380)
Empty Music (HDR-CX220/ CX230/ CX280/ CX290/ CX320/ CX380/ PJ220/ PJ230/
PJ380)
TV Type
HDMI Resolution
CTRL FOR HDMI (Control for HDMI)
USB Connect
USB Connect Setting
USB LUN Setting
Beep
LCD Brightness
Power On By LCD (HDR -CX320/ CX320E/ CX380/ CX380E/ CX390E/ PJ320E/ PJ380/
PJ380E/ PJ390E)
Language Setting
Calibration (HDR- CX320/ CX320E/ CX380/ CX380E/ CX390E/ PJ320E/ PJ380/ PJ380E/
PJ390E)
Battery Info
Power Save
Initialize
Demo Mode
Date & Time Setting
Area Setting
Back to top
Copyright 2013 Sony Corporation
"Handycam" User Guide
11
PrintSearch
Top page > Troubleshooting
Operation Search
Before use
Getting started
Recording
Playback
Playing images on a TV
Saving images with an external
device
Customizing your camcorder
Troubleshooting
Maintenance and precautions
Contents list
Troubleshooting
If you have problems
If you have problems
Troubleshooting
Overall operations
Batteries/power sources
LCD screen
Memory card
Recording
Playback
Editing movies/photos on your camcorder
Playback on the TV
Copying/Connecting to other devices
Connecting to a computer
Self-diagnosis display/Warning indicators
Self- diagnosis display
Warning Indicators
Back to top
Copyright 2013 Sony Corporation
"Handycam" User Guide
12
PrintSearch
Top page > Maintenance and precautions
Operation Search
Before use
Getting started
Recording
Playback
Playing images on a TV
Saving images with an external
device
Customizing your camcorder
Troubleshooting
Maintenance and precautions
Contents list
Maintenance and precautions
Maintenance and precautions
About the AVCHD format
About the memory card
About the “InfoLITHIUM” battery pack
About handling of your camcorder
On use and care
On moisture condensation
On charging the pre - installed rechargeable battery
Notes on disposal/transfer the ownership of the camcorder
Recording time of movies/number of recordable photos
Charging time
Expected time of recording and playback with each battery pack
Expected recording time of movies
Expected number of recordable photos
Zoom magnification
Using your camcorder abroad
Using your camcorder abroad
On trademarks
On trademarks
License
Notes on the License
Copyright 2013 Sony Corporation
Back to top
"Handycam" User Guide
13
PrintSearch
Top page > Contents list
Operation Search
Before use
Getting started
Recording
Playback
Playing images on a TV
Saving images with an external
device
Customizing your camcorder
Troubleshooting
Maintenance and precautions
Contents list
Contents list
Operation Search
Operation Search
Search by operation
Back to top
Before use
How to use this User Guide
How to use this User Guide
Model Information
Parts and controls/Screen indicators
Parts and controls
Screen indicators
About language setting
About language setting
Operating your camcorder
Selecting items on the LCD screen
Getting started
Checking the supplied items
Supplied items
Charging the battery pack
Charging the battery pack using the AC Adaptor (Models with an AC Adaptor)
Charging the battery pack using your computer
Turning the power on, and setting the date and time
Turning the power on, and setting the date and time
Preparing the recording media
Selecting a recording medium (Models with internal memory)
Inserting a memory card
Recording
Recording
Recording movies
Shooting photos
Screen indicators during recording
Back to top
Back to top

Useful functions for recording images
Zooming
14
Capturing photos during movie recording (Dual Capture)
Recording in mirror mode
Intelligent Auto
Recording the selected subject clearly (Face Priority) (Models with touch panel)
Playback
Playback
Playing movies and photos from the Event View screen
Dividing a movie
Capturing a photo from a movie (Models with internal memory or models with a USB input
function)
Highlight playback
Enjoying a digest of your movies (Highlight Playback)
Changing the settings for Highlight Playback
Saving Highlight Playback in high definition image quality (HD) (Scenario Save)
Converting Highlight Playback scenes or Highlight Scenarios to standard definition image
quality (STD) (Highlight Movie)
Back to top
Using the built-in projector
Using the built-in projector (Models with a projector)
Using the projector for your computer or smartphone (Models with the PROJECTOR IN
jack)
Playing images on a TV
Playing images on a high definition TV
Connecting the camcorder to a high definition TV
Playing images on a non-high-definition TV
Connecting the camcorder to a non-high-definition TV
Setting the aspect ratio according to the connected TV (16:9/4:3)
When your TV is monaural (When your TV has only one audio input jack)
Connecting the camcorder to a TV via a VCR
Playing images on a TV supporting “BRAVIA” Sync
Using “BRAVIA” Sync
Saving images with an external device
Back to top
Back to top
Using the “PlayMemories Home” software
Playing images on a computer
Checking the computer system
Installing the “PlayMemories Home” software in your computer
Disconnecting your camcorder from the computer
The devices on which the created disc can be played back
Starting the “PlayMemories Home” software

Downloading the dedicated software for the camcorder
Saving images on an external media device
15
Saving images on an external media device easily (models with an AC Adaptor)
Saving the desired images in the camcorder to the external media device (models with an
AC Adaptor)
Playing back images in the external media device on the camcorder (models with an AC
Adaptor)
Devices that cannot be used as an external media device
Creating a disc with a recorder
Creating a standard definition image quality (STD) disc with a recorder
Back to top
Customizing your camcorder
Using menu items
Setting up menu items
Shooting Mode
Movie
Photo
Camera/Mic
White Balance
Spot Meter/Fcs (Spot meter/focus) (HDR -CX320/ CX320E/ CX380/ CX380E/ CX390E/
PJ320E/ PJ380/ PJ380E/ PJ390E)
Spot Meter (Flexible spot meter) (HDR -CX320/ CX320E/ CX380/ CX380E/ CX390E/
PJ320E/ PJ380/ PJ380E/ PJ390E)
Spot Focus (HDR- CX320/ CX320E/ CX380/ CX380E/ CX390E/ PJ320E/ PJ380/ PJ380E/
PJ390E)
Exposure
Focus
Low Lux
Scene Selection
Fader
Self-Timer
Tele Macro
SteadyShot (movie)
SteadyShot (photo) (HDR -CX280/ CX280E/ CX290/ CX290E/ CX320/ CX320E/ CX380/
CX380E/ CX390E/ PJ320E/ PJ380/ PJ380E/ PJ390E)
Digital Zoom
Auto Back Light
Face Detection
Smile Shutter
Smile Sensitivity
Closer Voice (HDR -CX320/ CX320E/ CX380/ CX380E/ CX390E/ PJ320E/ PJ380/ PJ380E/
PJ390E)
Blt-in Zoom Mic
Auto Wind NR (HDR- CX320/ CX320E/ CX380/ CX380E/ CX390E/ PJ320E/ PJ380/
PJ380E/ PJ390E)
Wind Noise Reduct. (HDR -CX220/ CX220E/ CX230/ CX230E/ CX280/ CX280E/ CX290/
CX290E/ PJ220/ PJ220E/ PJ230/ PJ230E)
Micref Level (Microphone reference level)

My Button
Grid Line
16
Display Setting
Image Quality/Size
REC Mode
Frame Rate
HD/MP4/STD Setting
Wide Mode
x.v.Color
Image Size
Playback Function
Event View
Highlight Movie
Scenario
Edit/Copy
Delete
Protect
Copy
Direct Copy
Setup
Media Select (HDR - CX230/ CX230E/ CX290/ CX290E/ CX380/ CX380E/ CX390E/ PJ230/
PJ230E/ PJ380/ PJ380E/ PJ390E)
Media Info
Format
Repair Img. DB F.
File Number
Data Code
Volume
Download Music (HDR-CX220/ CX230/ CX280/ CX290/ CX320/ CX380/ PJ220/ PJ230/
PJ380)
Empty Music (HDR-CX220/ CX230/ CX280/ CX290/ CX320/ CX380/ PJ220/ PJ230/
PJ380)
TV Type
HDMI Resolution
CTRL FOR HDMI (Control for HDMI)
USB Connect
USB Connect Setting
USB LUN Setting
Beep
LCD Brightness
Power On By LCD (HDR -CX320/ CX320E/ CX380/ CX380E/ CX390E/ PJ320E/ PJ380/
PJ380E/ PJ390E)
Language Setting
Calibration (HDR- CX320/ CX320E/ CX380/ CX380E/ CX390E/ PJ320E/ PJ380/ PJ380E/
PJ390E)
Battery Info
Power Save
Initialize
Demo Mode

Date & Time Setting
Area Setting
17
Troubleshooting
If you have problems
If you have problems
Troubleshooting
Overall operations
Batteries/power sources
LCD screen
Memory card
Recording
Playback
Editing movies/photos on your camcorder
Playback on the TV
Copying/Connecting to other devices
Connecting to a computer
Self-diagnosis display/Warning indicators
Self- diagnosis display
Warning Indicators
Back to top
Maintenance and precautions
Maintenance and precautions
About the AVCHD format
About the memory card
About the “InfoLITHIUM” battery pack
About handling of your camcorder
On use and care
On moisture condensation
On charging the pre - installed rechargeable battery
Notes on disposal/transfer the ownership of the camcorder
Recording time of movies/number of recordable photos
Charging time
Expected time of recording and playback with each battery pack
Expected recording time of movies
Expected number of recordable photos
Zoom magnification
Using your camcorder abroad
Using your camcorder abroad
Back to top
On trademarks
On trademarks
License
Notes on the License

Copyright 2013 Sony Corporation
18
Back to top
"Handycam" User Guide
19
Operation Search
PrintSearch
Top page > Operation Search > Operation Search > Search by operation
Before use
Getting started
Recording
Playback
Playing images on a TV
Saving images with an external
device
Customizing your camcorder
Troubleshooting
Maintenance and precautions
Contents list
Search by operation
Setting the date and time
Date & Time Setting
Area Setting
Identifying part names
Parts and controls
Displaying the data code
Data Code
Selecting the suitable setting automatically for the recording situation
Intelligent Auto
Recording people clearly
Face Detection
Recording the selected subject clearly (Face Priority) (Models with touch panel)
Smile Shutter
Scene Selection (Portrait)
Scene Selection (Spotlight)
Closer Voice (HDR-CX320/ CX320E/ CX380/ CX380E/ CX390E/ PJ320E/ PJ380/ PJ380E/ PJ390E)
Recording images with the selected image quality
REC Mode
Frame Rate
HD/MP4/STD Setting
Wide Mode
Image Size
Recording images without blurring
SteadyShot (movie)
SteadyShot (photo) (HDR-CX280/ CX280E/ CX290/ CX290E/ CX320/ CX320E/ CX380/ CX380E/
CX390E/ PJ320E/ PJ380/ PJ380E/ PJ390E)
Adjusting the focus
Spot Focus (HDR-CX320/ CX320E/ CX380/ CX380E/ CX390E/ PJ320E/ PJ380/ PJ380E/ PJ390E)
Tracking focus: Recording the selected subject clearly (Face Priority) (Models with touch panel)
Focus
Recording movies in a dim place
Low Lux
Scene Selection (Night Scene)
Recording sound clearly
Closer Voice (HDR-CX320/ CX320E/ CX380/ CX380E/ CX390E/ PJ320E/ PJ380/ PJ380E/ PJ390E)
Auto Wind NR (HDR-CX320/ CX320E/ CX380/ CX380E/ CX390E/ PJ320E/ PJ380/ PJ380E/
PJ390E)
Wind Noise Reduct. (HDR-CX220/ CX220E/ CX230/ CX230E/ CX280/ CX280E/ CX290/ CX290E/
PJ220/ PJ220E/ PJ230/ PJ230E)
Blt-in Zoom Mic

Micref Level (Microphone reference level)
20
Capturing photos during movie recording
Recording high quality photos during movie recording (Dual capture): Recording movies
Smile Shutter
Recording sunset or fireworks beautifully
Scene Selection (Fireworks)
Scene Selection (Sunrise&Sunset)
Selecting a recording medium
Media Select (HDR-CX230/ CX230E/ CX290/ CX290E/ CX380/ CX380E/ CX390E/ PJ230/ PJ230E/
PJ380/ PJ380E/ PJ390E)
Saving battery power
Power Save
Playing movies and photos from an event
Event View
Enjoying a digest of your movies
Enjoying a digest of your movies (Highlight Playback)
Using the built-in projector
Using the built-in projector (Models with a projector)
Playing images on a TV
Connecting the camcorder to a high definition TV
Connecting the camcorder to a non-high-definition TV
Editing movies and photos
Capturing a photo from a movie (Models with internal memory or models with a USB input function)
Dividing a movie
Delete
Saving images with an external device
Saving images on an external media device easily (models with an AC Adaptor)
Creating a disc
Creating a standard definition image quality (STD) disc with a recorder
Back to top
Copyright 2013 Sony Corporation
"Handycam" User Guide
21
Operation Search
PrintSearch
Top page > Before use > How to use this User Guide > How to use this User Guide
Before use
Getting started
Recording
Playback
Playing images on a TV
Saving images with an external
device
Customizing your camcorder
Troubleshooting
Maintenance and precautions
Contents list
How to use this User Guide
Selecting a topic to display
Searching a topic by keyword
Returning to a previous page
Printing out a page
Marks and notations used in this User Guide
This User Guide explains how to use each function of the camcorder, how to change settings, and how
to troubleshoot a problem.
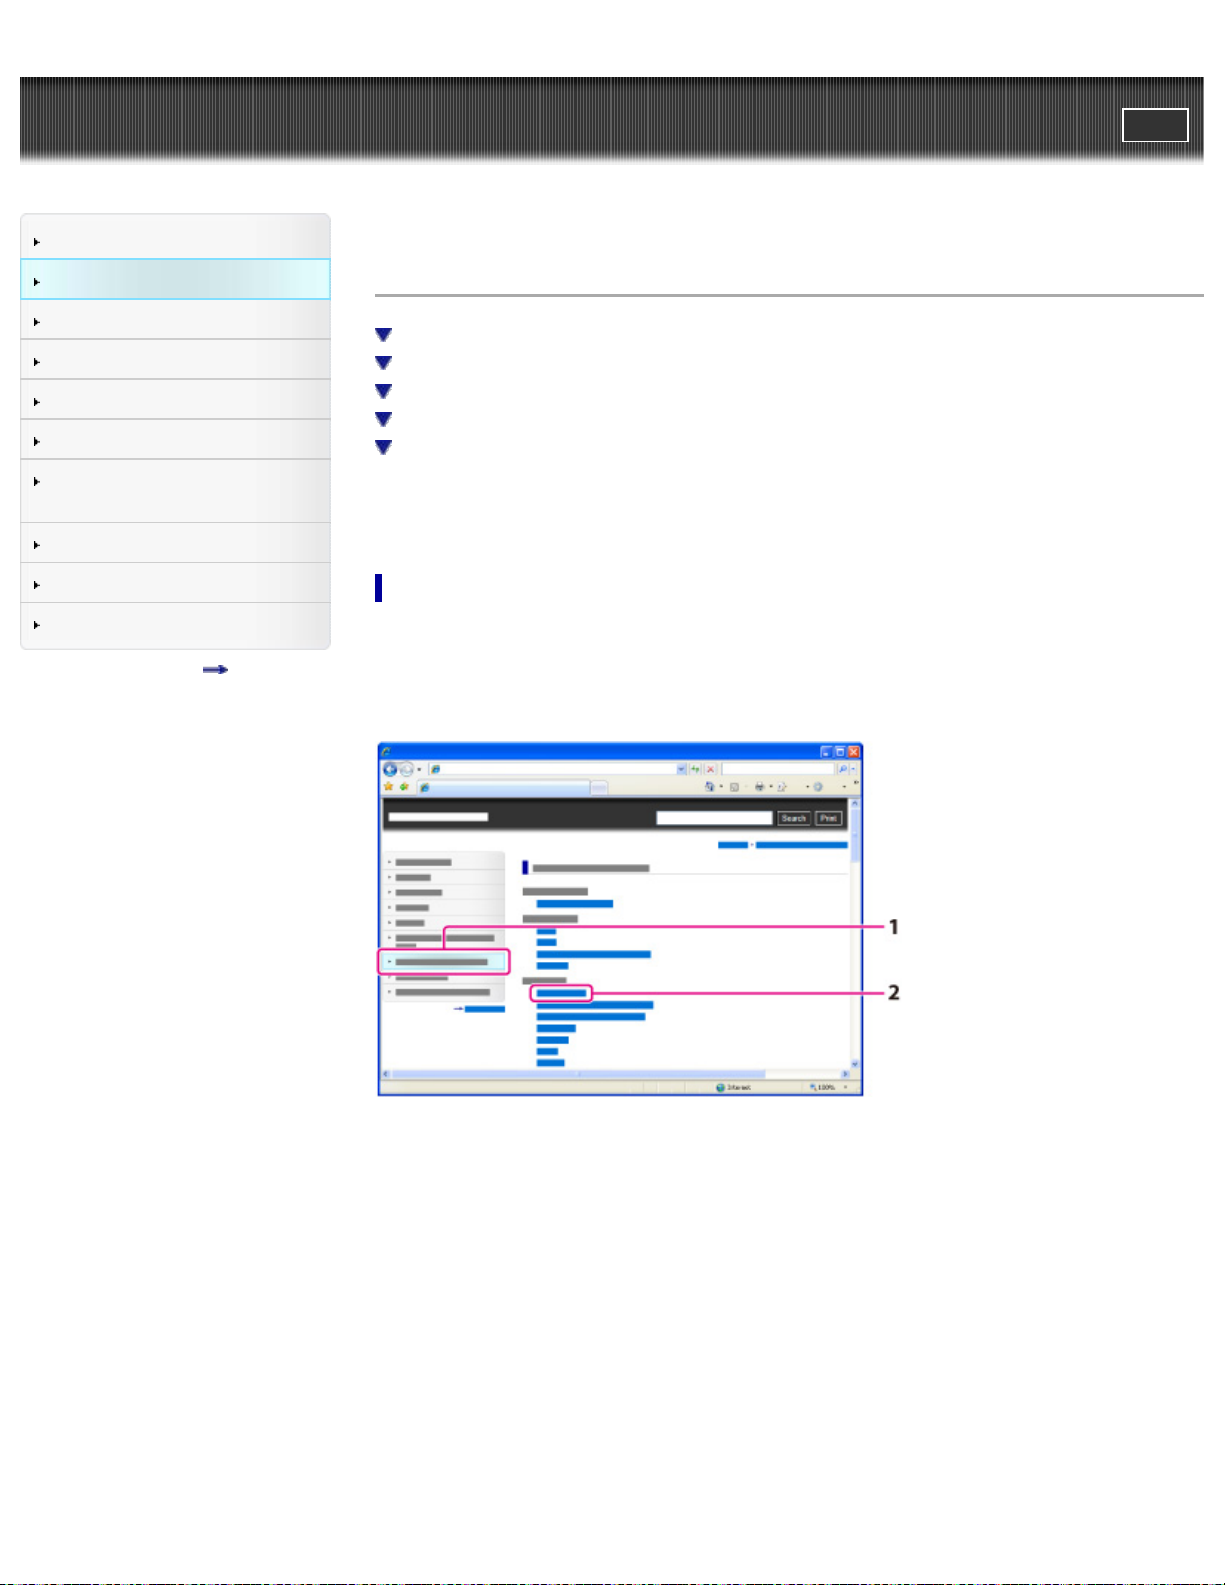
Selecting a topic to display
The following illustrations take Internet Explorer 7 as an example.
1. Click a title in the side bar on the left of the browser window.
A list of topic titles appears in the right pane.
2. Click a topic title in the list.
Descriptions appear in the right pane.
Changing the font size
22
Change the font size by changing the setting of your web browser. For how to change the font size
setting, refer to the Help of your web browser.
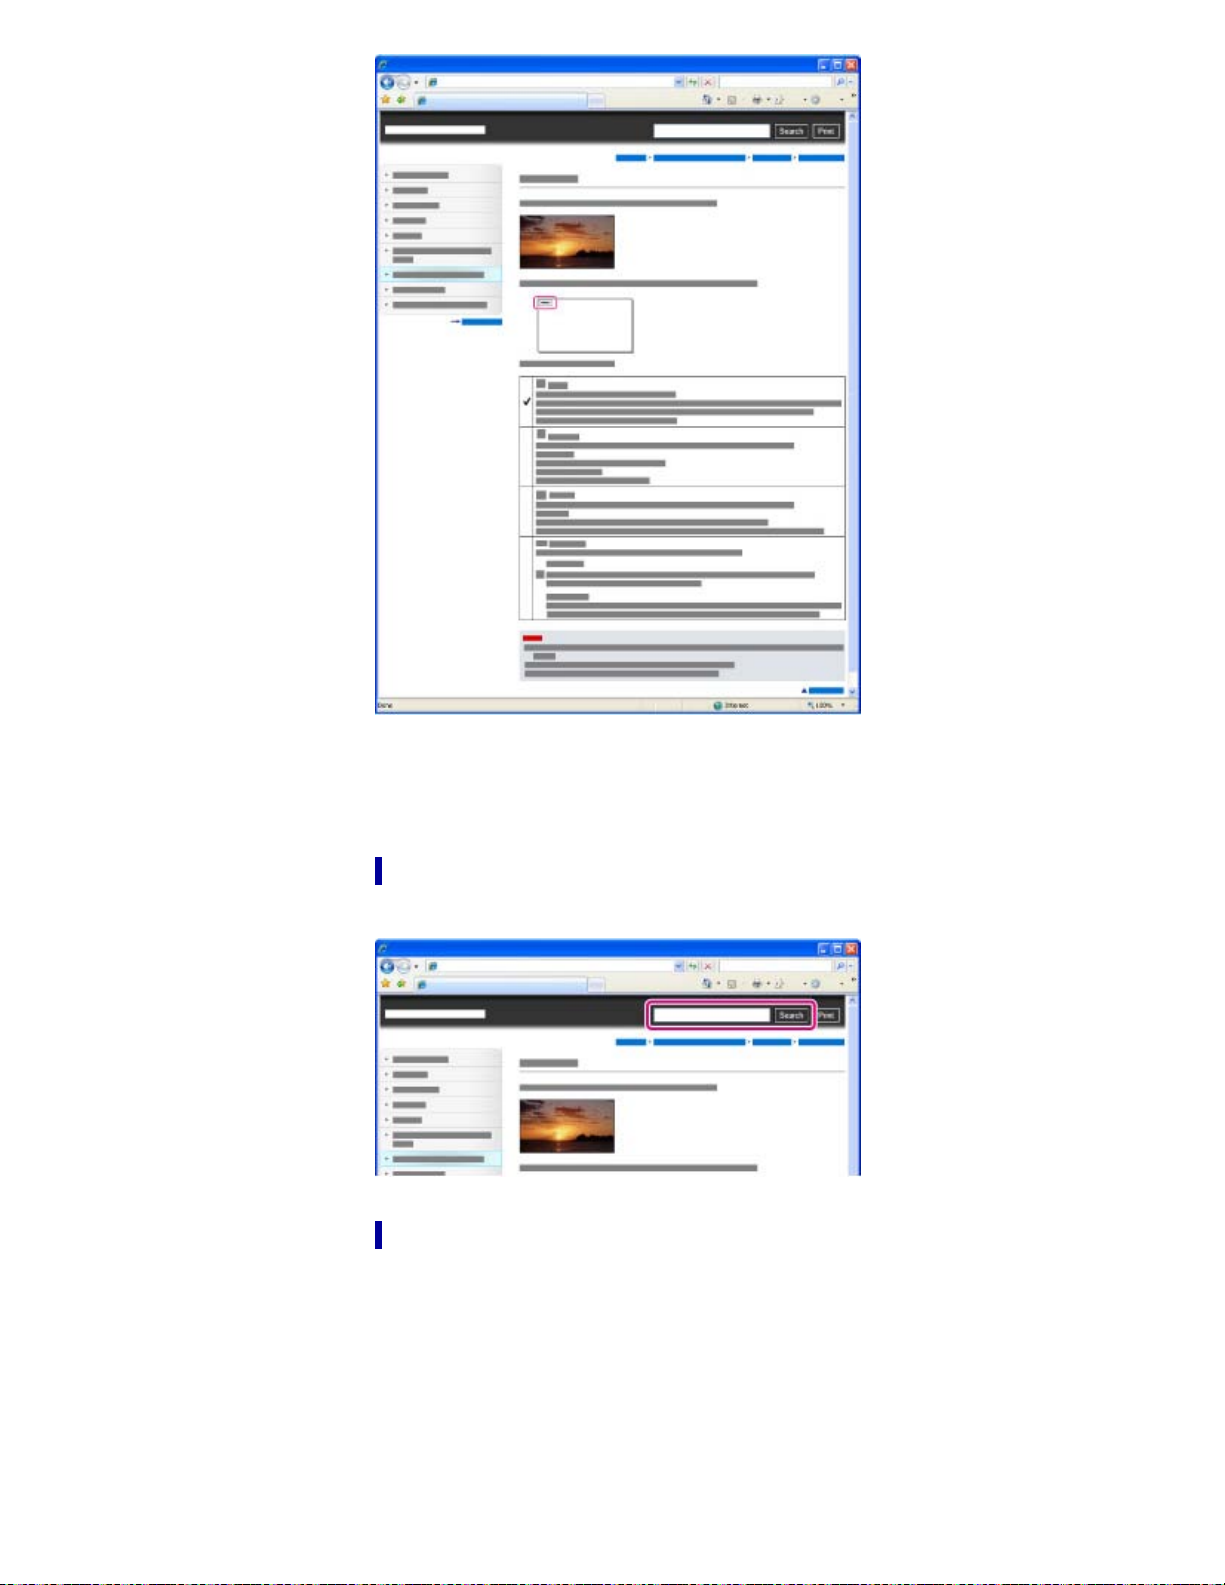
Searching a topic by keyword
Enter the keyword in the search window, then click the [Search] button.
Returning to a previous page
Use the back button of your web browser or the breadcrumb trail navigation (A) to return to a page you
previously viewed.
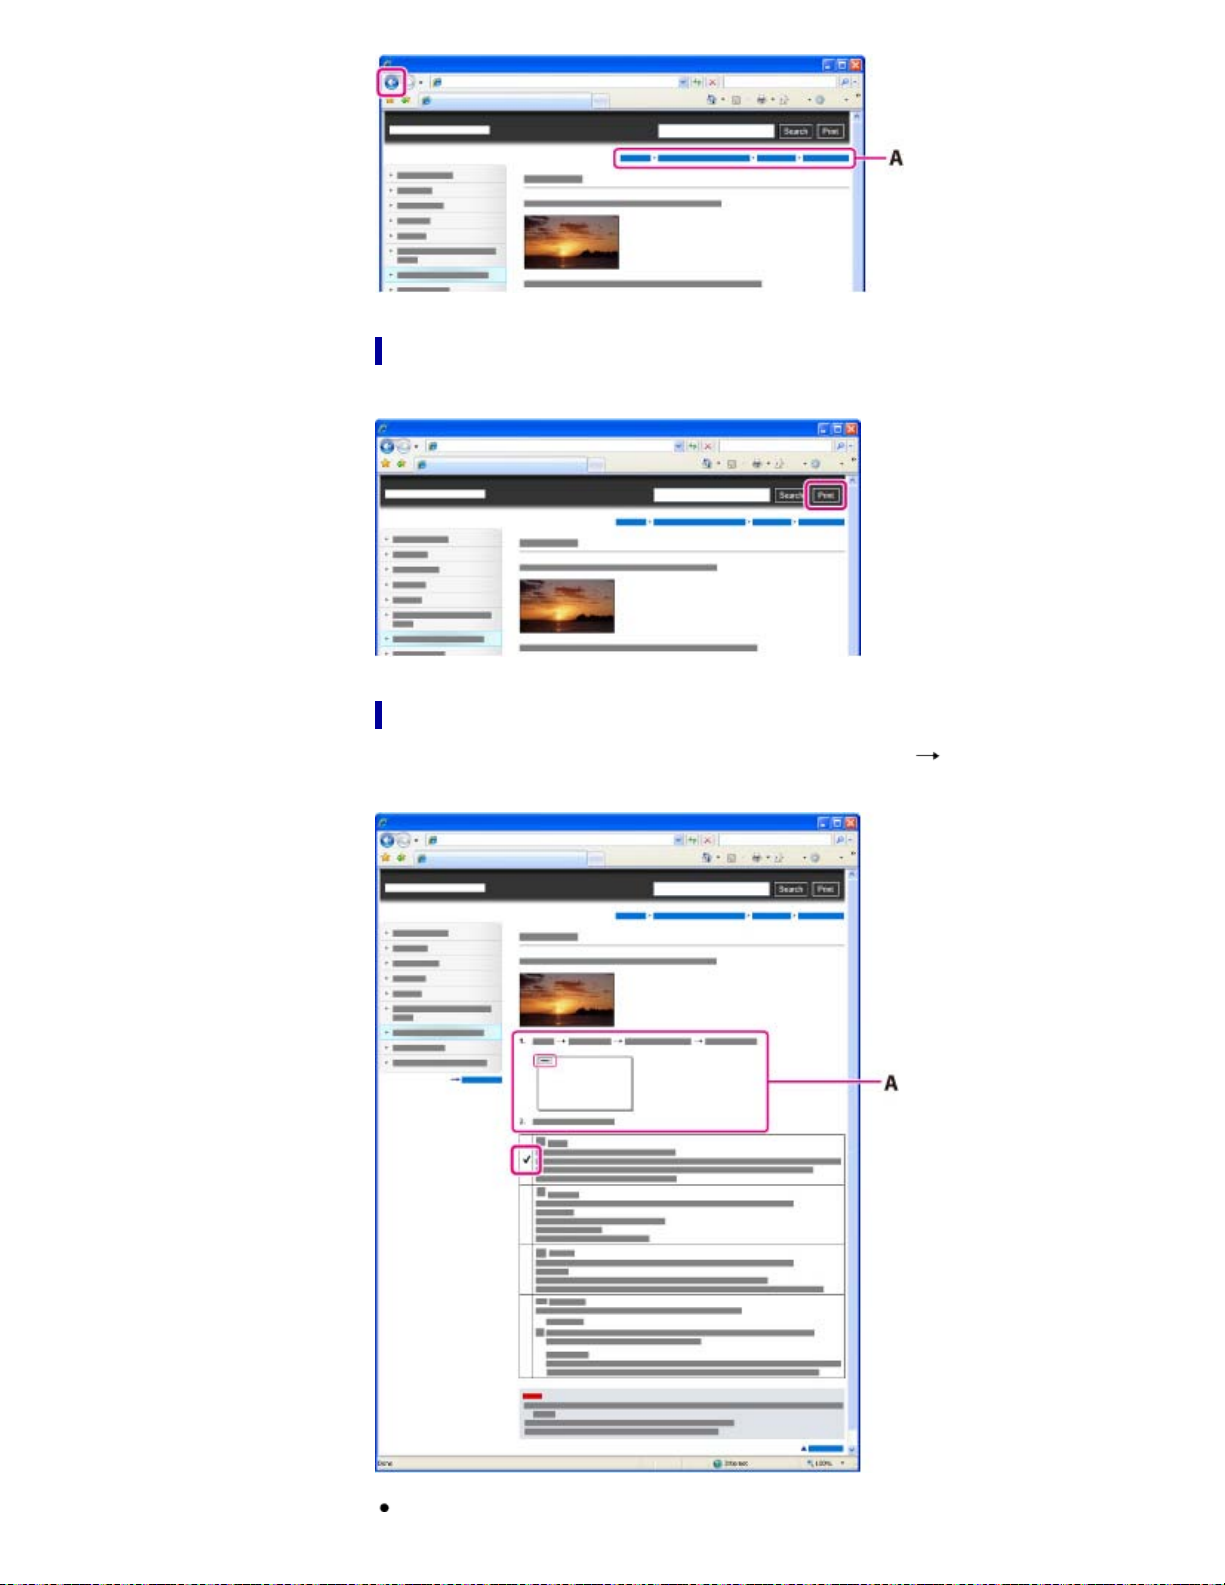
Printing out a page
23
Click the [Print] button to print out a page you are viewing.
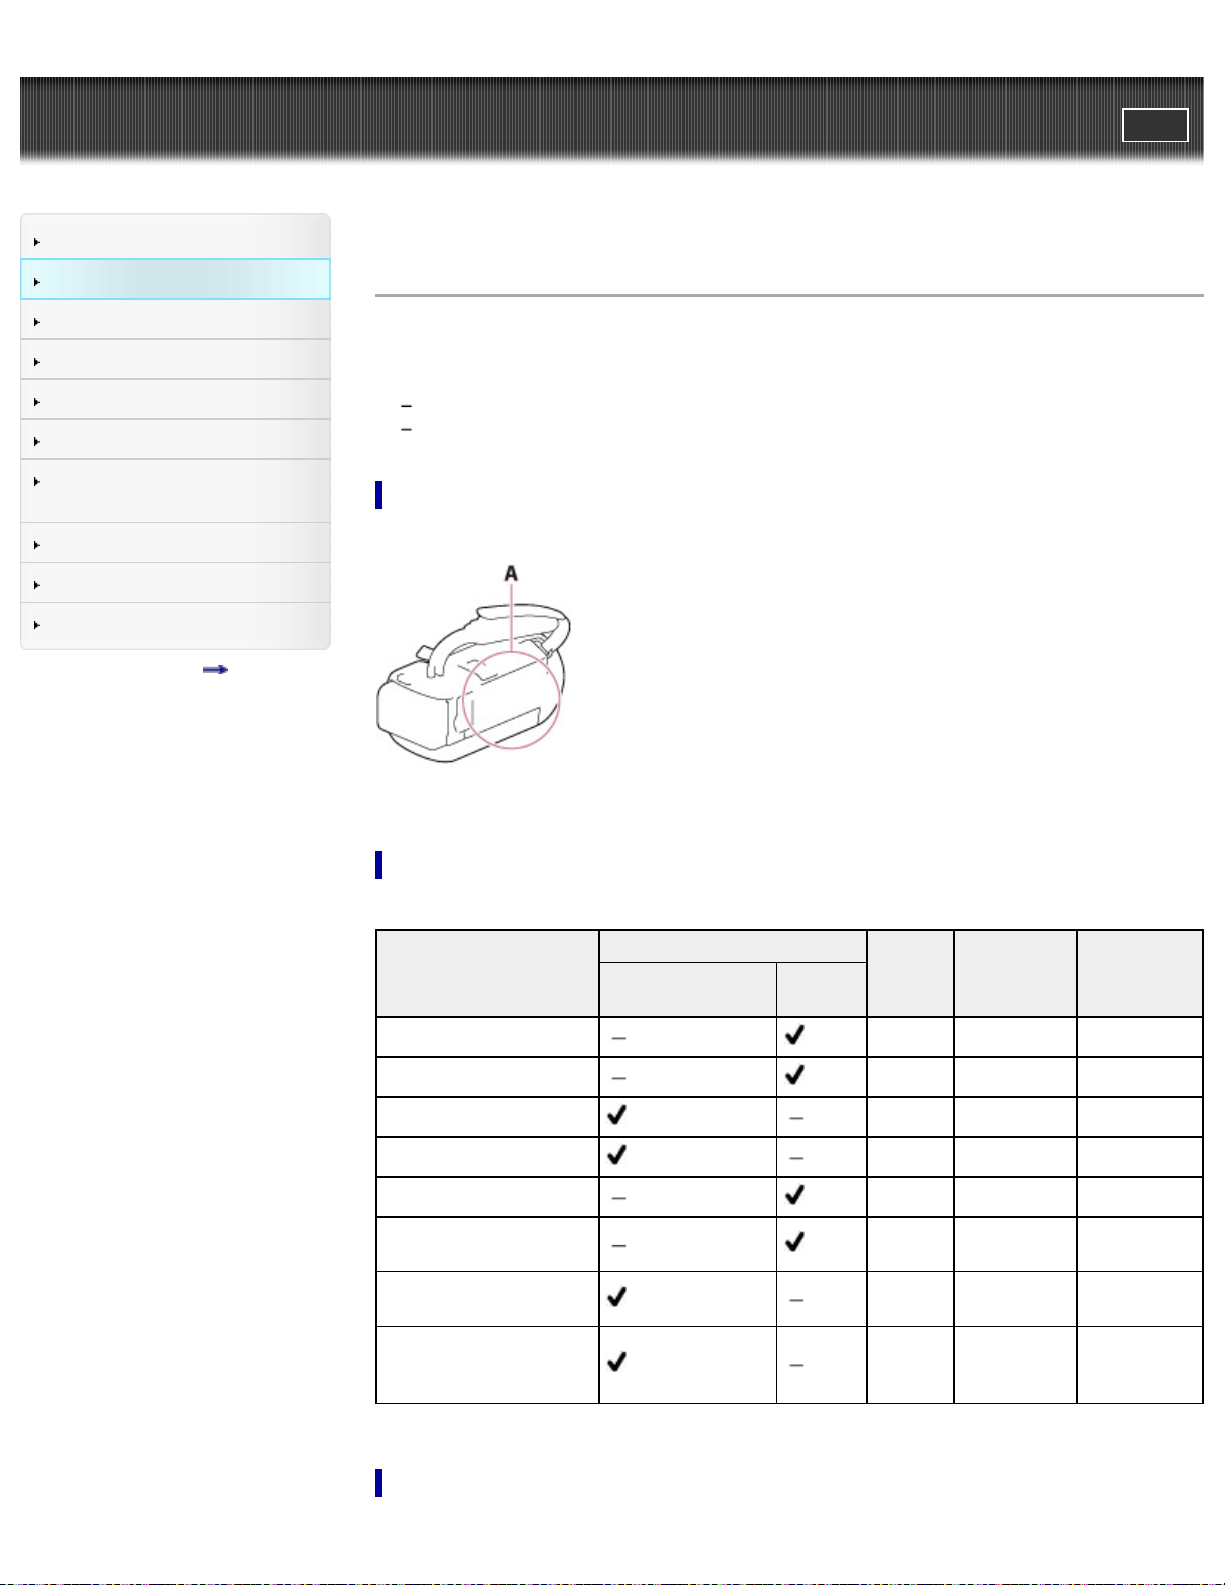
Marks and notations used in this User Guide
In this User Guide, the sequence of operations is shown by arrows ( ) (A).
Operate the camcorder in the order indicated.

Icons in the operating procedure sentences appear when the camcorder is in its default settings.
24
The default setting is indicated by
.
Back to top
Copyright 2013 Sony Corporation
"Handycam" User Guide
25
Operation Search
PrintSearch
Top page > Before use > How to use this User Guide > Model Information
Before use
Getting started
Recording
Playback
Playing images on a TV
Saving images with an external
device
Customizing your camcorder
Troubleshooting
Maintenance and precautions
Contents list
Model Information
In this User Guide, the differences in the specifications for each model are described together.
If you find the description “Models with ... ” like below, confirm in this chapter whether the description
applies to your camcorder.
(Models with a projector)
(Models with the NTSC color system)
To confirm the model name of your camcorder
See the bottom of your camcorder.
A: Model name (HDR-xxx)
Differences in functions
Recording media
Model name
HDR-CX220/ PJ220
HDR-CX220E/ PJ220E
HDR-CX230/ PJ230
HDR-CX230E/ PJ230E
HDR-CX280/ CX320
HDR-CX280E/ CX320E/
PJ320E
HDR-CX290/ CX380/
PJ380
HDR-CX290E/ CX380E/
CX390E/ PJ380E/
PJ390E
Internal memory
+ Memory card
Memory
card
Signal
format
NTSC Input/Output Electronic
PAL Output only Electronic
NTSC Input/Output Electronic
PAL Output only Electronic
NTSC Input/Output Optical
PAL Output only Optical
NTSC Input/Output Optical
PAL Output only Optical
USB
connection
SteadyShot
Differences in equipment
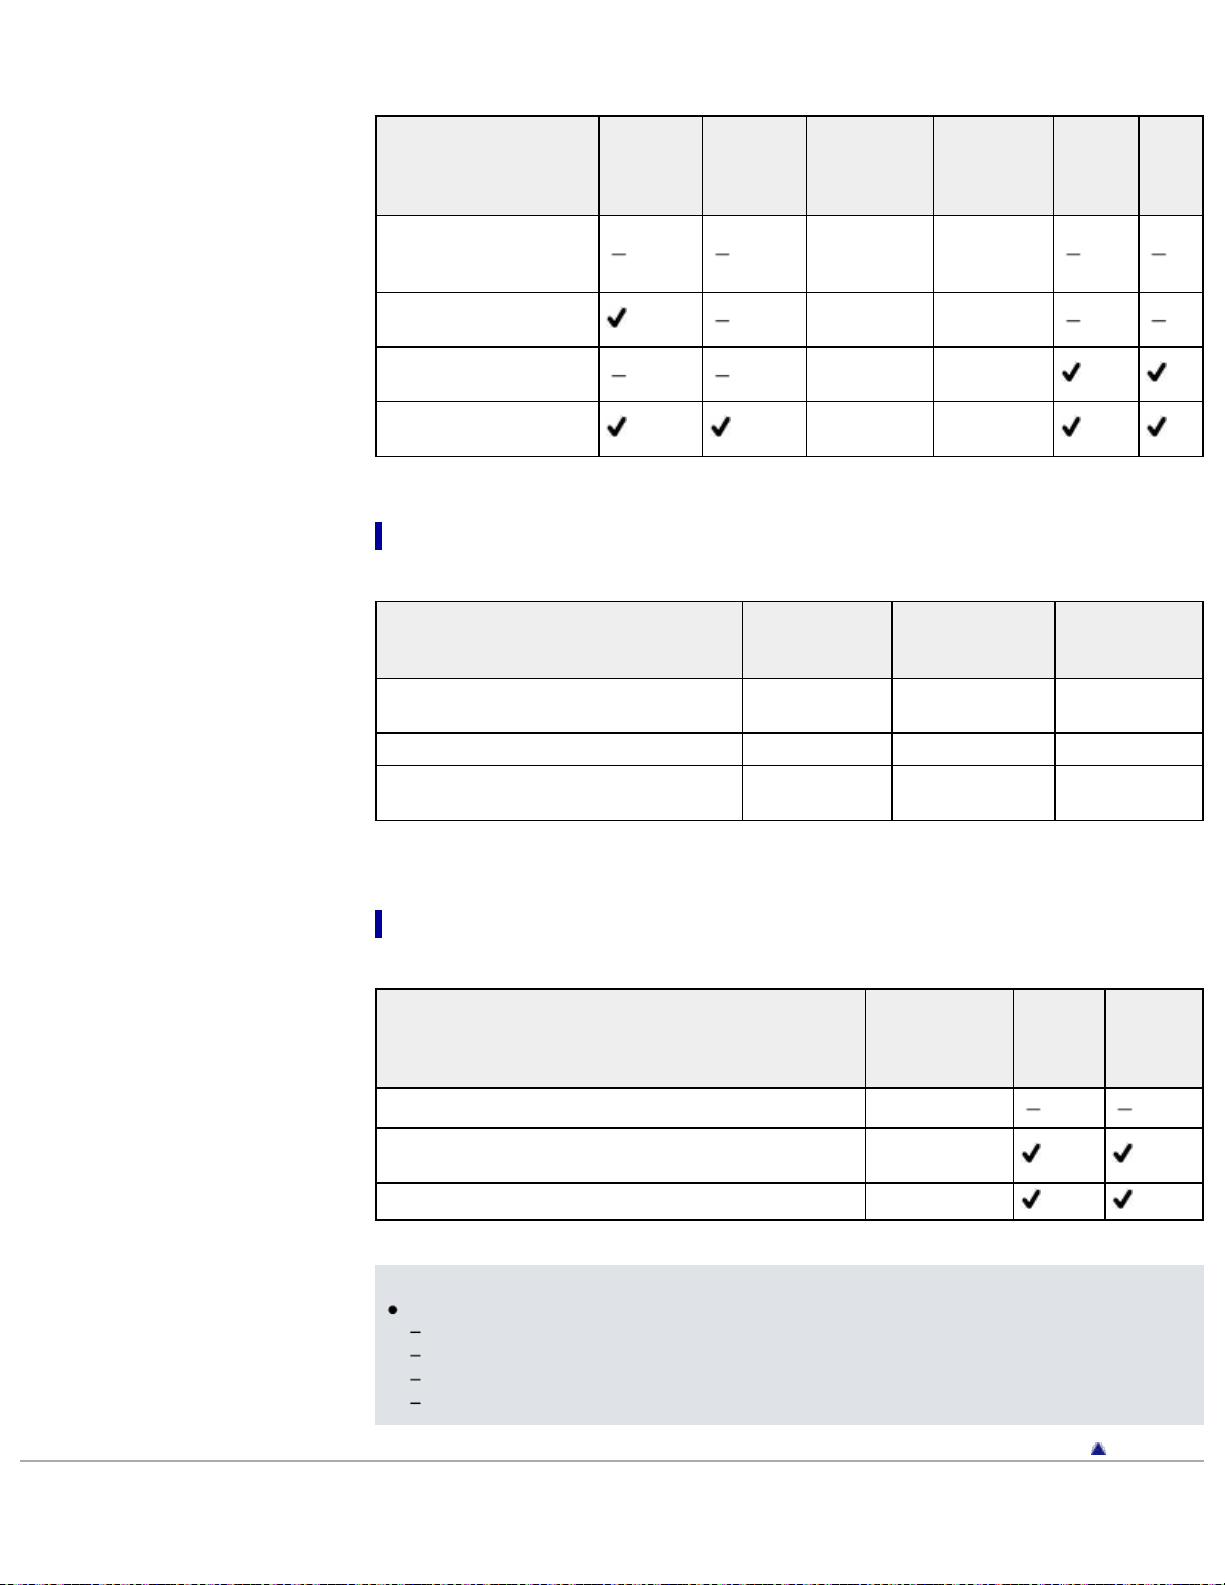
Illustrations used in this manual are based on HDR-PJ380E.
26
Model name Projector
HDR-CX220/ CX220E/
CX230/ CX230E/ CX280/
CX280E/ CX290/ CX290E
HDR-PJ220/ PJ220E/
PJ230/ PJ230E
HDR-CX320/ CX320E/
CX380/ CX380E/ CX390E
HDR-PJ320E/ PJ380/
PJ380E/ PJ390E
Projector
IN jack
Selecting
items on
the LCD
screen
Multi selector Manually
Multi selector Manually
Touch panel Automatically
Touch panel Automatically
Opening
Lens
cover
POWER
button
Differences in zoom magnification
Model name
HDR-CX220/ CX220E/ CX230/ CX230E/
PJ220/ PJ220E/ PJ230/ PJ230E
HDR-CX280/ CX280E/ CX290/ CX290E 27 times 50 times 320 times
HDR-CX320/ CX320E/ CX380/ CX380E/
CX390E/ PJ320E/ PJ380/ PJ380E/ PJ390E
Optical zoom
magnification
27 times 32 times 320 times
30 times 55 times 350 times
Extended
zoom
magnification
Digital zoom
magnification
MIC
input
jack
Differences in supplied items
Model name
HDR-CX220/ CX220E/ CX230/ CX230E NP-FV30
HDR-CX280/ CX280E/ CX290/ CX290E/ CX320/ CX320E/
CX380/ CX380E/ CX390E/ PJ220/ PJ220E/ PJ230/ PJ230E
HDR-PJ320E/ PJ380/ PJ380E/ PJ390E NP-FV50
Notes
For the following items, the descriptions are explained with the model name.
Parts and controls [Details]
Menu items
Expected recording time of movies [Details]
Expected number of recordable photos [Details]
Copyright 2013 Sony Corporation
Rechargeable
battery packACAdaptor
NP-FV30
Power
Cord
(Mains
lead)
Back to top
"Handycam" User Guide
27
Operation Search
PrintSearch
Top page > Before use > Parts and controls/Screen indicators > Parts and controls
Before use
Getting started
Recording
Playback
Playing images on a TV
Saving images with an external
device
Customizing your camcorder
Troubleshooting
Maintenance and precautions
Contents list
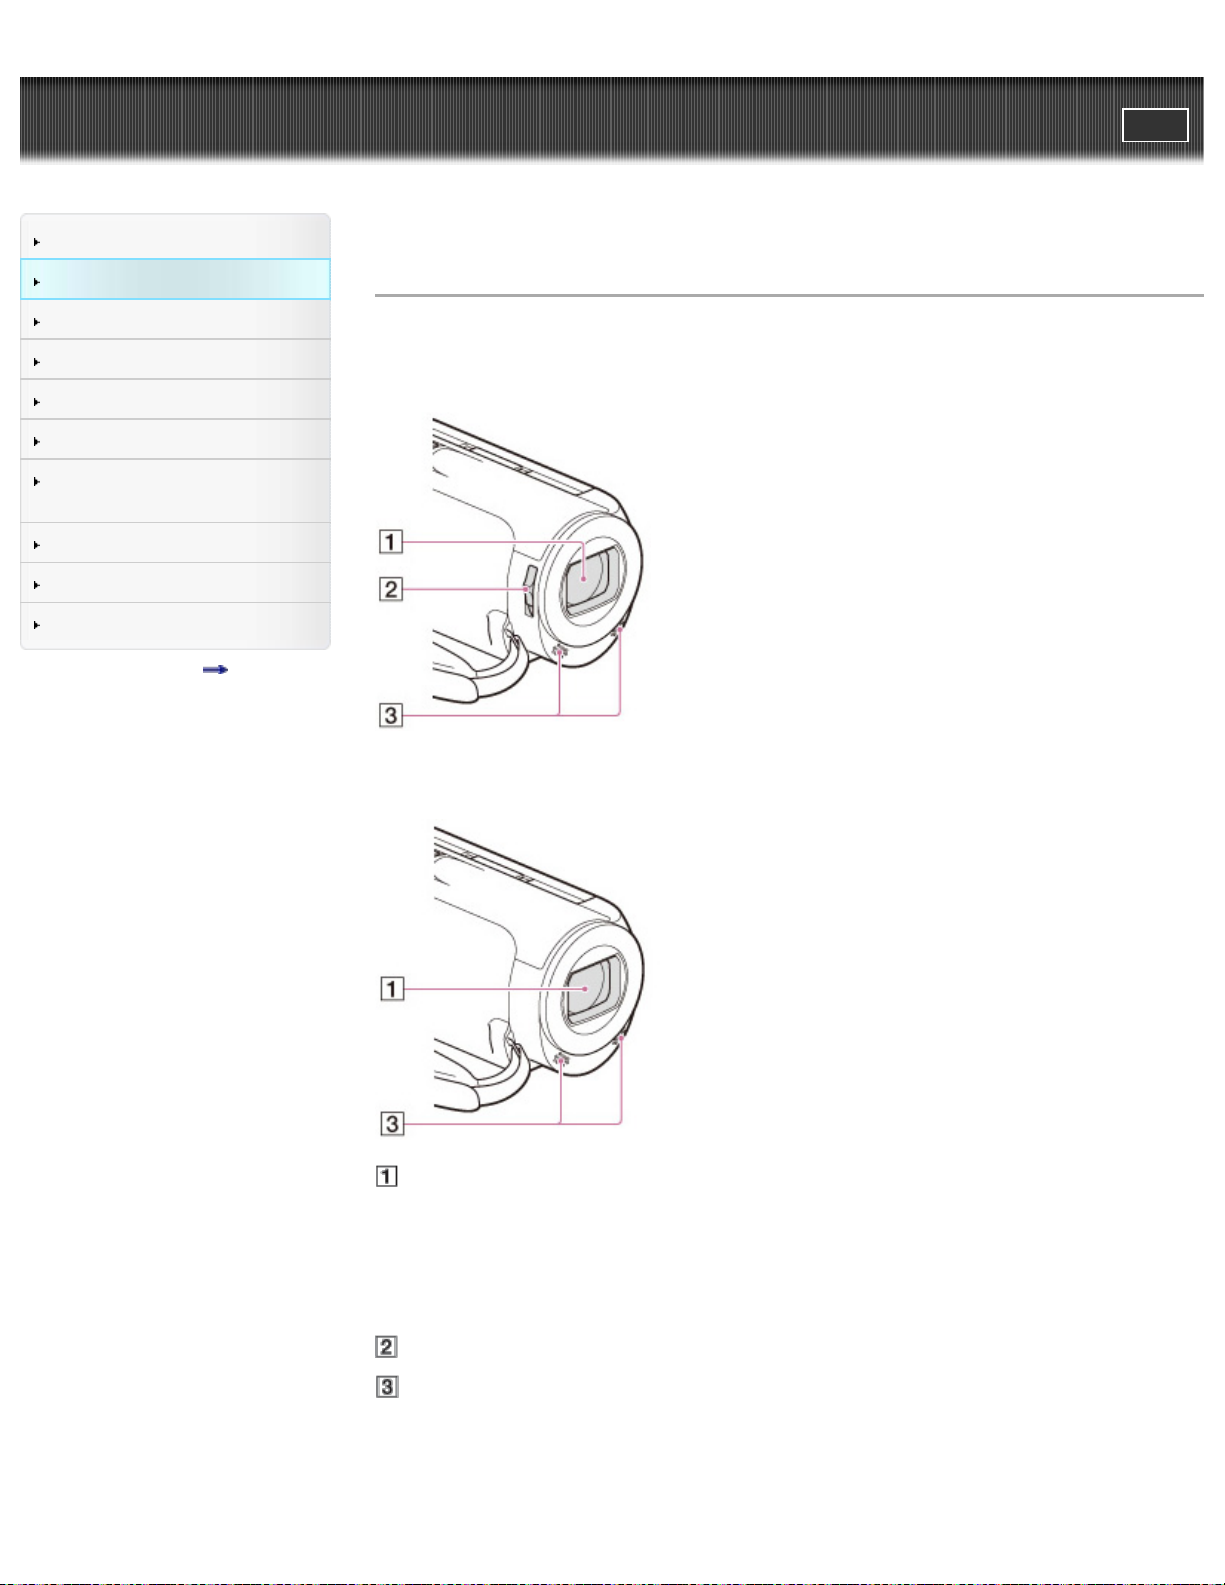
Parts and controls
HDR-CX220/ CX220E/ CX230/ CX230E/ CX280/ CX280E/ CX290/ CX290E/ PJ220/
PJ220E/ PJ230/ PJ230E
HDR-CX320/ CX320E/ CX380/ CX380E/ CX390E/ PJ320E/ PJ380/ PJ380E/ PJ390E
Lens
HDR-CX220/ CX220E/ CX230/ CX230E/ CX280/ CX280E/ CX290/ CX290E/ PJ220/
PJ220E/ PJ230/ PJ230E: Carl Zeiss lens
HDR-CX320/ CX320E/ CX380/ CX380E/ CX390E/ PJ320E/ PJ380/ PJ380E/ PJ390E:
G lens
LENS COVER switch
Built-in microphones
HDR-CX220/ CX220E/ CX230/ CX230E/ CX280/ CX280E/ CX290/ CX290E/ PJ220/
PJ220E/ PJ230/ PJ230E
HDR-CX320/ CX320E/ CX380/ CX380E/ CX390E/ PJ320E/ PJ380/ PJ380E/ PJ390E
28
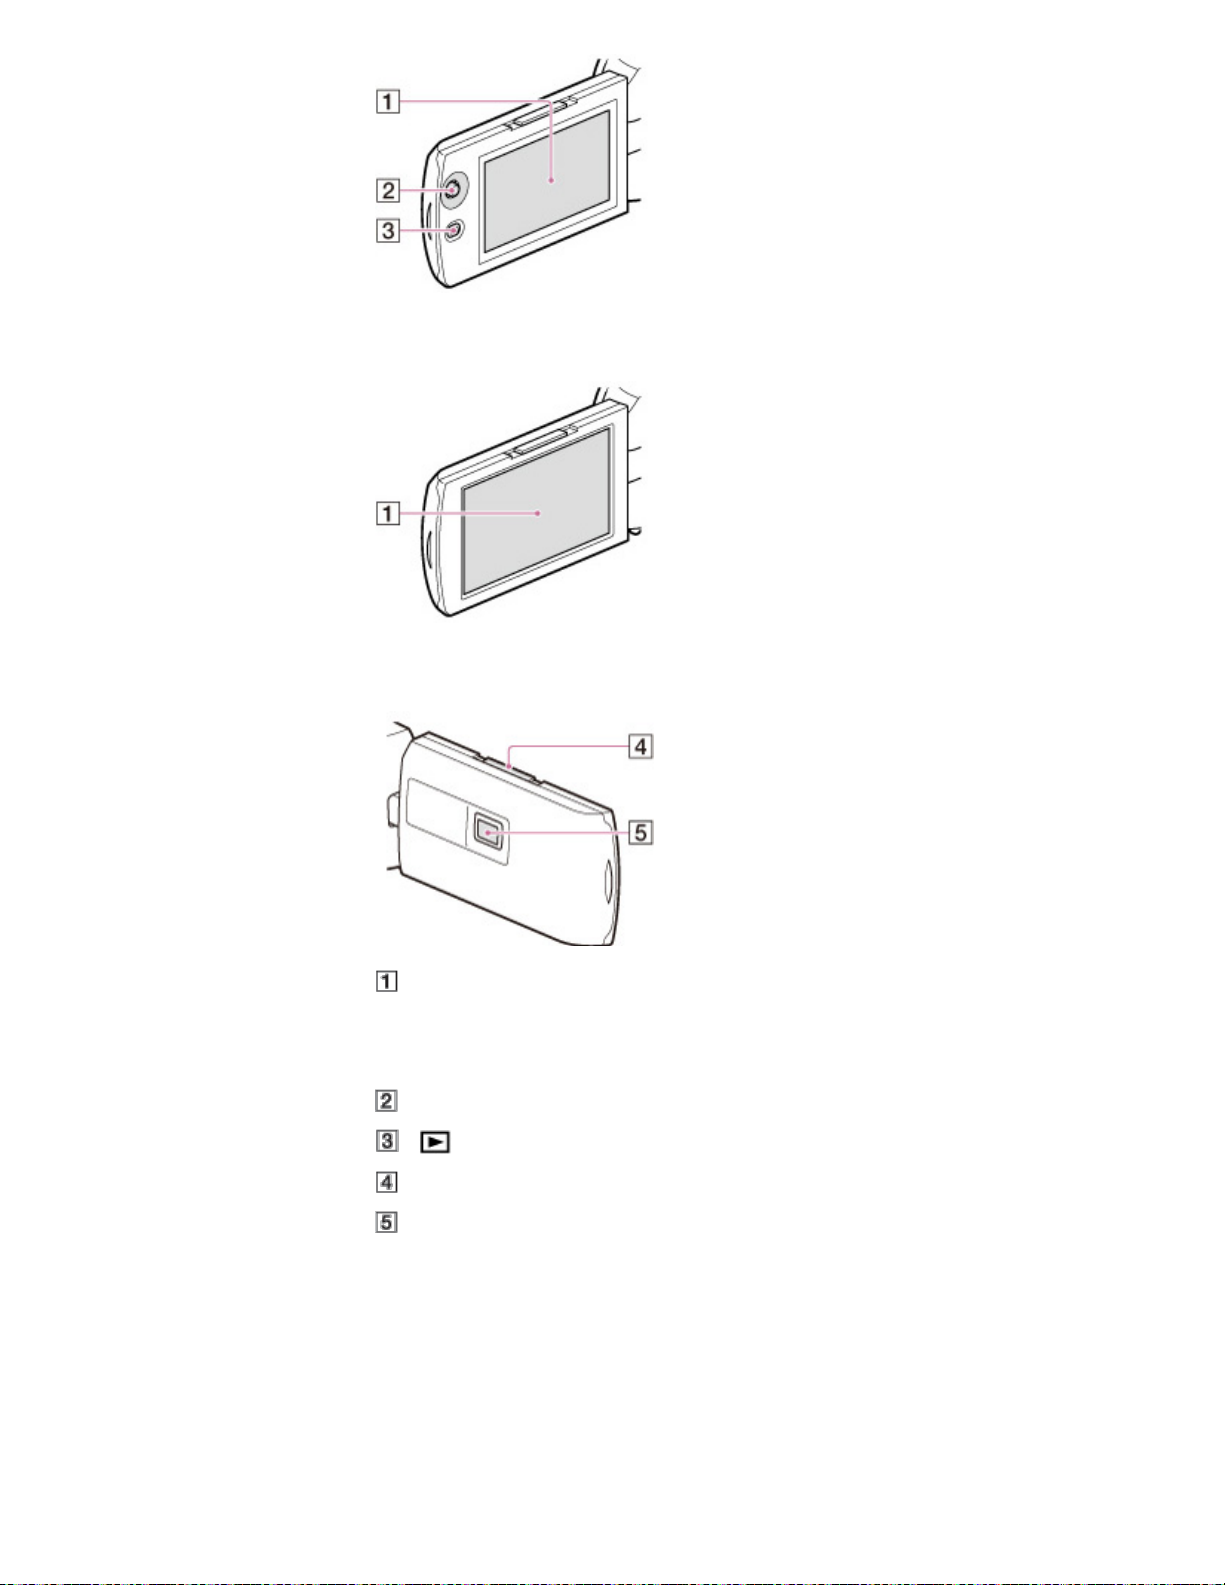
HDR-PJ220/ PJ220E/ PJ230/ PJ230E/ PJ320E/ PJ380/ PJ380E/ PJ390E
LCD screen/Touch panel (HDR-CX320/ CX320E/ CX380/ CX380E/ CX390E/
PJ320E/ PJ380/ PJ380E/ PJ390E)
If you rotate the LCD panel 180 degrees, you can close the LCD panel with the LCD screen facing
out. This is convenient during playback operations.
Multi selector
(View Images) button
PROJECTOR FOCUS lever
Projector lens
HDR-CX220/ CX220E/ CX230/ CX230E/ CX280/ CX280E/ CX290/ CX290E
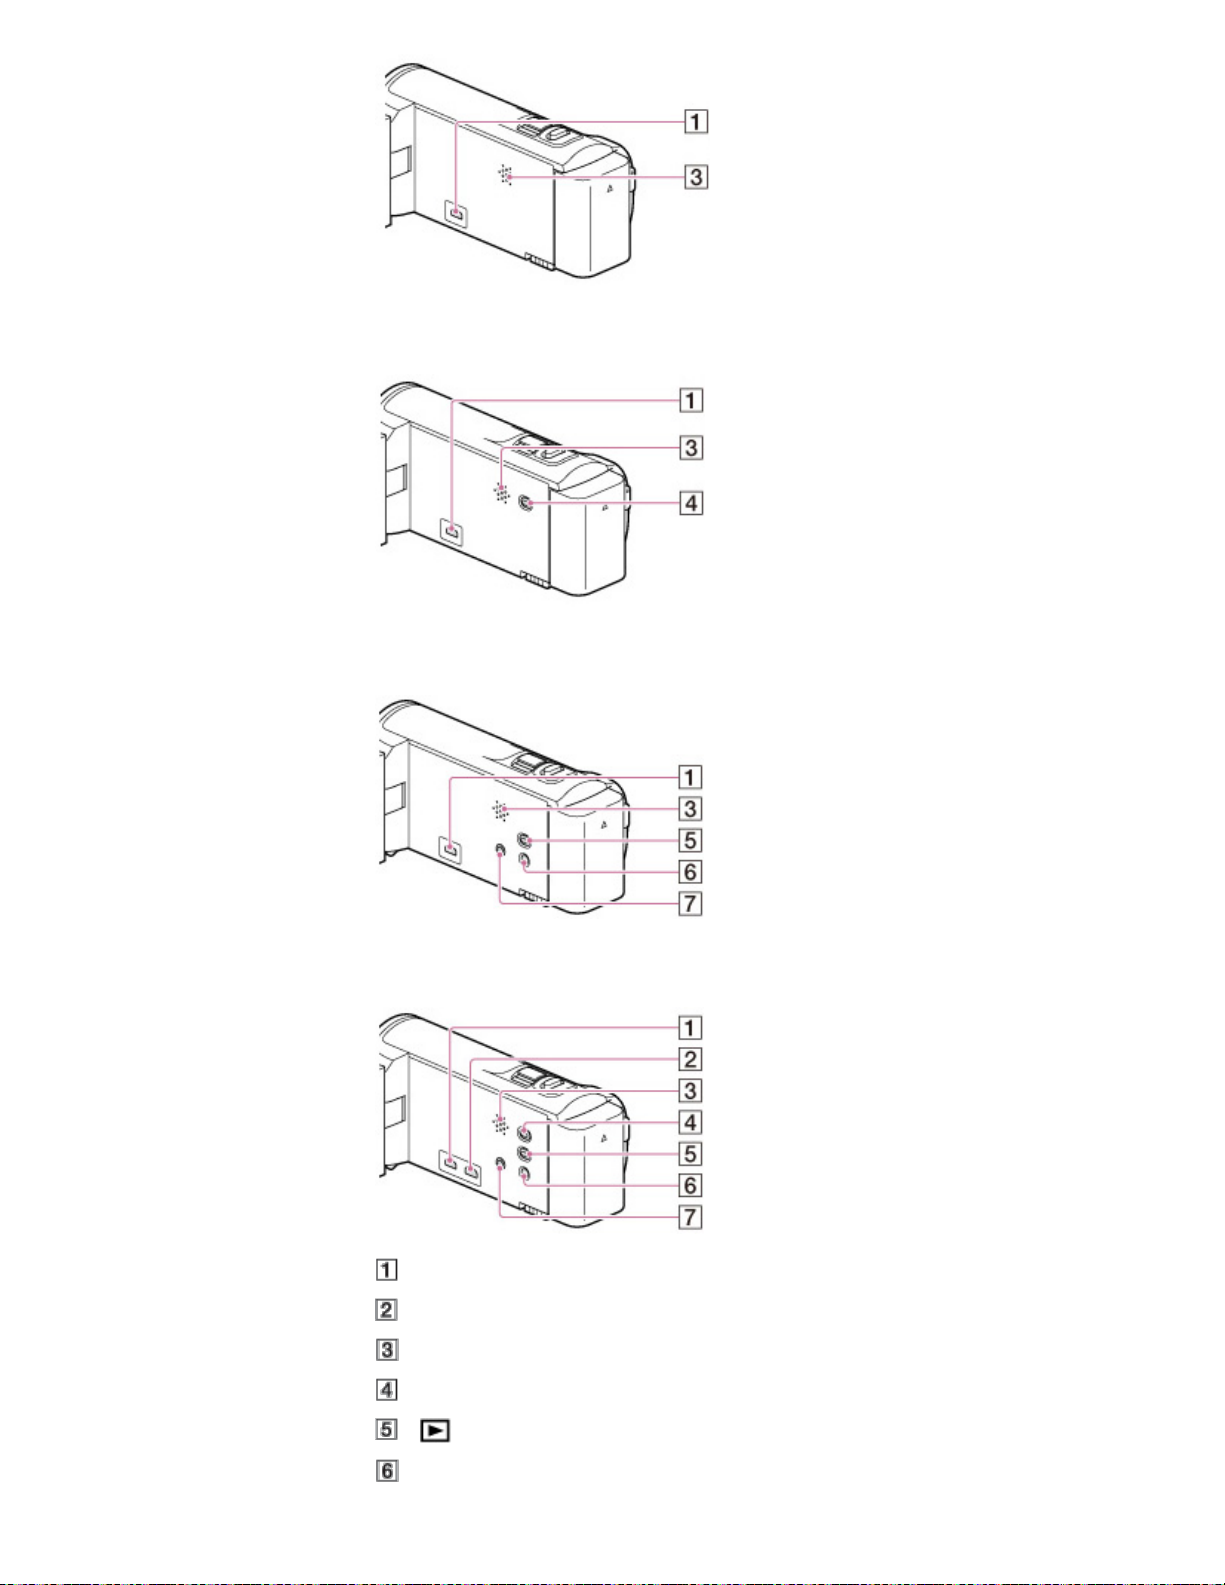
HDR-PJ220/ PJ220E/ PJ230/ PJ230E
29
HDR-CX320/ CX320E/ CX380/ CX380E/ CX390E
HDR-PJ320E/ PJ380/ PJ380E/ PJ390E
HDMI OUT jack
PROJECTOR IN jack
Speaker
PROJECTOR button
(View Images) button
POWER button
(microphone) jack (PLUG IN POWER)
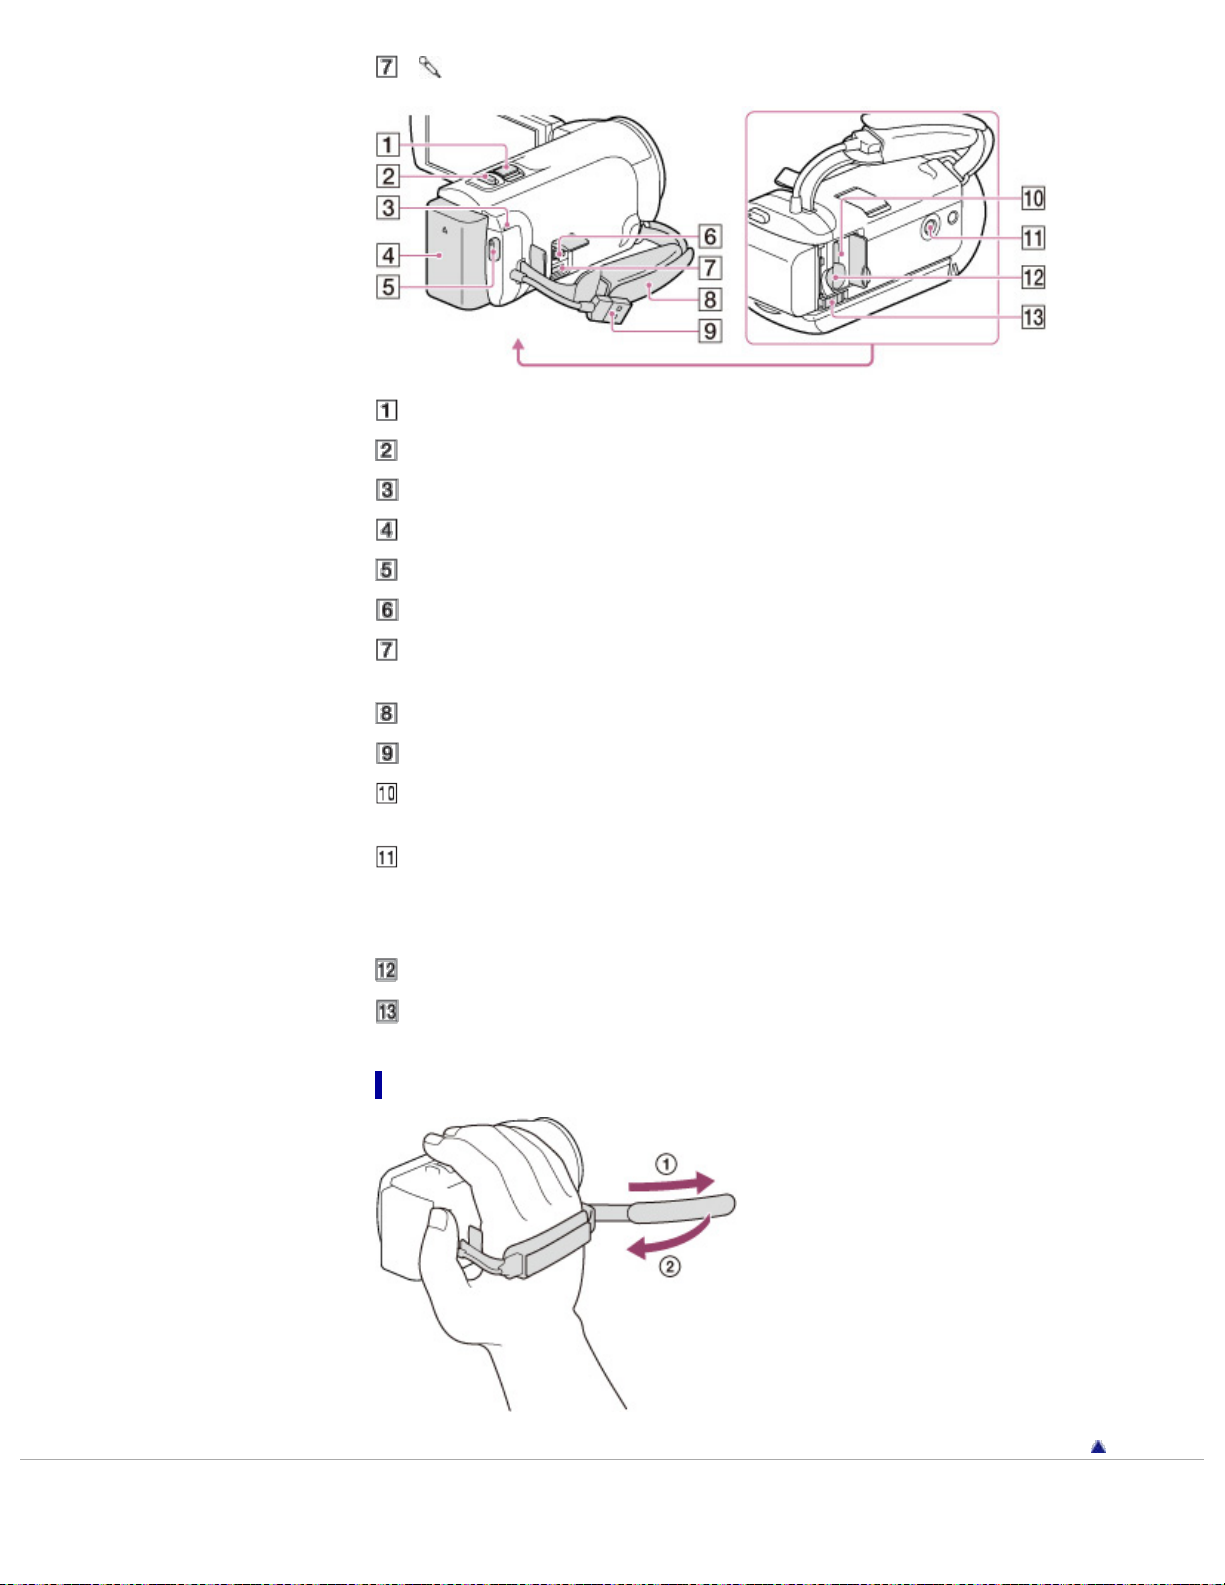
30
Power zoom lever
PHOTO button
POWER/CHG (charge) lamp
Battery pack
START/STOP button
DC IN jack
Multi/Micro USB Terminal
Supports Micro USB compatible devices.
Grip belt
Built-in USB Cable
Memory card access lamp
While the lamp is lit or flashing, the camcorder is reading or writing data.
Tripod receptacle
Attach a tripod (sold separately: the length of the screw must be less than 5.5 mm (7/32 in.)).
Depending on the specifications of the tripod, your camcorder may not attach in the proper
direction.
Memory card slot
BATT (battery) release lever
To fasten the grip belt
Back to top
Copyright 2013 Sony Corporation
 Loading...