

Sony PEGA-CC5 annexe
3-265-889-11 (1)
WELCOME
INSTALL and ACTIVATE
Congratulations on the purchase of your SmartST™ Professional for Palm OS® 5 navigation solution.
You will have received the following material:
• SmartST Professional software.
• Map data for your region.
• User Manual and Quick Start Guide in Adobe® Reader® format.
• Adobe® Reader®.
• Application Product Key and Map Product Key.
Use this guide to help you get started with SmartST Professional. The following steps are described in
more detail in your User Manual.
For Activate Software to operate with a USB connection, Windows® 98 & ME users should download
and install all the latest Microsoft Windows updates
GET READY
Step 1
Make sure you have Palm™ Desktop and HotSync® installed on your computer (found on the
installation CD supplied with your handheld).
Step 2
(a) If you use a memory card writer to install a map to a memory card, connect it to your computer
now.
(b) Alternatively, if you are a Sony CLIÉ™ user, you can use a memory card writer, or install maps
directly to a memory card plugged into your handheld using either the MS Import or Data Import
utility. You will find one of these applications on the installation CD supplied with your handheld.
Note: On the CD they are called MS Export or Data Export.
Step 4
Insert a memory card into your handheld.
Step 5
Insert the SmartST Professional CD into your computer and follow the prompts to install the
application.
Step 6
From the Main Menu, select “SmartST Application.”
Step 7
At the Install screen select “Install Application.”
Step 8
Select the HotSync® User name of your handheld device and select “Done.”
Step 9
Perform a HotSync® operation to install SmartST Professional onto your handheld.
Step 10
Make sure your computer has an internet connection available.
Step 11
(a) If you plan to use a memory card writer to install a map to a memory card, remove the memory
card from your handheld and insert it into the writer.
(b) Alternatively, if you plan to install maps directly to a memory card plugged into your handheld,
run MS Import or Data Import on your handheld.
Step 12
From the Main Menu select “Activate Software” and follow the prompts. You will need an
Application Product Key and a Map Product Key on this Quick Start Guide.
Printed in Japan
Step 3
Connect the handheld to your computer.
Note: Please refer to section 2 of the User Manual for minimum memory requirements.
© 2004 Navman NZ Limited. NAVMAN is a registered trademark of Navman NZ Limited. SmartST™ is a
trademark of Navman NZ Limited. All rights reserved
continue to reverse side t
INSTALLING MAPS
Step 17
The SmartST Professional Main Menu is displayed.
PLANNING A ROUTE
Step 13
Ensure MS Import or Data Import is active (where applicable).
Step 14
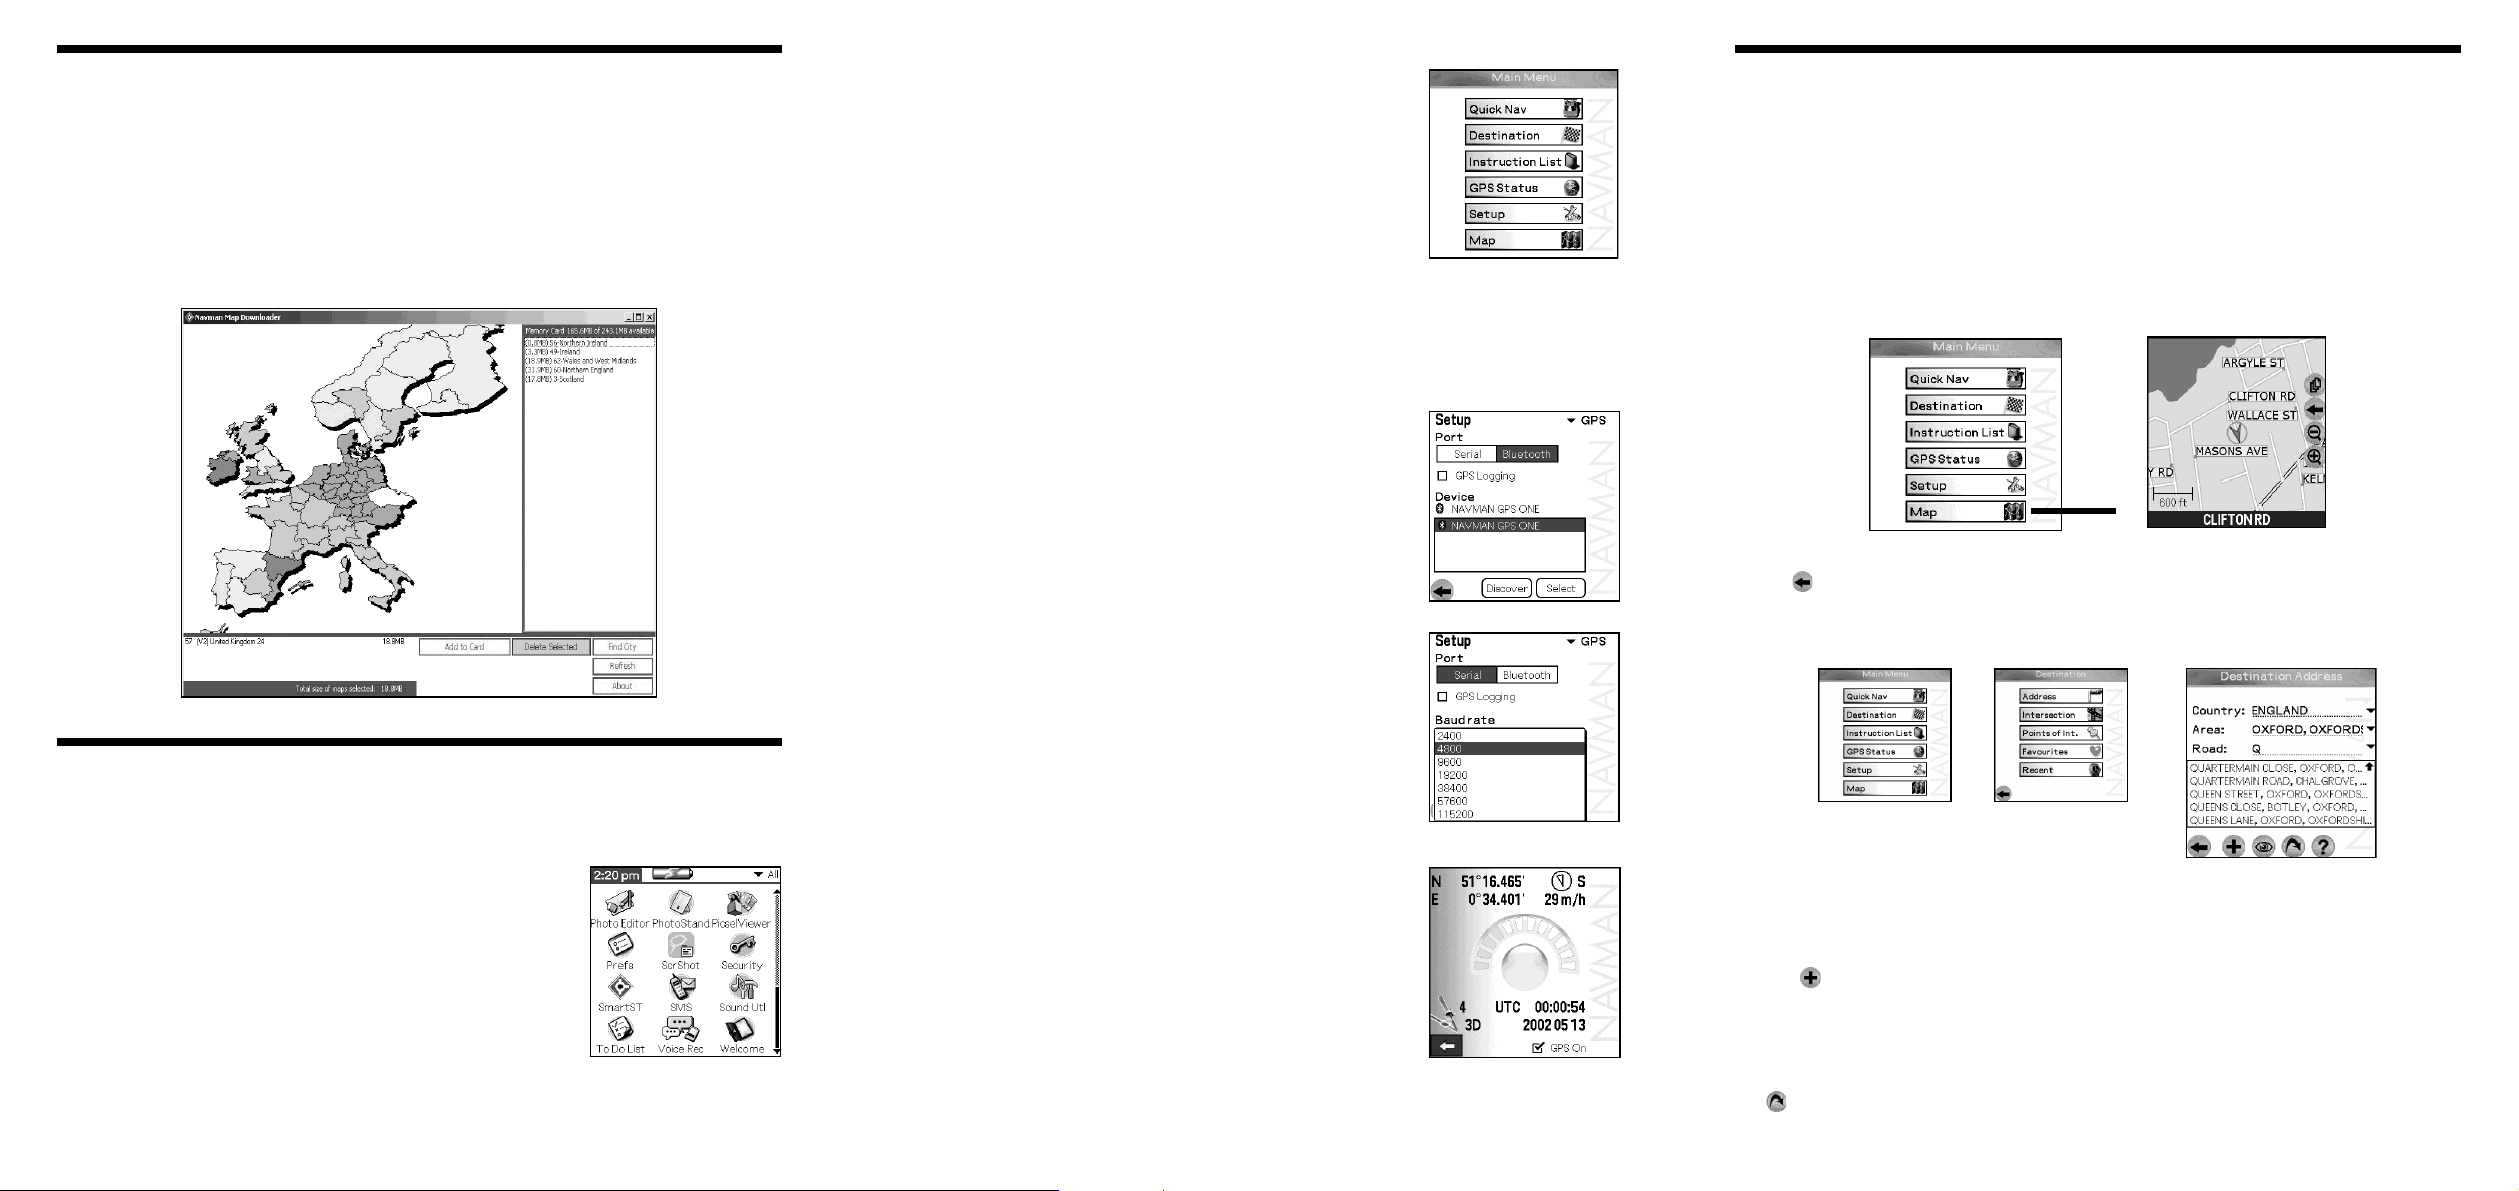
From the Main Menu on your computer, select “Install Maps.”
Step 15
Select a map region to install. Select the “Add to Card” button to install the map region onto a
memory card plugged into your handheld or in a memory card writer.
Step 18
If you are using a Serial GPS receiver or a Bluetooth GPS receiver, you will need to configure it when
using it for the first time.
• From the Main Menu, tap on “Setup.”
• From the drop-down list, tap on “GPS.”
Bluetooth GPS Users:
• Switch on the GPS receiver now.
• From the Port options, select “Bluetooth.” Tap on “Discover.”
• When your receiver is found, highlight it and tap on “Select.”
Serial GPS Users:
• From the Port options, select “Serial.”
• Refer to the instructions supplied with your GPS receiver to set the
“Baud rate.”
Note: Sony Car Cradle users: For your safety, a number of functions are unavailable when your
handheld is attached to the Car Cradle. Before you plan a route, detach your handheld from the Car
Cradle. Please refer to the User Manual for more information about using the Sony Car Cradle with
SmartST.
Step 20
From the Main Menu, tap on “Map.” The Map Screen is displayed. The message “Waiting for GPS”
will disappear once a GPS fix is obtained.
Note: A clear view of the sky is required to obtain a GPS fix. Refer to Section 7-5 of the User Manual
for additional information.
N
Step 21
Tap the icon on the Map Screen to return to the Main Menu.
Step 22
Tap “Destination,” then “Address.”
,
,
CONFIGURE YOUR GPS
Note: Sony Car Cradle users do not need to configure GPS. Go to step 20, Planning a Route.
Step 16
From the Launcher screen on your handheld, tap on SmartST.
Step 19
Turn on the GPS connection. From the Main Menu, tap on “GPS
Status.” Tick the “GPS On” box, and return to the Main Menu.
Step 23
Complete the address details. Enter the first few letters then select the entry you want from the dropdown list.
Sony Car Cradle users:
• Tap and the destination address is saved as a favourite.
• Connect your handheld to the Car Cradle, tap several times, then the Main Menu is displayed.
• From the Main Menu, tap “Destination,” then “Favourites.”
• Select your destination from the Favourites List.
Step 24
Tap and your route is calculated and displayed on the Map. Follow the voice prompted screen
instructions to reach your destination.
 Loading...