

Sony PCG-SR33 User Manual

Contents
Using Your VAIO® Notebook......................7
Using the Keyboard ........................................................................7
Indicators .............................................................................9
Indicator Lights..................................................................10
The Windows Key in Combination with Other Keys........11
The Fn Key in Combination with Other Keys...................12
Using the Touchpad .....................................................................13
Using the Optical Drive.................................................................14
Notes on CD Media ...........................................................17
Using PC Cards ............................................................................ 18
Using i.LINK
Windows Me™..................................................................22
Windows 2000 ...................................................................22
The Jog Dial™ Control.................................................................. 23
Using the Jog Dial™ Control ............................................23
Launcher Mode ..................................................................24
Guide Mode .......................................................................24
Using the Jog Dial Control with Sony Software................25
Using the Jog Dial Control with Other Software...............25
VAIO Action Setup........................................................................26
Using Memory Stick
Types of Memory Stick Media ..........................................26
Handling and Storing Memory Stick Media ....................27
Inserting a Memory Stick Media .......................................28
Removing a Memory Stick Media.....................................29
Using Memory Stick Media with Data from Another Device
®
Network Connection.............................................. 22
®
Media........................................................26
1

Change to Current Document Title
30
Write-Protecting a Memory Stick Media.......................... 31
Formatting a Memory Stick Media................................... 32
Power Saving Modes ....................................................................32
Normal Mode .................................................................... 32
Standby Mode ................................................................... 33
Hibernate Mode................................................................. 33
Notes on Using Power Management................................. 34
Using a Phone Line.......................................................................34
Notes on the Telephone Line ............................................ 37
Using Local Area Network (LAN) ..................................................38
Using Ethernet to Connect to a Network .......................... 38
Setting Up Your Ethernet Connection .............................. 38
Connecting Peripheral Devices ...............41
Connecting a Floppy Disk Drive (Optional)....................................41
To Disconnect a Floppy Disk Drive When the Notebook is
On...................................................................................... 43
To Carry a Floppy Disk Drive .......................................... 44
Connecting an i.LINK® Device ......................................................45
DVgate™ Applications..................................................... 46
Hard Drive Partition.......................................................... 47
To Defragment a Partition................................................. 47
Connecting a Universal Serial Bus (USB) Device ..........................48
To Connect a USB Device ................................................ 48
Connecting an External Display.....................................................49
To Connect a Monitor....................................................... 49
To Connect a Projector ..................................................... 50
Recording from a Microphone or Audio Equipment......................51
Switching the connector functionality .............................. 51
2

Expanding Your Notebook Capabilities......................................... 54
Personal Digital Assistant..................................................54
The Wireless LAN Access Point .......................................54
The Wireless LAN PC Card ..............................................55
Customizing Your VAIO® Notebook ........57
Displaying the Sony Notebook Setup Screen................................58
Sony Notebook Setup Tabs................................................59
Controlling Power Management ................................................... 59
Viewing the Power Management Status Icons ..................59
To Activate the Power Management Toolbar....................60
Power Management Profiles ..............................................61
Power Management Commands ........................................62
Conserving Battery Power .................................................63
Displaying Battery Information..................................................... 63
To Activate Battery Information Toolbar ..........................63
Battery Icon Descriptions ..................................................64
Displaying Detailed Battery Information ..........................65
Changing the Window Design of Sony Software .......................... 65
Selecting the Display Mode .......................................................... 66
Using the Dual Display Function (Windows Me only)................... 68
Selecting Dual Display Mode ............................................68
Setting the Colors and Resolution for Each Display .........69
Customizing the Virtual Desktop ......................................69
Releasing the Dual Display Setting ...................................69
Adding Memory .........................................71
Related Safety Guidelines............................................................. 71
Typical Expansion Memory Configuration .................................... 72
To Install a Memory Module.........................................................72
To Remove a Memory Module ..................................................... 75
Confirming Added Memory Capacity............................................76
3

Change to Current Document Title
About the Software on Your Notebook ...79
Overview .......................................................................................79
MovieShaker™ ..............................................................................84
Importing Images and Sound Clips................................... 84
Creating a Movie using Shaker......................................... 85
Editing Clips and Scenes................................................... 86
Saving a Movie ................................................................. 87
OpenMG Jukebox 2.0 Software Instructions.................................87
Electronic Music Distribution (EMD) Services................ 87
Starting OpenMG Jukebox 2.0.......................................... 88
Recording a CD................................................................. 89
Transferring Songs (Check-in/Check-out)........................ 91
Additional Features........................................................... 93
Notes on Performing the System Restore Function of System
Tools on Windows® Millennium Edition ......................... 94
Notes on Using Portable Players....................................... 94
PictureGear™ ................................................................................95
Managing Your Pictures ................................................... 95
Creating a Photo Album.................................................... 95
Using Panorama Maker..................................................... 96
Making Still Images and Panoramic from MPEG ............ 96
Application, Driver, and System Recovery CDs.............................97
Using Your Recovery CDs ............................................... 97
Using the Driver Recovery CD(s)..................................... 98
Using the System Recovery CD(s) ................................... 99
Recovering Microsoft® Word 2002................................ 100
Software Support Information ....................................................101
4

Getting Help .............................................103
VAIO Support Agent ................................................................... 104
Using the Quick Fix Wizard ............................................104
Using Common Solutions................................................106
Using Support Central .....................................................107
About Automatic Updates ...............................................111
Troubleshooting ......................................117
Troubleshooting Your Notebook.................................................117
Troubleshooting the LCD Screen................................................ 121
Troubleshooting the Mouse and Touchpad ................................ 122
Troubleshooting Drives, PC Cards, and Peripheral Devices........ 124
Troubleshooting Software .......................................................... 126
Troubleshooting the Modem ...................................................... 127
Troubleshooting Audio ...............................................................128
Troubleshooting the Printer........................................................129
Index .........................................................133
5

Change to Current Document Title
6
Using Your VAIO® Notebook
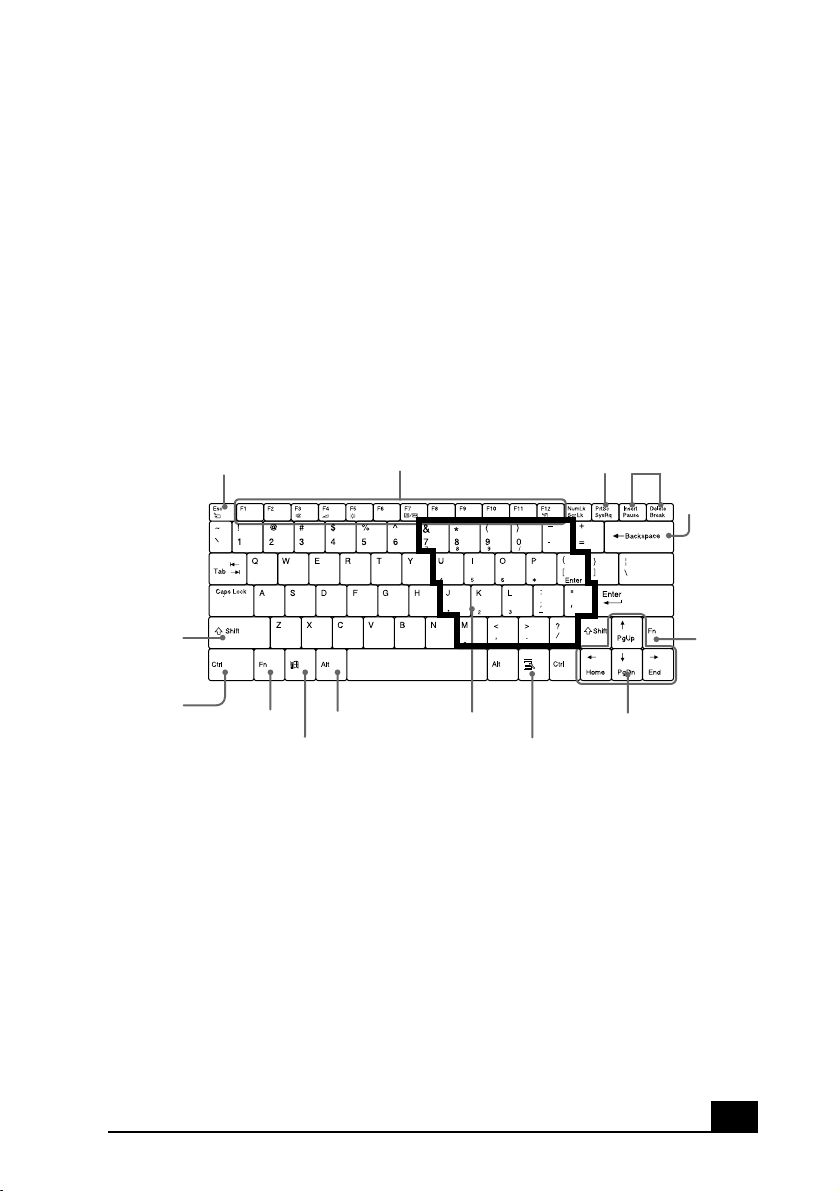
Using the Keyboard
Although the notebook keyboard is very similar to that of a typewriter, the
keyboard has additional keys that perform specific computer-related tasks.
Keyboard
Shift Key
Ctrl Key
Escape Key
Fn Key
Windows Key
Alt Key
Function Keys
Numeric Keypad Area
Print Screen Key
Applications Key
Correction Keys
Navigation Keys
Backspace
Key
Fn Key
7

VAIO® Notebook User Guide
The Notebook Keyboard Keys
Key Description
Numeric keypad area The numeric keypad area contains the keys found on a
typical calculator. Use this area to type numbers or to
perform mathematical calculations such as addition
and subtraction. Note the following:
❑ To activate the numeric keypad, press the Num
Lock key, which causes the Num Lock light to
come on and remain on until the numeric keypad
is deactivated.
❑ To deactivate the Num Lock key, press the Num
Lock key again, which causes the Num Lock
light to go off.
Navigation keys The Left/Right/Up/Down arrows are devoted to move
the cursor on the screen and also function as the
Home, End, Page Up, and Page Down keys,
respectively.
Correction keys The Insert, Back Space, and Delete keys enable you to
make corrections in your documents.
Function keys The 12 function keys along the top of the keyboard
are used to perform designated tasks. For example, in
many applications, F1 is the Help key. The task
associated with each function key may vary from one
application to the next.
Escape key The Esc (Escape) key is used to cancel commands.
Print Screen key The Print Screen key takes an electronic snapshot of
the screen and places it in the Windows Clipboard.
You can then paste the screen shot into a document
and print it.
Operator keys (Ctrl, Alt, Shift
keys).
Several keys are always used with at least one other
key: Ctrl, Alt, and Shift. When held down with
another key, the Ctrl (Control) and Alt (Alternate)
keys offer another way to give commands. For
example, in many applications, instead of choosing
the Save command from a menu, you can hold down
Ctrl and press S (referred to as Ctrl+S). The Shift key
operates the same way as on a typewriter; it is used to
produce capital letters or special symbols such as @
and $.
8
Using Your VAIO® Notebook
Key Description
Windows key The key with the Windows logo displays the
Windows Start menu; it is the equivalent of clicking
Start on the task bar. See “The Windows Key in
Combination with Other Keys” on page 11.
Fn key The Fn keys at the left and right sides work the same
and are used in combination with other keys to issue
commands. See “The Fn Key in Combination with
Other Keys” .
Applications key The Applications key displays a shortcut menu of
context-sensitive choices; pressing this key is the
equivalent of clicking the right mouse button.
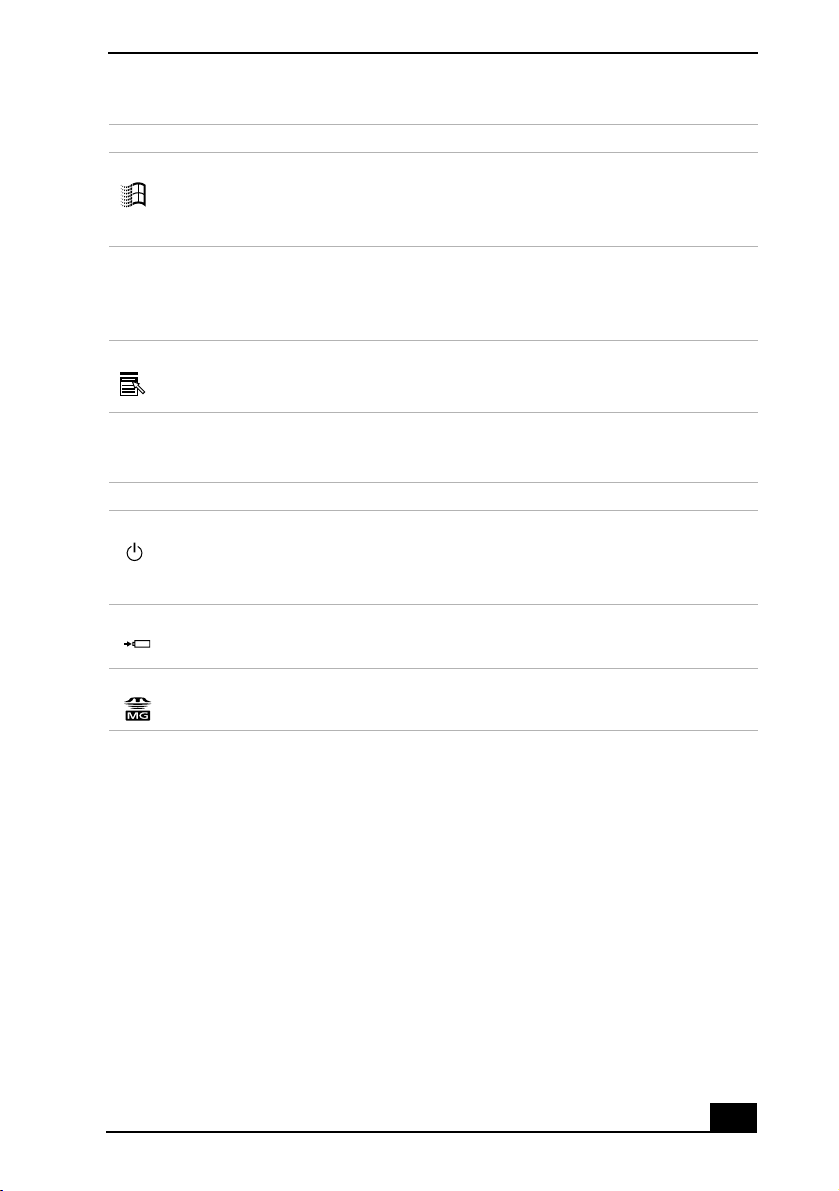
Indicators
Indicators Functions
Power Light is green when the notebook is powered on,
flashes amber when the notebook is in Standby mode,
and turns off when the notebook is in Hibernate mode
or is powered off.
Battery Indicates the status of the battery, which is attached at
the rear of the notebook.
MG Memory Stick Indicates the Memory Stick slot is in use.
9

VAIO® Notebook User Guide
Indicator Lights
Light On Off
Hard disk Data is being read from or
written to the hard drive. Do
not enter Standby mode or turn
off the notebook when this
indicator light is on.
Num Lock The number keys in the
numeric keypad are active.
The hard drive is not being
accessed.
The character keys in the
keypad area are active.
Caps Lock The letters appear in uppercase
as you type. The Shift key
lowers the case of typed letters
when Caps Lock is on.
Scroll Lock The screen scrolls differently.
(Exactly how it scrolls depends
on the specific application. It
has no effect in many
applications.)
Letters appear in lower case as
you type (unless you hold
down the Shift key).
Information moves across the
display normally.
10
Using Your VAIO® Notebook
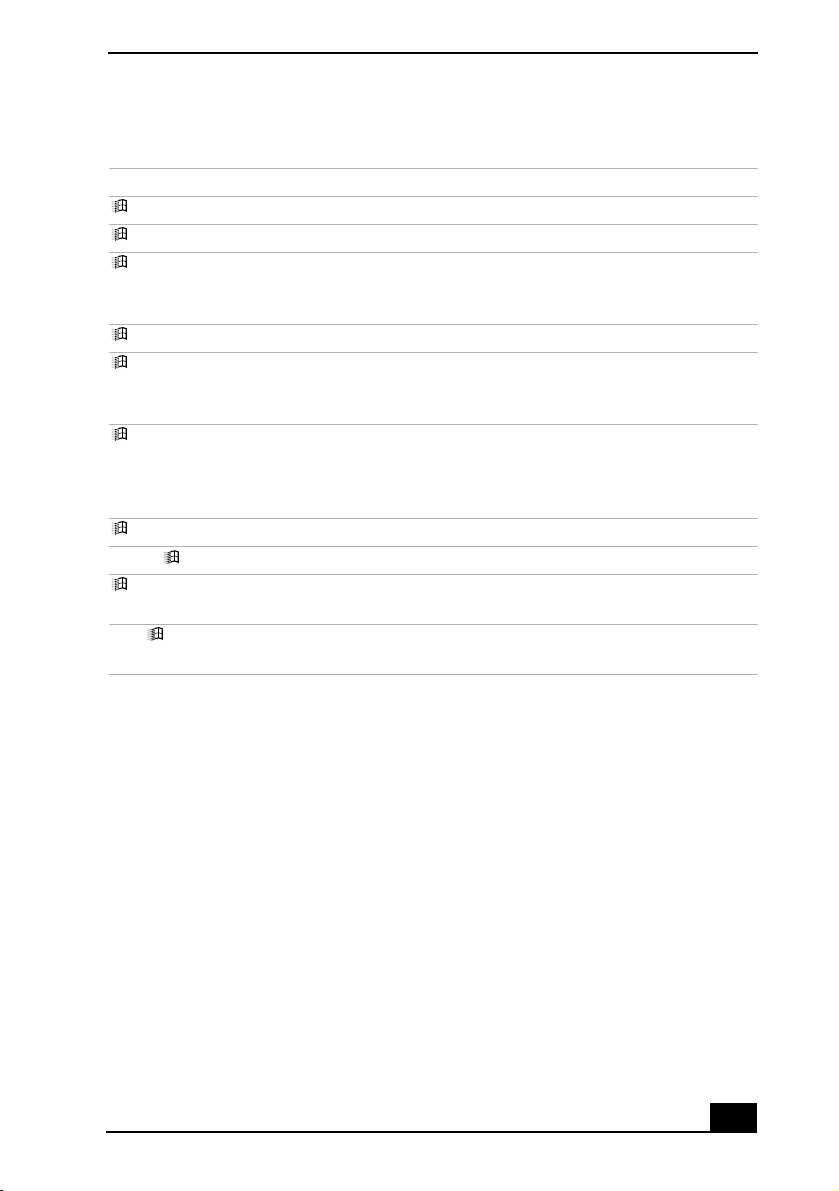
The Windows Key in Combination with Other Keys
Combinations Functions
+ F1 Displays Windows Help.
+ Tab Switches the selected button on the taskbar.
+ D All displayed windows are temporarily minimized,
and desktop is displayed; when pressed again, all
minimized windows are opened.
+ E Displays Windows Explorer.
+ F Displays the Windows Find: All Files window to find
a file or folder. This is the equivalent of selecting Find
then Files or Folders from the Start menu.
+ Ctrl + F Displays the Windows Find: Computer window
where you can locate other computers. This is the
equivalent of selecting Find then Computer from the
Start menu.
+ M Minimizes all displayed windows.
Shift + + M Returns all minimized windows to their previous size.
+ R Displays the Run window. This is the equivalent of
selecting Run from the Start menu.
Fn + + Insert Displays the Properties window. This is the equivalent
of clicking the System icon in the Control Panel.
11
VAIO® Notebook User Guide
➜
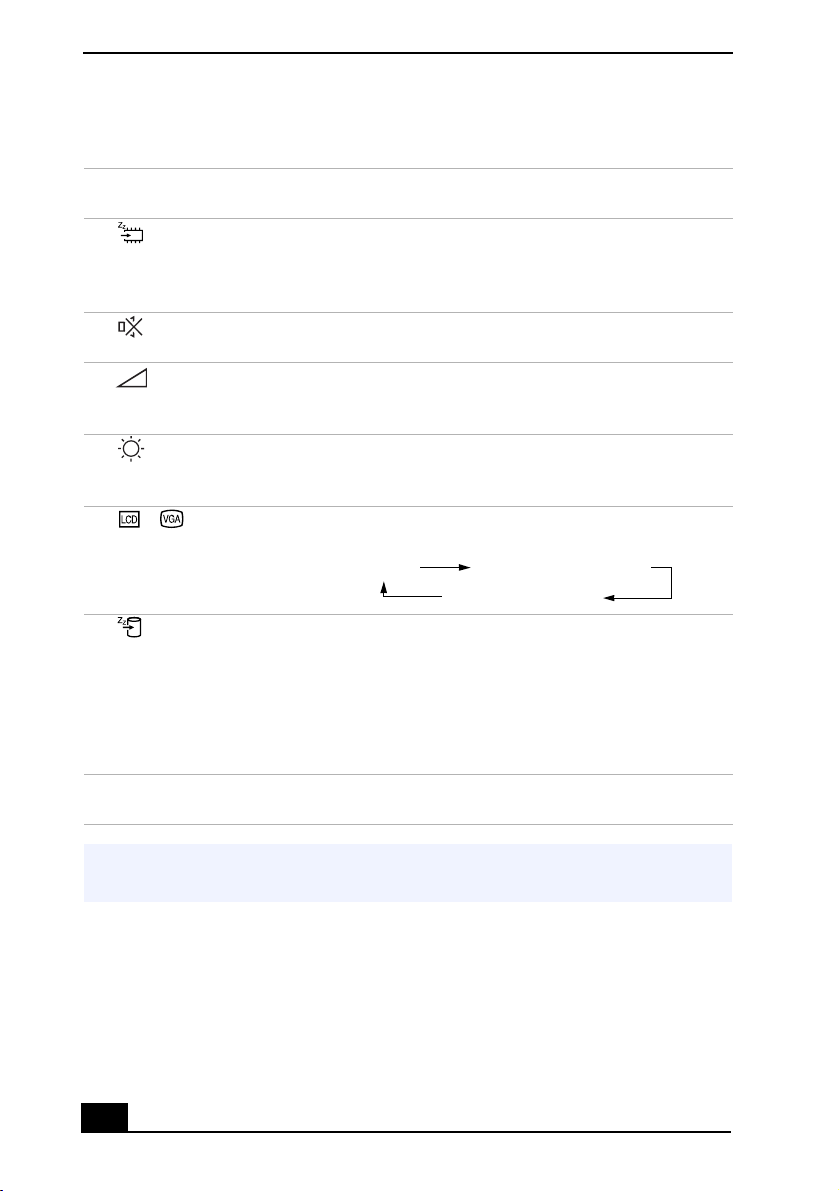
The Fn Key in Combination with Other Keys
Combinations/
Feature Functions
Fn+ (ESC)
Standby
Fn+ (F3)
Mute on/off
Fn+ (F4)
Speaker volume
Fn+ (F5)
Brightness control
Fn+ / (F7)
Switch to the
external display
Fn+ (F12)
Hibernate
Fn+B
Mega-Bass switch
Puts the system in Standby mode, which is a power
management state. To return the system to the active
state, press any key or press the power switch on your
notebook.
Toggles the built-in speaker off and on.
Adjusts the built-in speaker volume as follows:
To increase volume, press Fn+F4, then or .
To decrease volume, press Fn+F4, then or .
Adjusts the brightness of the LCD.
To increase light intensity, press Fn+F5 then or .
To decrease light intensity, press Fn+F5 then or .
Toggles through the LCD, external display, and both
LCD and external display.
Only LCD
Puts the system in Hibernate mode, which is the
lowest level of power consumption. When you
execute this command, the states of the system and
the peripheral devices are written to the hard disk and
the system power is turned off. To turn the power
back on and return the system to the original state,
press the power switch on your notebook.
Toggles the mega-bass function off and on. This
feature is available with headphone only.
LCD and external display
Only external display
➜
➜
➜
➜
➜
➜
➜
✍ You can also carry out these functions using the Jog Dial control. Some functions are
not available until Windows launches.
12
Using the Touchpad
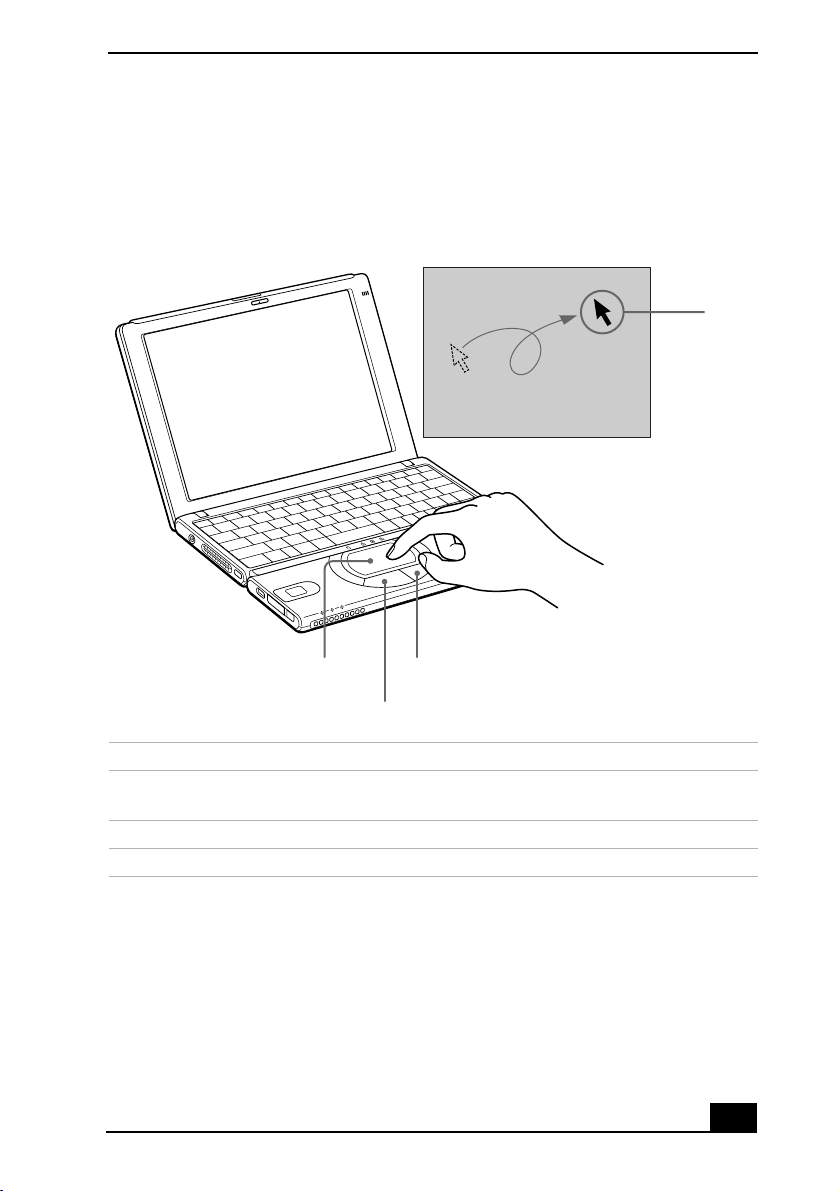
Using the Touchpad
The keyboard contains a cursor-pointing device called a touchpad. You can point
to, select, drag, and scroll objects on the screen using the built-in touchpad.
Touchpad
Pointer
Touchpad
Right button
Left button
Actions Descriptions
Point Slide one finger on the touchpad to place the pointer
on an item or object.
Click Press the left button once.
Double-click Press the left button twice.
13
VAIO® Notebook User Guide
Actions Descriptions
Right-click Press the right button once. In many applications, this
action displays a shortcut menu of context-sensitive
choices.
Drag Slide one finger while pressing the left button.
Scroll Move your finger along the right edge of the touchpad
to scroll vertically. Move your finger along the bottom
edge to scroll horizontally. (The scroll function is
available only with applications that support a
touchpad scroll feature.)
✍ See Mouse Properties for information on touchpad features, such as clicking both
buttons simultaneously, adjusting touchpad speed, Web Assist, Tap Off, and Easy
Launcher functions. To access Mouse Properties, click Start on the Windows taskbar,
point to settings, select Control Panel, and click the Mouse icon.
Using the Optical Drive
It is recommended that you use a Sony compatible DVD drive, for optimal
performance.
If you connect a non-Sony DVD drive to your VAIO notebook, the DVD
playback may not function properly. The bundled DVD software must be
installed to play a DVD.
If you connect an optical drive (not supplied) when your notebook is running on
battery power, the battery life will be shorter. The drive draws power from the
notebook through a PC card.
✍ Procedures for connecting the CD drive may vary, depending on the CD drive. See the
manual that came with your CD drive for more information on use.
(Windows 2000 only) To play an audio CD in the optical drive, your notebook's
settings must be set properly. You can check the settings as follows:
1 Click the Start button, point to Settings, and then click Control Panel.
2 Double-click the System icon.
3 Click the Hardware tab and then click Device Manager.
14
Using the Optical Drive
4 Double-click the drive you use under CD-ROM drive.
5 Click the Property tab and make sure the “Enable digital CD audio for this
CD-ROM device” box is checked.
To Connect the optical Drive
✍ You can connect the optical drive while the notebook is on, unless you plan to use the
System Recovery CDs. Turn off your notebook before using the System Recovery
CDs.
1 Remove the PC card slot protector from the PC card slot. See “Using PC
Cards” for details.
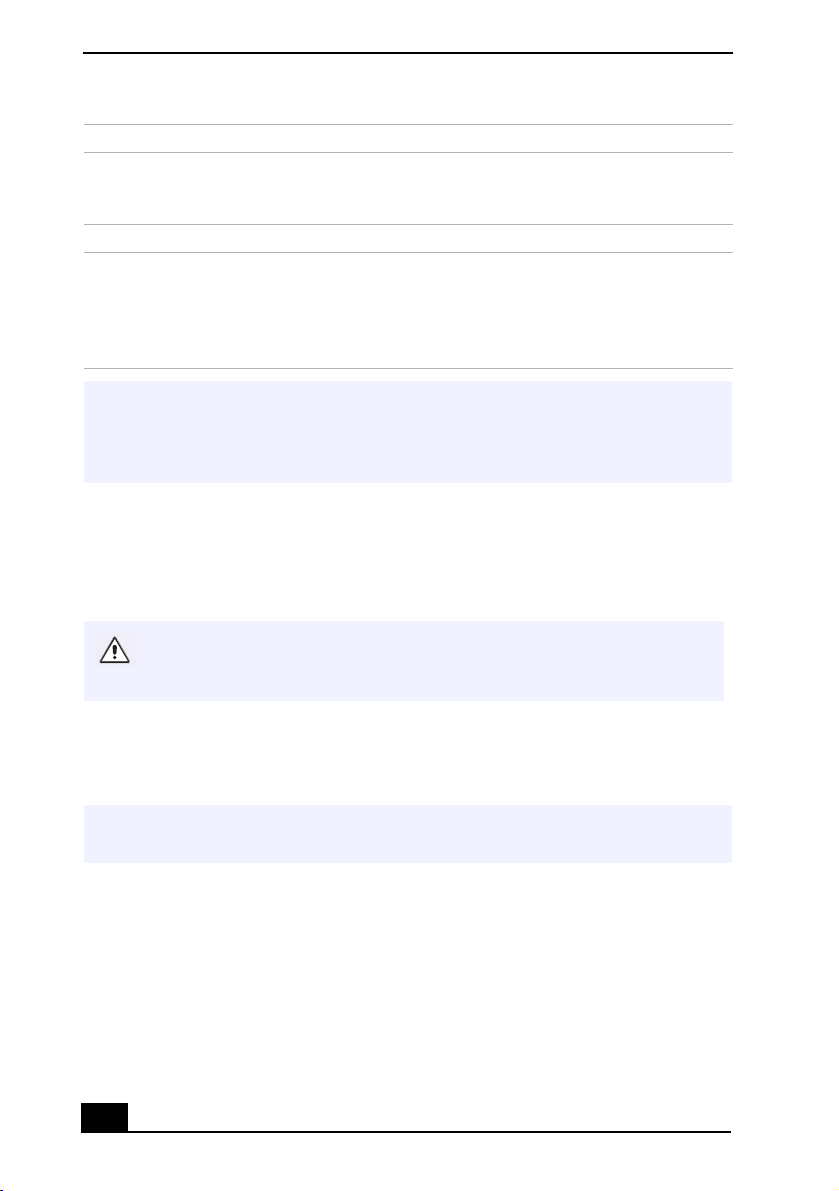
2 Remove the PC card from the bottom side of the CD drive.
Removing the PC Card
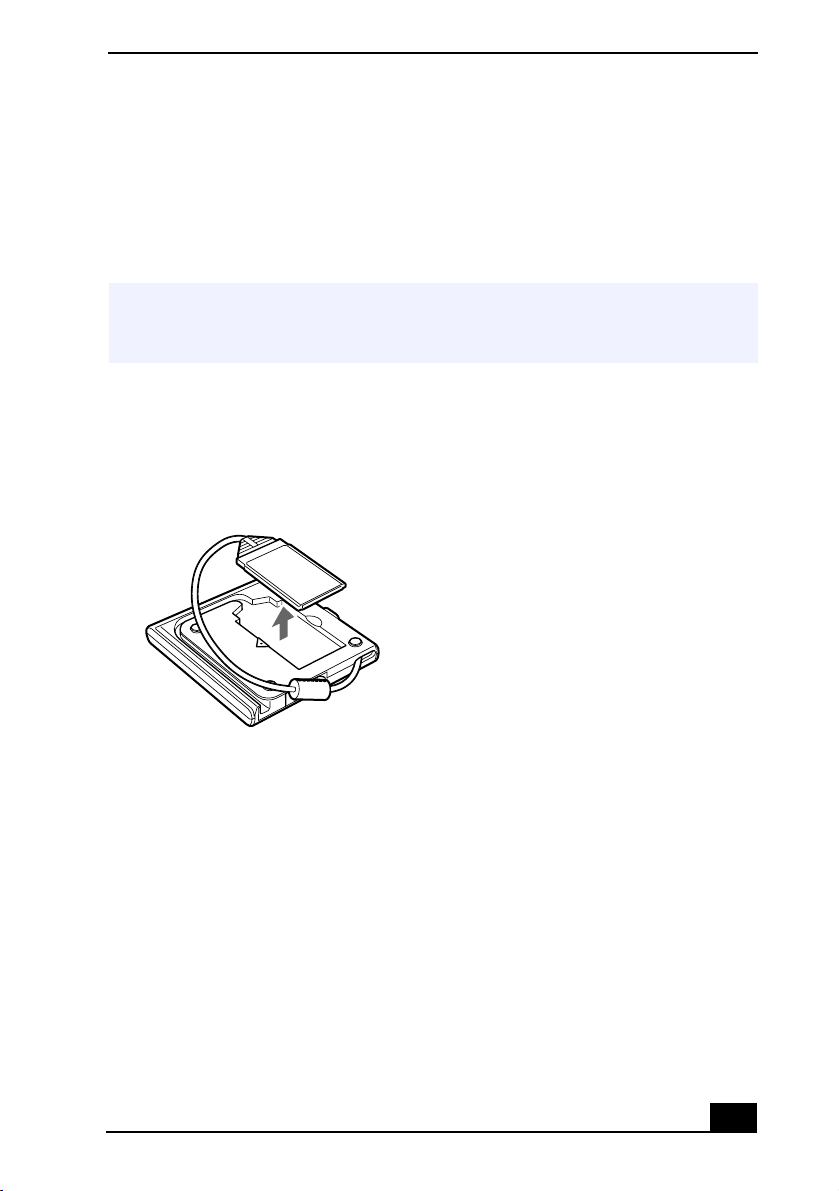
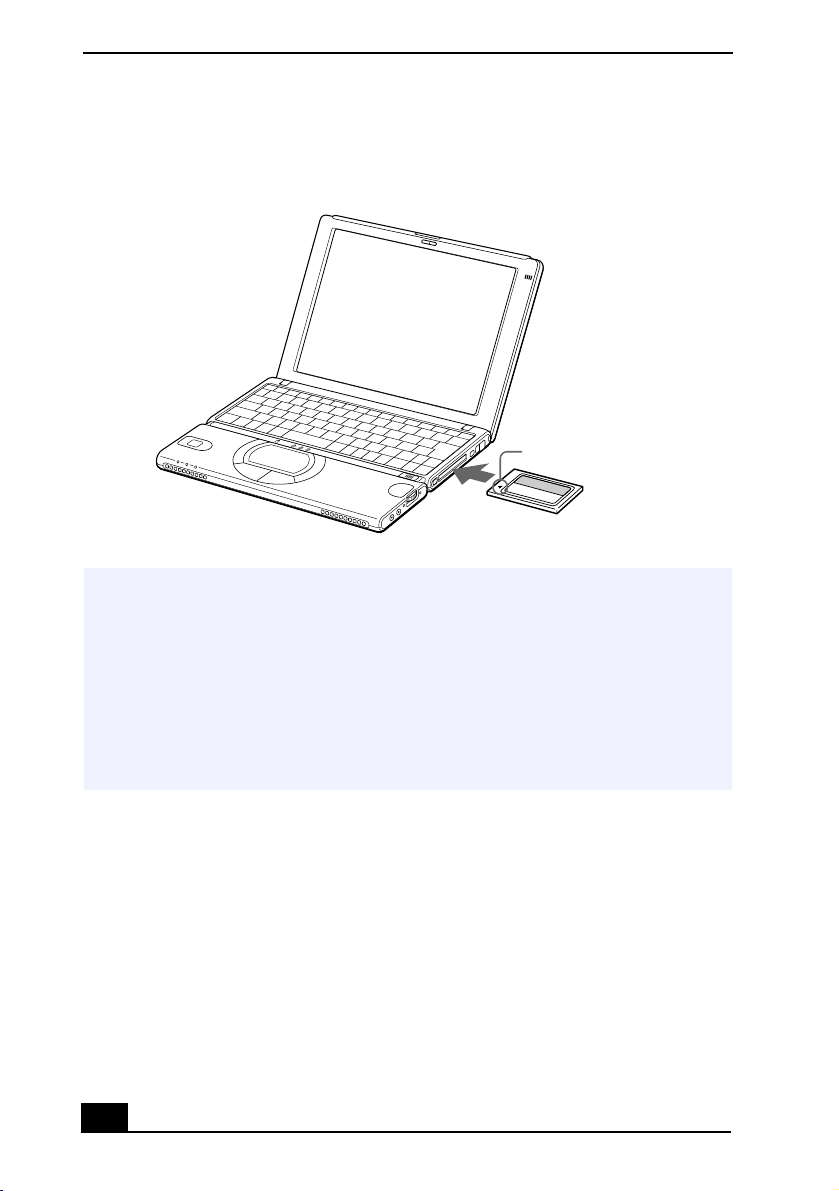
3 Insert the PC card into the PC card slot with the SONY logo facing up. See
“Using PC Cards” for details.
15
VAIO® Notebook User Guide
Inserting the PC Card
✍ A protective cover is attached to the lens of the CD-ROM drive at the factory. Before
using the CD-ROM drive, remove this protective cover.
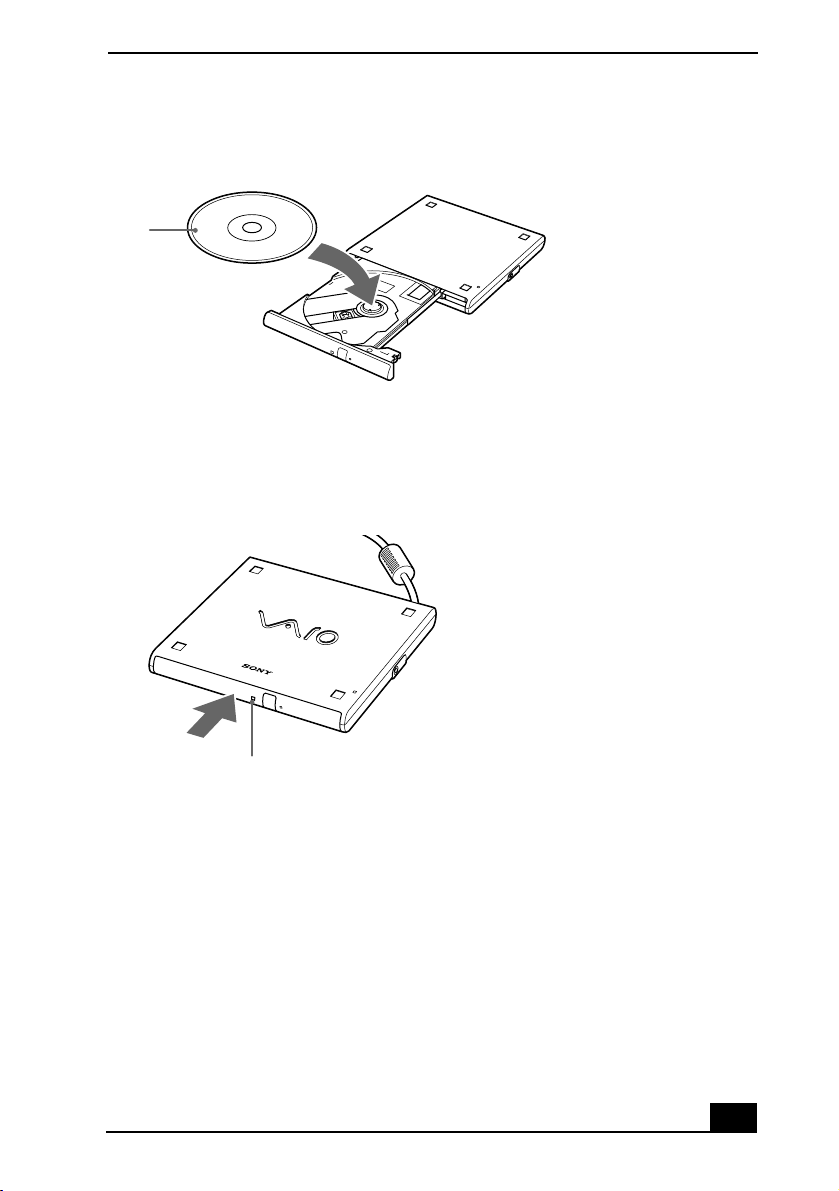
To Insert a Disc
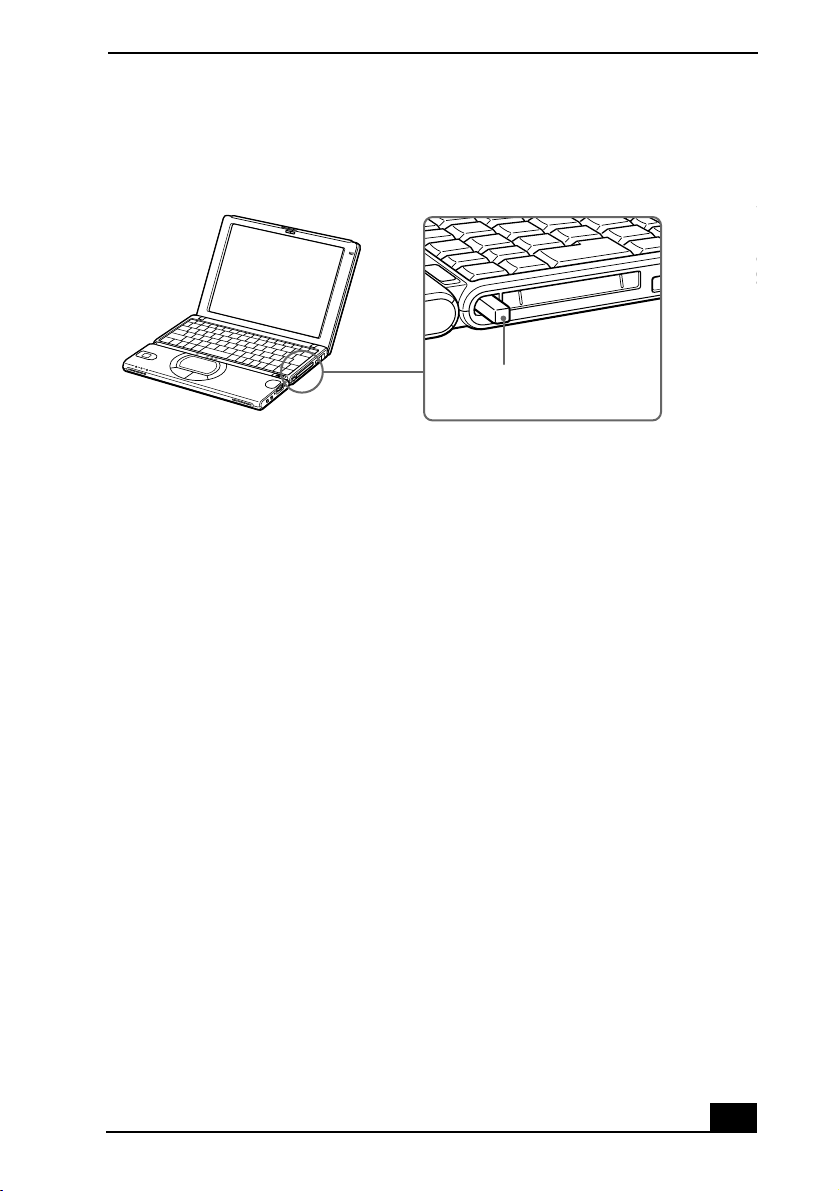
1 Press the Eject button. The disc tray slides out.
Using the CD-ROM Drive
Eject Button
2 Place the disc in the tray with the label side facing up. Push the disc onto the
hub until the disc clicks into place.
16
Using the Optical Drive
Inserting a Disc
Disc
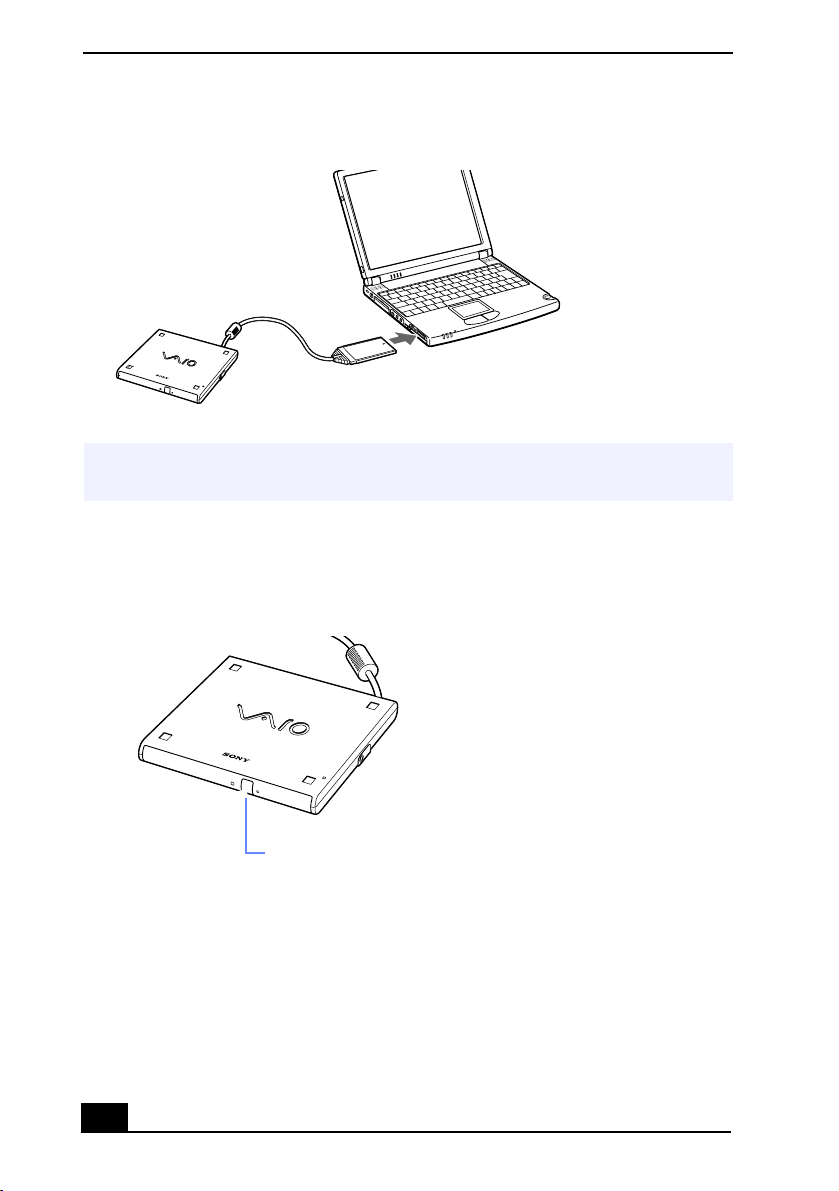
3 Close the tray by pushing it gently. The BUSY indicator on the drive flashes
while your notebook is reading data from the disc.
The Flashing BUSY Indicator
Busy Indicator
To Remove the Drive
Remove the PC card from the notebook. See “Using PC Cards” for details.
Notes on CD Media
❑ Do not touch the surface of the disc.
❑ Do not drop or bend the disc.
❑ Do not use adhesive labels to identify the disc. The label may come off while
the disc is in use in the optical drive and cause the drive to malfunction.
17

VAIO® Notebook User Guide
❑ Fingerprints and dust on the surface of a disc may cause read errors. Proper
care of the disc is essential to maintain its reliability. Do not use solvents
such as benzine, thinner, commercially available cleaners or anti-static spray,
as they may cause damage to the disc.
❑ For normal cleaning, hold the disc by its edge and use a soft cloth to wipe the
surface from the center out.
❑ If the disc is badly soiled, moisten a soft cloth with water, wring it out well,
and use it to wipe the surface of the disc from the center out. Wipe off any
remaining moisture with a dry soft cloth.
Using PC Cards
Your notebook includes a PC card slot. PC cards allow you to connect portable
external devices, such as a CD-ROM drive.
✍ The PC card slot can accommodate one Type I or Type II PC card. This slot is
compatible with 16 bit card and Card Bus. ZV (Zoomed Video) port is not available.
Some PC cards require that you disable idle devices when using the PC card. You can
use Sony Notebook Setup to disable devices. See “Displaying the Sony Notebook
Setup Screen” for details.
Be sure to use the most recent software driver provided by the PC card manufacturer.
If an “!” mark appears on the Device Manager tab in the System Properties dialog box,
remove the software driver then reinstall it.
To Insert a PC Card
✍ You do not need to shut down the notebook before inserting or removing a PC card.
18
Using PC Cards
1 Insert the PC card in the PC card slot with front label facing up.
Eject Button
Eject Button
19
VAIO® Notebook User Guide
2 Gently push the card into the slot until the card is fixed into the connector.
Inserting a PC Card
Insert with the arrow
facing forward.
PC Card
✍ Do not force a PC card into the slot, as this may damage the connector pins.
If you have difficulty inserting a card, check that you are inserting the card with the
correct orientation.
Do not carry your notebook while the head of the PC card (such as a wireless LAN
card) is out of the slot. Pressure or shock may damage the connector pins.
If you alternate between normal power operation and the Standby or Hibernate power
management modes while the card is inserted, a device connected to your system
may not be recognized. In such case, reboot your system.
See the manual that came with your PC card for more information on its use.
20
Using PC Cards
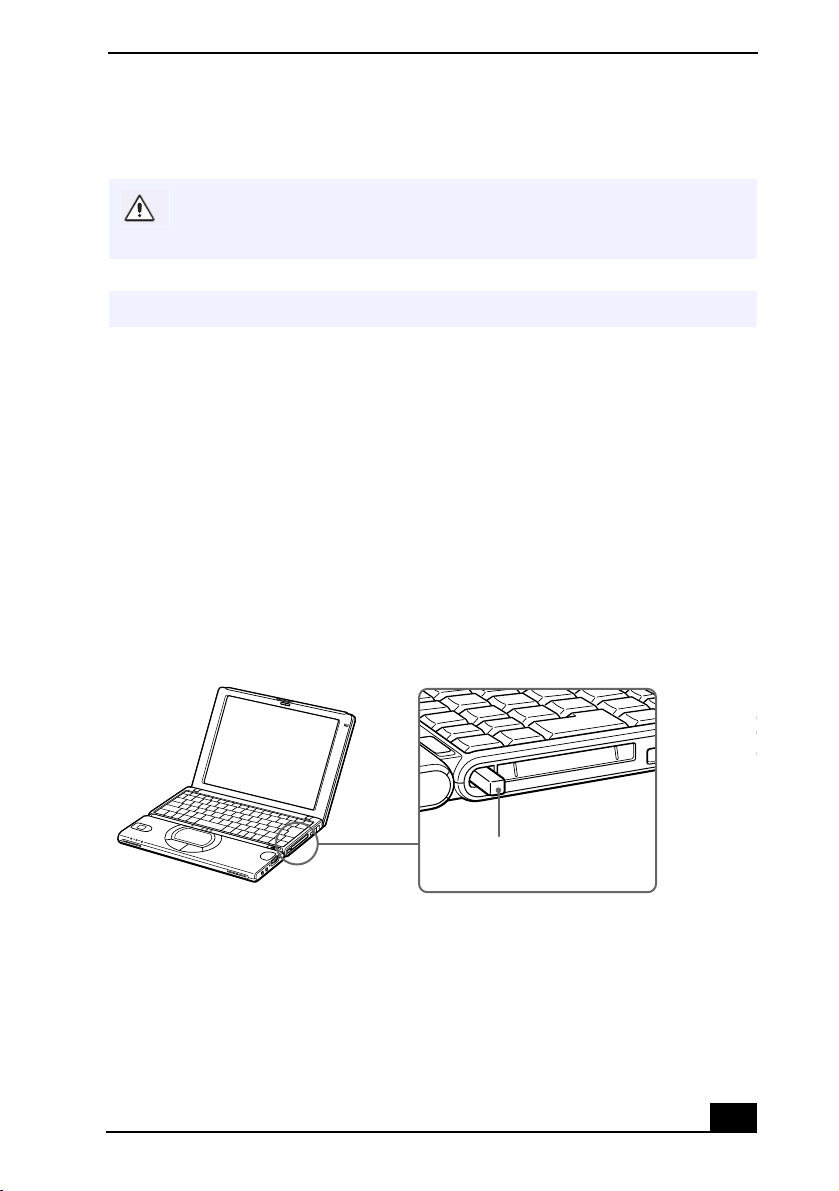
To Remove a PC Card When the Notebook is on.
If you do not perform the following procedure for removing the PC card from
the your notebook while the notebook is turned on, your notebook system
may crash and data not previously save may be lost.
✍ If your notebook is turned off, do not perform this procedure.
1 Close any application that uses the PC card, otherwise data may be lost.
2 Double-click the "Unplug or Eject Hardware" icon in the taskbar to access
the "Unplug or Eject Hardware" dialog box, and select the PC card.
3 Click Stop to access the "Stop a Hardware device" dialog box, and confirm
that the PC card is selected, then click OK.
4 The message “PC Card can now be safely removed from the system”
appears. Click OK.
5 Close the "Unplug or Eject Hardware" window.
6 Pull the PC card release button up and press it in towards the notebook.
Removing a PC Card
Eject Button
7 Gently grasp the card and pull it out.
8 Insert the PC card slot protector into the empty slot.
21
VAIO® Notebook User Guide
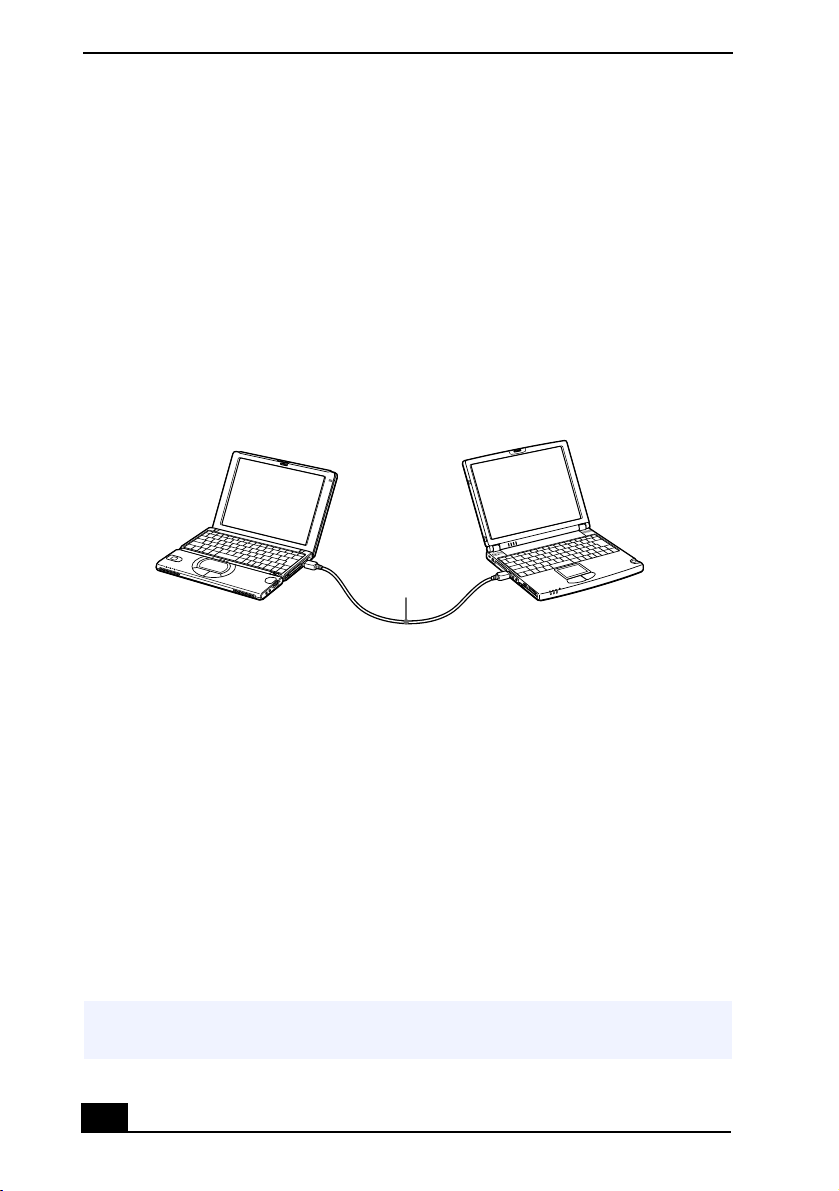
Using i.LINK® Network Connection
Windows Me™
You can connect your VAIO® notebook to another VAIO Notebook that has the
Windows Me operating system or the Sony Smart Connect 3.0 software
preinstalled. You may use an i.LINK
systems then use one notebook to edit, copy, or delete files on the other notebook.
You can also print from a printer that is attached to either notebook. Select the
STD mode in Smart Connect 3.0 software to connect with another notebook that
has Windows Me preinstalled.
Connecting with an i.LINK Cable
®
cable (optional) to connect the two
i.LINK Cable
Windows 2000
The preinstalled Smart Connect software allows you to use an i.LINK® cable
(optional) to connect your VAIO notebook to another VAIO notebook that also
has Smart Connect or Windows Me preinstalled. You can then use one notebook
to edit, copy or delete files on the other notebook. You can also print from a
printer attached to either notebook.
See Smart Connect online help for more information.
* i.LINK is a trademark of Sony used only to designate that a product contains an IEEE 1394
connection. The i.LINK connection may vary, depending on the software applications, operating system, and i.LINK-compatible devices. All products with an i.LINK connection may
not communicate with each other. Refer to the documentation that came with your i.LINKcompatible device for information on operating conditions and proper connection. Before
connecting i.LINK-compati-ble PC peripherals to your system, such as a CD-RW or hard
disk drive, confirm their operating system compatibility and required operating conditions.
✍ When you connect two VAIO notebooks, you must assign each notebook a unique
name by which it will be identified when the two notebooks are networked together.
22
The Jog Dial™ Control
✍ If you have previously purchased a VAIO computer or notebook that does not have the
Windows Me operating system or Smart Connect 3.0 software preinstalled, consult
the Sony website for support options (http://www.sony.com/pcsupport).
The Jog Dial™ Control
This section explains how to use the Jog Dial control. For information on how to
change the Jog Dial control settings, right-click the Jog Dial control icon in the
task tray and click Help Topics.
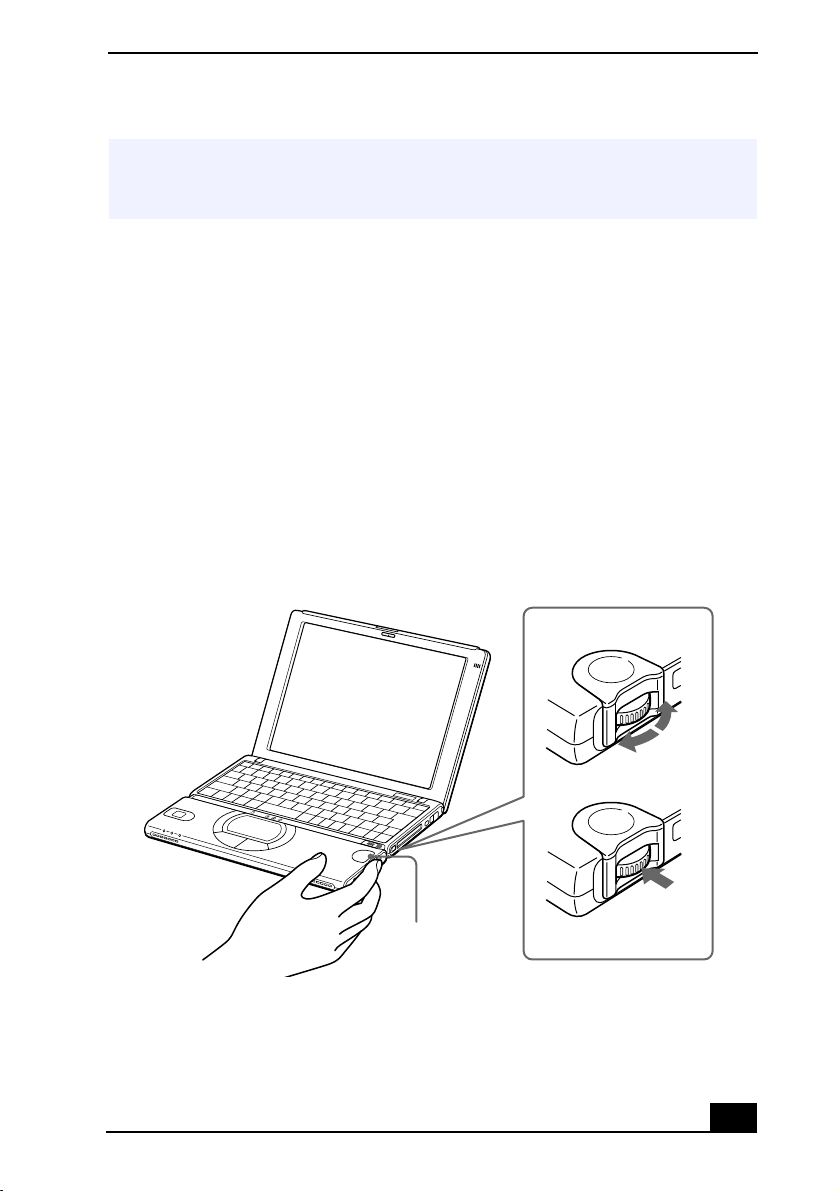
Using the Jog Dial™ Control
Your notebook is equipped with a Jog Dial control on the right side of the unit.
The Jog Dial control enables you to open an application, folder, or document
from a predefined list by rotating and pressing the Jog Dial control. In addition,
when you press the Jog Dial control, you can turn on your notebook
automatically and start the selected application or document.
Jog Dial Control
Tu rn
Press
Jog Dial Control
The Jog Dial control window always appears in the display. It is either in the
launcher mode or in the guide mode.
23
VAIO® Notebook User Guide
Launcher Mode
The Jog Dial control window is in launcher mode until a software application is
launched or the Jog Dial control window becomes active. When an arrow is
displayed next to an item in the Jog Dial control window, you can display a
submenu of that item by selecting it and pressing the Jog Dial control button.
Using Launcher Mode
To use the Jog Dial control, click the Jog Dial control window or the Jog Dial
control icon in the task tray. Alternatively, you can press the Jog Dial control on
the keyboard to switch to the launcher mode.
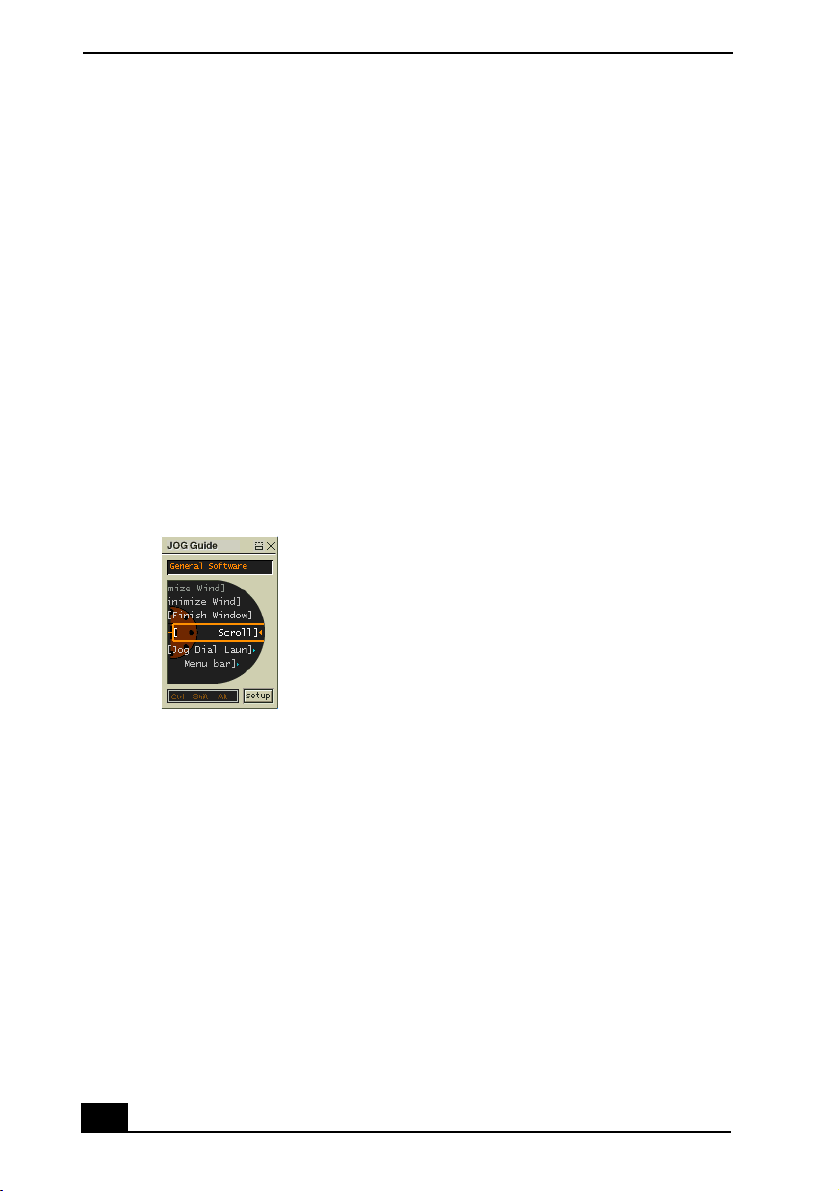
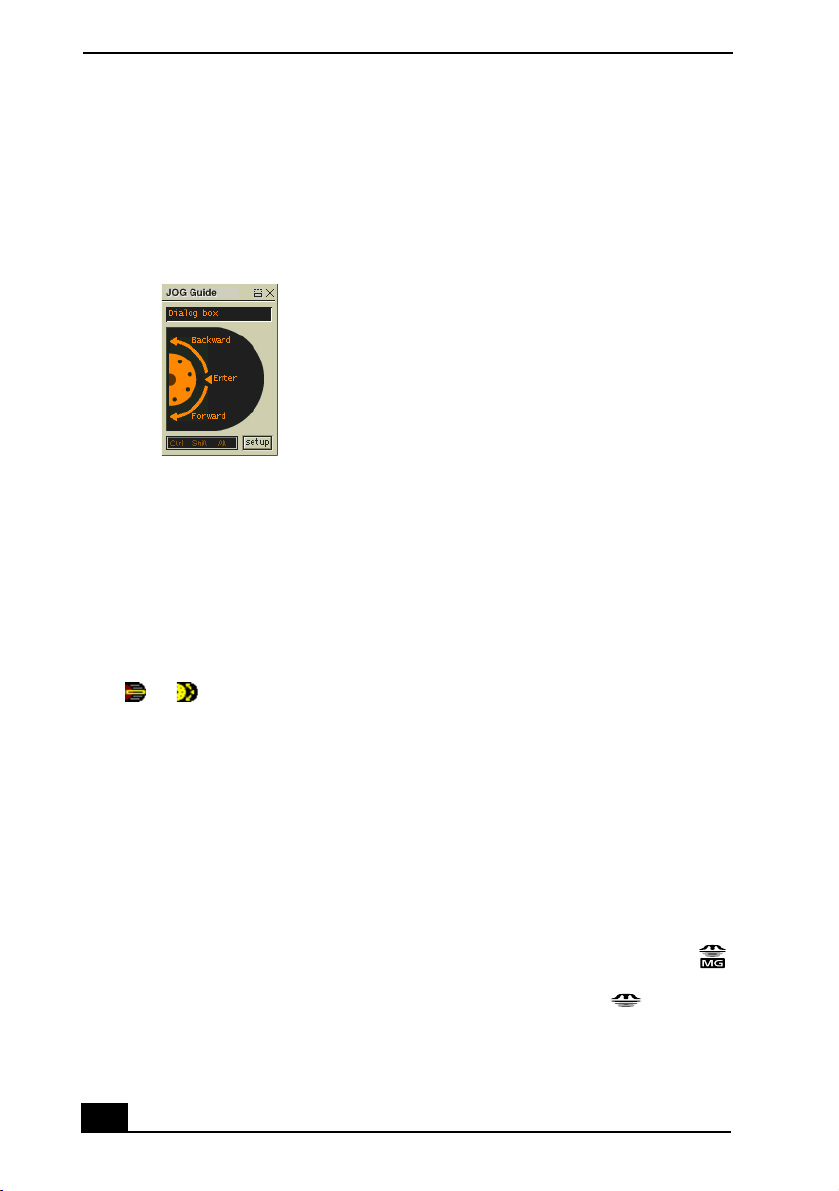
1 Turn the Jog Dial control to select the item you want, then press the Jog Dial
control. The window switches to the guide mode, and shows the Jog Dial’s
function.
Jog Guide Dialog Box
2 Turn or press the Jog Dial control to use the desired function.
3 To select another item, switch to the launcher mode and repeat from step 1.
Guide Mode
The Jog Dial control window is in the guide mode when software is in use and
the software window is active. Depending on the software you are using, you can
select items from the displayed list using the Jog Dial control. Some Sony software
applications have two modes in List View, Simple Menu and Full Menu. You can
switch the mode by pressing the shift key while turning the Jog Dial control.
Using Guide Mode
The Jog Dial control window displays the Jog Dial’s function.
24
The Jog Dial™ Control
Using the Jog Dial Control with Sony Software
If Sony software that supports the Jog Dial control is active, you can use the Jog
Dial’s functions that are allocated to that software. For more information on
functions allocated to software, see the software applications online Help.
Using the Jog Dial Control with Other Software
If the software you are using does not support the Jog Dial control, you can still
perform the following functions:
Action Description
Maximize or Minimize
*
Window
Finish Window
Scroll Press the Jog Dial
Jog Dial Launcher Press the Jog Dial
Menu Bar Press the Jog Dial
Some software does not support these functions.
*
*
Press the Jog Dial control button to maximize the size
of the active window. Press again to minimize or
return to normal window size.
Press the Jog Dial control button to close the active
application.
control button to begin scrolling
within the active window.
control button to return the Jog
control to Jog Launcher mode.
Dial
control button, then use the Jog
control to scroll through the active window’s
Dial
toolbar.
25
VAIO® Notebook User Guide
Using a Dialog Box
When a window such as Screen Properties is active, the Dialog box is displayed
in the Jog Dial window. You can select an item in the window by rotating the Jog
Dial control. Pressing the Jog Dial control is the equivalent of pressing Enter.
Jog Guide Dialog Box
VAIO Action Setup
VAIO Action Setup manages the settings for your notebook's Jog Dial™ control,
Memory Stick
functions controlled by VAIO Action Setup is provided. For more information on
changing the settings using VAIO Action Setup, right-click the Jog Dial control
icon or , in the task tray and click Help Topics.
®
media, and i.LINK® interface. An overview of some of the
Using Memory Stick® Media
This new compact, portable, and versatile recording medium has a data capacity
exceeding that of a floppy disk. The media is specially designed for exchanging
and sharing digital data with compatible products. Because it is removable, the
media can be used for external data storage.
Types of Memory Stick Media
Two types of Memory Stick media are available. The first type, MagicGate™
(hereafter referred as MG Memory Stick media), is provided with copyright
protection. The second type, simply referred to as Memory Stick media,
does not have the same copyright protection as MagicGate media.
26
Using Memory Stick® Media
You can use both media with your notebook.
For music, which requires copyright protection, you can only use MG Memory
Stick media with your notebook. You can also use MagicGate-compatible
devices to record and playback music when they are connected to your notebook.
You can store mixed data on the Memory Stick media. For example, you can
copy an image on to MG Memory Stick media that already contains music.
What is MagicGate?
MagicGate is copyright protection that consists of authentication and encryption
technology. Authentication technology ensures that protected content is only
transferred between compliant devices and media. Protected content is recorded
and transferred in an encrypted format to prevent unauthorized duplication or
playback.
✍ Ensure that the MG Memory Stick media has the MG mark .
Handling and Storing Memory Stick Media
Follow these guidelines when handling and storing Memory Stick media.
❑ Do not touch the contacts on a Memory Stick media with your fingers or any
metal object.
❑ Use only the labels provided with a Memory Stick media. Do not attach
other labels to it.
❑ Handle the media carefully. Avoid dropping, bending, or subjecting it to
shock or vibration.
❑ Do not attempt to disassemble the Memory Stick media.
❑ Do not allow the media to get wet.
❑ Avoid using or storing the Memory Stick media in any of the following:
❑ Locations subject to high temperatures or direct sunlight (i.e. the interior
of a vehicle parked in bright sunlight).
❑ Locations exposed to high humidity or corrosive substances.
❑ Locations that are subject to static electricity or electrical noise
generated by large appliances or office equipment.
❑ When transporting or storing a Memory Stick media, always use its storage
case.
27
VAIO® Notebook User Guide
❑ Always backup important data that is stored on a Memory Stick media.
❑ Do not remove the media when the indicator light is on.
❑ Only MG™ Memory Stick media can be used with copyright protected data
like music.
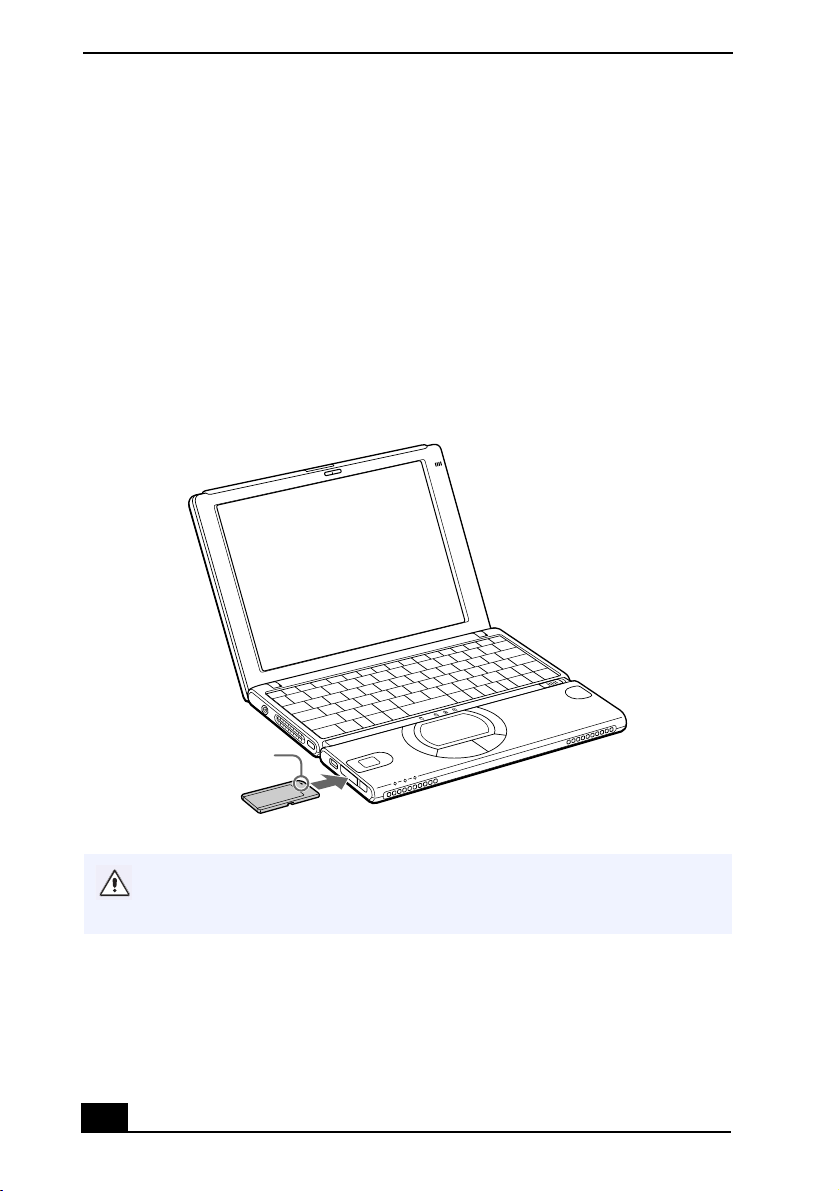
Inserting a Memory Stick Media
Insert the Memory Stick media into the media slot on the left side of the
notebook until it clicks into place. When the Memory Stick media is properly in
place, Sony VisualFlow™ will automatically launch to display the contents of the
Memory Stick.
Inserting a Memory Stick Media
Memory Stick
Media
Hold the Memory Stick media with the arrow pointing toward the slot. To avoid
damaging the notebook or the Memory Stick media, do not force the media
into the slot.
To confirm that the Memory Stick media is inserted correctly, check the
Removable Disk (S:) drive.
28

Using Memory Stick® Media
To check the drive:
1 Double-click the My Computer icon on the desktop.
2 Check that the Removable Disk (S:) icon is displayed in the My Computer
window.
3 Double-click the Removable Disk (S:) icon to display the contents of the
Memory Stick media.
✍ If you cannot find the Removable Disk (S:) icon, take the following steps.
Double-click the System icon in Control Panel. Device Manager appears. If you cannot
find the icon that you are looking for, click “Display all the options of the Control
Panel.”
Click the Refresh button.
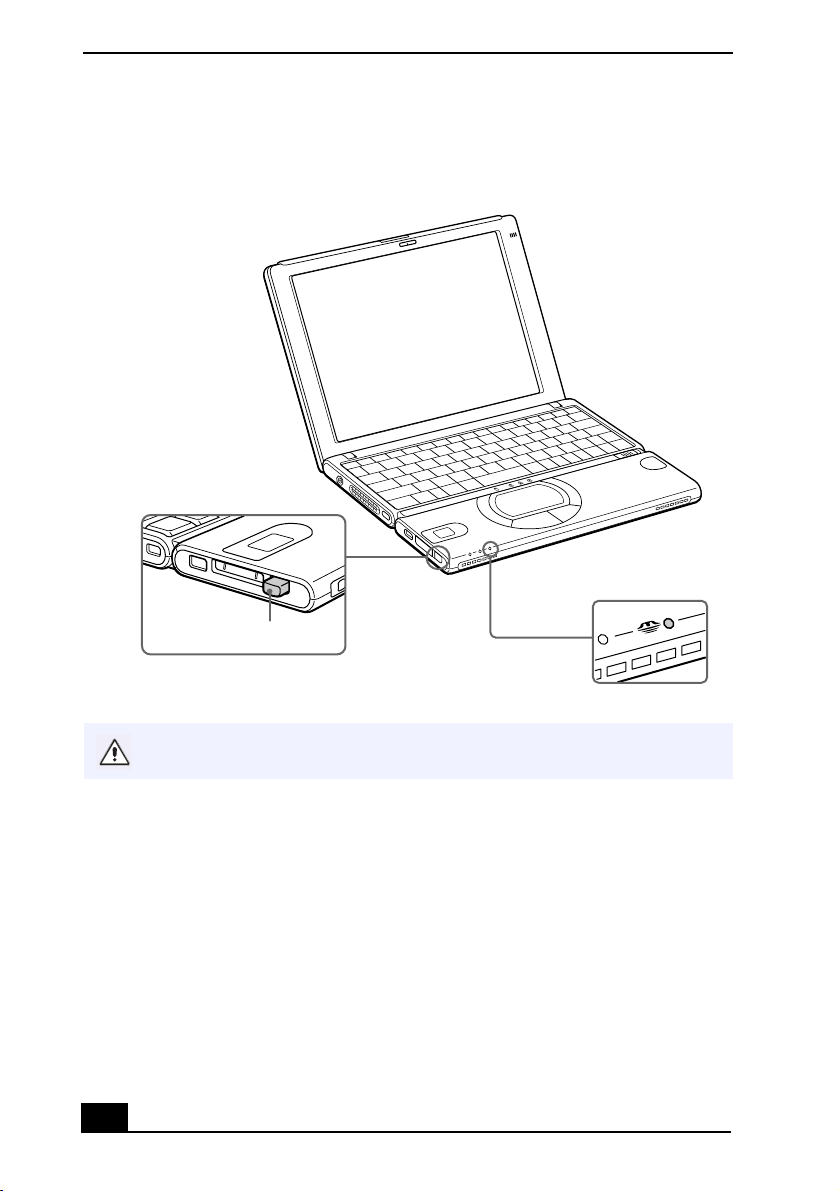
Removing a Memory Stick Media
1 Ensure that the Memory Stick media indicator light is off.
2 Push in the Memory Stick media eject button.
29
VAIO® Notebook User Guide
3 When the button ejects, push it again and remove the Memory Stick media.
Removing a Memory Stick Media
Eject Button
Large image files require more time to load to a Memory Stick media.
Using Memory Stick Media with Data from Another Device
Memory Stick media can be used with compatible devices like a Sony digital
video camera recorder or digital still camera. Insert the media into the Memory
Stick media slot and save your movie or still image as data files to the Memory
Stick media. Use Sony’s PictureGear™ software (preinstalled with your
notebook) to move the files to a Memory Stick media.
30
 Loading...