

Page 1

NEX-3/NEX-5/NEX-5C
The new functions provided by this firmware update and their respective
operations are described here.
Please refer to the “Instruction Manual,” and the “α Handbook” contained on
the supplied CD-ROM.
© 2011 Sony Corporation
A-E1T-100-11(1)
Page 2
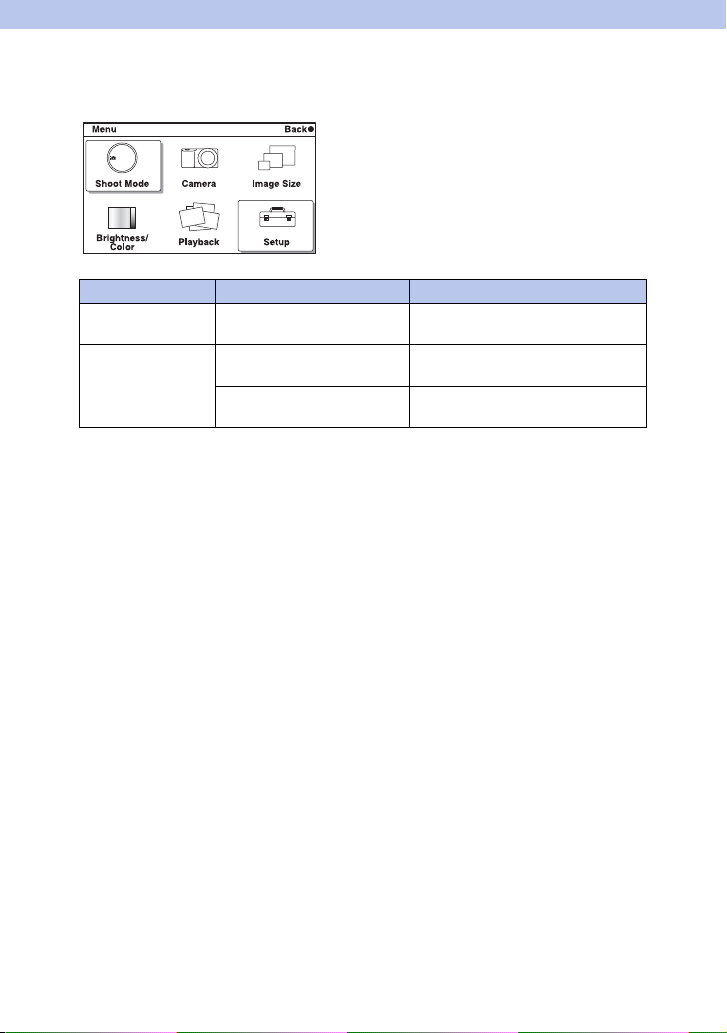
Functions provided
New functions are provided to the menu by this firmware update.
Menu New items provided Functions
Shoot Mode Picture Effect Selects a filter to obtain the various
Setup Peaking Level Enhances the outline of in-focus
Peaking Color Sets the color used for the peaking
textures.
ranges with a specific color.
function.
GB
2
Page 3

Picture Effect
You can shoot with an effect filter to obtain the various textures.
1 [Menu] t [Shoot Mode] t [Picture Effect] t desired mode.
Toy Camera Creates the look of a Toy Camera photo with
shaded corners and pronounced colors.
Posterization
(Color)
Posterization
(B/W)
Pop Color Creates a vivid look by emphasizing color
Retro Photo Creates the look of an aged photo with sepia
Partial Color
(Red)
Partial Color
(Green)
Creates a high contrast, abstract look by
heavily emphasizing primary colors.
Creates a high contrast, abstract look in black
and white.
tones.
color tones and faded contrast.
Creates an image which retains the color red,
but converts others to black and white.
Creates an image which retains the color
green, but converts others to black and white.
Continued r
GB
3
Page 4

Partial Color
(Blue)
Creates an image which retains the color blue,
but converts others to black and white.
Partial Color
(Yellow)
Creates an image which retains the color
yellow, but converts others to black and
white.
High-key Creates an image with the indicated
atmosphere: bright, transparent, ethereal,
tender, soft.
High Contrast
Monochrome
Creates an image with high contrast in black
and white.
Notes
• If you select [Picture Effect], with [RAW] or [RAW & JPEG] selected, [Quality] is temporarily set to
[Fine].
• When [Partial Color (Red)], [Partial Color (Green)], [Partial Color (Blue)], or [Partial Color (Yellow)] is
selected, images may not retain the selected color, depending on the shooting condition or subject.
GB
4
Page 5

Peaking Level
Enhances the outline of in-focus ranges with a specific color in manual focus. This
function allows you to confirm the focus easily.
1 [Menu] t [Setup] t [Peaking Level] t desired setting.
High Sets the peaking level to high.
Mid Sets the peaking level to middle.
Low Sets the peaking level to low.
Off Does not use the peaking function.
Notes
• Since the camera judges that sharp areas are in focus, the peaking level is different, depending on the
subject, shooting situation, or on the lens used.
• The outline of in-focus ranges is not enhanced when the camera is connected using an HDMI cable.
GB
5
Page 6

Peaking Color
Sets the color used for the peaking function in manual focus.
1 [Menu] t [Setup] t [Peaking Color] t desired setting.
White Enhances outlines in white.
Red Enhances outlines in red.
Yellow Enhances outlines in yellow.
Note
• This item cannot be set when [Peaking Level] is set to [Off].
GB
6
 Loading...