

Page 1
Help Guide
Wireless Noise Canceling Stereo Headset
MDR-XB950N1
Use this manual if you encounter any problems, or have any questions.
Getting started
What you can do with the BLUETOOTH function
About voice guidance
Supplied accessories
Checking the package contents
About the supplied manuals
Parts and controls
Location and function of parts
About the indicator
Charging the headset
Page 2
System requirements for battery charge using USB
Charging the headset
Available operating time
Checking the remaining battery charge
Making connections
How to make a wireless connection to BLUETOOTH devices
One- touch connection (NFC) compatible Android devices
One-touch connection (NFC) with a smartphone (Android 4.1 or later)
Disconnecting the smartphone by one touch (NFC)
Switching the device by one touch (NFC)
Android devices not compatible with one - touch connection (NFC)
Pairing and connecting with an Android smartphone
Connecting to a paired Android smartphone
iPhone (iOS devices)
Pairing and connecting with an iPhone
Connecting to a paired iPhone
Computers
Pairing and connecting with a computer (Windows 10)
Pairing and connecting with a computer (Windows 8/Windows 8.1)
Pairing and connecting with a computer (Windows 7)
Connecting to a paired computer (Windows 10)
Connecting to a paired computer (Windows 8/Windows 8.1)
Connecting to a paired computer (Windows 7)
Other BLUETOOTH devices
Pairing and connecting with other BLUETOOTH devices
Connecting to a paired BLUETOOTH device
Multi point connection
Connecting the headset to both a music player and a smartphone or mobile phone
Page 3
Connecting the headset to 2 Android smartphones
Connecting the headset to an Android smartphone and an iPhone
Using the supplied headphone cable
Listening to music
Listening to music via a BLUETOOTH connection
Listening to music from a device connected via BLUETOOTH
Controlling the audio device (BLUETOOTH connection)
Disconnecting BLUETOOTH connection (after use)
Noise canceling function
What is noise canceling?
Using the noise canceling function
About the Automatic AI noise canceling function
Bass effect function
About the bass effect function
Using the bass effect function
Sound quality mode
Switching the sound quality mode
Checking the sound quality mode
Supported codecs
Making phone calls
Receiving a call
Making a call
Functions for a phone call
Disconnecting BLUETOOTH connection (after use)
Using the voice assist function
Using the voice assist function (Siri)
Using the voice assist function (Google App)
Using the apps
Page 4
What you can do with "Sony | Headphones Connect" app
Installing "Sony | Headphones Connect" app
Important information
Precautions
Trademarks
Customer support websites
Troubleshooting
What can I do to solve a problem?
Power/Charging
The headset is not turned on.
Charging cannot be done.
Charging time is too long.
The headset cannot be recognized by a computer.
The remaining battery charge of the headset is not displayed on the screen of an iPhone, iPad, or iPod touch.
Sound
No sound
Low sound level
Low sound quality
Sound skips frequently during playback.
The noise canceling effect is not sufficient.
BLUETOOTH
Pairing cannot be done.
Unable to connect the headset to a BLUETOOTH device with one-touch connection (NFC)
Unable to make a BLUETOOTH connection
Distorted sound
The BLUETOOTH wireless communication range is short, or the sound skips.
The headset does not operate properly.
No voice from callers
Low voice from callers
Page 5

Resetting or initializing the headset
Resetting the headset
Initializing the headset to restore factory settings
4-692-591-11(1) Copyright 2017 Sony Corporation
Page 6

Table Of Contents
TOC-1
MDR-XB950N1 Help Guide i.............................................................................................................
Getting started i.................................................................................................................................
What you can do with the BLUETOOTH function 1...........................................................................
About voice guidance 2.....................................................................................................................
Supplied accessories i.......................................................................................................................
Checking the package contents 3...............................................................................................
About the supplied manuals 4.....................................................................................................
Parts and controls i............................................................................................................................
Location and function of parts 5..................................................................................................
About the indicator 7....................................................................................................................
Charging the headset i......................................................................................................................
System requirements for battery charge using USB 9................................................................
Charging the headset 10.............................................................................................................
Available operating time 12.........................................................................................................
Checking the remaining battery charge 13..................................................................................
Making connections ii........................................................................................................................
How to make a wireless connection to BLUETOOTH devices 15.....................................................
One-touch connection (NFC) compatible Android devices ii.............................................................
One-touch connection (NFC) with a smartphone (Android 4.1 or later) 16.................................
Disconnecting the smartphone by one touch (NFC) 18...............................................................
Switching the device by one touch (NFC) 19..............................................................................
Android devices not compatible with one-touch connection (NFC) ii................................................
Pairing and connecting with an Android smartphone 20.............................................................
Connecting to a paired Android smartphone 23..........................................................................
iPhone (iOS devices) ii......................................................................................................................
Pairing and connecting with an iPhone 26..................................................................................
Connecting to a paired iPhone 29...............................................................................................
Computers ii......................................................................................................................................
Pairing and connecting with a computer (Windows 10) 32..........................................................
Pairing and connecting with a computer (Windows 8/Windows 8.1) 36......................................
Pairing and connecting with a computer (Windows 7) 39............................................................
Connecting to a paired computer (Windows 10) 42....................................................................
Connecting to a paired computer (Windows 8/Windows 8.1) 45.................................................
Connecting to a paired computer (Windows 7) 49......................................................................
Other BLUETOOTH devices ii...........................................................................................................
Pairing and connecting with other BLUETOOTH devices 51......................................................
Connecting to a paired BLUETOOTH device 53.........................................................................
Multi point connection ii.....................................................................................................................
Page 7

Connecting the headset to both a music player and a smartphone or mobile
TOC-2
phone 55......................................................................................................................................
Connecting the headset to 2 Android smartphones 56...............................................................
Connecting the headset to an Android smartphone and an iPhone 58.......................................
Using the supplied headphone cable 60...........................................................................................
Listening to music iii..........................................................................................................................
Listening to music via a BLUETOOTH connection iii........................................................................
Listening to music from a device connected via BLUETOOTH 61..............................................
Controlling the audio device (BLUETOOTH connection) 63.......................................................
Disconnecting BLUETOOTH connection (after use) 64..............................................................
Noise canceling function iii................................................................................................................
What is noise canceling? 65........................................................................................................
Using the noise canceling function 66.........................................................................................
About the Automatic AI noise canceling function 68...................................................................
Bass effect function iii........................................................................................................................
About the bass effect function 69................................................................................................
Using the bass effect function 70................................................................................................
Sound quality mode iii.......................................................................................................................
Switching the sound quality mode 71..........................................................................................
Checking the sound quality mode 73..........................................................................................
Supported codecs 74.........................................................................................................................
Making phone calls iii........................................................................................................................
Receiving a call 75............................................................................................................................
Making a call 77.................................................................................................................................
Functions for a phone call 79............................................................................................................
Disconnecting BLUETOOTH connection (after use) 64....................................................................
Using the voice assist function iii.......................................................................................................
Using the voice assist function (Siri) 81.............................................................................................
Using the voice assist function (Google App) 82...............................................................................
Using the apps iii...............................................................................................................................
What you can do with "Sony | Headphones Connect" app 83...........................................................
Installing "Sony | Headphones Connect" app 84...............................................................................
Important information iv.....................................................................................................................
Precautions 85...................................................................................................................................
Trademarks 86..................................................................................................................................
Customer support websites 87..........................................................................................................
Troubleshooting iv.............................................................................................................................
What can I do to solve a problem? 88...............................................................................................
Power/Charging iv.............................................................................................................................
The headset is not turned on. 89.................................................................................................
Page 8

Charging cannot be done. 90......................................................................................................
TOC-3
Charging time is too long. 91.......................................................................................................
The headset cannot be recognized by a computer. 92...............................................................
The remaining battery charge of the headset is not displayed on the screen
of an iPhone, iPad, or iPod touch. 93..........................................................................................
Sound iv.............................................................................................................................................
No sound 94................................................................................................................................
Low sound level 95......................................................................................................................
Low sound quality 96...................................................................................................................
Sound skips frequently during playback. 97................................................................................
The noise canceling effect is not sufficient. 98............................................................................
BLUETOOTH iv.................................................................................................................................
Pairing cannot be done. 99..........................................................................................................
Unable to connect the headset to a BLUETOOTH device with one-touch
connection (NFC) 100.................................................................................................................
Unable to make a BLUETOOTH connection 101........................................................................
Distorted sound 102....................................................................................................................
The BLUETOOTH wireless communication range is short, or the sound skips. 103..................
The headset does not operate properly. 104...............................................................................
No voice from callers 105............................................................................................................
Low voice from callers 106..........................................................................................................
Resetting or initializing the headset v................................................................................................
Resetting the headset 107...........................................................................................................
Initializing the headset to restore factory settings 108.................................................................
Page 9
Help Guide
1
Wireless Noise Canceling Stereo Headset
MDR-XB950N1
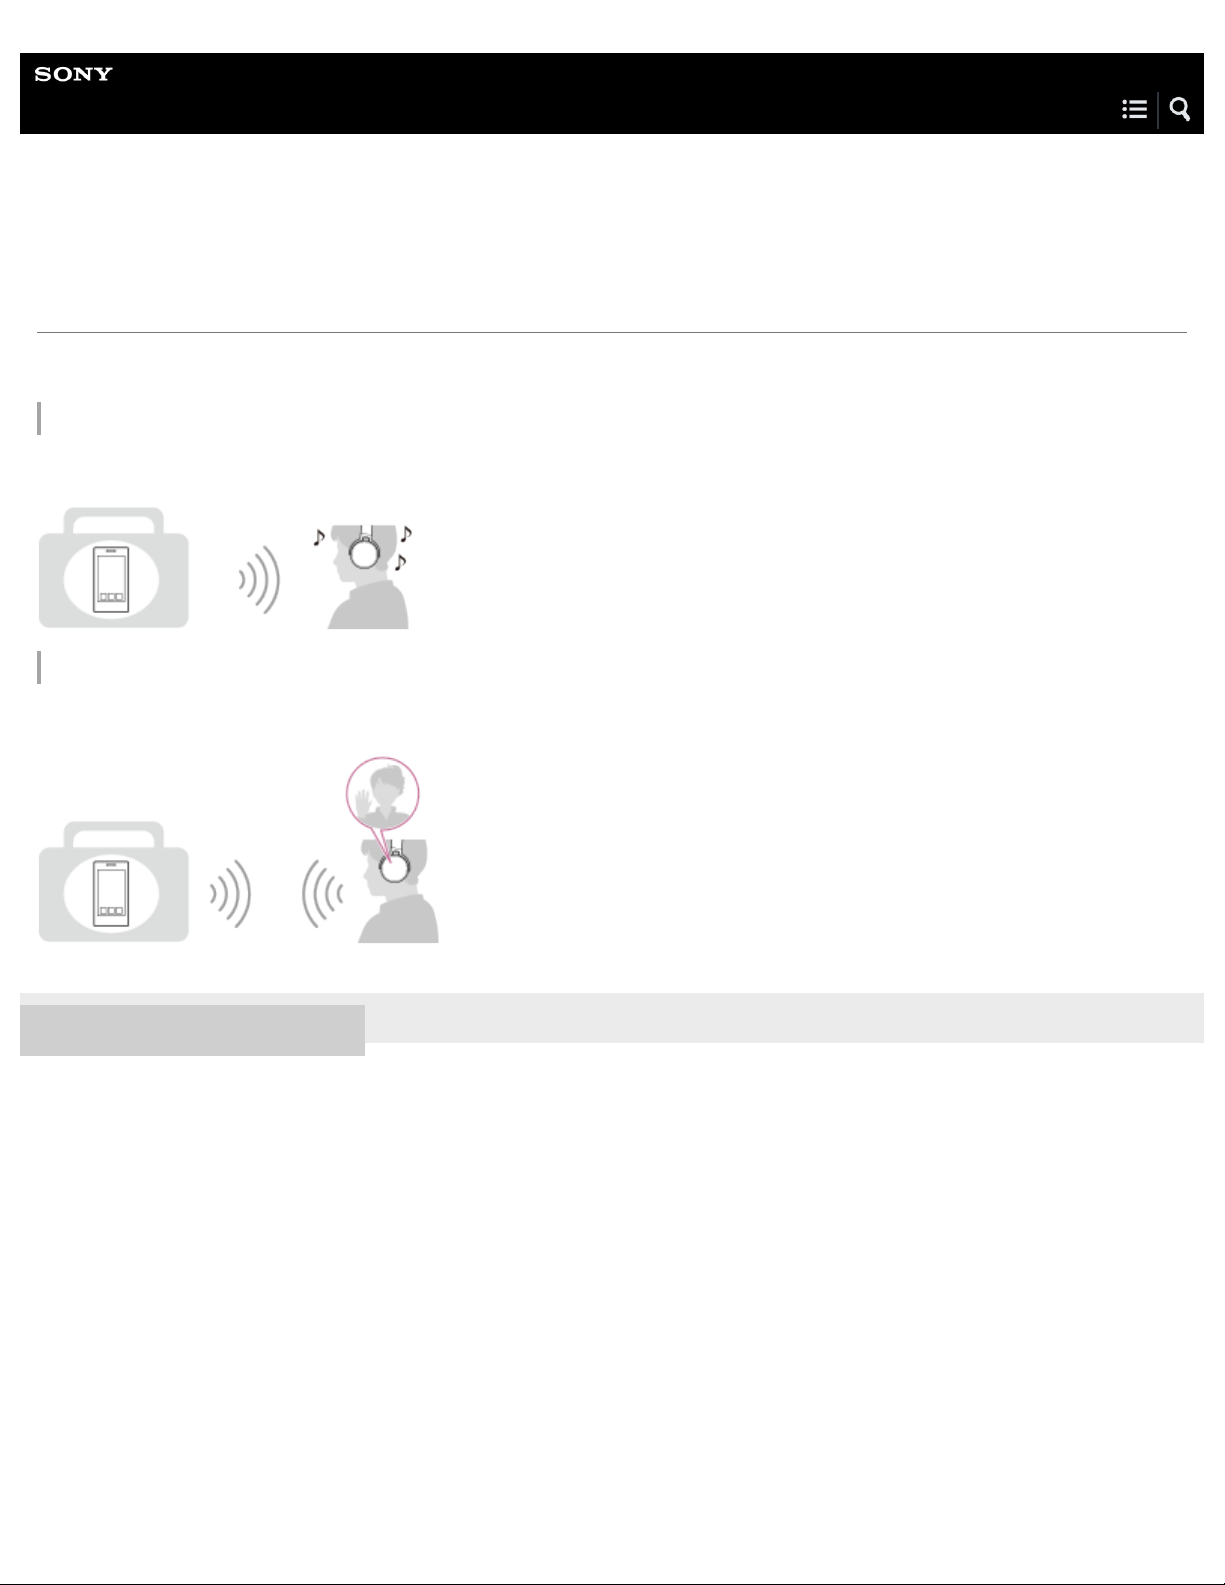
What you can do with the BLUETOOTH function
The headset uses BLUETOOTH wireless technology, allowing you to listen to music or make phone calls wirelessly.
Listening to music
You can receive audio signals from a smartphone, mobile phone, or music player to enjoy music wirelessly.
Talking on the phone
You can make and receive a call with your hands free, while leaving your smartphone or mobile phone in your bag or pocket.
4-692-591-11(1) Copyright 2017 Sony Corporation
Page 10
Help Guide
2
Wireless Noise Canceling Stereo Headset
MDR-XB950N1
About voice guidance
You hear voice guidance on the following situations via the headset.
When powering on: “Power on”
When powering off: “Power off”
When entering pairing mode: “BLUETOOTH pairing”
When establishing a BLUETOOTH connection: “BLUETOOTH connected”
When disconnecting a BLUETOOTH connection: “BLUETOOTH disconnected”
When checking the remaining battery charge by pressing the
medium” / “Battery level low”
When automatically turning off due to the low battery condition: “Please recharge headset”
When turning on the noise canceling function: “Noise canceling on”
When turning off the noise canceling function: “Noise canceling off”
When turning on the bass effect function: “Bass effect on”
When turning off the bass effect function: “Bass effect off”
button when turned on: “Battery level high” / “Battery level
4-692-591-11(1) Copyright 2017 Sony Corporation
Page 11
Help Guide
3
Wireless Noise Canceling Stereo Headset
MDR-XB950N1
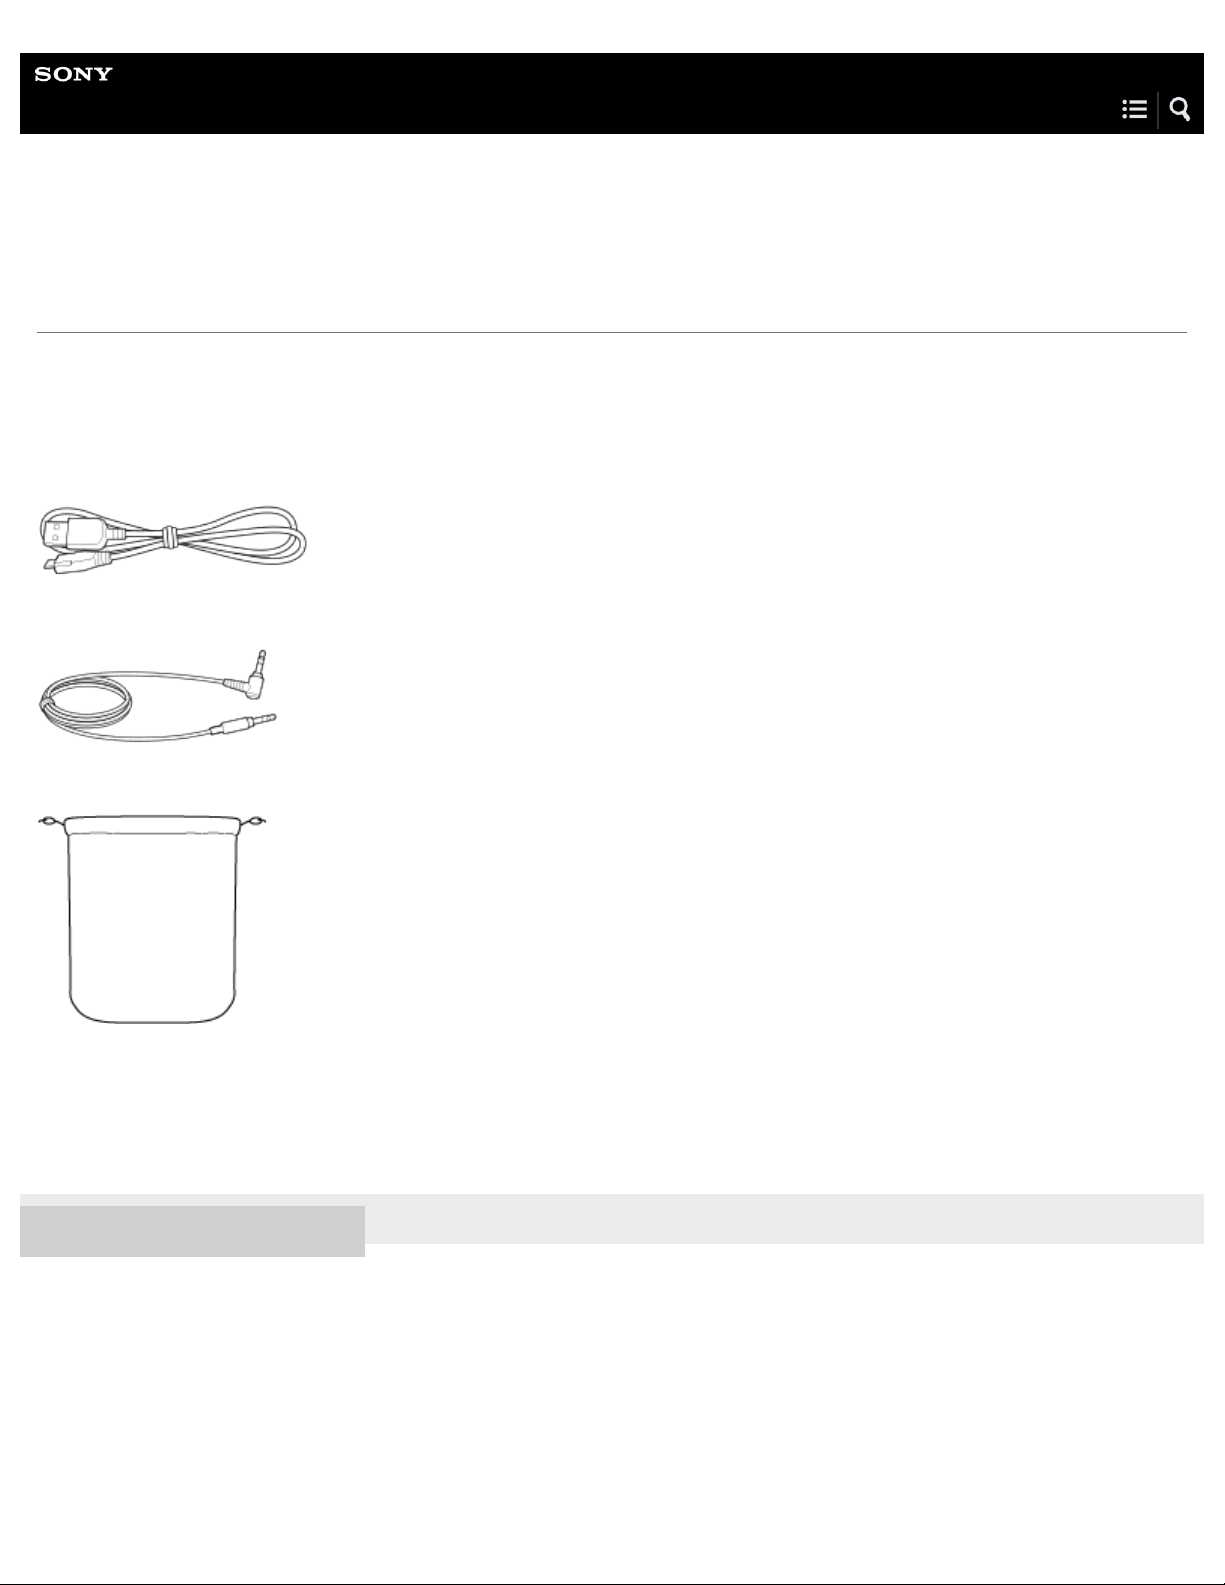
Checking the package contents
After opening the package, check that all items in the list are included in the package. If items are missing, contact your dealer.
Numbers in ( ) indicate the item amount.
Wireless Noise Canceling Stereo Headset (1)
Micro- USB cable (approx. 50 cm (19 3/4 in.)) (1)
Headphone cable (approx. 1.2 m (47 1/4 in.)) (1)
Carrying pouch (1)
Reference Guide (1)
Operating Instructions (1)
Other documents (1 set) (*)
*
May not be supplied in some countries or regions.
4-692-591-11(1) Copyright 2017 Sony Corporation
Page 12
Help Guide
4
Wireless Noise Canceling Stereo Headset
MDR-XB950N1
About the supplied manuals
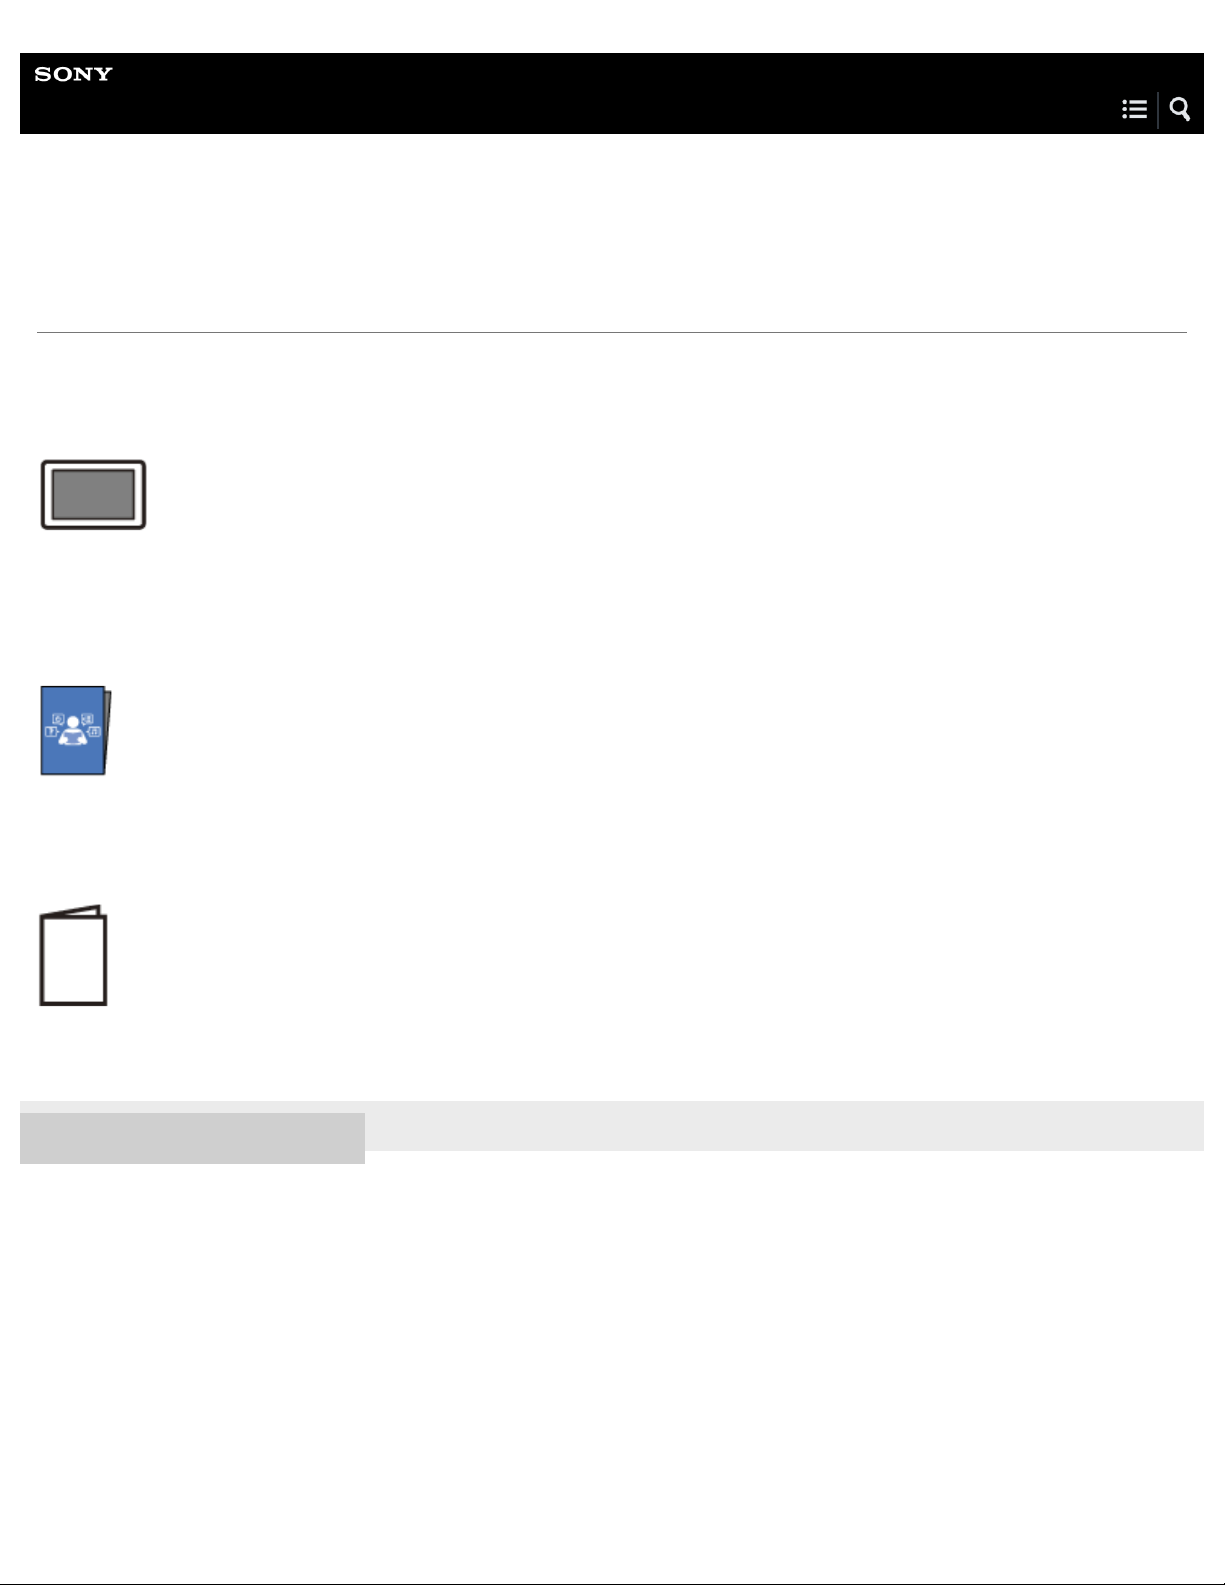
The following three manuals come with the headset.
Help Guide (this data)
Operation manual on the Web, which can be accessed by a PC or smartphone, provides the detailed information on how to use
the headset and troubleshooting, etc.
Operating Instructions (enclosed paper)
Provides basic information on how to connect or use the headset.
Reference Guide (enclosed paper)
Provides precautions and specifications.
4-692-591-11(1) Copyright 2017 Sony Corporation
Page 13
Help Guide
5
Wireless Noise Canceling Stereo Headset
MDR-XB950N1
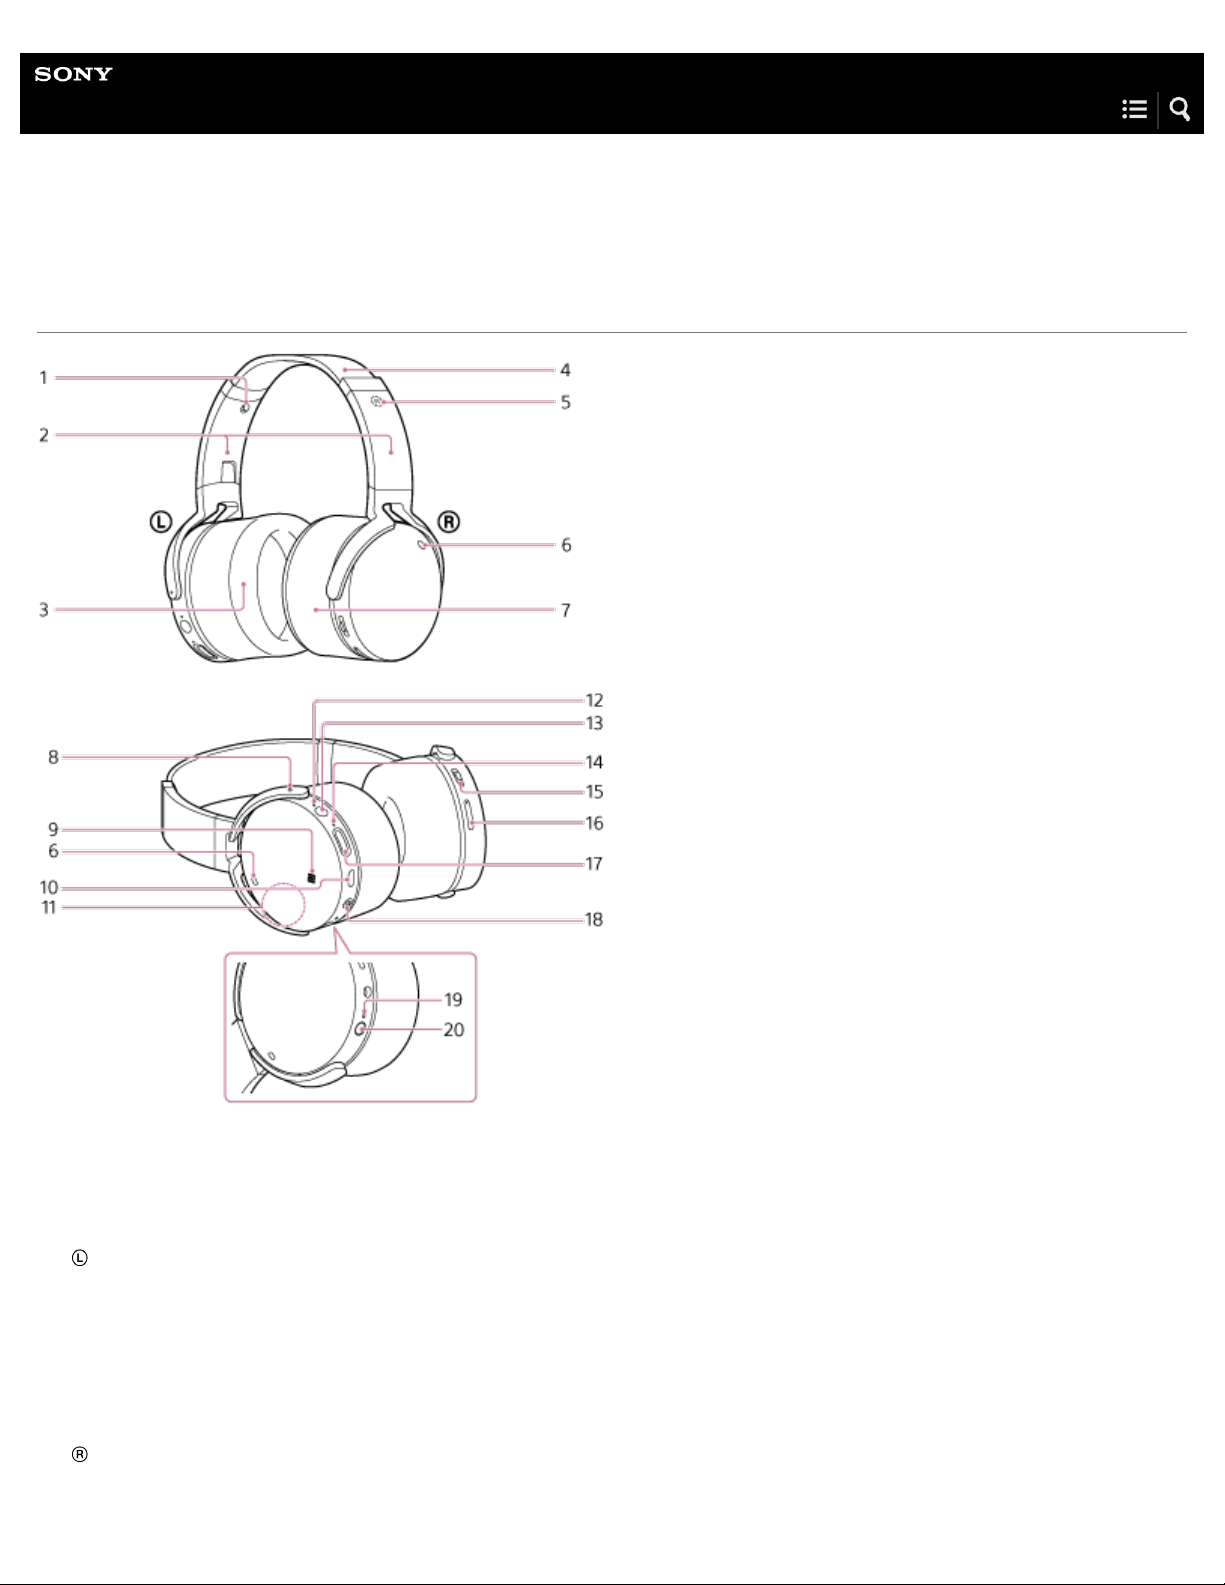
Location and function of parts
L mark
1.
Slider
2.
Slide to adjust the length of the headband.
left unit
3.
Headband
4.
R mark
5.
Microphone
6.
Picks up the sound of your voice when talking on the phone and suppresses noise when using the noise canceling function.
Both of the L and R microphones are used when talking on the phone.
right unit
7.
Tactile dot
8.
Page 14
The left unit has a tactile dot.
N-mark
6
9.
Micro- USB port
10
.
Connect a computer to this port with the supplied micro-USB cable to charge the headset.
Built-in antenna
11
.
A BLUETOOTH antenna is built into the headset.
Indicator (blue/red)
12
.
Lights up in red while charging.
Lights up in red and blue to indicate the power on/off, remaining battery charge or BLUETOOTH status of the headset.
13
14
15
16
17
18
19
(power) button
BASS EFFECT indicator (orange)
.
.
Lights up when the bass effect function is turned on.
Jog switch ( / / / )
.
Controls various call and playback functions.
+/- (Volume) buttons
.
The + button has a tactile dot.
BASS EFFECT button
.
Turns on or off the bass effect function.
INPUT jack
.
Connect a music player, etc. to this jack by using the supplied headphone cable. Make sure that you insert the plug of the
music player until it clicks. Otherwise, you may not hear the sound normally.
NC (noise canceling) indicator (green)
.
Shows the noise canceling status.
NC button
20
.
Related Topic
About the indicator
Checking the remaining battery charge
4-692-591-11(1) Copyright 2017 Sony Corporation
Page 15
Help Guide
7
Wireless Noise Canceling Stereo Headset
MDR-XB950N1
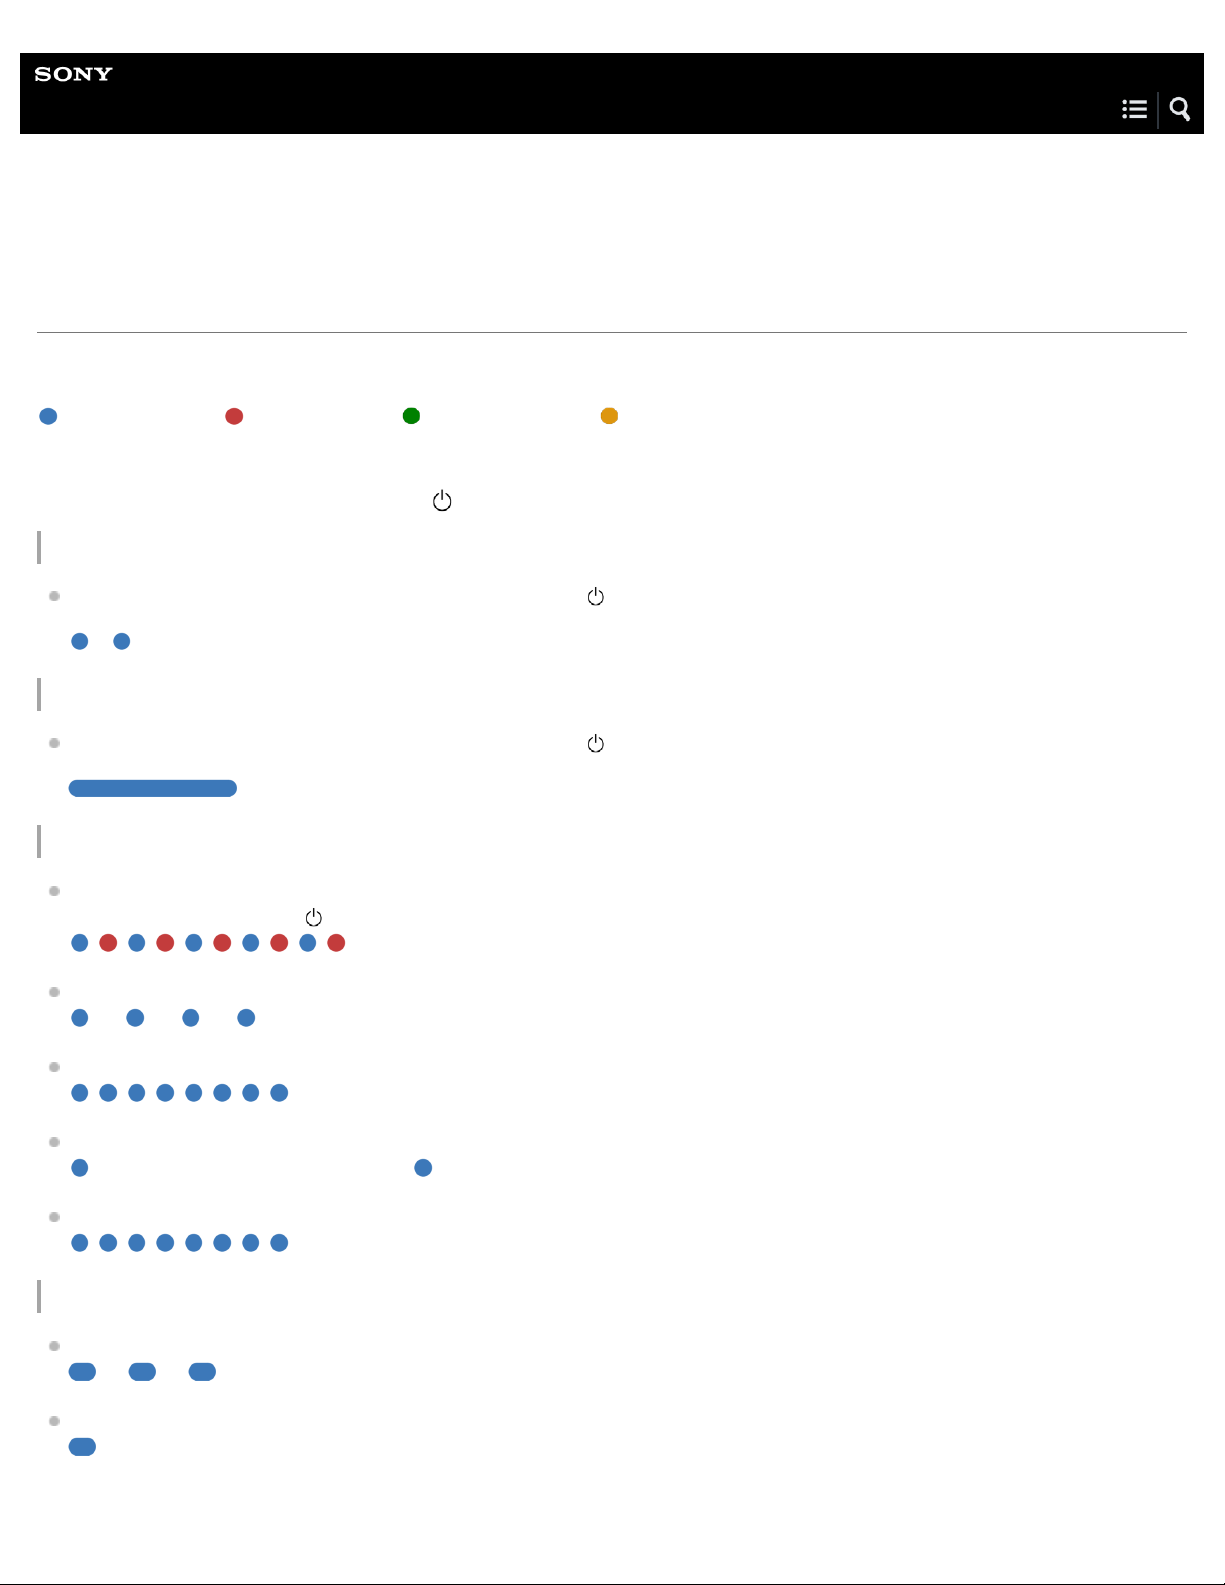
About the indicator
The indicator flashes in red, blue, green or orange to indicate various statuses.
: Turns on in blue/ : Turns on in red/ : Turns on in green/ : Turns on in orange/-: Turns off
Indicator (blue/red) next to the button
Turning on
When turning on the headset by pressing and holding the button for about 2 seconds when the headset is turned off.
- (flashes two times)
Turning off
When turning off the headset by pressing and holding the button for about 2 seconds when the headset is turned on.
(lights for about two seconds)
BLUETOOTH status indication
Pairing mode
(Pressing and holding the
Not connected
- - - - - - (one- second intervals)
Connection process completed
(flashes quickly for about five seconds)
Connected
- - - (about five -second interval) ---
Incoming call
button for about 7 seconds when the headset is turned off)
Sound quality mode indication
Priority on sound quality
- - - -
Priority on stable connection
For details, refer to “Switching the sound quality mode .”
Page 16
Remaining battery charge indication
8
High
- - - -
Medium
- -
Low (needs to charge)
For details, refer to “Checking the remaining battery charge.”
Charging
While charging
Other
Initialization completed
For details, refer to “Initializing the headset to restore factory settings.”
Indicator (green) next to the NC button
Noise canceling function
Noise canceling on
Noise canceling off
- - - - - - - -
For details, refer to “What is noise canceling?.”
Indicator (orange) next to the BASS EFFECT button
Bass effect function
Bass effect on
Bass effect off
-
For details, refer to "Using the bass effect function ."
Hint
When the remaining battery charge becomes low, the indicator turns from blue to red, except for pairing mode.
4-692-591-11(1) Copyright 2017 Sony Corporation
Page 17
Help Guide
9
Wireless Noise Canceling Stereo Headset
MDR-XB950N1
System requirements for battery charge using USB
The headset contains a lithium ion rechargeable battery, which should be charged before using the headset for the first time.
Personal Computer with pre -installed with any of the following operating systems and USB port:
When using Windows®
Windows® 10 Home / Windows® 10 Pro
Windows® 8.1 / Windows® 8.1 Pro
Windows® 8 / Windows® 8 Pro
Windows® 7 Home Basic / Home Premium / Professional / Ultimate
When using Mac
Mac OS X (version 10.8 or later)
Note
Sony does not guarantee proper operation in all system environments.
When using Windows 8.1 update using Windows Update.
4-692-591-11(1) Copyright 2017 Sony Corporation
Page 18
Help Guide
10
Wireless Noise Canceling Stereo Headset
MDR-XB950N1
Charging the headset
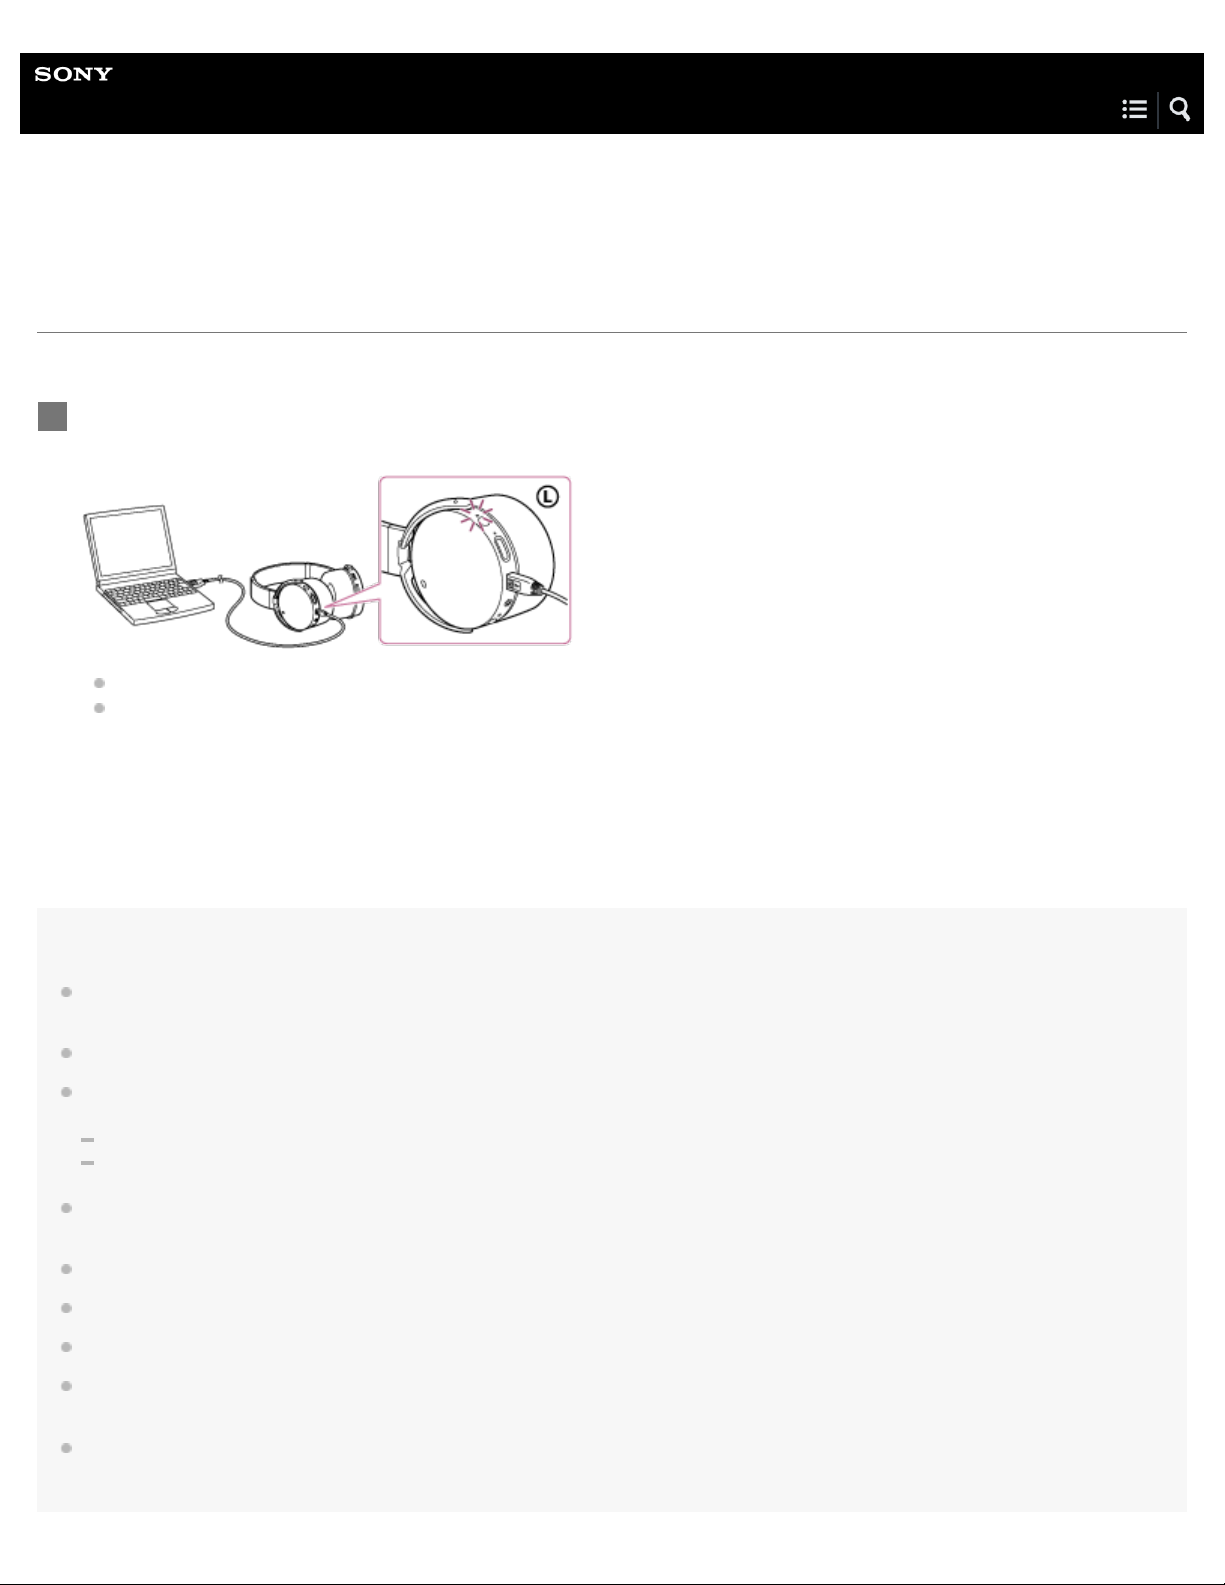
The headset contains a lithium ion rechargeable battery. Charge the headset using the supplied micro-USB cable.
Connect the supplied micro-USB cable to the headset, and then connect the other end to a booted
1
computer.
Make sure that the indicator (red) lights up.
Charging is completed in about 7 hours (*) and the indicator (red) goes off automatically.
*
Time required for charging the empty battery to its full capacity.
Note
The headset cannot be operated (turning on, BLUETOOTH paring and connection, music playback, etc.) while charging or if kept connected to the
computer after charging is complete.
The noise canceling function cannot be used while charging or if kept connected to the computer after charging is complete.
If the headset detects a problem while charging due to following causes, the indicator (red) may turn off, although charging is not complete. In this
case, charge again within the charging temperature range. If the problem persists, consult your nearest Sony dealer.
Ambient temperature exceeds the charging temperature range of 5 °C – 35 °C(41 °F - 95 °F).
There is a problem with the battery.
If the headset is not used for a long time, the indicator (red) may not light up when you connect the micro-USB cable to charge the headset. In this
case, do not disconnect the micro-USB cable from the headset: wait a few minutes until the indicator (red) lights up.
If the headset is not used for a long time, the battery may be quickly depleted, however, after a few recharges, the battery life will improve.
If you store the headset for a long time, charge the battery to its full capacity once every 6 months to avoid over discharge.
If the headset is not used for a long time, it may take longer to charge the battery.
If the life of the built-in rechargeable battery drops significantly, the battery should be replaced. Consult your nearest Sony dealer for replacement
of the rechargeable battery.
Avoid exposure to temperature extremes, direct sunlight, moisture, sand, dust or mechanical shock. Never leave the headset in a car parked in the
sun.
Page 19

If the computer enters into hibernation mode while connected to the headset, charging will not be completed properly. Check the setting of the
11
computer before charging. The indicator (red) will go off automatically if the computer enters into hibernation mode. Charge the headset again in
this case.
Use the supplied micro-USB cable only, and connect directly to a computer. Charging will not be completed properly by an indirect connection,
such as via a USB hub.
Hint
You can use the headset by connecting the supplied headphone cable, even while charging the headset.
If charging starts while the headset is turned on, the headset will turn off automatically.
4-692-591-11(1) Copyright 2017 Sony Corporation
Page 20
Help Guide
12
Wireless Noise Canceling Stereo Headset
MDR-XB950N1
Available operating time
The available operating times of the headset on a fully-charged battery are as follows:
Wireless connection
Music Playback time [SBC/AAC]: Max. 22 hours (NC ON)/Max. 24 hours (NC OFF)
Music Playback time [aptX]: Max. 20 hours (NC ON)/Max. 22 hours (NC OFF)
Communication time: Max. 20 hours (NC ON)/Max. 20 hours (NC OFF)
Standby time: Max. 20 hours (NC ON)/Max. 40 hours (NC OFF)
This headset can be used for about 3 hours after 1 hour charging.
Wired connection (Power on): Max. 20 hours (NC ON)
Note
Usage hours may be shorter depending on the Codec and the conditions of use.
4-692-591-11(1) Copyright 2017 Sony Corporation
Page 21
Help Guide
13
Wireless Noise Canceling Stereo Headset
MDR-XB950N1
Checking the remaining battery charge
You can check the remaining battery charge of the rechargeable battery.
When you turn on the headset by pressing the
You can check the remaining battery charge by the number of times the indicator (red) flashes.
You can also check the remaining battery charge when the headset is turned on. Pressing the
to flash and show the remaining battery charge. You also hear voice guidance of the remaining battery charge.
3 times
2 times
1 time
- - - - : High “Battery level high”
- - : Medium “Battery level medium”
: Low (needs to charge) “Battery level low”
button, the indicator (blue) flashes two times, then the indicator (red) flashes.
button will cause the indicator
When the battery is almost empty
The indicator turns red. When the battery becomes empty, the headset sounds a warning beep, you hear voice guidance “Please
recharge headset”, and the head set turns off automatically.
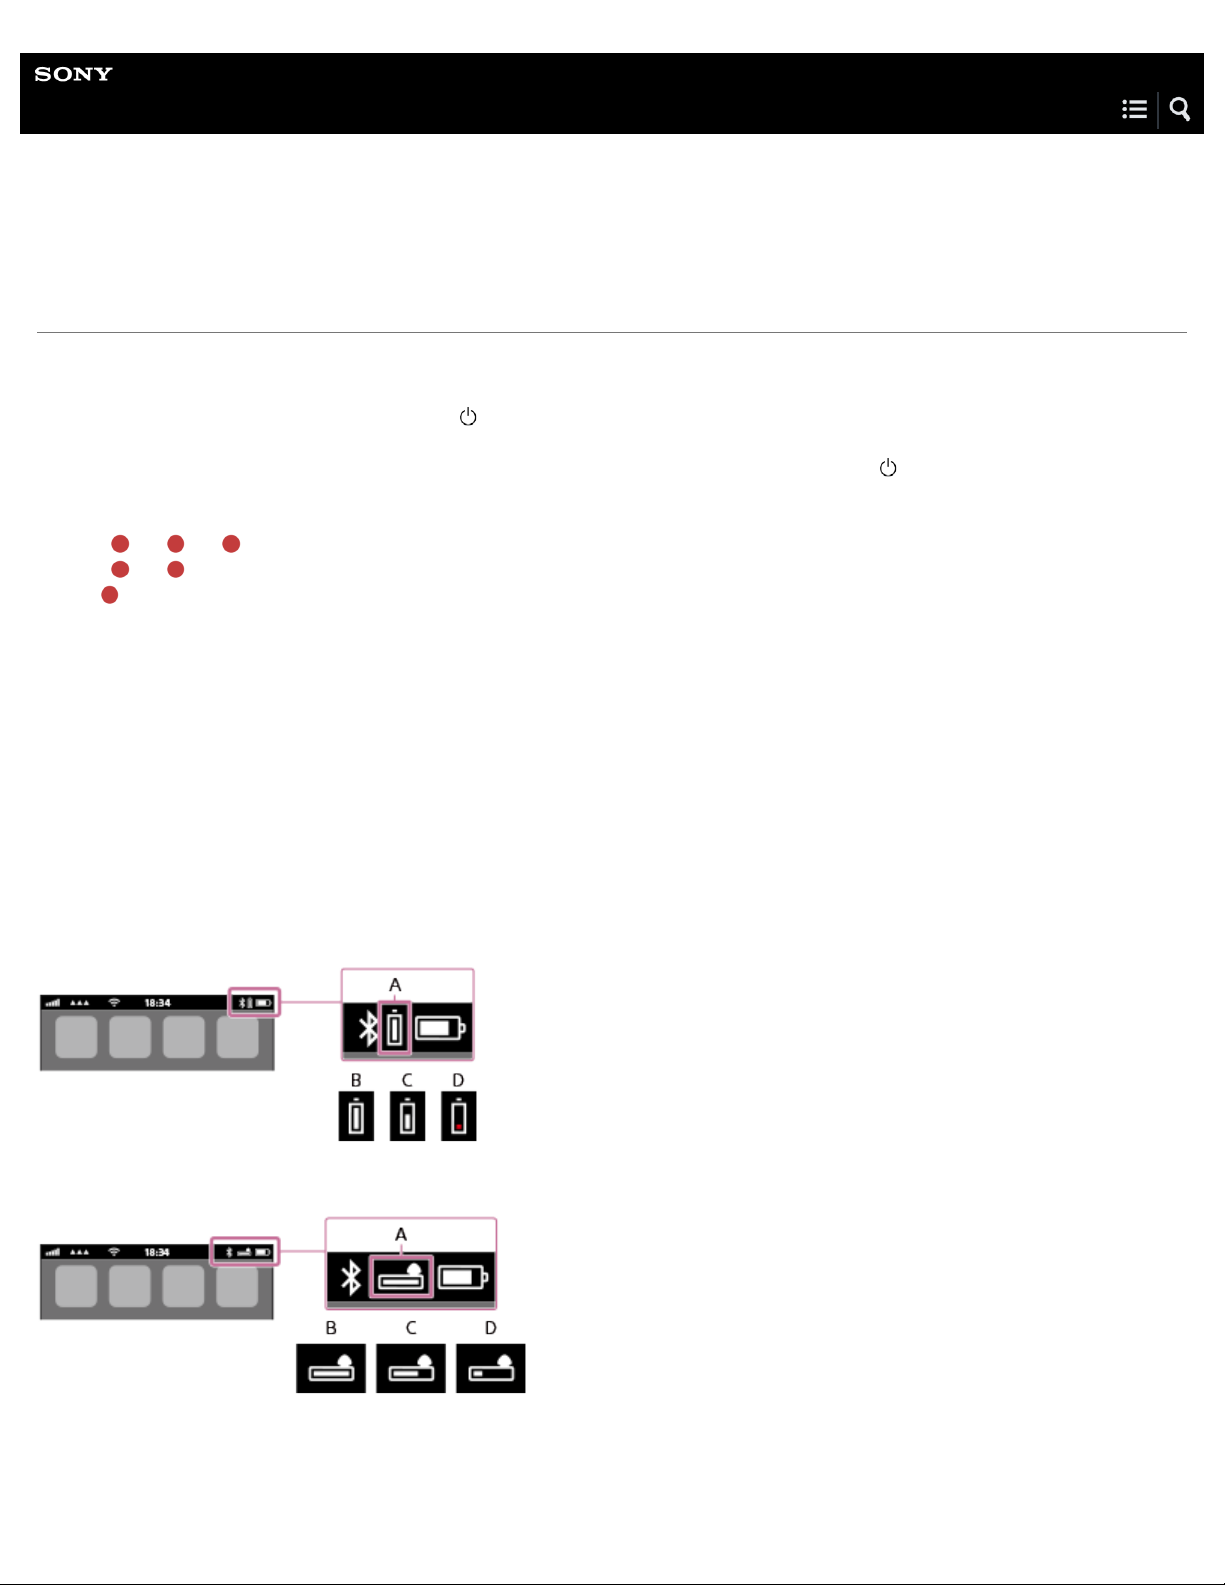
When you are using an iPhone, iPad, or iPod touch
When the headset is connected to an iPhone, iPad, or iPod touch (iOS 5.0 or later) that supports HFP (Hands-free Profile), it will
show an icon that indicates the remaining battery charge of the headset on the screen.
Compatible devices
iPhone, iPad, or iPod touch (iOS 5.0 or later) supporting Hands - free Profile (HFP)
iOS 7.0 or later
iOS 5.X / 6.X
A: Remaining battery charge of the headset
B: High
C: Medium
Page 22

D: Low (needs to charge)
14
Note
If you connect the headset to an iPhone, iPad or iPod touch with “Media audio” (A2DP) only in a multi point connection, the remaining battery
charge will not be displayed correctly.
Hint
You can also check the remaining battery charge with the “Sony | Headphones Connect” app.
Related Topic
What you can do with "Sony | Headphones Connect" app
4-692-591-11(1) Copyright 2017 Sony Corporation
Page 23
Help Guide
15
Wireless Noise Canceling Stereo Headset
MDR-XB950N1
How to make a wireless connection to BLUETOOTH devices
Device registration (pairing)
When using the BLUETOOTH function for the first time, you must previously register both devices to allow connection. The
operation to register a device is called device registration (paring).
If the device to be connected does not support the one - touch connection (NFC), operate the headset and the device to perform
device registration (pairing).
If the device supports one-touch connection (NFC), you can just touch to perform device registration (pairing) and establish a
BLUETOOTH connection.
Connecting the headset to a registered (paired) device
When the device is registered, it is not necessary to register it again. Connect to it with an appropriate method.
4-692-591-11(1) Copyright 2017 Sony Corporation
Page 24
Help Guide
16
Wireless Noise Canceling Stereo Headset
MDR-XB950N1
One-touch connection (NFC) with a smartphone (Android 4.1 or later)
By touching the headset with a smartphone, the headset turns on automatically and then pairs and makes a BLUETOOTH
connection.
Compatible smartphones
NFC- compatible smartphones installed with Android 4.1 or later
NFC
NFC (Near Field Communication) is a technology enabling short-range wireless communication between various devices,
such as smartphones and IC tags. Thanks to the NFC function, data communication - for example, BLUETOOTH pairing can be achieved easily by simply touching NFC-compatible devices together (i.e., at the N- Mark symbol or location
designated on each device).
Unlock the screen of the smartphone if it is locked.
1
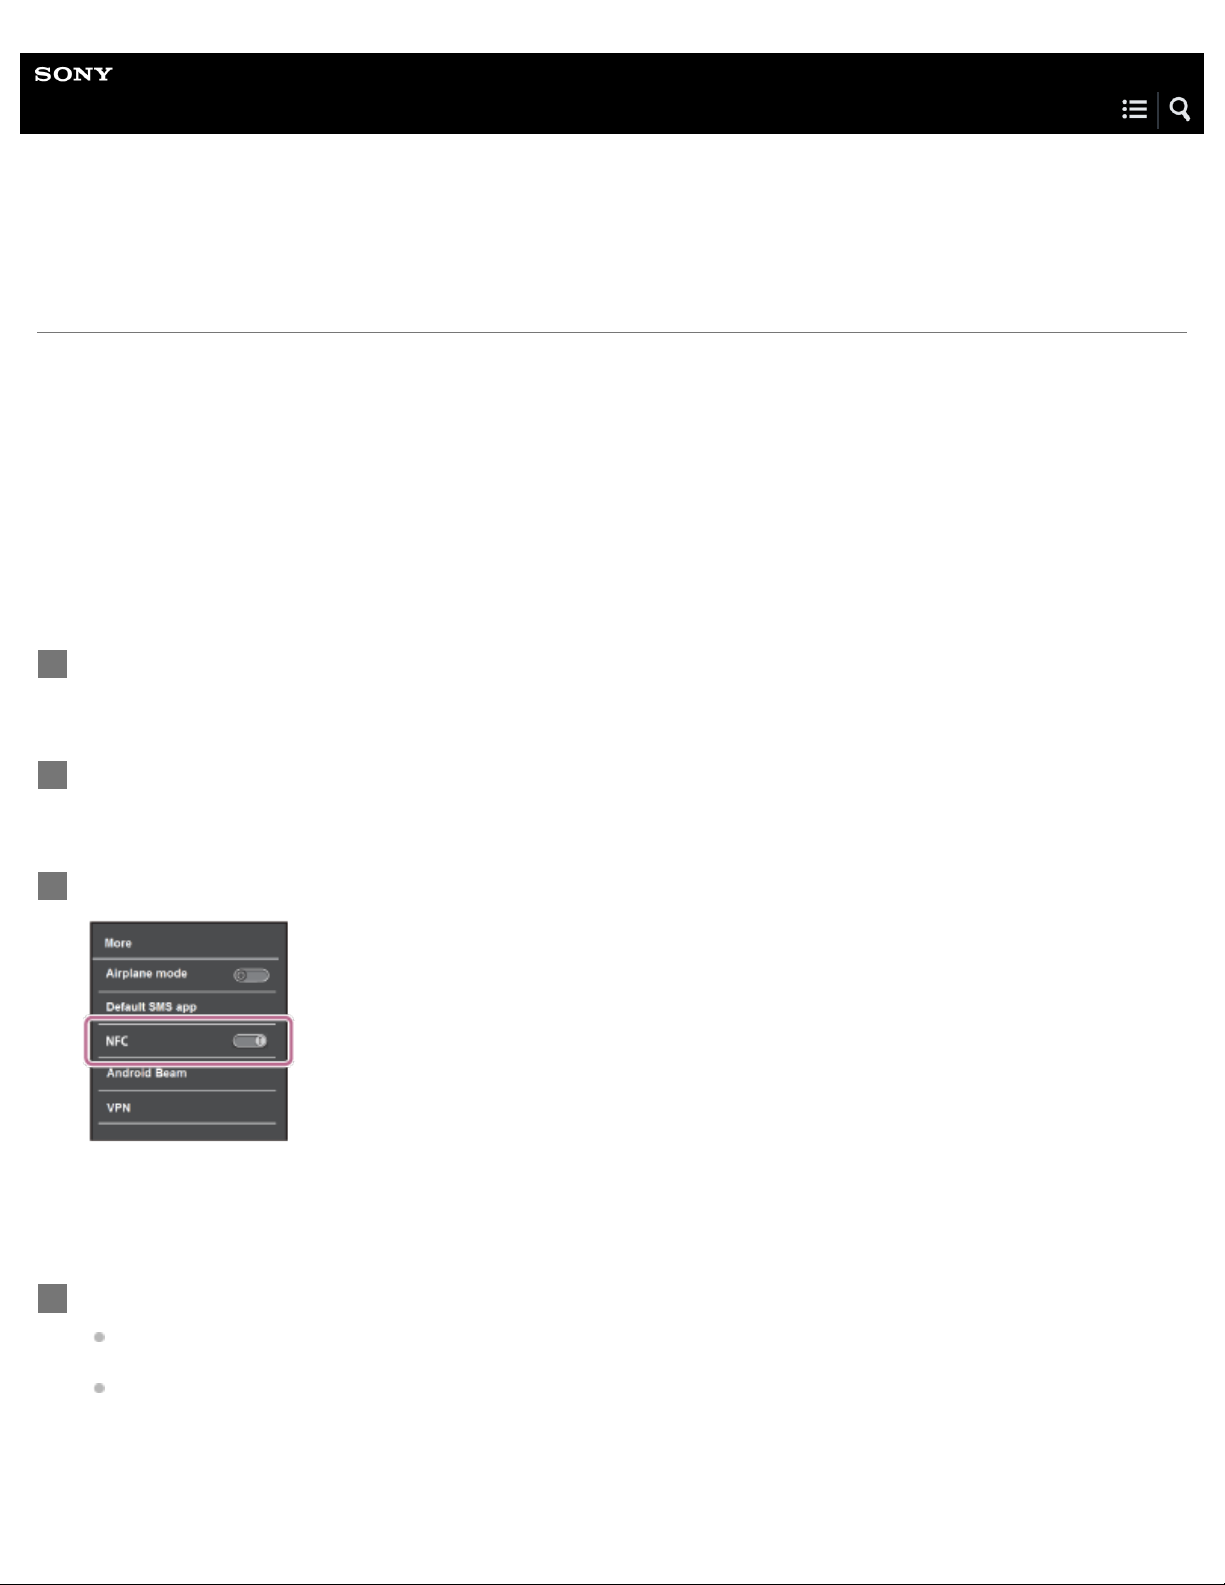
Select [Setting] — [More].
2
Set the NFC function to on.
3
* The above procedure is an example. For details, refer to the operating instructions supplied with your Android smartphone.
Touch the headset with the smartphone.
4
Touch the smartphone on the N- Mark of the headset. Keep touching the headset with the smartphone until the
smartphone reacts.
Refer to the operating instructions of the smartphone for the designated location to be touched on the smartphone.
Page 25
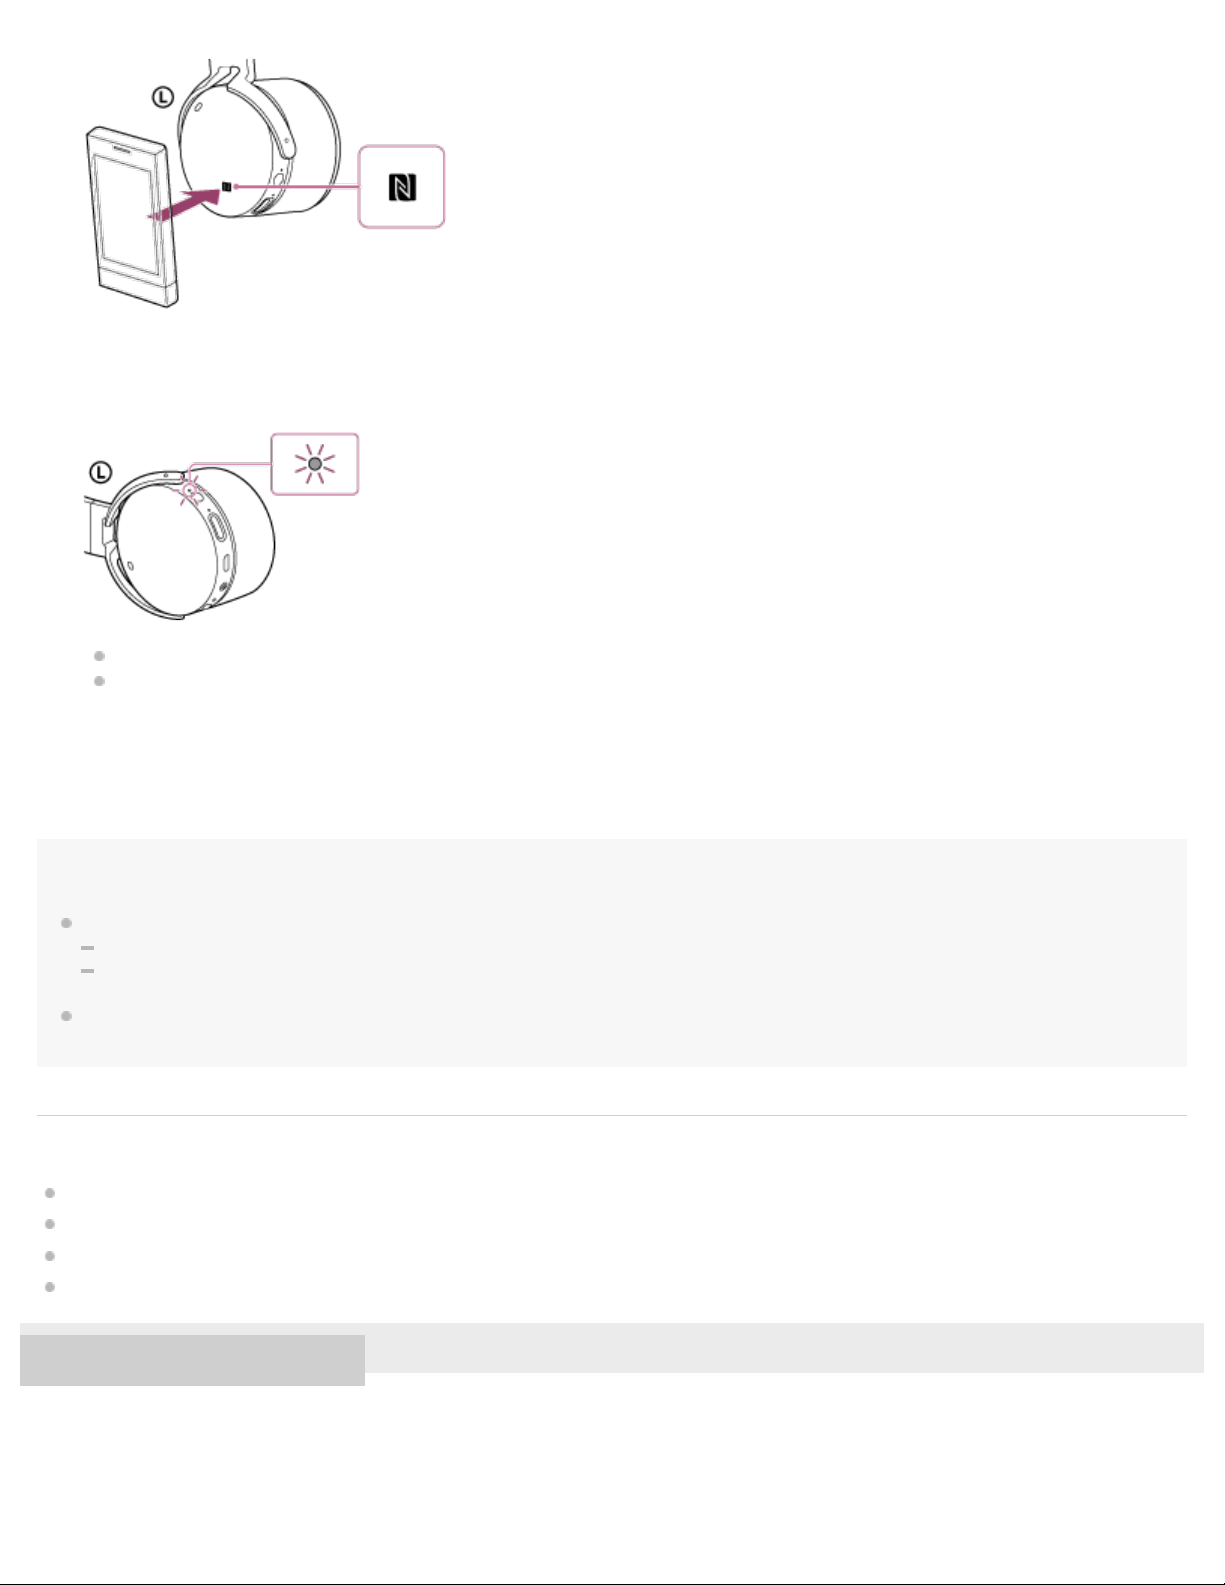
Follow the on-screen instructions to complete the pairing and connection.
17
When the headset is connected with the smartphone, the blue indicator starts flashing slowly. You hear voice guidance
“BLUETOOTH connected”.
To disconnect, touch the smartphone again. Unlock the screen of the smartphone if it is locked.
To connect a paired smartphone, perform step 4. Unlock the screen of the smartphone if it is locked.
Hint
If you cannot connect the headset, try the following.
Unlock the screen of the smartphone if it is locked, and move the smartphone slowly over the N-Mark of the headset.
If the smartphone is in a case, remove the case.
If you touch an NFC-compatible smartphone with the headset, the smartphone terminates BLUETOOTH connection with any current device, and
connects to the headset (One-touch connection switching).
Related Topic
How to make a wireless connection to BLUETOOTH devices
Disconnecting the smartphone by one touch (NFC)
Switching the device by one touch (NFC)
Listening to music from a device connected via BLUETOOTH
4-692-591-11(1) Copyright 2017 Sony Corporation
Page 26
Help Guide
18
Wireless Noise Canceling Stereo Headset
MDR-XB950N1
Disconnecting the smartphone by one touch (NFC)
You can disconnect the headset from the connected smartphone by touching the headset with it.
Unlock the screen of the smartphone if it is locked.
1
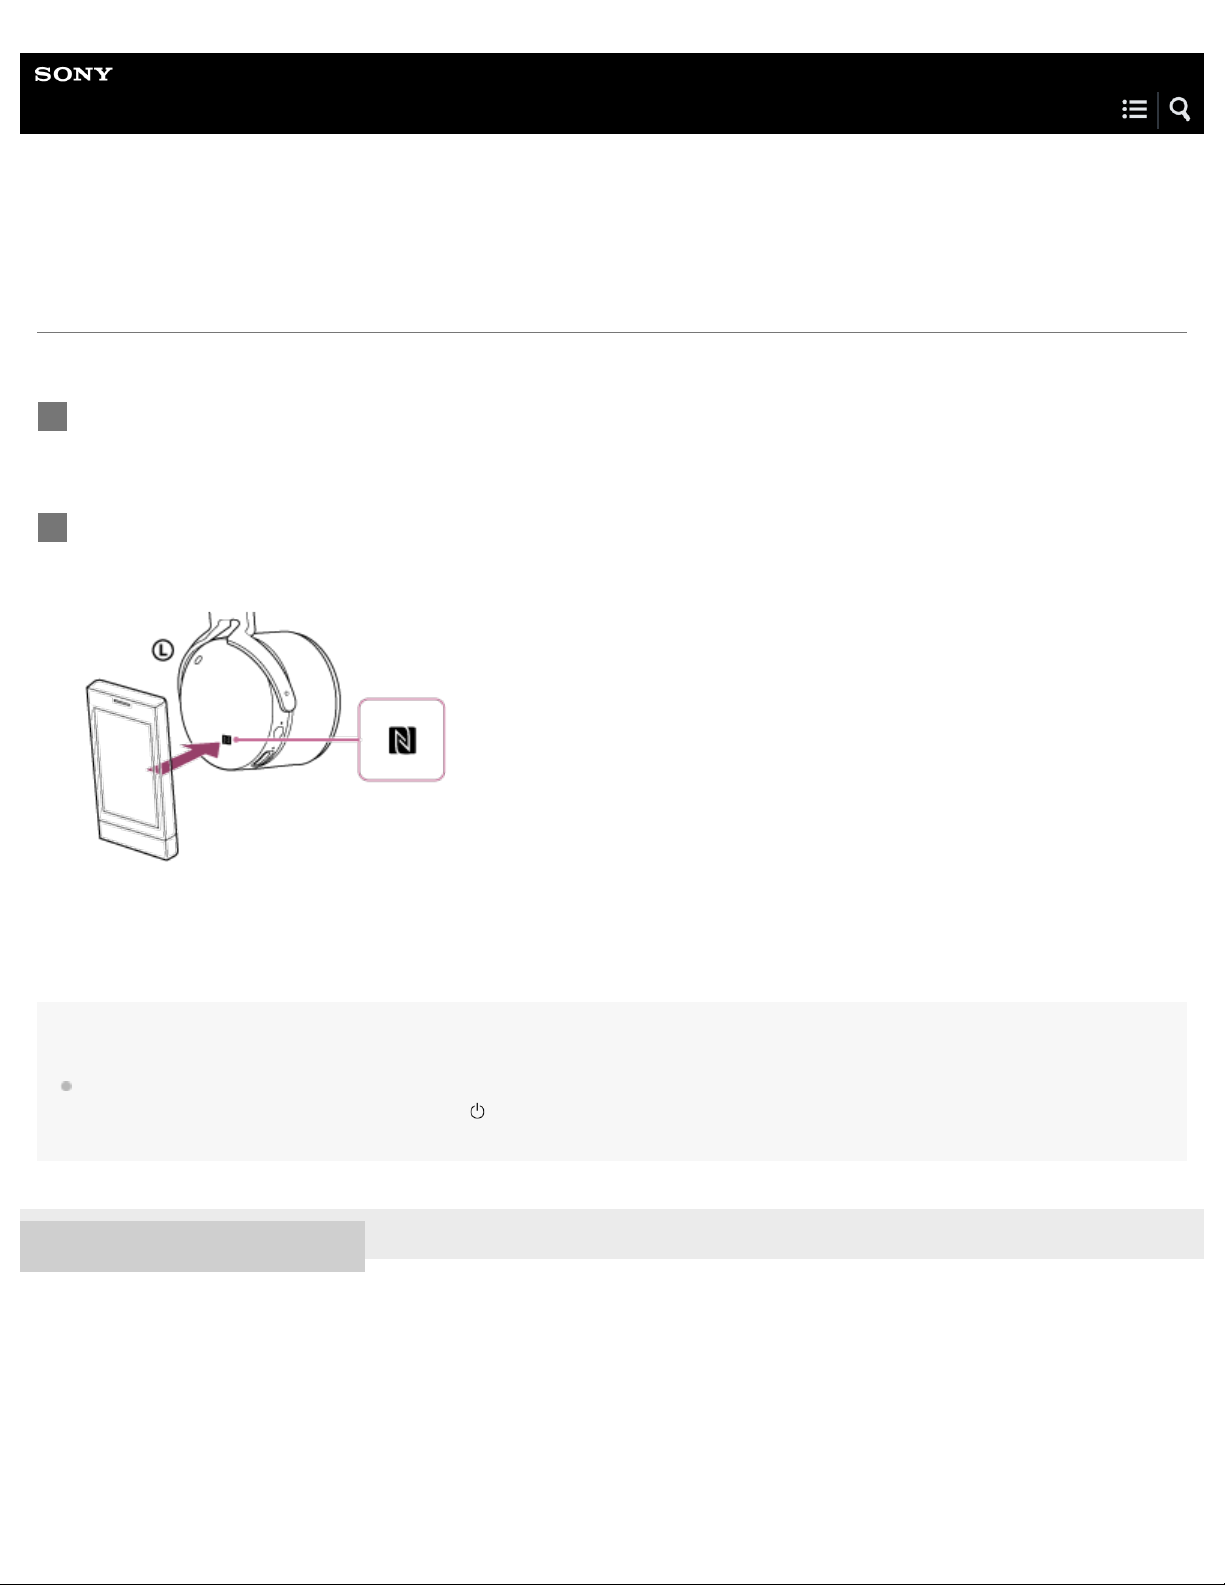
Touch the headset with the smartphone.
2
Touch the smartphone on the N- Mark of the headset. You hear voice guidance “BLUETOOTH disconnected”.
Note
After the headset is disconnected from the smartphone, if no operation is performed for about 5 minutes, the headset turns off automatically. To
turn off the headset before that, press and hold the
off, then the headset turns off.
4-692-591-11(1) Copyright 2017 Sony Corporation
button for about 2 seconds. You hear voice guidance “Power off”, the indicator (blue) goes
Page 27
Help Guide
19
Wireless Noise Canceling Stereo Headset
MDR-XB950N1
Switching the device by one touch (NFC)
When the headset is connected with a BLUETOOTH device, if you touch an NFC -compatible smartphone on the headset, the
headset is connected with the smartphone that touched on the headset most recently (One- touch connection switching).
However, if you are talking on a BLUETOOTH mobile phone connected to the headset, you cannot switch the BLUETOOTH
connection by one touch.
When the headset is connected with an NFC -compatible smartphone, if you touch the smartphone on another NFC-compatible
BLUETOOTH headset or BLUETOOTH speaker, the smartphone disconnects from the headset, and connects to the
BLUETOOTH device it touched.
Note
Unlock the screen of the smartphone if it is locked.
4-692-591-11(1) Copyright 2017 Sony Corporation
Page 28
Help Guide
Touch [ ] next to [ Bluetooth] to turn on the BLUETOOTH function.
20
Wireless Noise Canceling Stereo Headset
MDR-XB950N1
Pairing and connecting with an Android smartphone
Pairing is the process required to create a link between BLUETOOTH devices to allow wireless connection.
You must pair a device with the headset to be able to make a BLUETOOTH connection for the first time.
Before you start pairing operation, make sure that:
The smartphone is placed within 1 m(3 feet) of the headset.
The headset is charged sufficiently.
The operating instructions of the smartphone is on hand.
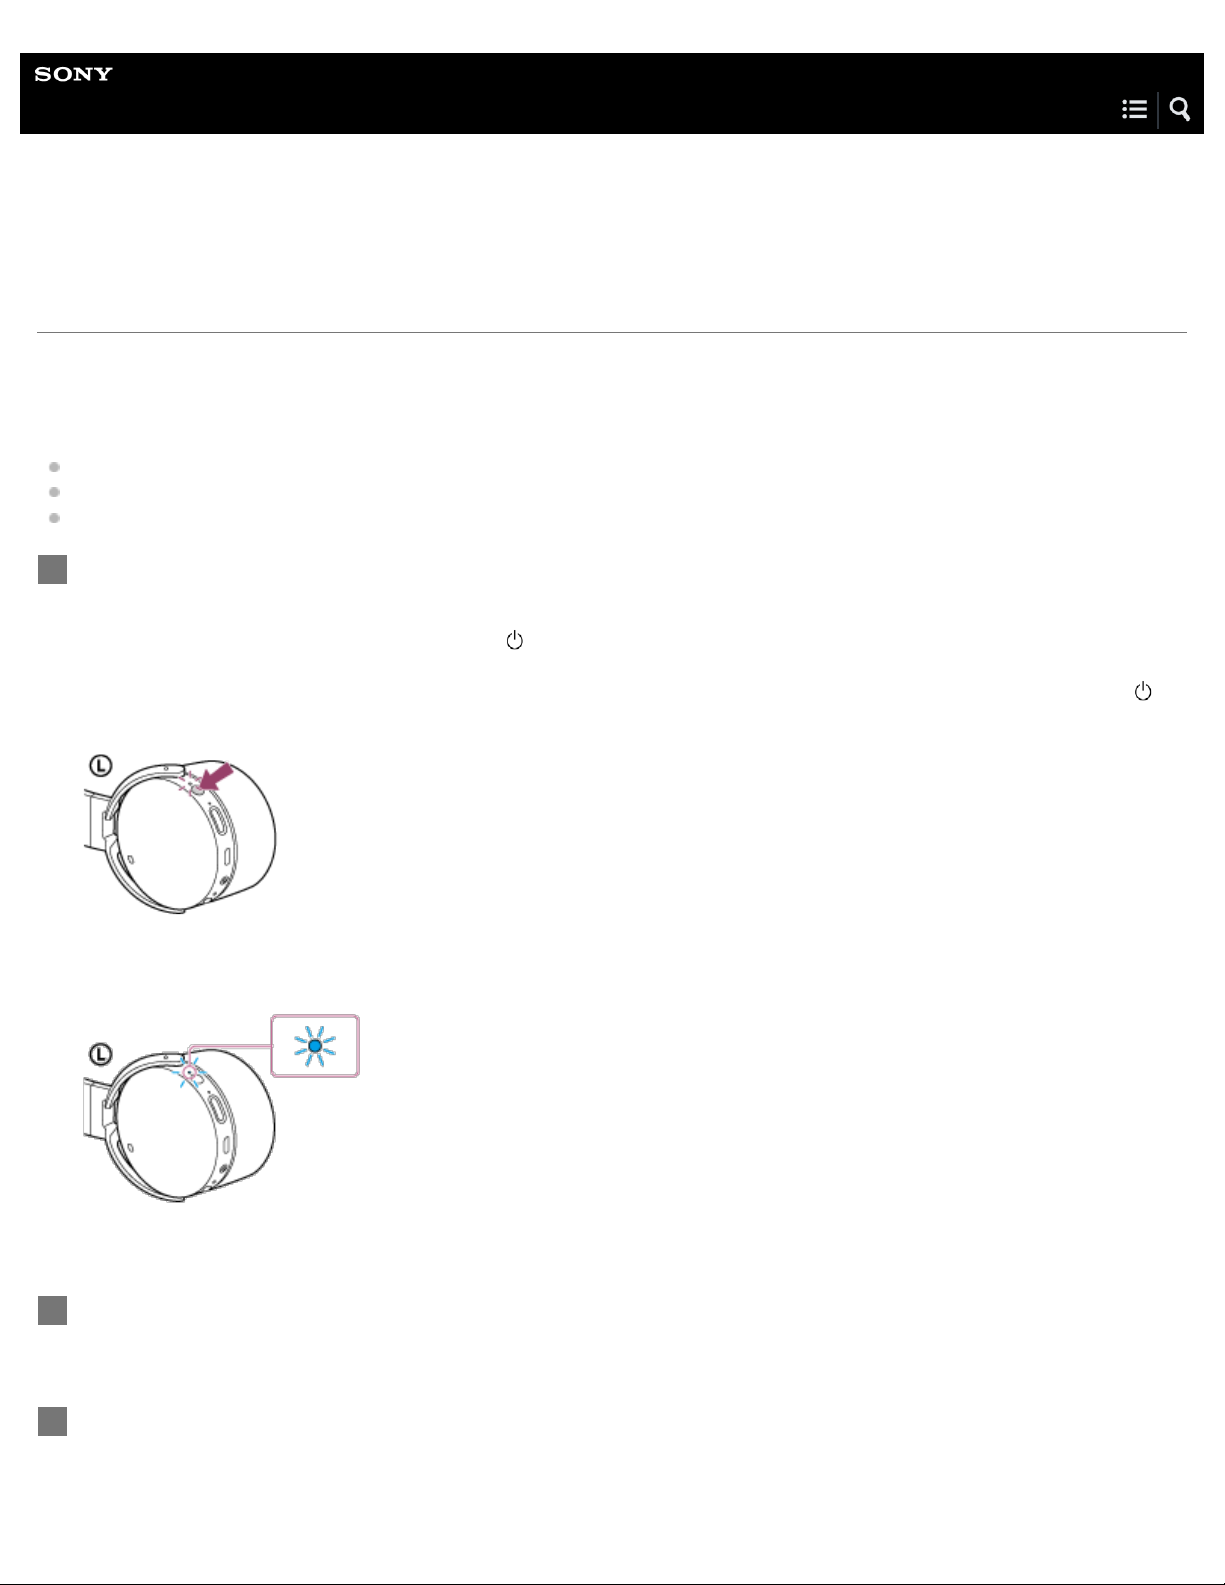
Enter pairing mode on this headset.
1
When you pair the headset with a device for the first time after you bought it, or after you initialized the headset (the headset
has no pairing information), press and hold the
enters pairing mode automatically.
When you pair a 2nd or subsequent device (the headset has pairing information for other devices), press and hold the
button for about 7 seconds.
button for about 2 seconds when the headset is turned off. The headset
Make sure that the indicator flashes blue and red alternately after you release the button. You hear voice guidance
“BLUETOOTH pairing”.
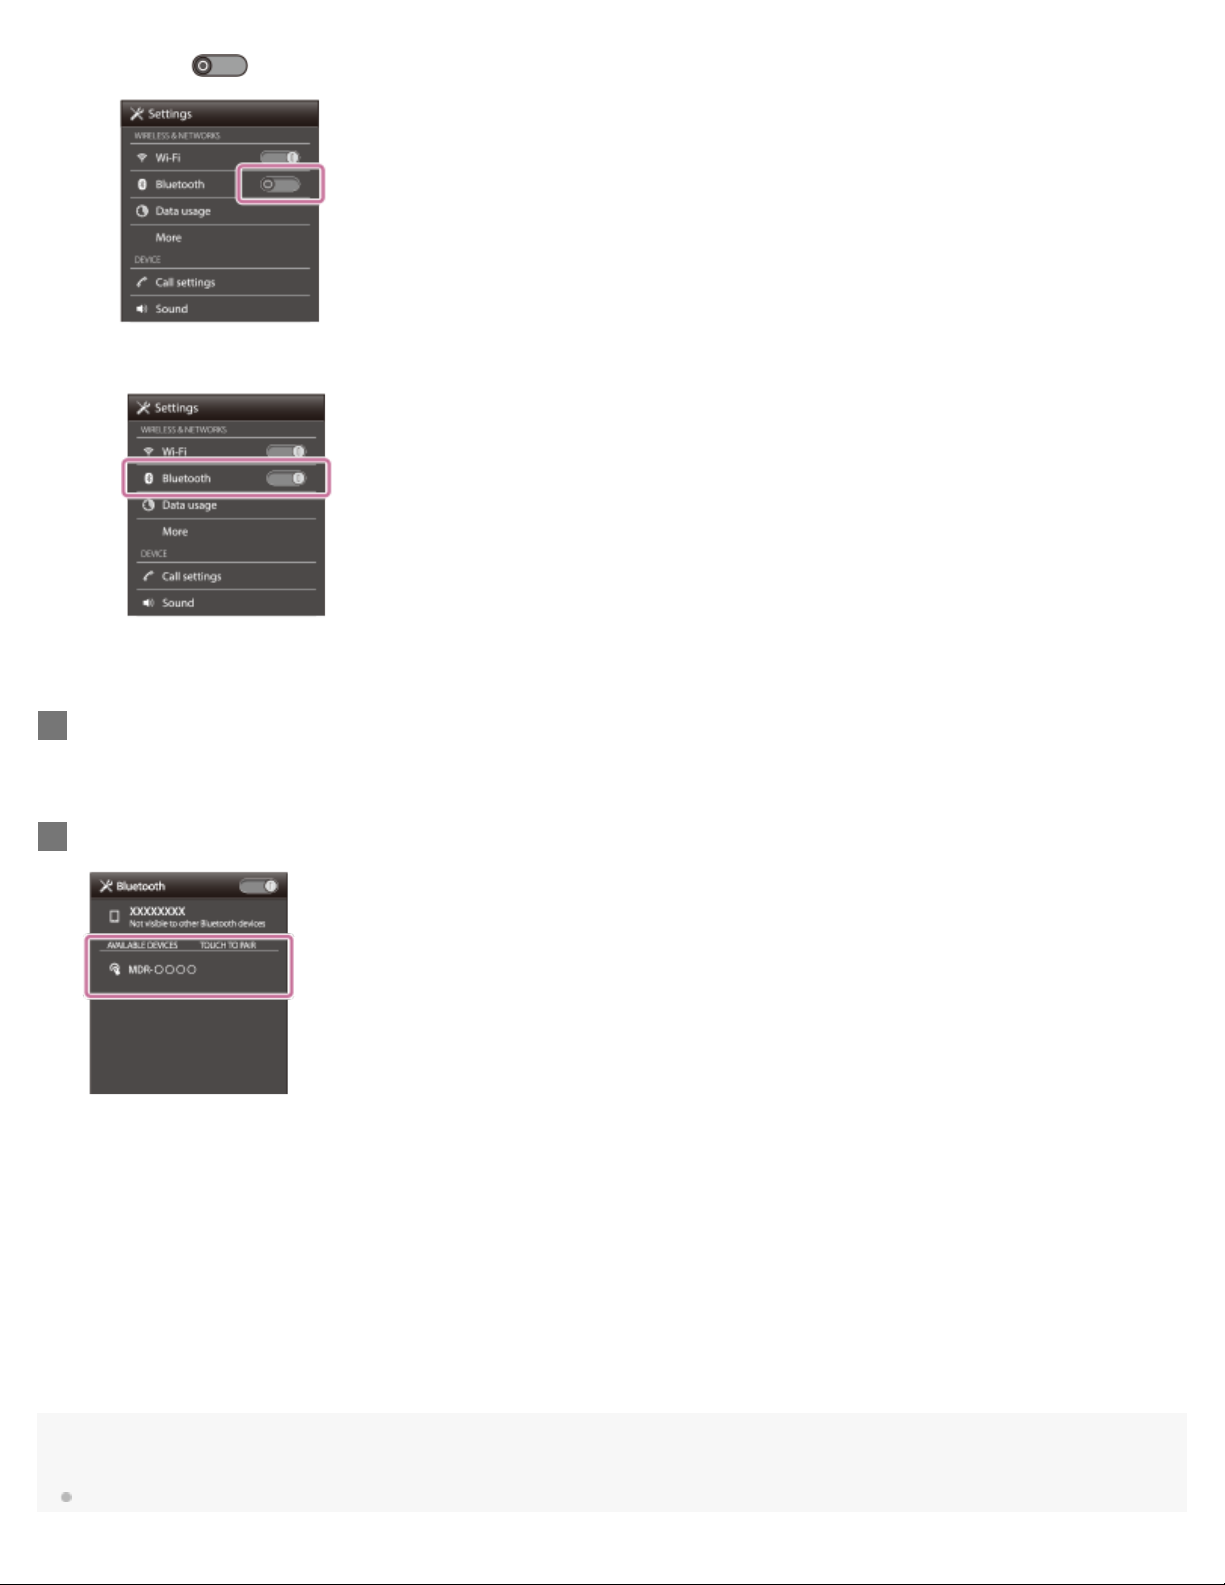
Unlock the screen of the Android smartphone if it is locked.
2
Search for this headset on the smartphone.
3
Select [ Setting] - [Bluetooth].
1.
Page 29
2.
21
Touch [ Bluetooth].
3.
Touch [Search for devices].
4
Touch [MDR-XB950N1].
5
If passkey (*) input is required on the display of the smartphone, input “0000.”
The headset and the smartphone are paired with each other and connected. You hear voice guidance “BLUETOOTH
connected”.
If they are not connected, see “ Connecting to a paired Android smartphone .”
If [ MDR-XB950N1] does not appear on the display, try again from step 3.
*
A Passkey may be called a “Passcode,” a “PIN code,” or a “Password.”
Note
If pairing is not established within about 5 minutes, pairing mode will be canceled and the headset will turn off. In this case, start over from step 1.
Page 30
Once BLUETOOTH devices are paired, there is no need to pair them again, except in the following cases:
22
Pairing information has been deleted after repair, etc.
The headset is already paired with 8 devices and another device is to be paired.
The headset can be paired with up to 8 devices. If a new device is paired after 8 devices are already paired, the paired device with the oldest
connection time is replaced by the new one.
When the pairing information for the headset has been deleted from the BLUETOOTH device.
When the headset is initialized, all pairing information is deleted.
In this case, delete the pairing information of the headset from the BLUETOOTH device, and then pair them again.
The headset can be paired with multiple devices, but can only play music from one paired device at a time.
Hint
The above procedure is an example. For details, refer to the operating instructions supplied with your Android smartphone.
To delete all pairing information, see “Initializing the headset to restore factory settings.”
Related Topic
How to make a wireless connection to BLUETOOTH devices
Connecting to a paired Android smartphone
Listening to music from a device connected via BLUETOOTH
Initializing the headset to restore factory settings
4-692-591-11(1) Copyright 2017 Sony Corporation
Page 31

Help Guide
23
Wireless Noise Canceling Stereo Headset
MDR-XB950N1
Connecting to a paired Android smartphone
Unlock the screen of the Android smartphone if it is locked.
1
Turn on the headset.
2
Press and hold the
Make sure that the indicator (blue) flashes after you release the button. You hear voice guidance “Power on”.
After the headset turns on, if it has automatically connected to the last connected device, you hear voice guidance
“BLUETOOTH connected”.
Check the connection status on the Android smartphone. If not connected, proceed to step 3.
button for about 2 seconds.
Display the devices paired with the smartphone.
3
Select [ Setting] - [Bluetooth].
1.
Touch [ ] next to [ Bluetooth] to turn on the BLUETOOTH function.
2.
Page 32

details, refer to the operating instructions supplied with your BLUETOOTH device.
Touch [ Bluetooth].
24
3.
Touch [MDR-XB950N1].
4
You hear voice guidance “BLUETOOTH connected”.
Hint
The above procedure is an example. For details, refer to the operating instructions supplied with your smartphone.
If the smartphone was connected with the headset the last time, an HFP/HSP connection is made when you turn on the headset. While the
headset is on, you can make an A2DP connection (music playback) by pressing the
button.
Note
If the last-connected BLUETOOTH device is put near the headset, the headset may connect automatically to the device by simply turning on the
headset. In this case, deactivate the BLUETOOTH function on the BLUETOOTH device or turn off the power.
If you cannot connect your BLUETOOTH device to the headset, deactivate pairing on your BLUETOOTH device and perform pairing again. For
Page 33

Related Topic
25
How to make a wireless connection to BLUETOOTH devices
Pairing and connecting with an Android smartphone
Listening to music from a device connected via BLUETOOTH
4-692-591-11(1) Copyright 2017 Sony Corporation
Page 34

Help Guide
Touch [ Bluetooth].
26
Wireless Noise Canceling Stereo Headset
MDR-XB950N1
Pairing and connecting with an iPhone
Pairing is the process required to create a link between BLUETOOTH devices to allow wireless connection.
You must pair a device with the headset to be able to make a BLUETOOTH connection for the first time.
Before you start pairing operation, make sure that:
The iPhone is placed within 1 m(3 feet) of the headset.
The headset is charged sufficiently.
The operating instructions of the iPhone is on hand.
Enter pairing mode on this headset.
1
When you pair the headset with a device for the first time after you bought it, or after you initialized the headset (the headset
has no pairing information), press and hold the
enters pairing mode automatically.
When you pair a 2nd or subsequent device (the headset has pairing information for other devices), press and hold the
button for about 7 seconds.
button for about 2 seconds when the headset is turned off. The headset
Make sure that the indicator flashes blue and red alternately after you release the button. You hear voice guidance
“BLUETOOTH pairing”.
Unlock the screen of the iPhone if it is locked.
2
Select the BLUETOOTH setting on the iPhone.
3
Select [ Settings].
1.
Page 35

2.
27
Touch [ ] to change it to [ ] (turn on the BLUETOOTH function).
3.
Touch [MDR-XB950N1].
4
If passkey (*) input is required on the display of the iPhone, input “0000.”
The headset and the iPhone are paired with each other and connected. You hear voice guidance “BLUETOOTH connected”.
If they are not connected, see “ Connecting to a paired iPhone .”
If [ MDR-XB950N1] does not appear on the display, try again from step 3.
*
A Passkey may be called a “Passcode,” a “PIN code,” or a “Password.”
Note
If pairing is not established within about 5 minutes, pairing mode will be canceled and the headset will turn off. In this case, start over from step 1.
Once BLUETOOTH devices are paired, there is no need to pair them again, except in the following cases:
Pairing information has been deleted after repair, etc.
The headset is already paired with 8 devices and another device is to be paired.
The headset can be paired with up to 8 devices. If a new device is paired after 8 devices are already paired, the paired device with the oldest
connection time is replaced by the new one.
When the pairing information for the headset has been deleted from the BLUETOOTH device.
Page 36

When the headset is initialized, all pairing information is deleted.
28
In this case, delete the pairing information of the headset from the BLUETOOTH device, and then pair them again.
If the pairing information was deleted by initializing the headset, etc., delete from your iPhone the pairing information for the headset, and then pair
them again.
The headset can be paired with multiple devices, but can only play music from one paired device at a time.
Hint
The above procedure is an example. For details, refer to the operating instructions supplied with your iPhone.
To delete all pairing information, see “Initializing the headset to restore factory settings.”
Related Topic
How to make a wireless connection to BLUETOOTH devices
Connecting to a paired iPhone
Listening to music from a device connected via BLUETOOTH
Initializing the headset to restore factory settings
4-692-591-11(1) Copyright 2017 Sony Corporation
Page 37

Help Guide
29
Wireless Noise Canceling Stereo Headset
MDR-XB950N1
Connecting to a paired iPhone
Unlock the screen of the iPhone if it is locked.
1
Turn on the headset.
2
Press and hold the
Make sure that the indicator (blue) flashes after you release the button. You hear voice guidance “Power on”.
After the headset turns on, if it has automatically connected to the last connected device, you hear voice guidance
“BLUETOOTH connected”.
Check the connection status on the iPhone. If not connected, proceed to step 3.
button for about 2 seconds.
Display the devices paired with the iPhone.
3
Select [ Settings].
1.
Touch [ Bluetooth].
2.
Page 38

Touch [ ] to change it to [ ] (turn on the BLUETOOTH function).
30
3.
Touch [MDR-XB950N1].
4
You hear voice guidance “BLUETOOTH connected”.
Hint
The above procedure is an example. For details, refer to the operating instructions supplied with your iPhone.
If the iPhone was connected with the headset the last time, an HFP/HSP connection is made when you turn on the headset. While the headset is
on, you can make an A2DP connection (music playback) by pressing the
button.
Note
If the last-connected BLUETOOTH device is put near the headset, the headset may connect automatically to the device by simply turning on the
headset. In this case, deactivate the BLUETOOTH function on the BLUETOOTH device or turn off the power.
If you cannot connect your BLUETOOTH device to the headset, deactivate pairing on your BLUETOOTH device and perform pairing again. For
details, refer to the operating instructions supplied with your BLUETOOTH device.
Page 39

Related Topic
31
How to make a wireless connection to BLUETOOTH devices
Pairing and connecting with an iPhone
Listening to music from a device connected via BLUETOOTH
4-692-591-11(1) Copyright 2017 Sony Corporation
Page 40

Help Guide
32
Wireless Noise Canceling Stereo Headset
MDR-XB950N1
Pairing and connecting with a computer (Windows 10)
Pairing is the process required to create a link between BLUETOOTH devices to allow wireless connection. You must pair a
device with the headset to be able to make a BLUETOOTH connection for the first time.
Before you start pairing operation, make sure that:
Your computer has a BLUETOOTH function that supports music playback connections (A2DP).
The computer is placed within 1 m(3 feet) of the headset.
The headset is charged sufficiently.
The operating instructions of the computer is on hand.
Depending on the computer, the built-in BLUETOOTH adaptor should be turned on. For whether or not a BLUETOOTH
adaptor is incorporate, and for how to turn it on, refer to the operating instructions supplied with the computer.
Enter pairing mode on this headset.
1
When you pair the headset with a device for the first time after you bought it, or after you initialized the headset (the headset
has no pairing information), press and hold the
enters pairing mode automatically.
When you pair a 2nd or subsequent device (the headset has pairing information for other devices), press and hold the
button for about 7 seconds.
button for about 2 seconds when the headset is turned off. The headset
Make sure that the indicator flashes blue and red alternately after you release the button. You hear voice guidance
“BLUETOOTH pairing”.
Resume the computer from sleep mode.
2
Register the headset using the computer.
3
Page 41

Click the [Start] button, then [ Settings].
33
1.
Click [ Devices].
2.
Click the [Bluetooth] tab, then click the [Bluetooth] button to turn on the BLUETOOTH function.
3.
Select [MDR-XB950N1], then click [Pair].
4.
Page 42

If passkey (*) input is required on the display of the computer, input “0000.”
34
The headset and the computer are paired with each other and connected.
You hear voice guidance “BLUETOOTH connected”.
If they are not connected, refer to “Connecting to a paired computer (Windows 10).”
If [MDR-XB950N1] does not appear on the display, try again from step 3.
*
A Passkey may be called a “Passcode,” a “PIN code,” or a “Password.”
Note
If pairing is not established within about 5 minutes, pairing mode will be canceled and the headset will turn off. In this case, start over from step 1.
Once BLUETOOTH devices are paired, there is no need to pair them again, except in the following cases:
Pairing information has been deleted after repair, etc.
The headset is already paired with 8 devices and another device is to be paired.
The headset can be paired with up to 8 devices. If a new device is paired after 8 devices are already paired, the paired device with the oldest
connection time is replaced by the new one.
When the pairing information for the headset has been deleted from the BLUETOOTH device.
When the headset is initialized, all pairing information is deleted.
In this case, delete the pairing information of the headset from the BLUETOOTH device, and then pair them again.
The headset can be paired with multiple devices, but can only play music from one paired device at a time.
Hint
The above procedure is an example. For details, refer to the operating instructions supplied with your computer.
To delete all pairing information, refer to “Initializing the headset to restore factory settings.”
Related Topic
How to make a wireless connection to BLUETOOTH devices
Page 43

Connecting to a paired computer (Windows 10)
Listening to music from a device connected via BLUETOOTH
35
Disconnecting BLUETOOTH connection (after use)
Initializing the headset to restore factory settings
4-692-591-11(1) Copyright 2017 Sony Corporation
Page 44

Help Guide
36
Wireless Noise Canceling Stereo Headset
MDR-XB950N1
Pairing and connecting with a computer (Windows 8/Windows 8.1)
Pairing is the process required to create a link between BLUETOOTH devices to allow wireless connection. You must pair a
device with the headset to be able to make a BLUETOOTH connection for the first time.
Before you start pairing operation, make sure that:
Your computer has a BLUETOOTH function that supports music playback connections (A2DP).
The computer is placed within 1 m(3 feet) of the headset.
The headset is charged sufficiently.
The operating instructions of the computer is on hand.
Depending on the computer, the built-in BLUETOOTH adaptor should be turned on. For whether or not a BLUETOOTH
adaptor is incorporate, and for how to turn it on, refer to the operating instructions supplied with the computer.
Enter pairing mode on this headset.
1
When you pair the headset with a device for the first time after you bought it, or after you initialized the headset (the headset
has no pairing information), press and hold the
enters pairing mode automatically.
When you pair a 2nd or subsequent device (the headset has pairing information for other devices), press and hold the
button for about 7 seconds.
button for about 2 seconds when the headset is turned off. The headset
Make sure that the indicator flashes blue and red alternately after you release the button. You hear voice guidance
“BLUETOOTH pairing”.
Resume the computer from sleep mode.
2
Register the headset using the computer.
3
Page 45

Move the mouse pointer to the top- right corner of the screen (when using a touch panel, swipe from the right edge of
37
1.
the screen), then select [ Settings] from the Charm Bar.
Select [ Change PC settings] of the [Settings] charm.
2.
Select [ Devices] of [PC settings].
3.
Select [ Add a device ].
4.
Select [ MDR-XB950N1].
5.
Page 46

If passkey (*) input is required on the display of the computer, input “0000.”
38
The headset and the computer are paired with each other and connected. You hear voice guidance “BLUETOOTH
connected”.
If they are not connected, see “ Connecting to a paired computer (Windows 8/Windows 8.1) .”
If [ MDR-XB950N1] does not appear on the display, try again from step 3.
*
A Passkey may be called a “Passcode,” a “PIN code,” or a “Password.”
Note
If pairing is not established within about 5 minutes, pairing mode will be canceled and the headset will turn off. In this case, start over from step 1.
Once BLUETOOTH devices are paired, there is no need to pair them again, except in the following cases:
Pairing information has been deleted after repair, etc.
The headset is already paired with 8 devices and another device is to be paired.
The headset can be paired with up to 8 devices. If a new device is paired after 8 devices are already paired, the paired device with the oldest
connection time is replaced by the new one.
When the pairing information for the headset has been deleted from the BLUETOOTH device.
When the headset is initialized, all pairing information is deleted.
In this case, delete the pairing information of the headset from the BLUETOOTH device, and then pair them again.
The headset can be paired with multiple devices, but can only play music from one paired device at a time.
Hint
The above procedure is an example. For details, refer to the operating instructions supplied with your computer.
To delete all pairing information, see “Initializing the headset to restore factory settings.”
Related Topic
How to make a wireless connection to BLUETOOTH devices
Connecting to a paired computer (Windows 8/Windows 8.1)
Listening to music from a device connected via BLUETOOTH
Disconnecting BLUETOOTH connection (after use)
Initializing the headset to restore factory settings
Page 47

Help Guide
39
Wireless Noise Canceling Stereo Headset
MDR-XB950N1
Pairing and connecting with a computer (Windows 7)
Pairing is the process required to create a link between BLUETOOTH devices to allow wireless connection. You must pair a
device with the headset to be able to make a BLUETOOTH connection for the first time.
Before you start pairing operation, make sure that:
Your computer has a BLUETOOTH function that supports music playback connections (A2DP).
The computer is placed within 1 m(3 feet) of the headset.
The headset is charged sufficiently.
The operating instructions of the computer is on hand.
Depending on the computer, the built-in BLUETOOTH adaptor should be turned on. For whether or not a BLUETOOTH
adaptor is incorporate, and for how to turn it on, refer to the operating instructions supplied with the computer.
Enter pairing mode on this headset.
1
When you pair the headset with a device for the first time after you bought it, or after you initialized the headset (the headset
has no pairing information), press and hold the
enters pairing mode automatically.
When you pair a 2nd or subsequent device (the headset has pairing information for other devices), press and hold the
button for about 7 seconds.
button for about 2 seconds when the headset is turned off. The headset
Make sure that the indicator flashes blue and red alternately after you release the button. You hear voice guidance
“BLUETOOTH pairing”.
Resume the computer from sleep mode.
2
Search for the headset using the computer.
3
Page 48

Click the [Start] button, then [ Devices and Printers].
40
1.
Click [ Add a device ].
2.
Select [ MDR-XB950N1], then click [ Next].
3.
If passkey (*) input is required on the display of the computer, input “0000.”
The headset and the computer are paired with each other and connected. You hear voice guidance “BLUETOOTH
connected”.
If they are not connected, see “ Connecting to a paired computer (Windows 7) .”
If [ MDR-XB950N1] does not appear on the display, try again from step 3.
*
A Passkey may be called a “Passcode,” a “PIN code,” or a “Password.”
Note
If pairing is not established within about 5 minutes, pairing mode will be canceled and the headset will turn off. In this case, start over from step 1.
Once BLUETOOTH devices are paired, there is no need to pair them again, except in the following cases:
Pairing information has been deleted after repair, etc.
The headset is already paired with 8 devices and another device is to be paired.
The headset can be paired with up to 8 devices. If a new device is paired after 8 devices are already paired, the paired device with the oldest
connection time is replaced by the new one.
When the pairing information for the headset has been deleted from the BLUETOOTH device.
When the headset is initialized, all pairing information is deleted.
In this case, delete the pairing information of the headset from the BLUETOOTH device, and then pair them again.
Page 49

The headset can be paired with multiple devices, but can only play music from one paired device at a time.
41
Hint
The above procedure is an example. For details, refer to the operating instructions supplied with your computer.
To delete all pairing information, see “Initializing the headset to restore factory settings.”
Related Topic
How to make a wireless connection to BLUETOOTH devices
Connecting to a paired computer (Windows 7)
Listening to music from a device connected via BLUETOOTH
Disconnecting BLUETOOTH connection (after use)
Initializing the headset to restore factory settings
4-692-591-11(1) Copyright 2017 Sony Corporation
Page 50

Help Guide
42
Wireless Noise Canceling Stereo Headset
MDR-XB950N1
Connecting to a paired computer (Windows 10)
Before starting the operation, make sure the following:
Depending on the computer, the built-in BLUETOOTH adaptor should be turned on. For whether or not a BLUETOOTH
adaptor is incorporate, and for how to turn it on, refer to the operating instructions supplied with the computer.
Resume the computer from sleep mode.
1
Turn on the headset.
2
Press and hold the
Make sure that the indicator (blue) flashes after you release the button. You hear voice guidance “Power on”.
After the headset turns on, if it has automatically connected to the last connected device, you hear voice guidance
“BLUETOOTH connected”.
Use the computer to check whether the connection is established, and if it is not established, proceed to step 3.
If the computer has connected to the last BLUETOOTH device connected, disconnect it, then proceed to the next step.
button for about 2 seconds.
Select the headset using the computer.
3
Right-click the volume icon on the windows toolbar, then click [Playback devices ].
1.
Page 51

Right-click [MDR -XB950N1].
43
2.
If [MDR-XB950N1] is not displayed, right-click on the [ Sound] screen, then select [ Show Disabled Devices].
Click [ Connect].
3.
The connection is established.
Page 52

Hint
44
The above procedure is an example. For details, refer to the operating instructions supplied with your computer.
If the computer was connected with the headset the last time, an HFP/HSP connection is made when you turn on the headset. While the headset
is on, you can make an A2DP connection (music playback) by pressing the
button.
Note
If the last-connected BLUETOOTH device is put near the headset, the headset may connect automatically to the device by simply turning on the
headset. In this case, deactivate the BLUETOOTH function on the BLUETOOTH device or turn off the power.
If you cannot connect your BLUETOOTH device to the headset, deactivate pairing on your BLUETOOTH device and perform pairing again. For
details, refer to the operating instructions supplied with your BLUETOOTH device.
Related Topic
How to make a wireless connection to BLUETOOTH devices
Pairing and connecting with a computer (Windows 10)
Listening to music from a device connected via BLUETOOTH
Disconnecting BLUETOOTH connection (after use)
4-692-591-11(1) Copyright 2017 Sony Corporation
Page 53

Help Guide
45
Wireless Noise Canceling Stereo Headset
MDR-XB950N1
Connecting to a paired computer (Windows 8/Windows 8.1)
Before starting the operation, make sure the following:
Depending on the computer, the built-in BLUETOOTH adaptor should be turned on. For whether or not a BLUETOOTH
adaptor is incorporate, and for how to turn it on, refer to the operating instructions supplied with the computer.
Resume the computer from sleep mode.
1
Turn on the headset.
2
Press and hold the
Make sure that the indicator (blue) flashes after you release the button. You hear voice guidance “Power on”.
After the headset turns on, if it has automatically connected to the last connected device, you hear voice guidance
“BLUETOOTH connected”.
Use the computer to check whether the connection is established, and if it is not established, proceed to step 3.
If the computer has connected to the last BLUETOOTH device connected, disconnect it, then proceed to the next step.
button for about 2 seconds.
Select the headset using the computer.
3
Select [ Desktop] on the Start screen.
1.
Move the mouse pointer to the top- right corner of the screen (when using a touch panel, swipe from the right edge of
2.
the screen), then select [ Settings] from the Charm Bar.
Page 54

Select [ Control Panel] in the [Settings] charm.
46
3.
Select [ Hardware and Sound], then [Devices and Printers].
4.
Right-click [MDR-XB950N1] in the [ Devices and Printers] screen.
5.
Page 55

Select [ Advanced Operation] — [Connect to audio sink device].
47
6.
Hint
The above procedure is an example. For details, refer to the operating instructions supplied with your computer.
If the computer was connected with the headset the last time, an HFP/HSP connection is made when you turn on the headset. While the headset
is on, you can make an A2DP connection (music playback) by pressing the
Note
If the last-connected BLUETOOTH device is put near the headset, the headset may connect automatically to the device by simply turning on the
headset. In this case, deactivate the BLUETOOTH function on the BLUETOOTH device or turn off the power.
If you cannot connect your BLUETOOTH device to the headset, deactivate pairing on your BLUETOOTH device and perform pairing again. For
details, refer to the operating instructions supplied with your BLUETOOTH device.
Related Topic
How to make a wireless connection to BLUETOOTH devices
Pairing and connecting with a computer (Windows 8/Windows 8.1)
button.
Page 56

Listening to music from a device connected via BLUETOOTH
Disconnecting BLUETOOTH connection (after use)
48
4-692-591-11(1) Copyright 2017 Sony Corporation
Page 57

Help Guide
49
Wireless Noise Canceling Stereo Headset
MDR-XB950N1
Connecting to a paired computer (Windows 7)
Before starting the operation, make sure the following:
Depending on the computer, the built-in BLUETOOTH adaptor should be turned on. For whether or not a BLUETOOTH
adaptor is incorporate, and for how to turn it on, refer to the operating instructions supplied with the computer.
Resume the computer from sleep mode.
1
Turn on the headset.
2
Press and hold the
Make sure that the indicator (blue) flashes after you release the button. You hear voice guidance “Power on”.
After the headset turns on, if it has automatically connected to the last connected device, you hear voice guidance
“BLUETOOTH connected”.
Use the computer to check whether the connection is established, and if it is not established, proceed to step 3.
If the computer has connected to the last BLUETOOTH device connected, disconnect it, then proceed to the next step.
button for about 2 seconds.
Select the headset using the computer.
3
Click the [Start] button, then [ Devices and Printers].
1.
Double-click [MDR-XB950N1] of the device.
2.
Page 58

Disconnecting BLUETOOTH connection (after use)
3.
50
Hint
Click [ Listen to Music].
The above procedure is an example. For details, refer to the operating instructions supplied with your computer.
If the computer was connected with the headset the last time, an HFP/HSP connection is made when you turn on the headset. While the headset
is on, you can make an A2DP connection (music playback) by pressing the
button.
Note
If the last-connected BLUETOOTH device is put near the headset, the headset may connect automatically to the device by simply turning on the
headset. In this case, deactivate the BLUETOOTH function on the BLUETOOTH device or turn off the power.
If you cannot connect your BLUETOOTH device to the headset, deactivate pairing on your BLUETOOTH device and perform pairing again. For
details, refer to the operating instructions supplied with your BLUETOOTH device.
Related Topic
How to make a wireless connection to BLUETOOTH devices
Pairing and connecting with a computer (Windows 7)
Listening to music from a device connected via BLUETOOTH
Page 59

Help Guide
3
51
Wireless Noise Canceling Stereo Headset
MDR-XB950N1
Pairing and connecting with other BLUETOOTH devices
Pairing is the process required to create a link between BLUETOOTH devices to allow wireless connection.
You must pair a device with the headset to be able to make a BLUETOOTH connection for the first time.
Before you start pairing operation, make sure that:
The BLUETOOTH device is placed within 1 m(3 feet) of the headset.
The headset is charged sufficiently.
The operating instructions of the BLUETOOTH device is on hand.
Enter pairing mode on this headset.
1
When you pair the headset with a device for the first time after you bought it, or after you initialized the headset (the headset
has no pairing information), press and hold the
enters pairing mode automatically.
When you pair a 2nd or subsequent device (the headset has pairing information for other devices), press and hold the
button for about 7 seconds.
button for about 2 seconds when the headset is turned off. The headset
Make sure that the indicator flashes blue and red alternately after you release the button. You hear voice guidance
“BLUETOOTH pairing”.
Perform the pairing procedure on the BLUETOOTH device to search for this headset.
2
[MDR-XB950N1] will be displayed on the list of detected devices on the screen of the BLUETOOTH device. If not displayed,
repeat from step 1.
Select [MDR-XB950N1].
Page 60

If passkey (*) input is required on the display of the BLUETOOTH device, input “0000.”
52
*
A Passkey may be called a “Passcode,” a “PIN code,” or a “Password.”
Make the BLUETOOTH connection from the BLUETOOTH device.
4
Depending on the BLUETOOTH device, the headset may be connected with the device automatically as soon as they are
paired.
When connected, you hear voice guidance “BLUETOOTH connected”.
Note
If pairing is not established within about 5 minutes, pairing mode will be canceled and the headset will turn off. In this case, start over from step 1.
When pairing with a BLUETOOTH device that cannot display a list of detected devices or that has no display, you may pair the device by setting
both the headset and the BLUETOOTH device to pairing mode. At this time, if passkey is set other than “0000” on the BLUETOOTH device,
pairing cannot be done with the headset.
Once BLUETOOTH devices are paired, there is no need to pair them again, except in the following cases:
Pairing information has been deleted after repair, etc.
The headset is already paired with 8 devices and another device is to be paired.
The headset can be paired with up to 8 devices. If a new device is paired after 8 devices are already paired, the paired device with the oldest
connection time is replaced by the new one.
When the pairing information for the headset has been deleted from the BLUETOOTH device.
When the headset is initialized, all pairing information is deleted.
In this case, delete the pairing information of the headset from the BLUETOOTH device, and then pair them again.
The headset can be paired with multiple devices, but can only play music from one paired device at a time.
Hint
The above procedure is an example. For details, refer to the operating instructions supplied with your BLUETOOTH device.
To delete all pairing information, see “Initializing the headset to restore factory settings.”
Related Topic
How to make a wireless connection to BLUETOOTH devices
Connecting to a paired BLUETOOTH device
Listening to music from a device connected via BLUETOOTH
Initializing the headset to restore factory settings
4-692-591-11(1) Copyright 2017 Sony Corporation
Page 61

Help Guide
53
Wireless Noise Canceling Stereo Headset
MDR-XB950N1
Connecting to a paired BLUETOOTH device
Turn on the headset.
1
Press and hold the
button for about 2 seconds.
Make sure that the indicator (blue) flashes after you release the button. You hear voice guidance “Power on”.
After the headset turns on, if it has automatically connected to the last connected device, you hear voice guidance
“BLUETOOTH connected”.
Check the connection status on the BLUETOOTH device. If not connected, proceed to step 2.
Make the BLUETOOTH connection from the BLUETOOTH device.
2
For details, refer to the operating instructions supplied with your BLUETOOTH device.
When connected, you hear voice guidance “BLUETOOTH connected”.
Hint
The above procedure is an example. For details, refer to the operating instructions supplied with your BLUETOOTH device.
If the BLUETOOTH device was connected with the headset the last time, an HFP/HSP connection is made when you turn on the headset. While
the headset is on, you can make an A2DP connection (music playback) by pressing the
button.
Page 62

Note
54
If the last-connected BLUETOOTH device is put near the headset, the headset may connect automatically to the device by simply turning on the
headset. In this case, deactivate the BLUETOOTH function on the BLUETOOTH device or turn off the power.
If you cannot connect your BLUETOOTH device to the headset, deactivate pairing on your BLUETOOTH device and perform pairing again. For
details, refer to the operating instructions supplied with your BLUETOOTH device.
Related Topic
How to make a wireless connection to BLUETOOTH devices
Pairing and connecting with other BLUETOOTH devices
Listening to music from a device connected via BLUETOOTH
4-692-591-11(1) Copyright 2017 Sony Corporation
Page 63

Help Guide
55
Wireless Noise Canceling Stereo Headset
MDR-XB950N1
Connecting the headset to both a music player and a smartphone or mobile phone
To use a BLUETOOTH music player for listening to music and a BLUETOOTH smartphone for making phone calls, the headset
needs to be connected with each device with a BLUETOOTH connection.
Pair the headset with BLUETOOTH devices, respectively.
1
Make an A2DP BLUETOOTH connection between the headset and the BLUETOOTH music player.
2
Make an HFP or HSP BLUETOOTH connection between the headset and the BLUETOOTH smartphone
3
or mobile phone.
Note
If the smartphone or mobile phone was connected with the headset the last time, an HFP or HSP connection is made automatically when you turn
on the headset. At the same time, an A2DP connection may also be made automatically. If this happens, disconnect the headset from the
smartphone or mobile phone once using the phone, then connect the devices again by repeating the process from step 2.
4-692-591-11(1) Copyright 2017 Sony Corporation
Page 64

Help Guide
56
Wireless Noise Canceling Stereo Headset
MDR-XB950N1
Connecting the headset to 2 Android smartphones
When you connect the headset to a smartphone, usually the music playback function and the phone call function are both
connected automatically.
To make a multi point connection with 2 smartphones separately, one for listening to music and the other for making phone calls,
change the settings of the smartphones so that only one of the functions is connected for each smartphone.
Pair the headset with both smartphones, respectively.
1
Use one of the smartphones to establish a BLUETOOTH connection with the headset.
2
On the smartphone connected to the headset, uncheck either [Phone audio] (HFP) or [Media audio]
3
(A2DP).
Example: To connect “Media audio” (A2DP) only
Touch [ Settings] - [Bluetooth] - the setting icon next to [ MDR-XB950N1].
On the [Paired Bluetooth device ] screen, uncheck [Phone audio].
Terminate the BLUETOOTH connection of the smartphone.
4
Page 65

Use the other smartphone to establish a BLUETOOTH connection to the headset.
57
5
In the same way, uncheck the function that you did not uncheck in step 3.
6
Use the first smartphone to establish a BLUETOOTH connection again.
7
Both smartphones are connected to the headset with only one function enabled.
Hint
The above procedure is an example. For details, refer to the operating instructions supplied with your Android smartphones.
4-692-591-11(1) Copyright 2017 Sony Corporation
Page 66

Help Guide
58
Wireless Noise Canceling Stereo Headset
MDR-XB950N1
Connecting the headset to an Android smartphone and an iPhone
When you connect the headset to a smartphone, usually the music playback function and the phone call function are both
connected automatically. To make a multi point connection using an Android smartphone and an iPhone separately for listening to
music and making phone calls, change the settings on the Android smartphone so that only one of the functions is connected.
Connect the Android smartphone first, and then connect the iPhone.
You cannot set the iPhone to connect one function only.
Pair the headset with both Android smartphone and iPhone, respectively.
1
Use the Android smartphone to establish a BLUETOOTH connection with the headset.
2
On the Android smartphone connected to the headset, uncheck either [Phone audio] (HFP) or [Media
3
audio] (A2DP).
Example: To connect “Media audio” (A2DP) only
Touch [ Settings] - [Bluetooth] - the setting icon next to [ MDR-XB950N1].
On the [Paired Bluetooth device ] screen, uncheck [Phone audio].
Page 67

Use the iPhone to establish a BLUETOOTH connection to the headset.
The iPhone is connected to the headset with both functions, but you can only use the function that you unchecked in step 3.
4
59
Hint
The above procedure is an example. For details, refer to the operating instructions supplied with your Android smartphone.
Note
If you connect an Android smartphone with [Phone audio] (HFP), the remaining battery charge of the headset will not be displayed correctly on an
iPhone.
4-692-591-11(1) Copyright 2017 Sony Corporation
Page 68

Help Guide
4-692-591-11(1) Copyright 2017 Sony Corporation
60
Wireless Noise Canceling Stereo Headset
MDR-XB950N1
Using the supplied headphone cable
You can use the headset as noise canceling headphones by connecting a device via the supplied headphone cable and turning
the headset on. When the headset is powered on, you can also use the bass effect function.
When turning on the headset, the NC (noise canceling) indicator (green) lights up or flashes.
Connect a playback device to the INPUT jack with the supplied headphone cable.
1
Make sure you connect the L-shaped plug to the playback device.
Note
Use the supplied headphone cable only.
Make sure you insert the plug firmly.
The BLUETOOTH function cannot be used.
The jog switch (
device.
The NC and BASS EFFECT buttons cannot be used when the headset is powered off.
/ / / ) and +/- buttons cannot be used. For volume, play/pause and other operations, control with the connected
Hint
When the headset is turned off, you can use it as ordinary headphones. The headset can be charged while in use.
When the noise canceling function is turned on, the headset turns off automatically if you disconnect the headphone cable.
When an incoming call arrives, a ring tone will be heard via the headphones. Answer the call using your smartphone or mobile phone, and talk
using the microphone of the phone. You can hear the voice of the caller from the headphones.
If you disconnect the headphone cable from the smartphone or mobile phone, you can talk using the microphone and speaker of the phone.
Page 69

Help Guide
61
Wireless Noise Canceling Stereo Headset
MDR-XB950N1
Listening to music from a device connected via BLUETOOTH
You can enjoy listening to music and basic remote control operation of a BLUETOOTH device via a BLUETOOTH connection. The
BLUETOOTH device is required to support the following BLUETOOTH profiles.
A2DP (Advanced Audio Distribution Profile):
enables you to enjoy high- quality audio content wirelessly.
AVRCP (Audio Video Remote Control Profile):
enables you to adjust volume, etc.
The operation may vary depending on the BLUETOOTH device. Refer to the operating instructions supplied with your
BLUETOOTH device.
Connect the headset to a BLUETOOTH device.
1
Wear the headset.
2
Adjust the length of the headband.
Put the headset with
tactile dot.
A: Tactile dot
Play back music or video on the BLUETOOTH device.
3
Adjust the volume on the BLUETOOTH device.
indication on your left ear and indication on your right ear. The unit of the headset has a
Adjust the volume by pressing the +/- buttons of the headset.
4
When the volume reaches the maximum or minimum, an alarm sounds.
Page 70

Note
62
If the communication condition is poor, the BLUETOOTH device may react incorrectly to the operation on the headset.
Hint
The headset supports SCMS-T content protection. You can enjoy music, etc., from a device such as a mobile phone or portable TV that supports
SCMS-T content protection.
Depending on the BLUETOOTH device, it may be necessary to adjust the volume or set the audio output setting on the BLUETOOTH device.
Volume during a call and volume during music playback can be adjusted independently. Changing the call volume does not change the volume of
music playback, and vice versa.
Related Topic
How to make a wireless connection to BLUETOOTH devices
Controlling the audio device (BLUETOOTH connection)
Using the noise canceling function
About the Automatic AI noise canceling function
Switching the sound quality mode
4-692-591-11(1) Copyright 2017 Sony Corporation
Page 71

Help Guide
63
Wireless Noise Canceling Stereo Headset
MDR-XB950N1
Controlling the audio device (BLUETOOTH connection)
If the BLUETOOTH device supports AVRCP, you can control it by the headset. The functions available may vary depending on
the BLUETOOTH device. Refer to the operating instructions supplied with your BLUETOOTH device.
Each button has the following function:
:
Press once during pause to start playback.
Press once during playback to pause.
/ :
Slide once to skip to the beginning of the next track/beginning of the previous (or current) track.
Slide and hold to fast-reverse/fast-forward.
+/-:
Press the + or - button to adjust the volume.
When connecting iOS devices such as iPhone,
Press twice to skip to the beginning of the next track (
has the following function:
).
Press three times to skip to the beginning of the previous (or current) track (
Press once and release, and then press and hold to fast- forward (
Press twice and release, and then press and hold to fast-reverse (
Note
).
).
).
If the communication condition is poor, the BLUETOOTH device may react incorrectly to the operation on the headset.
The available functions may vary depending on the BLUETOOTH device. When you operate as illustrated above, it may operate differently or may
not work at all.
4-692-591-11(1) Copyright 2017 Sony Corporation
Page 72

Help Guide
64
Wireless Noise Canceling Stereo Headset
MDR-XB950N1
Disconnecting BLUETOOTH connection (after use)
If using a device that supports one-touch connection (NFC), touch the device to the headset again.
1
(Unlock the screen of the device if it is locked.) If using a device that does not support one-touch
connection (NFC), operate from the BLUETOOTH device.
When disconnected, you hear voice guidance “BLUETOOTH disconnected”.
Press and hold the
2
button on the headset for about 2 seconds to turn off the headset.
You hear voice guidance “Power off”.
Hint
When you finish playing music, the BLUETOOTH connection may terminate automatically, depending on the BLUETOOTH device.
4-692-591-11(1) Copyright 2017 Sony Corporation
Page 73

Help Guide
65
Wireless Noise Canceling Stereo Headset
MDR-XB950N1
What is noise canceling ?
The noise canceling circuit actually senses outside noise with built-in microphones and sends an equal - but-opposite canceling
signal to the headset.
Note
The noise canceling effect may not be pronounced in a very quiet environment, or some noise may be heard.
Depending on how you wear the unit, the noise canceling effect may vary or a beeping sound (howling) may occur. In these cases, take off the unit
and put it on again.
The noise canceling function works for noise in the low frequency band primarily. Although noise is reduced, it is not canceled completely.
When you use the unit in a train or a car, noise may occur depending on street conditions.
Mobile phones may cause interference and noise. Should this occur, locate the unit further away from the mobile phone.
Do not cover the microphones of the unit with your hands. The noise canceling function may not work properly, or a beeping sound (howling) may
occur. In these cases, take your hands off of the microphones of the unit.
A: Microphones
Related Topic
Using the noise canceling function
About the Automatic AI noise canceling function
4-692-591-11(1) Copyright 2017 Sony Corporation
Page 74

Help Guide
66
Wireless Noise Canceling Stereo Headset
MDR-XB950N1
Using the noise canceling function
If you use the noise canceling function, you can enjoy music without being disturbed by ambient noise.
Press and hold the button for about 2 seconds when the headset is turned off to turn on the
1
headset.
You hear voice guidance “Power on”.
The noise canceling function is turned on automatically when you turn on the headset.
When the noise canceling function is turned on, the NC indicator (green) lights up.
To turn off the noise canceling function
Press the NC button. The NC indicator (green) flashes. You hear voice guidance “Noise canceling off”. (To turn on the
function, press the NC button again. You hear voice guidance “Noise canceling on”.)
Hint
If you use the noise canceling function with a BLUETOOTH connection, the noise canceling function is on even if you connect the supplied
headphone cable.
You can also turn on/off the noise canceling function with the “Sony | Headphones Connect” app.
Page 75

Related Topic
67
What is noise canceling?
About the Automatic AI noise canceling function
What you can do with "Sony | Headphones Connect" app
4-692-591-11(1) Copyright 2017 Sony Corporation
Page 76

Help Guide
68
Wireless Noise Canceling Stereo Headset
MDR-XB950N1
About the Automatic AI noise canceling function
The Automatic AI (Artificial Intelligence) Noise Canceling function constantly analyzes environmental ambient sound components
and automatically selects the most effective noise canceling mode.
Noise canceling mode types
NC Mode A
Noise mainly in an airplane is effectively reduced.
NC Mode B
Noise mainly in a bus or a train is effectively reduced.
NC Mode C
Noise mainly found in an office environment (PC, copier, air ventilation, etc.) is effectively reduced.
Related Topic
What is noise canceling?
Using the noise canceling function
4-692-591-11(1) Copyright 2017 Sony Corporation
Page 77

Help Guide
69
Wireless Noise Canceling Stereo Headset
MDR-XB950N1
About the bass effect function
The bass effect function enhances low frequencies. You can turn on or off the bass effect function simply by pressing a button.
Related Topic
Using the bass effect function
4-692-591-11(1) Copyright 2017 Sony Corporation
Page 78

Help Guide
70
Wireless Noise Canceling Stereo Headset
MDR-XB950N1
Using the bass effect function
You can enhance low frequencies thanks to the bass effect function.
When the headset is on, press the BASS EFFECT button.
1
The BASS EFFECT indicator (orange) lights up. You hear voice guidance “Bass effect on”.
To turn off the bass effect function
Press the BASS EFFECT button again. The BASS EFFECT indicator (orange) turns off. You hear voice guidance “Bass effect
off.”
Note
Since the function amplifies certain low frequencies, the effect may not be obtained with music that does not contain the frequencies to be
amplified.
The on or off status of the bass effect function remains and will be the same when you turn on the headset next time.
Hint
You can set details of the sound effect for the bass effect function with the “Sony | Headphones Connect” app.
Related Topic
About the bass effect function
What you can do with "Sony | Headphones Connect" app
4-692-591-11(1) Copyright 2017 Sony Corporation
Page 79

Help Guide
71
Wireless Noise Canceling Stereo Headset
MDR-XB950N1
Switching the sound quality mode
The sound quality is set to the “Priority on sound quality” mode as the default setting.
When using an SBC, AAC, or aptX compatible device, use with the “Priority on sound quality” mode.
If the connection is unstable, such as when producing only intermittent sound, select the “Priority on stable connection” mode.
Sound quality and indicator (blue) of each mode
When you switch the sound quality mode, the indicator flashes in blue to show the current sound quality mode.
“Priority on sound quality” mode: 3 times
SBC, AAC, or aptX is selected automatically.
“Priority on stable connection” mode: 1 time
SBC
Turn on the headset by pressing the button for more than 2 seconds while holding the + or - button
1
down.
To select “Priority on stable connection,” turn on the headset while holding the - button down.
To select “Priority on sound quality,” turn on the headset while holding the + button down.
- - - -
To check the sound quality mode
While the headset is powered on, press and hold the button, then press the + or - button within 2 seconds (before the power
is turned off). The indicator will flash in blue 3 times (“Priority on sound quality” mode) or 1 time (“Priority on stable connection”
mode).
Note
When you turn on the headset by pressing the button only, the indicator (blue) flashes two times to indicate the power-on, but the headset
does not indicate the sound quality mode with flashes of the indicator (blue).
Page 80

The playback time may become shorter, depending on the sound quality and the conditions under which you are using the headset.
72
Depending on the ambient conditions in the area where you are using the headset, intermittent sound may still occur, even if the “Priority on stable
connection” mode is selected.
4-692-591-11(1) Copyright 2017 Sony Corporation
Page 81

Help Guide
73
Wireless Noise Canceling Stereo Headset
MDR-XB950N1
Checking the sound quality mode
When you switch the sound quality mode, the indicator flashes in blue to show the current sound quality mode. When the headset
is powered on, press and hold the
the indicator flashes in blue to show the current sound quality mode.
“Priority on sound quality” mode: 3 times - - - -
SBC, AAC, or aptX is selected automatically.
“Priority on stable connection” mode: 1 time
SBC
button, then press the + or - button within 2 seconds (before the power is turned off), then
4-692-591-11(1) Copyright 2017 Sony Corporation
Page 82

Help Guide
74
Wireless Noise Canceling Stereo Headset
MDR-XB950N1
Supported codecs
A codec is an audio coding algorithm used when transmitting sound via a BLUETOOTH connection.
The headset supports the following 3 codecs for music playback via an A2DP connection: SBC, AAC, and aptX.
SBC
This is an abbreviation for Subband Codec.
This is the standard audio coding technology used by BLUETOOTH devices.
All BLUETOOTH devices support SBC.
AAC
This is an abbreviation for Advanced Audio Coding.
AAC is mainly used by Apple products such as iPhones, and it provides higher sound quality than that of SBC.
aptX
This is an audio coding technology.
aptX is used by some Android smartphones, and it provides a lower compression rate and higher sound quality than that of
SBC.
With the headset set to the “Priority on sound quality” mode, when music in one of the above codecs is transmitted from a
connected device, the headset switches to that codec automatically and plays back the music in the same codec.
However, depending on the device to be connected with the headset, you may need to set the device beforehand to listen to
music in a different codec on the headset, even if the device supports a codec of higher sound quality than SBC.
Refer to the operating instructions supplied with the device regarding setting the codec.
4-692-591-11(1) Copyright 2017 Sony Corporation
Page 83

Help Guide
75
Wireless Noise Canceling Stereo Headset
MDR-XB950N1
Receiving a call
You can enjoy a hands -free call with a smartphone or mobile phone that supports the BLUETOOTH profile HFP (Hands-free
Profile) or HSP (Headset Profile), via a BLUETOOTH connection.
If your smartphone or mobile phone supports both HFP and HSP, set it to HFP.
Operations may vary depending on the smartphone or mobile phone. Refer to the operating instructions supplied with your
smartphone or mobile phone.
This unit supports normal incoming calls only. Calling apps for smartphones and computers are not supported.
Ring tone
When an incoming call arrives, a ring tone will be heard from the headset, and the indicator (blue) flashes quickly.
You will hear either of following ring tones, depending on your smartphone or mobile phone.
Ring tone set on the headset
Ring tone set on the smartphone or mobile phone
Ring tone set on the smartphone or mobile phone only for a BLUETOOTH connection
Connect the headset to a smartphone or mobile phone beforehand.
1
When you hear a ring tone, press button on the headset and receive the call.
2
When an incoming call arrives even while you are listening to music, playback pauses and a ring tone will be heard from the
headset.
A: Microphone
If no ring tone is heard via the headset
The headset may not be connected with the smartphone or mobile phone with HFP or HSP. Check the connection status
on the smartphone or mobile phone.
Page 84

If playback does not pause automatically, operate the headset to pause playback.
76
Press the + or - button to adjust the volume.
3
When the volume reaches the maximum or minimum, an alarm sounds.
To end the call, press the
4
button on the headset again.
If you received a call during music playback, music playback resumes automatically.
Note
Depending on the smartphone or mobile phone, playback may not resume automatically even if you finish the call.
Use a smartphone or mobile phone at least 50 cm(19 3/4 in.) away from the headset. Noise may result if the headset and the smartphone or
mobile phone are too close.
Hint
Some smartphones or mobile phones by default receive calls with the phone instead of the headset. With an HFP or HSP connection, switch the
call device to the headset by holding the
Volume for a call can be adjusted during a telephone conversation only.
button down for about 2 seconds or by using your smartphone or mobile phone.
Volume during a call and volume during music playback can be adjusted independently. Changing the call volume does not change the volume of
music playback, and vice versa.
Related Topic
How to make a wireless connection to BLUETOOTH devices
Making a call
Functions for a phone call
4-692-591-11(1) Copyright 2017 Sony Corporation
Page 85

Help Guide
77
Wireless Noise Canceling Stereo Headset
MDR-XB950N1
Making a call
You can enjoy a hands -free call with a smartphone or mobile phone that supports the BLUETOOTH profile HFP (Hands-free
Profile) or HSP (Headset Profile), via a BLUETOOTH connection.
If your smartphone or mobile phone supports both HFP and HSP, set it to HFP.
Operations may vary depending on the smartphone or mobile phone. Refer to the operating instructions supplied with your
smartphone or mobile phone.
This unit supports normal incoming calls only. Calling apps for smartphones and computers are not supported.
Connect the headset to a smartphone or mobile phone beforehand.
1
Operate your smartphone or mobile phone to make a call.
2
When you make a call, the dial tone is heard from the headset.
If you make a call while you are listening to music, playback pauses.
If no dial tone is heard via the headset, switch the call device to the headset using your smartphone or mobile phone or by
holding the
A: Microphone
button down for about 2 seconds.
Press the + or - button to adjust the volume.
3
When the volume reaches the maximum or minimum, an alarm sounds.
To end the call, press the
4
button on the headset again.
Page 86

If you made a call during music playback, music playback resumes automatically.
78
Note
Use a smartphone or mobile phone at least 50 cm(19 3/4 in.) away from the headset. Noise may result if the headset and the smartphone or
mobile phone are too close.
Hint
Volume for a call can be adjusted during a telephone conversation only.
Volume for a call and listening to music can be adjusted independently. Even if you change the volume while playing back music, the volume of a
call does not change.
Related Topic
How to make a wireless connection to BLUETOOTH devices
Receiving a call
Functions for a phone call
4-692-591-11(1) Copyright 2017 Sony Corporation
Page 87

Help Guide
79
Wireless Noise Canceling Stereo Headset
MDR-XB950N1
Functions for a phone call
The available functions may vary depending on the profile supported by your smartphone or mobile phone. Even if the profile is
the same, functions may vary depending on the smartphone or mobile phone.
Refer to the operating instructions supplied with your smartphone or mobile phone.
Supported profile: HFP
During standby/music playback
Press the button for about 2 seconds to start the voice dial function of the smartphone/cell phone (*), activate Siri of the
iPhone/iPad, or activate the Google App of the Android smartphone.
Outgoing call
Press the
Press the
Incoming call
Press the
Press and hold the
During call
Press the
Press the
button once to cancel an outgoing call.
button for about 2 seconds to change the call device between the headset and the smartphone or mobile phone.
button once to answer a call.
button for about 2 seconds to reject a call.
button once to finish a call.
button for about 2 seconds to change the call device between the headset and the smartphone or mobile phone.
Supported profile: HSP
Outgoing call
Press the
Incoming call
Press the
button once to cancel an outgoing call. (*)
button once to answer a call.
During call
Press the
*
Some devices may not support this function.
Related Topic
button once to finish a call. (*)
Page 88

Receiving a call
Making a call
80
4-692-591-11(1) Copyright 2017 Sony Corporation
Page 89

Help Guide
81
Wireless Noise Canceling Stereo Headset
MDR-XB950N1
Using the voice assist function (Siri)
By using the Siri feature that comes with iPhone/iPad, you can speak to the headset’s microphone to operate the iPhone/iPad.
The following shows how to use Siri.
Turn Siri on.
1
On iPhone/iPad, select [Settings] — [Siri] to turn Siri on.
The operation above is an example. For details, refer to the operating instructions of the iPhone/iPad.
Note: For details on Siri, refer to the operating instructions or support website of the iPhone/iPad.
Connect the headset to the iPhone/iPad via BLUETOOTH.
2
When the iPhone/iPad is in standby or playing music, press and hold the
3
button to activate Siri.
You hear a startup sound.
Make a request to Siri through the headset’s microphone.
4
For details on Siri, such as apps which work with Siri, refer to the operating instructions of the iPhone/iPad.
To continue to request, press the
5
button before Siri is deactivated.
After activating Siri, when a certain time has passed without requests, a beep will sound and Siri will be deactivated.
Note
Siri cannot be activated when you say “Hey Siri” through the headset’s microphone even when the iPhone/iPad’s [Allow “Hey Siri”] setting is on.
4-692-591-11(1) Copyright 2017 Sony Corporation
Page 90

Help Guide
Google] setting is on.
82
Wireless Noise Canceling Stereo Headset
MDR-XB950N1
Using the voice assist function (Google App)
By using the Google App feature that comes with the Android smartphone, you can speak to the headset’s microphone to operate
the Android smartphone.
The following shows how to use the Google App.
Turn the Google App on.
1
On the Android smartphone, select [Settings] — [Apps]. A gear icon appears in the top - right corner of the display. Select the
gear icon, then [Default Apps] — [Assist & Voice input] — [Assist App], and then set [Assist App] to the Google App.
The operation above is an example. For details, refer to the operating instructions of the Android smartphone.
Note: The latest version of the app may be required.
For details on the Google App, refer to the operating instructions or support website of the Android smartphone.
The Google App may not be activated from the headset depending on specifications of the Android smartphone.
Connect the headset to the Android smartphone via BLUETOOTH.
2
When the Android smartphone is in standby or playing music, press and hold the
3
button to activate
the Google App.
Activate the Google App and hear the start-up sound.
4
Make a request to the Google App through the headset’s microphone.
5
For details on the Google App, such as apps which work with the Google App, refer to the operating instructions of the
Android smartphone.
After activating the Google App, when a certain time has passed without requests, a beep will sound and the Google App will
be deactivated
Note
The Google App cannot be activated when you say “OK Google” through the headset’s microphone even when the Android smartphone’s [OK
Page 91

Help Guide
83
Wireless Noise Canceling Stereo Headset
MDR-XB950N1
What you can do with "Sony | Headphones Connect" app
When you install the “Sony | Headphones Connect” app to your smartphone, you can do the following.
Display the remaining battery of the headset
Turn noise canceling on/off
Set CLEAR BASS (Electro Bass Booster)
Select the sound effect mode (VPT)
For details of the “Sony | Headphones Connect” app, refer to the following URL. You can also check the schedule of app release,
corresponding devices and so on.
http://www.sony.net/hpc/
The CLEAR BASS and sound effect setting with the app can be also turned on/off with the BASS EFFECT button on the headset.
Hint
The Electro Bass Booster and sound effect setting with the app are memorized by the headset. When you set the app once, you can also enjoy the
sound effect of the device not installed with the app using the bass effect function on the headset.
The operation of the “Sony | Headphones Connect” app depends on audio devices. The app specifications and screen design may be changed
without prior notice.
Related Topic
Installing "Sony | Headphones Connect" app
Checking the remaining battery charge
Using the noise canceling function
Using the bass effect function
4-692-591-11(1) Copyright 2017 Sony Corporation
Page 92

Help Guide
84
Wireless Noise Canceling Stereo Headset
MDR-XB950N1
Installing "Sony | Headphones Connect" app
Download the “Sony | Headphones Connect” app from Google Play store or App Store, and install the
1
app to your smartphone.
For details of the “Sony | Headphones Connect” app, refer to the following URL.
http://www.sony.net/hpc/
After installing the app, launch the “Sony | Headphones Connect” app.
2
4-692-591-11(1) Copyright 2017 Sony Corporation
Page 93

Help Guide
85
Wireless Noise Canceling Stereo Headset
MDR-XB950N1
Precautions
Note on static electricity
Static electricity accumulated in the body may cause mild tingling in your ears. To minimize the effect, wear clothes made from
natural materials.
Others
Be careful not to catch your finger in the unit when folding.
When you use the unit as wired headphones, use the supplied headphone cable only. Make sure that the headphone cable is
firmly inserted.
Do not place this headset in a place exposed to humidity, dust, soot or steam, or subject to direct sunlight. Do not leave the
headset in a car for a long time. It may cause a malfunction.
Using the BLUETOOTH device may not function on mobile phones, depending on radio wave conditions and location where
the device is being used.
Listening with this headset at high volume may affect your hearing.
For traffic safety, do not use this headset while driving or cycling.
Do not use the headset in places where it would be dangerous if you are unable to hear ambient sound, such as at railroad
crossings, train station platforms, pedestrian crossings, and construction sites.
Do not put weight or pressure on this headset as it may cause the headset to deform during long storage.
Do not subject the headset to excessive shock.
Clean the headset with a soft dry cloth.
Do not expose the headset to water. The headset is not waterproof. Remember to follow the precautions below.
Be careful not to drop the headset into a sink or other container filled with water.
Do not use the headset in humid locations or bad weather, such as in the rain or snow.
Do not get the headset wet. If you touch the headset with wet hands, or put the headset in a damp article of clothing, the
headset may get wet and this may cause a malfunction of the headset.
If you experience discomfort after using the BLUETOOTH device, stop using the BLUETOOTH device immediately. Should any
problem persist, consult your nearest Sony dealer.
The earpads may deteriorate due to long-term storage or use.
Optional replacement earpads can be ordered from your nearest Sony dealer.
If you have any questions or problems concerning this headset that are not covered in this manual, please consult your
nearest Sony dealer.
4-692-591-11(1) Copyright 2017 Sony Corporation
Page 94

Help Guide
86
Wireless Noise Canceling Stereo Headset
MDR-XB950N1
Trademarks
The BLUETOOTH word mark and logos are owned by the Bluetooth SIG, Inc. and any use of such marks by Sony Corporation
is under license.
The N -Mark is a trademark or registered trademark of NFC Forum, Inc. in the United States and in other countries.
Android and Google Play are trademarks of Google Inc.
iPad, iPhone, iPod touch and Siri are trademarks of Apple Inc., registered in the U.S. and other countries.
Microsoft and Windows are registered trademarks or trademarks of Microsoft Corporation in the United States and/or other
countries.
Mac and Mac OS are trademarks of Apple Inc., registered in the U.S. and other countries.
Qualcomm is a trademark of Qualcomm Incorporated, registered in the United States and other countries, used with
permission. aptX is a trademark of Qualcomm Technologies International, Ltd., registered in the United States and other
countries, used with permission.
Other trademarks and trade names are those of their respective owners.
4-692-591-11(1) Copyright 2017 Sony Corporation
Page 95

Help Guide
87
Wireless Noise Canceling Stereo Headset
MDR-XB950N1
Customer support websites
Please access the following support website to get the support information about your headset:
For customers in the U.S.A:
http://esupport.sony.com/
For customers in Canada:
http://esupport.sony.com/CA/
For customers in Latin America:
http://esupport.sony.com/LA/
For customers in European countries:
www.sony.eu/support
For customers in China:
https://service.sony.com.cn/
For customers in other countries/regions:
http://www.sony-asia.com/
4-692-591-11(1) Copyright 2017 Sony Corporation
Page 96

Help Guide
88
Wireless Noise Canceling Stereo Headset
MDR-XB950N1
What can I do to solve a problem ?
If the headset does not function as expected, try the following steps to resolve the issue.
Find the symptoms of the issue in this Help Guide, and try any corrective actions listed.
Connect the headset to a computer to charge the battery.
You may be able to resolve some issues by charging the battery.
Reset the headset.
Initialize the headset.
This operation resets volume settings, etc., and deletes all pairing information.
Look up information on the issue on the customer support website.
If the operations above do not work, consult your nearest Sony dealer.
Related Topic
Charging the headset
Customer support websites
Resetting the headset
Initializing the headset to restore factory settings
4-692-591-11(1) Copyright 2017 Sony Corporation
Page 97

Help Guide
89
Wireless Noise Canceling Stereo Headset
MDR-XB950N1
The headset is not turned on.
Charge the battery of the headset.
The headset cannot be turned on while charging the battery. Remove the micro- USB cable from the headset, and then turn on
the headset again.
Related Topic
Charging the headset
Checking the remaining battery charge
4-692-591-11(1) Copyright 2017 Sony Corporation
Page 98

Help Guide
90
Wireless Noise Canceling Stereo Headset
MDR-XB950N1
Charging cannot be done.
Check that you are using the micro -USB cable supplied.
Check that the micro-USB cable is connected to the headset and the computer firmly.
Check that the computer is turned on.
Check that the computer is not in standby, sleep or hibernation mode.
When using Windows 8.1 update using Windows Update.
Related Topic
Charging the headset
4-692-591-11(1) Copyright 2017 Sony Corporation
Page 99

Help Guide
91
Wireless Noise Canceling Stereo Headset
MDR-XB950N1
Charging time is too long.
Check that the headset and the computer are directly connected, not via a USB hub.
Related Topic
Charging the headset
4-692-591-11(1) Copyright 2017 Sony Corporation
Page 100

Help Guide
92
Wireless Noise Canceling Stereo Headset
MDR-XB950N1
The headset cannot be recognized by a computer.
The micro-USB cable is not connected properly to the USB port of the computer. Connect the micro-USB cable again.
Check that the headset and the computer are directly connected, not via a USB hub.
A problem may have occurred with the connected USB port of the computer. Connect to another USB port if it is available.
Try the USB connection procedure again in cases other than those stated above.
Check that you are using the micro -USB cable supplied.
4-692-591-11(1) Copyright 2017 Sony Corporation
 Loading...