

Sony MCE-K850 Operating Instructions Manual
VIDEO CD
Player
3-861-666-12 (1)
Operating Instructions
C1
C2
EN
C1
C2
MCE-K850
1997 by Sony Corporation
WARNING
To prevent fire or shock hazard, do not
expose the unit to rain or moisture.
To avoid electrical shock, do not open the
cabinet. Refer servicing to qualified personnel
only.
Laser component in this product is capable of emitting
radiation exceeding the limit for Class 1.
This appliance is classified as a CLASS 1 LASER product. The
CLASS 1 LASER PRODUCT MARKING is located on the rear
exterior.
The following caution label is located inside of the unit.
On placement
• Place the player in a location with adequate ventilation to
prevent heat build-up in the player.
• Do not place the player on a soft surface such as a rug that
might block the bottom.
• Do not place the player in a location near heat sources, or in
a place subject to direct sunlight, excessive dust or
mechanical shock.
On operation
• If the player is brought directly from a cold to a warm
location, or is placed in a very damp room, moisture may
condense on the lenses inside the player. Should this occur,
the player may not operate properly. In this case, remove
the disc and leave the player turned on for about an hour
until the moisture evaporates.
On adjusting volume
• Do not turn up the volume while listening to a portion with
very low level inputs or no audio signals. If you do, the
speakers may be damaged when a peak level portion is
played.
On cleaning
• Clean the cabinet, panel and controls with a soft cloth
slightly moistened with a mild detergent solution. Do not
use any type of abrasive pad, scouring powder or solvent
such as alcohol or benzine.
On transportation
• To protect the inside of the player, be sure to remove the
disc, and turn the power off after “no dISC” appears in the
front panel display.
If you have any questions or problems concerning your
player, please consult your nearest Sony dealer.
Precautions
On safety
• Caution – The use of optical instruments with this product
will increase eye hazard.
• Should any solid object or liquid fall into the cabinet,
unplug the player and have it checked by qualified
personnel before operating it any further.
On power sources
• (Models other than China model) Before operating the
player, check that the operating voltage of the player is
identical with your local power supply. The operating
voltage is indicated on the nameplate at the rear of the
player.
• The player is not disconnected from the AC power source
(mains) as long as it is connected to the wall outlet, even if
the player itself has been turned off.
• If you are not going to use the player for a long time, be
sure to disconnect the player from the wall outlet. To
disconnect the AC power cord (mains lead), grasp the plug
itself; never pull the cord.
• Should the AC power cord (mains lead) need to be
changed, have it done at a qualified service shop only.
EN
2
Welcome!
Thank you for purchasing the Sony Video Compact Disc
(VIDEO CD) Player. Before operating the unit, please read
this manual thoroughly and retain it for future reference.
About This Manual
The instructions in this manual are for model MCE-K850.
Conventions
• Instructions in this manual describe the controls on the
player.
You can also use the controls on the remote if they have the
same or similar names as those on the player.
• The following icons are used in this manual:
Indicates that you can use only the remote to do
Z
the task.
Indicates tips and hints for making the task easier.
z

TABLE OF CONTENTS
This Player Can Play the Following Discs................................................................4
Getting Started
Unpacking.............................................................................................................................4
Hooking Up the System......................................................................................................5
Basic Operations
Playing a VIDEO CD..............................................................................................................8
Enjoying Karaoke
Playing Karaoke ................................................................................................................ 10
Locating a Scene or Track You Want
Using the On-Screen Display .......................................................................................... 12
Using the Front Panel Display ........................................................................................ 13
Resuming Playback from the Point You Stopped a VIDEO CD (Resume Play) ..... 14
Locating a Specific Track ................................................................................................. 15
Locating a Particular Point in a Scene or Track............................................................ 16
Locating by Observing Several Scenes at One Time (Digest Play)............................ 17
EN
Playing CDs in Various Modes
Playing Repeatedly........................................................................................................... 19
Playing in Random Order (Shuffle Play) ...................................................................... 20
Creating Your Own Program (Program Play).............................................................. 20
Reducing Distortion of the Picture (DNR) .................................................................... 22
Making picture clearly (ACTIVE PICTURE) ................................................................ 22
Adding an Incidental Image to Moving Pictures (COMET) ...................................... 23
Enjoying Sound Effects (Surround Sound) ................................................................... 23
Controlling the TV with the Supplied Remote............................................................. 24
Enjoying Karaoke Using the Various Effects
Adding richness to your voice (Karaoke Star) ............................................................. 25
Adjusting the Balance of the Accompaniment and the Vocals .................................. 25
Playing Karaoke with Any Stereo Discs (Karaoke Pon) ............................................. 26
Enjoying Playback Using the PBC Functions
Playing VIDEO CDs with PBC Functions (PBC Playback)......................................... 27
Locating Scenes Directly Using the Scene Numbers (Scene Search)......................... 28
Additional Information
Notes on Discs ................................................................................................................... 30
Troubleshooting ................................................................................................................ 30
Specifications ..................................................................................................................... 31
Glossary.............................................................................................................................. 31
Index.......................................................................................................................................... 32
EN
3
Getting Started
This Player Can Play the
Following Discs
Getting Started
Audio CDs
Audio
12 cm/8 cm (CD
single)
74 min./
20 min.
Disc logo
Contents
Disc size
Play time
VIDEO CDs
Audio + Video
(moving pictures)
12 cm/8 cm
74 min./
20 min.
To play VIDEO CDs, see page 8.
To enjoy PBC Playback of VIDEO CDs with PBC functions,
see page 27.
To play karaoke, see page 10.
Note on VIDEO CDs
This player conforms to Ver. 1.1 and Ver. 2.0 of VIDEO CD
standards. You can enjoy two kinds of playback according to
the disc type.
Disc type
VIDEO CDs without
PBC functions
(Ver. 1.1 discs)
VIDEO CDs with PBC
functions
(Ver. 2.0 discs)
You can
Enjoy video playback (moving
pictures) as well as music.
Play interactive software using
menu screens displayed on the TV
screen (PBC Playback), in addition
to the video playback functions of
Ver 1.1 discs. Moreover, you can
play high-resolution still pictures, if
they are included on the disc.
Unpacking
Check that you received the following items:
• Audio and video connecting cord (1)
• Remote commander (remote) RMT-K750V (1)
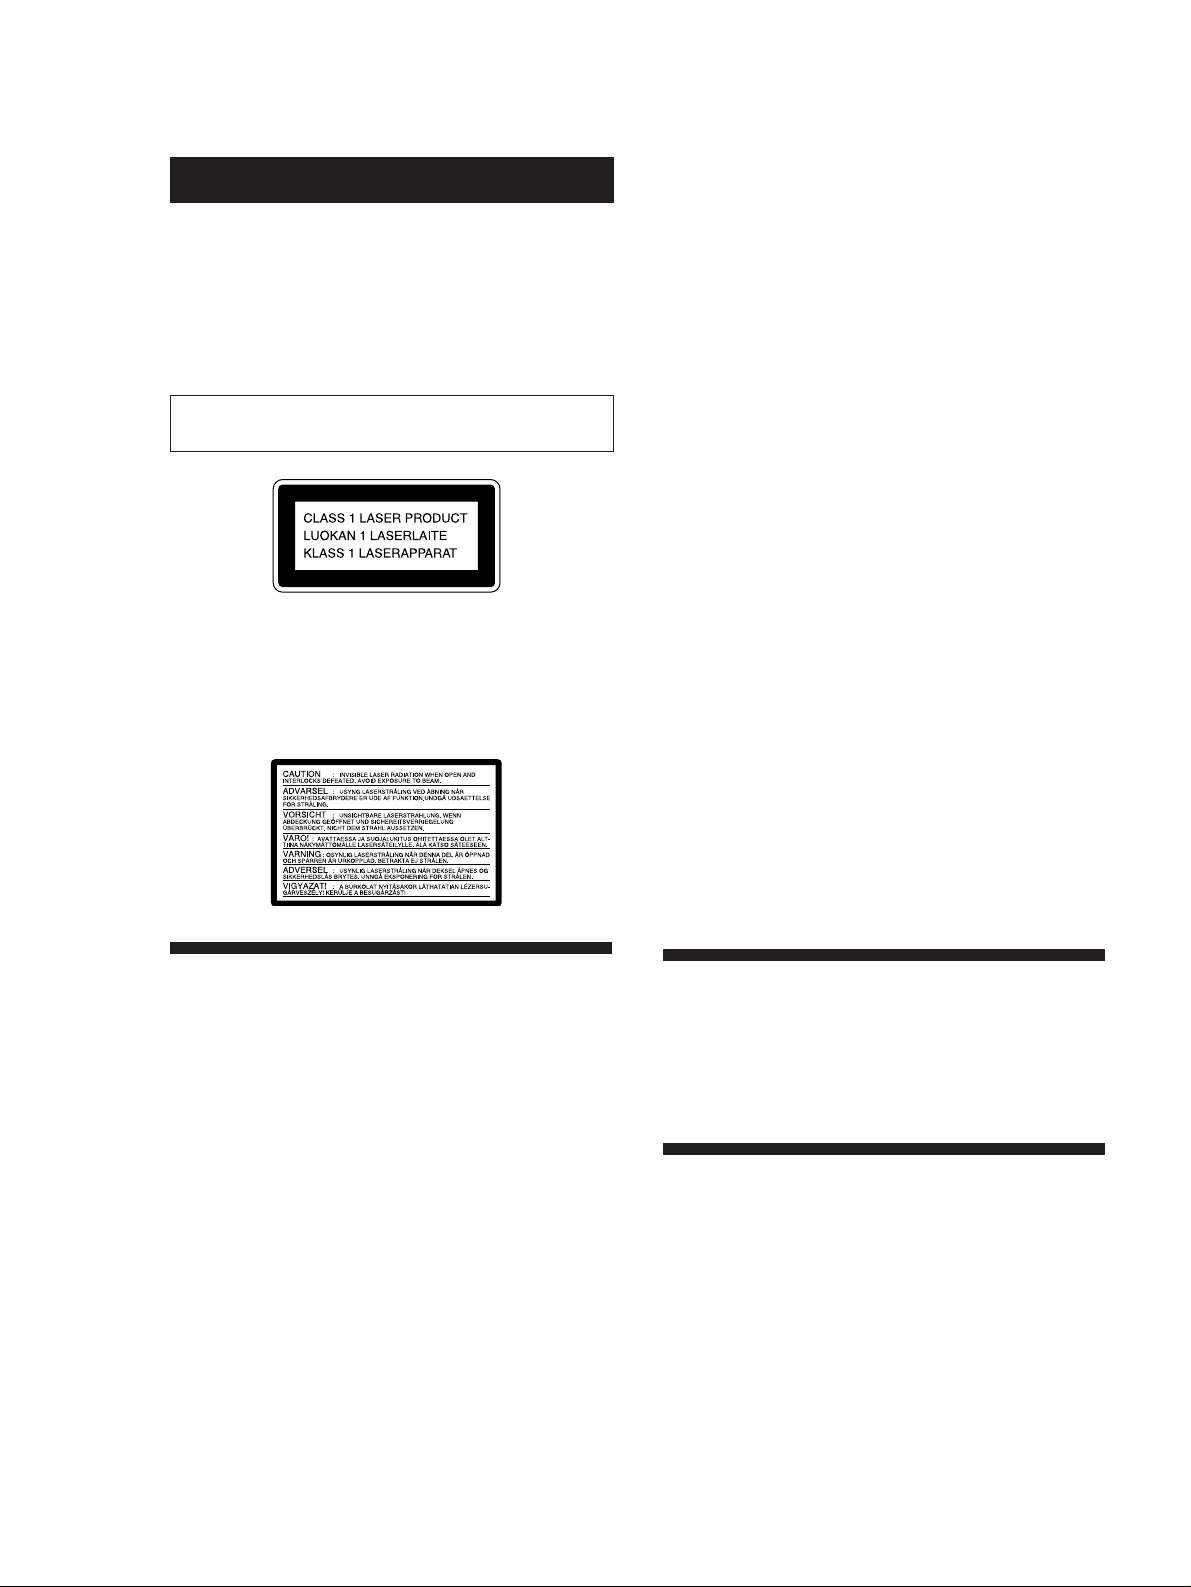
• Sony SUM-3 (NS) batteries (2)
Inserting batteries into the remote
You can control the player using the supplied remote.
Insert two R6 (size AA) batteries by matching the +
and – on the batteries. When using the remote, point it
at the remote sensor g on the player.
z You can control Sony TVs with the g mark using the
supplied remote
See page 24.
z When to replace batteries
With normal use, the batteries should last for about six
months. When the remote no longer operates the player,
replace all the batteries with new ones.
Notes
• Do not leave the remote near an extremely hot or humid
place.
• Do not drop any foreign object into the remote casing,
particularly when replacing the batteries.
• Do not expose the remote sensor to direct sunlight or
lighting apparatuses. Doing so may cause a malfunction.
• If you don’t use the remote for an extended period of time,
remove the batteries to avoid possible damage from battery
leakage and corrosion.
EN
4
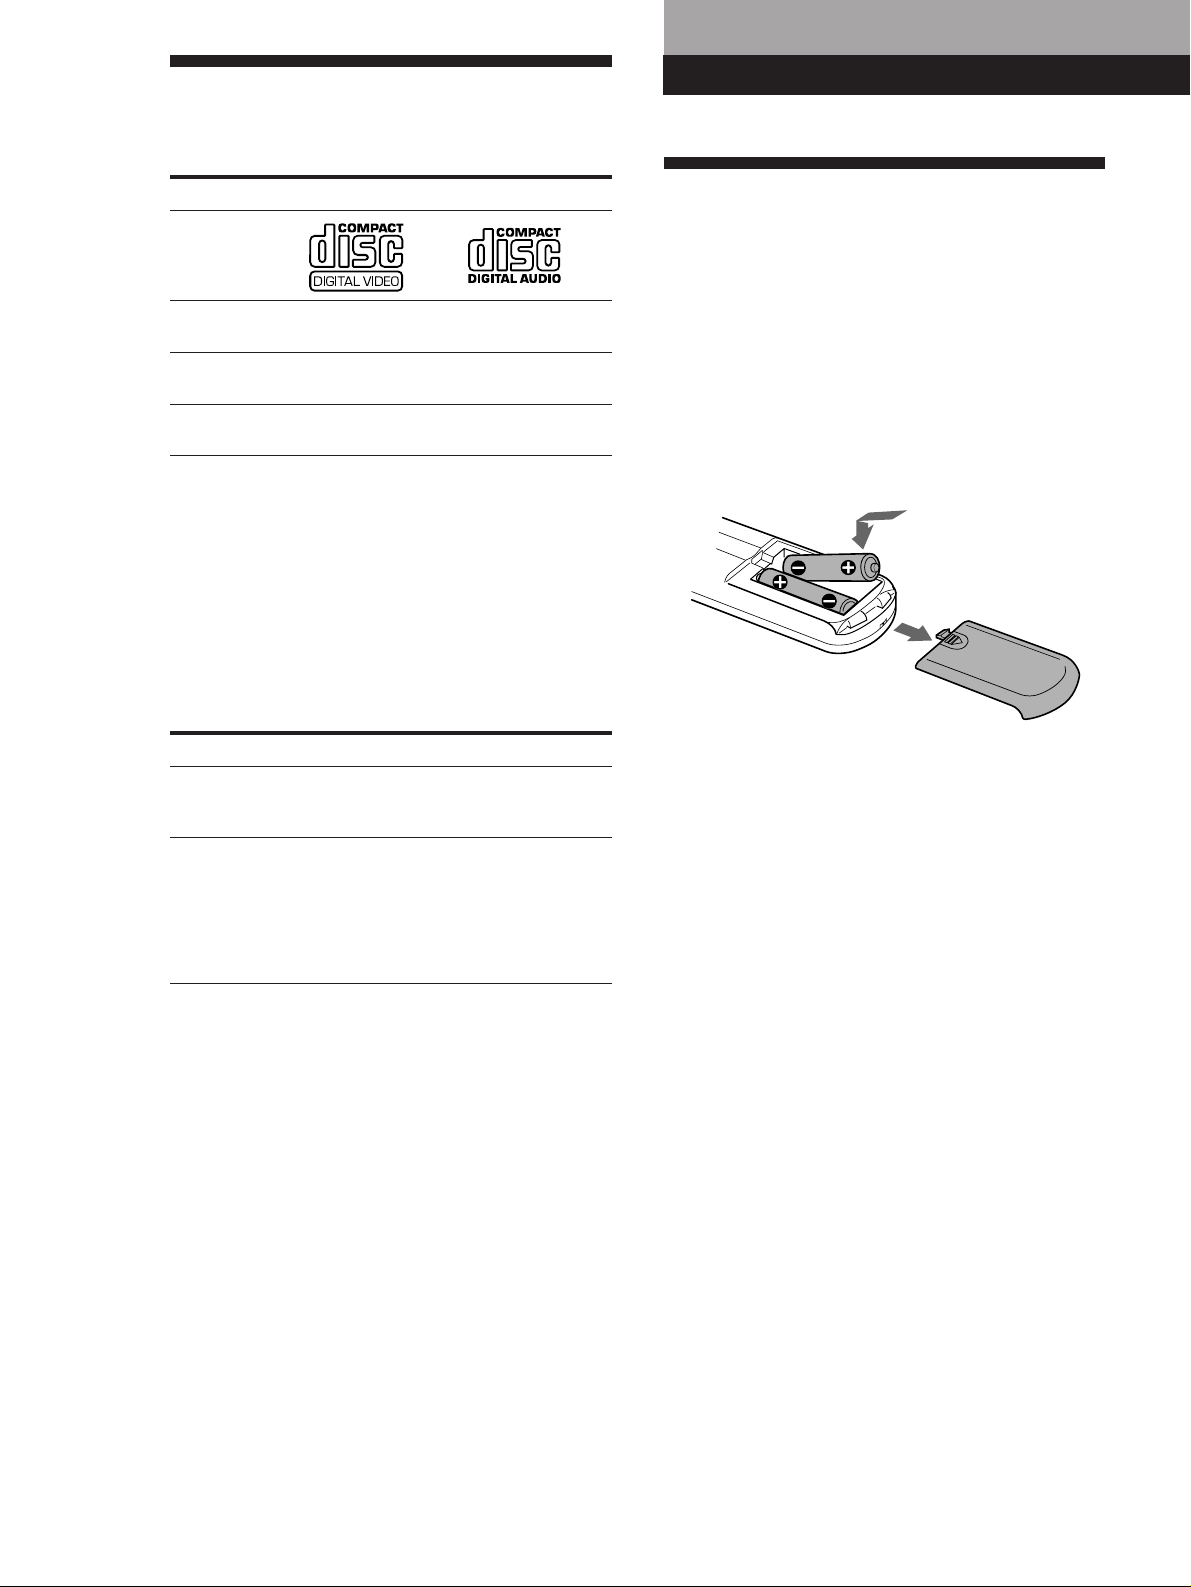
Hooking Up the System
Overview
This section describes how to hook up the VIDEO CD
player to a TV (with audio/video input jacks) and/or
an amplifier. Be sure to turn off the power of each
component before making the connections.
Getting Started
Playing CDsGetting Started
Getting Started
What cords will I need?
Audio and video connecting cord (supplied) (1)
Yellow
(video)
White
(L)
Red
(R)
Video connecting cord (not supplied) (1)
Yellow
(video)
White
(L)
Red
(R)
pWhen listening to the sound through TV speakers
VIDEO CD player
To AUDIO
OUT
To VIDEO
OUT
To video
To an AC
outlet
TV
input
To audio input
: Signal flow
To an AC outlet
pWhen listening to the sound through speakers
connected to an amplifier
VIDEO CD player
Yellow Yellow
Audio connecting cord (not supplied) (1)
White
(L)
Red
(R)
White
(L)
Red
(R)
Hookups
When connecting the cord, be sure to match the colorcoded cord to the appropriate jacks on the components:
Yellow (video) to Yellow, Red (right) to Red and White
(left) to White. Be sure to make connections firmly to
avoid hum and noise.
pWhen listening to the sound through TV speakers
VIDEO CD player
AUDIO OUT VIDEO
1
2
L
R
OUT
TV
INPUT
VIDEO
L
AUDIO
R
Amplifier
: Signal flow
To AUDIO
OUT
To VIDEO
OUT
To video
input
To audio
input
To an AC
outlet
TV
To an AC outlet
To an AC outlet
pWhen listening to the sound through speakers
connected to an amplifier
VIDEO CD player
AUDIO OUT VIDEO
1
L
R
OUT
2
(Continued)
TV
INPUT
VIDEO
L
AUDIO
R
Amplifier
CD
L
R
EN
5
Getting Started
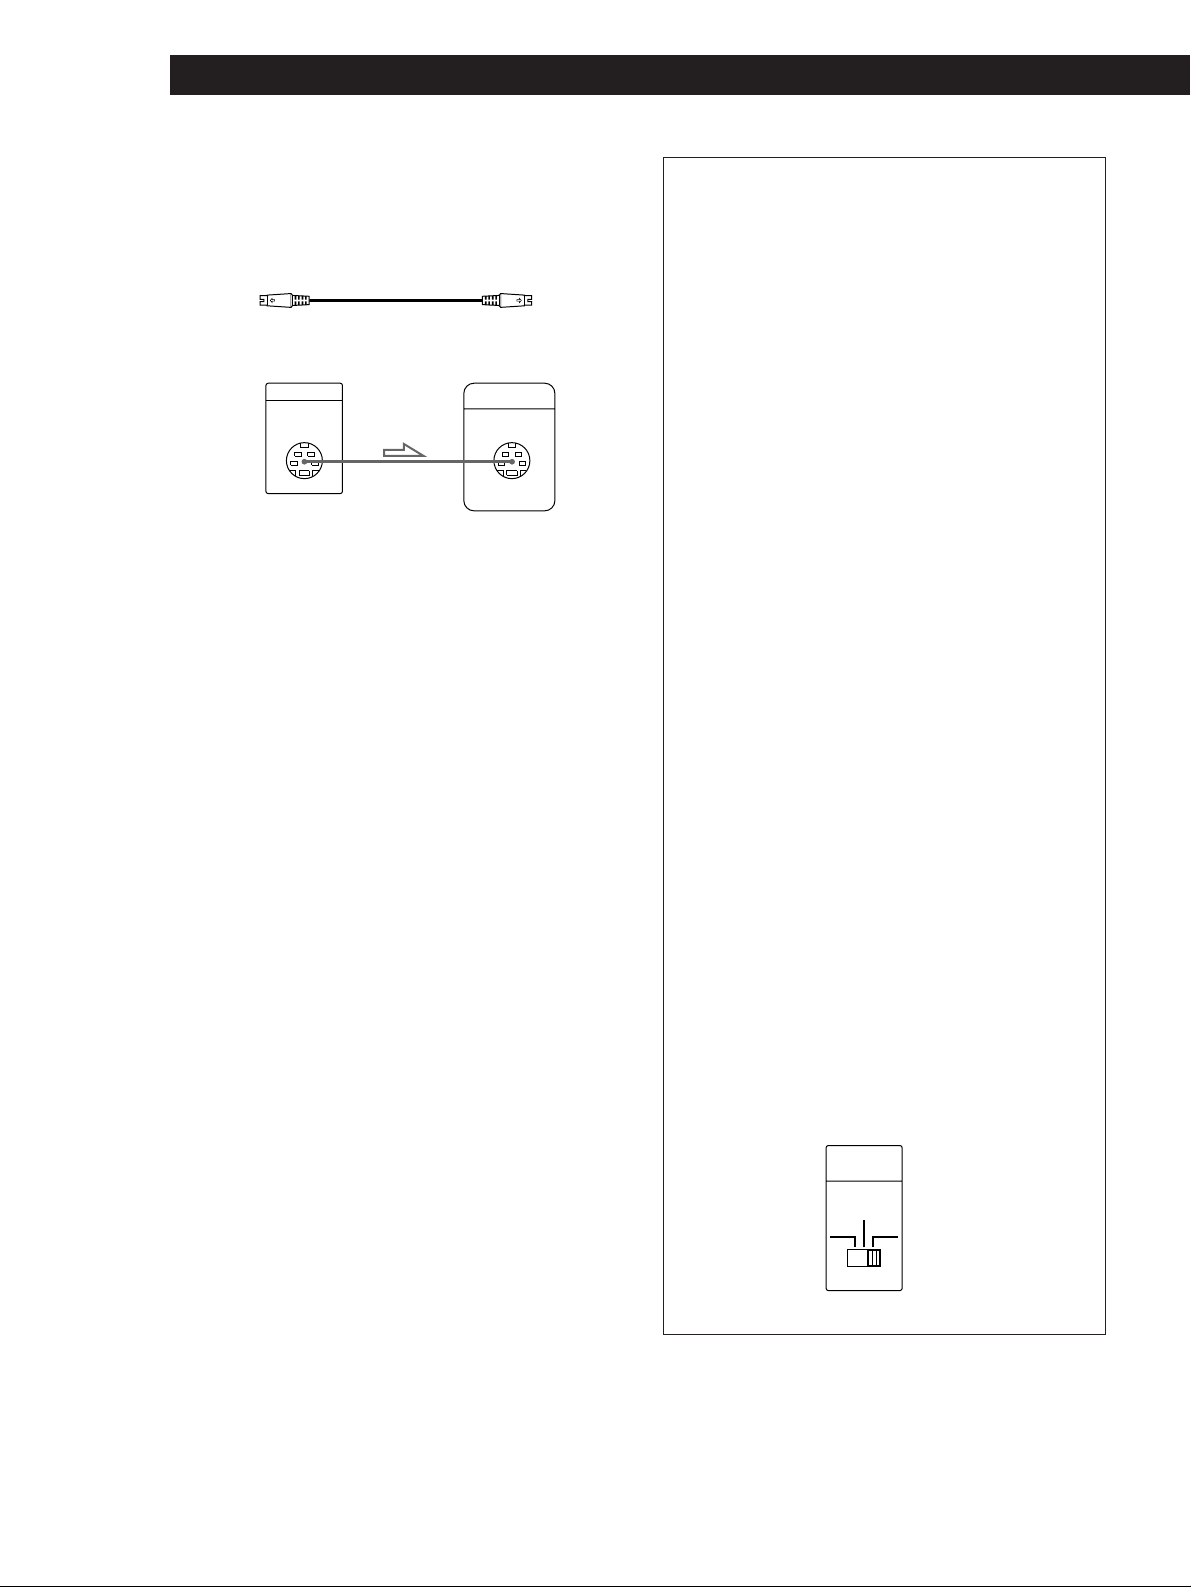
z If your TV or VCR has an S video input connector
Connect the component via the S VIDEO OUT connector
using the S video cable (not supplied). You will get a
better picture.
S video cable
YC-15V (not supplied)
VIDEO CD player
S VIDEO OUT
TV
S VIDEO IN
Important
Setting the color system switch
This player conforms to the NTSC and PAL color
systems. Set the COLOR SYSTEM switch on the rear
of the player to the appropriate position, according
to your TV.
• If the color system of your TV is NTSC:
Set the COLOR SYSTEM switch to NTSC. Pictures
will not be displayed if you set the switch to PAL.
When you play a VIDEO CD recorded in the PAL
color system, the picture will be stretched
vertically and will be displayed with the upper
and lower parts of the picture cut off.
• If the color system of your TV is PAL:
Set the COLOR SYSTEM switch to PAL. Pictures
will not be displayed if you set the switch to
NTSC. When you play a VIDEO CD recorded in
the NTSC color system, the picture will be
stretched horizontally and will be displayed with
the upper and lower parts of the screen masked in
black.
• If your TV automatically changes the color system
according to the input signal:
Pictures will be displayed with the switch set to
either NTSC or PAL.
If you set the COLOR SYSTEM switch to AUTO,
the player automatically changes the color system
of video output according to the color system of
the VIDEO CD to be played. In this case, the color
system selected remains until you turn off the
player, or you play another VIDEO CD with a
different color system. If you turn off the player,
the color system will be set to NTSC automatically
when you turn on the player again.
Be sure to turn off and on the player when you
change the setting.
COLOR
SYSTEM
AUTO
PAL
NTSC
,
EN
6

Connecting the AC power cord
Connect the AC power cord to a wall outlet.
Getting Started
Playing CDsGetting Started
Getting Started
EN
7
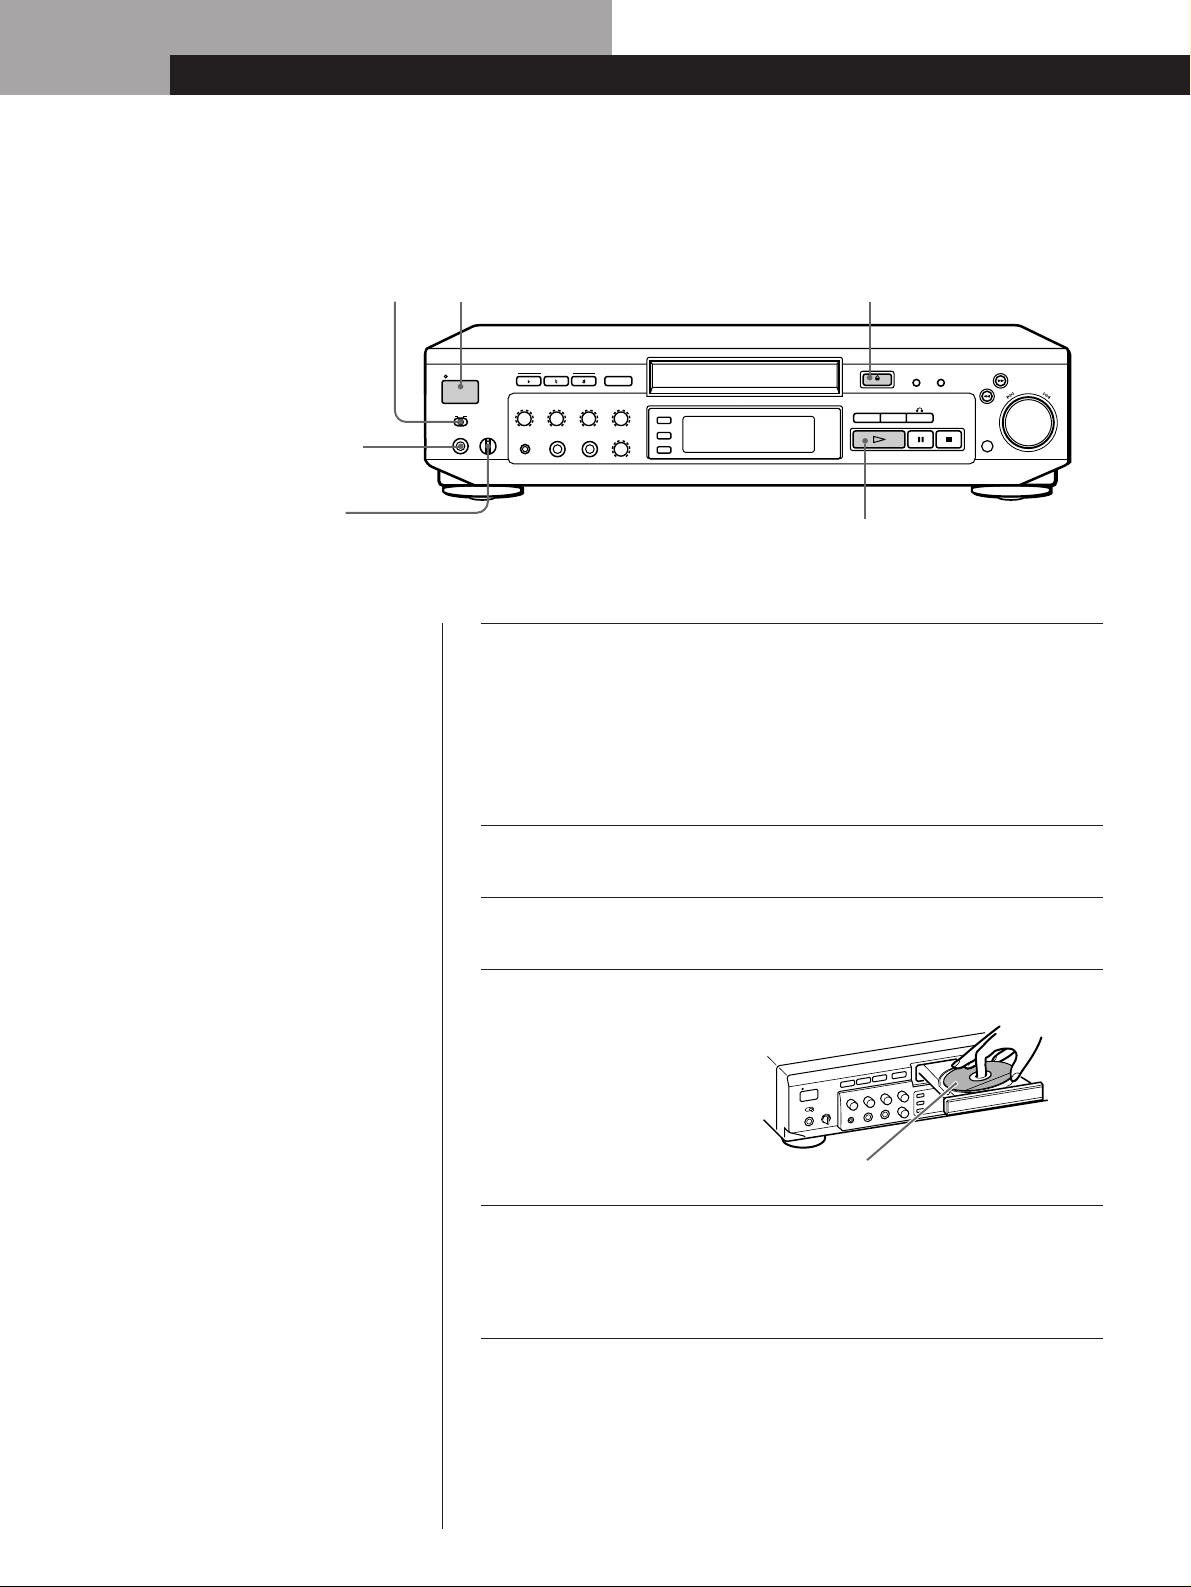
Basic Operations
Playing a VIDEO CD
23
Connect the headphones.
Adjust the headphone
volume.
• See pages 5 – 7 for the hookup
information.
• You can also play audio CDs just
like VIDEO CDs.
STANDBY
U
MODE
KARAOKE NORMAL
PHONES
LEVEL
MIN MAX
1
2
4
KEY CONTROL KARAOKE STAR
ECHO
MIC 1
LEVEL
LEVEL
MIN MAX
MIN MAX
MIC 1 MIC 2
MIC CONTROL
MIC 2
LEVEL
MIN MAX
VOCAL
LEVEL
MIN MAX
MUSIC LEVEL
MIN MAX
MPX
KARAOKE PON
SURROUND
DNR
OPEN/CLOSE
PREV NEXT RETURN
ACTIVE/COMET
E
S
G
O
J
–
g
5
When using a TV
Turn on the TV and select the video input so that you can view
the pictures from this player.
When using an amplifier
Turn on the amplifier and select the CD player position so that
you can listen to the sound from this player.
Set the MODE selector on the player to NORMAL.
L
E
C
T
O
R
+
PUSH
ENTER
z You can turn on the player
using the remote
Press 1/u on the remote
while the STANDBY
indicator above the U
switch on the front panel is
lit (standby mode).
In standby mode, you can
also directly turn on the
player by pressing § or ·
on the player.
z When playing VIDEO CDs with
PBC functions
In Step 5, the menu screen
appears on the TV screen.
You can play the VIDEO CD
interactively, following the
instructions on the menu
screen. (PBC Playback, see
page 27.)
z What is a VIDEO CD with PBC
functions?
See page 27 or 31.
Press the U switch to turn on the player.
3
Press § OPEN/CLOSE, and place the disc on the disc tray.
4
With the label side up
Press ·.
5
The disc tray closes and the player plays all the tracks once
(Continuous Play). Adjust the volume on the TV or the
amplifier.
EN
8
Basic Operations
g
z When “RESUME” appears in
the front panel display
You can resume playback
from the point you stopped
the VIDEO CD (Resume
Play, see page 14).
To stop playback
Press p.
6 OPEN/CLOSE
§ OPEN/
CLOSE
·PpJOG SELECTOR
·
NEXTPREV
(PUSH ENTER)
Basic Operations
z What is a track?
A disc is divided into
sections of a picture or a
music piece called “tracks.”
Each track is assigned with a
track number to locate the
track you want.
=
To
Pause
Start playing after pause
Select the track
(in Continuous Play mode)
Stop play and remove the CD
+
P
p
Press
P
P or ·
While playing, on the player:
Turn JOG SELECTOR to select the track number
Go to the next scene or track NEXT
Go back to the preceding scene or track PREV
While playing, on the remote:
Go to the next scene or track +
Go back to the preceding scene or track =
Before you start playing:
Turn JOG SELECTOR, or press NEXT, PREV, = or
+ to select the track number, then press JOG
SELECTOR or ·
§ OPEN/CLOSE
EN
9
Enjoying Karaoke
KARAOKE LIST
WAITING
1
2
3
4
5
6
7
8
Playing Karaoke
You can play karaoke (singing along) with CDs.
Be sure to set the on-screen display mode to ON
SCREEN 1 or ON SCREEN 2 (see page 12). If you select
ON SCREEN OFF display mode, no information is
shown on the TV screen.
2 Set the MODE selector on the player to
KARAOKE.
The following screen appears.
TV screen
MODE
selector
MIC 1 and
MIC 2 LEVEL
controls
ECHO
LEVEL
control
>10
CHECK
KEY
CONTROL
˜N n
MIC 1
and
MIC 2
jacks
MUSIC
LEVEL
control
PREV
NEXT
p
JOG SELECTOR
(PUSH ENTER)
Number
buttons
CLEAR
KEY CONTROL
˜, N, n
+=
p
3 Select the track you want to play.
On the player
Turn JOG SELECTOR until the track number you
want to play appears in the front panel display,
then press JOG SELECTOR.
On the remote
Press the number button of the track.
To select a track numbered over 10, use the >10
button (see page 15).
TV screen
TRK 5
Example: when you select track 5
Play starts automatically.
4 Turn the MIC 1 and/or MIC 2 LEVEL control to
adjust the microphone volume.
1 Set the MIC 1 and MIC 2 LEVEL controls on the
Karaoke
microphone
F-KM1,
F-VK600, etc.
(not supplied)
10
EN
player to MIN, then plug the microphone(s) into
the MIC 1 and/or MIC 2 jacks.
MIC 1MIC CONTROL MIC 2
Microphone
Control
plug
(not supplied)
When using the karaoke microphone F-KM1,
F-VK600, etc. (not supplied), plug the control plug
into the MIC CONTROL jack.
To stop playback
Press p.
Notes
If howling occurs:
– Move the microphone(s) away from the TV or the speakers.
– Lower the volume of the TV or the amplifier.
– Lower the microphone volume or echo level.
If the sound is distorted when the player is connected to a TV:
– Lower the microphone volume and music level.
z When you don’t use the microphone(s)
Unplug the microphone(s), switch the microphone(s) off
and turn the MIC 1 and/or MIC 2 LEVEL control to MIN.
 Loading...