

Page 1

KV-13VM42/43/KV-20VM42/KV-20VS42
9-884-613-02 (1)
Operating Instructions
KV-13VM42/43
KV-20VM42
Mode d’emploi
KV-20VS42
®
Manuel de instrucciones
Trinitron Color Video/TV
US
FR
ES
G
Owner's Record
The model and serial numbers are located at the rear
of the video TV. Record these numbers in the spaces
provided below. Refer to them whenever you call
upon your Sony dealer regarding this product.
Model No. Serial No.
© 1999 Sony Corporation Printed in U.S.A.
Getting Started
1
Page 2
WARNING
Precautions
To prevent fire or shock hazard, do not expose
the unit to rain or moisture.
This symbol is intended to alert the user to
the presence of uninsulated “dangerous
voltage” within the product's enclosure
that may be of sufficient magnitude to
constitute a risk of electric shock to
persons.
This symbol is intended to alert the user to
the presence of important operating and
maintenance (servicing) instructions in the
literature accompanying the product.
CAUTION
TO PREVENT ELECTRIC SHOCK, DO NOT USE THIS
POLARIZED AC PLUG WITH AN EXTENSION CORD,
RECEPTACLE OR OTHER OUTLET UNLESS THE
BLADES CAN BE FULLY INSERTED TO PREVENT
BLADE EXPOSURE.
When using TV games, computers, and similar products
with your Video/TV, keep the brightness and contrast
functions at low settings. If a fixed (non-moving) pattern
is left on the screen for long periods of time at a high
brightness or contrast setting, the image can be
permanently imprinted onto the screen. These types of
imprints are not covered by your warranty because they
are the result of misuse.
Note to CATV system installer
This reminder is provided to call the CATV system
installer's attention to Article 820-40 of the NEC that
provides guidelines for proper grounding and, in
particular, specifies that the cable ground shall be
connected to the grounding system of the building as
close to the point of cable entry as practical.
Safety
• Operate the Video/TV only on 120 V AC.
• One blade of the plug is wider than the other for safety
purposes and will fit into the power outlet only one
way. If you are unable to insert the plug fully into the
outlet, contact your dealer.
• Should any liquid or solid object fall into the cabinet,
unplug the Video/TV and have it checked by qualified
personnel before operating it any further.
• Unplug the Video/TV from the wall outlet if you are
not to going to use it for several days or more. To
disconnect the cord, pull it out by the plug. Never pull
the cord itself.
Installing
• To prevent internal heat build-up, do not block the
ventilation openings.
• Do not install the Video/TV in a hot or humid place, or
in a place subject to excessive dust or mechanical
vibration.
Cleaning
Clean the Video/TV with a soft dry cloth. Never use
strong solvents such as thinner or benzine, which might
damage the finish of the cabinet.
Transport
Keep the original carton and packing materials to use for
safety transport of your Video/TV in the future.
Information
You are cautioned that any changes or modifications not
expressly approved in this manual could void your
authority to operate this equipment.
If you have any questions or problems concerning your
Video/TV, please contact your nearest Sony dealer.
This Video/TV receiver displays closed captioning in
accordance with 15.119 of the FCC rules.
Caution
Television programs, films, video tapes and other
materials may be copyrighted. Unauthorized recording
of such material may be contrary to the provisions of the
copyright laws. Also, use of this Video/TV receiver for
other private viewing of programs broadcast on VHF or
UHF or transmitted by cable companies for the use of the
general public may require authorization from the
broadcaster/cable company and/or program owner.
Note on condensation
If the Video/TV is brought directly from a cold to a
warm location, moisture may condense inside the VCR
and cause damage to the video head and tape. When you
first install the Video/TV, or when you move it from a
cold to a warm location, wait for about one hour before
operating the Video/TV.
Getting Started
2
Page 3

Contents
Getting Started
Step 1 — Preparation ................................................. 4
Checking the supplied accessories ....................... 4
Inserting batteries into the remote control .......... 4
Step 2 — Connecting the Antenna ........................... 5
Connecting an antenna........................................... 5
Connecting an antenna/cable TV system ........... 5
Step 3 — Setting Up the Video/TV Automatically
– AUTO SET UP ........................................................................... 6
Erasing and adding channels ................................ 7
Setting cable TV on or off....................................... 9
Presetting channels – AUTO PROGRAM..................... 10
Changing the menu language ............................. 11
Step 4 — Setting the Clock ...................................... 12
Setting the clock automatically ........................... 12
Setting the date and clock manually .................. 15
Step 5 — Setting Up VCR Plus+ system* ............ 16
Setting the guide channel..................................... 16
Basic Operations
Watching the TV ....................................................... 18
Switching the Video/TV on and off................... 18
Selecting TV programs ......................................... 18
Adjusting the volume ........................................... 18
Muting the sound.................................................. 18
Switching quickly between two channels ......... 18
Adjusting the picture............................................ 19
Adjusting the sound (KV-20VS42 only)............. 20
Selecting stereo or bilingual programs
(KV-20VS42 only)............................................... 21
Listening to surround sound effects
(KV-20VS42 only)............................................... 23
Displaying on-screen information ......................24
Watching a video input signal through
the line input jacks ............................................. 24
Listening with headphones ................................. 24
Playing a Tape........................................................... 25
Inserting a video cassette ..................................... 25
Ejecting a video cassette ....................................... 25
Protecting your cassette against accidental
erasure ................................................................. 25
Resetting the tape counter ................................... 25
Playing a tape ........................................................ 26
Playing a tape repeatedly – AUTO REPEAT............. 27
Displaying on-screen information ......................28
Displaying the tape counter ................................ 28
Recording TV Programs .......................................... 29
Recording TV programs....................................... 29
Recording with the TV off ................................... 29
Recording TV Programs Using the Timer.............30
Setting the timer .................................................... 30
Using the Video/TV before timer recording
starts..................................................................... 32
Checking the timer settings ................................. 33
Changing or cancelling the timer settings ......... 33
Recording using QUICK TIMER.........................34
Recording TV Programs Using VCR Plus+ system ..
35
Additional Operations
Automatically Switching the Video/TV
On or Off – ON/OFF TIMER .................................. 36
Switching Off Automatically – Sleep Timer ................. 37
Selecting the Video/TV’s Cable Box Input
Channel – CHANNEL FIX .........................................38
Displaying Caption Vision/XDS............................ 39
Blocking Out Programs – Parental Control................. 40
Activating the Parental Control feature............. 40
Selecting custom ratings in U.S.A....................... 43
Selecting custom ratings in Canada....................46
Changing the password ....................................... 47
If you have forgotten your password................. 48
What the Ratings Mean ........................................... 49
Ratings in U.S.A. ................................................... 49
Ratings in Canada ................................................. 50
Setting Your Favorite Channels – FAVORITE
CHANNEL ................................................................................. 52
Searching Using the Index Function...................... 54
Playing back to the beginning of each
program – Index Scan....................................................... 54
Locating the desired program – Index Search ......... 54
Enhancing Video Picture Quality........................... 55
Adjusting the tracking automatically................. 55
Adjusting the tracking manually ........................ 55
Reducing the Picture Noise..................................... 56
Connecting Optional Equipment ........................... 57
Watching the picture input from optional
equipment ........................................................... 57
Additional Information
Troubleshooting........................................................ 58
Specifications............................................................. 60
Index to Parts and Controls .................................... 61
Video/TV set—front............................................. 61
Remote control....................................................... 62
* VCR Plus+ and PlusCode are registered trademarks of
Gemstar Development Corporation.
The VCR Plus+ system is manufactured under license from
Gemstar Development Corporation.
The instructions in this manual are for models
KV-13VM42, KV-13VM43, KV-20VM42, and KV20VS42. Before you begin to read this manual,
refer to the model number located on the rear of
your Video/TV. Model KV-20VS42 is used for
illustration purposes throughout this manual.
Any differences in operation are indicated in the
text, for example, “KV-20VS42 only.”
Getting Started
US
3
Page 4
Getting Started
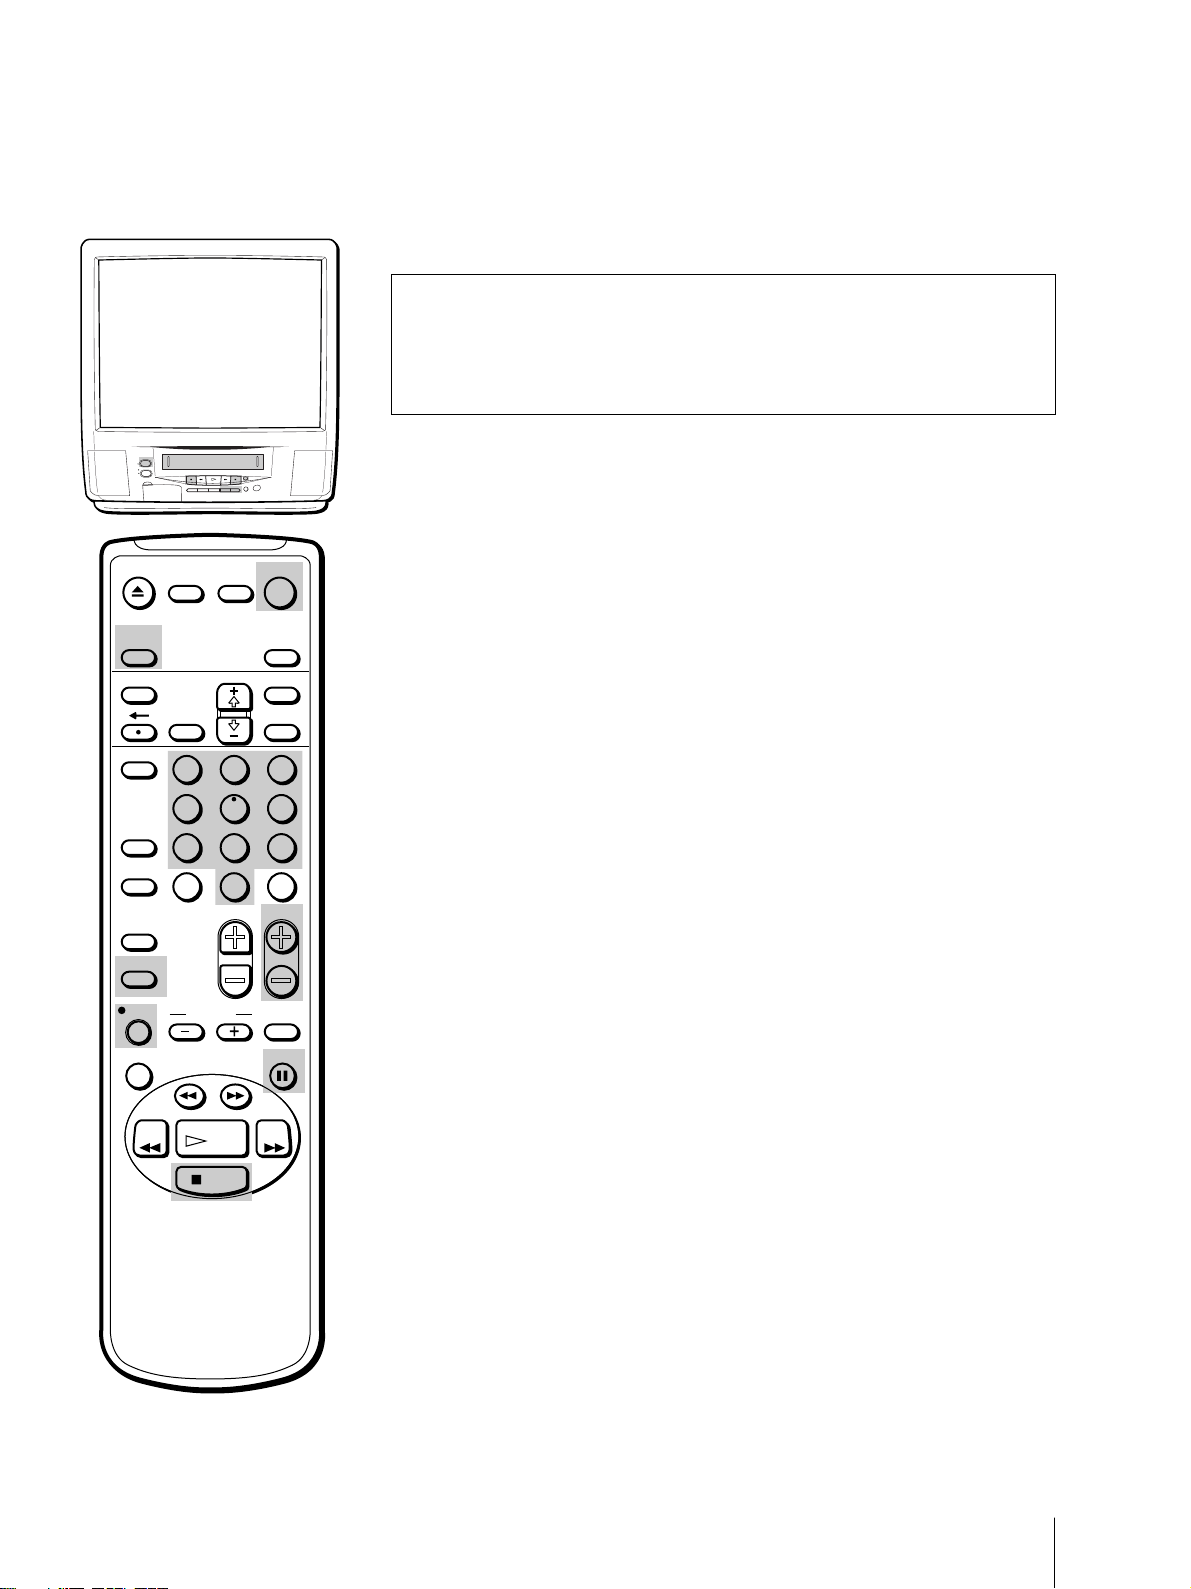
Step 1 — Preparation
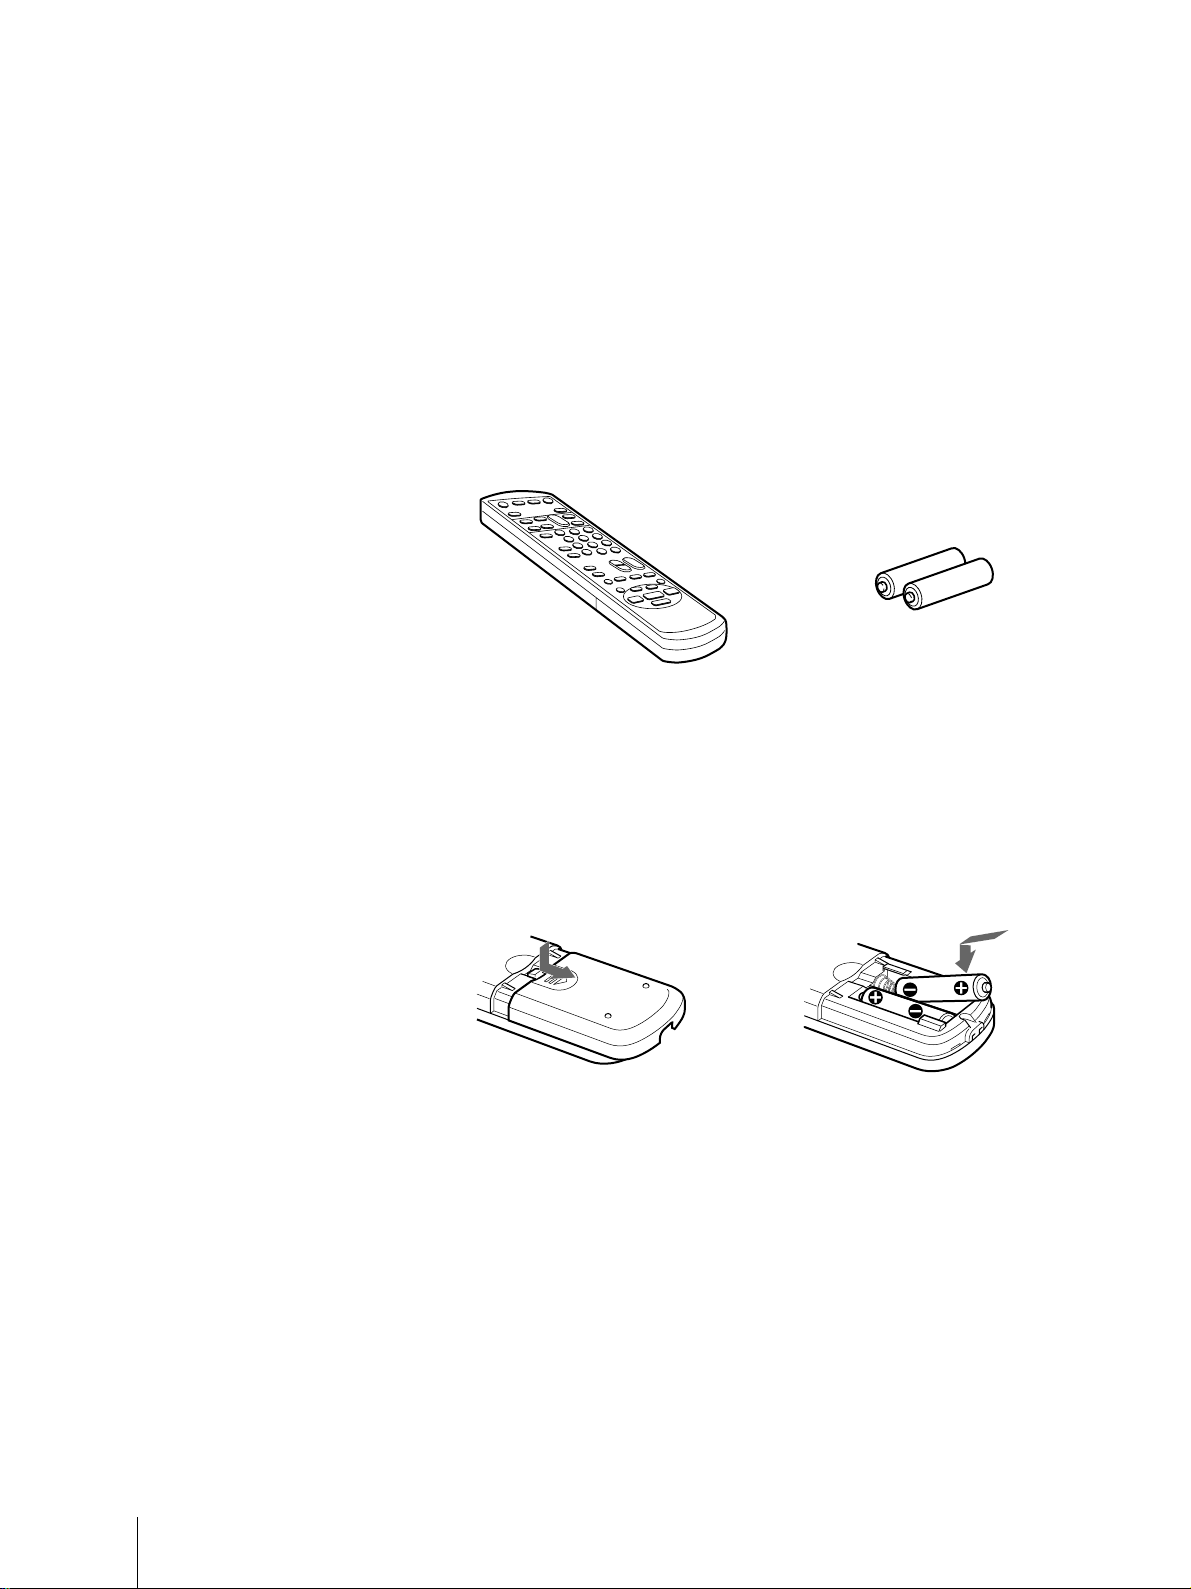
Checking the supplied accessories
When you have taken everything out of the carton, check that you have
these items:
• Remote control
• Two size AA (R6) batteries
Inserting the batteries
Insert two size AA (R6) batteries by
matching the + and – on the
batteries to the diagram inside the
battery compartment.
Insert the negative (–) end first, then
push in and down until the positive
(+) end clicks into position.
Notes
• With normal use, the batteries
should last about three to six
months.
• If you do not use the remote
control for an extended period of
time, remove the betteries to avoid
possible damage from battery
leakage.
• Do not use a new battery with an
old one.
• Do not use different types of
batteries.
Inserting batteries into the remote
control
Turn the remote control
over, and remove the cover.
Check the polarities and insert the
two size AA (R6) batteries correctly.
Getting Started
4
Page 5

Step 2 — Connecting the Antenna
Although you can use either an indoor or outdoor antenna with your
Video/TV, we recommend connecting an outdoor antenna or a cable TV
system for better picture quality.
Connecting an antenna
Connect your antenna cable to the VHF/UHF antenna terminal. If you
cannot connect your antenna cable directly to the terminal, follow the
instructions that match your cable type.
A
75-ohm coaxial
cable
(Rear of Video/TV)
VHF/UHF
B
300-ohm
twin lead cable
C
Coaxial cable and
twin lead cable
Antenna connector
(not supplied)
EAC-66 U/V mixer
(not supplied)
(Rear of Video/TV)
VHF/UHF
(Rear of Video/TV)
VHF/UHF
Connecting an antenna/cable TV
system
Connecting a single cable to the antenna
Connect the cable directly to the antenna.
(Rear of Video/TV)
VHF/UHF
Notes
• Most VHF/UHF combination
antennas have a signal splitter.
Remove the splitter before
attaching the appropriate
connector.
• If you use the U/V mixer, snow
and noise may appear in the
picture when viewing cable TV
channels over 37 (W+1).
• The cable box is supplied by the
cable company.
Connecting to a cable box
Some pay cable TV systems use scrambled or encoded signals that require
a cable box to view all channels.
If you control all channel selection through your cable box, you should
consider using the CHANNEL FIX feature (see “Selecting the Video/TV’s
Cable Box Input Channel – CHANNEL FIX” on page 38.)
(Rear of Video/TV)
VHF/UHF
Getting Started
5
Page 6
Step 3 — Setting Up the Video/TV
Automatically –
You can set up your Video/TV easily by using the AUTO SET UP feature.
To set up each item individually, see “Changing the menu language”
(page 11), “Setting cable TV on or off” (page 9), and “Presetting channels –
AUTO PROGRAM” (page 10).
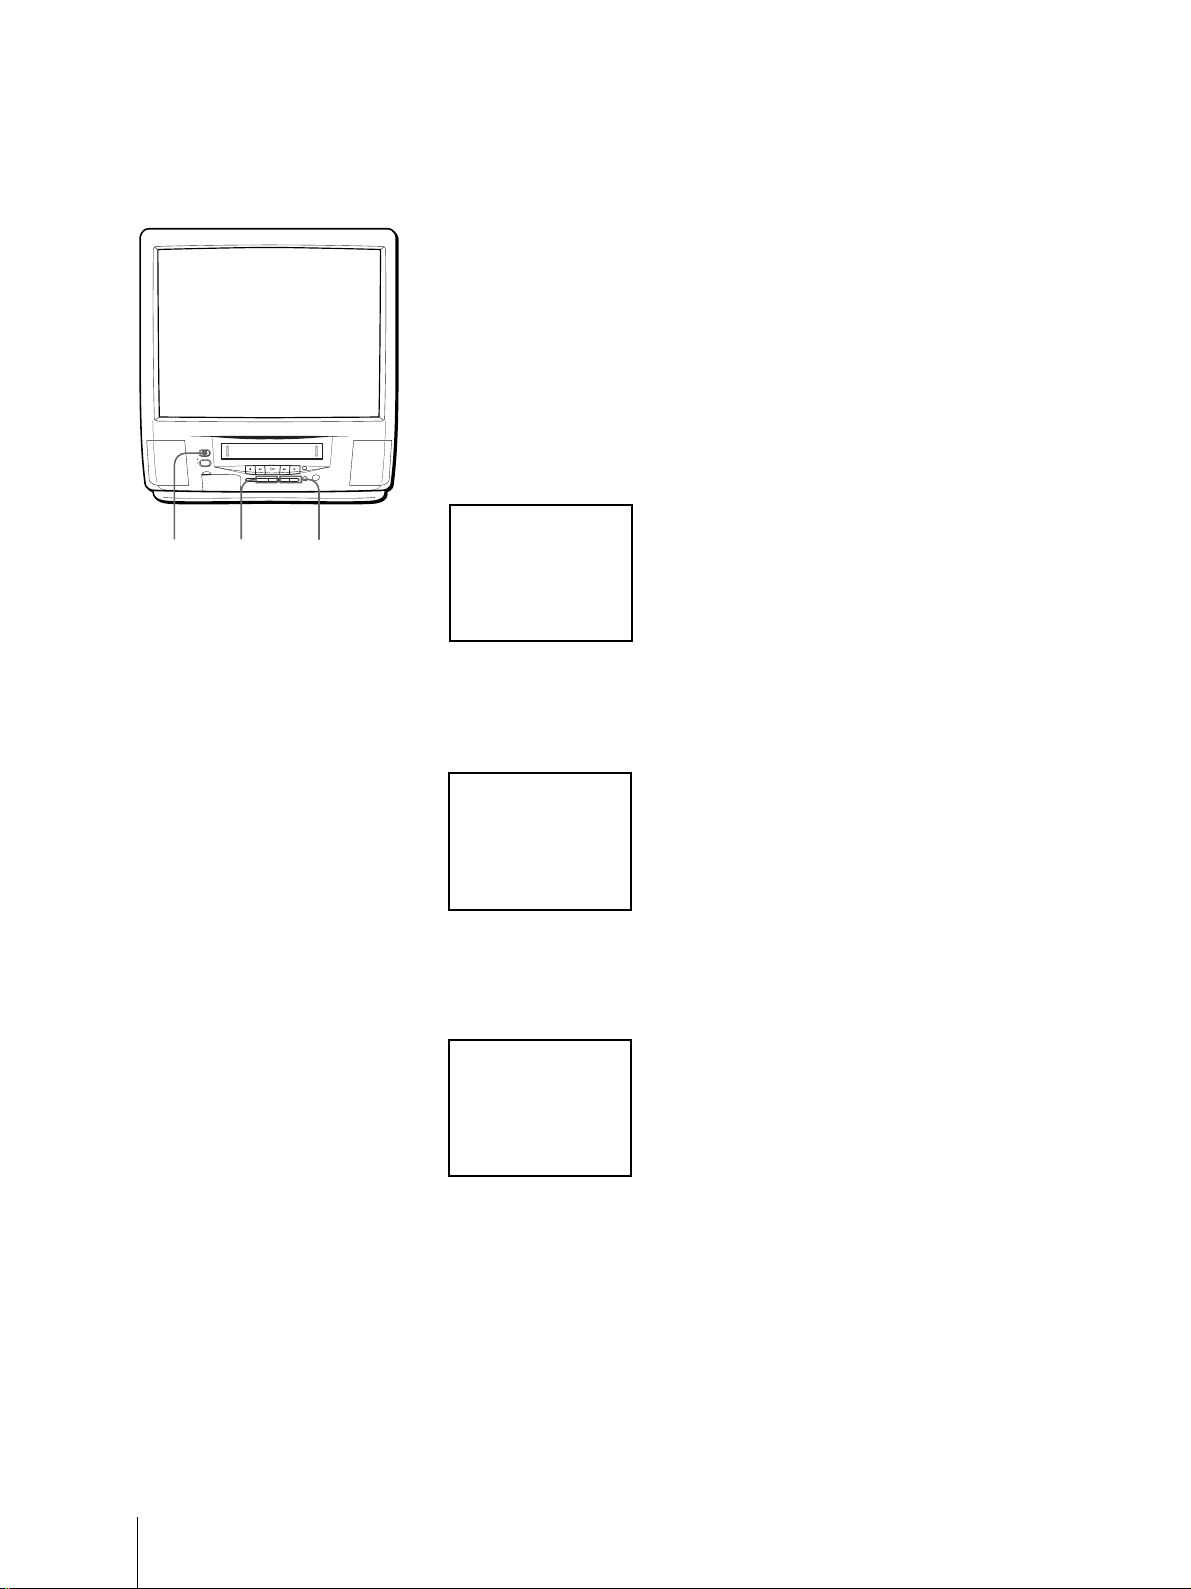
Before you begin
• Connect the antenna or cable to the Video/TV.
POWER
STANDBY
EJECT
REC
TIMER REC
INPUT
– VOL + – CHANNEL +
SELEECT
POWER VOL +/– CHANNEL +/–
1 Press POWER to turn the Video/TV on.
ENGLISH : [CH+
~
ESPANOL : [CH–
FRANÇAIS : [VOL+
AUTO SET UP : [VOL–
First please connect
the antenna
Press [INPUT SELECT
to exit
2 Select the on-screen menu language.
If you prefer Spanish or French to English, you can change the on-screen
menu language by pressing CHANNEL – for Spanish or VOL + for
French.
AUTO SET UP
]
]
]
]
]
To reset the factory settings
Press POWER on the Video/TV
while pressing RESET on the remote
control.
ENGLISH : [CH+
~
ESPANOL : [CH–
FRANÇAIS : [VOL+
AUTO SET UP : [VOL–
Primero conecte la
antenna
Oprima [INPUT SELECT
para sal i r
]
]
]
]
]
All of the on-screen menus are set to the factory preset condition in the
selected language.
3 Press VOL – to start AUTO SET UP.
AU TO PROGRAM
“AUTO PROGRAM” appears on the screen and the Video/TV starts
scanning and presetting channels automatically. When all receivable
channels are stored, “AUTO PROGRAM” disappears and the lowest
numbered channel is displayed.
To exit AUTO SET UP
Getting Started
6
Press INPUT SELECT.
Page 7
EJECT
INPUT
SELECT
MUTING DISPLAY
POWER
TV
SLEEP
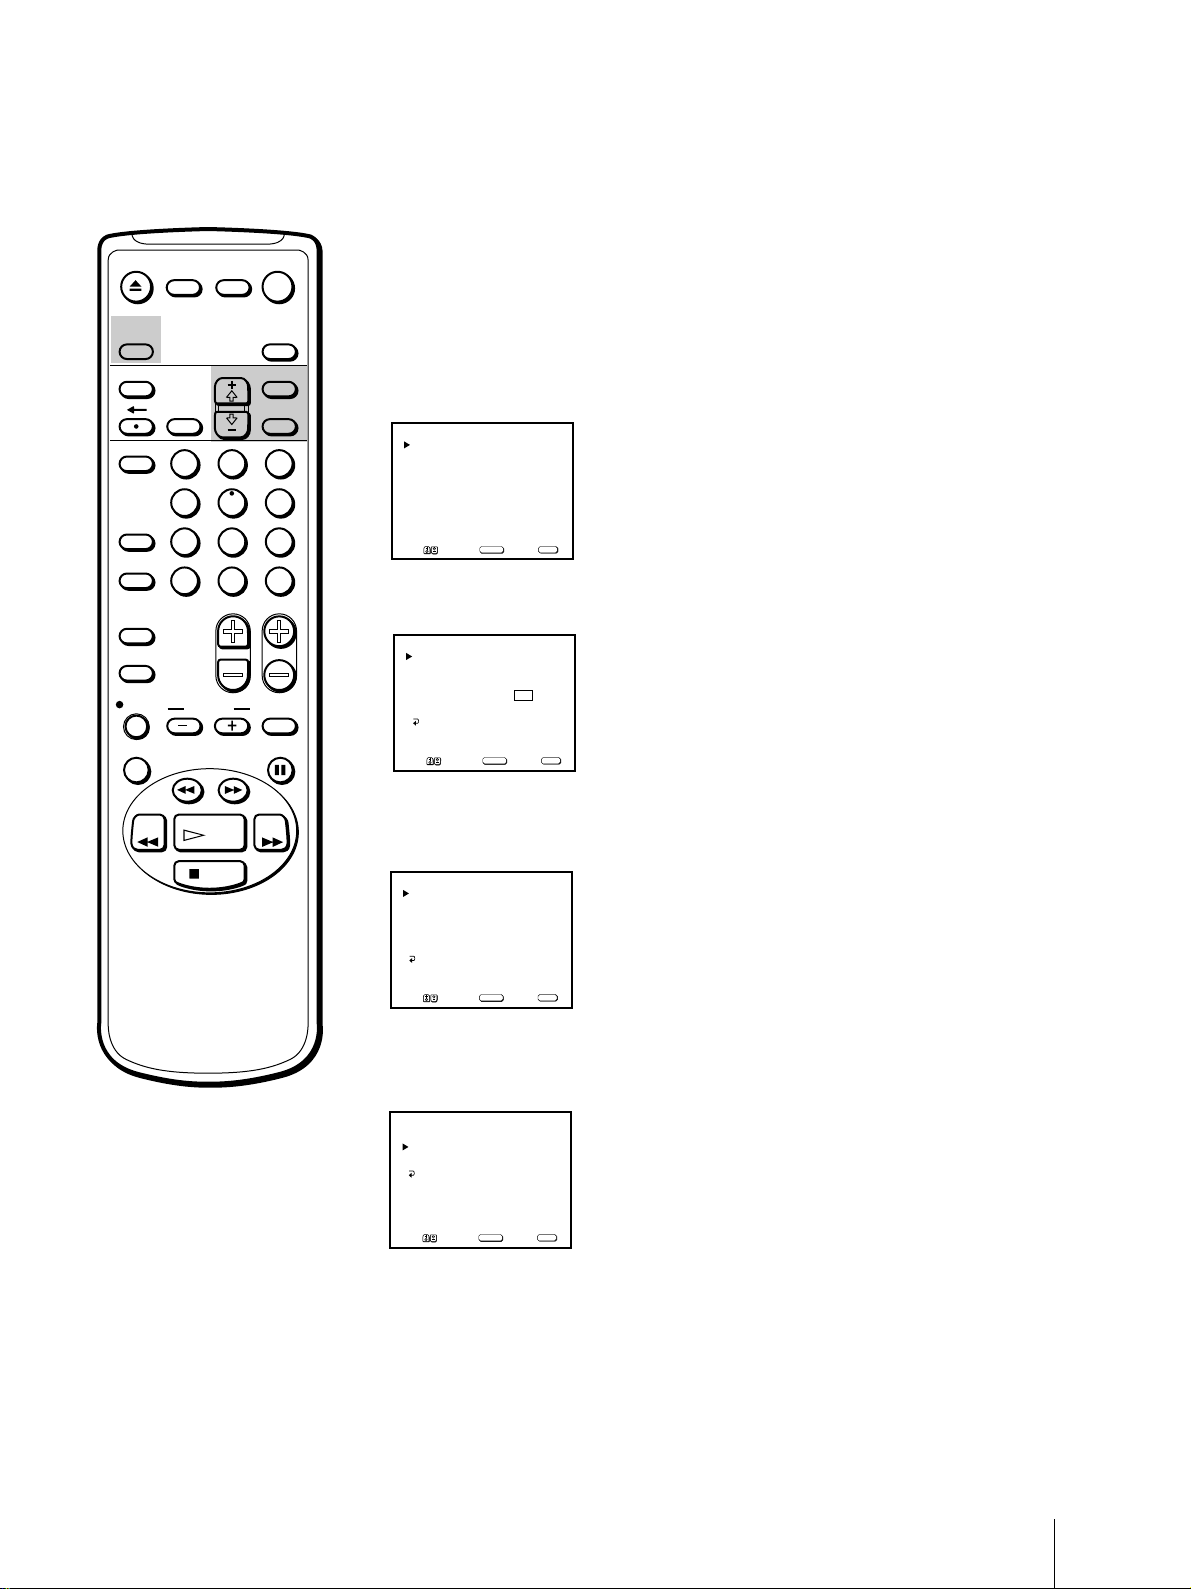
Erasing and adding channels
After AUTO SET UP, you can erase unnecessary channels or add more
channels.
TIMER ON SCREEN
VCR Plus
COUNTER/
REMAIN
COUNTER
RESET
INDEX
TAPE SPEED
REC
X2 PAUSE
REW FF
2
1
5
4
7
8
JUMP ENTER
0
&7
SLOW
SEARCH
PLAY
STOP
MENU
SELECTRESET
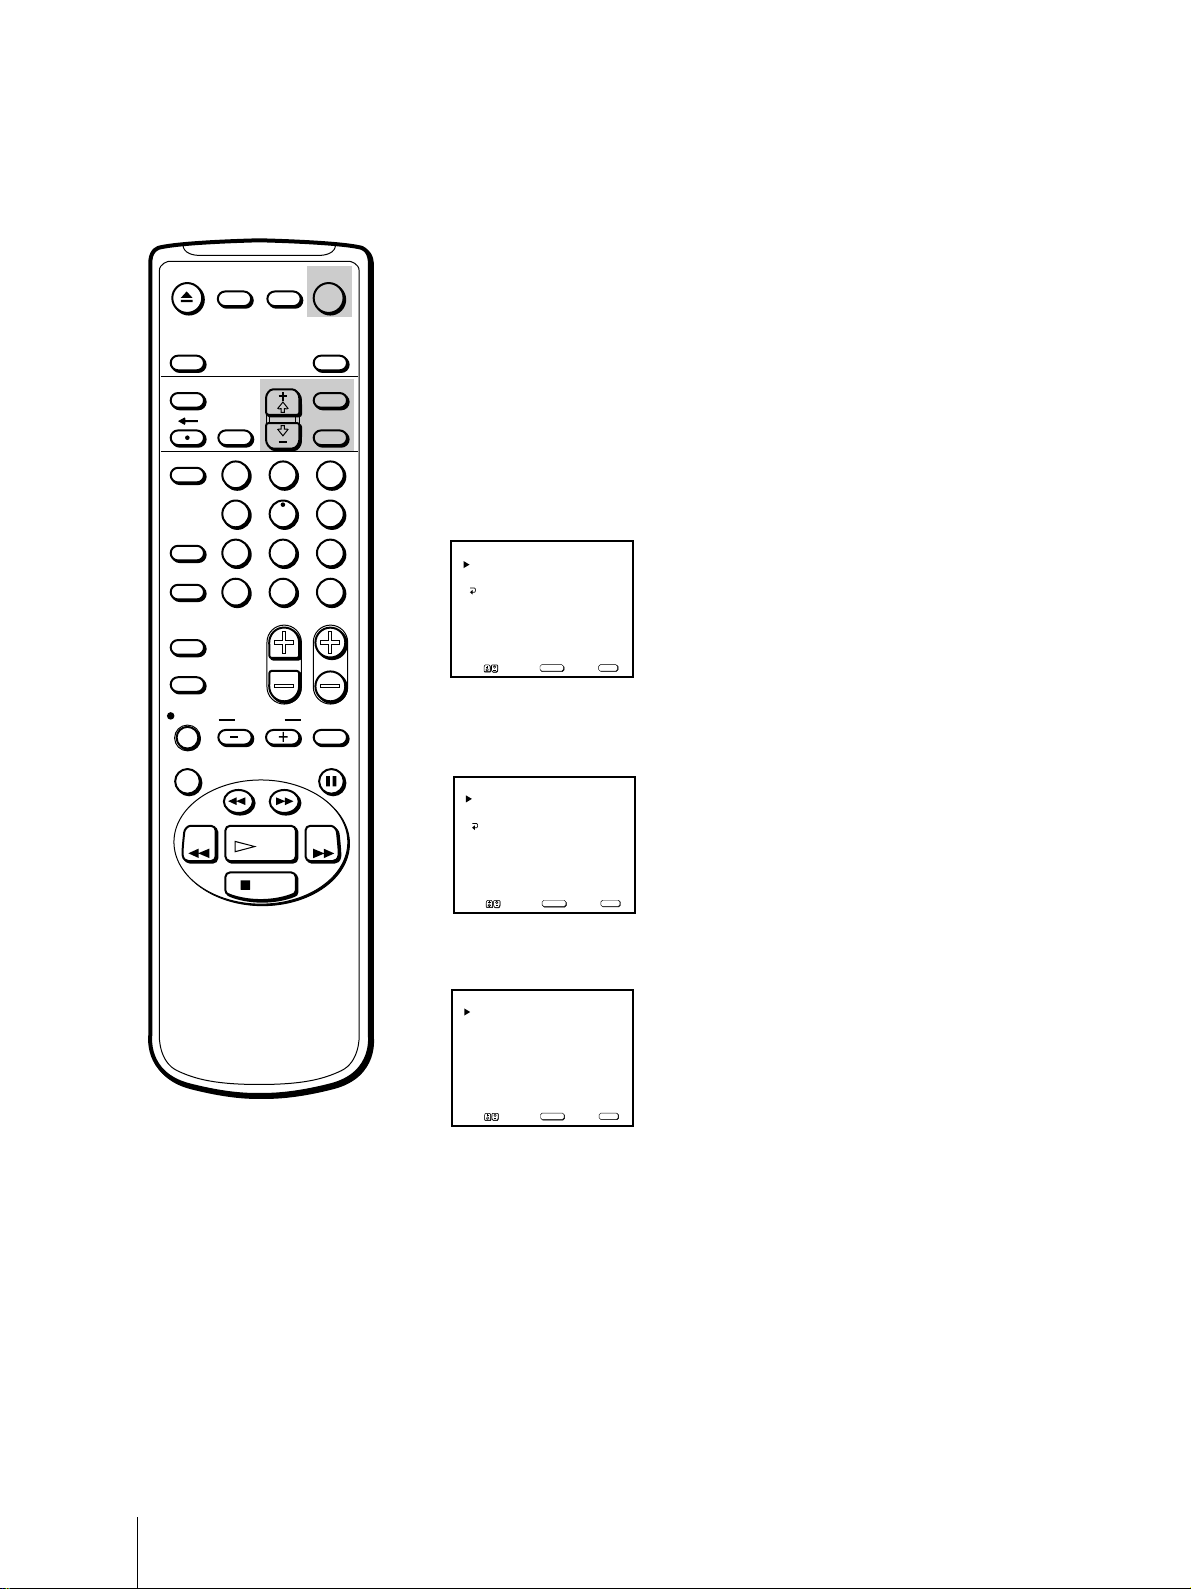
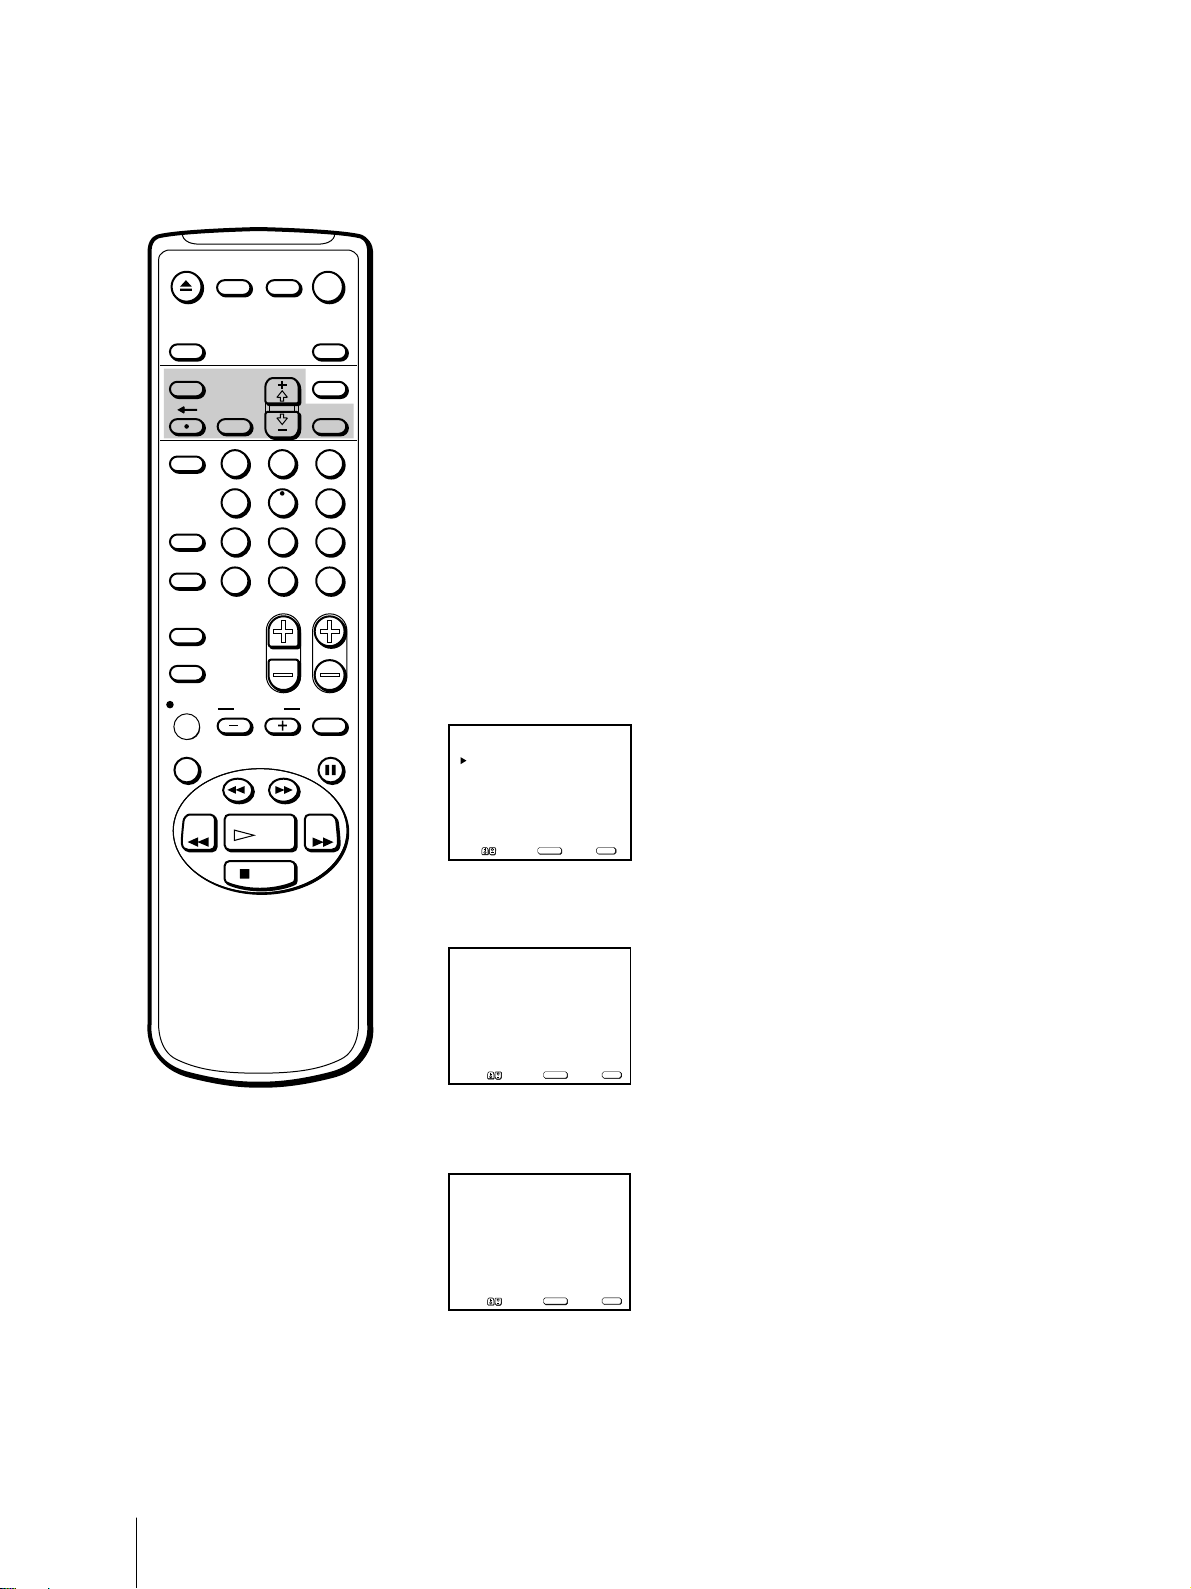
1 Press MENU to display the main menu.
The main menu appears.
V IDEO
3
6
9
AUDIO
TIMER
TAPE
SET UP
Move Select Exit
SELECT
MENU
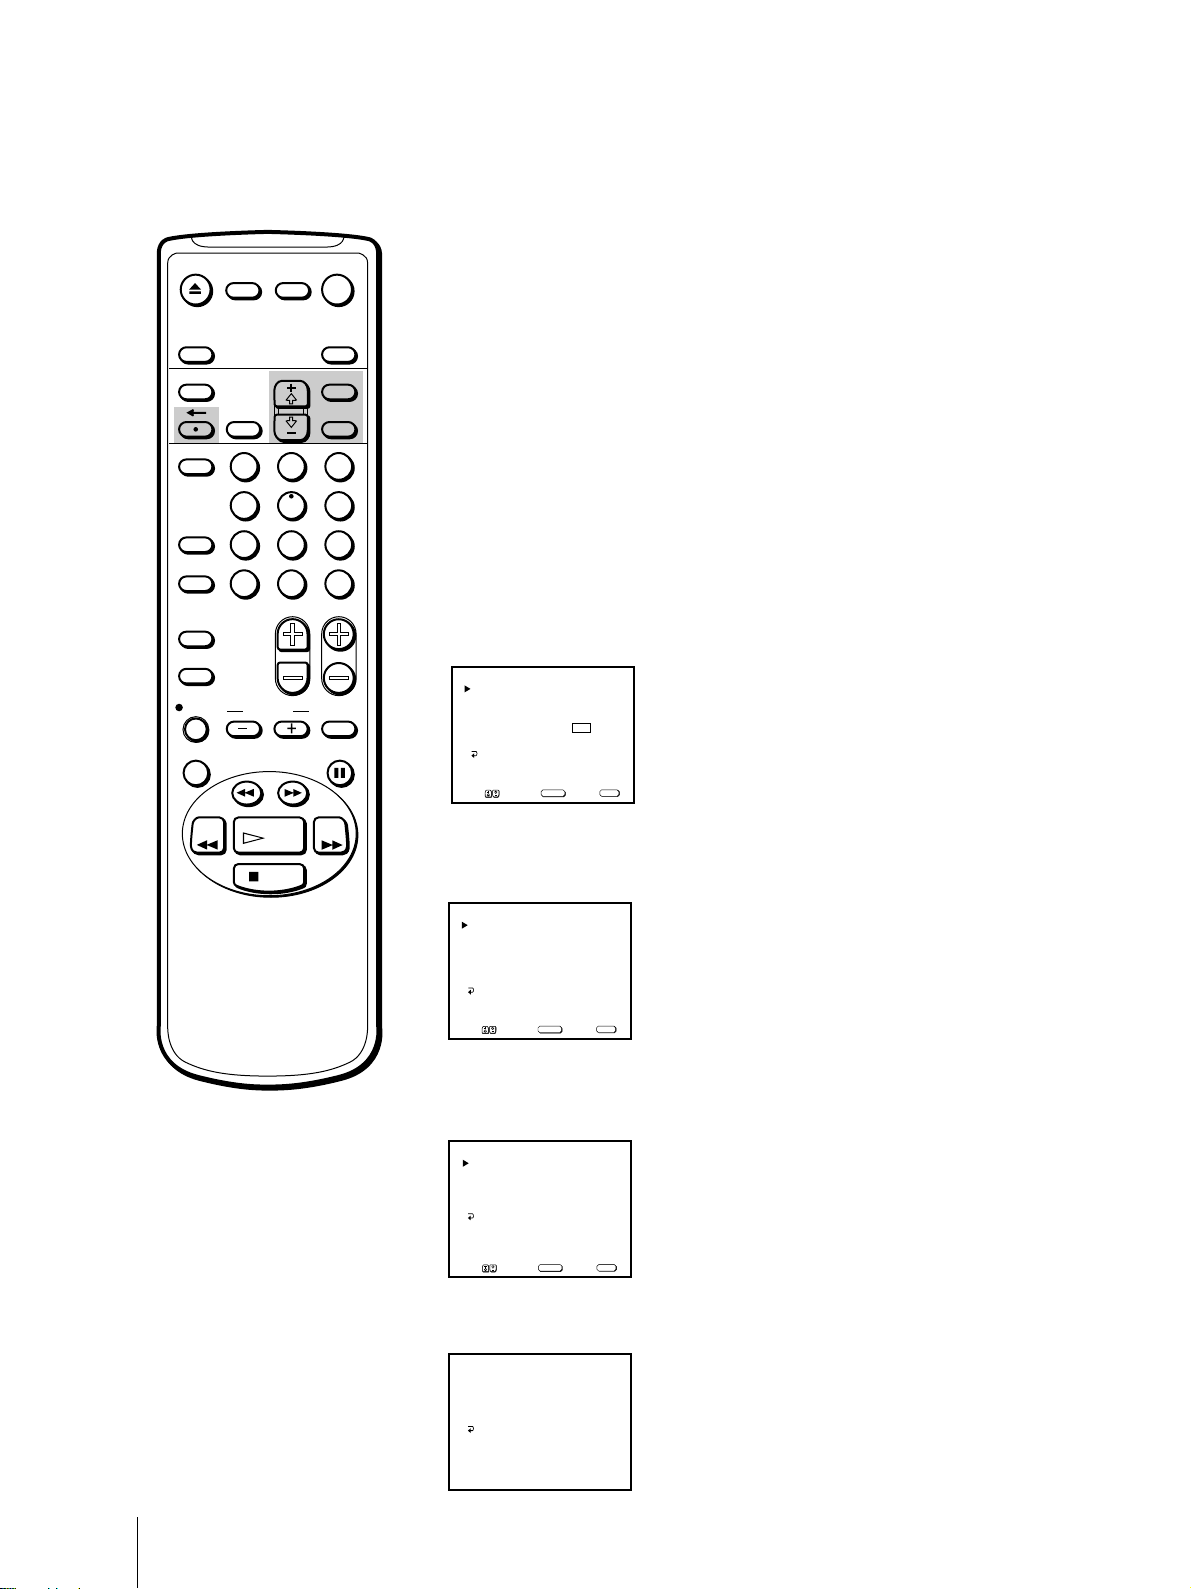
2 Move the cursor (z) to “SET UP” with + ◊ or – √ and press SELECT.
CHVOL
The SET UP menu appears.
SET UP
CHANNEL SET UP
PARENTAL CONTROL
FAVORITE CHANNEL
CAPTION VISION: CC 1
LANGUAGE: ENGLISH
MENU
MENU
Move Select Exit
SELECT
3 Move the cursor (z) to “CHANNEL SET UP” with + ◊ or – √ and press
SELECT.
The CHANNEL SET UP menu appears.
CHANNEL SET UP
CABLE: OFF
CHANNEL FIX: OFF
AUTO PROGRAM
CHANNEL SKIP/ADD
VCR P l u s+ SET UP
MENU
Note
If CHANNEL SKIP/ADD appears
in black, the Video/TV is set to
receive a video input signal through
the input jacks and you cannot select
CHANNEL SKIP/ADD. Press
INPUT SELECT so that a channel
number appears on the screen.
MENU
Move Select Exit
SELECT
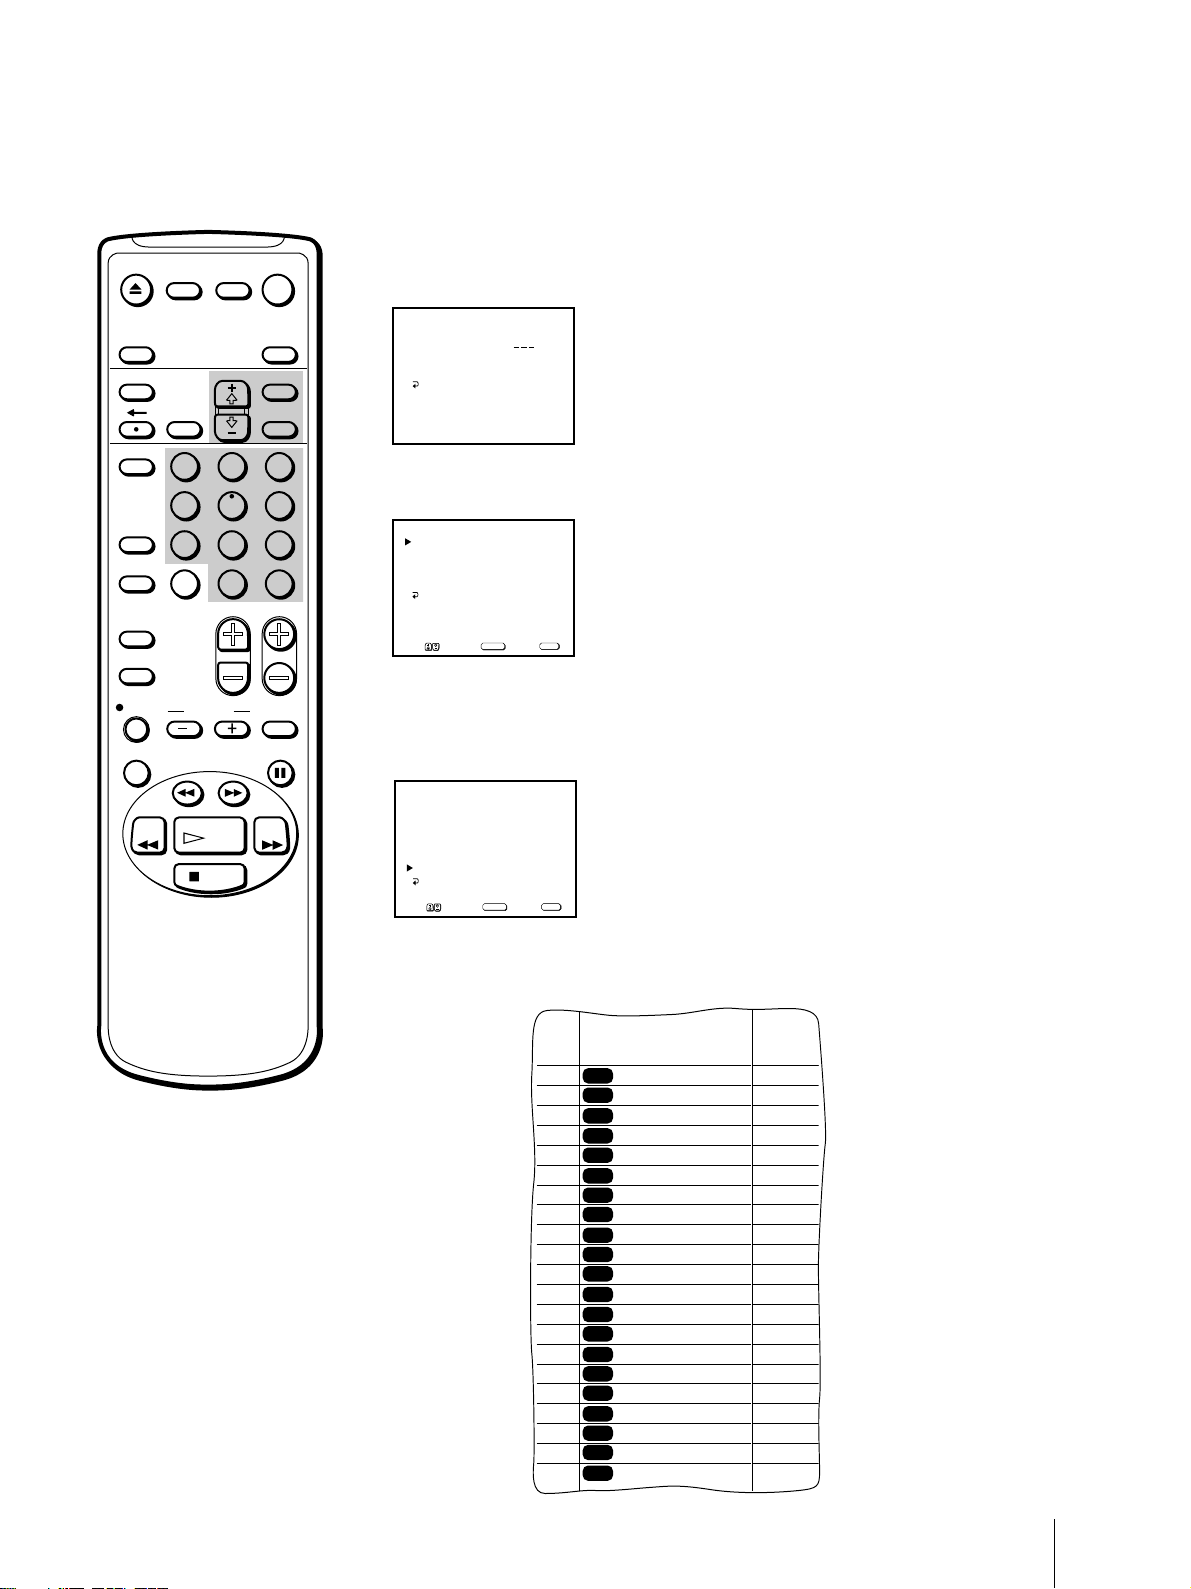
4 Move the cursor (z) to “CHANNEL SKIP/ADD” with + ◊ or – √ and
press SELECT.
The CHANNEL SKIP/ADD menu appears.
CHANNEL SKIP/ADD
SKIP
ADD
MENU
]or[
Use[0–9
to select the channel
Move Select Exit
CH+/–
SELECT
2
]
MENU
Getting Started
7
Page 8
EJECT
MUTING DISPLAY
INPUT
SELECT
TIMER ON SCREEN
VCR Plus
COUNTER/
REMAIN
COUNTER
RESET
INDEX
TAPE SPEED
REC
X2 PAUSE
REW FF
2
1
5
4
7
8
JUMP ENTER
0
&7
SLOW
SEARCH
PLAY
POWER
TV
SLEEP
MENU
SELECTRESET
3
6
9
CHVOL
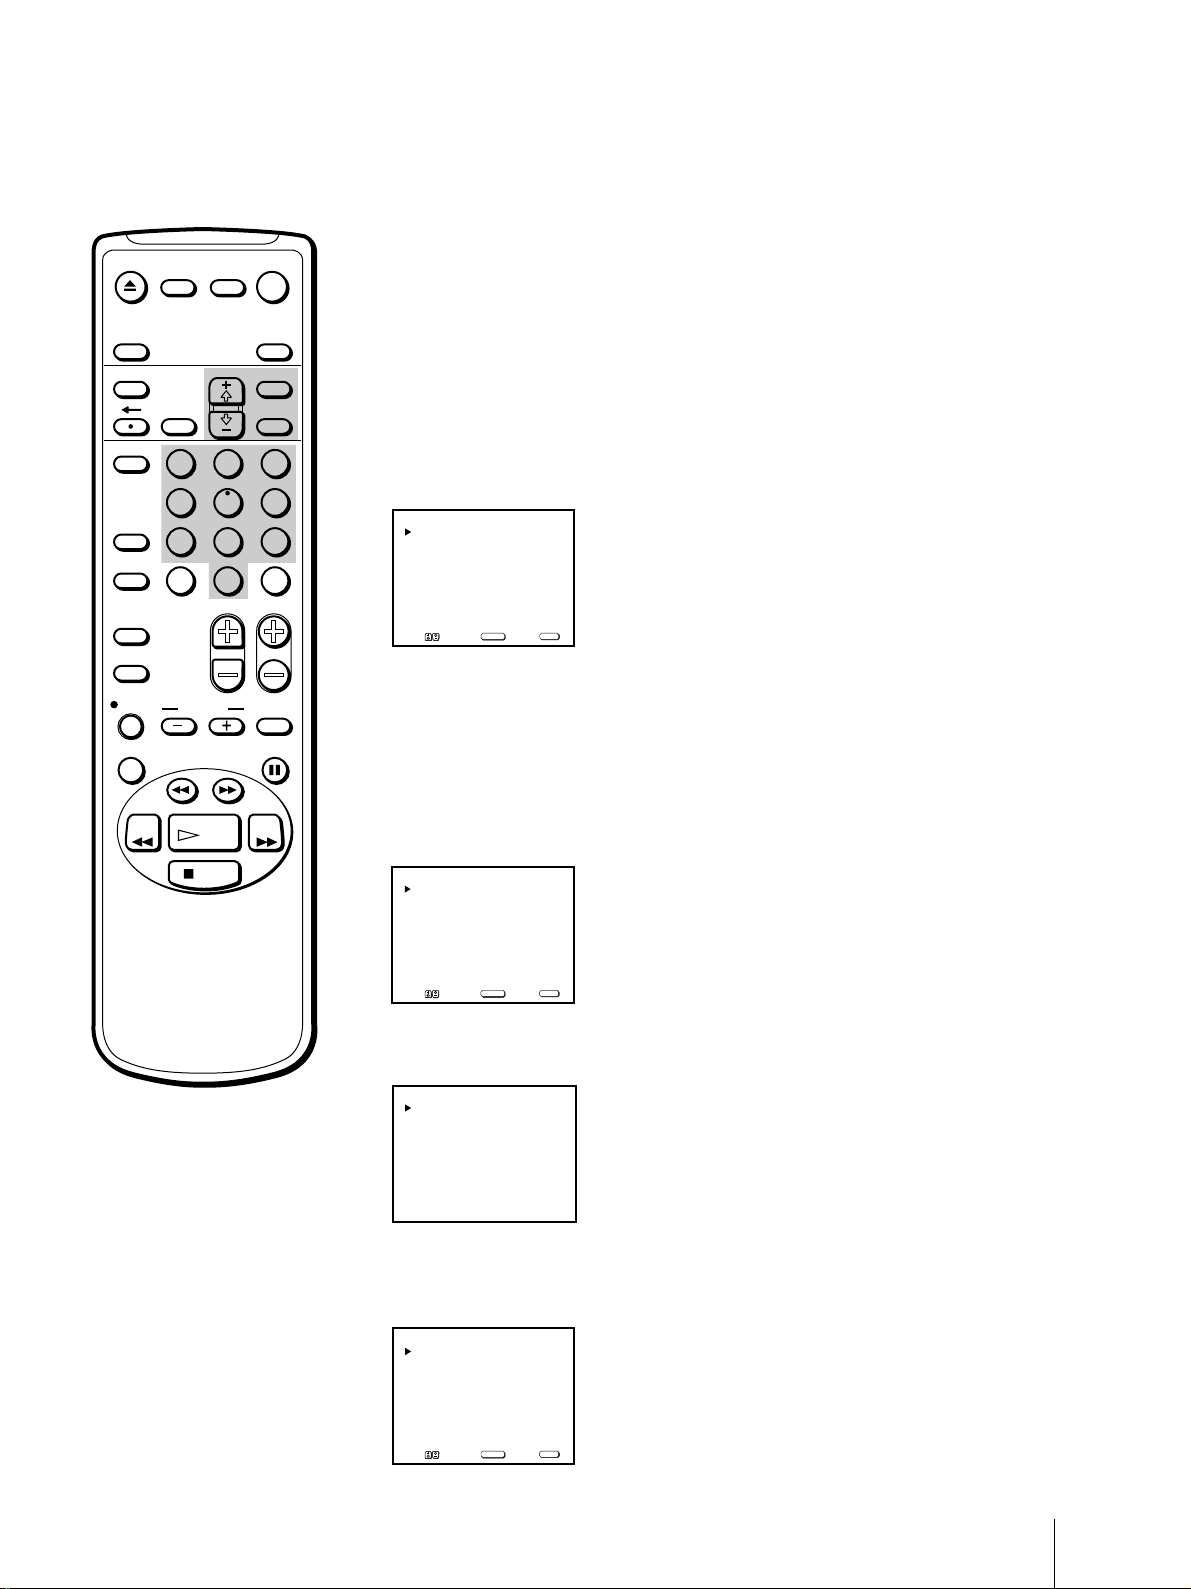
5 Erase and/or add channels:
To erase an unwanted channel
(1) Make sure the cursor (z) is beside SKIP.
(2) Press CH +/– or the 0 - 9 buttons to select the channel you want to
erase and press SELECT.
CHANNEL SKIP/ADD
SKIP
ADD
MENU
]or[
Use[0–9
to select the channel
Move Select Exit
CH+/–
SELECT
The message “Channel will be skipped” appears for several seconds and
the cursor (z) moves to ADD.
To add a channel
(1) Make sure the cursor (z) is beside ADD.
(2) Press CH+/– or the 0 - 9 buttons to select the channel you want to add
and press SELECT.
CHANNEL SKIP/ADD
SKIP
ADD
MENU
]or[
Use[0–9
to select the channel
Move Select Exit
CH+/–
SELECT
3
]
MENU
3
]
MENU
STOP
The message “Channel will be added” appears and the cursor (z) moves
to SKIP.
6 To erase and/or add other channels, repeat step 5.
7 Press MENU to return to the original screen.
Getting Started
8
Page 9
EJECT
MUTING DISPLAY
INPUT
SELECT
TIMER ON SCREEN
POWER
TV
SLEEP
MENU
SELECTRESET
Setting cable TV on or off
If you have connected the Video/TV to a cable TV system, set CABLE to
ON (the factory setting). If not, set CABLE to OFF to watch VHF or UHF
channels.
1 Press MENU to display the main menu.
VCR Plus
COUNTER/
REMAIN
COUNTER
RESET
INDEX
TAPE SPEED
REC
X2 PAUSE
REW FF
2
1
5
4
7
8
JUMP ENTER
0
&7
SLOW
SEARCH
PLAY
STOP
3
6
9
CHVOL
2 Move the cursor (z) to “SET UP” with + ◊ or – √ and press SELECT.
The SET UP menu appears.
SET UP
CHANNEL SET UP
PARENTAL CONTROL
FAVORITE CHANNEL
CAPTION VISION: CC 1
LANGUAGE: ENGLISH
MENU
MENU
Move Select Exit
SELECT
3 Move the cursor (z) to “CHANNEL SET UP” with + ◊ or – √ and press
SELECT.
The CHANNEL SET UP menu appears.
CHANNEL SET UP
CABLE: OFF
CHANNEL FIX: OFF
AUTO PROGRAM
CHANNEL SKIP/ADD
VCR P l u s+ SET UP
MENU
Move Select Exit
SELECT
MENU
4 Move the cursor (z) to “CABLE” with + ◊ or – √ and press SELECT.
The selected position turns red.
CHANNEL SET UP
CABLE: OFF
CHANNEL FIX: OFF
AUTO PROGRAM
CHANNEL SKIP/ADD
VCR P l u s + SET UP
MENU
Note
If CABLE appears in black, the
Video/TV is set to receive a video
input signal through the input jacks
and you cannot select CABLE. Press
INPUT SELECT so that a channel
number appears on the screen.
MENU
Move Select Exit
SELECT
5 Using + ◊ or – √, select “ON” or “OFF” and press SELECT.
CHANNEL SET UP
CABLE: ON
CHANNEL FIX: OFF
AUTO PROGRAM
CHANNEL SKIP/ADD
VCR P l u s + SET UP
MENU
MENU
Move Select Exit
SELECT
6 Press MENU to return to the original screen.
Getting Started
9
Page 10
EJECT
MUTING DISPLAY
INPUT
SELECT
TIMER ON SCREEN
POWER
TV
SLEEP
MENU
SELECTRESET
Presetting channels – AUTO PROGRAM
You can preset TV channels easily by using the AUTO PROGRAM feature.
Preset channels during the day rather than late at night, when some
channels may not be broadcasting.
1 Press MENU to display the main menu.
VCR Plus
COUNTER/
REMAIN
COUNTER
RESET
INDEX
TAPE SPEED
REC
X2 PAUSE
REW FF
2
1
5
4
7
8
JUMP ENTER
0
&7
SLOW
SEARCH
PLAY
STOP
3
6
9
CHVOL
2 Move the cursor (z) to “SET UP” with + ◊ or – √ and press SELECT.
The SET UP menu appears.
SET UP
CHANNEL SET UP
PARENTAL CONTROL
FAVORITE CHANNEL
CAPTION VISION: CC 1
LANGUAGE: ENGLISH
MENU
Move Select Exit
SELECT
MENU
3 Move the cursor (z) to “CHANNEL SET UP” with + ◊ or – √ and press
SELECT.
The CHANNEL SET UP menu appears.
CHANNEL SET UP
CABLE: OFF
CHANNEL FIX: OFF
AUTO PROGRAM
CHANNEL SKIP/ADD
VCR P l u s+ SET UP
MENU
MENU
Move Select Exit
SELECT
4 Move the cursor (z) to “AUTO PROGRAM” with + ◊ or – √ and press
SELECT.
Receivable channels for this
Video/TV
VHF: 2 – 13
UHF: 14 – 69
Cable: 1 – 125
Note
If AUTO PROGRAM appears in
black, the Video/TV is set to receive
a video input signal through the
input jacks and you cannot select
AUTO PROGRAM. Press INPUT
SELECT so that a channel number
appears on the screen.
To erase unnecessary channels,
or to add channels
See “Erasing and adding channels”
(page 7).
Getting Started
10
AU TO PROGRAM
“AUTO PROGRAM” appears on the screen and the Video/TV starts
scanning and presetting channels automatically. When all receivable
channels are stored, “AUTO PROGRAM” disappears and the lowest
numbered channel is displayed.
5 Press MENU to return to the original screen.
To exit AUTO PROGRAM
Press any button.
Page 11
EJECT
INPUT
SELECT
MUTING DISPLAY
POWER
TV
SLEEP
Changing the menu language
If you prefer Spanish or French to English, change the menu language with
the following steps.
TIMER ON SCREEN
VCR Plus
COUNTER/
REMAIN
COUNTER
RESET
INDEX
TAPE SPEED
REC
X2 PAUSE
REW FF
2
1
5
4
7
8
JUMP ENTER
0
&7
SLOW
SEARCH
PLAY
STOP
MENU
SELECTRESET
1 Press MENU to display the main menu.
2 Move the cursor (z) to “SET UP” with + ◊ or – √ and press SELECT.
3
6
9
CHVOL
The SET UP menu appears.
SET UP
CHANNEL SET UP
PARENTAL CONTROL
FAVORITE CHANNEL
CAPTION VISION: CC 1
LANGUAGE: ENGLISH
MENU
MENU
Move Select Exit
SELECT
3 Move the cursor (z) to “LANGUAGE” with + ◊ or – √ and press SELECT.
The language position turns red.
SET UP
CHANNEL SET UP
PARENTAL CONTROL
FAVORITE CHANNEL
CAPTION VISION: CC 1
LANGUAGE: ENGLISH
MENU
MENU
Move Select Exit
SELECT
4 Using + ◊ or – √, select the language you want and press SELECT.
The entire menu appears in the selected language.
PREFERENCIAS
AJUSTE DE CANAL
CONTROL PATERNO
CANAL FAVORITO
CAPTION VISION : CC1
LENGUAJE : ESPAÑOL
MENU
MENU
Mover Seleccionar Salir
SELECT
5 Press MENU to return to the original screen.
Getting Started
11
Page 12
Step 4 —
EJECT
MUTING DISPLAY
INPUT
SELECT
TIMER ON SCREEN
VCR Plus
1
JUMP ENTER
RESET
4
7
COUNTER/
REMAIN
COUNTER
INDEX
TAPE SPEED
POWER
TV
SLEEP
MENU
SELECTRESET
2
3
5
6
9
8
0
CHVOL
Setting the Clock
Setting the clock automatically
Some TV and cable channels transmit time signals with their broadcasts.
Your Video/TV can pick up these time signals to automatically set the
clock (AUTO CLOCK). The AUTO CLOCK feature works only if a channel
in your area is broadcasting a time signal. If your Video/TV cannot pick
up the signals, set the clock manually (page 15).
1 Press MENU to display the main menu.
2 Move the cursor (z) to “TIMER” with + ◊ or – √ and press SELECT.
The TIMER menu appears.
TIMER
CURRENT TIME SET
ON/OFF TIMER
MENU
SUN 12:00 AM
Move Select Exit
SELECT
MENU
REC
&7
SLOW
X2 PAUSE
SEARCH
REW FF
PLAY
STOP
Note
If there are only a few channels in
your area that carry time signals,
setting the clock automatically may
take up to about 45 minutes. If
nothing happens even after you wait
for about 45 minutes, set the clock
manually.
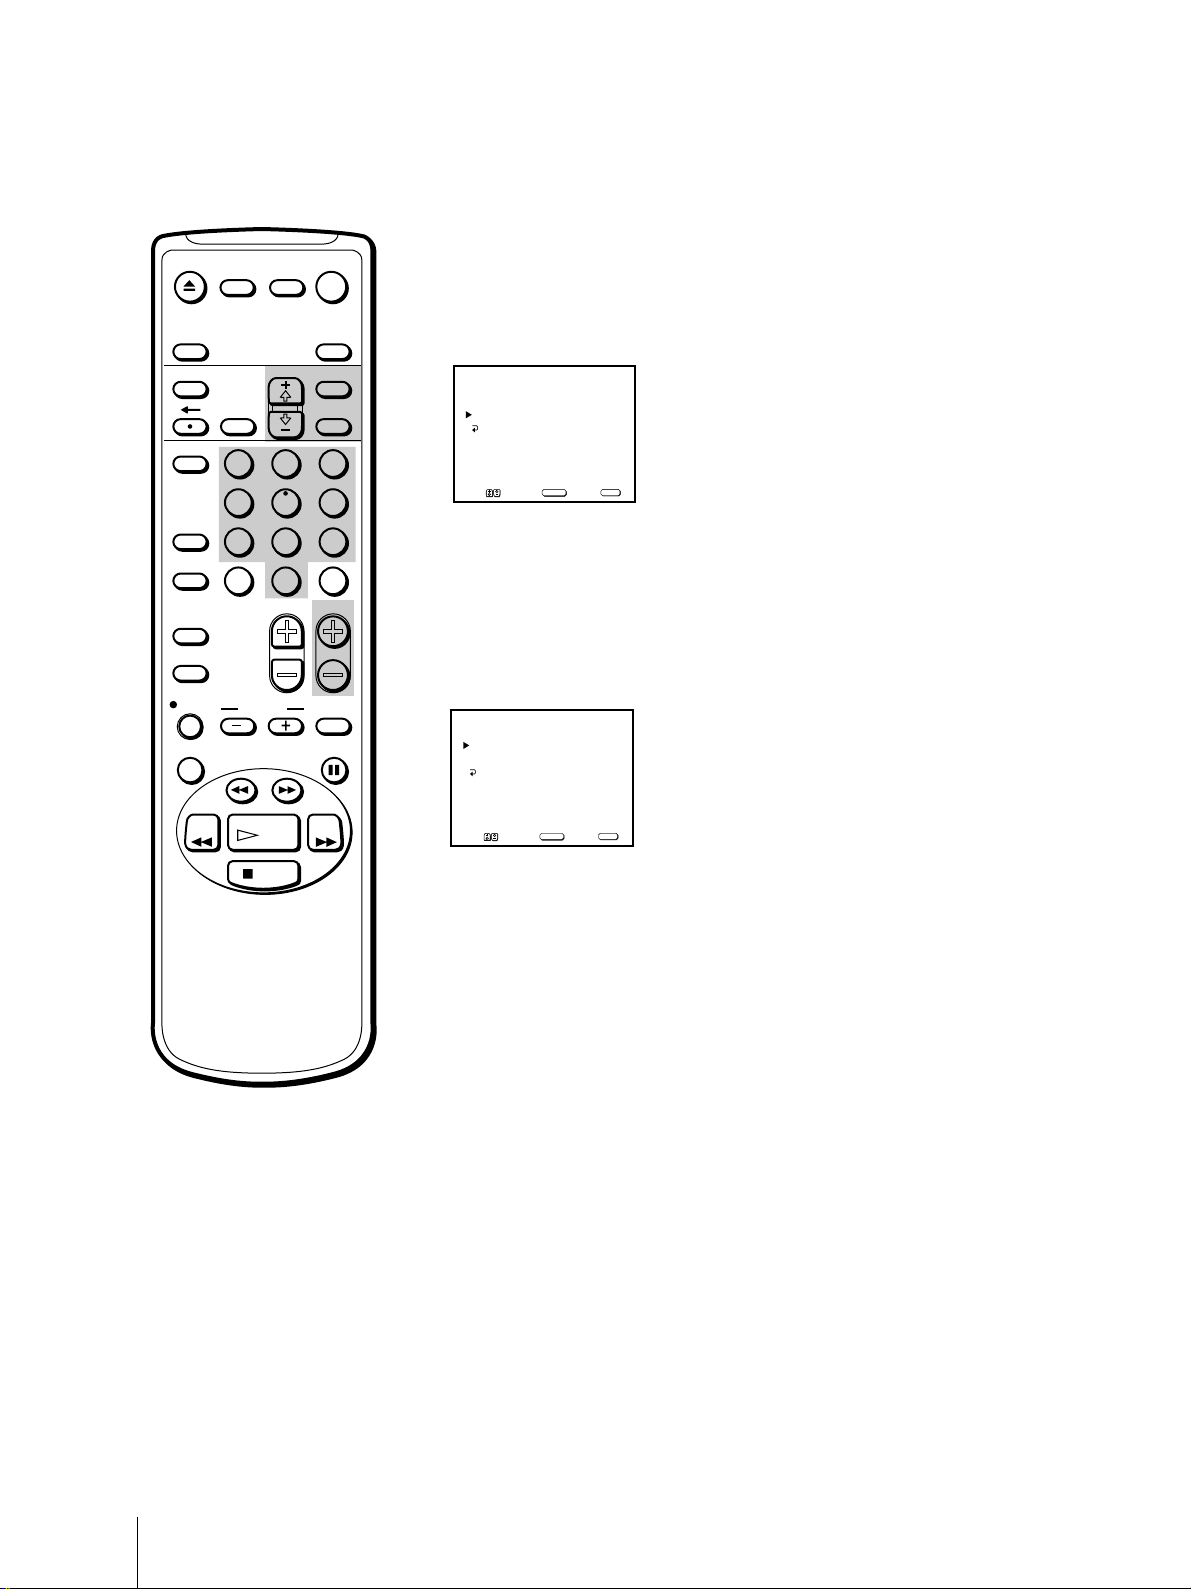
3 Move the cursor (z) to “CURRENT TIME SET” with + ◊ or – √ and press
SELECT.
The CURRENT TIME SET menu appears.
CURRENT TIME SET
AUTO
MANUAL
MENU
MENU
Move Select Exit
SELECT
4 Move the cursor (z) to “AUTO” with + ◊ or – √ and press SELECT.
The AUTO CURRENT TIME SET menu appears.
AUTO CURRENT TIME SET
FULL AUTO
OPTIONS
MENU
Move Select Exit
SELECT
5 Move the cursor (z) to “FULL AUTO” with + ◊ or – √ and press SELECT.
The message “Please turn TV off to receive clock data” appears for 5
seconds.
6 To activate the Auto Clock setting, press POWER to turn the Video/TV
off.
The time signals automatically set the time for your time zone and adjust
for daylight saving time.
Getting Started
12
Page 13
EJECT
MUTING DISPLAY
INPUT
SELECT
TIMER ON SCREEN
VCR Plus
COUNTER/
REMAIN
COUNTER
RESET
INDEX
TAPE SPEED
REC
X2 PAUSE
2
1
5
4
7
8
JUMP ENTER
0
&7
SLOW
SEARCH
POWER
TV
SLEEP
MENU
SELECTRESET
3
6
9
CHVOL
If the clock does not activate
If the clock is set, but your time zone or daylight saving time is not set
correctly, you can adjust these settings manually. If you live close to a time
zone border, the Video/TV’s clock may not match the actual broadcast
times of the programs. To confirm the time zone of the broadcast service,
contact your cable company and set the clock accordingly.
1 Follow steps 1-5 in “Setting the clock automatically” and select
“OPTIONS” in step 5.
The CURRENT TIME SET CHANNEL menu appears.
CURRENT TIME SET CHANNEL
AUTO
MANUAL CH___
MENU
Move Select Exit
If you know a channel number that carries a time signal
(1) Move the cursor (z) to “MANUAL” with + ◊ or – √ and press SELECT.
The CH position turns red.
(2) Using the 0-9 buttons, enter the channel number and press SELECT.
Then skip steps 2-5.
SELECT
REW FF
PLAY
STOP
2 Move the cursor (z) to “AUTO” with + ◊ or – √ and press SELECT.
The AUTO CURRENT TIME SET menu appears.
AUTO CURRENT TIME SET
TIME ZONE: AUTO
DAYLIGHT SAVING TIME AUTO
OK
MENU
Move Select Exit
SELECT
3 Move the cursor (z) to “TIME ZONE” with + ◊ or – √ and press SELECT.
The TIME ZONE menu appears.
TIME ZONE
AUTO
ATLANTIC
EASTERN
CENTRAL
MOUNTAIN
PACIFIC
ALASKA
HAWAII
OK
4 Using + ◊ or – √, select “AUTO.” Then move the cursor (z) to “OK,” and
press SELECT.
The DAYLIGHT SAVING TIME menu appears.
DAYLIGHT SAVING TIME
AUTO
STANDARD TIME
DAYLIGHT SAVING TIME
OK
Move Select Exit
SELECT
MENU
Getting Started
13
Page 14
EJECT
MUTING DISPLAY
INPUT
SELECT
TIMER ON SCREEN
RESET
POWER
TV
SLEEP
MENU
SELECT
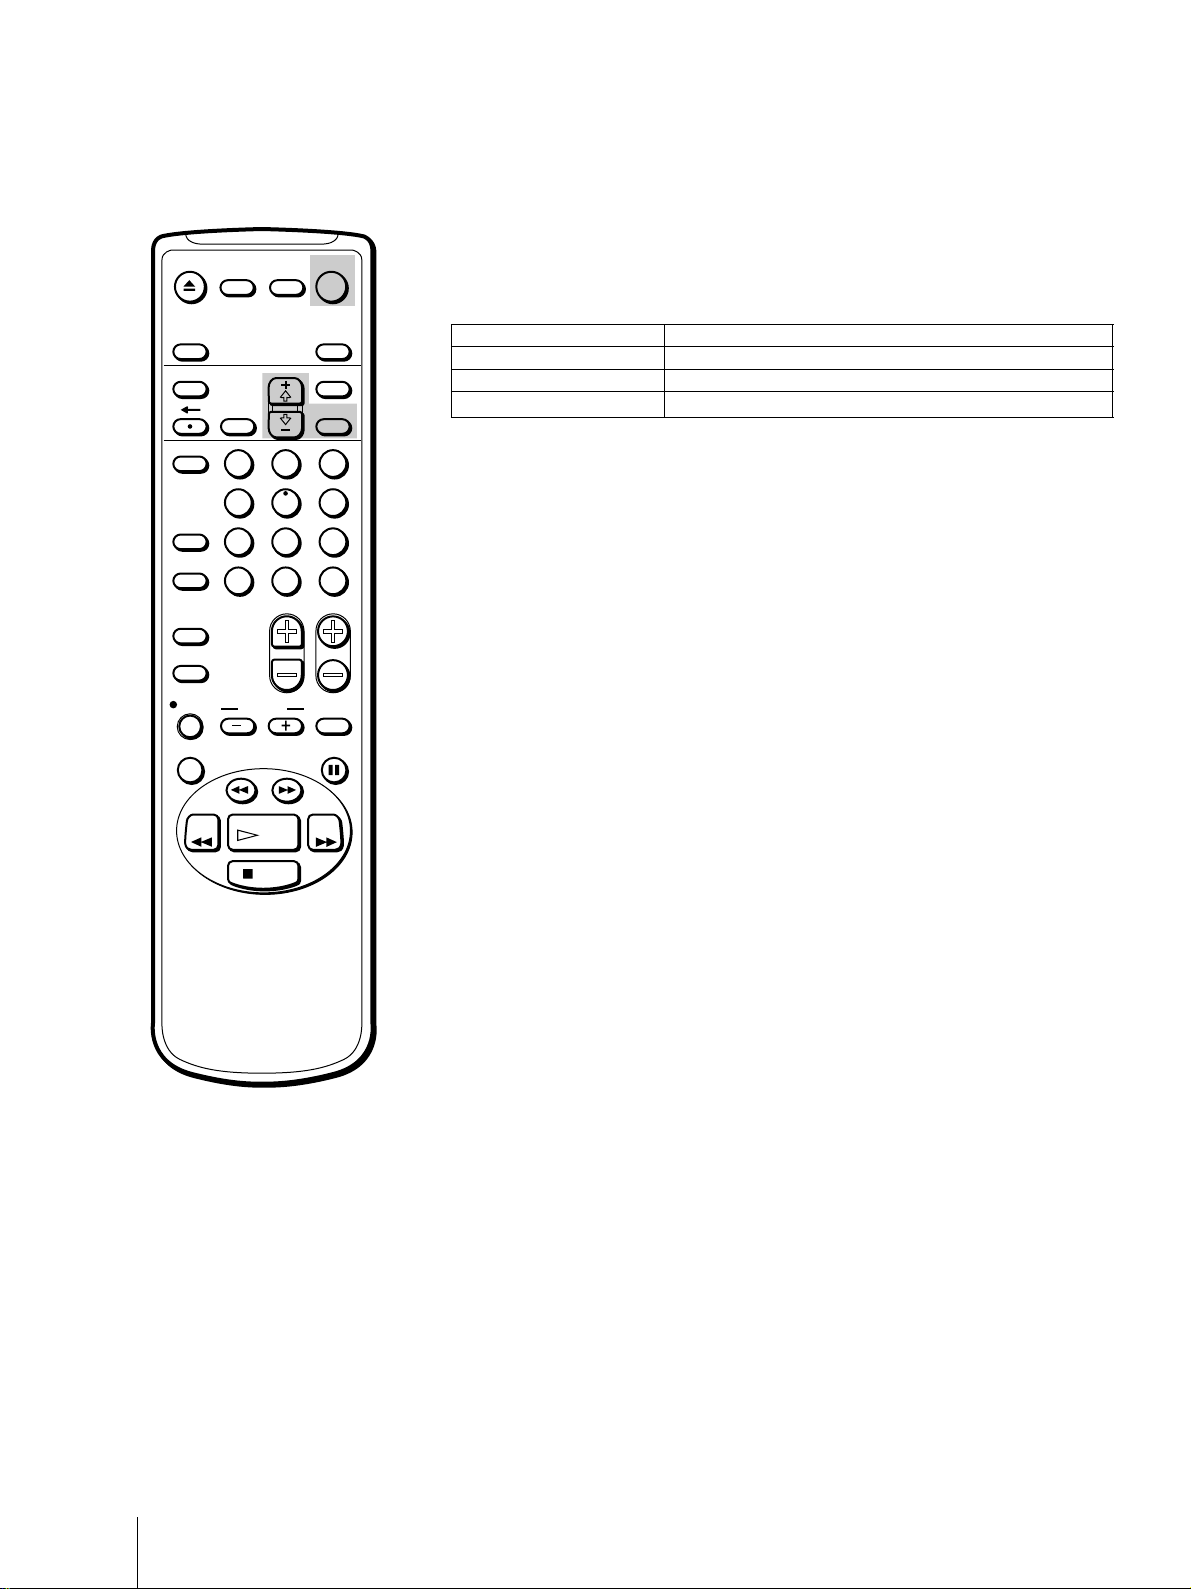
5 Using + ◊ or – √, select “AUTO,” “STANDARD TIME,” or “DAYLIGHT
SAVING TIME.” (See the table below). Then move the cursor (z) to “OK,”
and press SELECT.
Choose To
AUTO Select to set the daylight saving time automatically.
STANDARD TIME Select if your area does not use daylight saving time.
DAYLIGHT SAVING TIME Select if your area uses daylight saving time.
VCR Plus
COUNTER/
REMAIN
COUNTER
RESET
INDEX
TAPE SPEED
REC
X2 PAUSE
REW FF
2
1
5
4
7
8
JUMP ENTER
0
&7
SLOW
SEARCH
PLAY
STOP
3
6
6 To activate the Auto Clock setting, press POWER to turn the Video/TV
off.
9
CHVOL
Getting Started
14
Page 15
EJECT
MUTING
INPUT
SELECT
TIMER ON SCREEN
DISPLAY
POWER
TV
SLEEP
MENU
Setting the date and clock
manually
Setting the date and clock enables you to use the timer feature for
recording or automatically turning the Video/TV on or off.
VCR Plus
COUNTER/
REMAIN
COUNTER
RESET
INDEX
TAPE SPEED
REC
X2 PAUSE
REW FF
2
1
5
4
7
8
JUMP ENTER
0
&7
SLOW
SEARCH
PLAY
STOP
SELECTRESET
3
6
9
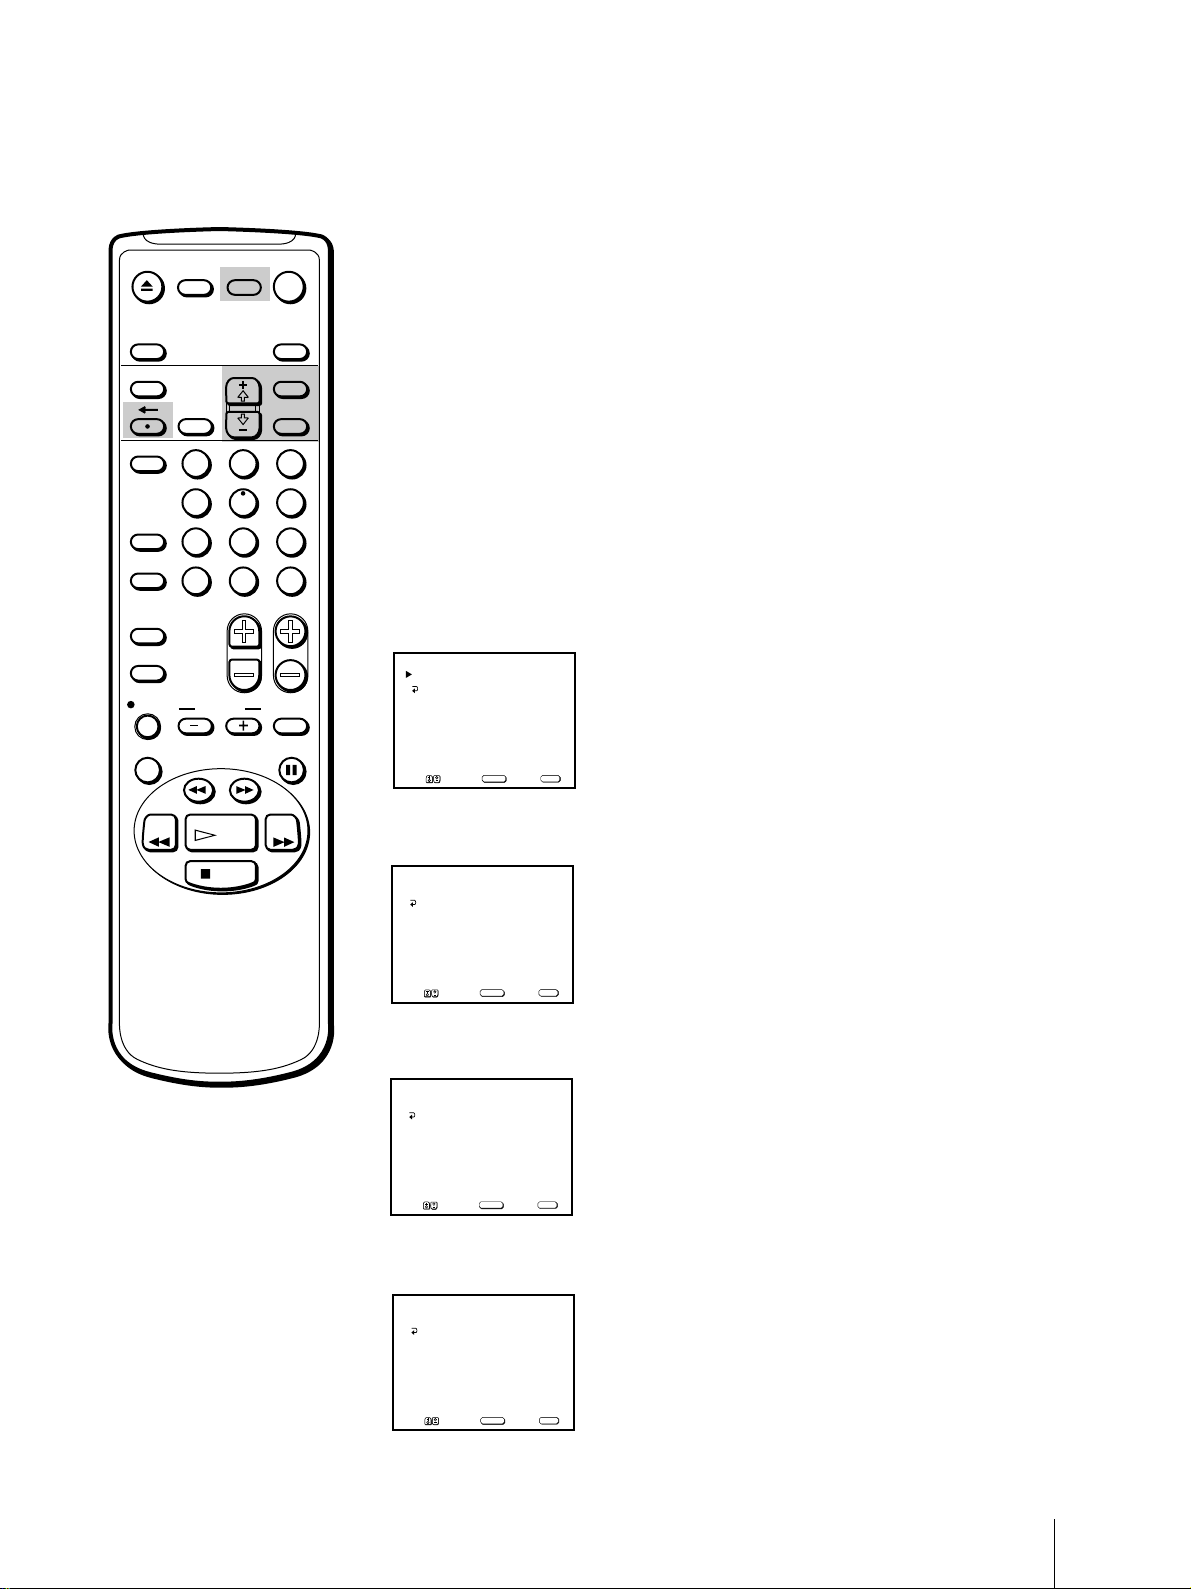
1 Press MENU to display the main menu.
2 Move the cursor (z) to “TIMER” with + ◊ or – √ and press SELECT.
The TIMER menu appears.
3 Move the cursor (z) to “CURRENT TIME SET” with + ◊ or – √ and press
SELECT.
The CURRENT TIME SET menu appears.
CHVOL
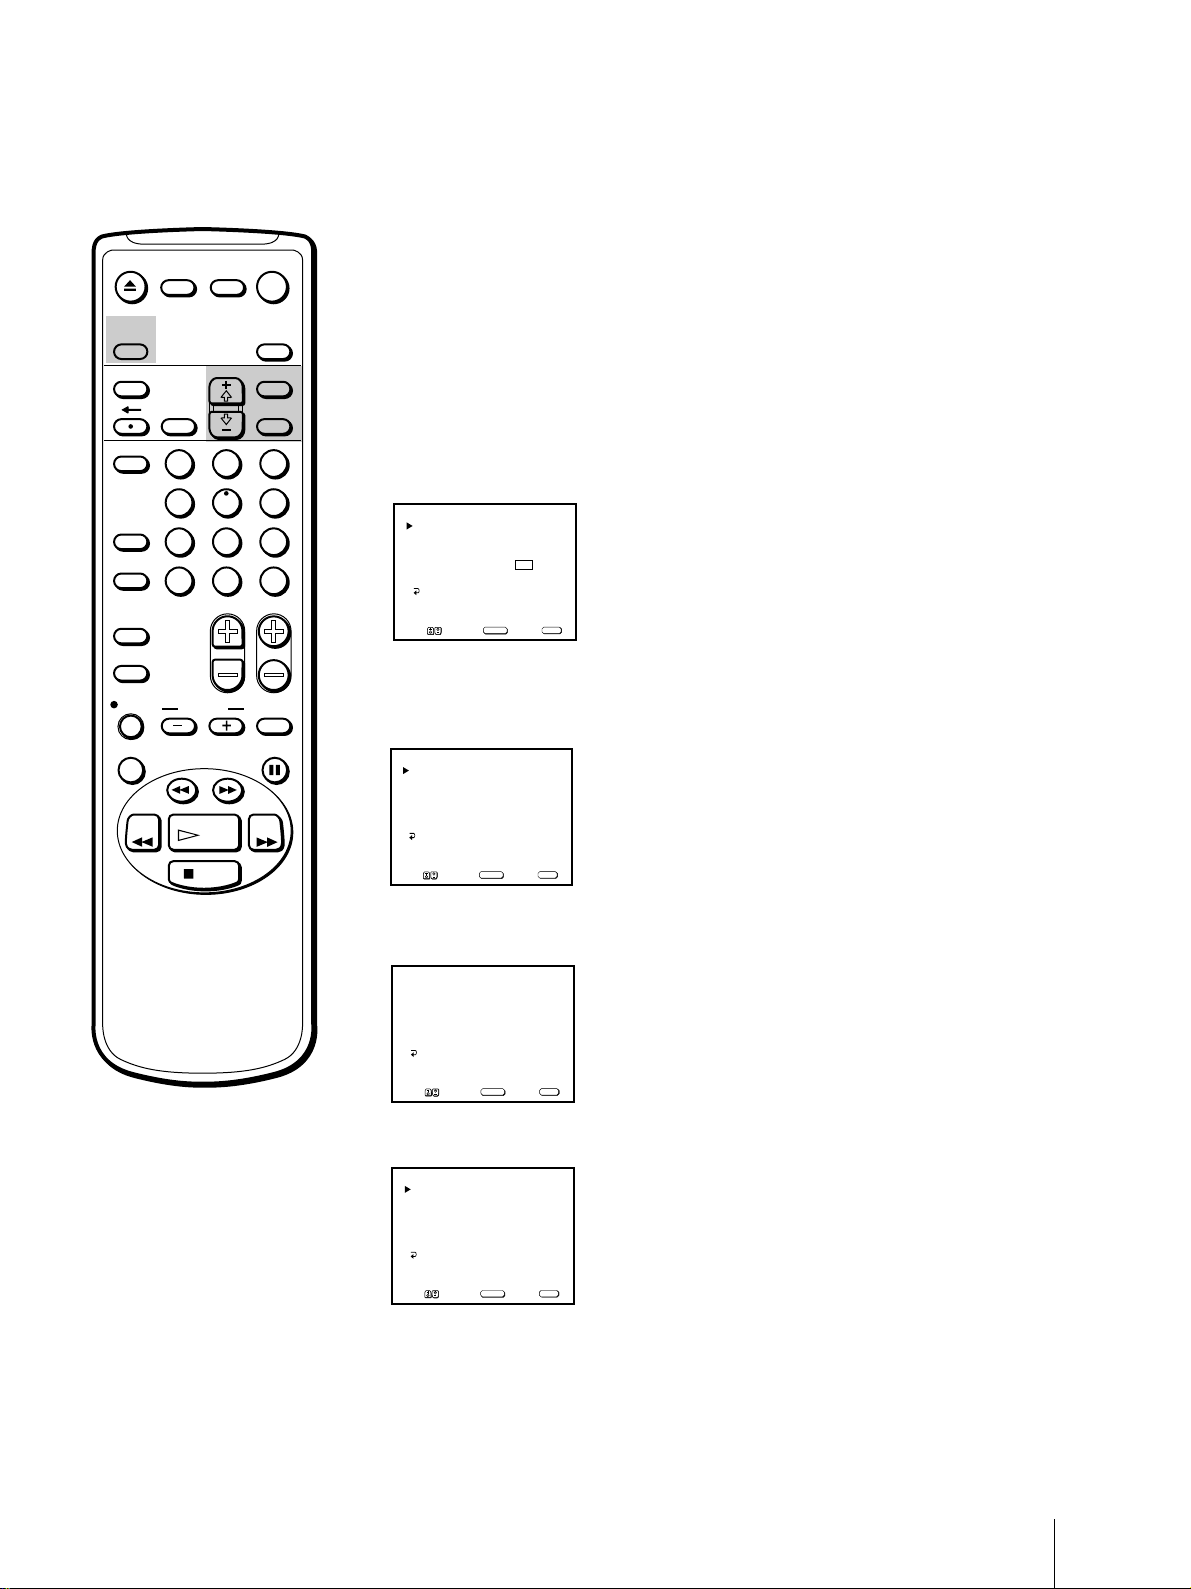
4 Move the cursor (z) to “MANUAL” with + ◊ or – √ and press SELECT.
The CURRENT TIME SET menu appears.
CURRENT TIME SET
__/__ ____ ___ __:__
MENU
Move Select Exit
SELECT
AM
MENU
5 Press SELECT to start setting the clock.
The month section turns red.
CURRENT TIME SET
1 /__ ____ ___ __:__
MENU
Set the month
Move Select Exit
SELECT
AM
MENU
To display the time
Press DISPLAY.
If you have made a mistake
Press ? to return to the previous
position.
If the clock has stopped and
“--/--” is displayed
You have to re-set the clock.
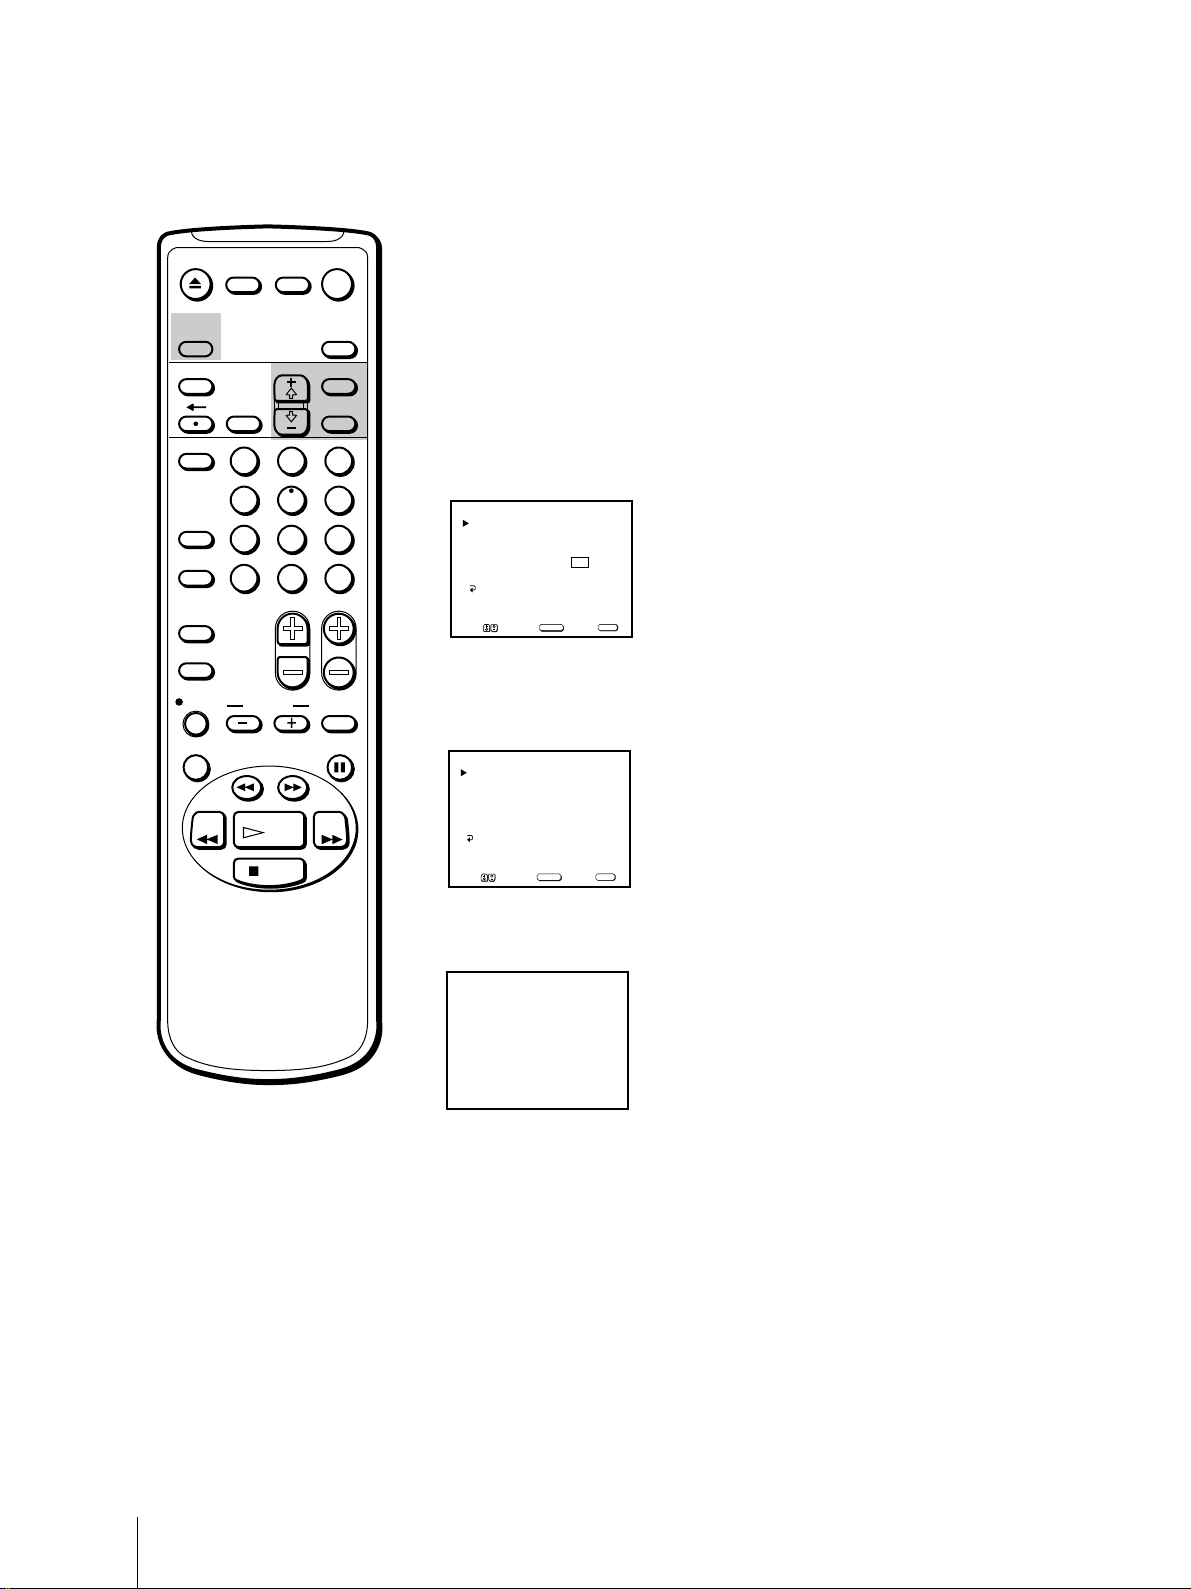
6 Using + ◊ or – √, set the month and press SELECT.
The day section turns red.
CURRENT TIME SET
7/1 ____ ___ __:__
MENU
Set the day
Move Select Exit
SELECT
AM
MENU
7 Using + ◊ or – √ and SELECT, set the day, year, hour and minute in the
same way as in step 6.
CURRENT TIME SET
7/10 1999 SAT 7:30PM
MENU
MENU
Move Select Exit
SELECT
8 After setting the minutes, press SELECT.
The clock starts working.
9 Press MENU to return to the original screen.
Getting Started
15
Page 16
Step 5 —
EJECT
MUTING DISPLAY
INPUT
SELECT
TIMER ON SCREEN
VCR Plus
1
POWER
TV
SLEEP
MENU
SELECTRESET
2
3
Setting Up VCR Plus+ system
The VCR Plus+ system feature allows you to simplify the task of
programming your Video/TV to make recordings with the timer. Setting
up your Video/TV involves coordinating the TV channel number (the
number you turn to on your Video/TV or VCR to watch a program) with
the guide channel (the number that’s assigned to that channel in your
program guide). To find the guide channel numbers, look in the “Channel
Line-up Chart” in the program guide for your area that features VCR
PlusCode numbers. It usually looks like the example on the next page.
5
COUNTER/
COUNTER
INDEX
TAPE SPEED
4
REMAIN
7
JUMP ENTER
RESET
REC
&7
SLOW
X2 PAUSE
SEARCH
REW FF
PLAY
STOP
6
9
8
0
CHVOL
Note
If VCR Plus+ System appears in
black, the Video/TV is set to receive
a video input signal through the
input jacks and you cannot select
VCR Plus+ System. Press INPUT
SELECT so that a channel number
appears on the screen.
If you have made a mistake
Press ? to return to the previous
position.
Setting the guide channel
1 Press MENU to display the main menu.
2 Move the cursor (z) to “SET UP” with + ◊ or – √ and press SELECT.
The SET UP menu appears.
SET UP
CHANNEL SET UP
PARENTAL CONTROL
FAVORITE CHANNEL
CAPTION VISION: CC 1
LANGUAGE: ENGLISH
MENU
MENU
Move Select Exit
3 Move the cursor (z) to “CHANNEL SET UP” with + ◊ or – √ and press
SELECT.
The CHANNEL SET UP menu appears.
CHANNEL SET UP
CABLE: OFF
CHANNEL FIX: OFF
AUTO PROGRAM
CHANNEL SKIP/ADD
VCR P l u s+ System
MENU
Move Sel e c t E xi t
4 Move the cursor (z) to “VCR Plus+ System” with + ◊ or – √ and press
SELECT.
The VCR Plus+ System SET UP menu appears.
VCR Plus+ System SET UP
GUIDE CH – TV CH
__ – ___
CHANNEL LIST
MENU
Move Sel e c t E xi t
5 Press SELECT to enter the guide channel number.
The GUIDE CH position turns red.
VCR Plus+ System SET UP
GUIDE CH – TV CH
__ – ___
CHANNEL LIST
MENU
Use [0-9] to set a
guide channel
Then press [ENTER]
SELECT
SELECT
SELECT
MENU
MENU
Getting Started
16
Page 17
EJECT
MUTING DISPLAY
INPUT
SELECT
TIMER ON SCREEN
VCR Plus
COUNTER/
REMAIN
COUNTER
RESET
INDEX
TAPE SPEED
REC
X2 PAUSE
REW FF
2
1
5
4
7
8
JUMP ENTER
0
&7
SLOW
SEARCH
PLAY
STOP
POWER
TV
SLEEP
MENU
SELECTRESET
3
6
9
CHVOL
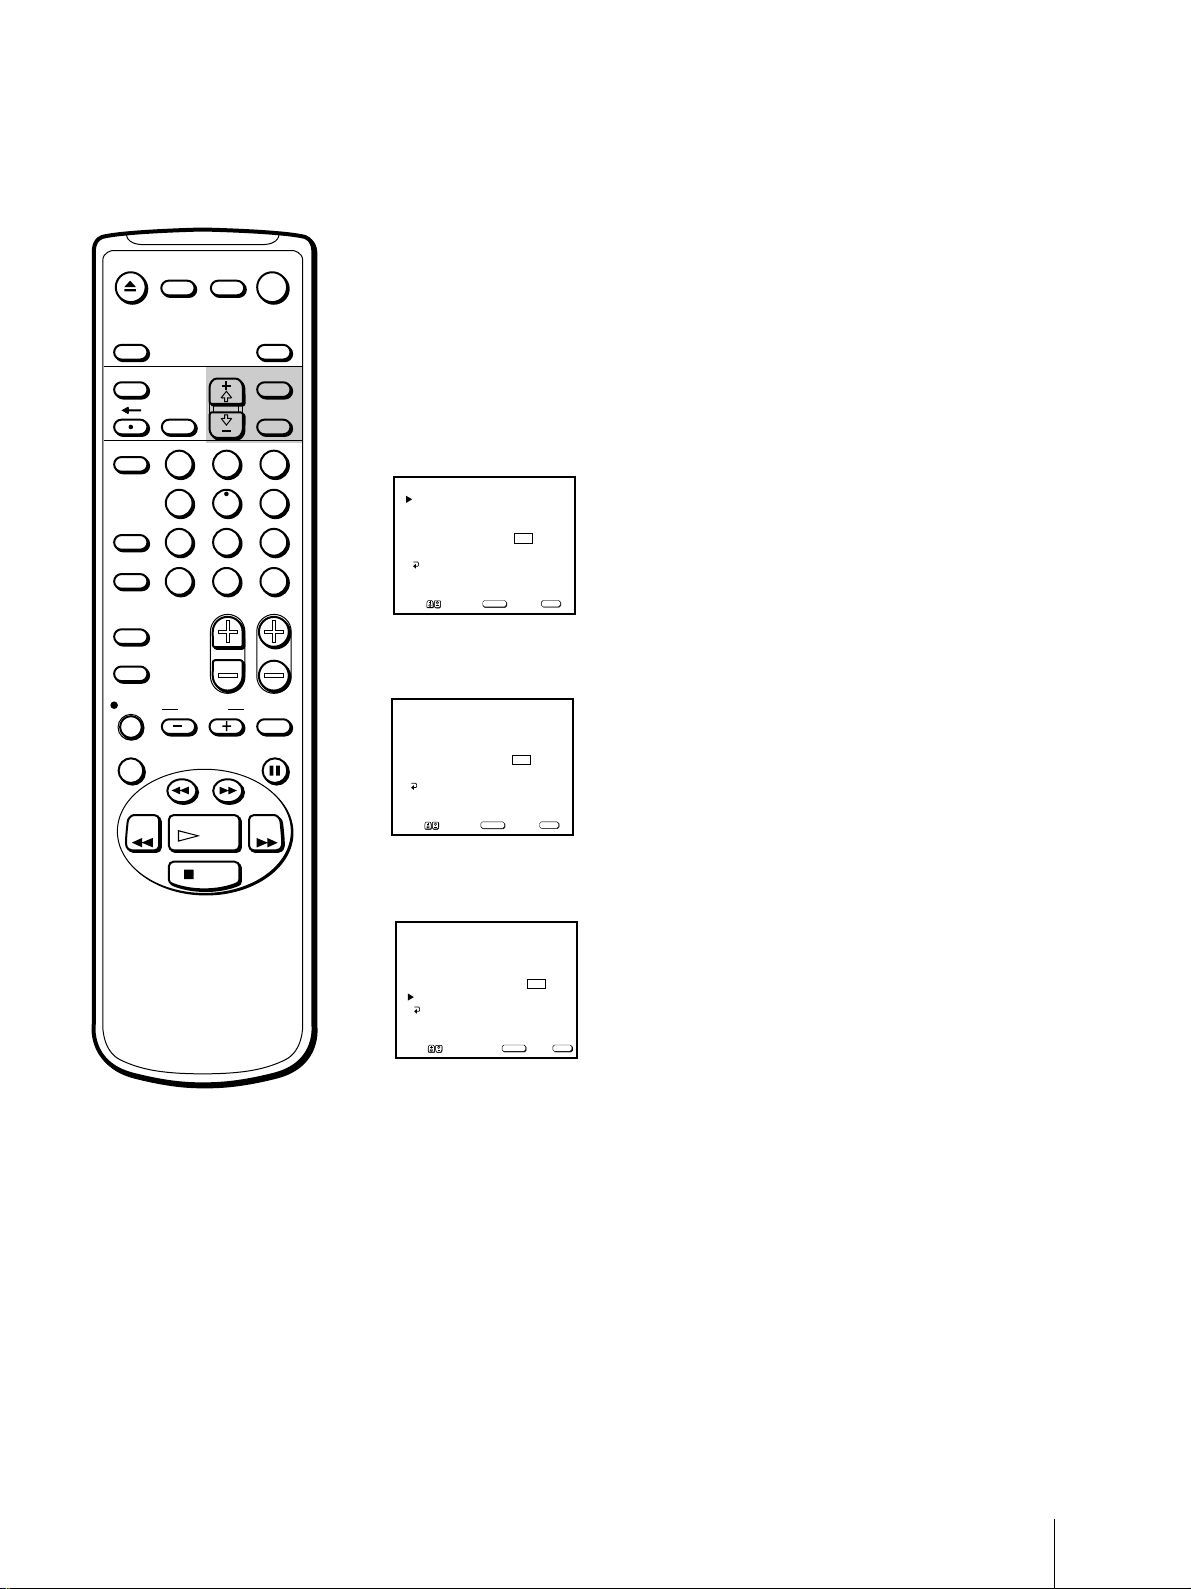
6 Press the 0-9 buttons to enter the channel number assigned in the guide
channel and press ENTER.
The TV CH position turns red.
VCR Plus+ SET UP
GUIDE CH – TV CH
16
–
CHANNEL LIST
MENU
Use [0-9] to set a
TV channel
Then press [ENTER]
7 Press the 0-9 buttons to enter the actual channel number on your Video/
TV and press ENTER.
VCR Plus+ SET UP
GUIDE CH – TV CH
–
16 125
CHANNEL LIST
MENU
MENU
Move Select Exit
SELECT
8 Repeat steps 6 and 7 for each guide channel number you want to enter.
9 Move the cursor (z) to “CHANNEL LIST” with + ◊ or – √ and press
SELECT to confirm your channel settings.
CHANNEL LIST
GUIDE– TV GUIDE– TV
16 – 125 33 – 49
17 – 22 59 – 3
20 – 42 61 – 47
21 – 28 99 – 102
PAGE 1
MENU
MENU
Move Select Exit
SELECT
Notes
• If you enter more than eight
channels, the additional channels
are stored on separate “pages.”
Move the cursor (z) to “PAGE”
and use + ◊ or – √ buttons to view
the entire list.
• The maximum number of guide
channels is 99.
10 After you finish presetting, press MENU to return to the original screen.
Example of a “Channel Line-up Chart”
CABLE
CH
16
17
20
21
22
25
34
35
5
27
29
30
31
38
39
45
17
44
49
50
51
AMC
American Movie Classics
BRV
Bravo(program grid only)
CNN
Cable News Network
CSP
C-SPAN
DIS
The Disney Channel
DSC
The Discovery Channel
ESN
ESPN
FAM
The Family Channel
HBO
Home Box Office
LIF
Lifetime
MAX
Cinomax
MTV
Music Television
NIK
Nickelodeon
SC
Sports Channel
SAMPLE
SCA
Sports Channel America
SHO
Showtime
TBS
TBS SuperStation
TMC
The Movie Channel
TNN
The Nashville Network
TNT
Turner Network Television
USA
USA Network
VCR Plus+
GUIDE CH
35
54
42
28
53
37
34
47
33
46
45
48
38
59
70
41
43
58
49
52
44
Getting Started
17
Page 18
Basic Operations
Watching the TV
This section explains the basic functions to use while watching the TV.
Most of the operations can be done using the remote control.
STANDBY
REC
TIMER REC
‰/
STANDBY
EJECT
INPUT
SELECT
TIMER ON SCREEN
VCR Plus
COUNTER/
REMAIN
COUNTER
RESET
INDEX
TAPE SPEED
POWER
EJECT
INPUT
–
VOL
+ –
SELEECT
POWER
MUTING DISPLAY
1
4
7
JUMP ENTER
Switching the Video/TV on and off
CHANNEL
+
POWER
TV
SLEEP
MENU
SELECTRESET
2
3
5
6
9
8
0
CHVOL
Switching on
Press POWER.
The STANDBY lamp flashes until the picture appears.
Switching off
Press POWER.
The Video/TV enters standby mode and the STANDBY lamp on the front
of the Video/TV lights up in red if a tape is inserted in the Video/TV.
If a tape is not inserted in the Video/TV, the STANDBY lamp disappears.
Selecting TV programs
Turn the cable mode ON or OFF to select the type of channel you want to
watch. For more information on setting the cable mode, see “Setting cable
TV on or off” on page 9.
Press CH +/– or the 0-9 buttons on the remote control, or CHANNEL +/–
on the Video/TV.
To select a double-digit numbers using the
0-9 buttons
REC
X2 PAUSE
Note
You can not jump to channels you
scanned through using the CH +/–
buttons.
Basic Operations
18
&7
SLOW
SEARCH
REW FF
PLAY
STOP
For example, if you want to select 21, first press 2, then press 1.
Adjusting the volume
Press VOL +/–.
Muting the sound
Press MUTING.
“MUTING” appears on the screen.
To resume normal sound, press MUTING again, or press VOL +.
Switching quickly between two
channels
Press JUMP. The channel switches to the previously selected channel.
Pressing JUMP again switches the channel back to the originally selected
channel.
Page 19
EJECT
MUTING DISPLAY
INPUT
SELECT
TIMER ON SCREEN
VCR Plus
COUNTER/
REMAIN
COUNTER
RESET
INDEX
TAPE SPEED
REC
X2 PAUSE
2
1
5
4
7
8
JUMP ENTER
0
&7
SLOW
SEARCH
POWER
TV
SLEEP
MENU
SELECTRESET
3
6
9
CHVOL
Adjusting the picture
When watching TV programs, you can adjust the picture to suit your taste.
You can adjust the picture received through the input jacks as well.
These adjustments are retained in memory even when you turn off the TV.
1 Press MENU to display the main menu.
The main menu appears.
V IDEO
AUDIO
TIMER
TAPE
SET UP
MENU
Move Select Exit
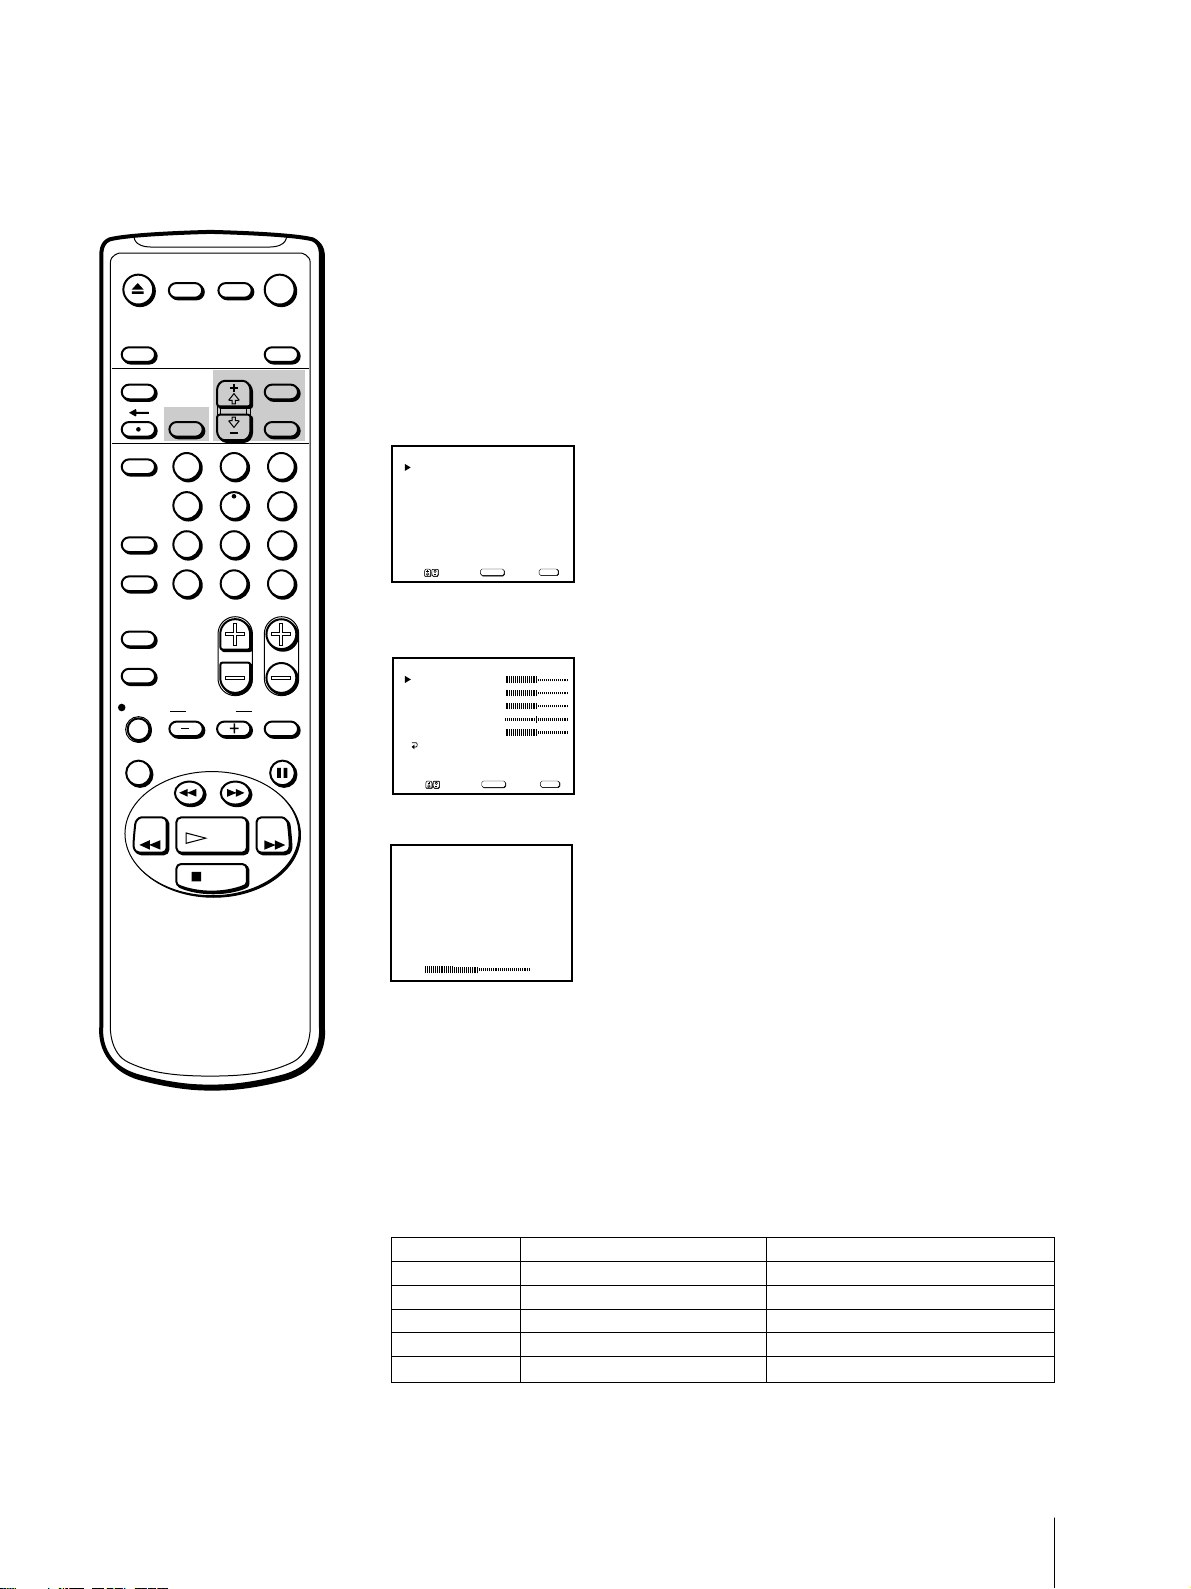
2 Move the cursor (z) to “VIDEO” with + ◊ or – √ and press SELECT.
The VIDEO menu appears.
VIDEO
PICTURE
BRIGHTNESS
COLOR
HUE
SHARPNESS
MENU
Move Select Exit
SELECT
SELECT
MENU
REW FF
PLAY
STOP
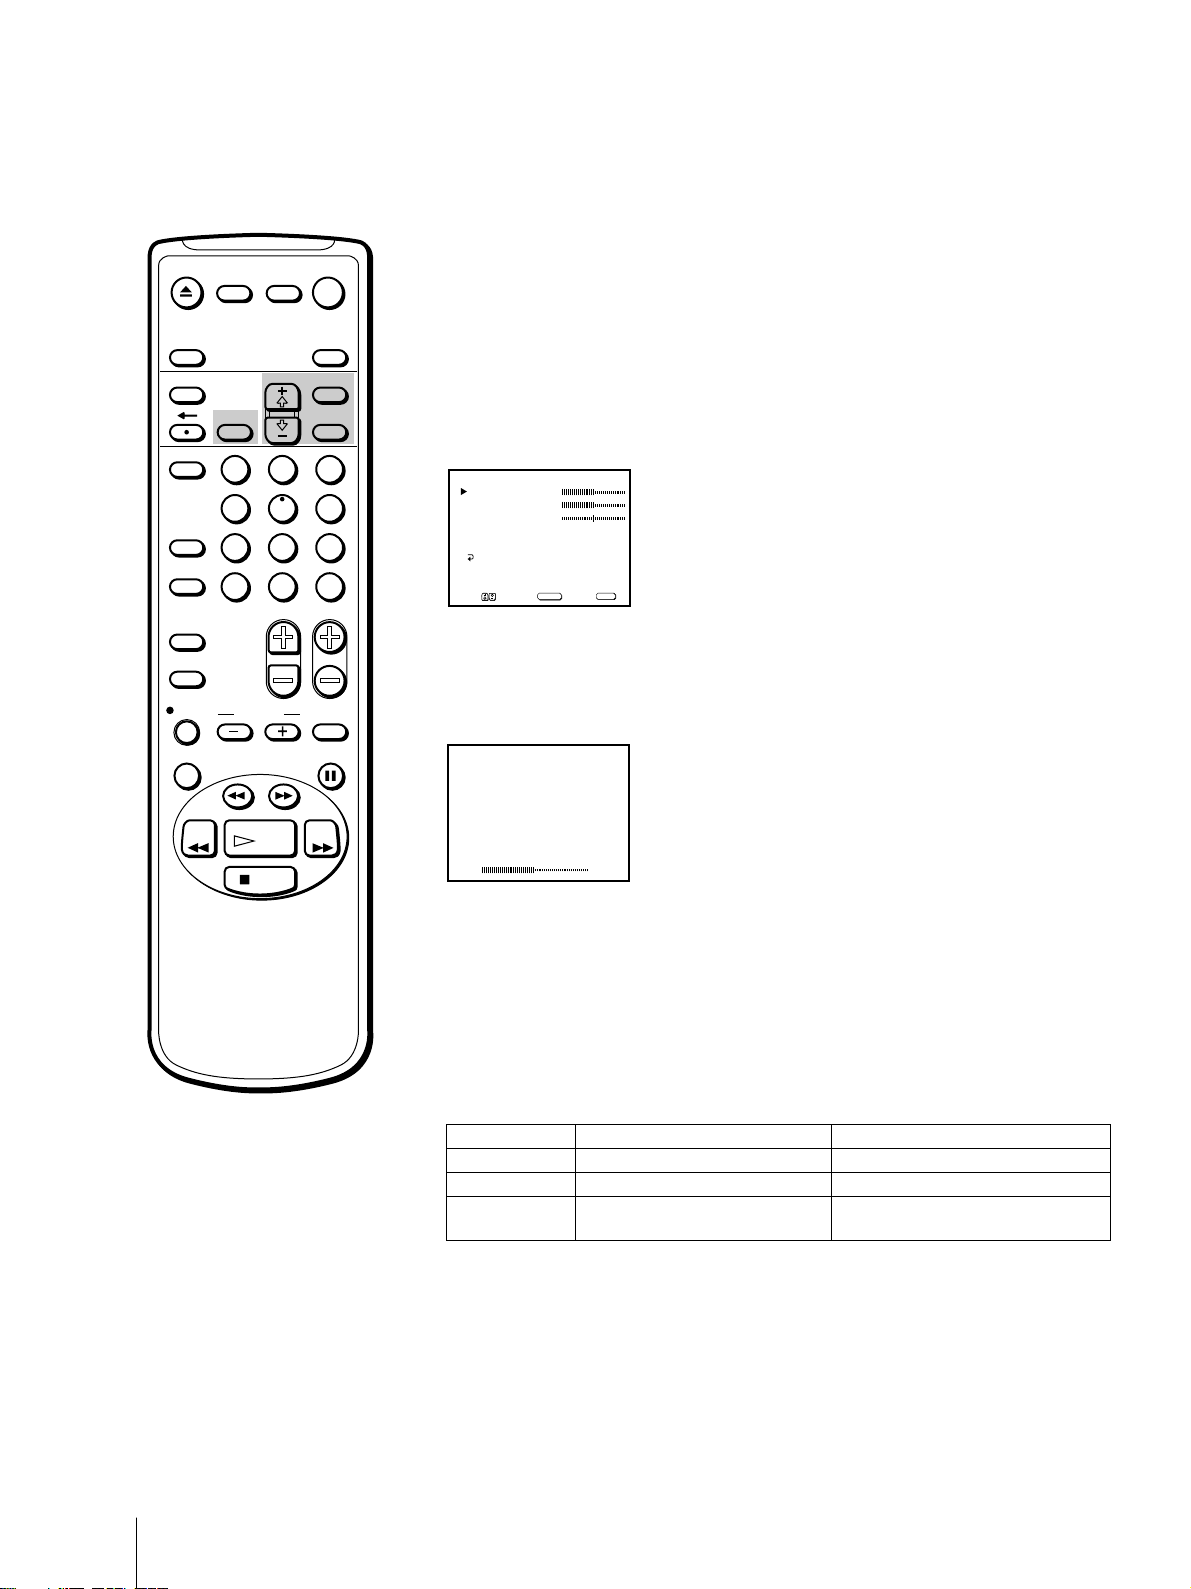
3 Using + ◊ or – √, select the item you want to adjust and press SELECT.
PICTURE
4 Adjust the picture with + ◊ or – √ and press SELECT.
With each press, the vertical bars increase or decrease and the figure at the
right margin changes to show the control level. (See the table below.)
5 To adjust other items, repeat steps 3 and 4 above.
6 Press MENU to return to the original screen.
The adjusted control levels are stored.
Description of adjustable items
Item
PICTURE
BRIGHTNESS
COLOR
HUE
SHARPNESS
Press +
◊◊
◊ to
◊◊
Increase picture contrast.
Brighten the picture.
Increase color intensity.
Make picture tones greenish.
Sharpen the picture.
Press –
Decrease picture contrast.
Darken the picture.
Decrease color intensity.
Make picture tones purplish.
Soften the picture.
√√
√ to
√√
To restore the factory settings
Press RESET after selecting and displaying the VIDEO menu.
All of the settings are restored to the factory settings.
Basic Operations
19
Page 20
EJECT
MUTING DISPLAY
INPUT
SELECT
TIMER ON SCREEN
POWER
TV
SLEEP
MENU
Adjusting the sound (KV-20VS42 only)
You can adjust the bass, treble, and balance to suit your taste. You can
adjust the sound of the signal received through the input jacks as well.
1 Press MENU to display the main menu.
VCR Plus
COUNTER/
REMAIN
COUNTER
RESET
INDEX
TAPE SPEED
REC
X2 PAUSE
REW FF
2
1
5
4
7
8
JUMP ENTER
0
&7
SLOW
SEARCH
PLAY
STOP
SELECTRESET
2 Move the cursor (z) to “AUDIO” with + ◊ or – √ and press SELECT.
The AUDIO menu appears.
3
6
9
CHVOL
AUDIO
BASS
TREBLE
BALANCE
MTS : STEREO
SURROUND : ON
MENU
Move Select Exit
SELECT
MENU
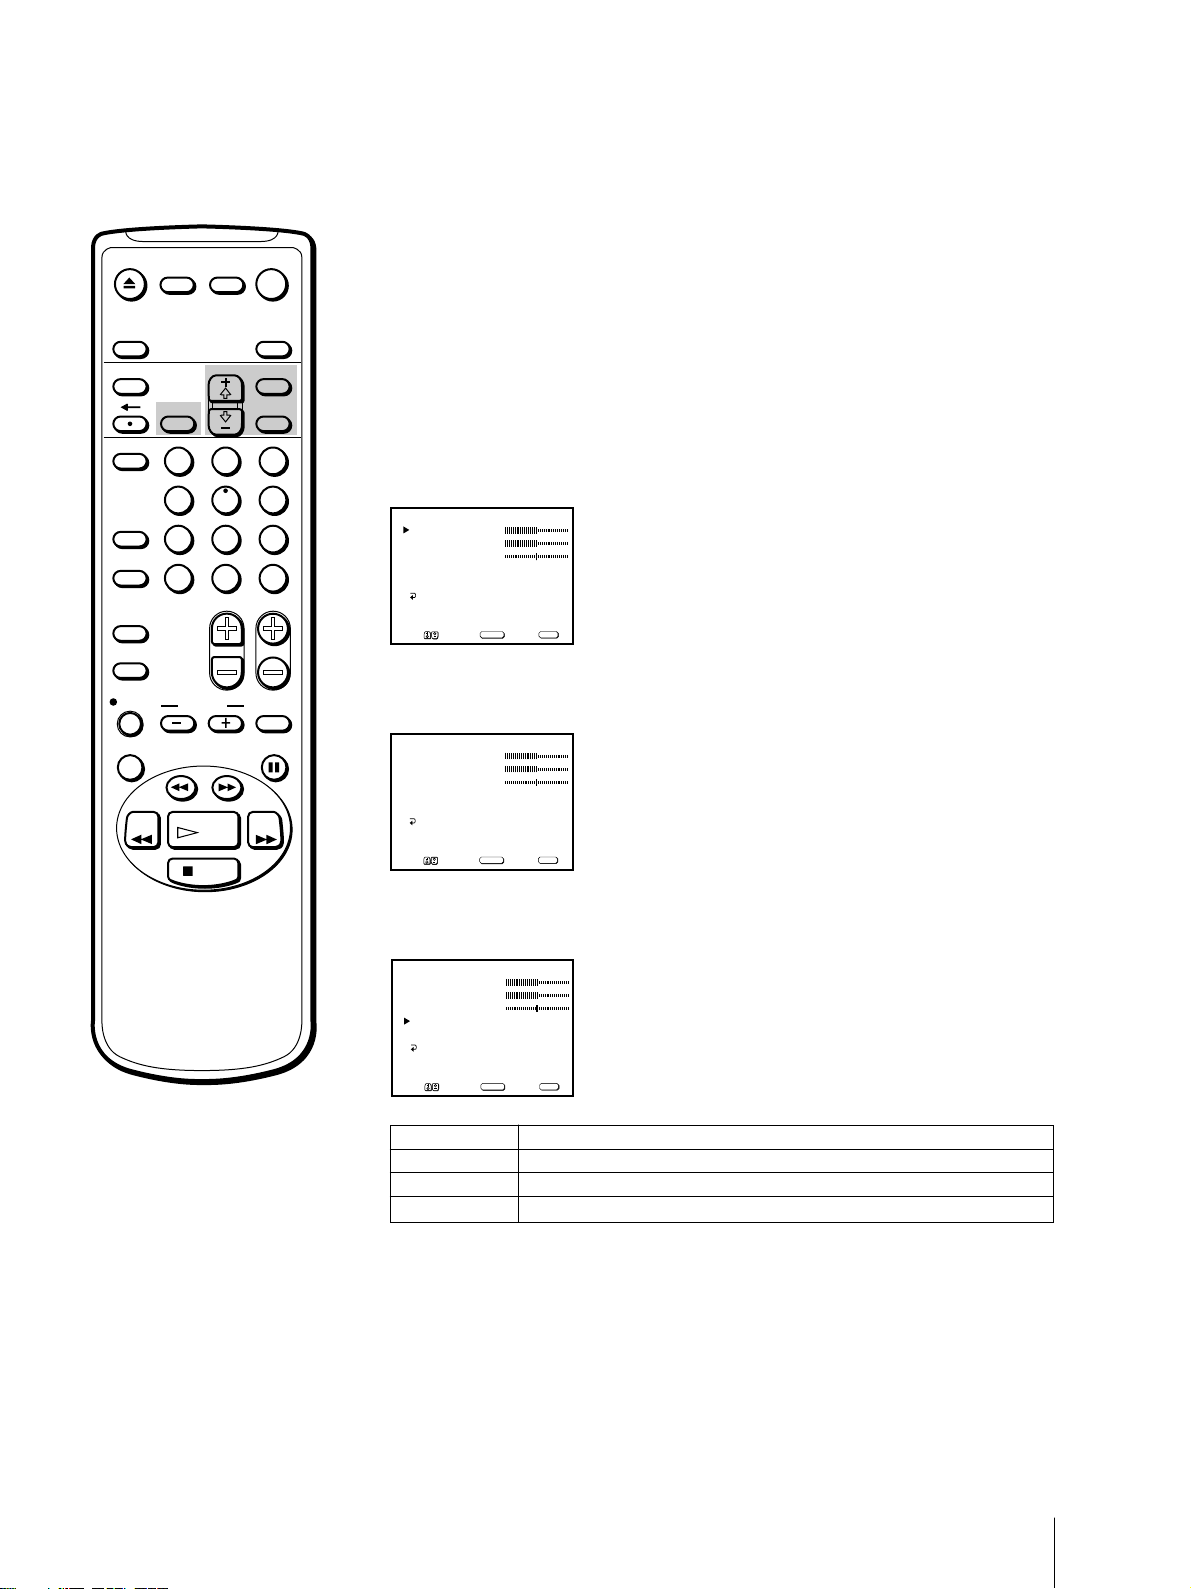
3 Select the item you want to adjust.
For example:
To adjust bass, move the cursor (z) with + ◊ or – √ to “BASS” and press
SELECT.
BASS
4 Adjust the selected item:
Press + ◊ or – √ to adjust the item and press SELECT.
Basic Operations
20
5 To adjust other items, repeat steps 3 and 4 above.
6 Press MENU to return to the original screen.
Description of adjustable items
Item
BASS
TREBLE
BALANCE
Press +
Increase the low pitched sounds.
Increase the high pitched sounds.
Emphasize the right speaker's
◊◊
◊ to
◊◊
Press –
Decrease the low pitched sounds.
Decrease the high pitched sounds.
Emphasize the left speaker's volume.
volume.
To restore the factory settings
Press RESET after selecting and displaying the AUDIO menu.
All of the settings are restored to the factory settings.
√√
√ to
√√
Page 21
EJECT
MUTING DISPLAY
POWER
TV
Selecting stereo or bilingual
programs
(KV-20VS42 only)
INPUT
SELECT
TIMER ON SCREEN
VCR Plus
COUNTER/
REMAIN
COUNTER
RESET
INDEX
TAPE SPEED
REC
X2 PAUSE
REW FF
2
1
5
4
7
8
JUMP ENTER
0
&7
SLOW
SEARCH
PLAY
STOP
SLEEP
MENU
SELECTRESET
3
6
9
CHVOL
The Multichannel TV Sound (MTS) feature allows you to switch between
stereo, mono, and Second Audio Program (SAP).
1 Press MENU to display the main menu.
2 Move the cursor (z) to “AUDIO” with + ◊ or – √ and press SELECT.
The AUDIO menu appears.
AUDIO
BASS
TREBLE
BALANCE
MTS : STEREO
SURROUND : ON
MENU
MENU
Move Select Exit
SELECT
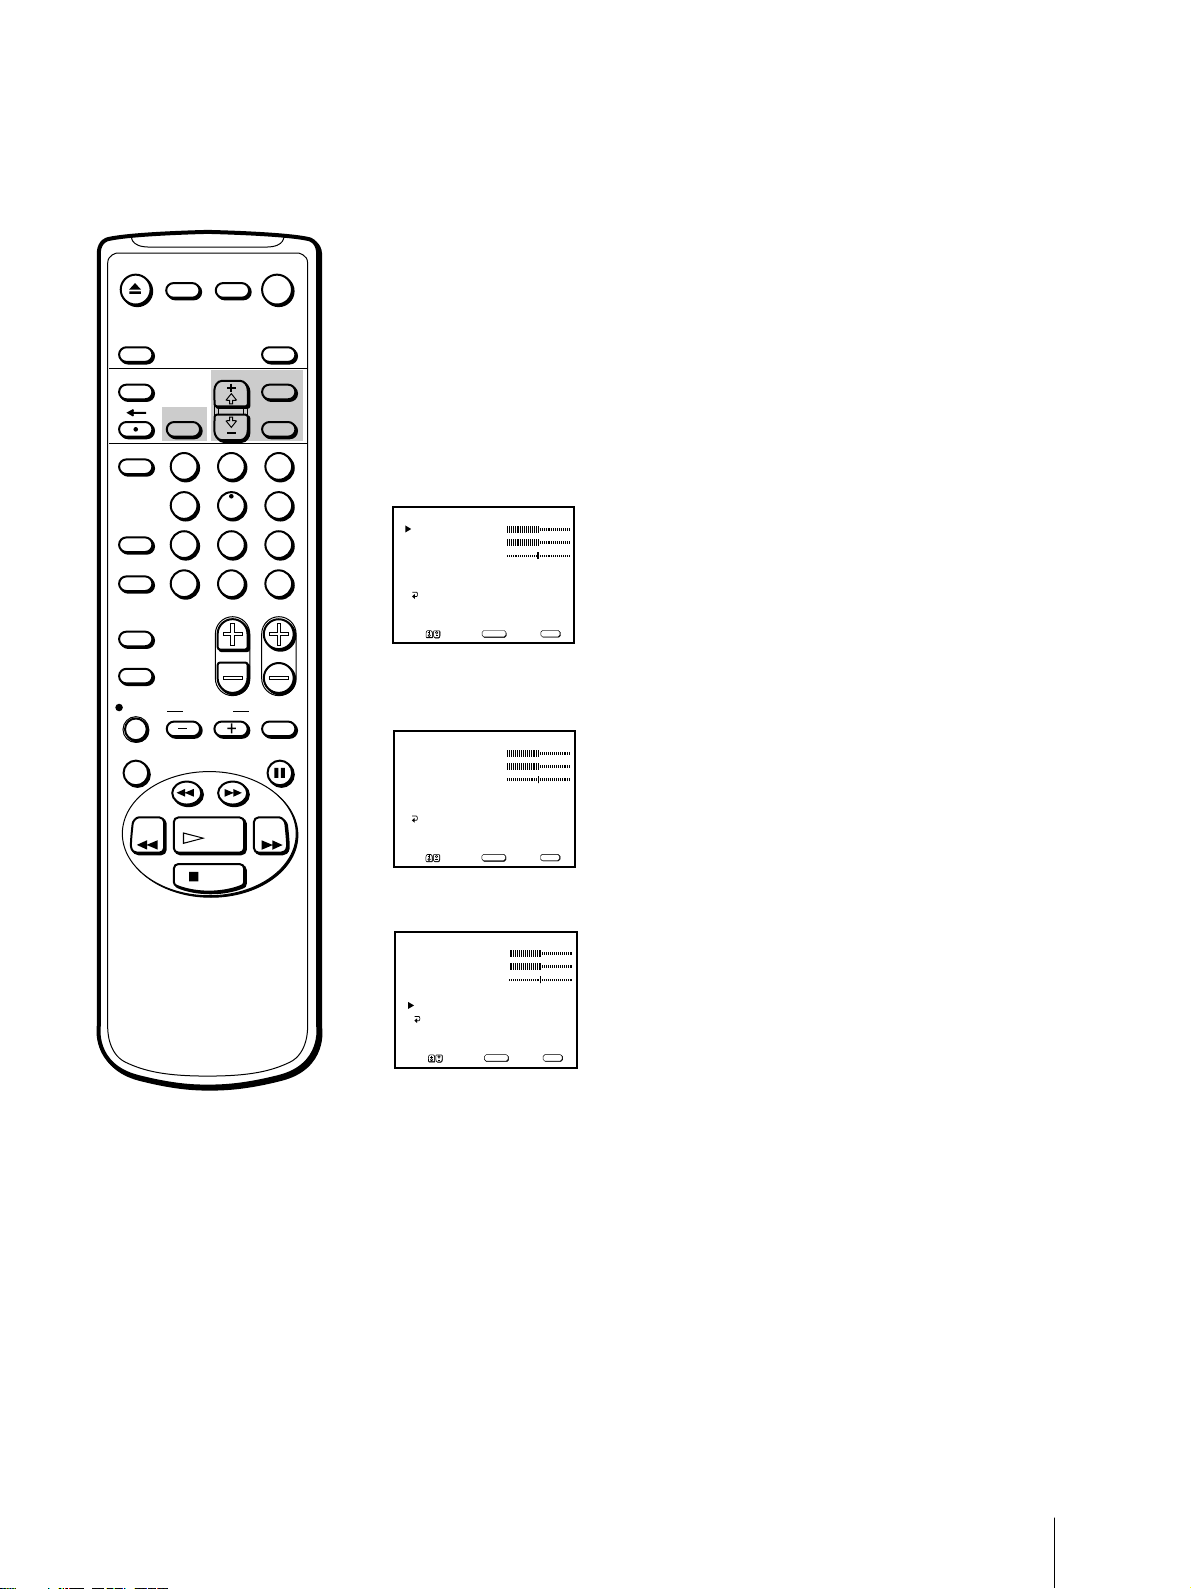
3 Move the cursor (z) to “MTS” with + ◊ or – √ and press SELECT.
The selected position turns red.
AUDIO
BASS
TREBLE
BALANCE
MTS : STEREO
SURROUND : ON
MENU
MENU
Move Select Exit
SELECT
Note
If you set MTS to “SAP” and a SAP
signal is not being broadcast, no
sound will come from the speakers.
(However, the program’s primary
audio channel will be recorded.) See
page 22 for a table describing the
relation between the speakers and
the source signal.
4 Using + ◊ or – √, select “STEREO,” “SAP,” or “MONO” and press
SELECT.
AUDIO
BASS
TREBLE
BALANCE
MTS : SAP
SURROUND : ON
MENU
MENU
Move Select Exit
Choose
STEREO
SAP
MONO
To restore the factory settings
Press RESET after selecting and displaying the AUDIO menu.
All of the settings are restored to the factory settings.
SELECT
To
Select for stereo reception when viewing a program broadcast in stereo.
Select to listen to a bilingual broadcast.
Select for mono reception (use to reduce noise during stereo broadcasts).
Basic Operations
21
Page 22

This table describes the relation between the sound output from the
speaker, the recorded sound, and the MTS mode. For instance, if you set
MTS to “SAP” and a SAP signal is not being broadcast, the sound from the
speakers is muted. However, if you record the same program, the sound
will be recorded in the program’s primary audio channel (stereo or mono).
Source
Signal
Mono
Stereo
Mono
+
SAP
Stereo
+
SAP
MTS
Mode
Mono
Stereo
SAP
Mono
Stereo
SAP
Mono
Stereo
SAP
Mono
Stereo
SAP
Speaker Output
L R
L + R L + R
L + R L + R
Mute Mute
L + R L + R
LR
Mute Mute
L + R L + R
L + R L + R
SAP SAP
L + R L + R
LR
SAP SAP
Recorded Sound
Hi-Fi “L” Hi-Fi “R” Normal
Track Track Track
L + R L + R L + R
L + R L + R L + R
L + R L + R L + R
L + R L + R L + R
L R L + R
L R L + R
L + R L + R L + R
L + R L + R L + R
SAP SAP SAP
L + R L + R L + R
L R L + R
SAP SAP SAP
On-screen
Display
None
None
SAP
None
STEREO
SAP
None
None
SAP
None
STEREO
SAP
Basic Operations
22
Page 23
EJECT
MUTING DISPLAY
POWER
TV
Listening to surround sound
effects
(KV-20VS42 only)
INPUT
SELECT
TIMER ON SCREEN
VCR Plus
COUNTER/
REMAIN
COUNTER
RESET
INDEX
TAPE SPEED
REC
X2 PAUSE
REW FF
2
1
5
4
7
8
JUMP ENTER
0
&7
SLOW
SEARCH
PLAY
STOP
SLEEP
MENU
SELECTRESET
The surround feature simulates the sound reproduction of a movie theater
or a concert hall. Surround is only effective for stereo programs.
1 Press MENU to display the main menu.
3
6
9
CHVOL
2 Move the cursor (z) to “AUDIO” with + ◊ or – √ and press SELECT.
The AUDIO menu appears.
AUDIO
BASS
TREBLE
BALANCE
MTS : STEREO
SURROUND : ON
MENU
MENU
Move Select Exit
SELECT
3 Move the cursor (z) to “SURROUND” with + ◊ or – √ and press SELECT.
The selected position turns red.
AUDIO
BASS
TREBLE
BALANCE
MTS : STEREO
SURROUND : OFF
MENU
MENU
Move Select Exit
SELECT
4 Using + ◊ or – √, select “ON” or “OFF” and press SELECT.
AUDIO
BASS
TREBLE
BALANCE
MTS : STEREO
SURROUND : ON
MENU
MENU
Move Select Exit
SELECT
To restore the factory settings
Press RESET after selecting and displaying the AUDIO menu.
All of the settings are restored to the factory settings.
Basic Operations
23
Page 24
POWER
STANDBY
EJECT
REC
TIMER REC
VIDEO L AUDIO R
EJECT
INPUT
SELECT
INPUT
– VOL + – CHANNEL +
SELEECT
VIDEO
L AUDIO R
MUTING DISPLAY
INPUT SELEECT
POWER
TV
SLEEP
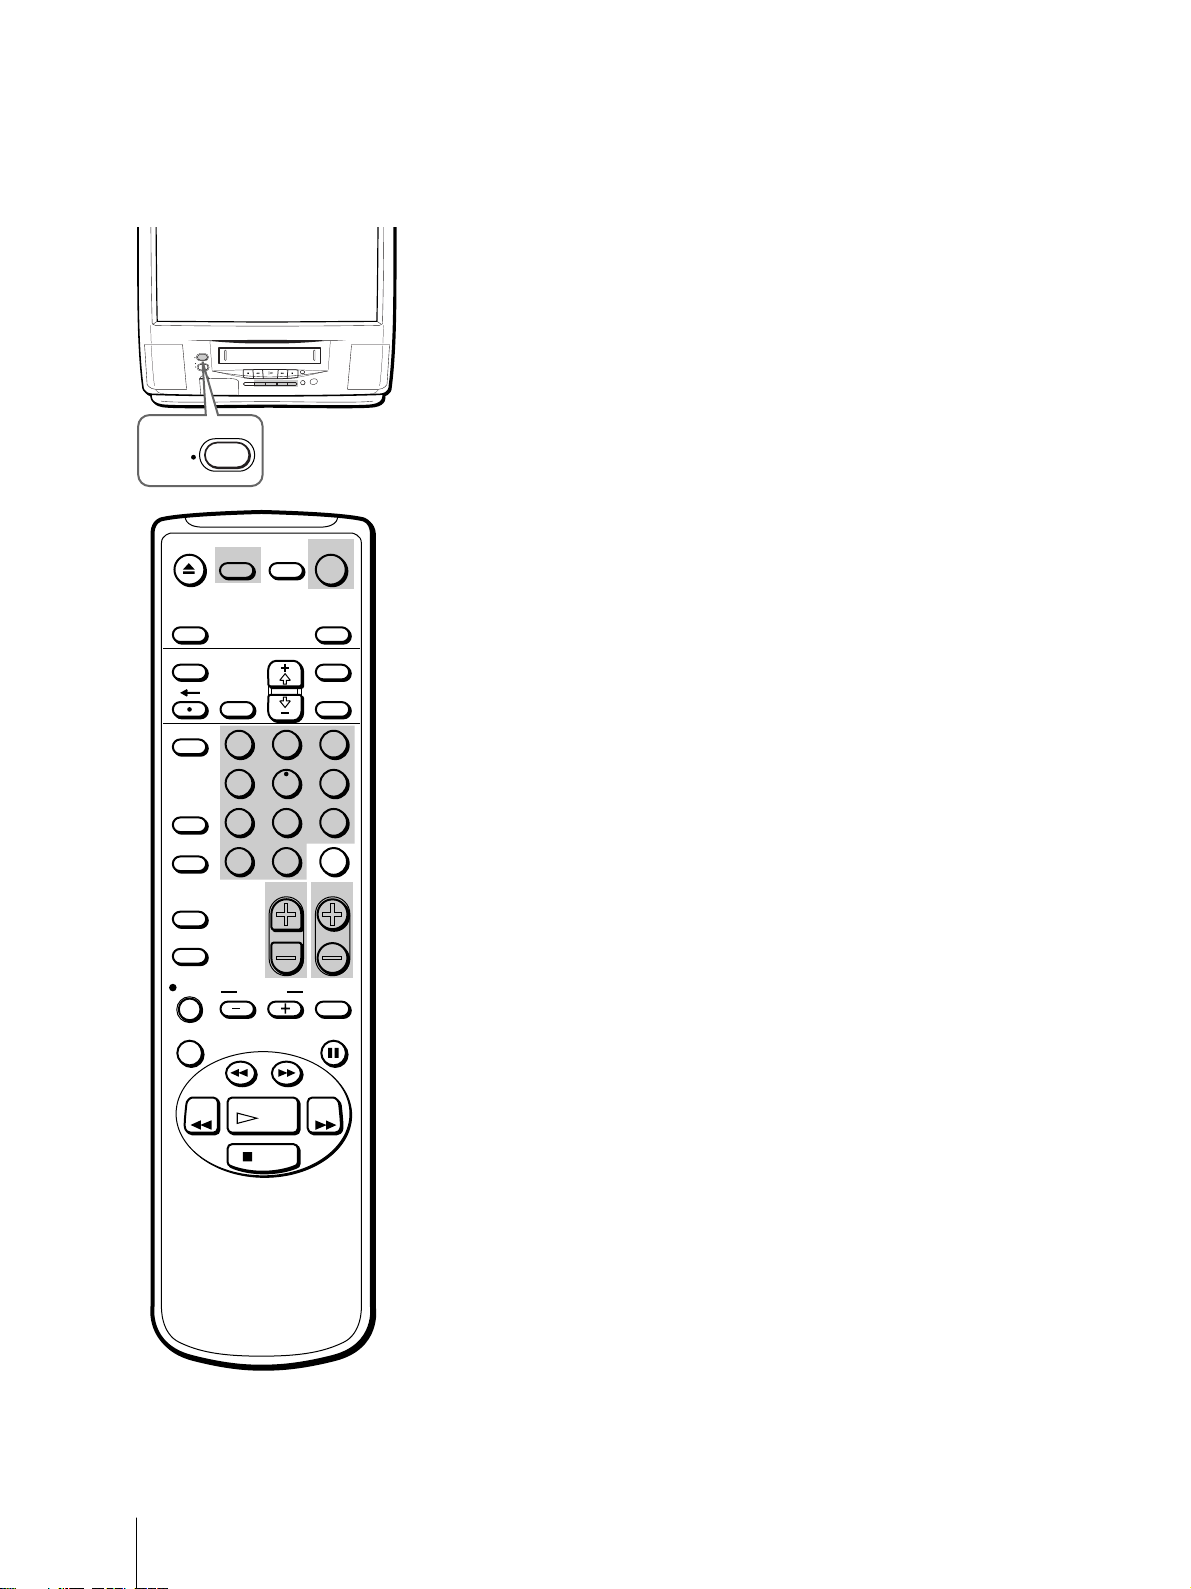
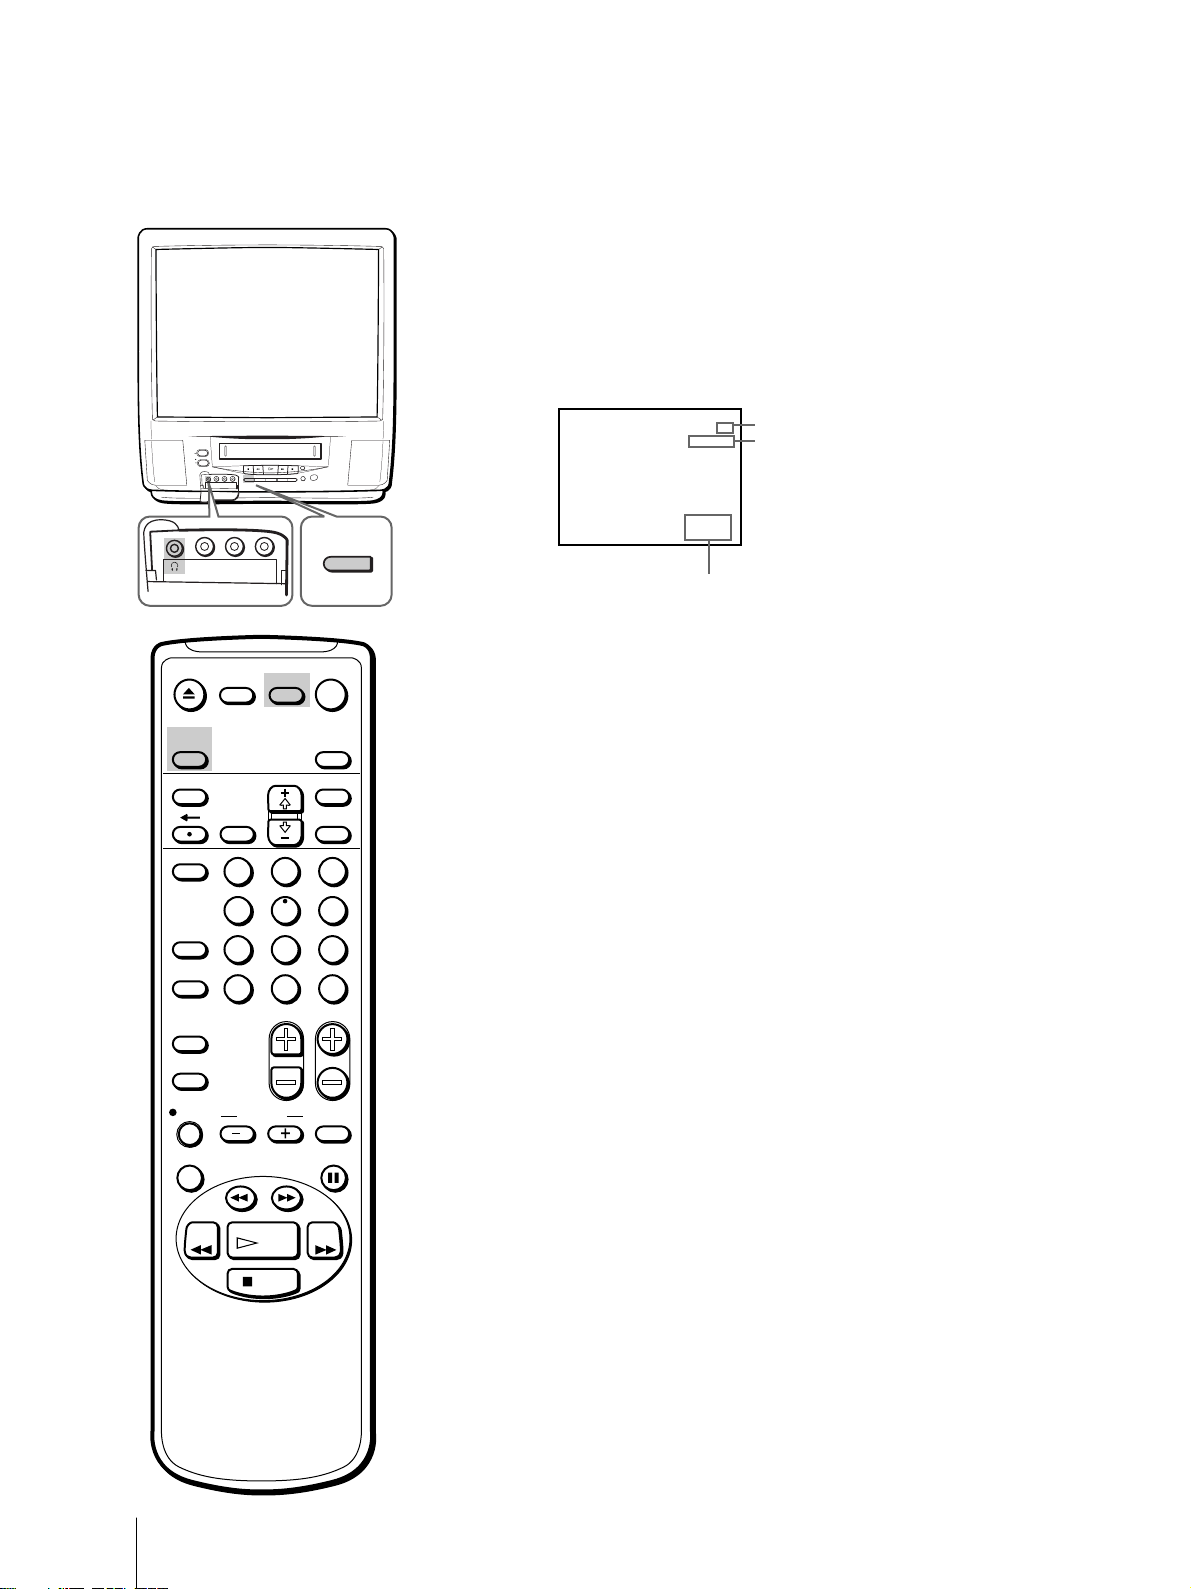
Displaying on-screen information
Press DISPLAY to turn the display on or off.
The channel number, date and time, audio mode are displayed.
Press DISPLAY repeatedly to scroll between XDS ON, CAPTION, and
DISPLAY OFF. For more information on XDS and CAPTION, see page 39.
STEREO
8:40PM
4/9FRI
Audio mode
Channel number
24
Current date and time
To make the indications disappear, press DISPLAY repeatedly until
“DISPLAY OFF” appears.
Watching a video input signal
TIMER ON SCREEN
VCR Plus
COUNTER/
REMAIN
COUNTER
RESET
INDEX
TAPE SPEED
REC
X2 PAUSE
REW FF
2
1
5
4
7
8
JUMP ENTER
0
&7
SLOW
SEARCH
PLAY
STOP
MENU
SELECTRESET
through the line input jacks
Press INPUT SELECT repeatedly until the desired input indicator appears.
3
6
9
CHVOL
To return to the normal TV picture, press INPUT SELECT until the
channel number appears. For more information on using the line input
jacks, see page 57.
Listening with headphones
Plug the headphones (not supplied) into the 2 (headphones) jack which is
located inside the cover on the front of the Video/TV.
The sound from the speaker is turned off.
Basic Operations
24
Page 25
Playing a Tape
This section shows you how to insert a video cassette and to play it. For
more information on using the advanced features, see “Additional
Operations” on pages 36 through 57.
Inserting a video cassette
Gently insert a cassette with the arrow indication facing upwards. The
POWER
STANDBY
EJECT
REC
TIMER REC
INPUT
– VOL + – CHANNEL +
SELEECT
cassette is automatically loaded into the cassette compartment and the
Video/TV turns on. If you insert a cassette without a safety tab, playback
automatically starts.
EJECT
MUTING DISPLAY
INPUT
SELECT
TIMER ON SCREEN
VCR Plus
COUNTER/
REMAIN
COUNTER
RESET
INDEX
TAPE SPEED
REC
X2 PAUSE
2
1
5
4
7
8
JUMP ENTER
0
&7
SLOW
SEARCH
POWER
TV
SLEEP
MENU
SELECTRESET
3
6
9
CHVOL
Ejecting a video cassette
Press EJECT 6.
You can eject the cassette even if the power is in standby mode.
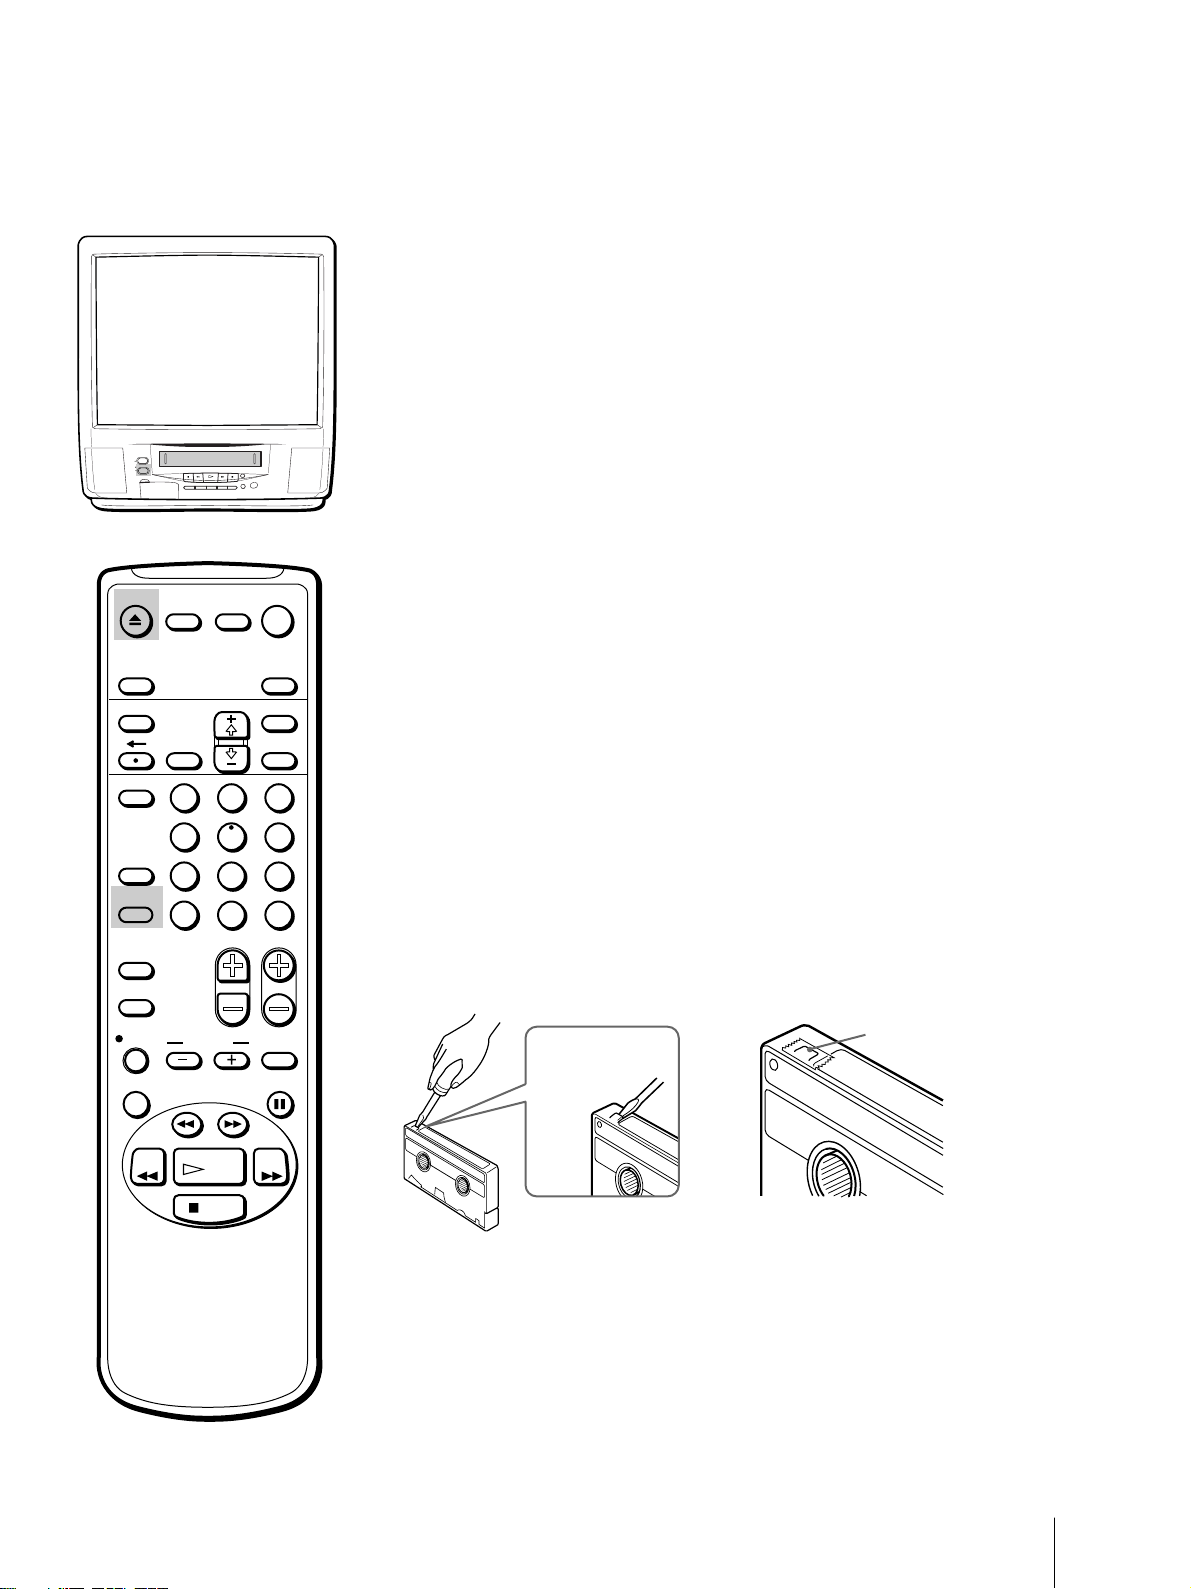
Protecting your cassette against
accidental erasure
The cassette has a safety tab to protect against accidentally erasing a
previous recording. Break off the safety tab with a screw driver or a
similar tool to prevent recording.
If the safety tab is removed, the cassette is ejected when you try to record
on it.
To record on a cassette with the safety tab broken off, simply cover the tab
hole with adhesive tape.
Adhesive tape
Safety tab
REW FF
PLAY
STOP
Resetting the tape counter
The tape counter helps you to locate a certain scene after playback. Press
COUNTER RESET on the remote control to set the counter to “00:00:00”
before playing the tape. The tape counter is automatically reset to
“00:00:00” whenever a cassette is inserted. The Video/TV keeps counting
the length of the tape being played. Note, however, that the tape counter
does not count the portions without video signals recorded.
Basic Operations
25
Page 26
POWER
STANDBY
EJECT
REC
TIMER REC
EJECT
MUTING DISPLAY
INPUT
SELECT
TIMER ON SCREEN
VCR Plus
COUNTER/
REMAIN
COUNTER
JUMP ENTER
RESET
INDEX
TAPE SPEED
REC
1 Insert the tape.
2 Press PLAY ·.
INPUT
– VOL + – CHANNEL +
SELEECT
POWER
TV
SLEEP
MENU
SELECTRESET
2
1
4
7
&7
SLOW
3
5
6
9
8
0
CHVOL
Playing a tape
The Video/TV automatically turns on. If you insert a cassette without a
safety tab, playback automatically begins.
Playback begins. On screen-information automatically disappears after
several seconds.
To stop playback
Press STOP p.
The Video/TV returns to the normal TV picture.
To stop playback for a moment
Press PAUSE P. The picture pauses.
Press PAUSE P again or press PLAY · to resume playback.
If you leave your Video/TV in pause mode, normal playback resumes
after about 5 minutes.
To fast forward the tape
Press STOP p, then press FF ).
To rewind the tape
Press STOP p, then press REW 0.
To view a tape at high speed
During playback, press and hold REW 0 (rewind) or FF ) (fast
forward). A high-speed picture appears on the TV screen.
To resume normal playback, release the button.
X2 PAUSE
SEARCH
REW FF
PLAY
STOP
Notes
• The sound is muted during all
operations except for normal
playback.
• If the OFF timer is activated
during playback, playback stops.
Basic Operations
26
To view the picture while in fast forward or rewind mode
Press and hold FF ) during fast forward or REW 0 during rewind.
The picture appears on the screen.
When you release the button, fast forward or rewind mode is resumed.
To view the picture at high speed
During playback, press SEARCH ) or SEARCH 0.
To view the picture at twice the normal speed
During playback, press X2.
To view the picture in slow motion
During playback, press SLOW & +/–.
To playback frame by frame
Press PAUSE P during normal playback, then press 7 (frame).
Page 27
EJECT
MUTING DISPLAY
POWER
TV
Playing a tape repeatedly – AUTO
REPEAT
INPUT
SELECT
TIMER ON SCREEN
VCR Plus
COUNTER/
REMAIN
COUNTER
RESET
INDEX
TAPE SPEED
REC
X2 PAUSE
REW FF
2
1
5
4
7
8
JUMP ENTER
0
&7
SLOW
SEARCH
PLAY
STOP
SLEEP
MENU
SELECTRESET
You can play the recorded portion of a tape repeatedly.
1 Press MENU.
The main menu appears.
3
6
9
CHVOL
V IDEO
AUDIO
TIMER
TAPE
SET UP
MENU
Move Select Exit
SELECT
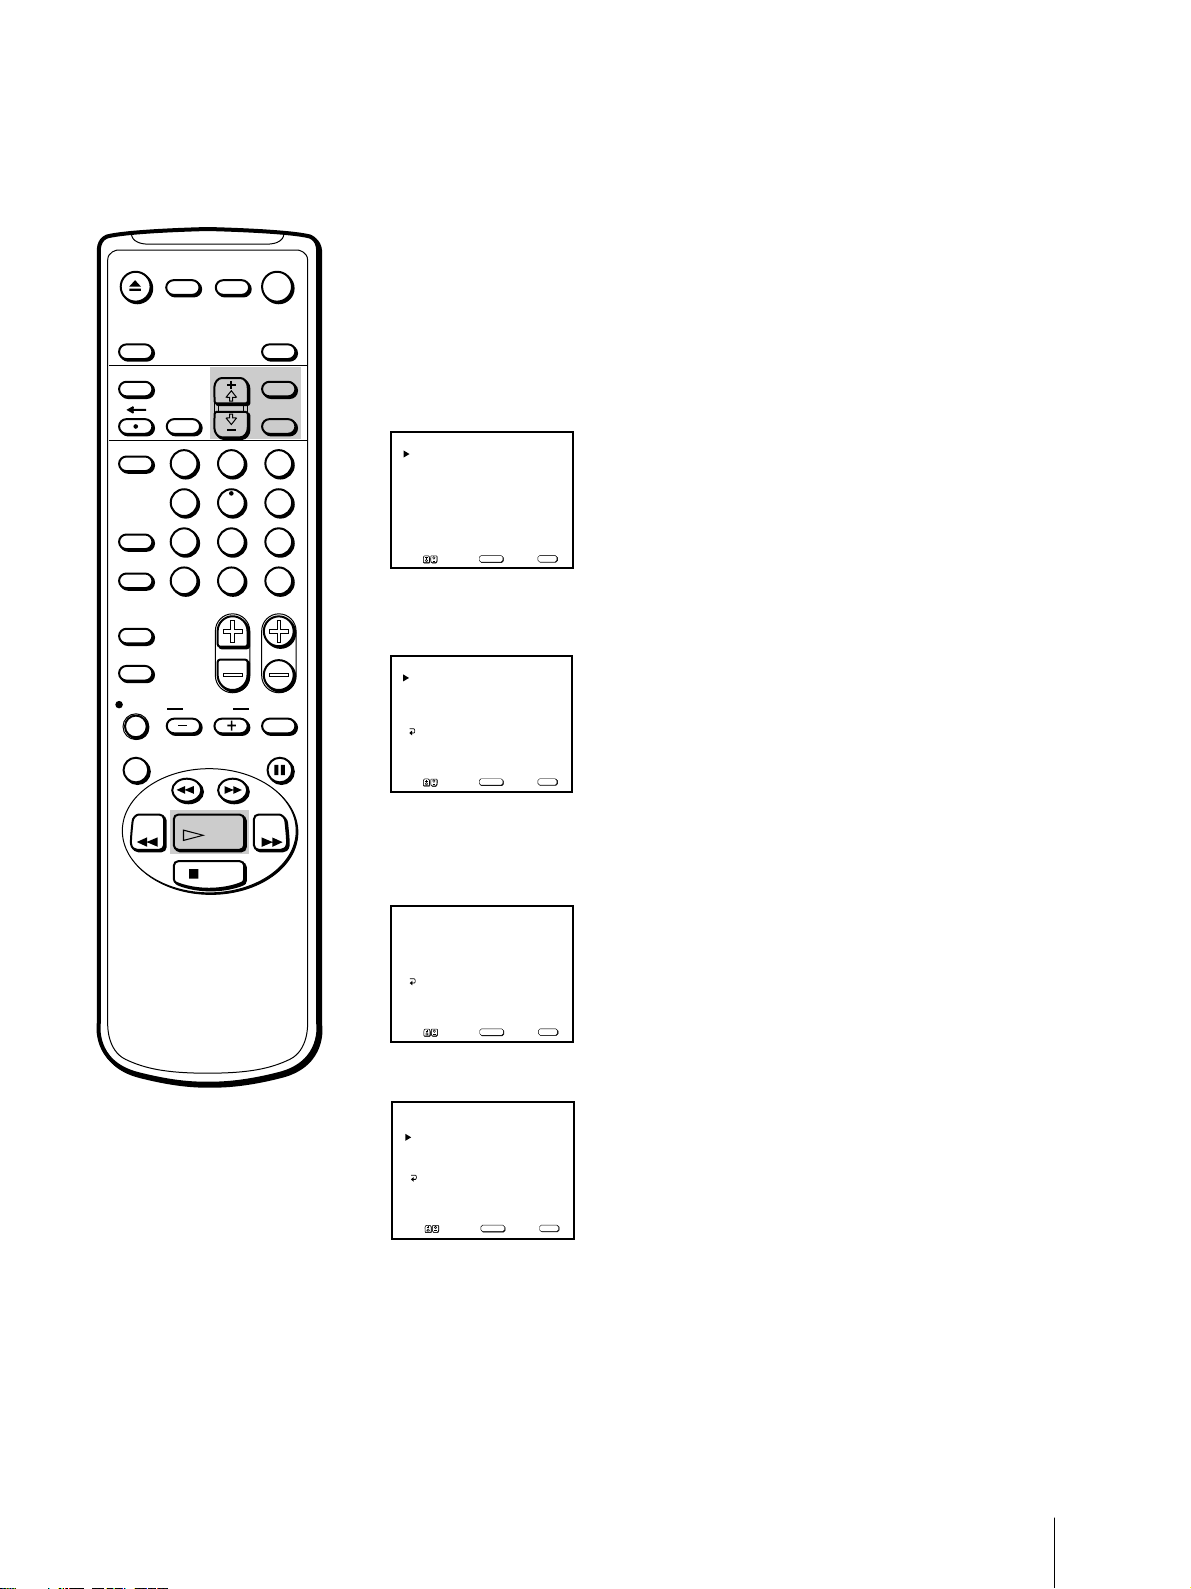
2 Move the cursor (z) to “TAPE” with + ◊ or – √ and press SELECT.
The TAPE menu appears.
TAPE
TAPE REMAIN: T-120
AUTO REPEAT: OFF
NOISE REDUCTION: OFF
TRACKING
MENU
MENU
Move Select Exit
SELECT
3 Move the cursor (z) to “AUTO REPEAT” with + ◊ or – √ and press
SELECT.
The selected position turns red.
TAPE
TAPE REMAIN: T-120
AUTO REPEAT: OFF
NOISE REDUCTION: OFF
TRACKING
MENU
Note
If you eject the cassette tape or turn
off the power, AUTO REPEAT will
return to OFF.
MENU
Move Select Exit
SELECT
4 Using + ◊ or – √, select “ON” and press SELECT.
TAPE
TAPE REMAIN: T120
AUTO REPEAT: ON
NOISE REDUCTION: OFF
TRACKING
MENU
MENU
Move Select Exit
SELECT
5 Press MENU to return to the original screen.
6 Press PLAY ·.
Playback begins. When the tape reaches the end, it will automatically
rewind and begin playing again.
Basic Operations
27
Page 28
EJECT
MUTING DISPLAY
INPUT
SELECT
TIMER ON SCREEN
POWER
TV
SLEEP
MENU
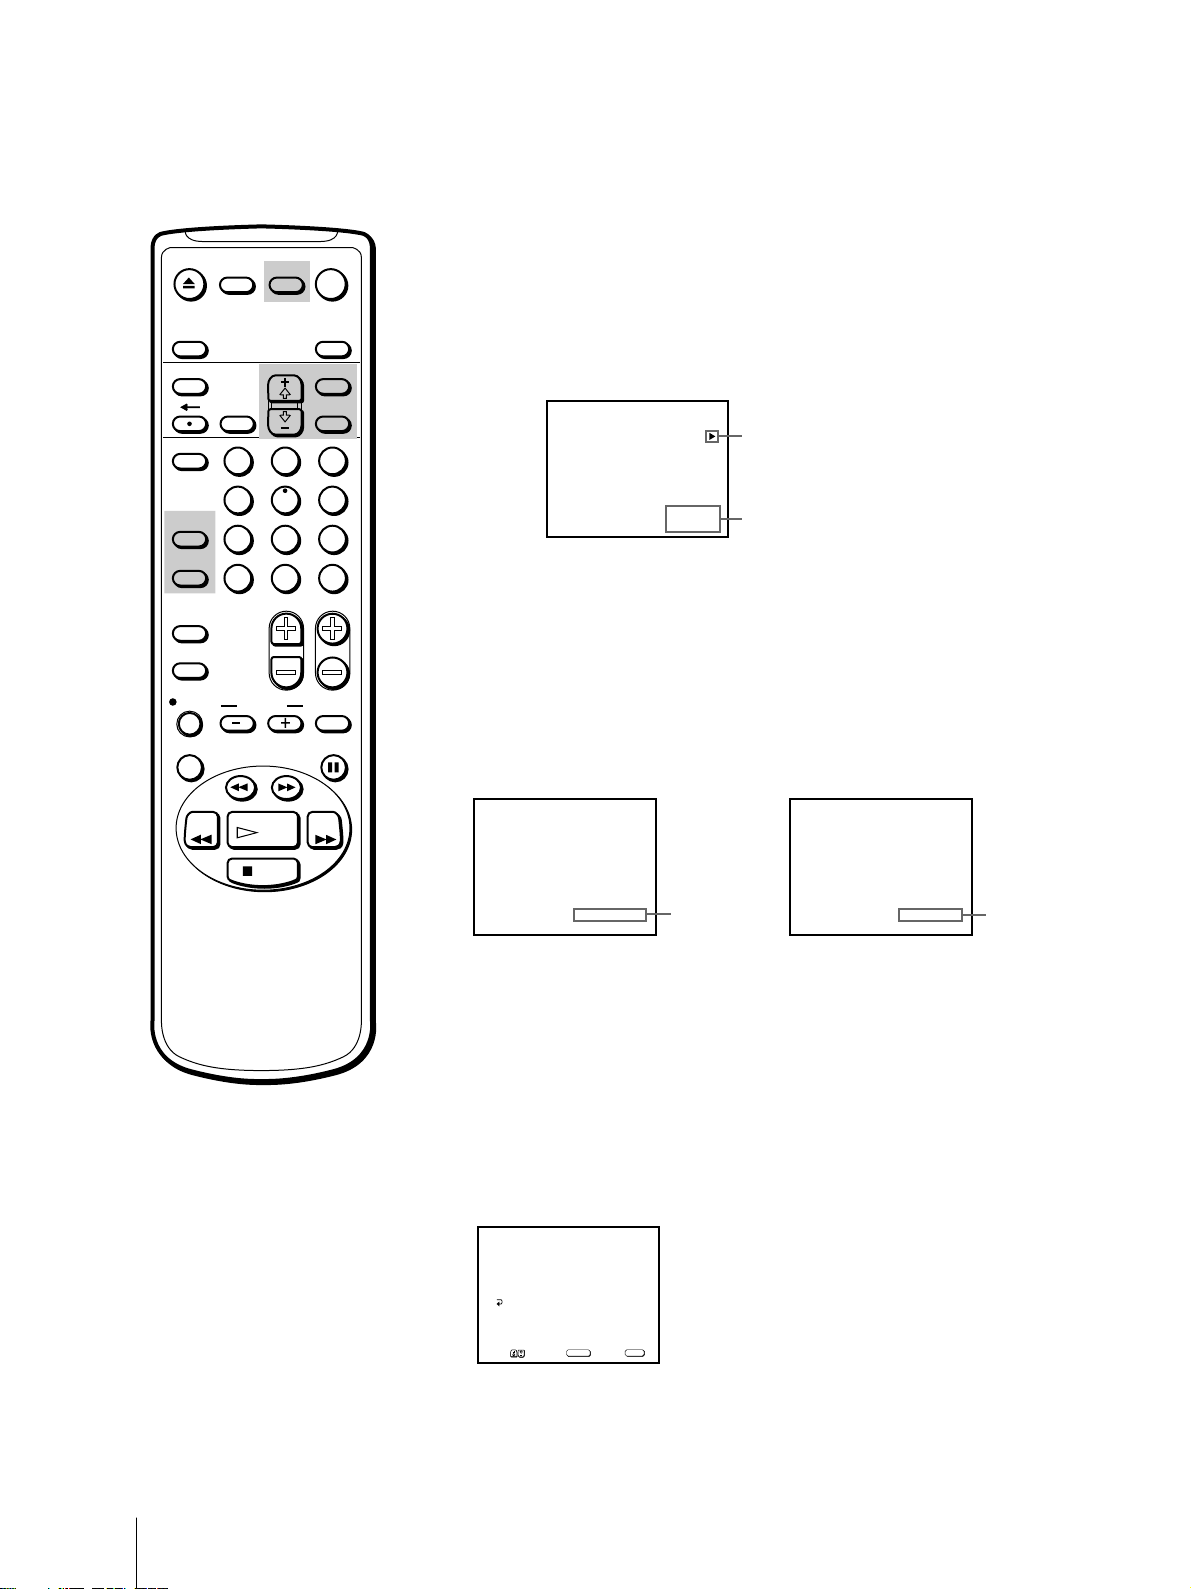
Displaying on-screen information
Press DISPLAY to turn the display on or off.
The date and time, tape operation mode is displayed.
Press DISPLAY repeatedly to scroll between XDS ON, CAPTION, and
DISPLAY OFF. For more information on XDS and CAPTION, see page 39.
RESET
VCR Plus
COUNTER/
REMAIN
COUNTER
RESET
INDEX
TAPE SPEED
REC
X2 PAUSE
REW FF
2
1
5
4
7
8
JUMP ENTER
0
&7
SLOW
SEARCH
PLAY
STOP
SELECT
3
6
9
CHVOL
VTR
Tape operation mode
8:40PM
7/15THU
Current date and time
Displaying the tape counter
Press COUNTER/REMAIN to display the tape counter. The tape counter
shows the tape travel time in hours, minutes and seconds during
recording or playback. Each time you press COUNTER/REMAIN, the
time counter and the remaining tape time counter appears alternately.
Press COUNTER RESET to restore the counter to “00:00:00.”
SP 00:00:36
Time counter
REM 1:15
Remaining tape
time counter
Notes
• The tape operation mode is
displayed on the screen whenever
you change the mode.
• If you are rewinding a tape and
the time counter is displayed on
the screen, the tape will stop when
the counter reaches “00:00:00.”
Use this function to search for the
beginning of a recording.
Basic Operations
28
When you use a 2-hour (120 minute) tape, set TAPE REMAIN to T-120.
When you use a tape longer than 120 minutes, set TAPE REMAIN to
OTHERS.
1 Press MENU to display the main menu.
2 Move the cursor (z) to “TAPE” with + ◊ or – √ and press SELECT.
3 Move the cursor (z) to “TAPE REMAIN” with + ◊ or – √ and press
SELECT.
The selected position turns red.
TAPE
TAPE REMAIN: T-120
AUTO REPEAT: OFF
NOISE REDUCTION: OFF
TRACKING
MENU
MENU
Move Select Exit
SELECT
4 Using + ◊ or – √, select “T-120” (the factory setting) or “OTHERS” and
press SELECT.
5 Press MENU to return to the original screen.
Page 29
Recording TV Programs
Recording TV programs
Caution
Television programs, films, video tapes and other materials may be
copyrighted. Unauthorized recording of such material may be contrary
to the provisions of the copyright laws. Also, use of this recorder with
cable television transmission and/or program owner.
POWER
STANDBY
EJECT
REC
TIMER REC
INPUT
–
VOL
+ –
CHANNEL
+
SELEECT
EJECT
MUTING DISPLAY
INPUT
SELECT
TIMER ON SCREEN
VCR Plus
COUNTER/
REMAIN
COUNTER
RESET
INDEX
TAPE SPEED
REC
X2 PAUSE
2
1
5
4
7
8
JUMP ENTER
0
&7
SLOW
SEARCH
POWER
TV
SLEEP
MENU
SELECTRESET
3
6
9
CHVOL
1 Insert a cassette with a safety tab.
The Video/TV turns on automatically.
2 Press INPUT SELECT until a channel number appears on the screen.
To record from a cable box, turn it on.
3 Press TAPE SPEED to select the recording speed, SP (Standard Play), or EP
(Extended Play). Recording in EP mode will extend the length of your
tape.
Maximum recording time
SP mode: 2 hours 40 minutes with T-160
EP mode: 8 hours with T-160
4 Select the channel with CH +/–. You can also use the 0-9 buttons on the
remote control. To enter double-digit numbers (such as 24), first press 2,
then press 4.
5 Press REC r.
The REC lamp on the front of the Video/TV lights up and recording
begins.
To stop recording
Press STOP p.
When the tape reaches the end, it stops and ejects the cassette.
To pause recording
Press PAUSE P.
To resume recording, press PAUSE P again.
REW FF
Note
If the ON or OFF timer is activated
during recording, the TV screen
turns on or off, but the recording
continues.
PLAY
STOP
You can cut out an unwanted scene during recording with this button.
1 Press PAUSE P when an unwanted scene appears on the screen.
Recording pauses.
2 Press PAUSE P again to release the pause mode at the desired scene.
Recording resumes from the point set in step 2.
When the recording pause mode is left on for more than 5 minutes, the
Video/TV stops recording.
Recording with the TV off
Press POWER.
The TV screen is turned off and the STANDBY lamp and REC lamp on the
front of the Video/TV light up.
The Video/TV continues recording.
Basic Operations
29
Page 30
Recording TV Programs Using the
Timer
The Timer Recording function allows you to preset your Video/TV to
EJECT
MUTING DISPLAY
INPUT
SELECT
TIMER ON SCREEN
VCR Plus
COUNTER/
REMAIN
COUNTER
RESET
INDEX
TAPE SPEED
REC
X2 PAUSE
REW FF
2
1
5
4
7
8
JUMP ENTER
0
&7
SLOW
SEARCH
PLAY
STOP
POWER
TV
SLEEP
MENU
SELECTRESET
3
6
9
CHVOL
record up to six programs within a one-month period.
Before you begin
• Make sure that the time and date clock are set. If not, the message
“Please set the clock first” is displayed on the screen. Refer to “Setting
the Clock” on page 12.
• Make sure that the loaded cassette has its safety tab. If a cassette
without safety tab is loaded, the message “Please insert a recordable
tape” is displayed.
Setting the timer
Here’s an example of how to record a program broadcast on channel 26
from 8:15 PM to 9:55 PM on Wednesday, 6th of October 1999, in EP mode.
1 Press TIMER ON SCREEN.
The TIMER SET/CHECK menu appears.
TIMER SET / CHECK 10 / 5
DATE START STOP CH
_/__ _:__ _:__ ___ _
_/__ _:__ _:__ ___ _
_/__ _:__ _:__ ___ _
_/__ _:__ _:__ ___ _
_/__ _:__ _:__ ___ _
_/__ _:__ _:__ ___ _
Move Select Exit
SELECT
2 Press SELECT.
Today’s date and the day of the week appears in red.
TIMER SET / CHECK 10 / 5
DATE START STOP CH
10/ 5TUE
_:__ _:__ ___ _
_/__ _:__ _:__ ___ _
_/__ _:__ _:__ ___ _
_/__ _:__ _:__ ___ _
_/__ _:__ _:__ ___ _
_/__ _:__ _:__ ___ _
Move Select Exit
SELECT
TUE
MENU
TUE
MENU
If you have made a mistake
Press ? to return to the previous
position and correct the setting.
To erase the settings
Press RESET while displaying the
TIMER SET/CHECK menu.
If you try to enter a recording
start time that is prior to the
current time
All of the items of the recording
settings are erased.
If you set MTS to “SAP” in the
AUDIO menu (KV-20VS42 only)
The SAP signal will be recorded only
if a SAP signal is being broadcast.
Otherwise, the program’s primary
audio channel will be recorded
(stereo or mono.) See page 22 for a
table describing the relation between
the speakers and the source signal.
Basic Operations
30
3 Press + ◊ until “6 WED” appears.
For daily and weekly recording, see “Daily/weekly recording” on page 32.
TIMER SET / CHECK 10 / 5
DATE START STOP CH
10/ 6WED
_:__ _:__ ___ _
_/__ _:__ _:__ ___ _
_/__ _:__ _:__ ___ _
_/__ _:__ _:__ ___ _
_/__ _:__ _:__ ___ _
_/__ _:__ _:__ ___ _
Move Select Exit
SELECT
TUE
MENU
Page 31

EJECT
MUTING DISPLAY
INPUT
SELECT
TIMER ON SCREEN
POWER
TV
SLEEP
MENU
SELECTRESET
4 Press SELECT, then set the hour of the recording start time to “8” with + ◊
or – √.
TIMER SET / CHECK 10 / 5
DATE START STOP CH
10/ 6WED
8:__PM _:__ ___ _
_/__ _:__ _:__ ___ _
_/__ _:__ _:__ ___ _
_/__ _:__ _:__ ___ _
_/__ _:__ _:__ ___ _
_/__ _:__ _:__ ___ _
Move Select Exit
SELECT
TUE
MENU
VCR Plus
COUNTER/
REMAIN
COUNTER
RESET
INDEX
TAPE SPEED
REC
X2 PAUSE
REW FF
2
1
5
4
7
8
JUMP ENTER
0
&7
SLOW
SEARCH
PLAY
STOP
3
5 Press SELECT, then set the minute of the recording start time to “15” with
+ ◊ or – √.
6
9
CHVOL
TIMER SET / CHECK 10 / 5
DATE START STOP CH
10
/ 6
WED
8:15PM _:__ ___ _
_/__ _:__ _:__ ___ _
_/__ _:__ _:__ ___ _
_/__ _:__ _:__ ___ _
_/__ _:__ _:__ ___ _
_/__ _:__ _:__ ___ _
Move Select Exit
SELECT
TUE
MENU
6 Press SELECT, then set the hour of the recording stop time to “9” with + ◊
or – √.
TIMER SET / CHECK 10 / 5
DATE START STOP CH
10
/ 6
WED
8:15PM 9:__PM ___ _
_/__ _:__ _:__ ___ _
_/__ _:__ _:__ ___ _
_/__ _:__ _:__ ___ _
_/__ _:__ _:__ ___ _
_/__ _:__ _:__ ___ _
Move Select Exit
SELECT
TUE
MENU
7 Press SELECT, then set the minute of the recording stop time to “55” with
+ ◊ or – √.
TIMER SET / CHECK 10 / 5
DATE START STOP CH
10
/ 6
WED
8:15PM 9:55PM ___ _
_/__ _:__ _:__ ___ _
_/__ _:__ _:__ ___ _
_/__ _:__ _:__ ___ _
_/__ _:__ _:__ ___ _
_/__ _:__ _:__ ___ _
Move Select Exit
SELECT
TUE
MENU
If you try to do an incorrect
operation
The Video/TV displays a message
on the screen and interrupts the
operation.
When the ON timer overlaps a
timer program
• If the start time of the ON timer is
the same or earlier than that of a
timer recording program, the ON
timer activates and the timer
recording does not operate.
• If the start time of the ON timer is
later than that of a timer recording
program, the TV screen turns on at
the ON timer start time, and the
recording continues.
8 Press SELECT, then set the channel to “26” with + ◊ or – √.
TIMER SET / CHECK 10 / 5
DATE START STOP CH
10
/ 6
WED
8:15PM 9:55PM 26 _
_/__ _:__ _:__ ___ _
_/__ _:__ _:__ ___ _
_/__ _:__ _:__ ___ _
_/__ _:__ _:__ ___ _
_/__ _:__ _:__ ___ _
Move Select Exit
SELECT
TUE
MENU
9 Press SELECT, then set the recording speed to EP with + ◊ or – √.
TIMER SET / CHECK 10 / 5
DATE START STOP CH
10
/ 6
WED
8:15PM 9:55PM 26
_/__ _:__ _:__ ___ _
_/__ _:__ _:__ ___ _
_/__ _:__ _:__ ___ _
_/__ _:__ _:__ ___ _
_/__ _:__ _:__ ___ _
Move Select Exit
SELECT
TUE
EP
MENU
Basic Operations
31
Page 32

EJECT
MUTING DISPLAY
INPUT
SELECT
TIMER ON SCREEN
VCR Plus
COUNTER/
REMAIN
COUNTER
RESET
INDEX
TAPE SPEED
REC
X2 PAUSE
REW FF
2
1
5
4
7
8
JUMP ENTER
0
&7
SLOW
SEARCH
PLAY
POWER
TV
SLEEP
MENU
SELECTRESET
3
6
9
CHVOL
10 Press SELECT.
The message “Please turn TV off to set timer” is displayed for three
seconds. Then the TIMER SET/CHECK menu reappears and the cursor
(z) is displayed at the left margin.
11 When you want to set other programs, press – √ to move the cursor (z) to
the next line, then repeat steps 2 through 10.
12 Press MENU to exit the TIMER SET/CHECK menu.
13 Press POWER to turn off the Video/TV.
The TIMER REC lamp on the front of the Video/TV lights up and the
Video/TV enters recording standby mode.
The Video/TV turns on automatically and starts recording at the preset
start time, and the TIMER REC lamp on the front of the Video/TV lights
up.
Daily/weekly recording
You can preset your Video/TV to record the same program every day of
the week (daily recording) or the same program on the same day every
week (weekly recording). Press – √ in step 3 until the desired setting
appears in the “DATE” position. With each press, the setting changes as
follows:
STOP
When preset timer recordings
overlap
• If the turn-on time of two
programs are the same, the
program listed first in the menu
has priority.
• If the recording start time of the
second program comes before
recording of the first program is
over, the second program starts
recording only after the first
program has finished.
4 (today) n SUN-SAT n MON–FRI n EVERY SAT n EVERY FRI n
EVERY THU n EVERY WED n EVERY TUE n EVERY MON n
EVERY SUN n 3 (next month) n 2......
To cancel timer recording
1 Press POWER to turn on the Video/TV.
2 Press TIMER ON SCREEN.
3 Using + ◊ or – √, select the timer setting which you want to stop
recording and press RESET.
Using the Video/TV before timer
recording starts
To use the Video/TV before timer recording begins, just press POWER.
The TIMER REC lamp turns off and the Video/TV switches on.
Basic Operations
32
Page 33

EJECT
MUTING DISPLAY
INPUT
SELECT
TIMER ON SCREEN
VCR Plus
COUNTER/
REMAIN
COUNTER
JUMP ENTER
RESET
INDEX
TAPE SPEED
POWER
TV
SLEEP
MENU
SELECTRESET
2
1
4
7
3
5
6
9
8
0
CHVOL
Checking the timer settings
You can display the list of the timer settings which you preset.
Press TIMER ON SCREEN.
The TIMER SET/CHECK menu appears.
MENU
TUE
EP
EP
SP
EP
TIMER SET / CHECK 10 / 5
DATE START STOP CH
10
/ 6
WED
8:15PM 9:55PM 26
10
/ 7
THU
7:30PM 8:30PM 50
MON- SAT 11
:00PM 12:00AM 32
EVERY THU
9:55AM 12:30PM 21
_/__ _:__ _:__ ___ _
_/__ _:__ _:__ ___ _
Move Select Exit
SELECT
Press TIMER ON SCREEN again to erase the TIMER SET/CHECK menu.
Changing or cancelling the timer
REC
&7
SLOW
X2 PAUSE
SEARCH
REW FF
PLAY
STOP
settings
1 Press TIMER ON SCREEN to display the TIMER SET/CHECK menu.
2 Select the setting you want to change or cancel with + ◊ or – √.
TIMER SET / CHECK 10 / 5
DATE START STOP CH
10
/ 6
WED
8:15PM 9:55PM 26
10
/ 7
THU
7:30PM 8:30PM 50
MON- SAT 11
:00PM 12:00AM 32
EVERY THU
9:55AM 12:30PM 21
_/__ _:__ _:__ ___ _
_/__ _:__ _:__ ___ _
Move Select Exit
SELECT
3 To change the setting
Using + ◊ or – √ and SELECT, re-enter the items you want to change.
Refer to steps 2 through 10 of “Setting the timer” on pages 30 through 32.
To cancel the setting
Press RESET.
4 Press TIMER ON SCREEN to return to the original screen.
5 If there are other timer settings on the list, press POWER to set the Video/
TV to timer recording standby mode.
MENU
TUE
EP
EP
SP
EP
Basic Operations
33
Page 34

Recording using QUICK TIMER
You can preset your Video/TV to start recording immediately and to
automatically stop recording after a specific time period.
POWER
STANDBY
EJECT
REC
TIMER REC
QUICK TIMER REC
INPUT
–
VOL
+ –
CHANNEL
+
SELEECT
Even if you have not set the clock, QUICK TIMER recording can be used.
QUICK TIMER REC
EJECT
MUTING DISPLAY
INPUT
SELECT
TIMER ON SCREEN
VCR Plus
COUNTER/
REMAIN
COUNTER
RESET
INDEX
TAPE SPEED
REC
X2 PAUSE
2
1
5
4
7
8
JUMP ENTER
0
VOL
&7
SLOW
SEARCH
POWER
TV
SLEEP
MENU
SELECTRESET
3
6
9
CH
To record
1 Insert a cassette with its safety tab intact.
2 Select the channel which you want to record with the 0-9 buttons or CH
+/–.
3 Press QUICK TIMER REC on the front of the Video/TV.
“QUICK TIMER 0:00” appears on the screen.
4 Press QUICK TIMER REC repeatedly to select the recording time period.
With each press, the time period changes as follows:
0:00 0:30 1:00 .... 7:30 8:00
The time period turns yellow and recording starts.
Even if you switch off the Video/TV, it continues recording.
When the preset time period has elapsed, the Video/TV stops recording.
To stop QUICK TIMER recording
Press STOP p or QUICK TIMER REC repeatedly until “QUICK TIMER
0:00” appears on the screen.
REW FF
PLAY
STOP
To change the recording time
period after QUICK TIMER
recording begins
Press QUICK TIMER REC until the
desired time period appears.
Note
If the OFF timer is activated during
quick timer recording, the TV screen
turns off, but the quick timer
recording continues.
Basic Operations
34
Page 35

Recording TV Programs Using VCR
Plus+
system
EJECT
MUTING DISPLAY
INPUT
SELECT
TIMER ON SCREEN
VCR Plus
COUNTER/
REMAIN
COUNTER
RESET
INDEX
TAPE SPEED
REC
X2 PAUSE
REW FF
2
1
5
4
7
8
JUMP ENTER
0
&7
SLOW
SEARCH
PLAY
STOP
POWER
TV
SLEEP
MENU
SELECTRESET
3
6
9
CHVOL
How the VCR Plus+ system works
Whenever you want to record a TV program, all you need to do is look up
the program’s “PlusCode,” a number assigned to each program published
in the TV section of most newspapers, cable TV listings, and even TV
GUIDE magazine. Then, just enter the PlusCode number of the program
you want and the VCR is automatically programmed to record that show.
It’s that simple. You can preset up to six programs within a one month
time frame. To take advantage of this function, you must first set up your
Video/TV and assign channel positions to the various guide channels. For
details, see “Setting Up VCR Plus+ system” on page 16.
Before you begin
• Make sure that the time and date are set correctly. If not, refer to “Setting
the Clock” on page 12.
• Make sure that the loaded cassette has its safety tab intact.
1 Press the VCR Plus button.
The VCR Plus+ System menu appears.
VCR Plus+ System
PlusCode number
TAPE SPEED
––––––––]
[
[
Use [0-9] to select
PlusCode number
To change tape speed,
press [TAPE SPEED]
Then press
2 Press the 0-9 buttons to enter the desired program’s PlusCode number.
VCR Plus+ System
PlusCode number
[
53292–––]
Use [0-9] to select
PlusCode number
To change tape speed,
press [TAPE SPEED]
Then press
AT]
SELECT
TAPE SPEED
[
AT]
SELECT
Example of “PlusCode”
14
MOVIE Musical(2hrs.) 33044
5:30
2
SPORT Golf(1hr.25min.) 42060
CNN
WS 9974
234
6:30
DRAMA Comedy(2hrs.) 17390
5
SCIENCE AND TECHNOLOGY
(1hrs.15min.) 73457
PlusCode
If you have made a mistake
entering program‘s PlusCode
Press RESET and re-enter the correct
number.
To check the timer setting
Press TIMER ON SCREEN. You can
check the list of the timer settings.
The timer will not accept a
setting in the following cases:
• When you enter the PlusCode
number of a program that has
already ended.
• When you enter the PlusCode
number of a program that has
already been set to record.
• If the 6 programs have already
been preset, “6 programs have
already been set” appears on the
screen.
3 Press TAPE SPEED repeatedly to select SP, EP, or AT (automatic tape
speed) and press SELECT. AT will automatically adjust the tape speed
between SP and EP so that the program you selected fits in the tape. (Note
that recording may stop if the tape is not long enough to record the
program in EP mode.)
The recording information (date, start and stop times, channel number,
and tape speed) appears in green.
VCR Plus+ System
PlusCode number
TAPE SPEED
[
53292 ]
(
RECORDING TIME
DATE START STOP CH
1
/05
TUE 9:00AM 10:30AM 7
Please turn TV off
to set timer
EP)
EP
Check that the information is correct. If it is not, press RESET to cancel the
setting.
4 Repeat steps 2 to 3 to preset another timer setting.
5 Press POWER to turn the Video/TV off.
The TIMER REC lamp on the front of the Video/TV lights up and the
Video/TV enters recording standby mode.
Basic Operations
35
Page 36

Additional Operations
Automatically Switching the
Video/TV On or Off –
You can set the Video/TV to turn on and off at any time. Make sure the
EJECT
MUTING DISPLAY
INPUT
SELECT
TIMER ON SCREEN
RESET
VCR Plus
COUNTER/
REMAIN
COUNTER
JUMP ENTER
RESET
INDEX
TAPE SPEED
REC
1
4
7
&7
SLOW
POWER
TV
clock is set correctly. If it is not, set the clock first (page 12).
1 Press MENU to display the main menu.
SLEEP
MENU
2 Move the cursor (z) to “TIMER” with + ◊ or – √ and press SELECT.
The TIMER menu appears.
SELECT
3 Move the cursor (z) to “ON/OFF TIMER” with + ◊ or – √ and press
2
3
5
6
9
8
0
CHVOL
SELECT.
The ON/OFF TIMER menu appears.
ON/OFF TIMER
______
––:–– AM _H CH___
MENU
SUN 12:00 AM
Move Select Exit
SELECT
MENU
4 Press SELECT to enter the ON/OFF TIMER setting.
ON/OFF TIMER
X2 PAUSE
SEARCH
REW FF
PLAY
STOP
If you have made a mistake
Press ? to return to the previous
position.
To erase the settings
Press RESET while the ON/OFF
timer menu is displayed.
Note
If the OFF timer is activated during
quick timer recording, the TV screen
turns off, but the quick timer
recording continues.
5 Press + ◊ or – √ to set the day(s), and press SELECT.
Each time you press + ◊ or – √, the days change as shown below.
EVERY SUN-SAT n EVERY MON-FRI n SUNDAY ...n... SATURDAY
n EVERY SUNDAY ...n... EVERY SATURDAY.
ON/OFF TIMER
EVERY MON–FRI
12:00 AM _H CH___
MENU
Set the day
Move Select Exit
SUN 12:00 AM
SELECT
MENU
6 Press + ◊ or – √ to set the time (hour then minute) that you want the
Video/TV to turn on and press SELECT.
ON/OFF TIMER
EVERY MON–FRI
12:02 AM _H CH___
MENU
Set the time
Move Select Exit
SUN 12:00 AM
MENU
SELECT
7 Press + ◊ or – √ to set the duration time and press SELECT.
With each press, the duration increases by one hour for up to twelve
hours.
ON/OFF TIMER
EVERY MON–FRI
12:02 AM 1H CH___
MENU
Additional Operations
36
Set the duration
Move Select Exit
SUN 12:00 AM
SELECT
MENU
Page 37

8 Press + ◊ or – √ to set the channel and press SELECT.
ON/OFF TIMER
EVERY MON–FRI
12:02 AM 1H CH 1
MENU
Select a channel
Move Select Exit
SUN 12:00 AM
SELECT
MENU
9 Press MENU to return to the original screen.
If you are not using the Video/TV, press POWER to set the Video/TV in
standby mode.
One minute before the Video/TV turns off, the message “TV will turn off
soon” appears on the screen.
Switching Off Automatically – Sleep Timer
You can automatically switch the Video/TV into standby mode after a
EJECT
MUTING DISPLAY
INPUT
SELECT
TIMER ON SCREEN
POWER
TV
SLEEP
MENU
SELECTRESET
selected time period.
Press SLEEP.
With each press, the time period (in minutes) changes as follows:
OFF 30 60 90
VCR Plus
COUNTER/
REMAIN
COUNTER
RESET
INDEX
TAPE SPEED
REC
X2 PAUSE
REW FF
2
1
5
4
7
8
JUMP ENTER
0
&7
SLOW
SEARCH
PLAY
STOP
3
6
One minute before the TV switches into standby mode, the message “TV
will turn off soon” is displayed on the screen.
9
CHVOL
Additional Operations
37
Page 38

Selecting the Video/TV’s Cable Box
Input Channel –
EJECT
MUTING DISPLAY
INPUT
SELECT
TIMER ON SCREEN
VCR Plus
COUNTER/
REMAIN
COUNTER
JUMP ENTER
RESET
INDEX
TAPE SPEED
REC
POWER
TV
SLEEP
MENU
SELECTRESET
2
1
4
7
3
5
6
9
8
0
CHVOL
&7
SLOW
Use the CHANNEL FIX feature to prevent the Video/TV’s input channel
from being accidentally changed.
It is recommended that you set up your Video/TV as follows when you
connect a cable box.
1 Press MENU to display the main menu.
2 Move the cursor (z) to “SET UP” with + ◊ or – √ and press SELECT.
The SET UP menu appears.
3 Move the cursor (z) to “CHANNEL SET UP” with + ◊ or – √ and press
SELECT.
The CHANNEL SET UP menu appears.
CHANNEL SET UP
CABLE: OFF
CHANNEL FIX: OFF
AUTO PROGRAM
CHANNEL SKIP/ADD
VCR P l u s+ SET UP
MENU
Move Select Exit
CHANNEL FIX
MENU
SELECT
X2 PAUSE
SEARCH
REW FF
PLAY
STOP
4 Move the cursor (z) to “CHANNEL FIX” with + ◊ or – √ and press
SELECT.
The selected position turns red.
CHANNEL SET UP
CABLE: OFF
CHANNEL FIX: OFF
AUTO PROGRAM
CHANNEL SKIP/ADD
VCR PLUS+ SET UP
MENU
MENU
Move Select Exit
SELECT
5 Using + ◊ or – √, select the Video/TV’s cable box input channel that you
want to set and press SELECT.
With each press, the input mode changes as follows:
OFF 2 3 4 5 6 LINE
When you set CHANNEL FIX to “2-6,” you can only watch the TV channel
that you have fixed, or the input line.
When you set CHANNEL FIX to “LINE,” you cannot switch the line input
to a TV channel.
When you want to switch CHANNEL FIX off, set it to “OFF.”
Additional Operations
38
6 Press MENU to return to the original screen.
Page 39

Displaying Caption Vision/XDS
EJECT
MUTING DISPLAY
INPUT
SELECT
TIMER ON SCREEN
VCR Plus
COUNTER/
REMAIN
COUNTER
RESET
INDEX
TAPE SPEED
REC
X2 PAUSE
REW FF
2
1
5
4
7
8
JUMP ENTER
0
&7
SLOW
SEARCH
PLAY
STOP
POWER
TV
SLEEP
MENU
SELECTRESET
3
6
9
CHVOL
Some programs are broadcast with Caption Vision. To display Caption
Vision, select either CC1, CC2, TEXT1, or TEXT2 from the menu.
CC1 or CC2 shows you an on-screen version of the dialogue or sound
effects of a program. (The mode should be set to CC1 for most programs.)
TEXT1 or TEXT2 shows you on-screen information presented using either
half or the whole screen. It is not usually related to the program.
Some programs are broadcast with XDS (Extended Data Service) which
shows a network name, program name, program length, call letters and
time of the show. When you select XDS with the DISPLAY button, this
information will be displayed on the screen if the broadcaster offers this
service.
1 Press MENU to display the main menu.
2 Move the cursor (z) to “SET UP” with + ◊ or – √ and press SELECT.
The SET UP menu appears.
3 Move the cursor (z) to “CAPTION VISION” with + ◊ or – √ and press
SELECT.
The caption setting turns red.
SET UP
CHANNEL SET UP
PARENTAL CONTROL
FAVORITE CHANNEL
CAPTION VISION: CC 1
LANGUAGE: ENGLISH
MENU
Note
Poor reception of TV programs can
cause errors in Caption Vision.
Captions may appear with errors
instead of the correct words.
MENU
Move Select Exit
SELECT
4 Using + ◊ or – √, select the caption type you want and press SELECT.
SET UP
CHANNEL SET UP
PARENTAL CONTROL
FAVORITE CHANNEL
CAPTION VISION: TEXT2
LANGUAGE: ENGLISH
MENU
MENU
Move Select Exit
SELECT
5 Press MENU to return to the original screen.
To cancel caption display
Press DISPLAY repeatedly until “DISPLAY OFF” appears on the screen.
With each press, the display changes as follows:
On-screen information n XDS n Caption Vision or Text
n
DISPLAY OFF
n
Additional Operations
39
Page 40

Blocking Out Programs – Parental Control
The TV programs and movies shown on TV are given a rating signal based
EJECT
MUTING DISPLAY
INPUT
SELECT
TIMER ON SCREEN
VCR Plus
COUNTER/
REMAIN
COUNTER
JUMP ENTER
RESET
INDEX
1
4
7
2
5
8
0
POWER
TV
SLEEP
MENU
SELECTRESET
3
6
9
CHVOL
on the following rating systems.
In U.S.A.: U.S. Television Parental Guidelines to rate television programs
(U.S. TV ratings), and Motion Picture Association of America (MPAA)
Guidelines to rate movies including those shown on TV (movie ratings).
In Canada: Canadian English Language ratings to rate television programs
in English, and Canadian French Language ratings to rate those in French.
To block programs you feel are unsuitable for your children, you need to
set the TV for the desired rating systems. Sony’s predetermined ratings are
also available.
See pages 49 to 51 for a description of the ratings.
The Parental Control feature of the Video/TV functions by receiving the
rating signal from your local broadcasting station or cable service
provider.
TAPE SPEED
REC
X2 PAUSE
&7
SLOW
SEARCH
REW FF
PLAY
STOP
If you have made a mistake
Press ? to return to the previous
position.
Note
When playing a tape on which
blocked programs are recorded, the
block will be effective in normal
playback mode. In other tape
operation modes or if the tape is
well-worn or old, the block may not
be effective.
Activating the Parental Control
feature
First, set a password, then select your desired rating from Sony’s
predetermined ratings.
1 Press MENU to display the main menu.
2 Move the cursor (z) to “SET UP” with + ◊ or – √ and press SELECT.
The SET UP menu appears.
3 Move the cursor (z) to “PARENTAL CONTROL” with + ◊ or – √ and
press SELECT.
PARENTAL CONTROL
SELECT
SELECT
____
MENU
MENU
PASSWORD:
MENU
Move Select Exit
4 Move the cursor (z) to “PASSWORD” with + ◊ or – √ and press SELECT.
The password position turns red.
PARENTAL CONTROL
PASSWORD:
MENU
Use [0-9] buttons to
enter new four digit
password
Move Select Exit
Additional Operations
40
Page 41

EJECT
MUTING DISPLAY
INPUT
SELECT
TIMER ON SCREEN
VCR Plus
COUNTER/
REMAIN
COUNTER
JUMP ENTER
RESET
INDEX
T APE SPEED
REC
POWER
TV
SLEEP
MENU
SELECTRESET
2
1
4
7
3
5
6
9
8
0
CHVOL
SLOW
PARENTAL CONTROL
PASSWORD:
MENU
Confirm password
MENU
Move Select Exit
SELECT
* Do not enter “4357” corresponding to “HELP” on a phone number pad.
(See page 48.) If you enter “4357,” “Invalid password, please try again”
appears.
6 To confirm the password, re-enter the same password with the 0–9
buttons.
Your password is stored and the PARENTAL CONTROL menu
automatically appears.
PARENTAL CONTROL
PARENTAL LOCK: OFF
CHANGE PASSWORD
MENU
5 Enter a four digit password* using the 0–9 buttons.
X2 PA USE
SEARCH
REW FF
PLAY
STOP
MENU
Move Select Exit
SELECT
If you want to change the password, see page 47.
7 Move the cursor (z) to “PARENTAL LOCK” with + ◊ or – √ and press
SELECT.
The selected position turns red.
PARENTAL CONTROL
PARENTAL LOCK: OFF
CHANGE PASSWORD
MENU
Move Select Exit
SELECT
MENU
8 Using + ◊ or – √, select “ON” and press SELECT.
PARENTAL CONTROL
PARENTAL LOCK: ON
RATING: CHILD
CHANGE PASSWORD
MENU
MENU
Move Select Exit
SELECT
9 Move the cursor (z) to “RATING” with + ◊ or – √ and press SELECT.
The rating position turns red.
PARENTAL CONTROL
PARENTAL LOCK: ON
RATING: CHILD
CHANGE PASSWORD
MENU
Ages up to 6
MENU
Move Select Exit
SELECT
Additional Operations
41
Page 42

EJECT
MUTING DISPLAY
INPUT
SELECT
TIMER ON SCREEN
POWER
TV
SLEEP
MENU
10 Using + ◊ or – √, select a desired rating (“CHILD,” “YOUTH,” or
“YOUNG ADULT”) and press SELECT.
PARENTAL CONTROL
PARENTAL LOCK: ON
RATING: YOUTH
CHANGE PASSWORD
MENU
VCR Plus
COUNTER/
REMAIN
COUNTER
RESET
INDEX
T APE SPEED
REC
X2 PA USE
REW FF
2
1
5
4
8
7
JUMP ENTER
0
SLOW
SEARCH
PLAY
STOP
SELECTRESET
3
Move Select Exit
If you want to select the ratings from “CUSTOM,” go to step 4 of
SELECT
MENU
“Selecting custom ratings in U.S.A.” on page 43 or “Selecting custom
6
ratings in Canada” on page 46, according to your country.
9
11 Press MENU to return to the original screen.
CHVOL
To deactivate the Parental Control feature
If you set “PARENTAL LOCK” in the PARENTAL CONTROL menu to
“OFF,” the Parental Control feature will not work and you can view all TV
programs and movies shown on TV.
1 Perform steps 1–4 of “Activating the Parental Control feature” on page 40.
2 Enter your four digit password using the 0–9 buttons.
The PARENTAL CONTROL menu appears.
3 Move the cursor to “PARENTAL LOCK” with + ◊ or – √ and press
SELECT.
The selected position turns red.
Additional Operations
42
4 Using + ◊ or – √, select “OFF” and press SELECT.
5 Press MENU to return to the original screen.
To unlock the Parental Control feature
temporarily
When you select a Parental Control program, no sound or picture except
for a channel number will appear. The indicator is displayed. To view
the program, follow the steps below.
1 Press ENTER to display the password screen.
2 Enter your password using the 0–9 buttons.
Parental Control will be canceled (“PARENTAL LOCK” set to “OFF”)
until you turn your Video/TV off.
Page 43

EJECT
MUTING DISPLAY
INPUT
SELECT
TIMER ON SCREEN
POWER
TV
SLEEP
MENU
SELECTRESET
Selecting custom ratings in U.S.A.
If you want to select the ratings to be blocked from “CUSTOM” once you
have activated the Parental Control feature (page 40), follow the procedure
below.
For a detailed description of each rating, see “What the Ratings Mean” on
page 49.
VCR Plus
COUNTER/
REMAIN
COUNTER
RESET
INDEX
TAPE SPEED
REC
X2 PAUSE
REW FF
2
1
5
4
7
8
JUMP ENTER
0
&7
SLOW
SEARCH
PLAY
STOP
3
6
9
1 Perform steps 1–4 of “Activating the Parental Control feature” on page 40.
2 Enter your four digit password using the 0–9 buttons.
The PARENTAL CONTROL menu appears.
3 Move the cursor (z) to “RATING” with + ◊ or – √ and press SELECT.
CHVOL
The rating position turns red.
4 Using + ◊ or – √, select “CUSTOM” and press SELECT.
The CUSTOM RATINGS menu appears.
CUSTOM RATINGS
TV RATINGS
MOVIE RATINGS
UNRATED: VIEW AL L
MENU
Select category
MENU
Move Select Exit
SELECT
First, select TV ratings.
5 Move the cursor (z) to “TV RATINGS” with + ◊ or – √ and press SELECT.
The TV RATINGS menu appears.
TV RATINGS
TV–Y: _
TV–Y7 : _ FV_
TV–G: _
TV–PG: _ D_ L_ S_ V_
TV–14: _ D_ L_ S_ V_
TV–MA: _ L_ S_ V_
MENU
Select category
Move Select Exit
SELECT
MENU
6 Move the cursor (z) to the TV rating to be blocked with + ◊ or – √ and
press SELECT.
The selected position turns red.
TV RATINGS
TV–Y: _
TV–Y7 : _ FV_
TV–G: _
TV–PG: D_ L_ S_ V_
TV–14: _ D_ L_ S_ V_
TV–MA: _ L_ S_ V_
MENU
Allow rating
Move Select Exit
SELECT
MENU
Additional Operations
43
Page 44

EJECT
MUTING DISPLAY
INPUT
SELECT
TIMER ON SCREEN
VCR Plus
COUNTER/
REMAIN
COUNTER
RESET
INDEX
T APE SPEED
REC
X2 PA USE
REW FF
2
1
5
4
8
7
JUMP ENTER
0
SLOW
SEARCH
PLAY
STOP
POWER
TV
SLEEP
MENU
SELECTRESET
3
6
9
CHVOL
7 Using + ◊ or – √, select “ ” and press SELECT.
The indicator automatically appears beside the selected rating and all
“higher” ratings, indicating that the programs that match the ratings will
be blocked.
TV RATINGS
TV–Y: _
TV–Y7 : _ FV_
TV–G: _
TV–PG: D L S V
TV–14: D L S V
TV–MA: L S V
MENU
Block rating
Move Select Exit
SELECT
MENU
Some ratings have additional content ratings called “extenders.” The
extenders are defined as follows: D (Sexually Suggestive Dialog), FV
(Fantasy Violence), L (Coarse Language), S (Sexual Situations) and V
(Violence). By setting the extenders, you can define additional viewing
limits. For more details of extenders, see page 50.
All of the extenders included in the selected ratings will be blocked. If you
wish to allow any of them to be viewed, go to step 8.
8 Select the extender to be viewed by pressing SELECT.
Each time you press SELECT, the selected position moves to the next
extender.
TV RATINGS
TV–Y: _
TV–Y7 : _ FV_
TV–G: _
TV–PG: D L S V
TV–14: D L S V
TV–MA: L S V
MENU
Block content
Move Select Exit
SELECT
MENU
Additional Operations
44
9 Using + ◊ or – √, select “–” and press SELECT.
“–” appears beside the selected extender, indicating that the programs that
match the extender can be viewed.
TV RATINGS
TV–Y: _
TV–Y7 : _ FV_
TV–G: _
TV–PG: D_ L S V
TV–14: D L S V
TV–MA: L S V
MENU
Select category
Move Select Exit
SELECT
MENU
If you select “ ,” “ ” is displayed to show that the programs that match
the extender will be blocked again.
10 Repeat steps 8 and 9 for other extenders.
All programs that match the ratings you select and higher, except for the
extenders that were canceled, will be blocked.
11 After setting of the TV ratings is complete, move the cursor (z) to
“ MENU” with + ◊ or – √ and press SELECT to return to the CUSTOM
RATINGS menu.
Page 45

EJECT
MUTING DISPLAY
INPUT
SELECT
TIMER ON SCREEN
VCR Plus
COUNTER/
REMAIN
COUNTER
RESET
INDEX
TAPE SPEED
REC
X2 PAUSE
REW FF
2
1
5
4
7
8
JUMP ENTER
0
&7
SLOW
SEARCH
PLAY
STOP
POWER
TV
SLEEP
MENU
SELECTRESET
3
6
9
CHVOL
Second, select movie ratings.
12 Move the cursor (z) to “MOVIE RATINGS” with + ◊ or – √ and press
SELECT.
The MOVIE RATINGS menu appears.
MOVIE RATINGS
G: _
PG: _
PG–13: _
R: _
NC–17: _
X: _
MENU
Select rating
Move Select Exit
SELECT
MENU
13 Move the cursor (z) to the movie rating to be blocked with + ◊ or – √ and
press SELECT.
The selected position turns red.
MOVIE RATINGS
G: _
PG: _
PG–13 :
R: _
NC–17: _
X: _
MENU
Allow rating
Move Select Exit
SELECT
MENU
14 Using + ◊ or – √, select “ ” and press SELECT.
The indicator automatically appears beside the selected rating and all
“higher” ratings, indicating that the programs that match the ratings will
be blocked.
MOVIE RATINGS
G: _
PG: _
PG–13 :
R:
NC–1 7 :
X:
MENU
Select rating
Move Select Exit
SELECT
MENU
15 Press MENU to return to the original screen.
To block TV programs and/or movies for
which a rating signal is not given (NR and
N/A)
For a description of the NR and N/A ratings, see page 49.
1 Perform steps 1–4 of “Selecting custom ratings in U.S.A.” on page 43.
2 Move the cursor (z) to “UNRATED” with + ◊ or – √ and press SELECT.
The selected position turns red.
CUSTOM RATINGS
TV RATINGS
MOVIE RATINGS
UNRATED: VIEW AL L
MENU
View all unrated
programming
Move Select Exit
SELECT
MENU
Additional Operations
45
Page 46

EJECT
MUTING DISPLAY
INPUT
SELECT
TIMER ON SCREEN
VCR Plus
COUNTER/
REMAIN
COUNTER
JUMP ENTER
RESET
INDEX
TAPE SPEED
3 Using + ◊ or – √, select the type of programs to be blocked and press
POWER
TV
SLEEP
MENU
SELECTRESET
2
1
4
7
3
5
6
9
8
0
CHVOL
SELECT.
CUSTOM RATINGS
TV RATINGS
MOVIE RATINGS
UNRATED: BLOCK TV
MENU
Select category
MENU
Move Select Exit
Select To block
VIEW ALL
BLOCK TV
BLOCK MOVIES
BLOCK ALL
SELECT
No program (to view any unrated TV program and movie)
Unrated TV programs
Unrated movies
Unrated TV programs and movies
4 Press MENU to return to the original screen.
REC
&7
SLOW
X2 PAUSE
SEARCH
REW FF
PLAY
STOP
Selecting custom ratings in Canada
If you want to select the ratings to be blocked from “CUSTOM” once you
have activated the Parental Control feature (page 40), follow the procedure
below.
For a detailed description of each rating, see “What the Ratings Mean” on
page 49.
1 Perform steps 1–4 of “Activating the Parental Control feature” on page 40.
2 Enter your four digit password using the 0–9 buttons.
The PARENTAL CONTROL menu appears.
3 Move the cursor (z) to “RATING” with + ◊ or – √ and press SELECT.
The rating position turns red.
4 Using + ◊ or – √, select “CUSTOM” and press SELECT.
The CUSTOM RATINGS menu appears.
CUSTOM RATINGS
ENGL I SH RATINGS
FRENCH RATINGS
U. S. A. RATINGS
MENU
Select rating system
MENU
Move Select Exit
SELECT
Additional Operations
46
Page 47

EJECT
MUTING DISPLAY
INPUT
SELECT
TIMER ON SCREEN
VCR Plus
COUNTER/
REMAIN
COUNTER
RESET
INDEX
TAPE SPEED
REC
X2 PAUSE
REW FF
2
1
5
4
7
8
JUMP ENTER
0
&7
SLOW
SEARCH
PLAY
STOP
POWER
TV
SLEEP
MENU
SELECTRESET
3
6
9
CHVOL
5 Using + ◊ or – √, select the rating you want to block and press SELECT.
The selected rating menu appears.
Canadian English ratings
ENGLISH RATINGS
C: _
C8+: _
G: _
PG: _
14+: _
18+: _
MENU
Select rating
Move Select Exit
SELECT
MENU
Canadian French ratings
FRENCH RATINGS
G: _
8 ans+: _
13 ans+: _
16 ans+: _
18 ans+: _
MENU
Select rating
Move Select Exit
SELECT
MENU
U.S. TV ratings
TV RATINGS
TV–Y: _
TV–Y7 : _ FV_
TV–G: _
TV–PG: _ D_ L_ S_ V_
TV–14: _ D_ L_ S_ V_
TV–MA: _ L_ S_ V_
MENU
Select category
Move Select Exit
SELECT
6 Move the cursor (z) to the TV rating to be blocked with + ◊ or – √ and
press SELECT.
The selected position turns red.
Example: Canadian English ratings
ENGLISH RATINGS
C: _
C8+: _
G: _
PG:
14+: _
18+: _
MENU
Allow rating
Move Select Exit
SELECT
MENU
7 Using + ◊ or – √, select “ ” and press SELECT.
The indicator automatically appears beside the selected rating and all
“higher” ratings, indicating that the programs that match the ratings will
be blocked.
MENU
ENGLISH RATINGS
C: _
C8+: _
G: _
PG:
14+:
18+:
MENU
Block rating
Move Select Exit
SELECT
MENU
Some U.S. TV ratings have additional content ratings called “extenders,”
such as D, FV, L, S, and V. By setting the extenders, see steps 7 to 10 of
“Selecting custom ratings in U.S.A.” on page 44. For more details of
extenders, see page 50.
All of the extenders included in the selected ratings will be blocked. If you
wish to allow any of them to be viewed, go to step 8 of “Selecting custom
ratings in U.S.A.” on page 44.
8 Press MENU to return to the original screen.
Changing the password
1 Perform steps 1–4 of “Activating the Parental Control feature” on page 40.
2 Enter your four digit password using the 0–9 buttons.
The PARENTAL CONTROL menu appears.
Additional Operations
47
Page 48

EJECT
MUTING DISPLAY
INPUT
SELECT
TIMER ON SCREEN
VCR Plus
POWER
TV
SLEEP
MENU
SELECTRESET
2
1
3
SELECT.
The CHANGE PASSWORD menu appears.
CHANGE PASSWORD
SELECT
____
MENU
PASSWORD:
MENU
Move Select Exit
3 Move the cursor (z) to “CHANGE PASSWORD” with + ◊ or – √ and press
5
COUNTER/
REMAIN
COUNTER
RESET
INDEX
TAPE SPEED
4
7
8
JUMP ENTER
0
REC
X2 PAUSE
&7
SLOW
SEARCH
REW FF
PLAY
STOP
6
9
4 Move the cursor (z) to “PASSWORD” with + ◊ or – √ and press SELECT.
The password position turns red.
5 Enter a new four digit password using the 0–9 buttons.
CHVOL
CHANGE PASSWORD
PASSWORD:
MENU
Confirm password
Move Select Exit
SELECT
MENU
6 Enter the password set in step 5 again to confirm.
If you entered it incorrectly, “Password incorrect, please try again”
appears.
Re-enter the correct password.
7 Press MENU to return to the original screen.
If you have forgotten your
password
Notes
• If you entered “4357” as your
password the first time, you
cannot store a password. (See step
5 of “Activating the Parental
Control feature” on page 41.)
• When you select a Parental
Control program and the
indicator is displayed on the
screen, you cannot view that
program even if you enter “4357.”
(See “To unlock the Parental
Control feature temporarily” on
page 42.)
Additional Operations
48
1 Perform steps 1–4 of “Activating the Parental Control feature” on page 40.
2 Enter the master password “4357” (corresponding to “HELP” on a phone
number pad).
You can then store a new password.
Page 49

What the Ratings Mean
Ratings in U.S.A.
Sony’s predetermined ratings
These are original ratings that Sony predetermined according to the viewer’s age. Each rating allows you to
view the certain programs, as follows:
See below for a description of each rating.
Ratings
CHILD:
Suitable for children under the age of 6
YOUTH:
Suitable for children aged 7 and older
YOUNG ADULT:
Suitable for children aged 13 and older
Viewable U.S. movie ratings
G, NR, and N/A
G, PG, NR, and N/A
G, PG, PG-13, NR, and N/A
Viewable U.S. TV rating
TV-Y, TV-G, and TV-NR
TV-Y, TV-Y7, TV-G, TV-PG, and TV-NR
TV-Y, TV-Y7, TV-G, TV-PG, TV-14, and
TV-NR
U.S. movie ratings
U.S. movie ratings are for movies (including those shown on TV) rated according to the Motion Picture
Association of America (MPAA) Guidelines.
Ratings
G
(General Audiences—All Ages
Admitted)
PG
(Parental Guidance Suggested. Some
Material May Not Be Suitable For
Children)
PG-13
(Parents Strongly Cautioned. Some
Material May Be Inappropriate For
Children Under 13)
R
(Restricted, Under 17 Require
Accompanying Parent Or Adult
Guardian)
NC-17 or X
(No One 17 Or Under Admitted)
NR
(Not Rated)
N/A
(Not Applicable)
Explanations
In G-rated films no strong words are used, the violence is at a minimum, nudity and sex
scenes are not present, nor is there any drug use.
This is a film which may need to be monitored first by parents.
Parents are alerted to be very careful about the attendance of their under-teenage children
when viewing.
This film includes hard language, tough violence, nudity, drug abuse or other elements of
concern.
This is a film that most parents would consider not suitable for children aged 17 and
under. There may be violence, sex, aberrational behavior, drug abuse or other elements of
concern.
This is a film that a producer has not rated, intending to have his film widely released.
This is a film that a producer considers outside the scope of the MPAA ratings.
Note
NR and N/A ratings are shown together as “UNRATED” in the menu.
Additional Operations
49
Page 50

U.S. TV ratings
U.S. TV ratings are for TV programs rated according to the U.S. Television Parental Guidelines.
Ratings
TV-Y (All Children)
TV-Y7
(Directed to Older Children)
TV-G
(General Audience)
TV-PG
(Parental Guidance Suggested)
TV-14
(Parents Strongly Cautioned)
TV-MA
(Mature Audience Only)
TV-NR (Not Rated/Unrated)
Note
The TV-NR rating is shown as “UNRATED” in the menu.
Explanations
This program is designed for young children aged 2–6 and is appropriate for all children.
This program is designed for children aged 7 and above. Themes and elements in this
program may include mild fantasy violence or slapstick violence, or may frighten children
under the age of 7.
Most parents would find this program suitable for all ages. It contains little or no violence,
no strong language and little or no sexual dialog or situations.
This program contains some material that parents may find unsuitable for younger
children.
This program contains some material that many parents would find unsuitable for children
under the age of 14.
This program is specifically designed to be viewed by adults and therefore may be
unsuitable for children under the age of 17.
This is a program broadcast without any rating, such as news, news flashes or sports.
About the extenders of U.S. TV ratings
TV-Y7, TV-PG, TV-14 and TV-MA ratings have additional content ratings called “extenders” to define
additional viewing limits. The extenders are defined as follows:
Extenders
D (Sexually Suggestive Dialog)
FV (Fantasy Violence)
L (Coarse Language)
S (Sexual Situations)
V (Violence)
Explanations
Programs containing suggestive dialog, or sexual innuendo
Programs containing cartoon violence occurring in TV-Y7 programs only
Programs containing coarse language
Programs containing sexual content
Programs containing violence. There may be some profanity, violence or brief nudity in
these programs.
Ratings in Canada
Sony’s predetermined ratings
These are original ratings that Sony predetermined according to the viewer’s age. Each rating allows you to
view the certain programs, as follows:
See below for a description of each rating.
Ratings Viewable Canadian English
Language ratings
CHILD: Suitable for
children under the age of 7
YOUTH: Suitable for children
aged 8 and older
YOUNG ADULT: Suitable for
children aged 14 and older
Additional Operations
50
C and G
C, G, C8+ and PG
C, G, C8+, PG and 14+
Viewable Canadian French
Language ratings
G
G and 8 ans+
G, 8 ans+, 13 ans+
Viewable U.S. TV ratings
TV-Y, TV-G, and TV-NR
TV-Y, TV-Y7, TV-G, TV-PG,
and TV-NR
TV-Y, TV-Y7, TV-G, TV-PG,
TV-14, and TV-NR
Page 51

Canadian English Language ratings
The Canadian English Language ratings are for TV programs in English broadcast in Canada.
Ratings
C
(Programming intended for children
under age 8)
G
(General Audience)
C8+
(Programming generally considered
acceptable for children 8 years and over
to watch on their own)
PG
(Parental Guidance)
14+
(Programming contains themes or
content which may not be suitable for
viewers under the age of 14.)
18+
(Adult)
E
(Exempt)
Note
The E (Exempt) rating is not shown in the menu.
Explanations
There will be no realistic scenes of violence or no offensive language, nudity or sexual
content. Careful attention is paid to themes, which could threaten children’s sense of
security and well-being.
These programs contain very little violence, either physical or verbal or emotional. There
may be some inoffensive slang, no profanity and no nudity.
Violence will not be portrayed as the preferred, acceptable, or only way to resolve conflict;
or encourage children to imitate dangerous acts which they may see on television. There
will be no profanity, nudity or sexual content.
Programming intended for a general audience but which may not be suitable for younger
children. Parents may consider some content inappropriate for unsupervised viewing by
children aged 8–13.
Parents are strongly cautioned to exercise discretion in permitting viewing by pre-teens
and early teens.
These programs contain violence integral to the development of the plot, character or
theme, intended for adult audiences. They may contain graphic language and explicit
portrayals of nudity and/or sex.
Exempt programming includes: news, sports, documentaries and other information
programming; talk shows, music videos, and variety programming.
Canadian French Language ratings
The Canadian French Language ratings are for TV programs in French broadcast in Canada.
Ratings
G
(General)
8 ans+
(8+ General - Not recommended for
young children)
13 ans+
(Programming may not suitable for
children under the age of 13.)
16 ans+
(Programming is not suitable for
children under the age of 16.)
18 ans+
(Programming restricted to adults)
E
(Exempt)
Note
The E (Exempt) rating is not shown in the menu.
Explanations
Programming intended for audience of all ages. These programs contain no violence, or
the violence they contain is minimal or is depicted appropriately with humor or caricature
or in an unrealistic manner.
Programming intended for a broad audience but contains light or occasional violence that
could disturb young children. Viewing with an adult is recommended for young children
(under the age of 8).
Viewing with an adult is strongly recommended for children under 13.
These programs contain frequent scenes of violence or intense violence.
These programs contain constant violence or scenes of extreme violence.
Exempt programming.
Additional Operations
51
Page 52

Setting Your Favorite Channels –
FAVORITE CHANNEL
The FAVORITE CHANNEL feature allows your Video/TV to memorize
EJECT
INPUT
SELECT
MUTING DISPLAY
POWER
TV
SLEEP
the channels that you watch the most. If the feature is set to AUTO, the
last five channels you selected with the 0-9 buttons are automatically set as
your favorite channels. If you want to input your own selection of
channels, set the feature to MANUAL.
TIMER ON SCREEN
RESET
VCR Plus
COUNTER/
REMAIN
COUNTER
RESET
INDEX
TAPE SPEED
REC
X2 PAUSE
REW FF
2
1
5
4
7
8
JUMP ENTER
0
&7
SLOW
SEARCH
PLAY
STOP
MENU
SELECT
3
6
9
CHVOL
1 Press MENU to display the main menu.
2 Move the cursor (z) to “SET UP” with + ◊ or – √ and press SELECT.
3 Move the cursor (z) to “FAVORITE CHANNEL” with + ◊ or – √ and
press SELECT.
The FAVORITE CHANNEL menu appears.
FAVORITE CHANNEL
MODE: AUTO
1.125
2. 7
3. 28
4. 46
5. 31
MENU
MENU
Move Select Exit
SELECT
4 Press SELECT to set the mode.
The MODE position turns red.
FAVORITE CHANNEL
MODE: AUTO
1.125
2. 7
3. 28
4. 46
5. 31
MENU
Move Select Exit
SELECT
MENU
If you have made a mistake
Press ? to return to the previous
position.
To erase the settings
Press RESET while the FAVORITE
CHANNEL menu is displayed.
Additional Operations
52
5 Select “AUTO” or “MANUAL” with + ◊ or – √ and press SELECT.
If you select AUTO, skip steps 6 through 8. The last five channels you
selected with the 0-9 buttons are automatically set as your favorite
channels.
If you select MANUAL, the favorite channel numbers become white,
indicating that favorite channels can be entered.
6 Move the cursor (z) with + ◊ or – √ to select a channel and press SELECT.
The selected position turns red.
FAVORITE CHANNEL
MODE: MANUAL
1.125
2. 7
3. 28
4. 46
5. 31
MENU
Select a channel
Move Select Exit
SELECT
MENU
Page 53

EJECT
MUTING DISPLAY
INPUT
SELECT
TIMER ON SCREEN
VCR Plus
COUNTER/
REMAIN
COUNTER
JUMP ENTER
RESET
INDEX
TAPE SPEED
7 Using + ◊ or – √, select the channel that you want to set as your favorite
POWER
TV
SLEEP
MENU
SELECTRESET
2
1
4
7
3
5
6
9
8
0
CHVOL
channel and press SELECT.
FAVORITE CHANNEL
MODE: MANUAL
1.125
2. 15
3. 28
4. 46
5. 31
MENU
Select a position
Move Select Exit
SELECT
MENU
8 Repeat steps 6 and 7 to set the other favorite channels.
9 Press MENU to return to the original screen.
Selecting your favorite channels
1 Press SELECT.
The favorite channels menu appears.
REC
&7
SLOW
X2 PAUSE
SEARCH
REW FF
PLAY
STOP
125
15
28
46
31
Exit
2 Move the cursor (z) with + ◊ or – √ to select the channel you want to
watch and press SELECT.
The selected channel will appear on the screen.
To exit the favorite channel menu
Press + ◊ or – √ to select “Exit” and press SELECT.
Additional Operations
53
Page 54

Searching Using the Index Function
The Video/TV automatically marks the tape with an index signal at the
EJECT
MUTING DISPLAY
INPUT
SELECT
TIMER ON SCREEN
VCR Plus
COUNTER/
REMAIN
COUNTER
JUMP ENTER
RESET
INDEX
TAPE SPEED
1
4
7
POWER
TV
SLEEP
point where each recording begins. These signals can be used to find a
specific recording.
Playing back to the beginning of
MENU
each program – Index Scan
SELECTRESET
1 Insert a tape with index signals.
2
3
5
6
9
8
0
CHVOL
2 Press INDEX once during playback.
3 Press ) FF or 0 REW to search for individual programs ahead or
behind the current position.
The tape rewinds or rapidly advances to the next index signal.
Each time an index signal is detected, the index scan number appears and
the tape plays for about 5 seconds, then rewinds or rapidly advances to the
next index signal.
REC
To stop searching
Press STOP p.
&7
SLOW
X2 PAUSE
SEARCH
REW FF
PLAY
STOP
INDEX SCAN 01
4 Press PLAY · at the desired program.
Locating the desired program
– Index Search
You can locate a desired program and play it back by designating how
many index signals to skip ahead or behind the current position.
1 Insert a cassette with index signals.
2 Press INDEX.
3 Using the 0-9 buttons, enter the number of index signals you want to skip.
For example, if the tape at INDEX 02 and you want to locate INDEX 05,
press 0 and 3.
4 Press ) FF or 0 REW to begin the search for the program ahead or
behind the current position.
“INDEX SEARCH 03” appears on the screen. When the desired signal is
found, playback begins automatically.
Additional Operations
54
INDEX SEARCH 03
Page 55

Enhancing Video Picture Quality
EJECT
MUTING DISPLAY
INPUT
SELECT
TIMER ON SCREEN
VCR Plus
COUNTER/
REMAIN
COUNTER
RESET
INDEX
TAPE SPEED
REC
X2 PAUSE
REW FF
2
1
5
4
7
8
JUMP ENTER
0
&7
SLOW
SEARCH
PLAY
POWER
TV
SLEEP
MENU
SELECTRESET
3
6
9
CHVOL
Adjusting the tracking
automatically
The tracking condition is automatically adjusted on this Video/TV. The
AUTO TRACKING indicator will appear for three seconds while the
Video/TV is searching for the best tracking condition.
Adjusting the tracking manually
If streaks or snow noise appear on the screen during normal playback or
slow picture, adjust the picture tracking condition manually.
1 Press MENU to display the main menu.
2 Move the cursor (z) to “TAPE” with + ◊ or – √ and press SELECT.
The TAPE menu appears.
TAPE
TAPE REMAIN: T-120
AUTO REPEAT: OFF
NOISE REDUCTION: OFF
TRACKING
MENU
MENU
Move Select Exit
SELECT
STOP
To return to automatic
tracking
Set AUTO to ON in the TRACKING
menu with + ◊ or – √ and press
SELECT.
3 Move the cursor (z) to “TRACKING” with + ◊ or – √ and press SELECT.
The TRACKING menu appears.
TRACKING
AUTO:ON
TRACKING ADJUST
MENU
MENU
Move Select Exit
SELECT
4 Select “TRACKING ADJUST” with + ◊ or – √ and press SELECT.
The tracking meter appears.
TRACKING ADJUST
NORMAL TRACKING
5 Using + ◊ or – √, adjust the tracking until the picture is clear.
6 Press SELECT.
The TRACKING menu reappears.
7 Press MENU to return to the original screen.
Additional Operations
55
Page 56

Reducing the Picture Noise
You can automatically reduce the picture noise on the video playback
EJECT
MUTING DISPLAY
POWER
TV
picture by setting NOISE REDUCTION to ON. Use this feature when you
are playing a well-worn or old video, such as a rental video.
INPUT
SELECT
TIMER ON SCREEN
VCR Plus
COUNTER/
REMAIN
COUNTER
RESET
INDEX
TAPE SPEED
REC
X2 PAUSE
REW FF
2
1
5
4
7
8
JUMP ENTER
0
&7
SLOW
SEARCH
PLAY
STOP
SLEEP
MENU
SELECTRESET
CHVOL
1 Press MENU to display the main menu.
2 Move the cursor (z) to “TAPE” with + ◊ or – √ and press SELECT.
The TAPE menu appears.
TAPE
3
6
TAPE REMAIN: T-120
AUTO REPEAT: OFF
NOISE REDUCTION: OFF
TRACKING
MENU
9
MENU
Move Select Exit
SELECT
3 Move the cursor (z) to “NOISE REDUCTION” with + ◊ or – √ and press
SELECT.
The selected position turns red.
TAPE
TAPE REMAIN: T-120
AUTO REPEAT: OFF
NOISE REDUCTION: OFF
TRACKING
MENU
MENU
Move Select Exit
SELECT
4 Using + ◊ or – √, select “ON” and press SELECT.
The picture noise is reduced.
TAPE
TAPE REMAIN: T-120
AUTO REPEAT: OFF
NOISE REDUCTION: ON
TRACKING
MENU
Move Select Exit
SELECT
MENU
5 Press MENU to return to the original screen.
Additional Operations
56
Page 57

Connecting Optional Equipment
Watching the picture input from
optional equipment
To connect a video camera
Front
Front (KV-20VS42 only)
POWER
STANDBY
EJECT
REC
TIMER REC
VIDEOAUDIO
INPUT
–
VOL
+ –
CHANNEL
+
SELEECT
to VIDEO/AUDIO
jacks
POWER
STANDBY
EJECT
REC
TIMER REC
INPUT
–
VOL
+ –
CHANNEL
+
SELEECT
VIDEO
L AUDIO R
to LINE IN (VIDEO/AUDIO L
(MONO)/R) jacks
to video/audio outputs
To connect a VCR without a cable box
Rear
to VIDEO/AUDIO
jacks
Rear (KV-20VS42 only)
to LINE IN (VIDEO/AUDIO L
(MONO)/R) jacks
Notes
• When connecting optional
equipment, such as videogames,
please use the connecting cables
recommended by the equipment's
manufacturer.
• To connect monaural video
equipment, connect the audio
output of the video equipment to
AUDIO L (MONO) of the video
TV (KV-20VS42 only).
to video/audio outputs
To connect a VCR with a cable box
Rear
to VIDEO/AUDIO
jacks
Rear (KV-20VS42 only)
to LINE IN (VIDEO/AUDIO
L (MONO)/R) jacks
to video/audio outputs
To watch the video input signal
Press INPUT SELECT so that “LINE” appears on the screen.
Additional Operations
Cable box
57
Page 58

Additional Information
Troubleshooting
If, after reading the following instructions, you have additional questions related to the use of your Sony Video/TV,
please call one of the following members (English only).
Customers in the continental United States contact the Direct Response Center at: 1-800-222-SONY (7669)
Customers in Canada contact the Customer Relations Center at: (416) 499-SONY (7669)
Function
TV reception
Clock and
timer
Playback
Problems
No picture (screen is
dark), no sound
Good picture but no
sound
No color or poor color
(screen is dark) for
color programs, but
good sound.
No picture, no sound
from video input
source
Cannot receive VHF or
UHF channels when
using an antenna.
TV is fixed to one
channel
The clock has stopped
and “--/--” is
displayed.
Power is on, but the
tape does not run.
Poor playback picture
Possible causes and remedies
• The AC power cord is disconnected.
/ Connect the AC power cord.
• The Video/TV is switched off.
/ Press POWER.
• The Parental Control feature is activated.
/ See “Activating the Parental Control feature” on page 40.
• The headphones are connected to the 2 jack.
/ Disconnect the headphones.
• MUTING is displayed on the screen.
/ Press MUTING.
• Verify your audio mode (KV-20VS42 only).
/ Check the MTS setting in the AUDIO menu.
• Press VOL+.
• Check antenna/cable connections. (page 5)
• Adjust “PICTURE,” “BRIGHTNESS,” “COLOR,” “HUE,” and “SHARPNESS”
in the VIDEO menu. (page 19)
• The connecting cord between the Video/TV and the input source is
disconnected.
/ Connect it firmly.
• Input is not selected correctly.
/ Press INPUT SELECT until the desired input indicator appears. (page 24)
• Cable setting is not correct.
/ Set CABLE to OFF.
• Cable setting is not correct.
/ Set CHANNEL FIX to OFF.
• The power has been interrupted or the AC power cord is disconnected for
more than 30 minutes.
/ Re-set the clock and timer settings if necessary. (pages 15, 30)
• Moisture has condensed in the Video/TV.
/ Turn the power off, unplug the AC power cord and leave the Video/TV
for about one hour.
• Adjust the tracking. (page 55)
• The video heads are dirty.
/ The video heads are dirty (see page 59). Clean the video heads using a
Sony video head cleaning cassette. If Sony cleaning cassettes are not
available in your area, have the heads cleaned at your nearest Sony
service facility (a standard service charge will be required). Do not use a
commercially available liquid type cleaning cassette other than Sony’s, as
they may damage the video heads.
/ The video heads may have to be replaced. Consult your local Sony dealer
for more information.
Additional Information
58
Page 59

Symptoms caused by contaminated video heads
• Normal picture • Rough picture • Unclear picture • No picture (or
initial terminal
contamination
black& white
screen appears)
Function
Playback
Recording
Timer
recording
Others
Problems
The sound drops out.
The cassette is ejected
when you press
REC r.
Recording does not
function.
Timer settings cannot
be made.
The cassette is ejected
when you press
POWER to set the
timer.
The TIMER REC lamp
does not light up even
though you press
POWER to set the
timer.
Timer recording was
not made.
No sound is recorded
on the audio track.
The picture turns off
and the STANDBY
lamp on the front
panel flashes (selfdiagnosis function)
A cassette cannot be
inserted.
The remote control
does not work.
The VCR does not
operate.
Possible causes and remedies
• The tape is defective.
/ Use a new tape.
• The safety tab of the cassette has been removed.
/ Cover the tab hole with adhesive tape, or use another cassette
with a safety tab. (page 25)
• No cassette has been inserted.
/ Insert a cassette with the safety tab.
• The tape is at its end.
/ Rewind the tape.
• The clock has not been set.
/ Set the current time and date. (page 12)
• You made a mistake when setting the timer.
/ Check the setting steps. (pages 30 through 32)
• The safety tab of the cassette has been removed.
/ Cover the tab hole with adhesive tape, or use another cassette
with a safety tab.
• No cassette has been inserted.
/ Insert a cassette with its safety tab.
• No setting was made for the timer.
/ Set the timer to record a program. (pages 30 through 32)
• You did not press POWER to turn off the Video/TV and set the timer.
• There has been a power interruption lasting more than 30 minutes.
• The Multichannel TV Sound feature was set to SAP but a SAP program was
not being broadcast. (KV-20VS42 only)
/ Set the MTS setting to STEREO or MONO.
• The Video/TV is equipped with a self-diagnosis function. If there is a
problem with your Video/TV, the STANDBY lamp on the front panel will
flash repeatedly. Counting the number of flashes helps you inform qualified
Sony personnel of the Video/TV’s condition.
/ Press POWER on the Video/TV to turn it off, then inform qualified Sony
personnel or the Direct Response Center (page 58) of the number of flashes.
• Another cassette is already inserted.
/Press EJECT 6 to eject the cassette.
• The batteries are low.
/Replace the batteries. (page 4)
• The batteries are installed incorrectly.
/Install the batteries with correct polarities. (page 4)
• Moisture condensation occurred.
/ Turn the power off, unplug the AC power cord and leave the Video/TV
to dry for over one hour.
Additional Information
59
Page 60

Specifications
TV Section
Television system American TV Standard
Channel coverage VHF: 2-13/UHF:14-69/
CATV: 1-125
Picture tube KV-13VM42/43: Microblack
Trinitron® tube
KV-20VM42: Trinitron® Tube
20-inch picture measured
diagonally
KV-20VS42: Trinitron® Tube
20-inch picture measured
diagonally
Screen size KV-13VM42/43: 13-inch
picture measured diagonally
KV-20VM42/KV-20VS42:
20-inch picture measured
diagonally
Antenna 75-ohm external antenna
terminal for VHF/UHF
Video Section
Format VHS NTSC standard
VCR system KV-13VM42/KV-13VM43/KV-
20VM42: Rotary 4-head
helical scanning monaural
system
KV-20VS42: Rotary 4-head
helical scanning Hi-Fi stereo
system
Audio recording system
KV-13VM42/KV-13VM43/
KV-20VM42: Monaural
KV-20VS42: HiFi Stereo
Video signal NTSC color, EIA standards
Tape speed SP: 33.35 mm/s (1 3/8 inches/s)
EP: 11.11 mm/s (7/16 inches/s)
LP: 16.67 mm/s (11/16 inches/s),
playback only
Maximum recording time
8 hours in EP mode (with T-160
tape)
Inputs KV-13VM42/KV-13VM43/KV-
20VM42
VIDEO IN: phono jack (2)
Input level: 1 Vp-p, 75 ohms,
unbalanced, sync negative
KV-20VS42
VIDEO IN: phono jack (2)
Input level: 1 Vp-p, 75 ohms,
unbalanced, sync negative
TM
KV-13VM42/KV-13VM43/
KV-20VM42
AUDIO IN: phono jack (2)
Input level: 500 mVrms
Input impedance: 47 kilohms
KV-20VS42
AUDIO IN: phono jack (4)
Input level: 500 mVrms
Input impedance: 47 kilohms
Headphones jack KV-20VS42: Stereo minijack
KV-13VM42/KV-13VM43/
KV-20VM42: Mono minijack
General
Clock Quartz locked
Clock back up Approx. 30 minutes min.
Power requirements
120 V AC, 60 Hz
Power consumption
TV power ON
KV-13VM42/KV-13VM43:
69 W
KV-20VM42: 88 W
KV-20VS42: 89 W
Standby
KV-13VM42/KV-13VM43/
KV-20VM42/KV-20VS42: 2.9 W
Operating temperature
5°C to 40°C (41°F to 104°F)
Storage temperature
–20°C to 60°C (–4°F to 140°F)
Dimensions KV-13VM42/KV-13VM43:
Approx. 375 × 399 × 408 mm
(w/h/d) (14 7/8 × 15 3/4 ×
16 1/8 inches)
KV-20VM42/KV-20VS42:
Approx. 506 × 514 × 476 mm
(w/h/d) (20 × 20 1/4 ×
18 3/4 inches)
Mass KV-13VM42/KV-13VM43:
Approx. 14.5 kg (31 lbs. 16
oz)
KV-20VM42/KV-20VS42:
Approx. 26 kg (57 lbs. 5 oz)
Accessories supplied
Remote control (1)
Size AA (R6) batteries (2)
Design and specifications are subject to change
without notice.
Additional Information
60
Page 61

Index to Parts and Controls
Video/TV set—front
This section briefly describes the buttons and controls on the Video/TV set and on the remote control.
For more information, refer to the pages next to each description.
1
2
3
4
5
KV-13VM42, KV-13VM43
POWER
STANDBY
EJECT
REC
TIMER REC
INPUT
– VOL + – CHANNEL +
SELEECT
VIDEO AUDIO
VIDEO AUDIO
6
7
8
9
!º
!¡
!™
!£
1
2
3
4
5
KV-20VM42, KV-20VS42
POWER
STANDBY
EJECT
REC
TIMER REC
VIDEO L AUDIO R
INPUT
– VOL + – CHANNEL +
SELEECT
VIDEO
L AUDIO R
6
7
8
9
!º
!¡
!™
!£
1 POWER button (pages 6, 12, 18)
2 Lamps
‰/STANDBY (page 18)
REC (recording) (page 29)
TIMER REC (recording) (pages 32, 35)
3 EJECT 6 button (page 25)
4 2 (headphones) jack (page 24)
5 VIDEO/AUDIO L(MONO)/R jacks (KV-20VS42
only) (page 57)
VIDEO/AUDIO jacks (KV-13VM42, KV-
13VM43, and KV-20VM42 only) (page 57)
6 Tape transport buttons (page 26)
7 Cassette compartment (page 25)
8 REC (recording) r button (page 29)
9 Remote sensor
!º QUICK TIMER REC button (page 34)
!¡ CHANNEL +/– buttons (pages 18, 29)
!™ VOL (volume) +/– buttons (page 18)
!£ INPUT SELECT button (pages 24, 29, 57)
Additional Information
61
Page 62

Remote control
1
2
3
4
5
6
7
8
9
!º
!¡
!™
!£
!¢
!∞
!§
EJECT
MUTING DISPLAY
INPUT
SELECT
TIMER ON
SCREEN
VCR Plus
COUNTER/
REMAIN
COUNTER
RESET
INDEX
TAPE SPEED
REC
X2 PAUSE
REW FF
2
1
5
4
7
8
JUMP ENTER
0
&7
SLOW
SEARCH
PLAY
STOP
POWER
TV
SLEEP
MENU
SELECTRESET
CHVOL
1 MUTING (muting) (page 18)
2 EJECT 6 (page 25)
!¶
!•
!ª
3 INPUT SELECT (pages 24, 29, 57)
4 TIMER ON SCREEN (pages 30, 32, 33)
5 VCR Plus (page 35)
6 COUNTER/REMAIN (page 28)
@º
7 COUNTER RESET (pages 25, 28)
8 JUMP (page 18)
3
9 INDEX (page 54)
!º TAPE SPEED (pages 29, 35)
6
@¡
9
@™
!¡ SLOW & +/– (page 26)
!™ REC (recording) r (page 29)
!£ X2 (page 26)
!¢ SEARCH 0/) (page 26)
!∞ REW (rewind) 0 (page 26)
@£
@¢
@∞
!§ STOP p (page 26)
!¶ DISPLAY (pages 24, 28)
!• POWER (pages 6, 12, 18)
!ª SLEEP (page 37)
@§
@¶
@º Menu operation buttons (pages 7, 19, 36, 40)
MENU
SELECT
@•
+ ◊/– √
RESET
? (back space)
@¡ 0–9 (pages 18, 29, 35, 41)
@™ ENTER (pages 17, 42)
@£ CH (channel) +/– (pages 18, 29)
@¢ VOL (volume) +/– (page 18)
@∞ 7 (frame) (page 26)
@§ PAUSE P (pages 26, 29)
@¶ PLAY · (page 26)
@• FF ) (fast forward) (pages 26, 54)
Additional Information
62
Page 63

Additional Information
63
Page 64

AVERTISSEMENT
Précautions
Afin d’éviter tout risque d’incendie ou
d’électrocution, ne pas exposer l’appareil à la
pluie ni à l’humidité.
Ce symbole est destiné à avertir l’utilisateur
de la présence à l’intérieur du boîtier de cet
appareil d’une “tension dangereuse” non
isolée d’une magnitude suffisante pour
constituer un risque d’électrocution.
Ce symbole est destiné à attirer l’attention de
l’utilisateur sur la présence d’importantes
instructions d’utilisation et de maintenance
(entretien) dans les documents qui
accompagnent l’appareil.
ATTENTION
POUR EVITER TOUT RISQUE D’ELECTROCUTION,
N’UTILISEZ PAS CETTE FICHE D’ALIMENTATION
SECTEUR POLARISEE AVEC UN PROLONGATEUR, UNE
PRISE DE COURANT OU AVEC UNE AUTRE PRISE SI LES
LAMES NE PEUVENT ETRE INTRODUITES
COMPLETEMENT AFIN D’EVITER QUE DES PARTIES DE
LAME NUE RESTENT EXPOSEES.
Lorsque vous utilisez des jeux vidéo, des ordinateurs et
autres produits similaires avec votre téléviseur de projection,
maintenez les réglages de luminosité et de contraste sur de
faibles valeurs. Si une image fixe (non animée) reste affichée
à l’écran pendant de longues périodes alors que la
luminosité et le contraste sont réglés sur des valeurs élevées,
l’image peut rester définitivement incrustée sur l’écran. Ces
types d’incrustations ne sont pas couvertes par notre
garantie parce qu’elles résultent d’une utilisation
inappropriée.
Remarque pour l’installateur du
système CATV
La présente remarque est destinée à attirer l’attention des
installateurs du système CATV sur l’article 820-40 du NEC
qui stipule les instructions relatives à une mise à la terre
adéquate. Il prévoit plus particulièrement que le câble de
mise à la terre doit être raccordé au circuit de terre du
bâtiment aussi près que possible de l’entrée du câble.
Remarque sur la condensation
Si le téléviseur/vidéo est transporté directement d’un
endroit froid dans un endroit chaud, de l’humidité risque de
se condenser à l’intérieur du magnétoscope et
d’endommager la tête vidéo ou la bande magnétique.
Lorsque vous installez le téléviseur/vidéo pour la première
mise en service ou lorsque vous le transportez d’un endroit
froid dans un endroit chaud, attendez environ une heure
avant de le faire fonctionner.
Préparation
2
Sécurité
• Faites uniquement fonctionner le téléviseur/vidéo sur une
tension de 120 V CA.
• L’une des lames de la fiche est plus large que les autres
pour des raisons de sécurité et ne s’adapte dans la prise
que dans un seul sens. Si vous ne parvenez pas à
introduire complètement la fiche dans la prise, prenez
contact avec votre revendeur Sony.
• Si un liquide ou un solide venait à s’introduire à l’intérieur
du téléviseur/vidéo, débranchez le cordon d’alimentation
et faites-le vérifier par le personnel qualifié avant de le
remettre en service.
• Débranchez le téléviseur/vidéo de la prise murale si vous
prévoyez de ne pas l’utiliser pendant une période
prolongée. Pour débrancher le cordon, saisissez-le par la
fiche. Ne tirez jamais sur le cordon proprement dit.
Installation
• Pour éviter toute surchauffe interne, n’obstruez pas les
ouïes de ventilation.
• N’installez pas le téléviseur/vidéo dans un endroit chaud
ou humide ni dans un endroit soumis à de la poussière en
excès ou à des vibrations mécaniques.
Entretien
Nettoyez le téléviseur/vidéo à l’aide d’un chiffon doux et
sec. N’utilisez en aucun cas de solvants puissants comme du
diluant ou de la benzine, qui risqueraient de ternir le fini du
châssis.
Transport
Conservez le carton et les matériaux de conditionnement
d’origine afin d’assurer un éventuel transport ultérieur du
téléviseur/vidéo dans les meilleures conditions possibles.
Information
Attention : Tout changement ou modification non
explicitement approuvé dans le présent mode d’emploi peut
invalider votre droit à utiliser cet appareil.
Si vous avez des questions ou des problèmes concernant
votre téléviseur/vidéo, veuillez consulter votre revendeur
Sony.
Ce téléviseur/vidéo affiche des sous-titres conformément
aux critères 15.119 du règlement FCC.
Attention
Les émissions télévisées, les films, les cassettes vidéo et
autres matériaux peuvent être protégés par des droits
d’auteur. L’enregistrement non autorisé de tels matériaux
peut être en infraction avec la législation sur les droits
d’auteur. De même, l’utilisation de ce téléviseur/vidéo à
d’autres fins que la visualisation privée d’émissions
diffusées en UHF ou en VHF ou retransmises par des
compagnies de télévision par câble et destinées au grand
public peut requérir l’autorisation de la chaîne de télévision,
de la compagnie de télévision par câble et/ou du
propriétaire de l’émission.
Références utilisateur
Les numéros de modèle et de série sont situés à l’arrière du
téléviseur vidéo. Inscrivez le numéro de série dans les
espaces prévus à cet effet ci-dessous. Signalez ces numéros
de référence lorsque vous prenez contact avec votre
distributeur Sony au sujet de ce produit.
Modèle nº Nº de série
Page 65

Contenu
Préparation
1re étape — Préparation ............................................ 4
Vérification des accessoires fournis .......................4
Installation des piles dans la télécommande........ 4
2e étape — Raccordement de l’antenne .................. 5
Raccordement d’une antenne ................................. 5
Raccordement d’une antenne/réseau de
télédistribution ..................................................... 5
3e étape — Installation automatique du
téléviseur/vidéo – AUTO SET UP......................... 6
Suppression et ajout de chaînes ............................. 7
Activation/désactivation de la télédistribution...9
Présélection de chaînes
– PROGRAMMATION AUTO ........................................... 10
Changement de la langue d’affichage des menus .... 11
4e étape — Réglage de l’horloge ............................ 12
Réglage automatique de l’horloge ....................... 12
Réglage manuel de la date et de l’heure ............. 15
5e étape — Réglage du système VCR Plus+ * ..... 16
Réglage du guide de chaîne .................................. 16
Opérations de base
Regarder la télévision............................................... 18
Mise sous et hors tension du téléviseur/vidéo.. 18
Sélection d’émissions télévisées ........................... 18
Réglage du volume ................................................ 18
Coupure du son ...................................................... 18
Commutation rapide de deux chaînes ................ 18
Réglage de l’image ................................................. 19
Réglage du son (KV-20VS42 uniquement) ......... 20
Sélection d’émissions stéréo ou bilingues
(KV-20VS42 uniquement) ................................. 21
Activation du son spatial (KV-20VS42 uniquement) ... 23
Affichage d’informations à l’écran ...................... 24
Visualisation d’un signal d’entrée vidéo via les
prises d’entrée de ligne ..................................... 24
Ecouter avec un casque d’écoute ......................... 24
Lecture d’une cassette .............................................. 25
Introduction d’une cassette vidéo........................ 25
Ejection d’une cassette vidéo ................................ 25
Protection d’une cassette contre l’effacement
accidentel.............................................................25
Remise à zéro du compteur de bande ................. 25
Lecture d’une cassette............................................ 26
Lecture répétée d’une cassette – REPETITION AUTO ..... 27
Affichage d’informations à l’écran ...................... 28
Affichage du compteur de bande ........................ 28
Enregistrement d’émissions télévisées .................. 29
Enregistrement d’émissions télévisées................ 29
Enregistrement avec le téléviseur hors tension..29
Enregistrement d’émissions télévisées à l’aide du
programmateur....................................................... 30
Réglage du programmateur.................................. 30
Utilisation du téléviseur/vidéo avant le début
d’un enregistrement par programmateur ...... 32
Vérification des réglages du programmateur .... 33
Modification ou annulation des réglages du
programmateur .................................................. 33
Enregistrement à l’aide du programmateur rapide
– QUICK PROGRAMMATEUR ......................................... 34
Enregistrement d’émissions télévisées à l’aide du
système VCR Plus+
................................................................................
Opérations complémentaires
Mise sous ou hors tension automatique du
téléviseur/vidéo — MINUTERIE.................................... 36
Mise hors tension automatique
— Programmateur d’extinction............................................... 37
Sélection de la chaîne d’entrée du décodeur du
téléviseur/vidéo — CANAL FIXE .................................. 38
Affichage de sous-titres/XDS ................................. 39
Blocage de programmes télévisés
— Contrôle parental .................................................................... 40
Activation de la fonction de contrôle parental... 40
Sélection d’un classement personnalisé aux
Etats-Unis ............................................................43
Sélection d’un classement personnalisé
au Canada ........................................................... 46
Changement du mot de passe .............................. 47
Si vous avez oublié votre mot de passe .............. 48
Ce que les classements signifient ........................... 49
Classements aux Etats-Unis ..................................49
Classements au Canada......................................... 50
Sélection de vos chaînes favorites — CANAL PREFERE .. 52
Recherche à l’aide de la fonction d’index..............54
Lecture du début de chaque enregistrement
– Balayage des index.................................................................. 54
Localisation d’un enregistrement déterminé
– Recherche d’index ............................................................. 54
Optimisation de la qualité de l’image....................55
Réglage automatique de l’alignement................. 55
Réglage manuel de l’alignement .......................... 55
Réduction des parasites dans l’image....................56
Raccordement d’un appareil en option .................57
Visualisation de l’image d’un appareil
en option ............................................................. 57
Informations complémentaires
Dépannage ................................................................. 58
Spécifications............................................................. 60
Index des composants et des commandes ............ 61
Téléviseur/vidéo — Avant ................................... 61
Télécommande........................................................ 62
* VCR Plus+ et PlusCode sont des marques déposées de
Gemstar Development Corporation.
Le système VCR Plus+ est fabriqué sous licence de Gemstar
Development Corporation.
Les instructions contenues dans le présent mode
d’emploi concernent les modèles KV-13VM42,
KV-13VM43, KV-20VM42 et KV-20VS42. Avant
d’entamer la lecture de ce mode d’emploi, vérifiez
la désignation de votre modèle à l’arrière du
téléviseur/vidéo. C’est le modèle KV-20VS42 qui
est représenté dans les illustrations de ce mode
d’emploi. Toute différence de fonctionnement est
clairement indiquée dans le texte, par exemple
“KV-20VS42 uniquement”.
Préparation
35
FR
3
Page 66

Préparation
1re étape — Préparation
Vérification des accessoires fournis
Lorsque vous avez tout retiré du carton, vérifiez si vous avez bien reçu les
accessoires suivants :
• Télécommande
• Deux piles AA (R6)
Installation des piles
Introduisez deux piles AA (R6) en
faisant correspondre les pôles + et –
des piles au diagramme à l’intérieur
du compartiment à piles.
Introduisez d’abord le pôle négatif
(–) et poussez ensuite sur la pile
jusqu’à ce que le côté positif (+)
s’encliquette en position.
Remarques
• Dans des conditions normales
d’utilisation, les piles offrent une
autonomie d’environ six mois.
• Si vous prévoyez de ne pas utiliser
la télécommande pendant une
période prolongée, retirez-en les
piles fin d’éviter tout dommage
causé par une fuite des piles.
• N’utilisez pas une pile usagée et
une pile neuve en même temps.
• N’utilisez pas des piles de types
différents.
Installation des piles dans la
télécommande
Retournez la télécommande
et retirez le couvercle.
Vérifiez la polarité et installez
correctement les deux piles AA (R6).
Préparation
4
Page 67

2e étape — Raccordement de
l’antenne
Bien que vous puissiez utiliser une antenne intérieure ou externe avec
votre téléviseur/vidéo, nous recommandons une antenne externe ou un
réseau de télédistribution par câble de façon à obtenir la meilleure qualité
d’image possible.
Raccordement d’une antenne
Branchez votre câble d’antenne sur la borne d’antenne VHF/UHF. Si vous
ne raccordez pas directement votre câble d’antenne à la borne, exécutez les
instructions de raccordement qui s’appliquent à votre type de câble.
A
Câble coaxial de
75 ohms
B
Câble bifilaire de
300 ohms
Connecteur d‘antenne
(non fourni)
C
Câble coaxial et
câble bifilaire
(arrière du téléviseur/vidéo)
VHF/UHF
(arrière du téléviseur/vidéo)
VHF/UHF
(arrière du téléviseur/vidéo)
VHF/UHF
Mixeur U/V EAC-66
(non fourni)
Raccordement d’une antenne/
réseau de télédistribution
Raccordement d’un simple câble à l’antenne
Raccordez directement le câble à l’antenne
(arrière du téléviseur/vidéo)
VHF/UHF
Remarques
• La plupart des antennes
combinées VHF/UHF sont
équipées d’un répartiteur de
signal. Retirez le répartiteur avant
de fixer le connecteur approprié.
• Si vous utilisez le mixeur U/V, de
la neige et des parasites peuvent
apparaître dans l’image lorsque
vous visualisez des chaînes de
télévision par câble au delà du
numéro 37 (W+1).
• Le décodeur est fourni par la
compagnie de télédistribution par
câble.
Raccordement à un décodeur
Certains réseaux de télévision par câble payants utilisent des signaux
brouillés ou codés qui requièrent un décodeur pour pouvoir visualiser
toutes les chaînes.
Si vous commandez toutes les chaînes via votre décodeur, il serait
préférable d’utiliser la fonction CANAL FIXE (voir “Sélection de la chaîne
d’entrée du décodeur du téléviseur/vidéo – CANAL FIXE” à la page 38.)
(arrière du téléviseur/vidéo)
VHF/UHF
Préparation
5
Page 68

3e étape — Installation automatique
du téléviseur/vidéo –
Vous pouvez installer votre téléviseur/vidéo de manière simplifiée grâce
à la fonction AUTO SET UP. Pour configurer chaque paramètre
individuellement, reportez-vous aux sections “Changement de la langue
d’affichage des menus” (page 11), “Activation/désactivation de la
télédistribution” (page 9) et “Présélection de chaînes de télévision – AUTO
PROGRAMMATION” (page 10).
POWER
STANDBY
EJECT
REC
TIMER REC
INPUT
– VOL + – CHANNEL +
SELEECT
POWER VOL +/– CHANNEL +/–
Avant de commencer
• Raccordez l’antenne ou le câble au téléviseur/vidéo.
1 Appuyez sur POWER pour mettre le téléviseur/vidéo sous tension.
ENGLISH : [CH+
~
ESPANOL : [CH–
FRANÇAIS : [VOL+
AUTO SET UP : [VOL–
First please connect
the antenna
Press [INPUT SELECT
to exit
2 Sélectionnez la langue d’affichage des menus.
Si vous préférez le français ou l’espagnol à l’anglais, vous pouvez changer
la langue d’affichage des menus en appuyant sur la touche VOL + pour le
français ou CHANNEL – pour l’espagnol.
]
]
]
]
]
AUTO SET UP
Pour restaurer les réglages par
défaut
Appuyez sur la touche POWER du
téléviseur/vidéo tout en maintenant
la touche RESET de la
télécommande enfoncée.
ENGLISH : [CH+
~
ESPANOL : [CH–
FRANÇAIS : [VOL+
AUTO SET UP : [VOL–
Raccorder d’abord
l’antenne
Appuyer sur [INPUT SELECT
pour quitter
]
]
]
]
]
Tous les écrans de menu apparaissent dans la langue d’affichage
sélectionnée par défaut.
3 Appuyez sur VOL – pour lancer la fonction AUTO SET UP.
PROGRAMMATION AU TO
L’indication “PROGRAMMATION AUTO” apparaît à l’écran et le
téléviseur/vidéo entame l’exploration et la présélection automatiques des
chaînes de télévision. Lorsque toutes les chaînes captables ont été
présélectionnées, l’indication “PROGRAMMATION AUTO” disparaît et la
chaîne dont le numéro est le plus petit est visualisée à l’écran.
Préparation
6
Pour quitter AUTO SET UP
Appuyez sur INPUT SELECT.
Page 69

EJECT
INPUT
SELECT
MUTING DISPLAY
POWER
TV
SLEEP
Suppression et ajout de chaînes
Au terme de la procédure AUTO SET UP, vous pouvez supprimer des
chaînes jugées inutiles ou en ajouter d’autres.
TIMER ON SCREEN
VCR Plus
COUNTER/
REMAIN
COUNTER
RESET
INDEX
TAPE SPEED
REC
X2 PAUSE
REW FF
2
1
5
4
7
8
JUMP ENTER
0
&7
SLOW
SEARCH
PLAY
STOP
MENU
SELECTRESET
1 Appuyez sur MENU pour afficher le menu principal.
Le menu principal s’affiche.
V IDEO
3
6
9
AUDIO
PROGRAMMATEUR
CASSETTE
REGLAGE
Aller Choisir Sortie
SELECT
MENU
2 Déplacez le curseur (z) sur “REGLAGE” à l’aide de la touche + ◊ ou – √ et
CHVOL
appuyez ensuite sur SELECT.
Le menu REGLAGE apparaît.
REGLAGE
REGLAGE DE CANAUX
CONTROLE PARENTAL
CANAL PREFERE
CAPTION VISION: CC 1
LANGUE: FRANÇAIS
MENU
Aller Choisir Sortie
SELECT
MENU
3 Déplacez le curseur (z) sur “REGLAGE DE CANAUX” à l’aide de la
touche + ◊ ou – √ et appuyez ensuite sur SELECT.
Le menu REGLAGE DE CANAUX apparaît.
REGLAGE DE CANAUX
CABLE: NON
CANAL FIXE: NON
PROGRAMMATION AUTO
SAUTE/AJOUTE CANAL
REGLAGE VCR P l u s +
MENU
Remarque
Si l’indication SAUTE/AJOUTE
CANAL apparaît en noir, cela
signifie que le téléviseur/vidéo est
réglé pour recevoir un signal
d’entrée vidéo via les prises d’entrée
et vous ne pouvez pas sélectionner
SAUTE/AJOUTE CANAL.
Appuyez sur INPUT SELECT de
façon à ce qu’un numéro de chaîne
apparaisse à l’écran.
Aller Choisir Sortie
SELECT
MENU
4 Déplacez le curseur (z) sur “SAUTE/AJOUTE CANAL” à l’aide de la
touche + ◊ ou – √ et appuyez ensuite sur SELECT.
Le menu SAUTE/AJOUTE CANAL apparaît.
SAUTE/AJOUTE CANAL
SAUTE
AJOUTE
MENU
Utiliser[0–9
pour sélectionner le
canal
Aller Choisir Sortie
]ou[
CH+/–
SELECT
2
]
MENU
Préparation
7
Page 70

EJECT
MUTING DISPLAY
INPUT
SELECT
TIMER ON SCREEN
VCR Plus
COUNTER/
REMAIN
COUNTER
RESET
INDEX
TAPE SPEED
REC
X2 PAUSE
REW FF
2
1
5
4
7
8
JUMP ENTER
0
&7
SLOW
SEARCH
PLAY
POWER
TV
SLEEP
MENU
SELECTRESET
3
6
9
CHVOL
5 Suppression et/ou ajout de chaînes:
Pour supprimer une chaîne jugée inutile
(1) Amenez le curseur (z) en regard de SAUTE.
(2) Appuyez sur les touches CH +/– ou 0 à 9 pour sélectionner la chaîne
que vous voulez supprimer et appuyez ensuite sur SELECT.
SAUTE/AJOUTE CANAL
SAUTE
AJOUTE
MENU
Utiliser[0–9
pour sélectionner le
canal
Aller Choisir Sortie
]ou[
CH+/–
SELECT
Le message “Ce canal sera ignoré” apparaît pendant quelques secondes et
le curseur (z) se déplace sur AJOUTE.
Pour ajouter une chaîne
(1) Amenez le curseur (z) en regard de AJOUTE.
(2) Appuyez sur les touches CH +/– ou 0 à 9 pour sélectionner la chaîne
que vous voulez ajouter et appuyez ensuite sur SELECT.
SAUTE/AJOUTE CANAL
SAUTE
AJOUTE
MENU
Utiliser[0–9
pour sélectionner le
canal
Aller Choisir Sortie
]ou[
CH+/–
SELECT
3
]
MENU
3
]
MENU
STOP
Le message “Ce canal a été ajouté” apparaît et le curseur (z) se déplace sur
SAUTE.
6 Pour supprimer et/ou ajouter d’autres chaînes, répétez l’étape 5.
7 Appuyez sur MENU pour revenir à l’écran de départ.
Préparation
8
Page 71

EJECT
MUTING DISPLAY
INPUT
SELECT
TIMER ON SCREEN
VCR Plus
COUNTER/
REMAIN
COUNTER
RESET
INDEX
TAPE SPEED
REC
X2 PAUSE
REW FF
2
1
5
4
7
8
JUMP ENTER
0
&7
SLOW
SEARCH
PLAY
STOP
POWER
TV
SLEEP
MENU
SELECTRESET
3
6
9
CHVOL
Activation/désactivation de la
télédistribution
Si vous avez raccordé votre téléviseur/vidéo à un réseau de
télédistribution, réglez CABLE sur OUI (réglage par défaut). Sinon, réglez
CABLE sur NON pour visualiser des chaînes VHF ou UHF.
1 Appuyez sur MENU pour afficher le menu principal.
2 Déplacez le curseur (z) sur “REGLAGE” à l’aide de la touche + ◊ ou – √ et
appuyez ensuite sur SELECT.
Le menu REGLAGE apparaît.
REGLAGE
REGLAGE DE CANAUX
CONTROLE PARENTAL
CANAL PREFERE
CAPTION VISION: CC 1
LANGUE: FRANÇAIS
MENU
Aller Choisir Sortie
SELECT
3 Déplacez le curseur (z) sur “REGLAGE DE CANAUX” à l’aide de la
touche + ◊ ou – √ et appuyez ensuite sur SELECT.
Le menu REGLAGE DE CANAUX apparaît.
REGLAGE DE CANAUX
CABLE: NON
CANAL FIXE: NON
PROGRAMMATION AUTO
SAUTE/AJOUTE CANAL
REGLAGE VCR P l u s +
MENU
MENU
Remarque
Si l’indication CABLE apparaît en
noir, cela signifie que le téléviseur/
vidéo est réglé pour recevoir le
signal d’entrée vidéo via les prises
d’entrée et vous ne pouvez pas
sélectionner CABLE. Appuyez sur
INPUT SELECT de façon à ce qu’un
numéro de chaîne apparaisse à
l’écran.
Aller Choisir Sortie
SELECT
MENU
4 Déplacez le curseur (z) sur “CABLE” à l’aide de la touche + ◊ ou – √ et
appuyez ensuite sur SELECT.
La position sélectionnée vire au rouge.
REGLAGE DE CANAUX
CABLE: NON
CANAL FIXE: NON
AUTO PROGRAMMATION
SAUTE/AJOUTE CANAL
REGLAGE VCR P l u s +
MENU
Aller Choisir Sortie
SELECT
MENU
5 A l’aide de la touche + ◊ ou – √, sélectionnez “OUI” ou “NON” et appuyez
ensuite sur SELECT.
REGLAGE DE CANAUX
CABLE: OUI
CANAL FIXE: NON
AUTO PROGRAMMATION
SAUTE/AJOUTE CANAL
REGLAGE VCR P l u s +
MENU
Aller Choisir Sortie
SELECT
MENU
6 Appuyez sur MENU pour revenir à l’écran de départ.
Préparation
9
Page 72

EJECT
MUTING DISPLAY
POWER
TV
Présélection de chaînes –
PROGRAMMATION AUTO
INPUT
SELECT
TIMER ON SCREEN
VCR Plus
COUNTER/
REMAIN
COUNTER
RESET
INDEX
TAPE SPEED
REC
X2 PAUSE
REW FF
2
1
5
4
7
8
JUMP ENTER
0
&7
SLOW
SEARCH
PLAY
STOP
SLEEP
MENU
SELECTRESET
Vous pouvez présélectionner des chaînes télévisées de manière simplifiée
à l’aide de la fonction PROGRAMMATION AUTO. Présélectionnez les
chaînes pendant la journée plutôt que le soir lorsque certaines stations ne
diffusent plus leurs émissions.
3
6
9
1 Appuyez sur MENU pour afficher le menu principal.
2 Déplacez le curseur (z) sur “REGLAGE” à l’aide de la touche + ◊ ou – √ et
appuyez ensuite sur SELECT.
Le menu REGLAGE apparaît.
CHVOL
REGLAGE
REGLAGE DE CANAUX
CONTROLE PARENTAL
CANAL PREFERE
CAPTION VISION: CC 1
LANGUE: FRANÇAIS
MENU
Aller Choisir Sortie
SELECT
MENU
3 Déplacez le curseur (z) sur “REGLAGE DE CANAUX” à l’aide de la
touche + ◊ ou – √ et appuyez ensuite sur SELECT.
Le menu REGLAGE DE CANAUX apparaît.
REGLAGE DE CANAUX
CABLE: NON
CANAL FIXE: NON
PROGRAMMATION AUTO
SAUTE/AJOUTE CANAL
REGLAGE VCR P l u s +
MENU
Chaînes captables à l’aide du
téléviseur/vidéo
VHF: 2 – 13
UHF: 14 – 69
Câble: 1 – 125
Remarque
Si l’indication PROGRAMMATION
AUTO apparaît en noir, cela signifie
que le téléviseur/vidéo est réglé
pour recevoir un signal d’entrée
vidéo via les prises d’entrée et vous
ne pouvez pas sélectionner
PROGRAMMATION AUTO.
Appuyez sur INPUT SELECT de
façon à ce qu’un numéro de chaîne
apparaisse à l’écran.
Pour supprimer des chaînes
jugées inutiles ou ajouter
d’autres chaînes
Voir “Suppression et ajout de
chaînes” (page 7).
Préparation
10
Aller Choisir Sortie
SELECT
MENU
4 Déplacez le curseur (z) sur “PROGRAMMATION AUTO” à l’aide de la
touche + ◊ ou – √ et appuyez ensuite sur SELECT.
PROGRAMMATION AU TO
L’indication “PROGRAMMATION AUTO” apparaît à l’écran et le
téléviseur/vidéo entame l’exploration et la présélection automatiques des
chaînes de télévision. Lorsque toutes les chaînes captables ont été
présélectionnées, l’indication “PROGRAMMATION AUTO” disparaît et la
chaîne dont le numéro est le plus petit est visualisée à l’écran.
5 Appuyez sur MENU pour revenir à l’écran de départ.
Pour quitter AUTO PROGRAMMATION
Appuyez sur une touche.
Page 73

EJECT
MUTING DISPLAY
INPUT
SELECT
TIMER ON SCREEN
POWER
TV
SLEEP
MENU
Changement de la langue
d’affichage des menus
Si vous préférez le français ou l’espagnol à l’anglais, changez la langue
d’affichage des menus selon la procédure suivante.
VCR Plus
COUNTER/
REMAIN
COUNTER
RESET
INDEX
TAPE SPEED
REC
X2 PAUSE
REW FF
2
1
5
4
7
8
JUMP ENTER
0
&7
SLOW
SEARCH
PLAY
STOP
SELECTRESET
3
6
1 Appuyez sur MENU pour afficher le menu principal.
2 Déplacez le curseur (z) sur “REGLAGE” à l’aide de la touche + ◊ ou – √ et
appuyez ensuite sur SELECT.
Le menu REGLAGE apparaît.
9
CHVOL
REGLAGE
REGLAGE DE CANAUX
CONTROLE PARENTAL
CANAL PREFERE
CAPTION VISION: CC 1
LANGUE: FRANÇAIS
MENU
Aller Choisir Sortie
SELECT
MENU
3 Déplacez le curseur (z) sur “LANGUE” à l’aide de la touche + ◊ ou – √ et
appuyez ensuite sur SELECT.
La position sélectionnée vire au rouge.
REGLAGE
REGLAGE DE CANAUX
CONTROLE PARENTAL
CANAL PREFERE
CAPTION VISION: CC 1
LANGUE: FRANÇAIS
MENU
Aller Choisir Sortie
SELECT
MENU
4 A l’aide de la touche + ◊ ou – √, sélectionnez la langue de votre choix et
appuyez ensuite sur SELECT.
Le menu entier apparaît dans la langue sélectionnée.
REGLAGE
REGLAGE DE CANAUX
CONTROLE PARENTAL
CANAL PREFERE
CAPTION VISION: CC 1
LANGUE: FRANÇAIS
MENU
Aller Choisir Sortie
SELECT
MENU
5 Appuyez sur MENU pour revenir à l’écran de départ.
Préparation
11
Page 74

4e étape — Réglage de l’horloge
EJECT
MUTING DISPLAY
INPUT
SELECT
TIMER ON SCREEN
VCR Plus
COUNTER/
REMAIN
COUNTER
RESET
INDEX
TAPE SPEED
REC
X2 PAUSE
REW FF
2
1
5
4
7
8
JUMP ENTER
0
&7
SLOW
SEARCH
PLAY
STOP
POWER
TV
SLEEP
MENU
SELECTRESET
3
6
9
CHVOL
Réglage automatique de l’horloge
Certaines chaînes de télévision et chaînes câblées transmettent des signaux
horaires en même temps que leurs émissions. Votre téléviseur/vidéo peut
capter ces signaux horaires pour régler l’horloge automatiquement (AUTO
CLOCK). La fonction AUTO CLOCK est uniquement opérante si une
chaîne de votre zone géographique retransmet un signal horaire. Si votre
téléviseur/vidéo ne peut capter les signaux, réglez l’horloge
manuellement (page 15).
1 Appuyez sur MENU pour afficher le menu principal.
2 Déplacez le curseur (z) sur “PROGRAMMATEUR” à l’aide de la touche +
◊ ou – √ et appuyez ensuite sur SELECT.
Le menu PROGRAMMATEUR apparaît.
PROGRAMMATEUR
HEURE
MINUTERIE
MENU
DIM 12:00 AM
Aller Choisir Sortie
SELECT
3 Déplacez le curseur (z) sur “HEURE” à l’aide de la touche + ◊ ou – √ et
appuyez ensuite sur SELECT.
Le menu HEURE apparaît.
HEURE
AUTO
MANUEL
MENU
MENU
Remarque
Si seulement quelques chaînes de
télévision de votre zone
géographique diffusent des signaux
horaires, le réglage automatique de
l’horloge peut prendre environ 45
minutes. Si rien ne se produit même
après avoir attendu environ 45
minutes, réglez l’horloge
manuellement.
Préparation
12
Aller Choisir Sortie
SELECT
MENU
4 Déplacez le curseur (z) sur “AUTO” à l’aide de la touche + ◊ ou – √ et
appuyez ensuite sur SELECT.
Le menu AUTO HEURE apparaît.
AUTO HEURE
TOUT AUTO
OPTIONS
Aller Choisir Sortie
SELECT
MENU
5 Déplacez le curseur (z) sur “TOUT AUTO” à l’aide de la touche + ◊ ou – √
et appuyez ensuite sur SELECT.
Le message “Veuillez mettre le TV hors tension pour recevoir des données
d’horloge” s’affiche pendant 5 secondes.
6 Pour activer la fonction de réglage automatique de l’horloge, appuyez sur
POWER pour mettre le téléviseur/vidéo hors tension.
Les signaux horaires règlent automatiquement l’heure suivant votre
fuseau horaire ainsi que, le cas échéant, suivant l’heure d’été.
Page 75

EJECT
MUTING DISPLAY
INPUT
SELECT
TIMER ON SCREEN
VCR Plus
COUNTER/
REMAIN
COUNTER
JUMP ENTER
RESET
INDEX
POWER
TV
Si l’horloge ne démarre pas
Si l’horloge est activée mais que votre fuseau horaire ou l’heure d’été n’ont
pas été réglés correctement, vous pouvez régler ces paramètres
manuellement. Si vous habitez à proximité de la limite d’un fuseau
SLEEP
MENU
SELECTRESET
horaire, il se peut que l’horloge du téléviseur/vidéo ne corresponde pas
aux heures de diffusion réelles des émissions télévisées. Pour vérifier le
fuseau horaire auquel appartient le service de télédiffusion, consultez
votre compagnie de câblodistribution et réglez l’horloge suivant les
informations qu’elle vous aura communiquées.
2
1
3
1 Exécutez les étapes 1 à 5 de la procédure de “Réglage automatique de
5
4
7
6
9
8
0
CHVOL
l’horloge” et sélectionnez “OPTIONS” à l’étape 5.
Le menu HEURE CANAL apparaît.
HEURE CANAL
AUTO
MANUEL CH___
TAPE SPEED
REC
&7
SLOW
X2 PAUSE
SEARCH
REW FF
PLAY
STOP
Aller Choisir Sortie
SELECT
MENU
Si vous connaissez le numéro d’une chaîne qui diffuse un signal
horaire
(1) Déplacez le curseur (z) sur “MANUEL” à l’aide de la touche + ◊ ou – √
et appuyez ensuite sur SELECT.
La position CH vire au rouge.
(2) A l’aide des touches 0 à 9, introduisez le numéro de la chaîne et
appuyez ensuite sur SELECT. Omettez ensuite les étapes 2 à 5.
2 Déplacez le curseur (z) sur “AUTO” à l’aide de la touche + ◊ ou – √ et
appuyez ensuite sur SELECT.
Le menu AUTO HEURE apparaît.
AUTO HEURE
FUSEAU HORAIRE: AUTO
HEURE D’ETE: AUTO
OK
Aller Choisir Sortie
SELECT
MENU
3 Déplacez le curseur (z) sur “FUSEAU HORAIRE” à l’aide de la touche + ◊
ou – √ et appuyez ensuite sur SELECT.
Le menu FUSEAU HORAIRE apparaît.
FUSEAU HORAIRE
AUTO
ATLANTIQUE
EST
CENTRE
MONTAGNES
PACIFIQUE
ALASKA
HAWAII
OK
4 A l’aide de la touche + ◊ ou – √, sélectionnez “AUTO”. Déplacez ensuite le
curseur (z) sur “OK” et appuyez sur SELECT.
Le menu HEURE D’ETE apparaît.
HEURE D’ETE
AUTO
HEURE STANDARD
HEURE D’ETE
OK
Aller Choisir Sortie
SELECT
MENU
Préparation
13
Page 76

EJECT
MUTING DISPLAY
INPUT
SELECT
TIMER ON SCREEN
RESET
VCR Plus
COUNTER/
REMAIN
COUNTER
JUMP ENTER
RESET
INDEX
TAPE SPEED
5 A l’aide de la touche + ◊ ou – √, sélectionnez “AUTO”, “HEURE
POWER
TV
SLEEP
MENU
SELECT
2
1
4
7
3
5
6
9
8
0
CHVOL
STANDARD” ou “HEURE D’ETE”. (Consultez le tableau ci-dessous.)
Déplacez ensuite le curseur (z) sur “OK” et appuyez sur SELECT.
Choisissez Pour
AUTO Sélectionner le réglage automatique de l’heure d’été.
HEURE STANDARD Indiquer que votre zone géographique n’applique pas l’heure
d’été.
HEURE D’ETE Indiquer que votre zone géographique applique l’heure d’été.
6 Pour activer la fonction de réglage automatique de l’horloge, appuyez sur
POWER pour mettre le téléviseur/vidéo hors tension.
REC
&7
SLOW
X2 PAUSE
SEARCH
REW FF
PLAY
STOP
14
Préparation
Page 77

EJECT
MUTING
INPUT
SELECT
TIMER ON SCREEN
DISPLAY
POWER
TV
SLEEP
MENU
Réglage manuel de la date et de
l’heure
Le réglage de la date et de l’heure vous permet d’utiliser la fonction de
programmateur pour l’enregistrement ou pour la mise sous ou hors
tension automatique du téléviseur/vidéo.
VCR Plus
COUNTER/
REMAIN
COUNTER
RESET
INDEX
TAPE SPEED
REC
X2 PAUSE
REW FF
2
1
5
4
7
8
JUMP ENTER
0
&7
SLOW
SEARCH
PLAY
STOP
SELECTRESET
1 Appuyez sur MENU pour afficher le menu principal.
2 Déplacez le curseur (z) sur “PROGRAMMATEUR” à l’aide de la touche +
3
6
9
CHVOL
◊ ou – √ et appuyez ensuite sur SELECT.
Le menu PROGRAMMATEUR apparaît.
3 Déplacez le curseur (z) sur “HEURE” à l’aide de la touche + ◊ ou – √ et
appuyez ensuite sur SELECT.
Le menu HEURE apparaît.
4 Déplacez le curseur (z) sur “MANUEL” à l’aide de la touche + ◊ ou – √ et
appuyez ensuite sur SELECT.
Le menu HEURE apparaît.
HEURE
__/__ ____ ___ __:__
MENU
Aller Choisir Sortie
SELECT
AM
MENU
5 Appuyez sur SELECT pour activer la procédure de réglage de l’horloge.
La section du mois vire au rouge.
HEURE
1 /__ ____ ___ __:__
MENU
Reglez le mois
Aller Choisir Sortie
SELECT
AM
MENU
Pour afficher l’heure
Appuyez sur DISPLAY.
Si vous avez commis une
erreur
Appuyez sur ? pour revenir à la
position précédente.
Si l’horloge s’est arrêtée et
que l’indication “--/--” est
affichée
Vous devez recommencer le réglage
de l’horloge.
6 A l’aide de la touche + ◊ ou – √, réglez le mois et appuyez ensuite sur
SELECT.
La section du jour vire au rouge.
HEURE
7/ 1 ____ ___ __:__
MENU
Régler le jour
Aller Choisir Sortie
SELECT
AM
MENU
7 A l’aide de la touche + ◊ ou – √ et de SELECT, réglez le jour, l’année,
l’heure et les minutes de la même façon qu’à l’étape 6.
HEURE
7/10 1999 SAM 7:30PM
MENU
Aller Choisir Sortie
SELECT
MENU
8 Après avoir réglé les minutes, appuyez sur SELECT.
L’horloge démarre.
9 Appuyez sur MENU pour revenir à l’écran de départ.
Préparation
15
Page 78

5e étape — Réglage du système VCR
Plus+
EJECT
MUTING DISPLAY
INPUT
SELECT
TIMER ON SCREEN
VCR Plus
COUNTER/
REMAIN
COUNTER
INDEX
TAPE SPEED
1
4
7
JUMP ENTER
RESET
REC
&7
X2 PAUSE
SEARCH
SLOW
La fonction du système VCR Plus+ simplifie les opérations de
POWER
TV
programmation de votre téléviseur/vidéo pour effectuer des
enregistrements à l’aide du programmateur. Le réglage de votre
téléviseur/vidéo consiste à coordonner le numéro de la chaîne de
SLEEP
télévision (le numéro que vous sélectionnez pour mettre votre téléviseur/
vidéo ou votre magnétoscope sous tension pour regarder une émission)
MENU
SELECTRESET
avec le guide de chaîne (le numéro attribué à cette chaîne dans votre guide
des programmes). Pour obtenir les numéros de guide de chaîne, consultez
le “Tableau de concordance des chaînes” dans un guide des programmes
de télévision où figurent les codes PlusCode. Ce tableau est d’ordinaire
2
3
5
6
9
8
0
CHVOL
semblable à l’exemple de la page suivante.
Réglage du guide de chaîne
1 Appuyez sur MENU pour afficher le menu principal.
2 Déplacez le curseur (z) sur “REGLAGE” à l’aide de la touche + ◊ ou – √ et
appuyez ensuite sur SELECT.
Le menu REGLAGE apparaît.
REGLAGE
REGLAGE DE CANAUX
CONTROLE PARENTAL
CANAL PREFERE
CAPTION VISION: CC 1
LANGUE: FRANÇAIS
MENU
REW FF
PLAY
STOP
Remarque
Si l’indication Système VCR Plus+
apparaît en noir, cela signifie que le
téléviseur/vidéo est réglé pour
recevoir un signal d’entrée vidéo via
les prises d’entrée et vous ne pouvez
pas sélectionner Système VCR
Plus+. Appuyez sur INPUT SELECT
jusqu'à ce qu’un numéro de chaîne
apparaisse à l’écran.
Si vous avez commis une
erreur
Appuyez sur ? pour revenir à la
position précédente.
Préparation
16
Aller Choisir Sortie
SELECT
MENU
3 Déplacez le curseur (z) sur “REGLAGE DE CANAUX” à l’aide de la
touche + ◊ ou – √ et appuyez ensuite sur SELECT.
Le menu REGLAGE DE CANAUX apparaît.
REGLAGE DE CANAUX
CABLE: NON
CANAL FIXE: NON
PROGRAMMATION AUTO
SAUTE/AJOUTE CANAL
Système VCR P l us +
MENU
Aller Choisir Sortie
SELECT
MENU
4 Déplacez le curseur (z) sur “Système VCR Plus+” à l’aide de la touche + ◊
ou – √ et appuyez ensuite sur SELECT.
Le menu REGLAGE Système VCR Plus+ apparaît.
REGLAGE
Système VCR Plus+
GUIDE CH – TV CH
__ – ___
LISTE DES CANAUX
MENU
Aller Choisir Sortie
SELECT
MENU
5 Appuyez sur SELECT pour introduire le numéro guide de chaîne.
La position GUIDE CH vire au rouge.
REGLAGE
Système VCR Plus+
GUIDE CH – TV CH
__ – ___
LISTE DES CANAUX
MENU
Utilisez [0-9] pour
régler un canal guide
Pressez [ENTER]
Page 79

EJECT
MUTING DISPLAY
INPUT
SELECT
TIMER ON SCREEN
VCR Plus
COUNTER/
REMAIN
COUNTER
RESET
INDEX
TAPE SPEED
REC
X2 PAUSE
REW FF
2
1
5
4
7
8
JUMP ENTER
0
&7
SLOW
SEARCH
PLAY
STOP
POWER
TV
SLEEP
MENU
SELECTRESET
3
6
9
CHVOL
6 Appuyez sur les touches 0 à 9 pour introduire le numéro de chaîne attribué
dans le guide de chaîne et appuyez ensuite sur ENTER.
La position TV CH vire au rouge.
REGLAGE VCR Plus+
GUIDE CH – TV CH
1 6 –
LISTE DES CANAUX
MENU
Utilisez [0-9] pour
régler un canal TV
Pressez [ENTER]
7 Appuyez sur les touches 0 à 9 pour introduire le numéro assigné à cette
chaîne sur votre téléviseur/vidéo et appuyez ensuite sur ENTER.
REGLAGE VCR Plus+
GUIDE CH – TV CH
16 – 125
LISTE DES CANAUX
MENU
Aller Choisir Sortie
SELECT
MENU
8 Répétez les étapes 6 et 7 pour chaque numéro de guide de chaîne que vous
voulez introduire.
9 Déplacez le curseur (z) sur “LISTE DES CANAUX” à l’aide de la touche
+ ◊ ou – √ et appuyez ensuite sur SELECT pour confirmer vos réglages.
LISTE DES CANAUX
GUIDE – TV GUIDE– TV
16 – 125 33 – 49
17 – 22 59 – 3
20 – 42 61 – 47
21 – 28 99 – 102
PAGE 1
MENU
Aller Choisir Sortie
SELECT
MENU
Remarques
• Si vous introduisez plus de huit
chaînes, les chaînes
supplémentaires sont mémorisées
dans des “pages” séparées.
Déplacez le curseur (z) sur
“PAGE” et utilisez les touches + ◊
ou – √ pour visualiser la liste
complète.
• Le nombre maximum de guides
de chaînes est 99.
10 Lorsque vous avez terminé la présélection, appuyez sur MENU pour
revenir à l’écran de départ.
Exemple de tableau de
concordance des chaînes
CABLE
CH
16
17
20
21
22
25
34
35
5
27
29
30
31
38
39
45
17
44
49
50
51
AMC
American Movie Classics
BRV
Bravo(program grid only)
CNN
Cable News Network
CSP
C-SPAN
DIS
The Disney Channel
DSC
The Discovery Channel
ESN
ESPN
FAM
The Family Channel
HBO
Home Box Office
LIF
Lifetime
MAX
Cinomax
MTV
Music Television
NIK
Nickelodeon
SC
Sports Channel
SAMPLE
SCA
Sports Channel America
SHO
Showtime
TBS
TBS SuperStation
TMC
The Movie Channel
TNN
The Nashville Network
TNT
Turner Network Television
USA
USA Network
VCR Plus+
GUIDE CH
35
54
42
28
53
37
34
47
33
46
45
48
38
59
70
41
43
58
49
52
44
Préparation
17
Page 80

Opérations de base
Regarder la télévision
Cette section présente les fonctions de base à utiliser lorsque vous
regardez la télévision. La plupart de ces opérations peuvent être exécutées
sans l’aide de la télécommande.
POWER
STANDBY
EJECT
REC
TIMER REC
INPUT
– VOL + – CHANNEL +
SELEECT
Mise sous et hors tension du
téléviseur/vidéo
POWER
‰/
STANDBY
EJECT
MUTING DISPLAY
INPUT
SELECT
TIMER ON SCREEN
VCR Plus
COUNTER/
REMAIN
COUNTER
RESET
INDEX
TAPE SPEED
REC
X2 PAUSE
2
1
5
4
7
8
JUMP ENTER
0
&7
SLOW
SEARCH
POWER
TV
SLEEP
MENU
SELECTRESET
3
6
9
CHVOL
Mise sous tension
Appuyez sur POWER.
Le témoin STANDBY clignote jusqu’à ce que l’image apparaisse.
Mise hors tension
Appuyez sur POWER.
Le téléviseur/vidéo passe en mode de veille et le témoin STANDBY à
l’avant du téléviseur/vidéo s’allume en rouge si une cassette se trouve
déjà à l’intérieur du téléviseur/vidéo. Si aucune cassette ne se trouve à
l’intérieur du téléviseur/vidéo, le témoin STANDBY disparaît.
Sélection d’émissions télévisées
Réglez le mode de câble sur OUI ou NON pour sélectionner le type de
chaîne que vous souhaitez visualiser. Pour des informations plus détaillées
sur le réglage du mode de câble, reportez-vous à la section “Activation/
désactivation de la télédistribution” à la page 9.
Appuyez sur les touches CH +/– ou 0 à 9 de la télécommande, ou
CHANNEL +/– sur le téléviseur/vidéo.
Pour sélectionner un numéro à deux chiffres
à l’aide des touches 0 à 9
Par exemple, si vous voulez sélectionner le numéro 21, appuyez d’abord
sur la touche 2 et ensuite sur 1.
REW FF
Remarque
Vous ne pouvez pas commuter les
chaînes que vous avez explorées à
l’aide des touches CH +/–.
Opérations de base
18
PLAY
STOP
Réglage du volume
Appuyez sur VOL +/–.
Coupure du son
Appuyez sur MUTING.
L’indication “MUTING” apparaît à l’écran.
Pour restaurer le son normal, appuyez à nouveau sur MUTING ou
appuyez sur VOL +.
Commutation rapide de deux
chaînes
Appuyez sur JUMP. La chaîne précédemment sélectionnée réapparaît.
Une nouvelle pression sur JUMP commute la chaîne de départ.
Page 81

EJECT
MUTING DISPLAY
INPUT
SELECT
TIMER ON SCREEN
VCR Plus
COUNTER/
REMAIN
COUNTER
RESET
INDEX
TAPE SPEED
REC
X2 PAUSE
REW FF
2
1
5
4
7
8
JUMP ENTER
0
&7
SLOW
SEARCH
PLAY
POWER
TV
SLEEP
MENU
SELECTRESET
3
6
9
CHVOL
Réglage de l’image
Lorsque vous regardez des émissions télévisées, vous pouvez régler
l’image en fonction de vos préférences. Vous pouvez également régler
l’image reçue via les prises d’entrée.
Ces réglages restent en mémoire même lorsque vous mettez le téléviseur/
vidéo hors tension.
1 Appuyez sur MENU pour afficher le menu principal.
Le menu principal s’affiche.
V IDEO
AUDIO
PROGRAMMATEUR
CASSETTE
REGLAGE
Aller Choisir Sortie
SELECT
2 Déplacez le curseur (z) sur “VIDEO” à l’aide de la touche + ◊ ou – √ et
appuyez ensuite sur SELECT.
Le menu VIDEO apparaît.
VIDEO
IMAGE
LUMINOSITE
COULEUR
NUANCE
NETTETE
MENU
Aller Choisir Sortie
SELECT
3 A l’aide de la touche + ◊ ou – √, sélectionnez le paramètre que vous voulez
régler et appuyez ensuite sur SELECT.
MENU
MENU
STOP
IMAGE
4 Réglez l’image à l’aide de la touche + ◊ ou – √ et appuyez ensuite sur
SELECT.
A chaque pression, les barres verticales augmentent ou diminuent et le
chiffre dans la marge droite change pour indiquer le niveau de réglage.
(Consultez le tableau ci-dessous.)
5 Pour régler d’autres paramètres, répétez les étapes 3 et 4 ci-dessus.
6 Appuyez sur MENU pour revenir à l’écran de départ.
Les niveaux de réglage sélectionnés sont mémorisés.
Description des paramètres réglables
Paramètre
IMAGE
LUMINOSITE
COULEUR
NUANCE
NETTETE
Appuyez sur +
Augmenter le contraste de l’image.
Rendre l’image plus claire.
Augmenter l’intensité des couleurs.
Rendre l’image plus verdâtre.
Rendre l’image plus nette.
◊◊
◊ pour
◊◊
Appuyez sur –
Diminuer le contraste de l’image.
Rendre l’image plus foncée.
Diminuer l’intensité des couleurs.
Rendre l’image plus rougeâtre.
Adoucir les contours de l’image.
Pour restaurer les réglages par défaut
Appuyez sur RESET après avoir sélectionné et affiché le menu VIDEO.
Tous les paramètres sont ramenés aux valeurs de réglage par défaut.
√√
√ pour
√√
Opérations de base
19
Page 82

EJECT
MUTING DISPLAY
INPUT
SELECT
TIMER ON SCREEN
POWER
TV
SLEEP
MENU
SELECTRESET
Réglage du son (KV-20VS42 uniquement)
Vous pouvez ajuster les graves, les aigus et la balance en fonction de vos
préférences. Vous pouvez également régler le son de signal reçu via les
prises d’entrée.
1 Appuyez sur MENU pour afficher le menu principal.
VCR Plus
COUNTER/
REMAIN
COUNTER
RESET
INDEX
TAPE SPEED
REC
X2 PAUSE
REW FF
2
1
5
4
7
8
JUMP ENTER
0
&7
SLOW
SEARCH
PLAY
STOP
3
6
9
CHVOL
2 Déplacez le curseur (z) sur “AUDIO” à l’aide de la touche + ◊ ou – √ et
appuyez ensuite sur SELECT.
Le menu AUDIO apparaît.
AUDIO
GRAVE
AIGU
BALANCE
MTS :
SURROUND :
MENU
Aller Choisir Sortie
SELECT
STEREO
OUI
MENU
3 Sélectionnez le paramètre que vous voulez régler.
Par exemple :
Pour régler les graves, déplacez le curseur (z) sur “GRAVE” à l’aide de la
touche + ◊ ou – √ et appuyez ensuite sur SELECT.
GRAVE
4 Réglez le paramètre sélectionné :
Appuyez sur + ◊ ou – √ pour régler le paramètre et appuyez ensuite sur
SELECT.
Opérations de base
20
5 Pour régler d’autres paramètres, répétez les étapes 3 et 4 ci-dessus.
6 Appuyez sur MENU pour revenir à l’écran de départ.
Description des paramètres réglables
Paramètre
GRAVE
AIGU
BALANCE
Appuyez +
Augmenter les graves.
Augmenter les aigus.
Augmenter le volume du haut-
parleur droit.
◊◊
◊ pour
◊◊
Appuyez –
Diminuer les graves.
Diminuer les aigus.
Augmenter le volume du haut-
parleur gauche.
Pour restaurer les réglages par défaut
Appuyez sur RESET après avoir sélectionné et affiché le menu AUDIO.
Tous les paramètres sont ramenés aux valeurs de réglage par défaut.
√√
√ pour
√√
Page 83

EJECT
MUTING DISPLAY
POWER
TV
Sélection d’émissions stéréo ou
bilingues
(KV-20VS42 uniquement)
INPUT
SELECT
TIMER ON SCREEN
VCR Plus
COUNTER/
REMAIN
COUNTER
RESET
INDEX
TAPE SPEED
REC
X2 PAUSE
REW FF
2
1
5
4
7
8
JUMP ENTER
0
&7
SLOW
SEARCH
PLAY
STOP
SLEEP
MENU
SELECTRESET
3
6
9
CHVOL
La fonction de son télévisé multicanal MTS (Multichannel TV Sound) vous
permet de commuter le son stéréo, le son monaural et l’émission audio
secondaire SAP (Second Audio Program).
1 Appuyez sur MENU pour afficher le menu principal.
2 Déplacez le curseur (z) sur “AUDIO” à l’aide de la touche + ◊ ou – √ et
appuyez ensuite sur SELECT.
Le menu AUDIO apparaît.
AUDIO
GRAVE
AIGU
BALANCE
MTS :
SURROUND :
MENU
Aller Choisir Sortie
SELECT
STEREO
OUI
MENU
3 Déplacez le curseur (z) sur “MTS” à l’aide de la touche + ◊ ou – √ et
appuyez ensuite sur SELECT.
La position sélectionnée vire au rouge.
AUDIO
GRAVE
AIGU
BALANCE
MTS :
SURROUND :
MENU
STEREO
OUI
Remarque
Lorsque vous réglez MTS sur “SAP”
mais qu’il n’y a pas de signal SAP
retransmis, aucun son n’est diffusé
par les haut-parleurs. (Le canal
audio primaire de l’émission est
toutefois enregistré.) Voir page 22 le
tableau décrivant la relation entre
les haut-parleurs et le signal source.
Aller Choisir Sortie
SELECT
MENU
4 A l’aide de la touche + ◊ ou – √, sélectionnez “STEREO”, “SAP” ou
“MONO” et appuyez ensuite sur SELECT.
AUDIO
GRAVE
AIGU
BALANCE
MTS : SAP
SURROUND : OUI
MENU
Aller Choisir Sortie
SELECT
Choisissez
STEREO
SAP
MONO
Pour restaurer les réglages par défaut
Appuyez sur RESET après avoir sélectionné et affiché le menu AUDIO.
Tous les paramètres sont ramenés aux valeurs de réglage par défaut.
MENU
Pour
Sélectionner la réception stéréo lorsque vous regardez une émission
diffusée en stéréo.
Sélectionner une émission diffusée en mode bilingue.
Sélectionner la réception mono (permet de réduire les parasites dans les
émissions stéréo).
Opérations de base
21
Page 84

Ce tableau décrit la relation entre les sons diffusés par les haut-parleurs, le
son enregistré et le mode MTS. Par exemple, si vous réglez MTS sur “SAP”
mais qu’un signal SAP n’est pas retransmis, le son diffusé par les hautparleurs est coupé. Si toutefois vous enregistrez cette émission, le son du
canal audio primaire de l’émission (stéréo ou mono) sera enregistré.
Signal
source
Mono
Stéréo
Mono
+
SAP
Stéréo
+
SAP
Mode
MTS
Mono
Stéréo
SAP
Mono
Stéréo
SAP
Mono
Stéréo
SAP
Mono
Stéréo
SAP
Sortie haut-parleur
L R
L + R L + R
L + R L + R
Coupure Coupure
L + R L + R
LL
Coupure Coupure
L + R L + R
L + R L + R
SAP SAP
L + R L + R
LR
SAP SAP
Son enregistré
Piste hi-fi Piste hi-fi Piste
“L“ “R” normale
L + R L + R L + R
L + R L + R L + R
L + R L + R L + R
L + R L + R L + R
L R L + R
L R L + R
L + R L + R L + R
L + R L + R L + R
SAP SAP SAP
L + R L + R L + R
L R L + R
SAP SAP SAP
Ecran de
menu
Néant
Néant
SAP
Néant
STEREO
SAP
Néant
Néant
SAP
Néant
STEREO
SAP
Opérations de base
22
Page 85

EJECT
MUTING DISPLAY
POWER
TV
Activation du son spatial (KV-20VS42
uniquement)
INPUT
SELECT
TIMER ON SCREEN
VCR Plus
COUNTER/
REMAIN
COUNTER
RESET
INDEX
TAPE SPEED
REC
X2 PAUSE
REW FF
2
1
5
4
7
8
JUMP ENTER
0
&7
SLOW
SEARCH
PLAY
STOP
SLEEP
MENU
SELECTRESET
CHVOL
La fonction de son spatial simule la restitution sonore d’une salle de
cinéma ou d’une salle de concert. La fonction de son spatial n’est opérante
qu’avec les émissions stéréo.
1 Appuyez sur MENU pour afficher le menu principal.
3
2 Déplacez le curseur (z) sur “AUDIO” à l’aide de la touche + ◊ ou – √ et
6
9
appuyez ensuite sur SELECT.
Le menu AUDIO apparaît.
AUDIO
GRAVE
AIGU
BALANCE
MTS :
SURROUND :
MENU
Aller Choisir Sortie
SELECT
STEREO
OUI
MENU
3 Déplacez le curseur (z) sur “SURROUND” à l’aide de la touche + ◊ ou – √
et appuyez ensuite sur SELECT.
La position sélectionnée vire au rouge.
AUDIO
GRAVE
AIGU
BALANCE
MTS :
SURROUND :
MENU
STEREO
NON
Aller Choisir Sortie
SELECT
MENU
4 A l’aide de la touche + ◊ ou – √, sélectionnez “OUI” ou “NON” et appuyez
ensuite sur SELECT.
AUDIO
GRAVE
AIGU
BALANCE
MTS :
SURROUND :
MENU
Aller Choisir Sortie
Pour restaurer les réglages par défaut
Appuyez sur RESET après avoir sélectionné et affiché le menu AUDIO.
Tous les paramètres sont ramenés aux valeurs de réglage par défaut.
SELECT
STEREO
OUI
MENU
Opérations de base
23
Page 86

Affichage d’informations à l’écran
Appuyez sur DISPLAY pour activer ou désactiver l’affichage.
Le numéro de la chaîne, la date et l’heure et le mode audio s’affichent.
Appuyez plusieurs fois de suite sur DISPLAY pour faire défiler XDS ON,
CAPTION et DISPLAY OFF. Pour des informations plus détaillées sur
XDS and CAPTION, reportez-vous à la page 39.
POWER
STANDBY
EJECT
REC
TIMER REC
VIDEO
L AUDIO R
VIDEO L AUDIO R
EJECT
MUTING DISPLAY
INPUT
SELECT
TIMER ON SCREEN
VCR Plus
COUNTER/
REMAIN
COUNTER
JUMP ENTER
RESET
INDEX
Numéro de chaîne
24
INPUT
SELEECT
– VOL + – CHANNEL +
INPUT SELEECT
POWER
TV
SLEEP
MENU
SELECTRESET
STEREO
8:40PM
4/9VEN
Pour faire disparaître les indications, appuyez plusieurs fois de suite sur
DISPLAY jusqu’à ce que l’indication “DISPLAY OFF” apparaisse
Visualisation d’un signal d’entrée
vidéo via les prises d’entrée de
Mode audio
Date et heure
ligne
2
1
4
7
3
5
6
9
8
0
CHVOL
Appuyez plusieurs fois de suite sur INPUT SELECT jusqu’à ce que
l’indicateur d’entrée voulu apparaisse.
Pour revenir à l’image télévisée normale, appuyez sur INPUT SELECT
jusqu’à ce que le numéro de chaîne apparaisse. Pour des informations plus
détaillées sur l’exploitation des prises d’entrée de ligne, voir page 57.
TAPE SPEED
REC
X2 PAUSE
REW FF
Opérations de base
24
Ecouter avec un casque d’écoute
&7
SLOW
SEARCH
PLAY
STOP
Branchez le casque d’écoute (non fourni) sur la prise 2 (casque d’écoute)
qui se situe derrière le couvercle à l’avant du téléviseur/vidéo.
La diffusion du son par les haut-parleurs est désactivée.
Page 87

Lecture d’une cassette
Cette section présente comment introduire une cassette vidéo et la
reproduire. Pour des informations plus détaillées sur l’utilisation des
fonctions avancées, reportez-vous aux “Opérations complémentaires” des
pages 36 à 57.
Introduction d’une cassette vidéo
Introduisez précautionneusement une cassette avec le repère fléché orienté
POWER
STANDBY
REC
TIMER REC
EJECT
INPUT
SELECT
EJECT
INPUT
SELEECT
MUTING DISPLAY
– VOL + – CHANNEL +
POWER
TV
SLEEP
vers le haut. La cassette est automatiquement chargée dans le
compartiment à cassette et le téléviseur/vidéo se met sous tension. Si vous
introduisez une cassette sans onglet de protection, la lecture démarre
automatiquement.
Ejection d’une cassette vidéo
Appuyez sur EJECT 6.
Vous pouvez éjecter la cassette même si l’appareil se trouve en mode de
veille.
TIMER ON SCREEN
VCR Plus
COUNTER/
REMAIN
COUNTER
RESET
INDEX
TAPE SPEED
REC
X2 PAUSE
REW FF
2
1
5
4
7
8
JUMP ENTER
0
&7
SLOW
SEARCH
PLAY
STOP
MENU
SELECTRESET
Protection d’une cassette contre
l’effacement accidentel
3
6
9
CHVOL
La cassette est dotée d’un onglet de protection qui permet d’empêcher
l’effacement accidentel d’un enregistrement existant. Brisez l’onglet de
protection au moyen d’un tournevis ou d’un ustensile similaire afin
d’empêcher tout enregistrement sur cette cassette.
Lorsque l’onglet de protection a été brisé, la cassette est éjectée de
l’appareil si vous tentez d’enregistrer dessus.
Pour enregistrer sur une cassette dont l’onglet de protection a été brisé,
recouvrez simplement l’orifice de l’onglet au moyen de bande adhésive.
Bande adhésive
Onglet de
protection
Remise à zéro du compteur de
bande
Le compteur de bande vous permet de retrouver certaines scènes après la
lecture. Appuyez sur la touche COUNTER RESET de la télécommande
pour remettre le compteur sur “00:00:00”, avant de commencer la lecture.
Le compteur est automatiquement remis à “00:00:00” chaque fois qu’une
cassette est insérée. Le téléviseur/vidéo continue à compter la longueur de
la bande, sans tenir compte des passages dépourvus de signaux vidéo.
Opérations de base
25
Page 88

STANDBY
REC
TIMER REC
EJECT
POWER
EJECT
INPUT
– VOL + – CHANNEL +
SELEECT
MUTING DISPLAY
POWER
TV
Lecture d’une cassette
1 Introduisez la cassette
Le téléviseur/vidéo se met automatiquement sous tension. Si vous
introduisez une cassette sans onglet de protection, la lecture démarre
automatiquement.
2 Appuyez sur PLAY ·.
La lecture commence. Les informations qui s’affichent à l’écran
disparaissent au bout de quelques secondes.
Pour arrêter la lecture
Appuyez sur STOP p.
Le téléviseur/vidéo revient à l’image télévisée normale.
INPUT
SELECT
TIMER ON SCREEN
VCR Plus
COUNTER/
REMAIN
COUNTER
RESET
INDEX
TAPE SPEED
REC
X2 PAUSE
REW FF
2
1
5
4
7
8
JUMP ENTER
0
&7
SLOW
SEARCH
PLAY
STOP
SLEEP
MENU
SELECTRESET
CHVOL
Pour interrompre momentanément la lecture
Appuyez sur PAUSE P. L’image passe en pause de lecture.
Appuyez à nouveau sur PAUSE P ou appuyez sur PLAY · pour
reprendre la lecture.
Si vous laissez votre téléviseur/vidéo en mode de pause, la lecture
3
6
normale reprend au bout d’environ 5 minutes.
Pour faire avancer rapidement la bande
Appuyez sur STOP p et ensuite sur FF ).
9
Pour rembobiner la bande
Appuyez sur STOP p et ensuite sur REW 0.
Pour visualiser une cassette en accéléré
En cours de lecture, maintenez la touche REW 0 (rembobinage) ou FF
) (avance rapide) enfoncée. Une image accélérée apparaît sur l’écran du
téléviseur.
Pour reprendre la lecture normale, relâchez la touche.
Pour visualiser l’image en cours d’avance rapide ou de
rembobinage
Maintenez la touche FF ) enfoncée en cours d’avance rapide ou REW
0 en cours de rembobinage. L’image apparaît à l’écran.
Dès que vous relâchez la touche, le mode d’avance rapide ou de
rembobinage est restauré.
Remarµques
• Le son est coupé durant toutes ces
opérations, à l’exception de la
lecture normale.
• Si le programmateur de mise hors
tension est activé en cours de
lecture, la lecture s’arrête.
Opérations de base
26
Pour visualiser l’image en accéléré
En cours de lecture, appuyez sur SEARCH ) ou SEARCH 0.
Pour visualiser l’image à une vitesse double de la normale
En cours de lecture, appuyez sur X2.
Pour visualiser l’image au ralenti
En cours de lecture, appuyez sur SLOW & +/–.
Pour activer la lecture image par image
Appuyez sur PAUSE P en cours de lecture normale et appuyez ensuite
sur 7 (image).
Page 89

EJECT
MUTING DISPLAY
POWER
TV
Lecture répétée d’une cassette –
REPETITION AUTO
INPUT
SELECT
TIMER ON SCREEN
VCR Plus
COUNTER/
REMAIN
COUNTER
RESET
INDEX
TAPE SPEED
REC
X2 PAUSE
REW FF
2
1
5
4
7
8
JUMP ENTER
0
&7
SLOW
SEARCH
PLAY
STOP
SLEEP
MENU
SELECTRESET
CHVOL
Vous pouvez reproduire un passage enregistré de manière répétée.
1 Appuyez sur MENU.
Le menu principal s’affiche.
3
6
9
V IDEO
AUDIO
PROGRAMMATEUR
CASSETTE
REGLAGE
Aller Choisir Sortie
SELECT
MENU
2 Déplacez le curseur (z) sur “CASSETTE” à l’aide de la touche + ◊ ou – √
et appuyez sur SELECT.
Le menu CASSETTE apparaît.
CASSETTE
RESTE BANDE: T-120
REPETITION AUTO: NON
REDUCTION BRUIT: NON
ALIGNEMENT
MENU
Aller Choisir Sortie
SELECT
MENU
3 Déplacez le curseur (z) sur “REPETITION AUTO” à l’aide de la touche
+ ◊ ou – √ et appuyez sur SELECT.
La position sélectionnée vire au rouge.
Remarque
Si vous éjectez la cassette ou si vous
mettez l’appareil hors tension,
“REPETITION AUTO” revient sur
“NON”.
CASSETTE
RESTE BANDE: T-120
REPETITION AUTO: NON
REDUCTION BRUIT: NON
ALIGNEMENT
MENU
Aller Choisir Sortie
SELECT
MENU
4 A l’aide de la touche + ◊ ou – √, sélectionnez “OUI” et appuyez sur
SELECT.
CASSETTE
RESTE BANDE: T-120
REPETITION AUTO: OU I
REDUCTION BRUIT: NO N
ALIGNEMENT
MENU
Aller Choisir Sortie
SELECT
MENU
5 Appuyez sur MENU pour revenir à l’écran de départ.
6 Appuyez sur PLAY ·.
La lecture démarre. Lorsque la cassette arrive en fin de bande, elle est
automatiquement rembobinée et la lecture redémarre.
Opérations de base
27
Page 90

EJECT
MUTING DISPLAY
INPUT
SELECT
TIMER ON SCREEN
RESET
POWER
TV
SLEEP
MENU
SELECT
Affichage d’informations à l’écran
Appuyez sur DISPLAY pour activer ou désactiver l’affichage.
La date et l’heure ainsi que le mode d’exploitation de la bande s’affichent.
Appuyez plusieurs fois de suite sur DISPLAY pour faire défiler XDS ON,
CAPTION et DISPLAY OFF. Pour des informations plus détaillées sur XDS
et CAPTION, voir page 39.
VCR Plus
COUNTER/
REMAIN
COUNTER
RESET
INDEX
TAPE SPEED
REC
X2 PAUSE
REW FF
2
1
5
4
7
8
JUMP ENTER
0
&7
SLOW
SEARCH
PLAY
STOP
VTR
3
Mode d’exploitation de
la bande
6
9
CHVOL
8:40PM
7/15JEU
Date et heure
Affichage du compteur de bande
Appuyez sur COUNTER/REMAIN pour afficher le compteur de bande. Le
compteur de bande indique la durée écoulée en heures, en minutes et en
secondes durant un enregistrement ou en cours de lecture. Chaque fois que
vous appuyez sur COUNTER/REMAIN, le compteur de durée et le
compteur de durée de bande restante apparaissent alternativement.
Appuyez sur COUNTER RESET pour ramener le compteur à “00:00:00”.
SP 00:00:36
Compteur de
REM 1:15
durée
Si vous utilisez une cassette de deux heures (120 minutes), réglez RESTE
BANDE sur T-120. Si vous utilisez une cassette d’une durée supérieure à
120 minutes, réglez RESTE BANDE sur AUTRES.
Compteur de
durée de bande
restante
Remarques
• Le mode d’exploitation de la
bande s’affiche à l’écran chaque
fois que vous changez de mode.
• Lorsque vous rembobinez une
cassette et que le compteur de
durée est affiché à l’écran, la
cassette s’arrête lorsque le
compteur arrive à “00:00:00”.
Utilisez cette fonction pour
rechercher le début d’un
enregistrement.
Opérations de base
28
1 Appuyez sur MENU pour afficher le menu principal.
2 Déplacez le curseur (z) sur “CASSETTE” à l’aide de la touche + ◊ ou
– √ et appuyez sur SELECT.
3 Déplacez le curseur (z) sur “RESTE BANDE” à l’aide de la touche + ◊
ou – √ et appuyez sur SELECT.
La position sélectionnée vire au rouge.
CASSETTE
RESTE BANDE: T-120
REPETITION AUTO: NON
REDUCTION BRUIT: NON
ALIGNEMENT
MENU
Aller Choisir Sortie
SELECT
MENU
4 A l’aide de la touche + ◊ ou – √, sélectionnez “T-120” (réglage par
défaut) ou “AUTRES” et appuyez sur SELECT.
5 Appuyez sur MENU pour revenir à l’écran de départ.
Page 91

Enregistrement d’émissions télévisées
Enregistrement d’émissions
télévisées
Attention
Les émissions télévisées, les films, les cassettes vidéo et autres
matériaux peuvent être protégés par des droits d’auteur.
L’enregistrement non autorisé de tels matériaux peut être en infraction
avec la législation sur les droits d’auteur. De même, l’utilisation de cet
POWER
STANDBY
EJECT
REC
TIMER REC
EJECT
MUTING DISPLAY
INPUT
SELECT
TIMER ON SCREEN
VCR Plus
COUNTER/
REMAIN
COUNTER
JUMP ENTER
RESET
INDEX
INPUT
– VOL + – CHANNEL +
SELEECT
POWER
TV
SLEEP
MENU
SELECTRESET
2
1
4
7
3
5
6
9
8
0
CHVOL
enregistreur avec un téléviseur relié à un réseau de télédistribution
peut être soumise à l’autorisation de l’exploitant du câble et/ou du
propriétaire du programme.
1 Introduisez une cassette dont l’onglet de protection est intact.
Le téléviseur/vidéo se met automatiquement sous tension.
2 Appuyez sur INPUT SELECT jusqu’à ce qu’un numéro de chaîne
apparaisse à l’écran.
Pour enregistrer via un décodeur, mettez celui-ci sous tension.
3 Appuyez sur TAPE SPEED pour sélectionner la vitesse d’enregistrement,
SP (lecture standard) ou EP (longue durée). L’enregistrement en mode EP
augmente la durée de votre cassette.
Durée maximum d’enregistrement
Mode SP : 2 heures 40 minutes avec une T-160
Mode EP : 8 heures avec une T-160
4 Sélectionnez la chaîne à l’aide des touches CH +/–. Vous pouvez
également utiliser les touches 0 à 9 de la télécommande. Pour introduire
un numéro à deux chiffres (par exemple 24), appuyez d’abord sur la
touche 2 et ensuite sur 4.
5 Appuyez sur REC r.
Le témoin REC à l’avant du téléviseur/vidéo s’allume et l’enregistrement
démarre.
TAPE SPEED
REC
Remarque
Si le programmateur de mise sous
ou hors tension est activé pendant
un enregistrement, l’écran du
téléviseur est activé ou désactivé,
mais l’enregistrement continue.
&7
SLOW
X2 PAUSE
SEARCH
REW FF
PLAY
STOP
Pour arrêter l’enregistrement
Appuyez sur STOP p.
Lorsque la cassette arrive en fin de bande, le téléviseur/vidéo arrête et
éjecte la cassette.
Pour activer une pause d’enregistrement
Appuyez sur PAUSE P.
Pour reprendre l’enregistrement, appuyez à nouveau sur PAUSE P.
Vous pouvez couper une scène jugée inutile pendant l’enregistrement au
moyen de cette touche.
1 Appuyez sur PAUSE P lorsqu’une scène inutile apparaît à l’écran.
Une pause d’enregistrement est activée.
2 Appuyez à nouveau sur PAUSE P pour désactiver le mode de pause au
début d’une scène que vous voulez enregistrer.
L’enregistrement reprend à l’endroit défini à l’étape 2.
Si le mode de pause d’enregistrement reste activé pendant plus de 5
minutes, le téléviseur/vidéo arrête l’enregistrement.
Enregistrement avec le téléviseur
hors tension
Appuyez sur POWER.
L’écran du téléviseur est désactivé et les témoins STANDBY et REC à
l’avant du téléviseur/vidéo s’allument.
Le téléviseur/vidéo poursuit l’enregistrement.
Opérations de base
29
Page 92

Enregistrement d’émissions
télévisées à l’aide du programmateur
La fonction d’enregistrement par programmateur vous permet de
EJECT
MUTING DISPLAY
INPUT
SELECT
TIMER ON SCREEN
VCR Plus
1
COUNTER/
REMAIN
COUNTER
INDEX
TAPE SPEED
4
7
JUMP ENTER
RESET
REC
&7
X2 PAUSE
SEARCH
SLOW
POWER
TV
SLEEP
MENU
SELECTRESET
2
3
5
6
9
8
0
CHVOL
programmer votre téléviseur/vidéo pour l’enregistrement de six
émissions dans un délai d’un mois.
Avant de commencer
•Assurez-vous que la date et l’heure de l’horloge sont correctement
réglées. Sinon, le message “Réglez d’abord l’horloge” s’affiche à l’écran.
Reportez-vous à la section “Réglage de l’horloge” à la page 12.
•Assurez-vous que la cassette introduite dans l’appareil a toujours son
onglet de protection. Si une cassette sans onglet de protection est
introduite, le message “Introduisez une cassette enregistrable” s’affiche.
Réglage du programmateur
Voici un exemple de procédure à suivre pour enregistrer en mode EP une
émission diffusée sur la chaîne nº 26 entre 8 h 15 PM et 9 h 55 PM le
mercredi 6 octobre 1999.
1 Appuyez sur TIMER ON SCREEN.
Le menu REG/VERIF PROG apparaît.
REW FF
PLAY
STOP
Si vous avez commis une erreur
Appuyez sur ? pour revenir à la
position précédente et corriger le
réglage.
Pour effacer les réglages
Appuyez sur RESET alors que le
menu REG/VERIF PROG est affiché.
Si vous essayez d’introduire une
heure de début d’enregistrement
antérieure à l’heure actuelle
Tous les paramètres de la
programmation d’enregistrement
sont effacés.
Si vous réglez MTS sur “SAP”
dans le menu AUDIO (KV-20VS42
uniquement)
Le signal SAP est enregistré
uniquement si un signal SAP est
retransmis. Sinon, c’est le canal audio
primaire de l’émission (stéréo ou
mono) qui est enregistré. Voir page 22
le tableau décrivant la relation entre
les haut-parleurs et le signal source.
Opérations de base
30
REG / VERIF PROG 10 / 5
DATE DEBUT FIN CH
_/__ _:__ _:__ ___ _
_/__ _:__ _:__ ___ _
_/__ _:__ _:__ ___ _
_/__ _:__ _:__ ___ _
_/__ _:__ _:__ ___ _
_/__ _:__ _:__ ___ _
Aller Choisir Sortie
SELECT
MAR
MENU
2 Appuyez sur SELECT.
La date et le jour de la semaine apparaissent en rouge.
REG / VERIF PROG 10 / 5
DATE DEBUT FIN CH
10/ 5MAR
_:__ _:__ ___ _
_/__ _:__ _:__ ___ _
_/__ _:__ _:__ ___ _
_/__ _:__ _:__ ___ _
_/__ _:__ _:__ ___ _
_/__ _:__ _:__ ___ _
Aller Choisir Sortie
SELECT
MAR
MENU
3 Appuyez sur + ◊ jusqu’à ce que l’indication “6 MER” apparaisse.
Pour un enregistrement quotidien ou hebdomadaire, reportez-vous à la
section “Enregistrement quotidien/hebdomadaire” à la page 32.
REG / VERIF PROG 10 / 5
DATE DEBUT FIN CH
10/ 6MER
_:__ _:__ ___ _
_/__ _:__ _:__ ___ _
_/__ _:__ _:__ ___ _
_/__ _:__ _:__ ___ _
_/__ _:__ _:__ ___ _
_/__ _:__ _:__ ___ _
Aller Choisir Sortie
SELECT
MAR
MENU
Page 93

EJECT
MUTING DISPLAY
INPUT
SELECT
TIMER ON SCREEN
POWER
TV
SLEEP
MENU
SELECTRESET
4 Appuyez sur SELECT et réglez ensuite l’heure de début d’enregistrement
sur “8” à l’aide de la touche + ◊ ou – √.
REG / VERIF PROG 10 / 5
DATE DEBUT FIN CH
10/ 6MER
8:__PM _:__ ___ _
_/__ _:__ _:__ ___ _
_/__ _:__ _:__ ___ _
_/__ _:__ _:__ ___ _
_/__ _:__ _:__ ___ _
_/__ _:__ _:__ ___ _
Aller Choisir Sortie
SELECT
MAR
MENU
VCR Plus
COUNTER/
REMAIN
COUNTER
RESET
INDEX
TAPE SPEED
REC
X2 PAUSE
REW FF
2
1
4
7
JUMP ENTER
3
5
6
9
8
0
CHVOL
&7
SLOW
SEARCH
PLAY
STOP
Si vous essayez d’effectuer une
opération incorrecte
Le téléviseur/vidéo affiche un
message à l’écran et interrompt
l’opération.
Si le réglage du
programmateur de mise sous
tension (ON) chevauche une
émission programmée
• Si l’heure de début du
programmateur de mise sous
tension est identique ou antérieure
à celle d’un enregistrement par
programmateur, le programmateur
de mise sous tension est activé et
l’enregistrement par
programmateur n’est pas exécuté.
• Si l’heure d’activation du
programmateur de mise sous
tension est postérieure à celle d’un
enregistrement par
programmateur, l’écran du
téléviseur est activé à l’heure réglée
sur le programmateur de mise sous
tension et l’enregistrement
continue.
5 Appuyez sur SELECT et réglez ensuite la minute de début
d’enregistrement sur “15” à l’aide de la touche + ◊ ou – √.
REG / VERIF PROG 10 / 5
DATE DEBUT FIN CH
10
/ 6
MER
8:15PM _:__ ___ _
_/__ _:__ _:__ ___ _
_/__ _:__ _:__ ___ _
_/__ _:__ _:__ ___ _
_/__ _:__ _:__ ___ _
_/__ _:__ _:__ ___ _
Aller Choisir Sortie
SELECT
MAR
MENU
6 Appuyez sur SELECT et réglez ensuite la minute de début
d’enregistrement sur “9” à l’aide de la touche + ◊ ou – √.
REG / VERIF PROG 10 / 5
DATE DEBUT FIN CH
10
/ 6
MER
8:15PM 9:__PM ___ _
_/__ _:__ _:__ ___ _
_/__ _:__ _:__ ___ _
_/__ _:__ _:__ ___ _
_/__ _:__ _:__ ___ _
_/__ _:__ _:__ ___ _
Aller Choisir Sortie
SELECT
MAR
MENU
7 Appuyez sur SELECT et réglez ensuite la minute de fin d’enregistrement
sur “55” à l’aide de la touche + ◊ ou – √.
REG / VERIF PROG 10 / 5
DATE DEBUT FIN CH
10
/ 6
MER
8:15PM 9:55PM ___ _
_/__ _:__ _:__ ___ _
_/__ _:__ _:__ ___ _
_/__ _:__ _:__ ___ _
_/__ _:__ _:__ ___ _
_/__ _:__ _:__ ___ _
Aller Choisir Sortie
SELECT
MAR
MENU
8 Appuyez sur SELECT et réglez ensuite la chaîne sur “26” à l’aide de la
touche + ◊ ou – √.
REG / VERIF PROG 10 / 5
DATE DEBUT FIN CH
10
/ 6
MER
8:15PM 9:55PM 26 _
_/__ _:__ _:__ ___ _
_/__ _:__ _:__ ___ _
_/__ _:__ _:__ ___ _
_/__ _:__ _:__ ___ _
_/__ _:__ _:__ ___ _
Aller Choisir Sortie
SELECT
MAR
MENU
9 Appuyez sur SELECT et réglez ensuite la vitesse d’enregistrement sur EP à
l’aide de la touche + ◊ ou – √.
REG / VERIF PROG 10 / 5
DATE DEBUT FIN CH
10
/ 6
MER
8:15PM 9:55PM 26
_/__ _:__ _:__ ___ _
_/__ _:__ _:__ ___ _
_/__ _:__ _:__ ___ _
_/__ _:__ _:__ ___ _
_/__ _:__ _:__ ___ _
Aller Choisir Sortie
SELECT
MAR
EP
MENU
Opérations de base
31
Page 94

EJECT
MUTING DISPLAY
INPUT
SELECT
TIMER ON SCREEN
VCR Plus
COUNTER/
REMAIN
COUNTER
RESET
INDEX
TAPE SPEED
REC
X2 PAUSE
REW FF
2
1
5
4
7
8
JUMP ENTER
0
&7
SLOW
SEARCH
PLAY
STOP
POWER
TV
SLEEP
MENU
SELECTRESET
3
6
9
CHVOL
10 Appuyez sur SELECT.
Le message “Mettre le TV hors tension pour régler le programmateur”
s’affiche pendant trois secondes. Le menu TIMER SET/CHECK réapparaît
et le curseur (z) apparaît dans la marge gauche.
11 Pour régler d’autres programmations, appuyez sur – √ pour amener le
curseur (z) sur la ligne suivante et répétez ensuite les étapes 2 à 10.
12 Appuyez sur MENU pour quitter le menu REG/VERIF PROG.
13 Appuyez sur POWER pour mettre le téléviseur/vidéo hors tension.
Le témoin TIMER REC à l’avant du téléviseur/vidéo s’allume et le
téléviseur/vidéo passe en mode de veille d’enregistrement.
Le téléviseur/vidéo se met automatiquement sous tension et démarre
l’enregistrement à l’heure de début programmée et le témoin TIMER REC
à l’avant du téléviseur/vidéo s’allume.
Enregistrement quotidien/hebdomadaire
Vous pouvez programmer votre téléviseur/vidéo pour enregistrer la
même émission tous les jours de la semaine (enregistrement quotidien) ou
la même émission le même jour de chaque semaine (enregistrement
hebdomadaire). Appuyez sur – √ à l’étape 3 jusqu’à ce que le réglage
voulu apparaisse à la position “DATE”. A chaque pression, le réglage
change selon la séquence suivante:
4 (aujourd’hui) n DIM-SAM n LUN–VEN n CHAQUE SAM n
CHAQUE VEN n CHAQUE JEU n CHAQUE MER n CHAQUE MAR
n CHAQUE LUN n CHAQUE DIM n 3 (mois suivant) n 2......
Si des enregistrements par
programmateur se
chevauchent
• Si l’heure de début de deux
émissions est identique, c’est la
première émission programmée
dans le menu qui a la priorité.
• Si l’heure de début
d’enregistrement de la seconde
émission est antérieure à la fin de
la première émission,
l’enregistrement de la seconde
émission ne commence que
lorsque la première émission est
terminée.
Opérations de base
32
Pour annuler un enregistrement par
programmateur
1 Appuyez sur POWER pour mettre le téléviseur/vidéo sous tension.
2 Appuyez sur TIMER ON SCREEN.
3 A l’aide de la touche + ◊ ou – √, sélectionnez l’enregistrement par
programmateur que vous voulez annuler et appuyez sur RESET.
Utilisation du téléviseur/vidéo avant
le début d’un enregistrement par
programmateur
Pour utiliser le téléviseur/vidéo avant qu’un enregistrement par
programmateur commence, appuyez simplement sur POWER. Le témoin
TIMER REC s’éteint et le téléviseur/vidéo est activé.
Page 95

EJECT
MUTING DISPLAY
POWER
TV
Vérification des réglages du
programmateur
INPUT
SELECT
TIMER ON SCREEN
VCR Plus
COUNTER/
REMAIN
COUNTER
RESET
INDEX
TAPE SPEED
REC
X2 PAUSE
REW FF
2
1
5
4
7
8
JUMP ENTER
0
&7
SLOW
SEARCH
PLAY
STOP
SLEEP
MENU
SELECTRESET
CHVOL
Vous pouvez afficher la liste des réglages du programmateur que vous
avez présélectionnés.
Appuyez sur TIMER ON SCREEN.
Le menu REG/VERIF PROG apparaît.
3
6
9
REG / VERIF PROG 10 / 5
DATE DEBUT FIN CH
10
/ 6
MER
8:15PM 9:55PM 26
10
/ 7
JEU
7:30PM 8:30PM 50
LUN- SAM 11
:00PM 12:00AM 32
JEU
9:55AM 12:30PM 21
CHAQUE
_/__ _:__ _:__ ___ _
_/__ _:__ _:__ ___ _
Aller Choisir Sortie
SELECT
MAR
MENU
EP
EP
SP
EP
Appuyez à nouveau sur TIMER ON SCREEN pour désactiver le menu
REG/VERIF PROG.
Modification ou annulation des
réglages du programmateur
1 Appuyez sur TIMER ON SCREEN pour afficher le menu REG/VERIF
PROG.
2 Sélectionnez le réglage que vous voulez modifier ou annuler à l’aide de la
touche + ◊ ou – √.
REG / VERIF PROG 10 / 5
DATE DEBUT FIN CH
10
/ 6
MER
8:15PM 9:55PM 26
10
/ 7
JEU
7:30PM 8:30PM 50
LUN- SAM 11
:00PM 12:00AM 32
JEU
9:55AM 12:30PM 21
CHAQUE
_/__ _:__ _:__ ___ _
_/__ _:__ _:__ ___ _
Aller Choisir Sortie
SELECT
MAR
MENU
EP
EP
SP
EP
3 Pour modifier le réglage
A l’aide de la touche + ◊ ou – √ et de SELECT, réintroduisez les
paramètres que vous voulez changer.
Reportez-vous aux tapes 2 à 10 de la section “Réglage du programmateur”
aux pages 30 à 32.
Pour annuler le réglage
Appuyez sur RESET.
4 Appuyez sur TIMER ON SCREEN pour revenir à l’écran de départ.
5 S’il y a d’autres réglages du programmateur sur la liste, appuyez sur
POWER pour activer le téléviseur/vidéo en mode de veille
d’enregistrement par programmateur.
Opérations de base
33
Page 96

Enregistrement à l’aide du
POWER
STANDBY
EJECT
REC
TIMER REC
QUICK TIMER REC
EJECT
MUTING DISPLAY
INPUT
SELECT
TIMER ON SCREEN
VCR Plus
COUNTER/
REMAIN
COUNTER
JUMP ENTER
RESET
INDEX
TAPE SPEED
programmateur rapide –
QUICK
PROGRAMMATEUR
QUICK TIMER REC
INPUT
–
VOL
+ –
CHANNEL
+
SELEECT
POWER
TV
SLEEP
MENU
SELECTRESET
2
1
4
7
3
5
6
9
8
0
VOL
CH
Vous pouvez programmer votre téléviseur/vidéo pour démarrer
immédiatement l’enregistrement et l’arrêter automatiquement au terme
d’une durée déterminée.
Vous pouvez utiliser la fonction d’enregistrement QUICK
PROGRAMMATEUR même si vous n’avez pas réglé l’horloge.
Pour enregistrer
1 Introduisez une cassette dont l’onglet de protection est intact.
2 Sélectionnez la chaîne que vous voulez enregistrer à l’aide des touches 0 à
9 ou CH +/–.
3 Appuyez sur QUICK TIMER REC à l’avant du téléviseur/vidéo.
L’indication “QUICK PROGRAMMATEUR 0:00” apparaît à l’écran.
4 Appuyez plusieurs fois de suite sur QUICK TIMER REC pour sélectionner
la durée d’enregistrement voulue. A chaque pression, la durée change
comme suit :
0:00 0:30 1:00 .... 7:30 8:00
REC
&7
SLOW
X2 PAUSE
SEARCH
REW FF
PLAY
STOP
Pour modifier la durée
d’enregistrement après le
début d’un enregistrement
QUICK PROGRAMMATEUR
Appuyez sur QUICK TIMER REC
jusqu’à ce que la durée voulue
apparaisse.
Remarque
Si le programmateur de mise hors
tension est activé durant un
enregistrement par programmateur
rapide, l’écran du téléviseur est
désactivé mais l’enregistrement
continue.
Opérations de base
34
La durée vire au jaune et l’enregistrement démarre.
L’enregistrement se poursuit même si vous mettez le téléviseur/vidéo
hors tension.
Au terme de la durée programmée, le téléviseur/vidéo arrête
l’enregistrement.
Pour arrêter un enregistrement QUICK
PROGRAMMATEUR
Appuyez plusieurs fois de suite sur STOP p ou QUICK TIMER REC
jusqu’à ce que l’indication “QUICK PROGRAMMATEUR 0:00” apparaisse
à l’écran.
Page 97

Enregistrement d’émissions télévisées
à l’aide du système VCR Plus+
EJECT
MUTING DISPLAY
INPUT
SELECT
TIMER ON SCREEN
VCR Plus
1
COUNTER/
REMAIN
COUNTER
INDEX
TAPE SPEED
4
7
JUMP ENTER
RESET
REC
&7
X2 PAUSE
SEARCH
REW FF
SLOW
PLAY
STOP
POWER
TV
SLEEP
MENU
SELECTRESET
2
3
5
6
9
8
0
CHVOL
Si vous avez commis une erreur
en introduisant le PlusCode de
l’émission
Appuyez sur RESET et réintroduisez
le numéro correct.
Pour vérifier les réglages du
programmateur
Appuyez sur TIMER ON SCREEN.
Vous pouvez vérifier la liste des
réglages du programmateur.
Le programmateur refuse les
réglages dans les cas suivants :
• Lorsque vous entrez le code
PlusCode d’un programme qui a
déjà été diffusé.
• Lorsque vous entrez le code
PlusCode d’un programme dont
l’enregistrement est déjà
programmé.
• Si six programmes ont déjà été
programmées, le message “6
programmes ont déja été régles”
apparaît à l’écran.
Comment fonctionne le système VCR Plus+
Lorsque vous souhaitez enregistrer un programme télévisé, il vous suffit simplement
de rechercher son code “PlusCode”, un numéro attribué à toutes les émissions
mentionnées dans les rubriques TV de la plupart des quotidiens, des programmes de
TV par câble et dans les programmes TV classiques. Il ne vous reste plus ensuite qu’à
entrer le code PlusCode du programme que vous souhaitez enregistrer. Le
magnétoscope est alors automatiquement programmé pour enregistrer ce
programme. C’est aussi simple que cela. Vous pouvez programmer l’enregistrement
de six émissions au maximum en l’espace d’un mois. Pour pouvoir profiter de cette
fonction, vous devez d’abord configurer votre téléviseur/vidéo et assigner des
numéros de chaîne aux différents guides de chaîne. Pour obtenir des détails à ce sujet,
reportez-vous à la section “Réglage du système VCR Plus+
Avant de commencer
• Assurez-vous que la date et l’heure sont correctement réglées. Si ce n’est pas le cas,
reportez-vous à la section “Réglage de l’horloge” à la page 12.
• Assurez-vous que la cassette introduite dans l’appareil a toujours son onglet de
protection.
1 Appuyez sur la touche VCR Plus.
Le menu Le Système VCR Plus+ apparaît.
Le Système VCR Plus+
Le numéro VITESSE
de PlusCode
––––––––]
[
Utilizer [0-9] pour
sélectionner numéro de
PlusCode
Pressez [TAPE SPEED] pour
changer vitesse de bande
Pressez
2 Appuyez sur les touches 0 à 9 pour introduire le numéro de PlusCode de
l’émission voulue.
Le Système VCR Plus+
Le numéro VITESSE
de PlusCode
––––––––]
[
Utilizer [0-9] pour
sélectionner numé ro de
PlusCode
Pressez [TAPE SPEED] pour
changer vitesse de bande
Pressez
3
Appuyez plusieurs fois de suite sur TAPE SPEED pour sélectionner SP, EP ou AT
(vitesse de défilement automatique de la bande) et appuyez ensuite sur SELECT.AT
pour activer le réglage automatique de la vitesse de défilement de la bande entre SP
et EP de façon à ce que l’émission que vous avez sélectionnée puisse être enregistrée
sur la longueur de bande disponible. (Attention que l’enregistrement peut s’arrêter si
la cassette n’est pas suffisamment longue pour enregistrer l’émission en mode EP.)
Les données d’enregistrement (date, heures de début et de fin, numéro de chaîne et
vitesse de bande) apparaissent en vert.
Le Système VCR Plus+
Le numéro VITESSE
de PlusCode
––––––––]
[
TEMPS D’ENREGISTREMENT
DATE DEBUT FIN CH
MAR
1/0 5
Mettez le TV hors
tension pour régler
le programmateur
Vérifiez si les données sont correctes. Si ce n’est pas le cas, appuyez sur
RESET pour annuler le réglage.
4 Répétez les étapes 2 à 3 pour programmer un autre réglage.
5 Appuyez sur POWER pour mettre le téléviseur/vidéo hors tension.
Le témoin TIMER REC à l’avant du téléviseur/vidéo s’allume et le
téléviseur/vidéo passe en mode de veille d’enregistrement.
DE BANDE
AT]
[
SELECT
DE BANDE
[
AT]
SELECT
DE BANDE
AT]
[
9:00AM 10:30AM 7
Exemple de “PlusCode”
14
MOVIE Musical(2hrs.) 33044
5:30
2
SPORT Golf(1hr.25min.) 42060
CNN
WS 9974
234
6:30
AT
DRAMA Comedy(2hrs.) 17390
5
SCIENCE AND TECHNOLOGY
(1hrs.15min.) 73457
” à la page 16.
PlusCode
Opérations de base
35
Page 98

Opérations complémentaires
Mise sous ou hors tension
automatique du téléviseur/vidéo —
MINUTERIE
Vous pouvez programmer le téléviseur/vidéo pour qu’il se mette sous ou
EJECT
MUTING DISPLAY
INPUT
SELECT
TIMER ON SCREEN
RESET
VCR Plus
COUNTER/
REMAIN
COUNTER
JUMP ENTER
RESET
INDEX
TAPE SPEED
1
4
7
POWER
TV
SLEEP
MENU
SELECT
hors tension à l’heure de votre choix. Assurez-vous que l’horloge est réglée
correctement. Si ce n’est pas le cas, réglez d’abord l’horloge (page 12).
1 Appuyez sur MENU pour afficher le menu principal.
2 Déplacez le curseur (z) sur “PROGRAMMATEUR” à l’aide de la touche
+ ◊ ou – √ et appuyez ensuite sur SELECT.
Le menu PROGRAMMATEUR apparaît.
2
3
5
6
9
8
0
CHVOL
3 Déplacez le curseur (z) sur “MINUTERIE” à l’aide de la touche + ◊ ou – √
et appuyez ensuite sur SELECT.
Le menu MINUTERIE apparaît.
MINUTERIE
_ _ _ _ _ _
––:–– AM _H CH___
MENU
DIM 12:00 AM
Aller Choisir Sortie
SELECT
MENU
REC
&7
SLOW
X2 PAUSE
SEARCH
REW FF
PLAY
STOP
Si vous avez commis une
erreur
Appuyez sur ? pour revenir à la
position précédente.
Pour annuler les réglages
Appuyez sur RESET pendant que le
menu MINUTERIE est affiché.
Remarque
Si le programmateur de mise hors
tension est activé pendant un
enregistrement par programmateur
rapide, l’écran du téléviseur est
désactivé mais l’enregistrement
continue.
Opérations complémentaires
36
4 Appuyez sur SELECT pour introduire votre réglage MINUTERIE.
5 Appuyez sur + ◊ ou – √ pour sélectionner le(s) jour(s) et appuyez ensuite
sur SELECT.
Chaque fois que vous appuyez sur la touche + ◊ ou – √, les jours changent
comme indiqué ci-dessous.
CHAQUE DIM-SAM n CHAQUE LUN-VEN n DIM ...n... SAM n
CHAQUE DIM ...n... CHAQUE SAM.
MINUTERIE
CHAQUE LUN–VEN
12:00 AM _H CH___
MENU
Régler le jour
Aller Choisir Sortie
DIM 12:00 AM
SELECT
MENU
6 Appuyez sur la touche + ◊ ou – √ pour sélectionner l’heure (l’heure et puis
les minutes) à laquelle vous voulez que le téléviseur/vidéo se mette sous
tension et appuyez ensuite sur SELECT.
MINUTERIE
CHAQUE LUN–VEN
12:02 AM _H CH___
MENU
Régler l’heure
Aller Choisir Sortie
DIM 12:00 AM
SELECT
MENU
7 Appuyez sur la touche + ◊ ou – √ pour sélectionner la durée et appuyez
ensuite sur SELECT.
A chaque pression, la durée augmente d’une heure jusqu’à une durée
maximale de douze heures.
MINUTERIE
CHAQUE LUN–VEN
12:02 AM 1H CH___
MENU
Régler la durée
Aller Choisir Sortie
DIM 12:00 AM
SELECT
MENU
Page 99

8 Appuyez sur + ◊ ou – √ pour sélectionner la chaîne et appuyez ensuite sur
SELECT.
MINUTERIE
CHAQUE LUN–VEN
12:02 AM 1H CH 1
MENU
Choisir le canal
Aller Choisir Sortie
DIM 12:00 AM
SELECT
MENU
9 Appuyez sur MENU pour revenir à l’écran de départ.
Si vous n’envisagez pas d’utiliser le téléviseur/vidéo, appuyez sur
POWER pour l’activer en mode de veille.
Une minute avant que le téléviseur/vidéo se mette hors tension, le
message “TV se met hors tension” apparaît à l’écran.
Mise hors tension automatique —
Programmateur d’extinction
EJECT
MUTING DISPLAY
INPUT
SELECT
TIMER ON SCREEN
POWER
TV
SLEEP
MENU
SELECTRESET
Vous pouvez activer automatiquement le téléviseur/vidéo en mode de
veille au bout d’une durée déterminée.
Appuyez sur SLEEP.
A chaque pression, la durée (en minutes) change comme suit:
NON 30 60 90
VCR Plus
COUNTER/
REMAIN
COUNTER
RESET
INDEX
TAPE SPEED
REC
X2 PAUSE
REW FF
2
1
5
4
7
8
JUMP ENTER
0
&7
SLOW
SEARCH
PLAY
STOP
3
Une minute avant que le téléviseur passe en mode de veille, le message
6
“TV se met hors tension” s’affiche à l’écran.
9
CHVOL
Opérations complémentaires
37
Page 100

Sélection de la chaîne d’entrée du
décodeur du téléviseur/vidéo —
FIXE
Utilisez la fonction CANAL FIXE pour éviter que la chaîne d’entrée du
EJECT
MUTING DISPLAY
INPUT
SELECT
TIMER ON SCREEN
VCR Plus
1
COUNTER/
COUNTER
INDEX
TAPE SPEED
4
REMAIN
7
JUMP ENTER
RESET
REC
&7
X2 PAUSE
SEARCH
REW FF
SLOW
PLAY
STOP
POWER
TV
SLEEP
MENU
SELECTRESET
2
3
5
6
9
8
0
CHVOL
téléviseur/vidéo soit changée accidentellement.
Si vous raccordez un décodeur, nous recommandons de configurer votre
téléviseur/vidéo de la façon suivante.
1 Appuyez sur MENU pour afficher le menu principal.
2 Déplacez le curseur (z) sur “REGLAGE” à l’aide de la touche + ◊ ou – √ et
appuyez ensuite sur SELECT.
Le menu REGLAGE apparaît.
3 Déplacez le curseur (z) sur “REGLAGE DE CANAUX” à l’aide de la
touche + ◊ ou – √ et appuyez ensuite sur SELECT.
Le menu REGLAGE DE CANAUX apparaît.
REGLAGE DE CANAUX
CABLE: NON
CANAL FIXE: NON
AUTO PROGRAMMATION
SAUTE/AJOUTE CANAL
VCR P l u s+ SET UP
MENU
Aller Choisir Sortie
SELECT
MENU
4 Déplacez le curseur (z) sur “CANAL FIXE” à l’aide de la touche + ◊ ou
– √ et appuyez ensuite sur SELECT.
La position sélectionnée vire au rouge.
REGLAGE DE CANAUX
CABLE: NON
CANAL FIXE: NON
AUTO PROGRAMMATION
SAUTE/AJOUTE CANAL
VCR PLUS+ SET UP
MENU
CANAL
Opérations complémentaires
38
Aller Choisir Sortie
SELECT
MENU
5 A l’aide de la touche + ◊ ou – √, sélectionnez la chaîne d’entrée du
décodeur du téléviseur/vidéo de votre choix et appuyez ensuite sur
SELECT.
A chaque pression, le mode d’entrée change comme suit:
NON 2 3 4 5 6 LINE
Si vous réglez CANAL FIXE sur “2-6”, vous pouvez uniquement regarder
la chaîne de télévision que vous avez programmée ou l’entrée de ligne.
Si vous réglez CANAL FIXE sur “LINE”, vous ne pouvez pas commuter
l’entrée de ligne et une chaîne de télévision.
Pour désactiver CANAL FIXE, réglez-le sur “NON” .
6 Appuyez sur MENU pour revenir à l’écran de départ.
 Loading...