

Sony KD85X9500G, KD55X9500G, KD65X9500G, KD75X9500G User Manual
4-748-650-12(1)
Television
Reference Guide
參考指南
GB
CT
Customer Support and Contact:
用戶支援和聯絡:
http://www.sony-asia.com/support
KD-85X9500G / 75X9500G / 65X9500G / 55X9500G
To attach the Table-Top
Stand, refer to the Setup
Guide.
Table of Contents
Safety Information . . . . . . . . . . . . . . . . . . . . .2
Parts and Controls . . . . . . . . . . . . . . . . . . . 4
Controls and Indicators . . . . . . . . . . . . . . . . .4
Using Remote Control . . . . . . . . . . . . . . . . 5
Remote Control Parts Description. . . . . . . . .5
Connection Diagram . . . . . . . . . . . . . . . . . 7
Installing the TV to the Wall . . . . . . . . . . . 9
Using the optional Wall-Mount Bracket . . . .9
Troubleshooting. . . . . . . . . . . . . . . . . . . . 10
Troubles and Solutions. . . . . . . . . . . . . . . . . 10
Specifications . . . . . . . . . . . . . . . . . . . . . . .11
Introduction
Thank you for choosing this Sony product.
Before operating the TV, please read this manual thoroughly and
retain i t for fu ture reference.
Note
• Before operating the TV, please read the “Safety Information”
(page
2).
• Read the supplied Safety Information for additional safety
information.
• Instructions about “Installing the TV to the Wall” are included
within this TV’s instruction manual.
• Images and illustrations used in the Setup Guide and this
manual are for reference only and may differ from the actual
product.
Help
Find more troubleshooting and other useful information
directly from your TV. Press HELP on the remote control to
display a list of topics, or to search by keyword.
Help Guide (Manual)
For more detailed information, select [Help Guide] from the
Help menu on your TV. You can also check the Help Guide from
your PC or smartphone (information provided on the back
cover of this manual).
Location of the identification label
Labels for the TV Model No. and Power Supply rating are located
on the rear of the TV.
This television is designed for use in Hong Kong and ensured
the usage in Hong Kong only.
Safety Information
Installation/Set-up
Install and use the TV set in accordance with the instructions
below in order to avoid any risk of fire, electric shock or damage
and/or injuries.
Installation
• The TV set should be installed near an easily accessible AC
power outlet (mains socket).
• Place the TV set on a stable, level surface to prevent it from
falling over and causing personal injury or property damage.
• Install the TV where it cannot be pulled, pushed, or knocked
over.
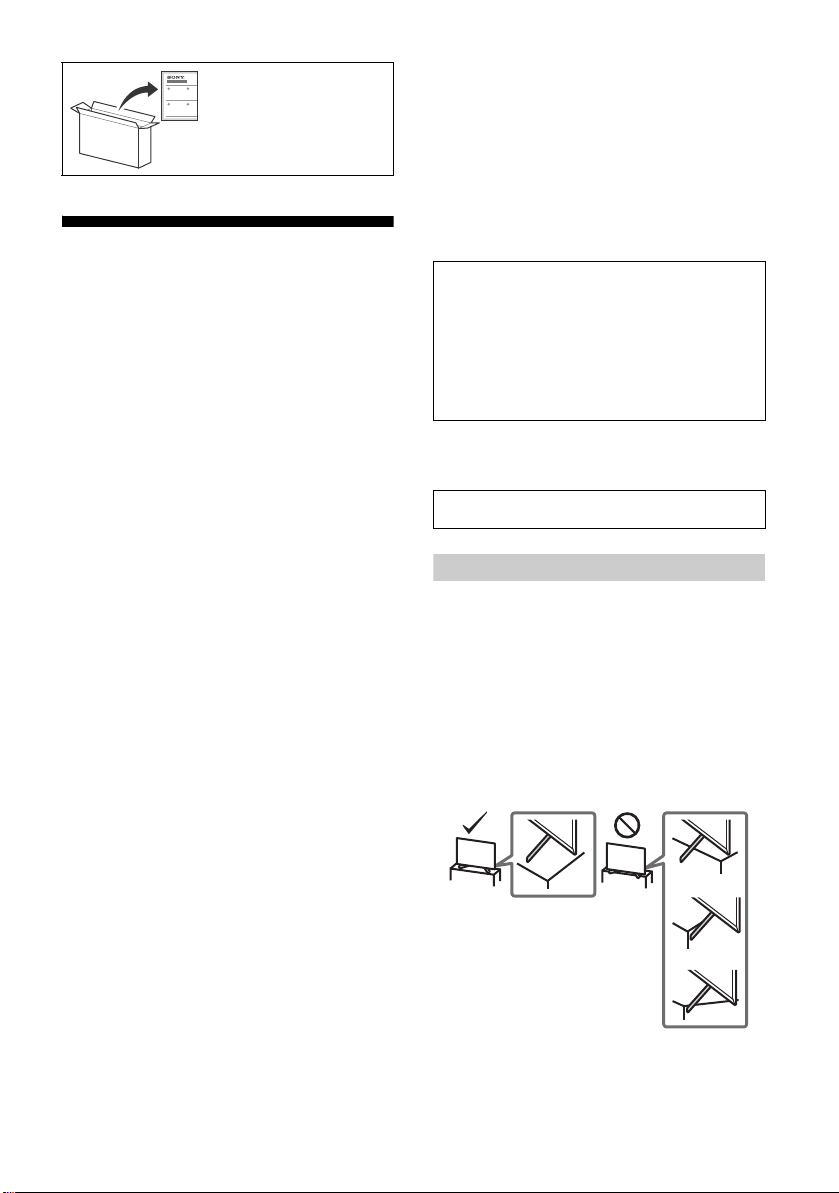
• Install the TV so that the TV’s Table-Top Stand does not protrude
out from the TV stand (not supplied). If the Table-Top Stand
protrudes out from the TV stand, it may cause TV set to topple
over, fall down, and cause personal injury or damage to the TV.
• Only qualified service personnel should carry out wall-mount
installations.
• For safety reasons, it is strongly recommended that you use
Sony accessories, includin g:
Wall-Mount Bracket SU-WL450
GB
2
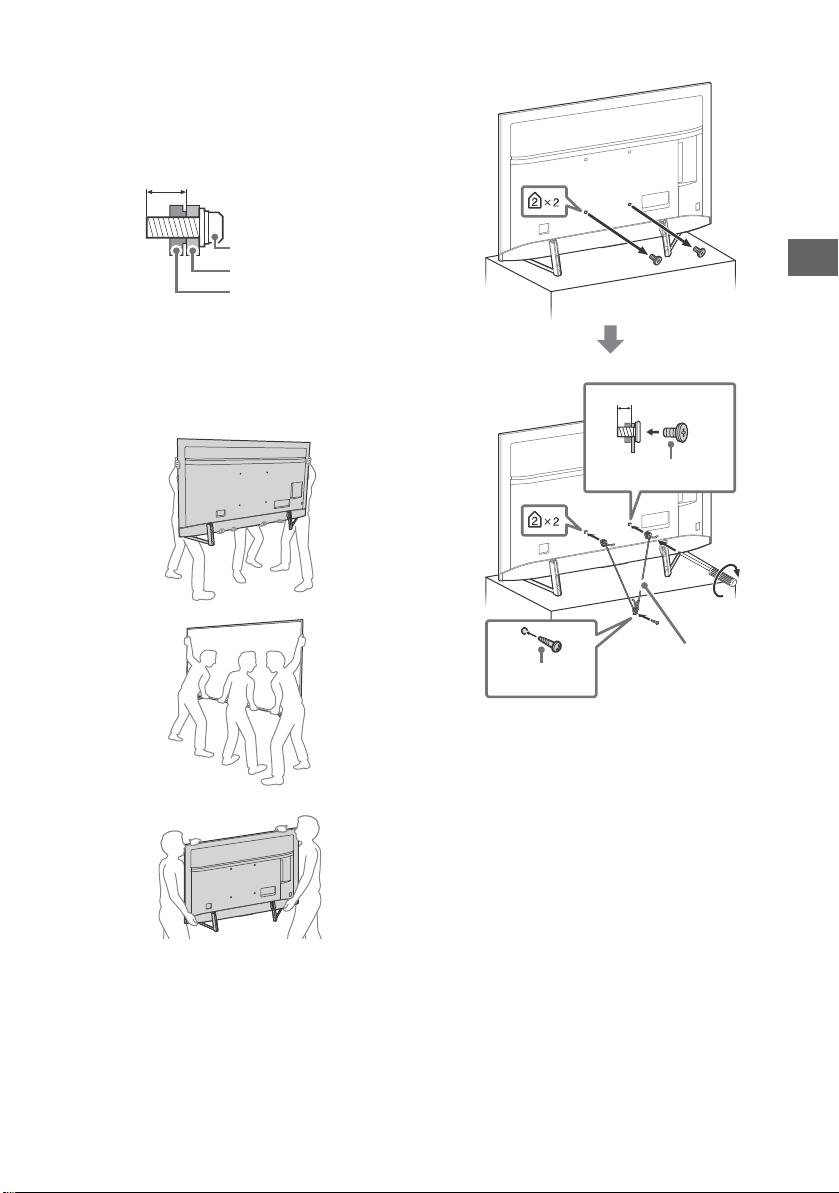
• Be sure to use the screws supplied with the Wall-Mount Bracket
Screw (M6)
Wall-Mount Bracket
TV’s rear co ver
8 mm – 12 mm
8 mm – 12 mm
M6 screw (not
supplied)
Screw (not
supplied)
Cord (not supplied)
1.5 N·m {15 kgf·cm}
GB
when attaching the Wall-Mount Bracket to the TV set. The
supplied screws are designed as indicated by illustration when
measured from the attaching surface of the Wall-Mount Bracket.
The diameter and length of the screws differ depending on the
Wall-Mount Bracket model.
Use of screws other than those supplied may result in internal
damage to the TV set or cause it to fall, etc.
Tran spo rti ng
• Before transporting the TV set, disconnect all cables.
• Two or more people (three or more people for KD-85X9500G)
are needed to transport a large TV set.
• When transporting the TV set by hand, hold it as shown below.
Do not put stress on the LCD panel and the frame around the
screen.
KD-85X9500G
Topple prevention
KD-75/65/55X9500G
• When transporting the TV set, do not subject it to jolts or
excessive v ibration.
• When transporting the TV set for repairs or when moving, pack
it using the original carton and packing material.
GB
3
Parts and Controls
ȬȫȪȩ
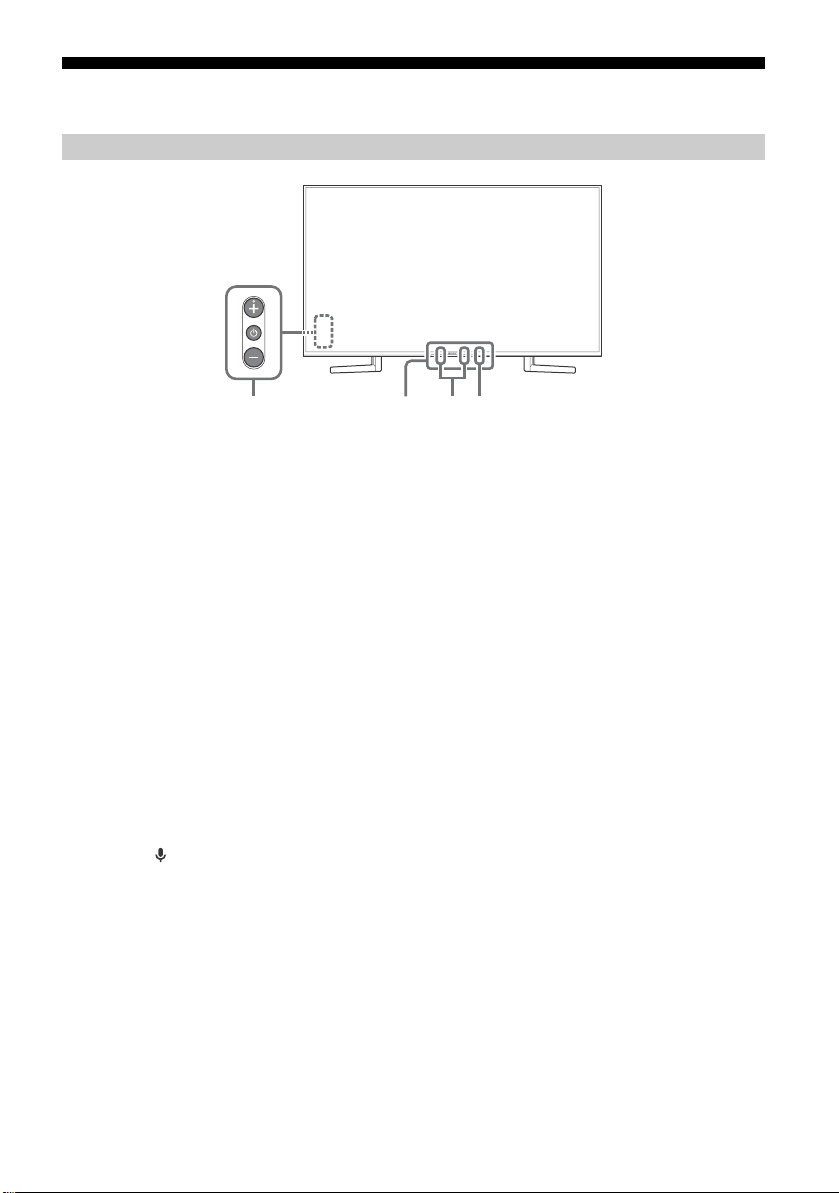
Controls and Indicators
(Power) /+/–
When the TV is off,
Press to power on.
When the TV is on,
Press and hold to power off.
Press repeatedly to change the function,
then press + or – button to:
•Adjust the volume.
• Select the channel.
• Select the input source of TV.
Remote Control sensor*1 / Light
sensor*
1
/ Illumination LED
The illumination LED lights up or blinks
according to the status of the TV.
For more information, refer to the Help
Guide.
Built-in MIC*2*
3
Use the hands-free built-in microphone for
voice search. To enable the built-in MIC,
follow the on-screen instructions when you
press the button.
Built-in MIC LED
The built-in MIC LED lights up in amber
when the built-in MIC is enabled. The
built-in MIC LED can be disabled.*
3
*1 Do not place anything near the sensor.
*2 The voice search requires an Internet connection.
The voice search with the built-in MIC is available
only on limited region/country/language.
Standby power consumption will increase because
the built-in MIC is always listening when the voice
search with the built-in MIC is enabled.
*3 For more information, see the Online Help Guide
(page
2).
GB
4
Using Remote Control
MIC
Ȫ
ȫ
Ȭ
ȭ
Ȯ
ȩ
GB
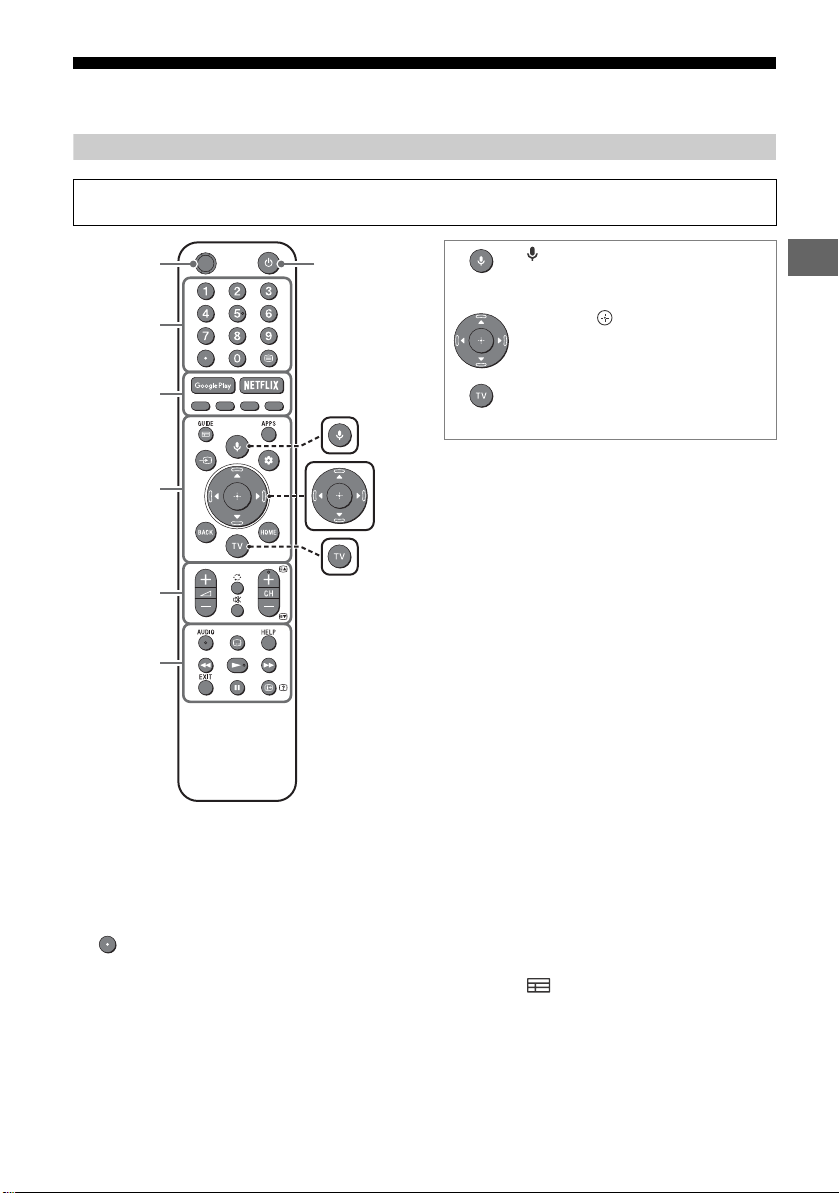
Remote Control Parts Description
The remote control shape, location, availability and function of remote control buttons may vary
depending on your region/country/TV model.
(Microphone)
Use voice search*. (e.g., Search
various content by voice.)
//// (Navigation D-Pad)
On screen menu navigation and
selection.
TV
Switch to a TV channel or input and
display the TV menu.
* The voice search requires an Internet connection.
(TV standby)
Turn on or turn off the TV (standby mode).
Number buttons
Use with the 0-9 buttons to select digital
channels.
(Text)
Display text information.
Google Play
Access the “Google Play” online service.
NETFLIX (Only on limited region/
country/TV model)
Access the “NETFLIX” online service.
Colour buttons
Execute corresponding function at that time.
GUIDE/
Display the digital programme guide.
APPS
Display a list of installed apps.
GB
5
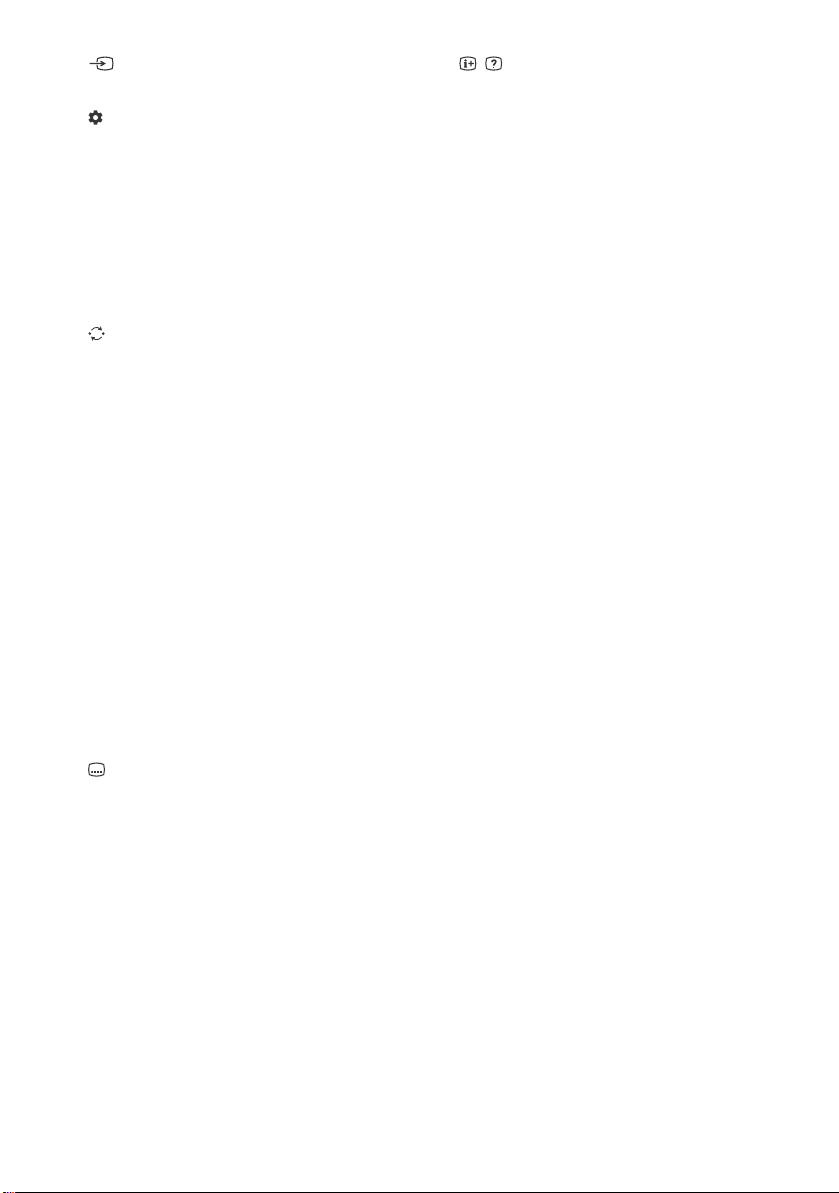
(Input select)
Display and select the input source, etc.
(Quick settings)
Display Quick Settings.
BACK
Return to the previous screen.
HOME
Display the TV Home Menu.
+/– (Volume)
Adjust the volume.
(Jump)
Jump back and forth between two channels
or inputs. The TV alternates between the
current channel or input and the last
channel or input that was selected.
(Mute)
Mute the sound. Press again to restore the
sound.
Hint
• The accessibility shortcut service can be turned
on or off by pressing and holding .
CH +/–//
In TV mode: Select the channel.
In Text mode: Select the next () or
previous () page.
AUDIO
Select the sound of multilingual source or
dual sound for the programme currently
being viewed (depend on programme
source).
(Subtitle setting)
Turn subtitles on or off (when the feature is
available).
HELP
Display the Help menu. Help Guide can be
accessed from here.
///
Operate media contents on the TV and
connected BRAVIA Sync-compatible device.
EXIT
Return to the previous screen or exit from
the menu. When an Interactive Application
service is available, press to exit from the
service.
/ (Info/Text reveal)
Display information.
GB
6
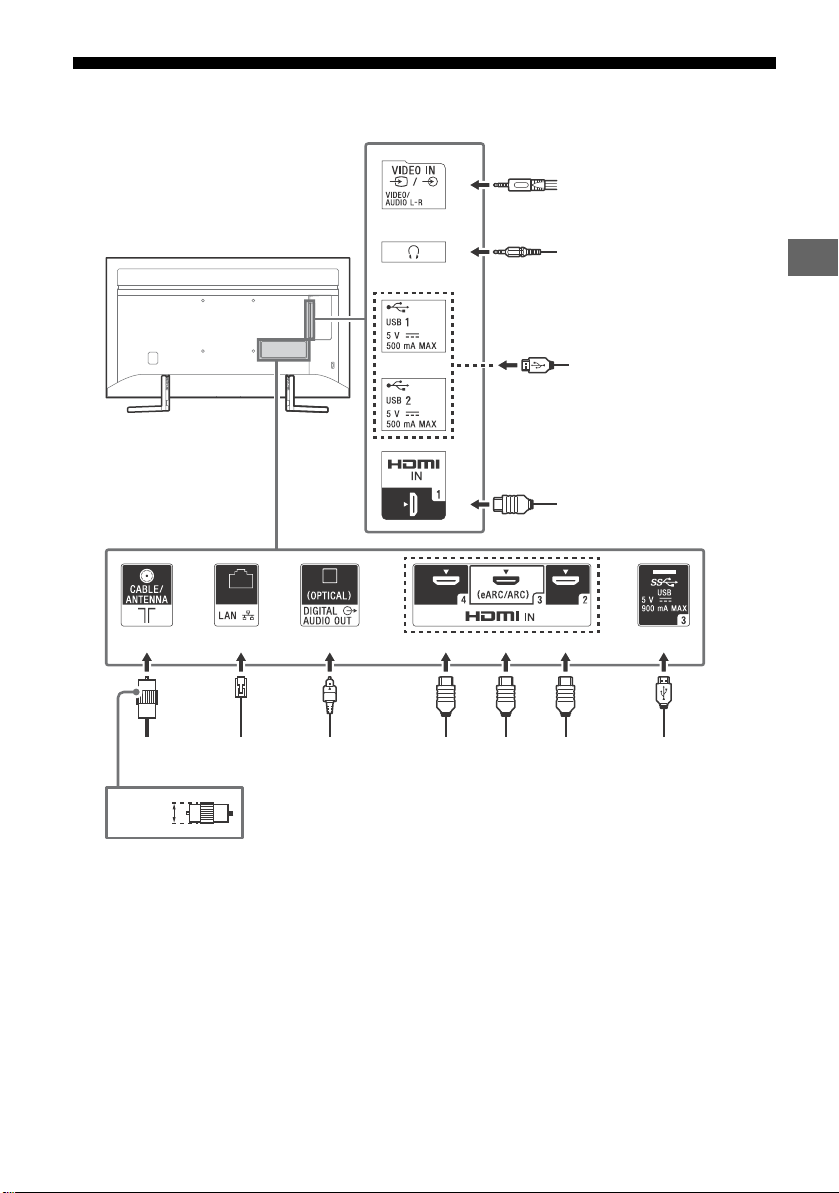
Connection Diagram
Ȭ
ȩ
Ȫ
ȫ
Ȭ
ȫ
<
Digital still
camera/
Camcorder/USB
storage media
Digital still camera/
Camcorder/USB storage
media
VCR/Video game
equipment/DVD player/
Camcorder
Audio
System
with
eARC/
ARC/
HDMI
Device
HDMI
Device
Cable/
Antenna
Router Audio System
with Optical
Audio Input
HDMI
Device
HDMI Device
Headphone
14 mm
GB
For more information on connections, refer to the Help Guide by pressing HELP on the remote control.
GB
7

/ VIDEO IN
3214
3.5 mm
1: L
2: Video
3: Ground
4: R
<
<
12 mm
21 mm
• For a composite connection, use an
Analogue Extension Cable (not supplied).
•
(Headphone)
• Supports 3-pole stereo mini jack only.
• You cannot output sound from both the
headphone and the TV speakers at the
same time.
USB 1/2, USB 3
• Connecting a large USB device may
interfere with other connected devices
beside it.
• When connecting a large USB device,
connect to the USB 1 port.
HDMI IN 1/2/3/4
• HDMI interface can transfer the digital
video and audio on a single cable.
•
• HDMI IN 3 eARC/ARC (Enhanced Audio
Return Channel/Audio Return Channel)
Connect your audio system to the
HDMI IN 3 to route TV audio to your audio
system. An audio system that supports
HDMI eARC/ARC can send video to the TV,
and receive audio from the TV via the
same HDMI cable. If your audio system
does not support HDMI eARC/ARC, an
additional connection with DIGITAL AUDIO
OUT (OPTICAL) is necessary.
• Use the HDMI cable with Ethernet to
connect audio system with eARC.
• To enjoy high quality 4K 50p/60p
contents, connect a Premium High Speed
HDMI cable and set the [HDMI signal
format] to [Enhanced format].
Do this setting individually for each
connected HDMI IN terminal. For details of
supported formats, refer to the
“Specifications” in this manual (page
11-12).
GB
8
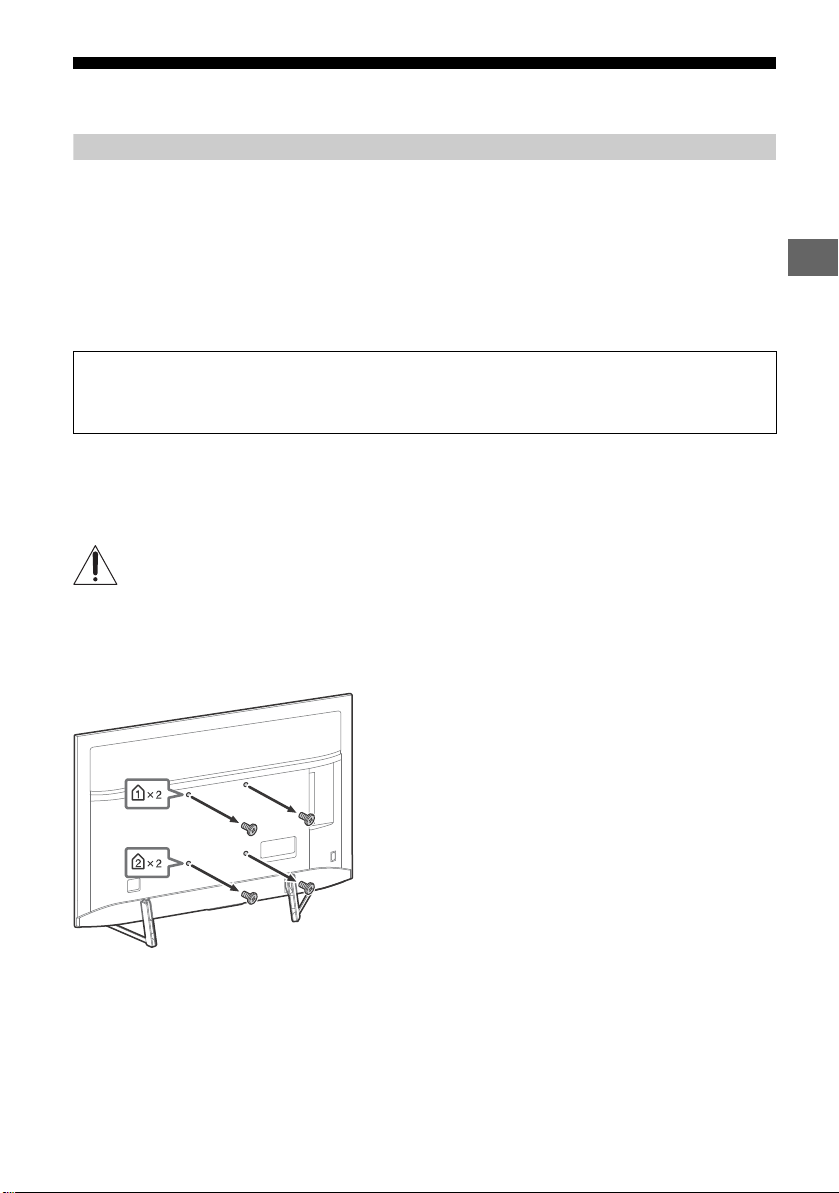
Installing the TV to the Wall
GB
Using the optional Wall-Mount Bracket
This TV’s instruction manual only provides the steps to prepare the TV for Wall-Mount installation
before it is installed on the wall.
To Customers:
For product protection and safety reasons, Sony strongly recommends that installation of your TV be
performed by Sony dealers or licensed contractors. Do not attempt to install it yourself.
To Sony Dealers and Contractors:
Provide full attention to safety during the installation, periodic maintenance and examination of this
product.
Sufficient expertise is required for installing this product, especially to determine the strength of the wall for
withstanding the TV’s weight. Be sure to entrust the attachment of this product to the wall to Sony dealers
or licensed contractors and pay adequate attention to safety during the installation. Sony is not liable for
any damage or injury caused by mishandling or improper installation.
Use the Wall-Mount Bracket SU-WL450 (not supplied) to install the TV to the wall.
When installing the Wall-Mount Bracket, also refer to the Operating Instructions and Installation Guide
supplied with the Wall-Mount Bracket.
Note
• Be sure to store the removed screws in a safe place, keeping them away from children.
For instructions on Wall-Mount Bracket installation, see the Installation Information (Wall-Mount Bracket) on the
product page for your TV model.
http://www.sony-asia.com/support
Remove the screws from the rear of the TV.
GB
9
 Loading...