

Sony Ipels PCS-G50, Ipels PCS-G50P, Ipela PCS-G50, Ipela PCS-G50P Connection Manual
Video Communication System PCS-G50/G50P
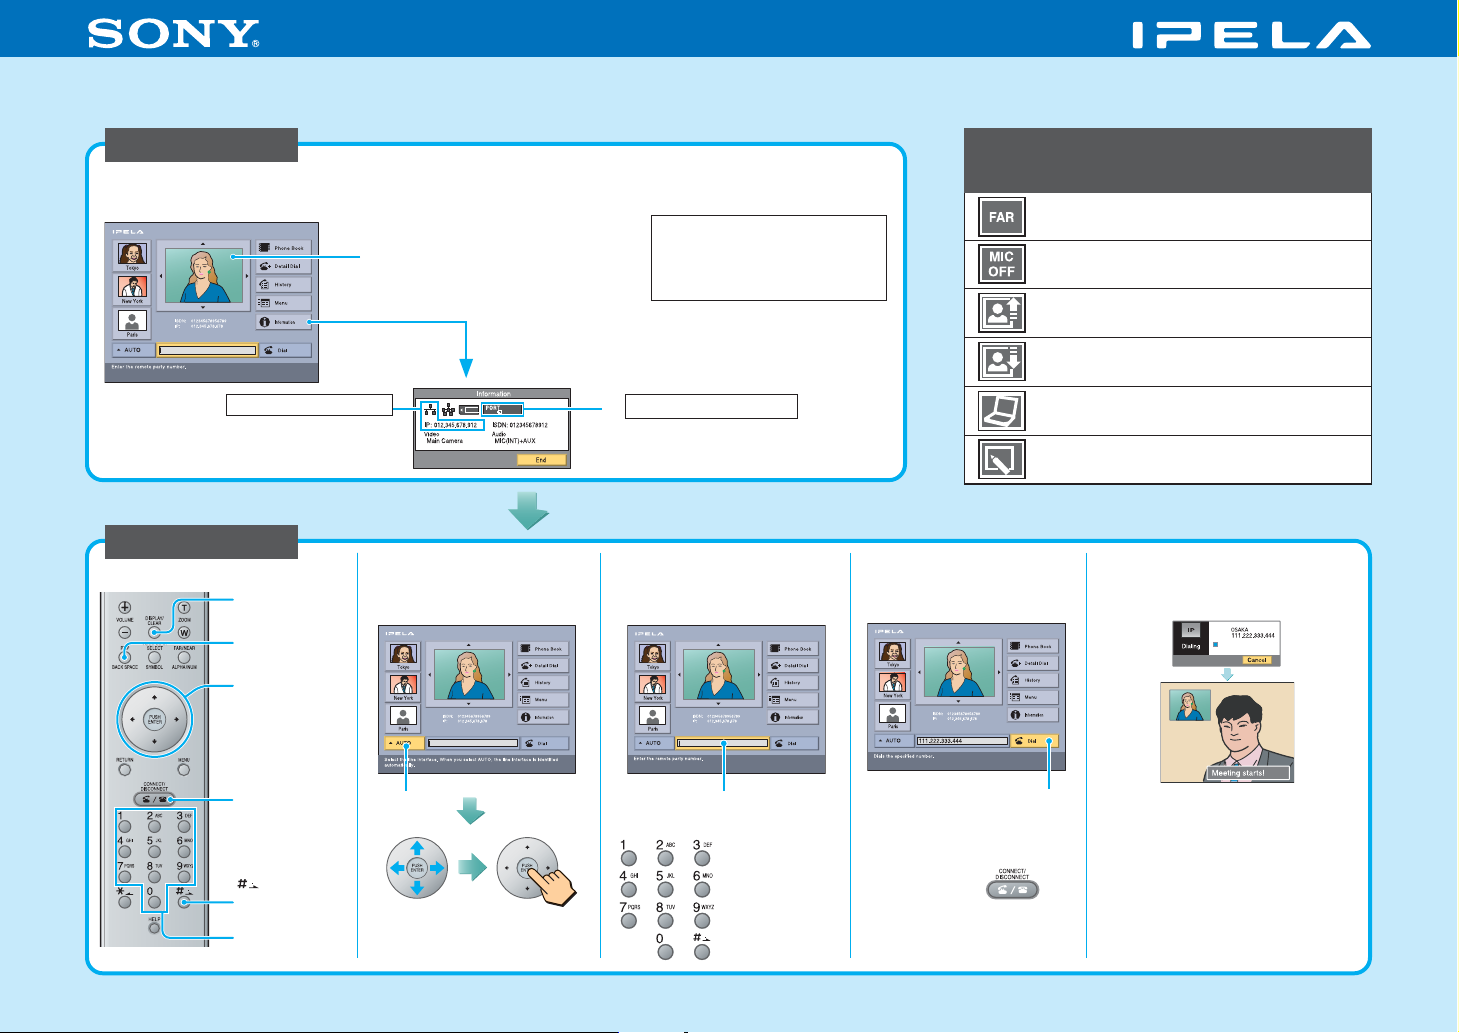
Quick Connection Guide Using Speed Dial
For details on operations, refer to the Operating Instructions
(stored in the supplied CD-ROM).
To begin with
Turn on your Video Communication System and TV monitor, and check the following to ensure
that connection is possible.
Note: Connection to a remote
party is not possible if neither
the IP address nor ISDN
indicator is displayed.
When using the ISDN
3
Are one or more ports of the
ISDN indicator highlighted?
When using the LAN
3
Is the LAN indicator
highlighted and is the IP
address displayed?
Is the picture of your camera
1
(local picture) on the monitor
screen?
2
Select “Information”
and press PUSH
ENTER
After checking...
Let’s connect
DISPLAY
(CLEAR) button
PinP
(BACKSPACE)
button
V/v/B/b (arrow)
buttons and
PUSH ENTER
button
Verify the “LINE I/F”.
1
Select the Number text
2
box and press PUSH
ENTER.
Main indicators that appear
during communication
Select “Dial” and
3
press PUSH ENTER.
Controlling a remote camera
Local microphone is turned off
Sending a still image
Receiving a still image
Sending or receiving a computer screen
Sending or receiving data from a
whiteboard
The system dials and
4
establishes
communication.
CONNECT/
DISCONNECT
button
(enter dot)
Number buttons
2005 Sony Corporation
button
Line I/F
Select the
type of line
to use.
To change
Press.
Number text box
Enter the IP
address or line
number.
Dial
Or press .
3-986-677-11(1)
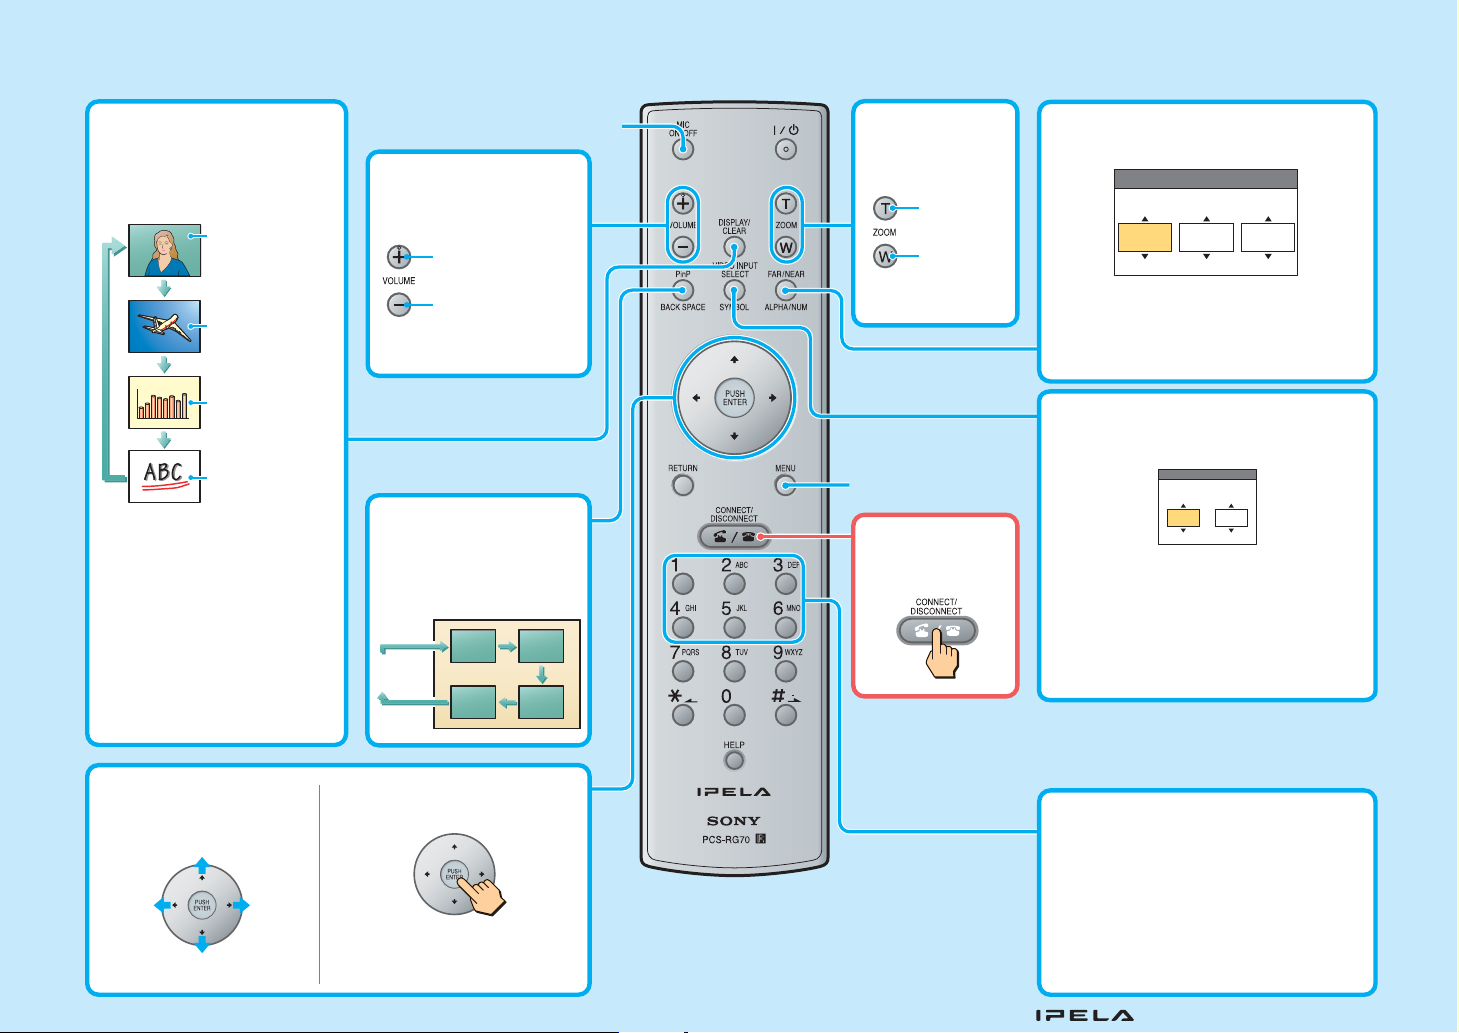
Remote Commander Guide: Operations available during communication
For details on operations, refer to the Operating Instructions (stored in the supplied CD-ROM).
Switching the picture on
the TV monitor
Each press of DISPLAY
switches the picture.
Picture from
remote
DISPLAY button
Still image
transmitted or
received
RGB picture
Picture on a
whiteboard
Note: You can switch among
the available pictures only.
Switching on/off the
local microphone
Adjusting the sound
of the remote party
To increase the
volume
To decrease
the volume
Changing the location
of the window picture
Each press of PinP
changes the location of the
window.
No
window
Adjusting the
camera zoom
To enlarge
the picture
To reduce
the picture
Displaying the menu
available during
communication
Ending the
conference
Selecting the displayed picture and
the camera
Display Control
Display
Far
Display: Select the “Near” or “Far” picture
to be displayed on the monitor screen.
Control: Select the “Near Camera” or “Far
Camera” to be controlled.
Control
Near
Camera
Selecting the input picture
Select the “Near” (local) picture and the
“Far” (remote) picture.
Video Input Select
VIDEO IN Far
Main camera Main camera
MAIN CAMERA: Selects the video from the
MAIN CAMERA.
AUX1: Selects the video from the device
connected to the AUX IN connector.
IR1: Selects the video from the optional PCS-
DS150 Document Stand.
Adjusting the camera
angle
Up
Left Right
Down
Using convenient functions
A submenu opens to enable
sending of still images, etc.
Presetting the camera angle
Press button 1 to 6 quickly to move the
camera to the preset position.
Hold down button 1 to 6 to preset the
current camera position.
Note: If you press button 1 to 6 quickly
when there is no preset setting, the camera
moves to the center position.
“IPELA” and are trademarks of Sony Corporation.
 Loading...