

Sony CMT-BX5BT, HCD-BX5BT - Receiver, Amplifier, Bluetooth Operating Instructions Manual
SONY;
MicroHI-FI
3-095-507-12(1)
Component
Operating
Owner's
The model and serial numbers are located on the rearofthe unit. Record these
numbers in the space provided below. Refer to them whenever you
Sony dealer regarding this product. .
Model
No.
Instructions
Record
Serial No. _
System
call
upon your
~1~
CMT-BX5BT
©
2007
Sony
I)
Corporation
Bluetootli
WARNING
To
reduce
electric
this apparatus to rain or
moisture.
CAUTION
The useofoptical instruments with this
product
Notice
CAlJTION: TO REDUCE THE RISKOFELECTRIC SHOCK,
REFER SERVICING TO QUALIFIED SERVICE PERSONNEL.
~
Lh
I
• maintenance (servicing)
~
NotetoCATV system installer:
This reminderisprovided to call the
CATV system installer's attention to·
Article 820-40
guidelines for proper grounding and, in
particular, specifies that the cable ground
shall be connected to the grounding
system
of
of
cable entry as practical.
the risk offire or
shock,
will
increase eye hazard.
for
the
DO NOT REMOVE COVER (OR BACK).
NO USER·SERVICEABLE PARTS INSIDE.
This symbol is intended to
alert the user to the presence
of
voltage"
enclosure that may be
sufficient magnitude to
constitute a risk
shock to persons.
This symbolisintended to
alert the usertothe presence
of
instructions in the literature
accompanying the appliance.
the building,asclose to the point
do
not expose
customers in
uninsulated "dangerous
within the product's
important operating
of
the NEC that provides
of
electric
the
of
U.S.A
and
Thefollowing
onlytothe
manufactured
Otherversions
FCC
technical regulations.
WARNING
This equipment has been tested and found
to comply with the limits for a Class B
digital device, pursuant to Part
FCC Rules. These limits are designed to
provide reasonable protection against
harmful interference in a residential
installation. This equipment generates,
uses and can radiate radio frequency
energy and,
in accordance with the instructions,
may cause harmful interference to
radio communications. However, there
is no guarantee that interference
not occur in a particular installation.
If
this equipment does cause harmful
interference to radio
reception, which can be determined
by turning the equipment off
is
the user
the interference by one
following measures:
- Reorient
antenna.
- Increase the separation between the
equipment and receiver.
- Connect the equipment into an outlet
on a circuit different from that to which
the receiver
- Consult the dealeroran experienced
radio/TV technician for help.
CAUTION
You
are cautioned that any changes
modifications not expressly approved in
this manual could void your authority to
operate this equipment.
This equipment must not be co-located
operated in conjunction with any other
antenna
encouraged to
or
FCC
statement
ver.lonofthl.
for
sale In
may
not
if
not installed
or
or
relocate the receiving
is
connected~
transmitter.
and
television
trytocorrect
or
moreofthe
.pplle.
model
the
U.S.A.
comply
15ofthe
used
will
and
on,
with
or
or
This equipment complies with FCC
radiation exposure limits set forth for
uncontrolled equipment and meets the
FCC radio frequency
(RF)
Exposure
Guidelines in Supplement C to OET65.
This equipment has a very low
level that
FCC radio frequency
is
deemed to complywith
(RF)
RF
energy
Exposure
Guidelines in Supplement C to OET65
without maximum permissive exposure
evaluation (MPE). But it
is
desirable that
it should be installed and operated with at
least 20cm and more between the radiator
and person's body(excluding extremities:
hands, wrists, feet and legs).
Notice
for
the
customersinCanada
Operationissubject to the following
two conditions: (1) this device may not
cause interference, and (2) this device
must accept any interference, including
interference that may cause undesired
operation
of
this device.
This equipment complies with IC radiation
exposure limits set forth for uncontrolled
equipment
and
meets the RSS-l02of
the
IC radio frequency (RF) Exposure rules.
Musicdiscs encoded
protectiontechnologies
with
copyright
This productisdesigned to playback
discs that conform to the Compact Disc
(CD) standard. Recently, various music
discs encoded withcopyright protection
technologies are marketed by some record
companies. Please be aware that among
those discs, there are some that do not
conform to the CD standard and
,may
not
be playable by this product.
mark
and
• The Bluetooth word
logos
are owned by the Bluetooth SIG, Inc.
and
any useofsuch marks by Sony
Corporation is
trademarks
of
their
respective owners.
under
and
license.
trade names are those
Other
• MPEG Layer-3 audio coding
technology
Fraunhofer IIS
and
patents licensed from
and
Thomson.
This equipment has
is
level that
deemed to complywith
avery
lowRFenergy
RSS-I02 without maximum permissive
exposure evaluation (MPE). But it
is
desirable that it should be installed and
operated with at least 20cm and more
between the radiator and person's body
(excluding extremities: hands, wrists, feet
and legs).
NoteonDualDiscs
A DualDiscisa two sided disc product
which mates DVD recorded material
on
one side with digital audio materialon,
the other side. However, since the
audIO
material side does not conform to the
Compact Disc (CD) standard, playback
this productisnot guaranteed.
on
Table
Guidetoparts and controls 5
Information on the display 9
of
Contents
Others
Getting Started
Hooking
securely
Setting
Basic
Playing aCD/MP3 disc
Listeningtothe radio
Using the Bluetooth function 14
Using optional audio
components 20
Adjusting the sound 20
Changing the display
up
the system
the
clock
Operations
10
11
12
13
21
Troubleshooting
Messages 28
Precautions 29
Specifications
Bluetooth wireless technology
Playable Bluetooth devices 34
25
31
32
Other Operations
Creating your
(Program
Presetting radio stations
Using theTimers 24
Play)
own
program
22
23
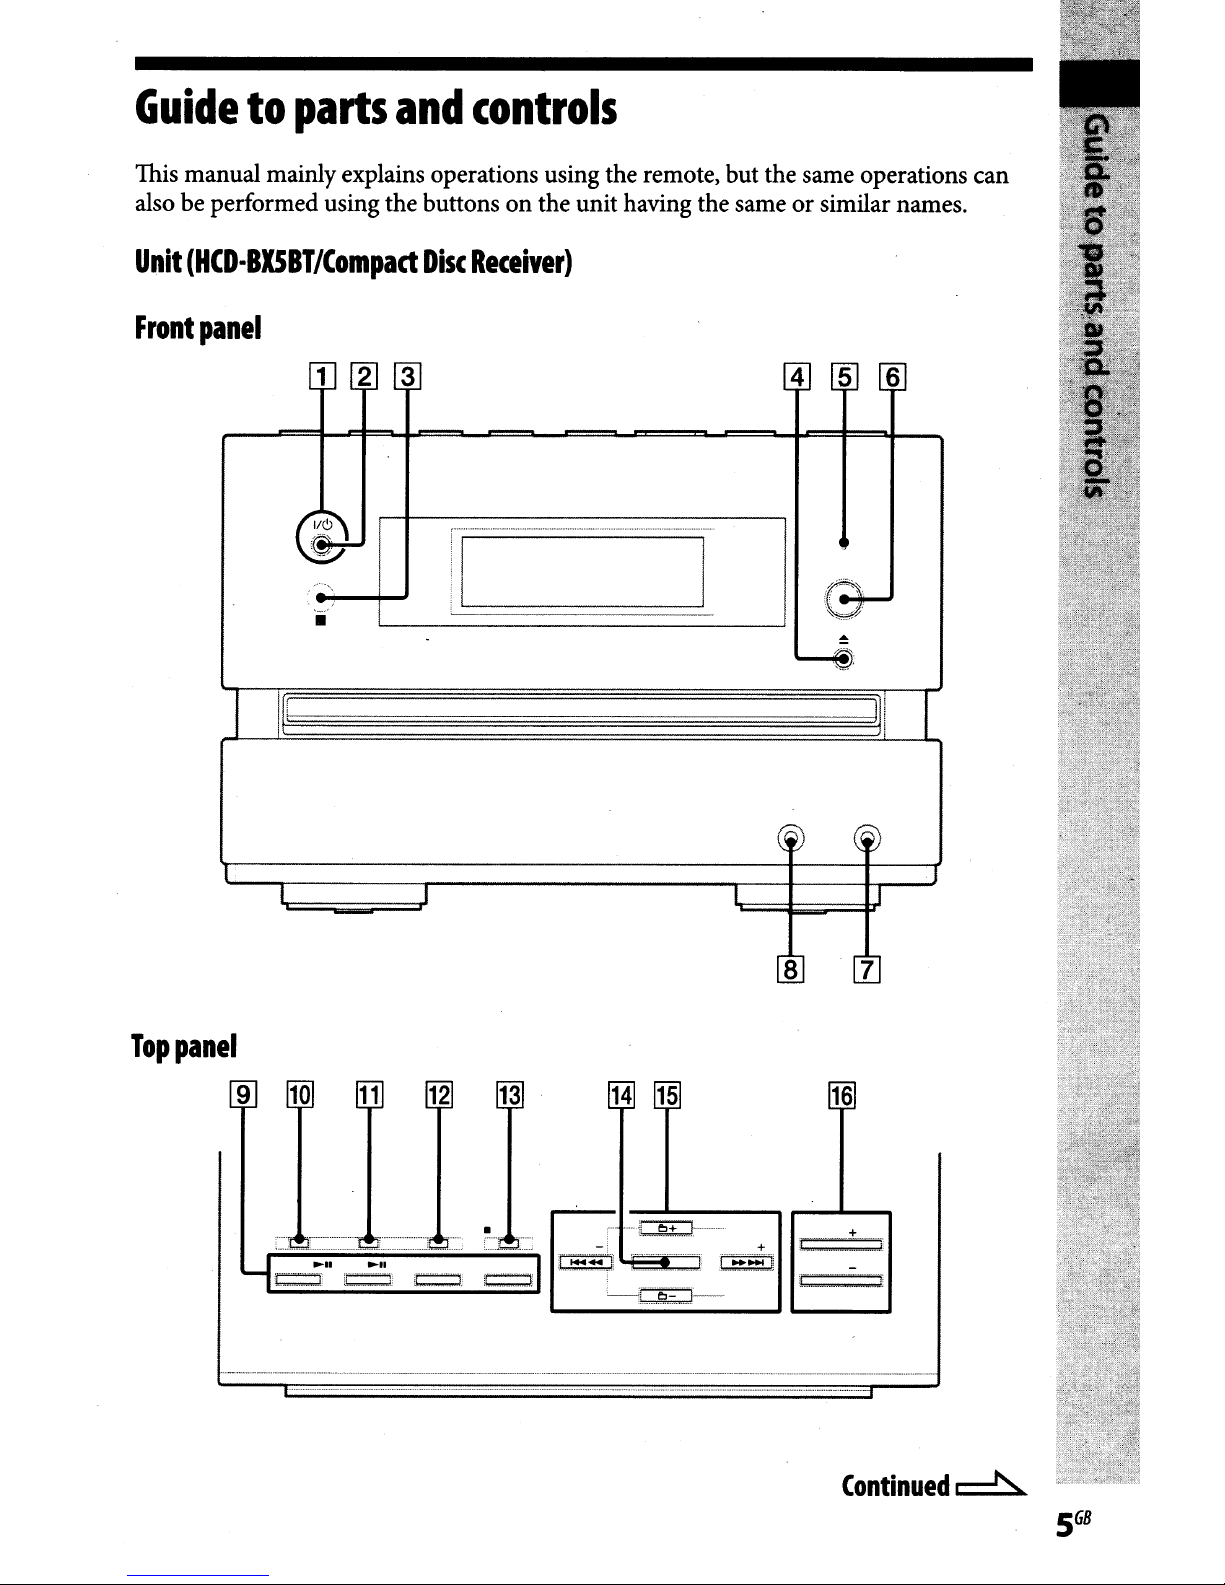
Guidetoparts
This manual mainly explains operations using the remote. but the same operations can
also be performed using the buttons
Unit
(HCD-BXSBTlCompad
and
Disc
controls
on
the unit having the sameorsimilar names.
Receiver)
Front
panel
456
IJI
Top
panel
9
10
11
12
13
•
14 15
+
(..........1
16
Continued~
Remote
(RM-SC31)
[§]
2
12
15
BLUETOOTH
19)
Lights up when the Bluetooth function
is active.
indicator (page
18,
[ID
BLUETOOTH
14
16, 18,
Press to make a connection,
disconnection,
Bluetooth device.
[Z]
19)
AUDIOINjack
I
t=:I-
t=:I+
15
16
Connect to an optional audio
component.
[ID
OPR
or
button (page
pairing with a
(page
20)
[j]
I!C)
(power)
button
(page
11,
27)
Press to
turn
on the system.
[2J
STANDBY
Lights up when the systemisturned
~
Remote
~
~
(open/close) button (page
Press to openorclose the disc tray.
indicator
sensor
(page
(page
21,25)
25)
24,
off.
12)
PHONES
Connect the headphones.
jack
[ID
Playback
buttons
Unit:
pause)
Press to select the Bluetooth function.
Press to start
music
mobile phone, etc.).
Unit:
button
Press to select the CD function.
Press to start
Remote:
Press to select the CD function.
buttons
BLUETOOTH
button (page
or
on
the Bluetooth device (Bluetooth
CD
~II
(page
or
CD
button (page
and
function
~II
pause playbackofthe
15,
(play/
16)
(play/pause)
12)
pause playbackofa disc.
12)

Remote:
II
(pause)
Press to startorpause playback.
TUNER/BAND
Presstoselect the TUNER function.
Press to select FM
mode.
Remote:
~
(play)
button,
button
button
or
(page
AM reception
AUDIOINbutton
13)
(page
20)
Press to select the AUDIO IN function.
M1
ENTER
24)
Press to enter the settings.
~
~
button
Press to select a trackorfile.
Unit:TUNE
(page
button
/~
(page
13)
(go
+/-
(page
back/go
12,
15,
(tuning)
11,
16,
22,
23,
forward)
22)
button
FUNCTION
Press to select the function.
button
(page
18,
19)
~
DISPLAY
Press to change the informationonthe
display.
button
(page
16,21)
[ll]
PLAY
button
Press to select the play
MP3 disc.
Press to select the tuning mode.
MODEITUNING
(page
12,
13,22,23)
modeofa CD
MODE
[j2J
Sound
Unit:
Remote:
Press to select the sound effect.
buttons
DSGX
EQ
(page
button
button
20)
~
Unit:
button
Remote:•(stop)
12,
./CANCEL
(page
13,
15, 16,
(stop/cancel)
12,
13,
15,
button
18)
16,
(page
18)
or
Remote:
(page
Press to tune in the desired station.
E:J
+/-
(page
Press to select a folder.
~/~
button
Press to find a pointina trackorfile.
+/-
(tuning) button
13,23)
(select
12,
15,22)
(rewind/fast
(page
12, 15,
folder)
button
forward)
16)
~
Unit:
13,
Remote:
(page
Press to adjust the volume.
VOL
16,
+/-
19,
20)
VOLUME
12,
13, 16, 19,
button
+/
(page
- button
20)
~
CLOCKITIMER
(page
24)
CLOCKITIMER
11,
24)
Press to set the clock
SELECT
SET
button
and
the Play Timer.
button
(page
12,
Press to stop playback.
Continued~
~
REPEAT/FM
12,
13)
Press to listen to a disc, a single track
file
repeatedly.
Press to select the FM reception mode
(monaural
or
stereo).
MODE
button
(page
~
Battery
(page
compartment
11)
lid
~
CLEAR
Press to delete a pre-programmed track
or
file.
Press to erase the pairing registration
information
button
of
the Bluetooth device.
(page
16, 18,
22)
~
TUNER
23)
MEMORY
button
(page
or
Press to preset the radio station.
~
SLEEP
Press to set the Sleep Timer.
button
(page
24)
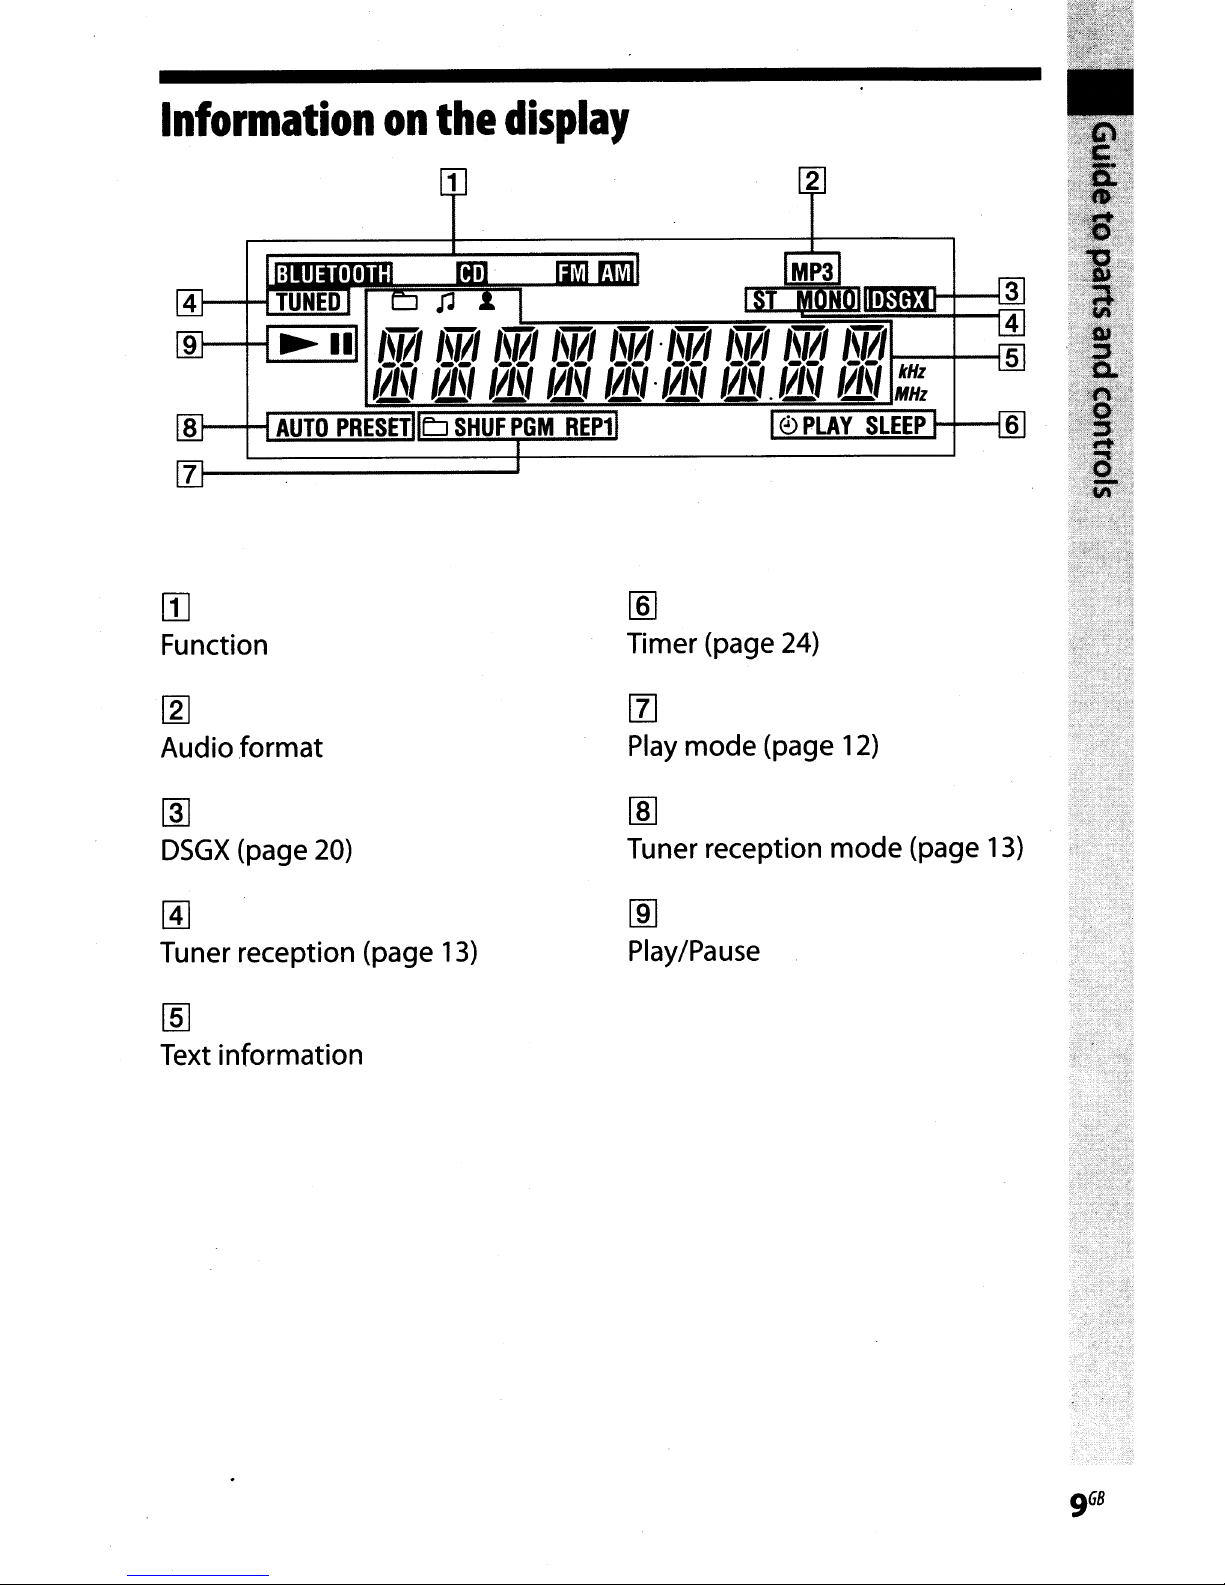
Information
on
the
display
8H-fAY1umii~~U!r-=---====-~~illfJt-+----I6
71-----------'
[]
Function
[g]
Audio
~
DSGX
@]
Tuner reception (page
~
Text information
format
(page 20)
13)
[ID
Timer (page 24)
[1]
Play
mode
(page 12)
[ID
Tuner reception
[ID
Play/Pause
mode
(page
13)
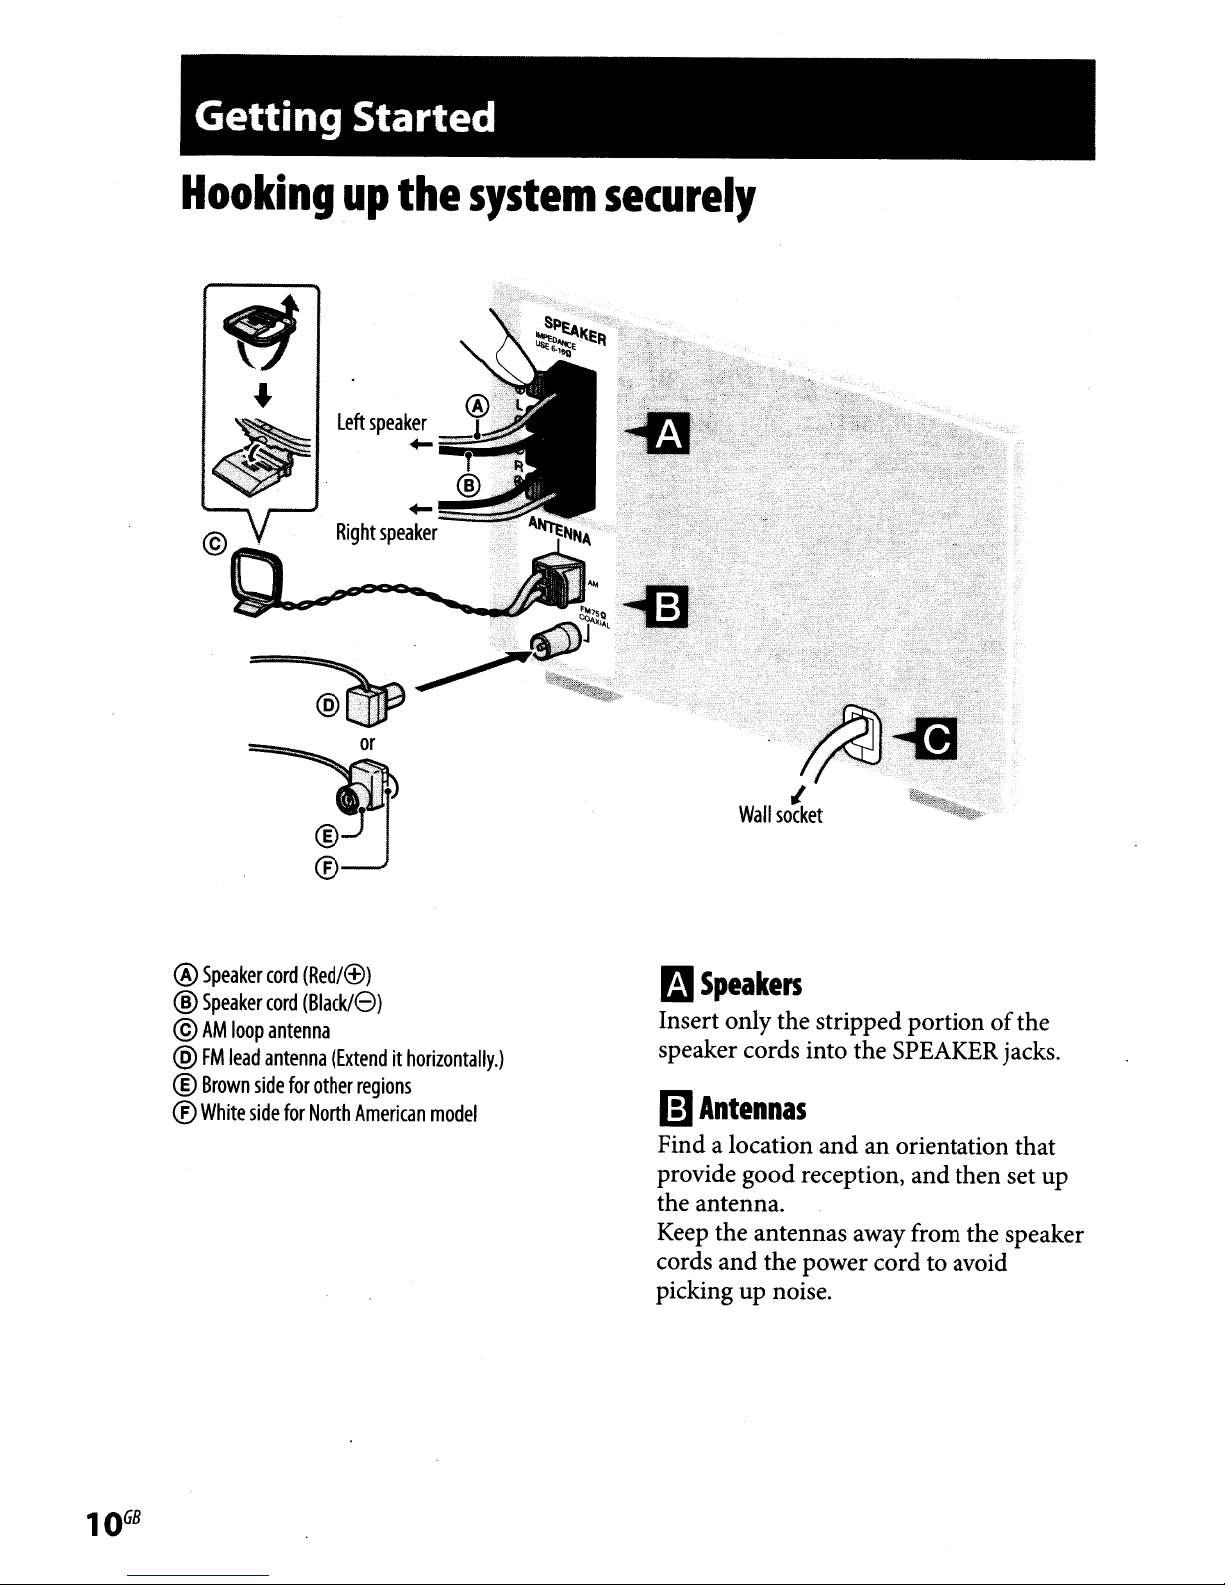
Getting Started
Hooking
up
the
system
securely
®
Speaker
®
Speaker
©
AM
@
FM
®
Brown
®
White
loop
lead
side
cord
(Red/<±))
cord
(Black/G)
antenna
antenna
side
for
for
(Extendithorizontally.)
other
regions
North
American
model
mSpeakers
Insert only the stripped portionofthe
speaker cords into the SPEAKER jacks.
mAntennas
Find a location and an orientation that
provide good reception, and then set up
the antenna.
Keep the antennas away from the speaker
and
cords
picking up noise.
the power cord to avoid
[iPower
Connect the power cord to a wall socket.
If
the
plug does
detach the supplied plug adaptor (only
for models equipped with an adaptor).
not
fit
the wall socket,
Setting
Use buttonsonthe remote to set the
clock.
the
clock
When
1
2
3 Hold down
4 After
To
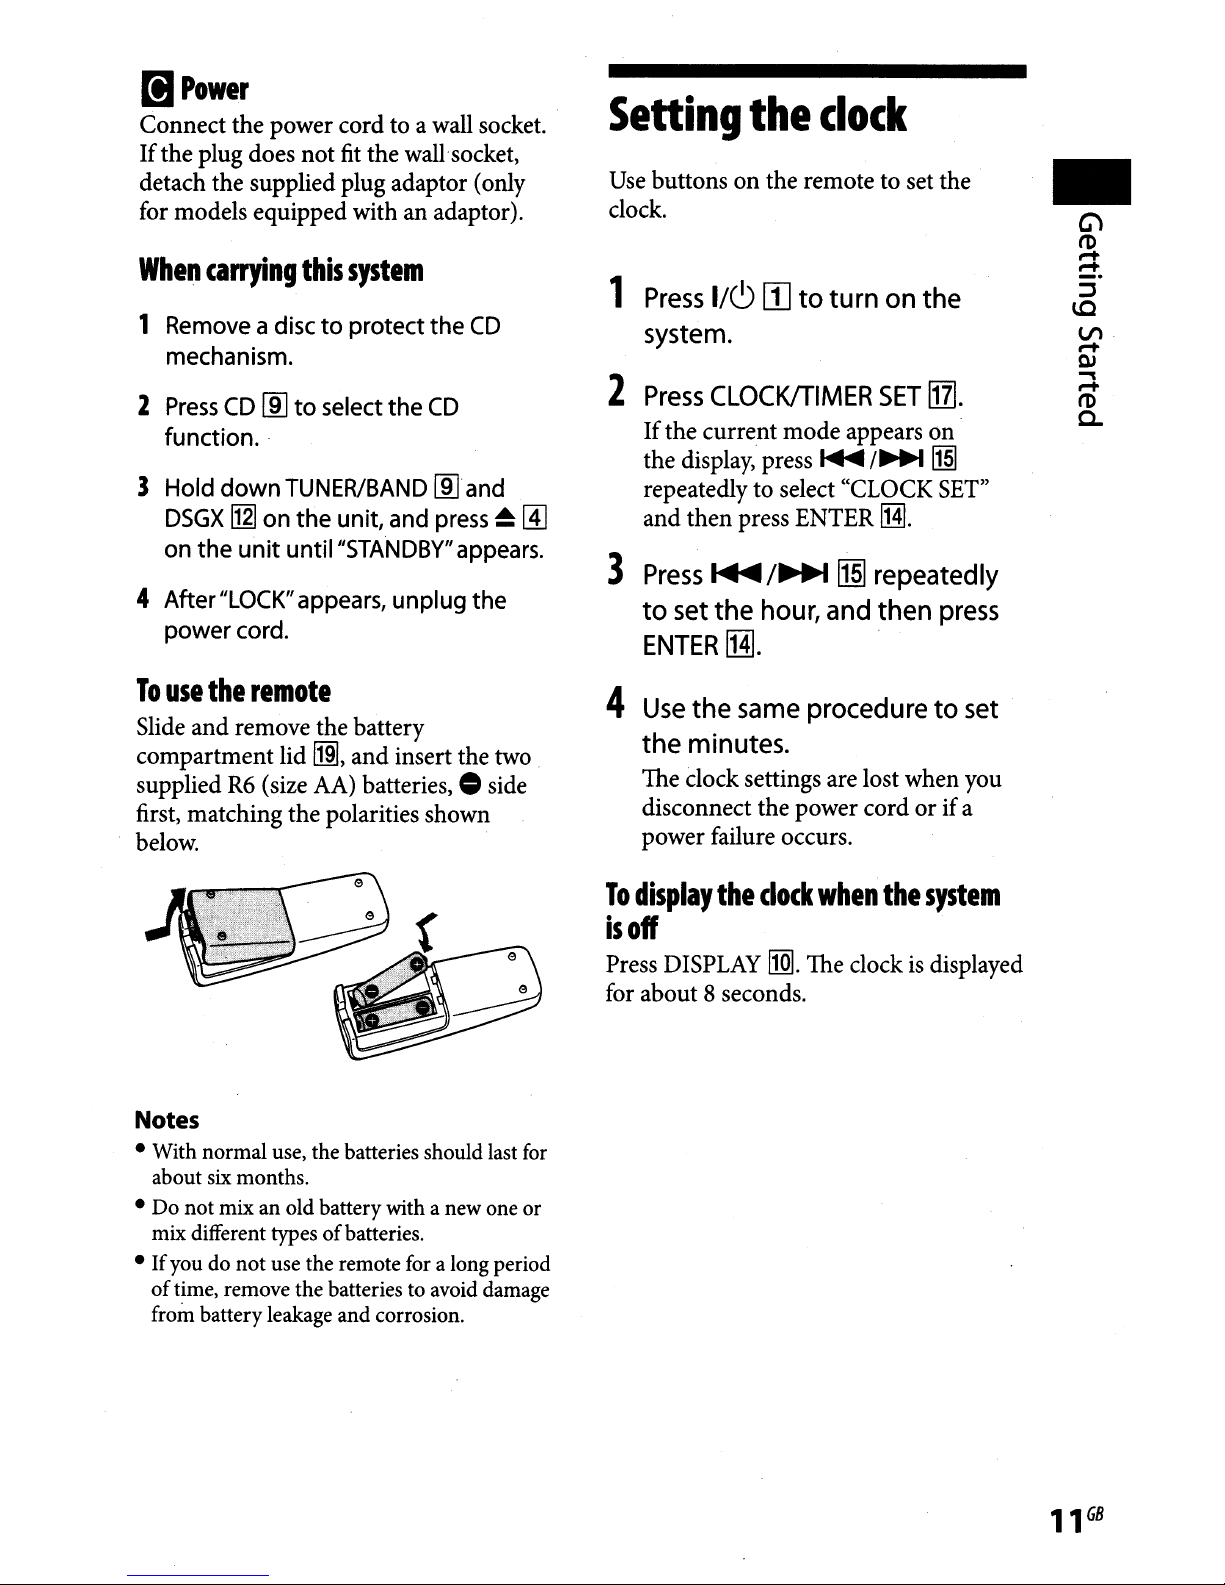
Slide and remove the battery
compartment lid
suppliedR6(size AA) batteries, • side
first, matching the polarities shown
below.
carrying
Remove
mechanism.
Press
CD
function
DSGX
on the unit until
power cord.
use
I12l
"LOCK"
the
this
adisc to protect the
rID
to select the
..
TUNER/BAND
on the unit,
appears,
remote
~,
system
CD
CD
rnJ
and
and
press
"STANDBY"
unplug the
and insert the two
appears.
~
~
1
Press
I/e:>[]to turn on the
system.
2
Press
If
the display, press
repeatedly to select "CLOCK SET"
and then press ENTER
3
Press
to set the
ENTER
4
Use
CLOCKfTIMER
the current mode appears on .
~/
SET
...
MI.
......
/~
hour,
~
repeatedly
and then press
IHI.
the same procedure to set
the minutes.
The
dock
settings are lost when you
disconnect the power cord or if a
power failure occurs.
111l.
~
Notes
• With normal use, the batteries should last for
about six months.
Do
not
•
mix different typesofbatteries.
If
•
of
from battery leakage and corrosion.
mixanold battery with a new one
you do
time, remove the batteries to avoid damage
not
use the remote for a long period
or
To
display
is
off
Press
for about 8 seconds.
the
dock
DISPLAY!1Q].
when
The clockisdisplayed
the
system
Other
operation
Basic Operations
PlayingaCD/MP3
1
Select
Press CD
2
Placeadisc.
Press
a disc with the label side up
disc tray.
~
the
rnJ.
~
CD
function.
on
the unit, and place
disc
on
the
To
Pause
Stop playback
Select a folder
on
disc
Select a track
or
Find a point in Hold down
a track or
Select Repeat REPEAT
Play until "REP"
playback"
an MP3
file
file
Press
(or CD
rnJ.
+/_
/~
To
~.
~
unit)
play, press the button
again.
.~.
E:J
.....
~
during playback, and
release the button at the
desired point.
appears.
~II
on
resume
~.
....
/~
repeatedly
or
"REP1"
the
To
close the disc tray, press
the unit again.
Do not force the disc tray closed with
your finger, as this may damage the
unit.
3
Start
Press
playback.
~
(or CD
~II
~
on
the unit)
rnJ.
4
Adjust
Press VOLUME
the unit)
the
~.
volume.
+/-
(or VOL
~
+/-
on
on
To
change
Press
the player
normal play ("E:J*" for
in the folder
("SHUF" or
play ("PGM").
*
When
Play performs
(shuffle) play.
the
play
mode
PLAY
MODE
is
stopped.
on
"rE:J
playing a CD-DA disc,
IITI
You
the disc), shuffle play
SHUF*"),orprogram
the
same operationasnormal
repeatedly while
can select
all MP3 files
E:J
(SHUF)
 Loading...