

Page 1

Sony Effio E Surveillance Camera
(Built-in OSD)
USER’S MANUAL
Applicable for: Standard Cameras, Dome Cameras,
Waterproof IR Cameras
Thank you for purchasing our products. Please read the
manual carefully before operating
Version: 412710V01 9#
Page 2

The limited stated: The information included in this article is
according to the current edition content establishment, regarding this
contains, the content doesn’t make any statement or the guarantee. In
addition this article will possibly not contain the information which
will be changed, without notice situation. The company has the
revision power to this publication.
Page 3
Page3of27
Safety Precaution
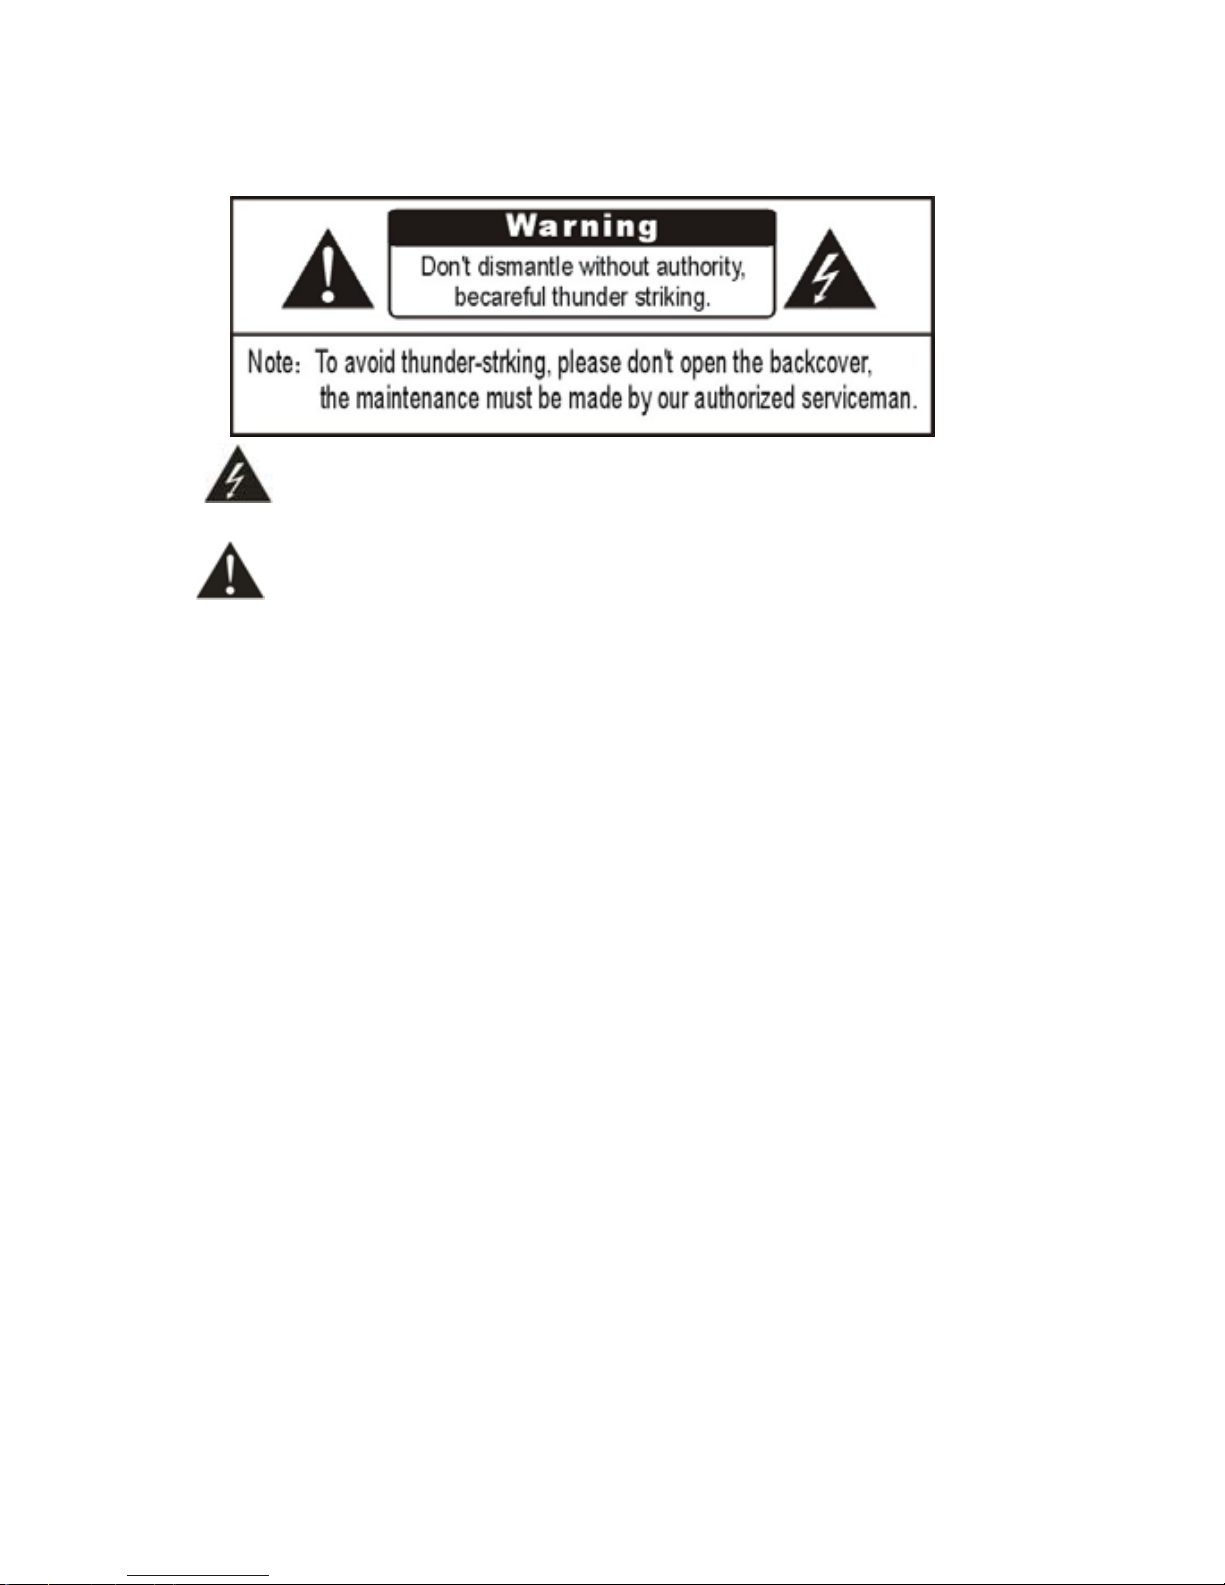
This symbol means that there might exist uninsulated
dangerous voltage inside the case, be careful of electric shock.
This symbol reminds you to pay attention to important
operation and maintenance instructions in the accompanied
information.
Warning
¾ n order to prevent damage caused by fire or electric
shock, please do not put cameras exposed in the moist
environment or rainwater.
¾ Please make sure the adapter is consistent with product
specifications, otherwise it might cause fire, electric shock or damage.
¾ Pay attention to polarity of the adapter, it might cause
some accidents like fires.
¾ Please don’t connect multiple cameras with the same
adapter at the same time; overloading of adapter capacity
may cause fires.
¾ Power supply must be firmly fixed so as not to loose to
cause fires.
¾ If the device gets ″ abnormal smell or smoke”, please
stop it immediately and contact with our customer service
center.
¾ If the camera doesn’t work as usual, please do not
dismantle it by yourself. Please contact our local distributor
or our maintenance office authorized by our company,
otherwise we won’t promise warranty.
¾ Please do not splash water on the product components
when cleaning.
Page 4

Page4of27
Notes
¾ Do not make the products under great impact or stay away from
strong electromagnetic interference and vibration.
¾ There are some sophisticated parts inside the camera, therefore,
during transportation and installation, please avoid the damage cause
by stress or severe vibration. For the sake of safety, please do not
switch on power before accomplishing all installation.
¾ Please comply with all electrical safety standards during
operation, camera or signal transmission cable should maintain a
sufficient distance (50 meters) with high-voltage equipment or cables,
if necessary, lighting and thunder protective measures must be taken.
¾ Please install the camera in well-ventilated environment.
¾ Please do not make the camera face sunshine or other strong light
directly in case of any damage to the lens and the sensor.
¾ The temperature and humidity range for cameras work are -10 ~
50 ℃, less than 95% separately, please do not start cameras beyond
this range.
¾ To avoid lightning strikes, please make sure the installation of
power supply ground line in a good condition.
¾ To prevent the equipment from damage by shower or splash of
water, please do not place the device substances such as liquid.
Page 5

Page5of27
Contents
Ⅰ、Features ............................................................................ 7
Ⅱ、InterfaceFunction Introduction ........................................ 9
2.1 Interface Function Description ................................ 9
Ⅲ、OSD .............................................................................. 10
3.1 Lens type ............................................................... 11
3.2 Shutter / AGC ........................................................ 11
3.3 White Balance ........................................................ 13
3.4 Backlight compensation......................................... 14
3.5 Image adjustment ................................................... 14
3.6 Adaptive Tone Reproduction ................................. 15
3.7 Motion Zone Test ................................................... 15
3.8 Privacy zone .......................................................... 17
3.9 Day/Night .............................................................. 18
3.10 NR ........................................................................ 21
3.11 Camera identification code .................................. 22
3.12 Synchronous Mode .............................................. 23
3.13 Languages ............................................................ 23
3.14 Camera replacement ............................................ 23
3.15 Return to the previous page ................................. 23
Page 6

Page6of27
3.16 Exit/Save ........................................................... 23
IV、Technical Specification ............................................... 24
V、 FAQ ............................................................................ 26
Page 7

Page7of27
Ⅰ、Features
1、 SONY CCD New Generation SONY CCD
Adopting the latest Second-generation high-sensitive CCD and
DSP, it can receive clear and lucid images even at circumstances with
very low illumination.
2、 Hi-resolution Video Resolution
Color horizontal resolution can reach 650TVL, B/W horizontal
resolution reach 700TVL.
3、 Day & Night Sw itch
Day & Night cameras can switch automatically into color or B/W
according to optical changes. When the environment gets down
gloomily, the new generation day & night camera uses new
generation's original installation magnetism valve type infrared optical
filter, will replace automatically for the transparent optical filter. The
camera will automatically cut over for clean, sharp black-and-white
images.
4、 Wide Dynamic Technology
The dynamic camera expands the picture applicable scope, used
the state-of-art science and technology, the effective technology which
is mainly used in simultaneously photographing when building interior
and window spots. Using this kind of technology is able to display
indoor and the outdoor picture simultaneously & clearly.
5、 2 Digital noise reduction technology
In the camera solidifies the digital noise reduction function
toughed, strengthened the signal-to-noise ratio (S/N) and the image
clarity, thus the camera can get clear, sharp images under the low light
environment.
6、 MD Multi-district establishment function
When the user is monitoring, the day and night camera monitor
any object on the screen starting to move, will transmit an alarm
immediately to the monitoring equipment, causes the user attention the
object which moves on screen. The new generation day & night camera
has the multi-region migration detection establishment function, and
has sensitivity multiple establishments for move detection. Any motion
object, at any time even there is no place to run away. The subtle points
Page 8

Page8of27
appears completely.
7、 (PRIVACY)PRIVACY ZONES multi-district establishment
function
To carry on the privacy protection in the public region, stemming
from the protection by the monitoring either the environment privacy,
some special areas or the phantom will camouflage through the privacy
the black block to camouflage the image, achieves the privacy
protection goal.
With the new generation day & night camera, the user may
establish easily the privacy position and size to camouflage the black
block. The camera developed many privacy for the user to
camouflage the black block specially, caused the privacy protection
question in each kind of situation monitoring becomes easy, simple.
8、 OSD control simply & conveniently
The new generation day and night camera has disposed the
function rich menu completely, all cameras operations complete
completely by the demonstration on monitoring device's menu relaxed
debugging. The user carry on superior performance establishments at
the greatest degree, conveniently. Thus the camera has been guaranteed
with highest quality picture effect.
Page 9
Page9of27
Ⅱ、Interface Function Introduction
2.1 Interface Function Description
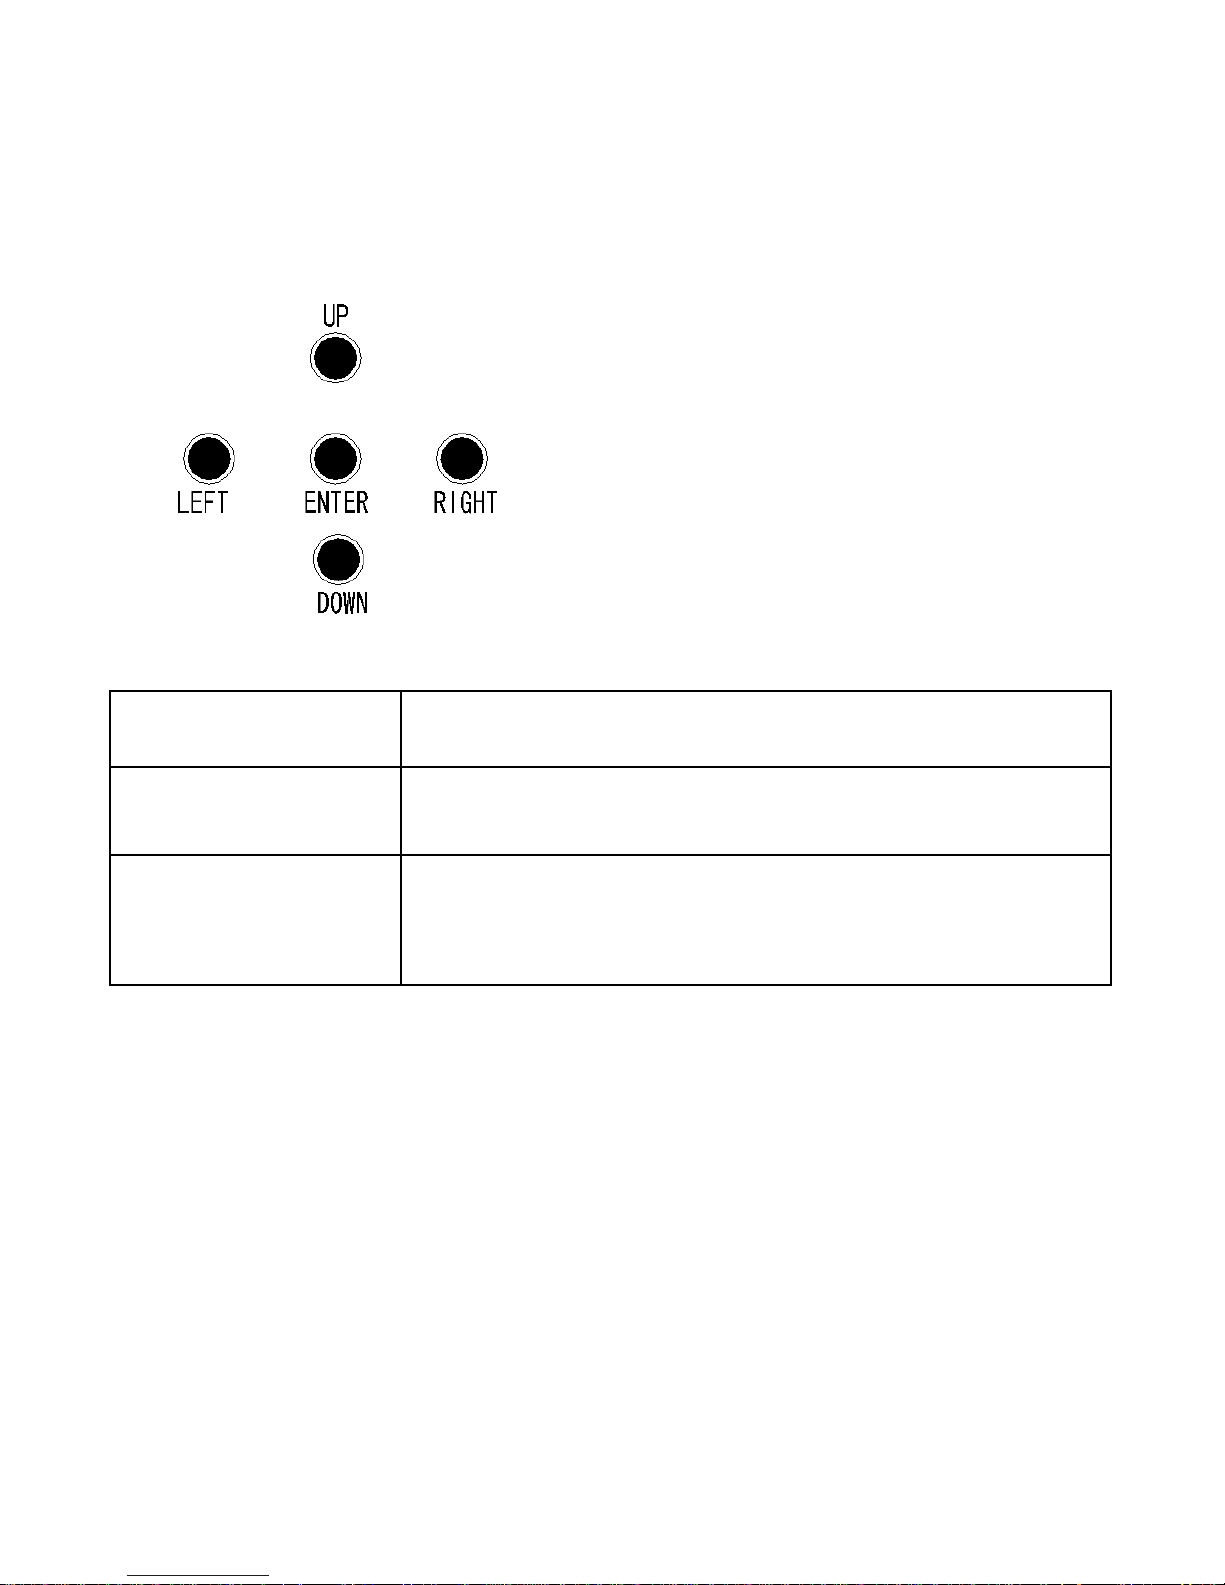
ENTER
This key is Enter key, used to enter and exit the menu
operations, which needs to determine.
UP/DOWN
With the UP and DOWN cursor keys to move up and
down the menu options.
LEFT/RIGHT
With the LEFT, RIGHT keys move around and modify
the parameters of the activities of the menu options.
Page 10
Page10of27
Ⅲ、OSD
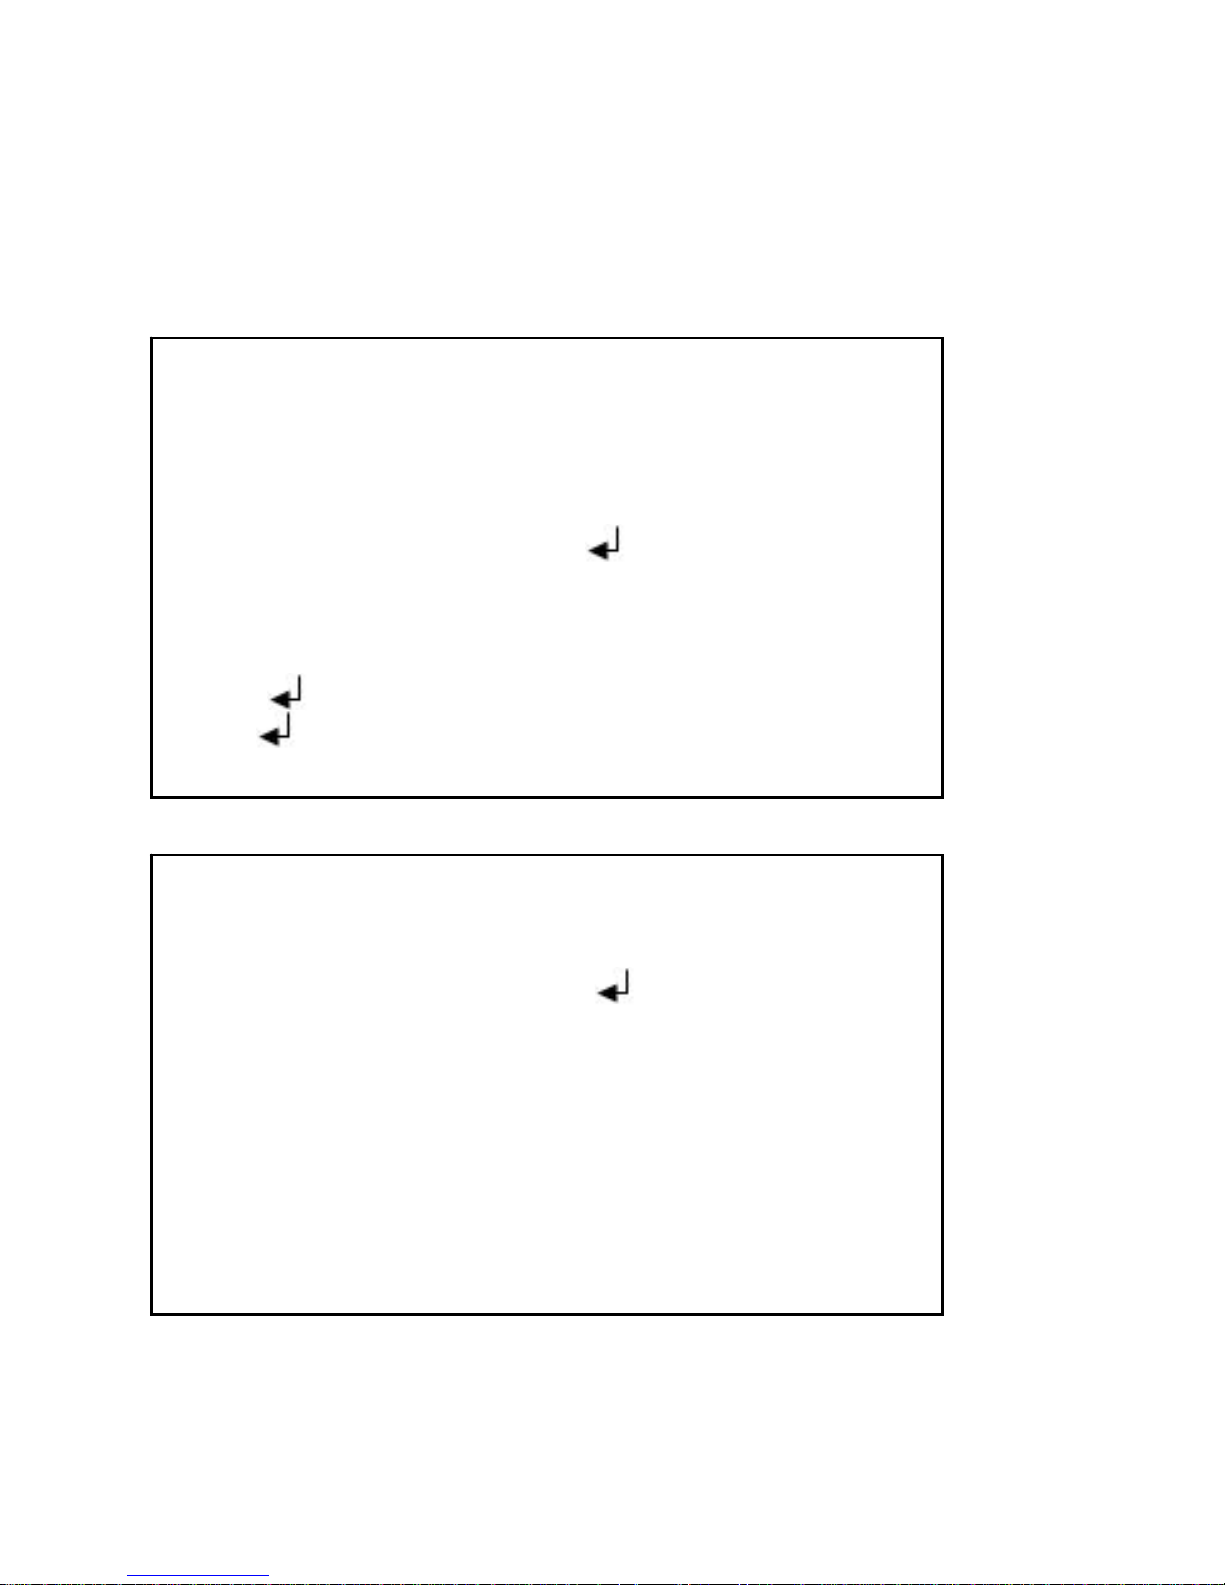
Press the "OK" button for 2 seconds, the camera will pop up the
main menu system (Figure 1)
SETUP MENU
LENS MANUAL
SHUTTER/AGC AUTO
WHITE BAL ATW
BACKLIGHT OFF
PICT ADJUST
ATR OFF
MOTION DET ON
NEXT
EXIT
SAVE ALL
SETUP MENU
PRIVACY OFF
DAY/NIGHT AUTO
NR
CAMERA ID OFF
SYNC INT
LANGUAGE ENGLISH
CAMERA RESET
BACK
EXIT SAVE ALL
Page 11

Page11of27
3.1 Lens type
There are 2 types of lenses, respectively: DC lens (DC drive lens),
video camera (manual lens). Users can select the lens type according to
the using the camera. Press the "left" or "right" button on to choose the
lens. When select the auto iris, should choose "Auto" file; users can
adjust the "speed" value to adjust the open speed of auto iris. The value
smaller, the speed of opening the iris is lower; the value bigger, the
speed is faster.
3.2 Shutter / AGC
Move the cursor to "Shutter / AGC"; press the "OK" button to
enter the Shutter / AGC sub-menu. Shutter/AGC has two sub-menus:
"Automatic", "Manual". Press left-right key, and then press the Enter
key to enter sub-menu to set the relevant parameters.
AUTO IRIS
TYPE DC
MODE AUTO
SPEED 0--255
RETURN
Page 12

Page12of27
High brightness mode has the two choices: "automatic shutter +
auto iris, auto iris". User can select according to the lens equipped
correspondingly. When using a fixed lens, user must select "Auto
Shutter + auto iris" mode. When using auto iris lens, user must select
the "Auto Iris" mode.
Brightness can be set between 0-255. User can adjust the
brightness of the overall picture, the smaller the value, the darker the
screen, the greater the value, the brighter the picture.
Low brightness mode, automatic gain has two options: on and off.
Select the brightness between the 0.25-1 to match the appropriate gain
factor.
Use can choose brightness between 0.25-1, the smaller the value,
the darker the screen, illumination worse, greater value, the brighter the
picture, the higher illumination.
AOTU SETUP
HIGHT LUMINANCE
MODE AUTO IRIS
BRIGHTNESS 0---------------255
LOW LUMINANCE
MODE AGC
BRIGHTNESS x0.50
RETURN
Page 13

Page13of27
3.3 White Balance
White balance can be set to ATW, PUSH, USER1, USER2, ANTI
CR, MANUAL or PUSH LOCK.
ATW (Auto Tracking White balance) and PUSH (Full pull-in) are
continuously monitoring/analyzing the color temperature of the
incoming light and correcting the white balance.
ATW limits the color temperature range at about 2,500˚K~8,500˚K to
reduce the excessive compensation for the big object which has a
single color.
PUSH has no limits between about 1,800˚K~10,500˚K but it may
over-compensate the white balance for the big object which has a
single color.
*In cases where it goes under 2,500˚K such as halogen light, ATW may
stop. If so, PUSH mode is recommended.
*In cases if Switch on the camera in an area where SAVE ENERGY
LAMPS are the only source of lights the Picture might be RED in
ATW mode. In these cases PUSH mode is recommended.
USER1 and USER2 are a fixed white balance which is
user-programmable by R-GAIN and B-GAIN and useful only for
the steady light.
ANTI CR (Anti Color Rolling) can reduce color rolling under
the fluorescent light when the camera operates in shutter control
without an auto iris lens. (NTSC version only) .
Page 14

Page14of27
3.4 Backlight compensation
Backlight mode
In the "Backlight Compensation" menu, press the "left" "right" to
select "Backlight compensation, brightness compensation, closed".
Users can select the appropriate backlight mode, according to the
actual needs.
3.5 Image adjustment
The mirror has two options: On and off. Opening time: image is
horizontal mirror, off time: the image is normal. Brightness, contrast,
sharpness value can choose between 0-255. The color tone is also the
real color of the image color. Users can choose the real colors between
0-255. Gain is of the screen color depth, 0-255 optional. The smaller
the value, the color is lighter; the greater value, the more concentrated
color.
PICT ADJUST
MIRROR OFF
BRIGHTNESS 0-255
CONTRAST 0-255
SHARPNESS 0-255
HUE 0-255
GAIN 0-255
RETURN
Page 15
Page15of27
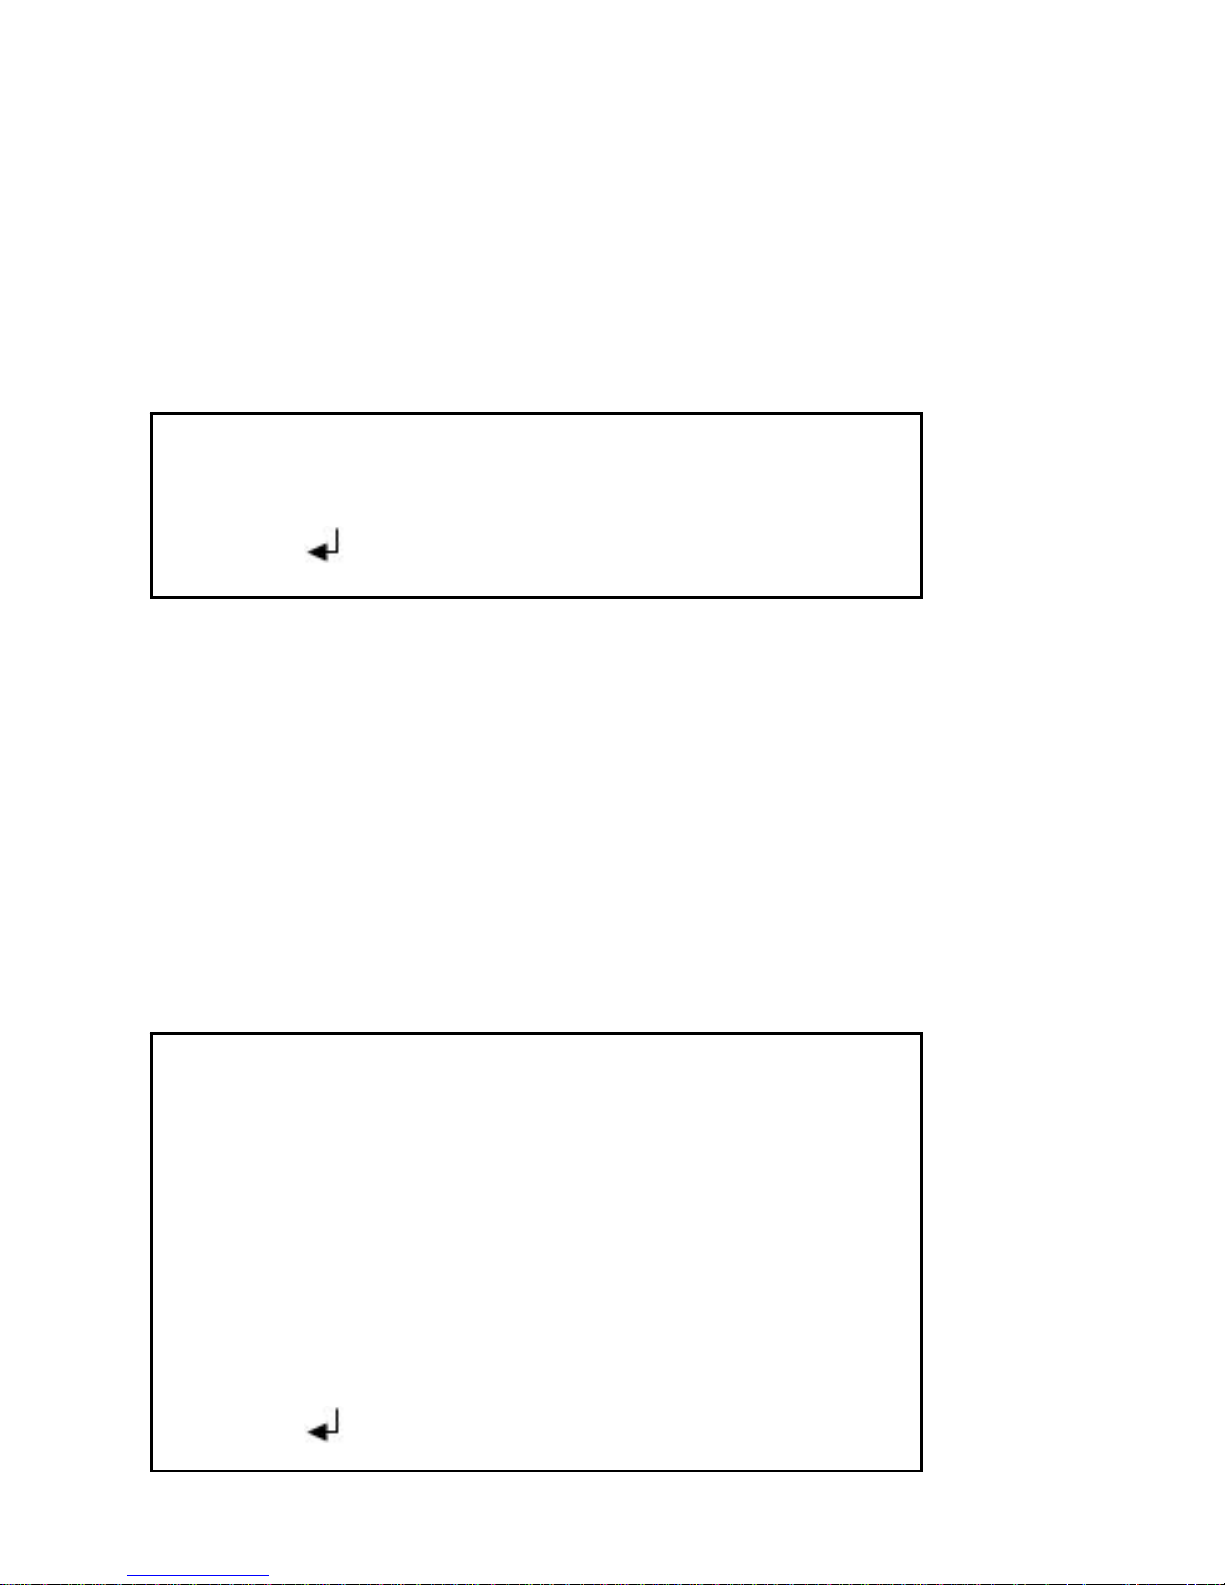
3.6 Adaptive Tone Reproduction
The ATR (Adaptive Tone Reproduction) function provides
gradation compensation to improve the contrast of subjects whose
gradation has been lost in cases where, for instance, both
low-luminance areas and high-luminance areas exist in the same
picture.
Brightness and contrast values can be chose between the "low,
medium, high", User can choose an appropriate value to achieve the
best image quality.
3.7 Motion Zone Test
In the " Motion Zone Test " menu, press the "left" "right" to select
"On". At this point the image will open the motion detection. Then,
click "OK" button to enter the " Motion Zone Test" setting sub-menu,
to set the detect range and sensitivity settings.
A
TR
LUMINANCE LOW
CONTRAST LOW
RETURN
MOTION DET
DETECT SENSE 0-127
BLOCK DISP ON
MONITOR AREA ON
AREA SEL 1/4
TOP 0-288
BOTTOM 0-288
LEFT 0-468
RIGHT 0-468
RETURN
Page 16

Page16of27
Detection sensitivity
Set motion detection sensitivity, the greater the value the higher
the sensitivity, 0-127 adjustable.
Block display
There are "open" / "off" / "set" of three options. Select "On", if
there is a moving picture, the box icon will be displayed; select "Off"
does not appear; select "Settings", you can enter the confirm button to
set the hidden regions.
Region Selection
Select motion detection zone, and the set the related zone.
Monitoring Zone
Check whether the relevant region in motion detection, which is a
function switch. When it is closed, this zone does not participate in
motion detection.
Up, down, left and ri ght set
Press the "left" and "right" key to set the level and width of the
fixed detection zone, the above side is as the benchmark for the below
zone, 0~288 adjustable.
The left side is as the benchmark for the right zone, 0~468
adjustable.
Page 17

Page17of27
Back
When the setup is complete, press the "up" and "down" key to
move the cursor to the "Back". Then, click "OK" button to return to the
implementation for the appropriate functions.
3.8 Privacy zone
In the "privacy shield" menu, press the "left" "right" to select
"On". At this point the image will open the Privacy masking. Then,
click "OK" to enter "privacy shield" setting sub-menu, you can mask
the scope of privacy and sensitivity settings.
Region Selection
Select the privacy zone region, and set the related zone, there are
four available setting zones.
PRIVACY
AREA SEL 1/4
TOP 0-288
DOWN 0-288
LEFT 0-468
RIGHT 0-468
COLOR 0-8
TRANSP 1.00
MOSAIC OFF
RETURN
Page 18

Page18of27
Up, down, left and ri ght set
Press the "left" and "right" key to set the level and width of the
fixed detection zone, the above side is as the benchmark for the below
zone, 0~288 adjustable.
The left side is as the benchmark for the right zone, 0~468
adjustable.
Color selection of the zone.
Set the color of the privacy zone block, 1-8 adjustable.
Transparency: 0-1 optional.
Mosaic: On / Off optional.
Back
When the setup is complete, press the "up" and "down" key to
move the cursor to the "Back". Then, click "OK" button to return to the
implementation for the appropriate functions.
3.9 Day/Night
Day/night switching function is mainly for the user to use the
camera easily on different occasions. There are 3 modes of day/night:
color mode, black and white mode, auto mode.
Auto Mode
In the "night switch" menu, press the "left" "right" key to select
"Auto Mode". Click "OK" to enter "Auto Mode" submenu, you can set
the corresponding parameters.
Page 19
Page19of27
Pulse burst signal: on and off, two options.
Delay Control
With this setting the camera achieves the delay time of the
transferring: color to black/white or black/white to color. Conversion
between the colors is through controlling of the camera’s brightness
sensor of the scene. When the light is at critical time, the camera may
switch the modes back and forth between color and black/white.
Setting the delay time function can resolve this problem. When the
camera senses the light intensity during this period are in line with the
color conversion before the conversion feature, or do not perform.
It is also intended to better protect the camera and allows users to
have better image quality.
Day--Night setting
Set the initiate level of the camera’s color/black switch, 0-255
adjustable.
Night—Day setting
Set the end level of the camera’s black/color switch, 0-255
DAY/NIGHT
BURST OFF
DELAY CNT 0-255
DAY—NIGHT 0-255
NIGHT—DAY 0-255
RETURN
Bac
k
Bac
k
Page 20
Page20of27
adjustable.
Note: Set the "Day - Night Set" and "Night - Day set" is to
prevent the frequent changes in light caused by switching the camera
has been in a state of users. On the choice of the value, do not set to the
same value. The same value will lead to frequent switch under the light
intensity changing.
Back
When the setup is complete, press the "up" and "down" key to
move the cursor to the "Back". Then click "OK" button, perform the
back function.
(1) Color Mode
In the "night switch" menu, press the "left" "right" key to select
"color model". At this point the image color mode will be enforced.
Users can set this function according to actual needs.
(2) Black/White Mode
In the "night switch" menu, press the "left" "right" key to select
"black and white model". At this time, the image will be enforced as
black and white mode. Then, click "OK" button to enter the "black and
white mode" submenu, to set the corresponding parameters.
B/W
BURST OFF
RETURN
Page 21

Page21of27
(1) Pulse
Set the pulse switch, the default value: Off.
3.10 NR
In the "noise reduction" menu click "OK" button to enter the
"noise reduction" sub-menu, you can set the corresponding parameters.
Noise reduction is in the case of very low light reduction caused
by low-light point of the picture noise to enhance the signal to noise
ratio (S / N) and image clarity, and the camera in low light conditions
catches clearly sharpness image, the quality can be guaranteed.
Set the noise reduction mode, Y / C, Y, C, off four options. Choose
noise reduction corresponds to the modes.
Select Y / C mode, you can adjust the value of brightness and
color in noise reduction between 0-15. The larger the value, the smaller
the noise is.
Select Y mode, you can adjust the Y level value decomposition.
Select C mode, you can adjust the C level value decomposition.
NR
NR MODE Y/C
Y LEVEL 0-15
C LEVEL 0-15
RETURN
Page 22
Page22of27
Back
When the setup complete, click "OK" button to return to the
implementation for the appropriate functions.
3.11 Camera identification code
In the "functional camera code" menu, press the "left" "right" to
select "On" At this point the camera image will display the name of
executive function. Click "OK" button to enter the "camera code"
setting sub-menu, you can set the camera name.
You can set the camera code as numbers, uppercase letters, and
related symbols. The length of the names is 15 characters.
"Clear" is for removing the camera name.
"Location" name for the set position. Through the "up, down, left,
right" mobile name location, to determine a good location, then press
"OK" button to return the name of the Edit menu.
CAMERA ID
ABCDEFGHIJKLMNOPQRSTUV
WXYZ0123456789-!“#%$&
()——`¥,:;〈=〉?@\*.x+/
CHR1 CHR2
←↑↓→ CLR POS RETURN
Page 23

Page23of27
"Return" is the end of the name edit to return to the previous menu.
3.12 Synchronous Mode
Synchronized pattern default for internal synchronization
3.13 Languages
Chinese, Japanese, English, French, Russian, German, Spanish,
Portuguese eight language selections.
3.14 Camera replacement
Chooses this item, then presses confirms the key, all parameters
will restore the leaving the plant default value.
3.15 Return to the previous page
After establishing completes, according to “on”, “under” the key
the cursor moves “returns the previous page”, presses again
“determines” in the key execution corresponding returns the first-level
menu.
3.16 Exit/Save
After the parameter establishment completes, when it needs to
preserve, according to “on”, “under” the key moves the cursor “the
withdrawal”, according to left, the right key choice “the preservation”
presses “determines” the key, moves “the withdrawal” to press again
confirms the key, the withdrawal menu.
Page 24
Page24of27
IV、Technical Specification
Function
Imaging Sensor 1 / 3" Sony Effio E
Pixel
PAL:976(H)×582(V);
NTSC:976(H)×494(V)
Signal System PAL/ NTSC
Syn. System Internal Synchronization
Shutter speed
PAL:1/50~1/100000s;
NTSC:1/60~1/100000s
S/N Ratio More than 50dB(AGC OFF)
Video Output 1.0Vp-p, 75 ohms
Horizontal resolution Color: 650TVL, B/W: 700TVL
Minimum Illumination
Color0.1Lux(F1.2,50IRE,AGC ON)
B/W:0.001Lux(F1.2,50IRE,AGC ON)
0 Lux when IR on
IR Leds (optional)
& IR distance
(1) 24pcs ф5mm IR LEDs: 20-25 meters;
(2) 36pcs ф5mm IR LEDs: 35-40 meters;
(2) 42pcs ф5mm IR LEDs: 35-40 meters;
(4) 72pcs ф5mm IR LEDs: 40-45 meters;
(4) 36pcs ф8mm IR LEDs: 45-50 meters;
(5) 12pcs power IR LEDs: 80-90 meters;
(6) wavelength of IR LED: 850nm
D/N Switch Auto/Color/B/W/External Control
Brightness Switch Color to B/W & B/W to Color for option
D/N Switching Time 0s~10s
Title setting 16 characters
Title Position Any position on the Screen
Image Brightness 0~99 adjustable
AGC Off/12db/24db/36db
OSD English/Chinese OSD
Peripheral Brightness
Compensation
0~50 adjustable
Strong Light Reversion 0~60 adjustable
Page 25
Page25of27
Backlight Compensation 0~3 adjustable
PRIVACY 1~8 Zones
Privacy Zone Color Color 0~Color 7 optional
WDR Off/On/Auto
WDR Sensitivity 0~10 adjustable
Motion Detection
On / Off (multi-sensitivity settings, alarm time
optional)
Alarm Display Icon
AWB
ATW, PUSH, USER1, USER2, ANTI CR,
MANUAL or PUSH LOCK
Image Freeze On/Off
Special Rotation/ up-side down /Mirror/Off
Sharpness 0~49 adjustable
GAMMA 0.3~1.0 adjustable
DNR 2D DNR
RS-485 Remote control Support
Communication Add. 1-254 optional
BPS baud rate 2400/9600/14400/19200/38400
Control Protocol Pelco-D
Video Output BNC method
Power Supply DC12V/AC24V(optional)
Power consumption 2.0 W
Operation Temperature -100C~+500C
Page 26

Page26of27
V、 FAQ
1. Q: No image after installation?
a. Check to connect the power supply correctly, whether the
indicating led is always on or not;
b. Check the video cable, make sure it is workable.
c. Check if the monitor has been open.
2. Q: Image interference after installation
a. Check the power quality, if the adapter can’t work, please
replace another one.
b. Check if electromagnetic interference exists in the surroundings,
please use some anti-interference devices.
3. Q: RS485 can’t control menu?
a. Please check the controller issued code is correct;
b. Please check if the control circuit is smooth;
c. Please verify the communication address, baud rate
well-matched;
d. Please check if the connection interface is loose.
4. Q: Camera image can’t switch into B/W at night?
Please open the camera menu to see if "Day/Night Switch" is set
as AUTO, if not, please change into AUTO.
5. Q: Noise is very obvious at night with low illumination.
please make sure AGC ON.
6. Q: The image color is abnormal.
a. please make sure if the white balance is correctly set as Auto
White Balance.
b. Please enter the menu to restore factory settings.
7. Q: Image appears to be whiter than usual after installation?
a. Please check whether the lens aperture was adjusted too large,
so that the image appears whiter.
b. Please verify the camera rear panel, if the regulator
potentiometer is adjusted too large.
c. Check if the brightness of the monitor is too large.
8. Q: When installation, image is not clear or exist dark corners?
a. Please adjust focus and zoom of the lens. Make sure the focus
should be adjusted in a proper way.
Page 27

Page27of27
b. Please check if the lens is clean.
 Loading...